Shoe Molding: Types, Styles, and Installation Tips
Updated on November 19, 2025
Moldings (and their simpler cousins, medallions) come in all types and styles, including shoe molding.Keep reading to discover everything you need to know about it, including full installation instructions.
Shoe molding covers up imperfections like old holes from screws or wire that had been pushed into the wall during previous home renovations.
Installing it is also a good idea to mask any accidents involving nails and hammers that seemed like a good idea at the time. As far as aesthetics are concerned, shoe molding can make your rooms look bigger and even increase real estate value.
If you’re interested in adding shoe molding to one or more rooms in your house, keep reading to find out everything there is to know about this type of baseboard molding.
What Is Shoe Molding?
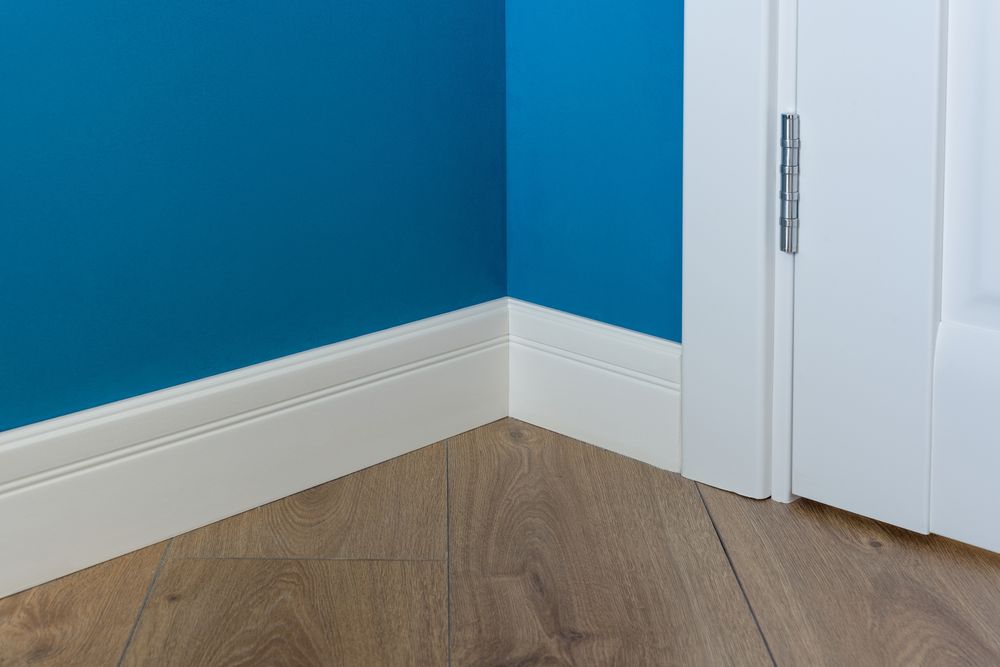
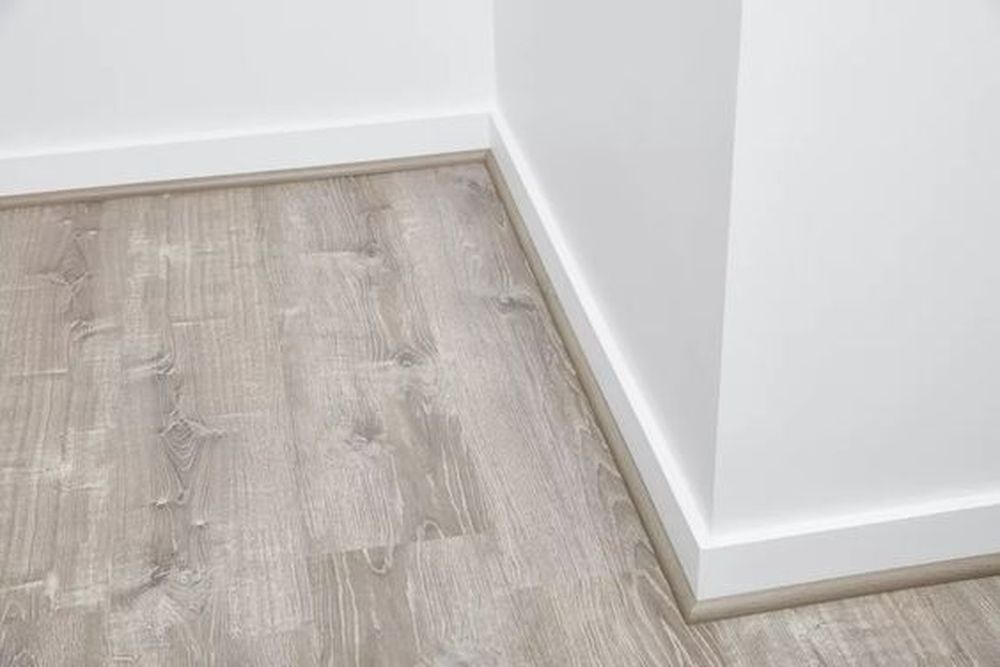
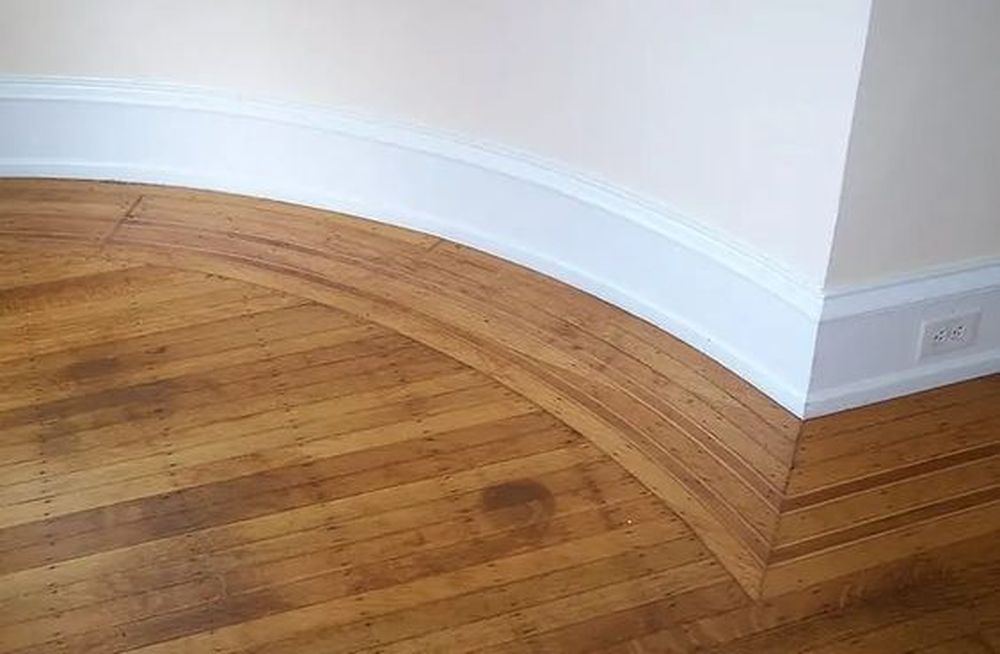
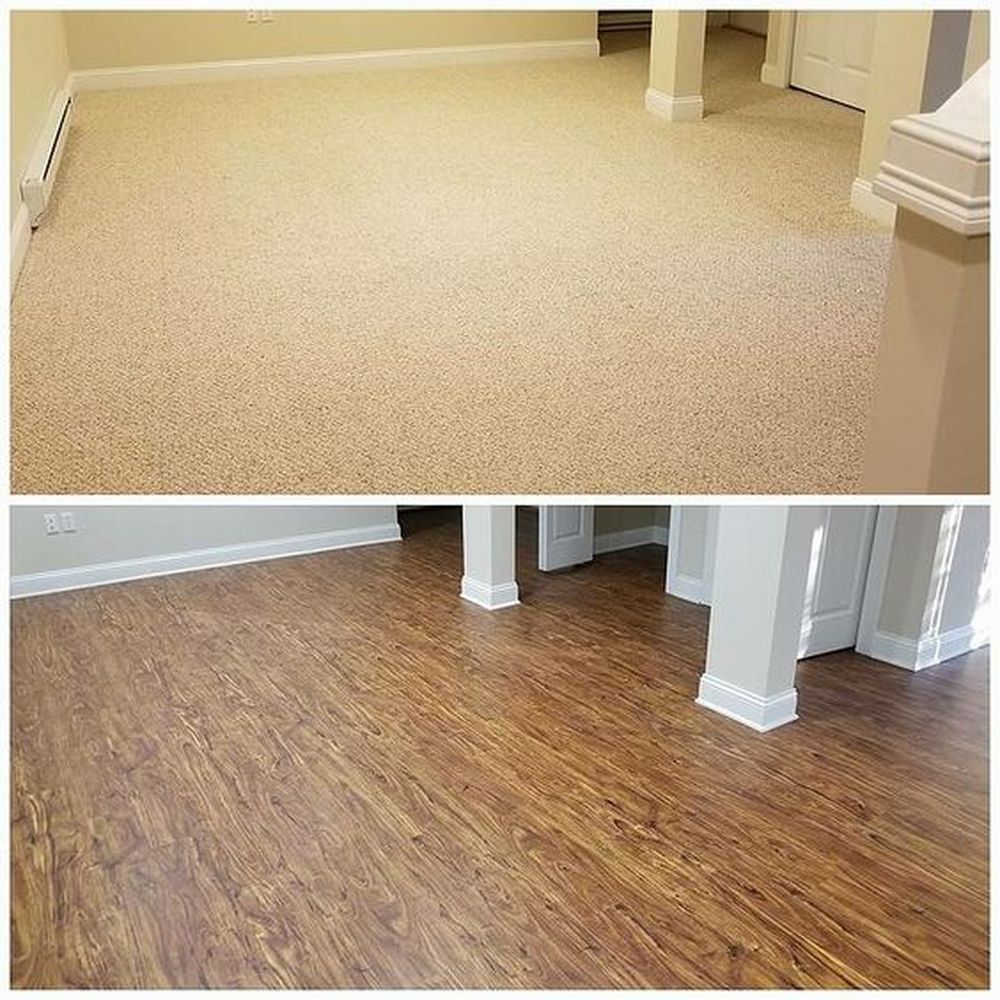
Shoe molding is a popular design element in homes with hardwood floors. It’s a type of baseboard molding, also known as floor molding or floor molding trim. It provides a decorative finishing touch while masking the expansion gap between the wood floor and the wall or threshold adjoining it.
In homes with carpeted bedrooms, an attractive shoe molding on the baseboard enhances the room’s elegance. Installing this type of molding is not difficult if you have some basic carpentry skills.
If you’re asking yourself what a baseboard is, keep in mind that it’s the long and thin board that covers the lowest part of an interior wall. It’s typically made from wooden or vinyl.
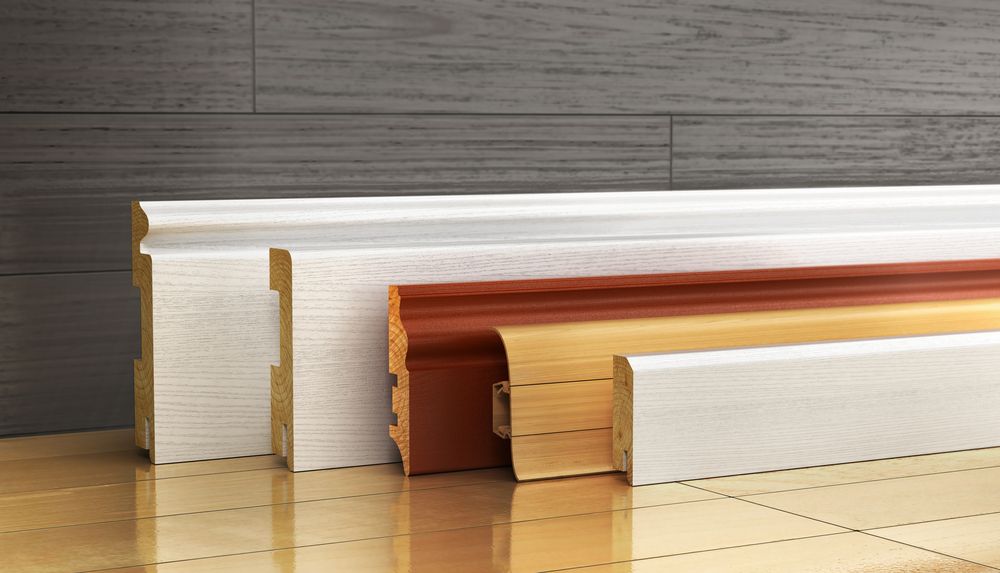
Shoe Molding Types
Many types of shoe molding are available, including parquet, chair rail, cove base, wood, vinyl, MDF, and polystyrene. What you choose should depend on your needs and budget.
Parquet
Parquet shoe molding is installed at the transition between wall and floor. It is made from small pieces of solid hardwood that interlock together to form an attractive design. This type is typically used when building a new home or finishing a basement. It costs more than chair rail molding but is more decorative.
Chair Rail
Chair rail shoe molding is applied above the baseboard as an accent piece on walls or cabinets. It’s available with square, rounded, or half-round profiles. It can also be custom-designed to fit your decorating needs using 1/8-inch to 3-inch wide profiles and almost any length you require. It costs less than parquet molding but is not as decorative.
Cove Base
Cove base shoe molding is a type of trim used to cover the expansion gap between the floor and wall. It is available in several styles, including bullnose, return, and square edge. It costs less than other types and is easy to install.
Wood
Wood shoe molding is made from solid, high-quality, unfinished hardwood that can be stained or painted to match the color of your floor. Stained wood moldings are available in oak, maple, mahogany, birch, walnut, and other hardwoods. Painting hardwood moldings is an economical alternative when matching existing floors is not essential. It costs more than other types.
Vinyl
Vinyl shoe molding is made from rigid PVC. It’s usually white but comes in several colors, including light taupe and gray. Vinyl trim provides a nice finished look on top of baseboards and at door bottoms, where it covers gaps resulting from carpet installation or uneven surfaces.
Vinyl has significant advantages over paint or stained wood because it does not require regular maintenance like coating or staining. Additionally, it does not expand and contract with heat and cold, so the installation is quite simple. Vinyl molding is available in various styles, including straight, beaded, and colonial. It costs more than wood molding.
Medium-Density Fiberboard (MDF)
MDF shoe molding is a popular choice because it is affordable, durable, and easy to install. MDF is made from recycled wood fibers that are compressed and bonded with resin. It is available in various finishes, including primed white, wood grain, and high gloss.
You can cut MDF molding using a miter or hand saw. It can also be installed using standard carpentry tools such as a hammer, screwdriver, and level. It costs less than vinyl molding.
Polystyrene
Polystyrene shoe molding is a lightweight, inexpensive, and easy-to-install trim perfect for small projects. It is available in various colors and styles, including beaded, colonial, and simple edge.
This type of trim can be cut with scissors or a utility knife. It can also be attached to walls with adhesive or double-sided tape. It costs less than MDF.
Shoe Molding vs. Quarter-Round Molding
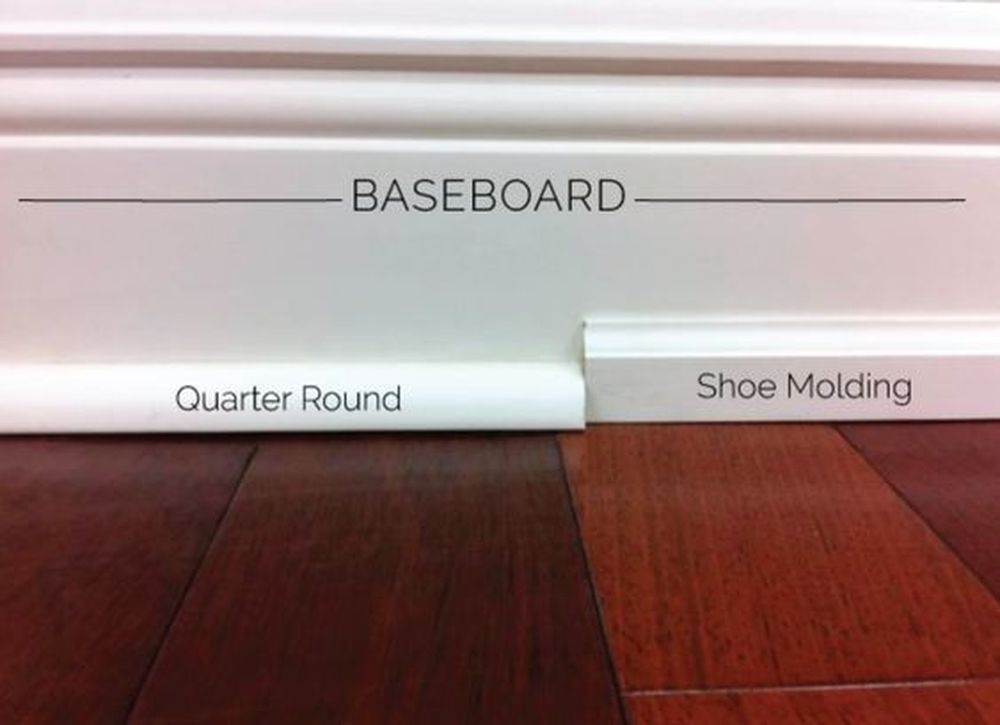
Quarter-round moldingis used to finish the transition where wood floors meet each other at 90-degree angles. A quarter-round baseboard is only 1/4-inches tall, whereas shoe molding is typically one inch tall.
Shoe molding also has a slim profile or bevel that appears thicker and more substantial than quarter round. A quarter-round trim is cheaper.
Shoe Molding Styles
As far as styles are concerned, there are plenty of options from which you can choose, depending on what you like best:
- Straightis the most basic style and is usually used as an accent piece along walls or cabinets.
- Beaded has a raised profile that gives it a more decorative look.
- Colonial features a two-piece design with a center profile and beaded edges.
- Simple edge is a basic style with a smooth, rounded edge.
- Return covers the expansion gap between the floor and wall. It has a curved profile that matches the curvature of the floor.
- Bullnose has a rounded profile used to finish the edge of a floor.
- Square edge has a straight profile used to finish the edge of a floor.
Shoe Molding Profiles
There are also several different profiles or bevels from which you can choose:
- Standard profile is the most common and is a simple bevel.
- Half-round profile has a curved edge that gives it a more decorative look.
- Reverse half-round profile has a curved edge that faces inward, creating a more subtle appearance.
- Cove profile has a curved edge that follows the contours of the floor.
- Quarter-round profile is a simple, rounded edge.
Considerations
Several aspects are worth taking into account when choosing the suitable shoe molding for your home. The most significant factors are the molding style and profile or bevel. You also need to decide if you want wood, vinyl, or MDF.
The molding style will determine the cost, installation difficulty, and longevity. If you are painting or staining wood molding, make sure it is unfinished because the finished trim is not as sturdy as raw hardwood.
You may be able to save money by purchasing unfinished softwood at a lumberyard or home improvement center because it is less expensive than hardwoods.
Hardwood vs. Softwood
Hardwoods are more durable than softwoods because they are harder and denser. They also look nicer after being painted or stained, but they leave unsightly gaps when used with carpeting, so it is best to use them for base molding installations only.
If you have hardwood floors installed throughout your house, consider using hardwood molding in every room. This will give your home a unified look, and it will be easy to find matching floor trim if you ever need to replace it.
Floor Trim Height
When selecting shoe molding, consider the height of the floor trim in the room where you will be installing it. If the floor trim is high, you may want to use a taller shoe molding such as 3/4 inches or even 1 inch. If it’s low, use a shorter molding such as 1/2 inches or 3/8 inches.
Be sure to measure the width of the gap between the floor and wall so that you can purchase the correct size molding. Most moldings are available in several widths, so you should find one that fits your gap perfectly.
Installation Time
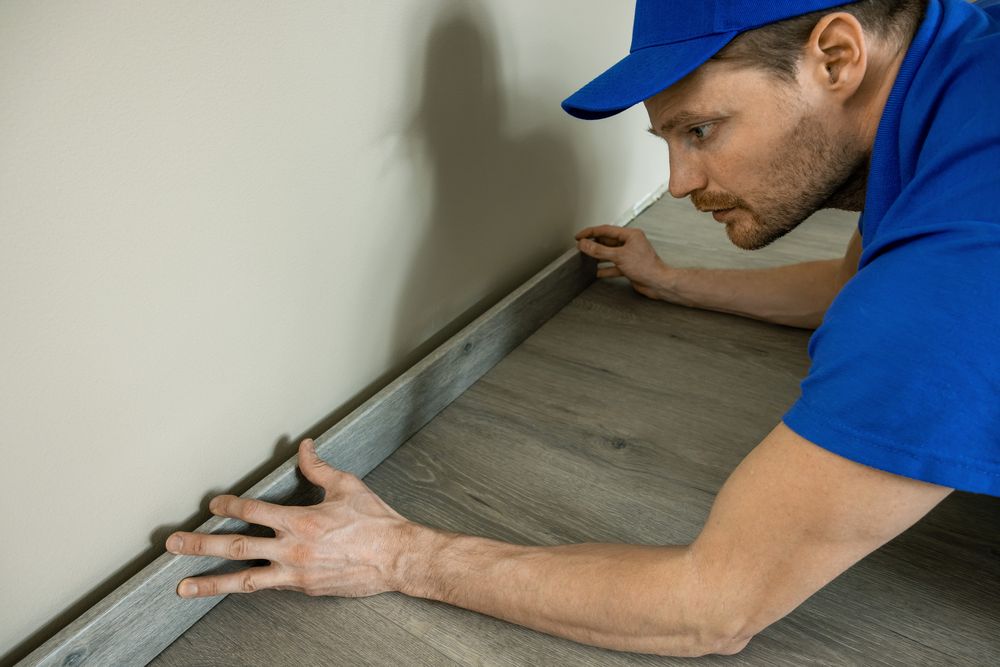
When installing shoe molding, ensure it is flush with the wall and floor surfaces to prevent tripping accidents. Consider using a pneumatic nail gun if you plan on installing a lot of molding because it dramatically reduces installation time.
If you are having trouble choosing between hardwood or vinyl, consider reading about the pros and cons of different types of floor trim. This will help you select the best type for your project.
How to Install Shoe Molding
Here are all the installation steps:
Before Getting Started
If installing chair rail or parquet shoe molding, be sure to follow the manufacturer’s instructions for proper installation. You will first need to install the baseboard and then nail the molding onto it in most cases. If you are installing long parquet or chair rail lengths, you may want to glue them in place using wood glue.
When installing T-molding, it is best to insert one end in a piece of baseboard before joining two ends together. The T should fit flush with the bottom, but only press it about halfway into each side so there is room for adjustment when joining both ends together.
You can also install 1/4-inch or 6-mm thick oak plywood flooring over existing hardwood floors. It goes down quickly with glue and screws through the face of your old hardwood flooring. Then sand off 5 mm on each side all around your room to expose the new oak flooring that is now hidden below and finish as desired.
Step 1: Get the width of the shoe molding
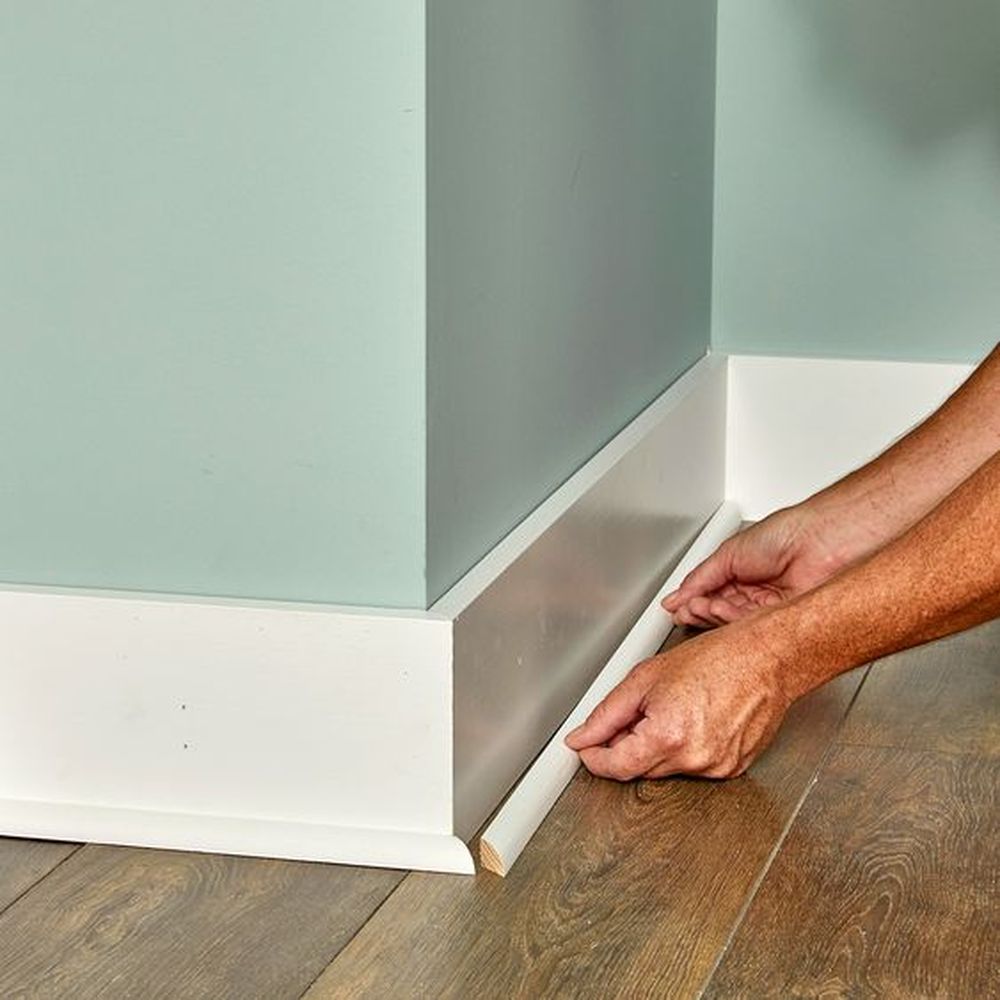
Shoe molding should be installed when the flooring is first put in and before the baseboard goes up. If you are adding it to an existing room, remove the old baseboard and measure the width of the gap between the floor and wall. Add 1/4-inch to this measurement to get the width of your molding.
Step 2: Cut the molding to size
Cut the molding to size using a miter saw or circular saw. The most important thing is measuring twice and cutting once. If you are using cove base molding, you will also need to cut a 45-degree angle on one end of each piece.
Step 3: Paint or stain shoe molding
If you plan to paint or stain the molding, now’s the time to do it – before installation. Dip your paintbrush in the paint or stain, and make sure to cover the whole area of the molding.
Allow the paint or stain to dry off and check the results to see if you are pleased with the new colors. Otherwise, you might want to apply a fresh coat of paint. Just be sure to allow enough time for the paint or stain to dry completely before continuing with the installation.
Step 4: Start in a corner and choose a direction
You can start installing shoe molding in any corner of your room. If you are tacking down chair rail, parquet flooring, or some other type of baseboard along one wall, then choose an opposite wall to start on.
If you are doing this inside your house, use newspapers, cardboard, or plastic sheets to protect the floor. Choose a room with good ventilation, open all windows, and leave the room while waiting for the paint to dry and ensure that no one else in your family steps inside. It is best to go with the grain of the wood when nailing on the shoe molding so that it doesn’t split.
Step 5: Apply a thin line of adhesive on top of the baseboard
Apply a strip of all-purpose adhesive to each part of the baseboard before pressing down on each piece of shoe molding. It will help prevent them from shifting once you nail them in place. Use an acid brush dipped in water to smooth out any air bubbles and ensure full contact between the baseboard and shoe molding.
Step 6: Nail the shoe molding in place
Use nails with a small head to avoid having to fill them afterward. Carefully mark where you want each piece of shoe molding, so they are all evenly spaced out before nailing them into place. You should be able to get about three or four pieces installed before needing to add another strip of adhesive and more nails.
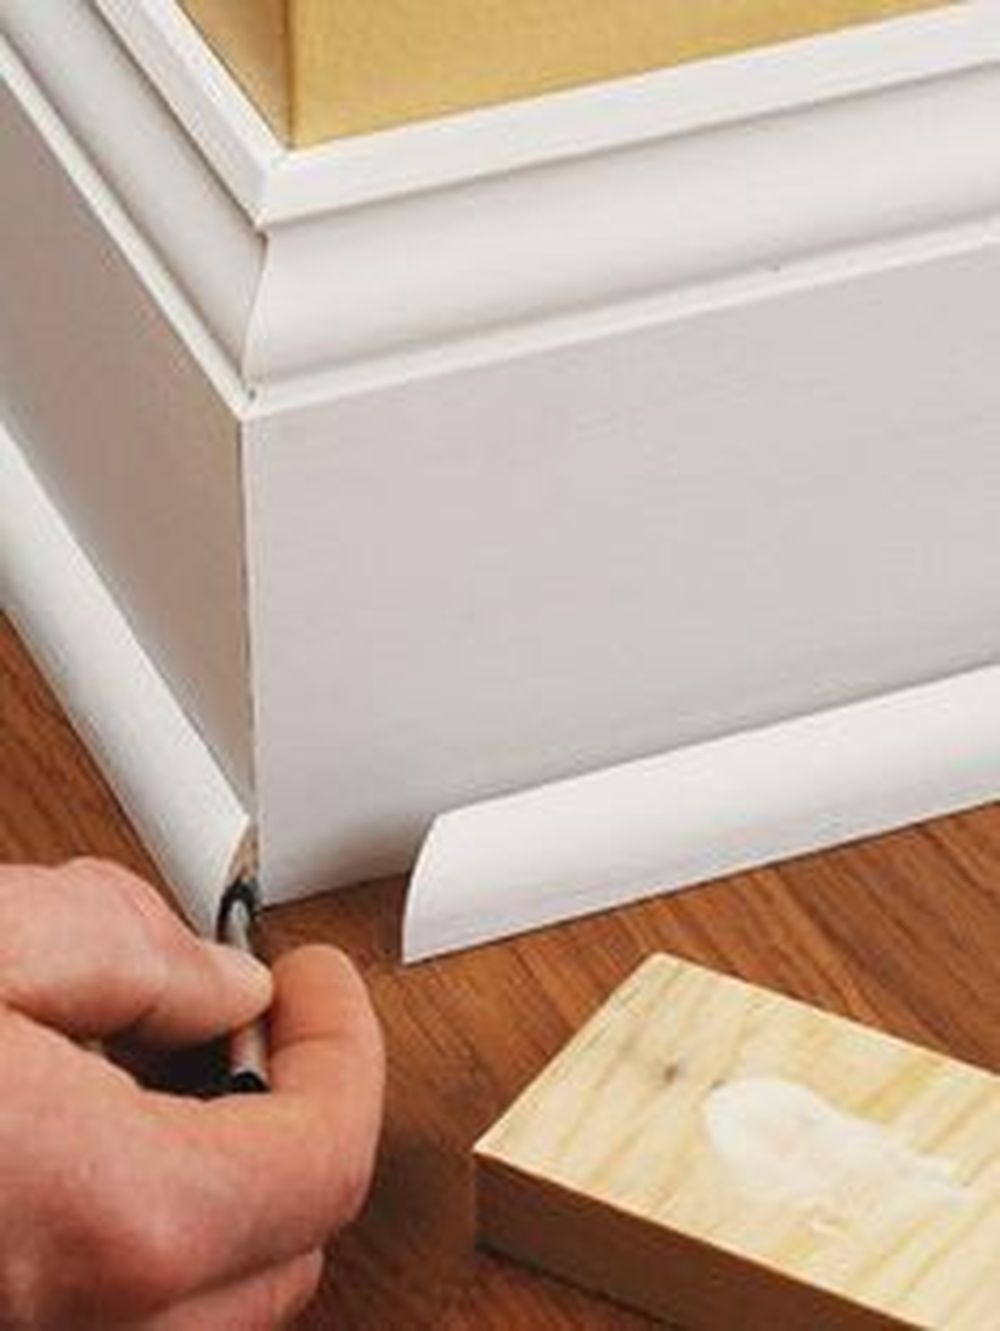
Step 7: Fill any holes with wood putty
Once the shoe molding is in place, use a putty knife to fill any holes or gaps between the molding and wall. Allow the putty to dry completely before lightly sanding it down to flush with the surface. Apply a coat of paint or sealant if desired.
FAQ
Discover more information:
How much does shoe molding cost?
It depends on your local market. On average, expect to pay between $2 and $5 per linear foot installed for chair rail or cove base molding. Parquet molding can run as high as $18 to $25 per lineal foot installed. This price includes materials and labor charges but does not cover the cost of any paint or stain.
How to install shoe molding without a nail gun?
It is possible only when the baseboard has already been placed on one of your walls and is typically made with a rotary tool, such as a Dremel. But you can also use a simple drill and simple metal guide attachments that can be found at your local hardware store.
How to cut shoe molding?
Use a miter saw to make precise, 45-degree cuts on each end. You can also use a hacksaw or coping saw, but they won’t give you precise cuts. If you are using cove base shoe molding, you will also need to cut a 45-degree angle on one end of each piece.
How to end shoe molding at the door frame?
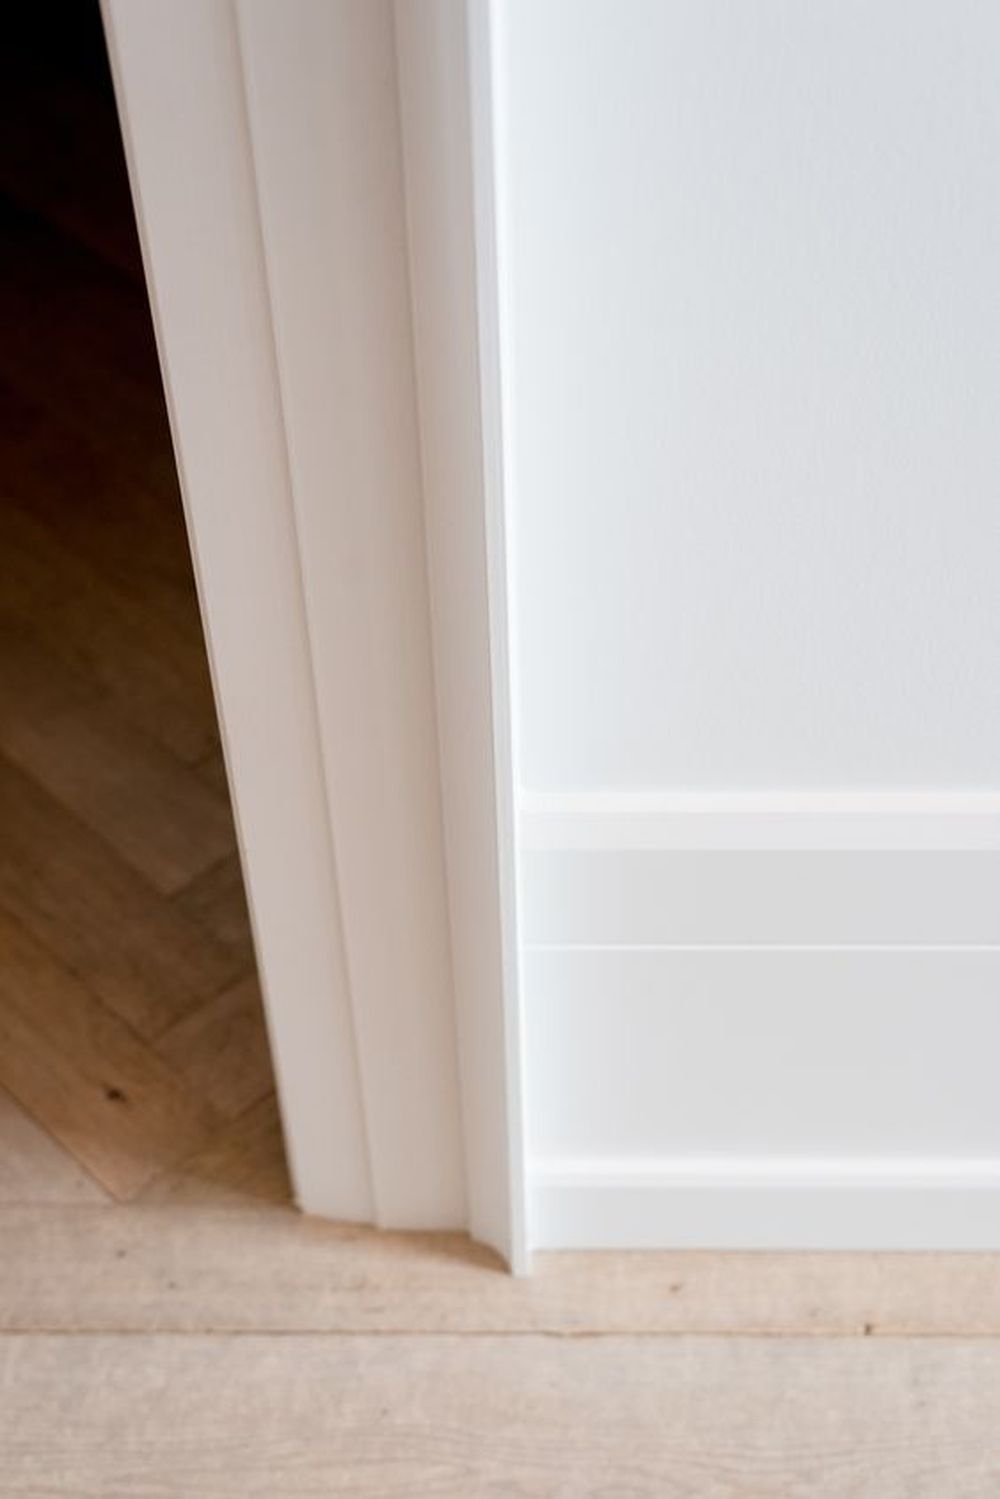
Rip or miter it. To miter your baseboard, use a miter saw to cut both ends at a 45-degree angle. If you are using cove base molding, you should cut this piece at a 45-degree angle on one end before installing it. To rip your floor trim, use a table saw and set the blade depth to half of what is in between your molding and baseboard.
Can I install shoe molding myself?
Yes, it’s a relatively easy task and can be done by most do-it-yourselfers. All you need are basic carpentry skills, some hand tools, and a few hours to complete the job.
What type of adhesive should I use for shoe molding?
An all-purpose adhesive is the best choice when installing shoe molding. It is a contact adhesive that will help secure the molding and prevent it from shifting or coming loose over time.
What type of nails should I use for shoe molding?
When nailing on shoe molding, use small head nails, so that they are easier to fill in later. You can also use finish nails, but countersink them below the surface, so they don’t show.
Can I paint or stain shoe molding?
Yes, you can paint or stain shoe molding to match your existing decor. Be sure to use a sealant or primer before applying any finish. You may also want to apply a coat of weatherproofing sealant if it’s exposed to moisture.
Can I install shoe molding over an existing floor?
It is best to remove the existing flooring before installing shoe molding. But if that’s not an option for you, try to leave at least a 1/4-inch space between the shoe molding and floor so that there is no moisture damage.
Can shoe molding be installed in a wet area like a kitchen or bathroom?
No, you should not install it in a wet area of your home. Because it is made with wood, it can easily absorb moisture and begin to swell, warp, or rot.
How do I transition shoe molding from carpet to tile?
Rip out some of the carpets while leaving the shoe molding in place using a pry bar. Then use a miter saw to cut two pieces of new shoe molding at 45-degree angles at either end of where you removed the carpet. You can then install your tiles on top of the shoe molding. Make sure you are using new nails when installing these pieces.
How do I transition shoe molding from hardwood to tile?
If you are transitioning from hardwood to tile, you will need to remove the shoe molding and then cut a piece of new baseboard to fit the space. Install the new baseboard using wood glue and nails. You can then install your tiles on top of the new baseboard.
What should I do if my shoe molding is too short?
Try to find a longer piece at your local hardware store, or you can rip it to size with a table saw. Be sure to cut it at a 45-degree angle to match the other pieces in your installation.
How do I remove shoe molding?
Try to pull it straight up. If that doesn’t work, use a hammer and pry bar to get it loose. You can then pry underneath the shoe molding with the pry bar and lift it off the nails holding it in place.
How to install quarter-round molding?
To install quarter-round molding, you should first determine if your floor is flat or not. If it is not flat, you will need to make sure the shoe molding is installed under the quarter-round so that none of it shows once it’s tacked down.
Once you’ve determined where to install your quarter-round, apply a thin layer of adhesive onto the subfloor, followed by a thin bead of adhesive onto one end of the shoe molding.
Immediately press the quarter round into place and hold it there for at least 30 seconds to make sure it’s secure. If you’re only applying quarter-round around the outside edges, then that should be enough to hold it in place.
If you’re installing it in the middle of the room, you will need to use nails or screws to secure it. Be sure to countersink the nails or screws below the surface so they’re not visible. You can also use a miter saw to cut your quarter-round at a 45-degree angle if you need a customized look for your installation.
Final Thoughts
Shoe molding is a great way to finish off your flooring installation and give it a more polished look. It can also help to protect your floors from moisture damage. Be sure to choose the right type for your flooring material and installation. And always follow the manufacturer’s instructions!
Now that you have all the installation details, you can give your floor a finished look that will last for years to come. Or, if you’re not feeling up to the task, you can always hire a professional.
Do you have any advice on shoe molding based on your personal experience? Be sure to let us know in the comment section below!