Railroad Ties For Garden Beds – Safety Concerns And Alternatives
Updated on April 5, 2021
The question of the safety of railroad ties in garden beds has been raised many times. So much so that the Environmental Protection Agency (EPA) has issued directives to ban their use not just in gardens but near residential areas in general. Does that mean that railroad ties for your garden beds are no longer an option? And how would you go about creating flower and veggie beds without them?
First, we need to understand the safety concerns with railroad ties. What makes them such an eminent threat in your veggie garden. What kind of toxics are there, and how long do they stay in the garden? Then we discuss other safer types of railroad ties you can use.
Dangers of Railroad Ties in Garden Beds
As you’re well aware, the EPA doesn’t throw about recommendations and prohibitions willy nilly. And when it comes to something as ubiquitous as railroad ties. There was a time when every other garden had those indispensable yet simple tools propping up the veggie beds. Until the EPA stepped in and made them illegal. So what gives?
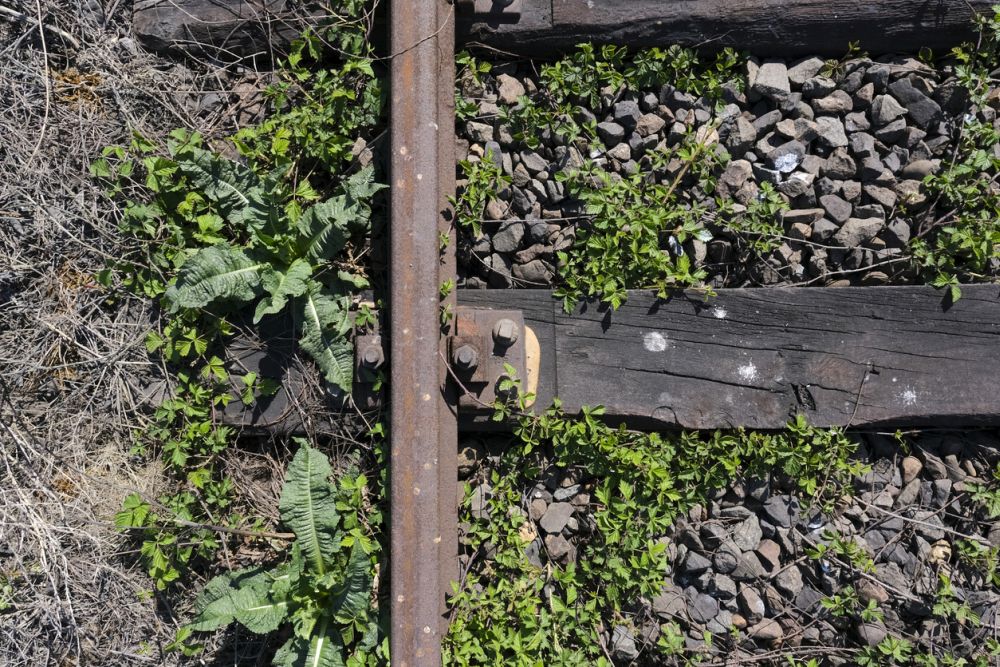
The problem with railroad ties is that they’re often made from treated wood. That type of wood has been used for railroad tracks since John Stevens, the father of American railroads, went into business. So why is it good for railroads but not good for your landscape? Two reasons, creosote and chromated copper arsenate or CCA for short. So what are these? And what do they have to do with railroad ties and your garden?
Creosote
Creosote is a chemical compound extracted from coal tar and other fossil fuel, where its antiseptic and preservative qualities make it ideal for treating wood. Since wood is the bedrock of railroads, the last thing the railroad engineers wanted was the wood planks eaten away by mites and other pests. So the wood gets processed where it becomes compact for durability and treated to a generous dose of creosote.
Back in the day, creosote was widely used to treat wood in the same way asbestos was used as a fire-retardant material in buildings in the 19th century. You might also notice a build-up of creosote in your chimney or wood stove. Some woodstoves even have gauges to indicate the level of creosote buildup inside the stove. So what makes this natural by-product of wood or coal-burning such a dangerous element?
- Direct exposure to the chemical compounds could lead to serious skin burns.
- Inhaling causes lung irritation and could lead to serious respiratory complications.
- It leads to eye irritation, excessive eye-watering and might require medical attention in cases of long exposure to it.
- Ingesting the material could lead to liver and kidney issues.
- In some cases, it could lead to delirium and mental confusion.
- Some people exposed to creosote displayed convulsions that warranted immediate medical help.
- Long exposure to the compound has led to death in severe cases, especially for people with pre-existing conditions.
Chromated Copper Arsenate (CCA)
As if creosote in railroad ties was not enough to deter insects and give the wood ties durability, another chemical compound was added while processing the wood ties. That compound is chromated copper arsenate. As the name implies, the three main ingredients of this lethal compound are chrome, copper, and arsenic. Each one of those is more toxic than the one before it. But since it’s such a highly toxic compound, many timber manufacturers decided to ditch it in favor of creosote. We’ve already seen the damage creosote can do to the human body, so you can imagine what even brief exposure to CCA can do to you.
Even the ash left after the burning of wood treated with CCA still contains high concentrations of arsenic that could be fatal to livestock or animals that inhale or ingest it.
How to Dispose of Railroad Ties Safely
Naturally, and considering the amount of danger that railroad ties pose to you, your family, and pets, you wouldn’t want to have them anywhere near your property. But what if you already have them installed in your garden bed, lining up your edges or marking the borders of your property? Should you get rid of them? And if so, how?
The first thing you should do is take the railroad ties out of your garden beds, lawn, or property. As long as they remain in the soil, they pose a health risk to anybody who comes near to them. Moreover, the chemicals in the wood tend to leach into the soil in the presence of moisture which contaminates your garden and veggies.
Don’t try to saw it off since that would leave parts of the wood ties in the soil to spread their toxicity far and wide. Also, the sawdust resulting from cutting the ties off is too dangerous to inhale.
Another thing you should never do with the pile of railroad ties in your garden is burn them. The resulting ash contains enough creosote to poison a large animal. The ash could also find its way into the soil and remain there for lengthy periods of time.
The best way to dispose of railroad ties is through a professional. Since this type of wood is illegal in many states, you should consult with the local authorities about the best ways to safely get rid of it.
Soil Contamination
We mentioned in passing how the railroad tiles leach their poisonous chemicals into the soil. But now that you have removed it safely from your garden, does that mean that your soil is 100 percent clean and that you can start growing your tomato patch and cucumber right away? Not so fast.
Before you consider growing any edible fruit trees or veggies in your garden, you should have the soil tested first. The tests would indicate how much contamination is still in the soil. According to the EPA guidelines, you should never plant anything in soil that had railroad ties planted in it before. So it seems there’s no expiry date for the soil contamination.
Another option is to replace the soil in your garden completely. That would require excavating about two feet of soil and filling it back with fresh soil. But here again, you’re faced with a dilemma. How far away from the center of contamination should excavate? Are three feet in all directions enough? Or should you make it five feet?
According to many experts, you shouldn’t take any chances with the soil. That means you should replace the whole soil volume in your garden. This might sound like an extreme measure, but considering the alternative, it really seems like the wisest thing you can do to save your garden and safeguard your household against the perils of toxic creosote.
Safer Alternatives to Railroad Ties
So if not railroad ties, what can you use instead to build your garden beds? Luckily there are many options you can choose from, and none of them have the same toxicity as old railroad ties. Here we explore two popular options.
- Landscaping Block: What many homeowners and gardeners have forgotten is that you can still build your raised beds with regular stone blocks. They are inexpensive and widely available. Moreover, they come in different sizes, shapes, and colors to suit any landscaping concept you’re aiming for. And since they’re made of elements that occur in nature and pose no health risk to humans or animals, they’re by far a safer option to old railroad ties.
- Barn Beams: The main attraction that old railroad ties offered to gardeners and developers alike were that they were cheap and ready for recycling. The same principle applies to old barn beams. They are made of hardened wood but without the toxic chemicals that railroad ties are steeped in. The caveat here is that you should avoid using barn beams covered in engine oil stains since they could be a fire hazard.
How to Use Safe Railroad Ties in Gardens
So you have got your hands on some old barn beams. You have tested them, and they are creosote- and CCA-free. They are perfect. They have a natural look that goes well with your rustic garden design. So how will you use them to build a garden bed or an edge? Here’s how to go about it in easy steps.
Garden Bed
- Plan your raised bed well using chalk and take the exact measurements of the perimeter.
- Make sure the soil is dry around the perimeter, and dig a trench along the chalk line you have marked. The trench should not be deeper than 6 inches.
- Cover the bottom of the trench with a 2-inch layer of gravel.
- Cut the ties to the exact height of the raised bed and drill holes in each tie about two feet apart.
- Install the ties in the trench in rows above each other, making sure the holes in each tie are aligned with those of the ones above and below them.
- Drive a steel bar into the holes of the ties and hammer it into the ground.
- Fill the bottom of the raised bed with a thick layer of gravel. Spread it around evenly.
- Fill the raised bed with soil up to 2 inches from the top of the ties. Now your raised bed is ready for growing plants.
Edges
- Measure and mark the boundaries of your garden.
- Dig a trench around the garden about 4 inches deep. Make sure it’s level.
- Cut the railroad ties to the desired length using a saw.
- Lay the ties in the trench in a row, making sure there’s no space between each tie end and the one next to it.
- Lay the second row of ties starting from the opposite direction so that the spaces between the ties are not aligned with the layer below it.
- Keep adding rows of ties and make sure they are level.
- Drill holes in the ties at each end of the edge and drive a long spike in them, then hammer it into the ground.
- Fill the gaps between the ties with the excess soil.
Make sure the wood ties are made from untreated wood. Cedar is an ideal candidate for building raised beds in your garden. It’s durable and has a high resistance to mites and the erosion of the elements.