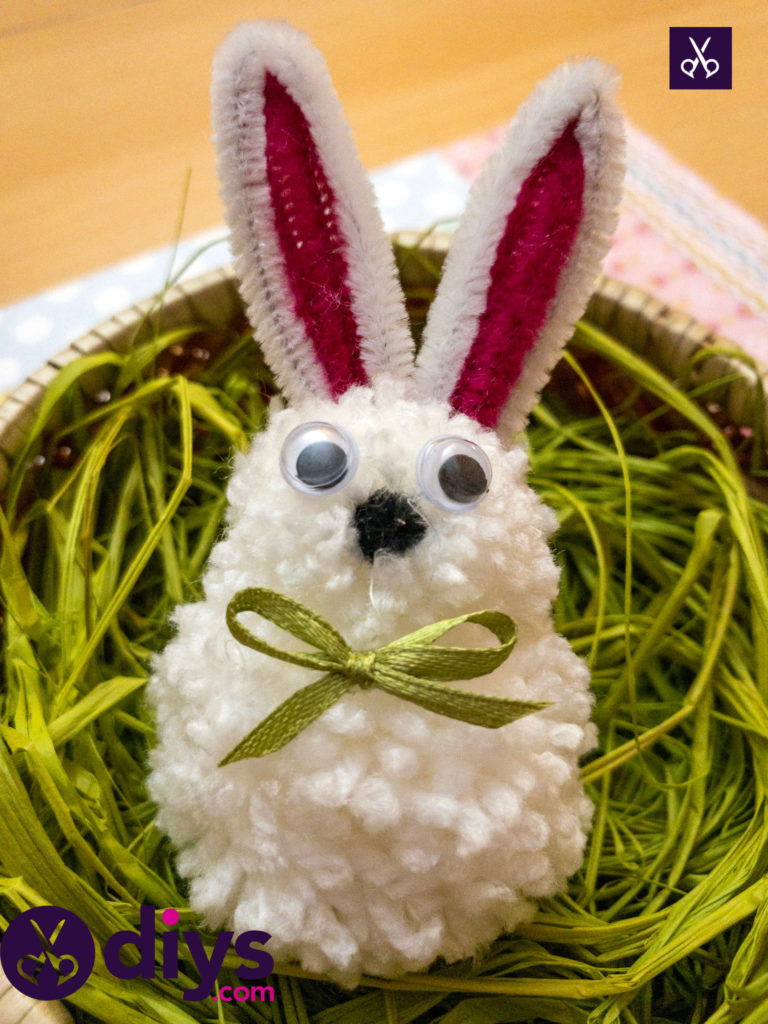
How to Make a Pom Pom Rabbit
Updated on November 19, 2025
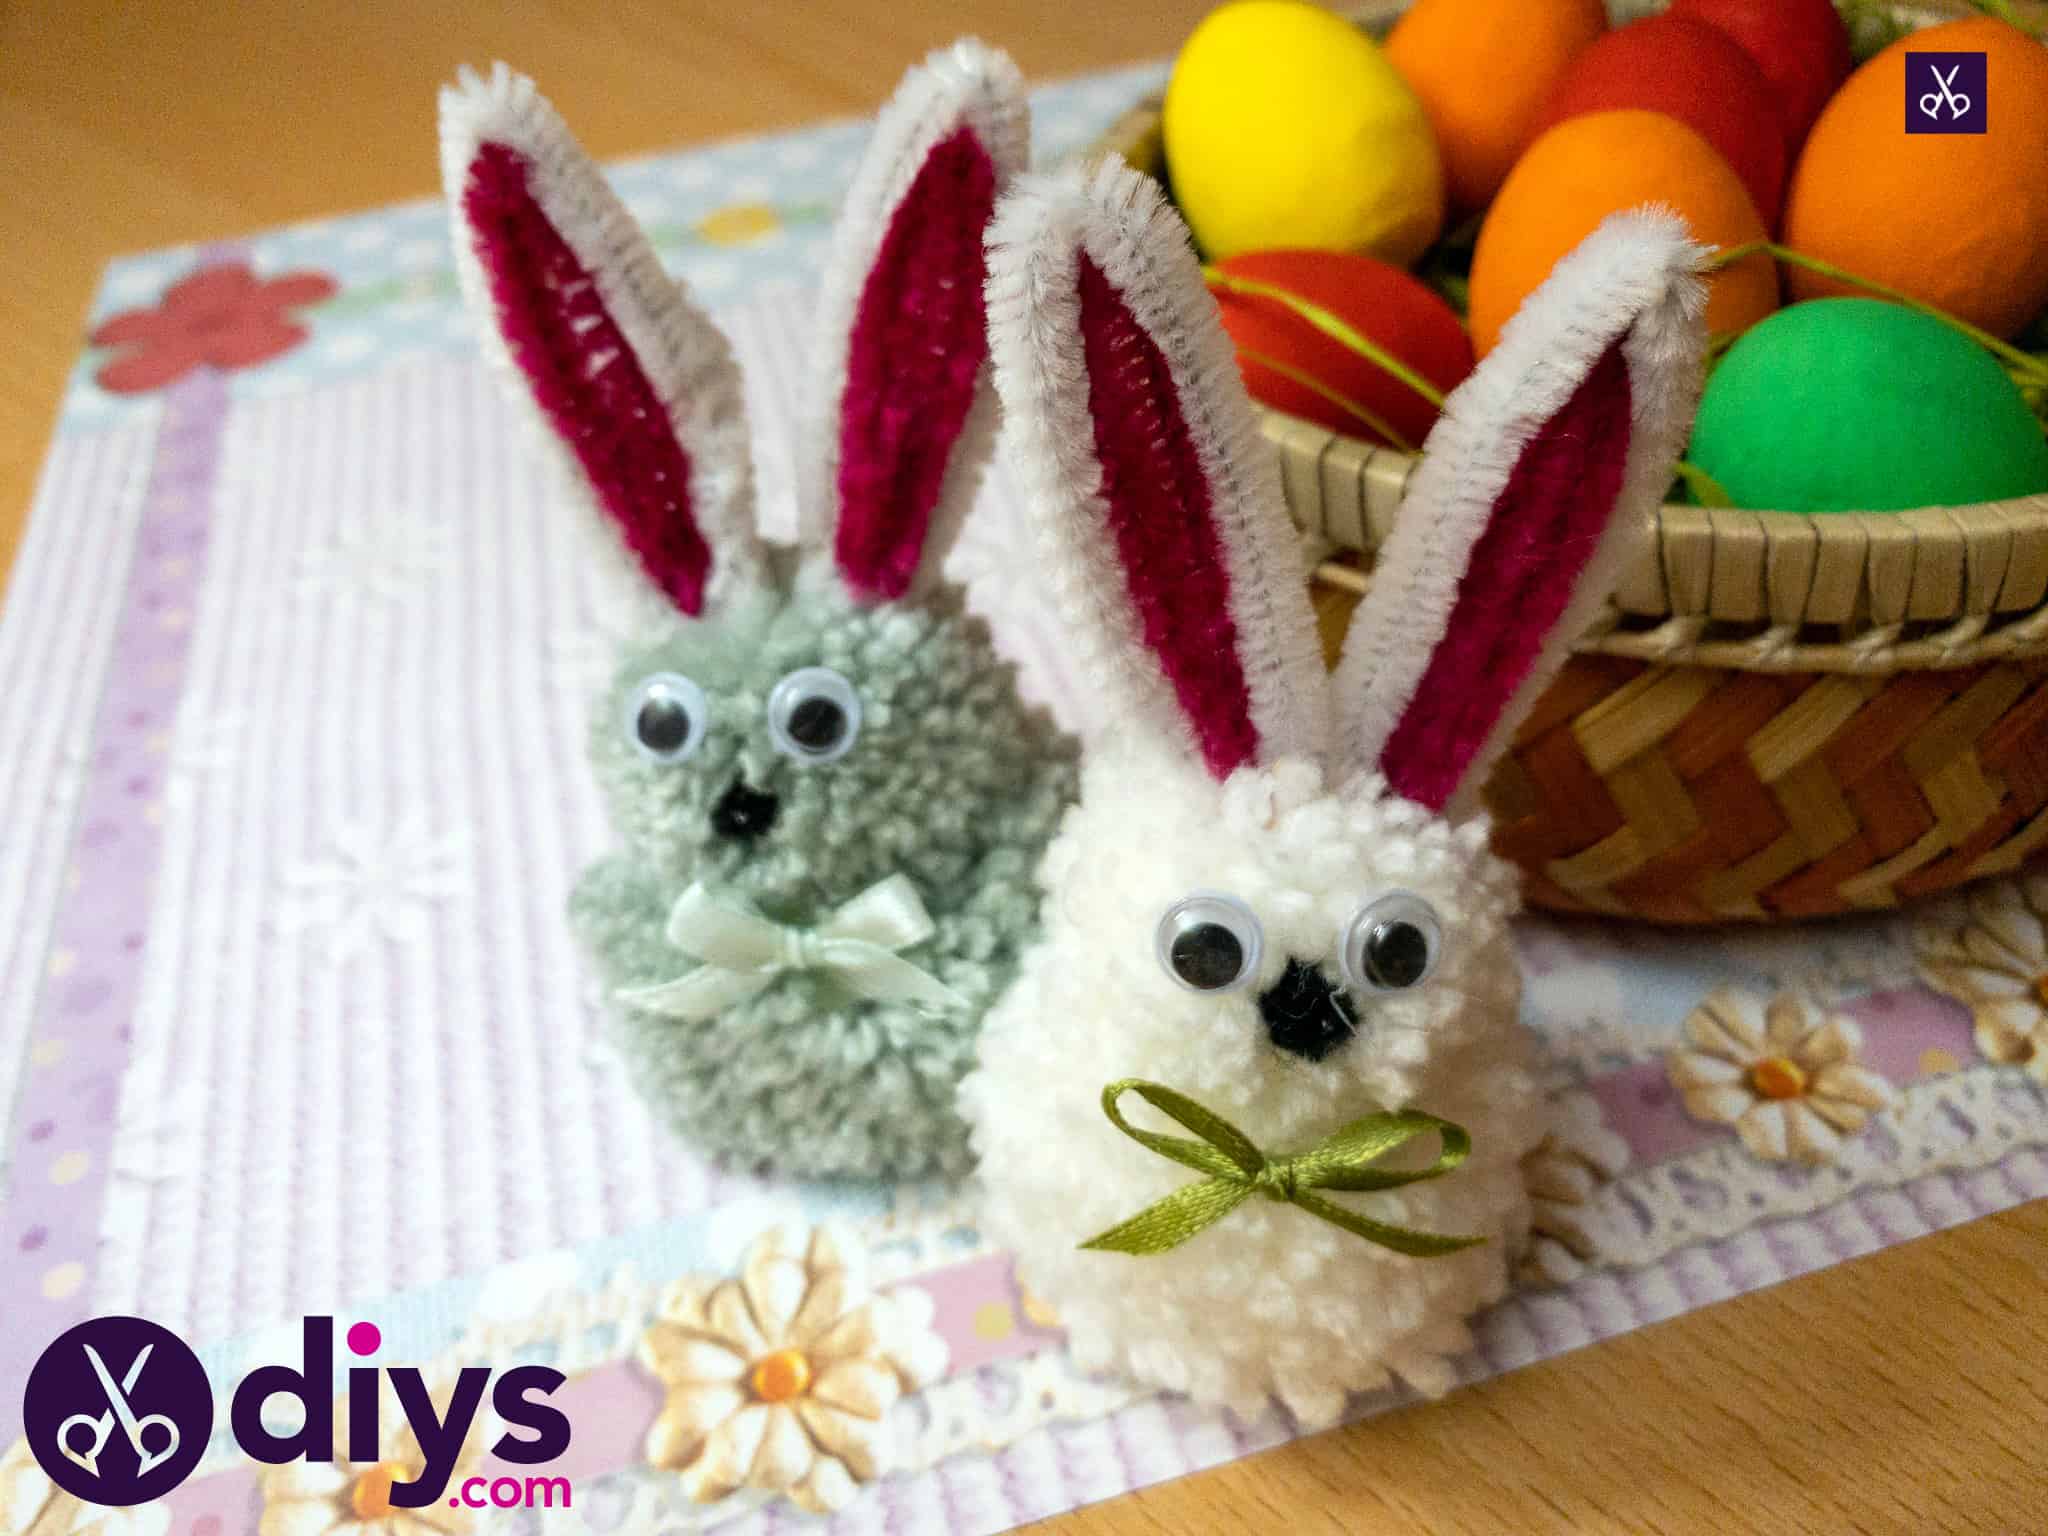


Ever since I was a little kid, pom pom crafts have been one of my very favourite kinds of DIY projects to make. I’m sure it’ll come as no surprise to you, then, that I recently taught my kids how to make little pom poms. Now they’re making them constantly! In fact, we’ve got such a surplus of pom poms happening that I can’t help feeling like I need to start brainstorming ways to put them all to better use once they’re done. That’s how I came up with the idea of making an adorable little pom pom bunny rabbit!

Just in case others would like to follow along with my bunny making process, I decided to outline how I did it! You’ll also find a full video tutorial at the end of the post, just in case you’d prefer to follow that instead.
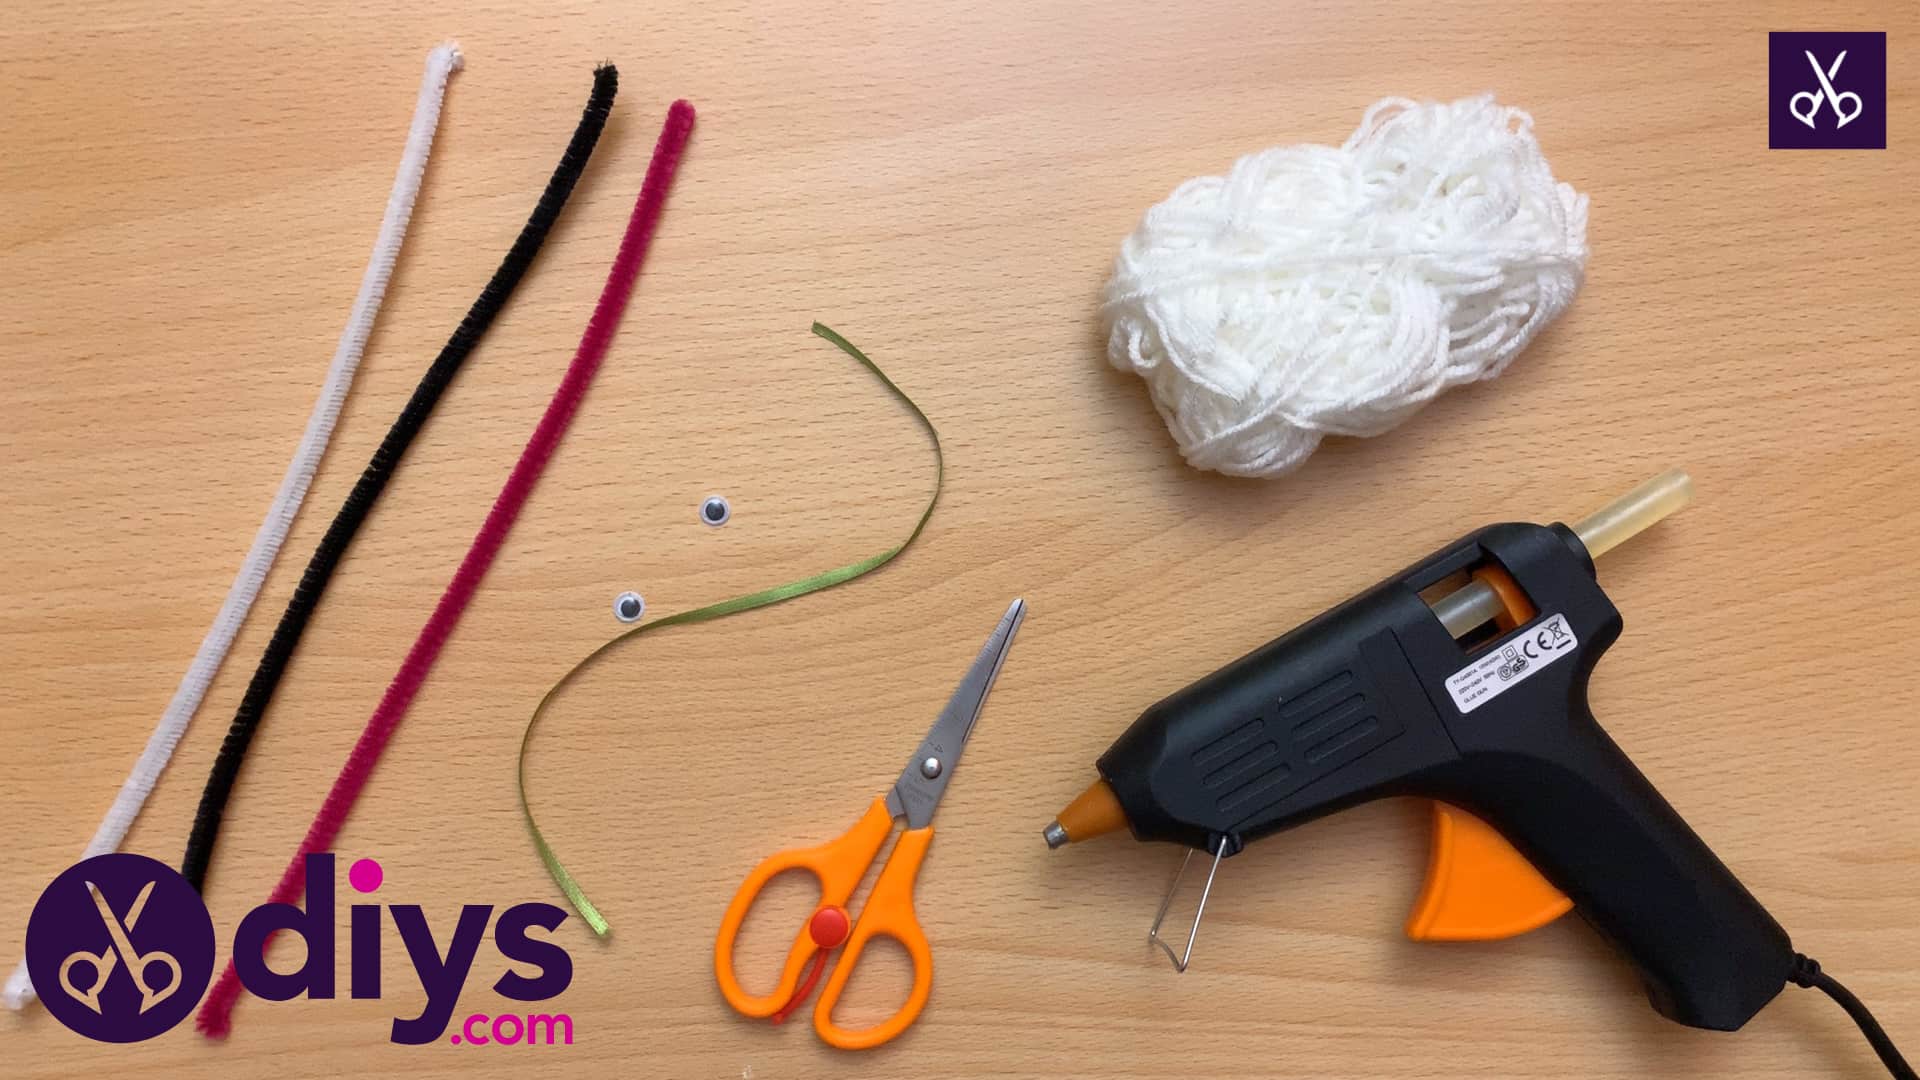
For this project, you’ll need:
- Yarn (whatever colour you like best)
- Hot glue
- Googly eyes
- Scissors
- Black, white, and pink pipe cleaner
- Ribbon
Step 1: Gather your materials!
I chose a neutrally coloured yarn here in order to make a bunny with realistically coloured fur, but you could pick any colour of yarn you like.

Step 2: start pom poms
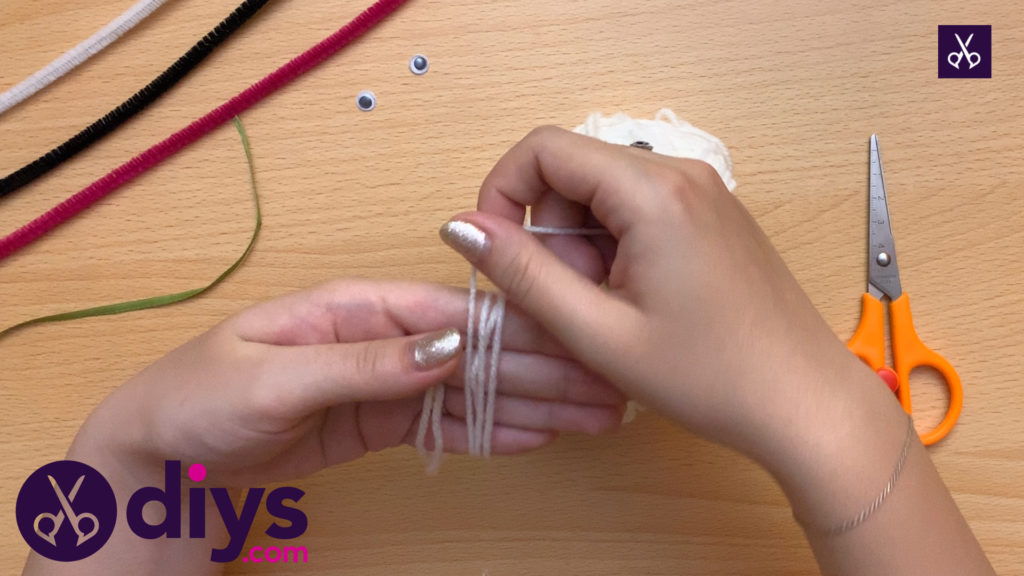
Make your first pom pom. Pinch your yarn end against your four fingers using your thumb and start wrapping the yarn around and around your fingers. Keeping wrapping until you have several layers in order to make a dense pom pom. Once you’ve got enough to hold your yarn in place automatically, carefully slide your thumb out from underneath and then keep wrapping.
Step 3: finish with a tie
When you feel like you’ve done enough wrapping, cut the yarn still attached to the ball and hold that end in place with your thumb instead. Cut another length of yarn and loop it above and below the wrapped layers of yarn between your middle and ring fingers. Tie the yarn and pull it tight to cinch the middle of the layers, then tie it in a knot to hold them in place.

Step 4: cut
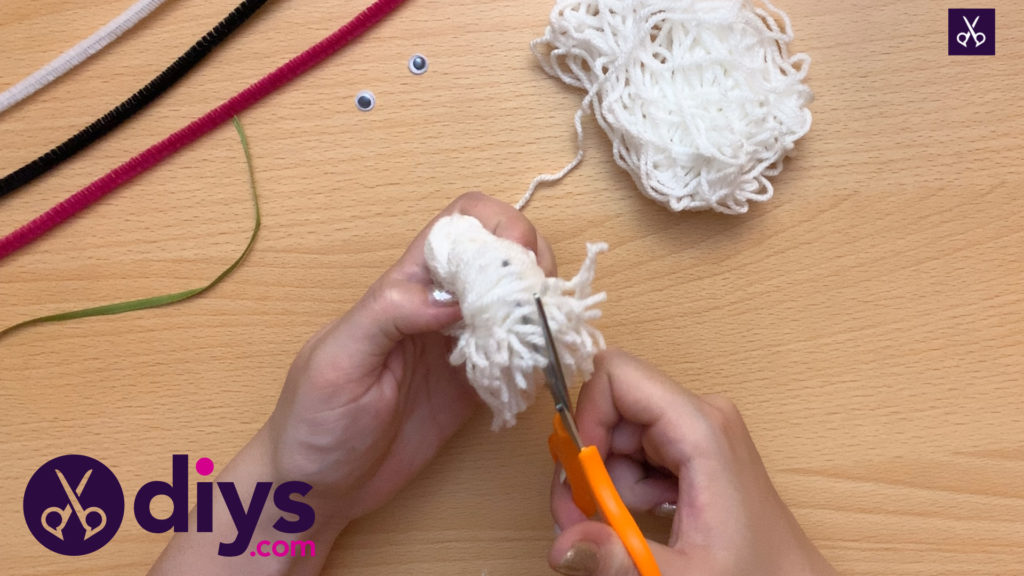
Slide your forming pom pom off your fingers and use your scissors to cut the loops that are now formed at either end so they turn into many yarn ends instead. They’ll spring apart thanks to the density of your wrapping and how tightly you tied the string in the middle, but you can help the shape and volume by separating the ends so they don’t stick together.
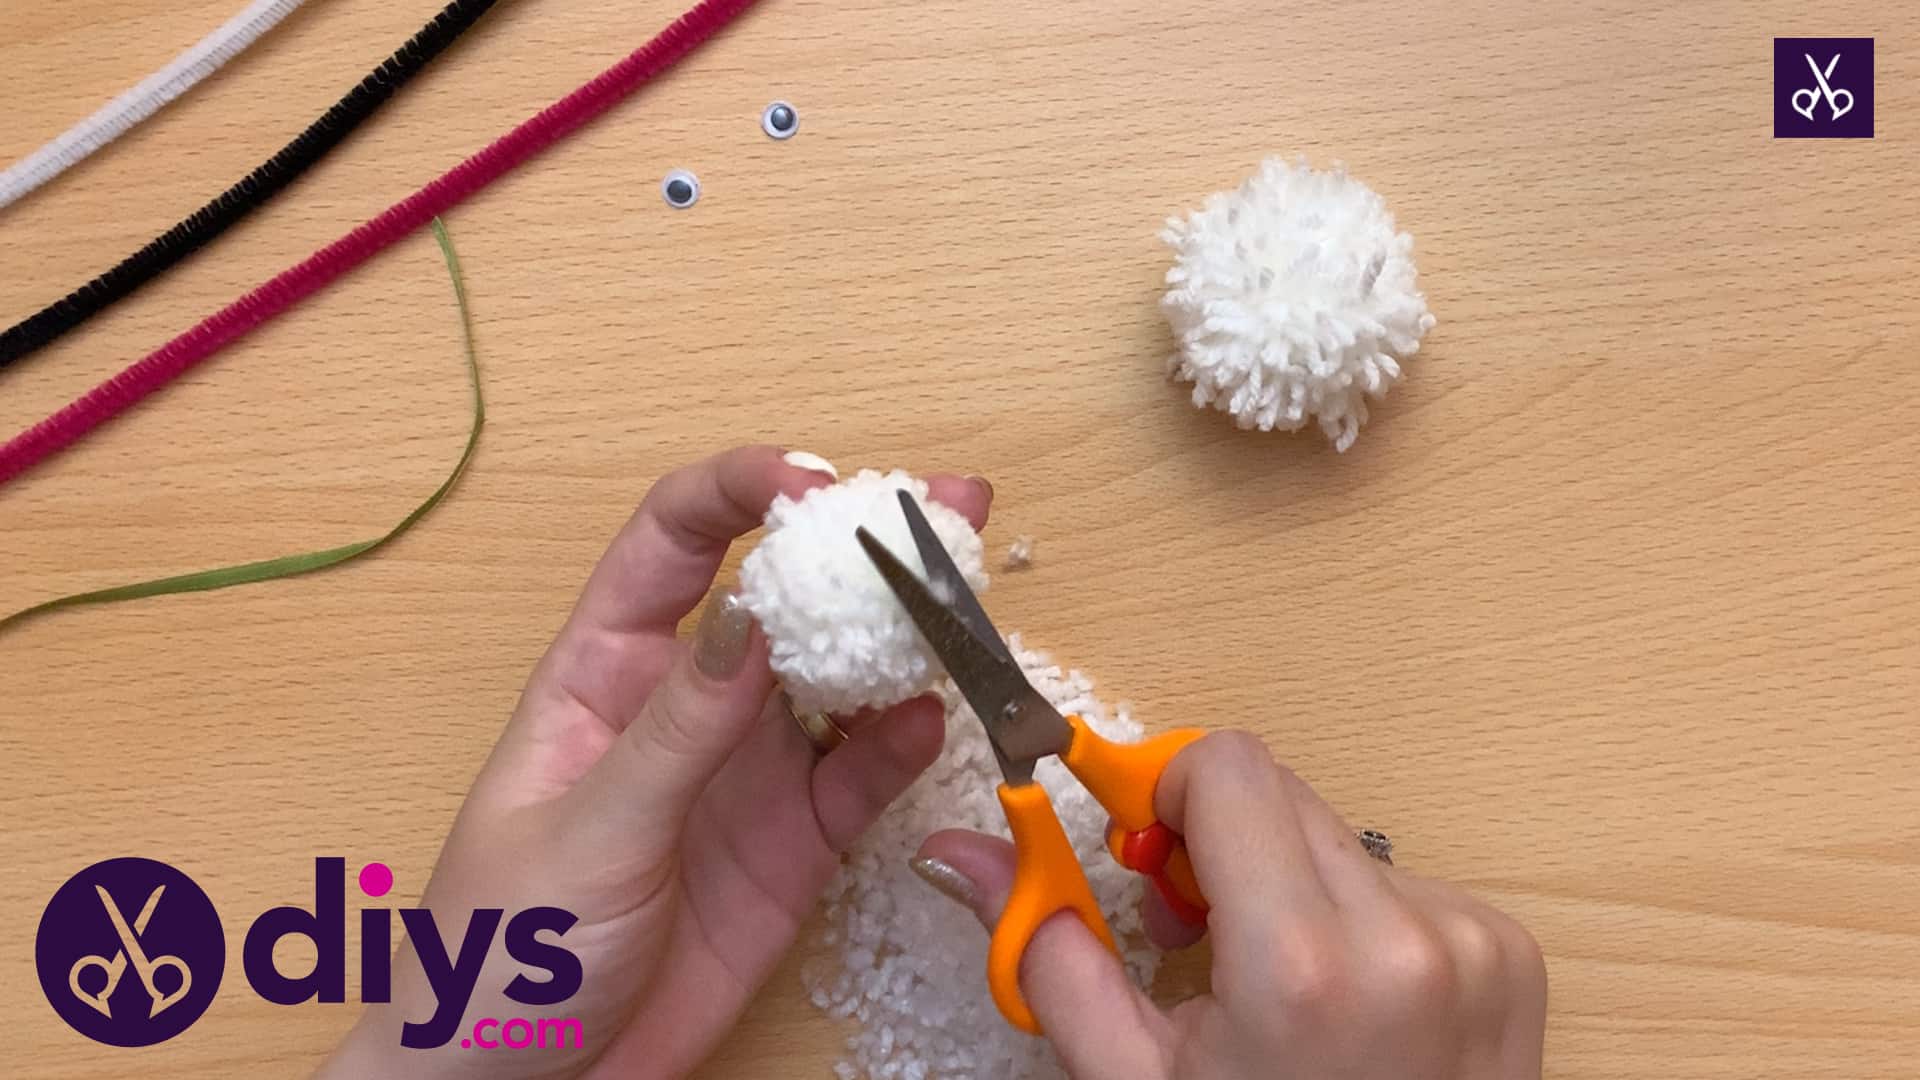
Step 5: trim
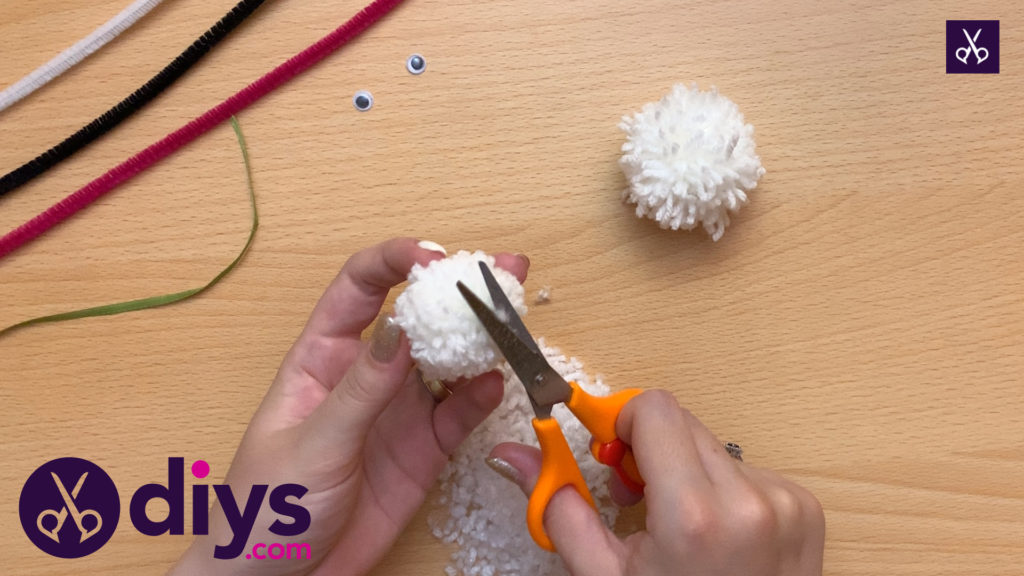
Once you’ve fluffed your pom pom, use you scissors to trim straggly ends all the way around, so you get a much smoother, more even rounded shape all the way around.

Step 6: repeat
Repeat the whole pom pom process to make a second pom pom!
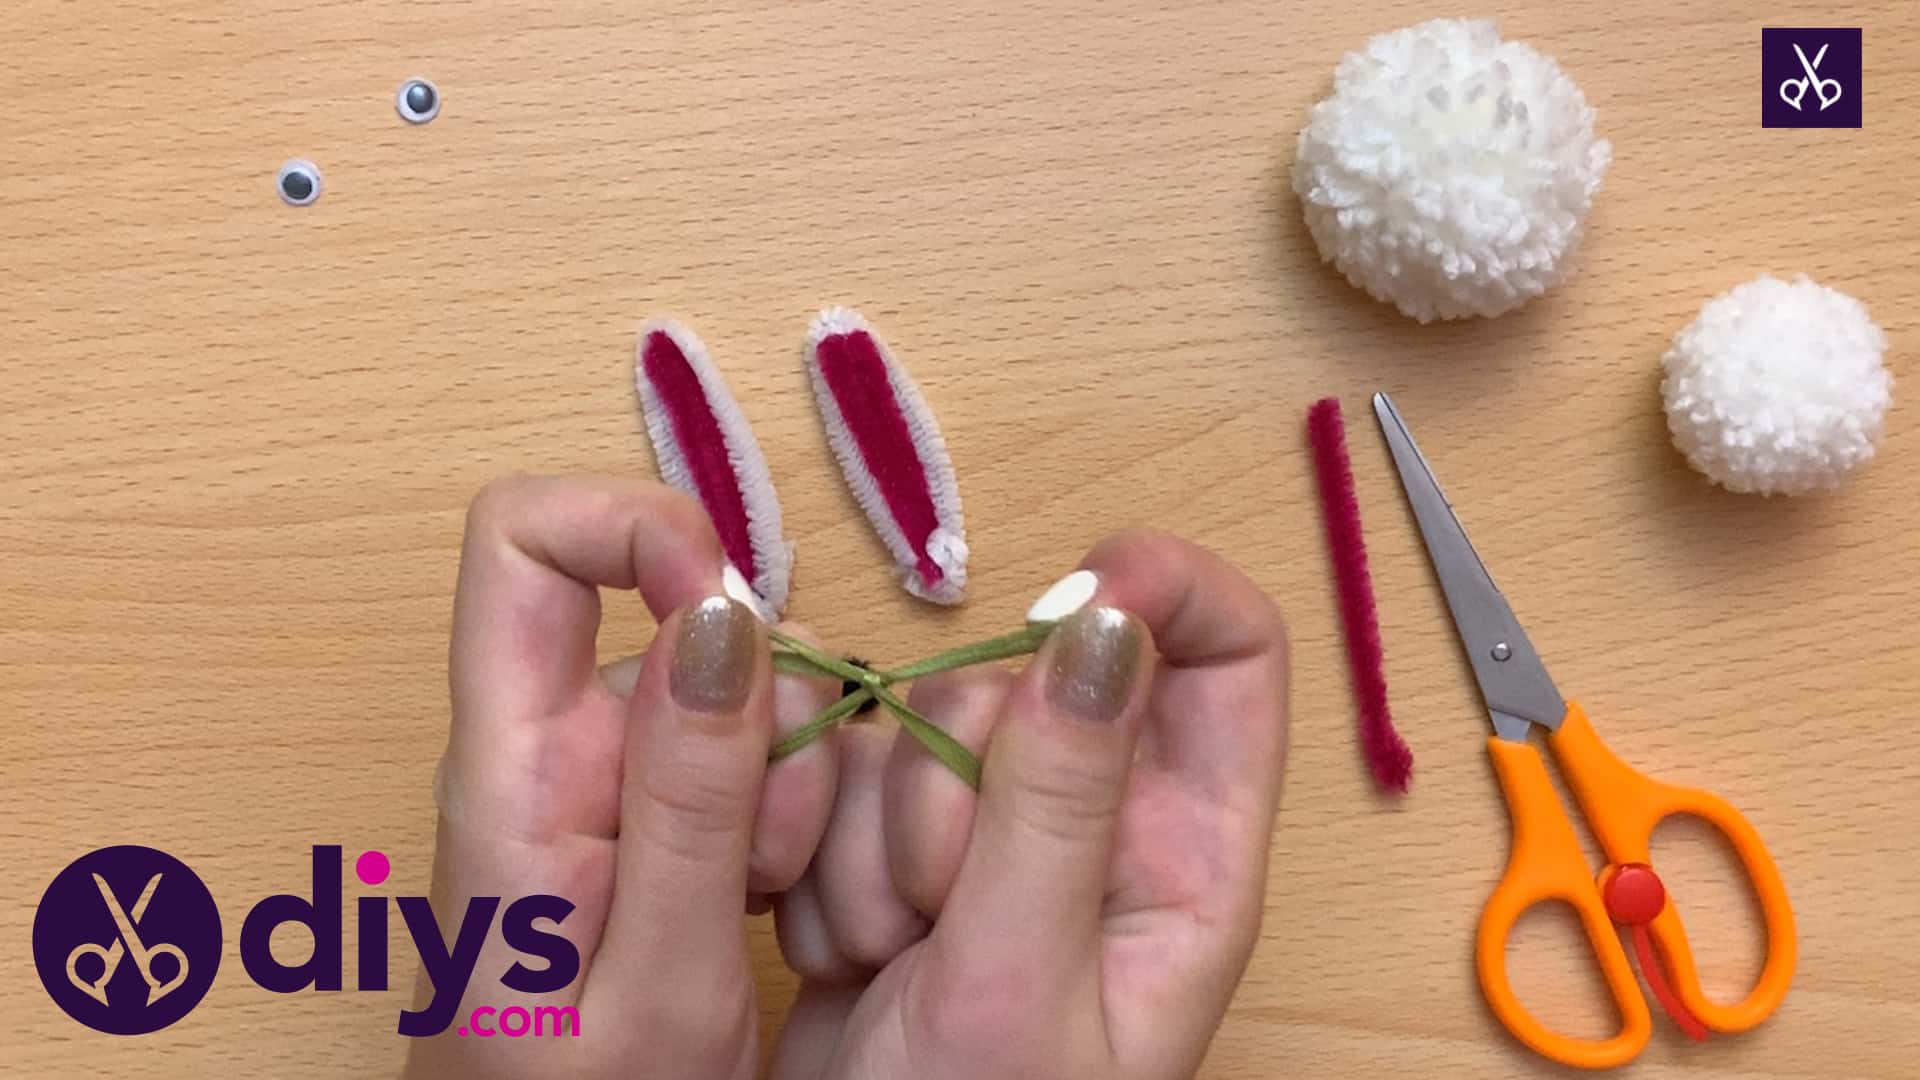
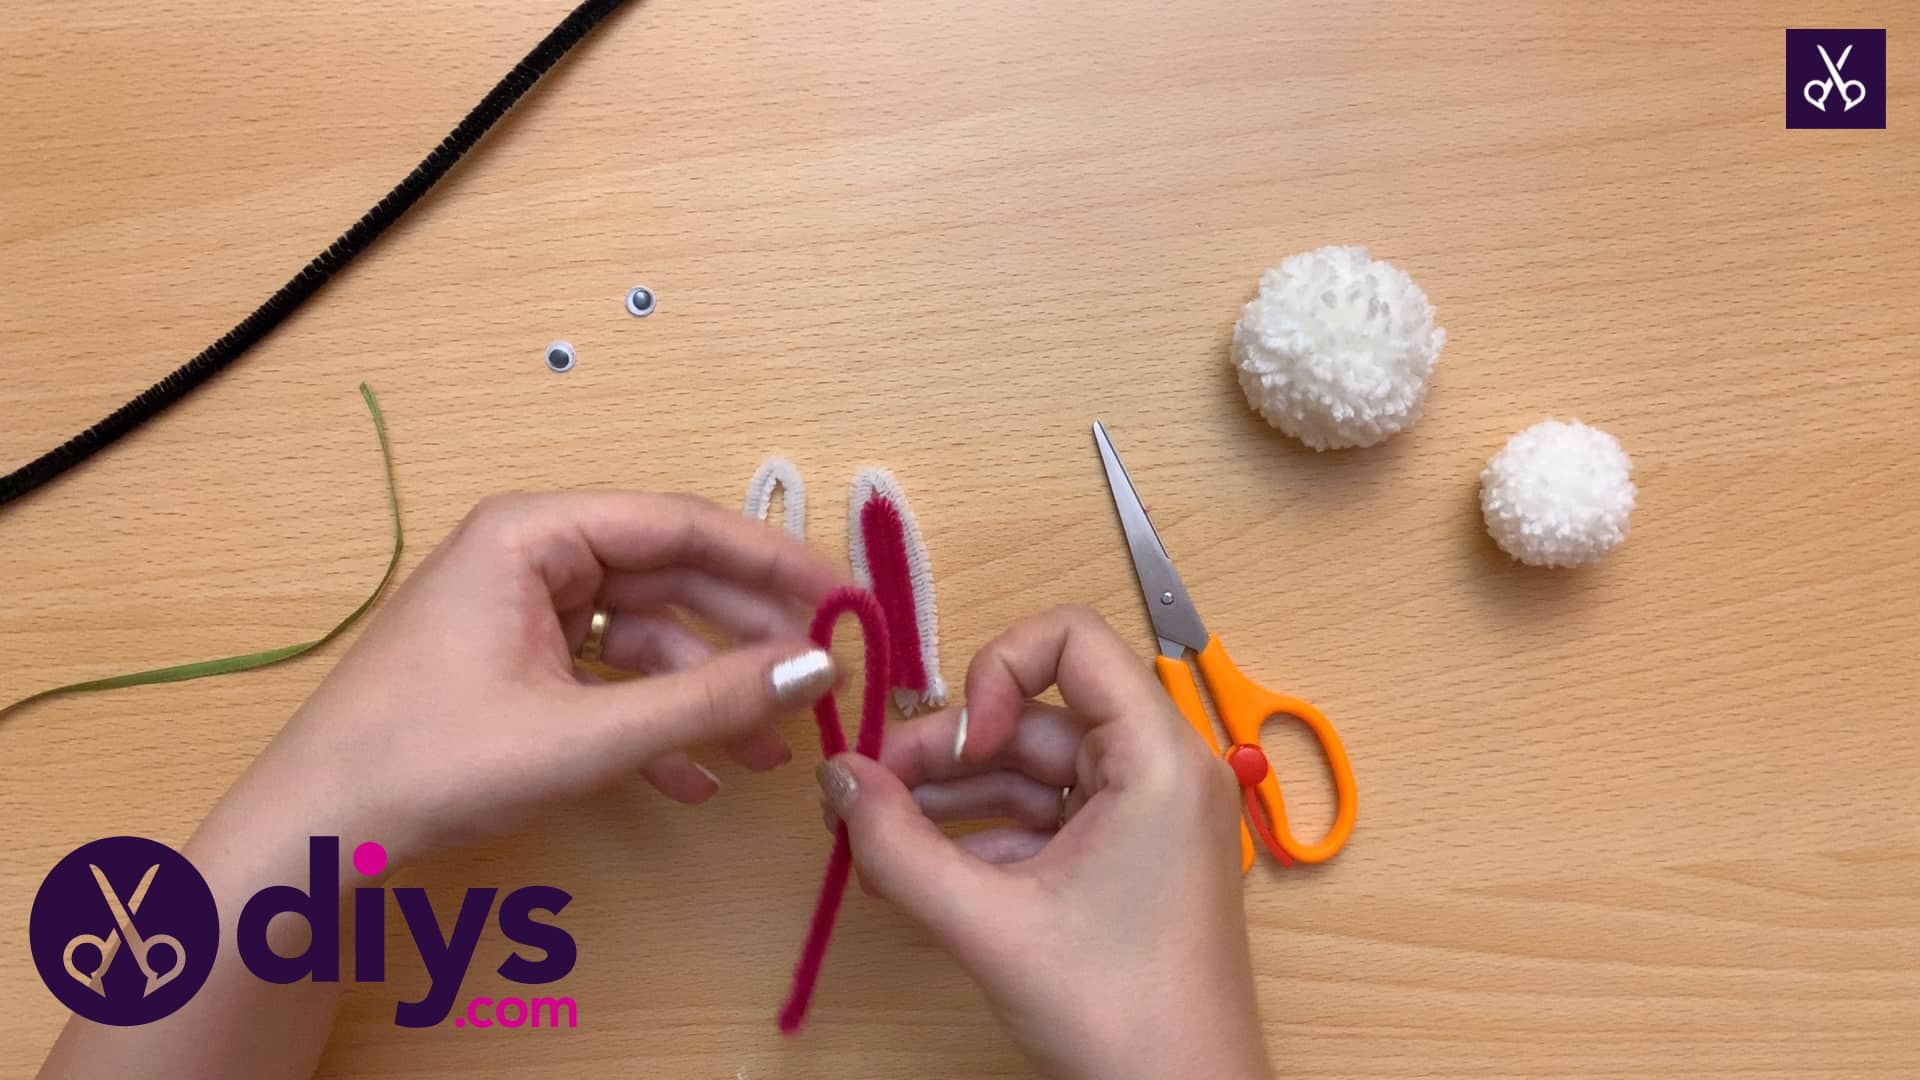
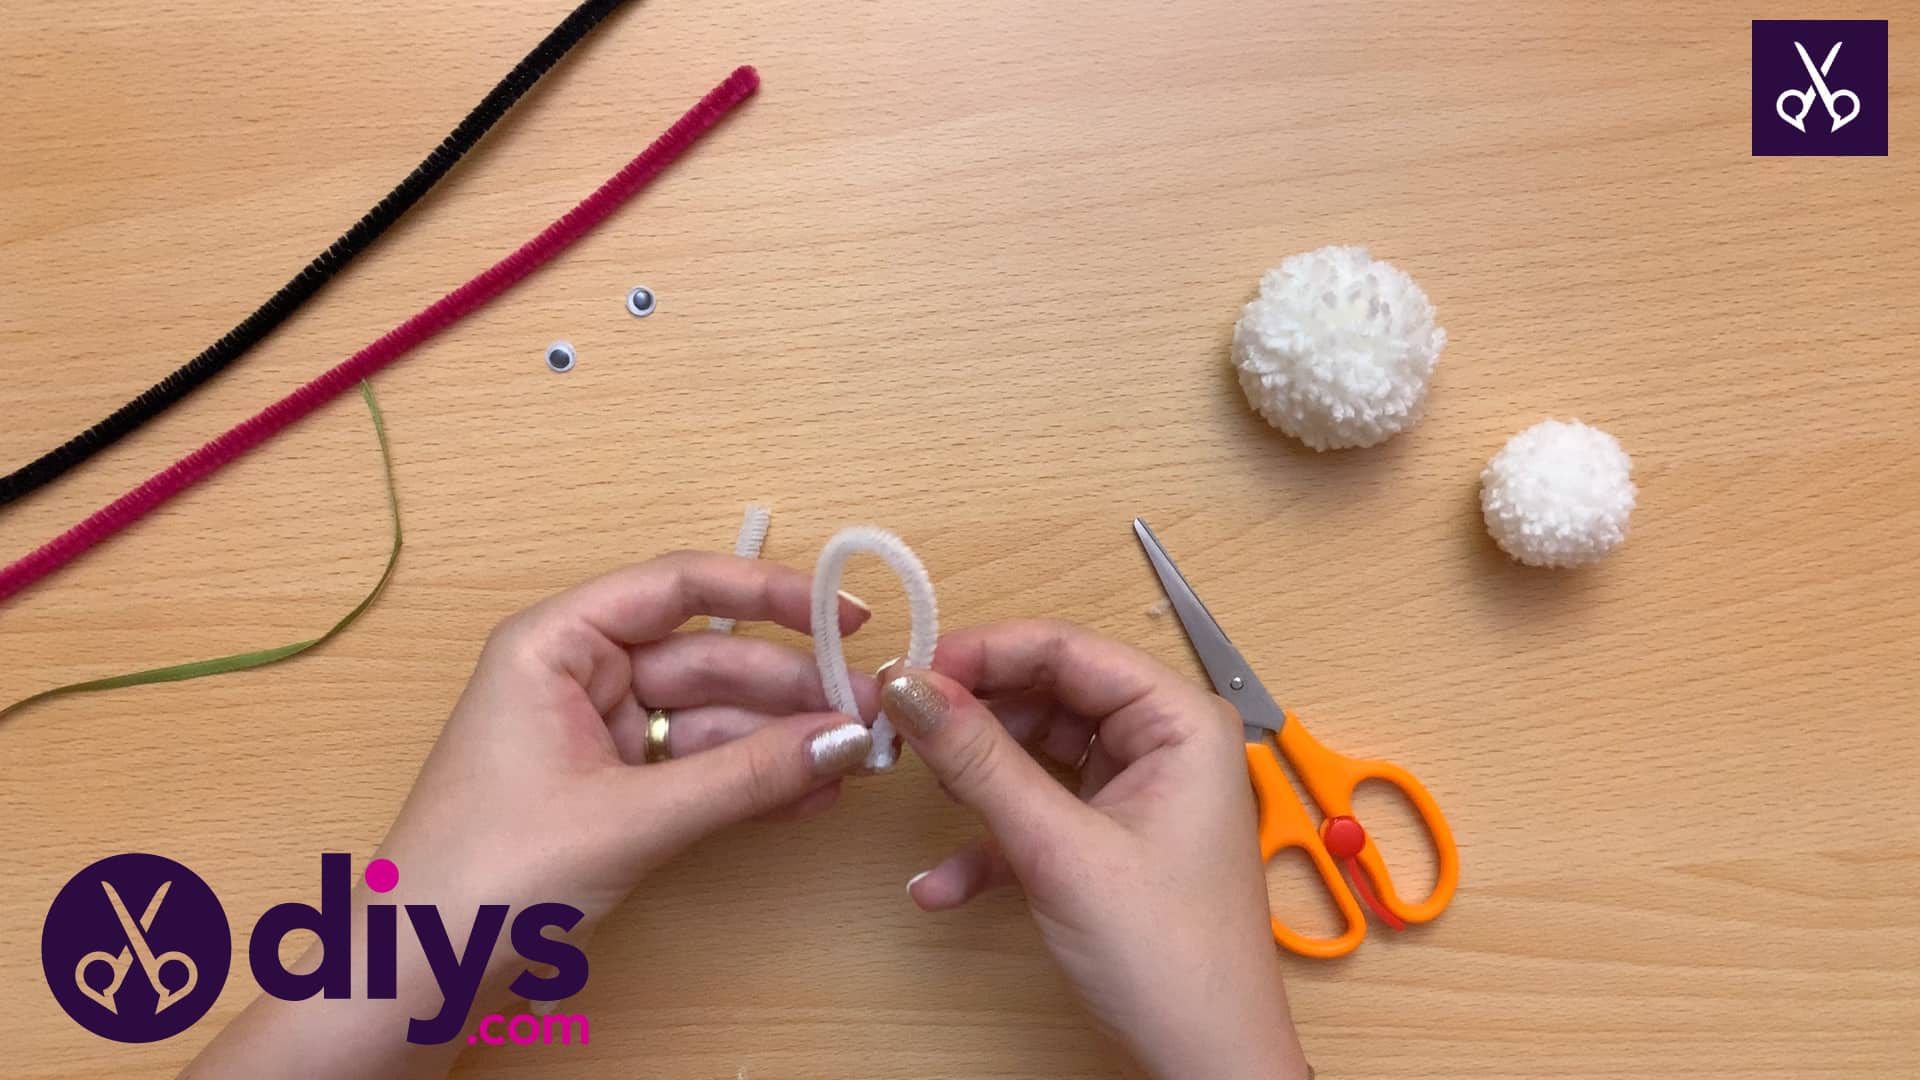
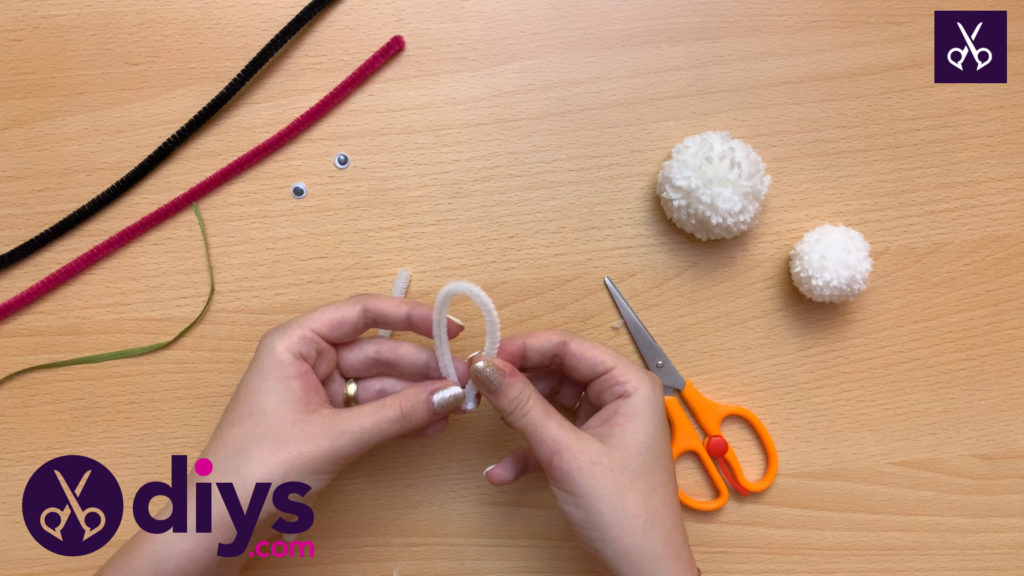
Step 7: make the ears
Fold your white pipe cleaner in half to find the center and cut it there so you have two pieces now. Light fold each one in half again without pinching the wire in the center this time; the goal is to make it arch in a rounded shape rather than bending it sharply. These pieces will be the outside of your bunny’s ears.
Step 8: make the inside of the ears
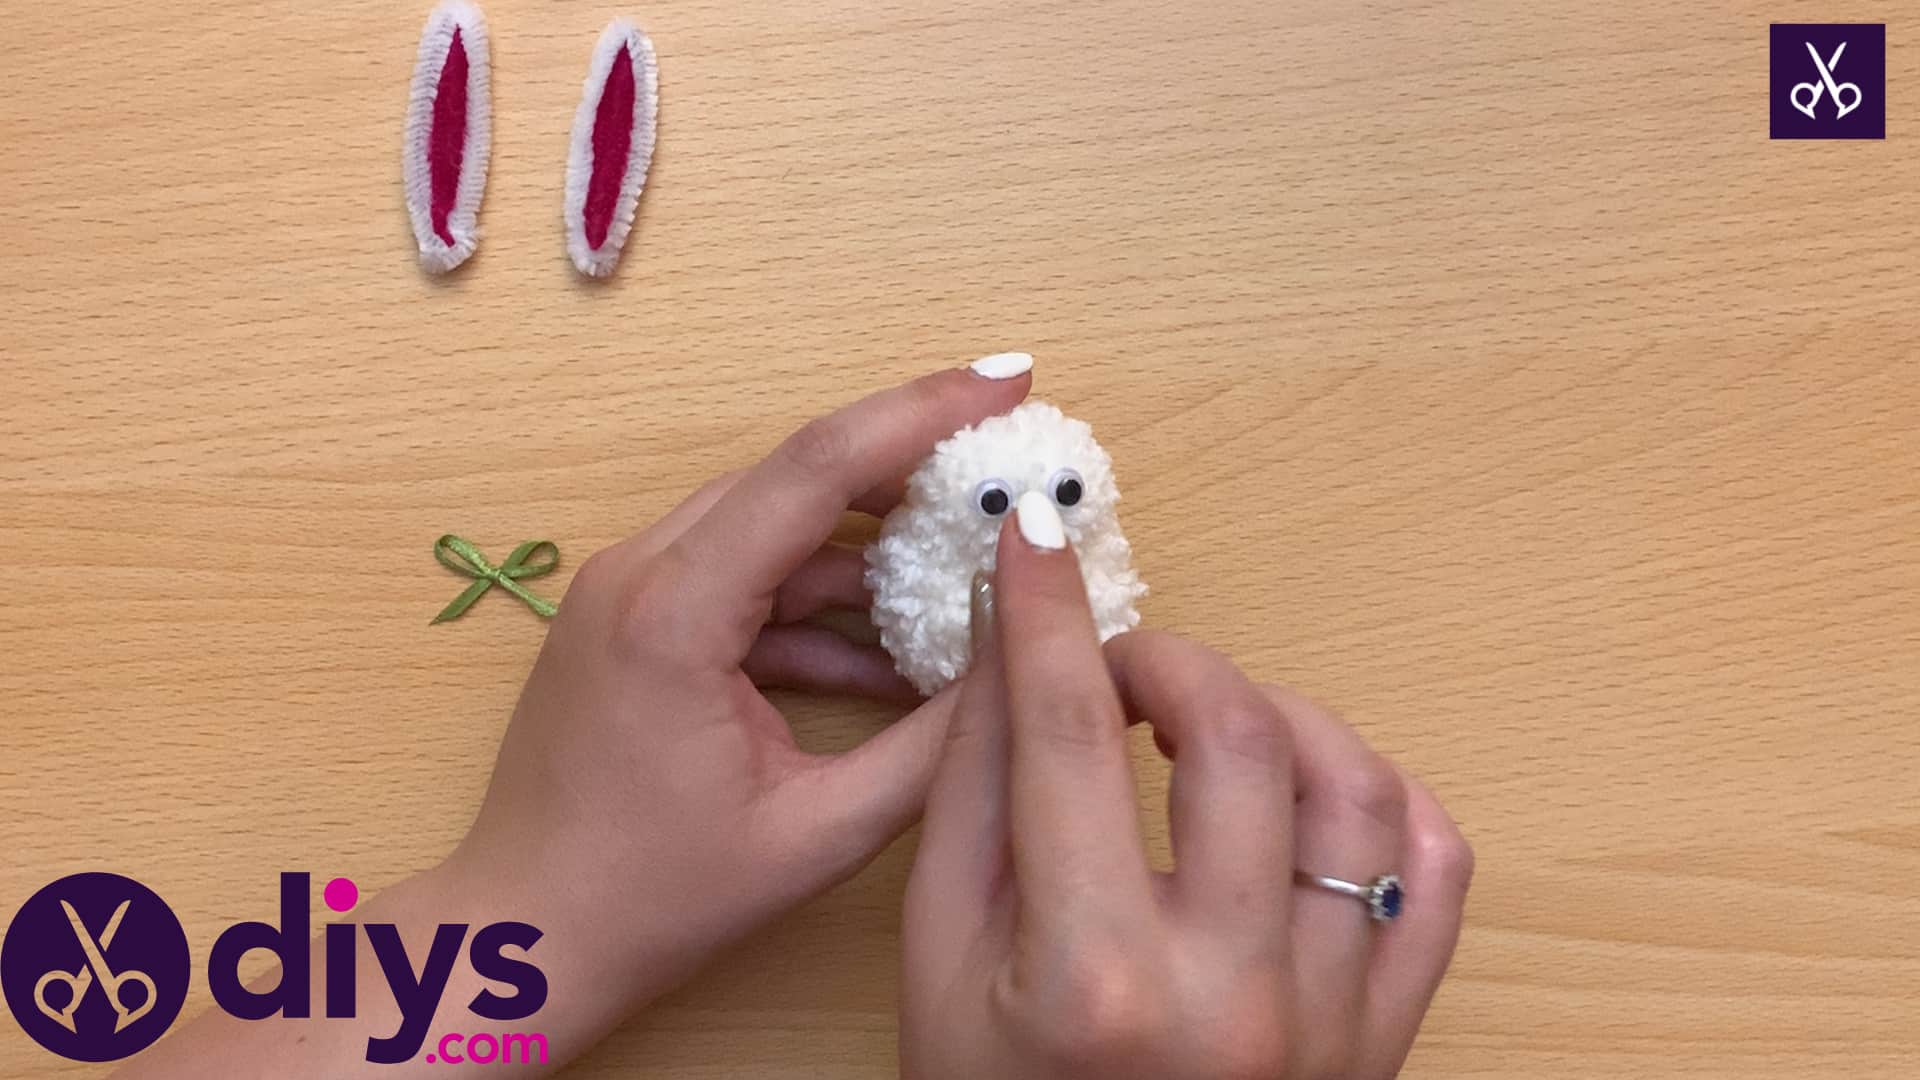
Fold the end of your red pipe cleaner over in a similar fashion, but measure it against the space in the center of your white ear pieces. This red will be the inner part of your bunny’s ears, so you want to size it such that the new arched shape will fit inside the ones you just made. Cut the piece off at the right length. I pinched my red pieces closed a little more than the arching white pieces just to make sure they actually fit well inside those.

Step 9: make the bow
Cut your ribbon to a piece about four inches long and tie it in a bow, just like you would a pair of shoe laces or a gift bow. If you’re having trouble getting the bow tied tightly enough, try grabbing the bow loops between your thumb and pointer finger and the ends with your other knuckles to give some solidity and pulling it all tightly at once.

Step 10: start gluing
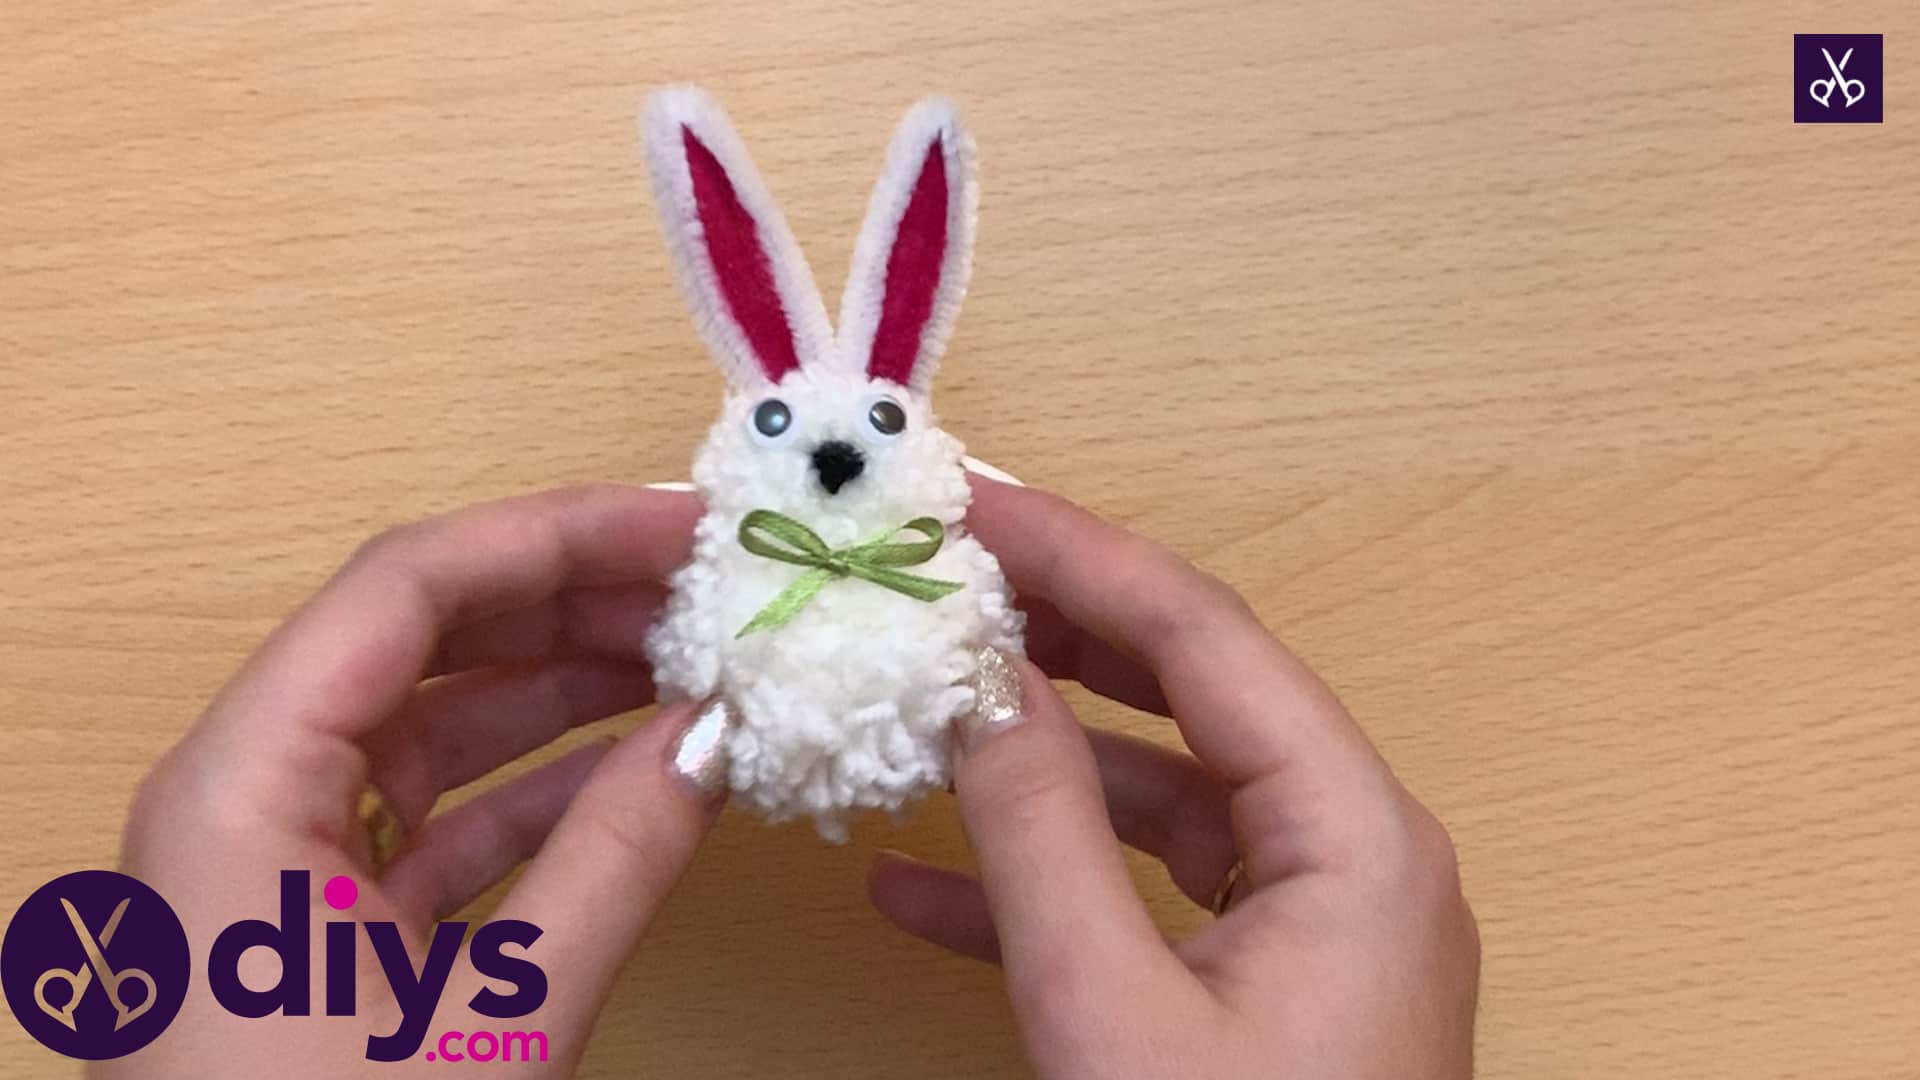
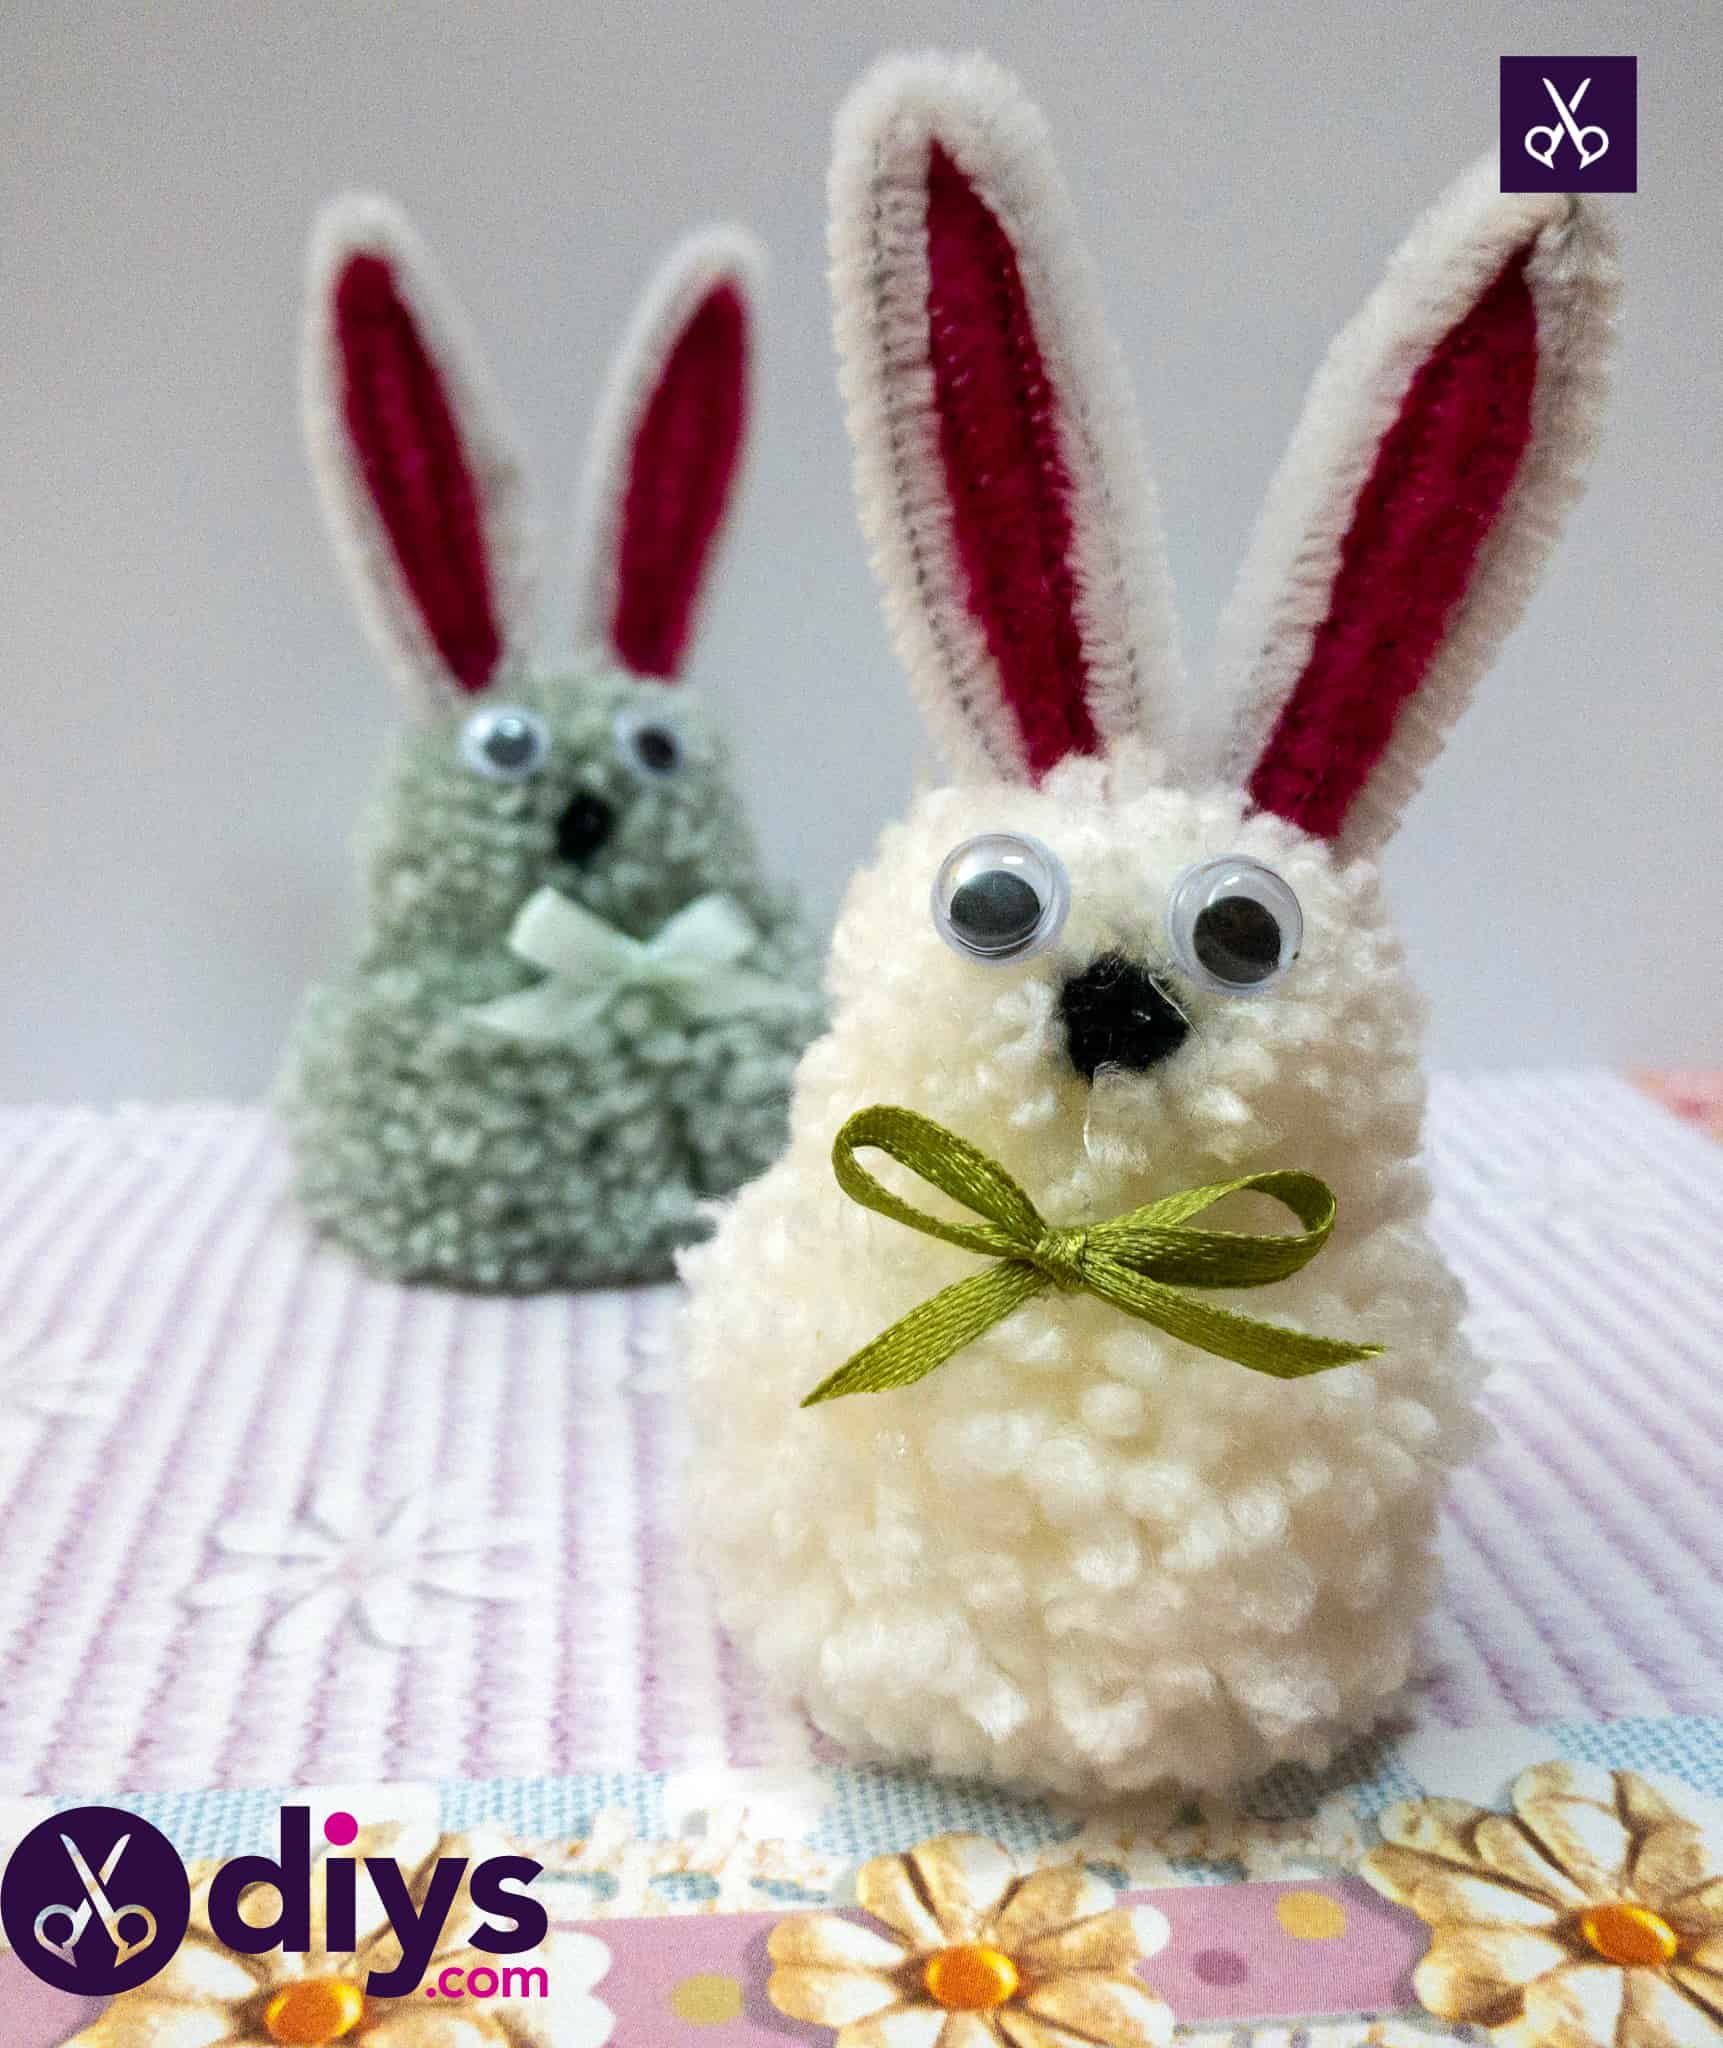
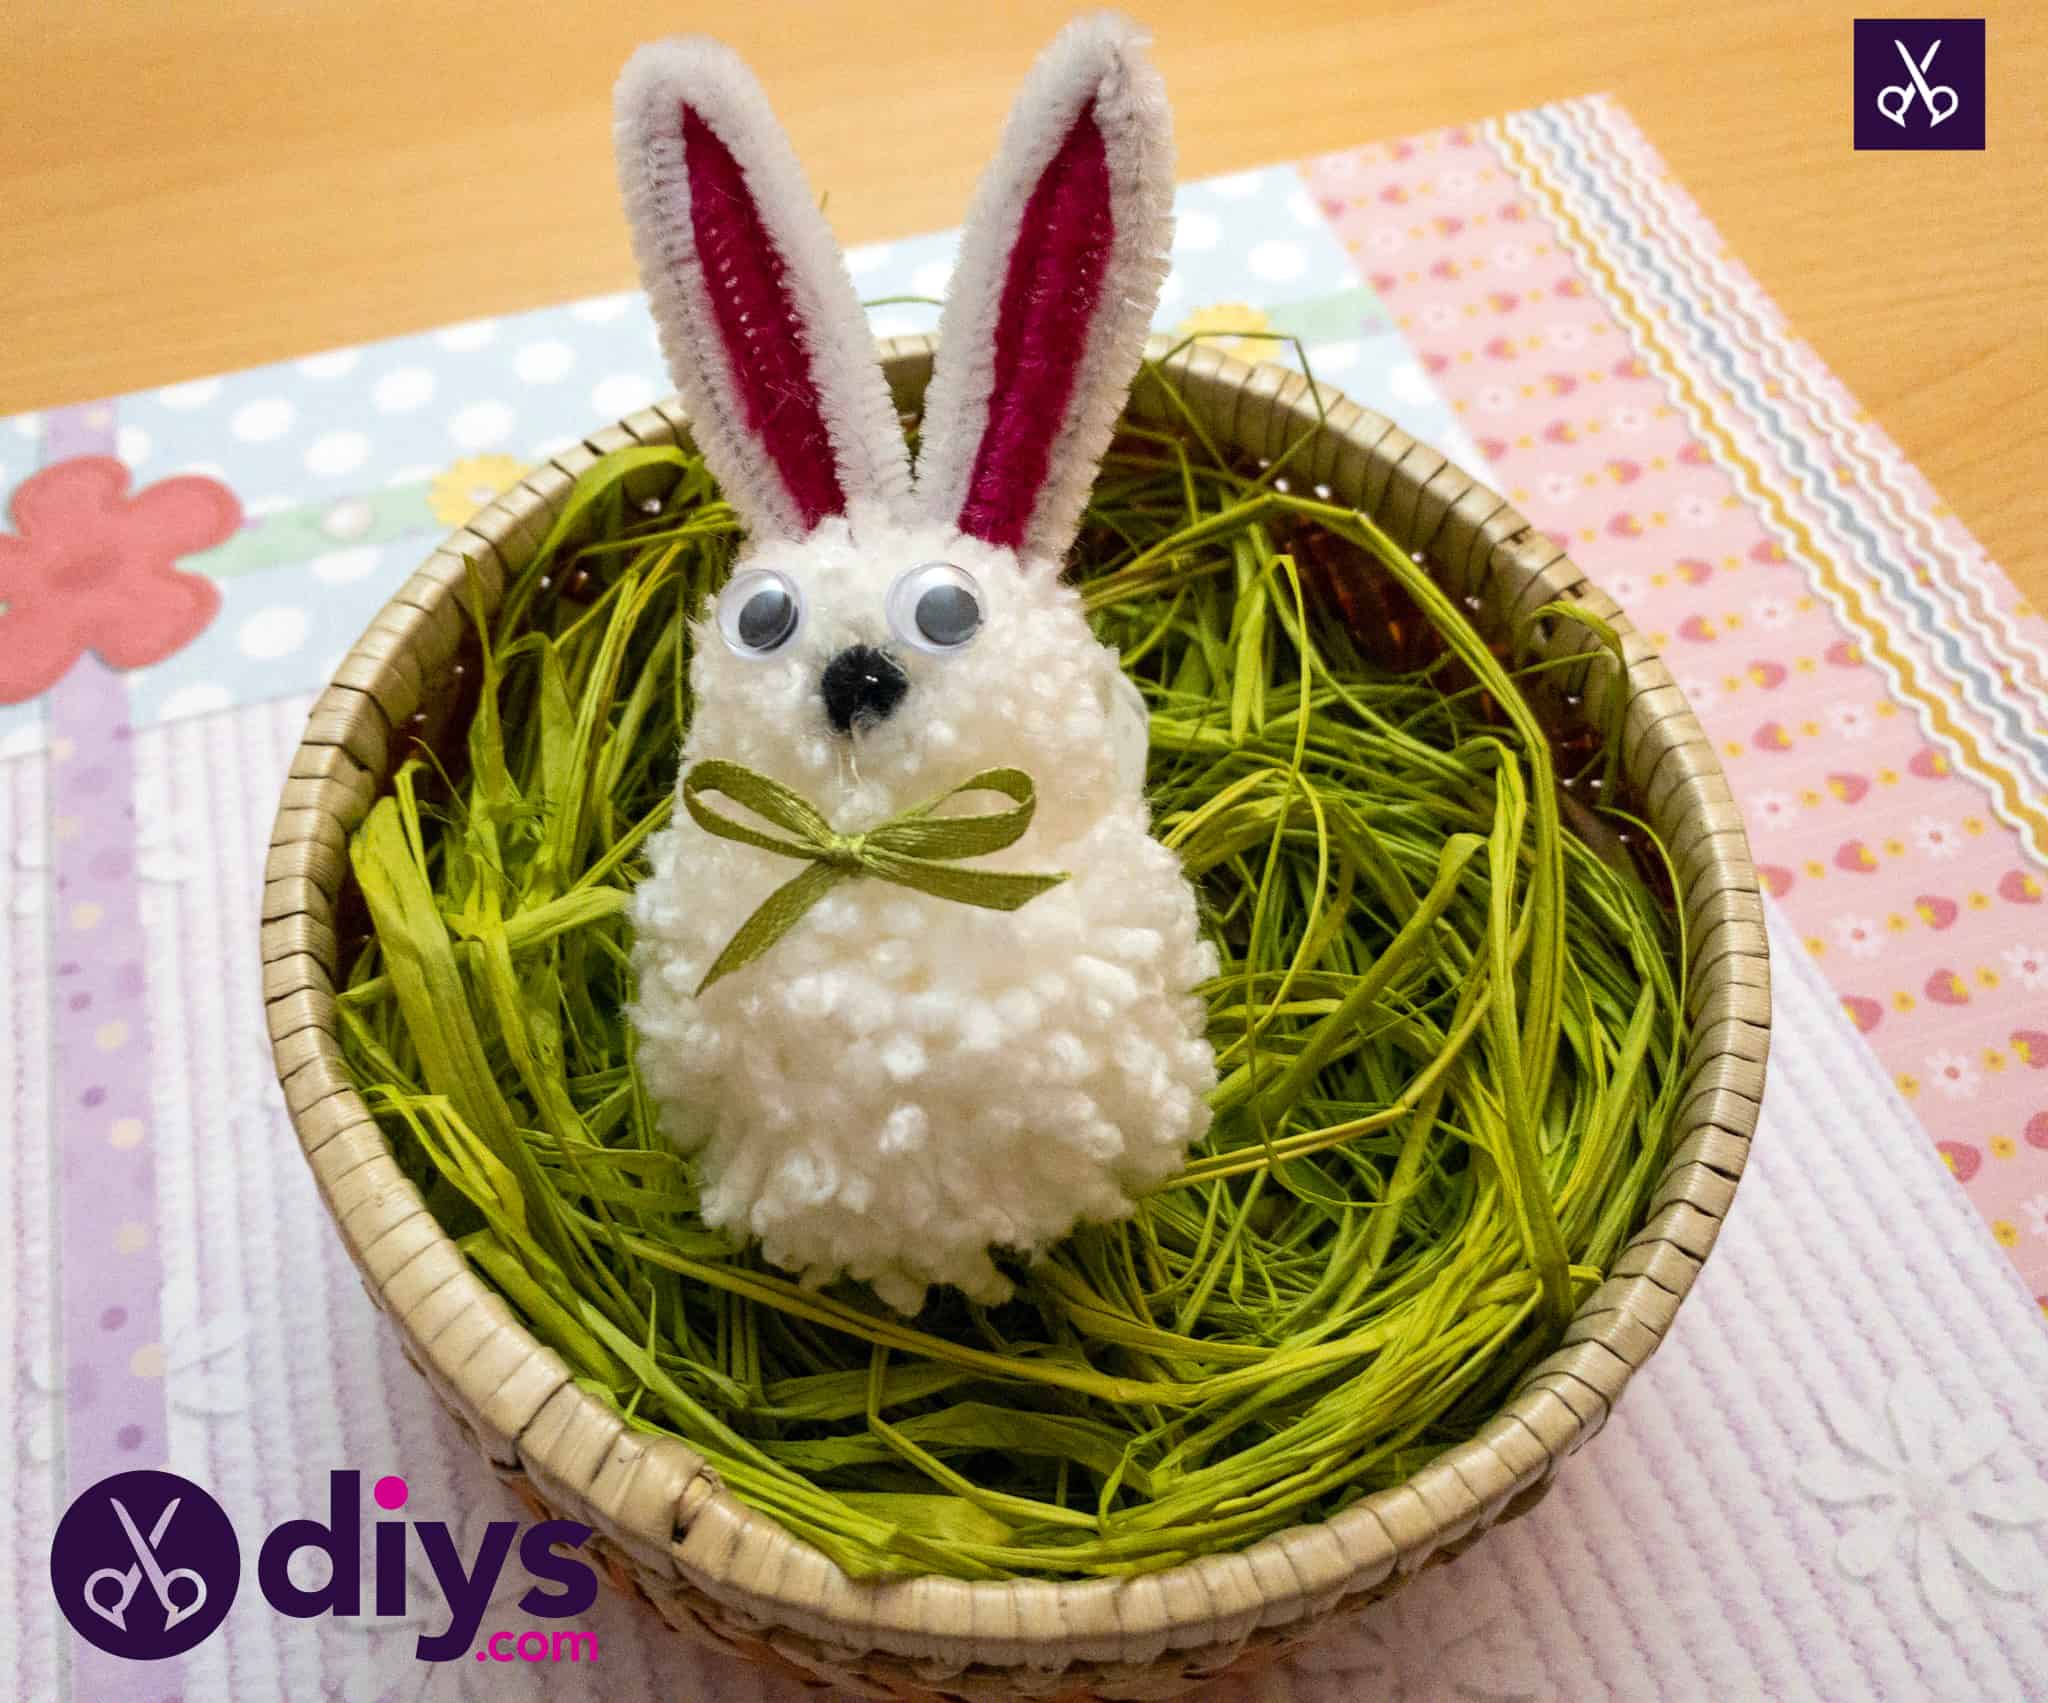
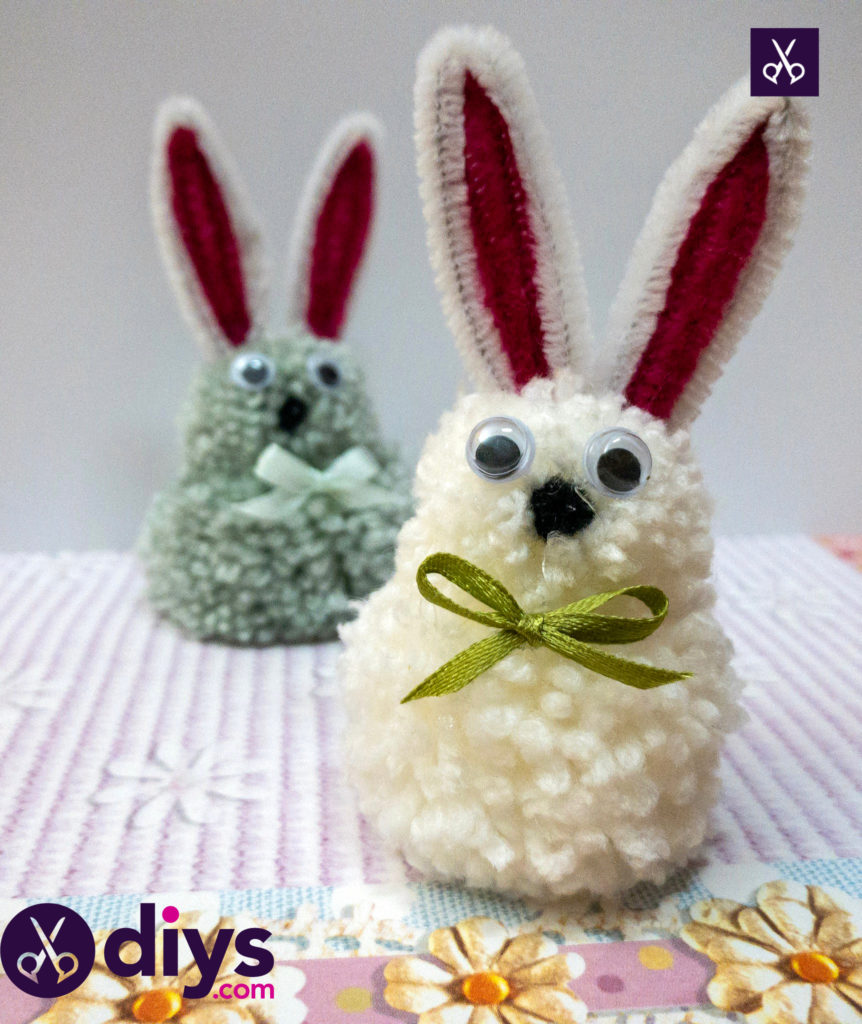
Cut a very small piece of black pipe cleaner. This will be your bunny’s nose. Next, find the center of the pom pom you’d like to use as the bottom or body of your bunny and apply hot glue. Press the top pom pom, which will be your bunny’s head, into the glue and hold it firmly in place until the glue dries, so it doesn’t shift and end up floppy.
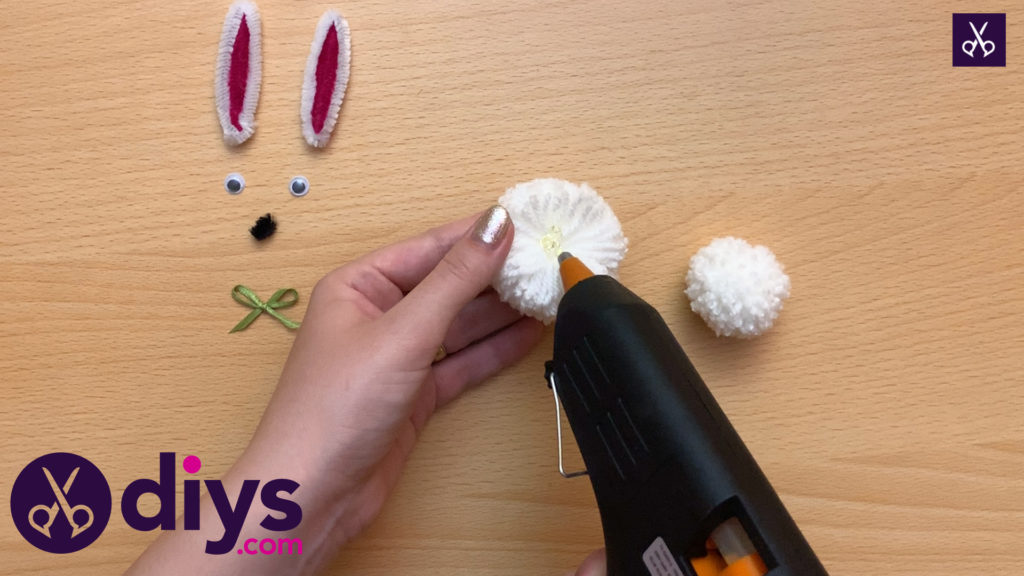
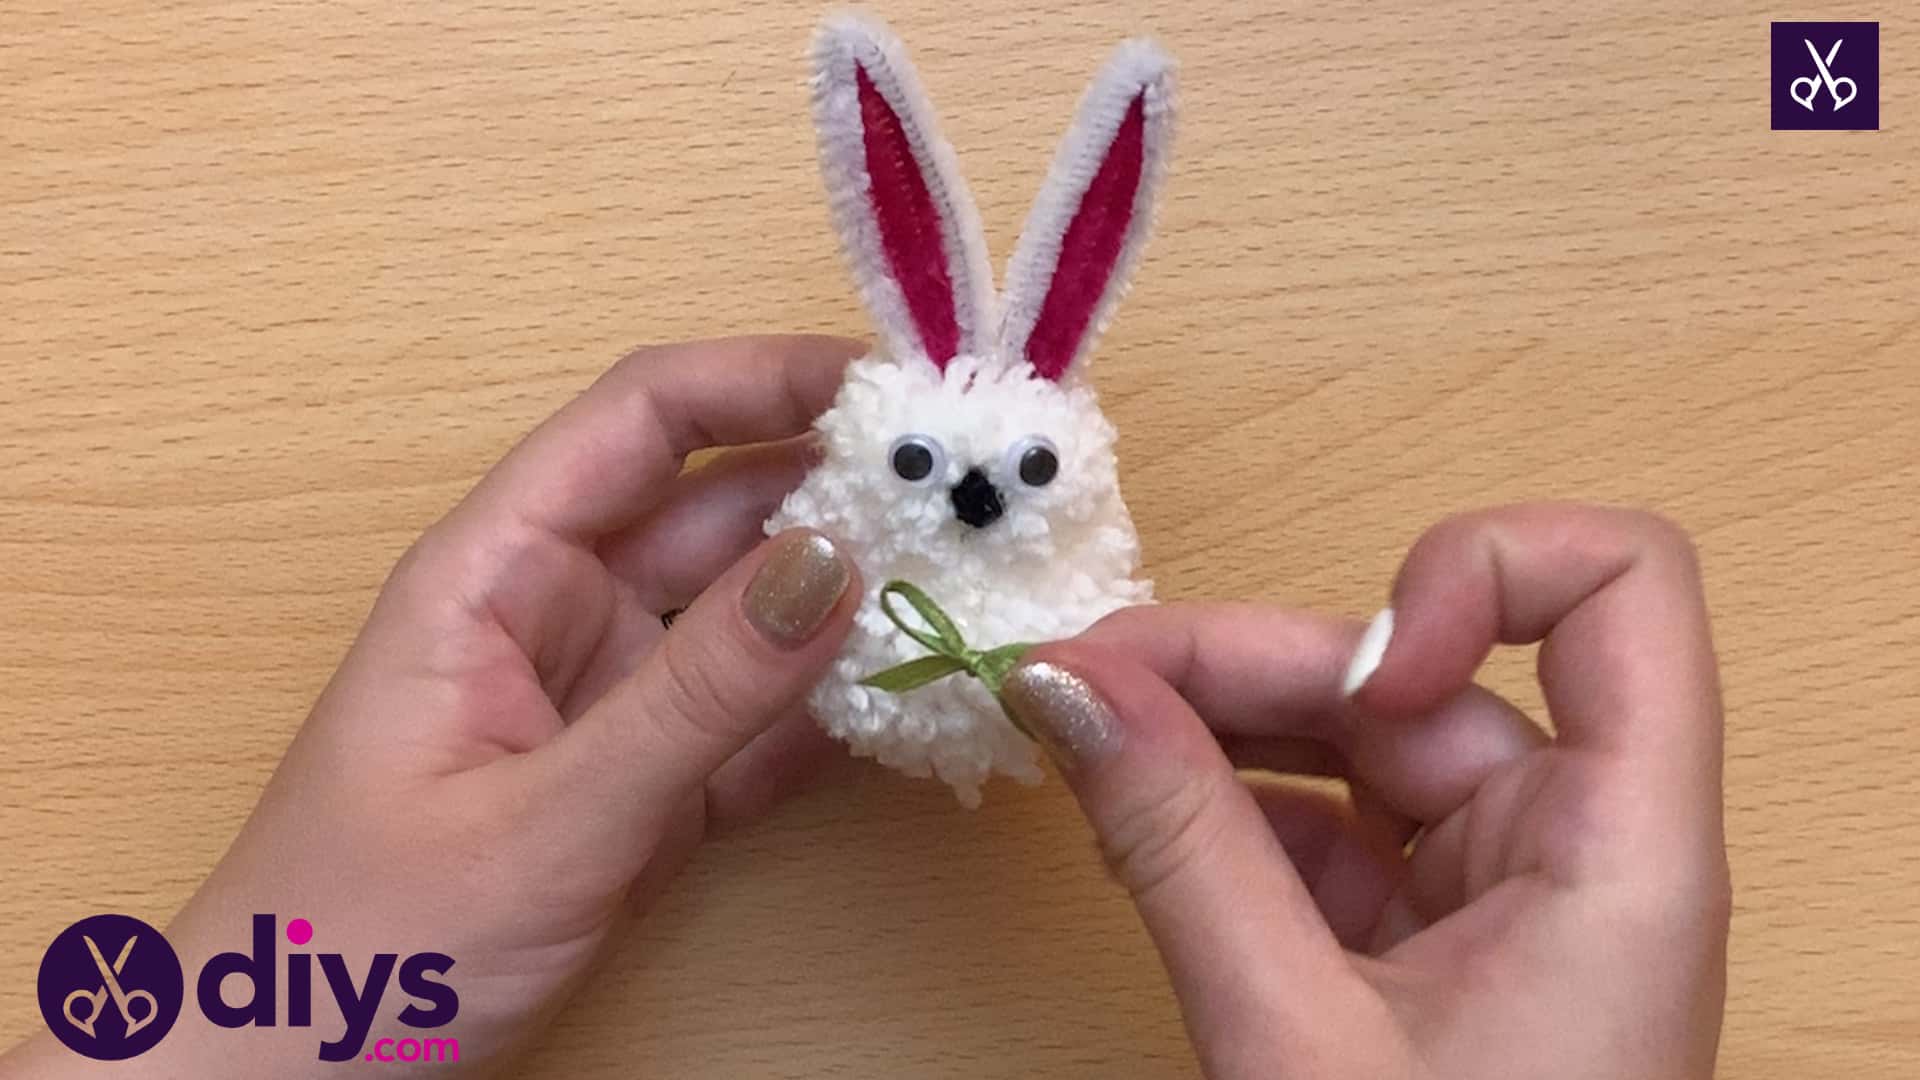
Step 11: start assembling
Use your hot glue to attach all of your bunny’s features! I started with the eyes and nose and then added the ears and topped him off with the little bow, tucked right under his chin.


There you have it! You could also try making this project with bigger or smaller pom poms, in addition to trying it out in different colours.
Just in case you’d like to try this project out yourself, here’s an awesome video tutorial to help you along!
