DIY Paper Valentine’s Day Creature
Updated on November 19, 2025


I like to make sure I always have a few kid-friendly Valentine’s Day craft ideas up my sleeve for a rainy day, which is how I found myself making these funny little paper Valentine creatures with my kids on a whim last week. Read on to see just how I put this DIY paper Valentine’s day creature.

Check out these step by step instructions complete with photos! If you’d rather follow along with a video tutorial instead of written words, scroll to the bottom of this post to find just what you’re looking for.

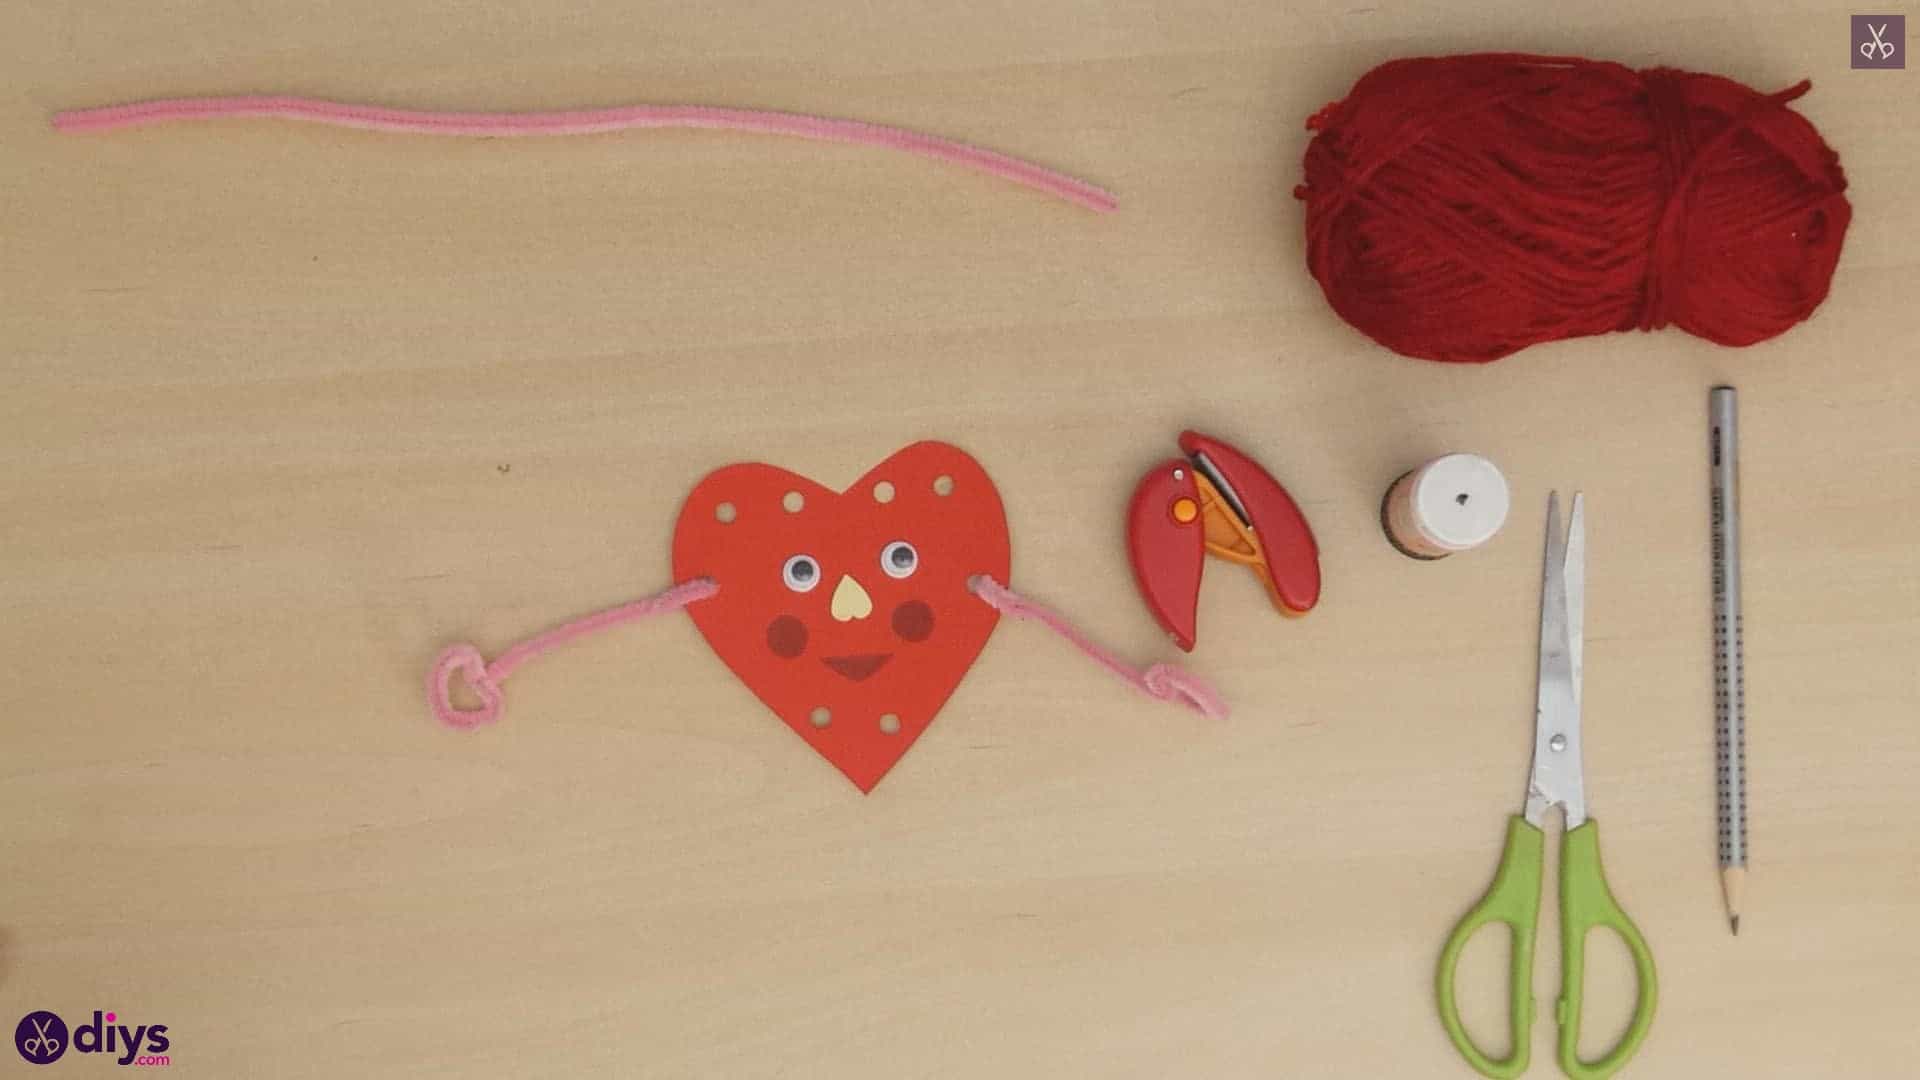
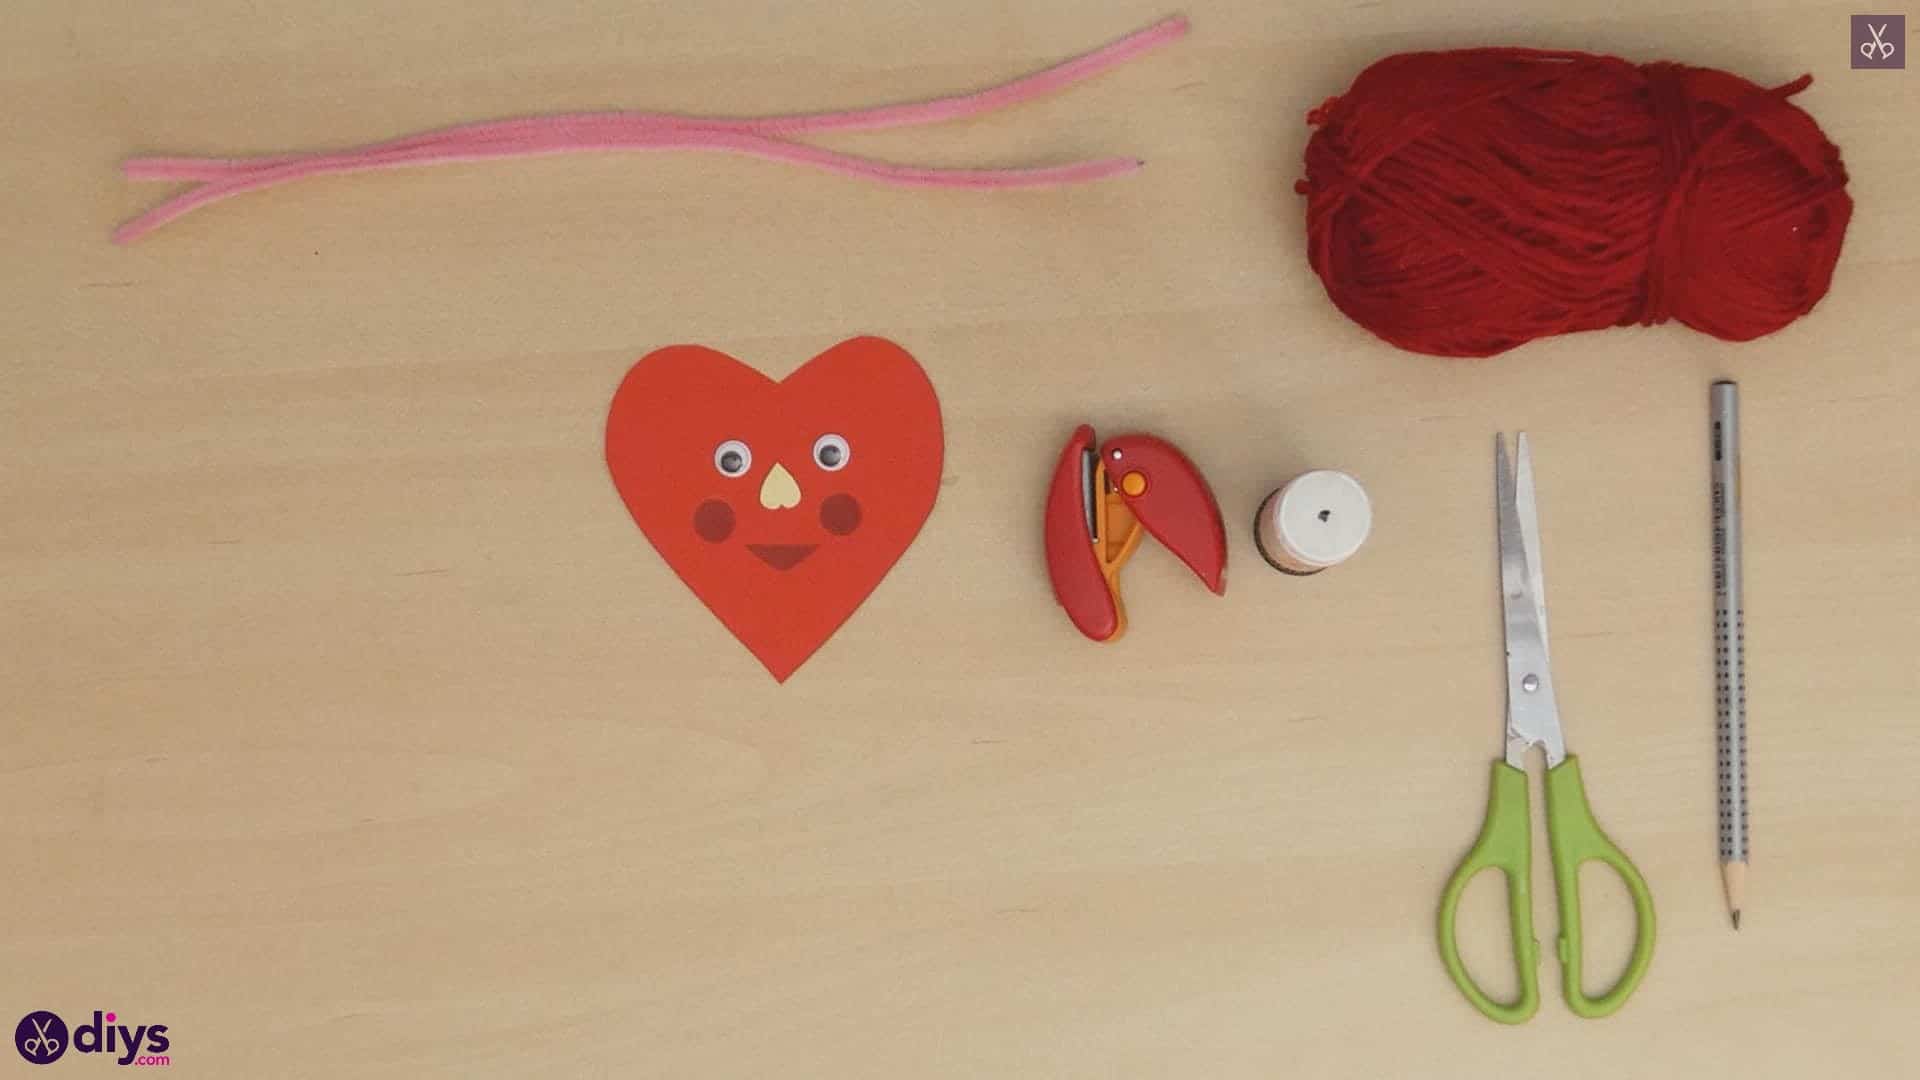
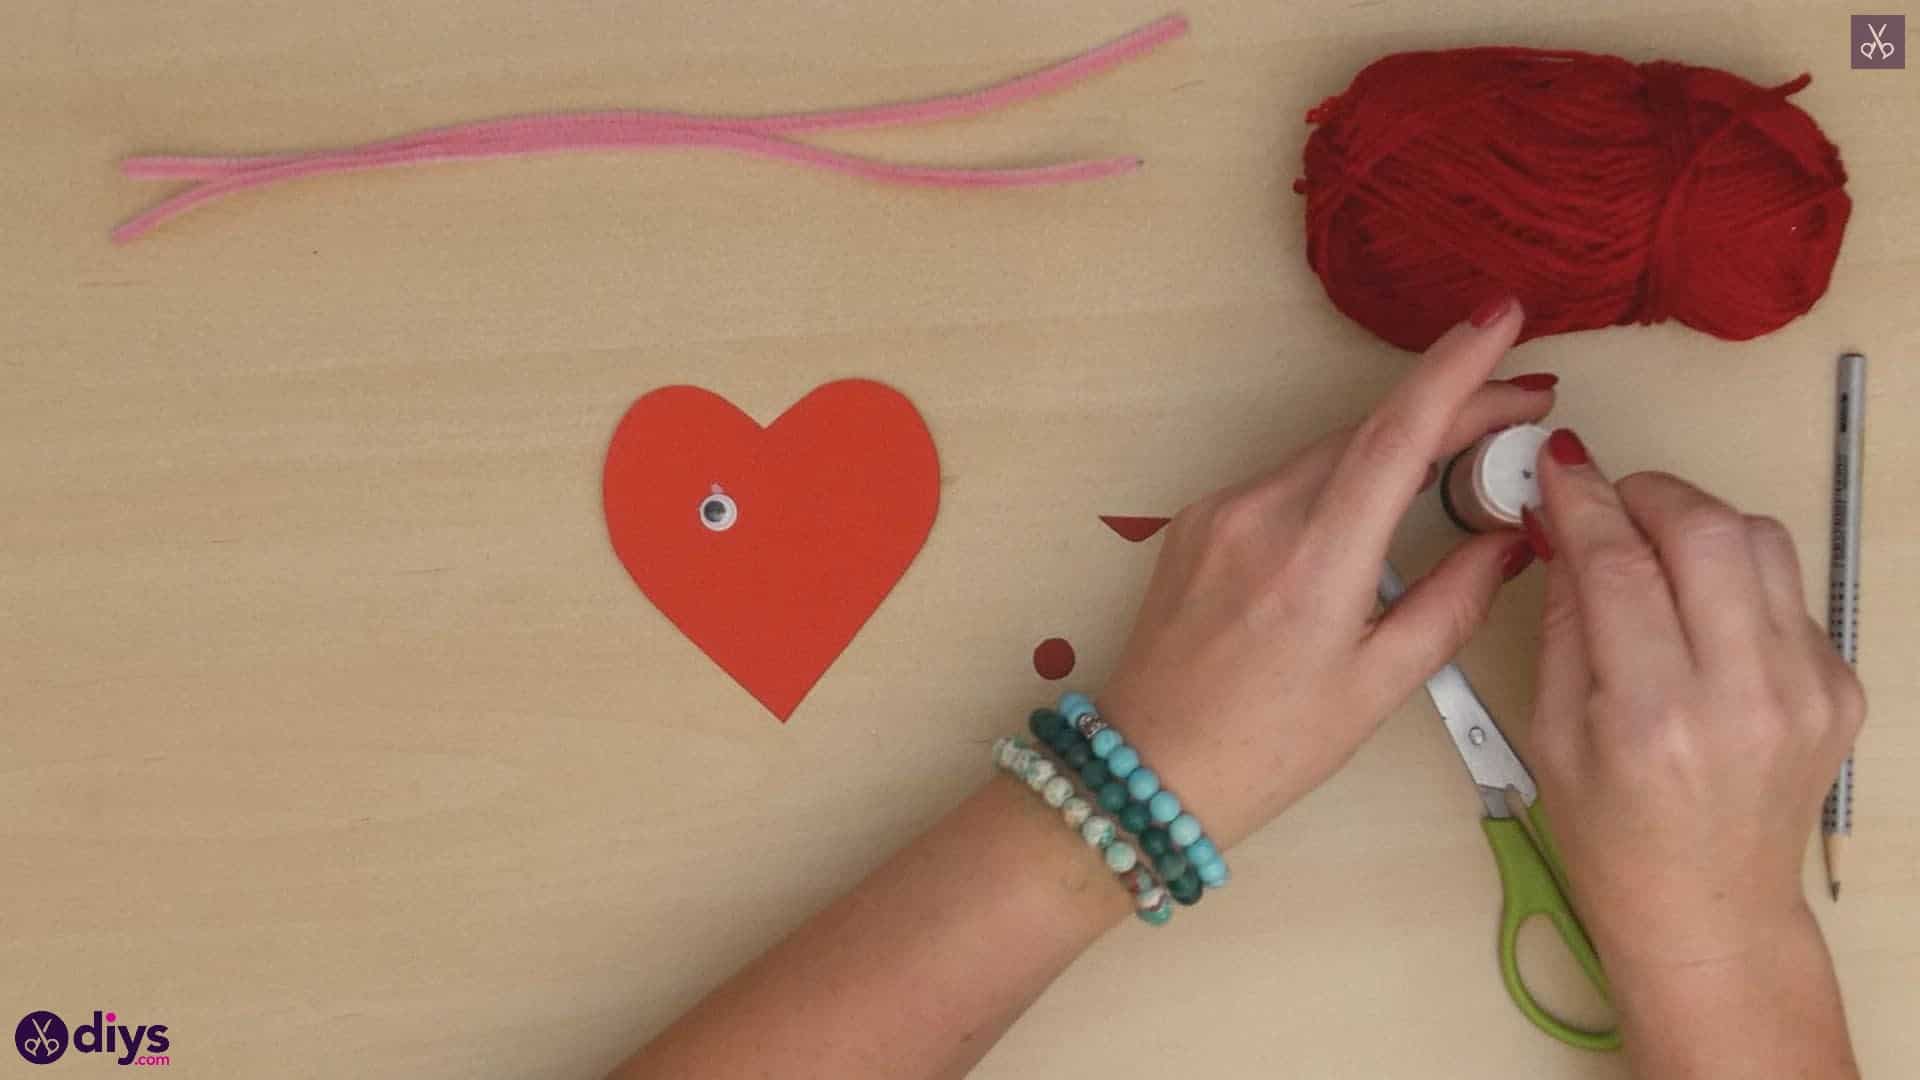
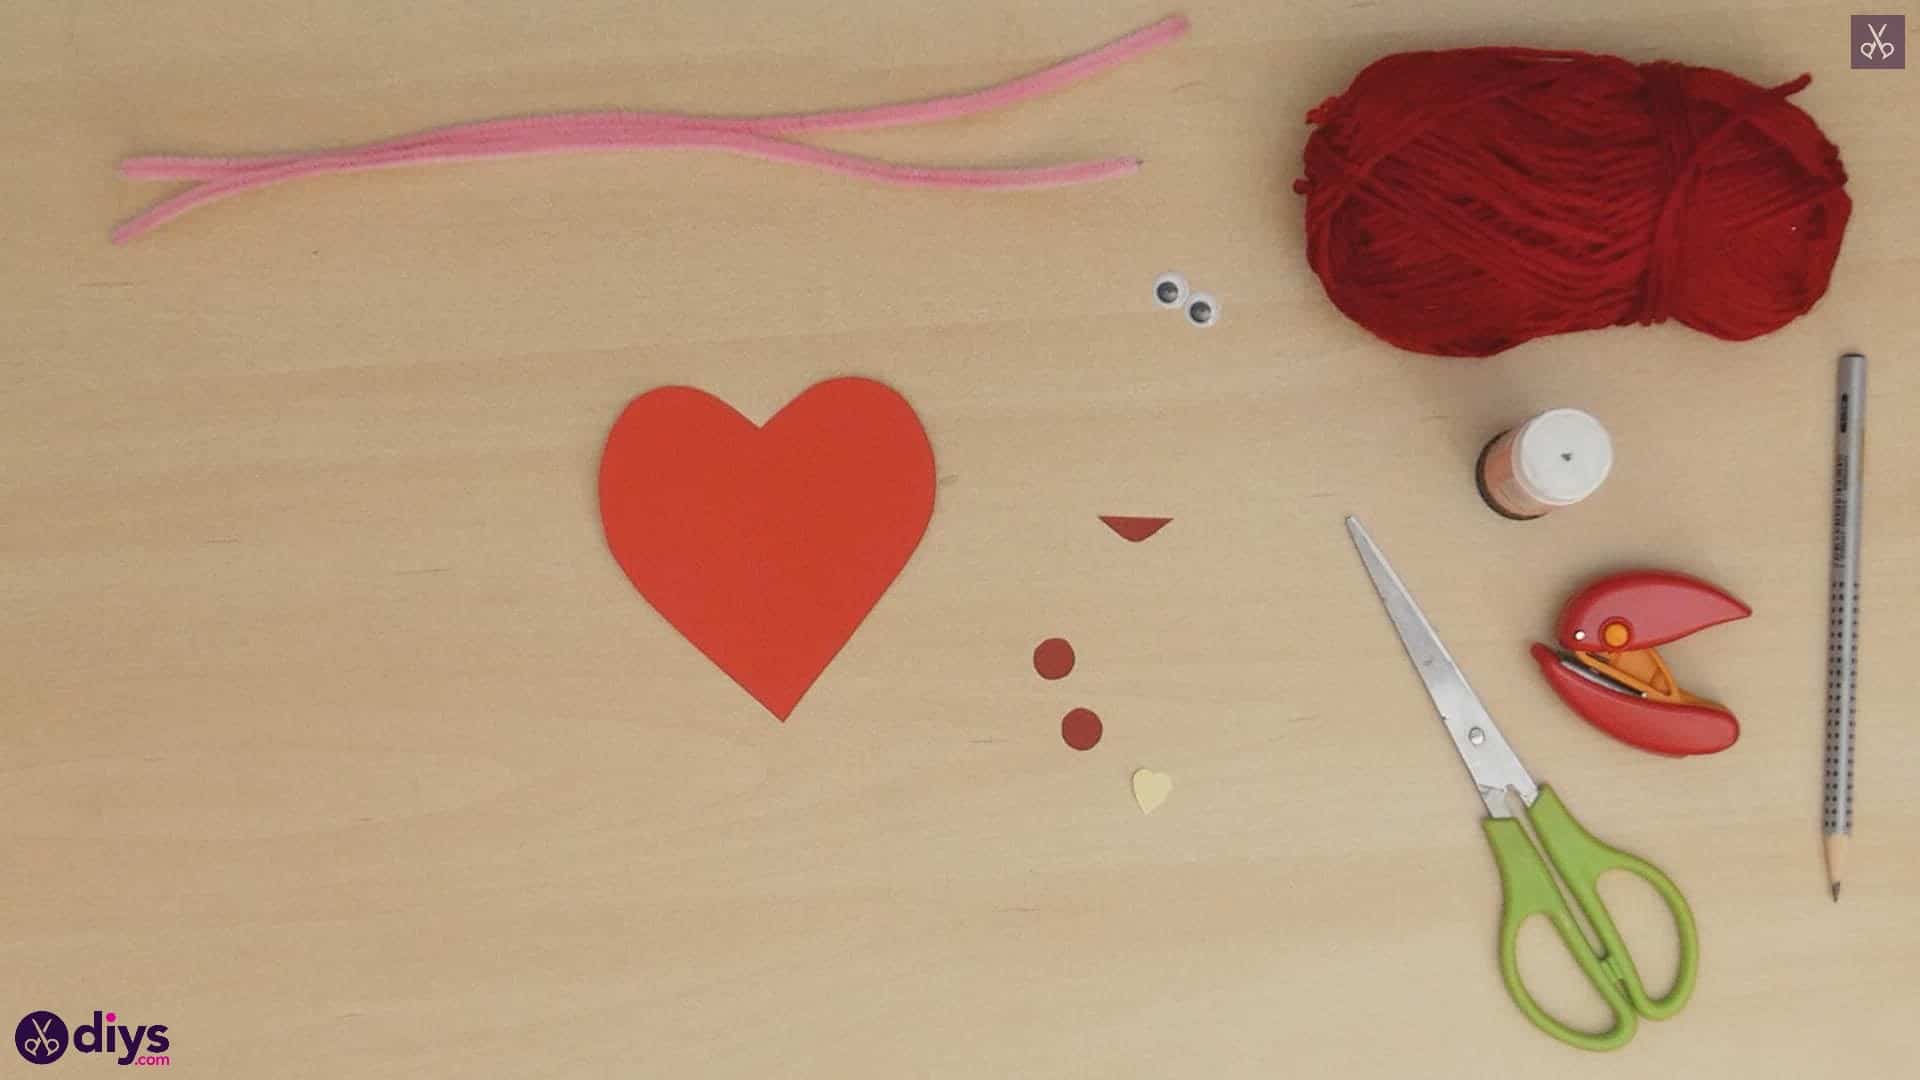
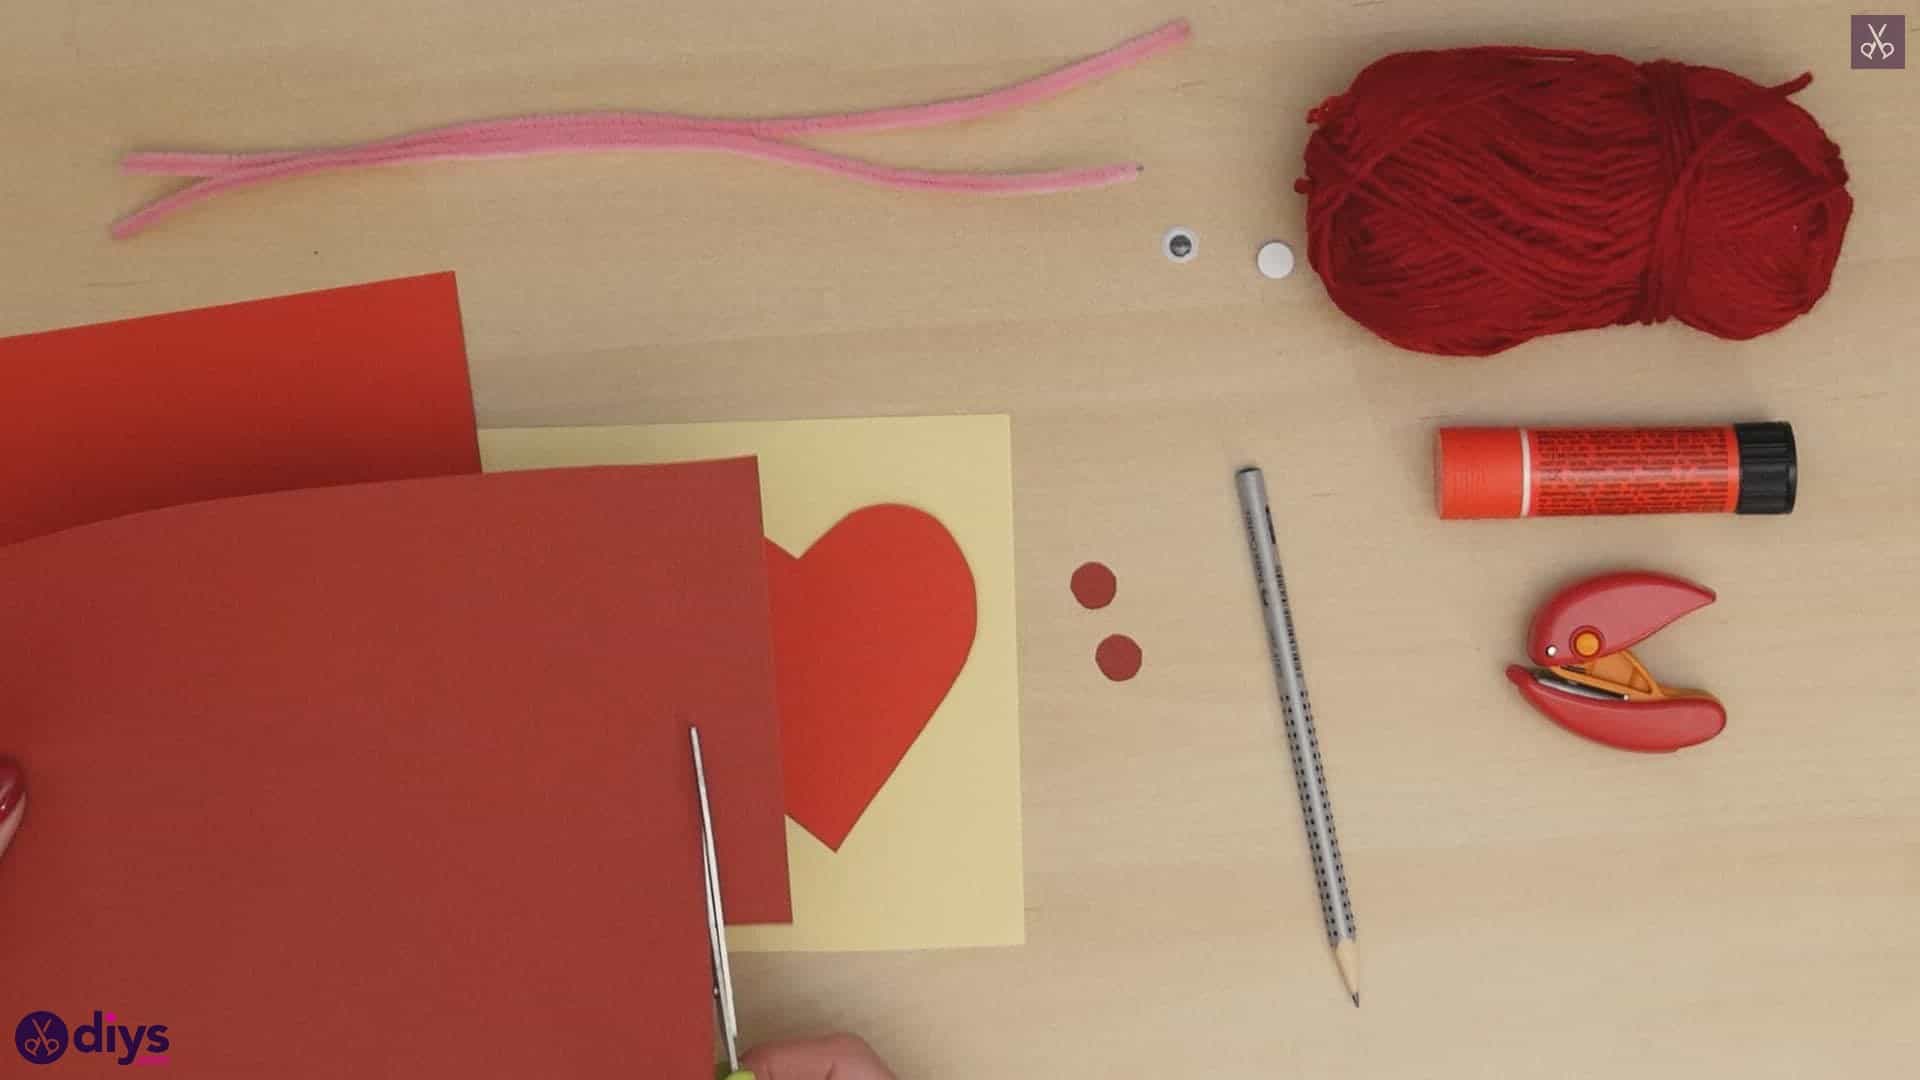
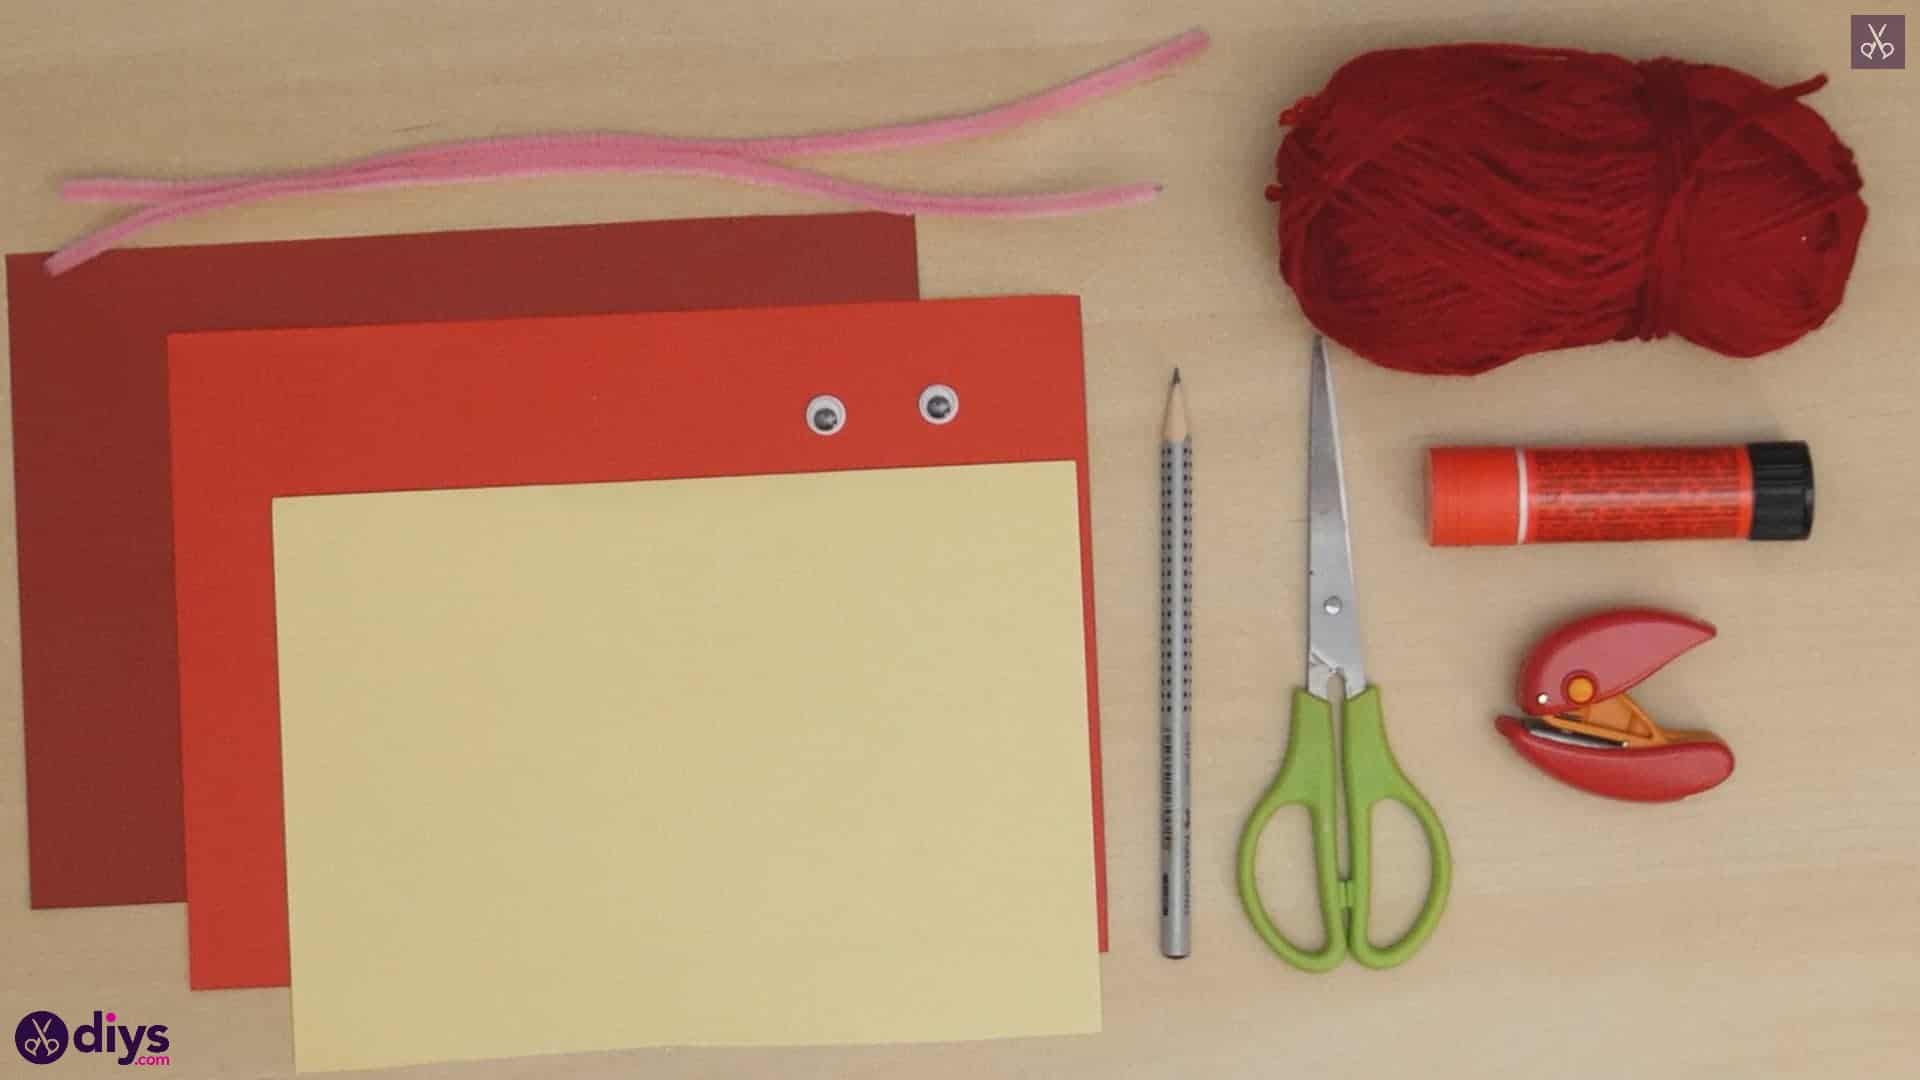
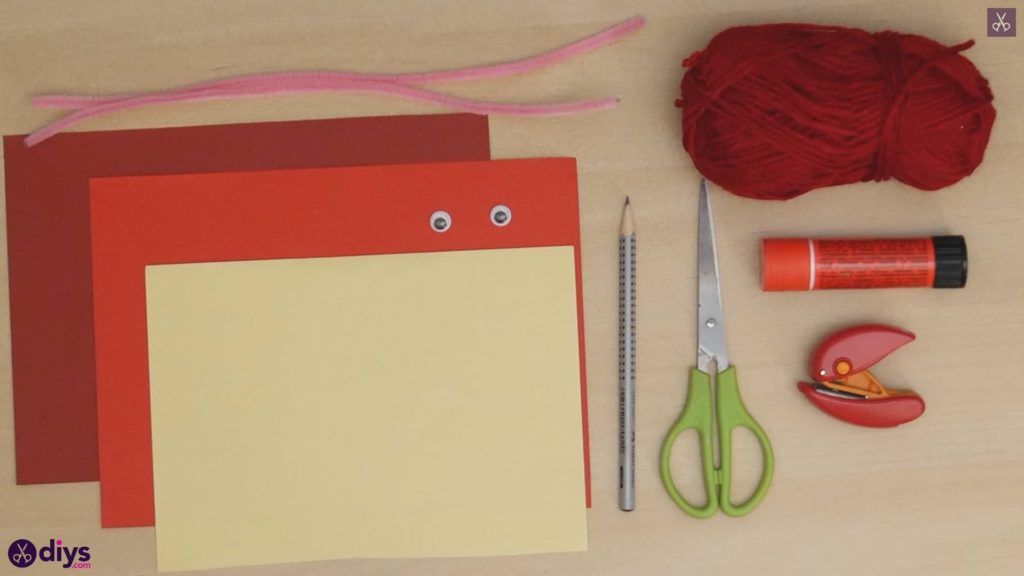
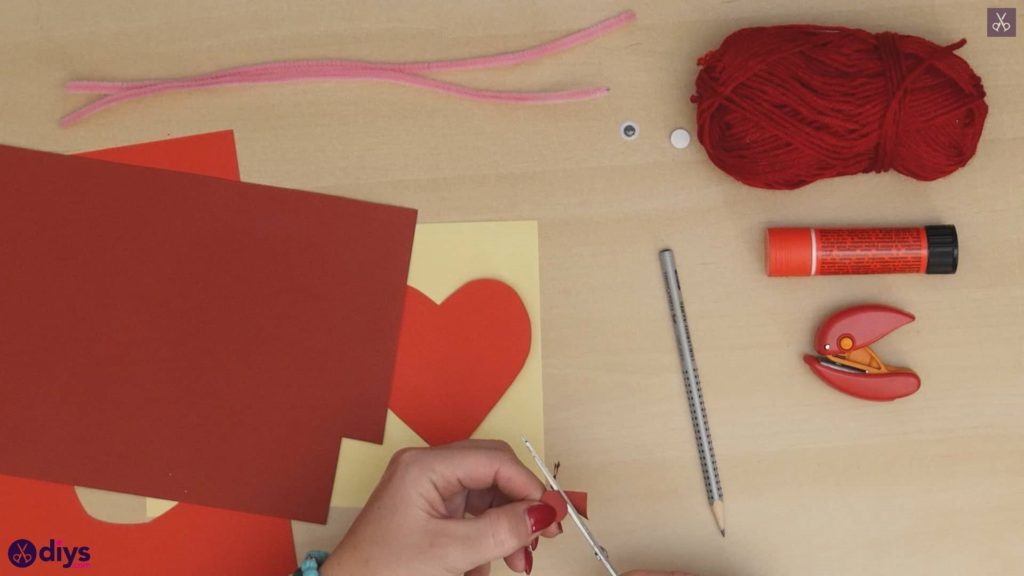
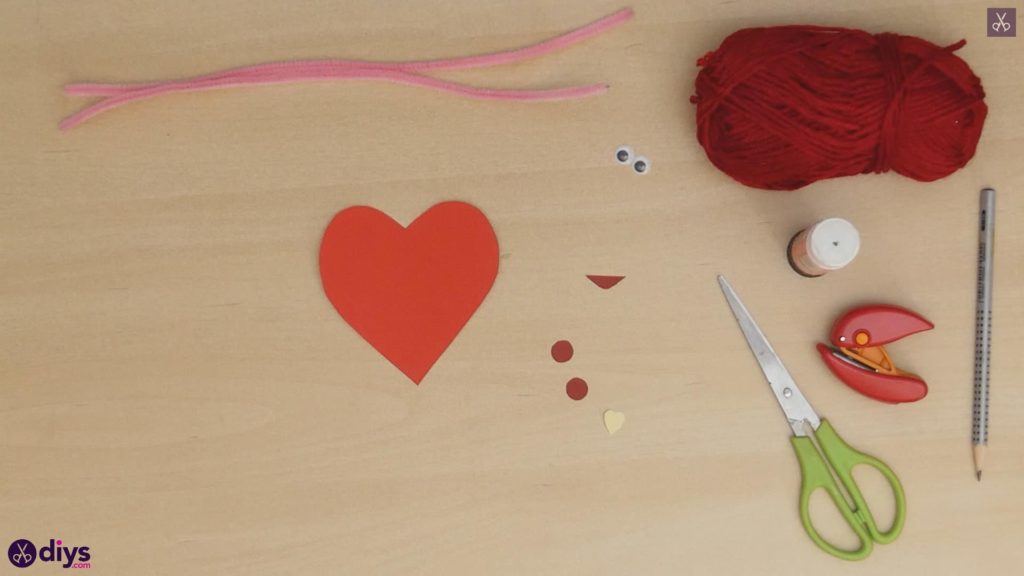
For this project, you’ll need:
- Red paper or card
- Paper (yellow and darker red)
- A hole punch
- Red yarn
- Googly eyes
- Scissors
- A glue stick
- Pink pipe cleaner

Step 1: double check your list
Gather your materials in front of you!
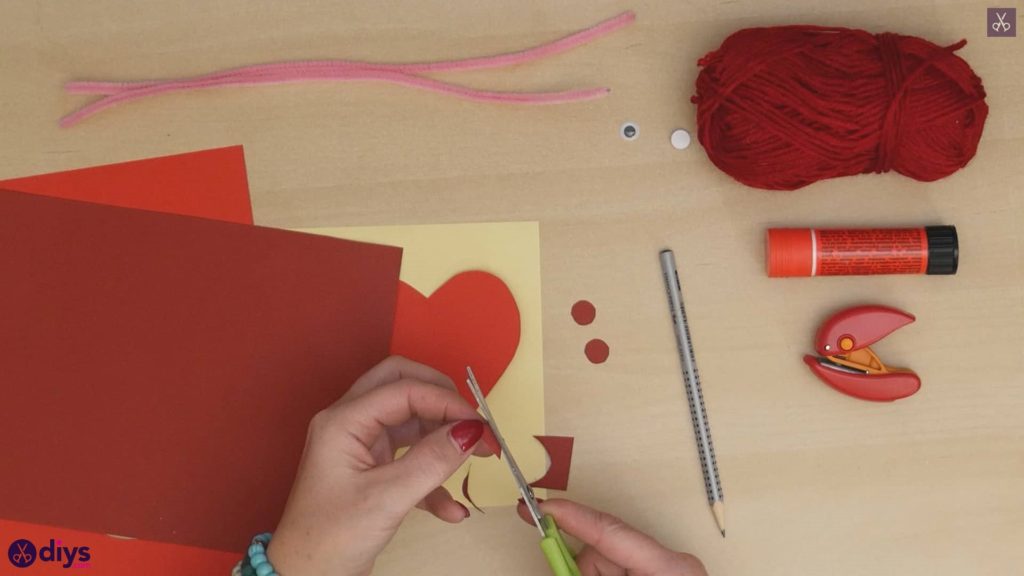
Step 2: draw the heart
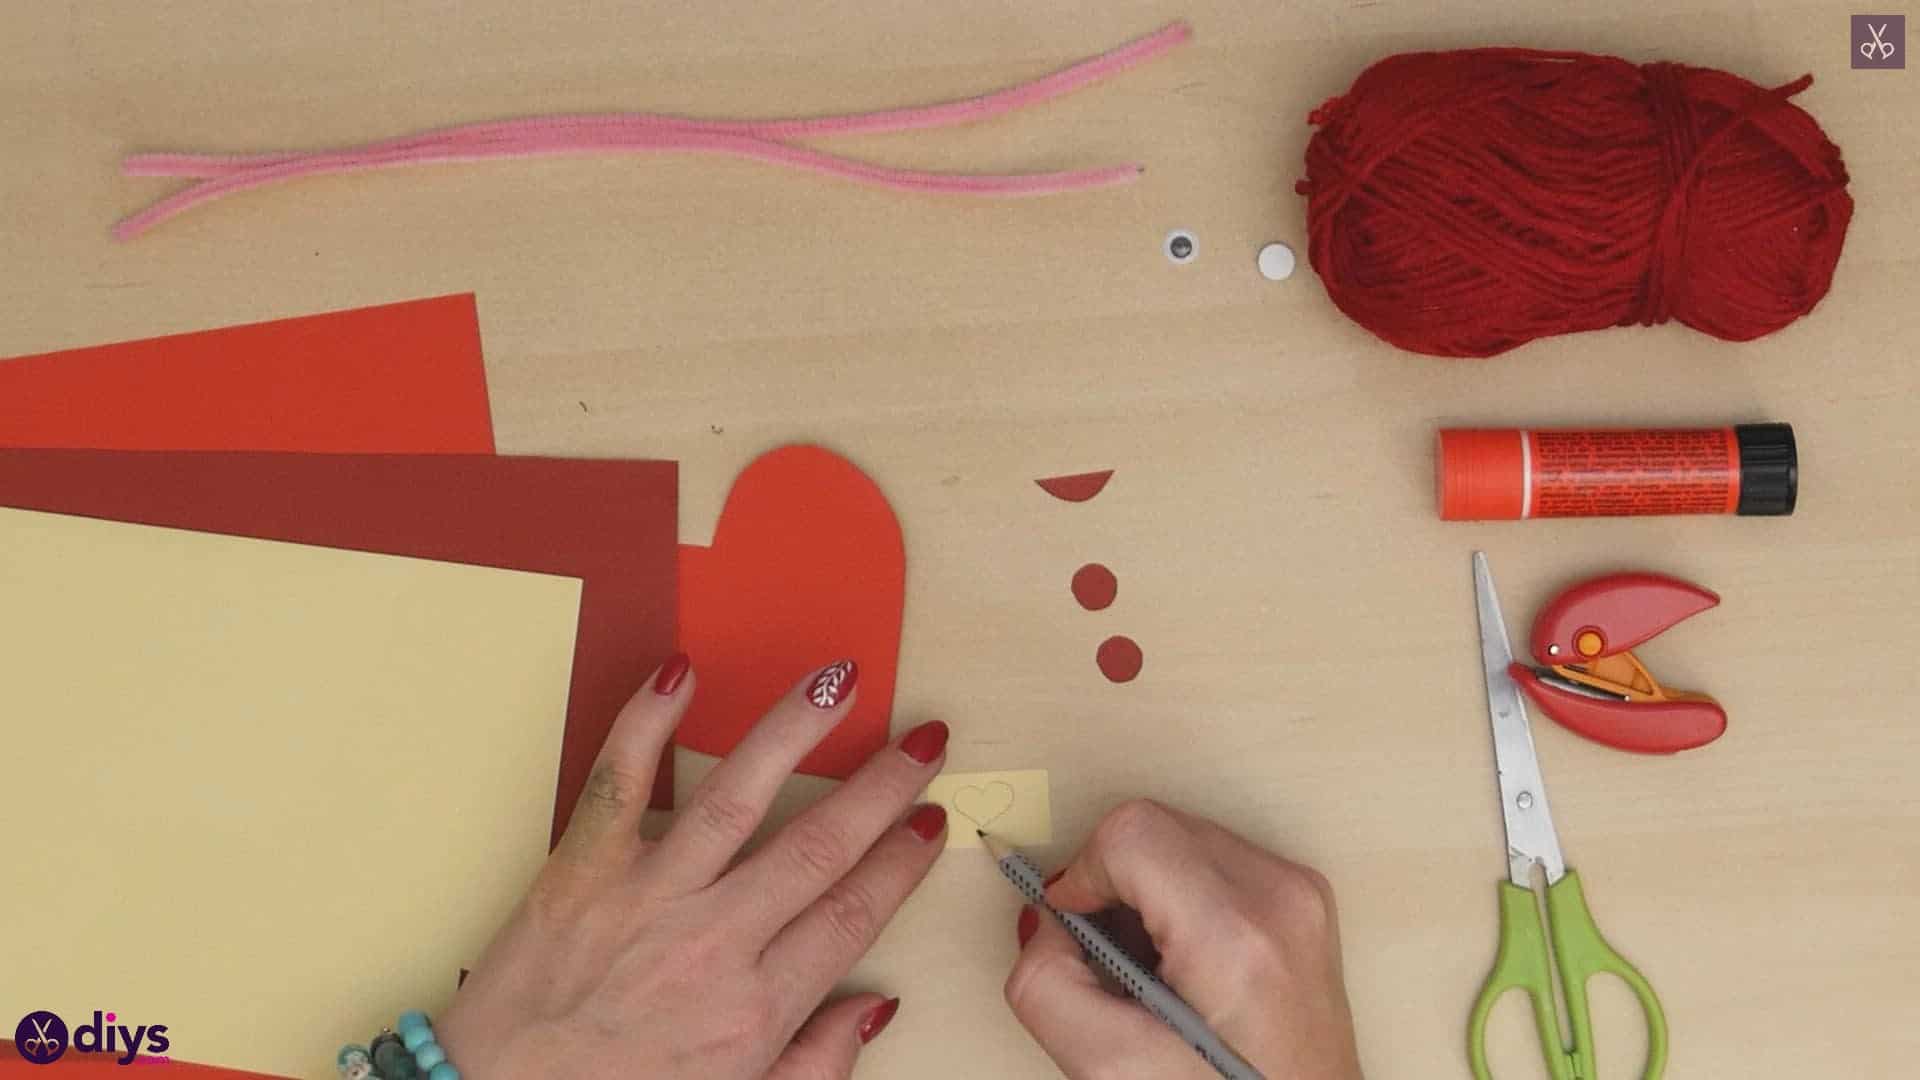
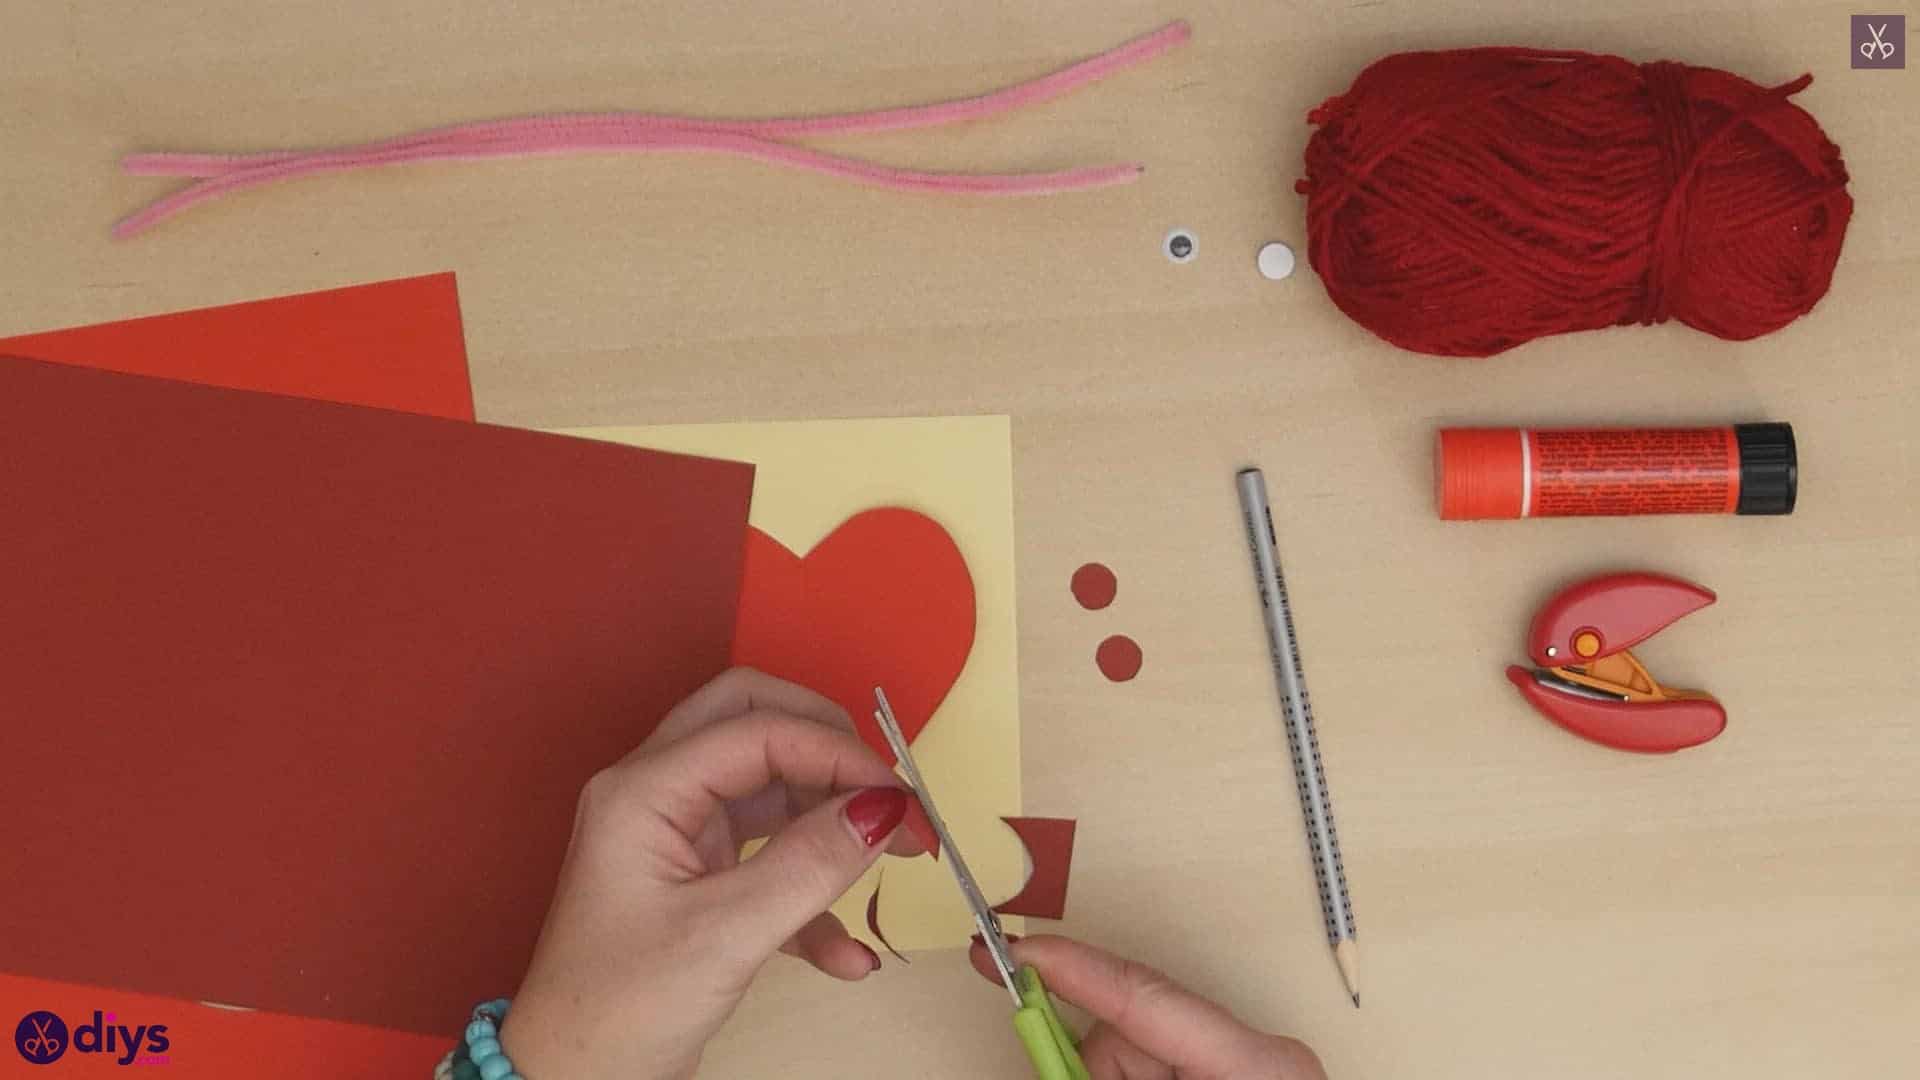
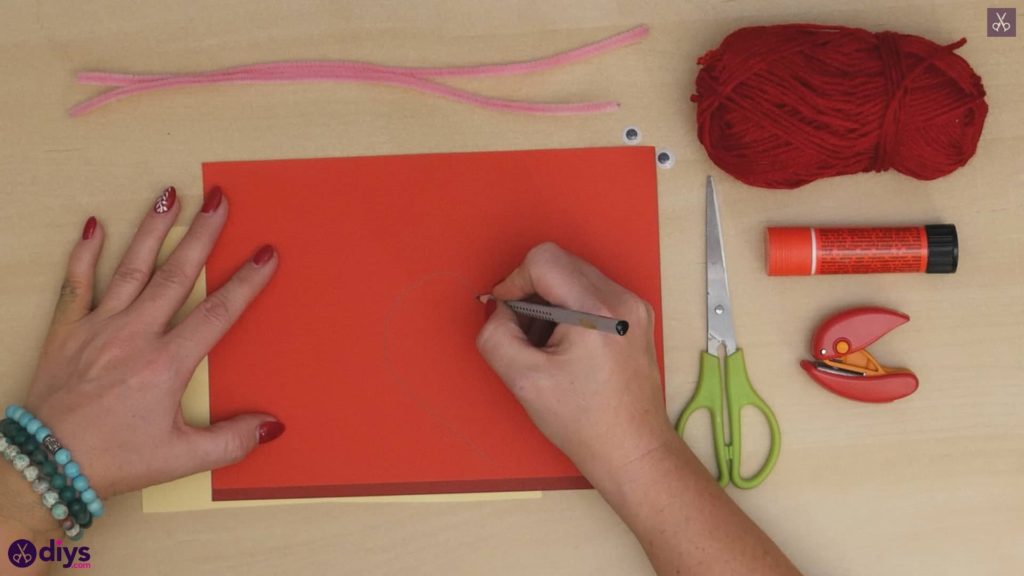
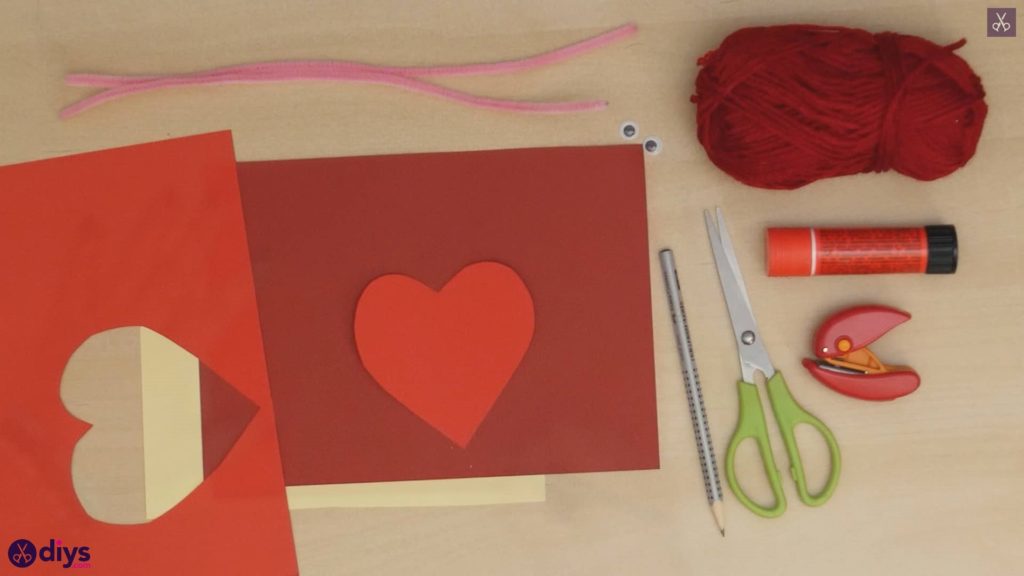
Use your pencil to draw the shape of a heart on your lighter red piece of paper, cardstock, or cardboard. I did mine freehand, doing my best to keep the rounded parts and sides of the heart evenly sized and symmetrical. I made my heart about two inches wide and three inches tall. Once you’re done drawing a shape you’re happy with, cut it out.
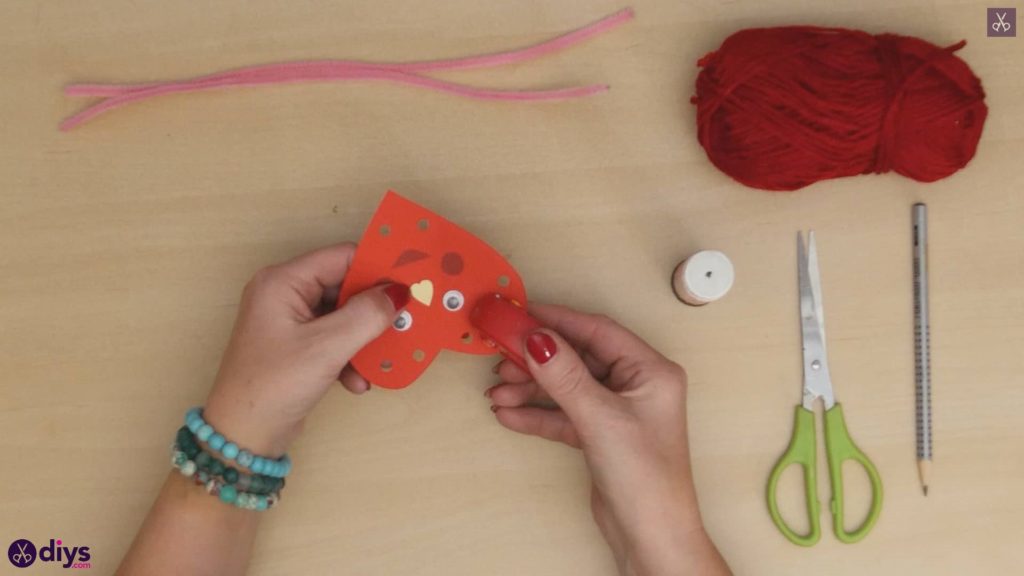
Step 3:Make the cheeks
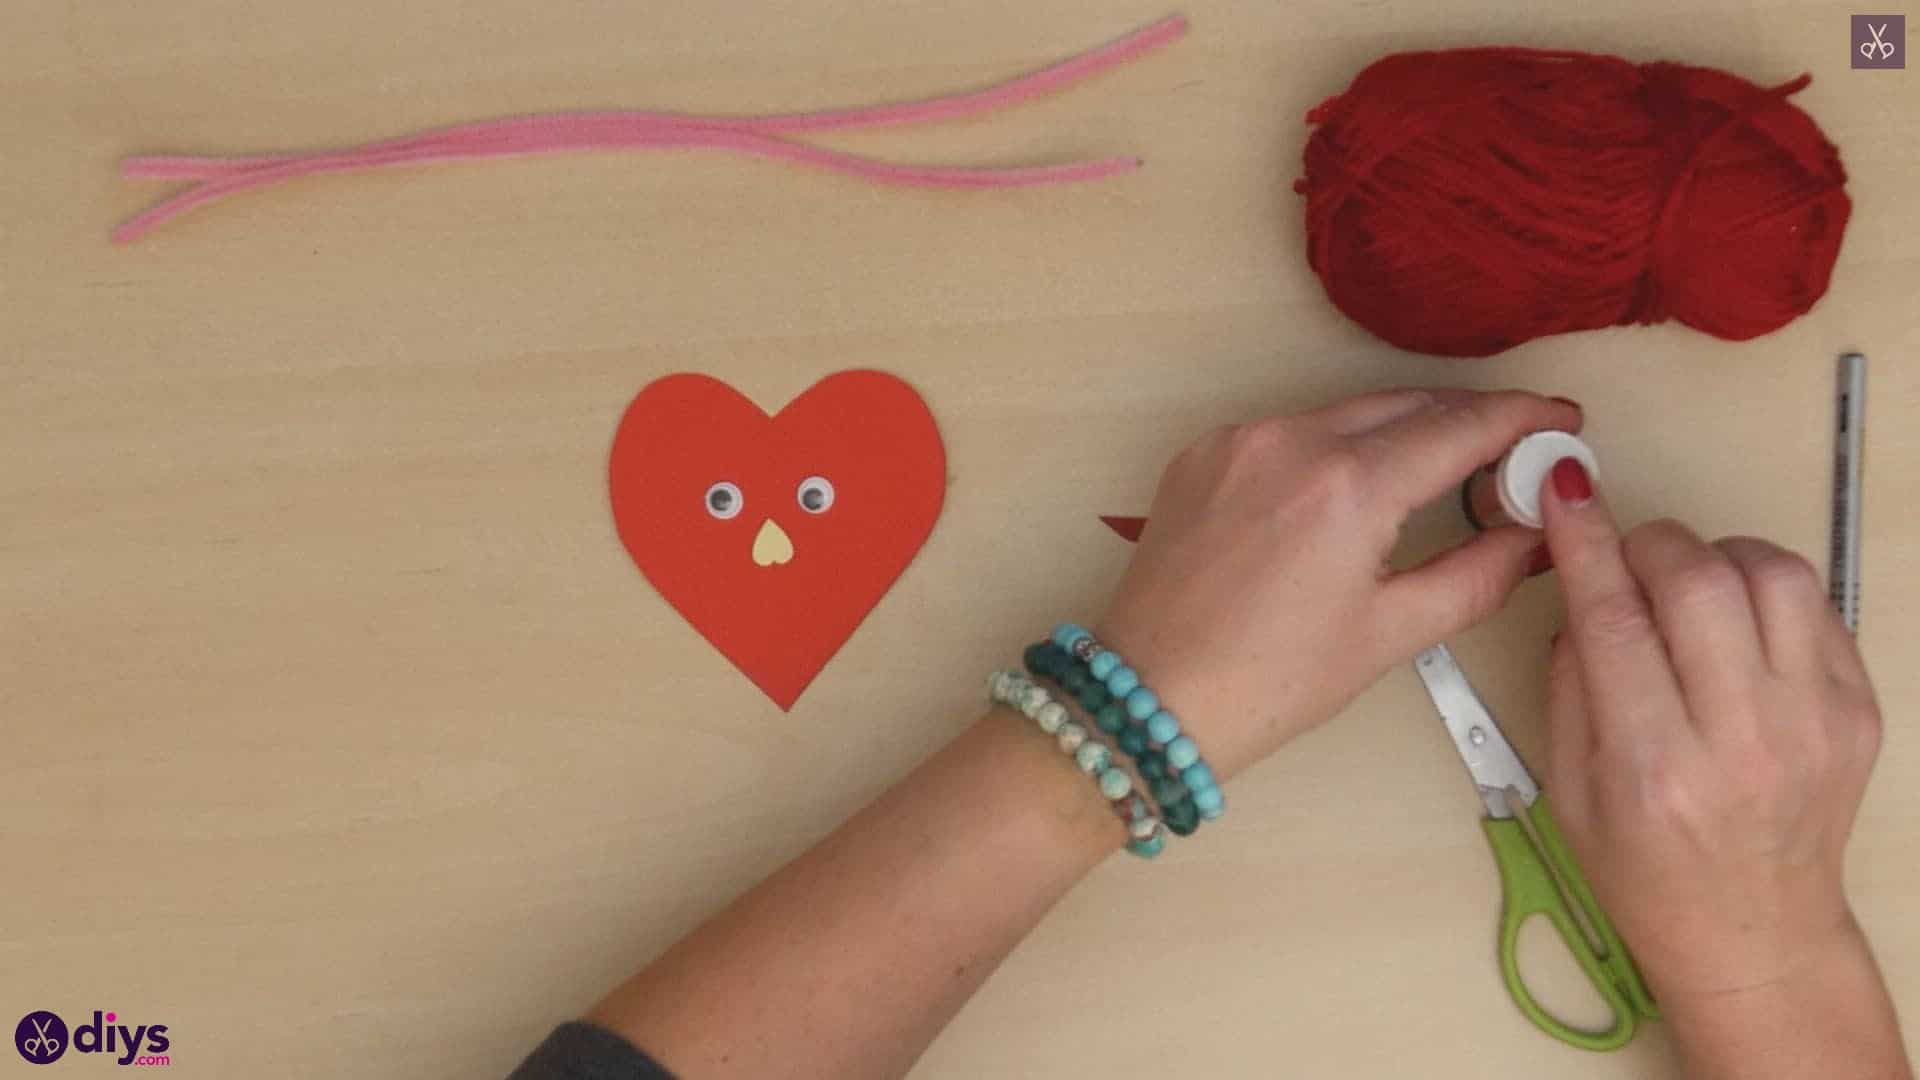
Cut out a small rectangle about an inch long and half an inch wide from the bottom right corner of your darker red piece of paper. Cut this small piece in half and layer the two resulting little dark red squares one on top of each other, holding them together with their edges lined up evenly. Use your scissors to round off the corners and straight edges from both of these little squares at once to make two small circles. These will be your creature’s rosy cheeks! Set them aside for a moment.

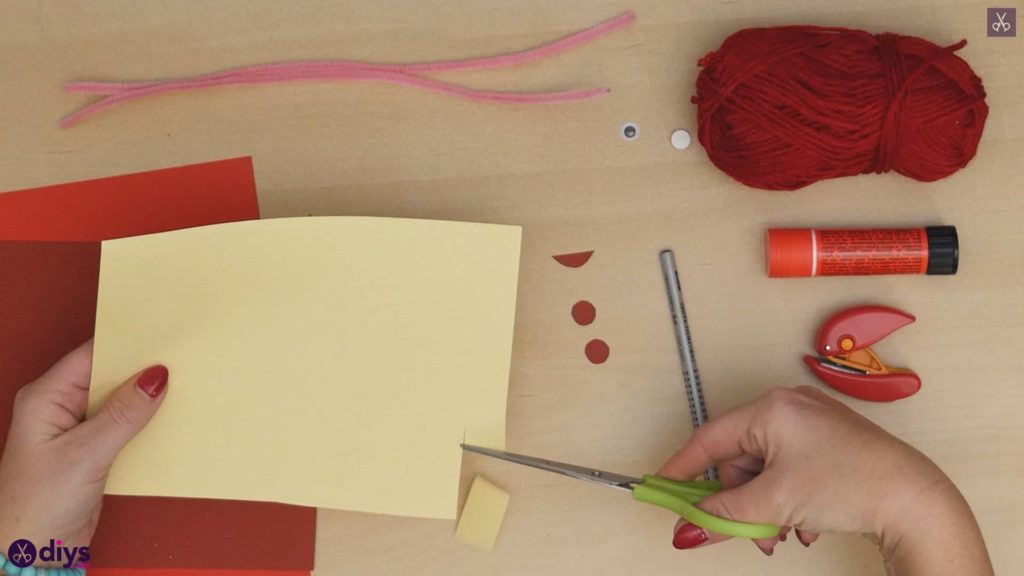
Step 4: make the mouth
Cut another small square from your dark red paper, about half an inch wide, and then round off the bottom and side edges and corners, keeping the top straight edge and corners to make a small semi-circle shape. This will be your creature’s mouth! Set this aside with the blushing cheeks for later.
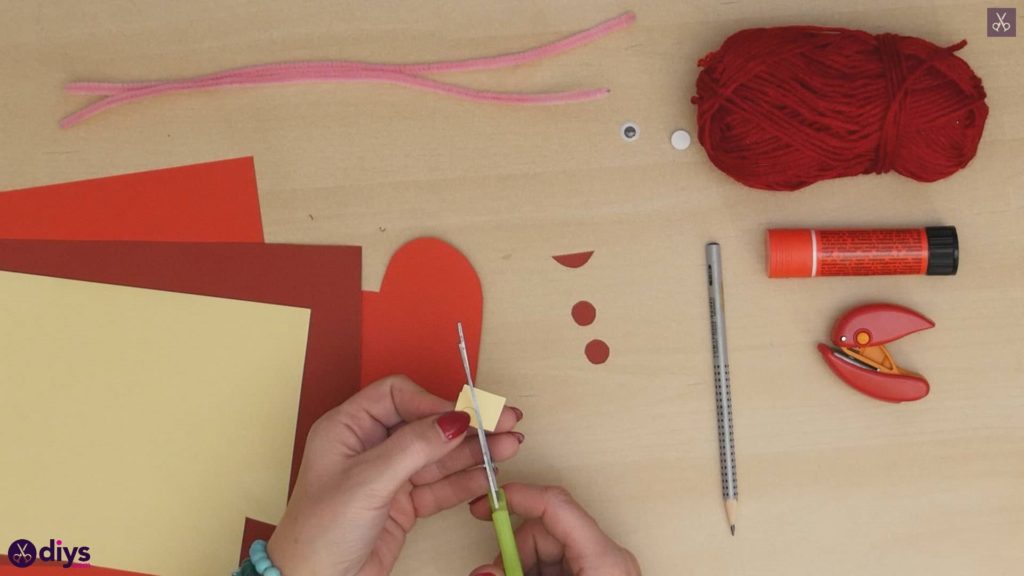
Step 5: make the nose
Cut another similarly sized little corner rectangle with your scissors, this time from your yellow paper. Then use your pencil to draw a small heart shape in the middle of that newly cut piece. Next, cut that little heart out! I kept the two sides of my heart nice and even by folding the whole little yellow piece in half right down its vertical center and cutting the outer edges out from bottom tip to rounded top at once so they were guaranteed to be the same size and shape. This little heart will be your creature’s nose, but you’ll flip it upside down! Set it aside for the moment with the other facial pieces.

Step 6: start gluing
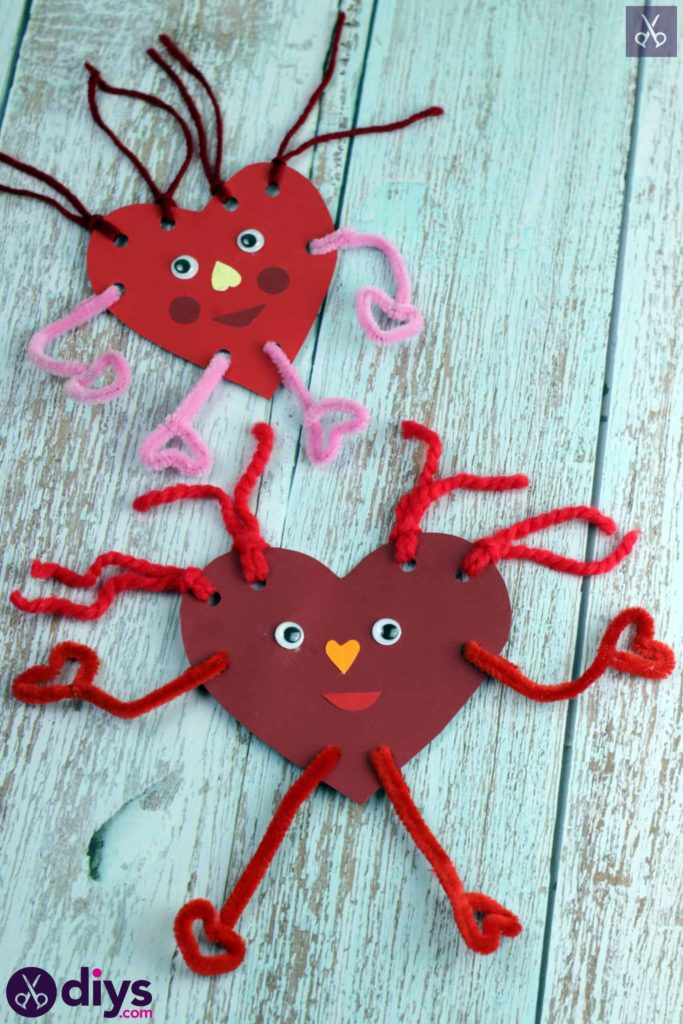
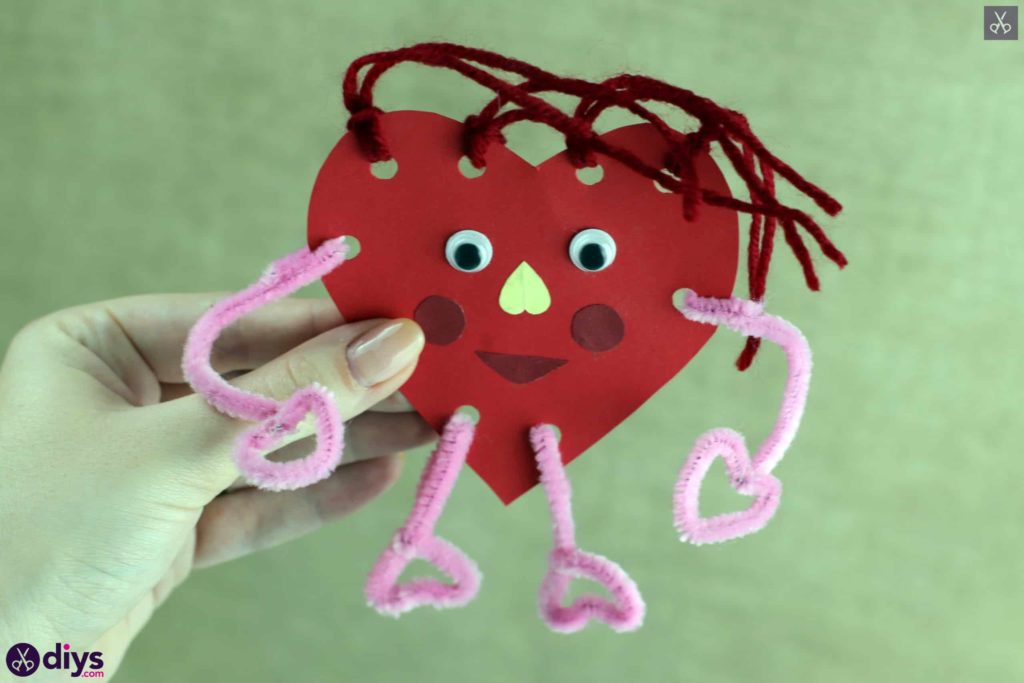
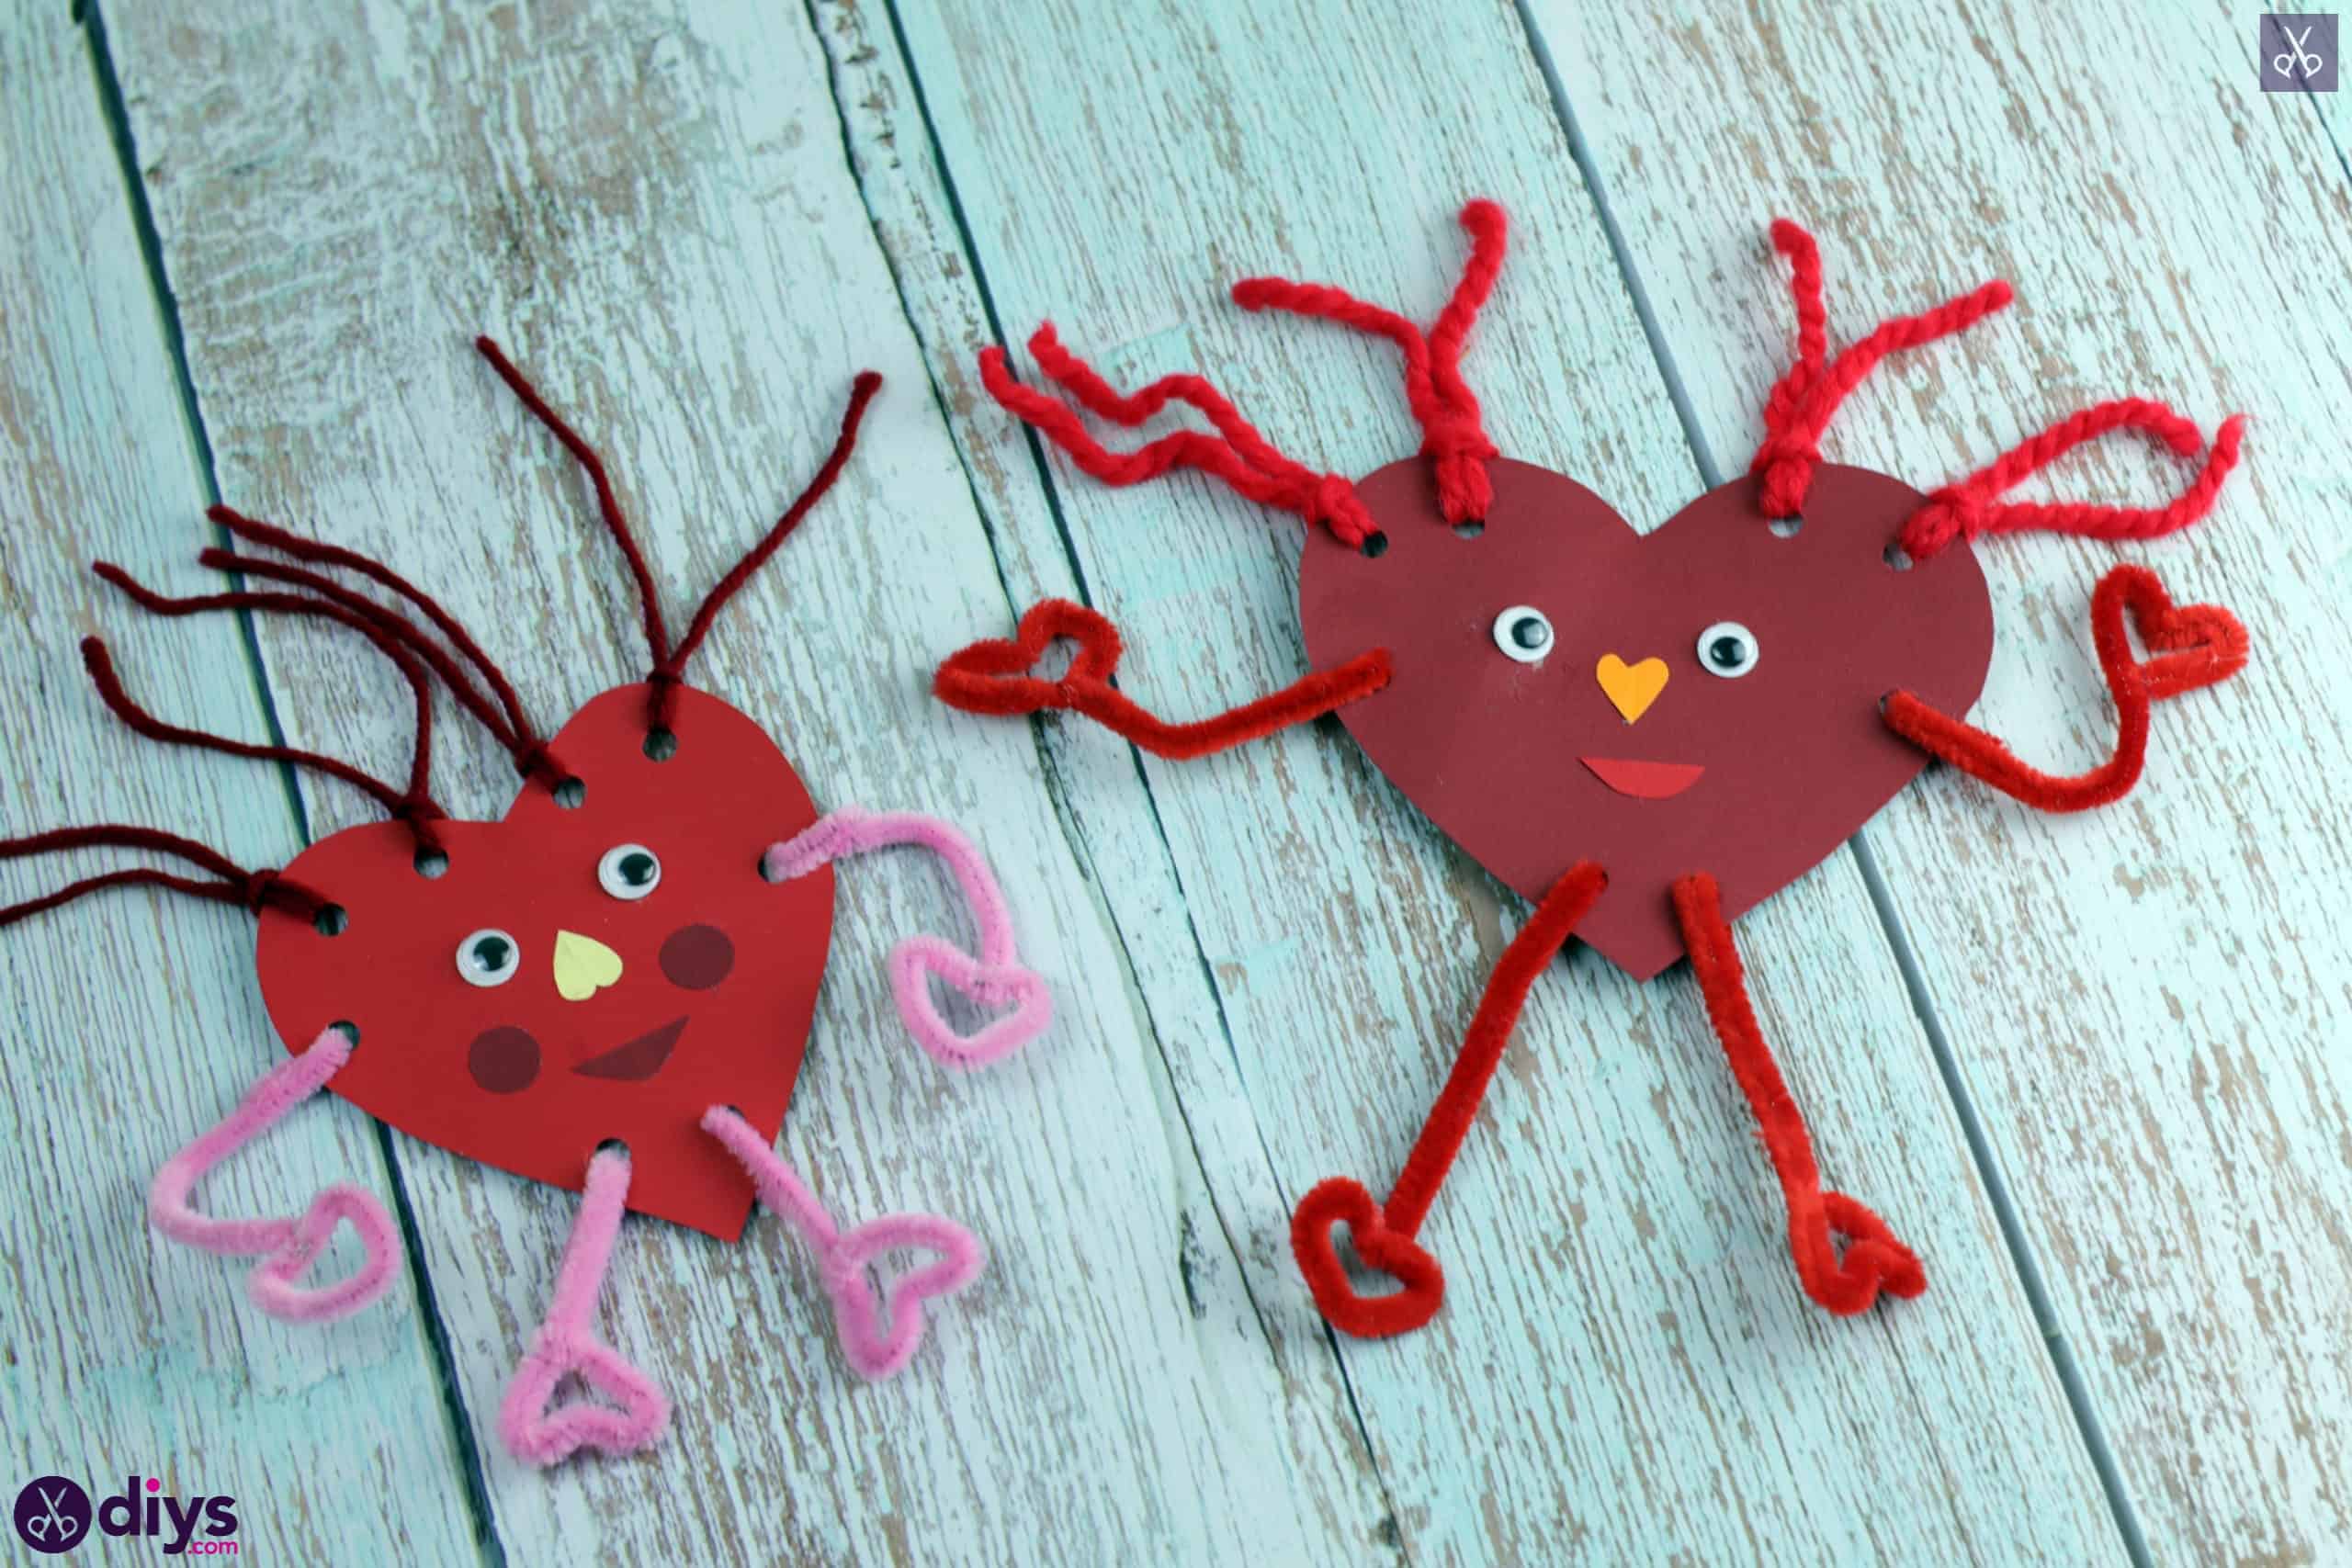
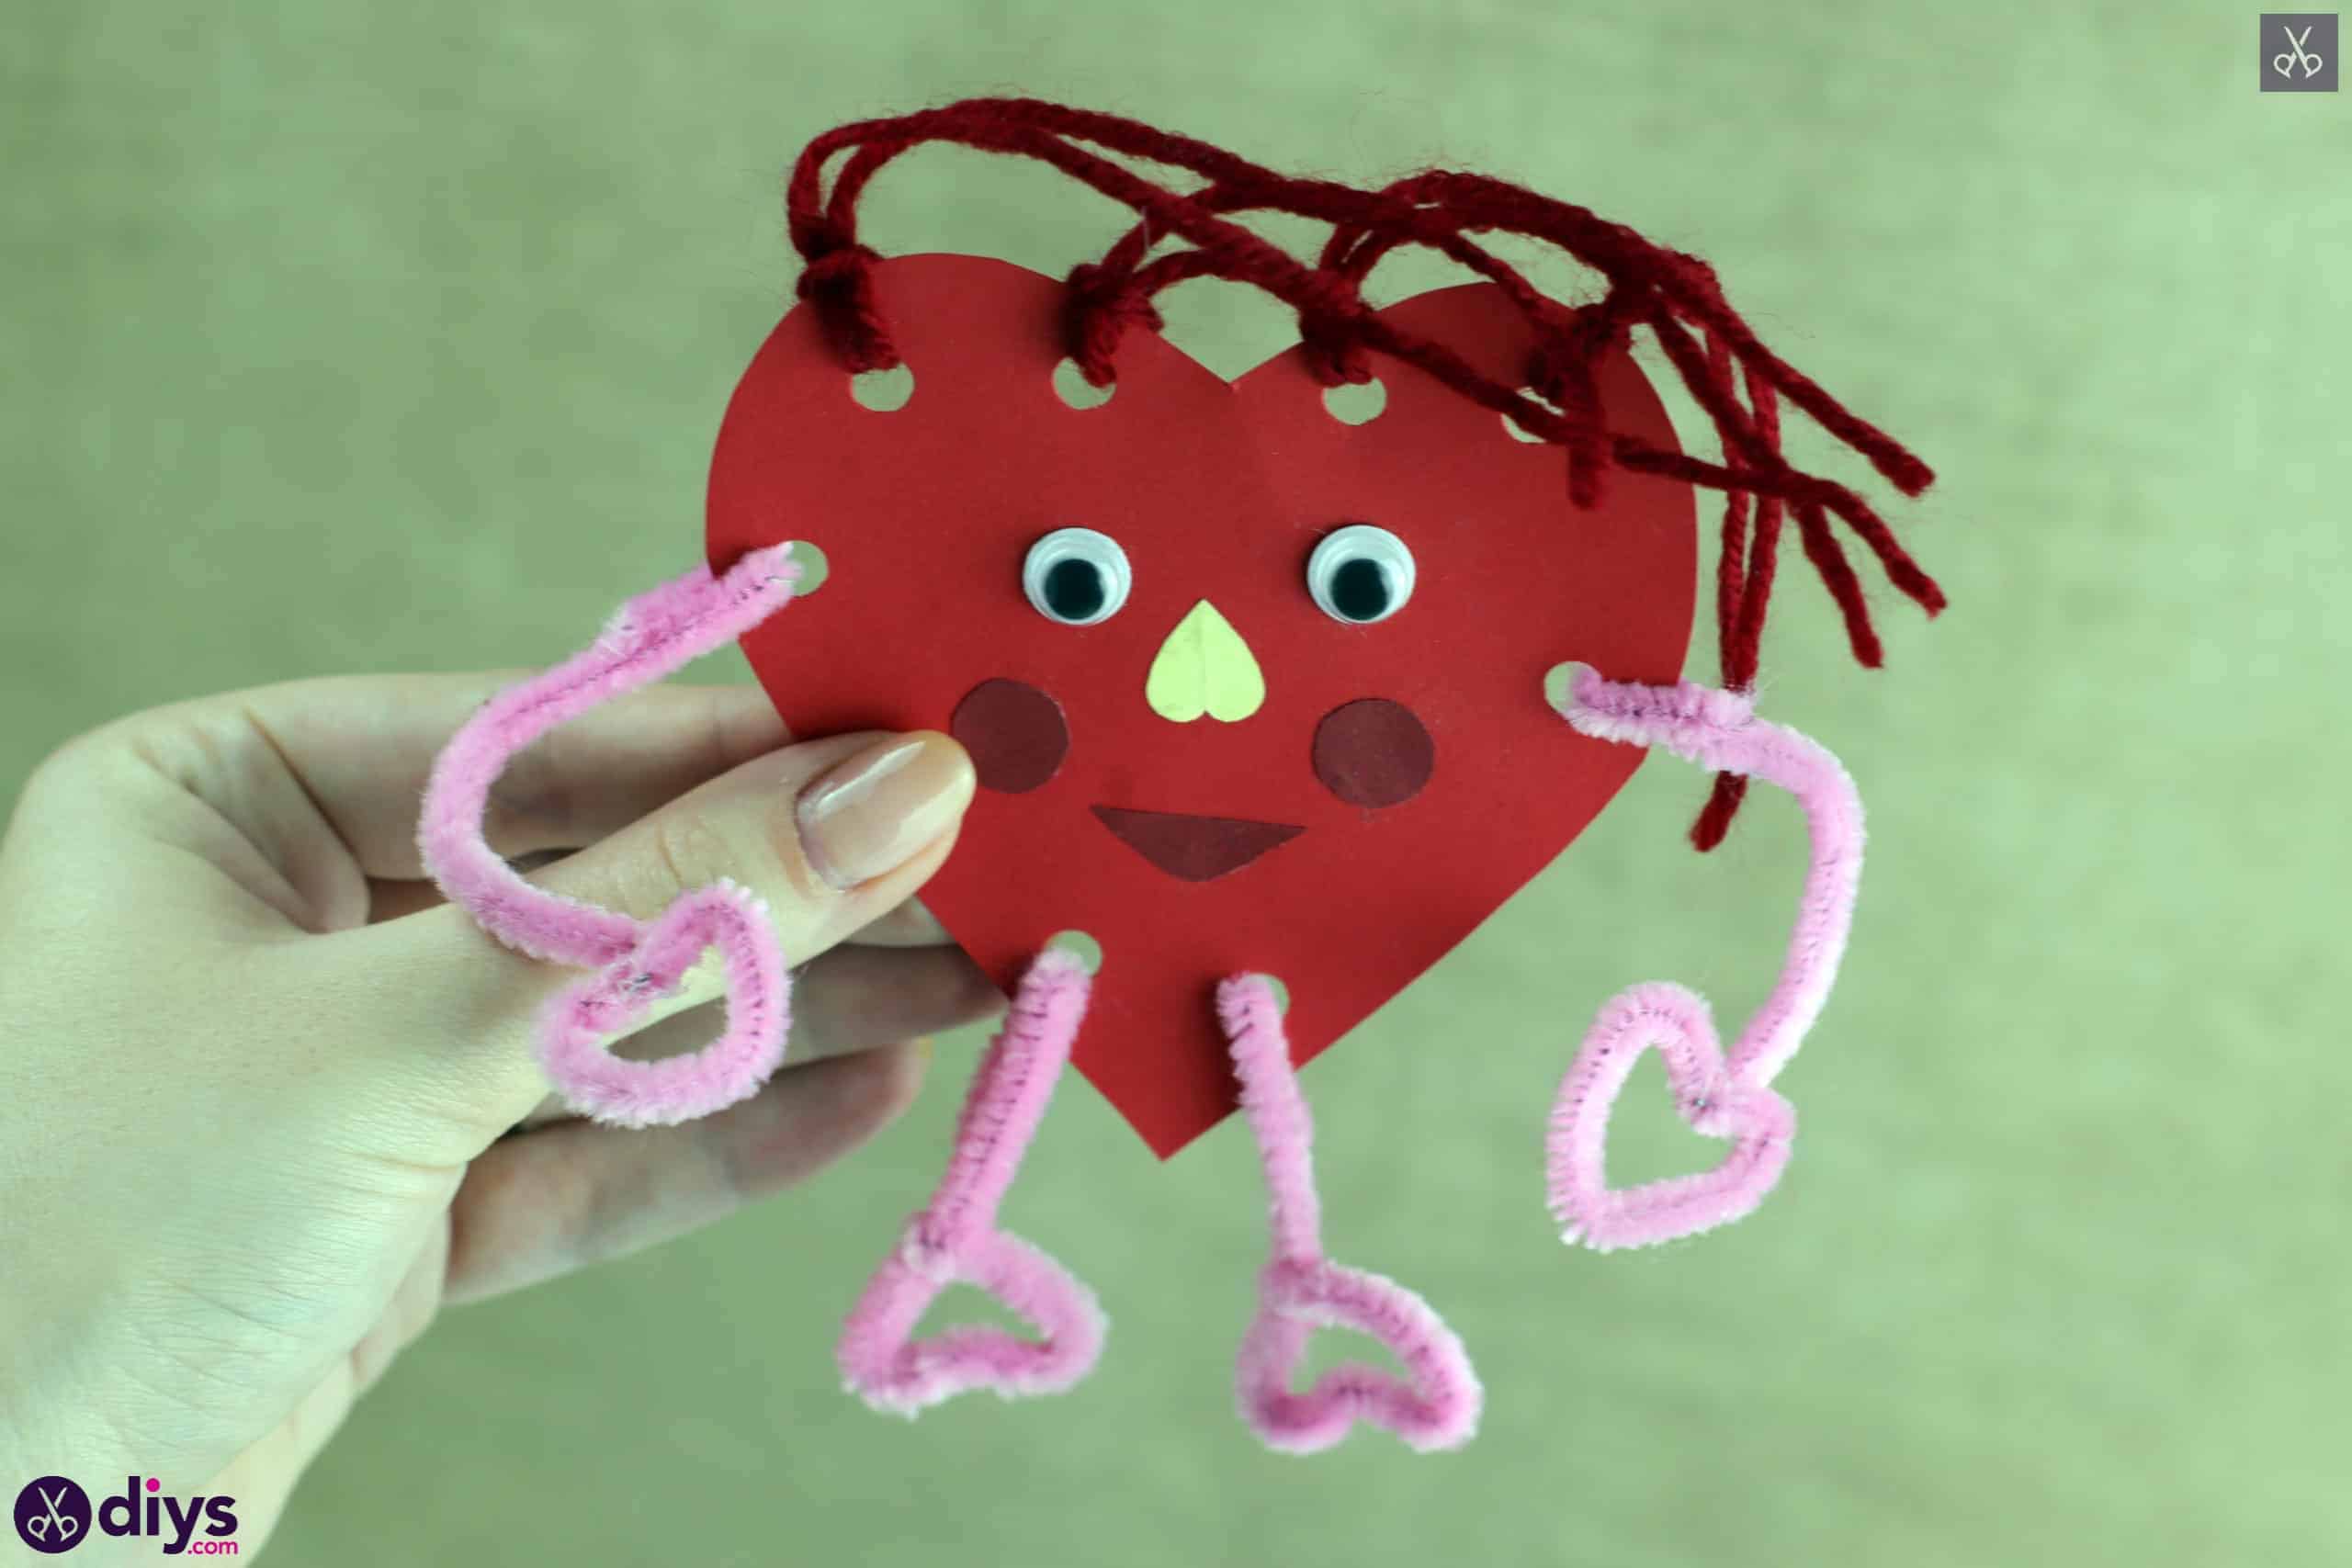
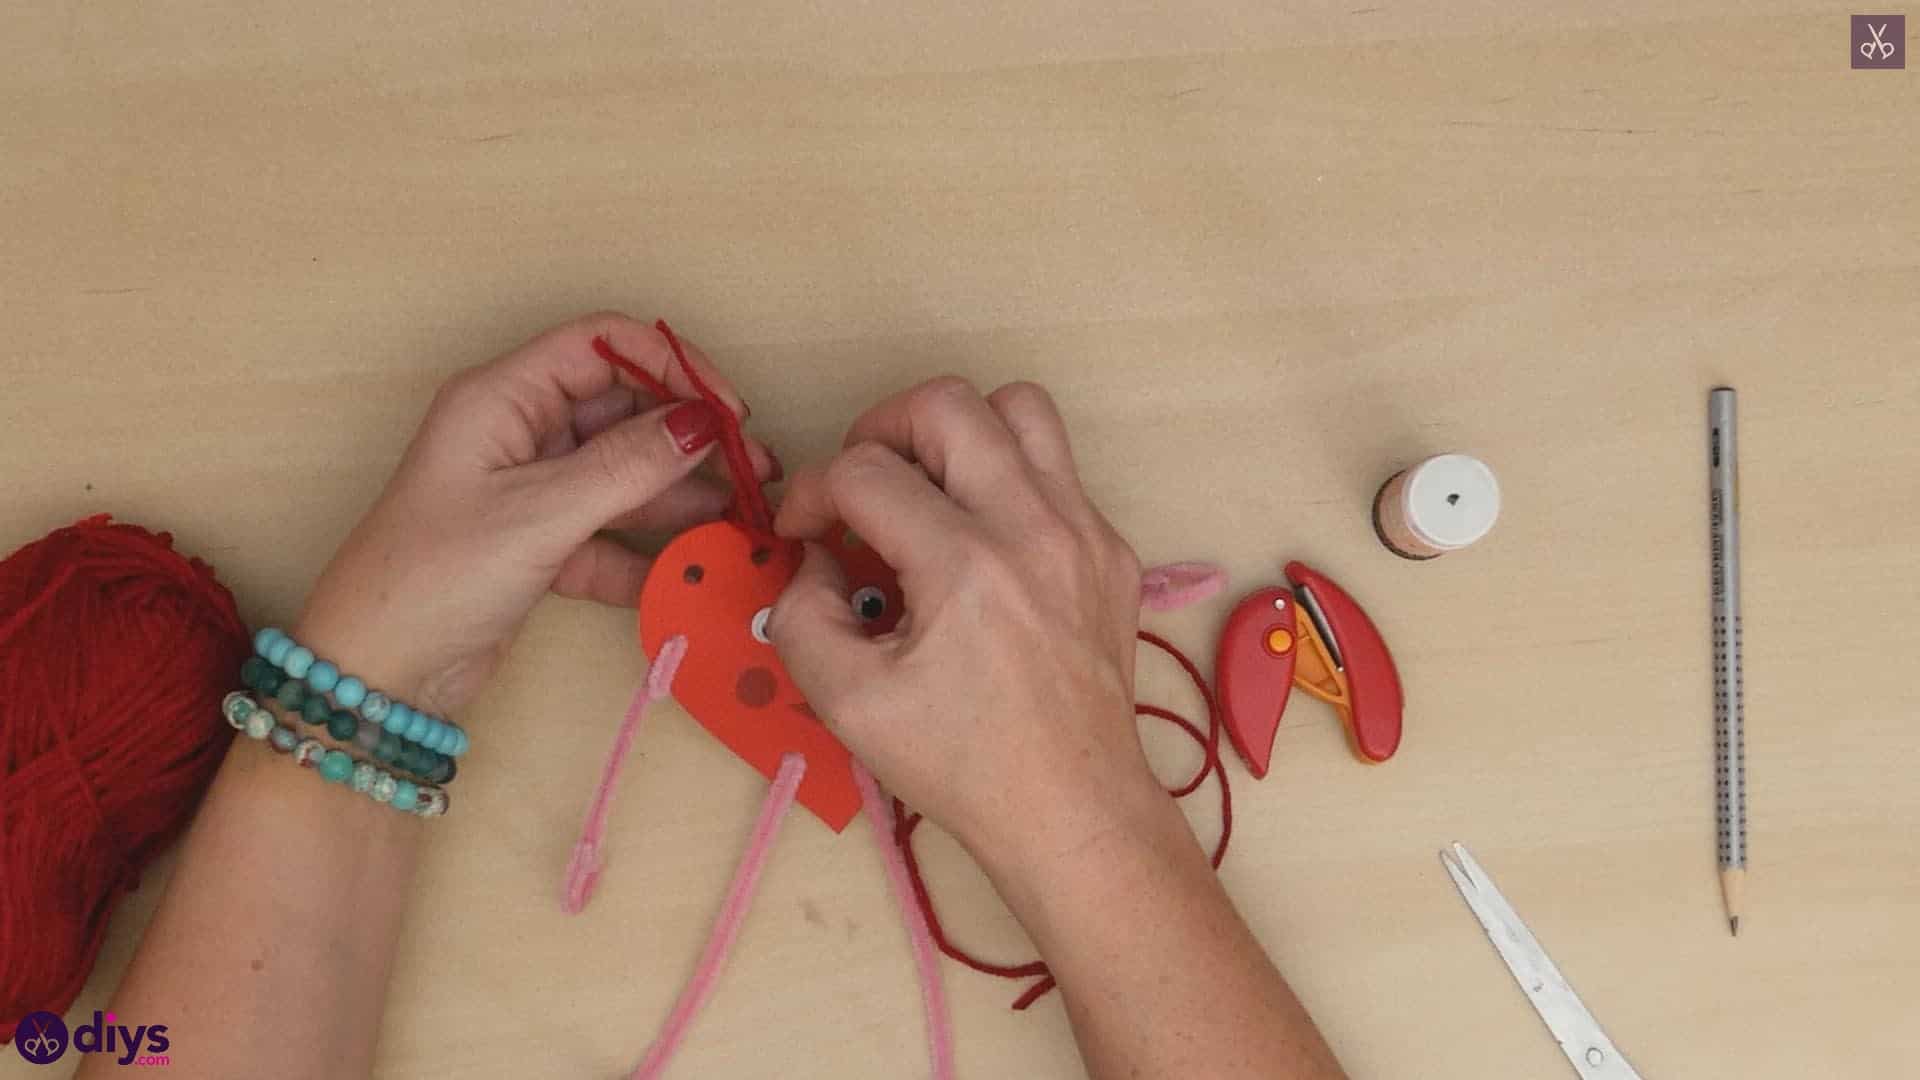
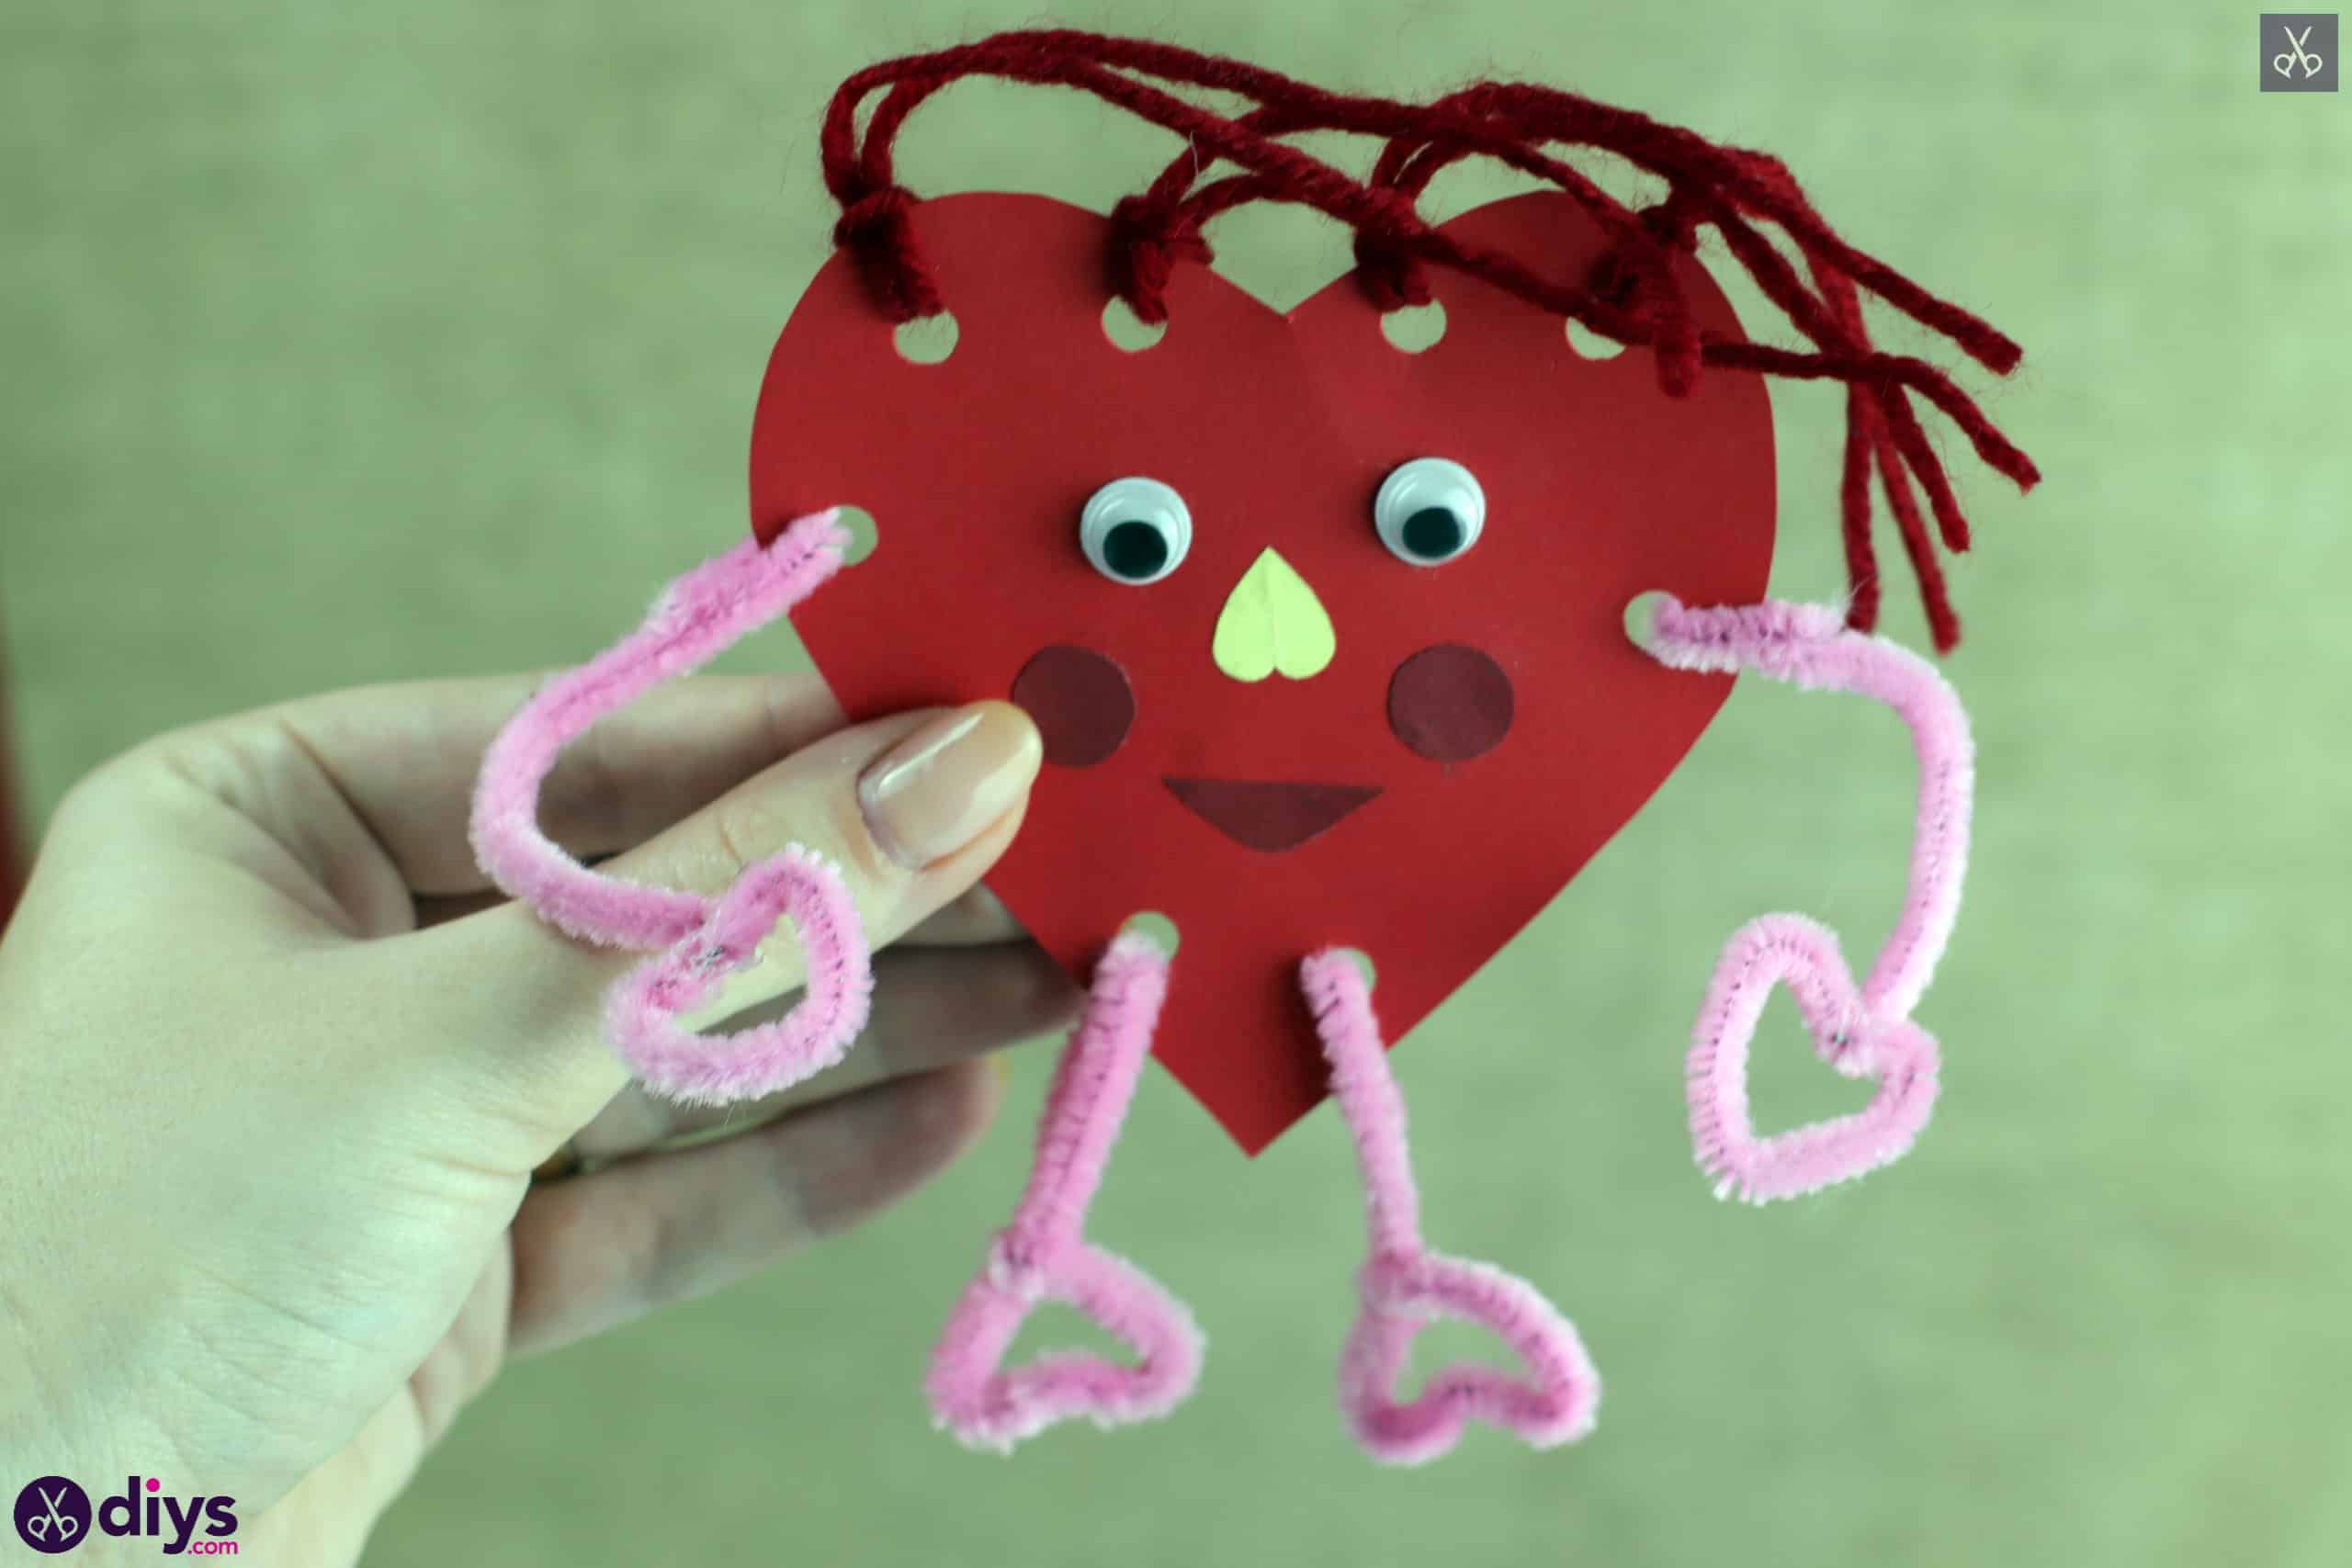
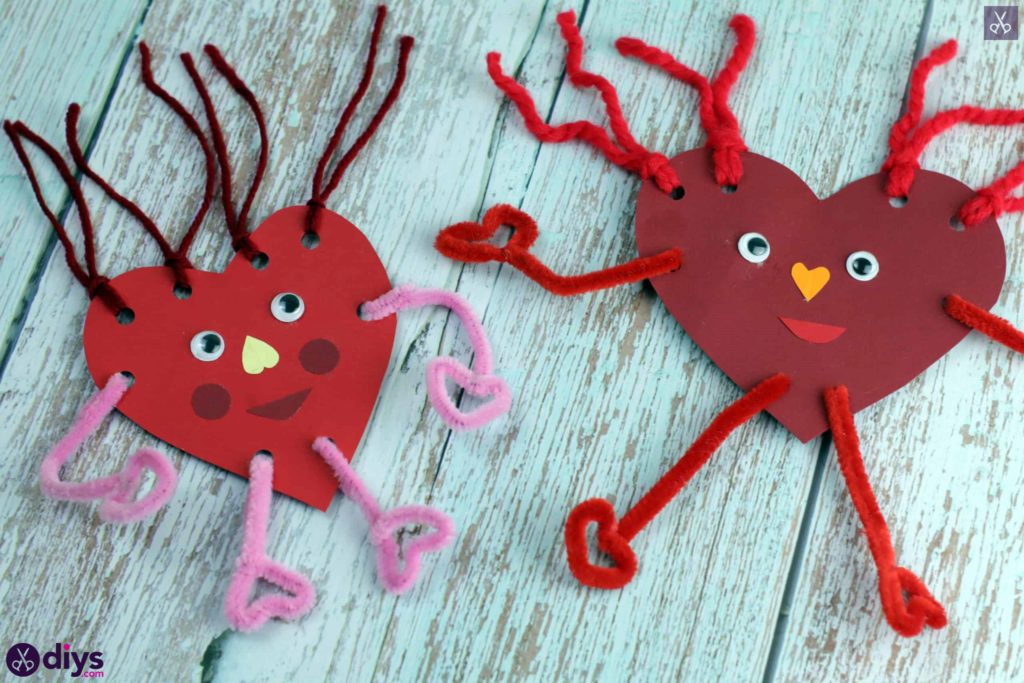
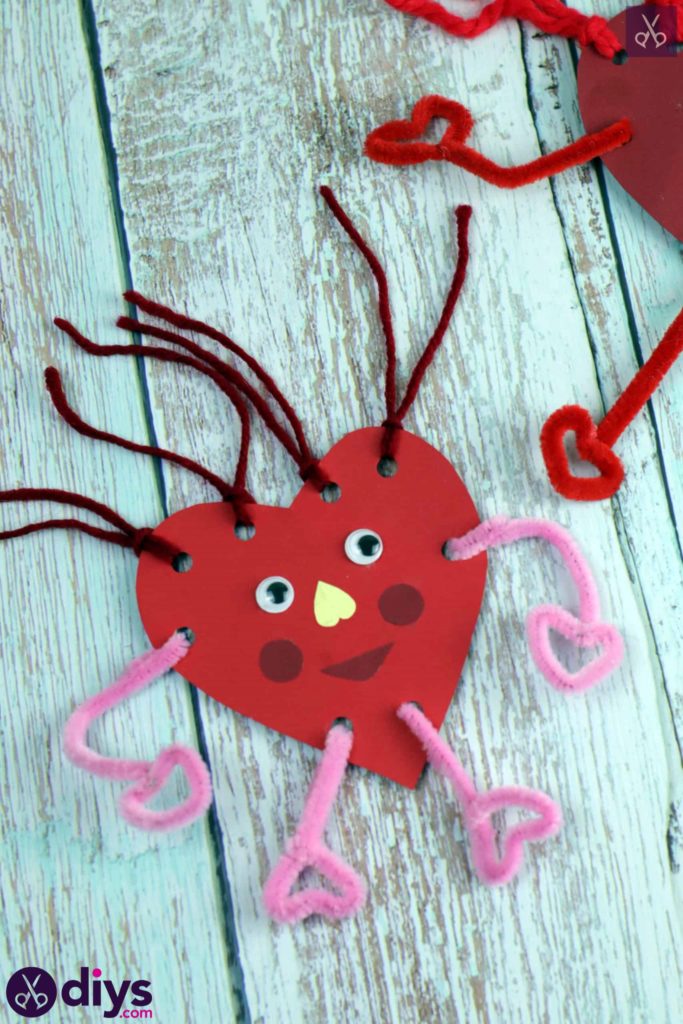
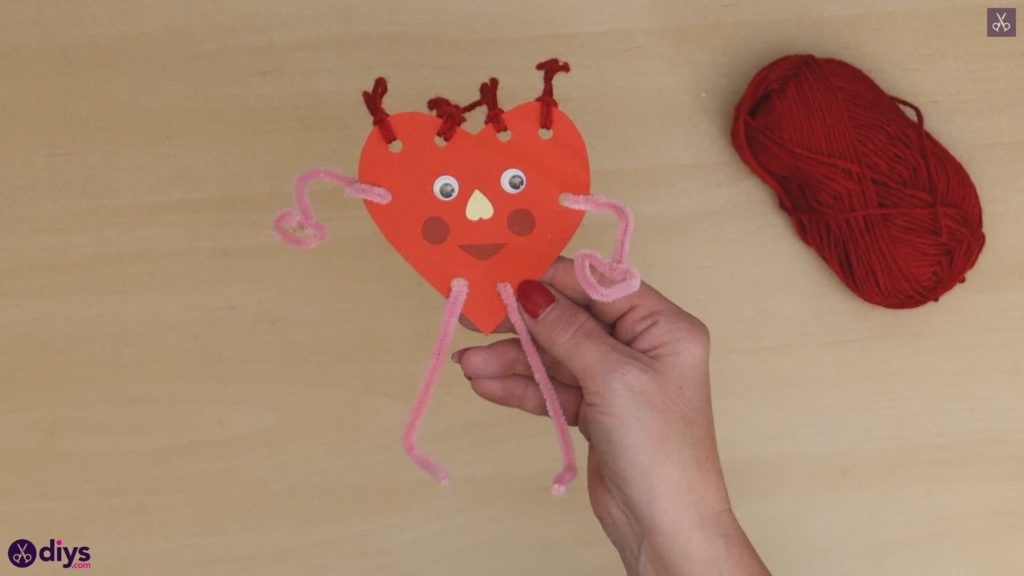
Use your glue stick to place all your face pieces down on the heart to start putting the creature together! Start with the googly eyes, playing them near the top middle of the heart, equidistant to each other. Don’t place themtoo close to the top, you want to save a tiny space there to add hair later. Them stick the yellow heart shaped nose down, but turned upside down so its bottom point sits between but slightly below the eyes and the rounded top faces downward. Next will come the two rounded blushing cheeks- one circle on each side and just below he nose- and finally the semi-circle smile with its flat edge facing upwards towards the nose’s rounded bottom.


Step 7: hole punch
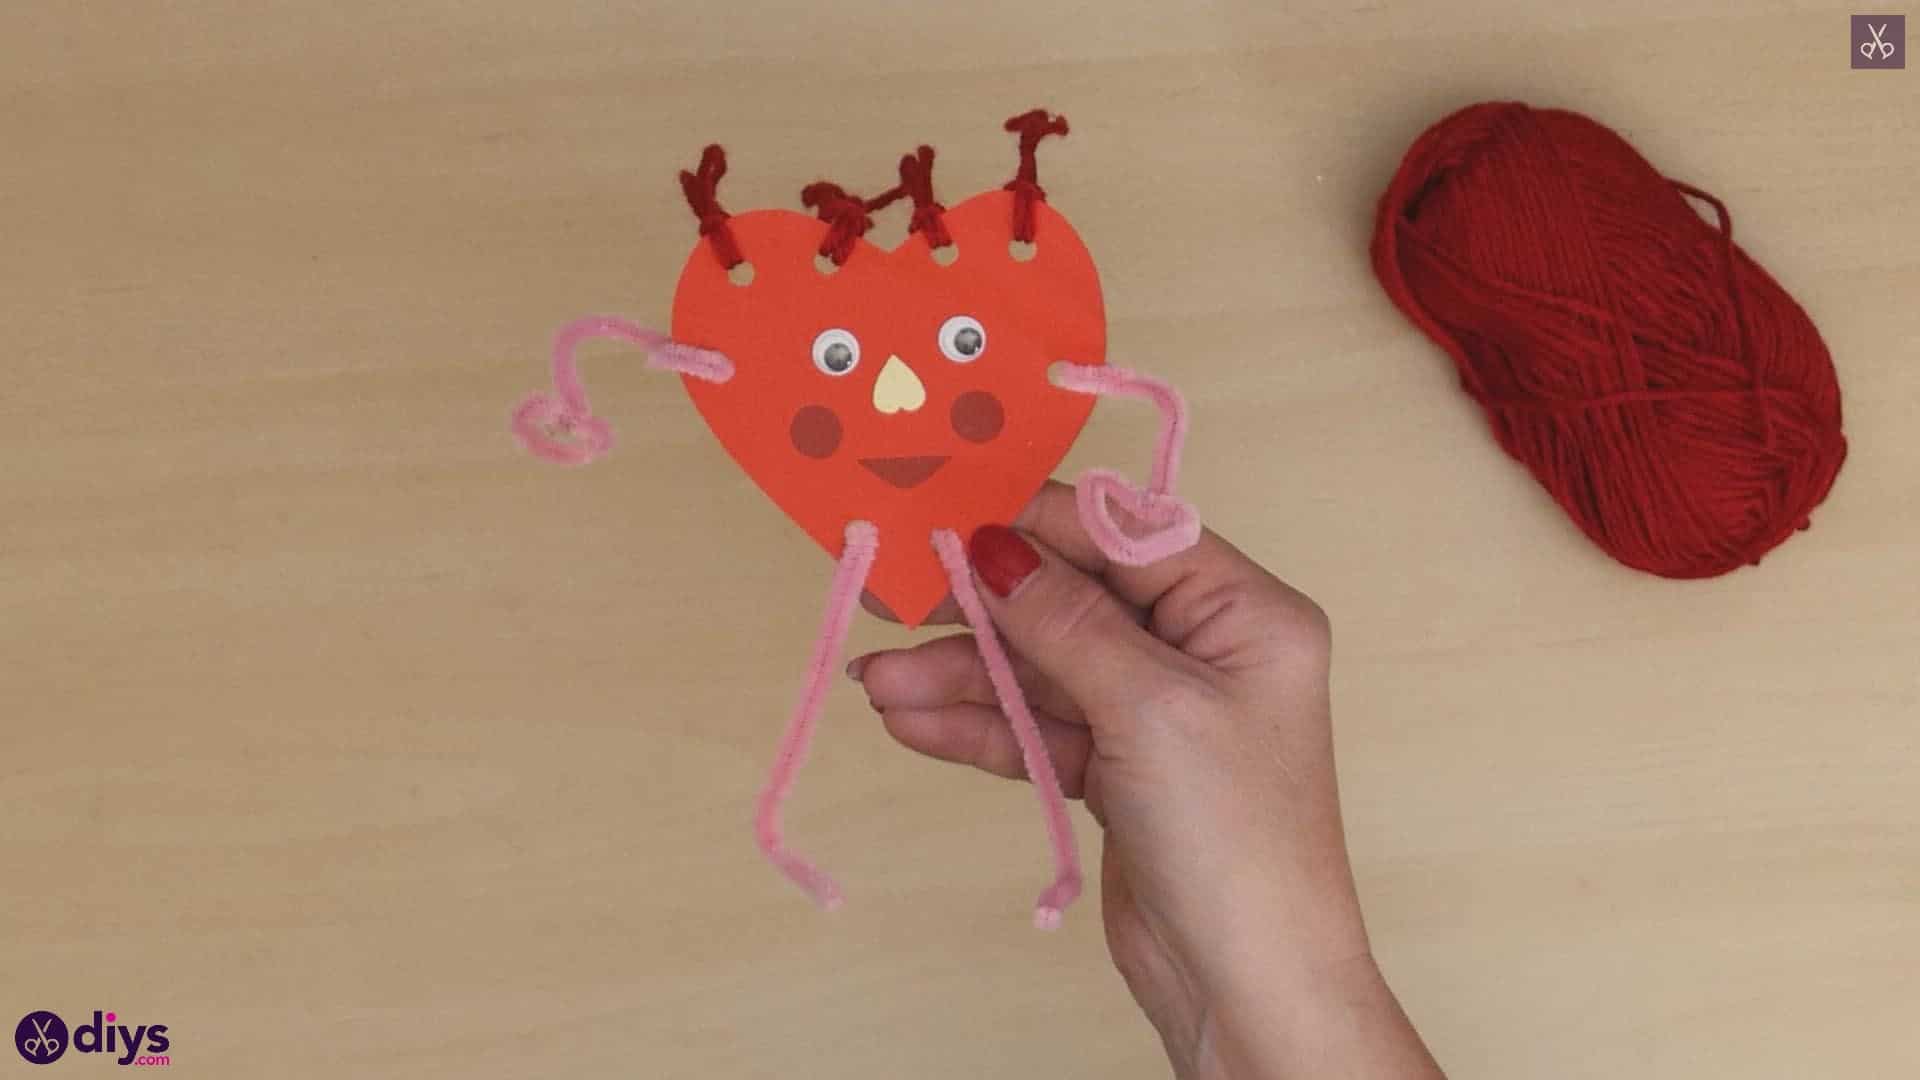
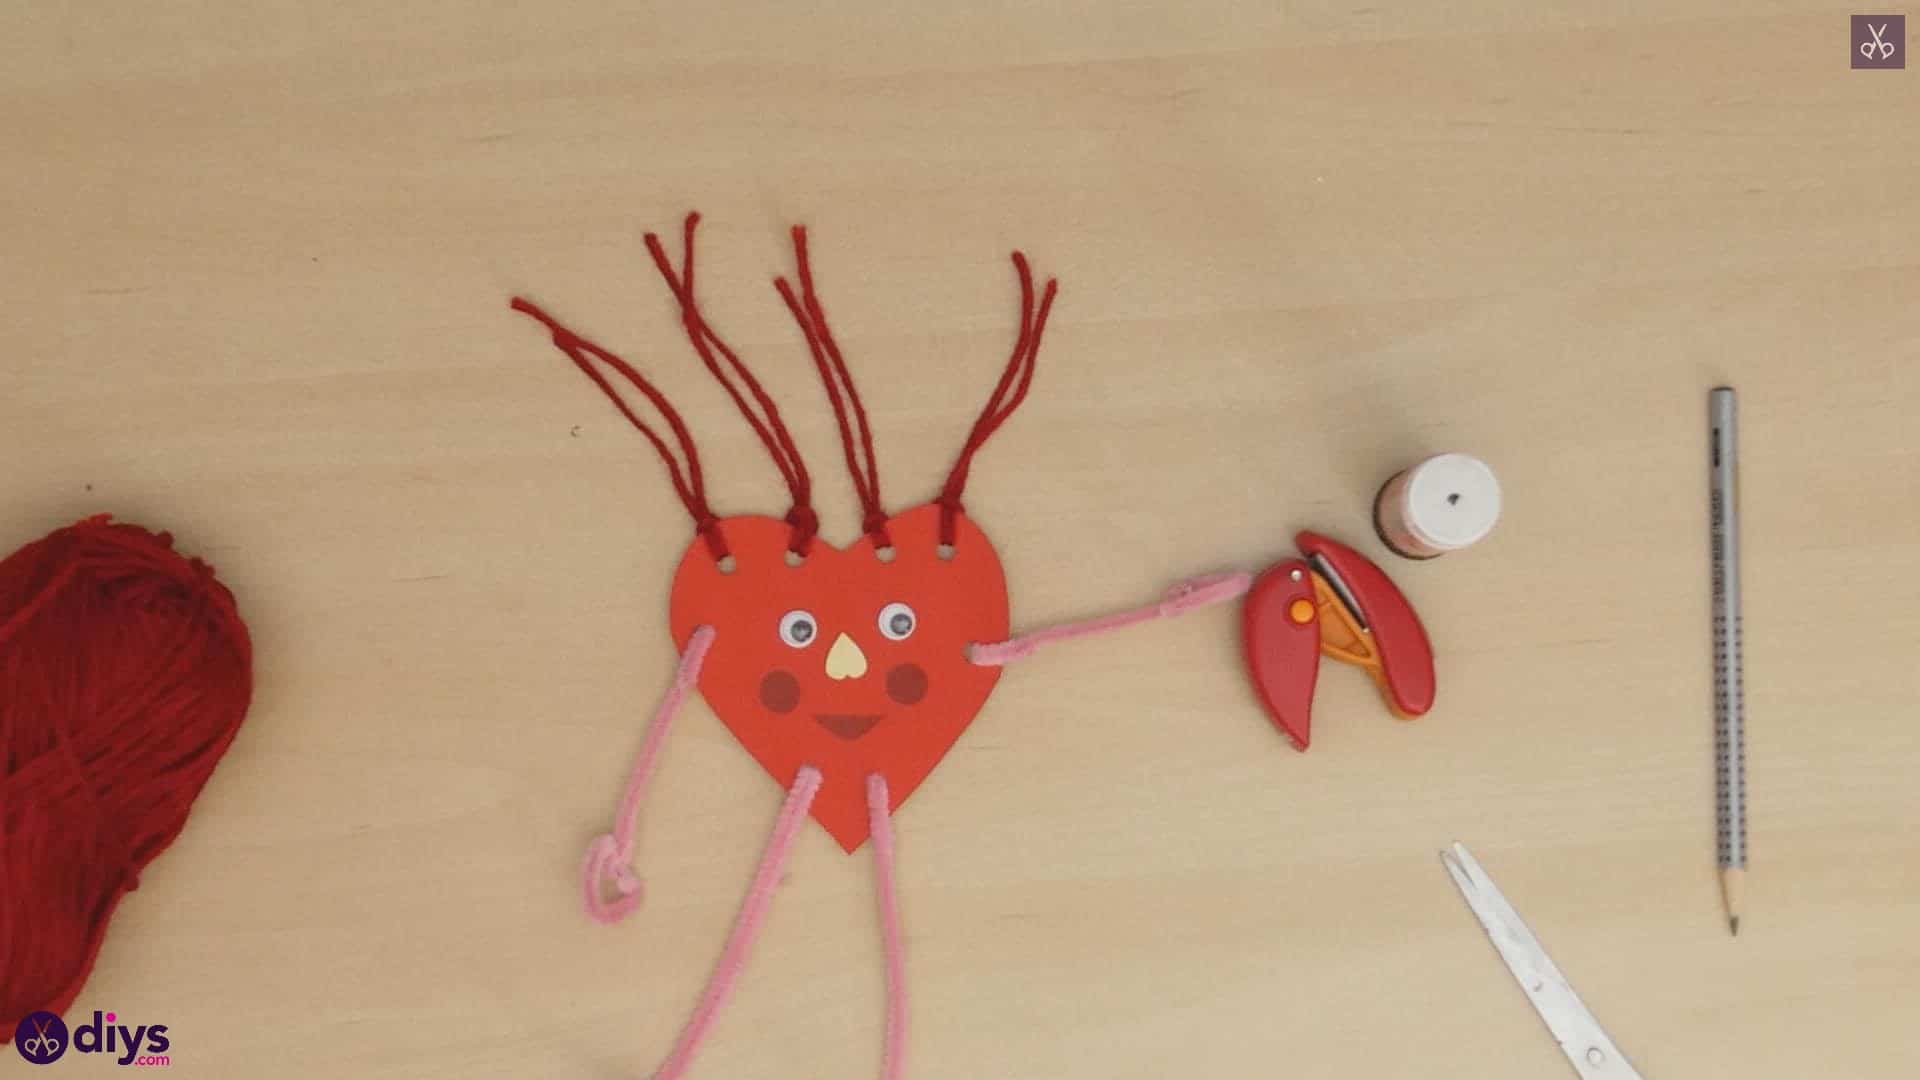
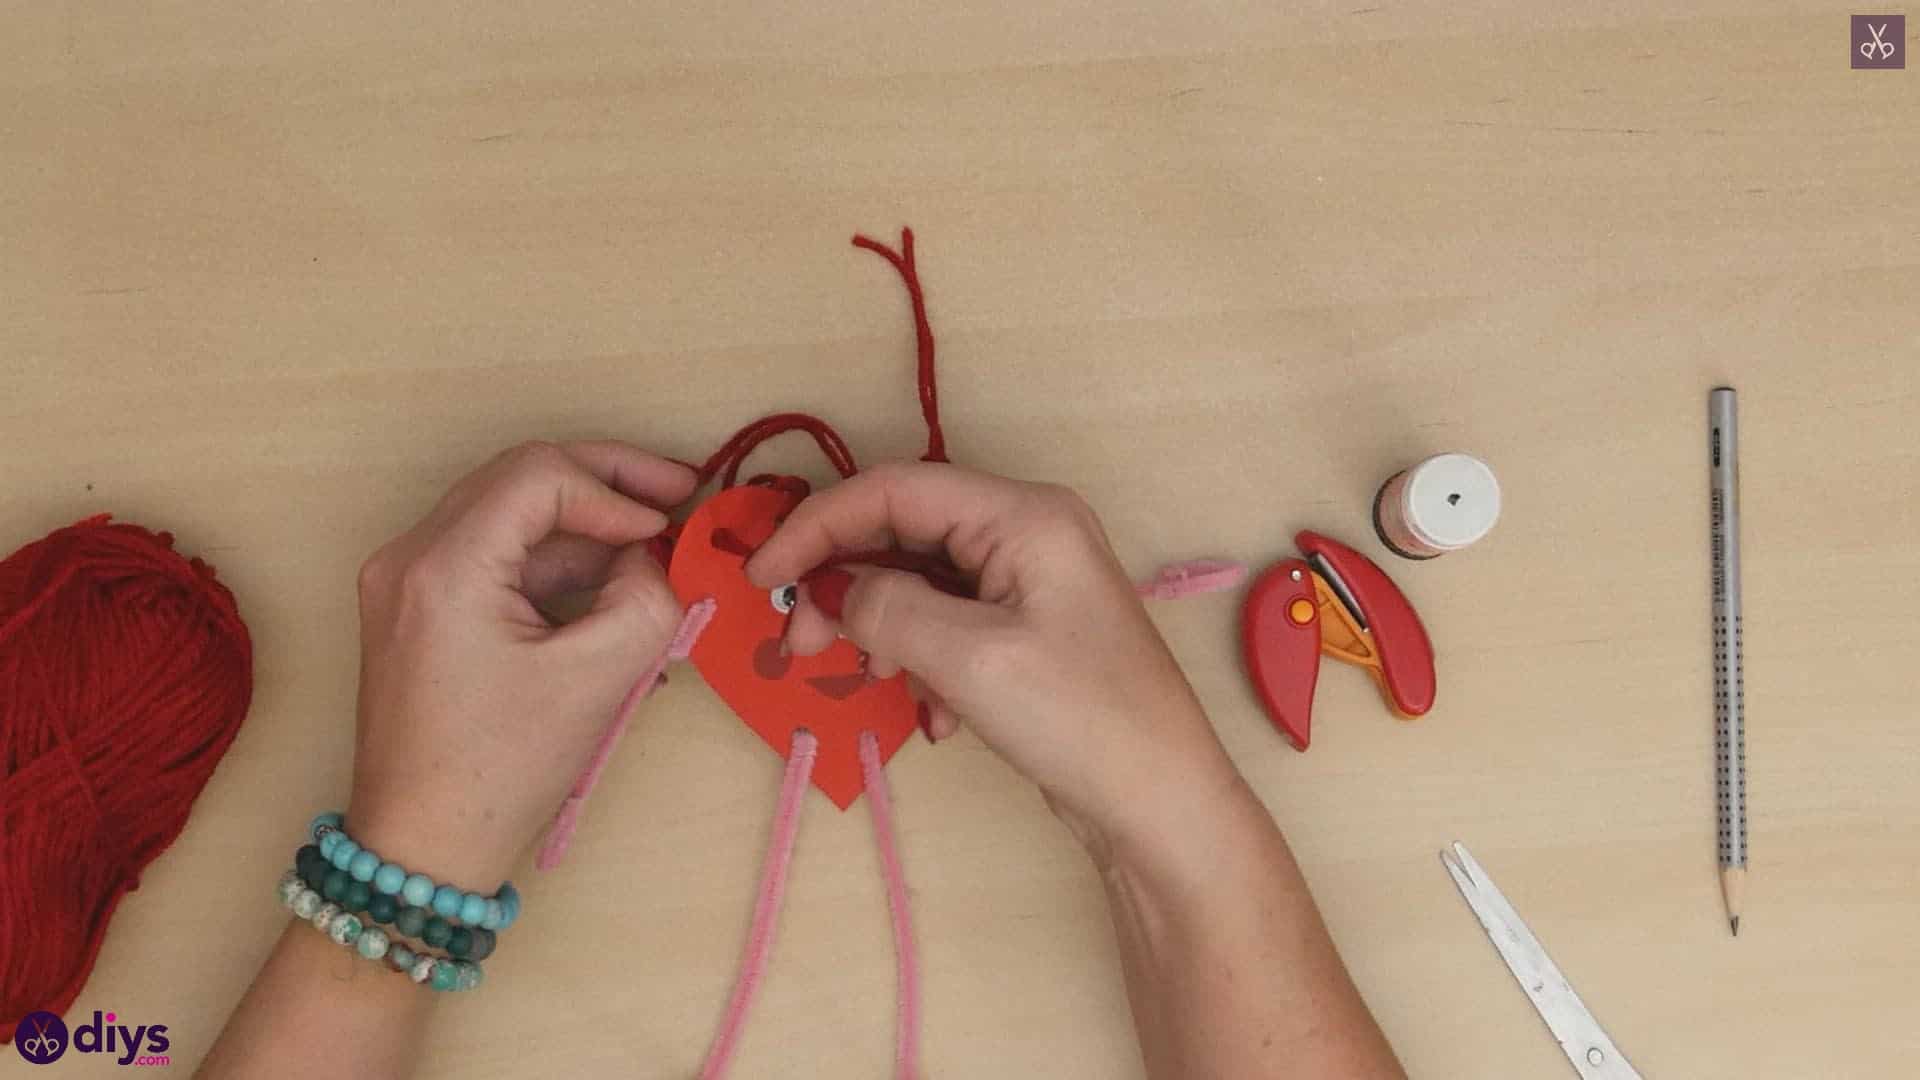
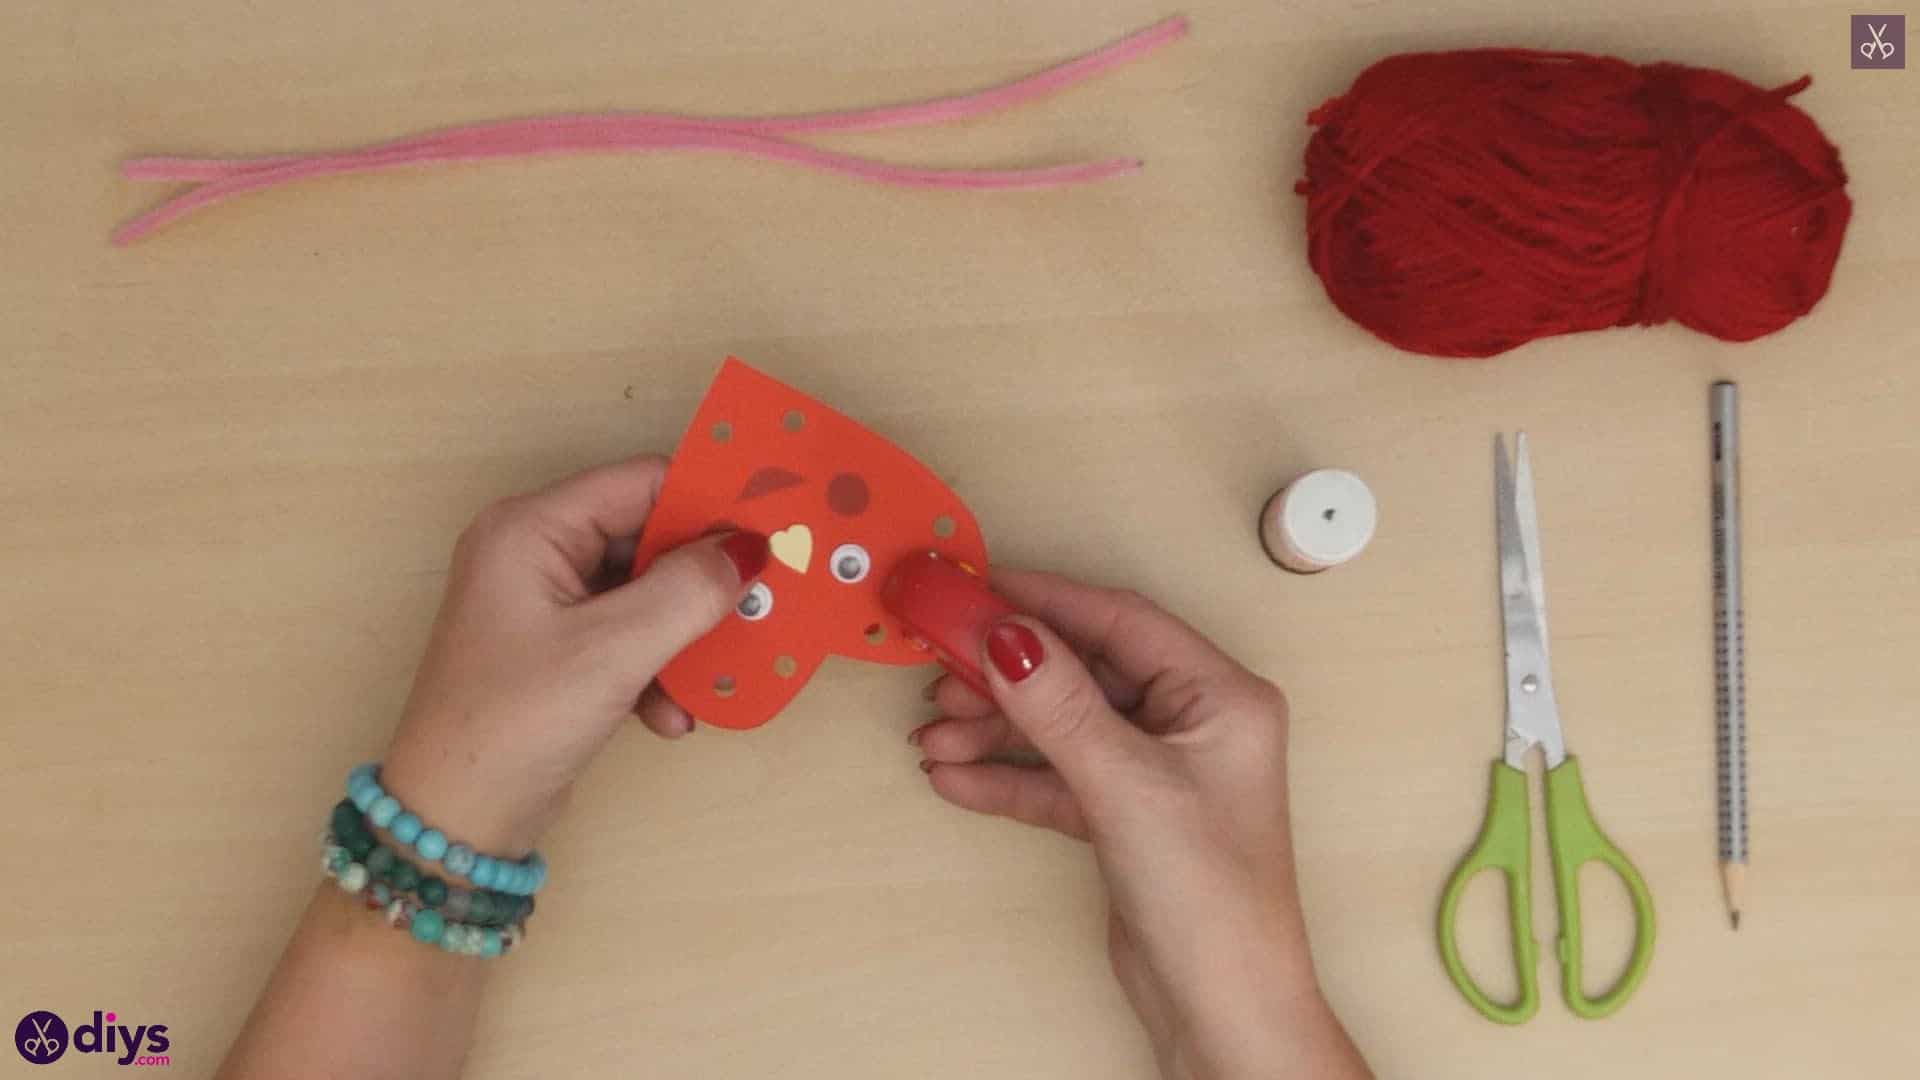
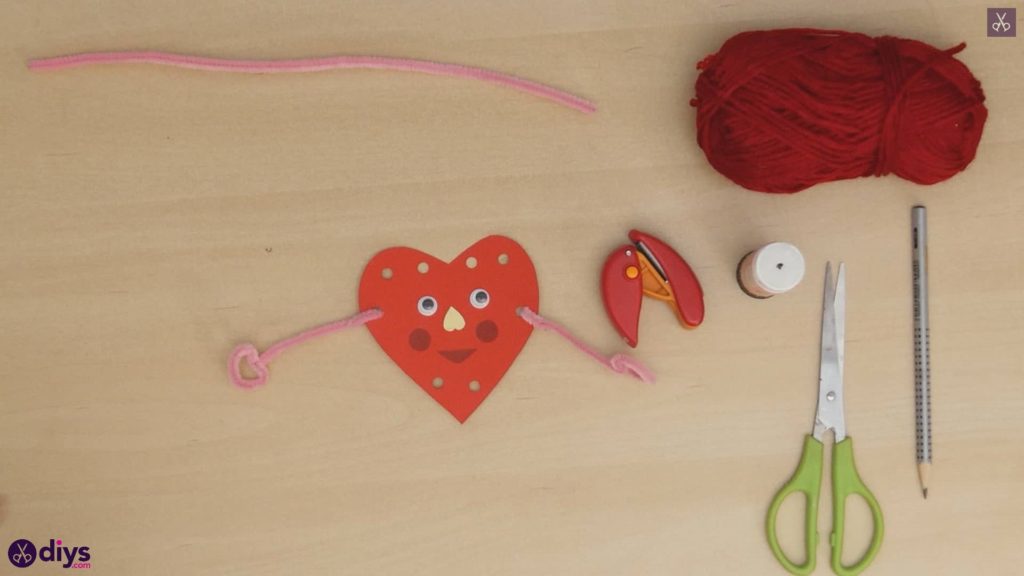
Use your hole punch to strategically place holes around the edges of your base heart for the creature’s arms, legs, and hair! I made to holes near the bottom, just above the lower point on either side. Then I made two holes on either side higher up and closer to the edges near the rosy cheeks. Finally, I made four holes at the top of the heart, just above the eyes and near the edges of the rounded tops, two on each side.
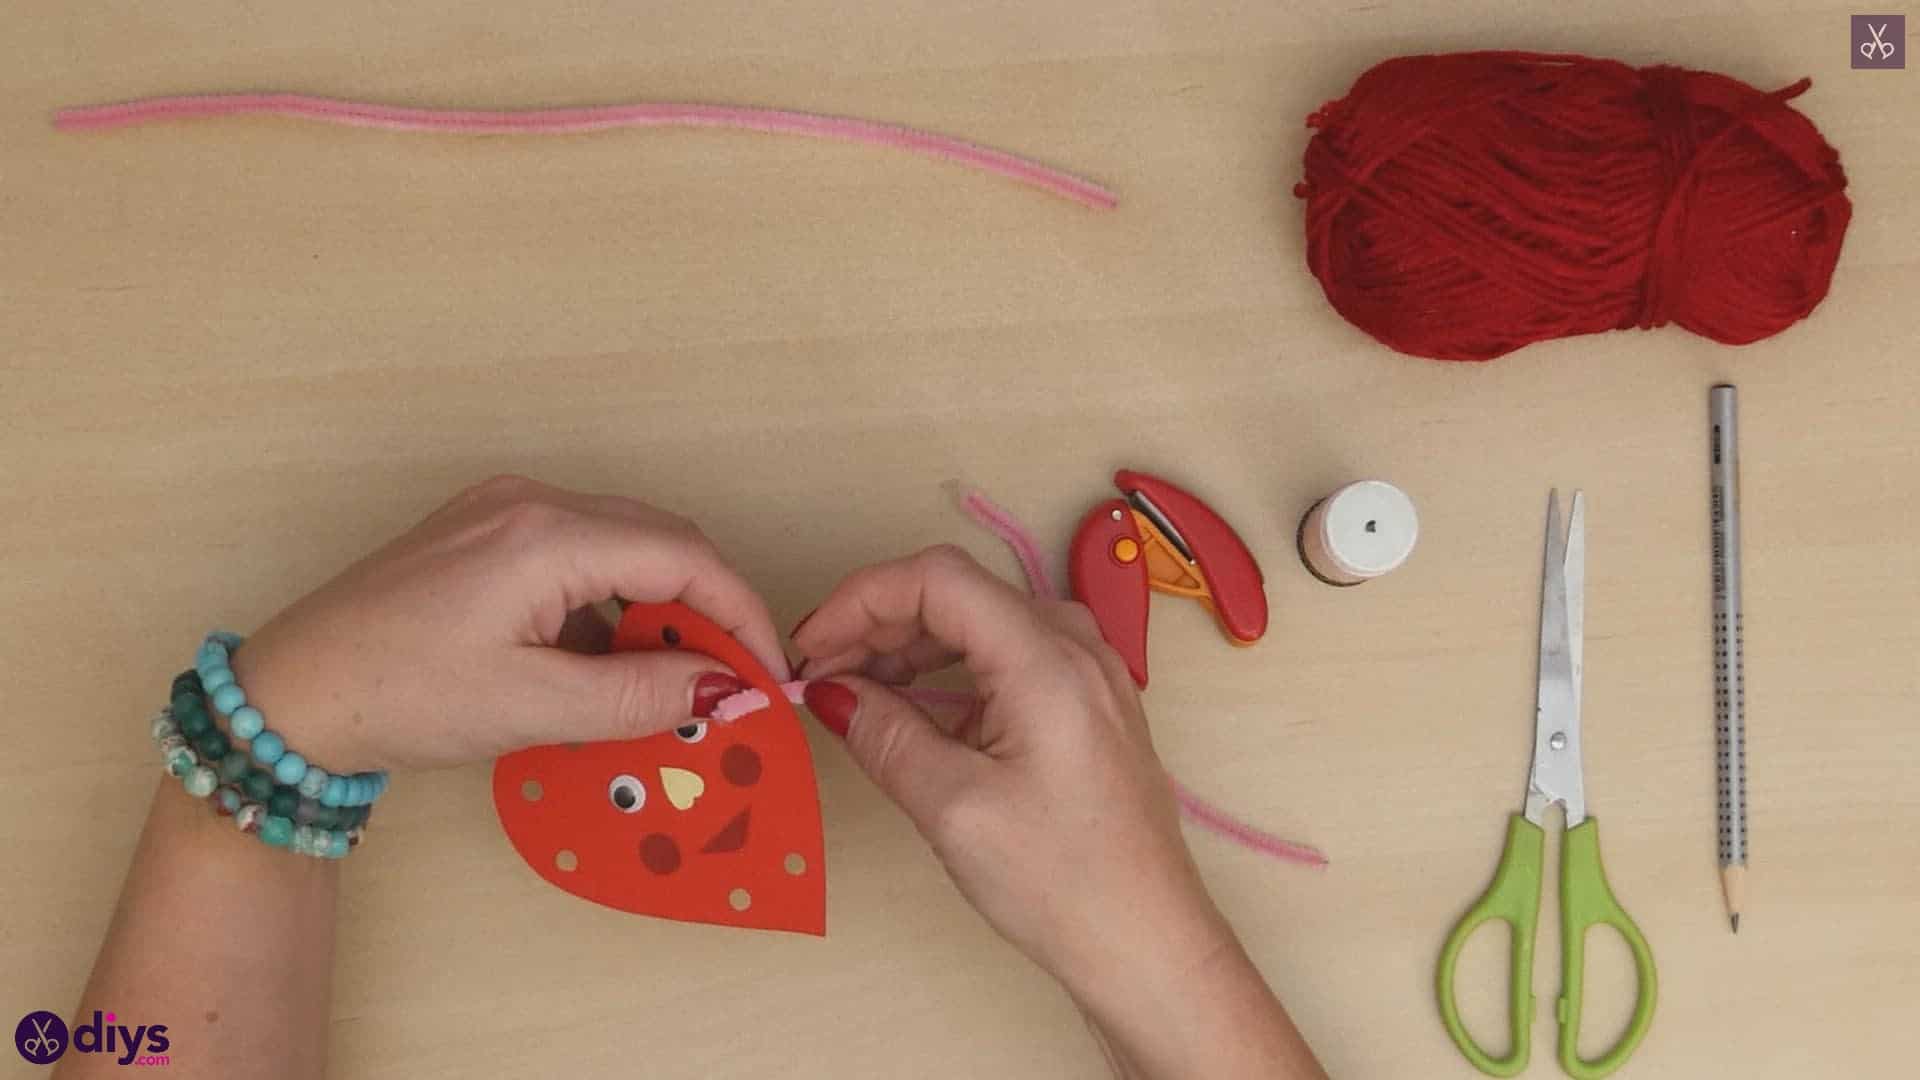
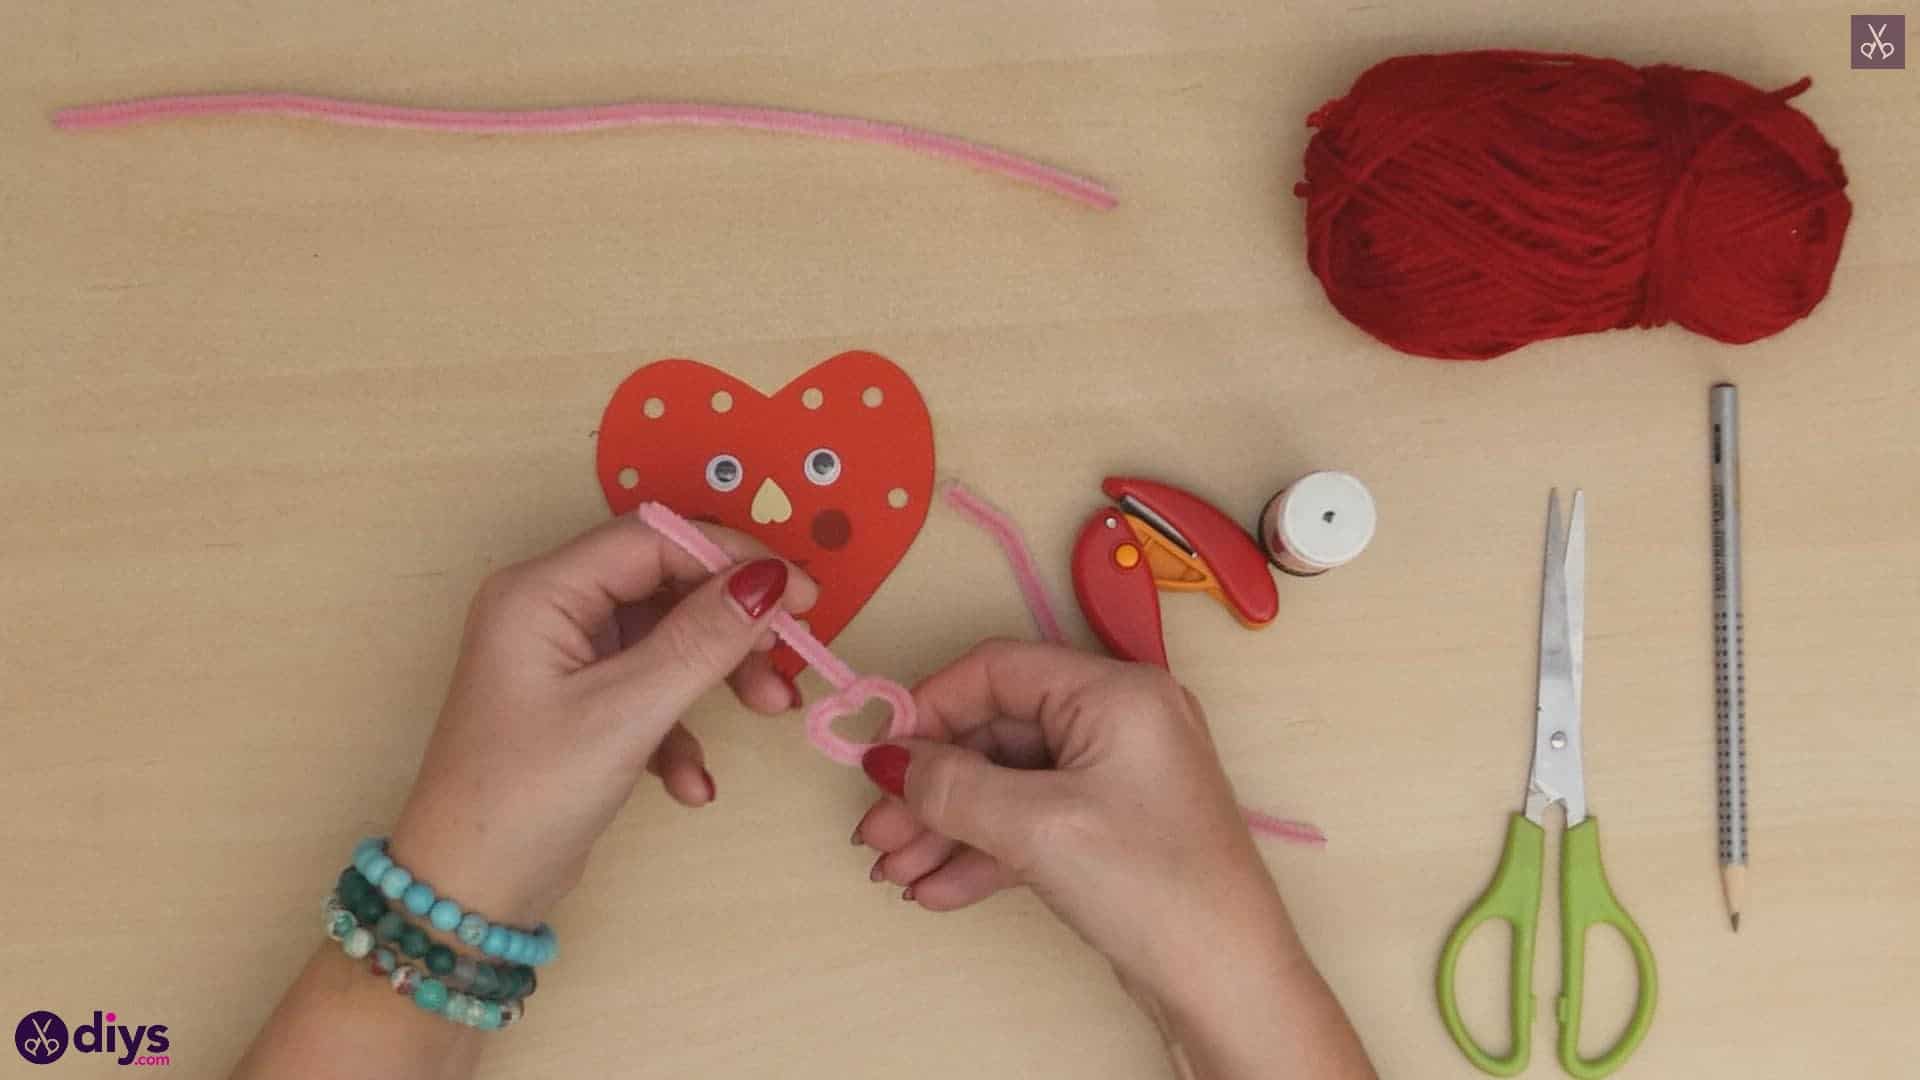
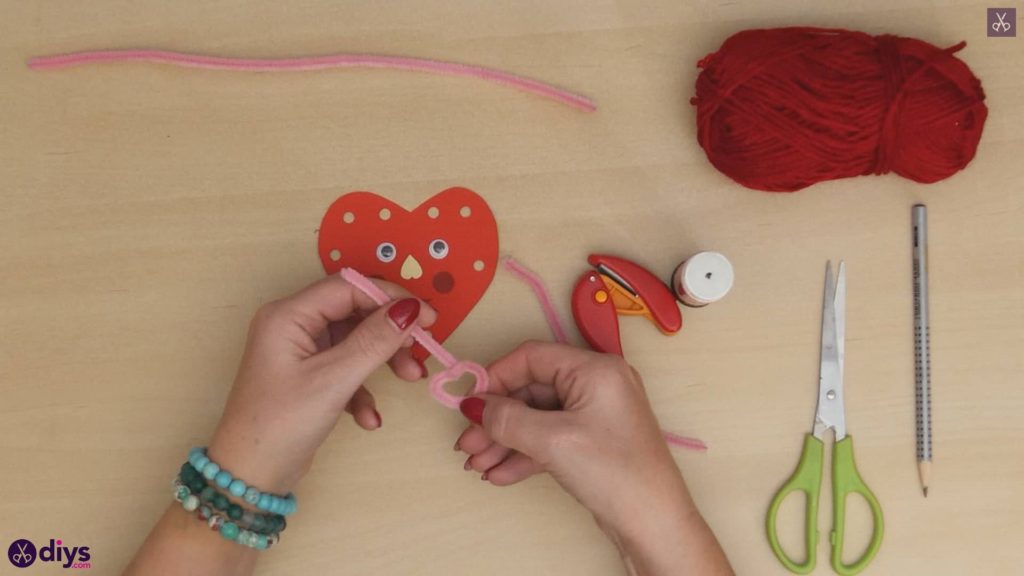
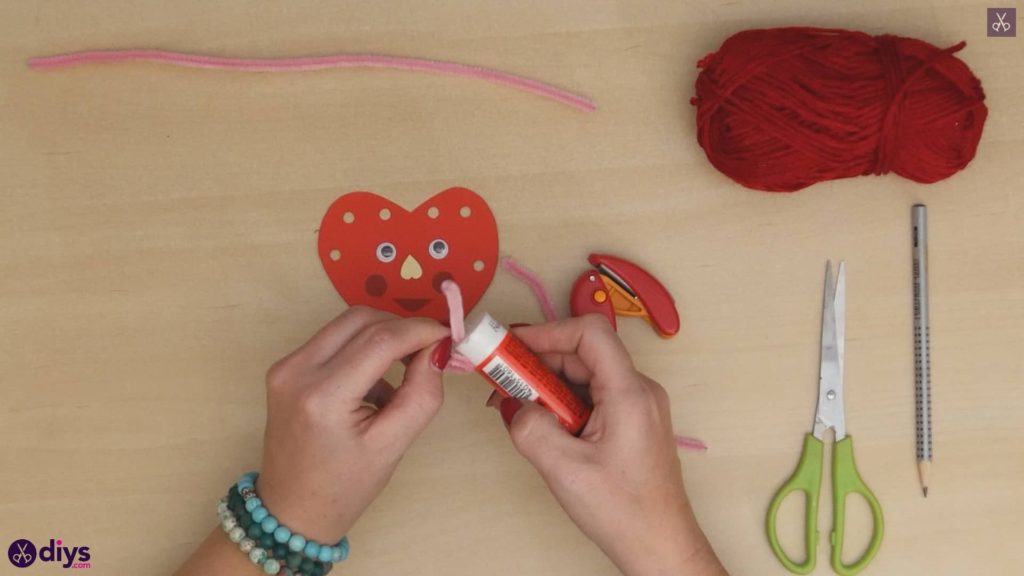
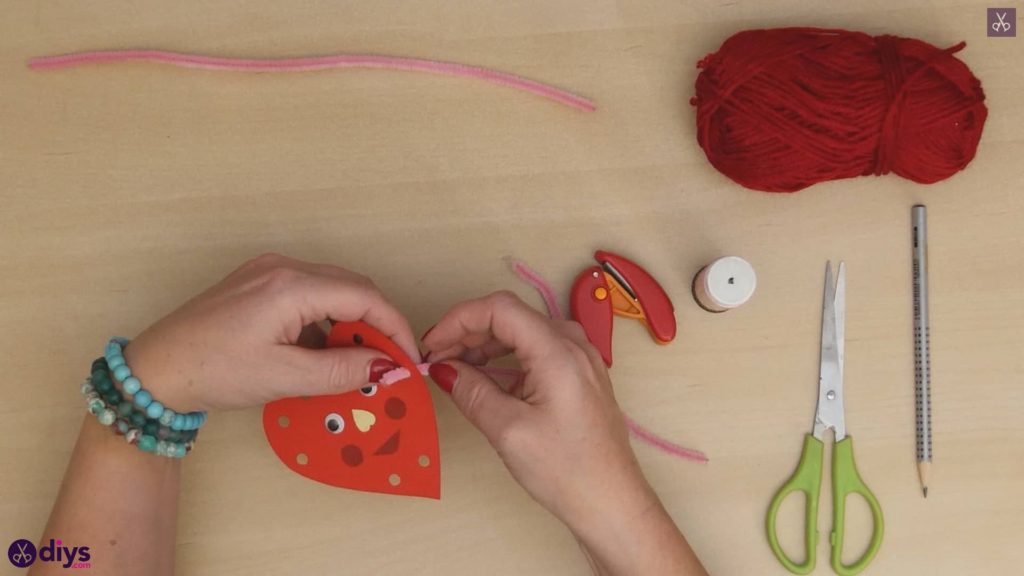
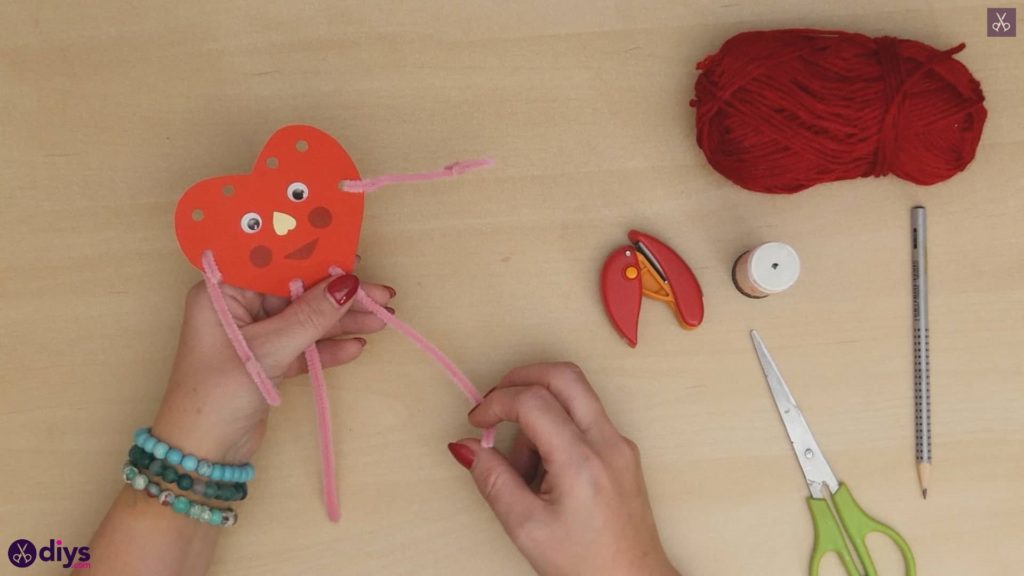
Step 8: add arms
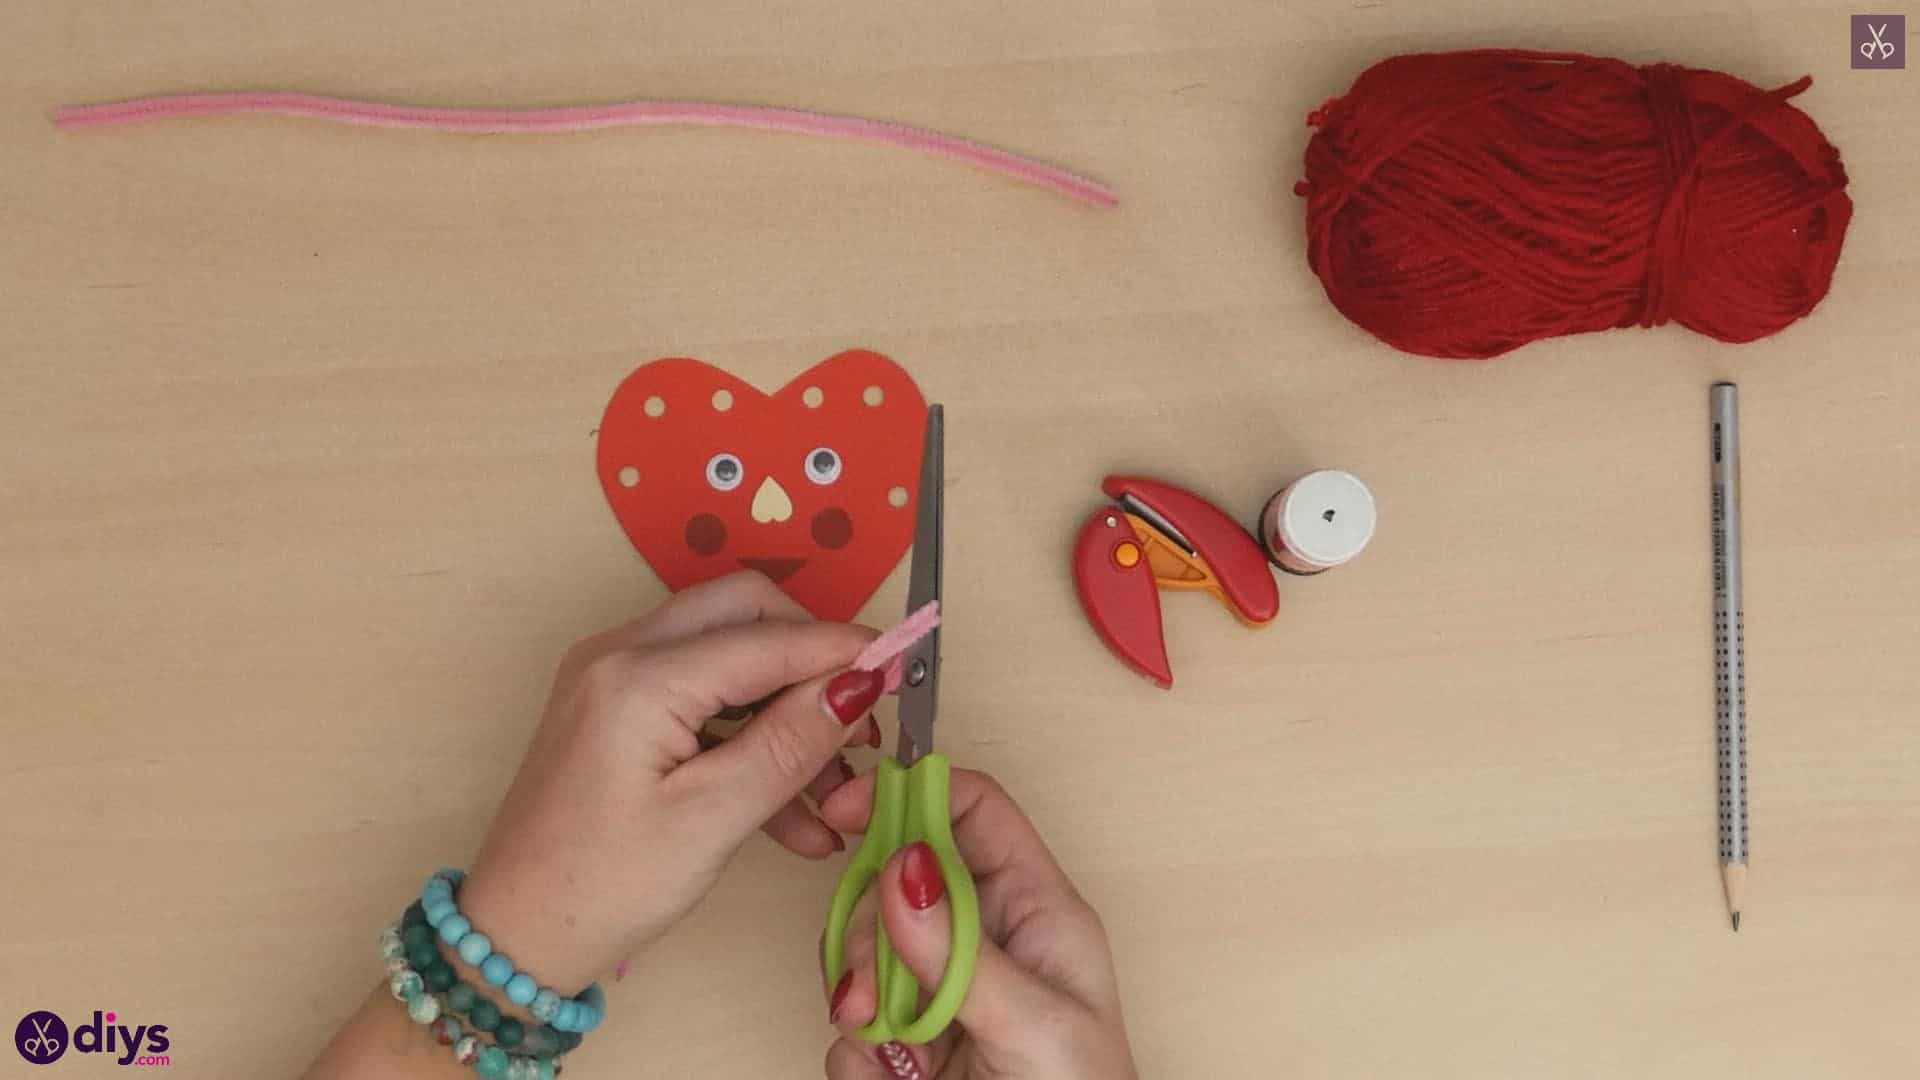
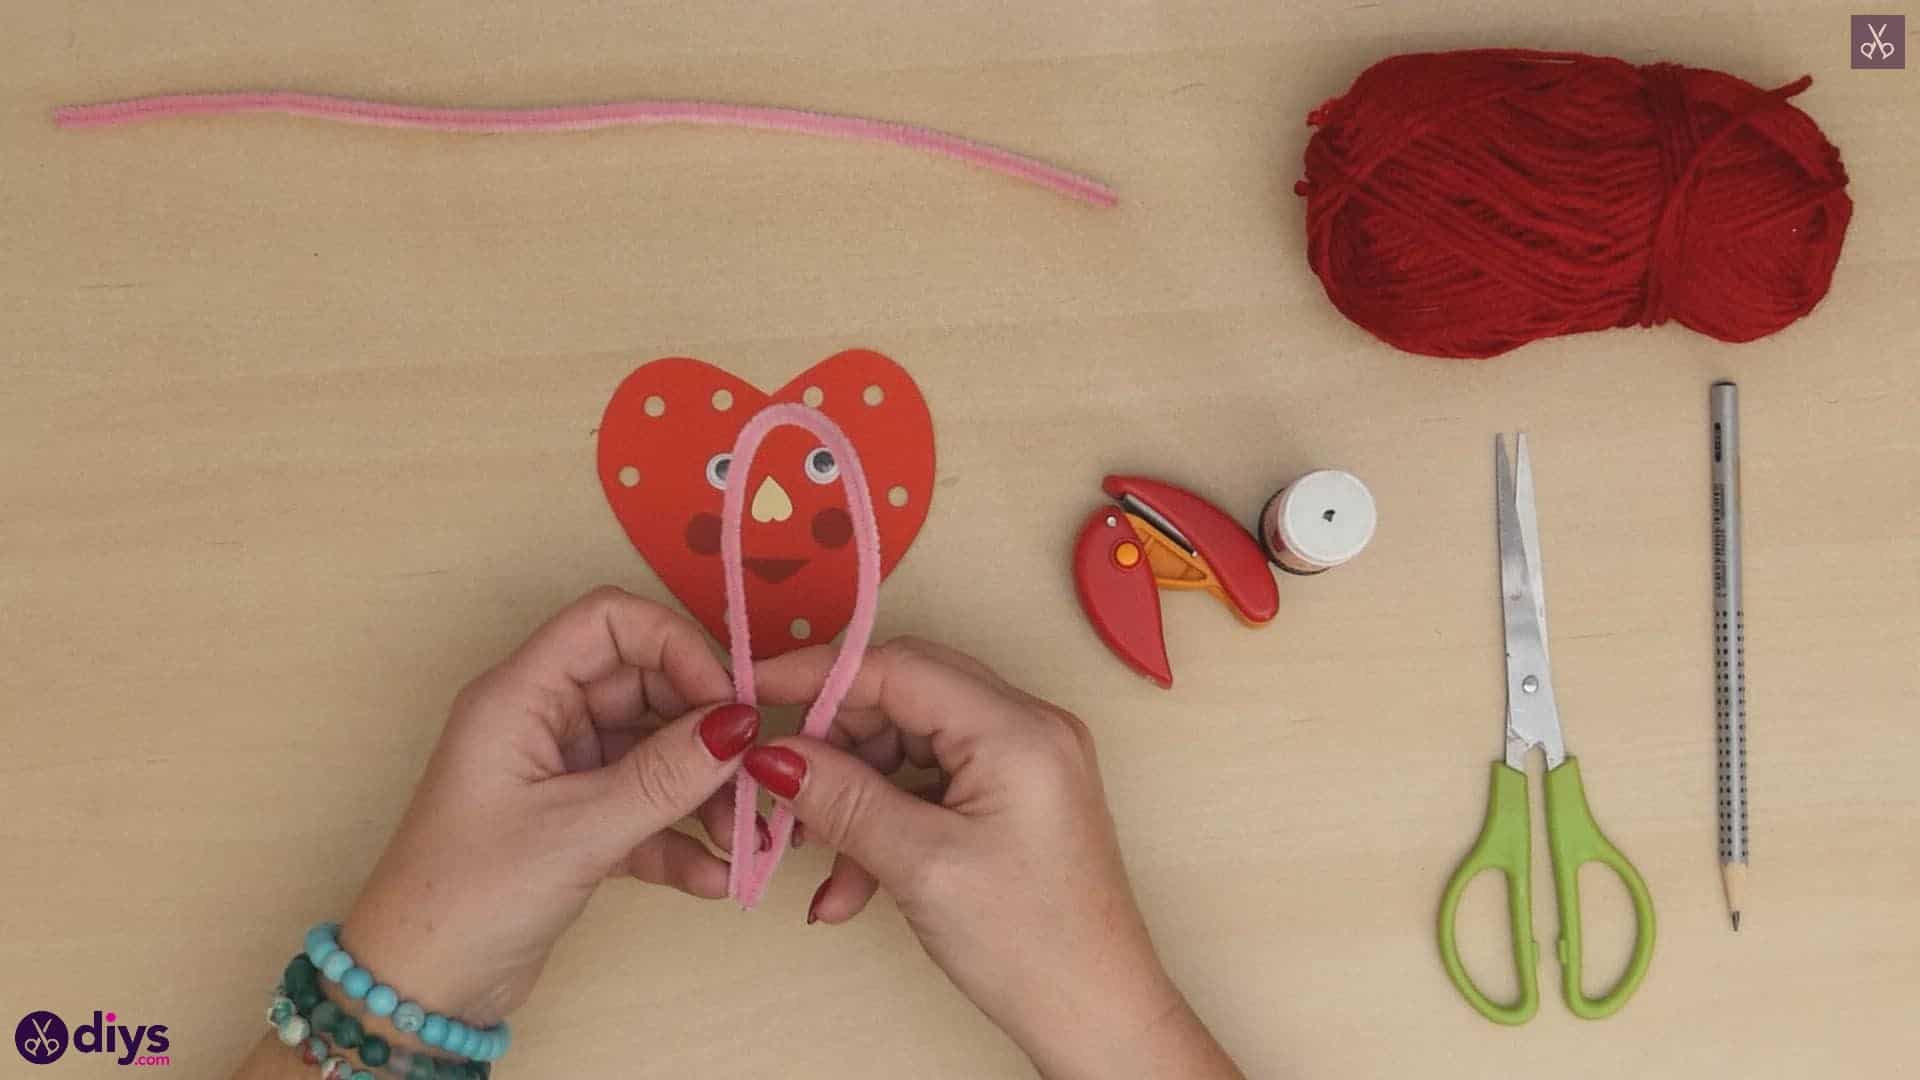
Cut one of your pink pipe cleaners in half and use each half to make an arm with a heart shaped hand for either side of your heart. Curve one end of each piece up and inward like a circle and then pinch the curved edge a little to make the pointed bottom of a heart. Then bend the arm piece to the side and pinch it down to make a second rounded top piece to match where you curved the end in. You can twist that end in place a little to keep it from unbending if you need to, or apply a little bit of glue to hold it in place. Next, bend the other free end over a little and slip it through one of the side arm holes. Apply glue to that tip and twist it around the rest of the pipe cleaner to attach the arm to the heart. Repeat this entire process once more to make and attach an arm on the other side.

Step 9: make the legs
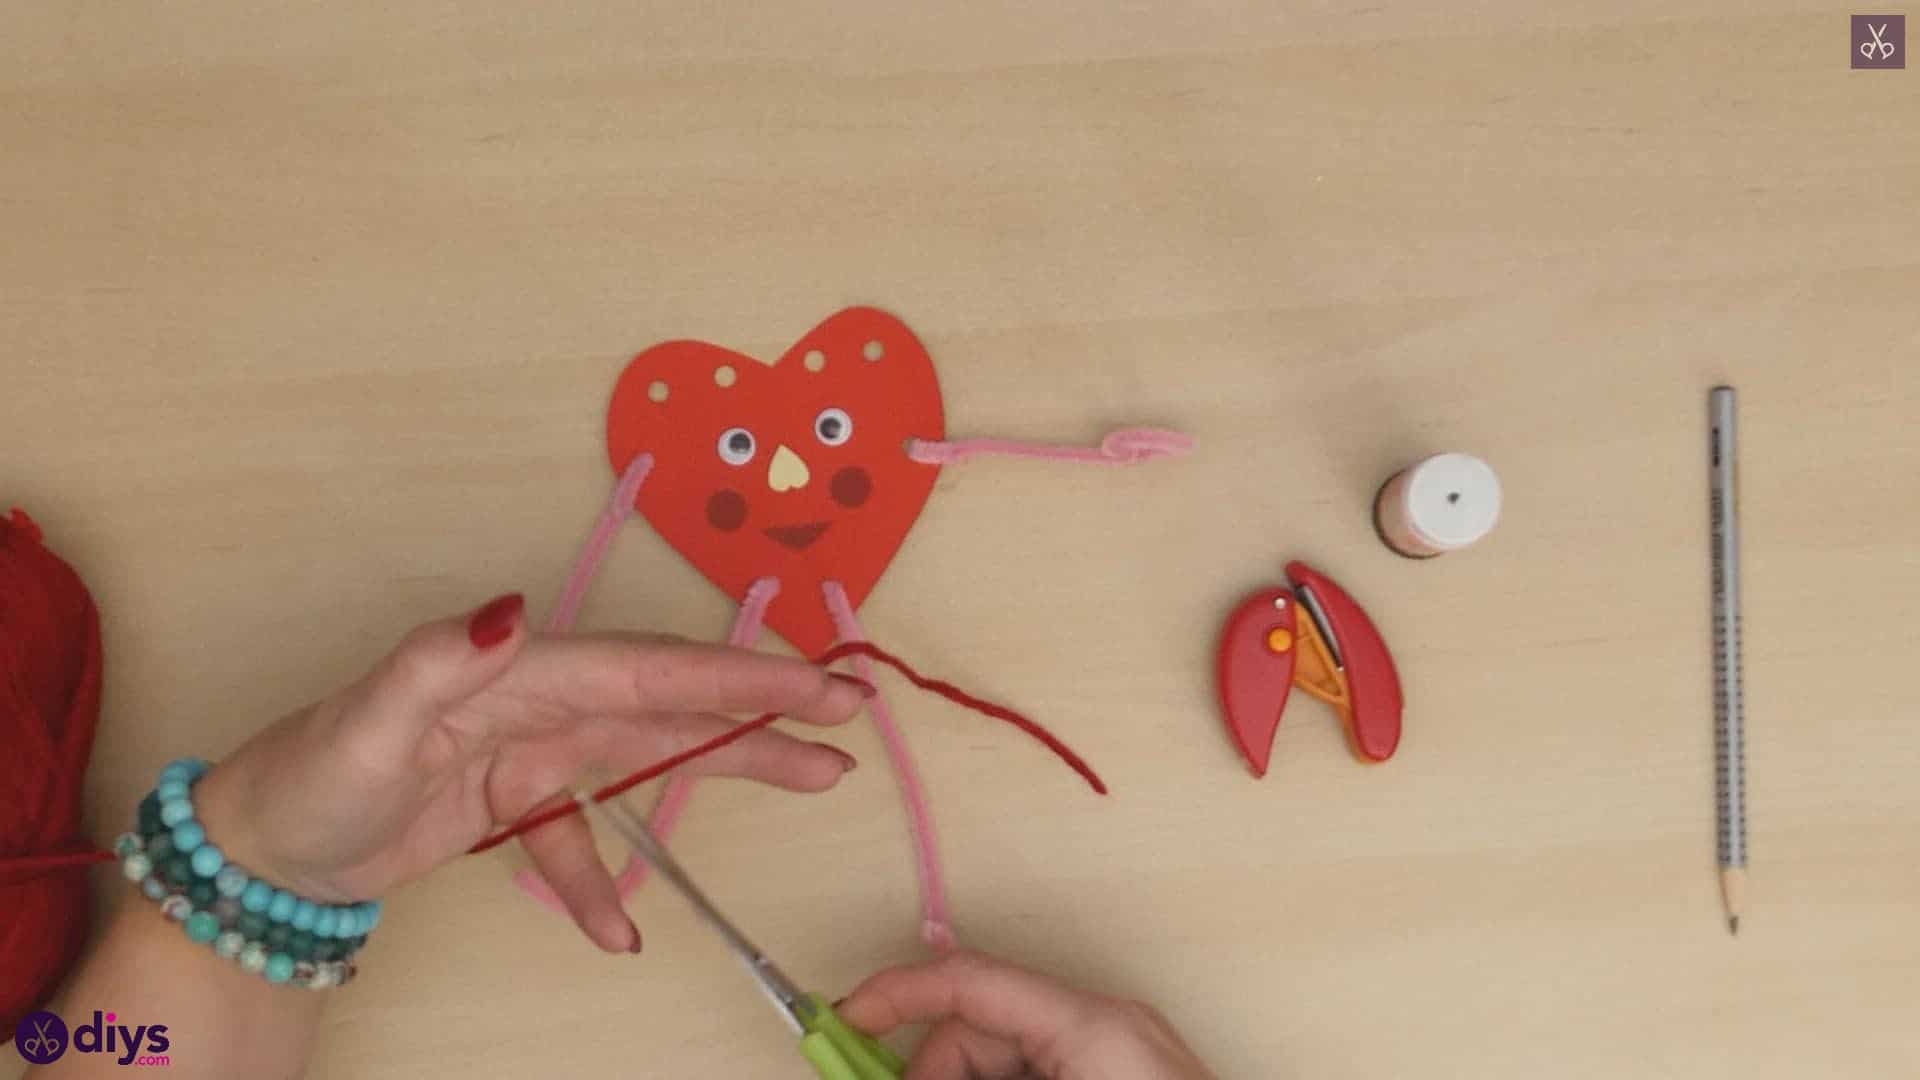
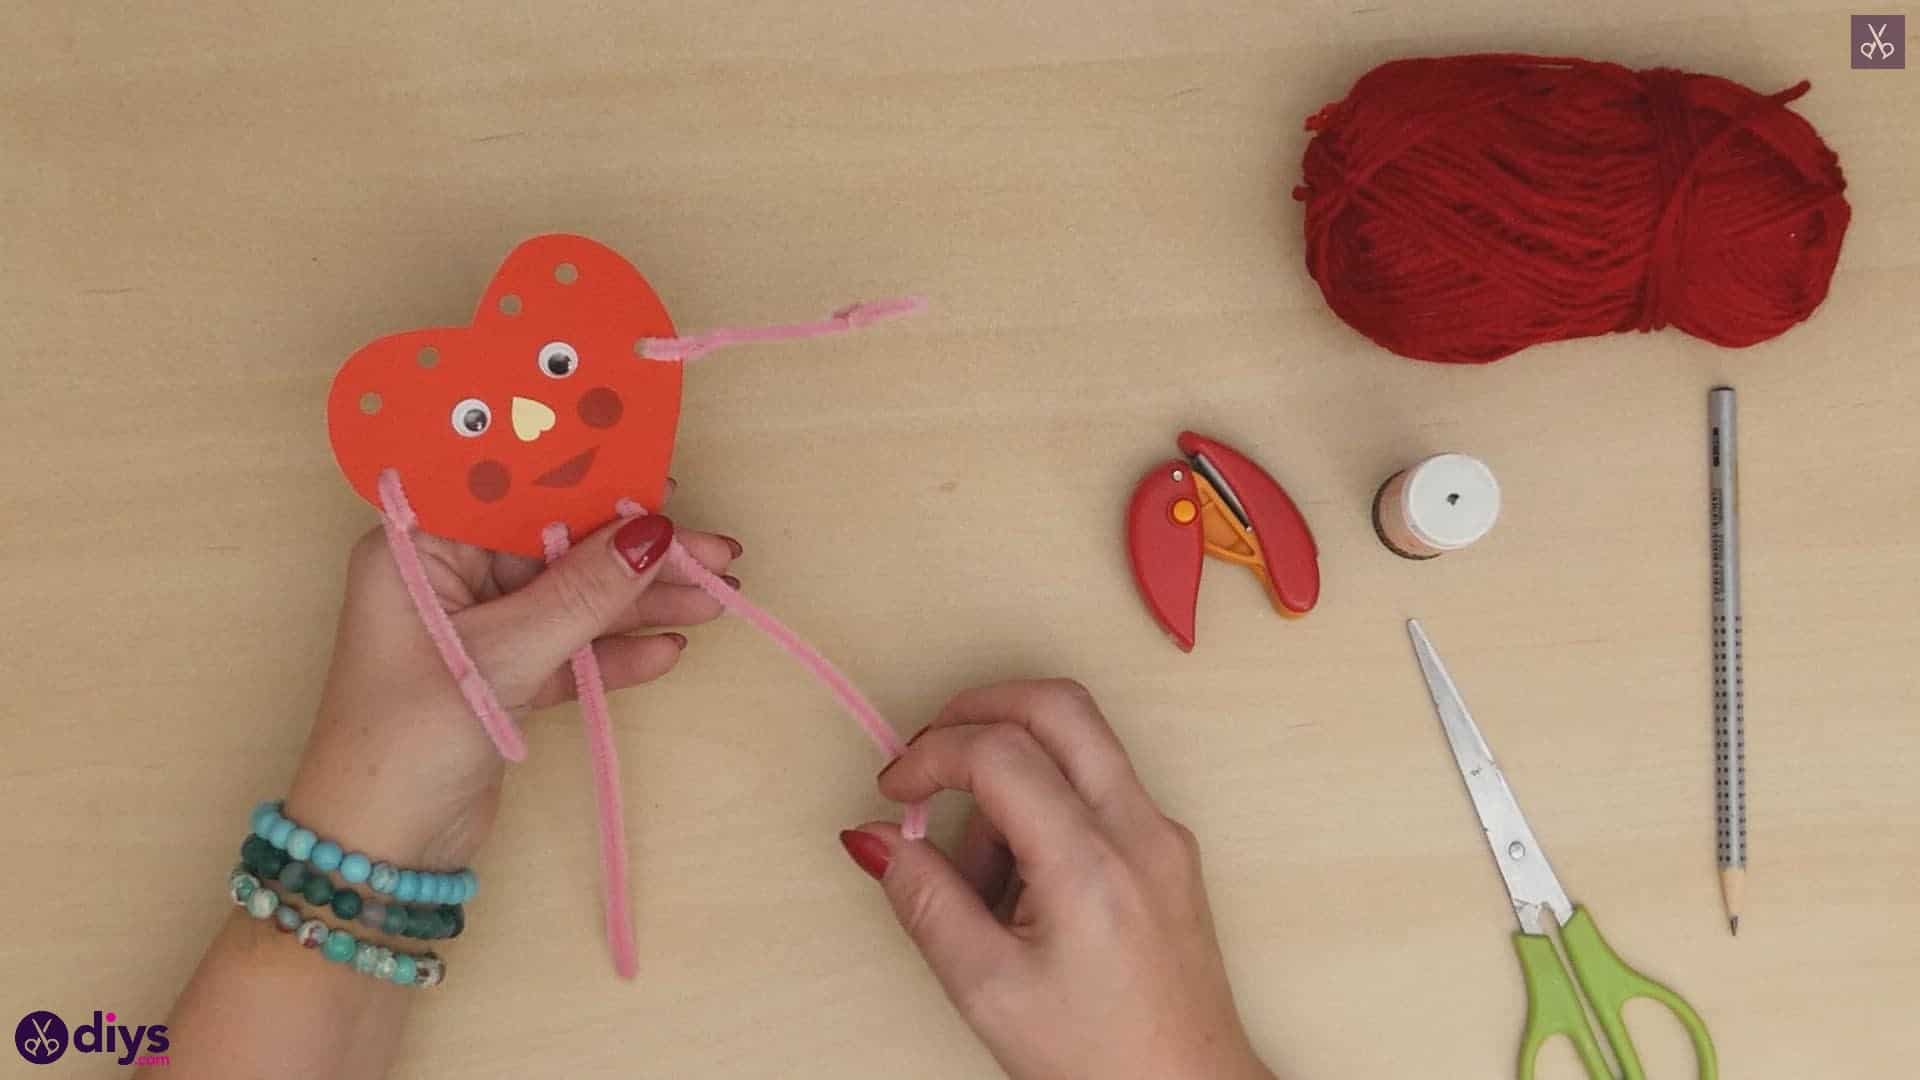
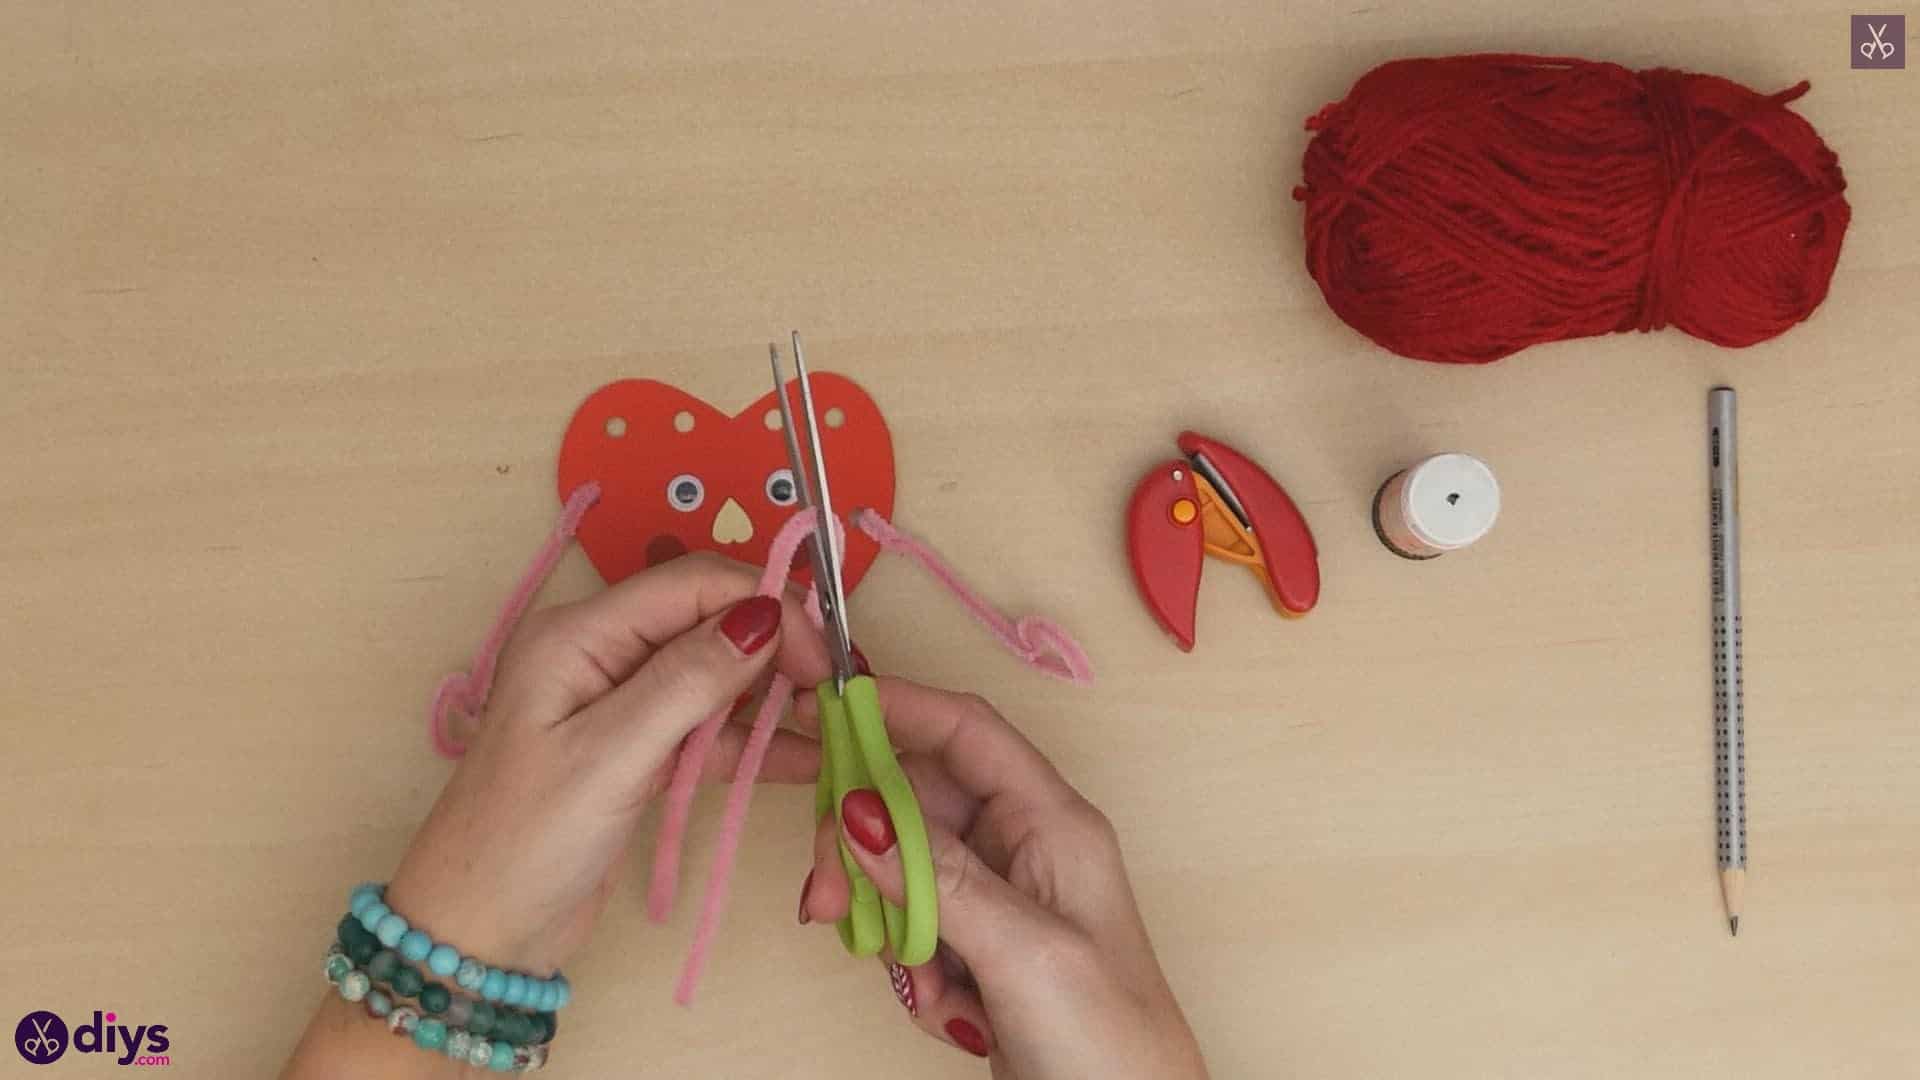
Repeat this entire pipe cleaner process once more from the beginning to make your creature two legs! This time, however, you can just bend the bottom ends upwards to make little flicked feet for your creature instead of heart shaped ones if you prefer. When I put the legs through the bottom two holes near the tip to attach them to my heart, I made sure to insert them front to back so that when I twisted the tips around the rest of each pipe cleaner, it looked a little neater because that twist sits at the back. Make and attach two legs, each one from half of your second pink pipe cleaner.

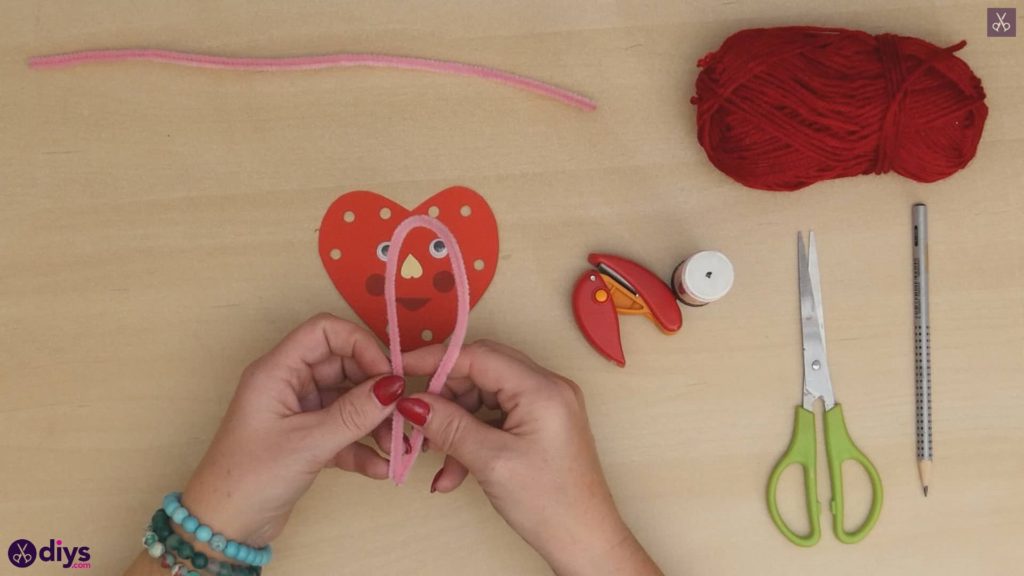
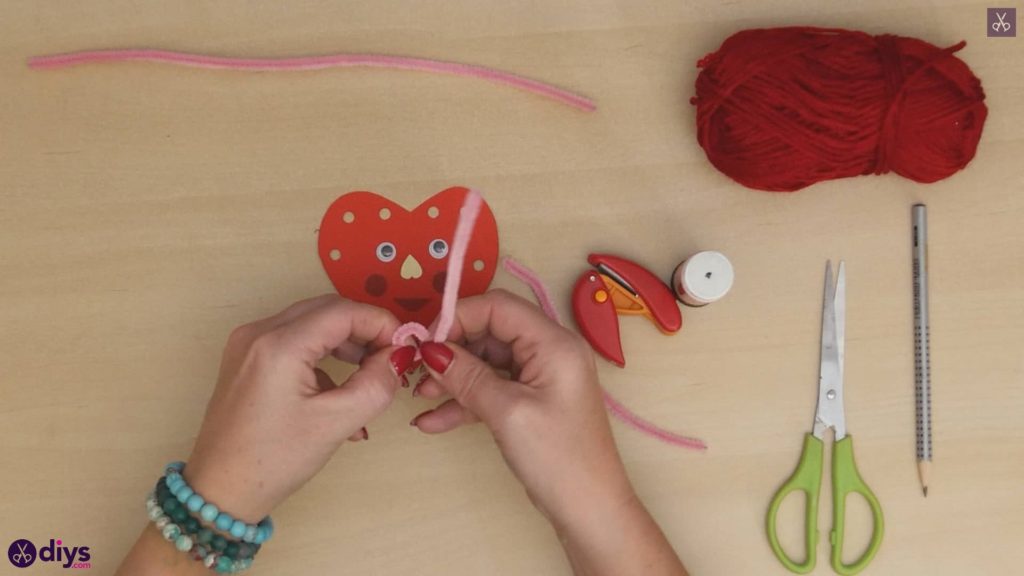
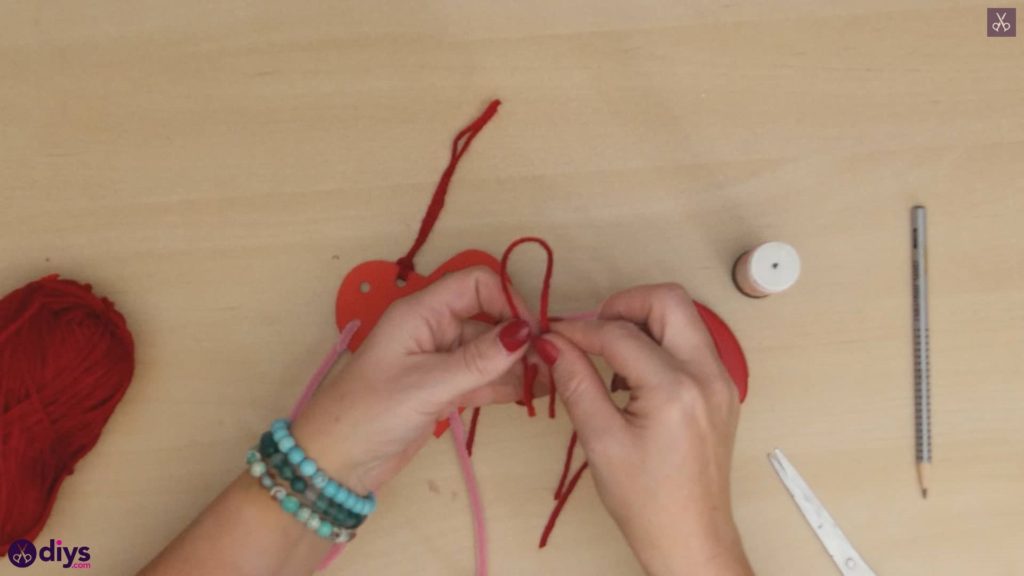
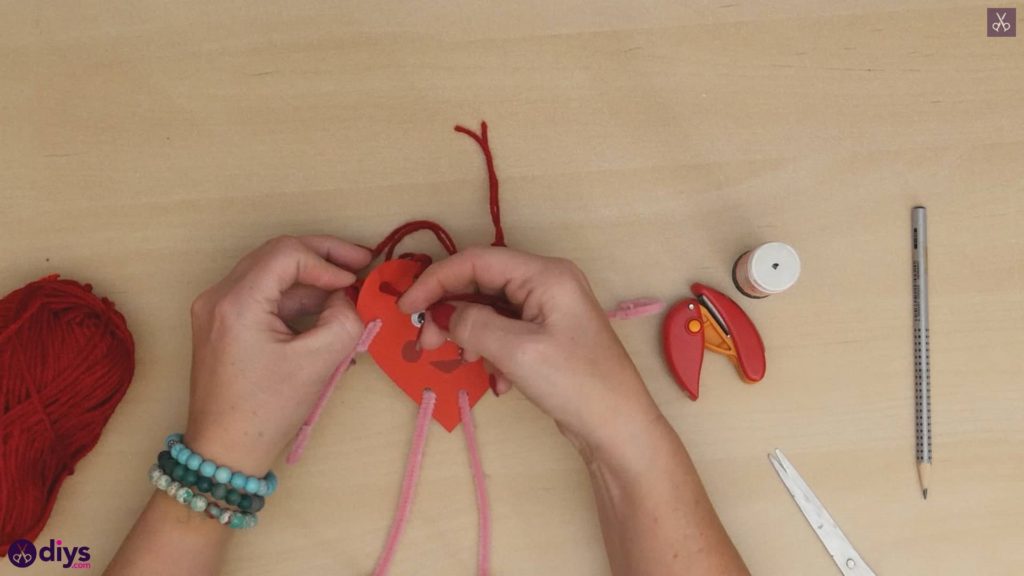
Step 10: make and add the hair
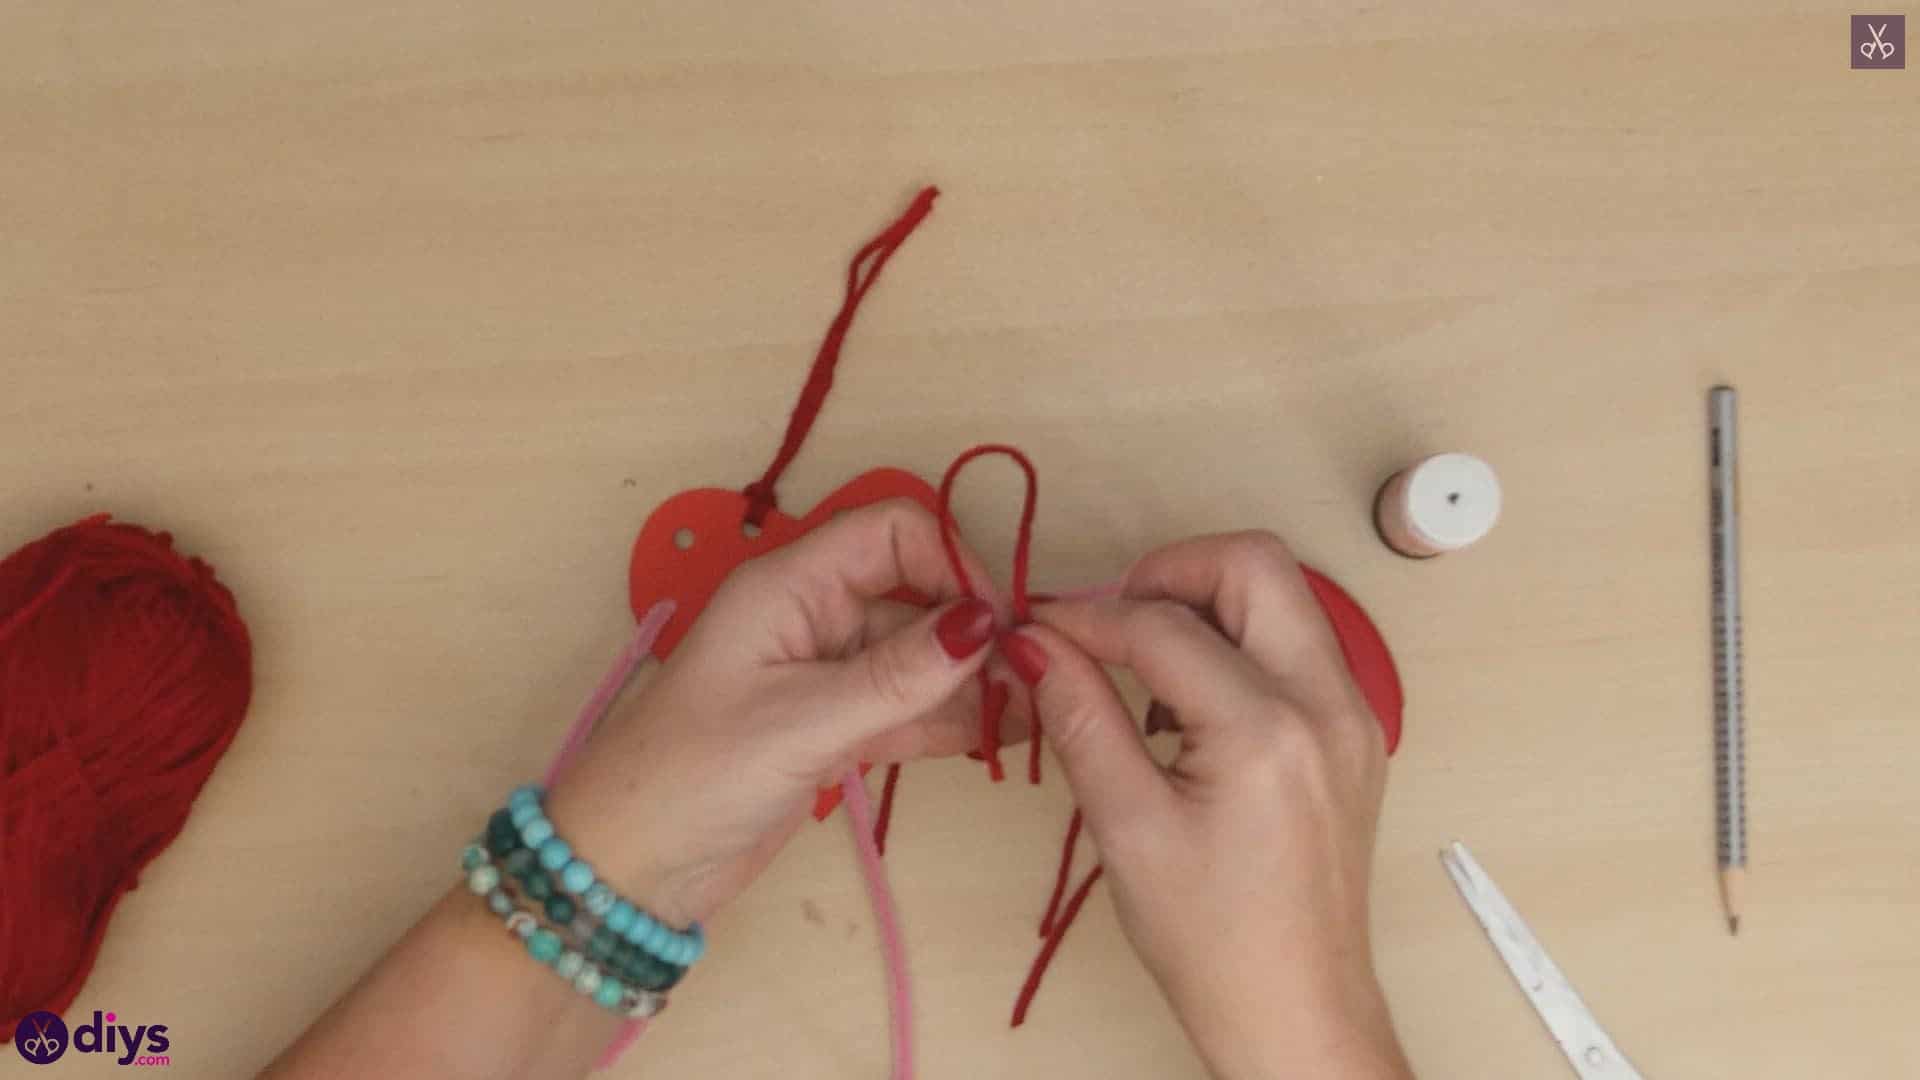
Cut four pieces of yarn from your ball of red yarn, making each one about four inches long. These will be used to make your heart creature’s hair! Take your first piece of yarn and fold it in half so the loose ends meet and the other end becomes a curved loop. Poke this whole curved loop through your first hole near the top of the heart and pill it through a little bit until you have enough room on the other side to bring the two ends, held together, up and over the top of the heart and then town through that curved loop on the other side to make a sort of slip knot. Pull the ends all the way through to slide the knot closed and make the loop tighten around the top of the heart, but don’t pull it too tight or it’ll buckle the paper your hole is in and maybe even rip the top of the heart. Repeat this process three more times with your additional three red yarn strings and heart holes.


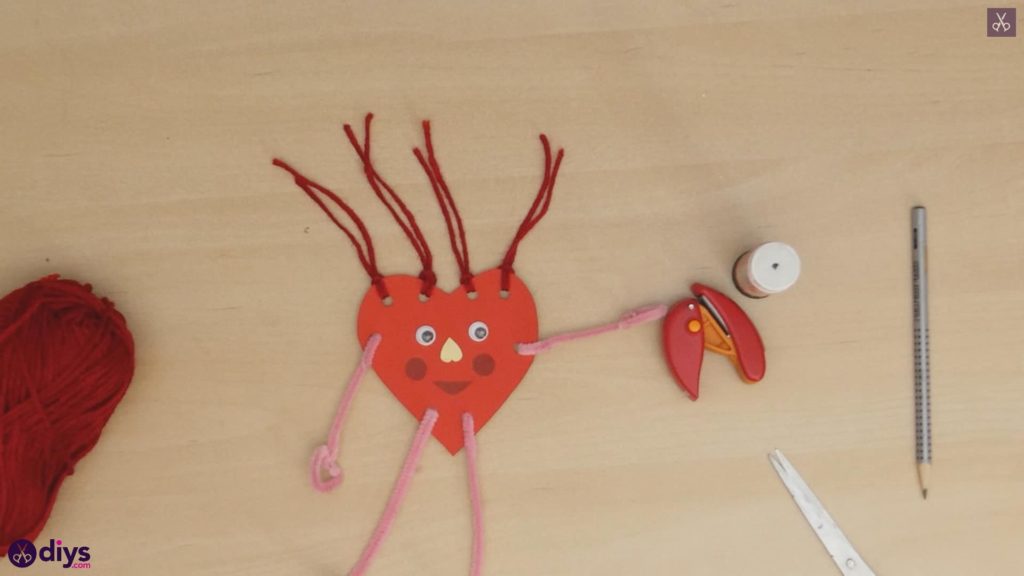
You’ve officially made yourself a little heart creature that’s perfect for hanging on the fridge or brightening someone’s day with on Valentine’s Day! Just in case you’d like to try this project out for yourself, here’s a fantastic tutorial video to help you!