DIY Ice Cream Popsicles
Updated on May 5, 2021


In the heat of the Summer you definitely don’t want to be without your cool tropical drinks, slushies, and in this case, ice cream. Maybe it will take quite a while to actually make ice cream itself, but for sure you can make your own ice cream popsicles. You can add a variety of different ingredients to suit your taste.


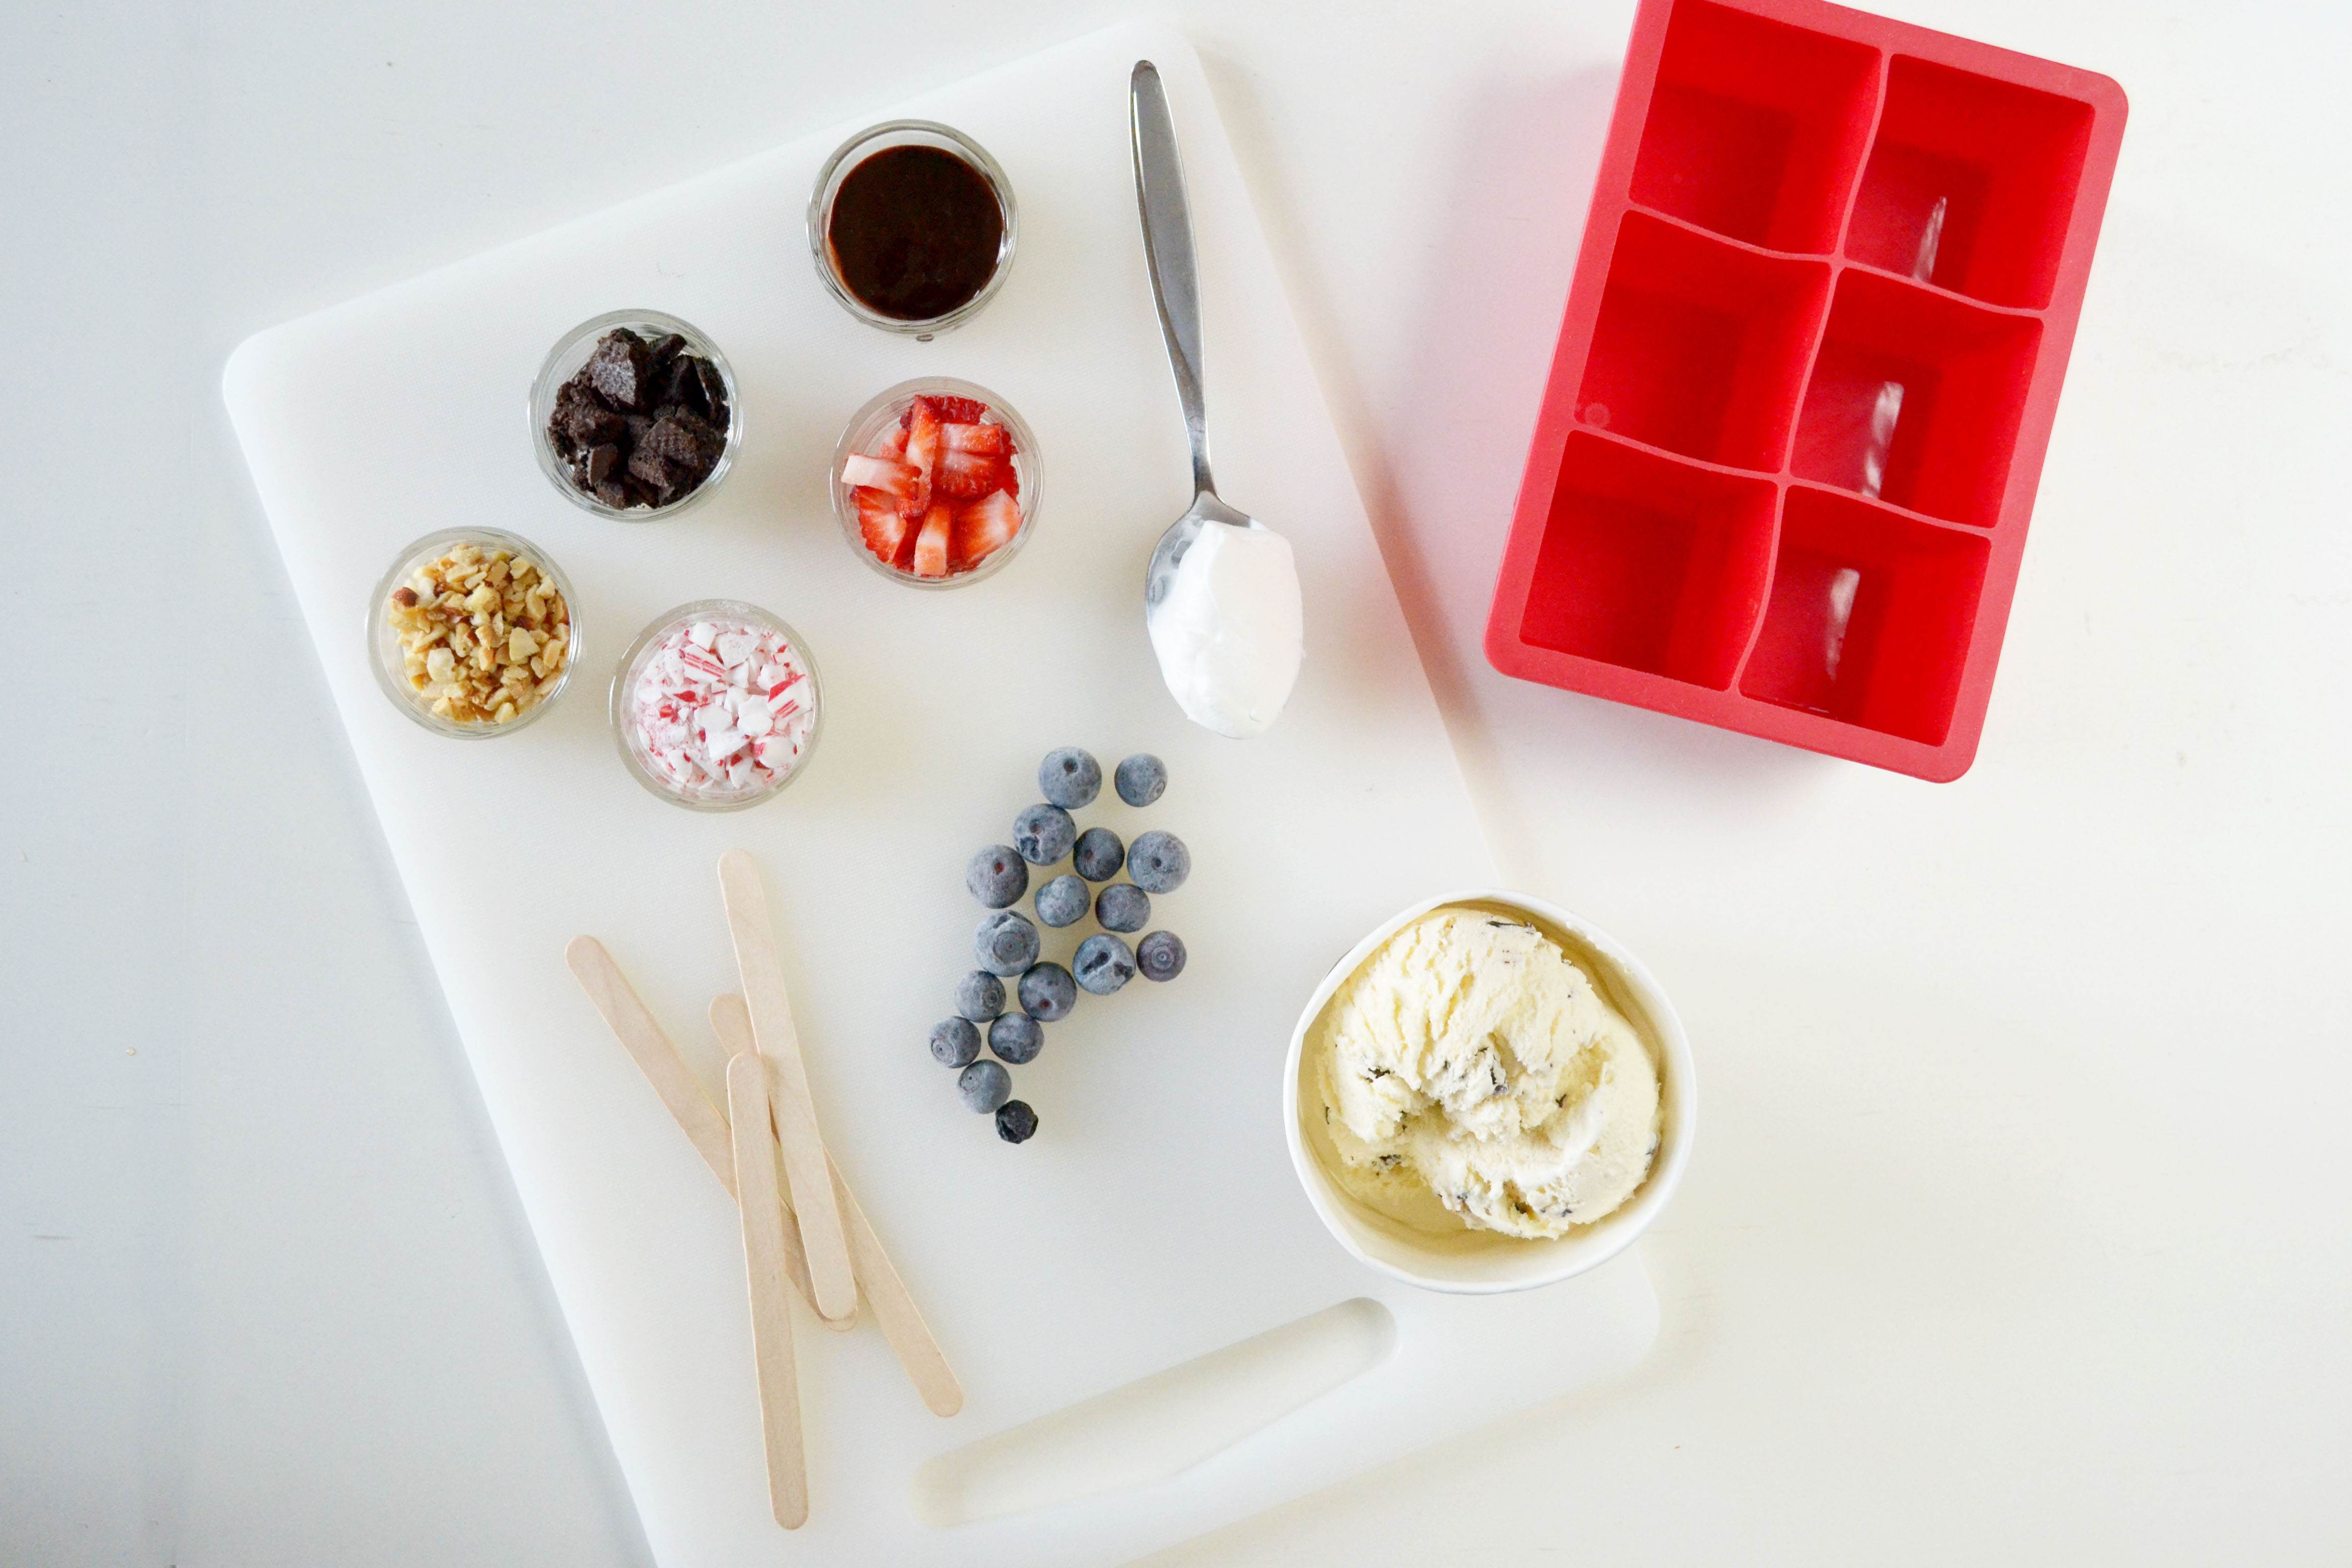
For this DIY, you’ll need some ready-made ice cream, any of your favorite toppings, popsicle sticks, and a silicone ice cube tray. This tray is a bit larger than the traditional ice cube tray, and it’s malleable, so it makes removing the popsicles much easier than a hard or rigid tray. These trays are usually sold in craft stores, where the candy molds are located.
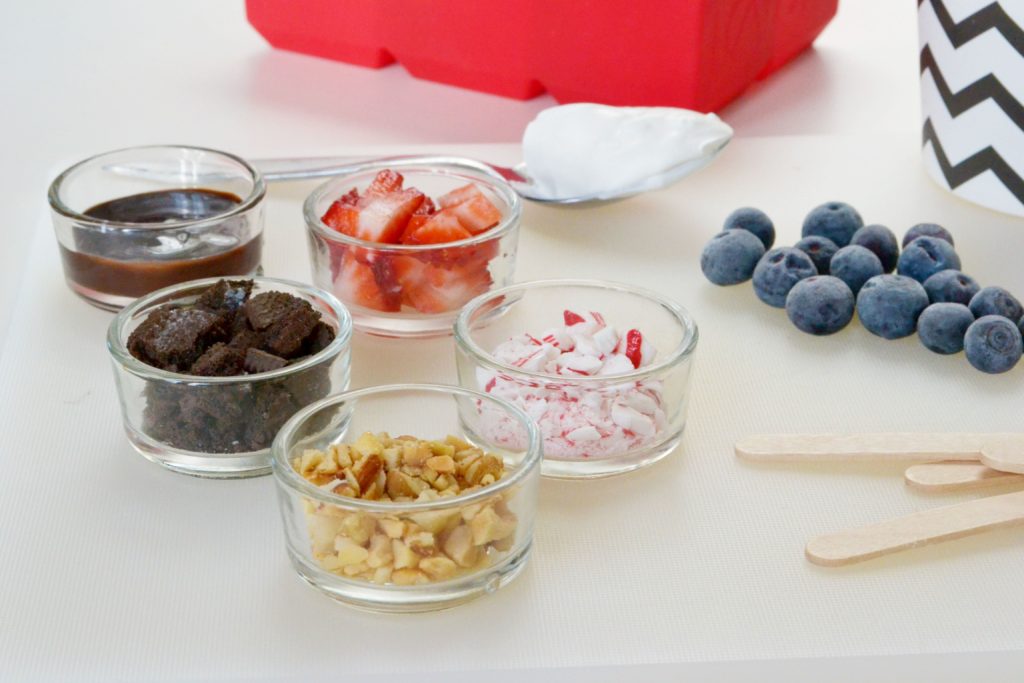
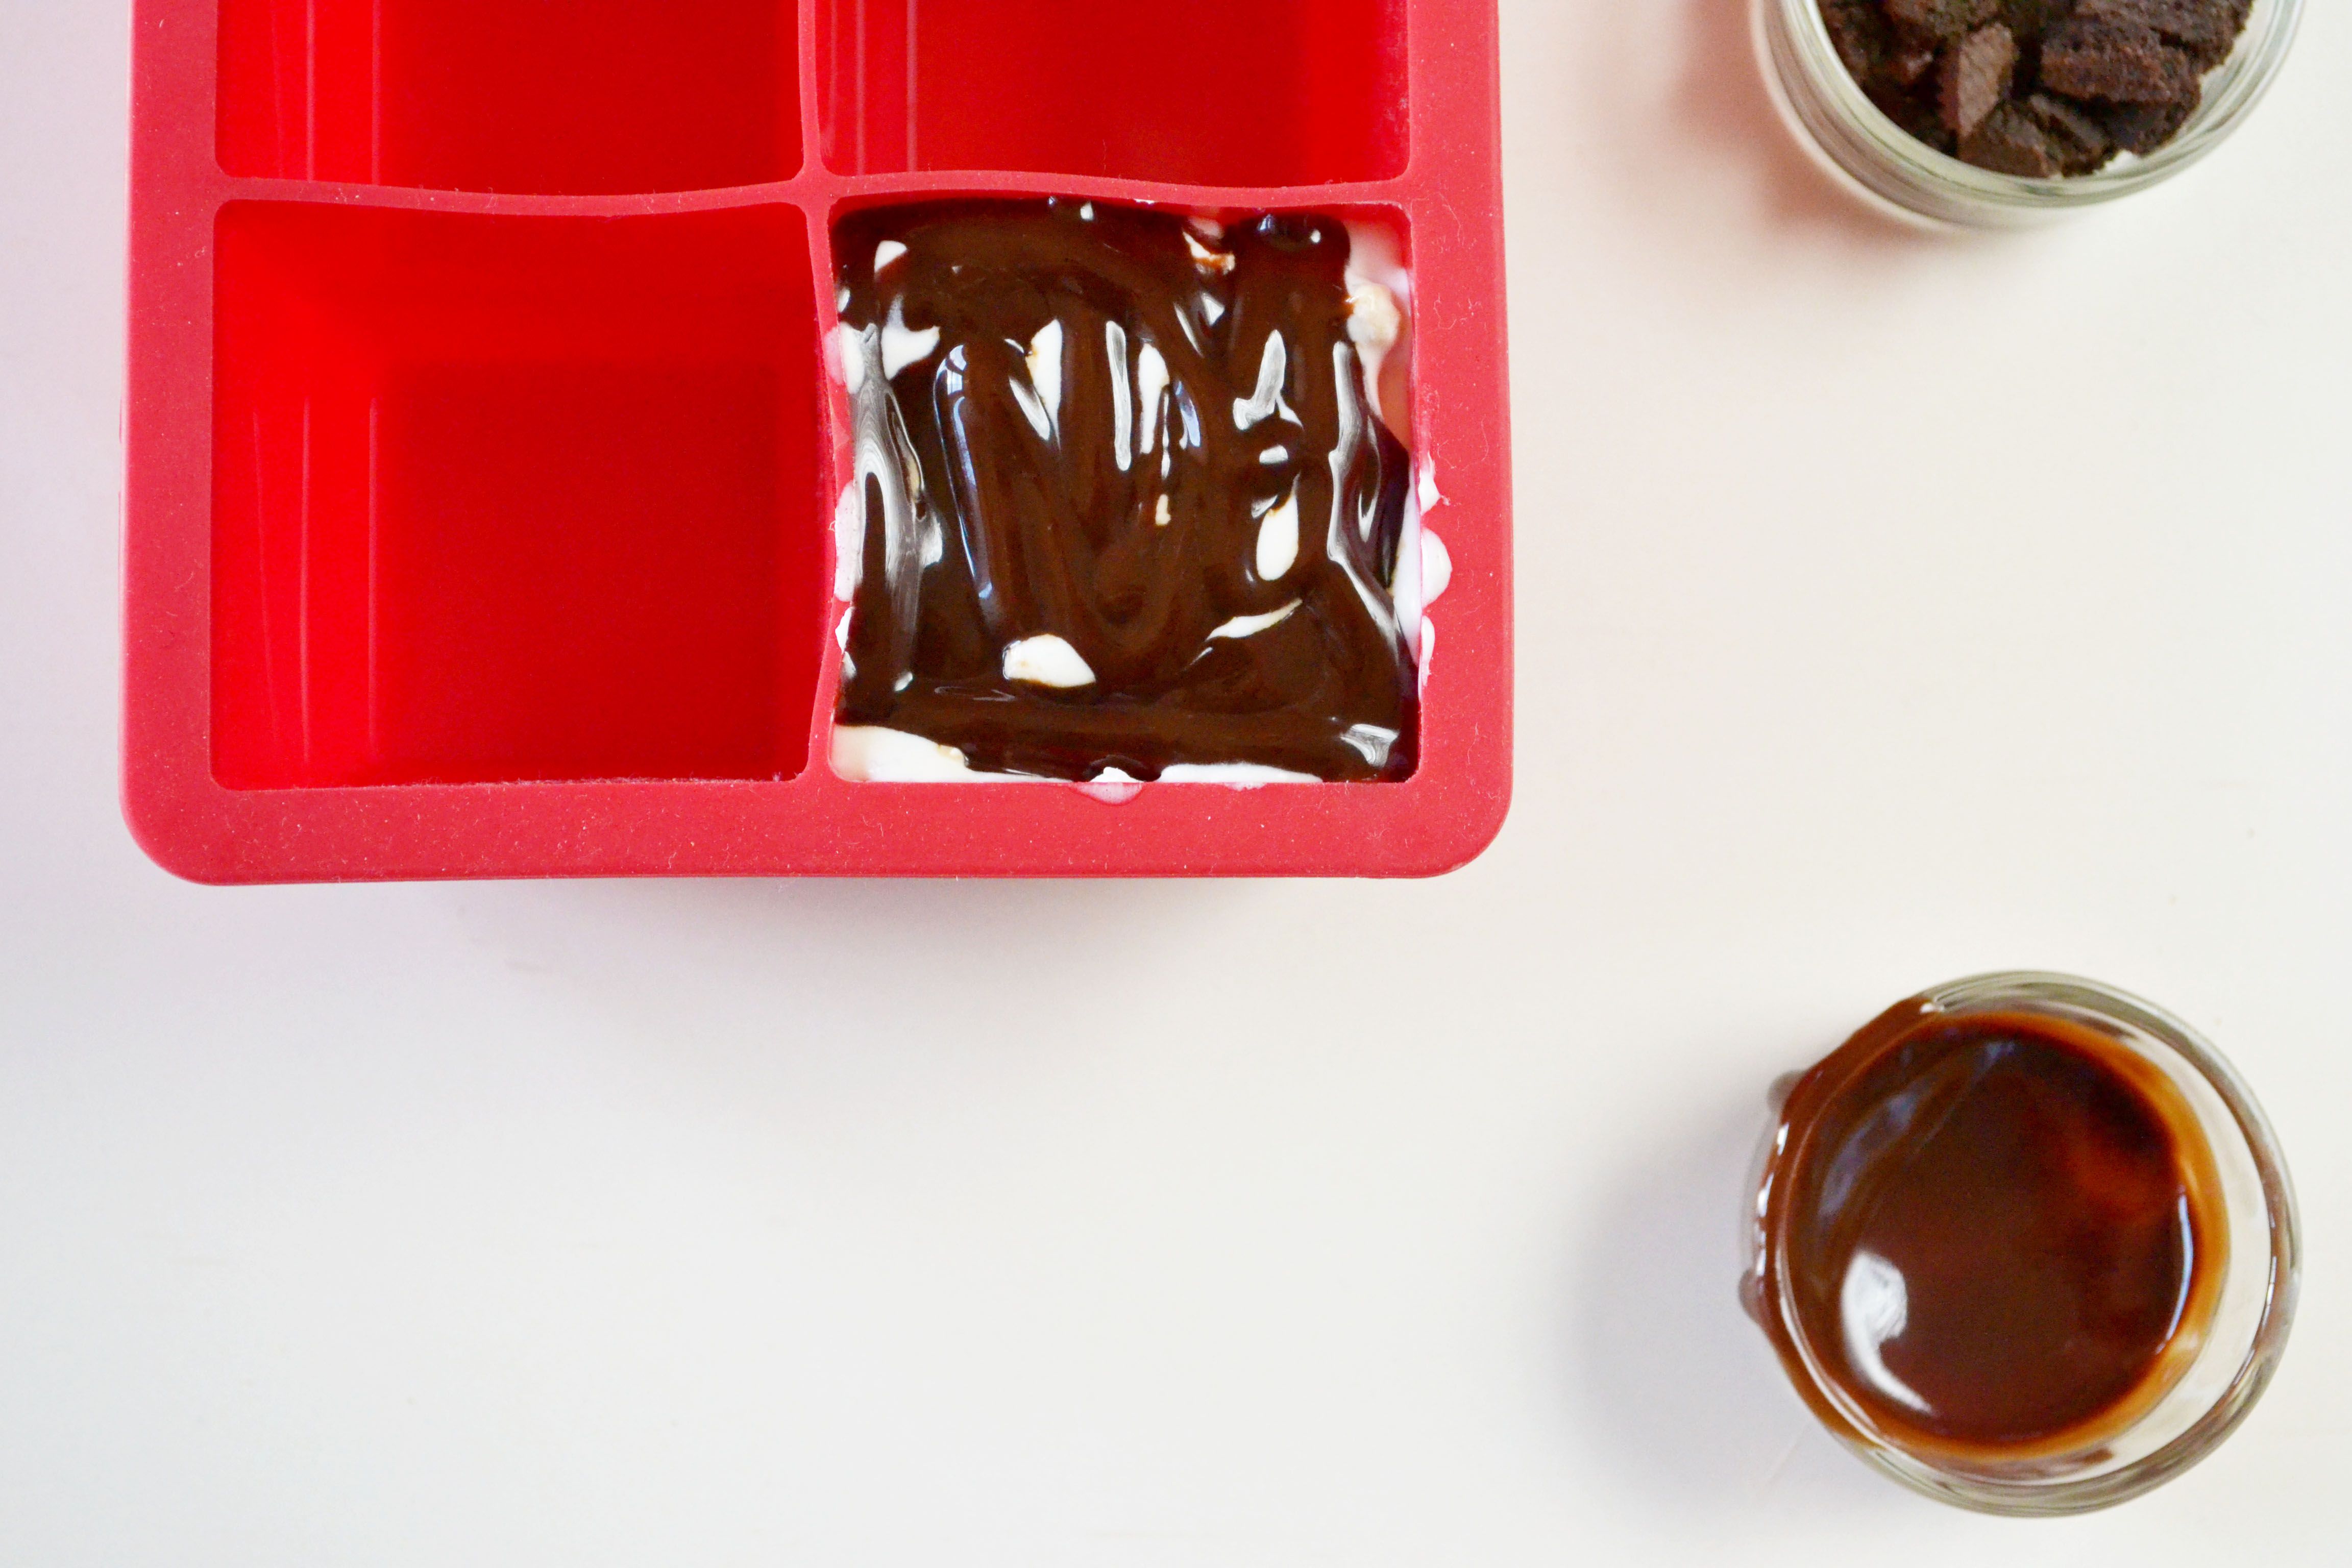
You can use all different kinds of toppings for this DIY. Some of my favorites to use are chocolate syrup, chopped nuts, strawberries, blueberries, peppermint crumbles, and crushed Oreo cookies. Sounds good, right? The great thing about this food craft is that you can create many different popsicle flavors with your own unique ingredients.
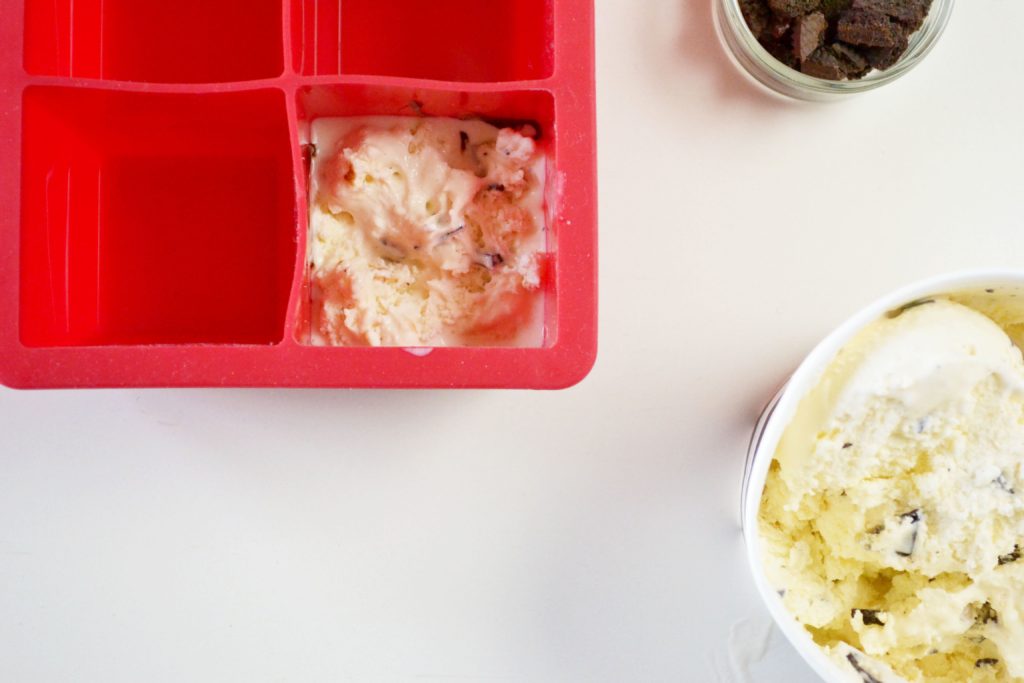
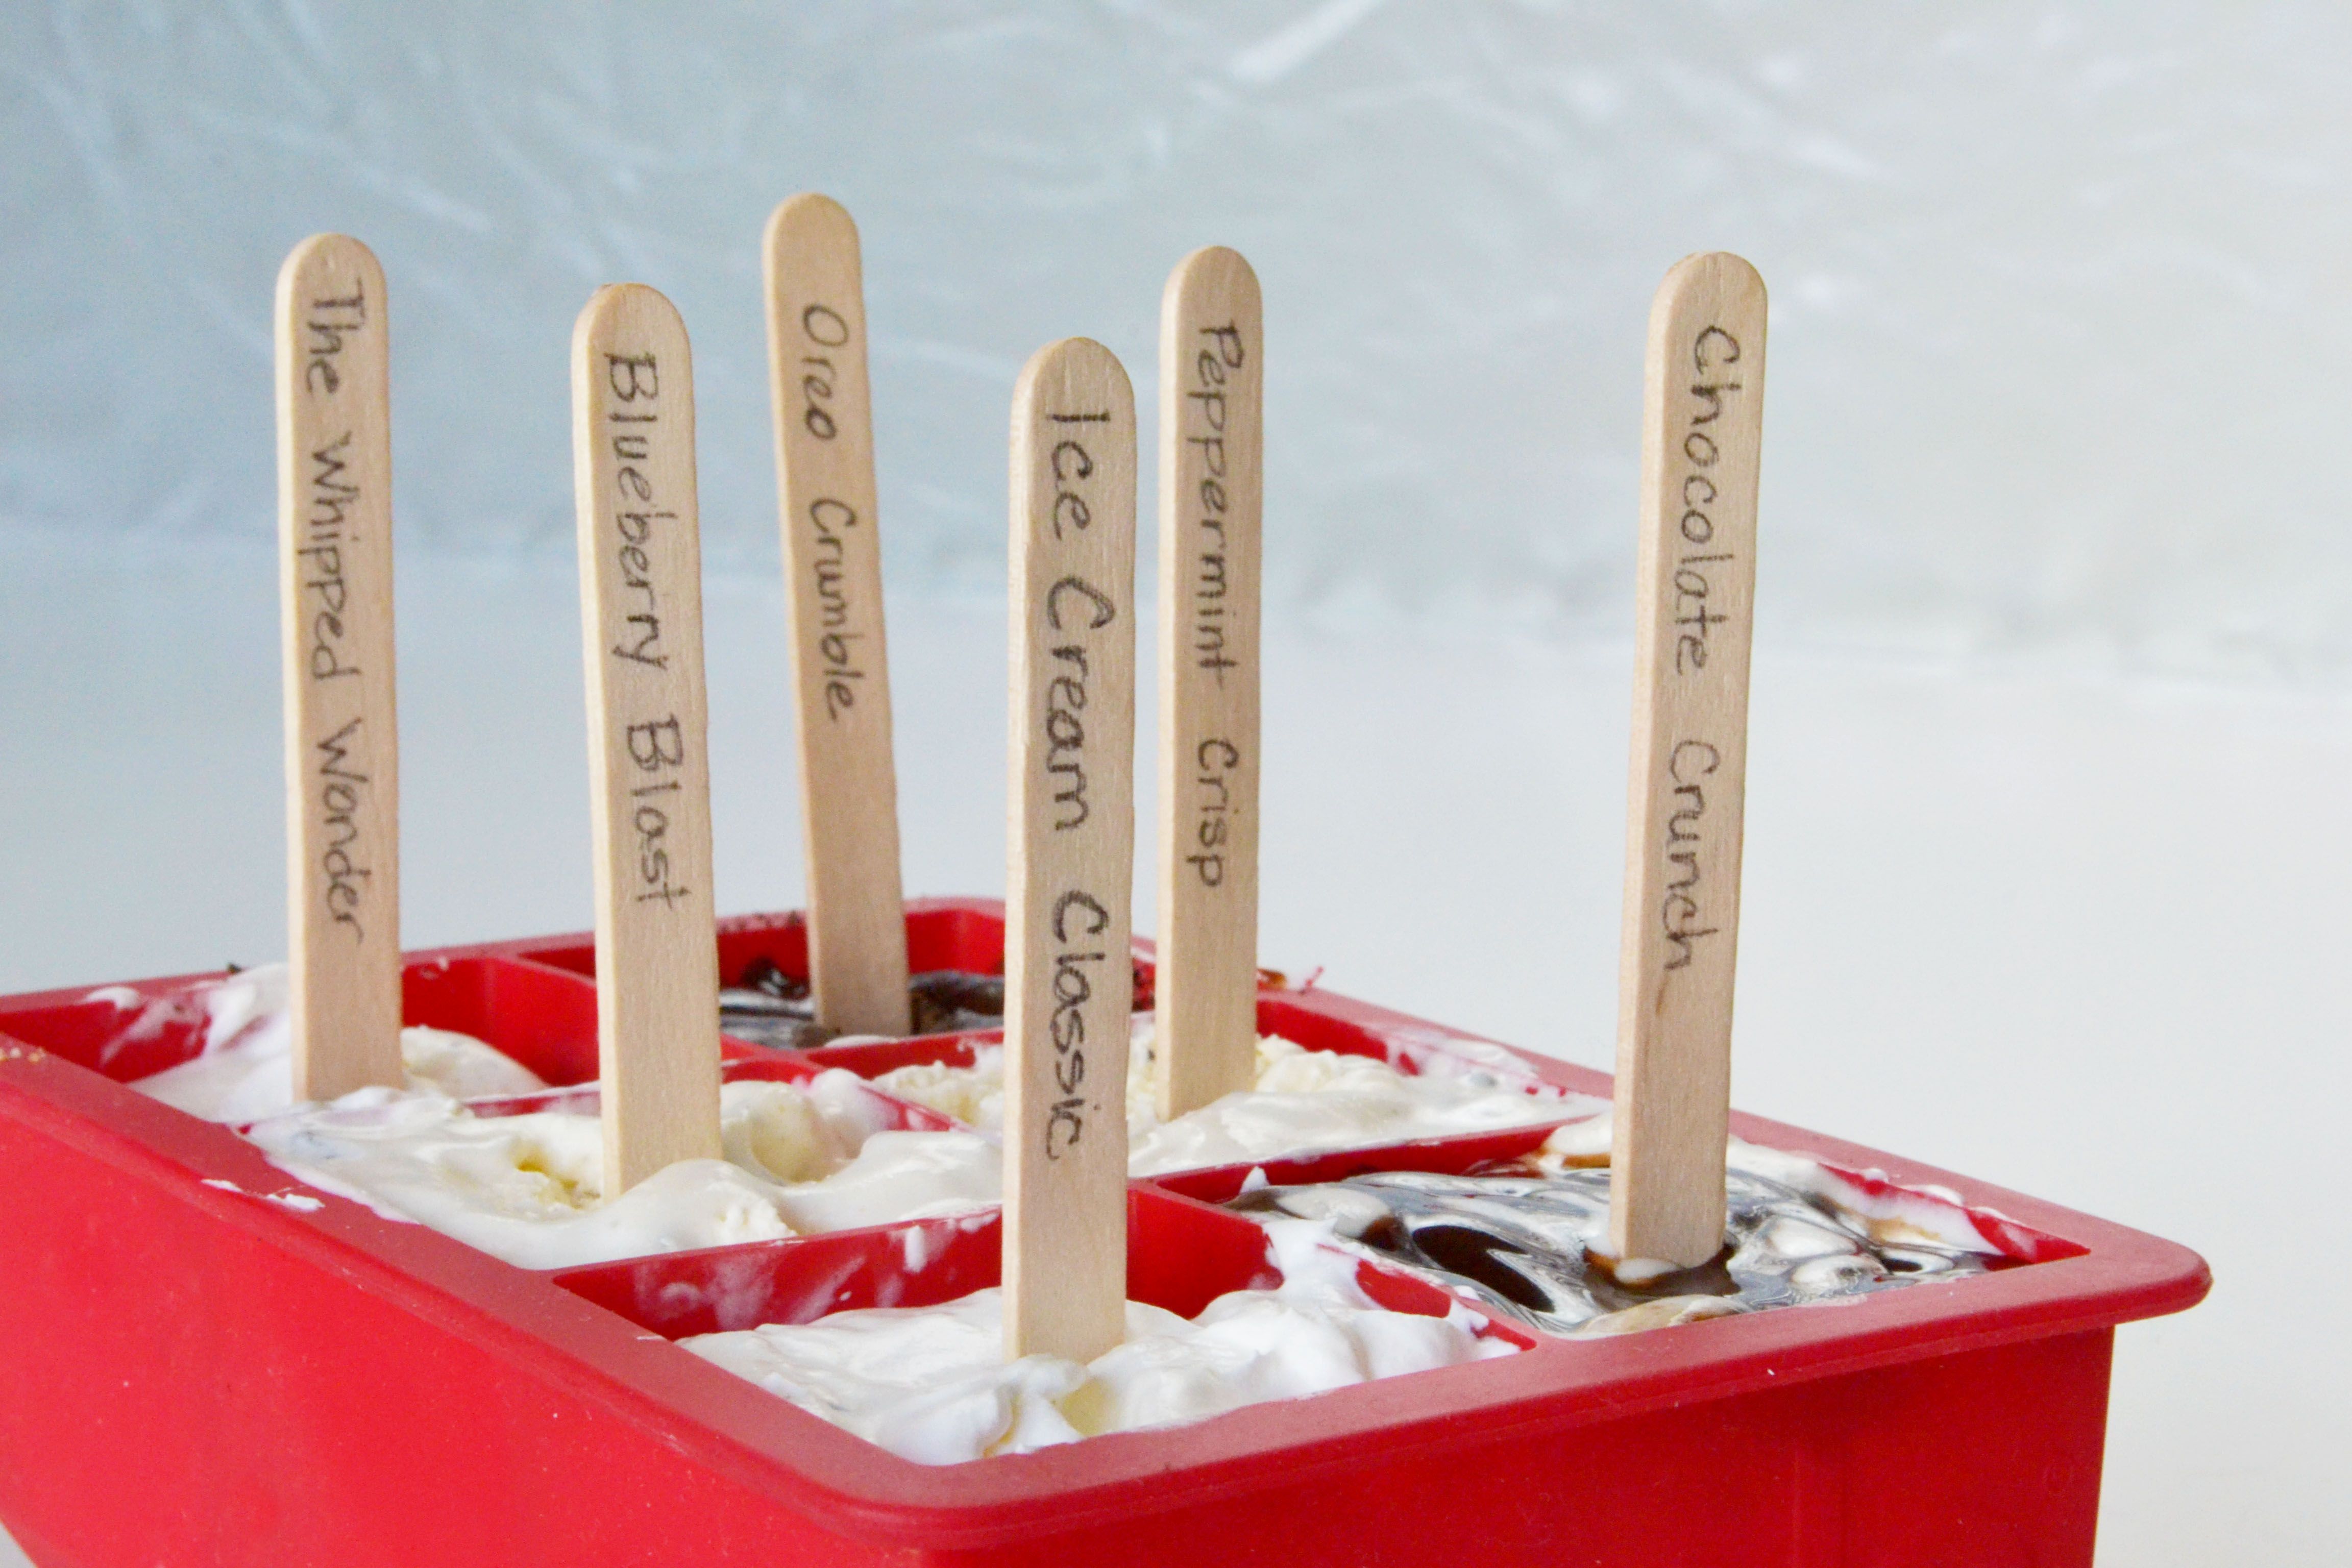
Gather your ingredients and popsicle sticks. The key is to layer the ice cream in between each layer, and that holds the entire popsicle together. The whip cream also acts as a filler, holding the loose ingredients together. Begin your first layer. For the Ice Cream classic sicle, I layered the nuts first, then cookie crumbs, ice cream, whip cream, and last, chocolate syrup.
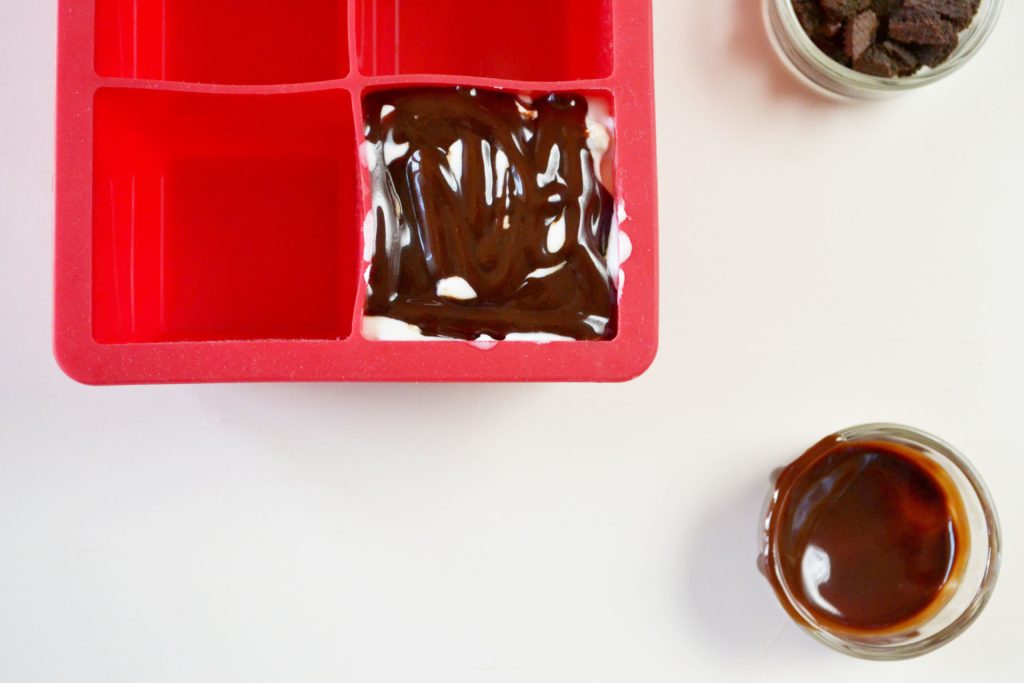
Layer your ingredients to achieve the taste you want. Add nuts and cookie crumbs to give your popsicles a crunch, or add strawberries and other fruits for a fresh, fruity taste.
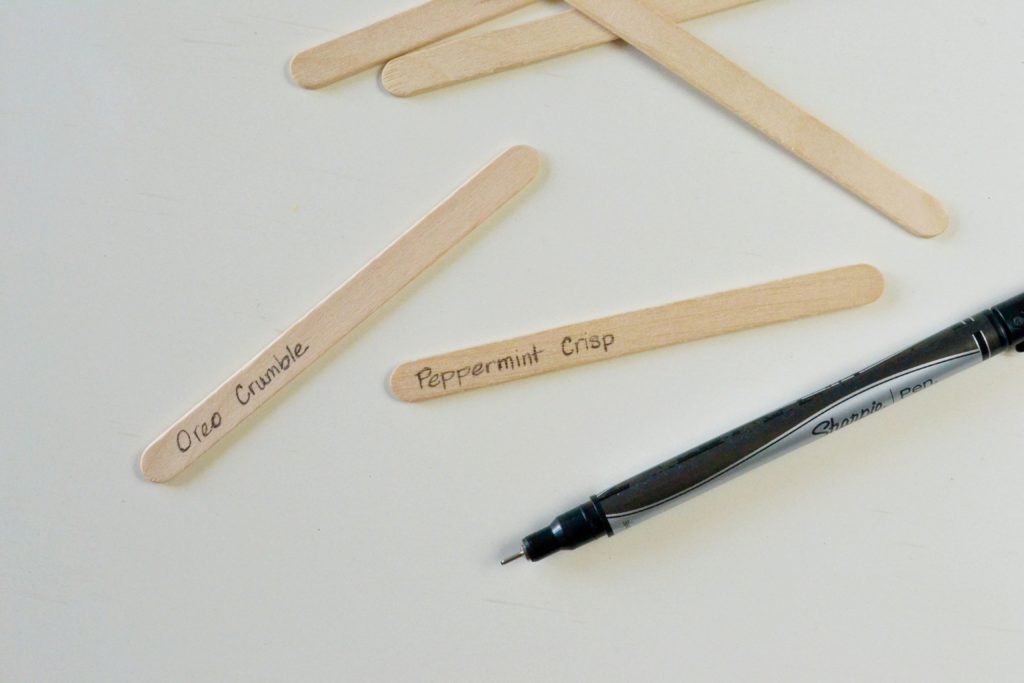
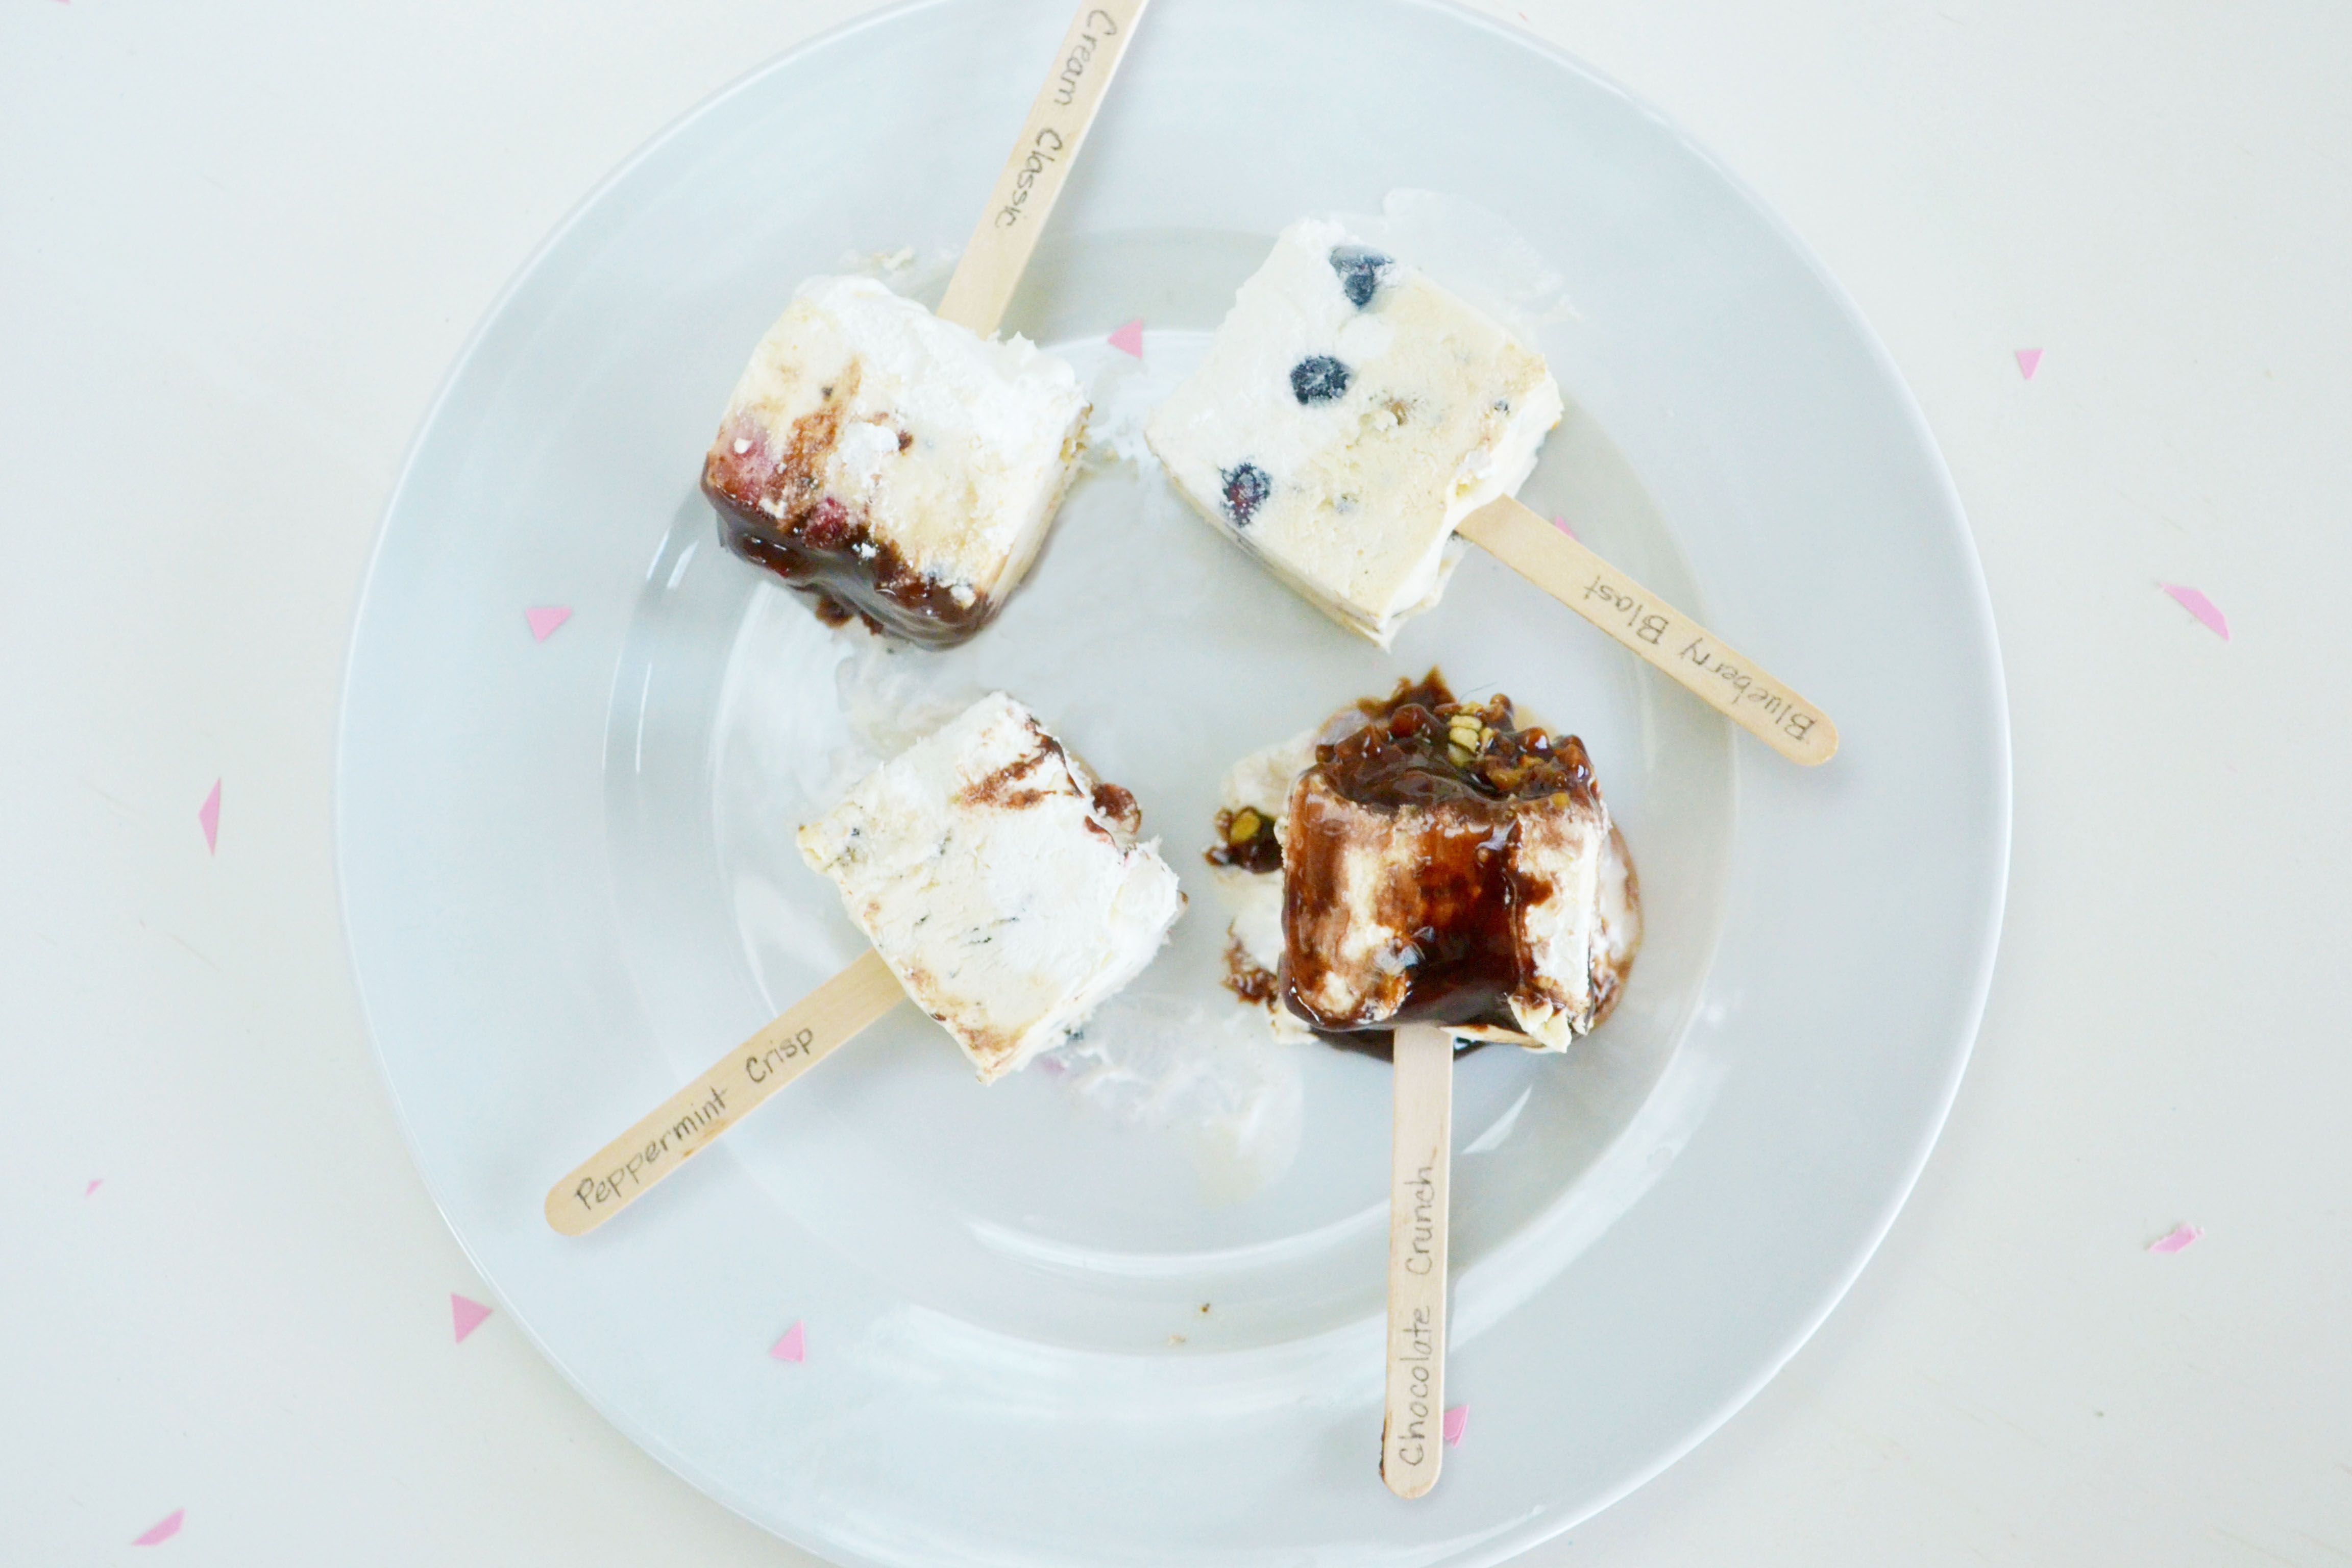
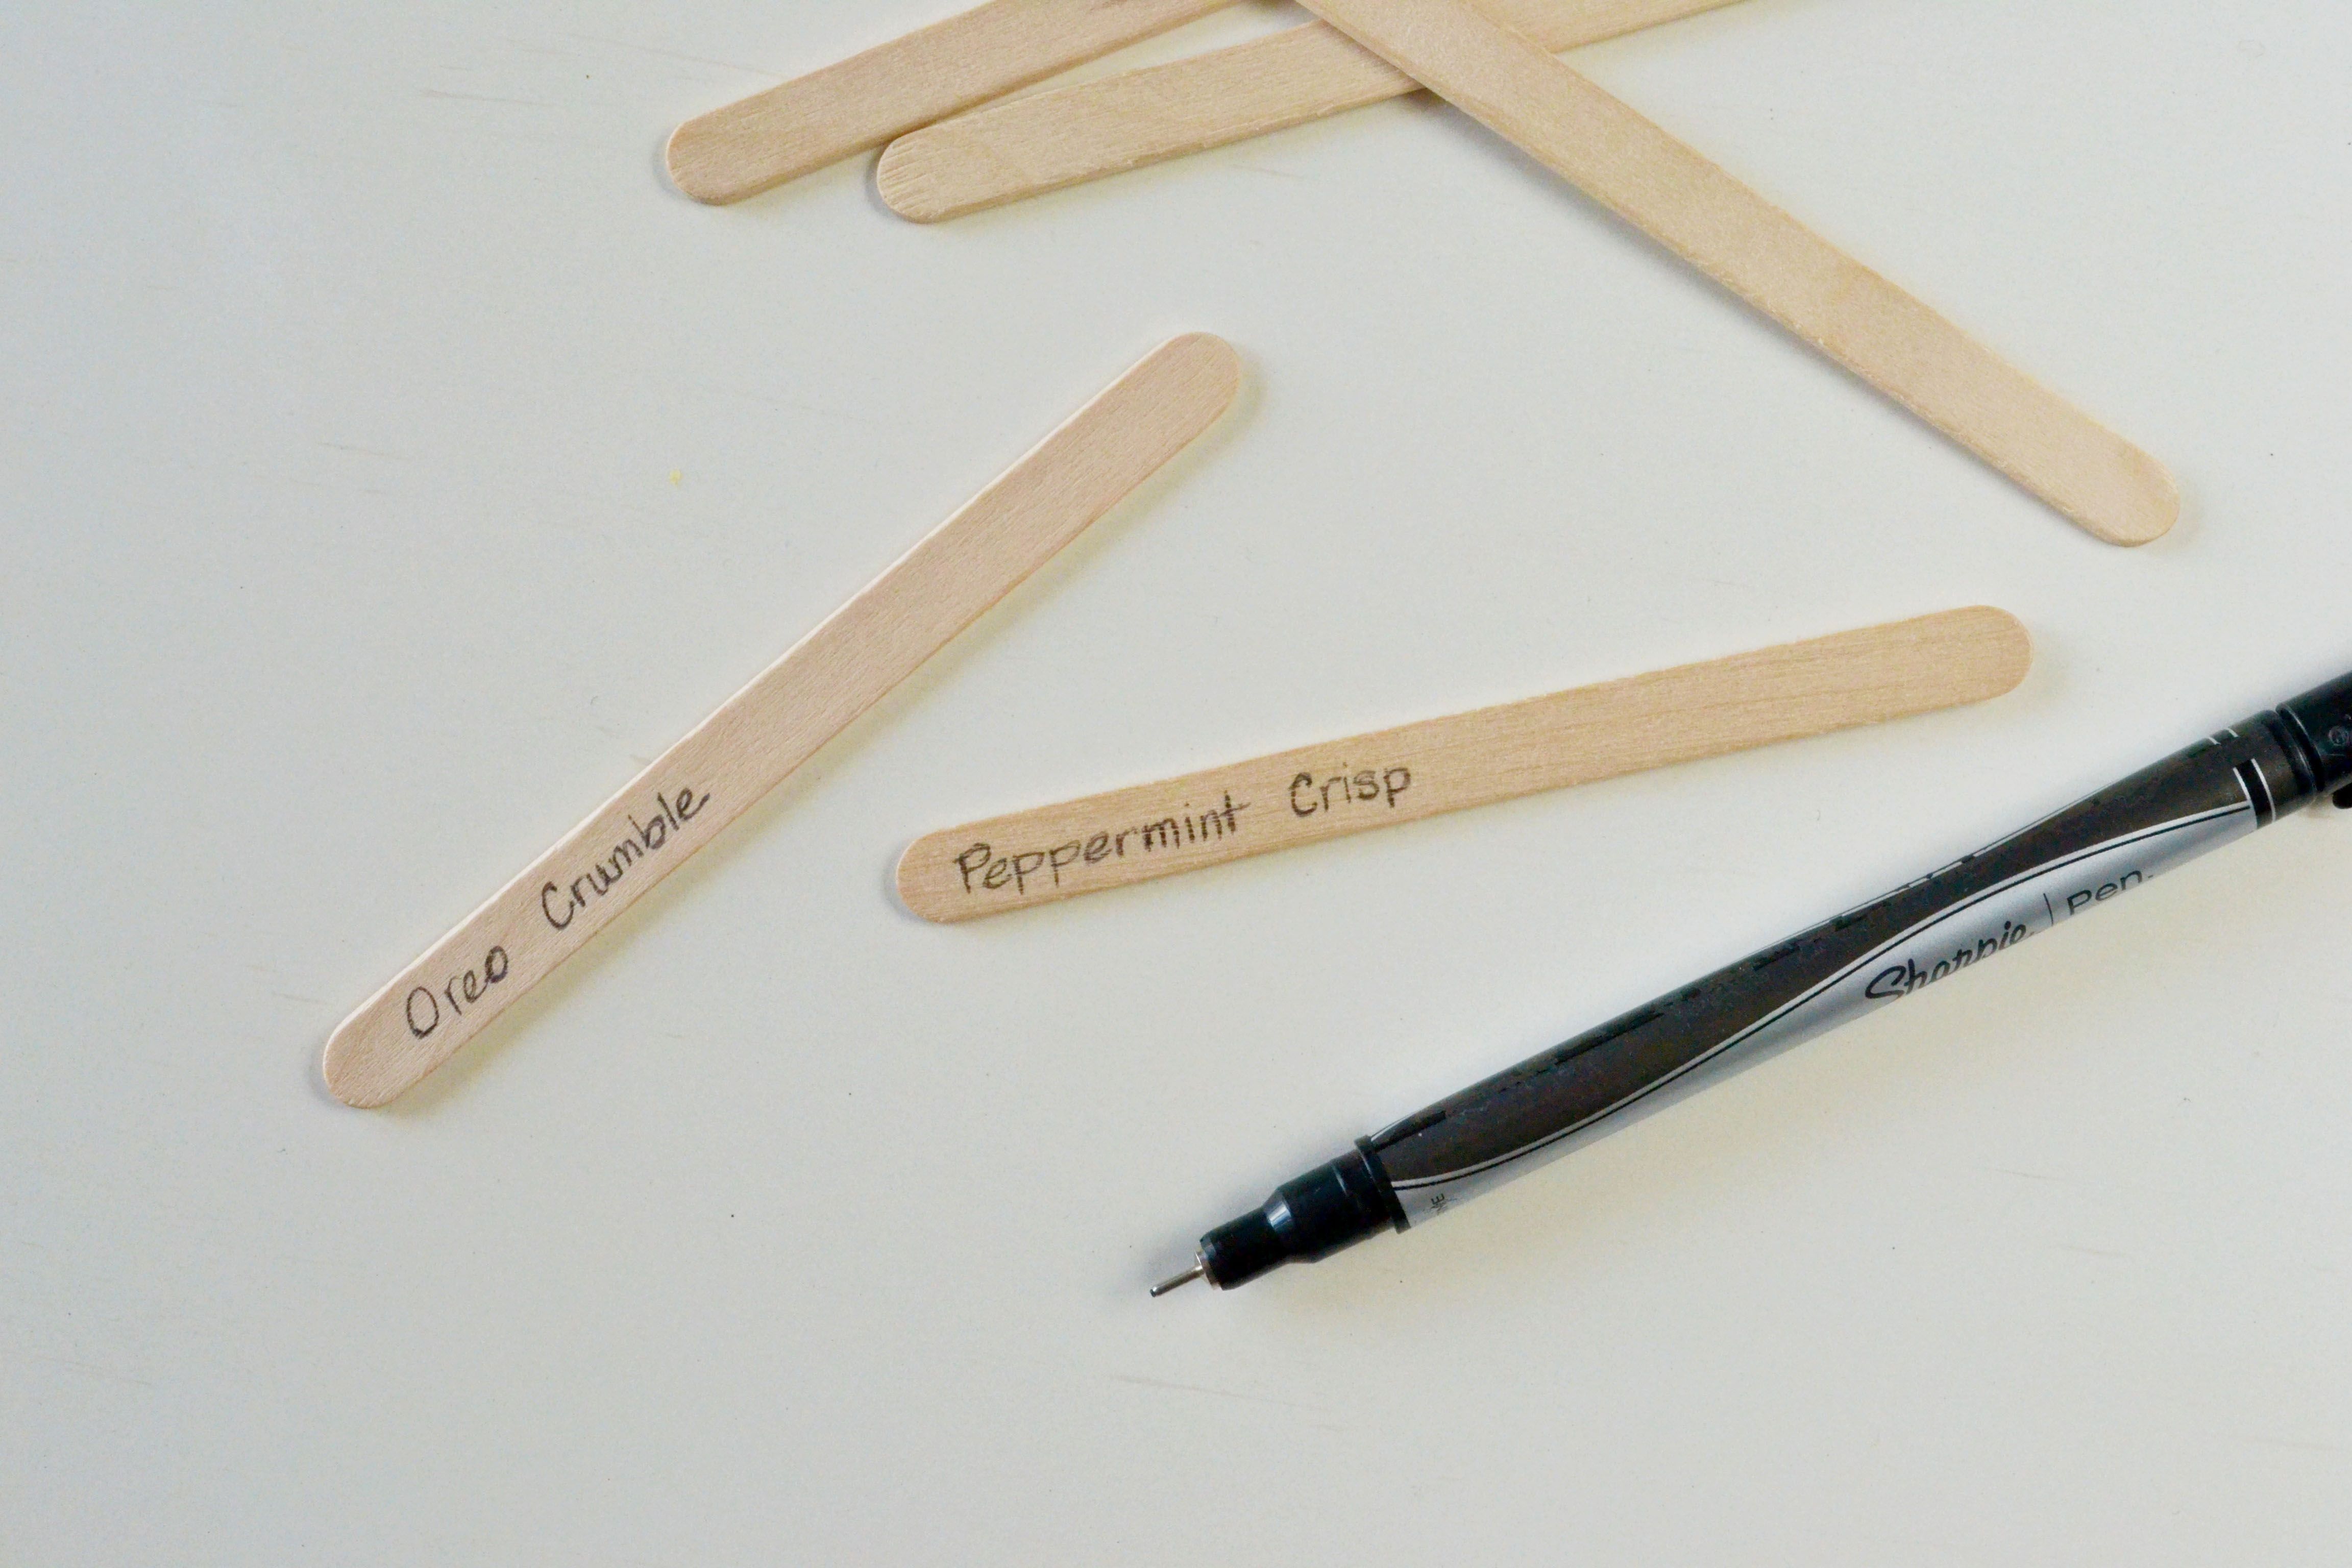
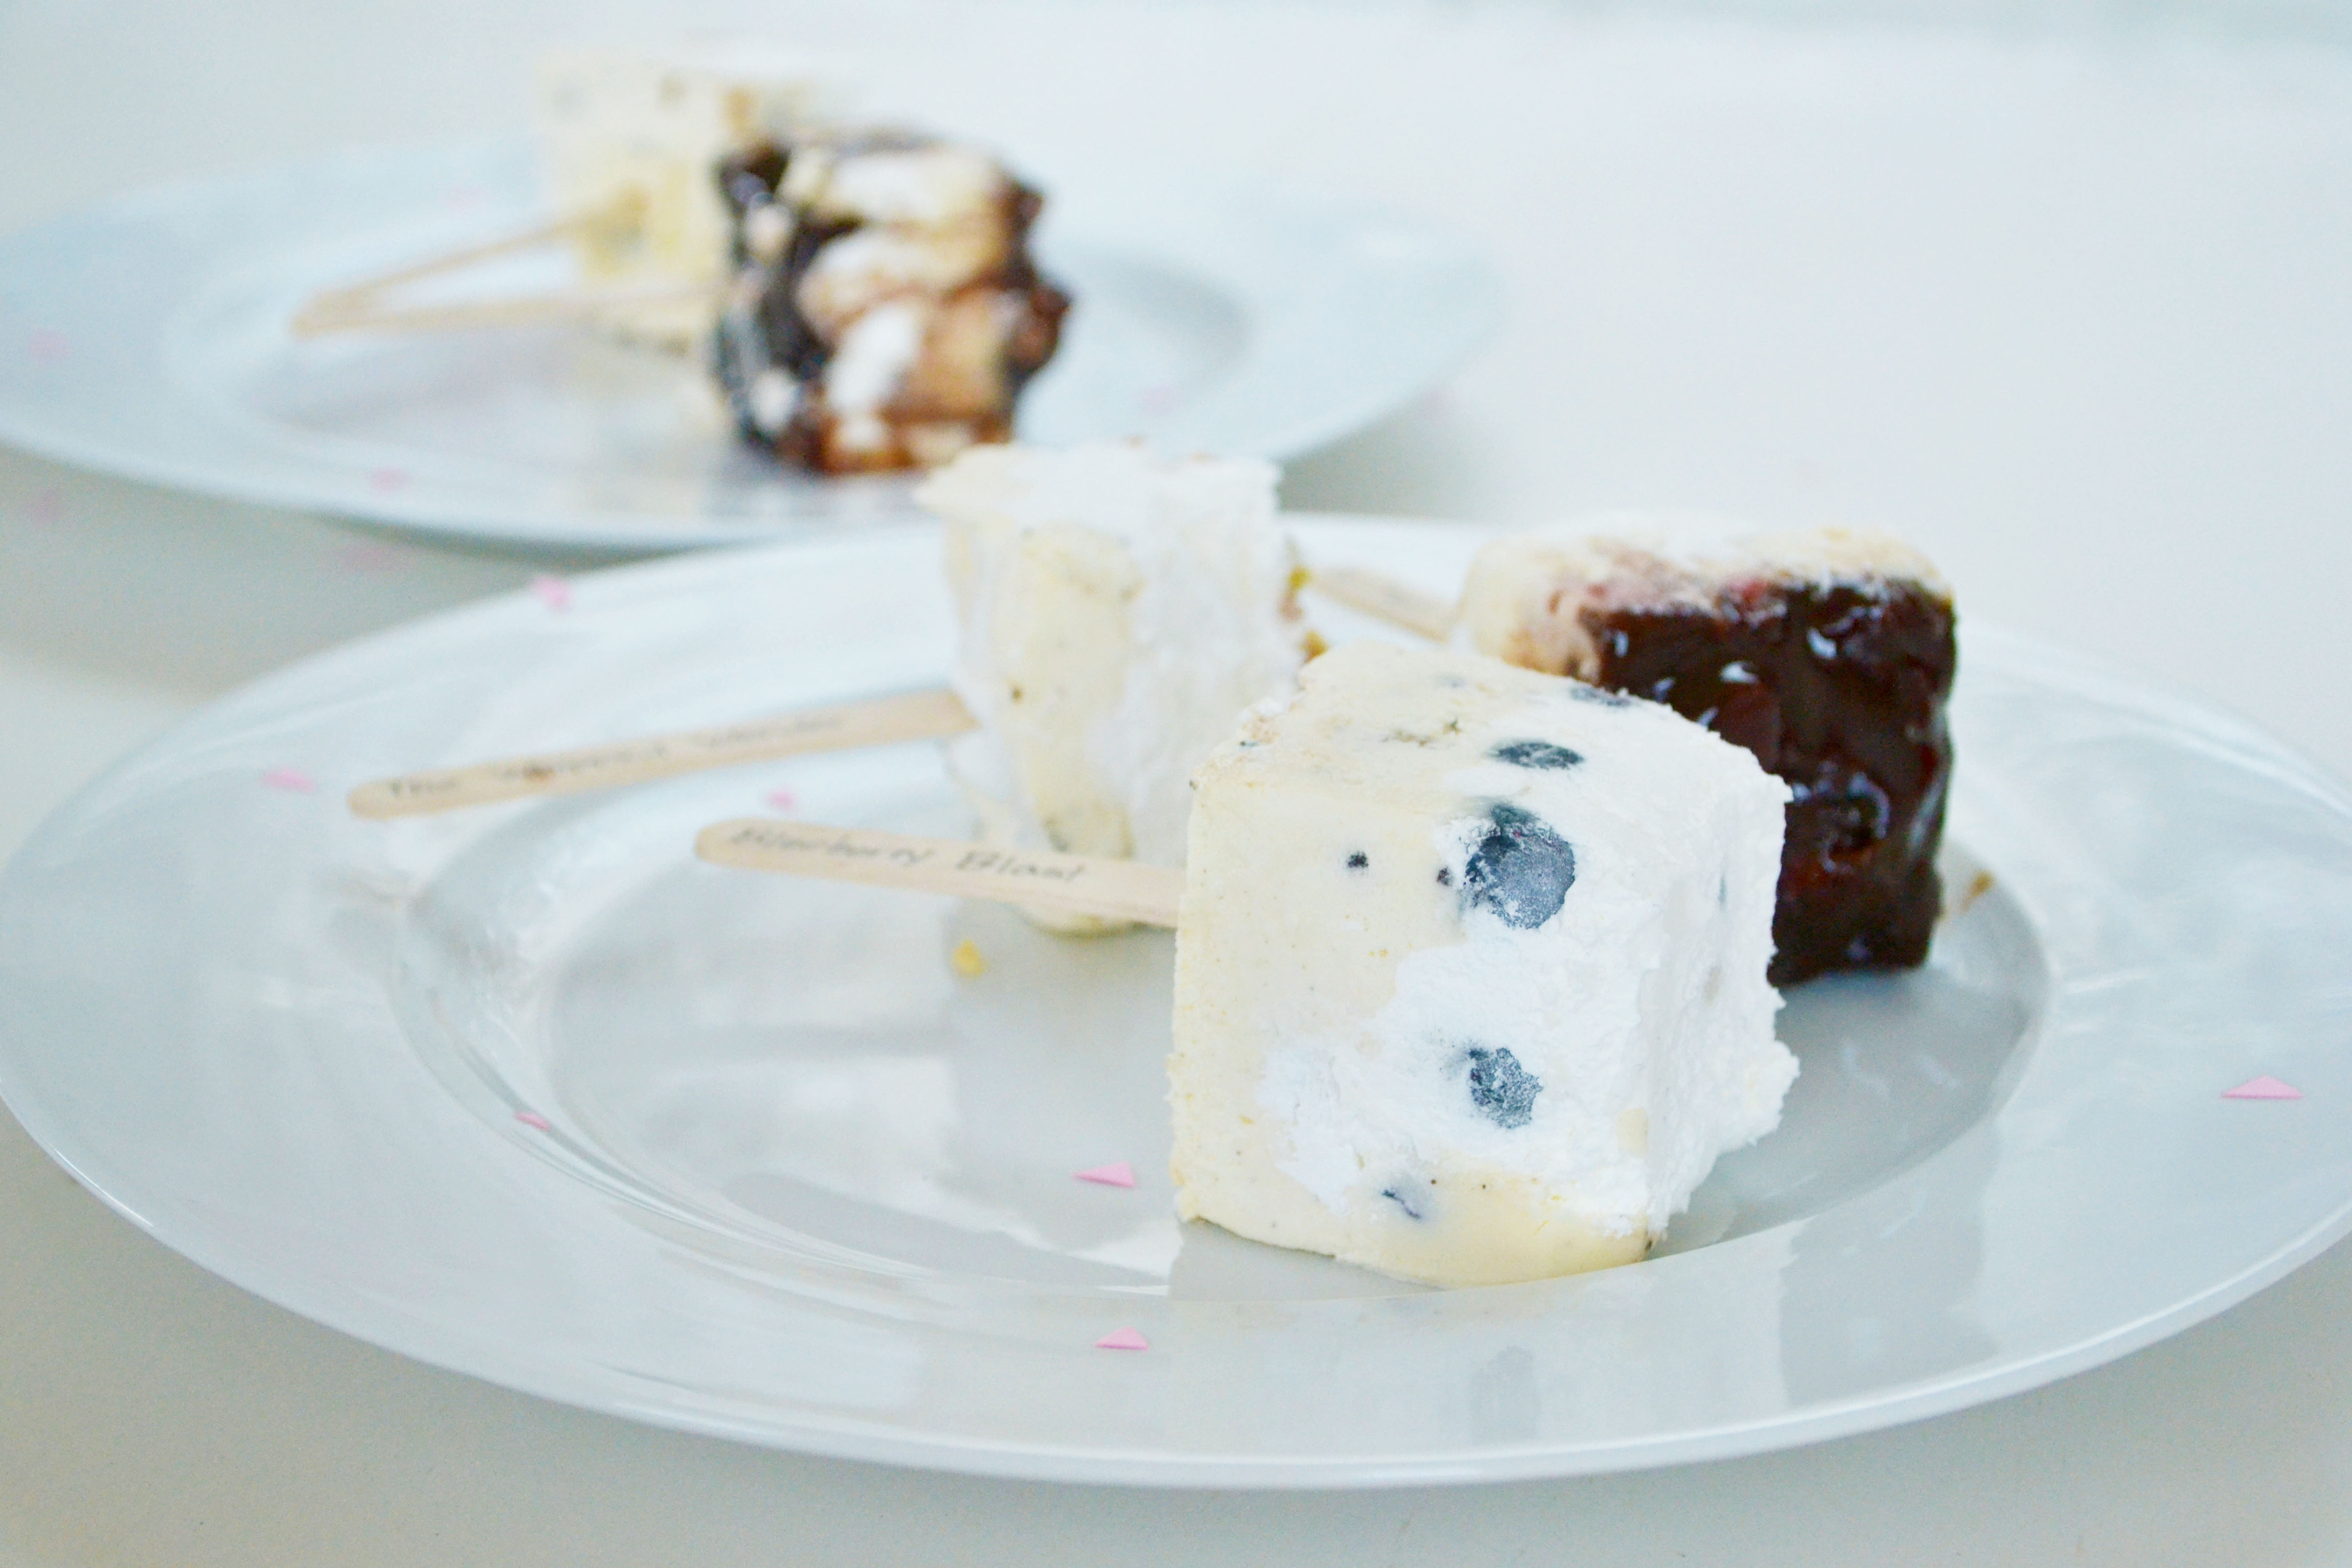
To distinguish between your popsicles, create unique names for each one and write it with a Sharpie pen on the popsicle stick. I came up with names like, Oreo Crumble, Peppermint Crisp, and Blueberry Blast. Be sure to write the name close to the end of the stick to ensure the name is visible when placed in the popsicle.
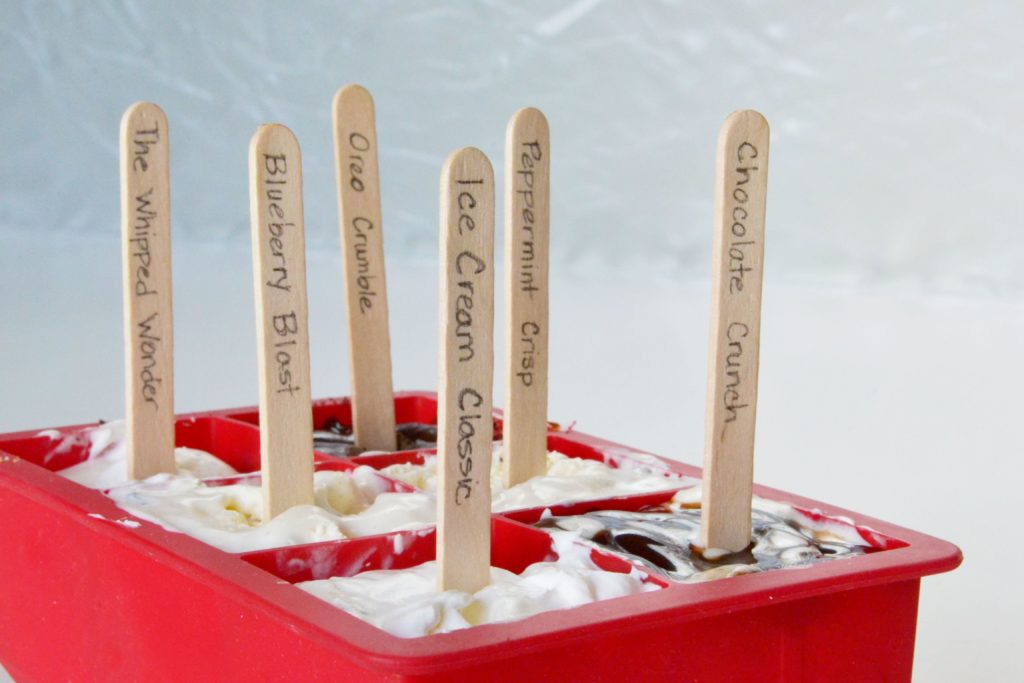
Place the stick in the popsicle and sit the filled ice cream tray in the freezer. I let this freeze for about three hours before removing. The ice cream may be a little stiff on the edges when it’s taken out. You may find that some ice cream sicles are easier to remove than others. Wiggle it out gently and use a knife to separate it from the edges as you pull it out.

The best part about this food craft is tasting the different layers of flavor that you’ve created. Let the kids take a stab at this DIY. They can get creative with sprinkles and food coloring to create a one-of-a-kind popsicle with a very unique taste. This is a great DIY to do with a group at parties or alone for a quick dessert after dinner. Enjoy!
DIY Ice Cream Popsicles

In the heat of the Summer you definitely don’t want to be without your cool tropical drinks, slushies, and in this case, ice cream. Maybe it will take quite a while to actually make ice cream itself, but for sure you can make your own ice cream popsicles.
Ingredients
- ice cream
- toppings - fruit, nuts, chocolate, peppermint crumbles, crushed Oreo, etc
- whip cream
Materials
- silicone ice cube tray
- popsicle sticks
Instructions
- Layer your ingredients. Add a couple of toppings, then ice cream, then whip cream, and syrup.
- Push a popsicle stick in the middle.
- Place the tray in the freezer for about three hours.
Notes
Depending on your favorite ingredients, you'll want to adapt the recipe. The whipped cream acts as a filler and holds together the loose ingredients, so make sure to use it.
Nutrition Information:
Yield:
6Serving Size:
1Amount Per Serving: Calories: 133Total Fat: 7gSaturated Fat: 3gTrans Fat: 0gUnsaturated Fat: 3gCholesterol: 11mgSodium: 55mgCarbohydrates: 17gFiber: 1gSugar: 12gProtein: 2g