DIY Fall Dried Wheat Garland
Updated on June 25, 2021
It’s hard to believe that summer is nearly over, but with it comes the cooler weather and cozy nights spent by the fire. Fall décor is fun to play with, from pumpkins and gourds to sunflowers and cornstalks. Dried wheat is one of my favorite materials to work with in the fall, mostly because people don’t use it very often. So today I’m going to share a quick and easy dried wheat fall garland project with you.
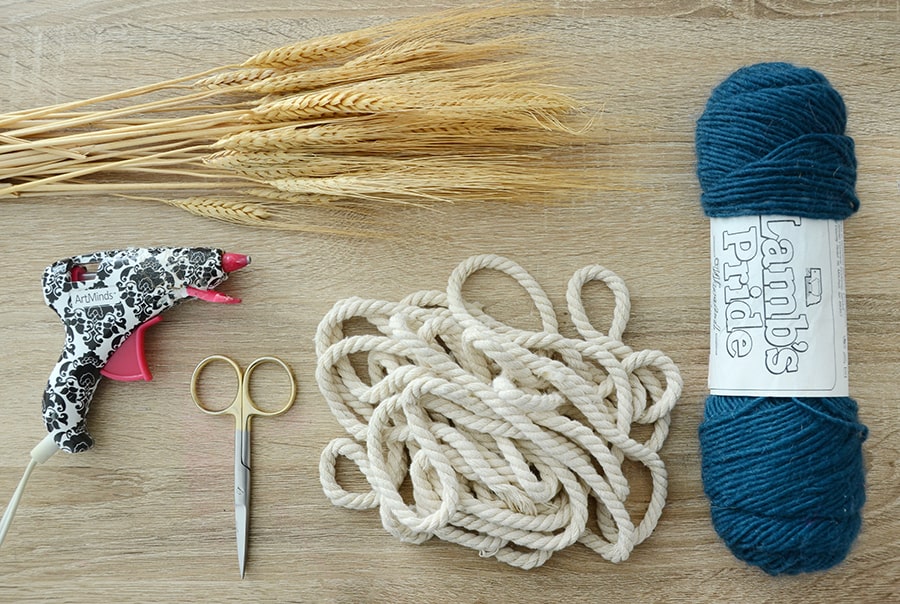
Here’s what you’ll need for this fall garland:
- 8-12 stalks of dried wheat (depending on how long you’d like your garland to be)
- 8-12 feet of white cotton rope, 1/4 – 1/2 inch diameter
- Colored yarn
- Scissors
- Hot glue gun
Step by step guide to craft the fall garland:
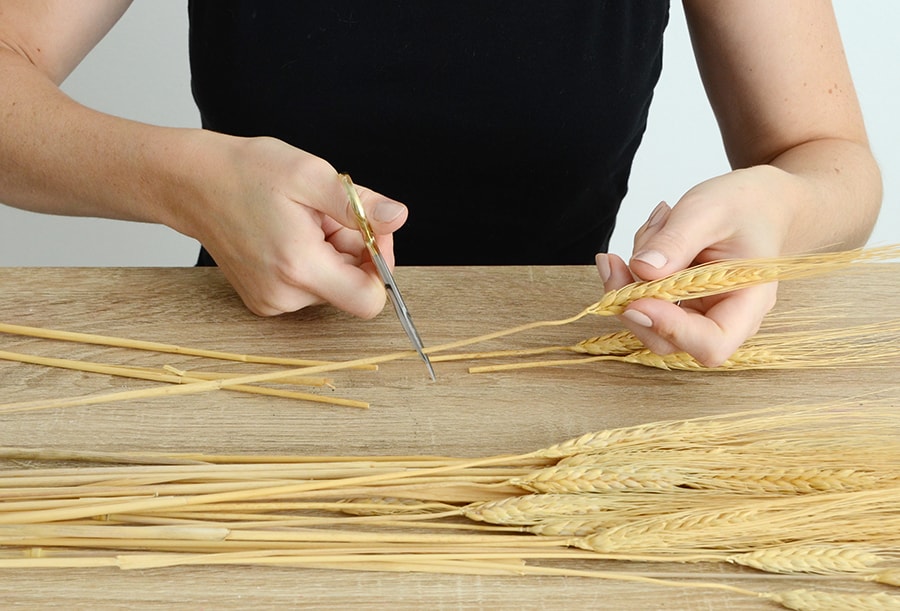
Step 1: cutting stems
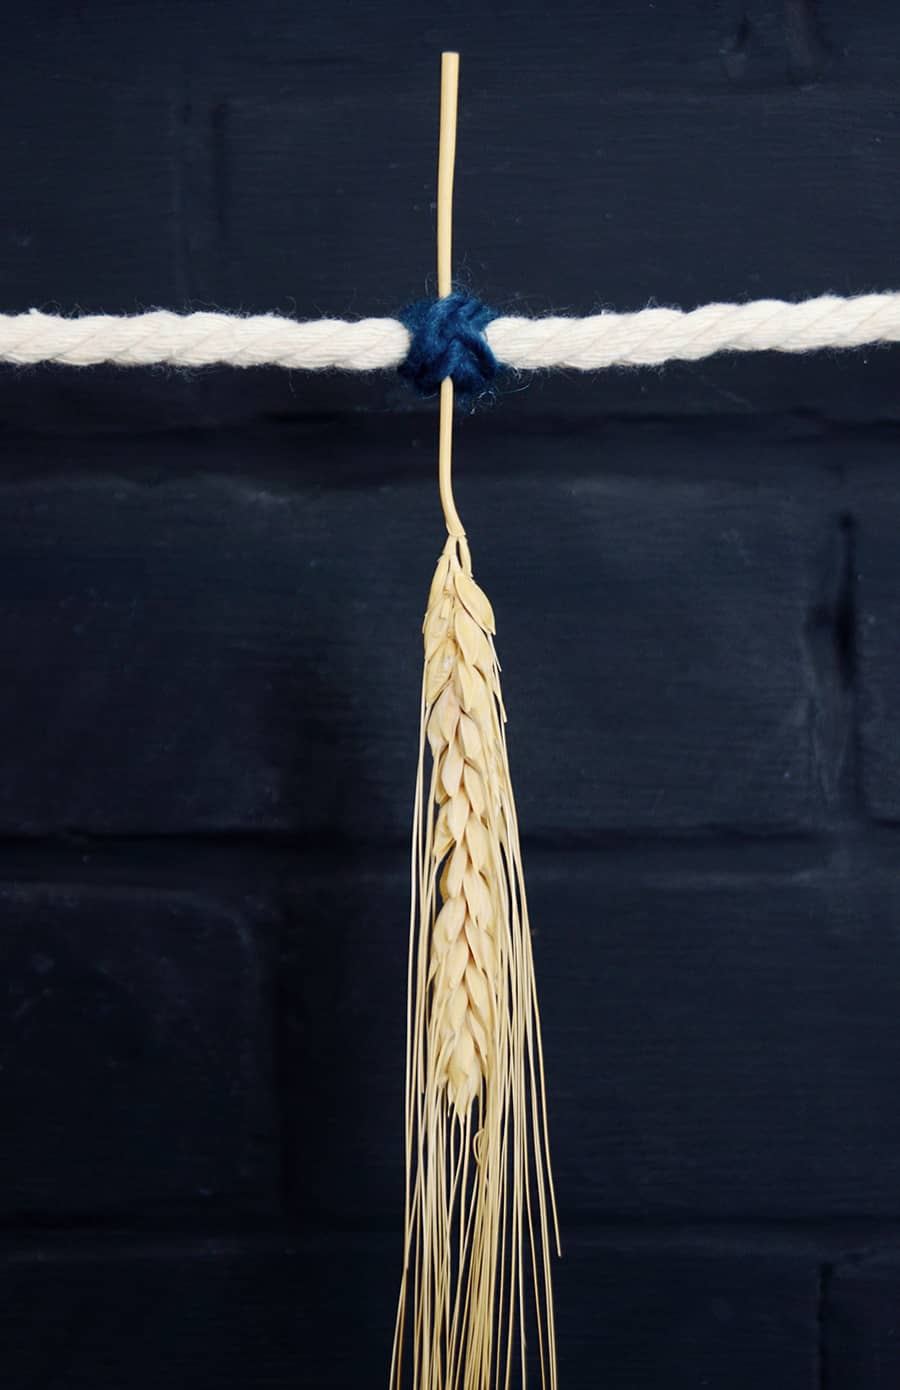
Begin by cutting the stems off of the wheat stalks, leaving about 2 inches of stem attached to the wheat as shown in the image above.
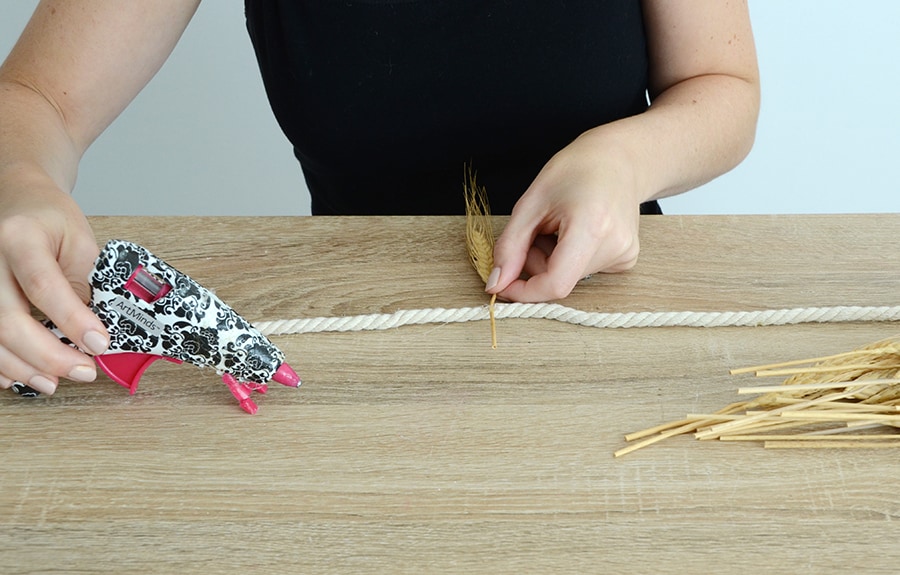
Step 2: attach to rope
Use your glue gun to attach the wheat to one end of the rope, leaving about a foot of excess (which you will use to hang your garland later). Glue the wheat to the rope, right in the middle of the short stem that you just created. While the glue dries, cut a piece of yarn that is 8 inches long.
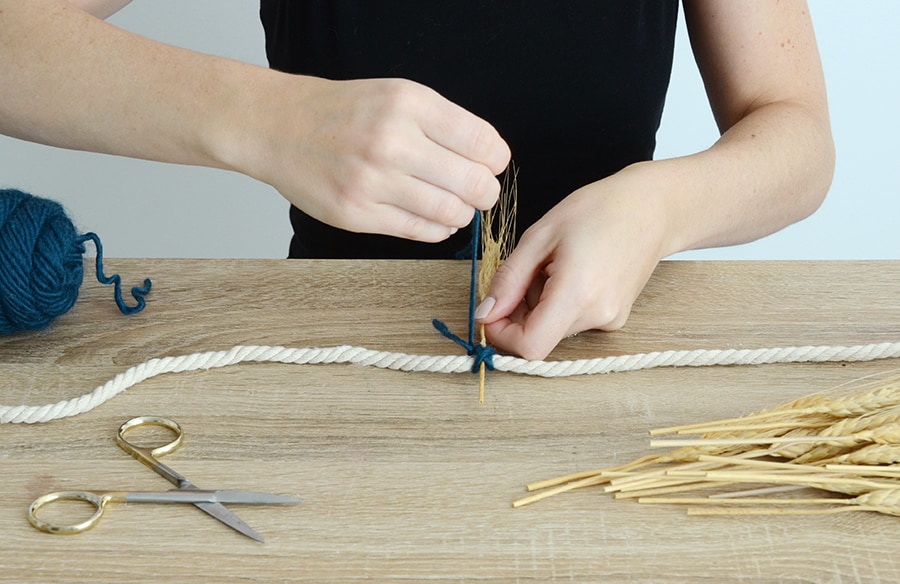
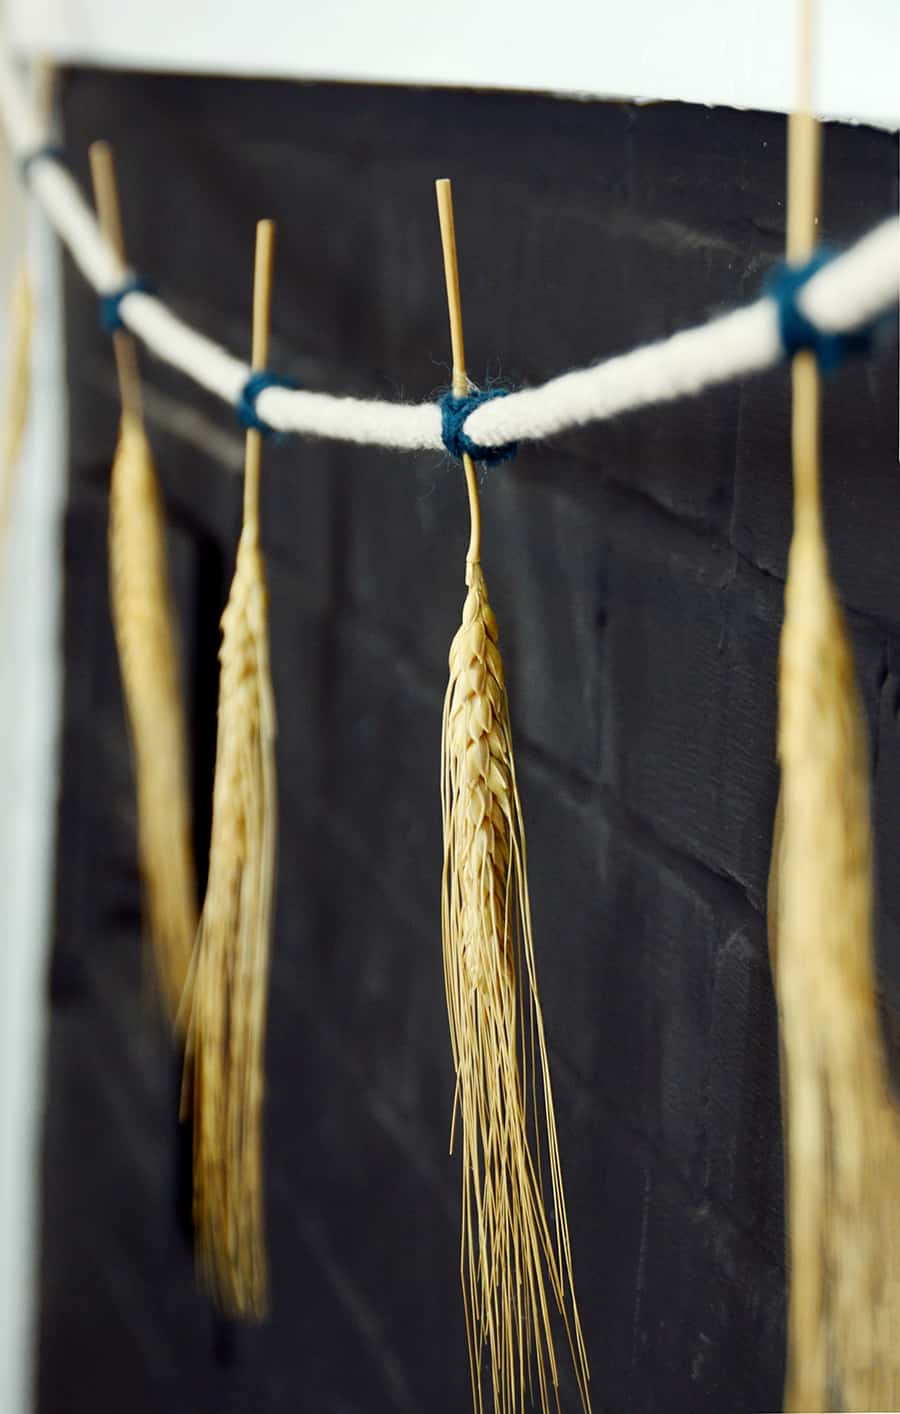
Step 3: knot with yarn
Wrap the yarn around the point where the wheat connects to the rope, tying it in a knot on the back side. Leave a 2 inch tail. Criss-cross the yarn back and forth in an X shape from front to back, and tie the loose end to the tail on the backside.
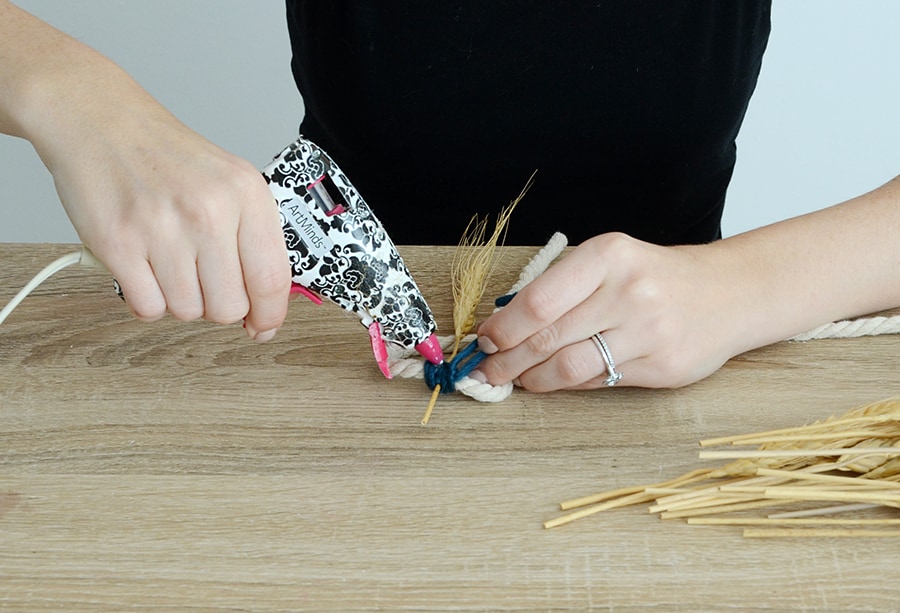
Step 4: glue
Turn it over and glue the tails down with your glue gun so they won’t be visible from the front. Trim off the excess yarn.
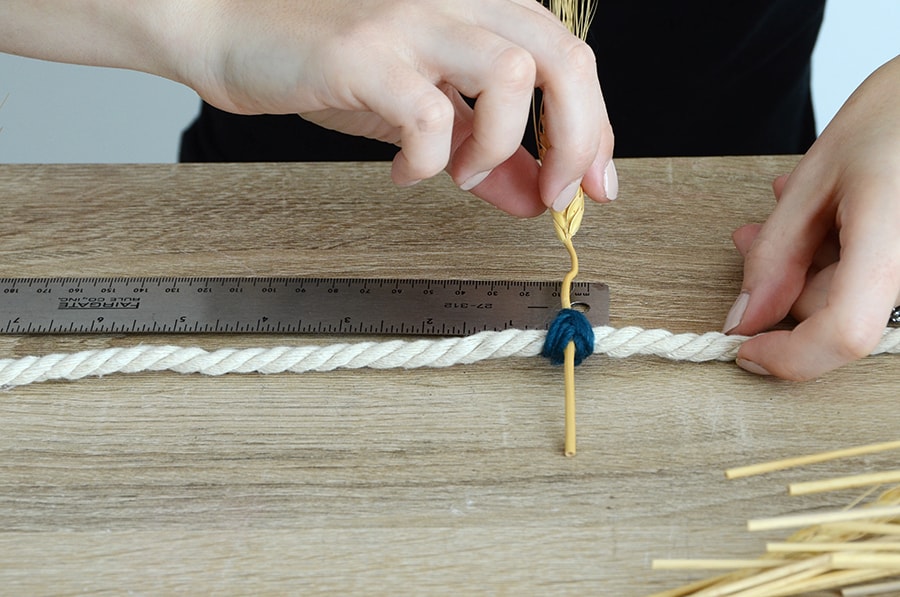
Step 5: repeat process
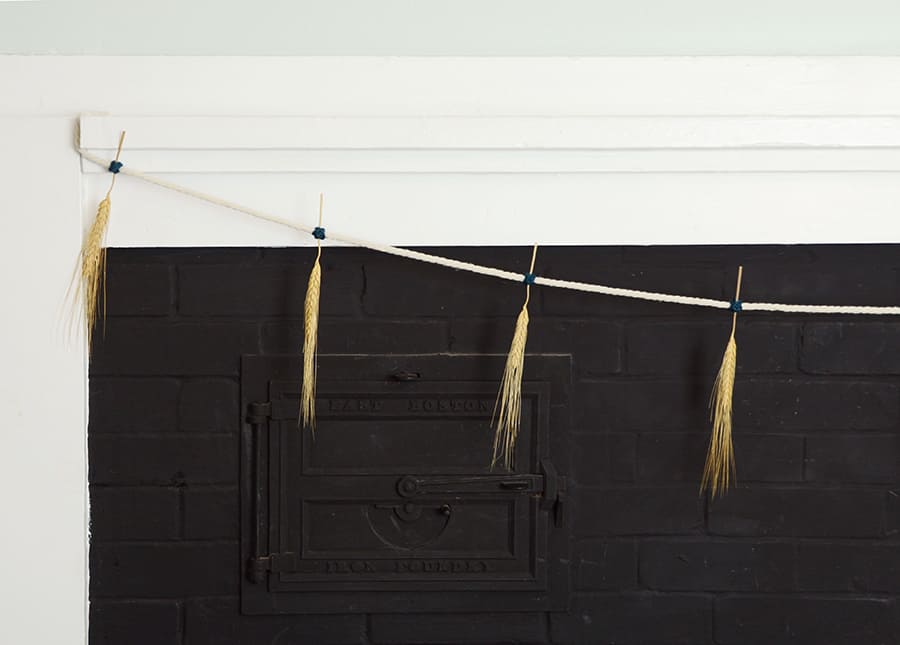
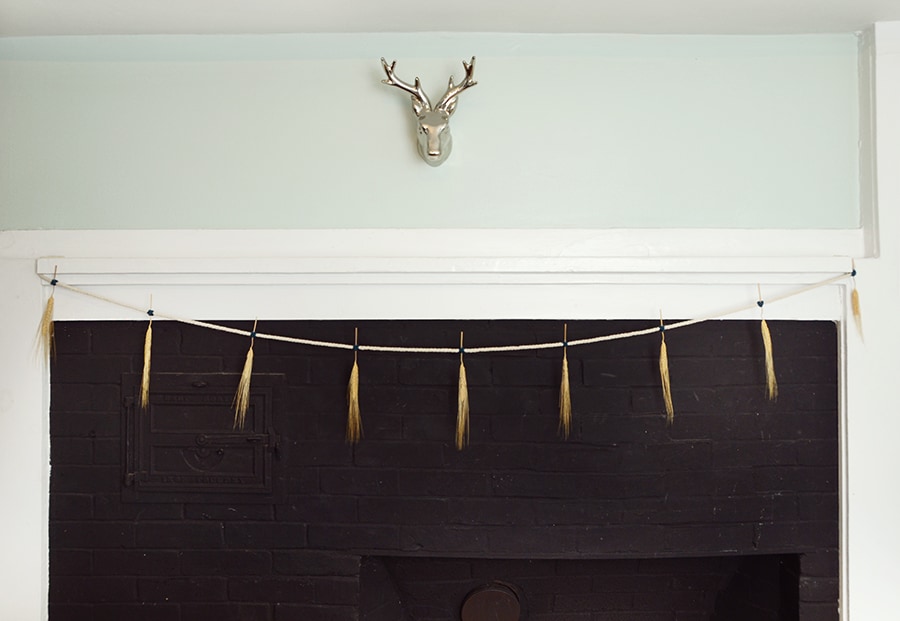
Repeat this process over and over until you have a garland in the length that you need. Space out each piece of wheat 9 inches, and be sure to leave some excess rope on the end to attach it to your mantel or wall. I used a piece of clear scotch tape on each end to mount mine, but you could also use hooks or other mounting hardware.
Step 6: prepare to hang
The final product is very elegant, a far cry from the gaudy fall decor that has been filling up the craft stores lately. And the rope gives it just the slightest hint of nautical flair, and also adds some extra texture to the piece.
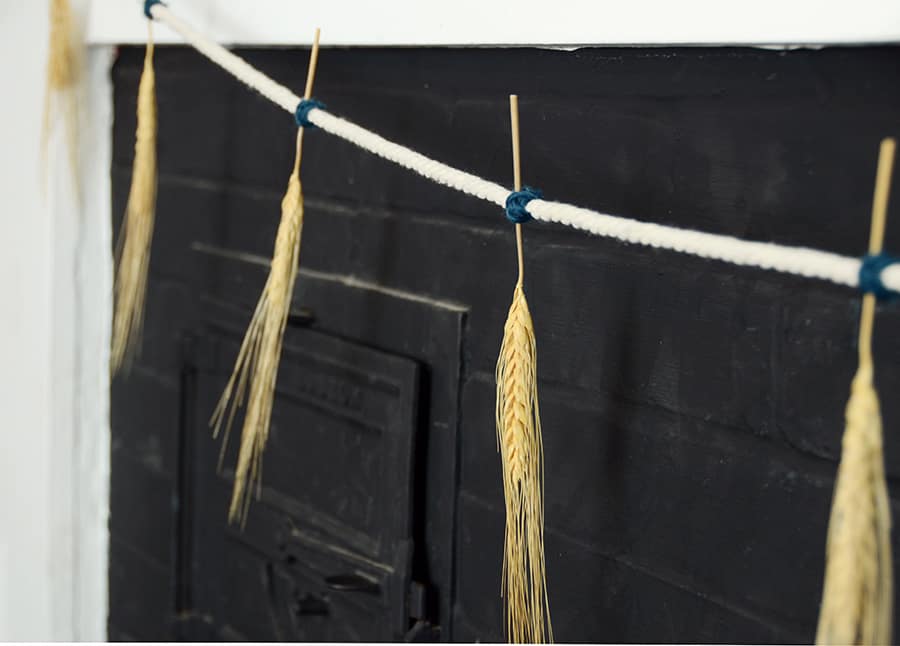
You can get creative with the yarn too… I went with a dark blue-green because I’m drawn toward cooler colors, but you might also consider doing more traditional fall hues like reds and oranges. Or you could even alternate different colors!
The wheat stalks are beautiful in and of themselves, so it’s pretty easy to make this project look good… happy crafting everyone!