DIY Popsicle Stick Sledge
Updated on November 19, 2025


When I get creative with my kids, we tend to do alot of crafting with popsicle sticks. They get a black out of working with something other than just construction paper and I like it because they’re affordable and the projects are usually simple enough for them to do on their own, making them feel independent. Recently, however, I realized how much I actuallyenjoy crafting with popsicle sticks myself too, so I decided to make something a little less kid-like and a little more geared towards what I like to make. That’s how I found myself crafting this adorable popsicle stick sledge ornament that I just can’t help sharing!
Check out these step by step instructions complete with photos! If you’d rather follow along with a video tutorial instead of written words, scroll to the bottom of this post to find just what you’re looking for.
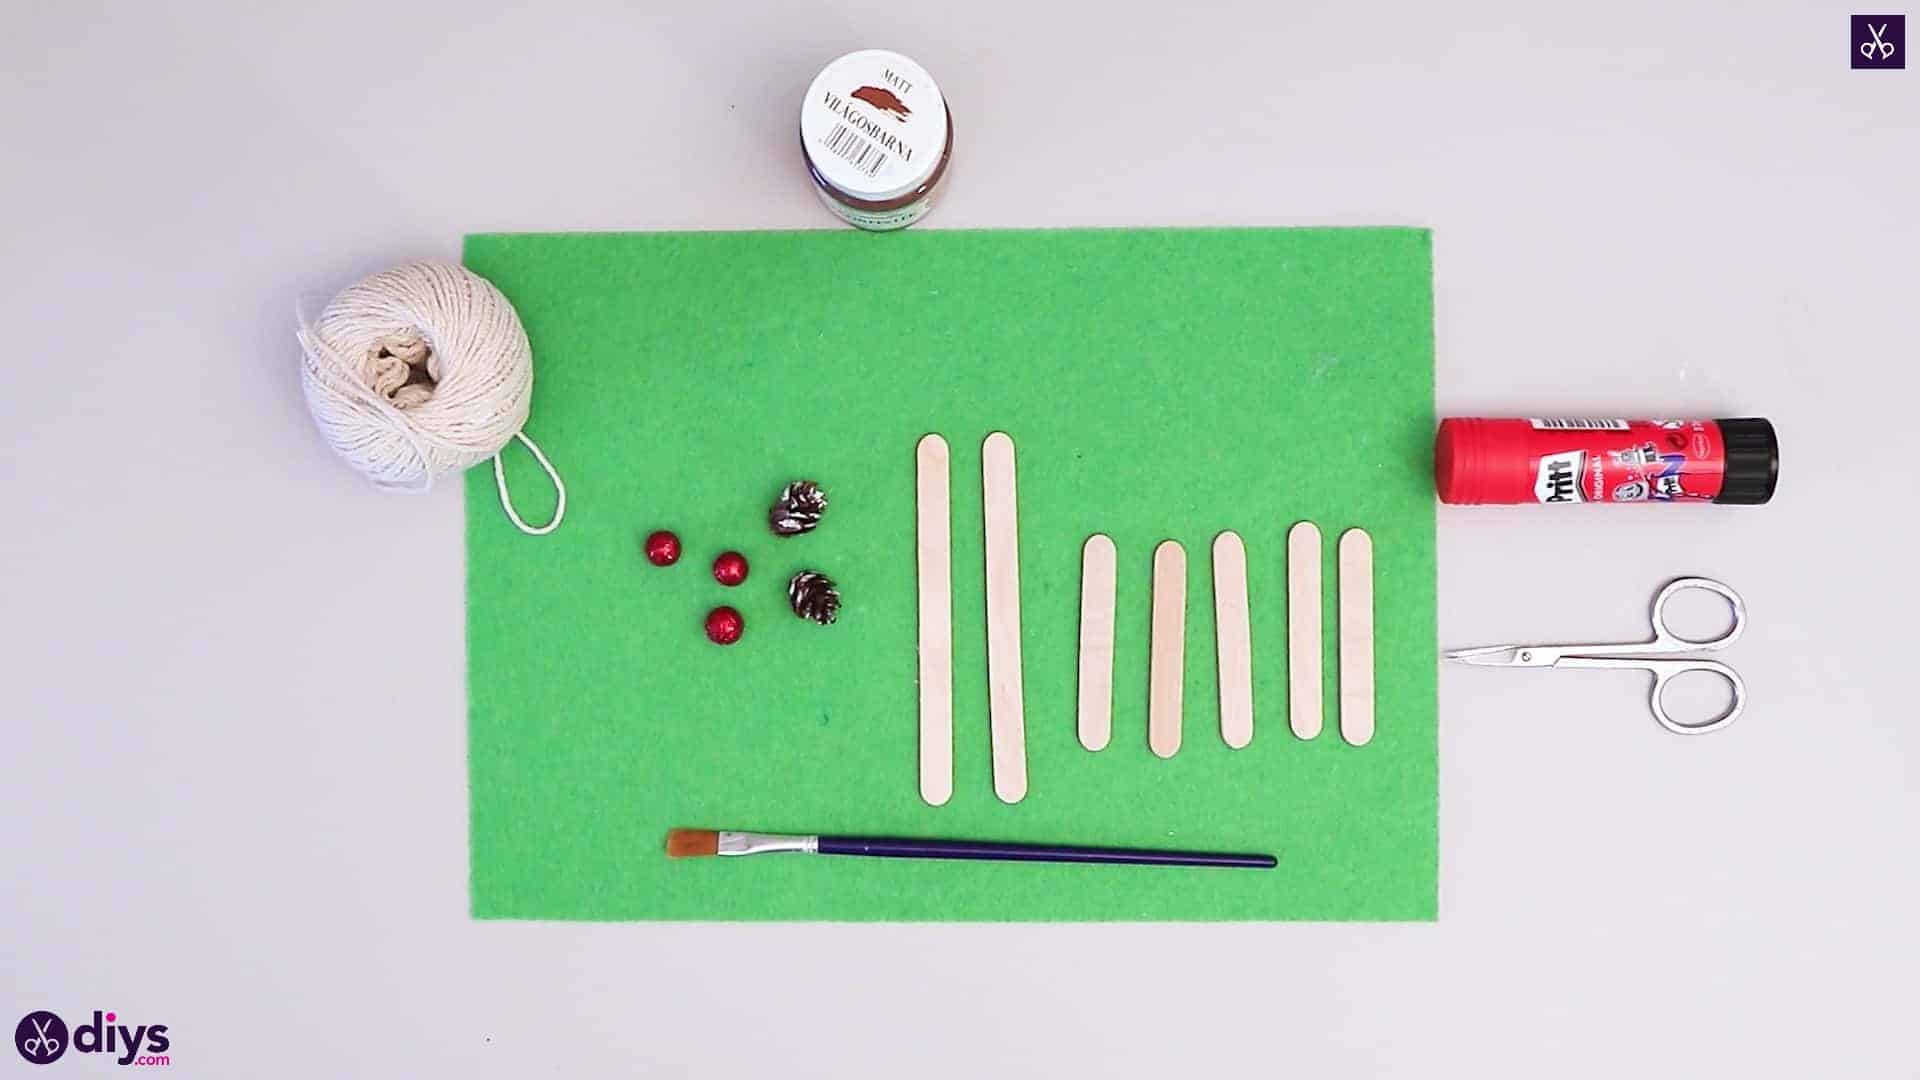
For this project, you’ll need:
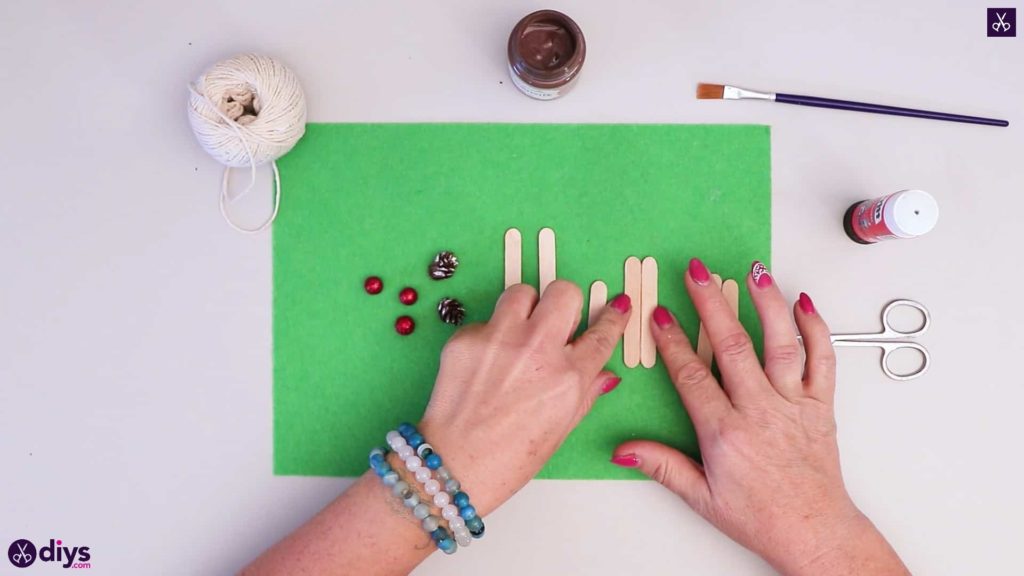
- Popsicle sticks (two regular length and five short or miniature)
- Small faux crafting pinecones
- Red pearled beads
- White yarn
- Green paper
- Brown paint
- A paintbrush
- Curved nail scissors
- A glue stick
Step 1: be prepared
Gather your materials!

Step 2: glue stick together
Apply glue all along the side edge of one of your shorter popsicle sticks. Stick it to the side edge of another short stick, lining up their top and bottom ends so the two sit evenly.

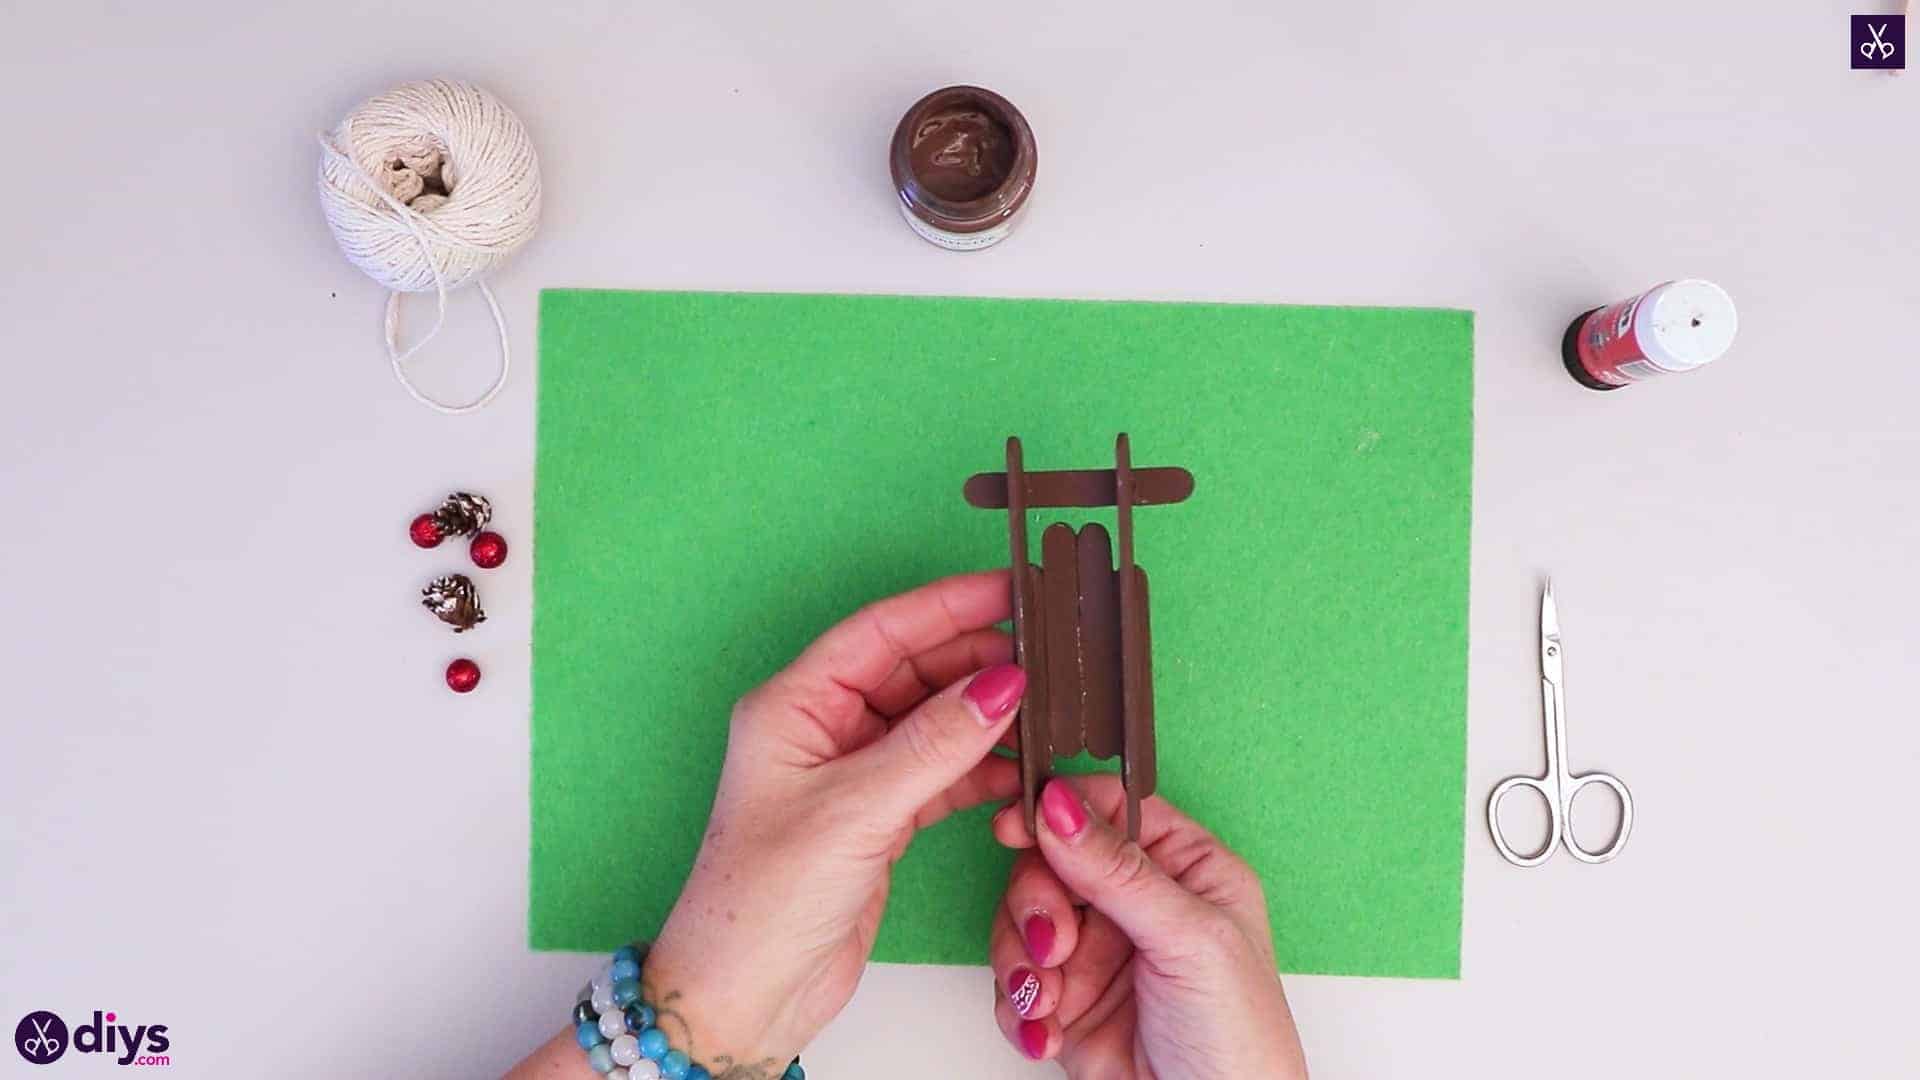
Step 3: assemble
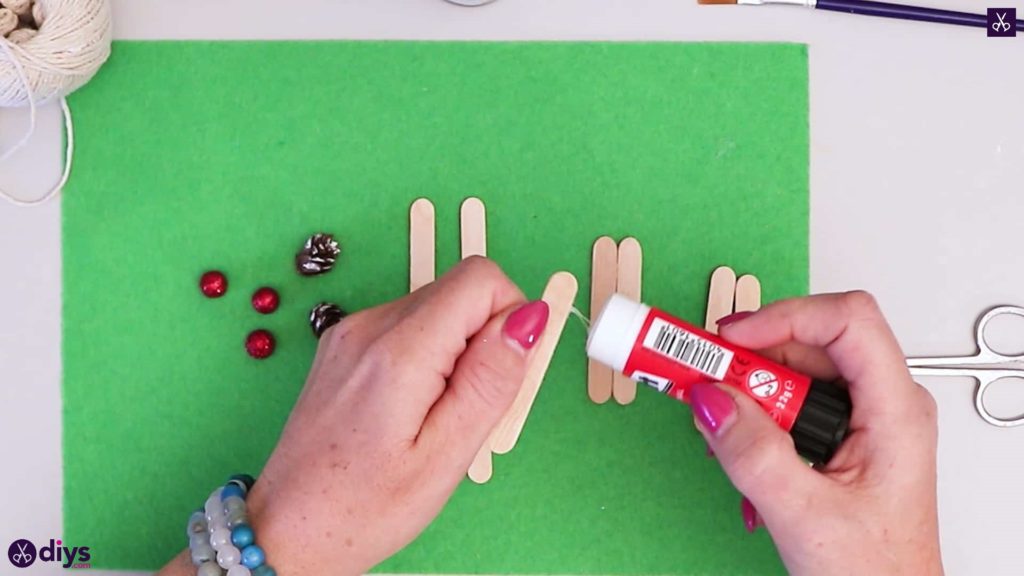
Apply glue to the side edge of a third shorter popsicle stick and stick it to the left side of your first stick, but this time move it down a centimetre or so. This will make the first stick protrude a little past this one’s top end, and this stick’s bottom end protrude slightly past that of the first. Repeat this whole process with a fourth stick on the other side, keeping the top end of your fourth stick level with the third one you just stuck down.

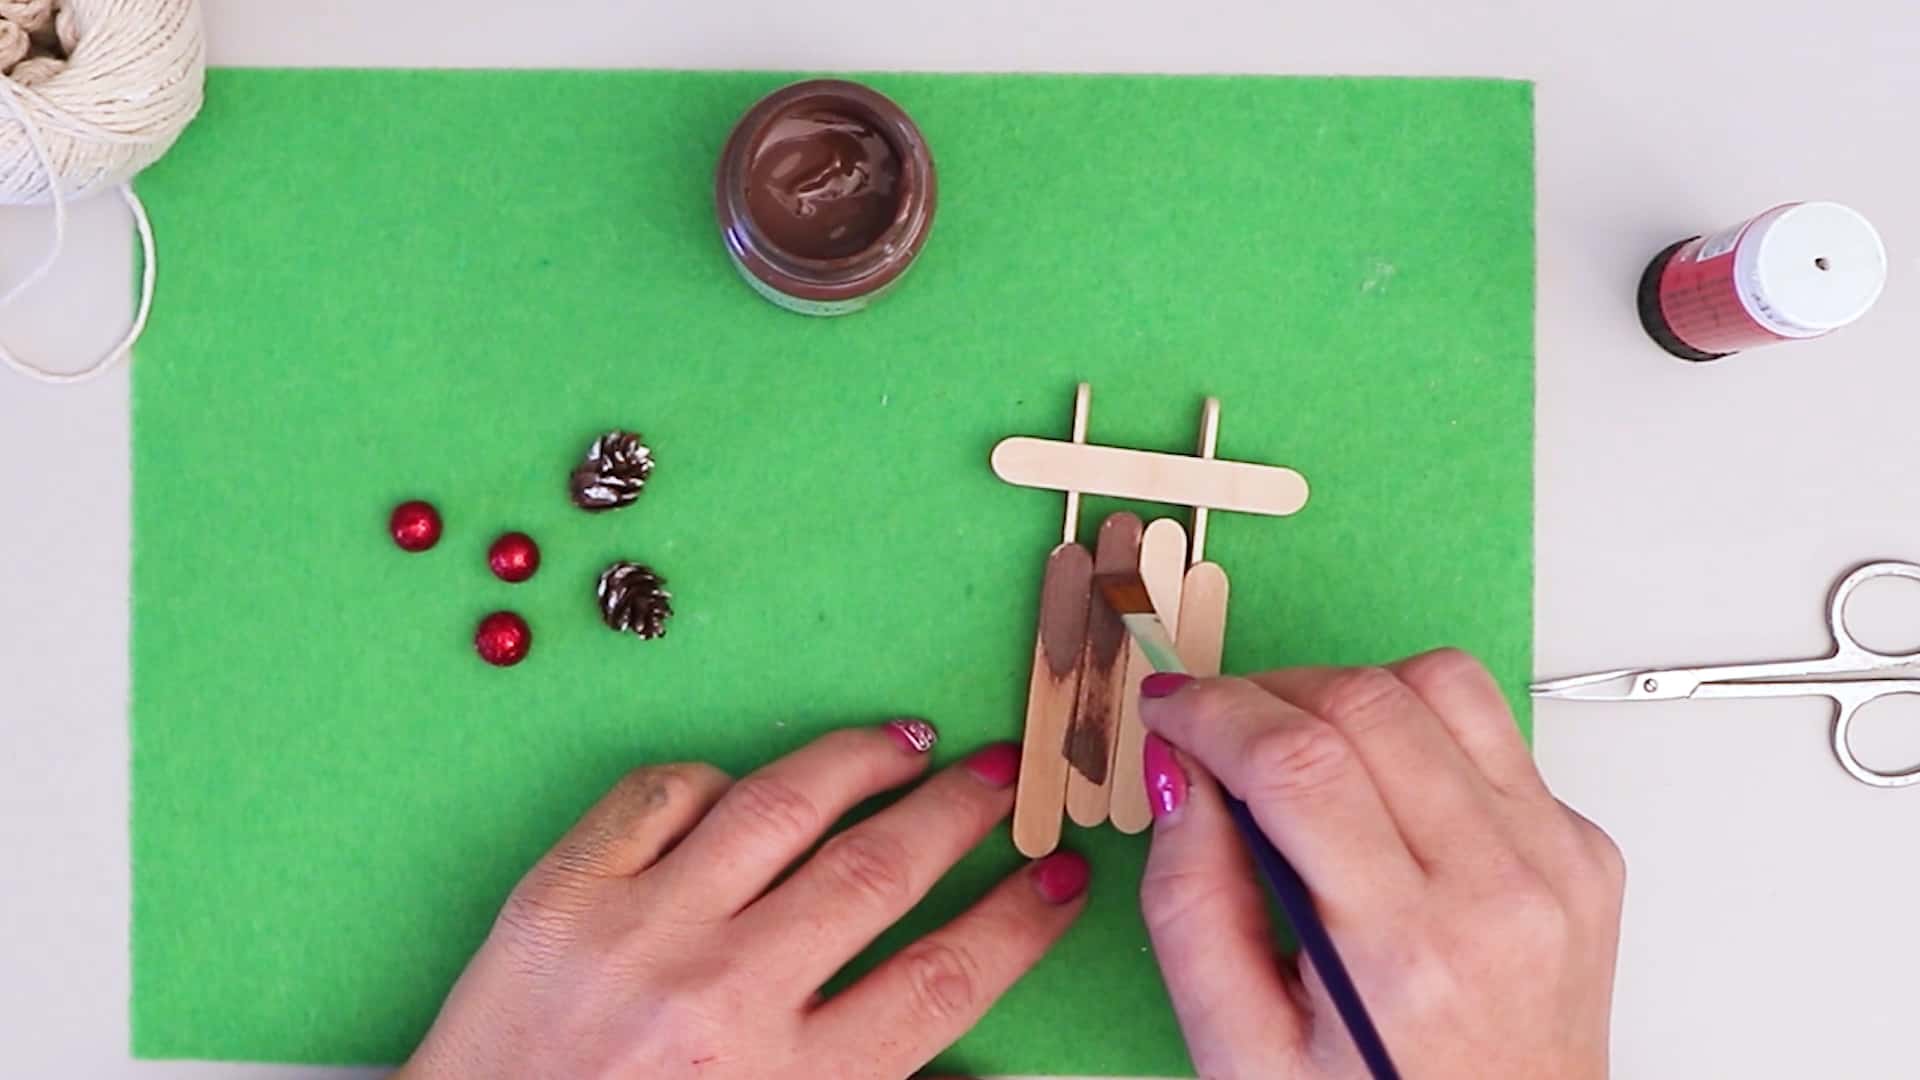
Step 4: make the runner
Apply glue to the side edge of one of your longer popsicle sticks. Turn it onto that side, so it stands upwards with its width becoming its height, and stick the glued side down lengthwise through the center of your left-most shorter popsicle stick. Your sledge now has a runner! Repeat this process on the right side to give the sledge a second runner. Position the long sticks so they protrude slightly more above the top ends of your shorter sticks than they do past the bottom ends, with their own ends sitting evenly to each other.


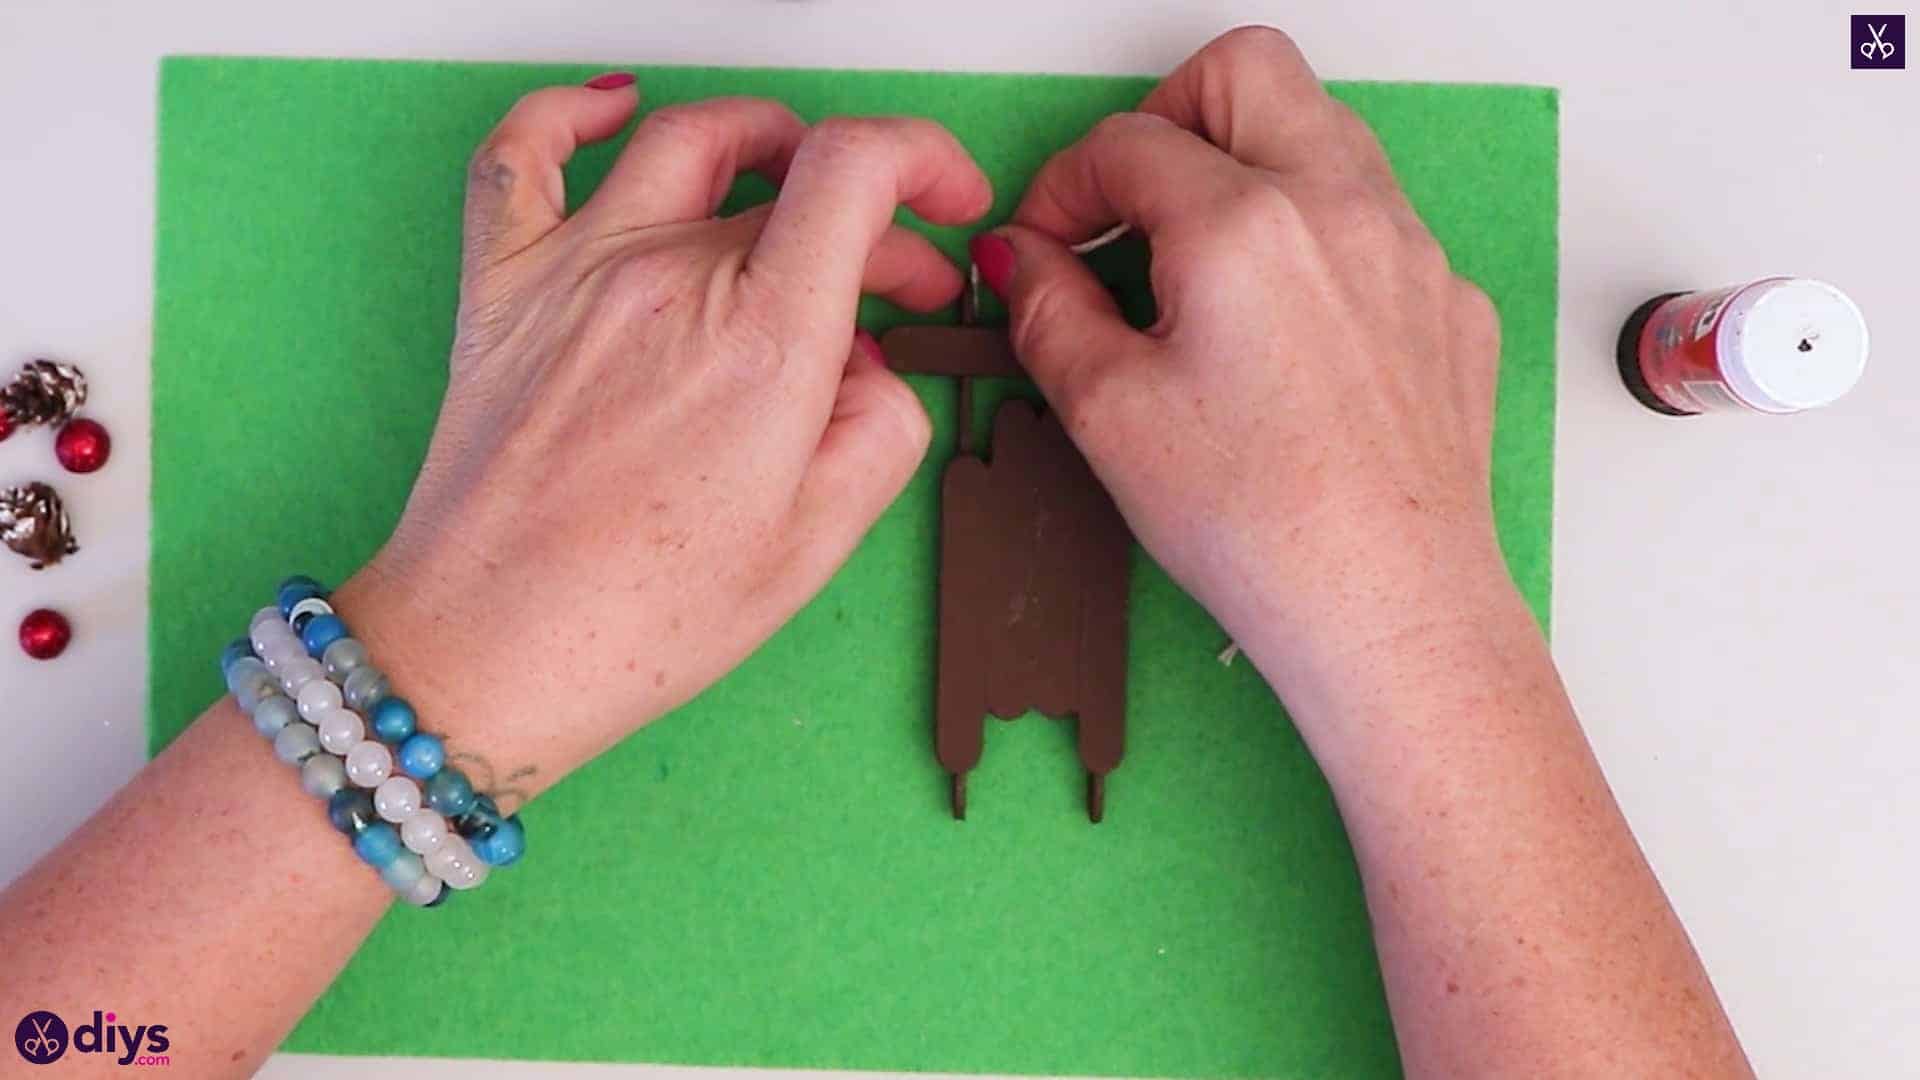
Step 5: bracing
Apply glue on one flat side of your last shorter popsicle stick. Flip your sledge over and place this shorter stick across the front ends of your longer runner sticks, like the brace of a real sledge. I made sure that the ends of this brace stick were even on either side. I also left some runner stick length sticking out above my brace stick for a realistic look too.
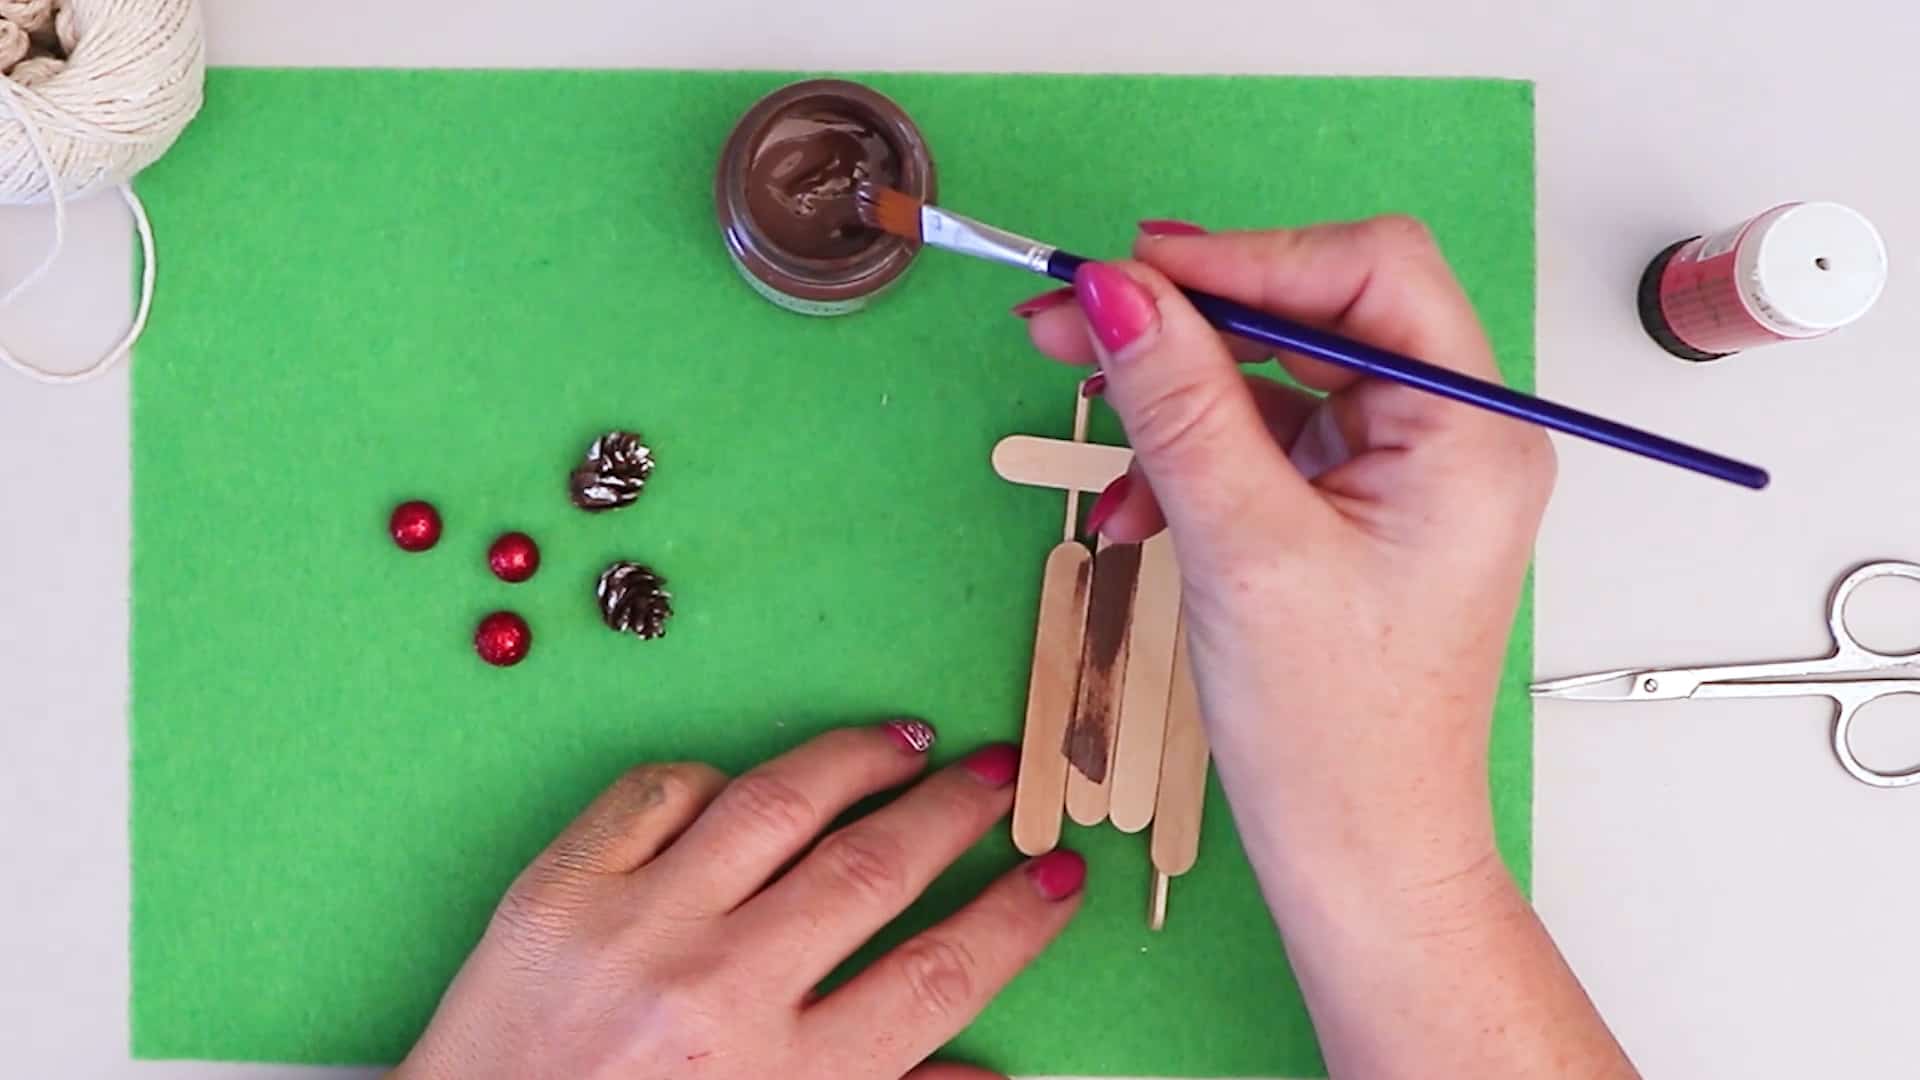
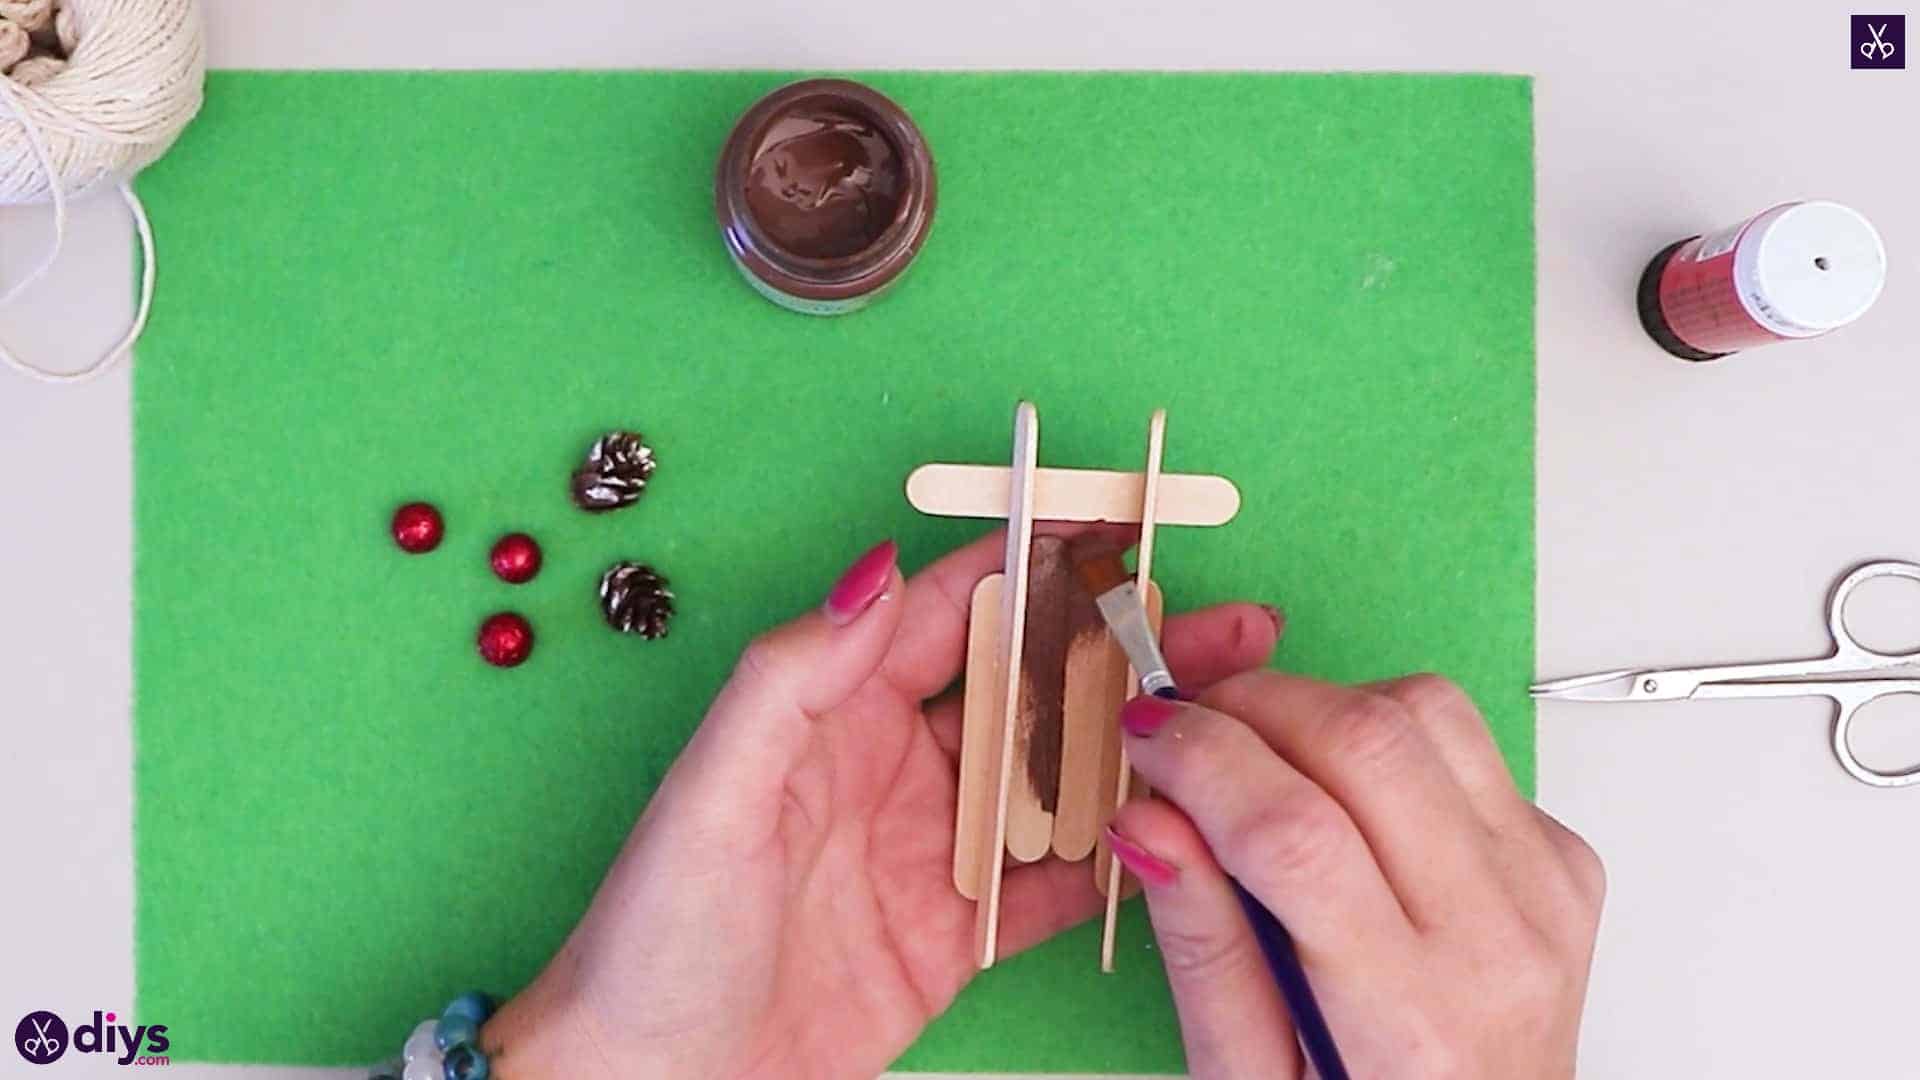
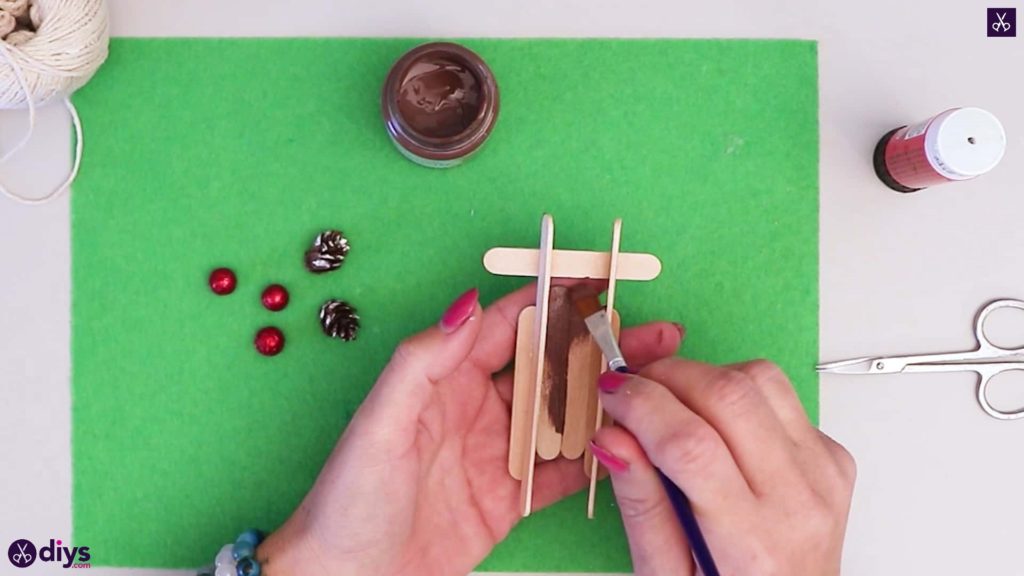
Step 6: paint
Use your paintbrush to paint your sled entirely brown like it’s made from dark stained wood, on the top and bottom.


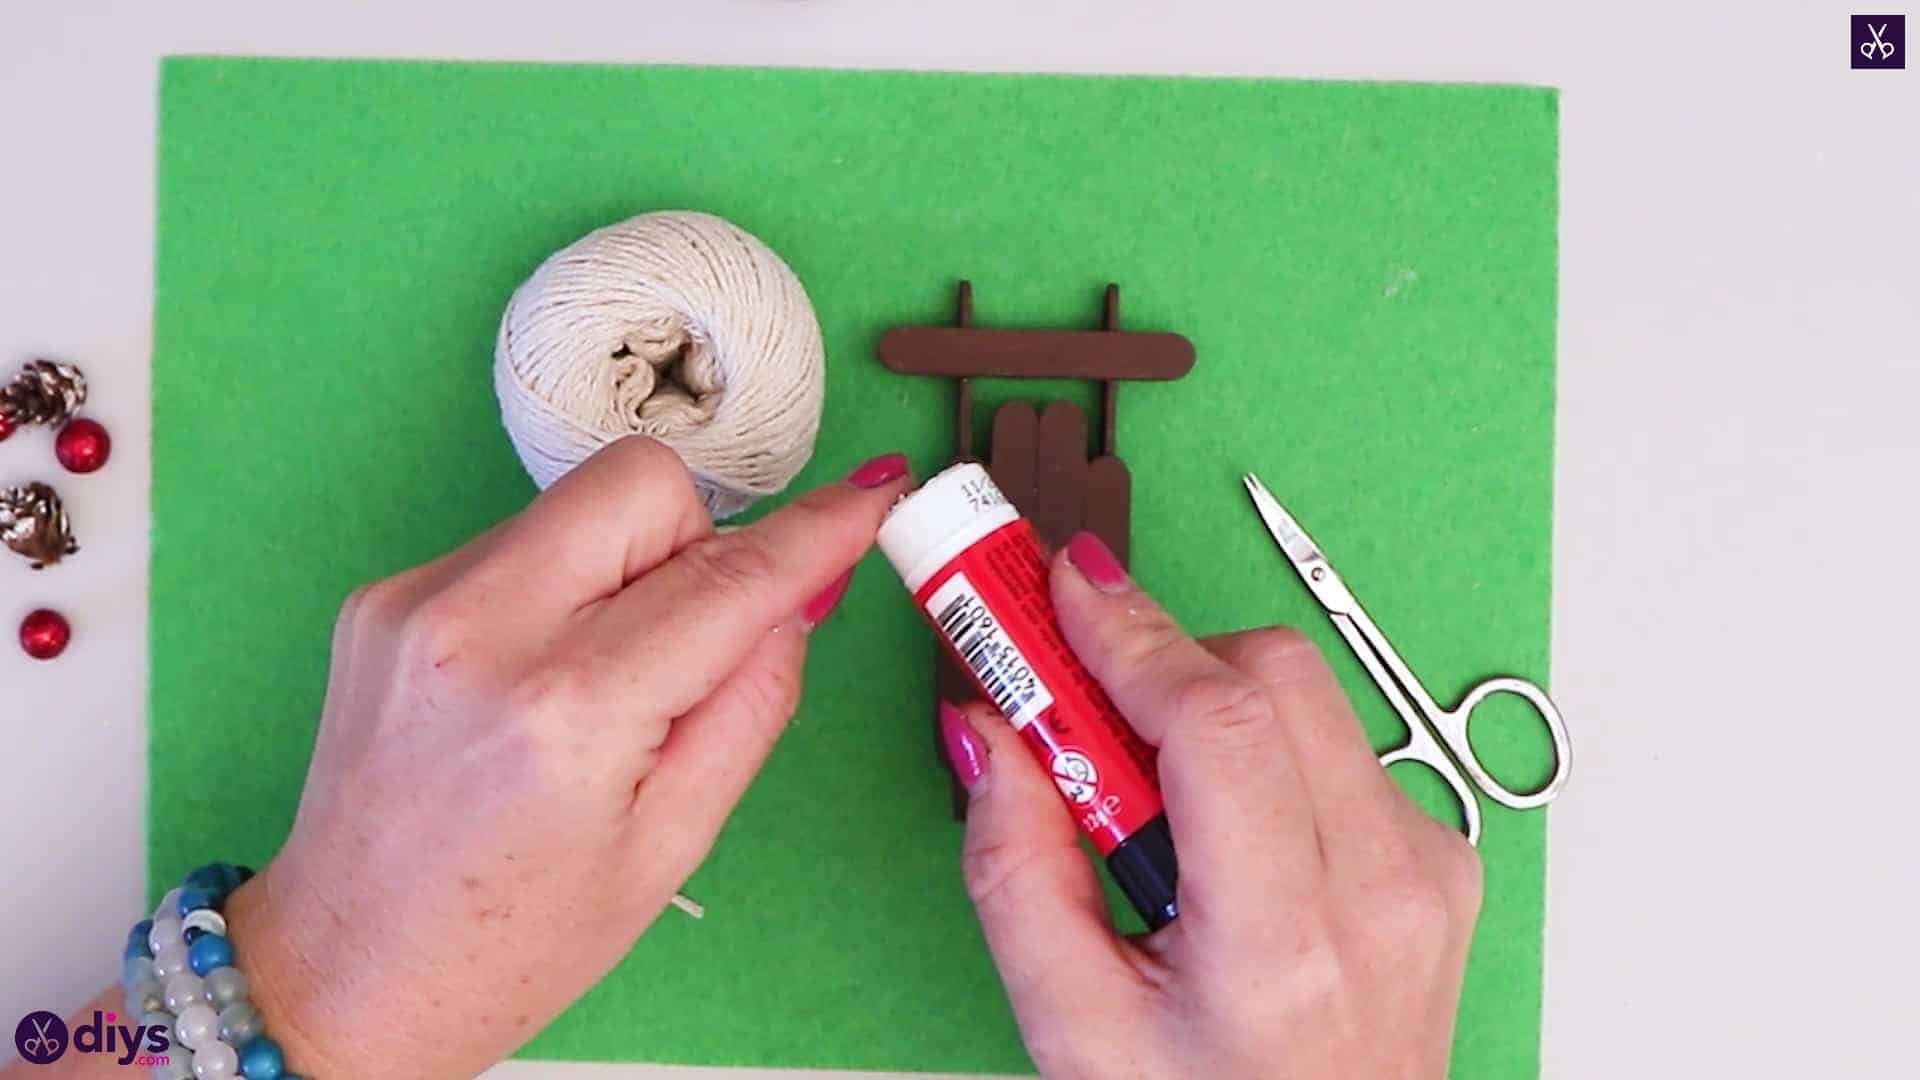
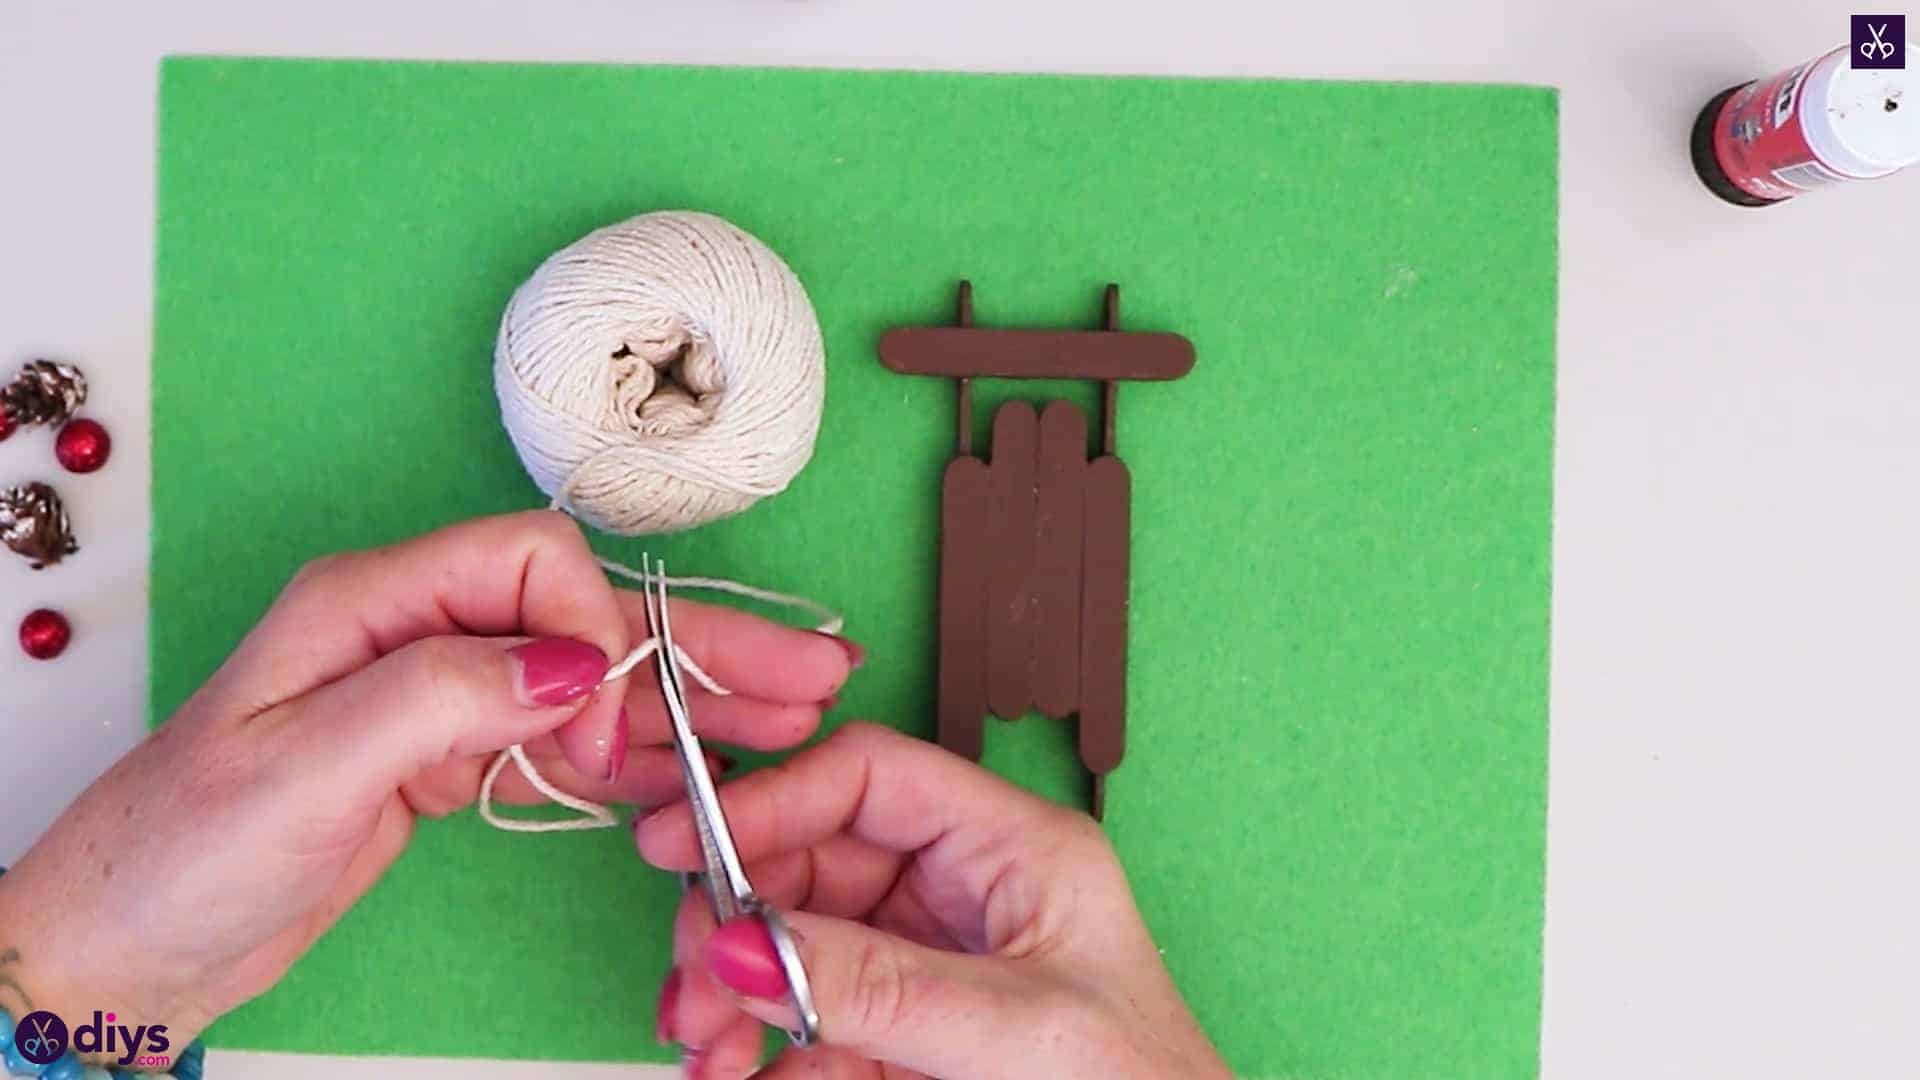
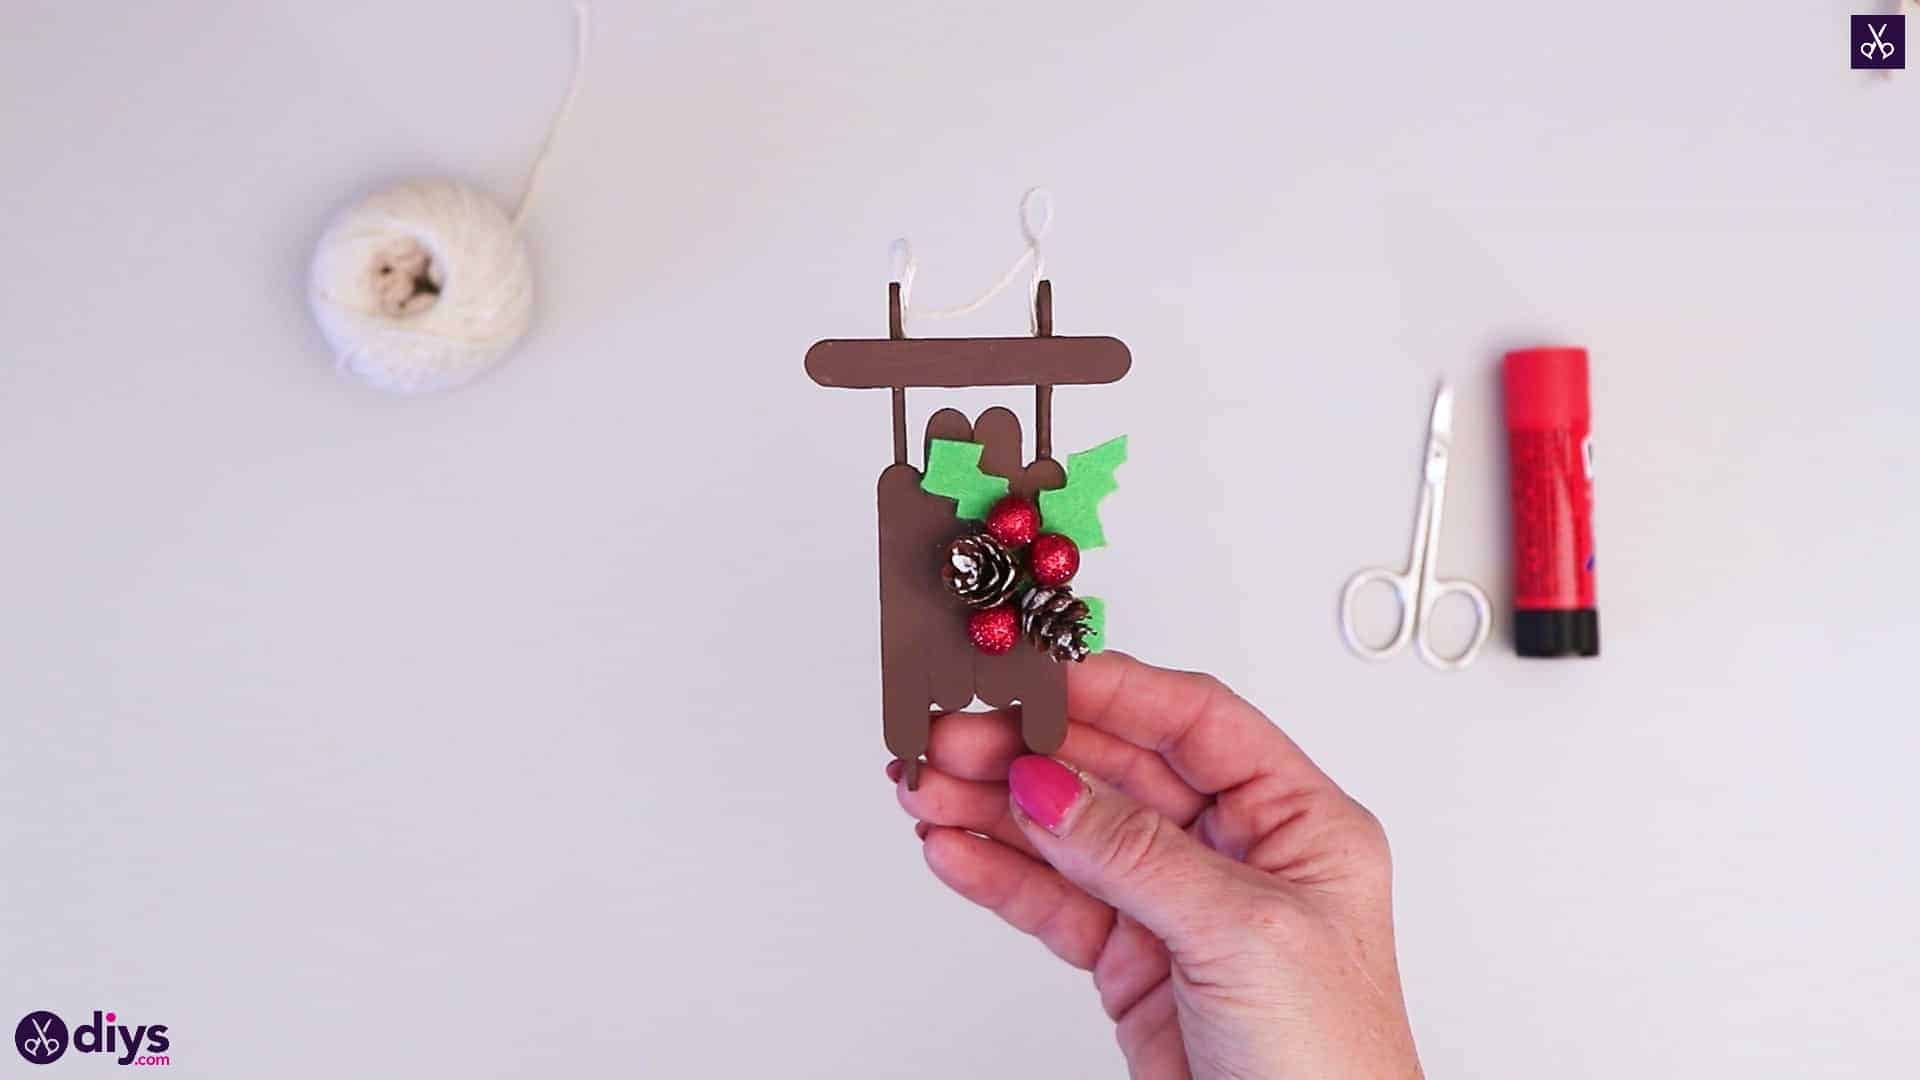
Step 7: make your loop
Take your string and fold the end over on itself until you have a loop about two inches long. Trim the loop off the ball of string. Unfold the loop and apply glue to each end of your resulting length of string. Flip your sledge upright again so it sits on its runners and stick one end to the inside of the right runner and the other end to the inside of the left runner. Your sledge now has an ornament string for you to hang it by!
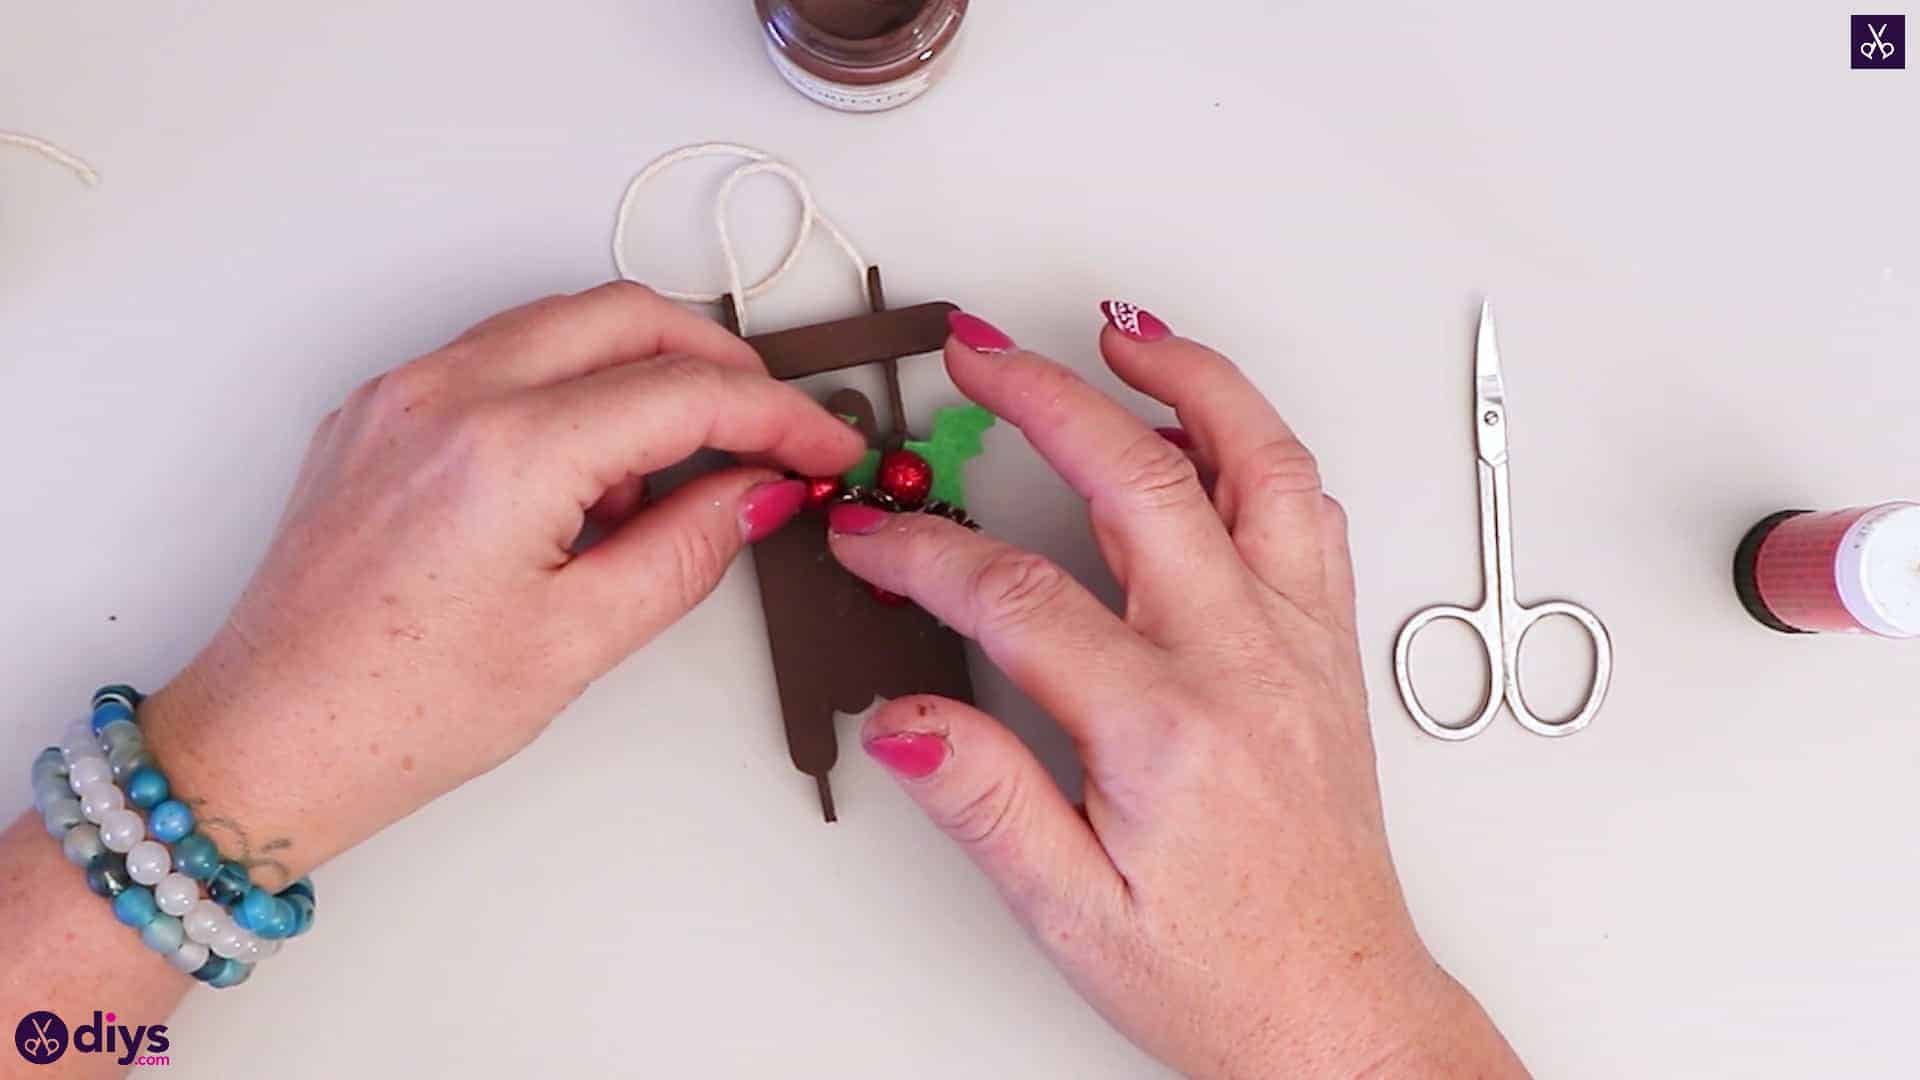
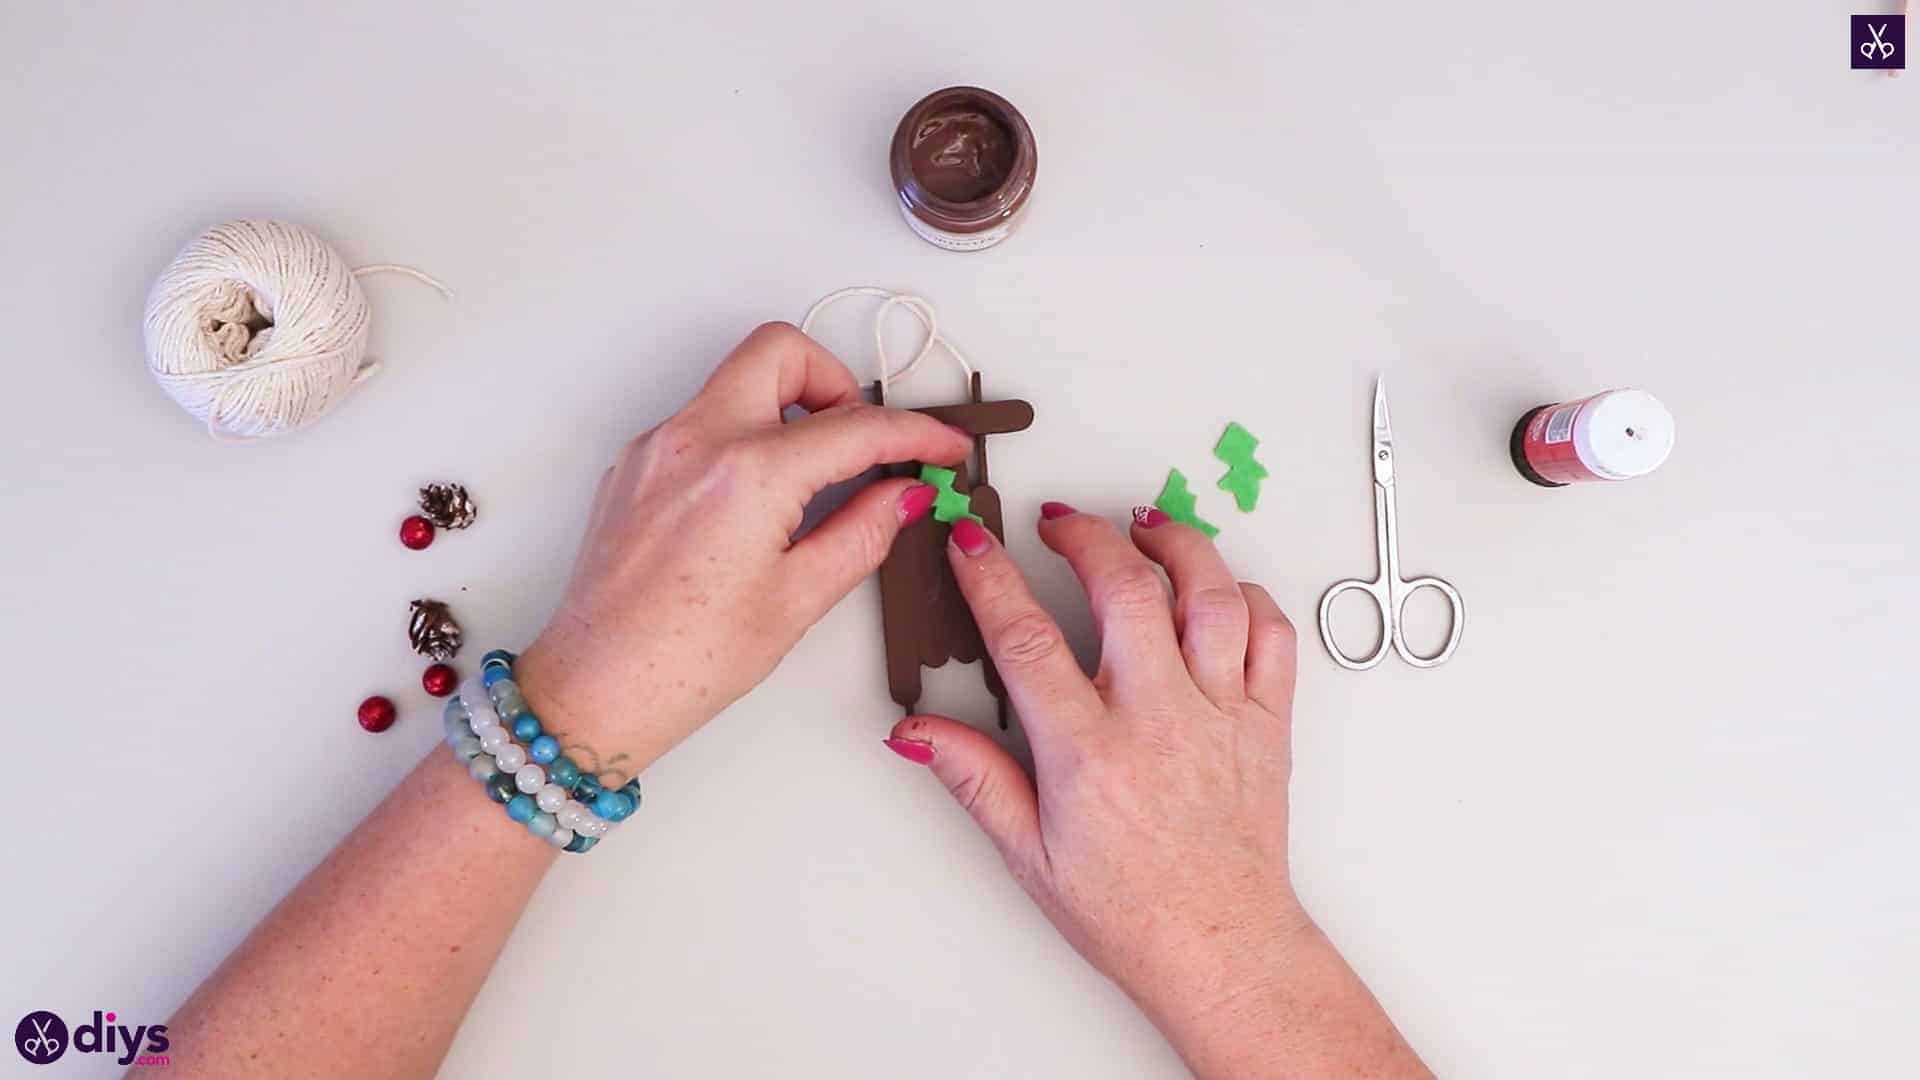
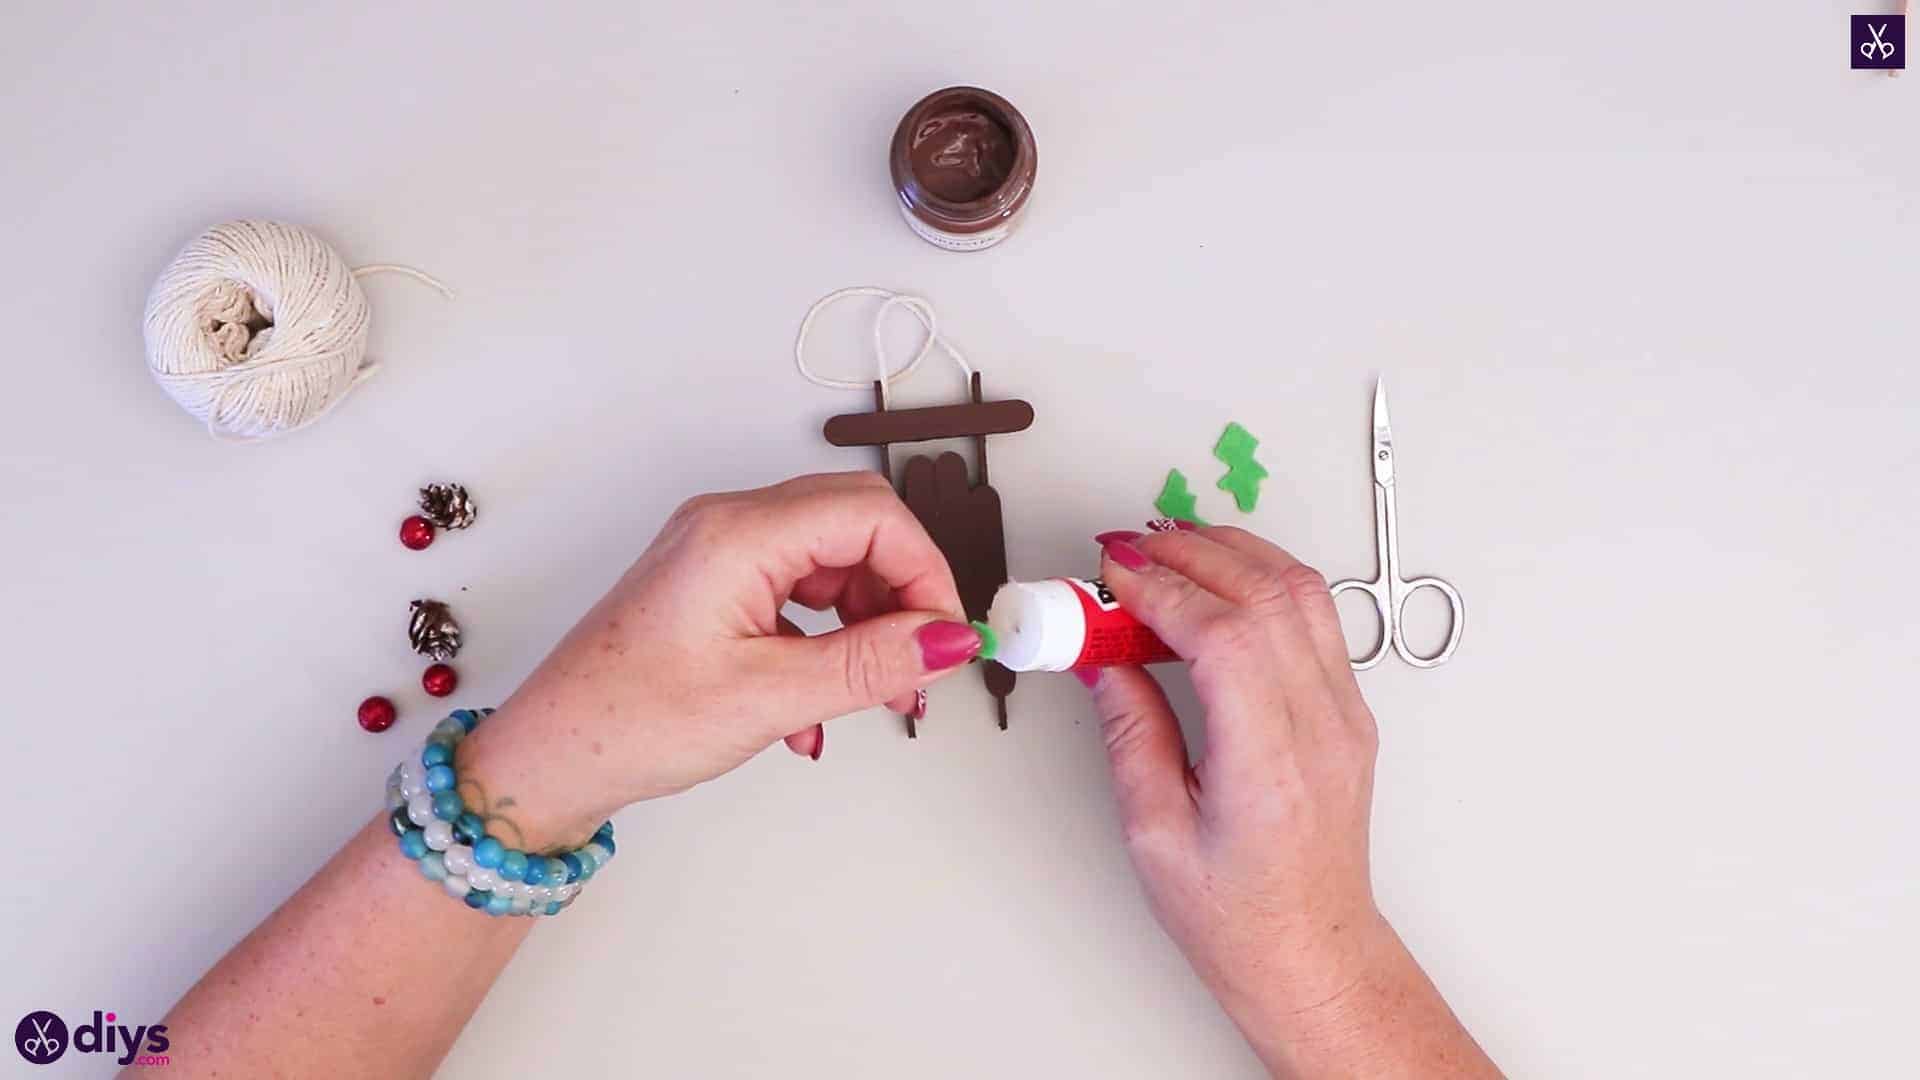
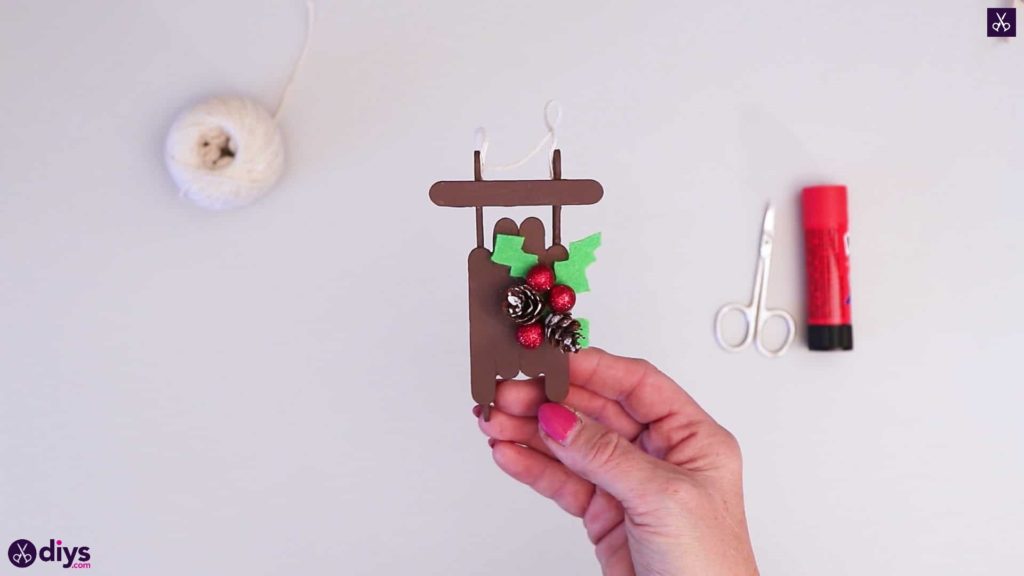
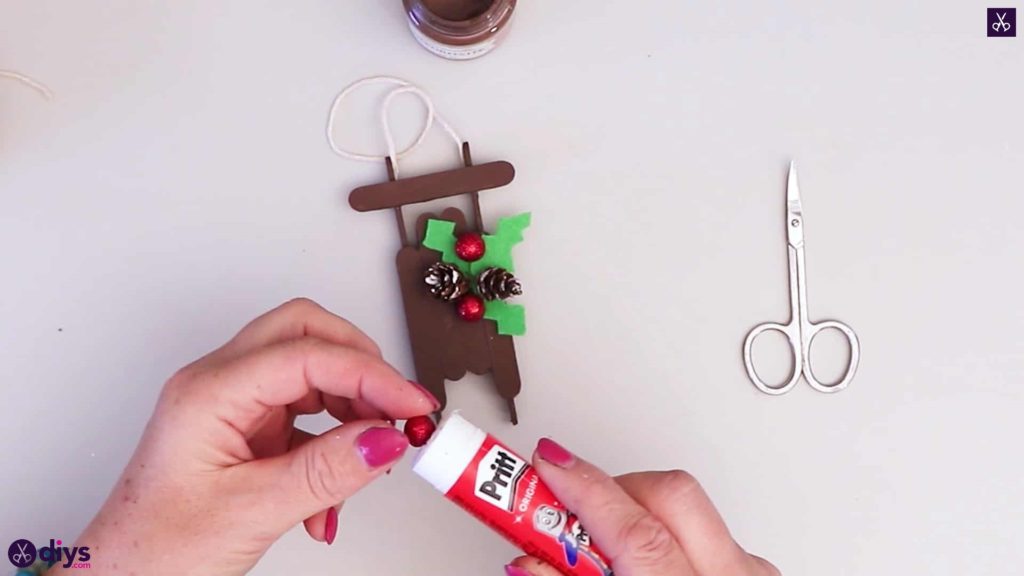
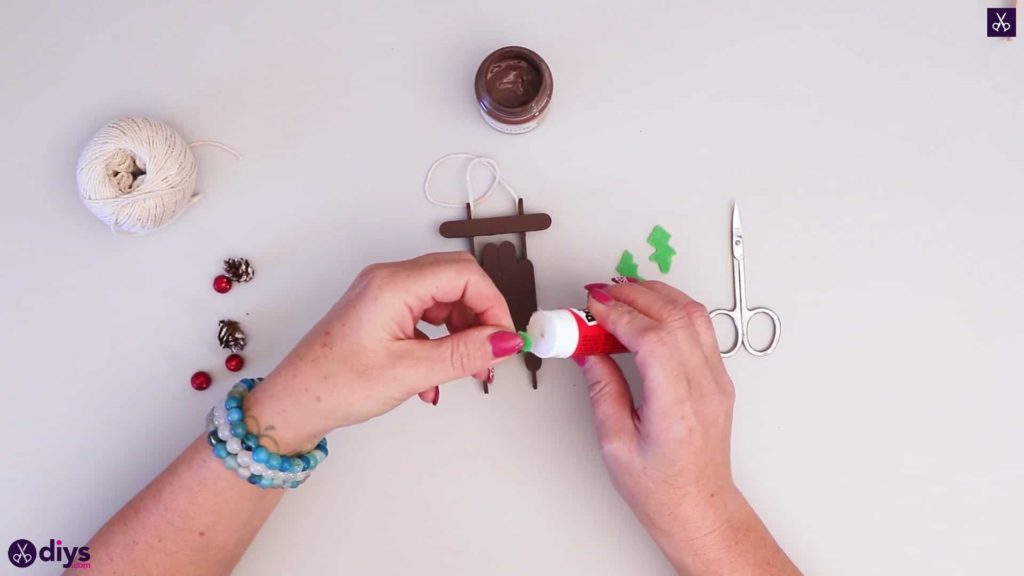
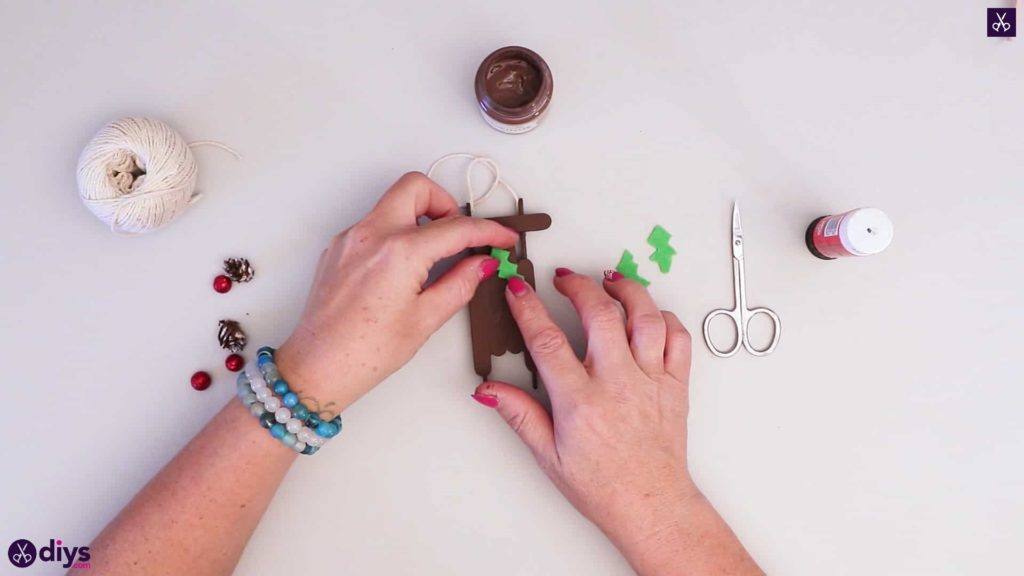
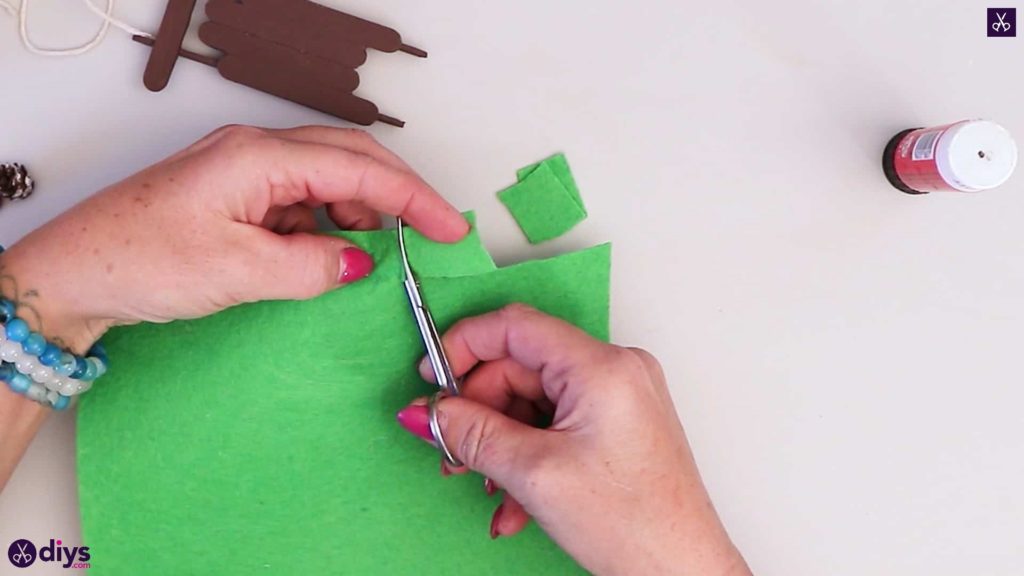
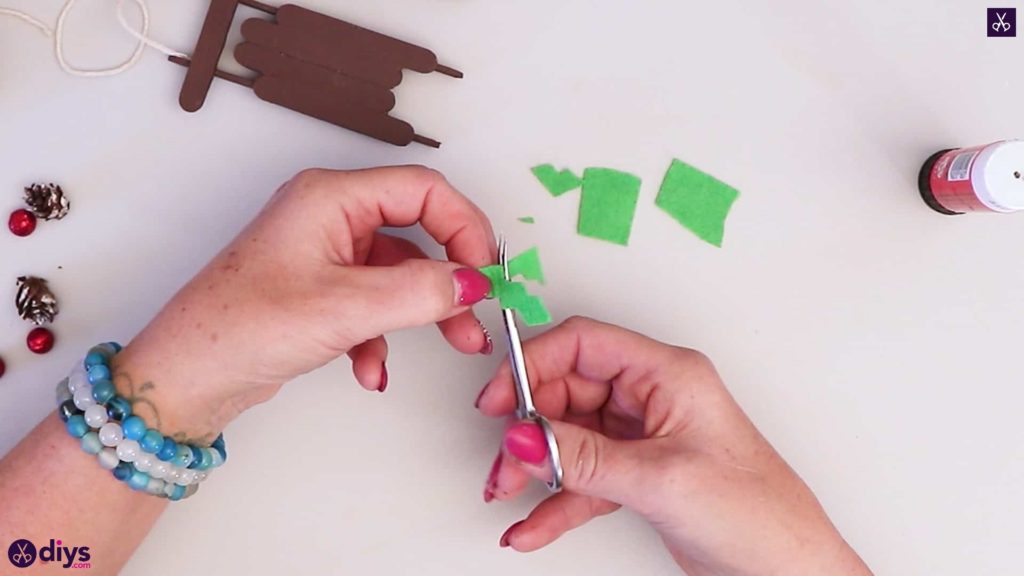
Step 8: make hollies
Cut three small squares from your sheet of green felt, and then trim the edges off each one in spiked shapes to make three little holly leaves. Apply glue to one pointed end of each leaf and stick them down in a bundle at the top right side of the sledge’s base. I stuck my ends down gathered together and layered, letting the other ends fan out like an actual sprig of holly.
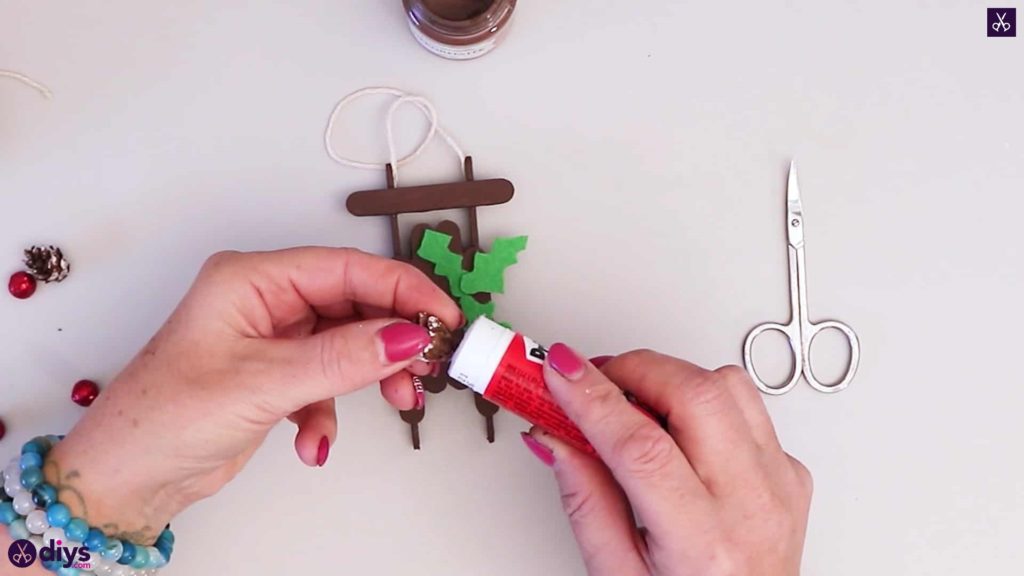
Step 9: glue the details
Apply glue to the bottoms of your crafting pine cones and red pearl beads, which represent berries. Stick these down arranged on top of the bases of your holly leaves, like a cluster of Christmas mistletoe.
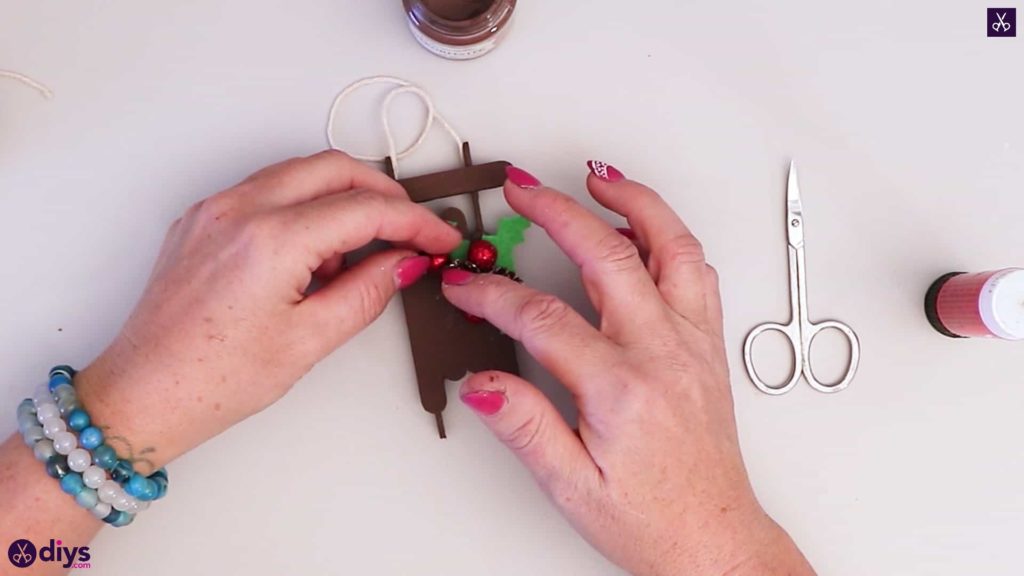
Your new DIY sledge ornament is officially finished! Just in case you’d like to try this project out for yourself, here’s a fantastic tutorial video to help you!