DIY Popsicle Stick House
Updated on November 19, 2025


Ever since I was a little kid, I have loved crafting with popsicle sticks. There are all kinds of things you can make with them, so long as you’re willing to have a little imagination, and they cheap and convenient! I love teaching my kids about the crafting supplies and techniques I love most, so I’m always looking for ways to help them make easy things from popsicle sticks, especially since that’s something they can handle doing by themselves, which makes them feel independent. Recently, we spent an entire afternoon making cute popsicle stick houses! One of our kids decided to stick a magnet to the back of theirs so it would stick to the fridge, while the other glued a looped string to the back and hung it in their window. Whatever you decide to do with yours, here’s a whole guide to making the house happen!
Check out these step by step instructions complete with photos or scroll to the bottom of this post to find a video tutorial, just in case you’re more of a visual learner.
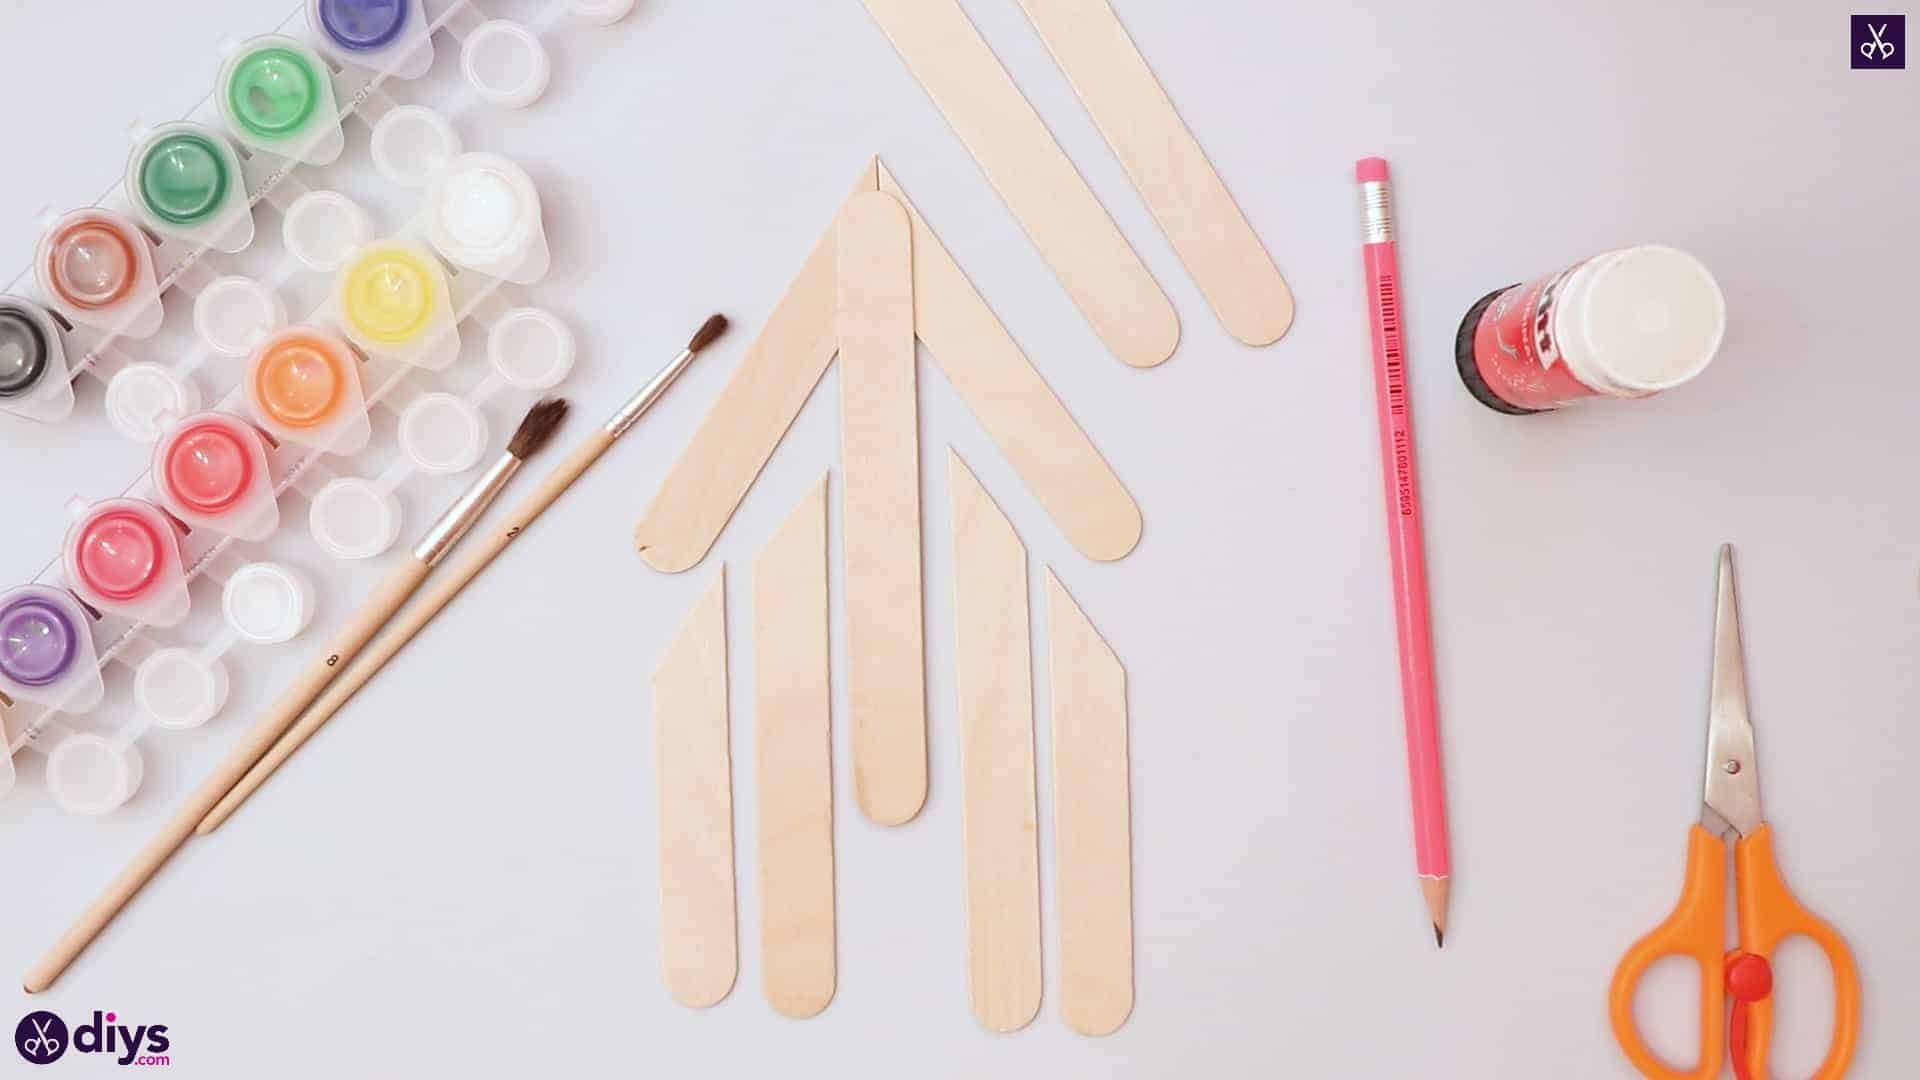
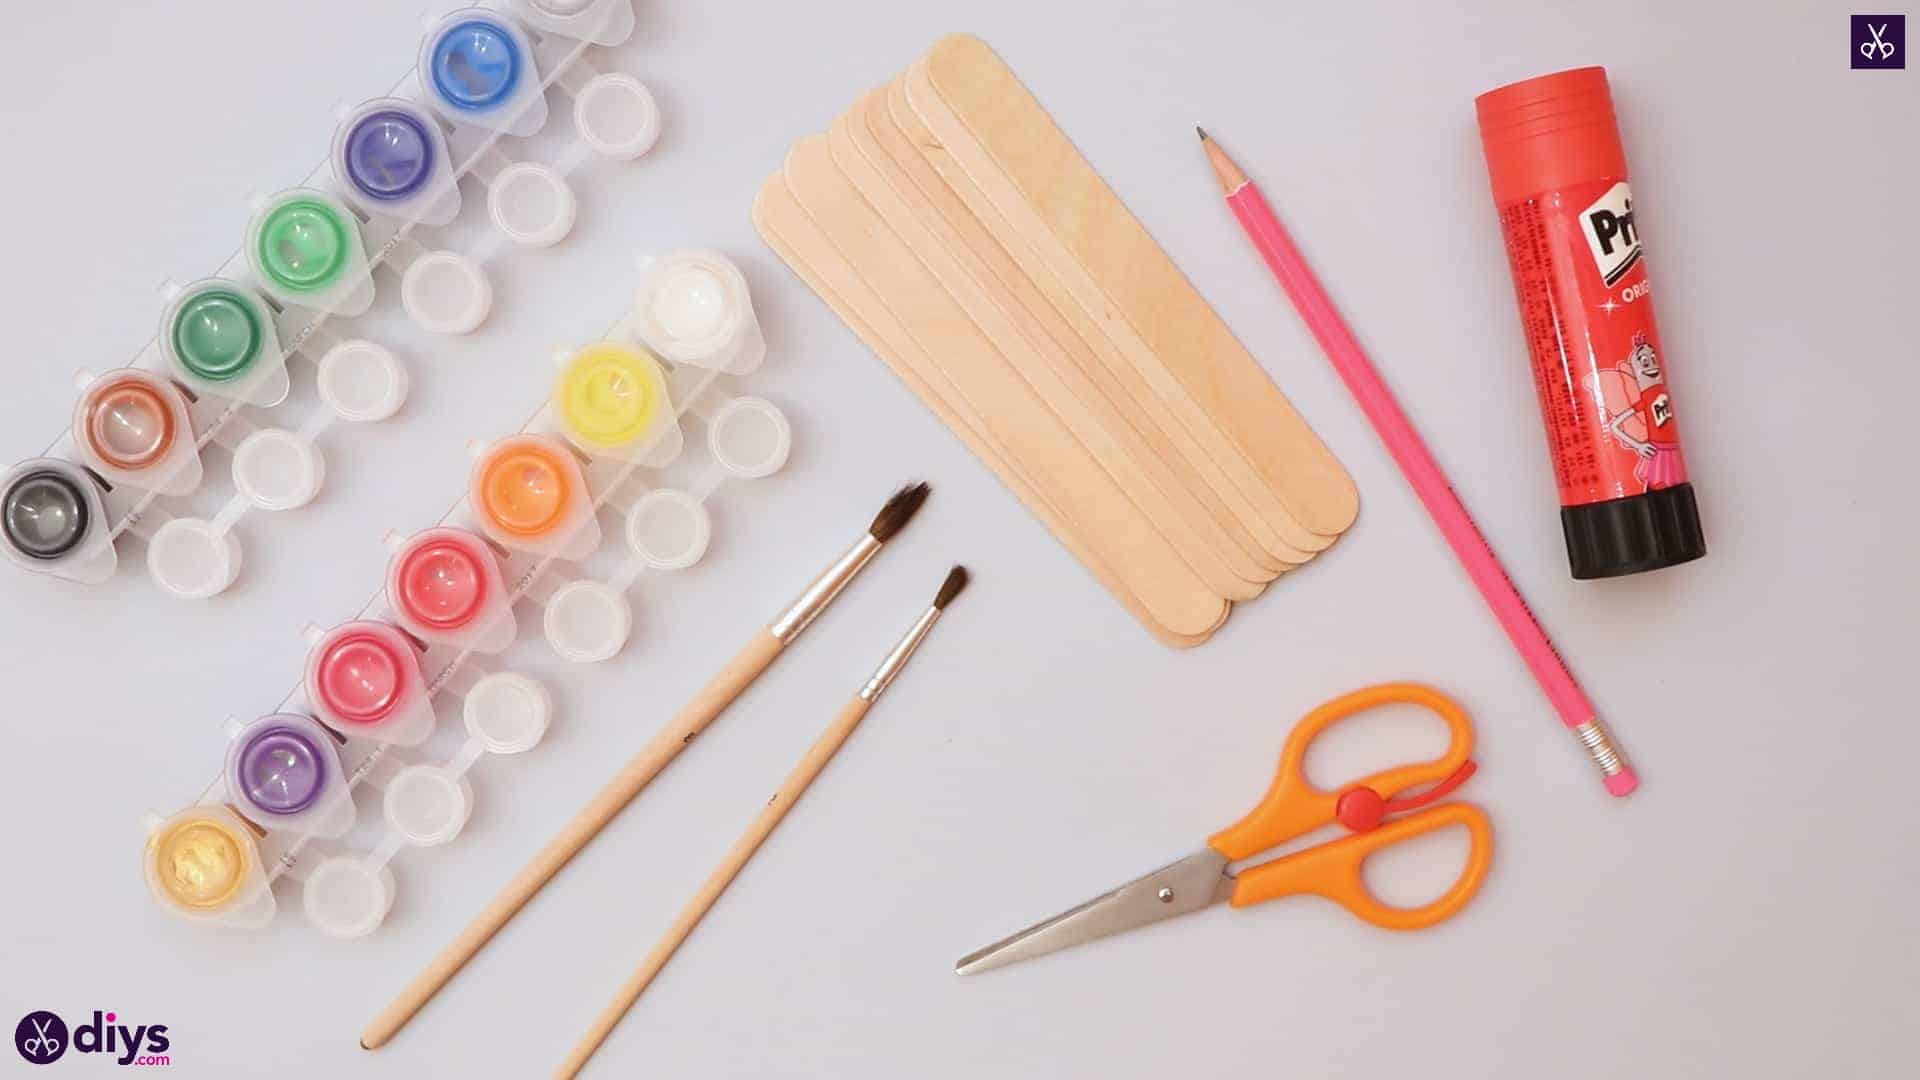
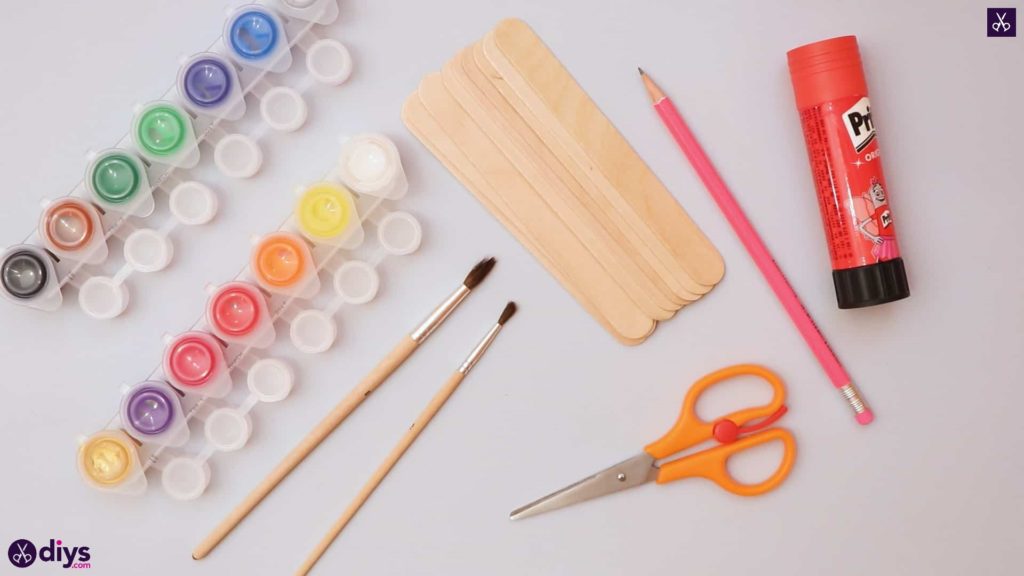
For this project, you’ll need:
- Popsicle sticks
- Paint (brown, blue, and red)
- A paintbrush
- A glue stick
- Scissors

Step 1:
Gather your materials!
Step 2:
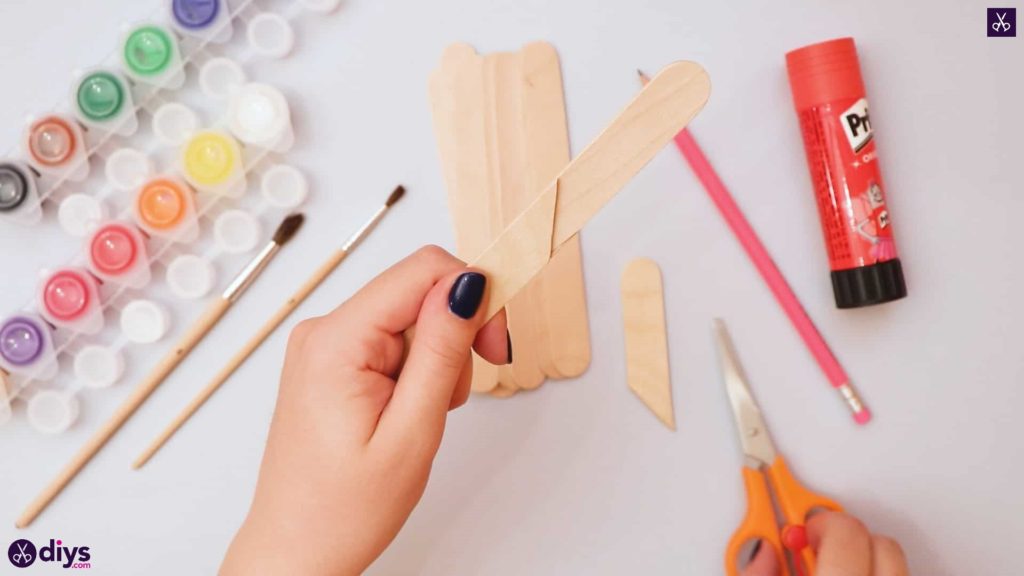
Find the middle of your first popsicle stick and angle your scissors upwards from there in order to cut the stick in half diagonally, creating two new, shorter sticks with angled edges.

Step 3:
Use one of your halved popsicle sticks as a guide to cut another in half, lining the two up end to end with the full stick underneath so you can angle your scissors along that same diagonal edge and make two more halved sticks of the same size and shape.
Step 4:
On two of your halved sticks, apply glue to the angled, diagonal cuts. Turn them so the sticks face opposite directions and their diagonal edges line up and sit flush against each other, creating a point at the top.
![]()
Step 5:
Lay your new pointed shape down flat on your work surface, then apply glue to one end of another whole popsicle stick that hasn’t been cut. Line it up in the centre of your pointed piece so that it covers the line where the diagonal edges meet, but sits low enough that none of its rounded edge peeks over the top or sides. Stick the whole popsicle stick down there.
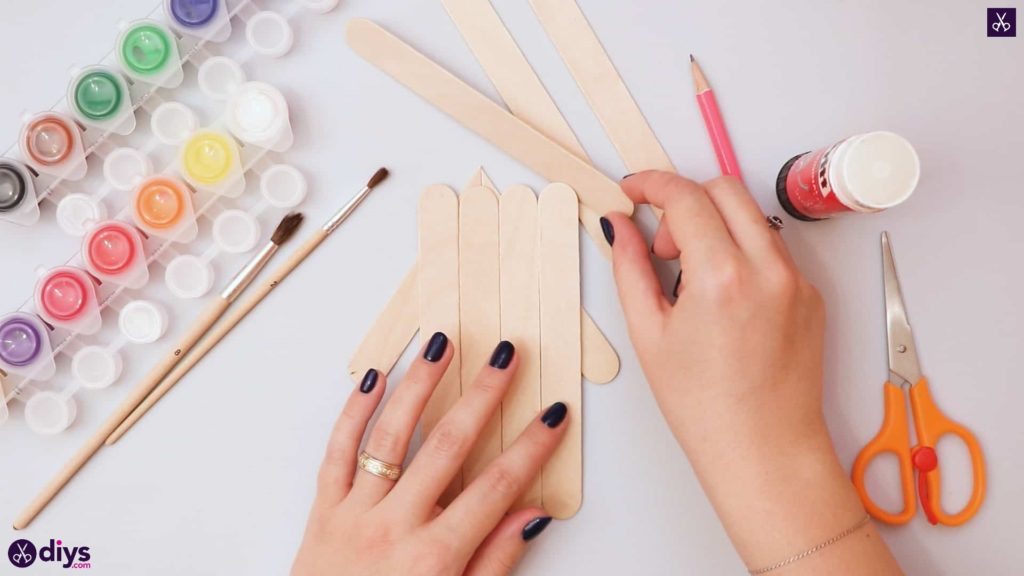
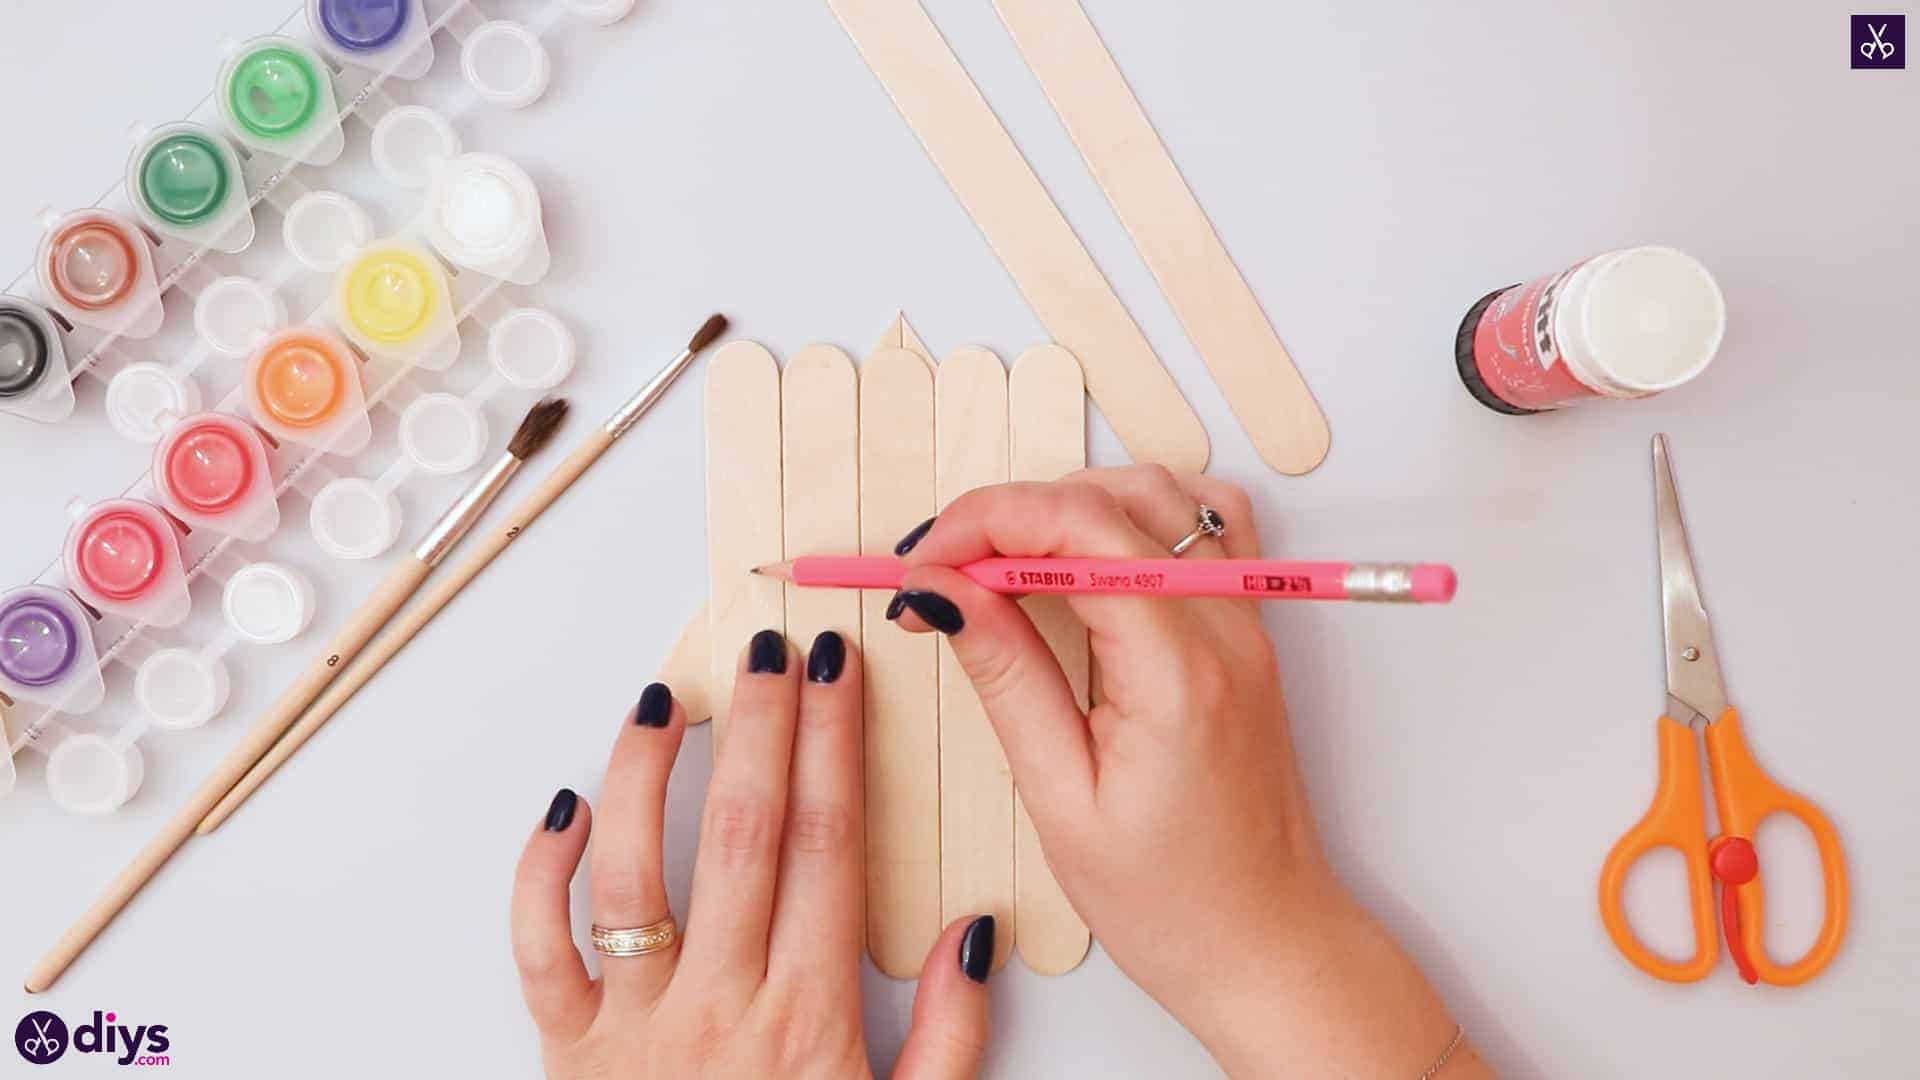
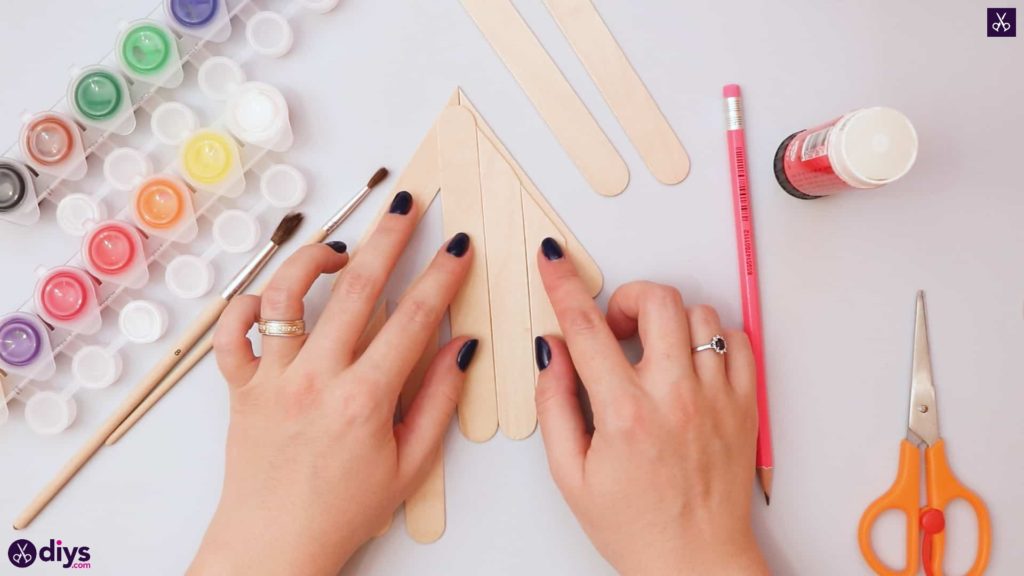
Step 6:
Next, lay four whole popsicles sticks (two on each side) down next to your middle stick so they sit flush against the sides of the ones next to it with their ends evenly lined up at the top and bottom. Use your pencil to sketch a diagonal line across your lined up popsicle sticks that starts where the base sticks (the ones in your pointed shape on the bottom) disappears under the hole sticks and ends where the point peeks out from underneath them at the top. Do the same on the other side so you end up with a sort of pencil drawn triangle.
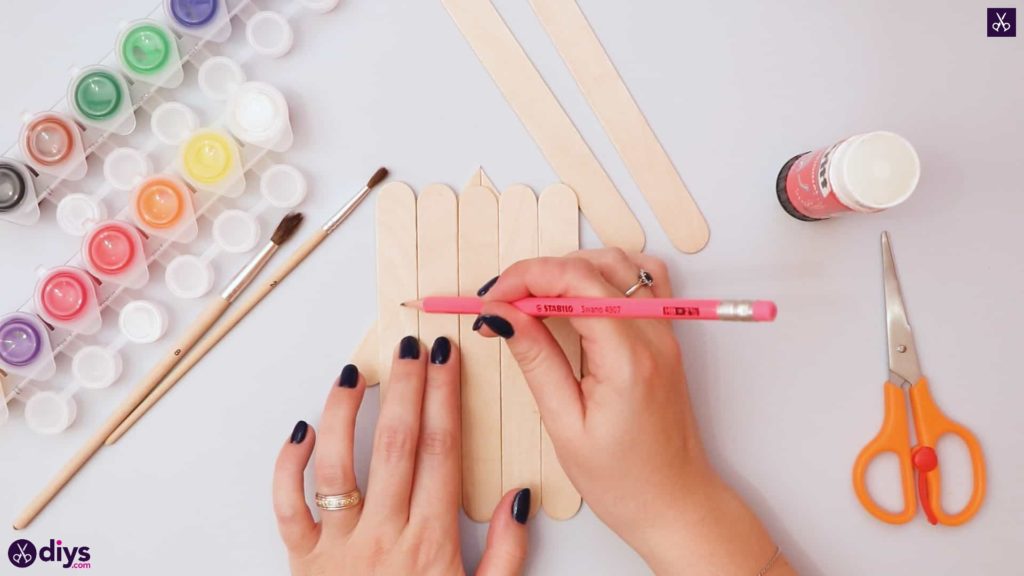
Step 7:
You’ll notice that your pencil lines hit each stick at a different height in order to make them fit the way the pointed piece underneath, which is the roof of your house, tapers. This is to make them the right length to keep the bottom of your house nice and straight, with all the popsicle sticks lined up evenly. Cut the tops of your popsicle sticks off along the diagonal pencil lines to make them the right size, pointing diagonally in the right direction at the top.
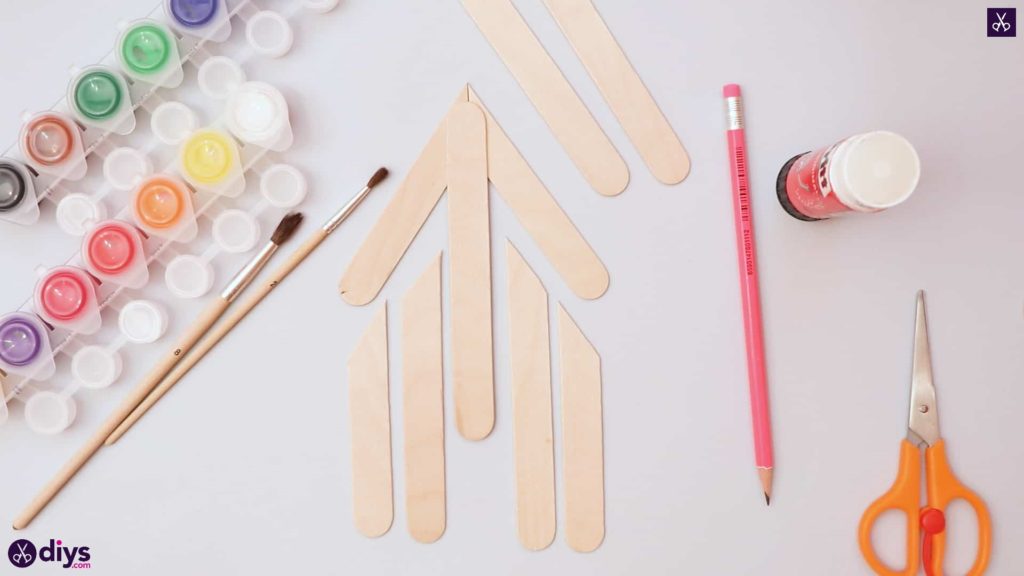
Step 8:
Apply glue on the underside of your newly cut pieces and stick them back into place, right where they were when you sketched your previous pencil line. They should create an essentially straight diagonal line downward from the top point, all along the sides. Make sure you glue each side.
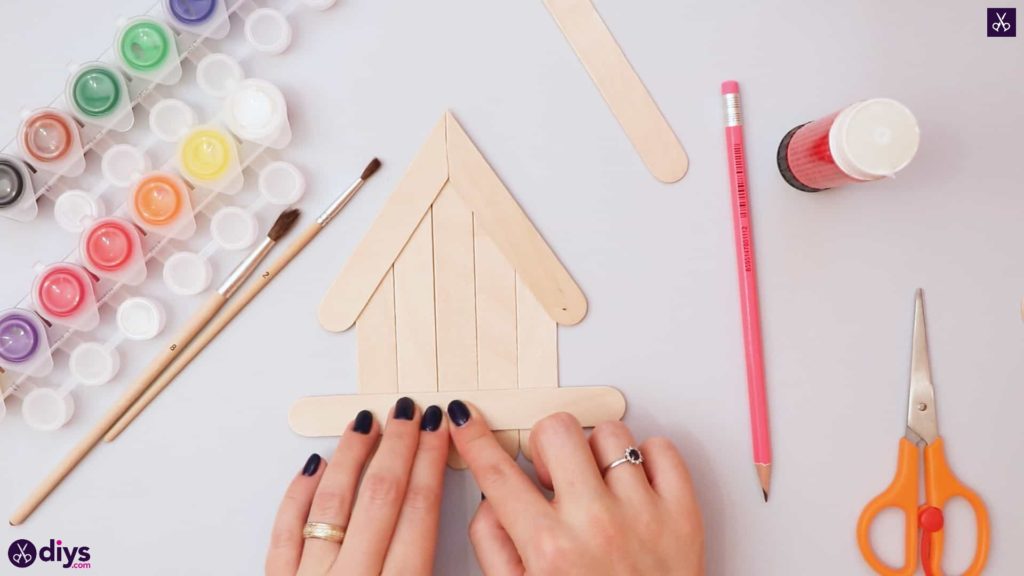
Step 9:
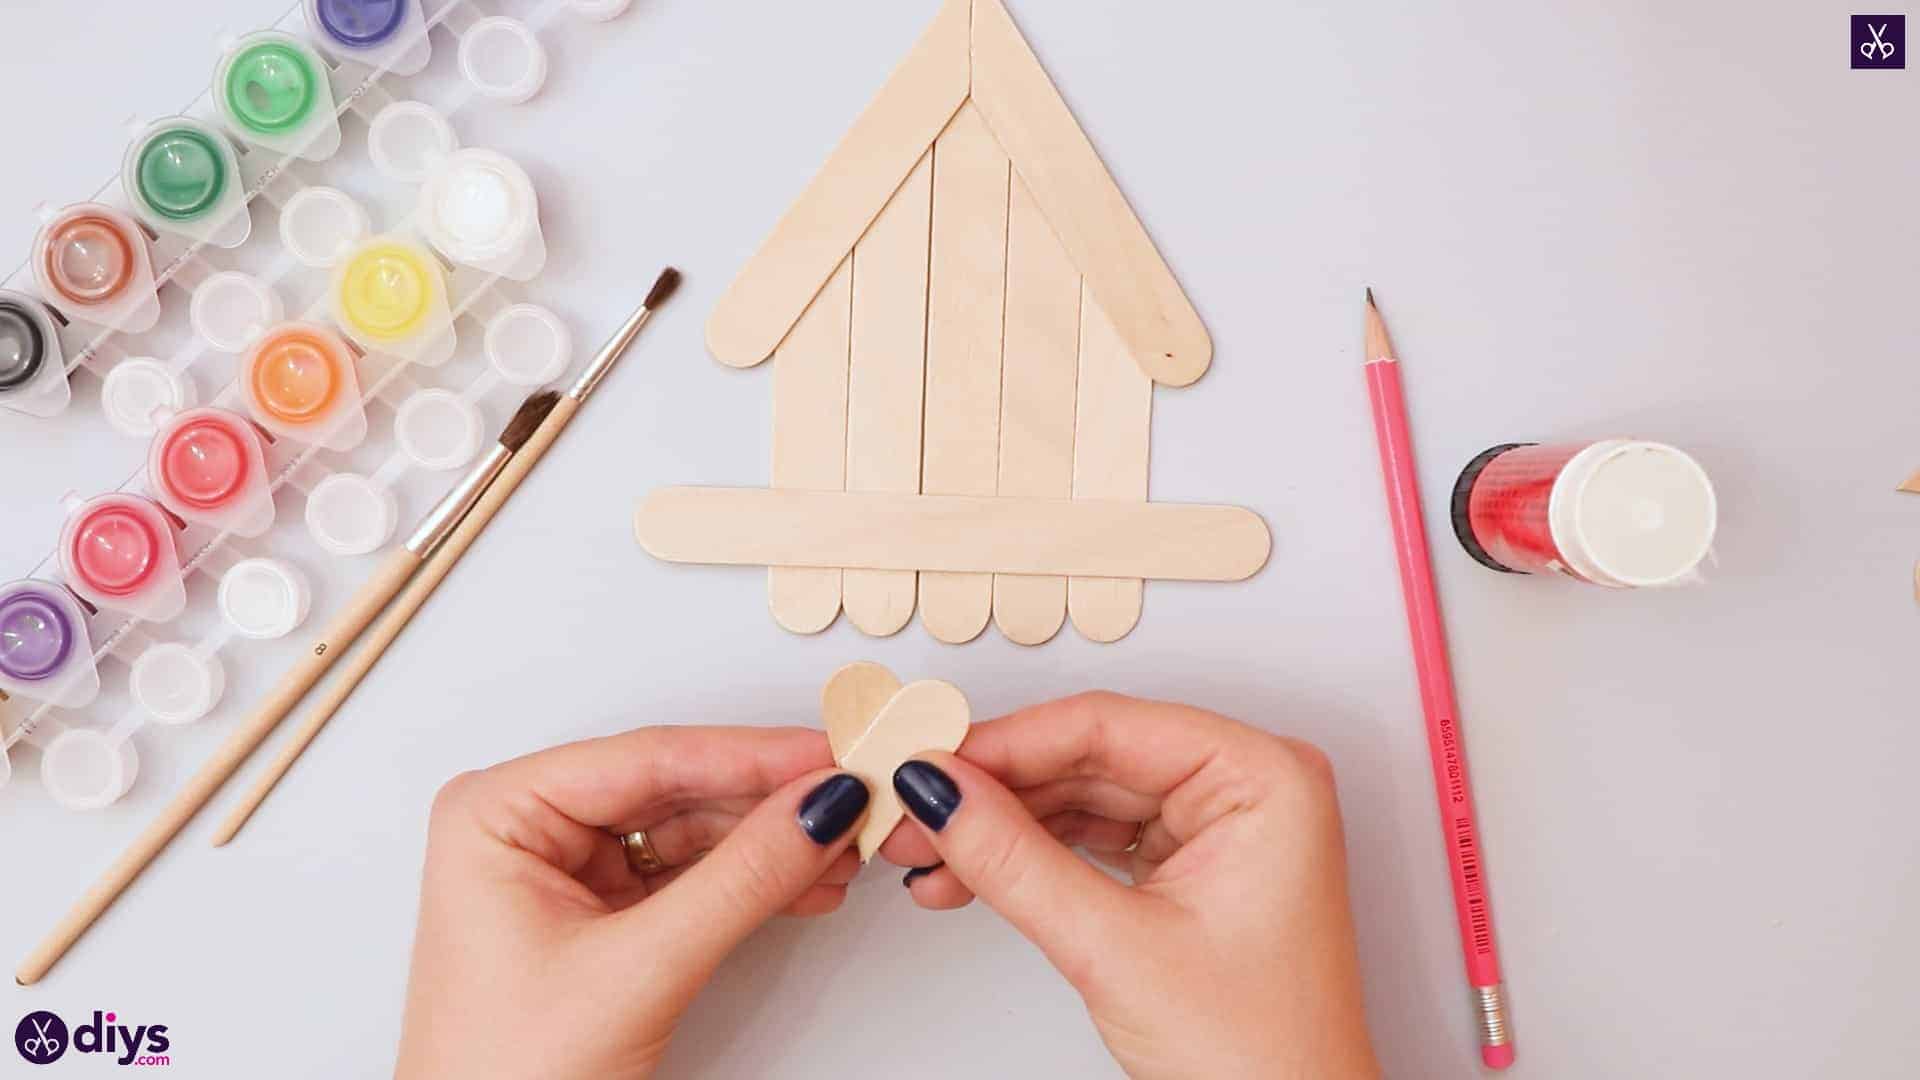
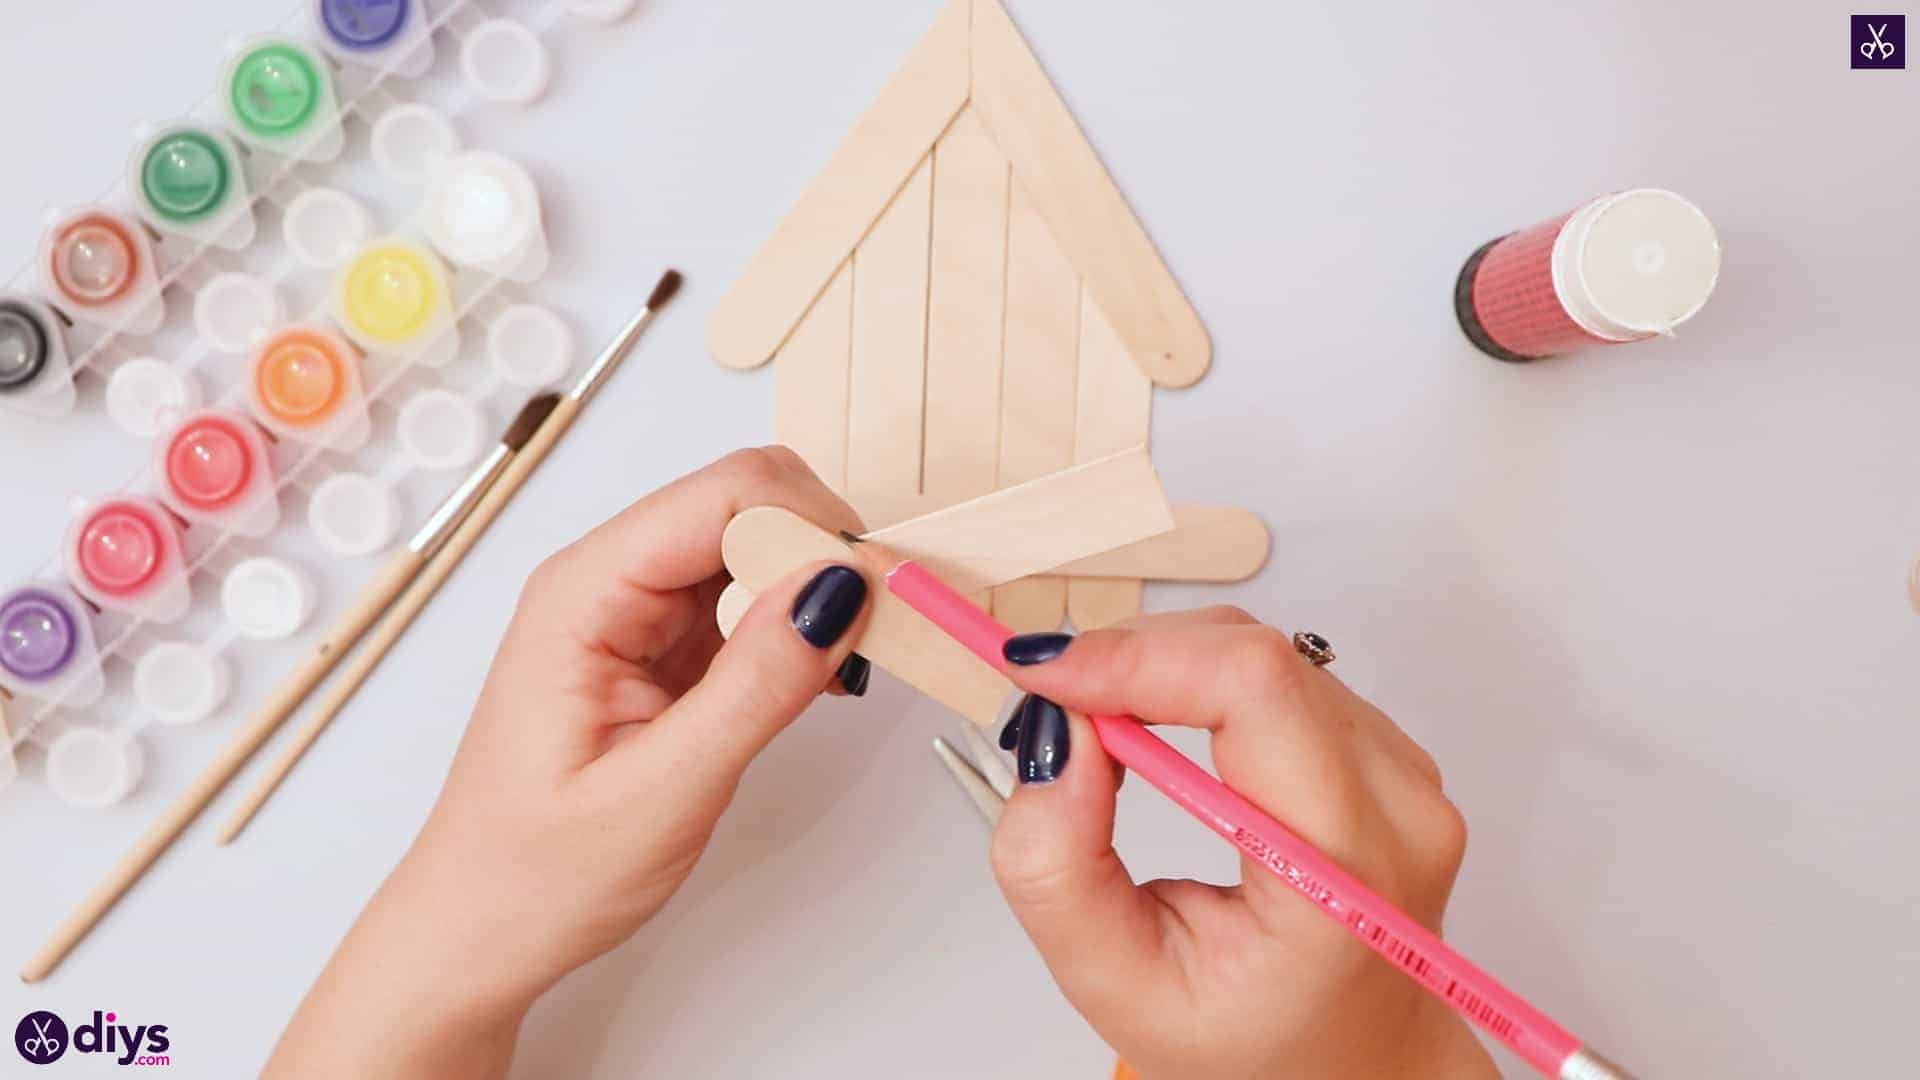
Flip your whole shape over and pick up one of your remaining spare, whole popsicle sticks. Apply glue all along one side, turn it over, and stick it down about half an inch above the bottom edge of your vertical popsicles, so it sits horizontally across all of them.
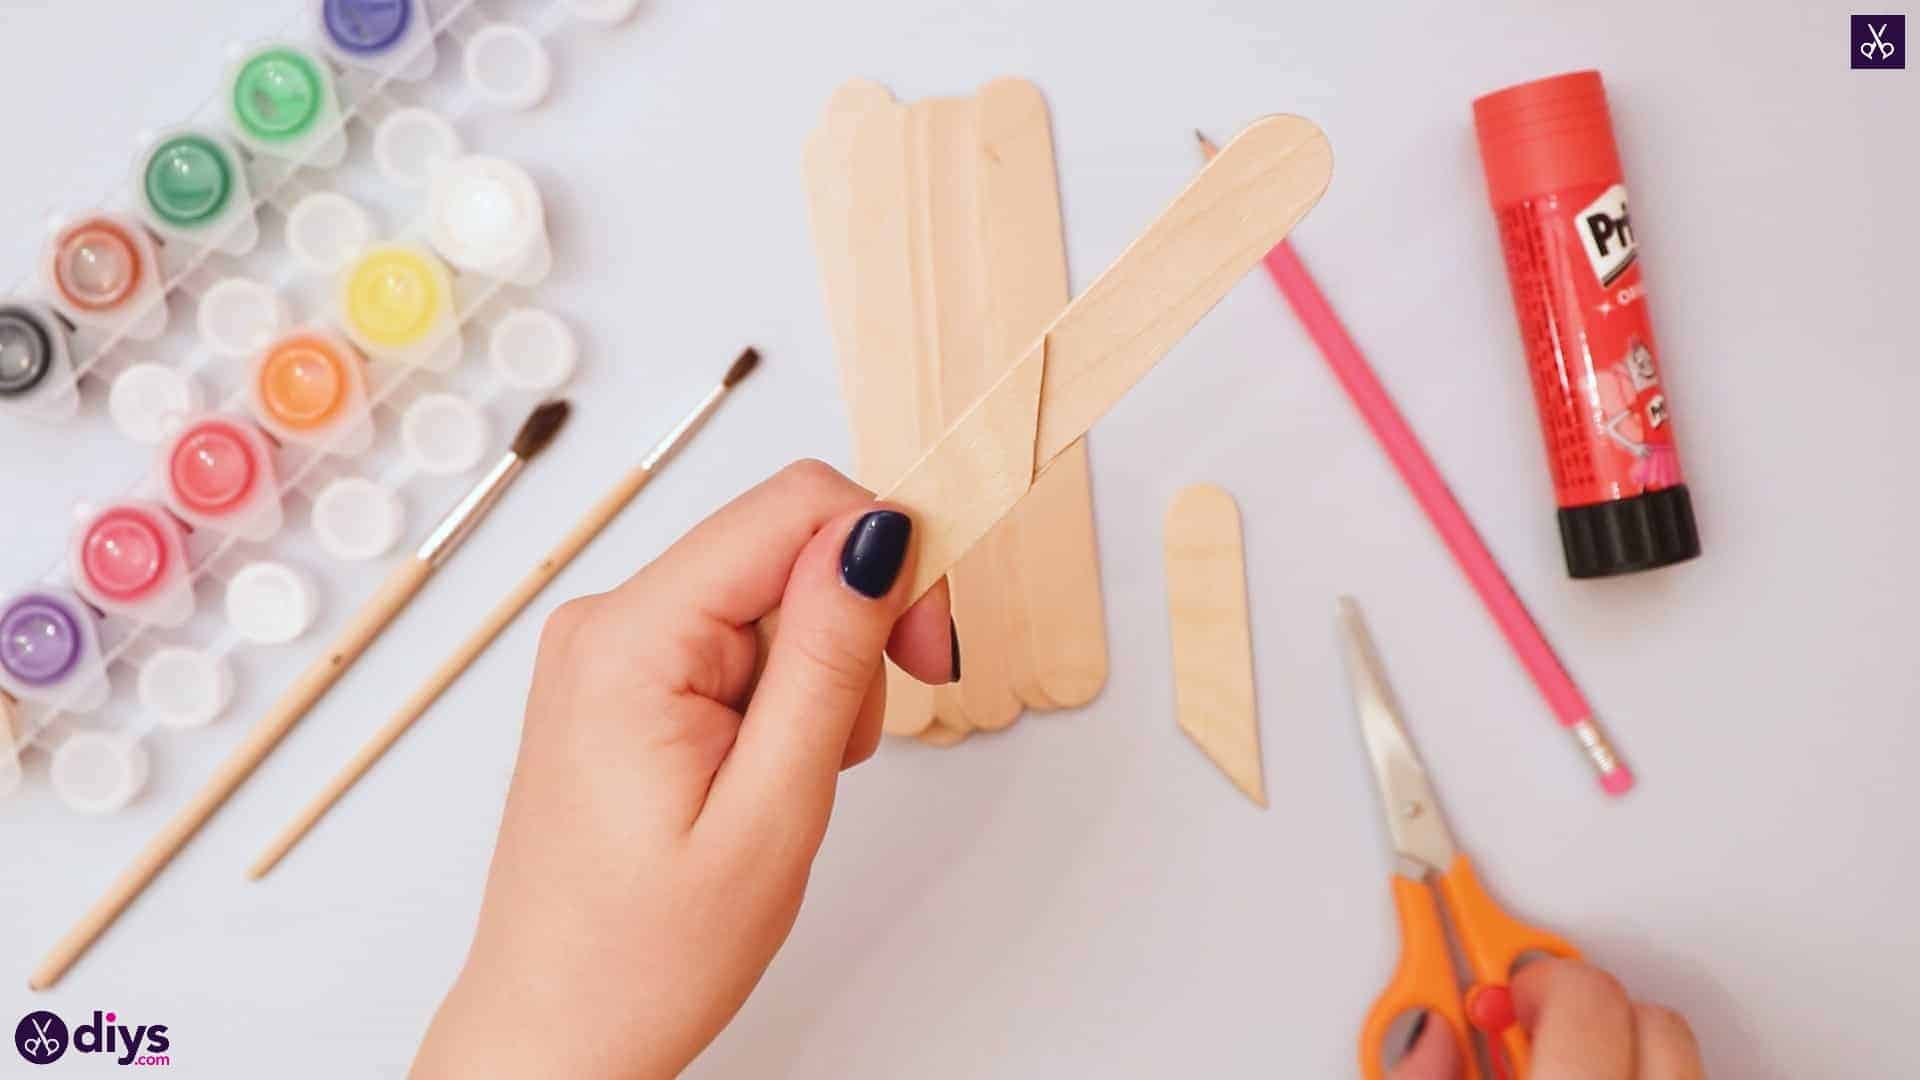
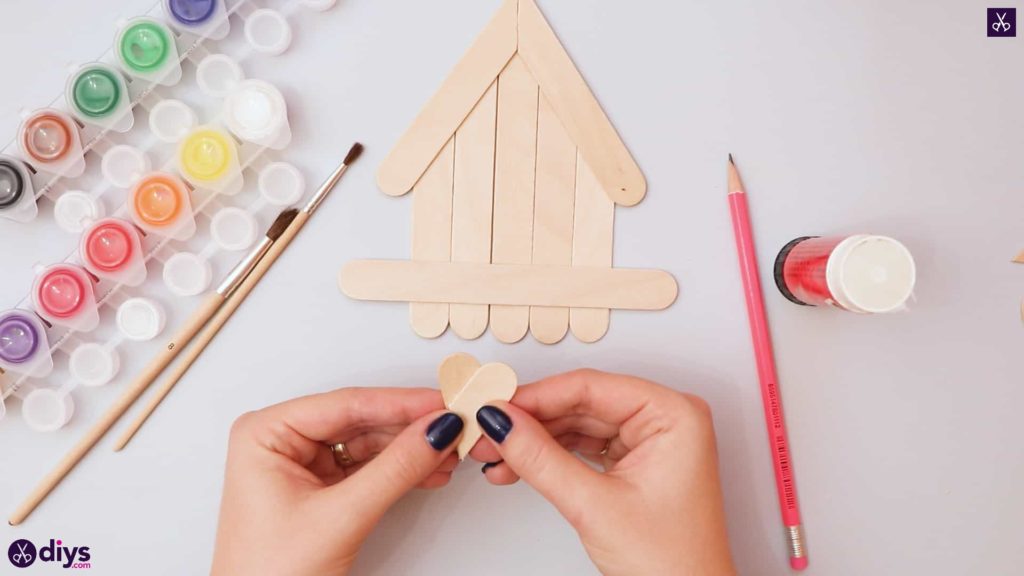
Step 10:
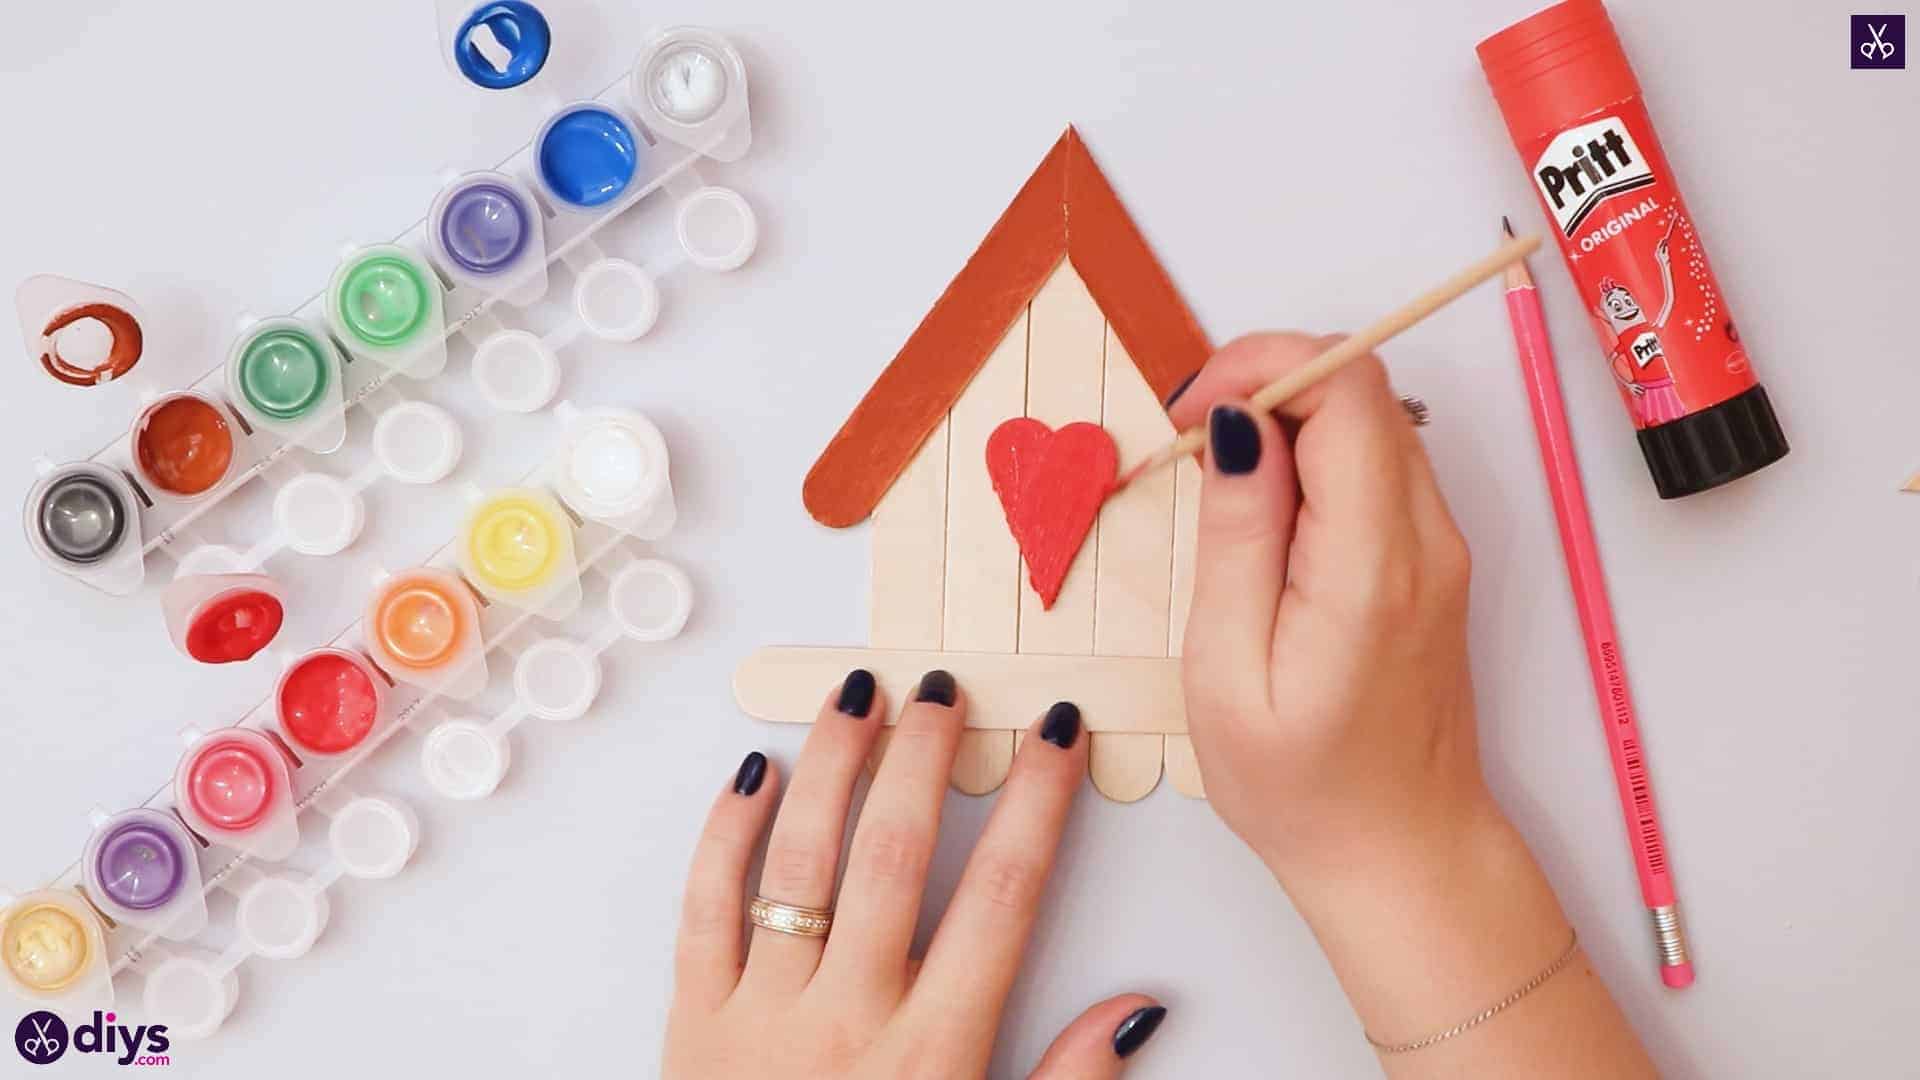
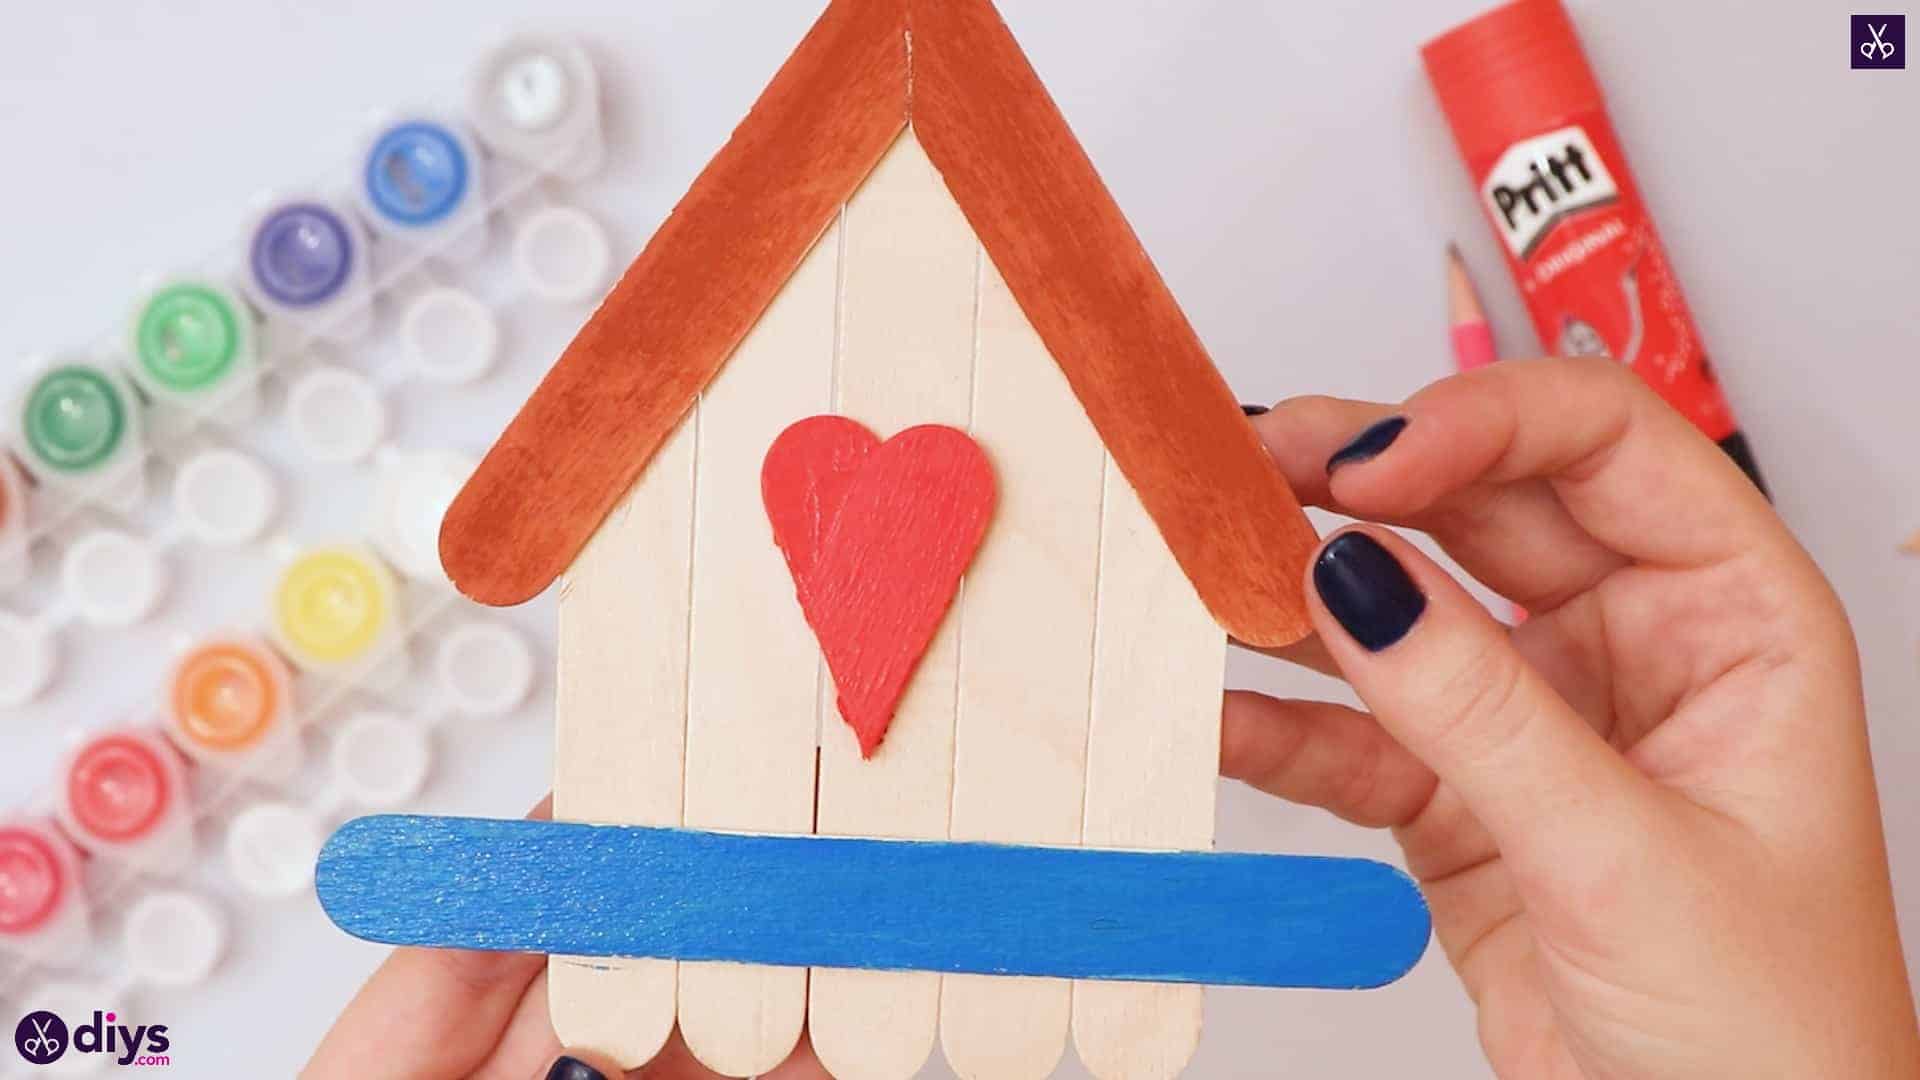
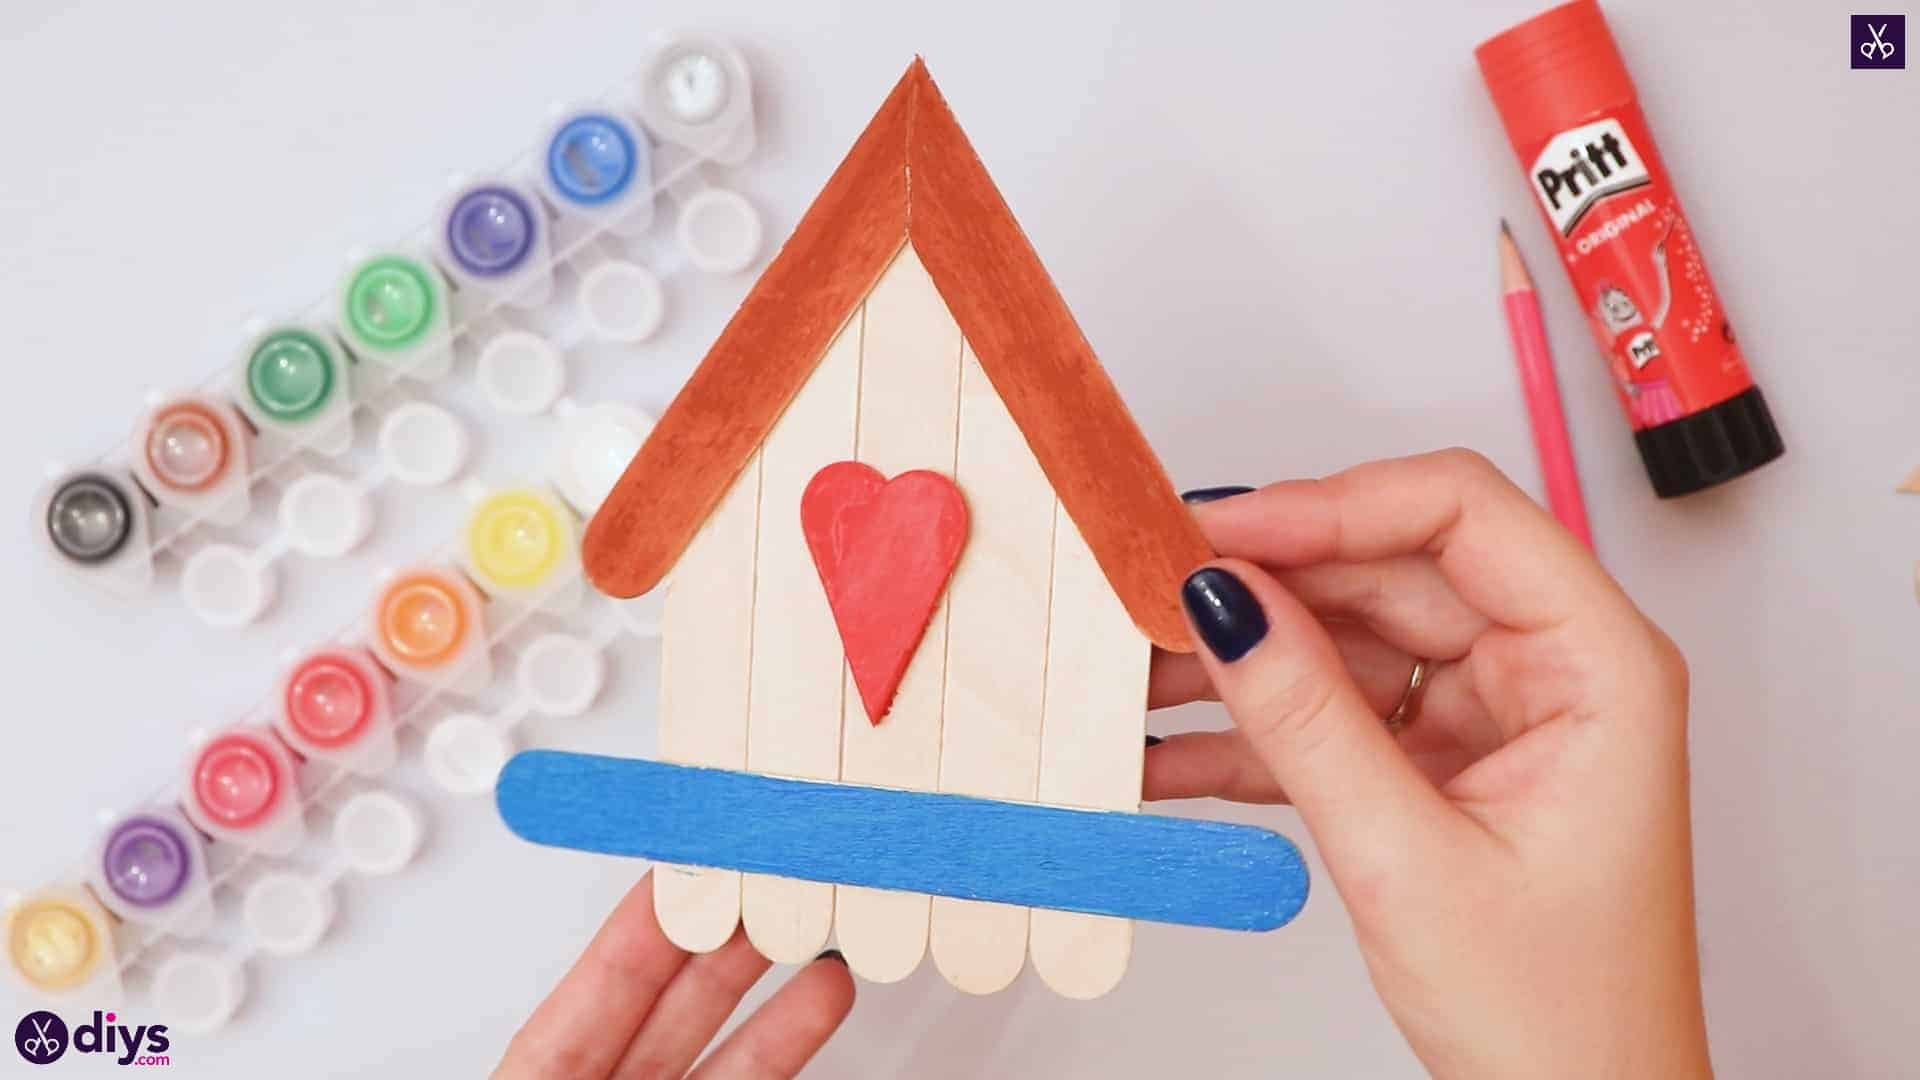
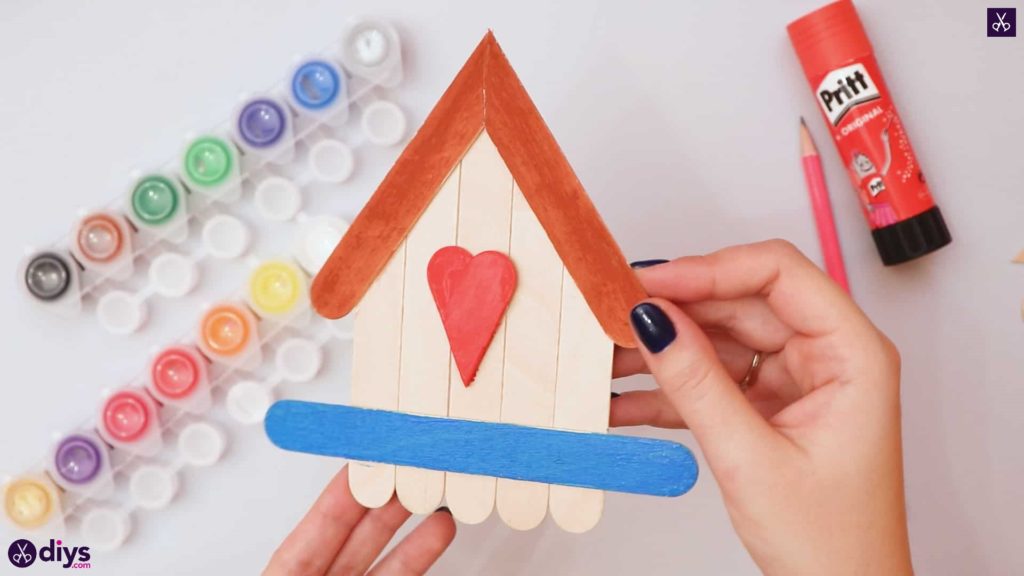
Take another of your spare popsicle sticks and cut it in half. Turn the two halves so their rounded ends cross over in a way that makes the top shape of a heart and hold them tightly together to keep them in place. Take your pencil and trace the spot where the top stick crosses over the one underneath it. Turn the piece over and do the same on the other side. Cut along those lines and then glue the pieces together so their new diagonal edges overlap evenly to make the heart’s bottom point.

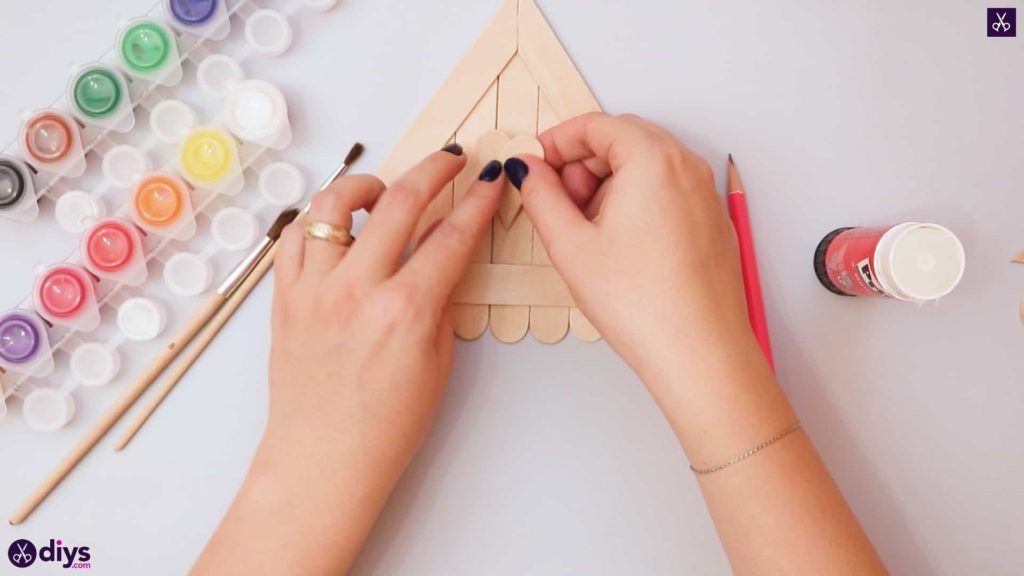
Step 11:
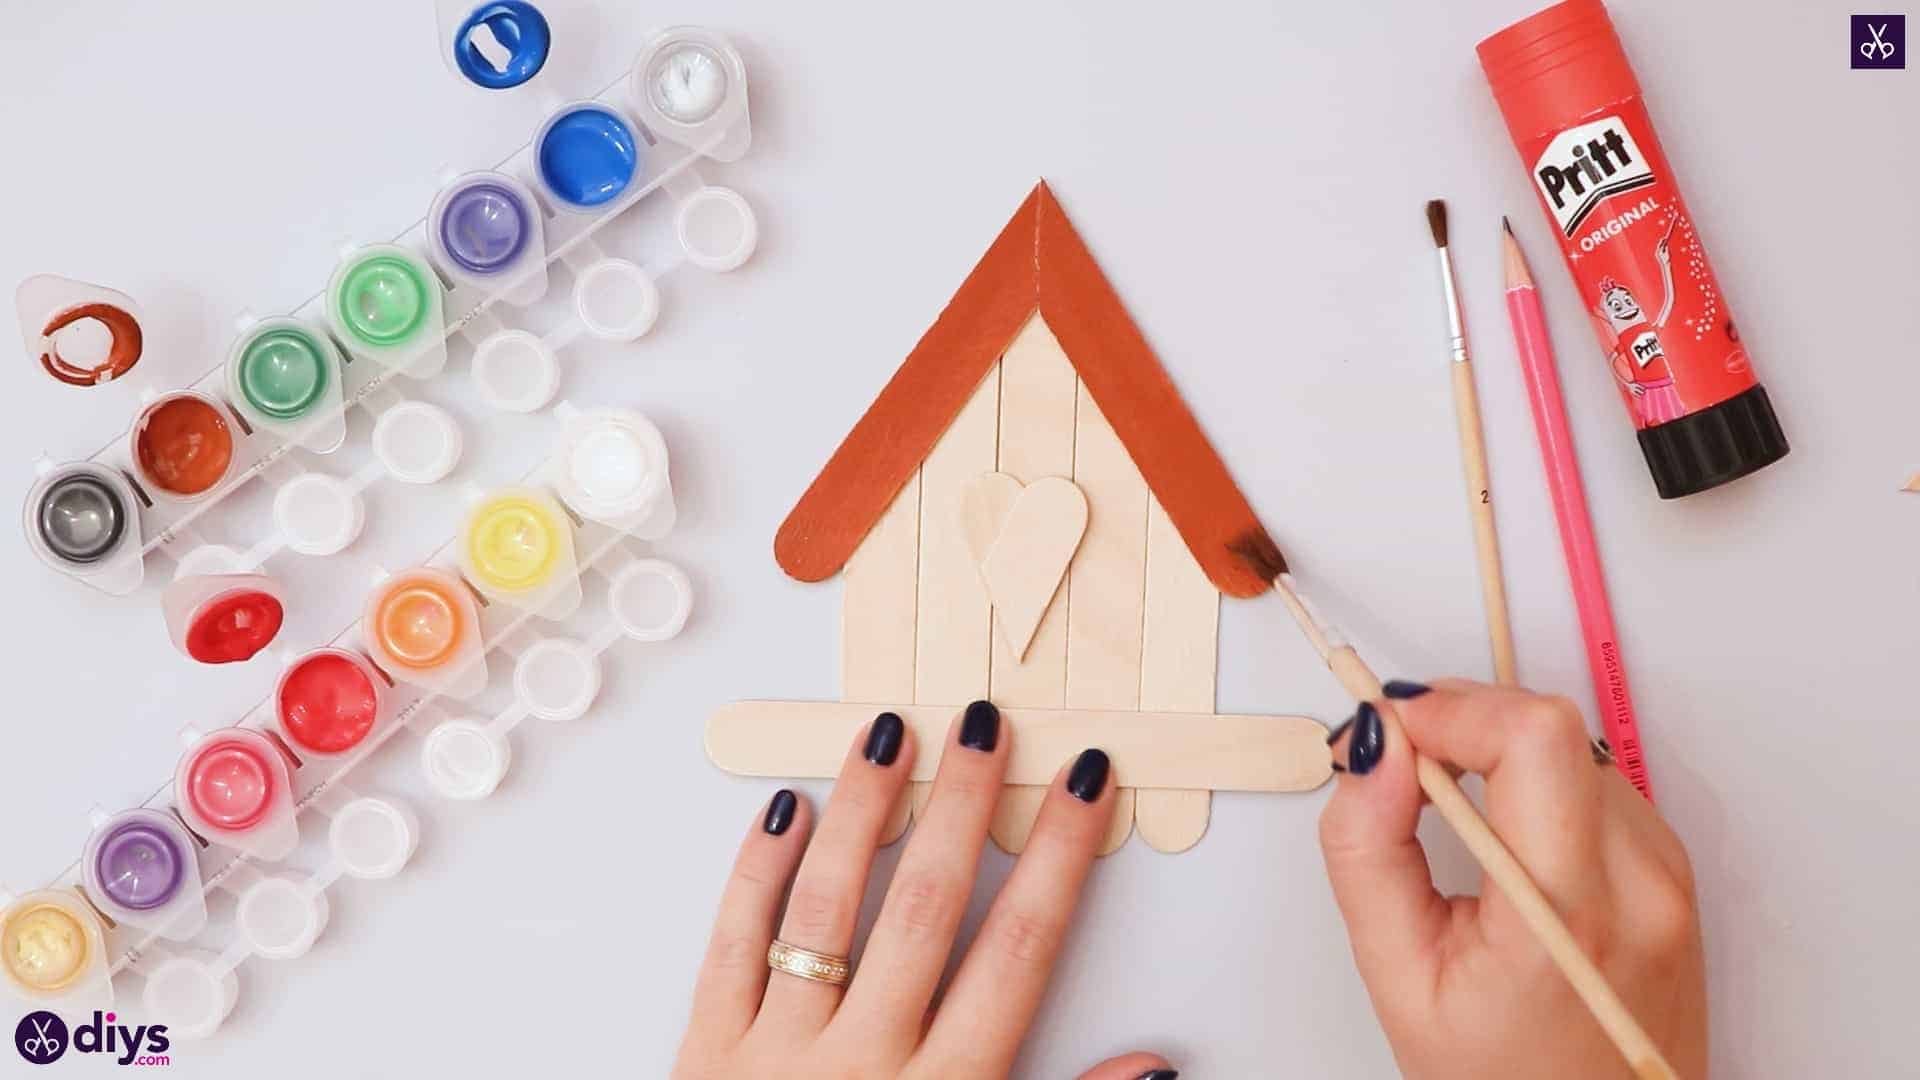
Apply glue to the back of your heart shape and stick it down in the centre of your house, about halfway between the horizontal stick near the bottom and the place where the pointed roof at the top starts.
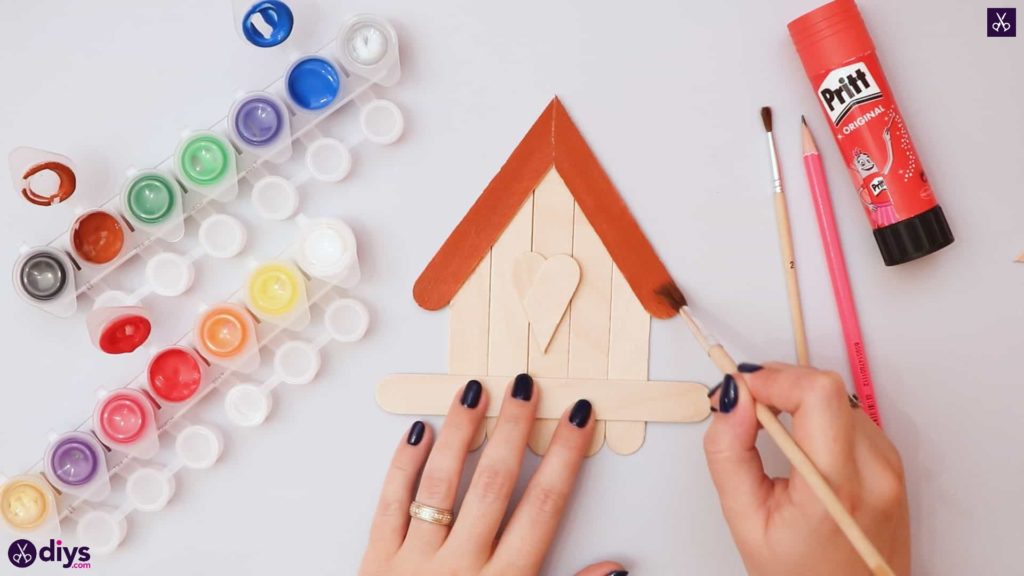
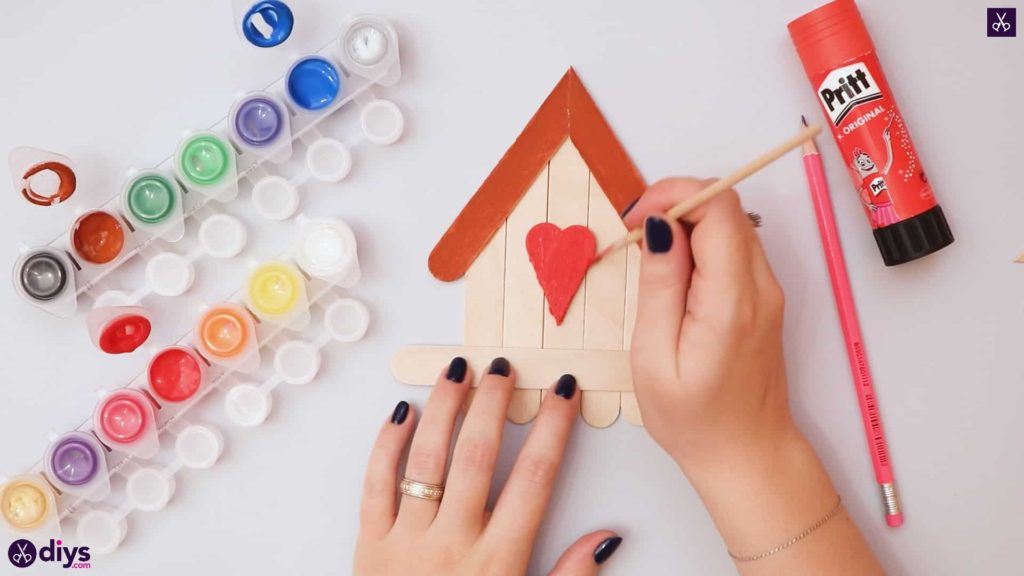
Step 12:
Paint the diagonal sticks that form your house’s roof red. Then paint the heart in the middle of your house red as well. finally, paint the horizontal stick near the bottom of your house’s front blue to make a little porch.


Your popsicle stick house is officially finished! Now you can turn it into whatever you please. Just in case you’d like to try this project out for yourself, here’s a fantastic tutorial video to help you!