How to Make a Pearl Bracelet
Updated on June 30, 2021


All my life, I’ve always been a huge accessories enthusiast. Even when I was a little kid, I could usually be found wearing more accessories than the average person, adorning my wrists especially. Bracelets are just my favourite thing! While I do tend to buy myself bracelets whenever I can afford to and find ones I like, I actually usually prefer to make them myself. it gives me a lot more satisfaction and makes me much happier in showing them off!
That’s why I decided to try a new technique in making myself a metallic pearled bracelet when I realized I didn’t have one in the style I wanted to match an outfit! Here are the steps I followed to make myself a new piece (or you can follow the video tutorial I also included at the end of this post).
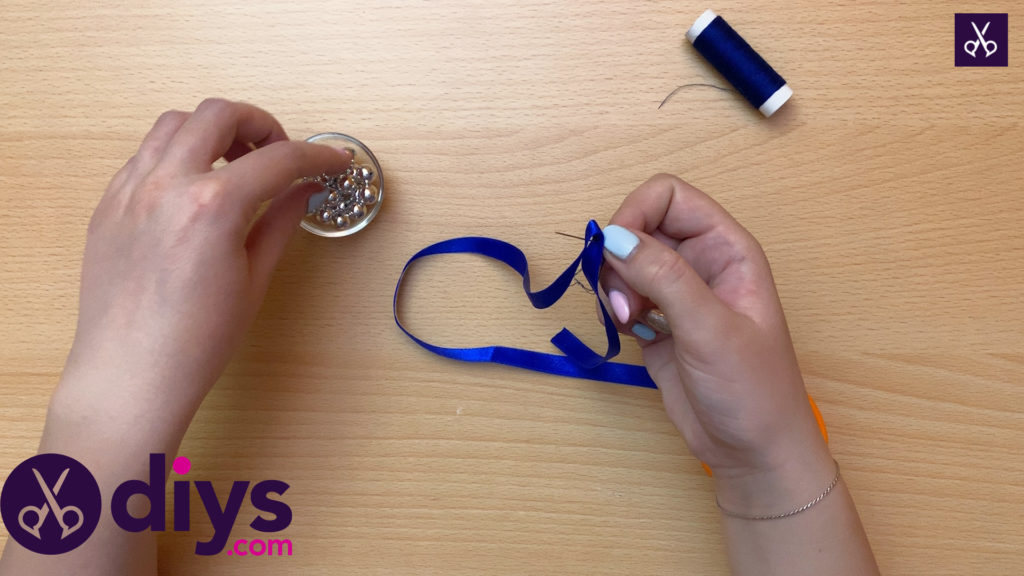
For this project, you’ll need:
- Thread
- Needle
- Scissors
- Pearl beads
- Ribbon
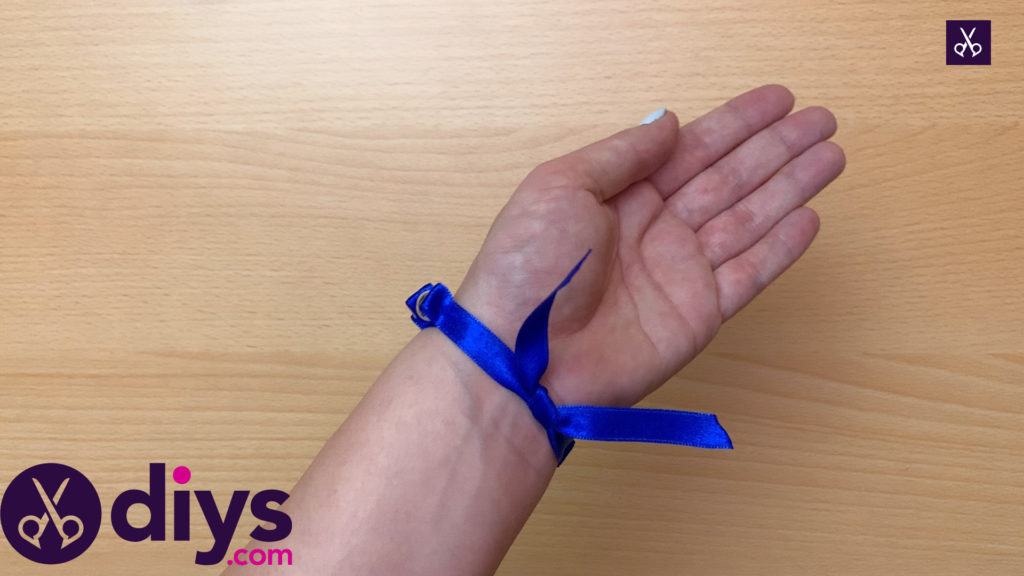
Step 1:
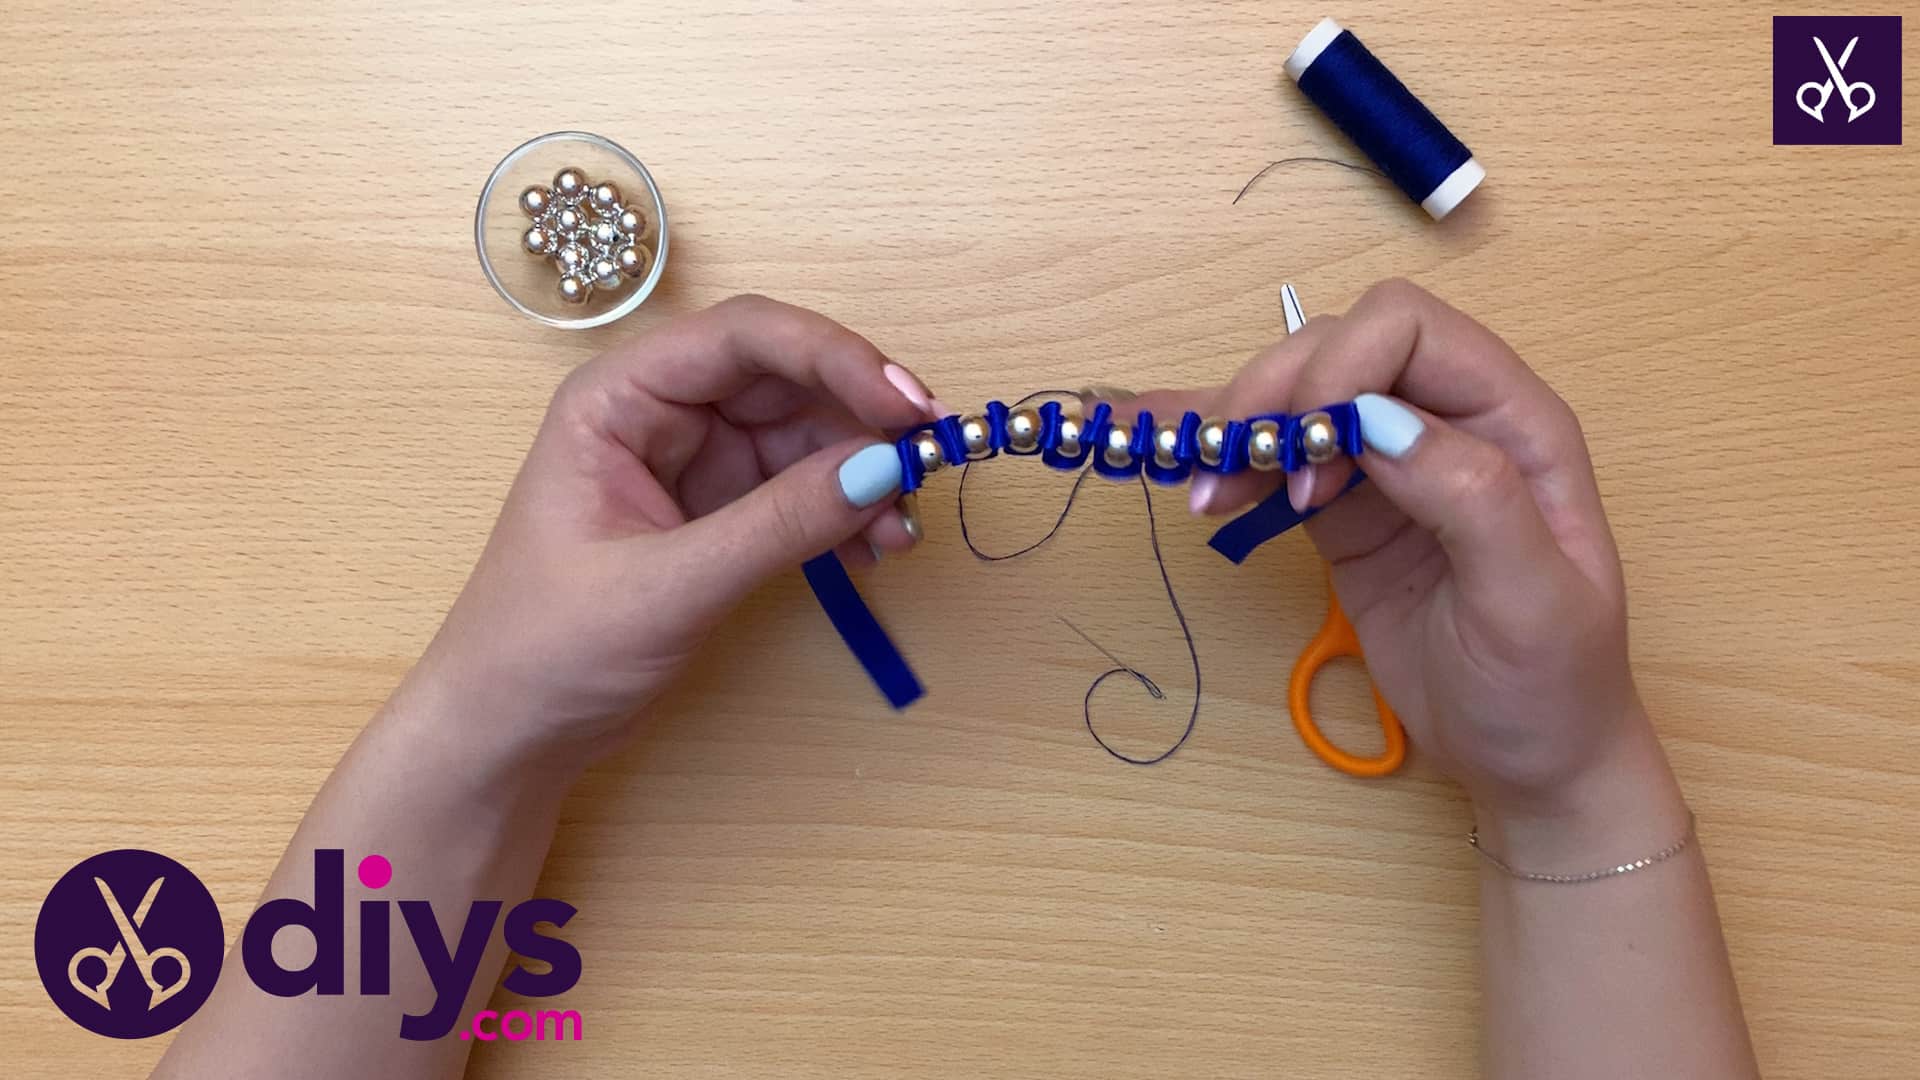
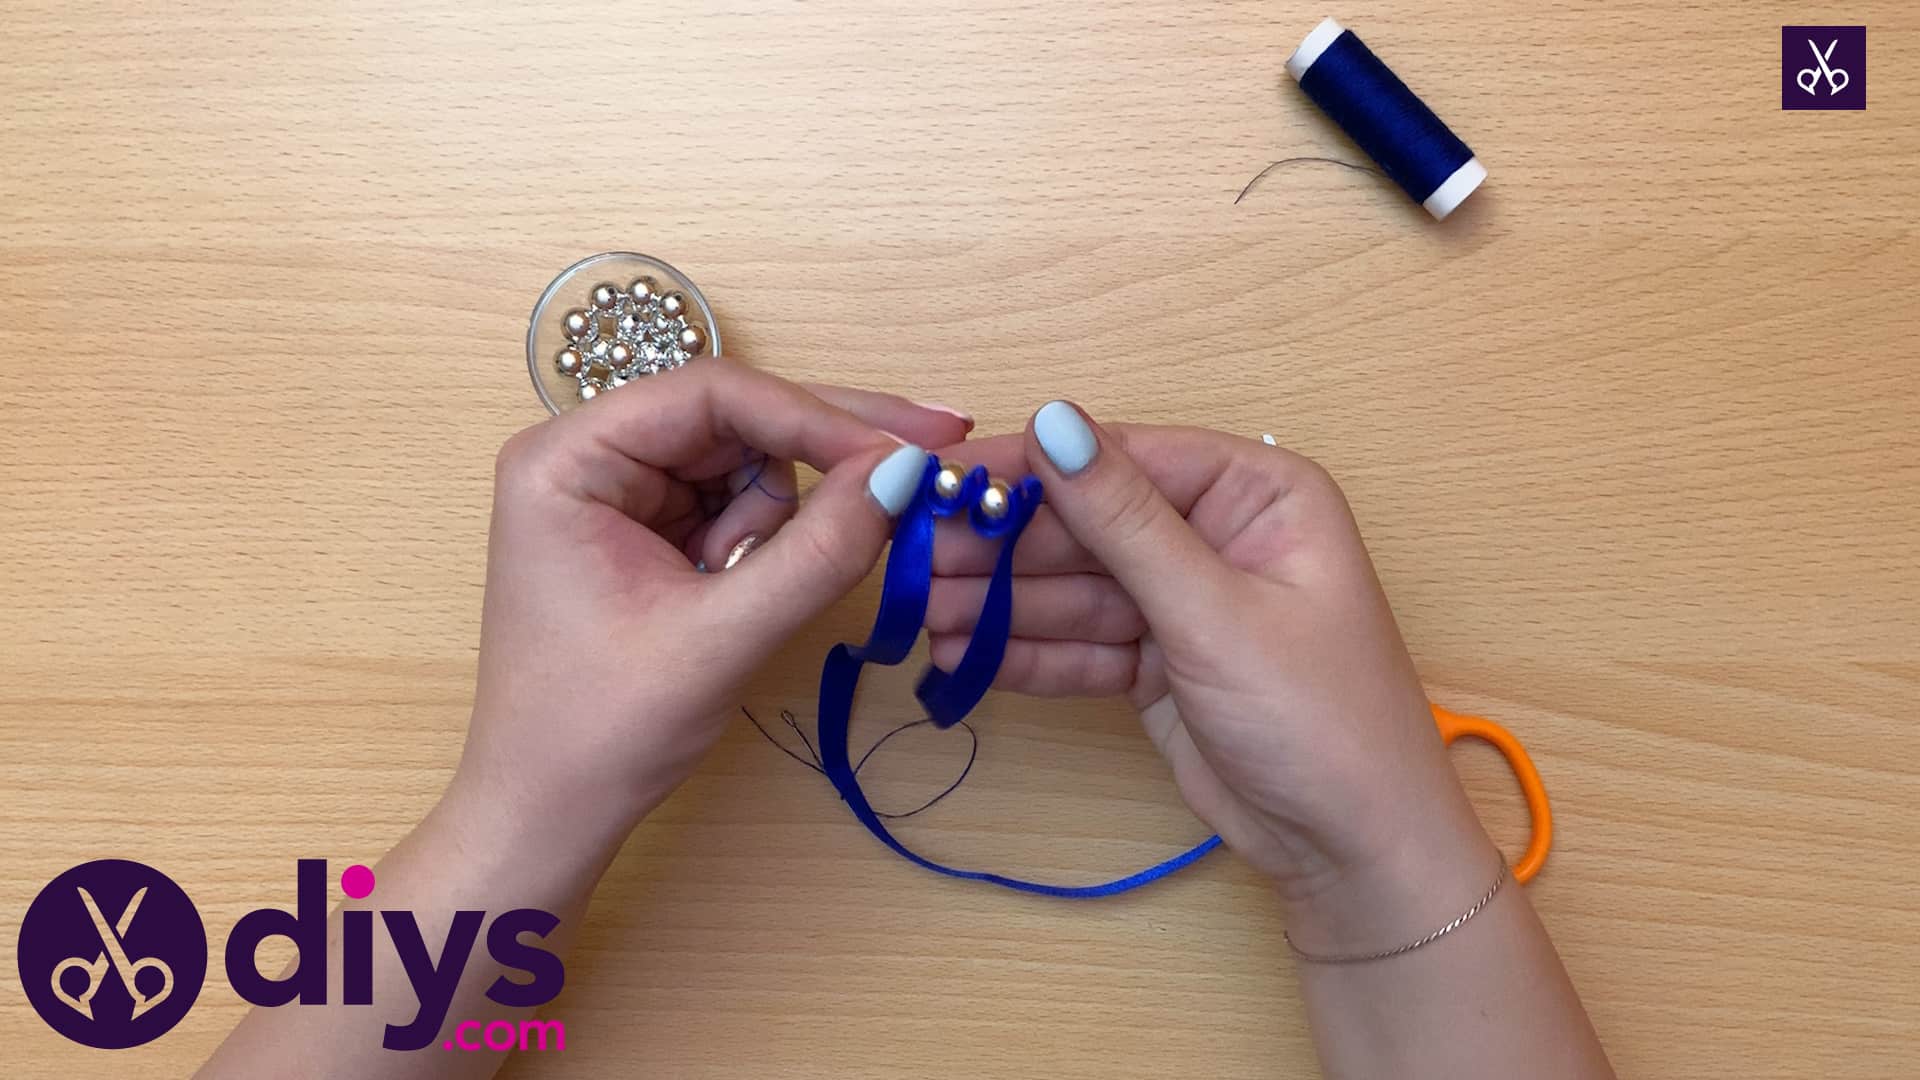
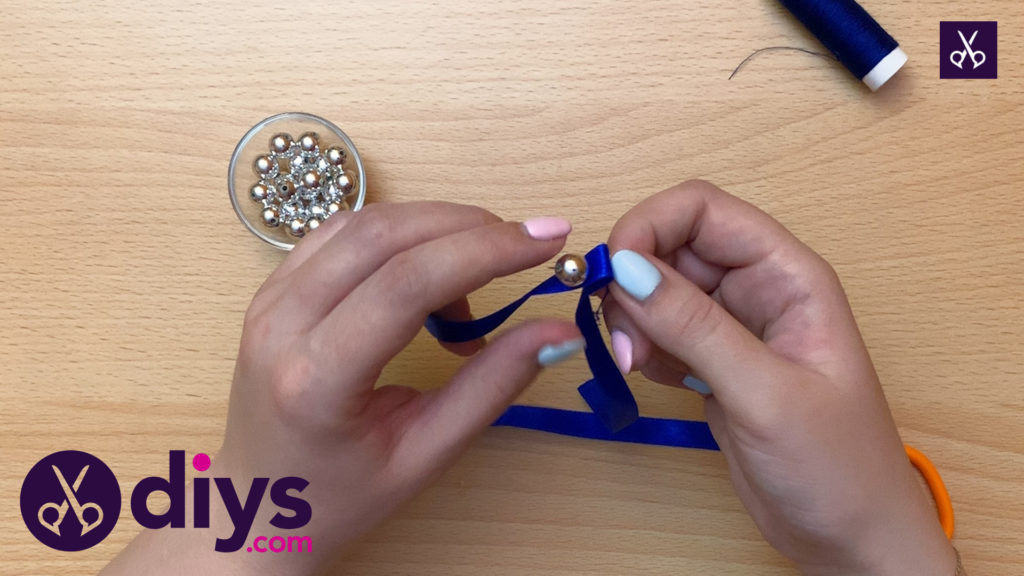
Gather your materials and cut yourself a length of ribbon that is long enough to wrap around your wrist entirely at least three times. This will give you enough slack to work with and then some, ensuring that you have the ribbon space to create your whole bracelet and still have length for tying it on at the end. Thread your needle. Then, at one end, move about five inches in from the end and fold the ribbon in half at that point.

Step 2:
Put your needle through both layers so the tip sticks out, but not so far that the whole needle goes through entirely. You want to put it through just enough that the whole width of the beads you’re using will fit on, but not so much that the ribbon fold you just made slides back onto the thread.
Step 3:
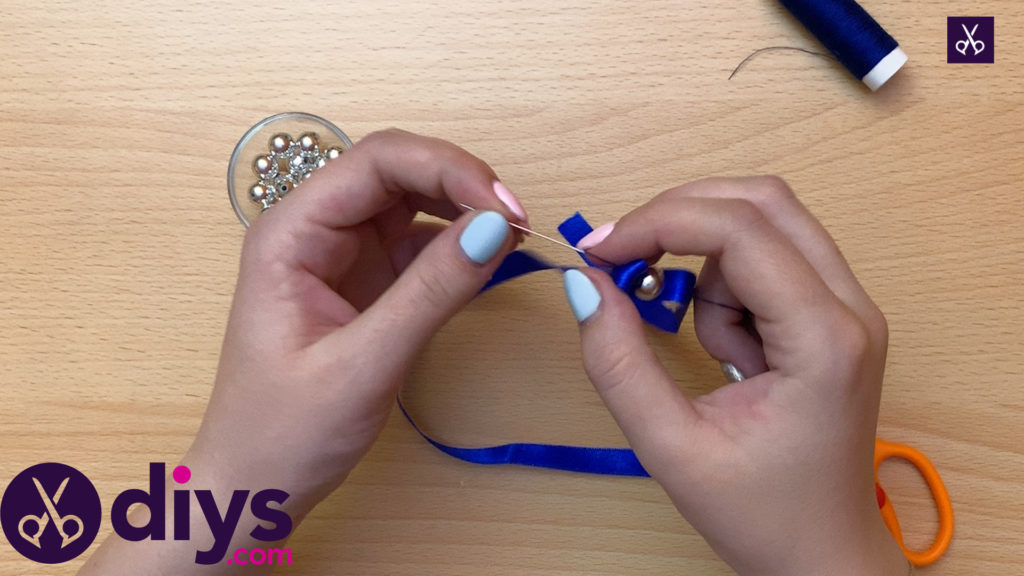
Place your bead on the length of needle that is stick through the ribbon. You’ll still avoid pulling the needle all the way through; instead, loosely pull the longer section of the ribbon you’re working towards upwards, make another fold like your first one, and put the same tip of your needle through both layers of that piece as well. You don’t have to pull it super tightly, as you don’t want the piece to buckle.
Step 4:
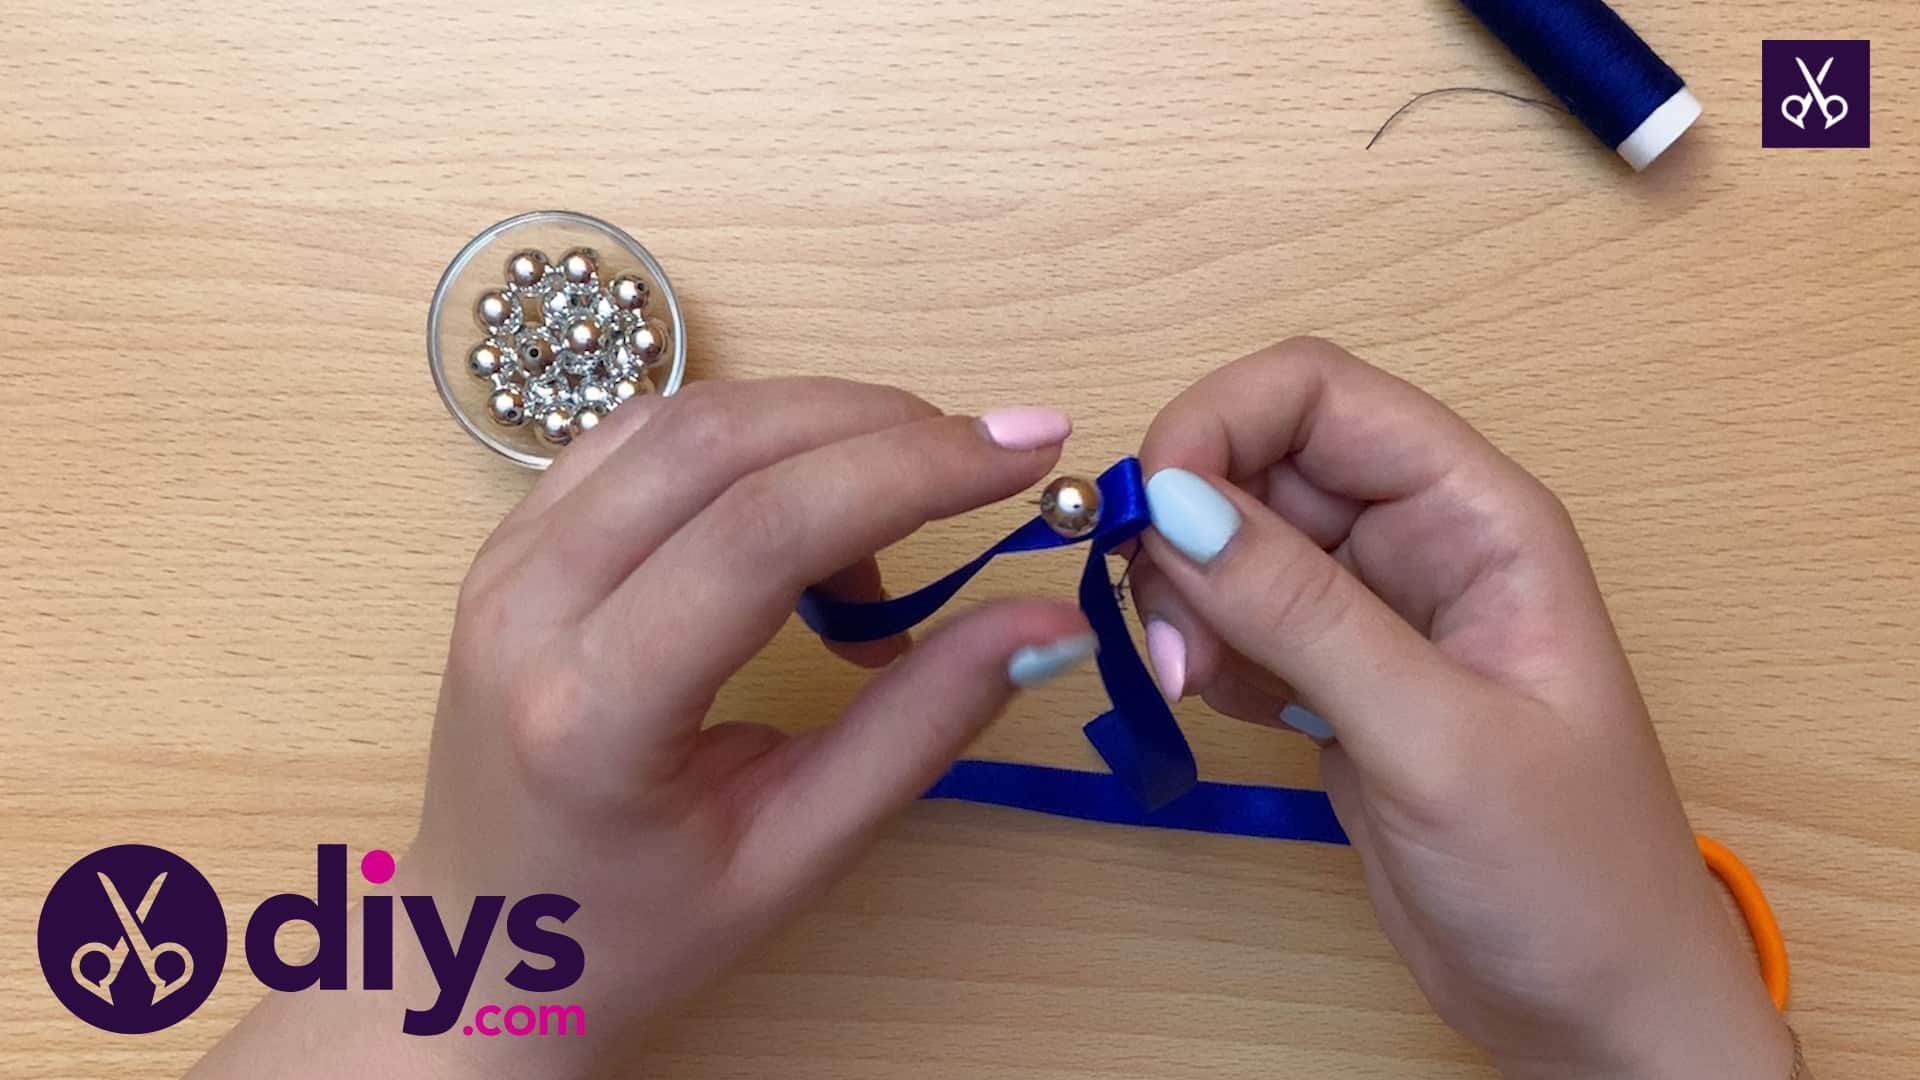
Once your second bent layer of ribbon is sitting around the pearled bead and up on the tip of the needle, you can finally pull the needle all the way through. Even here, however, you only want to pull it out to its eye, rather than pulling all the thread you laced it with through so that the needle is far away from your beads and loops and has too much slack. Doing so won’t ruin anything, but it is a little harder to manipulate as you work.
Step 5:
Put another bead on the tip of your needle so it sits against your second ribbon loop, and then pull more ribbon up and make a third fold to hook onto the tip of your needle.

Step 6:
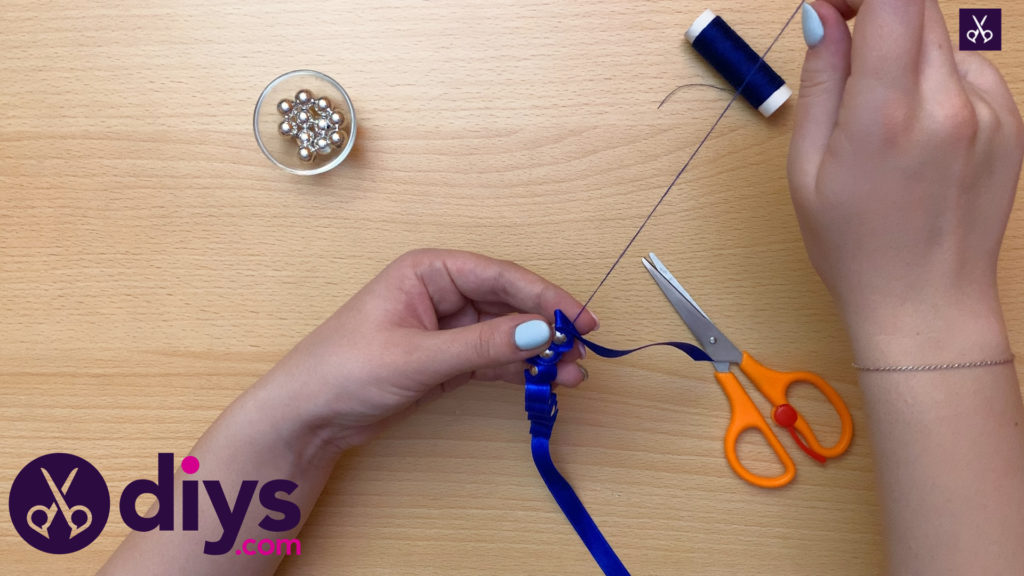
Place a third bead on your needle and repeat the fold process, pulling and pushing your needle through just enough to keep everything lined up and easy for working with as you go.
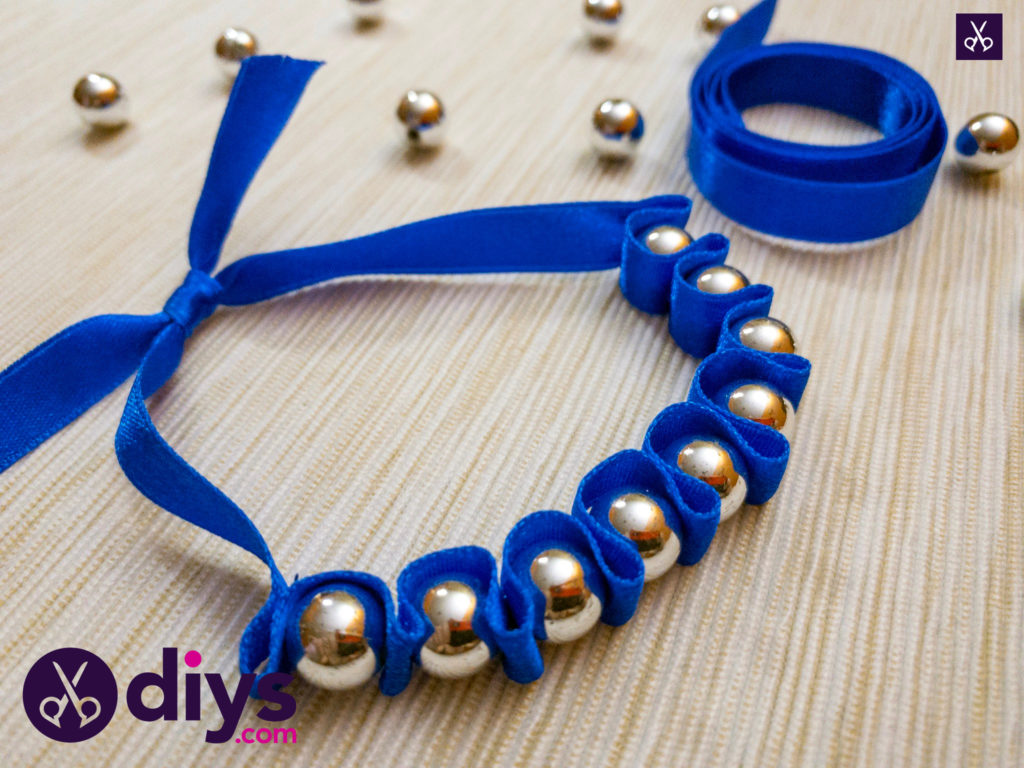
Step 7:
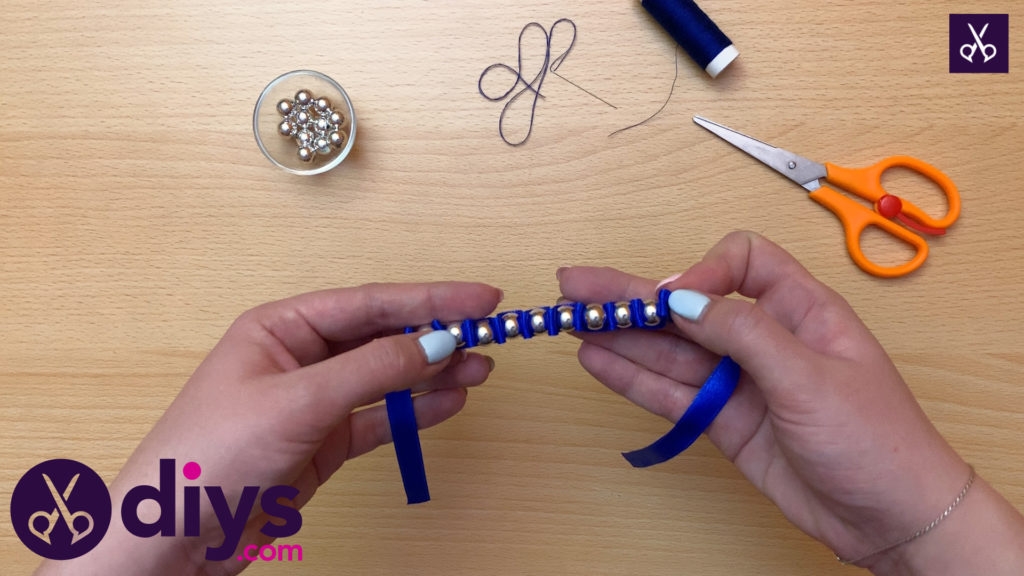
Repeat the process until you’ve got enough beads with ribbon folds in between them to cover the whole back side of your wrist (or however much of your wrist you please).

Step 8:
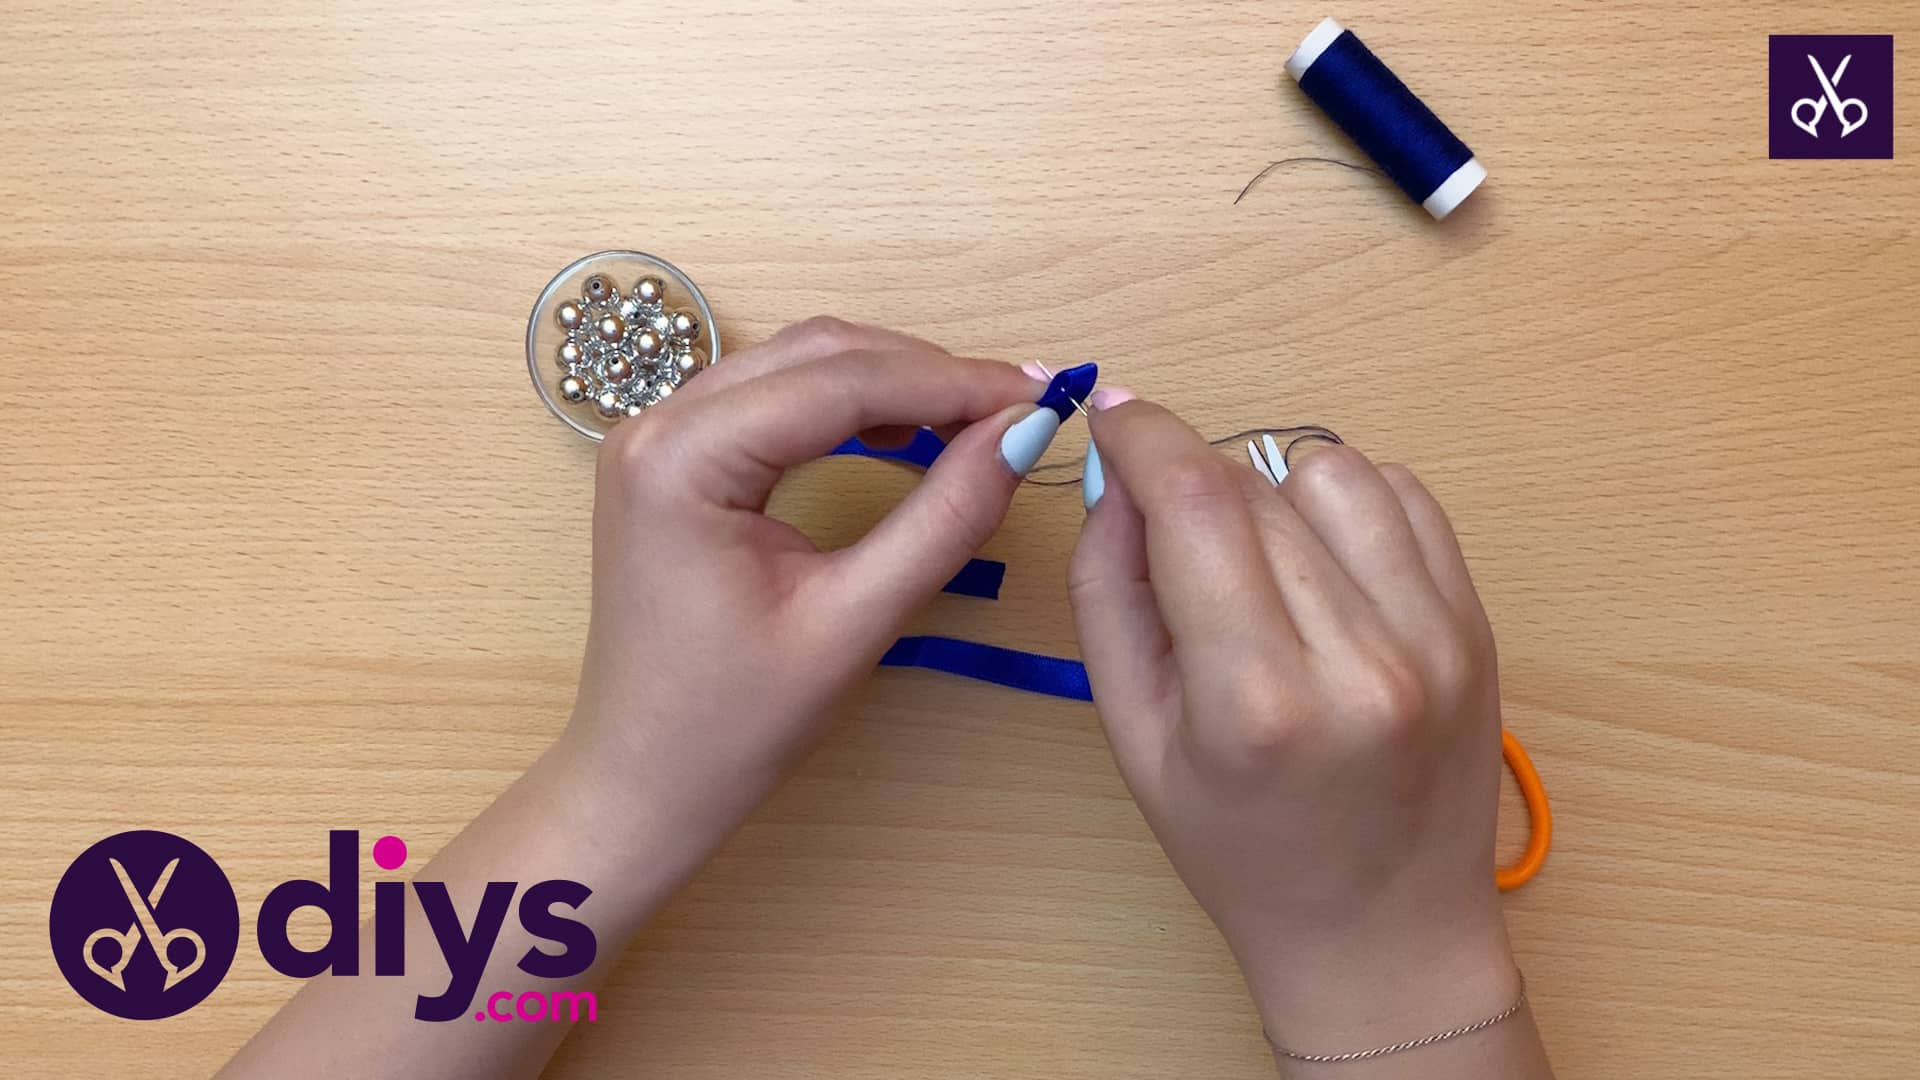
Once you’ve got as many repeats as you please, pull your needle and spare thread all the way through. Tie a knot in the thread, nice and flush against your last ribbon fold but not so tightly that the beads in the centre ripple. Cut the excess thread.
Step 9:
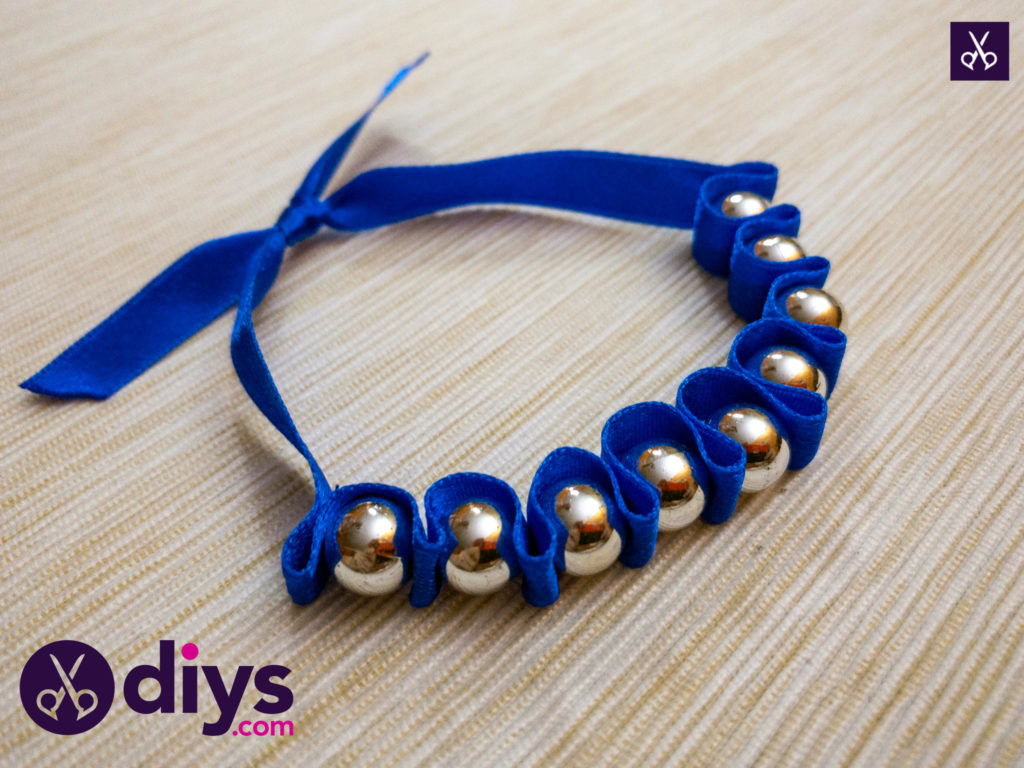
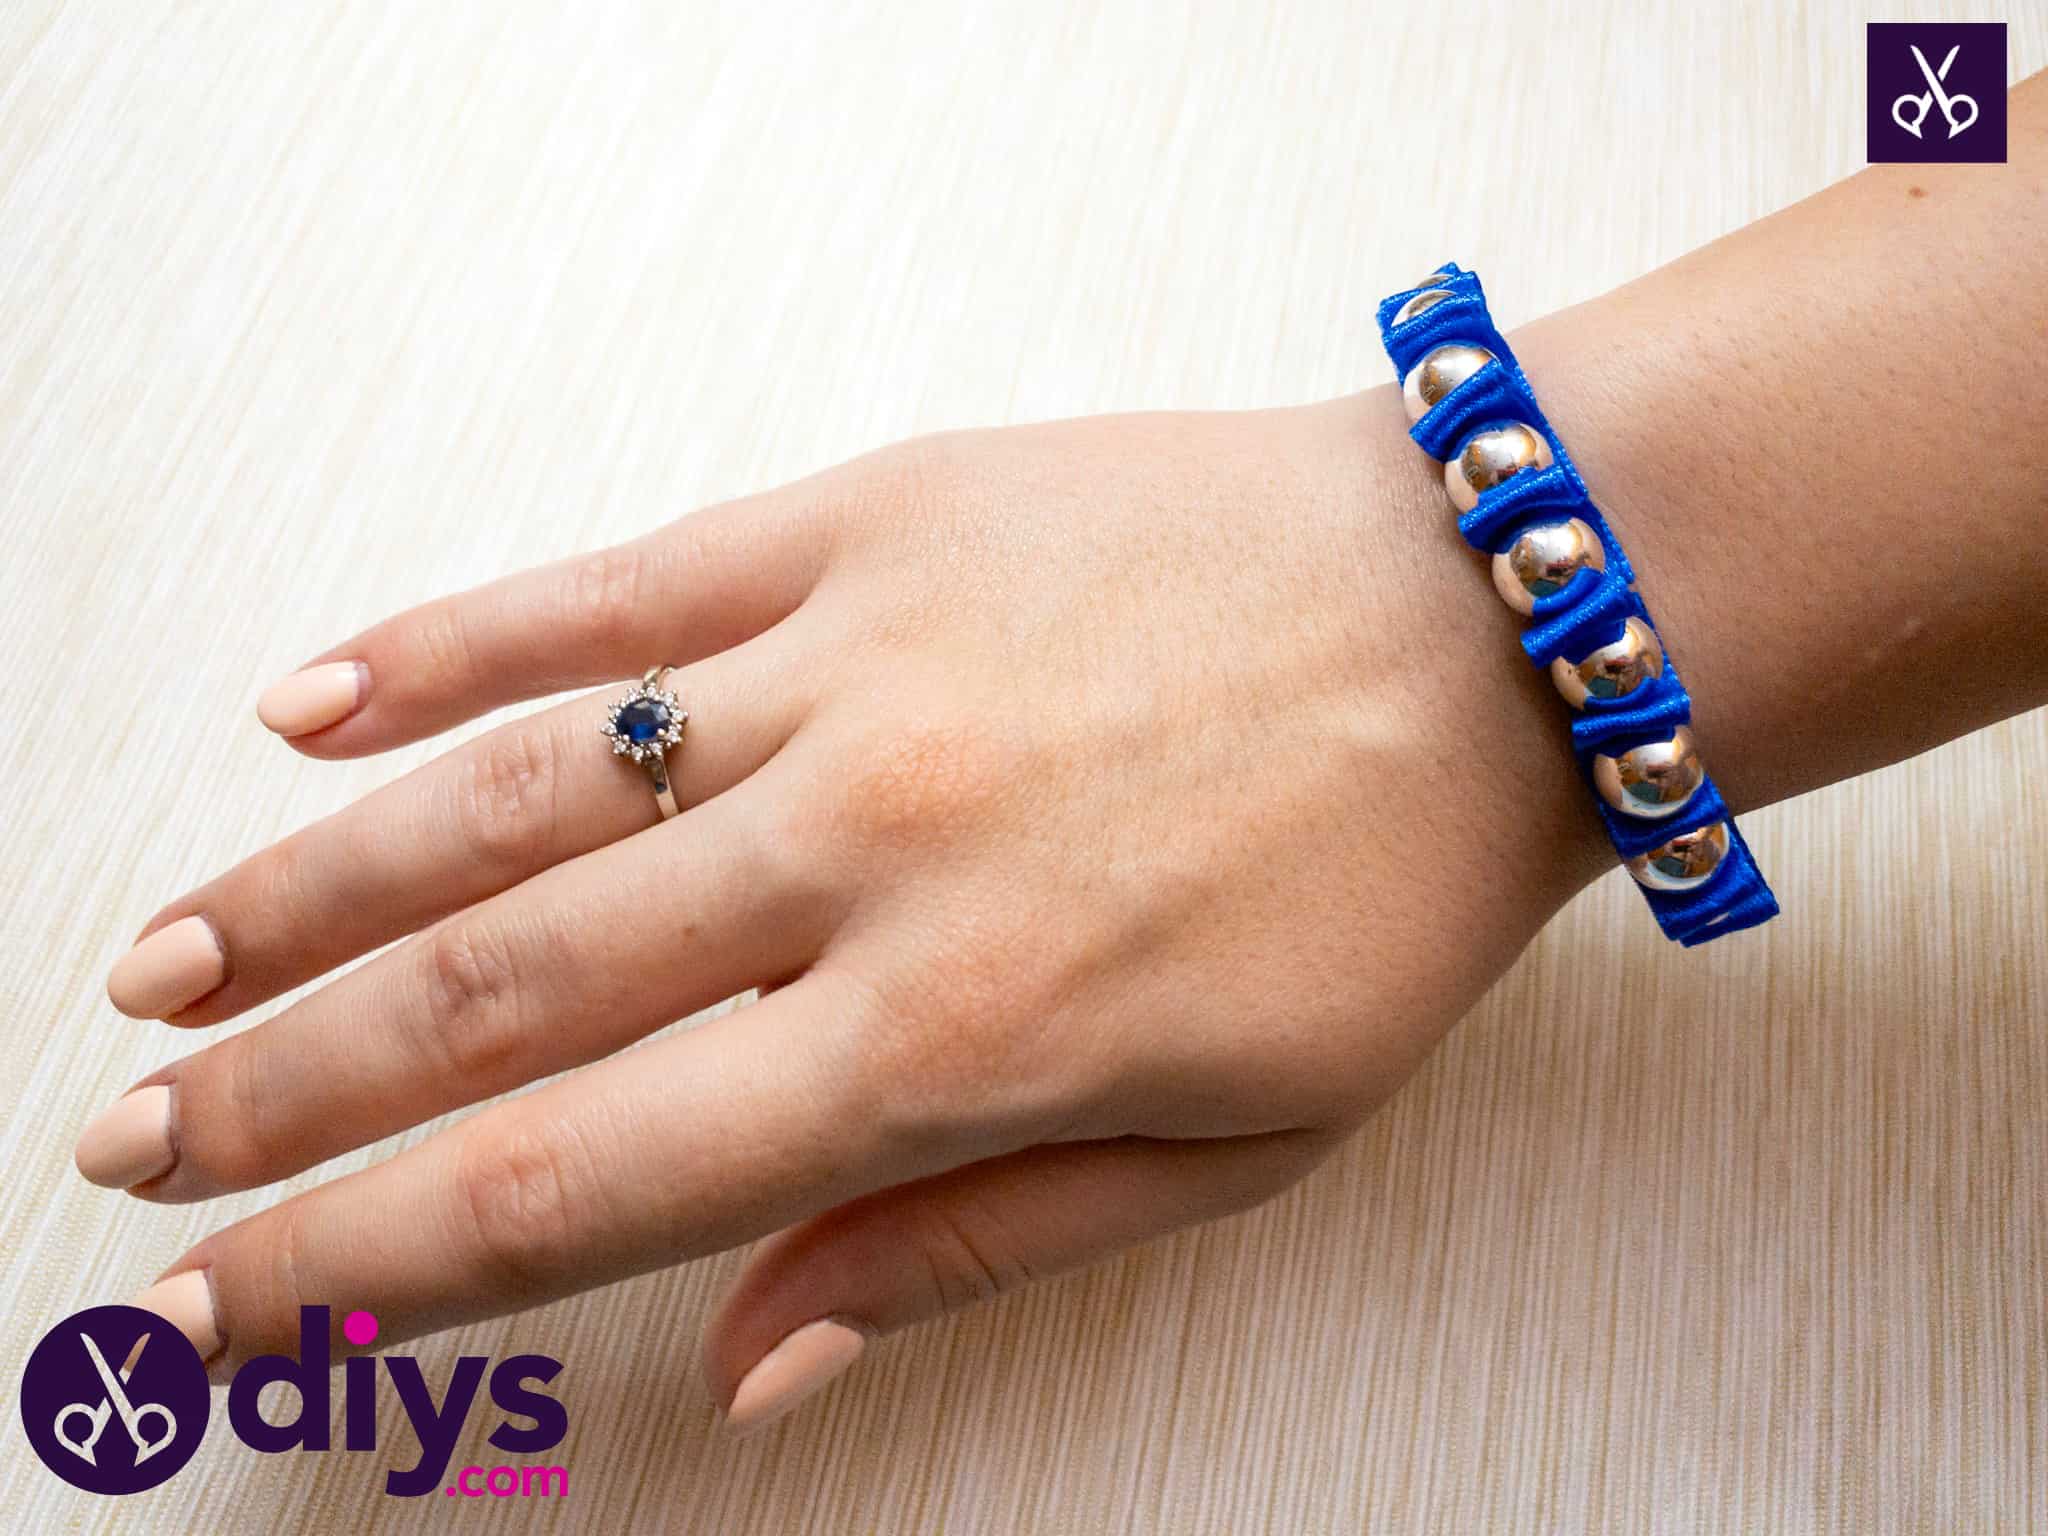
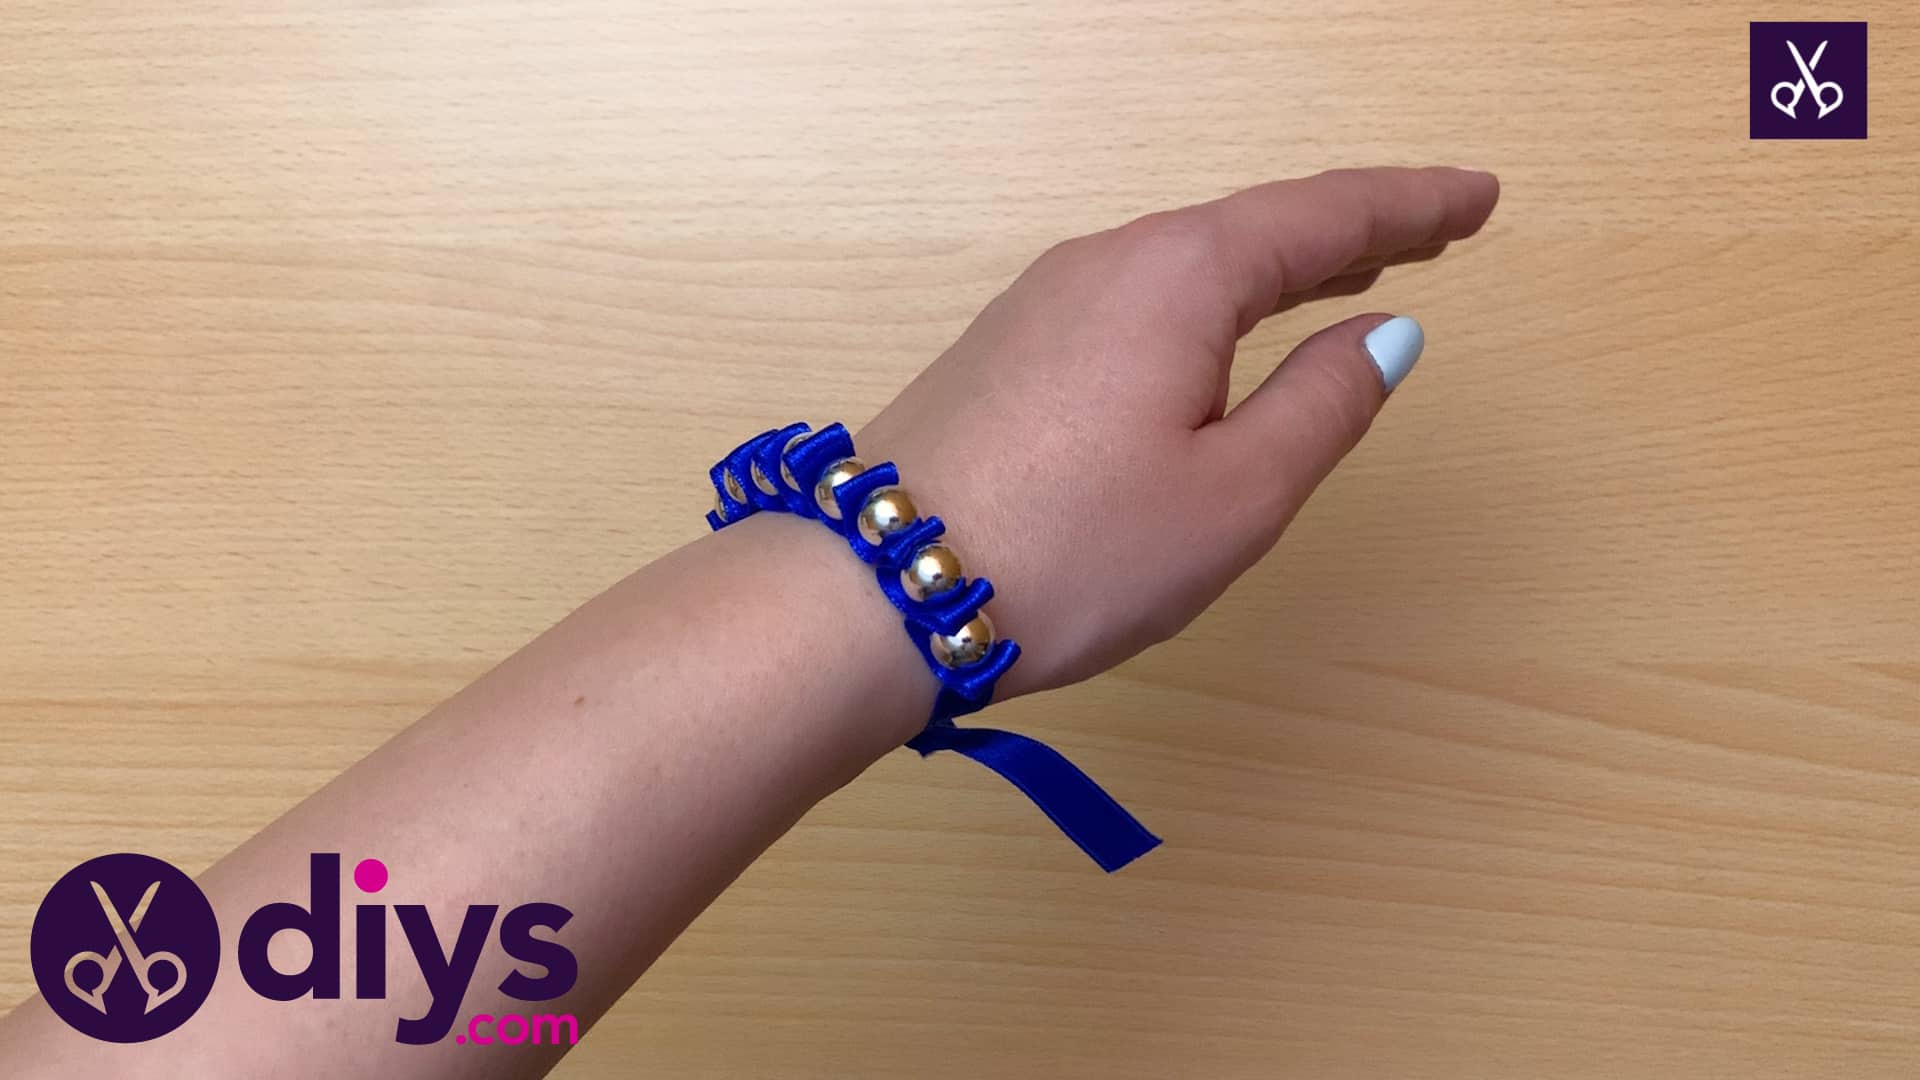
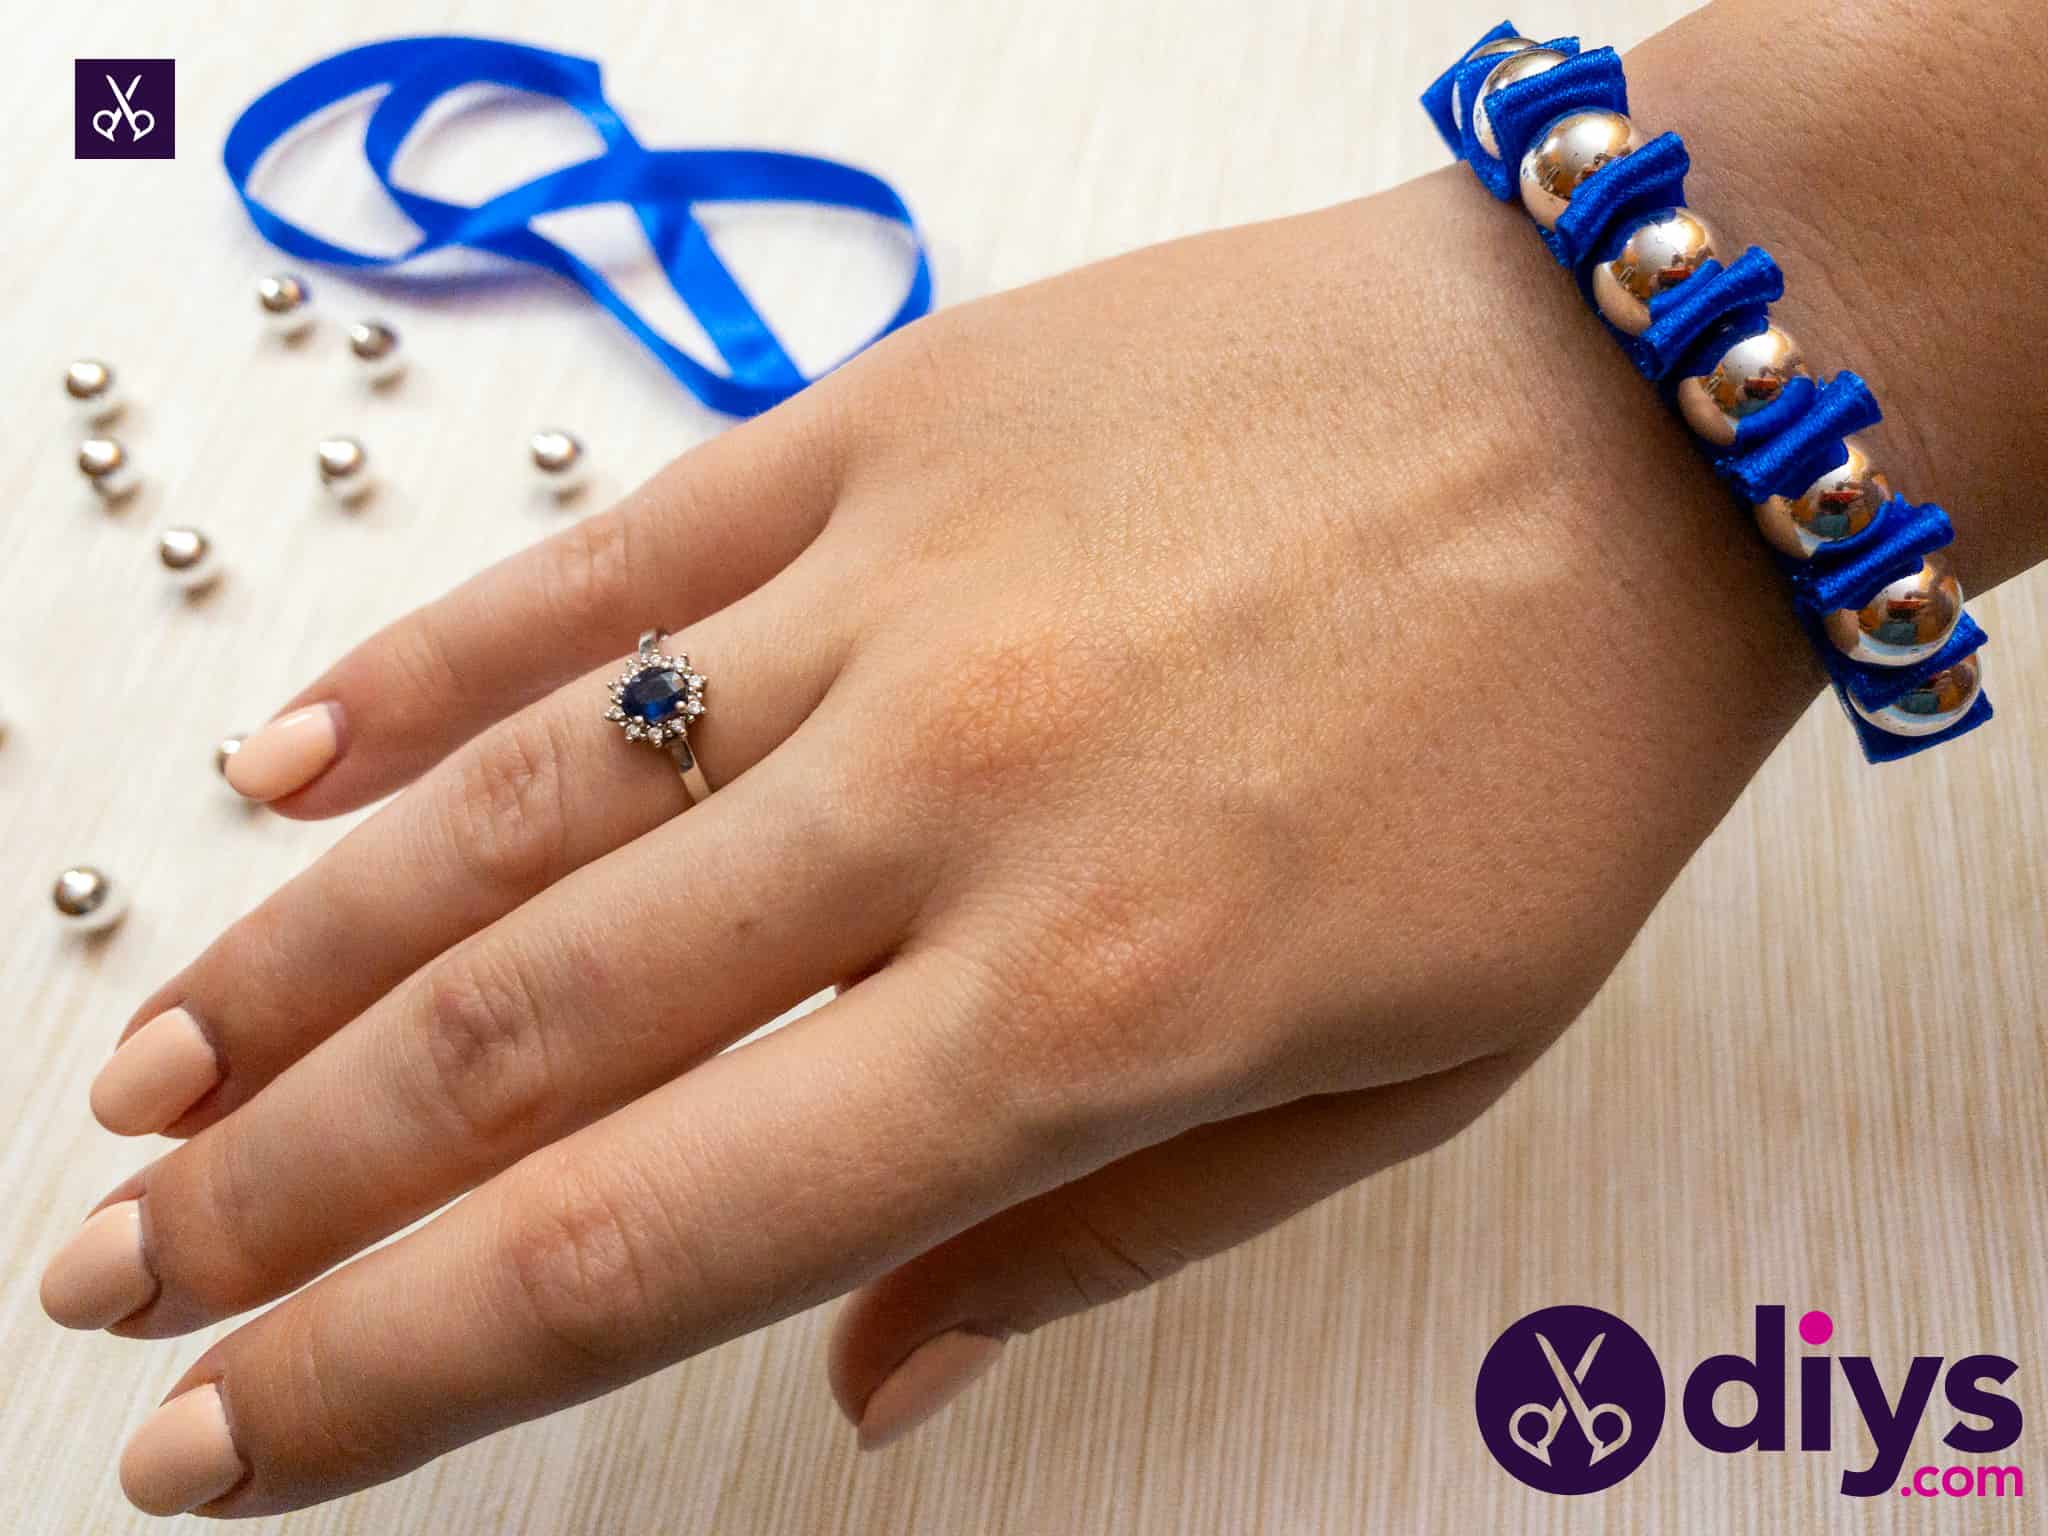
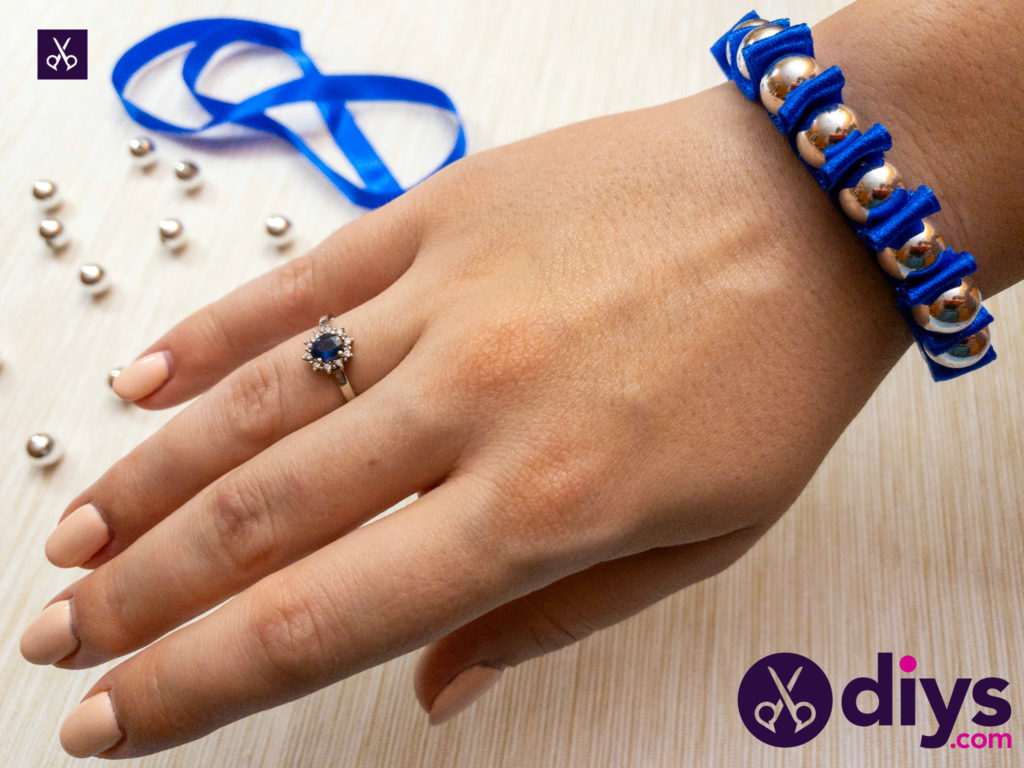
Put the bracelet on by tying the ribbon ends in a bow on the under side of your wrist. Feel free to trim your ends a little shorter if you need to, in case you left a little too much excess and you don’t want the ends hanging down too far and trailing in your food and so on throughout the day.
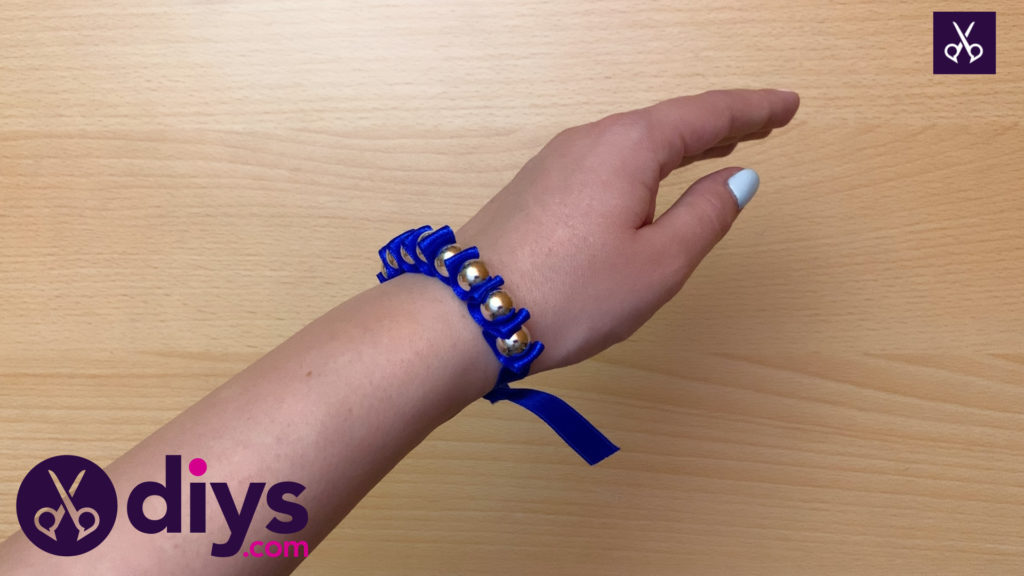
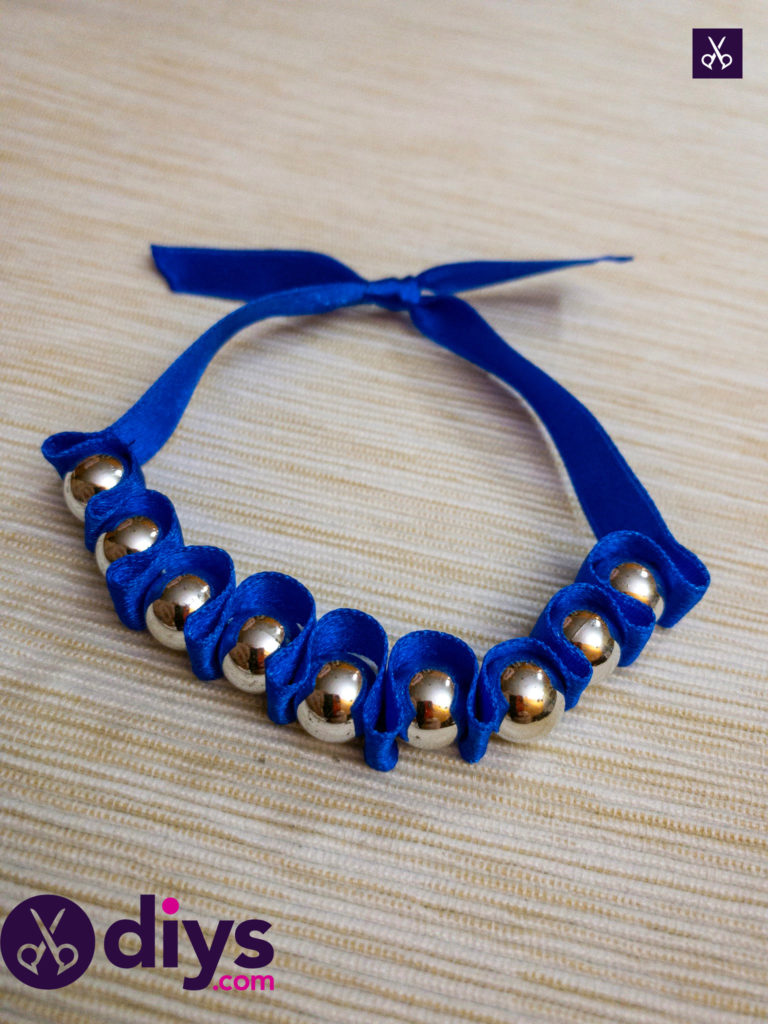
You now have a finished bracelet! I think this is the kind of project that will look fantastic with just about any colour of ribbon or finish of bead combination. Feel free to also play with how many bead and fold repeats you do! I have also made versions of this bracelet that have enough beads to encircle my whole wrist, rather than just covering the top.

Just in case you’d like to try it for yourself, here is a detailed tutorial video!