Cricut EasyPress 2 – Everything You Need to Know About Cricut Heat Press (Full Review)
Being creative is part of human nature, and given enough free time, most of us would even surprise ourselves with what we are capable of. The only problem is that no one is given enough time.
Well, working from home has become the new norm, and with more time on our hands thanks to not having to commute to and from anywhere, many of us can finally unleash our creative sides.
However, while our imagination may be without boundaries, we are limited by the tools and materials that we have at our disposal, and since money isn’t so easy to come by, we have to be very careful about what investments we make.
Well, crafting things at home is no different, and if you like getting creative and creating a lot of custom things, such as custom T-shirts, caps or plush toys, one neat addition to your crafting room would be a heat press.
The market is full of them, very few manage to actually do a good job, one perfect example being the Cricut EasyPress 2. On that note, we will be looking over the Cricut EasyPress 2 and we will be discussing what it is, what it can do, what you can use it for, whether it is worth buying, and more.
Table of Contents
What Is the Cricut EasyPress 2?
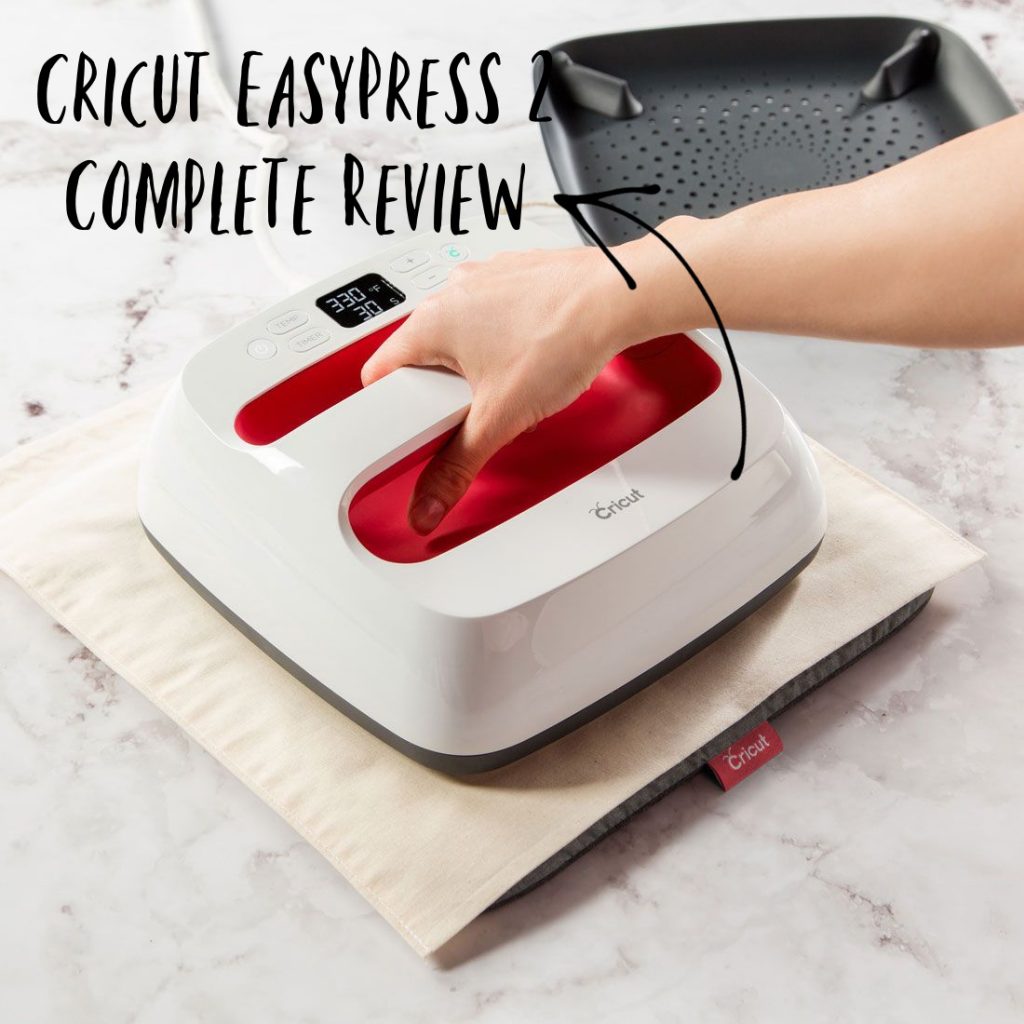
The Cricut EasyPress 2 is a heat press machine created to imprint graphic designs on a (regularly) flat surface, most usually fabrics and clothes and, just like most other heat presses, it performs the image transfer through the application of both heat and pressure.
However, once you test out the EasyPress 2, you’ll realise that it will become your everyday iron-on essential.
Of course, a bit of Internet research will show you that you can apply iron-on materials with other devices as well, including the typical household iron (go figures). More so, there are other brands of heat presses out there as well.
Given the wide range of alternatives, it’s only natural that some of you may be wondering:
Why not just use a regular iron or a different heat press?
Cricut EasyPress 2 vs. Iron
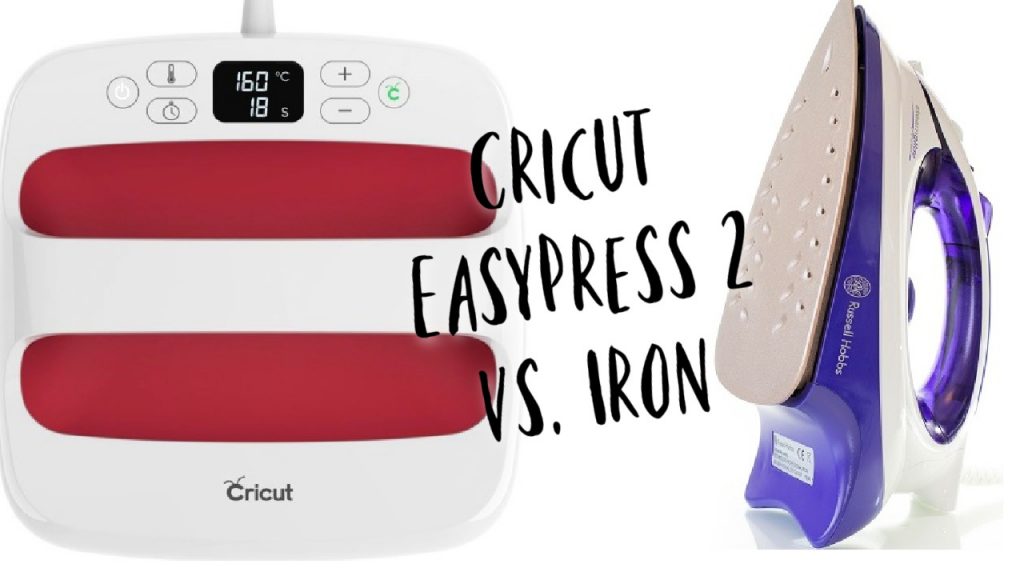
For starters, let’s talk about the differences between using the Cricut EasyPress 2 and the regular household iron.
Modern-day irons come with a wide variety of gadgets and intricate designs, most notably being the ones that involve the heating plate itself, most notably being the fact that you’ll rarely ever find iron with a completely flat surface anymore.
This is because most modern irons have holes in the plate to let the steam out, and while this does make them magnificent for ironing and straightening clothes, this also makes the plate unevenly heated.
Not only that but most household irons work by heating up the centre of the heating plate, with the edges heating up mostly via conduction, and that’s precisely why most iron-on tutorials that involve using a common iron recommend using a press cloth or Teflon sheet, to even out the heat distribution.
In order to compensate for the presence of those holes, you’d be forced to basically move the iron over the surface of the vinyl just to distribute the heat evenly.
Unfortunately, this little workaround comes with another problem, especially if you’re working with a bigger decal design: while you are moving your iron from left to right or up and down to compensate for the holes, you’re potentially leaving entire areas of the decals unpressed for a few seconds.
More so, irons rarely have any advanced temperature settings (unless you have one of those expensive models that are quite frankly not worth it), so most of the time you’ll need to work with whatever temperature presets the iron has, and hope that it sticks (literally).
Besides, pressing too hard while using the wrong materials can even lead to smudges in the design, and that is why regular heat presses are made to be stationary.
Unfortunately, you can’t leave the iron in one place either, since the aforementioned holes will cause the vinyl not to stick at all, so when you remove the protective tape, you might actually have the vinyl stick to it instead of the clothes.
Cricut EasyPress vs Regular Heat Press
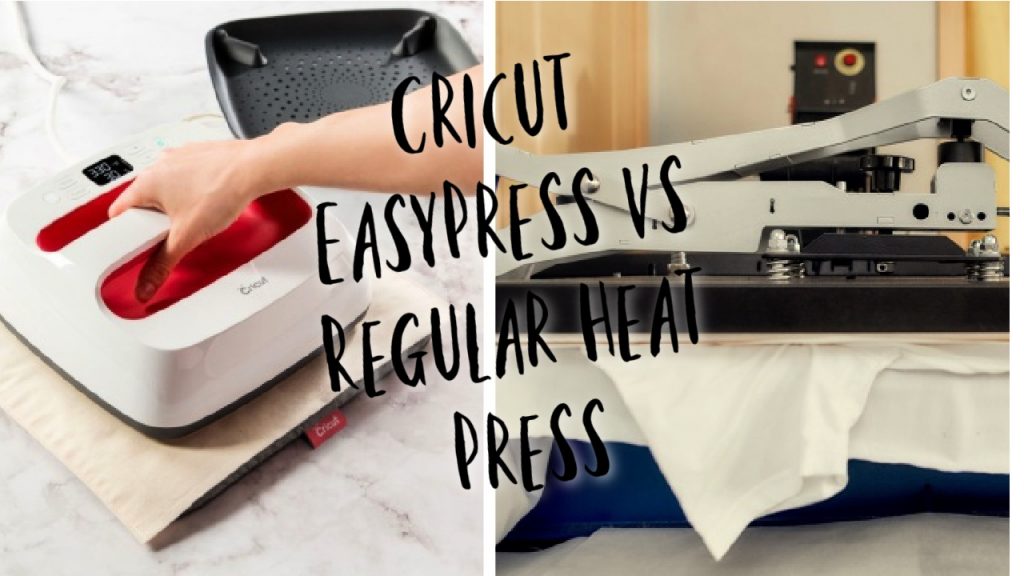
Now that we’ve established the household irons suited for the job, we need to move on to the next contender and that is the traditional industrial heat press.
In all honesty, going from a regular house iron to a regular heat press is indeed a big upgrade, since the heat press does have some very useful features:
- You have a built-in support surface, so you don’t have to worry about what you’re placing the clothes one
- You have advanced temperature control settings
- The heating plate is big enough to support any design that you’d regularly use for the average clothing item
- The heating plate is completely flat and evenly heated
However, professional heat presses still have a few notable drawbacks:
- They are very expensive
- They are very slow to work with
- They are mostly designed for professional and large-scale use
- They are usually large, and therefore need a lot of space in your crafting room
- Because they are large, they are inherently heavy to the point where actually carrying one by yourself may not be such a good idea.
- While their temperature control settings may be advanced, they may not be optimized precisely to your materials’ needs.
Cricut EasyPress 2: Both an Iron and a Heating Press
Now that you know the pros and cons of using the iron and the professional heating press, it’s time to see where the Cricut EasyPress 2 stands.
In short, we mentioned earlier that the Cricut EasyPress 2 brings the best of both a regular iron and a professional heating press, without having any of the drawbacks.
As such, here’s what the Cricut EasyPress has to offer compared to the two alternatives:
- It is portable, lightweight and easy to store, just like an iron
- You have advanced temperature control settings (see Heat Guide)
- It is very affordable
- The heating plate is big enough to support any standard clothing iron-on design
- The heating plate is completely flat and evenly heated.
Cricut EasyPress 2 vs. Cricut EasyPress
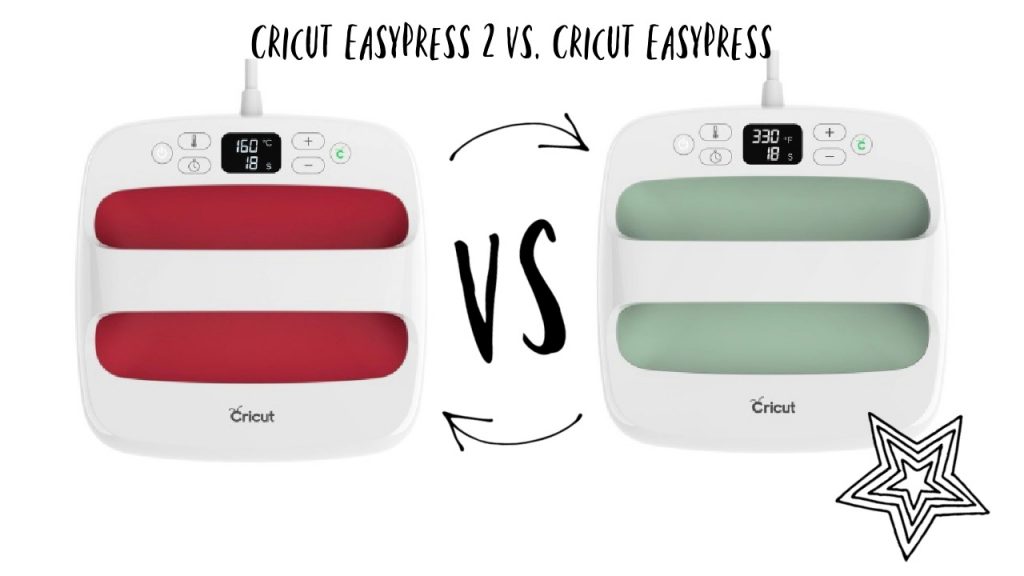
Some of you may have already used Cricut’s heat presses before, namely the first generation of Cricut EasyPress, and are now wondering what are the improvements brought to the second generation of machines, and whether these changes are worth the upgrade or not.
Well, there are plenty of changes in the second generation, some more noticeable than others, and you can see them all in the table below:
| Name | Cricut EasyPress | Cricut EasyPress 2 |
|---|---|---|
| Available sizes | 1 | 2 |
| Available colors | 2 | 3 |
| Remembers time and temperature settings | No | Yes |
| LCD screen brightness | Standard | Brighter |
| Super-fast heat-up time (up to 25% faster) | No | Yes |
| Streamlined Safety Base (keeps work surface up to 60°F cooler) | No | Yes |
| USB port for firmware updates | No | Yes |
| Uniform, edge-to-edge heating | No | Yes |
| Precise temperature control up to 400°F (205°C) | No | Yes |
| Large pressing area | Up to 12"x10" | Up to 9"x9" |
| Weight | 6”x7” - 3.3 lbs. (1.5 kg) 9”x9” - 5.7 lbs. (2.6 kg) 12”x10” - 8.6 lbs. (3.9 kg) | 5 lbs. (2.3 kg) |
| Heating plate thickness | Standard | Thicker |
| Protective case thickness | Standard | Thicker |
| Cooldown time | Standard | 60% faster |
| Heat-up time | Standard | Faster |
Note: Cricut doesn’t even sell the first generation Cricut EasyPress anymore, so unless you want to buy it from a third-party retailer that had it on stock, or buy a second-hand one, you’ll have to buy the EasyPress 2.
How Do I Tell What EasyPress I Have?
If you’re going to buy an EasyPress from a second-hand retailer, it’s good to know how you can tell apart the Cricut EasyPress 2 from the first-generation model.
The quickest way to do so is to check whether it has a USB port or not, since the Cricut EasyPress 2 has a micro-USB port on the back, near the power cord. As mentioned in the table above, this port is used to update the device’s firmware, and it is a feature that earlier Cricut EasyPress models do not possess.
Cricut EasyPress 2 Review
Cricut EasyPress 2 Specs
It features adjustable heat up to 400℉ (205°C), and thanks to the safety features and how easy it is to control, Cricut likes to market it as a no-stress heat press.
However, the Cricut brings the best of both worlds as it combines the speed of a heat press and the convenience of a regular household iron, so that not only will you be creating your custom clothing in no time at all, but the designs will stay on the fabric for a very long time as well, even through repeated washes.
One other great thing about the Cricut EasyPress 2 is that it is perfectly aware that there are different kinds of transfer materials available, as well as different types of fabrics that you can use them on, so the machine comes with a wide variety of temperature settings for every type of project.
All you need to do is apply the heat, press the machine on the fabric and when the beep sounds, the transfer is complete.
The heat plate is the core of the machine, and it is made of aluminium with a ceramic non-stick coating. In order to clean the heat plate, you can use any commercially available iron cleaner.
However, if you managed to accidentally stick iron-on film to the plate, you can remove it using a thick rag to wipe it off, preferably as soon as possible, while it’s still warm. Be sure not to touch the heat plate; it’s hot!
The overall build of the device makes it very lightweight, and its portable design also makes it very easy to store. More so, just because you’re thinking of getting a Cricut heat press doesn’t mean that you will be bound to using only Cricut consumables.
This is thanks to the fact that the machine is compatible with most major brands of HTVs (Heat Transfer Vinyls), as well as all Infusible Ink products.
Lastly, since the press works with all kinds of HTVs, it will work great with any other Cricut cutting machines, as you can use them to cut out the vinyl designs, and then use the EasyPress 2 to transfer the designs onto the clothes.
Of course, we all love items that can do multiple jobs at once, and even if you’re not all that into design imprinting on clothes, or if you’ve just run out of materials, you can still use the tool as a regular iron to keep your clothes neat and pressed.
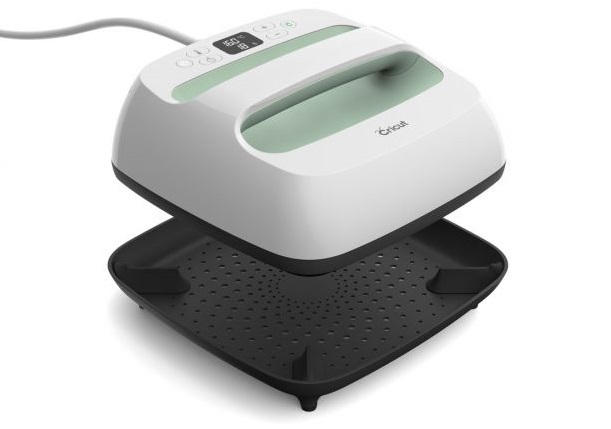
Cricut EasyPress 2 Design
The entire purpose of this article is to talk about a device that can help you craft things and make your designs a reality, so it would be strange not to talk about the build and the design of the Cricut EasyPress2 itself.
For starters, they made it so that using and carrying it is as easy as possible thanks to the large ergonomic handle that it has, and because of the materials that it is made out of, the machine is very light and easy to carry everywhere as well.
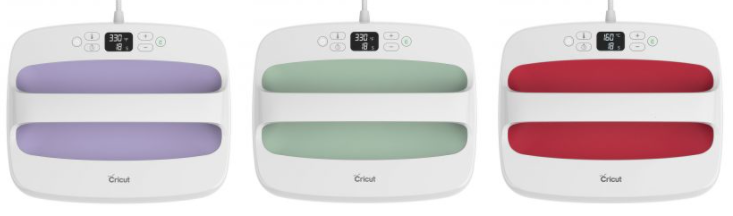
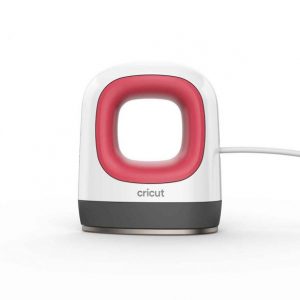
If you have a knack for colours, you’ll be happy to know that the device is currently available in 3 different colours:
- Mint (Green)
- Lilac (Purple)
- Raspberry (Red)
- Vanilla Pearl (Yellow) – Limited Edition
Different Sizes of Cricut EasyPress 2
The Cricut EasyPress 2 comes in three different varieties based on the size of the heating plate:
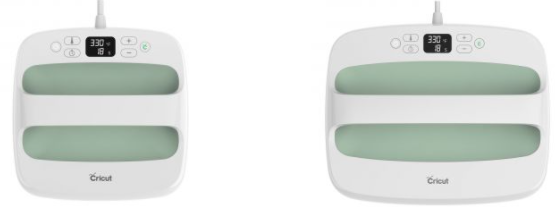
- Cricut EasyPress 2 – 6″x 7″ (15 cm x 17.5 cm)
- Cricut EasyPress 2 – 9″ x 9″ (22.5 cm x 22.5 cm)
- Cricut EasyPress 2 – 12″ x 10″ (30 cm x 25 cm)
Now, besides the difference in size (and other obviously correlated differences such as weight or price), there is absolutely no difference between the two models as far as capabilities and performance go.
Both versions have the same advanced heat plate design with a ceramic-coated surface, so choosing between the smaller or the bigger version is merely a matter of what type of clothes and designs you will be working on.
For example, if you’ll be working with small clothes for babies or toddlers, you’re better off buying the 9″ x 9″ press, but if you’ll be working on designs (both big or small) applied to regular adult clothes, you’ll do better with the 12″ x 10″ model.
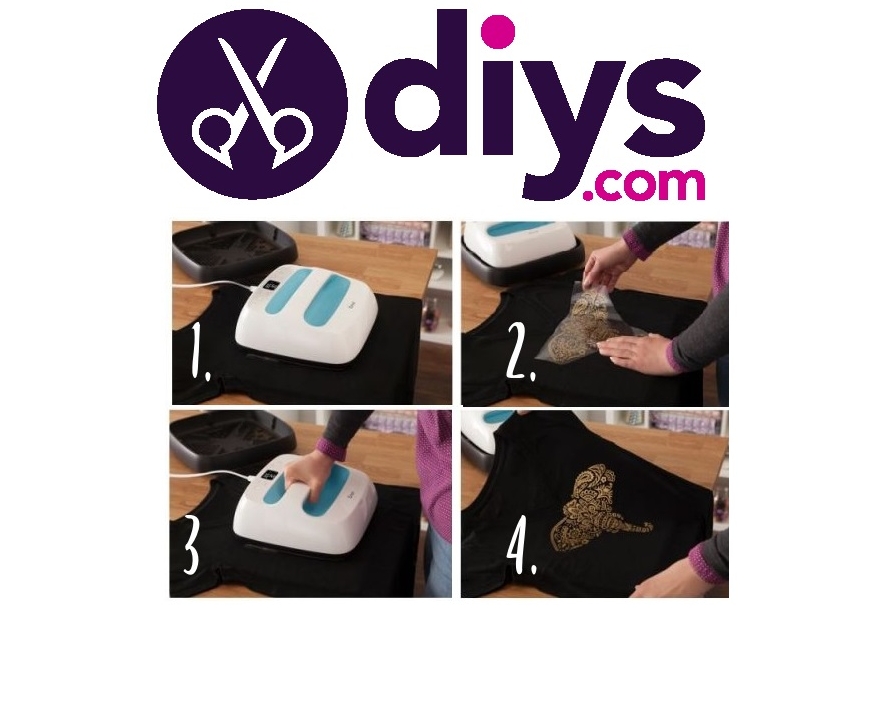
How Do I Use The Cricut EasyPress 2?
Now that you know what the Cricut EasyPress 2 is, what it does and what it looks like, it’s time we talk about actually using it:
- Plug in the machine to a power socket. It requires a maximum input 120V outlet.
- Because of this, it is not recommended for use outside North America.
- Press the Power button.
- Set the desired temperature and use the +/- buttons to adjust the values.
- See Heat Press guide for more details.
- Once the Cricut EasyPress 2 has reached the desired temperature, the Cricut logo will switch from orange to green, and it will also make a beeping sound.
- Press the timer, then use the +/- buttons to set the recommended time.
- Place your piece of clothing or fabric on an even and flat surface.
- Preheat the material.
- Place the iron-on material over the surface of the clothing or fabric.
- Place the Cricut EasyPress Mator a regular towel over the iron-on material.
- Press and hold the Cricut EasyPress 2 over the mat or towel.
- Press the countdown button.
- Flip base material.
- Heat back side of design for the recommended time.
- The machine will make a beeping sound to let you know when you can stop applying pressure and remove it.
- Peel the protective film from the design according to the Heat Press guide.
As far as onboard controls go, Cricut made the device to be as intuitive as possible, since all you have are the On/Off button, the temperature (Fahrenheit/Celsius) button, the countdown buttons, and the temperature control buttons (+/-).
Simply press the buttons to set the temperature and duration, and whatever values you input will be clearly visible on the machine’s very bright and clear LCD display.
Things to remember about using the Cricut EasyPress 2:
- Always use Cricut EasyPress at room temperature.
- Make sure that fabrics and other base materials are completely dry.
- Always return Cricut EasyPress to its Safety Base when you’re done using it.
- Before using it, make sure there is no tape or protective film over its control panel.
- Always use the EasyPress 2 on a firm, even surface
- Always use the recommended settings for the iron-on and base material you’re using.
- Remember to apply heat to both sides of the design for the recommended amount of time for optimal results.
Cricut EasyPress 2 Protective Features
If you’re looking to buy the Cricut EasyPress 2, especially the small 9″ x 9″ version, then you most likely either have kids, or have kids come by your place pretty often, so safety and security are things that you take very seriously.
Normally, a device that has components that heat to 400℉ would be considered very dangerous, to the point of being deemed a hazard, especially around children, but the Cricut EasyPress 2 comes with several helpful safety features that include an insulated Safety Base and automated shut-off feature.
However, just because these features exist, doesn’t mean that you need to leave the machine unsupervised so, whenever you’re using it, try to keep it out of reach of the little ones.
Cricut Heat Press Guide
We’ve already established that heat transfer machines like the EasyPress 2 work with high temperatures and that it supports a wide variety of temperature settings based on the iron-on materials and the clothing composition.
However, one thing that many of you may be thinking is that there are a lot of Infusible Ink and iron-on materials out there, not to mention the fact that clothes nowadays are made from a wide variety of materials and/or mixes.
Because of this, knowing exactly what temperatures to use can be a bit tricky, especially if you’re not exactly keen on burning a square-shaped hole through your clothes.
Fortunately enough, Cricut realised that tens of combinations of temperature controls and durations are not something we like to remember, so they included a way to customize Cricut’s EasyPress settings based on what iron-on materials you are using, and what type of clothing you’re working with.
This feature is available both on the associated Cricut smartphone app, as well as on the official Cricut Heat Guide page.
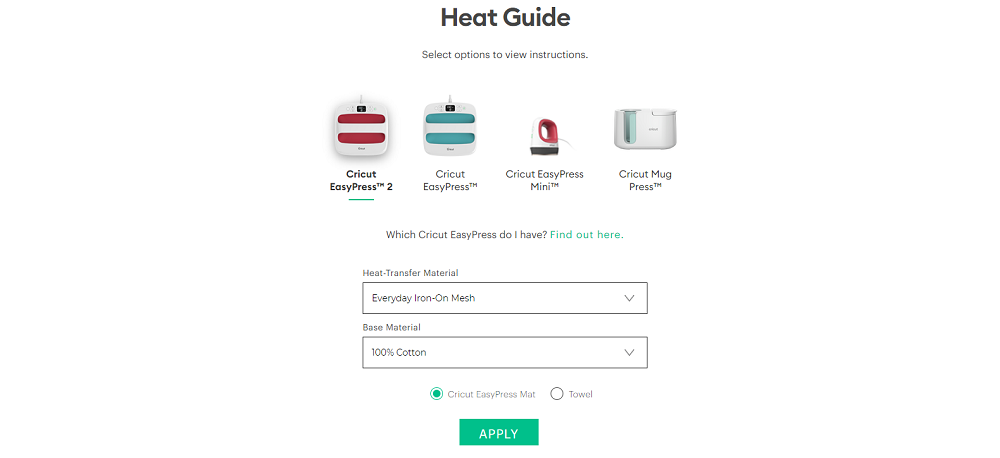
How Do I Use The Cricut Heat Guide?
- Go to the official Cricut Heat Guide page.
- Select the Cricut heat press that you are using from the following:
- Cricut EasyPress
- Cricut EasyPress 2
- Cricut EasyPress Mini
- Cricut Mug Press
- Under Heat-Transfer Material, select your iron-on material of choice from the dropdown list.
- For the purpose of our review, we selected Everyday Iron-On Mesh.
- Under Base Material, select from the dropdown list the material that your clothes are made out of.
- For the purpose of our review, we selected 100% Cotton.
- Select whether you will be using a Cricut EasyPress Mat, or a regular towel.
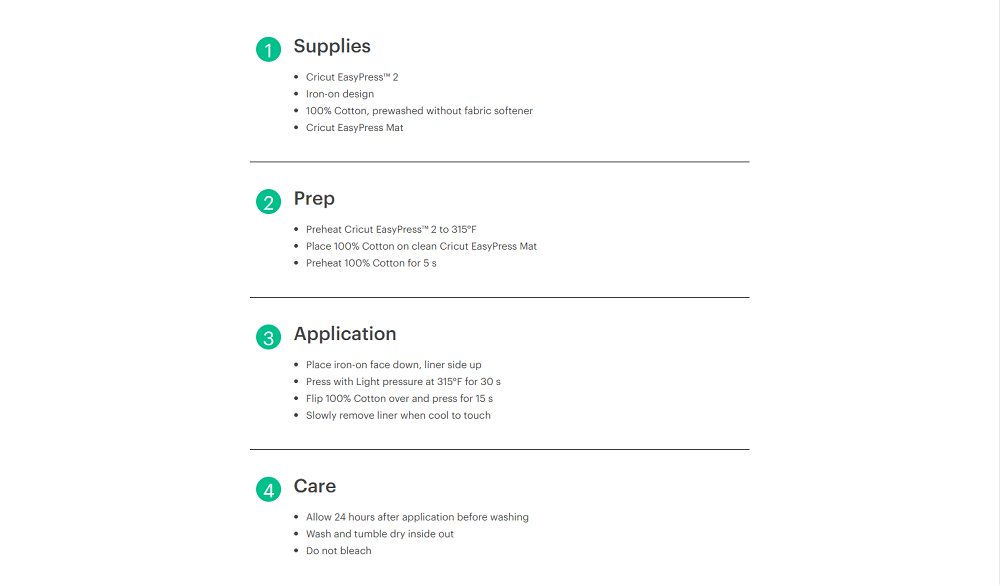
Once you’ve selected all of the settings, the online calculator will provide everything you need in order to set up the Cricut EasyPress 2, including:
- How much you need to preheat the machine.
- How much pressure needs to be applied.
- The temperature you need to set it to.
- How long you need to apply the pressure.
- What movements you need to use during the application.
- How to take care of the finished product so that the design will last as much as possible between washes.
How to Update Cricut EasyPress 2 Firmware (Windows & Mac)
Cricut is continuously upgrading their machines, and while little can be done to the actual hardware once you purchase it, there’s always the firmware that can be updated to receive the latest and greatest features.
Here’s how to upgrade your Cricut EasyPress 2 firmware:
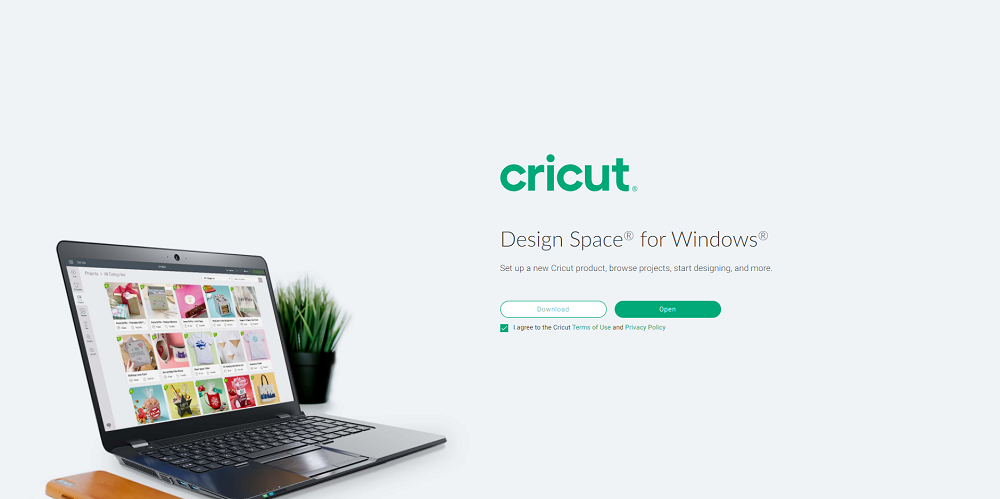
- Open your browser and go to the Design Space website.

- If you have Design Space installed on your PC, select Open
- If you don’t have Design Space installed, select Download.
- Sign in using your Cricut ID and password.
- If you don’t have one, register and create one first.
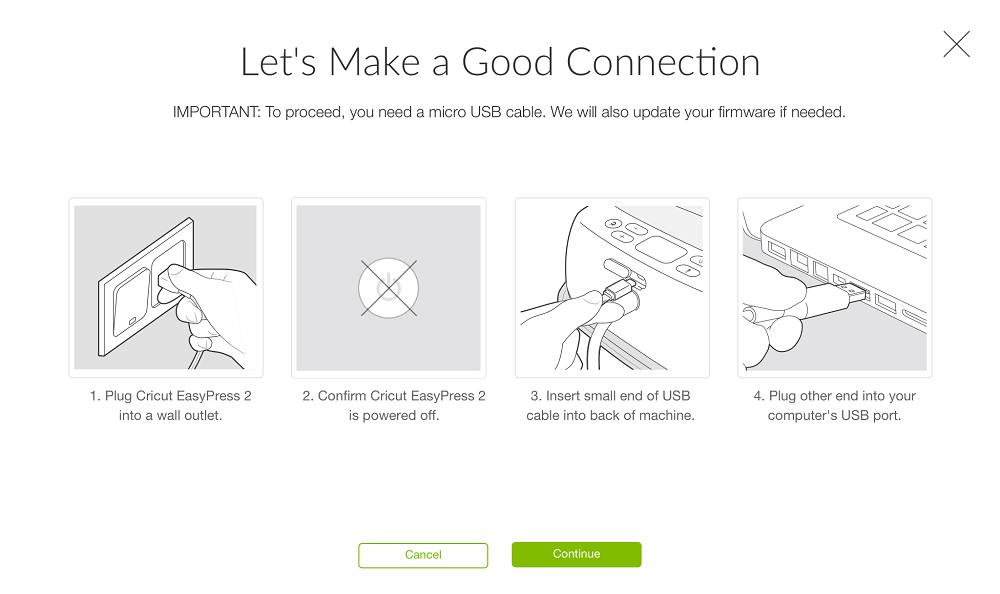
- Connect your EasyPress 2 to the PC by following the on-screen instructions.

- The software will scan and detect your machine, then check whether there are any updates available or not.
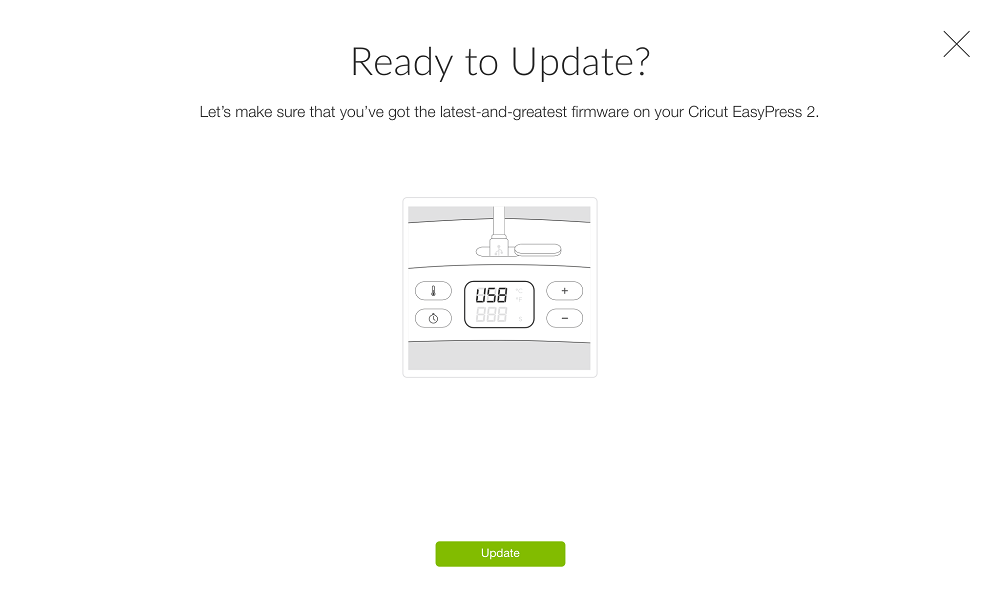
- If any updates are available, it will provide instructions for putting your machine into firmware update mode.
- Click on Update.
- Wait for the new firmware to download and then install on your Cricut machine
- A beeping sound will let you know when the firmware update was completed.
- Once the update is complete, press either on Done, or the X button in the top-right corner of the screen.
Cricut EasyPress 2 Drawbacks
No machine is perfect, and the same applies to the Cricut EasyPress as well since there are a few things that this machine cannot do.
For example, the Cricut EasyPress 2 will only work on flat surfaces, so if you try adding vinyl to rounded surfaces will not be easy at all.
Sure enough, there are plenty of workarounds that you can try to avoid this particular limitation, but if you’re involved in a project where you are dealing with bulk orders, you’ll be using a lot of time
On a similar note, the Cricut EasyPress 2 isn’t suited to apply designs to mugs either, since their surface isn’t flat either.
In fact, not only would you need the smallest EasyPress model available, but you’ll also need to apply the press multiple times over the surface of the mug just to get it right once.
However, if mugs are what you are interested in, don’t forget that Cricut also has a dedicated tool called the Mug Press created specifically for that.
Cricut EasyPress Mini Review
With so much talk about the Cricut EasyPress 2 and how portable it is, we thought it would be a real shame to mention a Cricut machine that takes that particular trait one step forward.
This machine is called the Cricut EasyPress Mini (go figures), and it is basically a smaller version of the EasyPress 2, with a ceramic-coated heating plate that can handle surfaces of the following sizes:
- Iron-on
- 4″ x 3.5″ or 1.7″ x 5.25″
- Infusible Ink
- 2.75″ x 2.75″ or 1.625″ x 5″
Its compact size makes it ideal for projects where the regular EasyPress 2 would be too large, and it also removes the drawback of only being able to work on flat surfaces.
That being said, the EasyPress Mini is great for atypical projects like hats, shoes, or stuffed animals, or other projects that have irregular or rounded surfaces.
More so, because of the very small heating plate, you can also use it to fix any transfer irregularities that may have occurred by simply pressing the Mini against the area where the HTV didn’t stick properly.
Lastly, the compact size makes it ideal for those of you that have to work with baby and toddler clothes, since the designs that go there are always very small and using a heat press or the Cricut EasyPress 2 would be too much.
However, the smaller size also translates to some limitations, such as only have 3 temperature presets:
- Low – 255°F (125°C) – 295°F (145°C)
- Great for lightweight, delicate, synthetic, or heat-sensitive fabrics
- It is also ideal for more delicate HTVs, such as Foil Iron-On
- Medium – 300°F (150°C)–355°F (180°C)
- Commonly used for most fabrics and heat-transfer vinyl
- High – 360°F (185°C) – 400°F (205°C)
- Only recommended for Infusible Ink projects and blanks
If this neat device caught your eye, you can go ahead and buy it from its official Cricut page, as well as from other popular third-party retailers such as Amazon.
FAQ: More Information About the Cricut EasyPress 2
Is the Cricut EasyPress 2 worth it?
The short answer would be Yes, especially given how affordable the EasyPress is compared to other heating presses that come close to its performances.
It is fast, lightweight, durable, precise, optimized for heat transfer projects, and it comes with plenty of safety features included, so there’s no need to worry about having the kids around it (don’t let them play with it though).
What is the difference between the Cricut easy press 1 and 2?
At first glance, there aren’t many differences between the first and second generation of Cricut EasyPress machines.
However, there are some minor quality changes, such as a different button design, a thicker heating plate and safety case, and the second generation of Cricut EasyPress devices also come with an added USB port to allow firmware updates.
Can I use the Cricut EasyPress 2 on plates?
Yes, you can. However, keep in mind that there are a few limitations in terms of what plates you can use:
- The plates need to be completely flat (The EasyPress 2 doesn’t work well on rounded surfaces)
- It’s recommended that you use a transparent plate, because you will be adding the vinyl on the outer side, and since you need to see it, having it transparent would help you.
What comes with the Cricut EasyPress 2?
Besides the actual Cricut EasyPress 2 machine, you’ll also receive a Safety Base, a Welcome Book, and enough materials for a practice project
What is Peel on a Cricut Machine?
When using Cricut machines or following the Cricut Heat Guide, know that Peel refers to removing the clear iron-on liner after applying iron-on material to your project surface, and it comes in two forms:
Cool Peel – Allow the liner to cool completely before removing it. If you remove the liner while it is still hot or warm, it may prevent your iron-on image from properly sticking to the material.
Warm Peel – You can remove the liner while still warm to the touch, just as long as it is not hot. If you remove the liner when it cooled off completely may prevent your iron-on image from properly sticking to the material.
What is a Cricut EasyPress Mat?
Whenever you perform a heat transfer of a vinyl image onto a surface, you need to put a protective cloth over the vinyl, and not apply the Cricut EasyPress 2 directly onto it.
Because of that, a Cricut EasyPress Mat is ideal for efficient heat transfers and it comes in three sizes to match the sizes of the Cricut heat presses.
Do I need the Cricut EasyPress mat?
While the Cricut EasyPress mat was created and optimized to be used together with the Cricut EasyPress 2 machine, using it is not mandatory, as you can use other pieces of cloth or even towels to do the exact same job.
How hard do I have to press on a Cricut EasyPress?
Depending on what type of project you’re working on and the materials involved, you may be asked to apply one of two levels of pressure:
- Gentle pressure – one hand with 5-10 lbs. of body weight.
- Firm pressure – press down with two hands and 15-20 lbs. of body weight.
Is the Cricut Heat Press Any Good? Conclusion
After testing it and comparing it to all other similar devices on the market today, we can say for certain that the Cricut EasyPress 2 is indeed worth the investment.
The design is great, focusing on both portability and durability, and the results you’ll get from using it to create your own custom projects will be more than satisfactory.
Lastly, there’s something about the machine’s precision that makes you feel safe when working with your iron-on materials, especially when you use the Heat Guide for some extra help.
That being said, this concludes our brief review of the Cricut EasyPress 2. We hope that we’ve covered as much ground as possible and that by reading our guide you’ll feel like you now know whether this machine is worth buying or not.
For more great reviews like the one above, please submit your entries in the comments section below, and we’ll create a similar article in no time.