DIY Concrete Tiny Jewelry Bowl
Updated on November 19, 2025
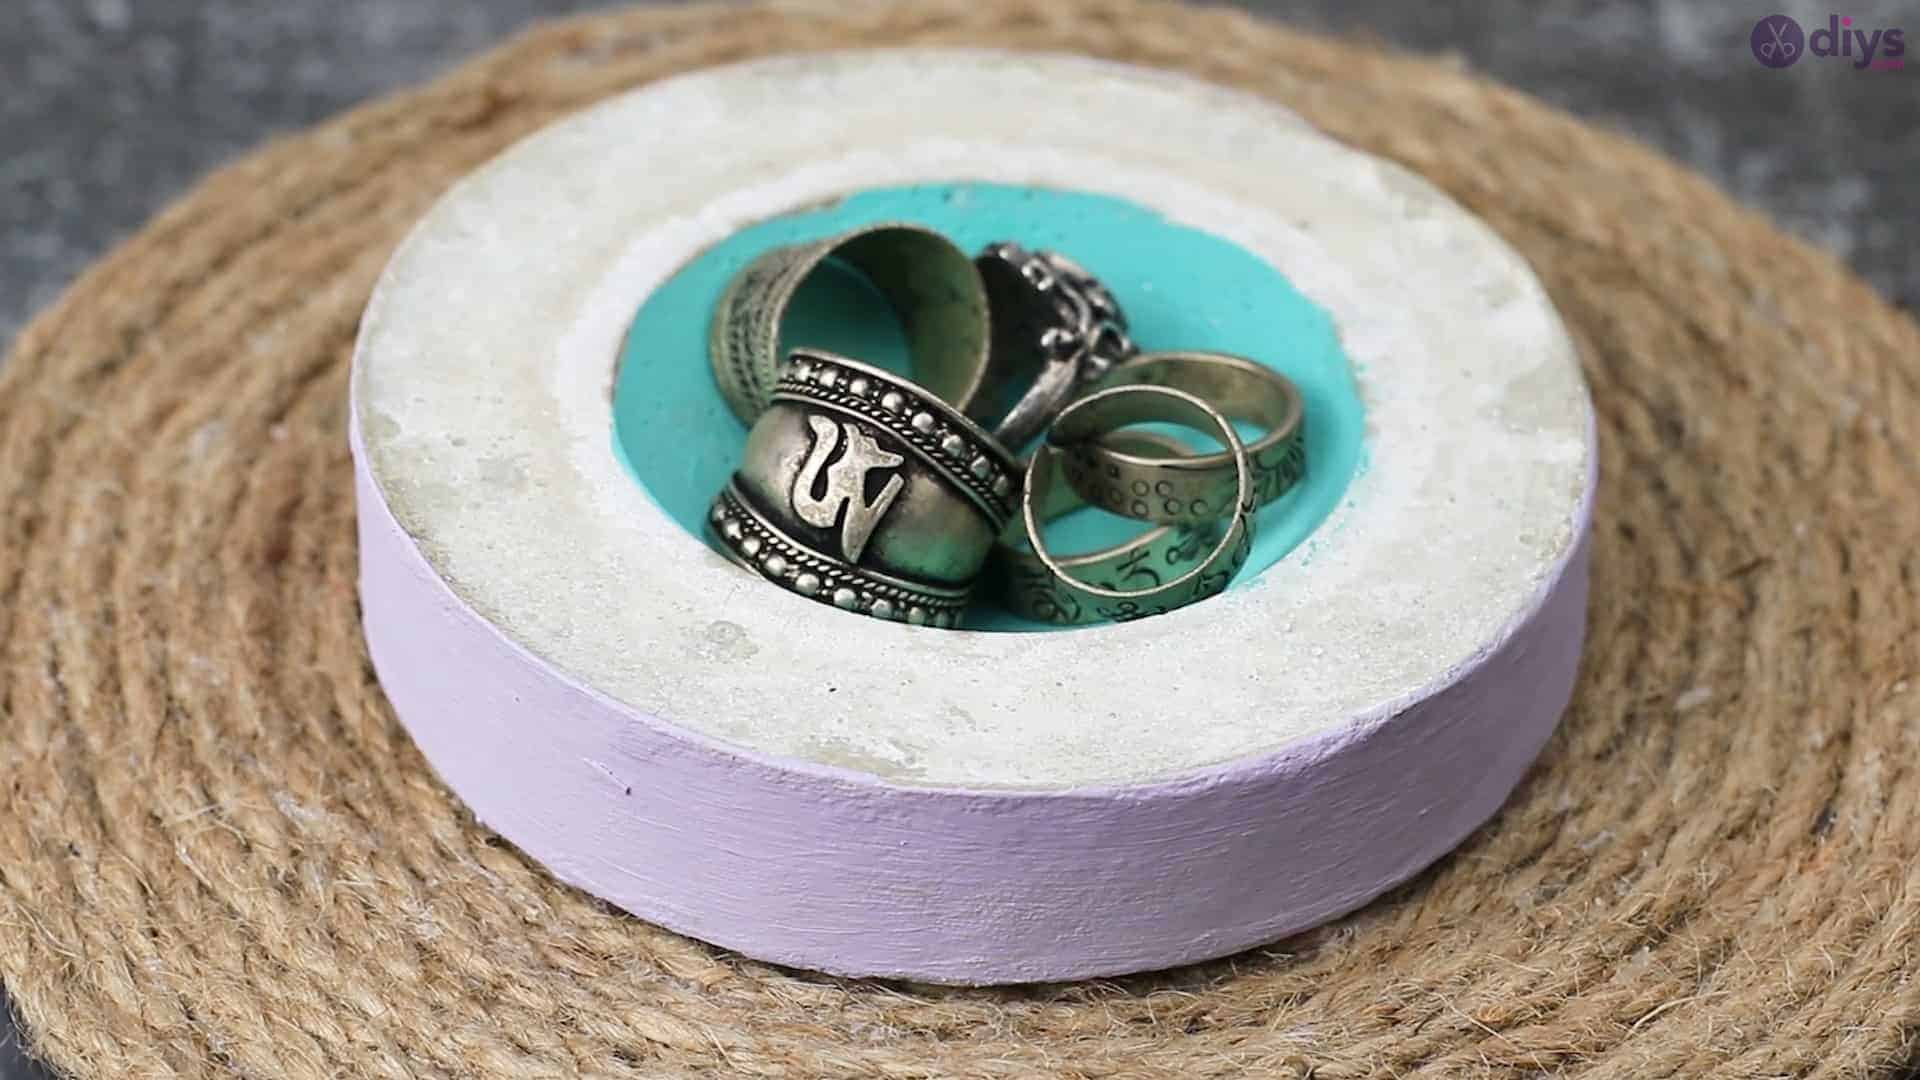


Ever since I was a little kid, I’ve been the kind of crafter who goes through total phases and gets really obsessed with my favourite technique du jour. It might only last a few days, but there have definitely been times where I’ve gone on total kicks doing the same kind of craft one after the other in different ways for weeks or even months at a time! That’s how I’ve been lately with DIY concrete crafts. There’s just something about molding our very own shapes and objects from total scratch using DIY fine particle cement that I really love! I’ve been making all kinds of things and finding some of them actually quite useful so, when I found myself wishing I had some kind of dish to put change, keys, and knick knacks in on the front table in the foyer, I decided that I’d rather make one of my own rather than buying one. That’s how this little concrete bowl came to be!
I’ve always loved following tutorials written by other crafting enthusiasts, so sometimes I like to return the favour by documenting my own crafting processes for other people to try out for themselves too. Check out these step by step instructions complete with photos! If you’d rather follow along with a video tutorial instead of written words, scroll to the bottom of this post to find just what you’re looking for.

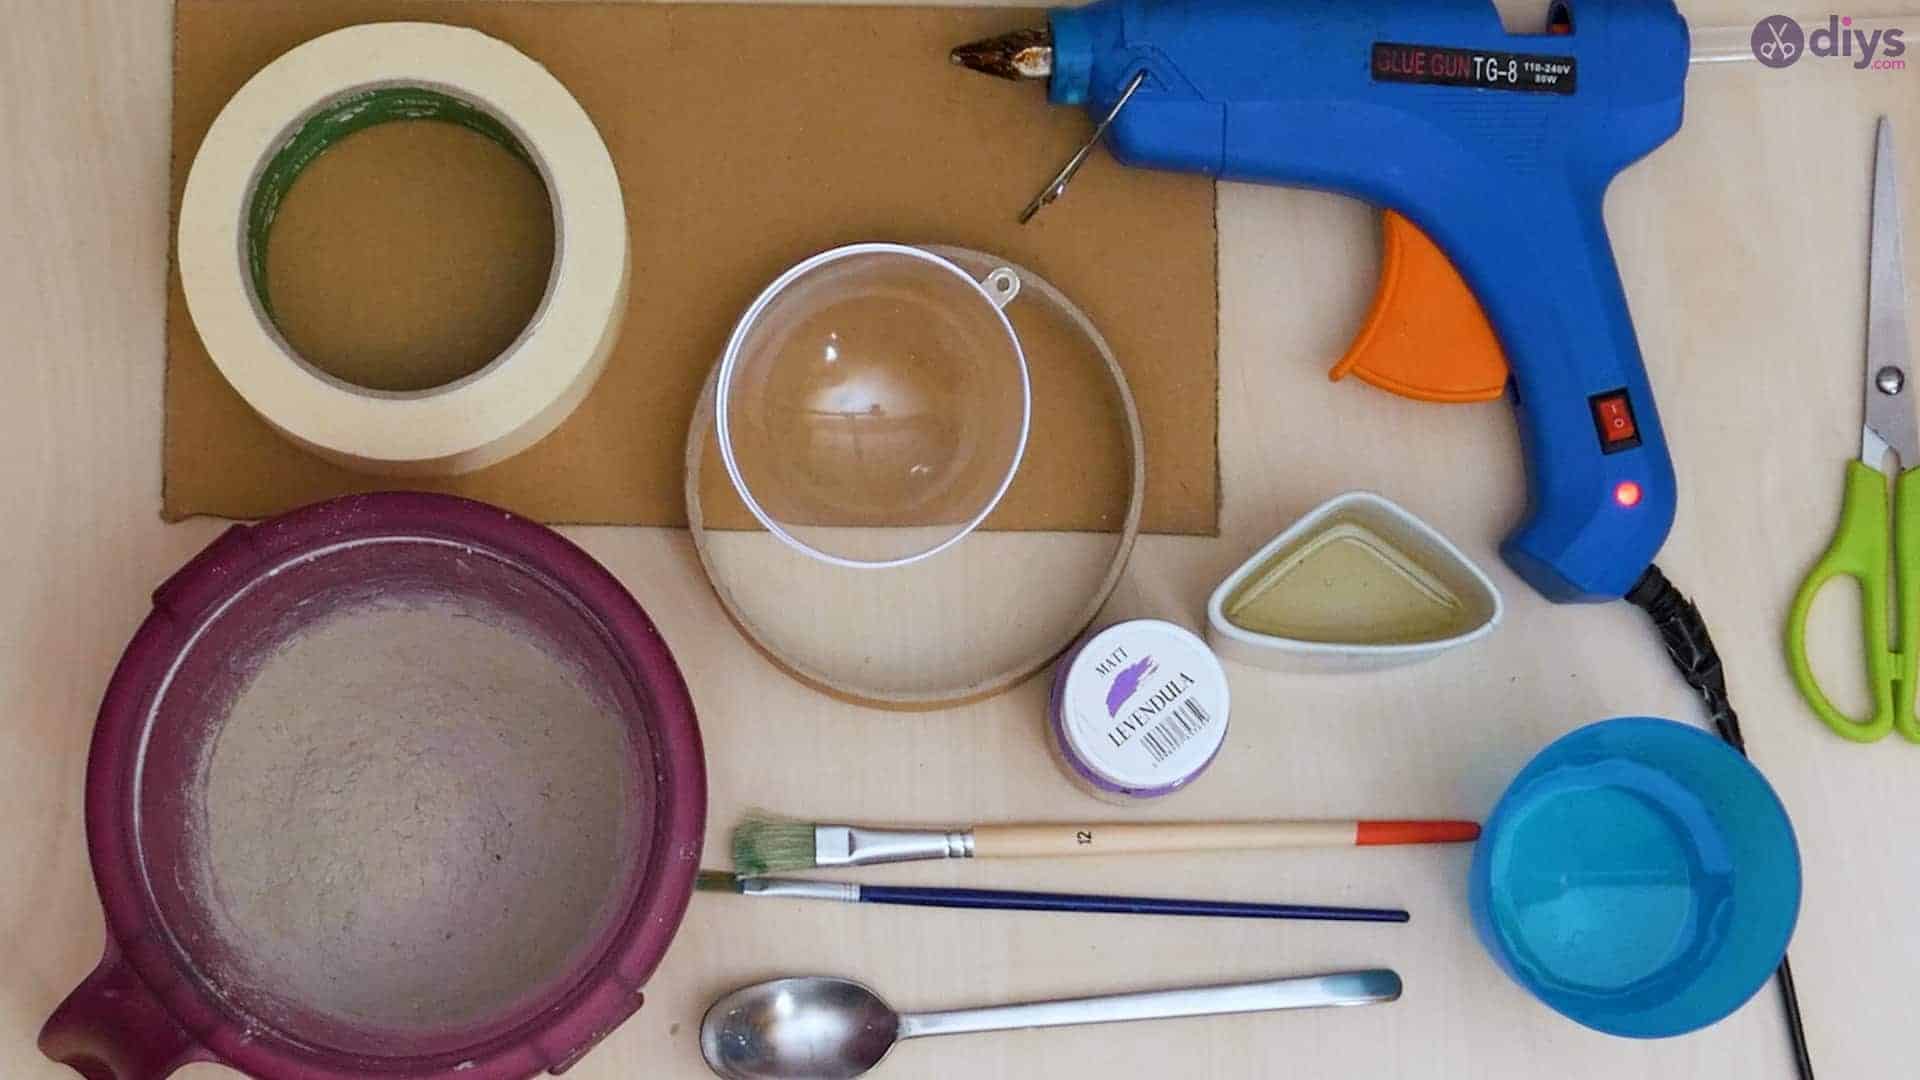
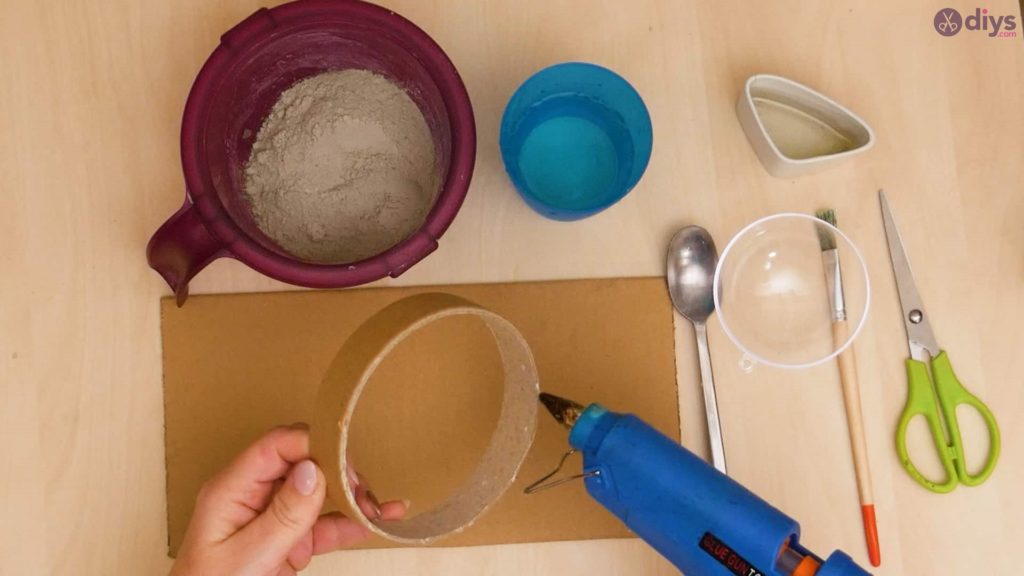
For this project, you’ll need:
- DIY fine particle cement
- Water
- A spoon
- Scissors
- Tape
- Oil
- A paintbrush
- Acrylic paint (mint and purple)
- Folding utility knife
- Plastic orb (I used half a plastic tree ornament)
- Empty tape roll
- Cardboard
- Hot glue

Step 1:
Gather your materials!

Step 2:
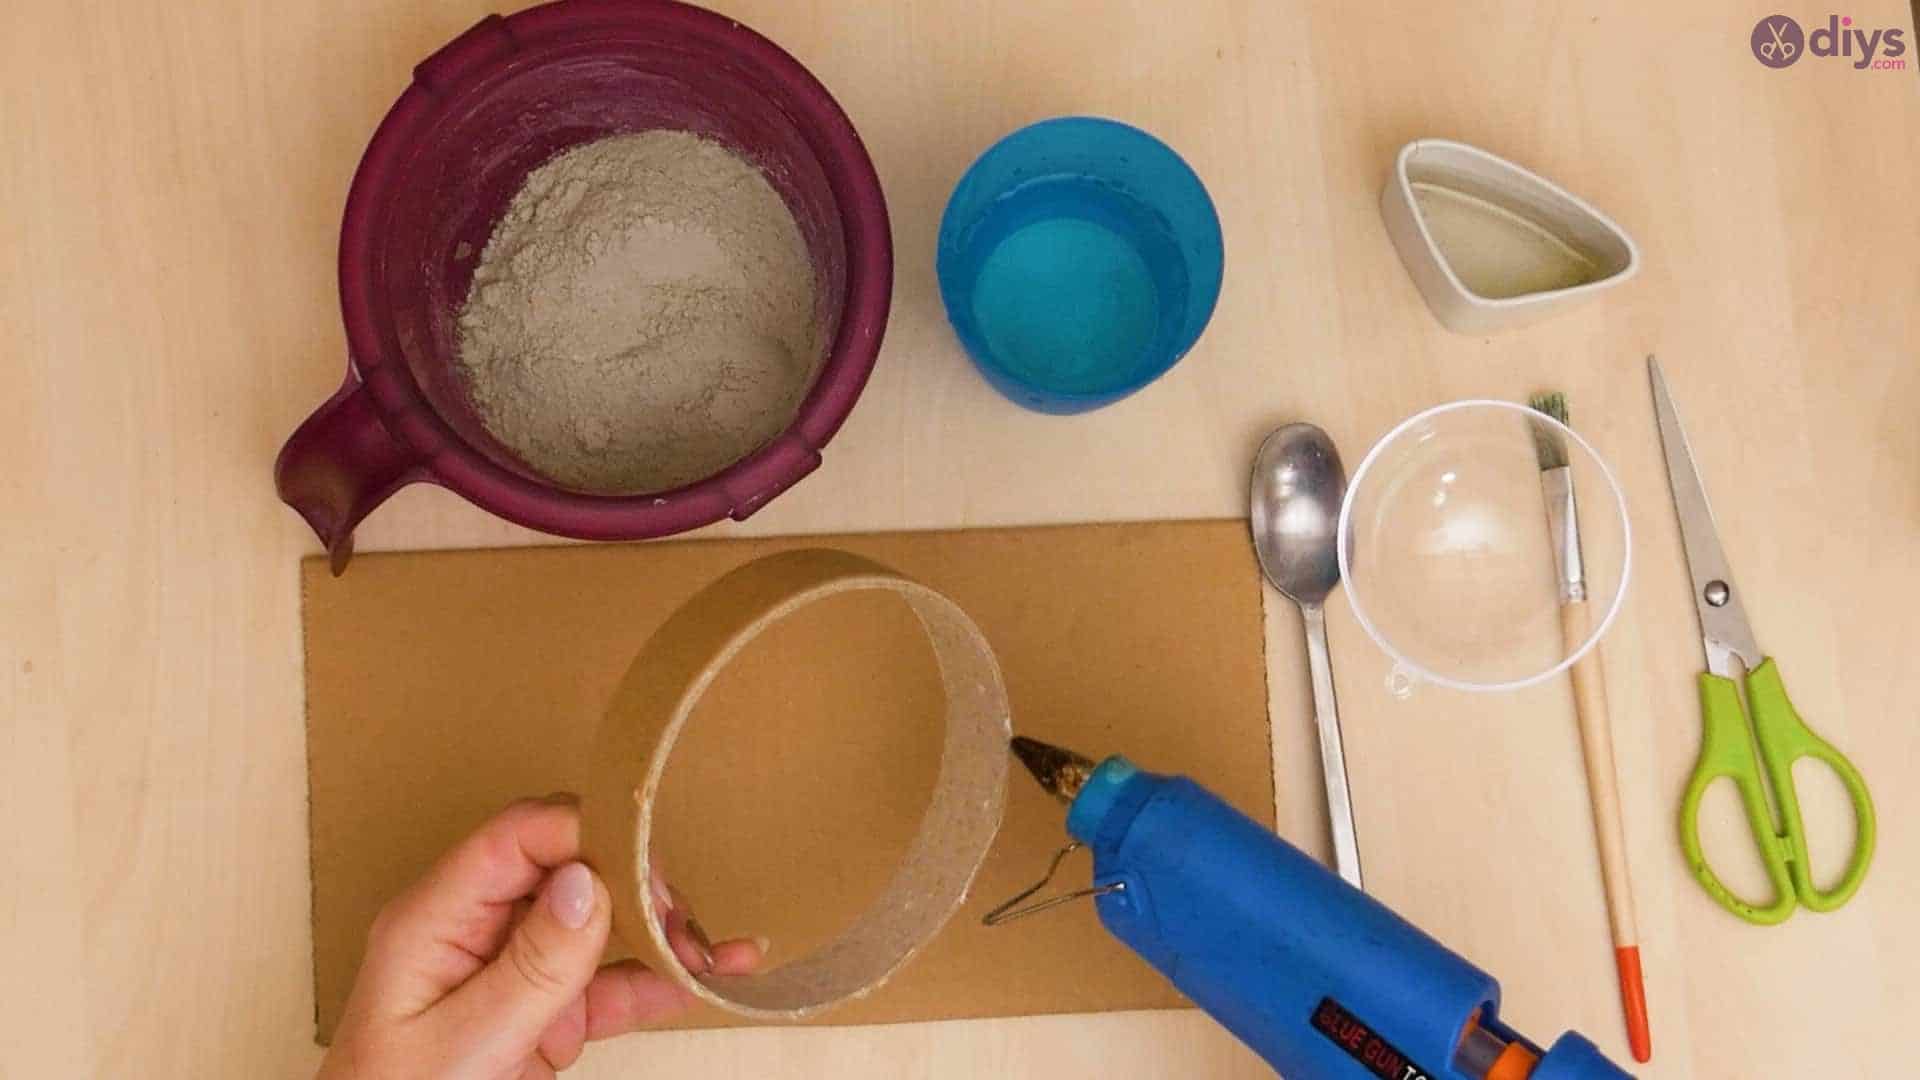
Cut a piece of cardboard that’s small enough for you to work with easily and won’t take up your whole table, but that’s still large enough to fit the whole circumference of your empty tape ring onto its surface if you lay it flat. Apply hot glue around the edge of the entire ring on one side and stick it down on the cardboard to create a circular mold with a cardboard bottom. This will be the shape that you make your cement bowl in.
Step 3:
Use your paintbrush to coat the entire inside surface of this circular mold you just made with oil (vegetable, canola, or olive oil will work). Make sure you cover the entire bottom all the way across and all up the sides of the tape ring. This oil will help stop the cement mix from sticking to the cardboard and the ring as it dries and forms your bowl. Apply enough that everything is well covered and a little bit saturated but not so much that it soaks through the cardboard and gets too wet to actually hold your wet cement mix.

Step 4:
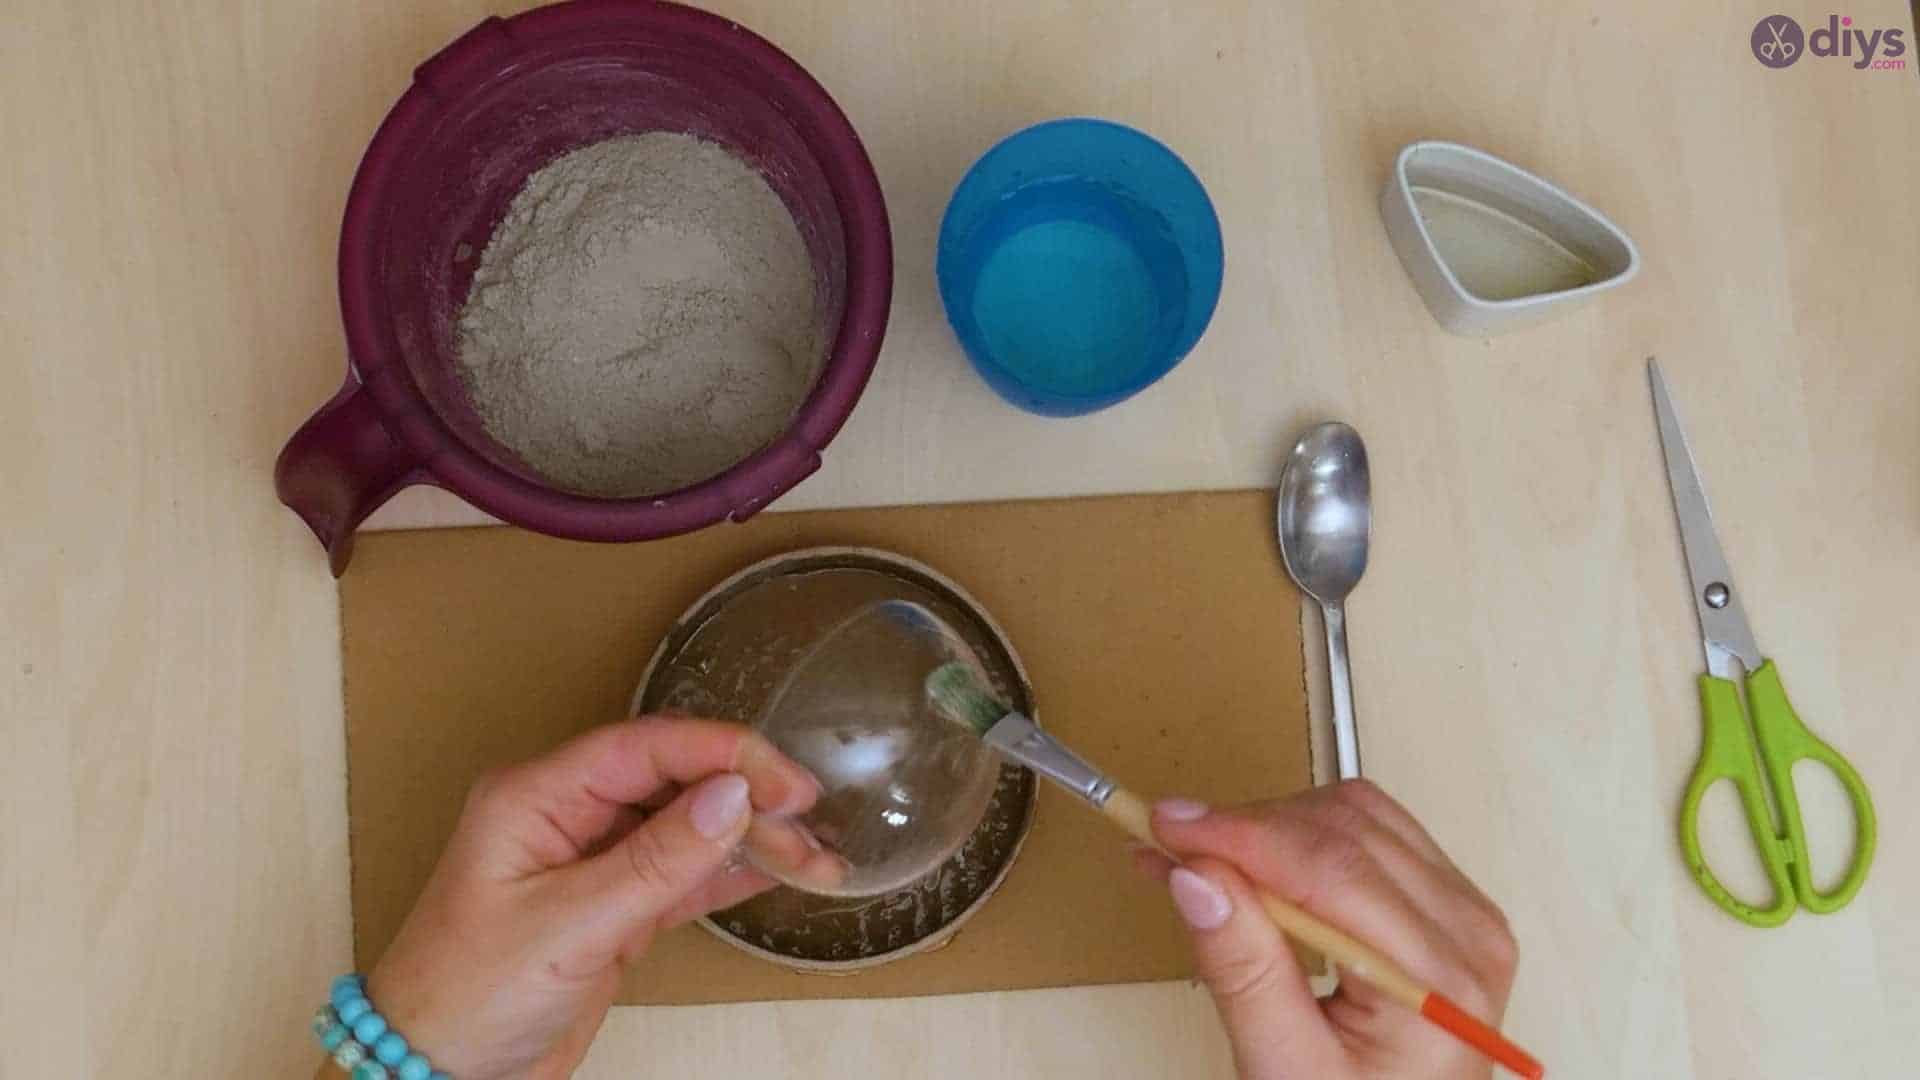
Next, use the paintbrush to apply oil to the rounded outside of the plastic orb. This will stop the cement from sticking to it when you press the orb down into the mix to make the inside scoop of the bowl. Set this aside for the moment.
Step 5:
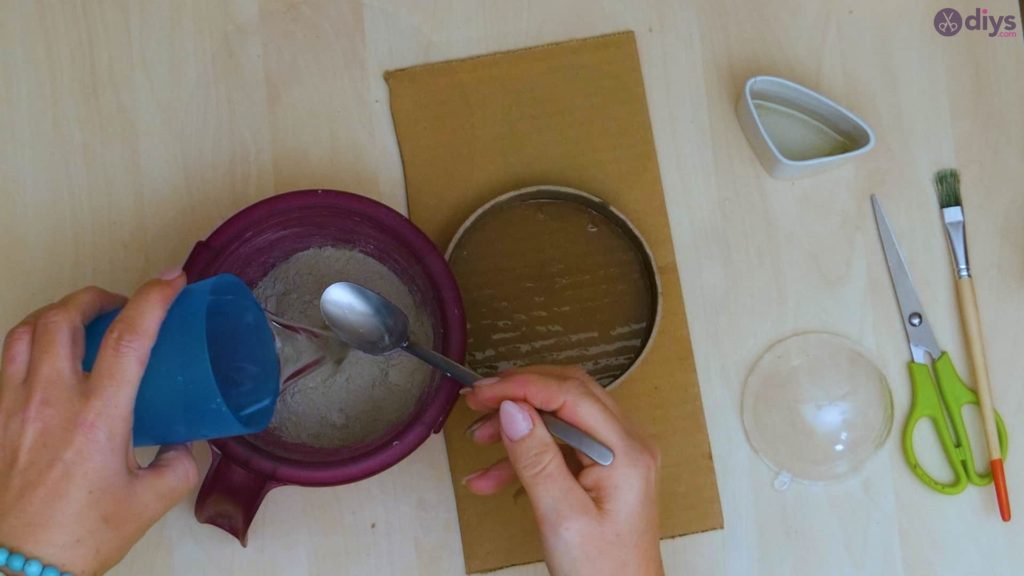
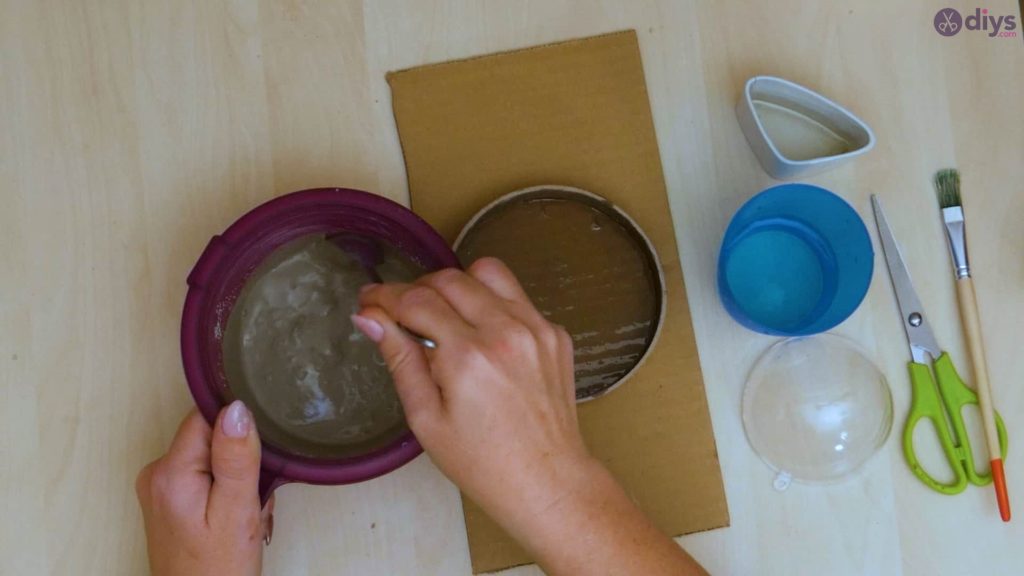
Mix water into your DIY fine particle cement mix with a spoon and stir it until you have the right consistency! Follow the instructions on the back of the package to get the right ratio of water to powdered mix, since it can vary from brand to brand.
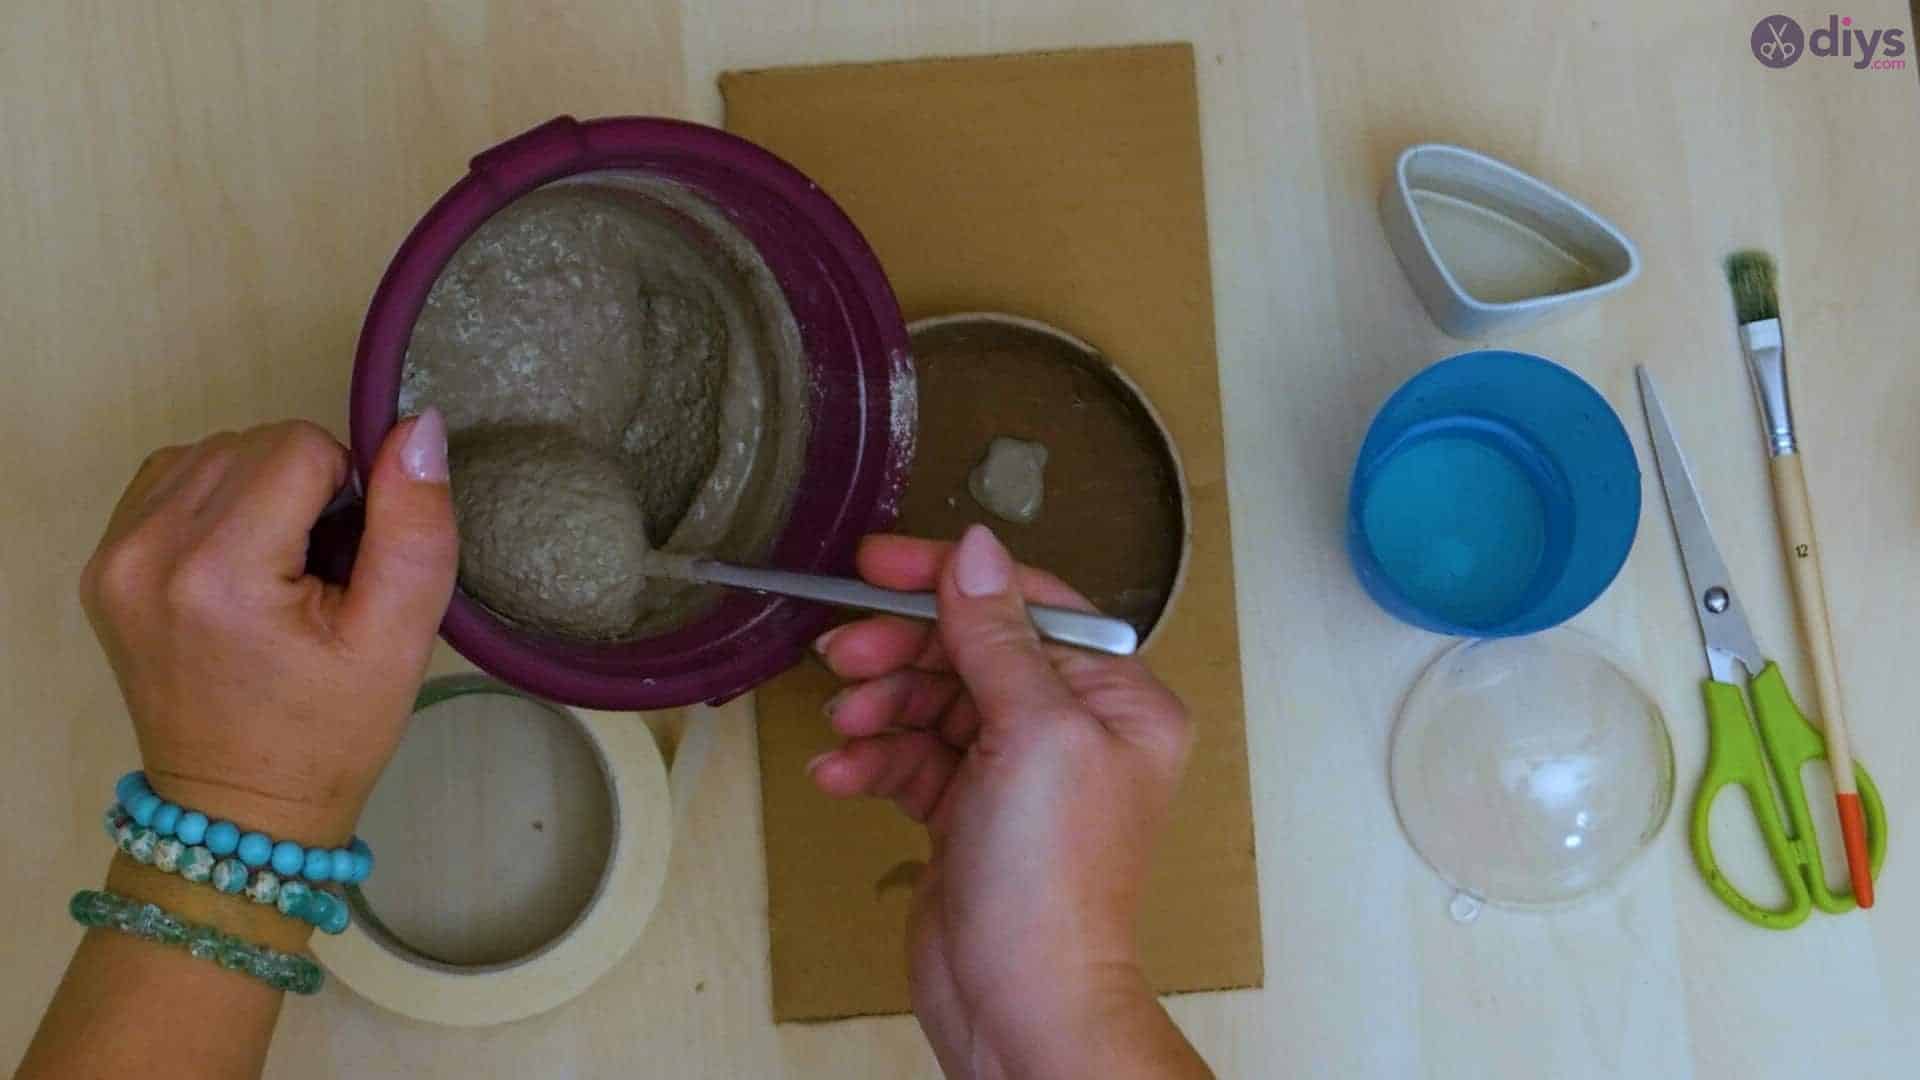
Step 6:
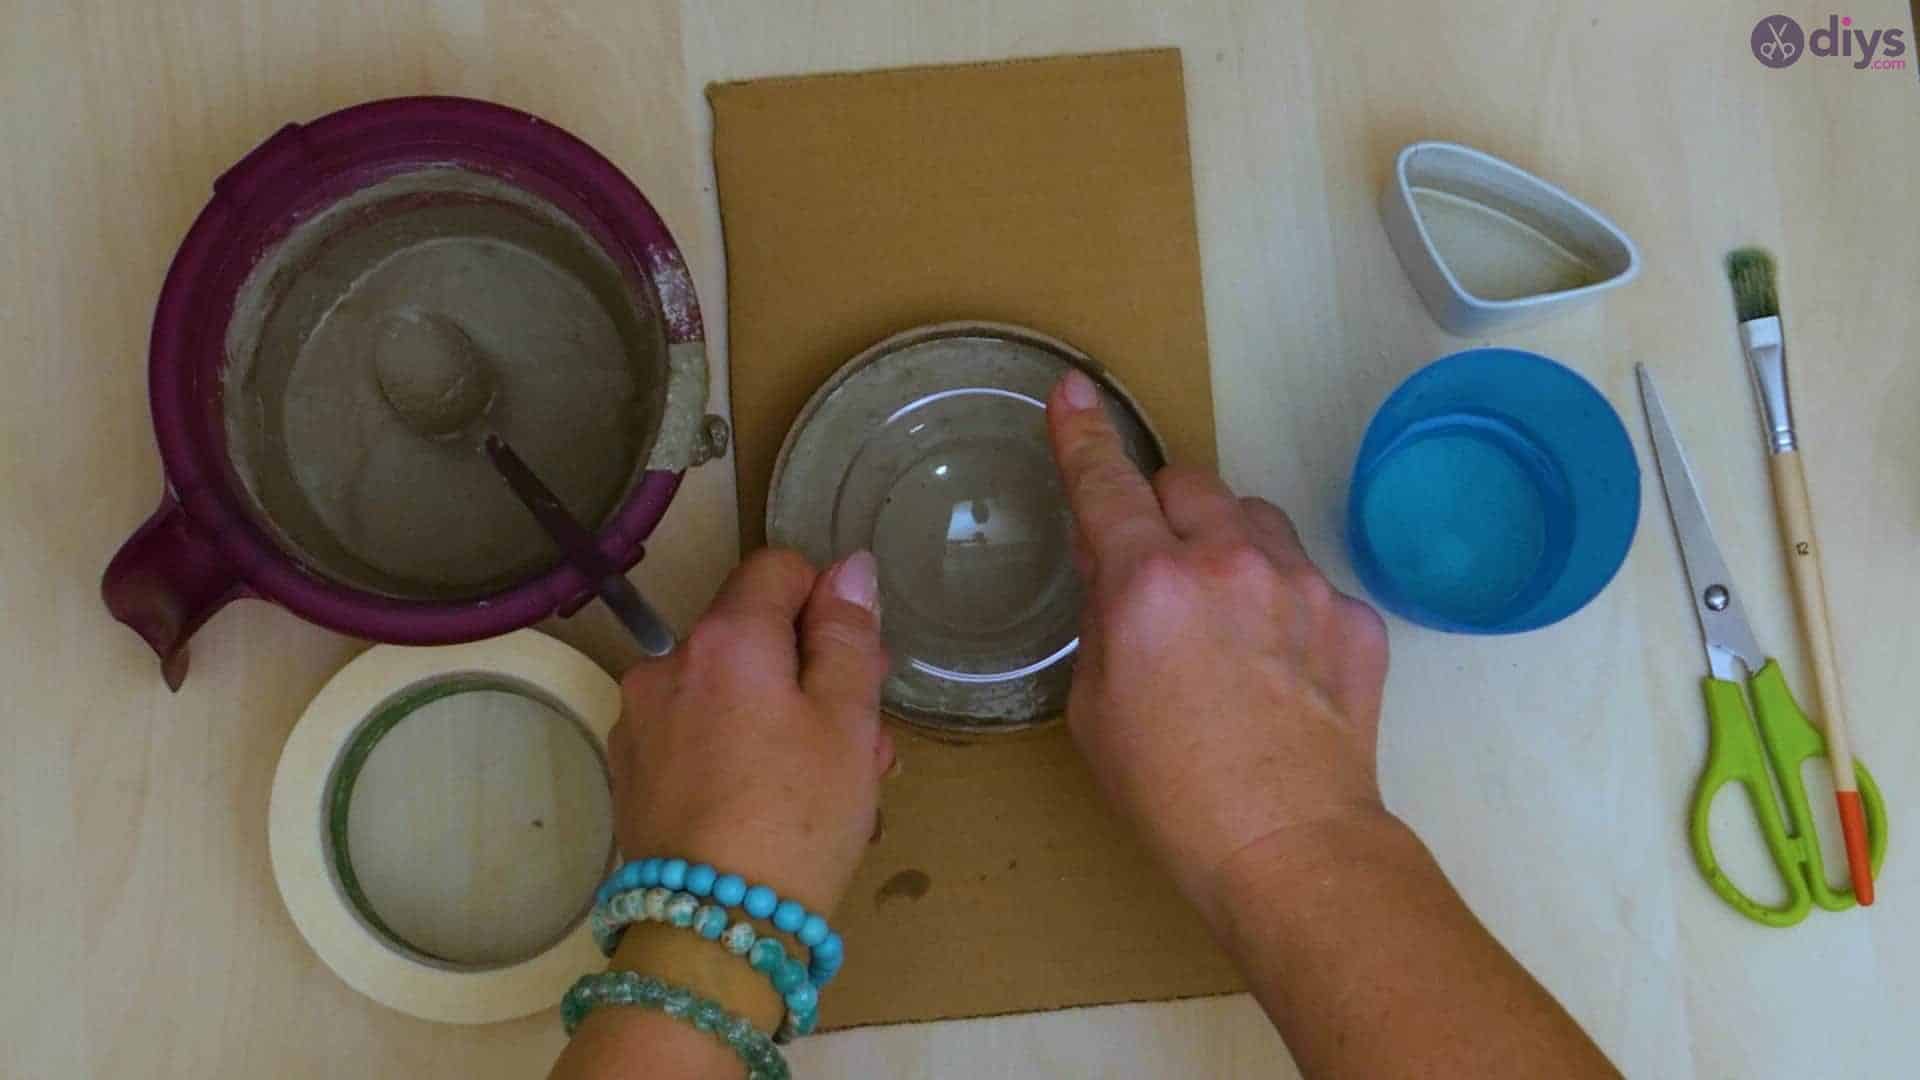
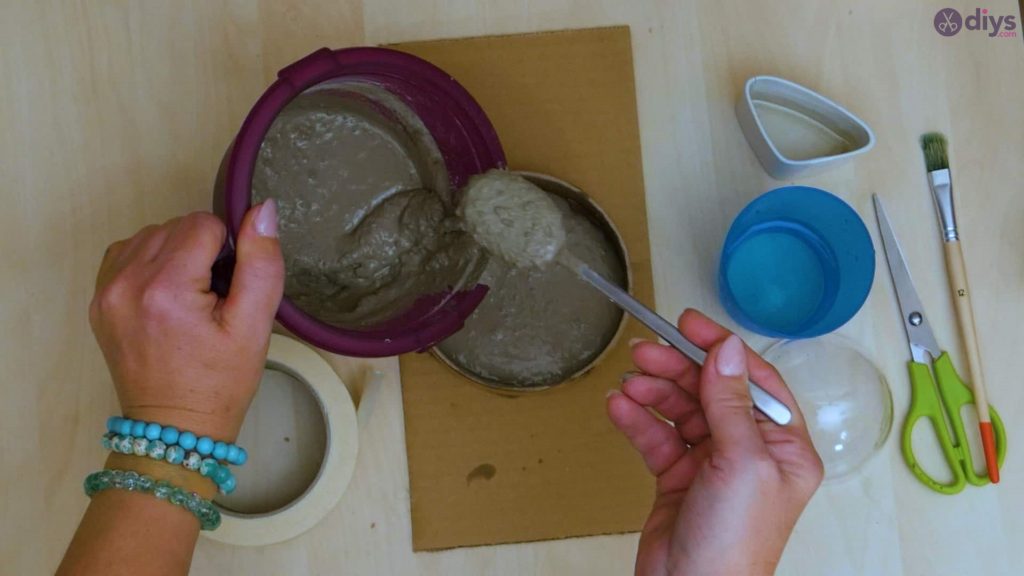
Use your spoon to fill your cardboard and tape roll mold with wet cement mix! Fill it almost all the way to the top, but leave a few centimetres of leeway before the edge so that the mix doesn’t spill over when you press the plastic orb into it in a moment to make the bowl’s centre depression. Once all of your mix is in, use your spoon to smooth the surface, making it nice and even. You can also tap the bottom of the cardboard mold on the tabletop to rid the mix of clumps and air bubbles and get a smoother surface.

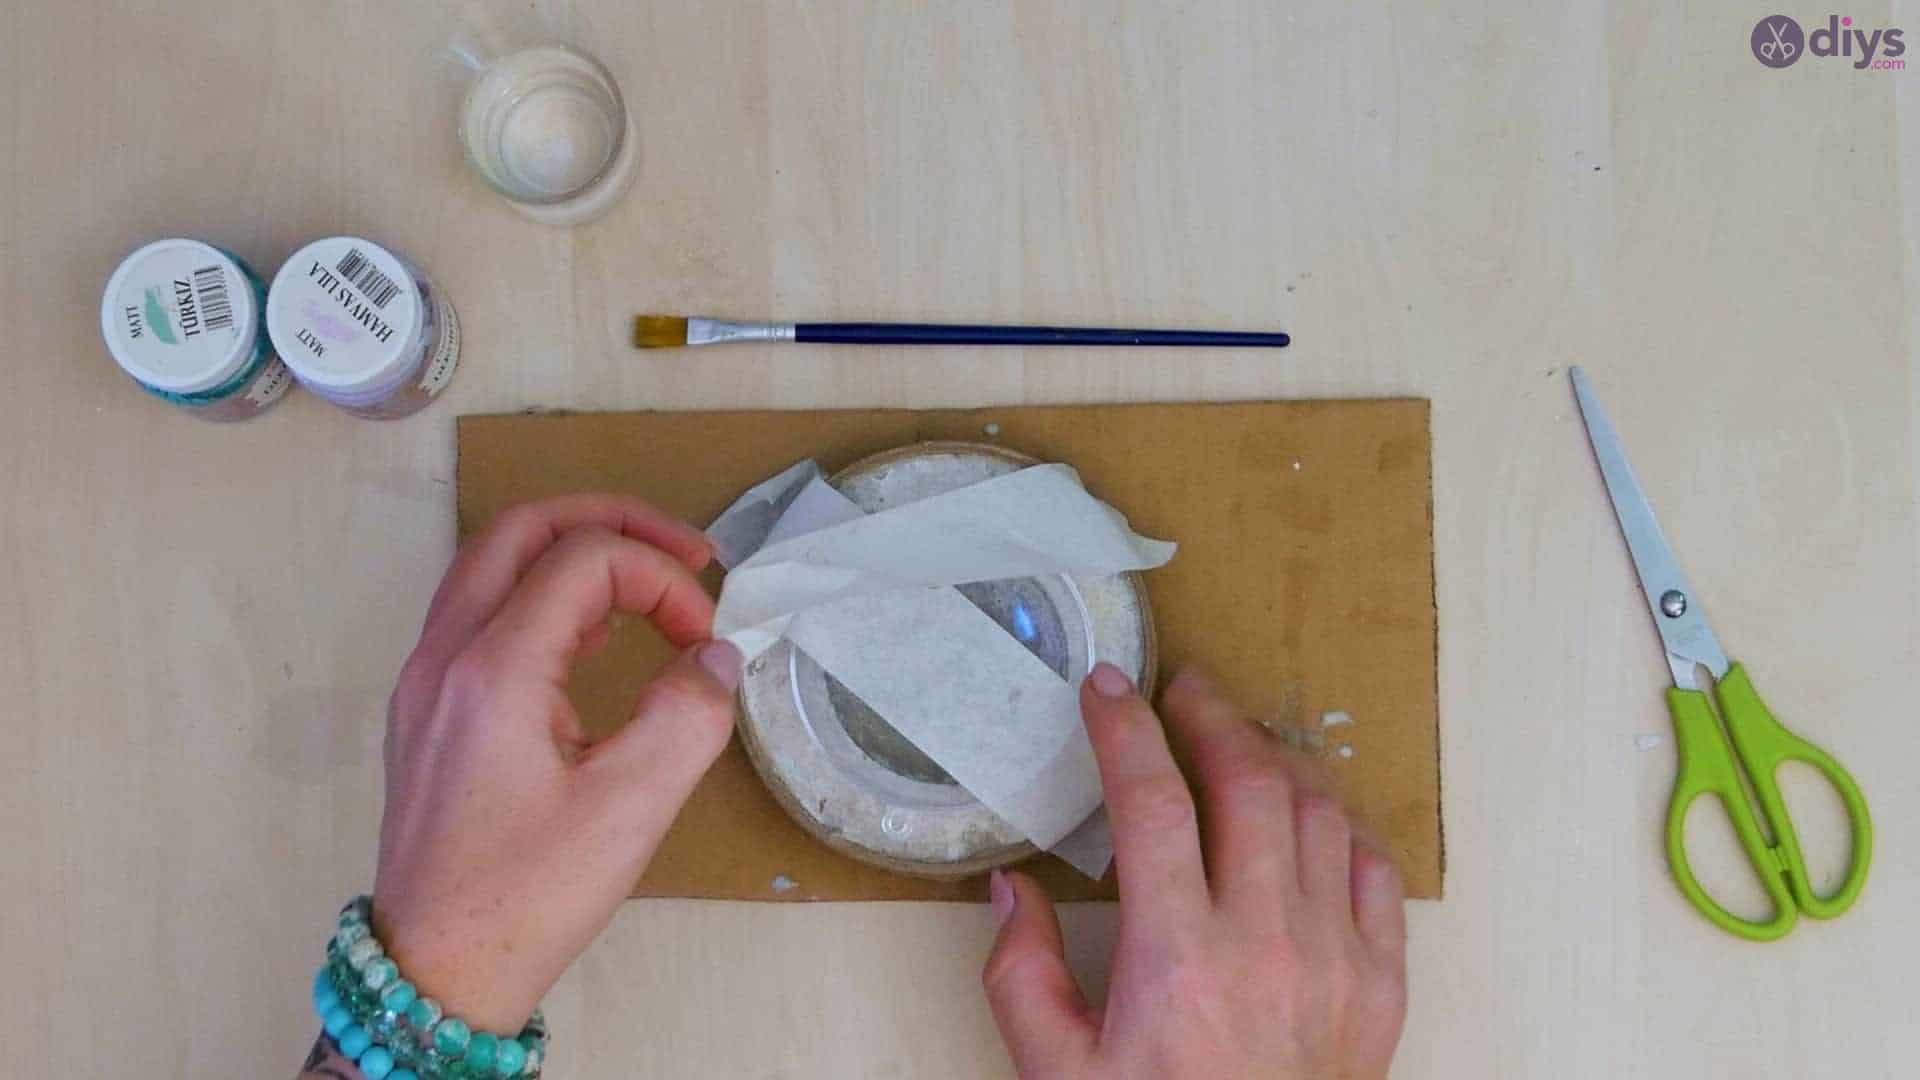
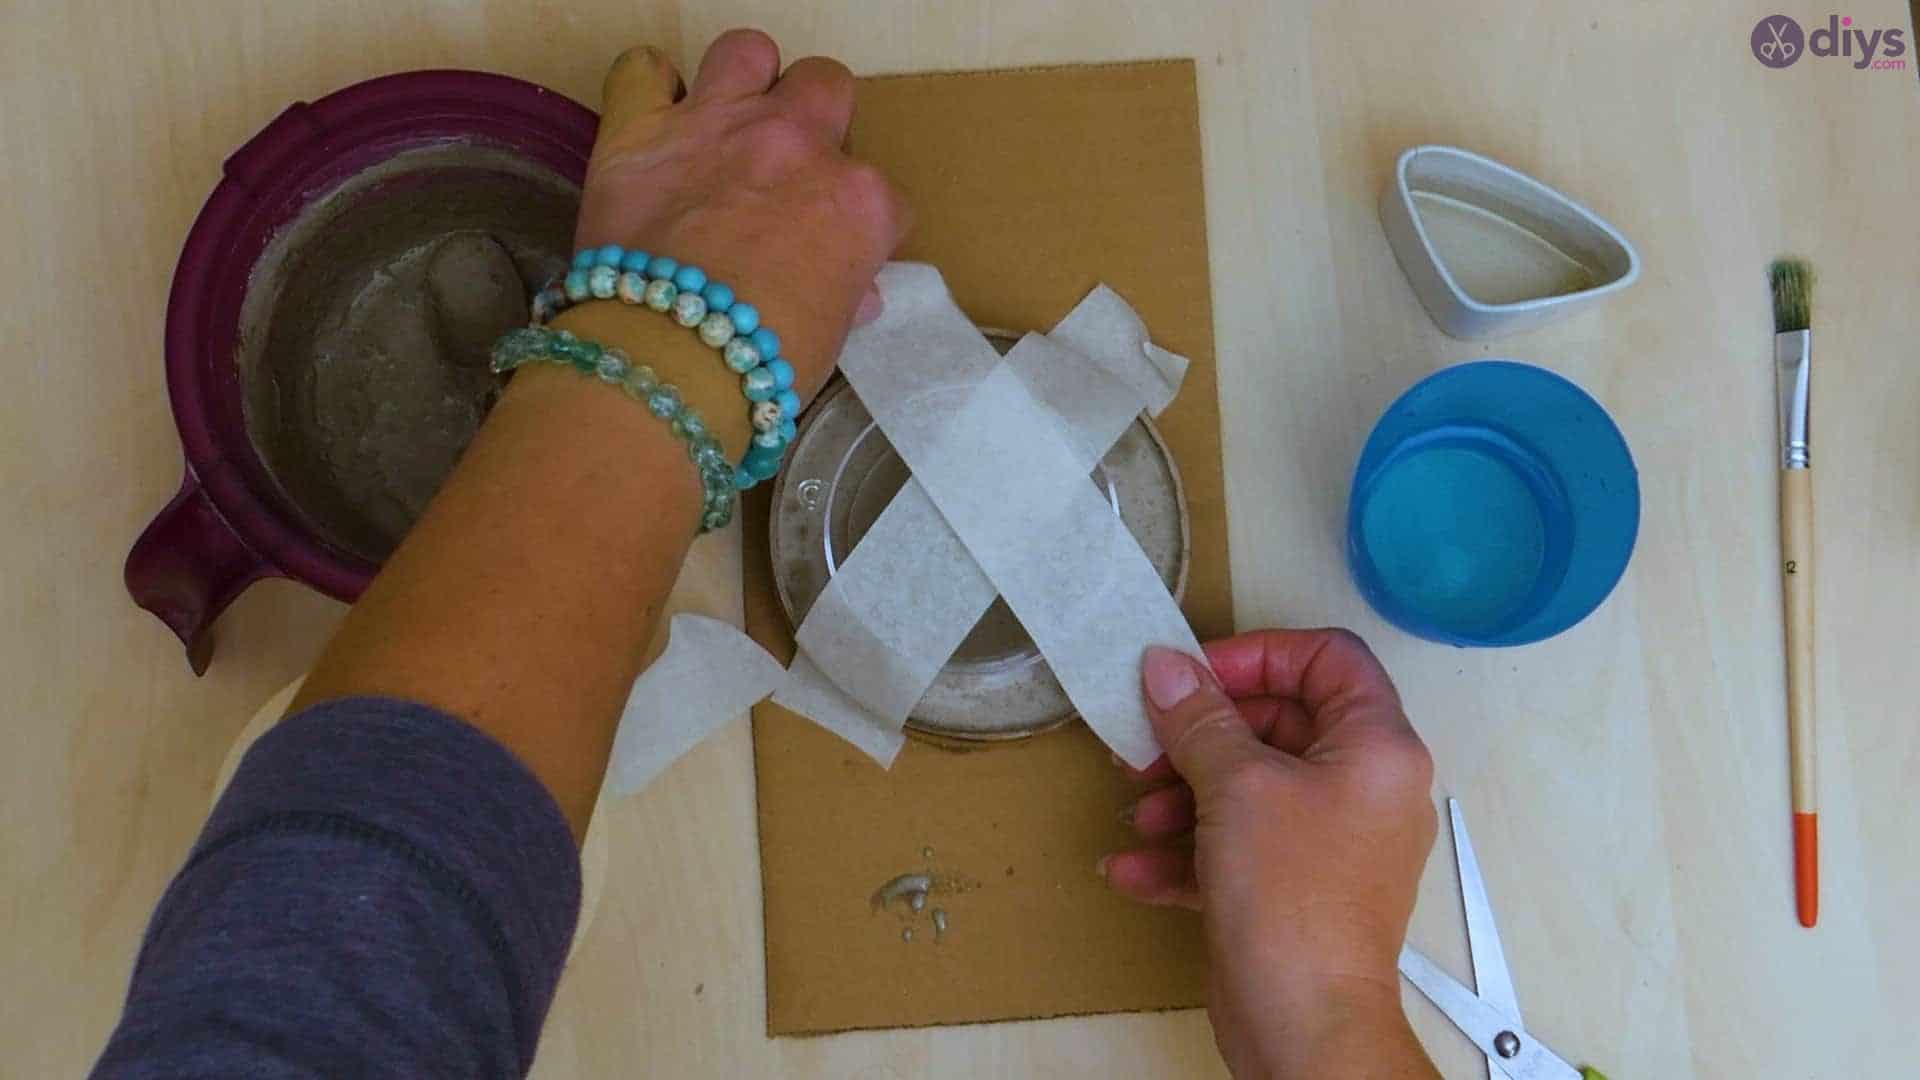
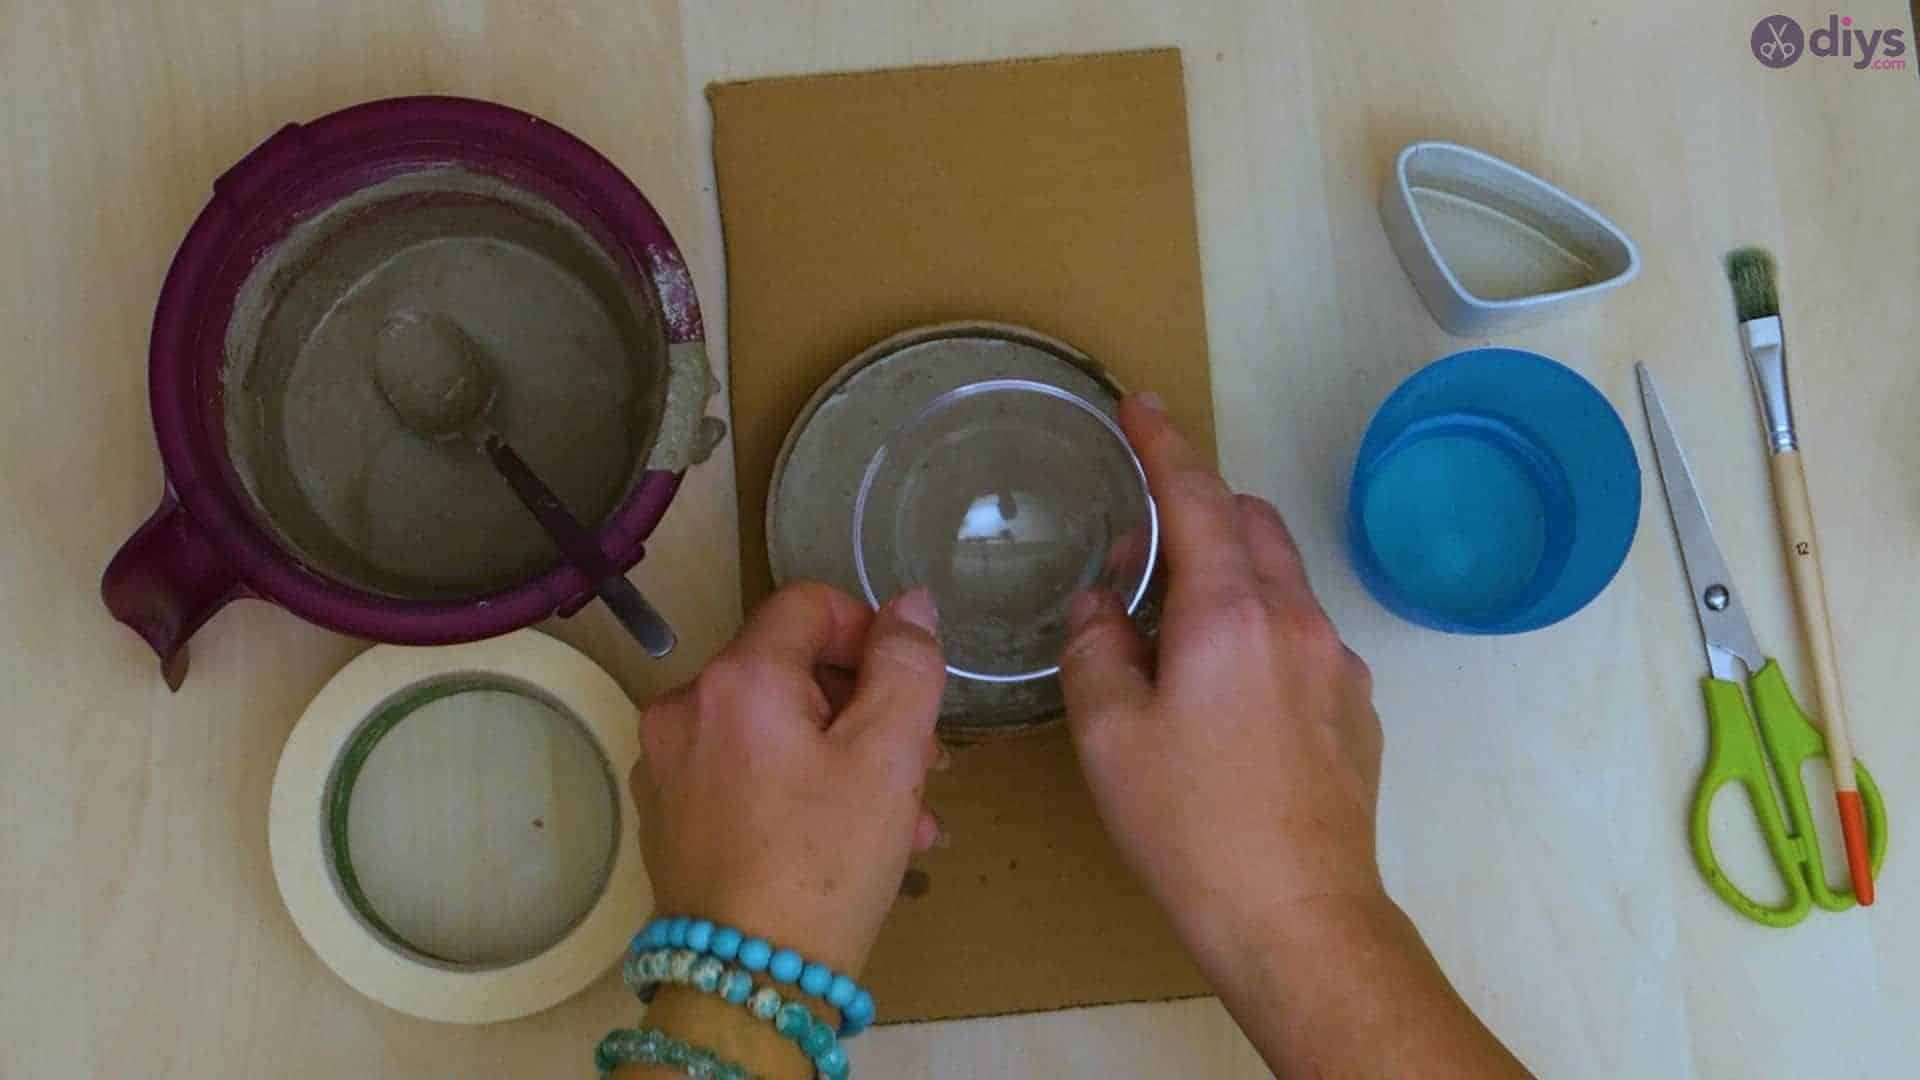
Step 7:
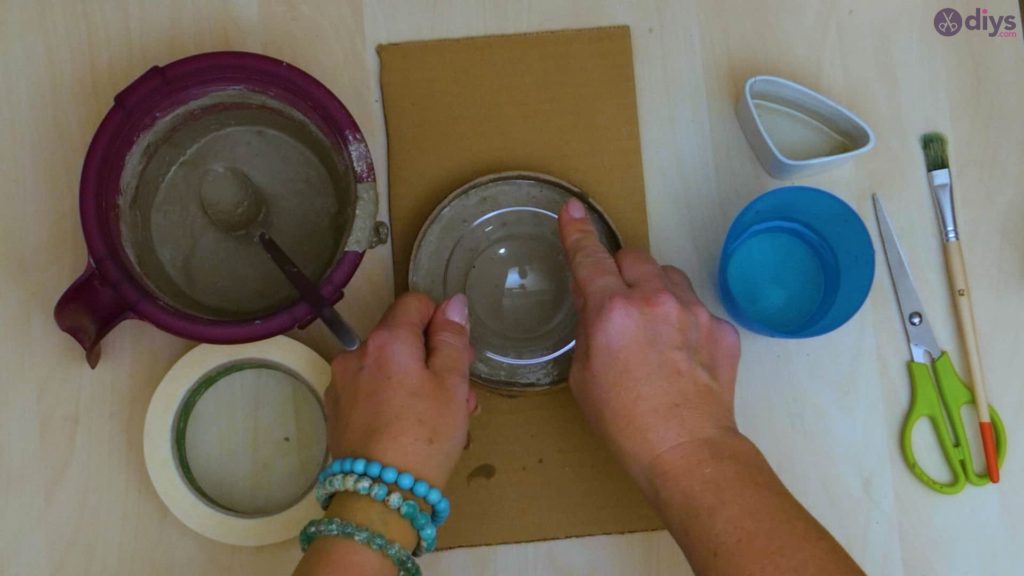
Grab your oiled plastic orb and turn it so the rounded part is facing down. Press it gently and slowly into the centre of the wet cement mix, sinking it towards the bottom of the cardboard mold to make the depression or scoop in the bowl that will actually hold things. Make sure you don’t push it all the way down to the bottom or you might make a hole in the bottom of the bowl; you want to leave space between the cardboard bottom and the most outwardly rounded part of the plastic orb. Once you’ve got it in place, stretch two pieces of tape across the orb, sticking it down from edge to edge of the tape ring. This will stop the orb from shifting in the wet mix as it dries and messing up your shape. Set the entire thing aside to dry completely.


Step 8:
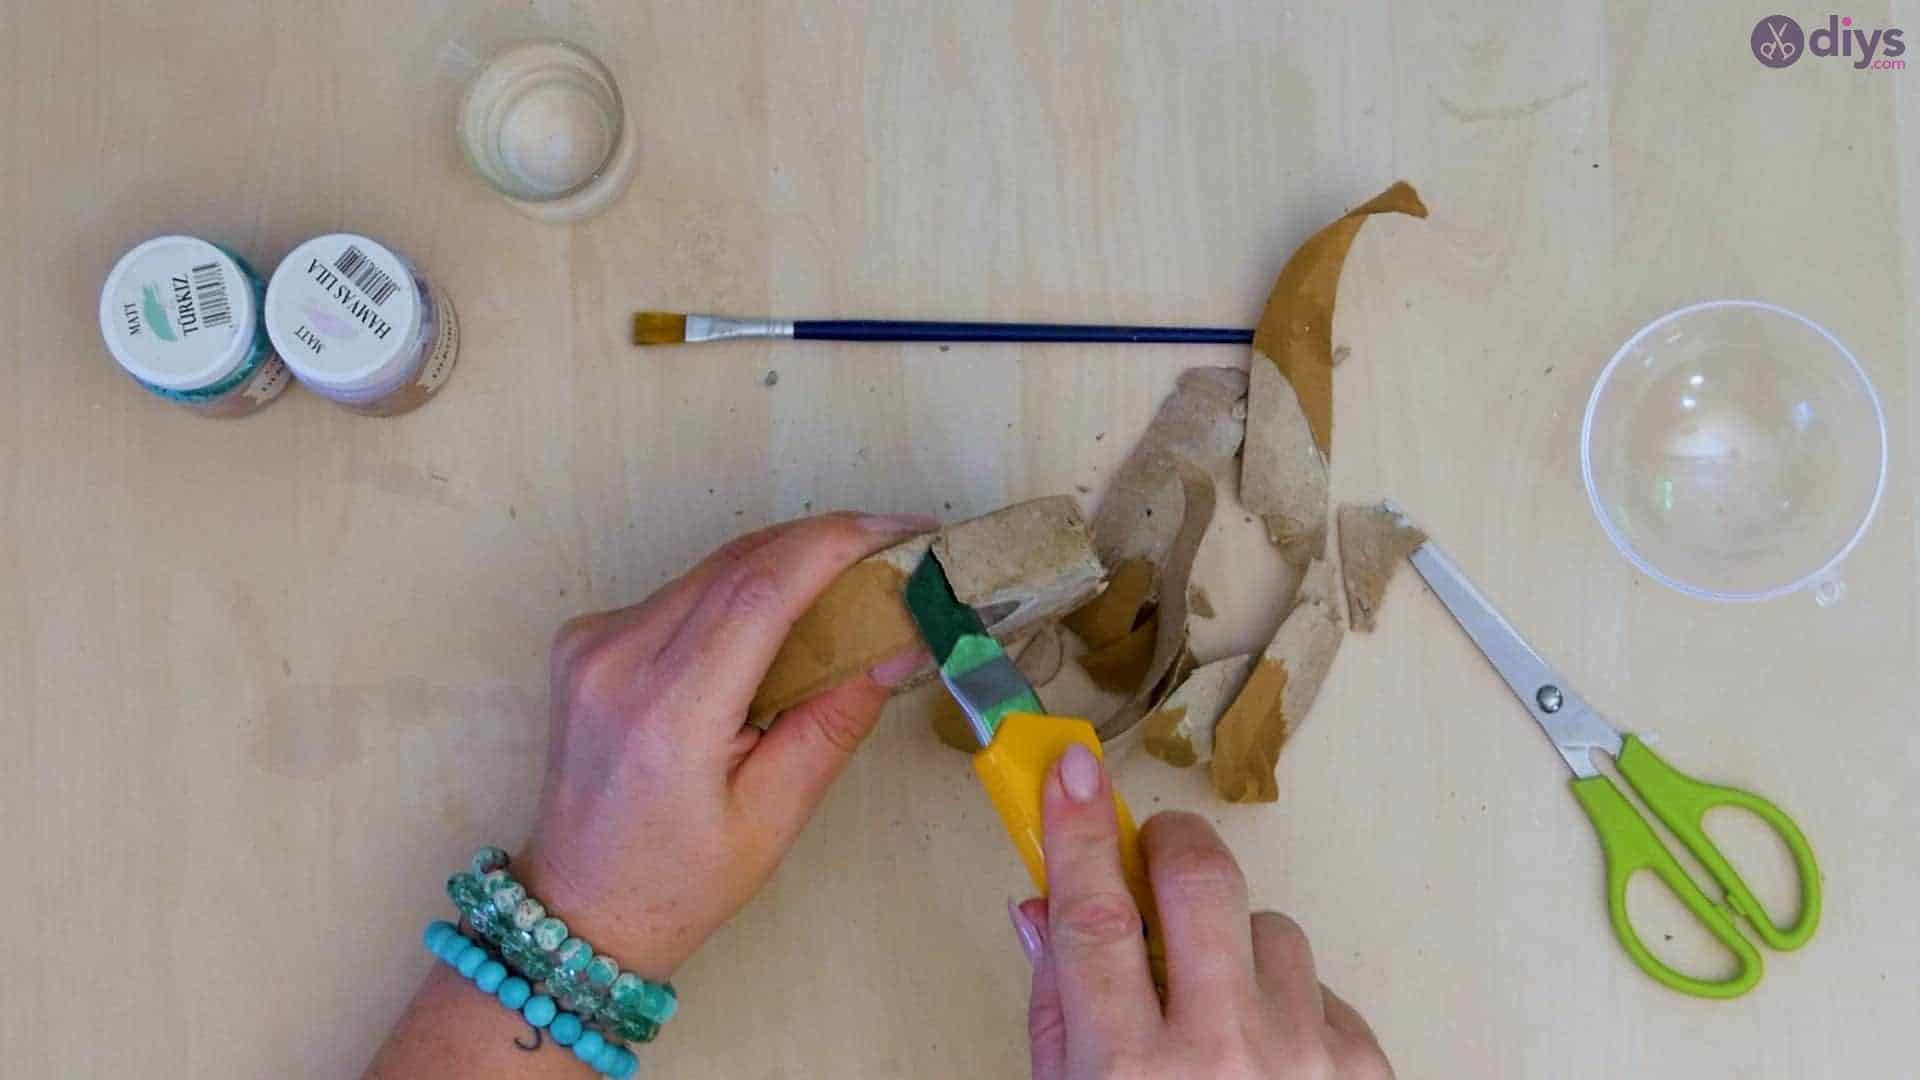
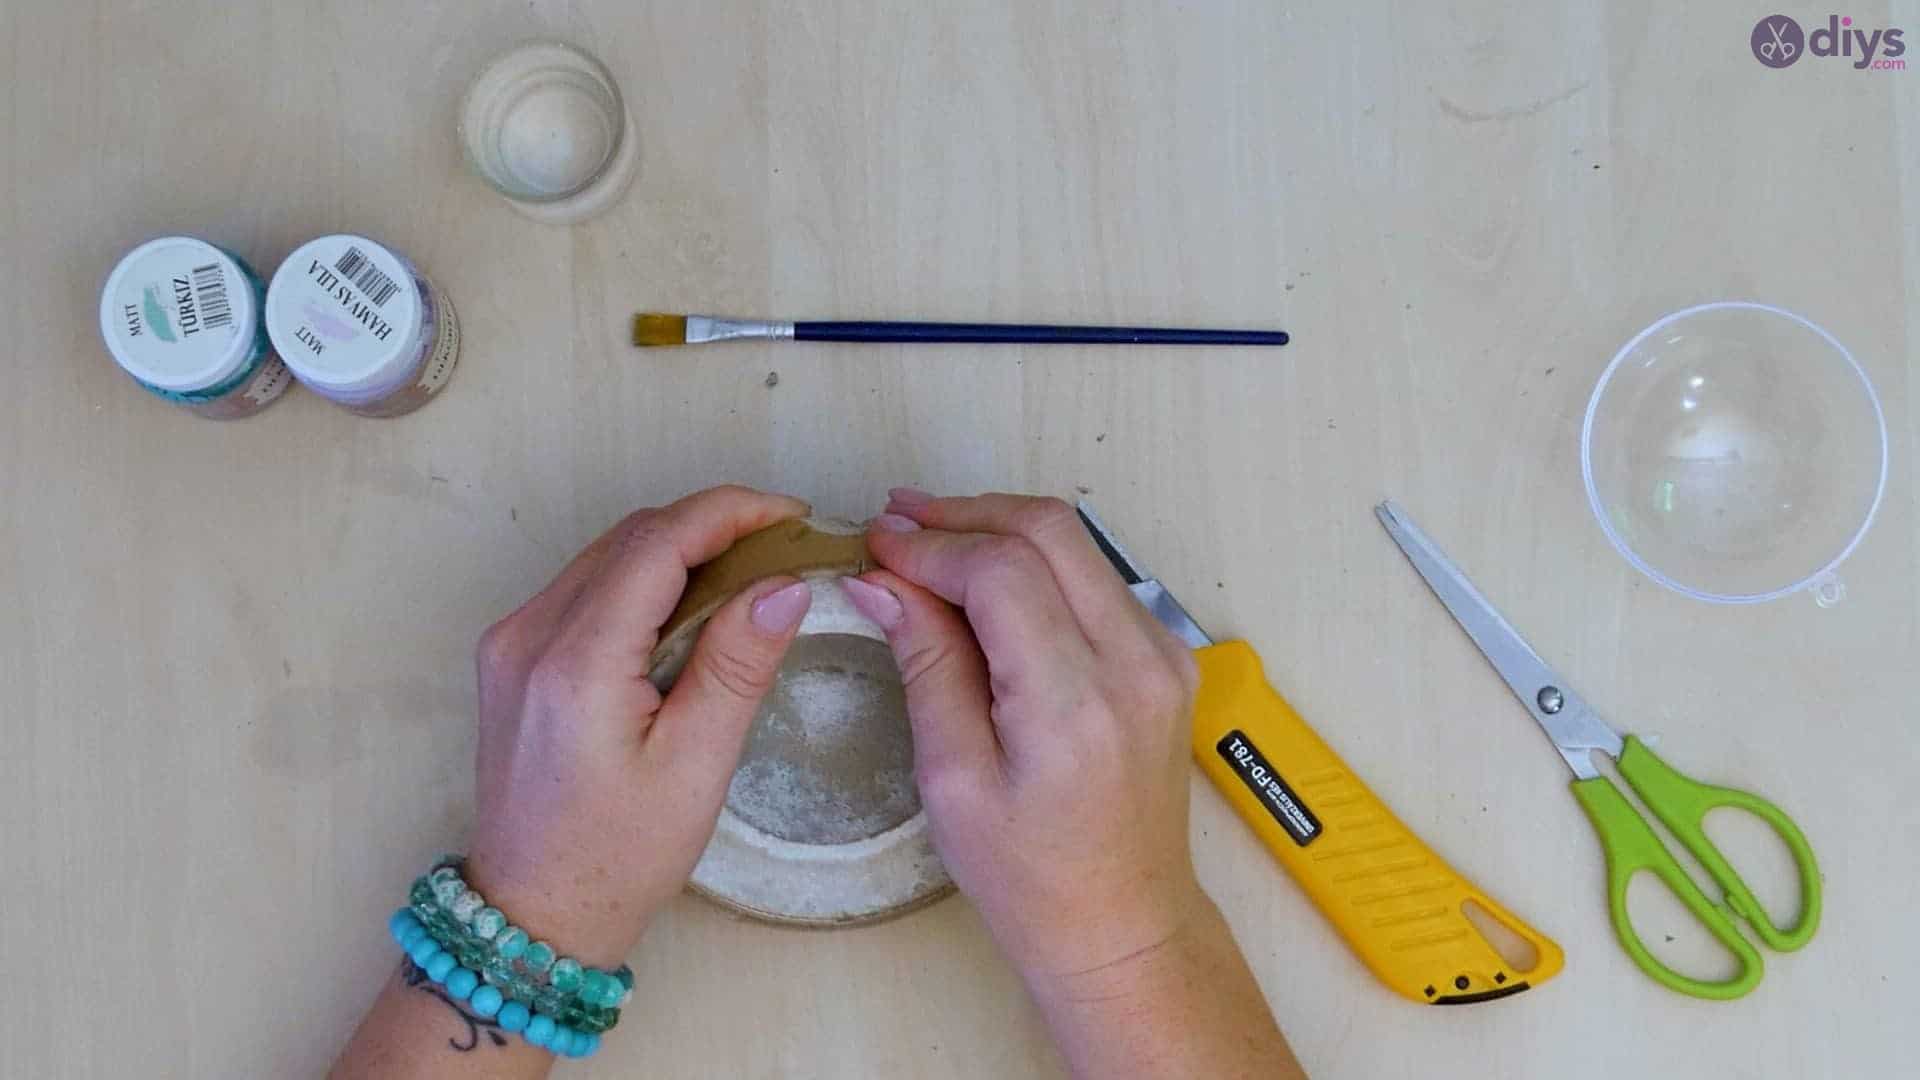
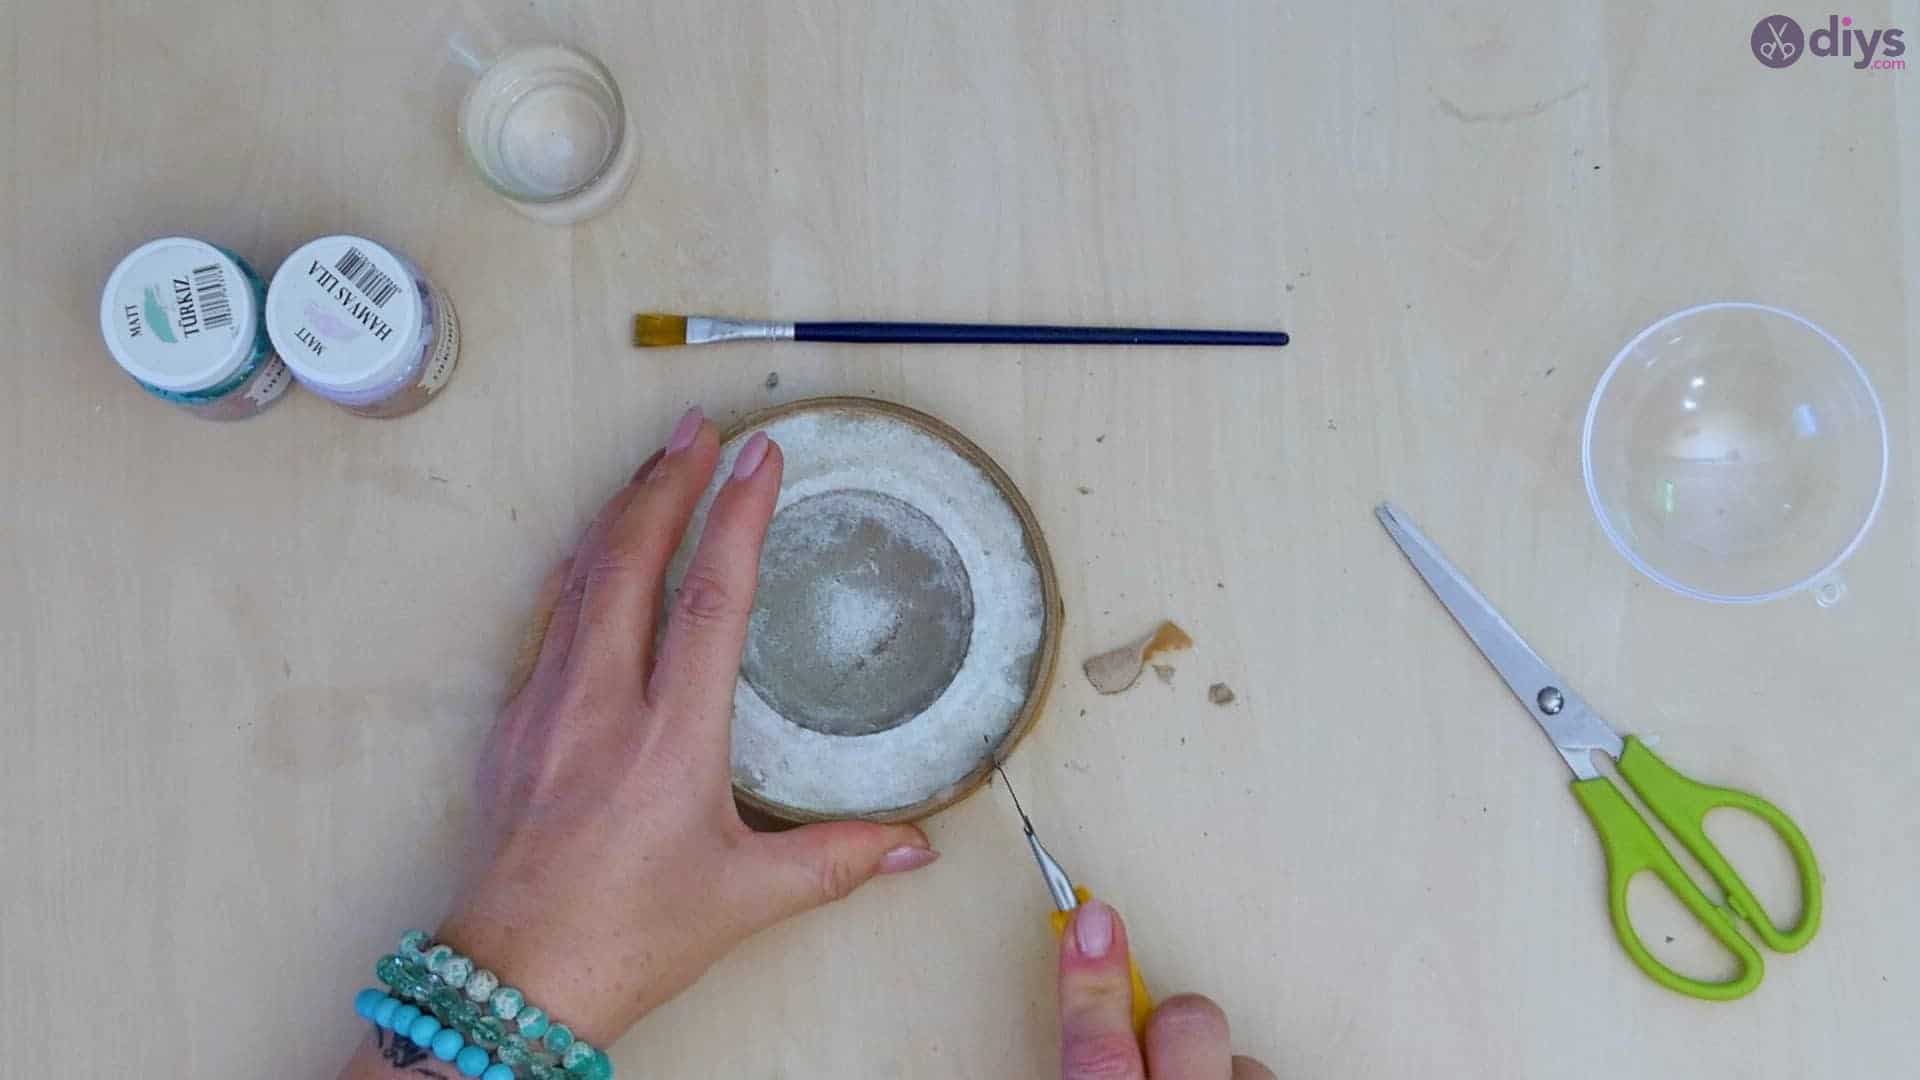
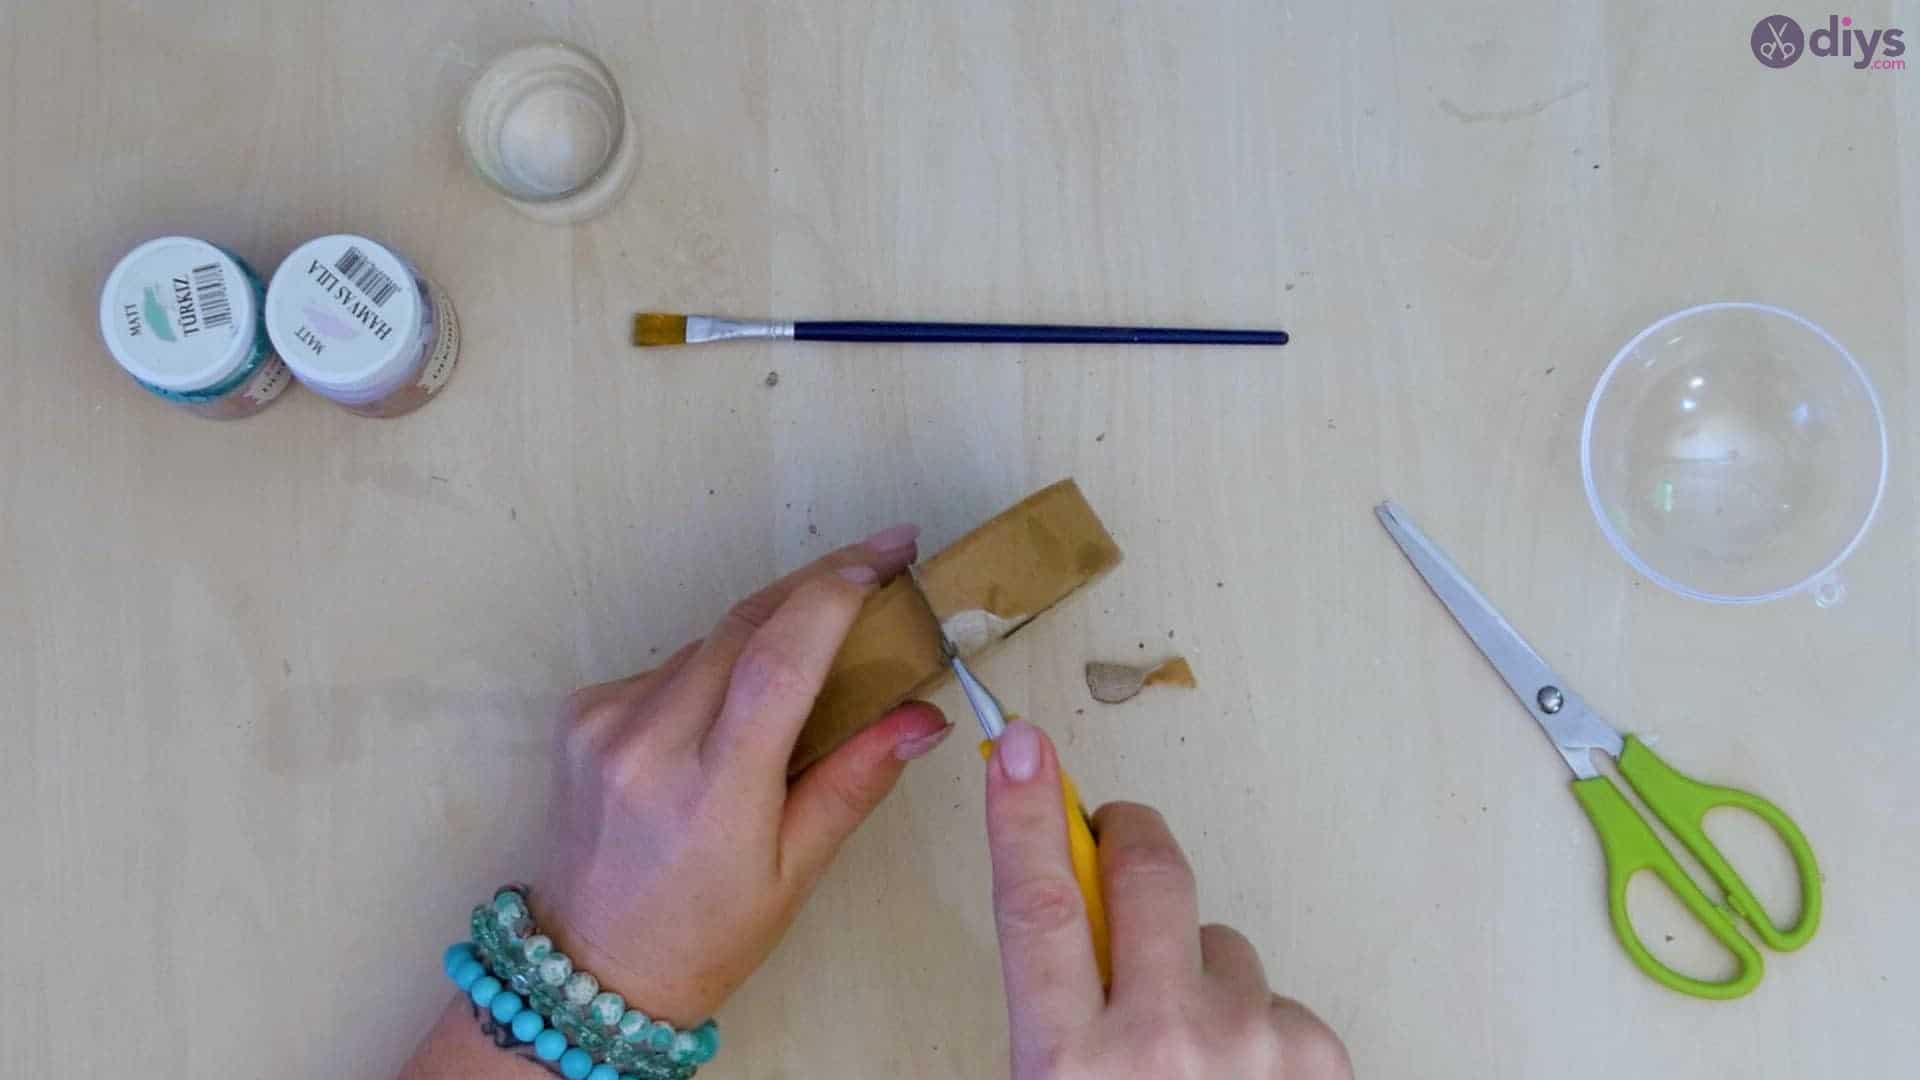
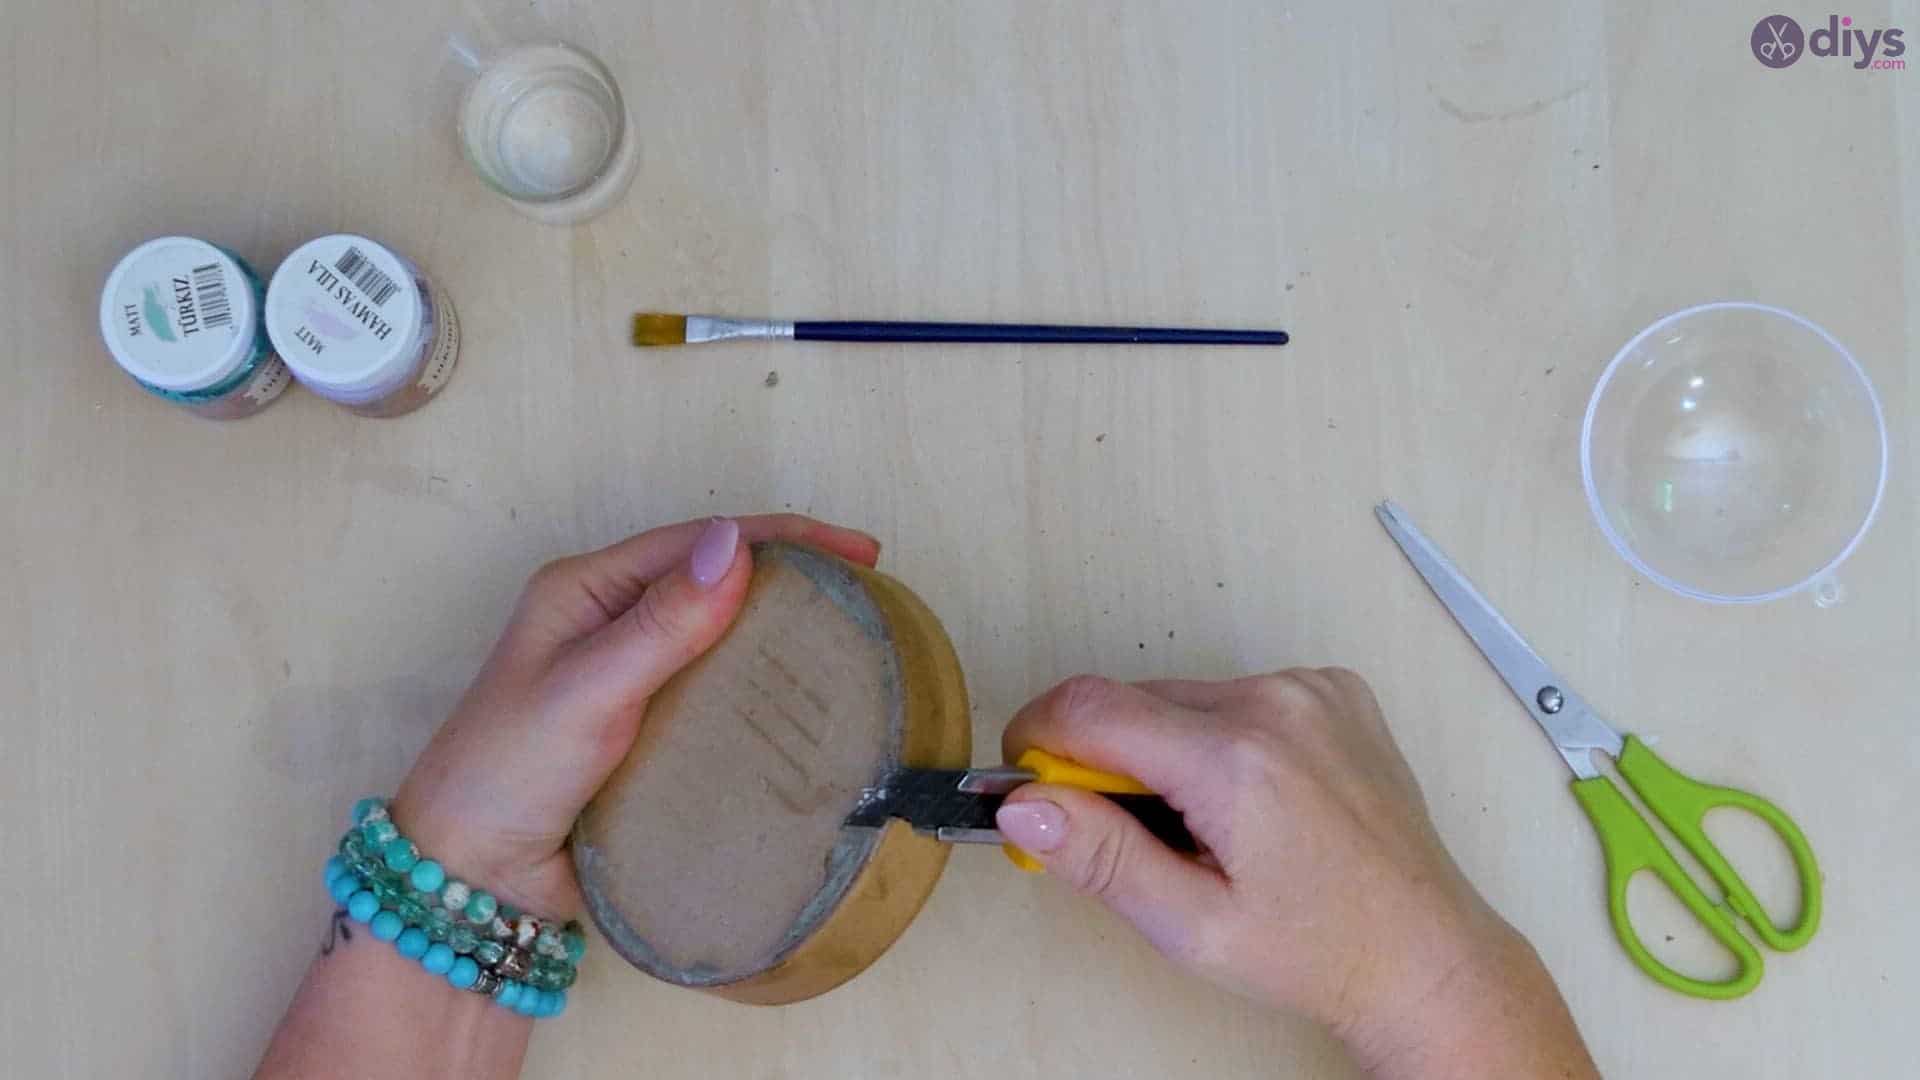
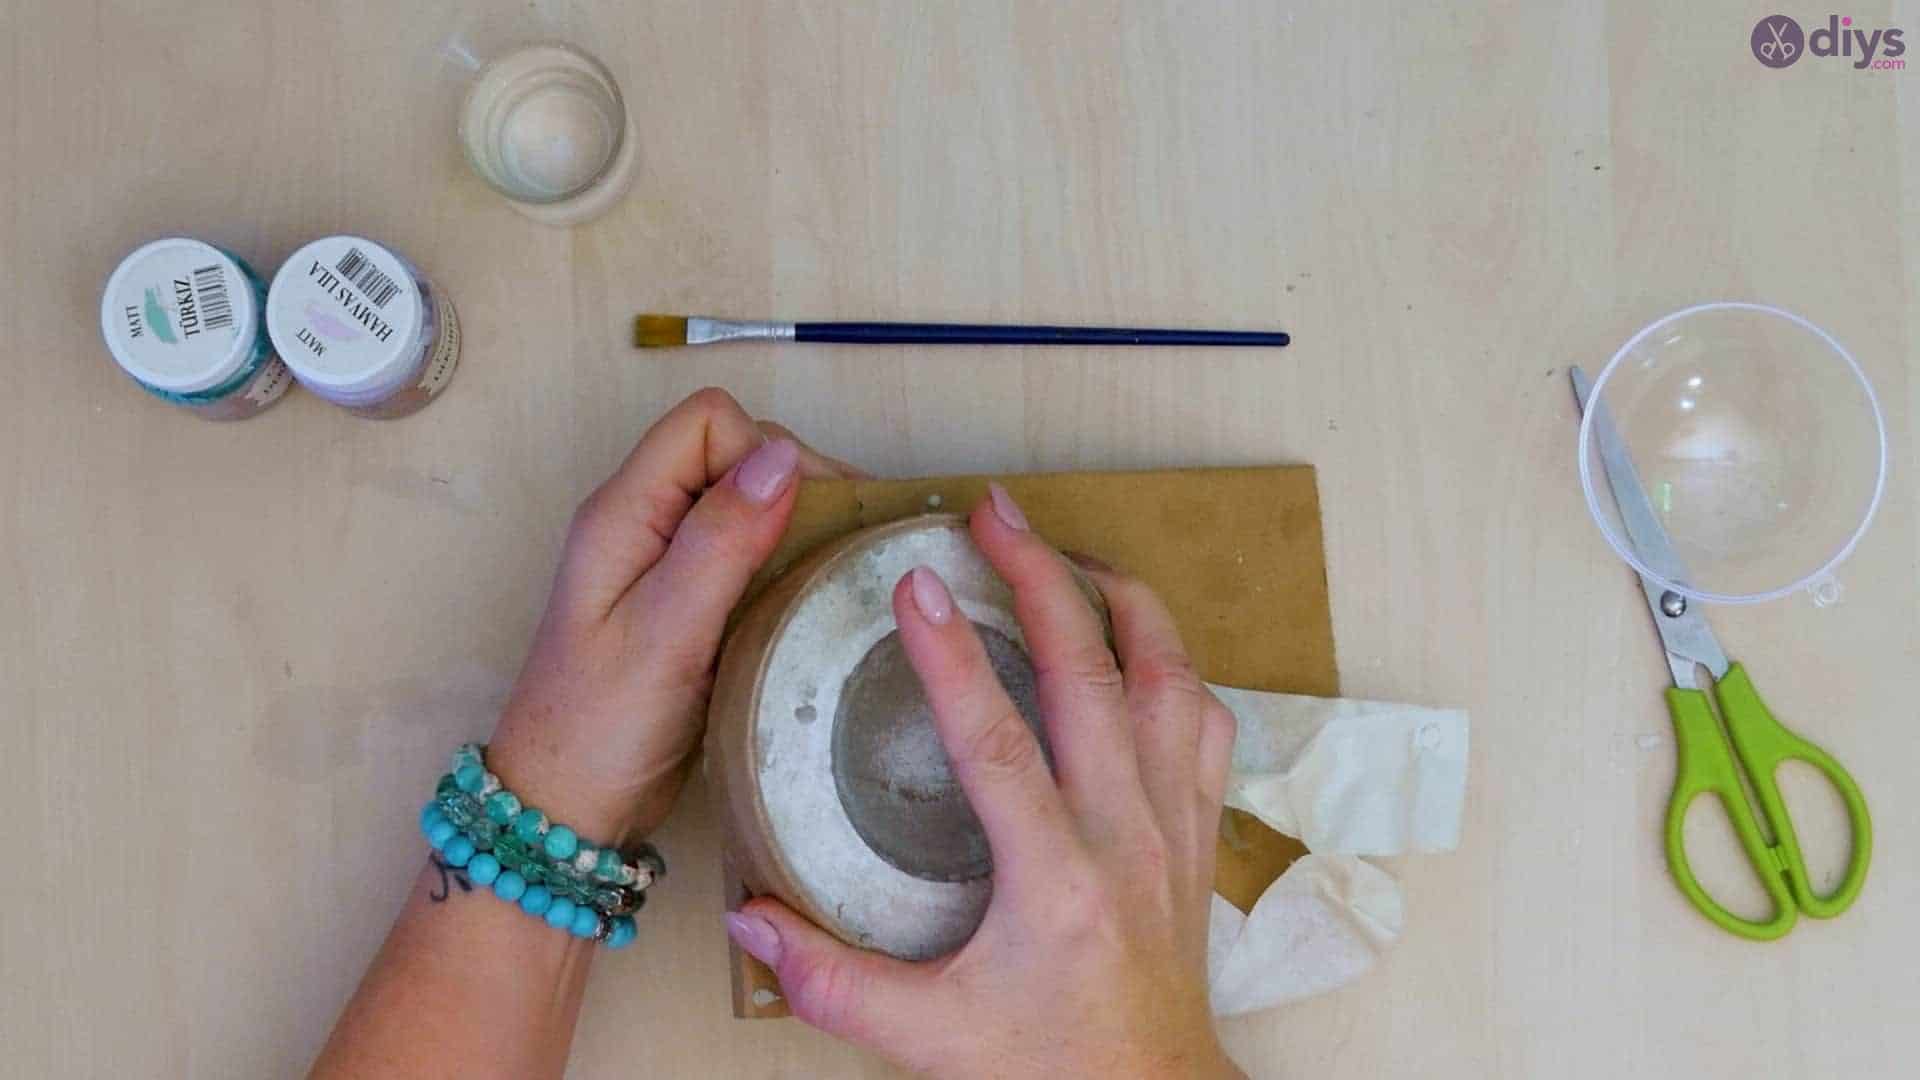
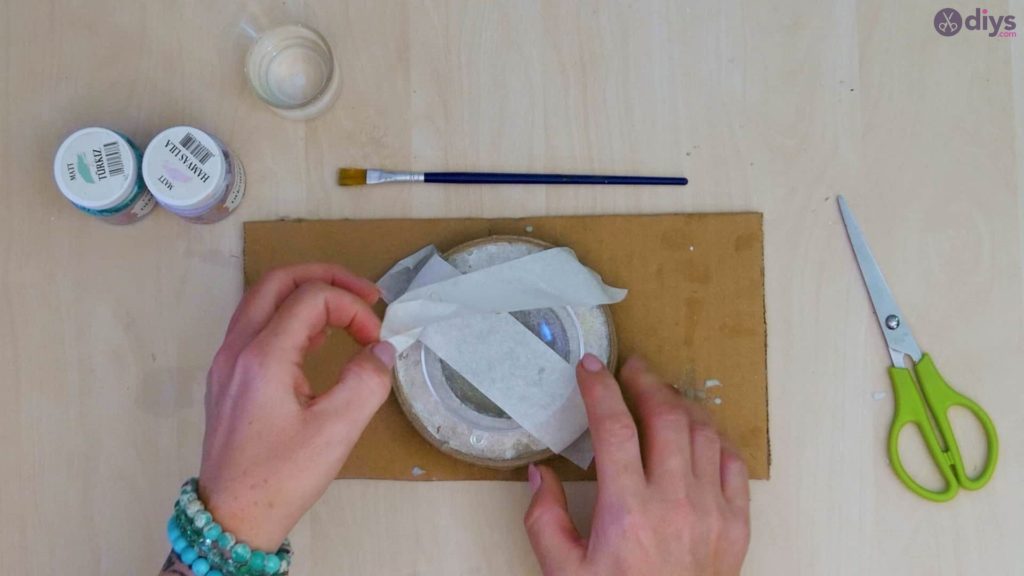
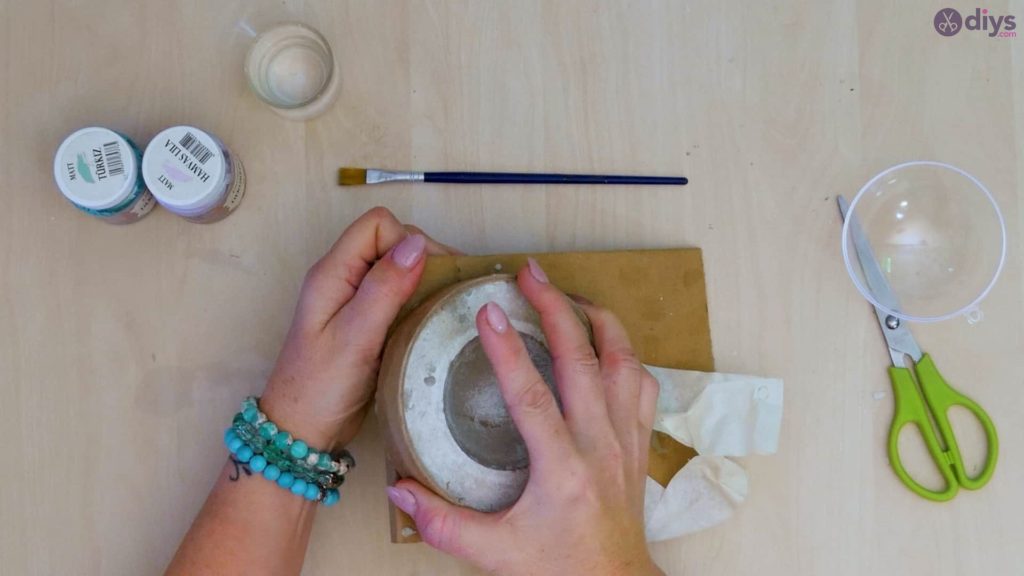
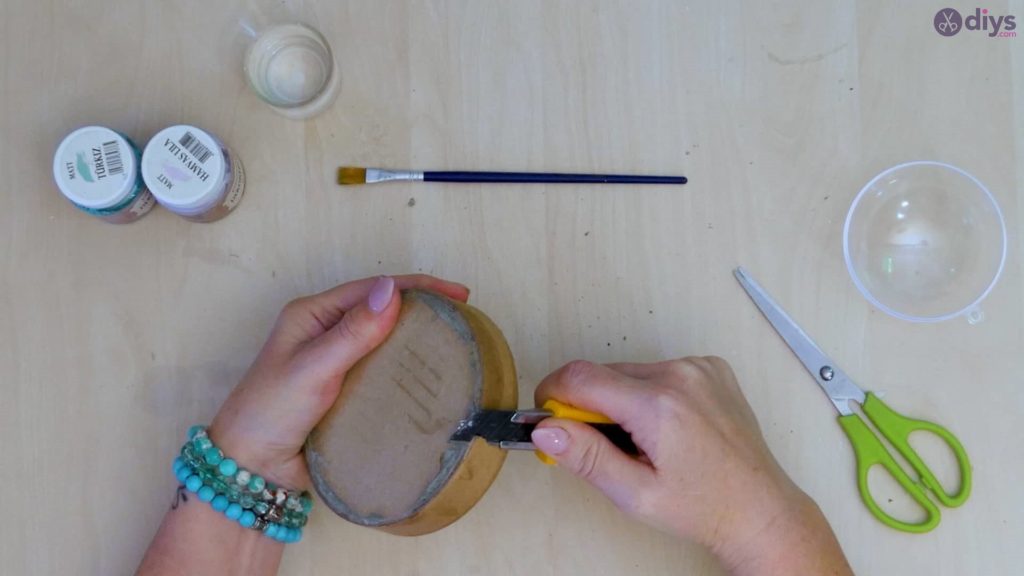
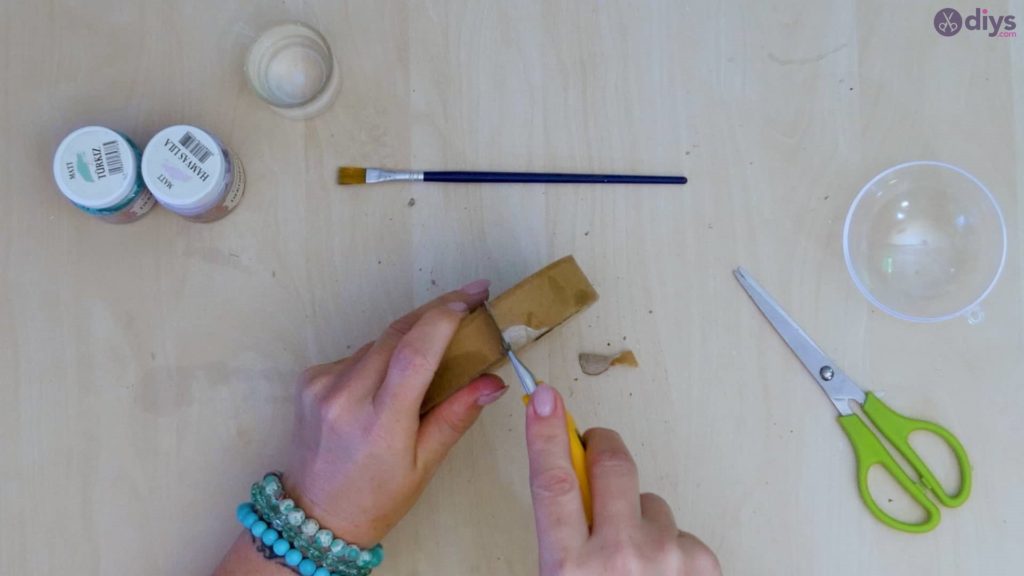
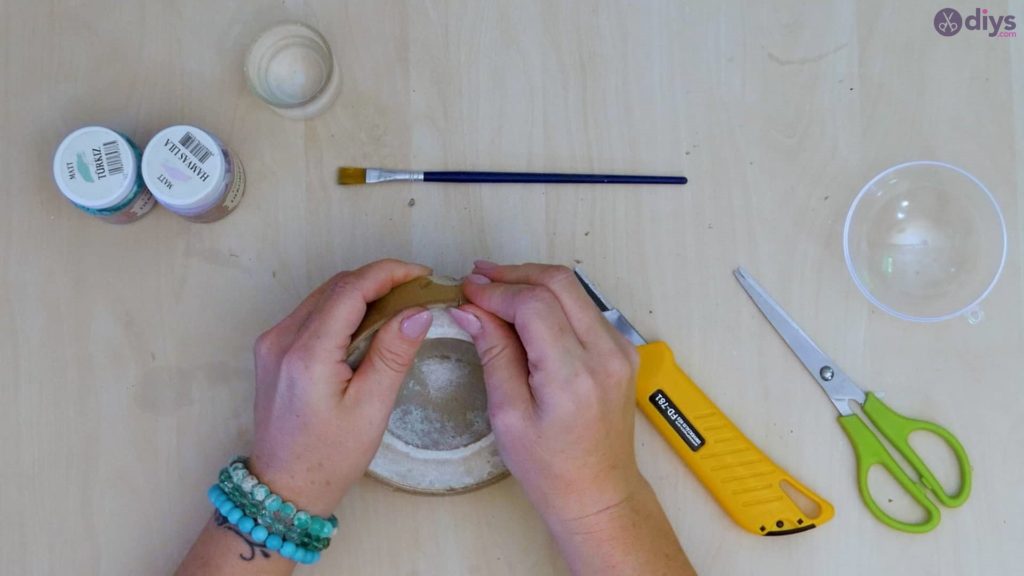
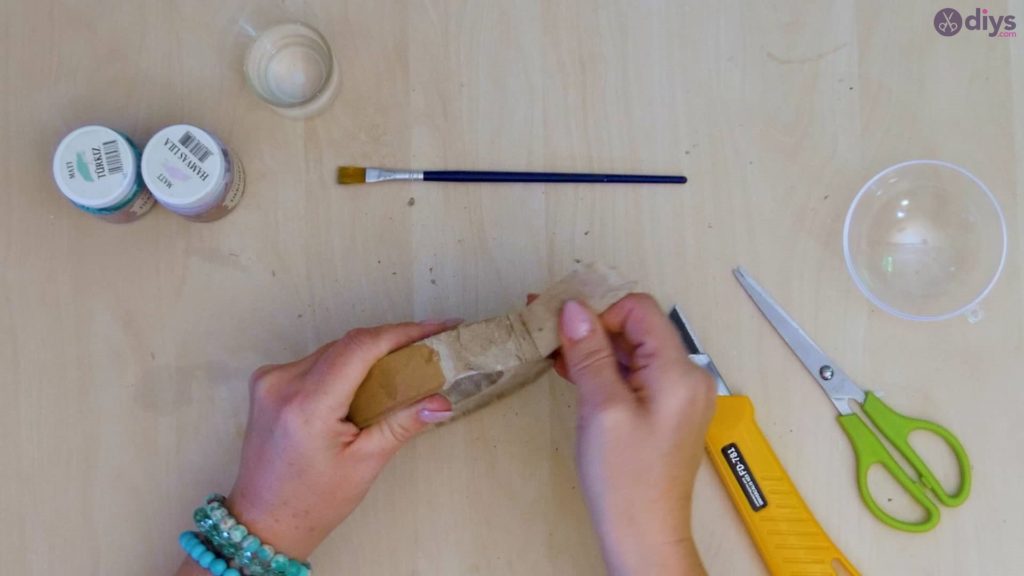
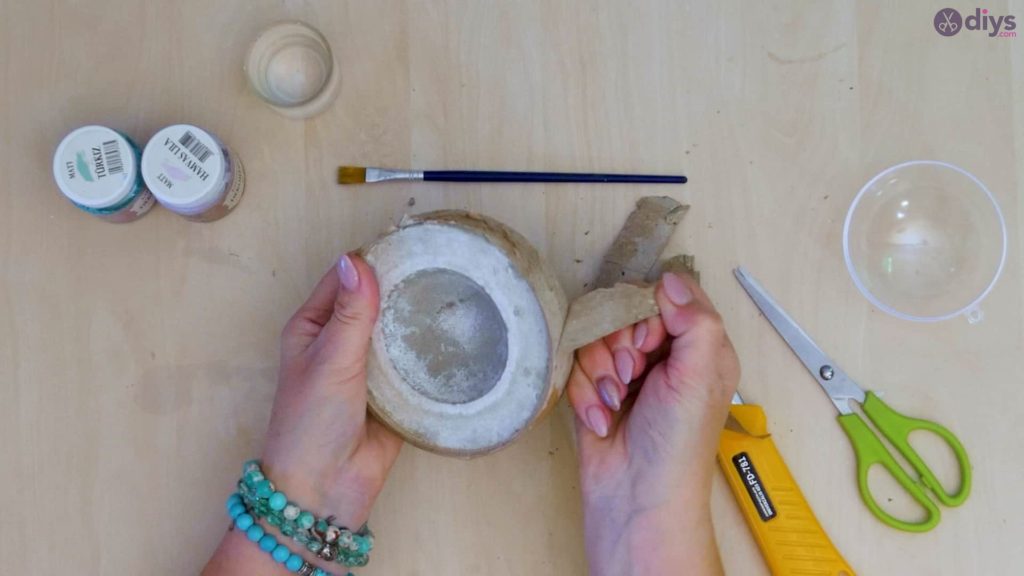
Once your new cement shape has dried completely and thoroughly, all the way through the middle, tear the cardboard and tape ring of the mold away from your new cement bowl! I started by peeling the bottom off, which you can carefully use the edge of your utility knife to help with in the stubborn patches. Then use your knife to make a cut in the tape ring and peel it away from the edge of the concrete bowl. If you need to, you can also use an abrasive block or a piece of sand paper to smooth the outside surface of the bowl down, but I chose to leave mine with a slightly rougher and more natural texture.


Step 9:
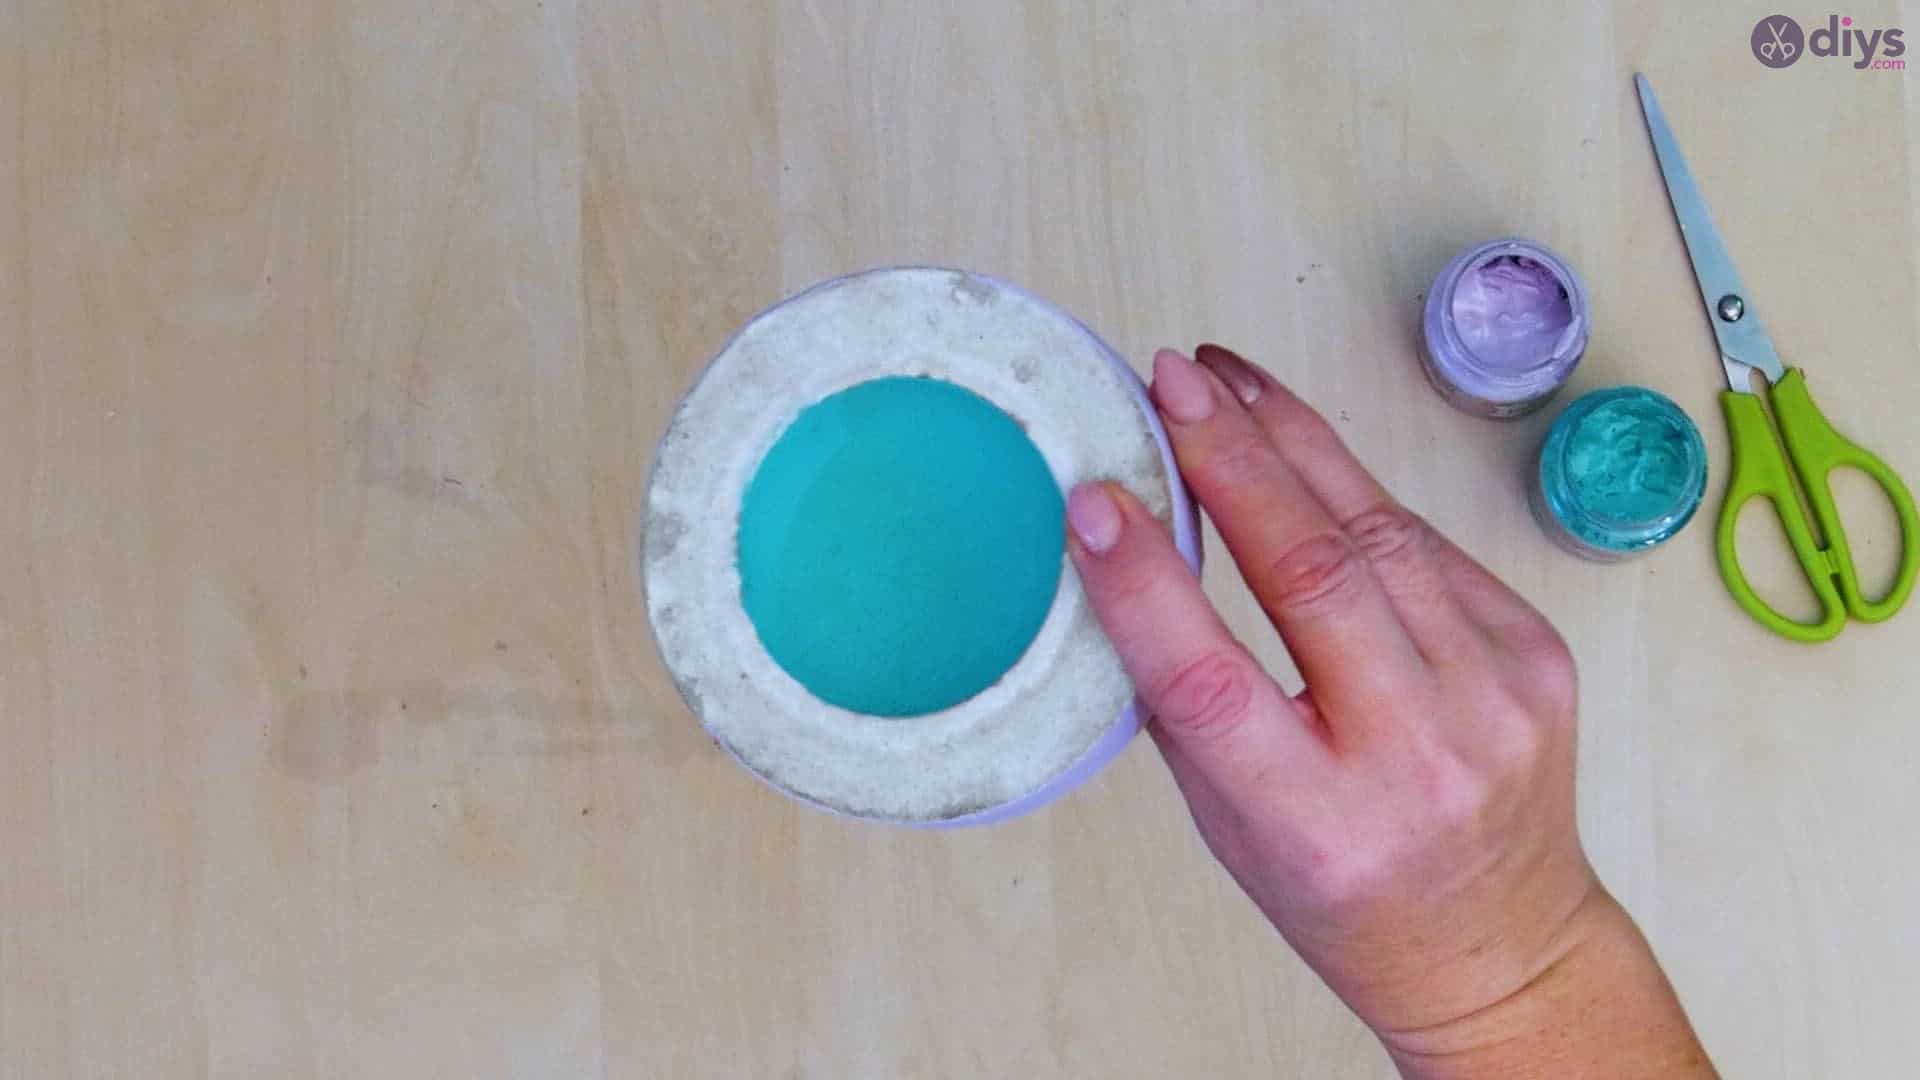
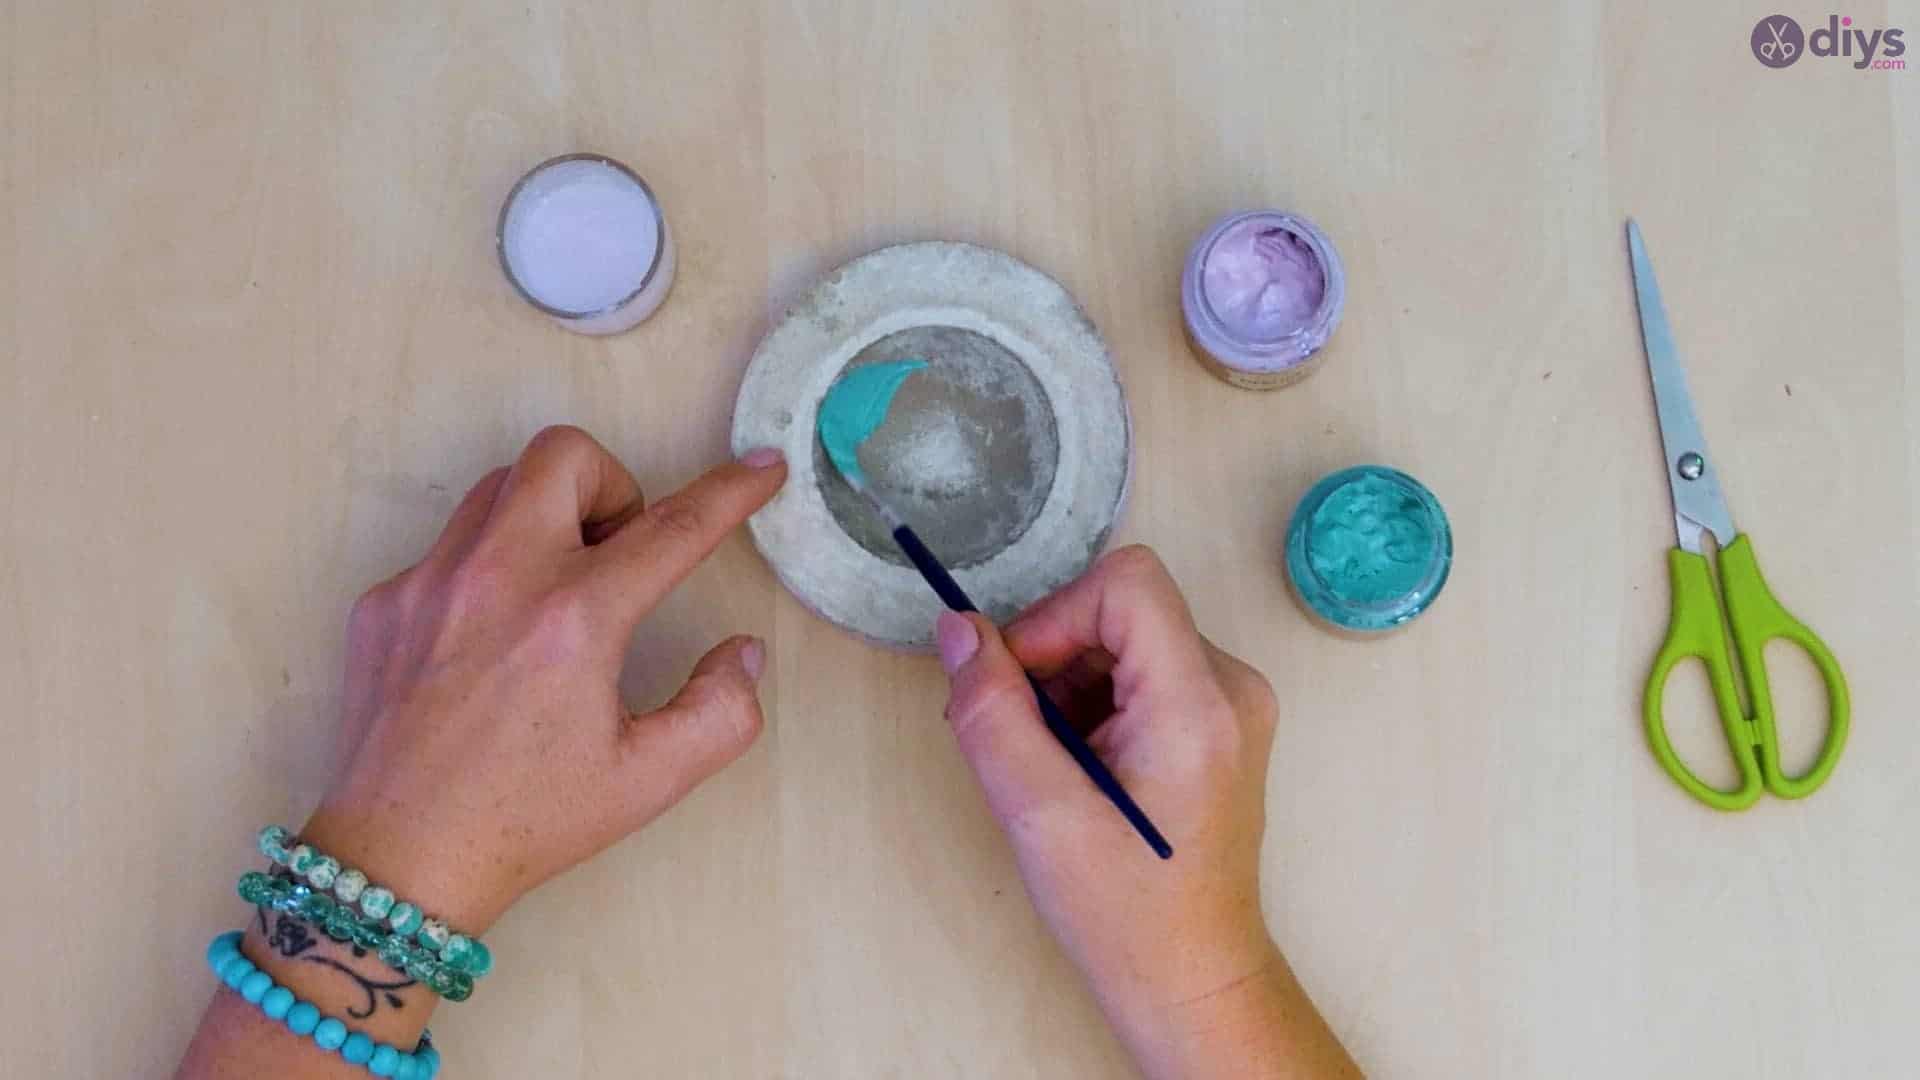
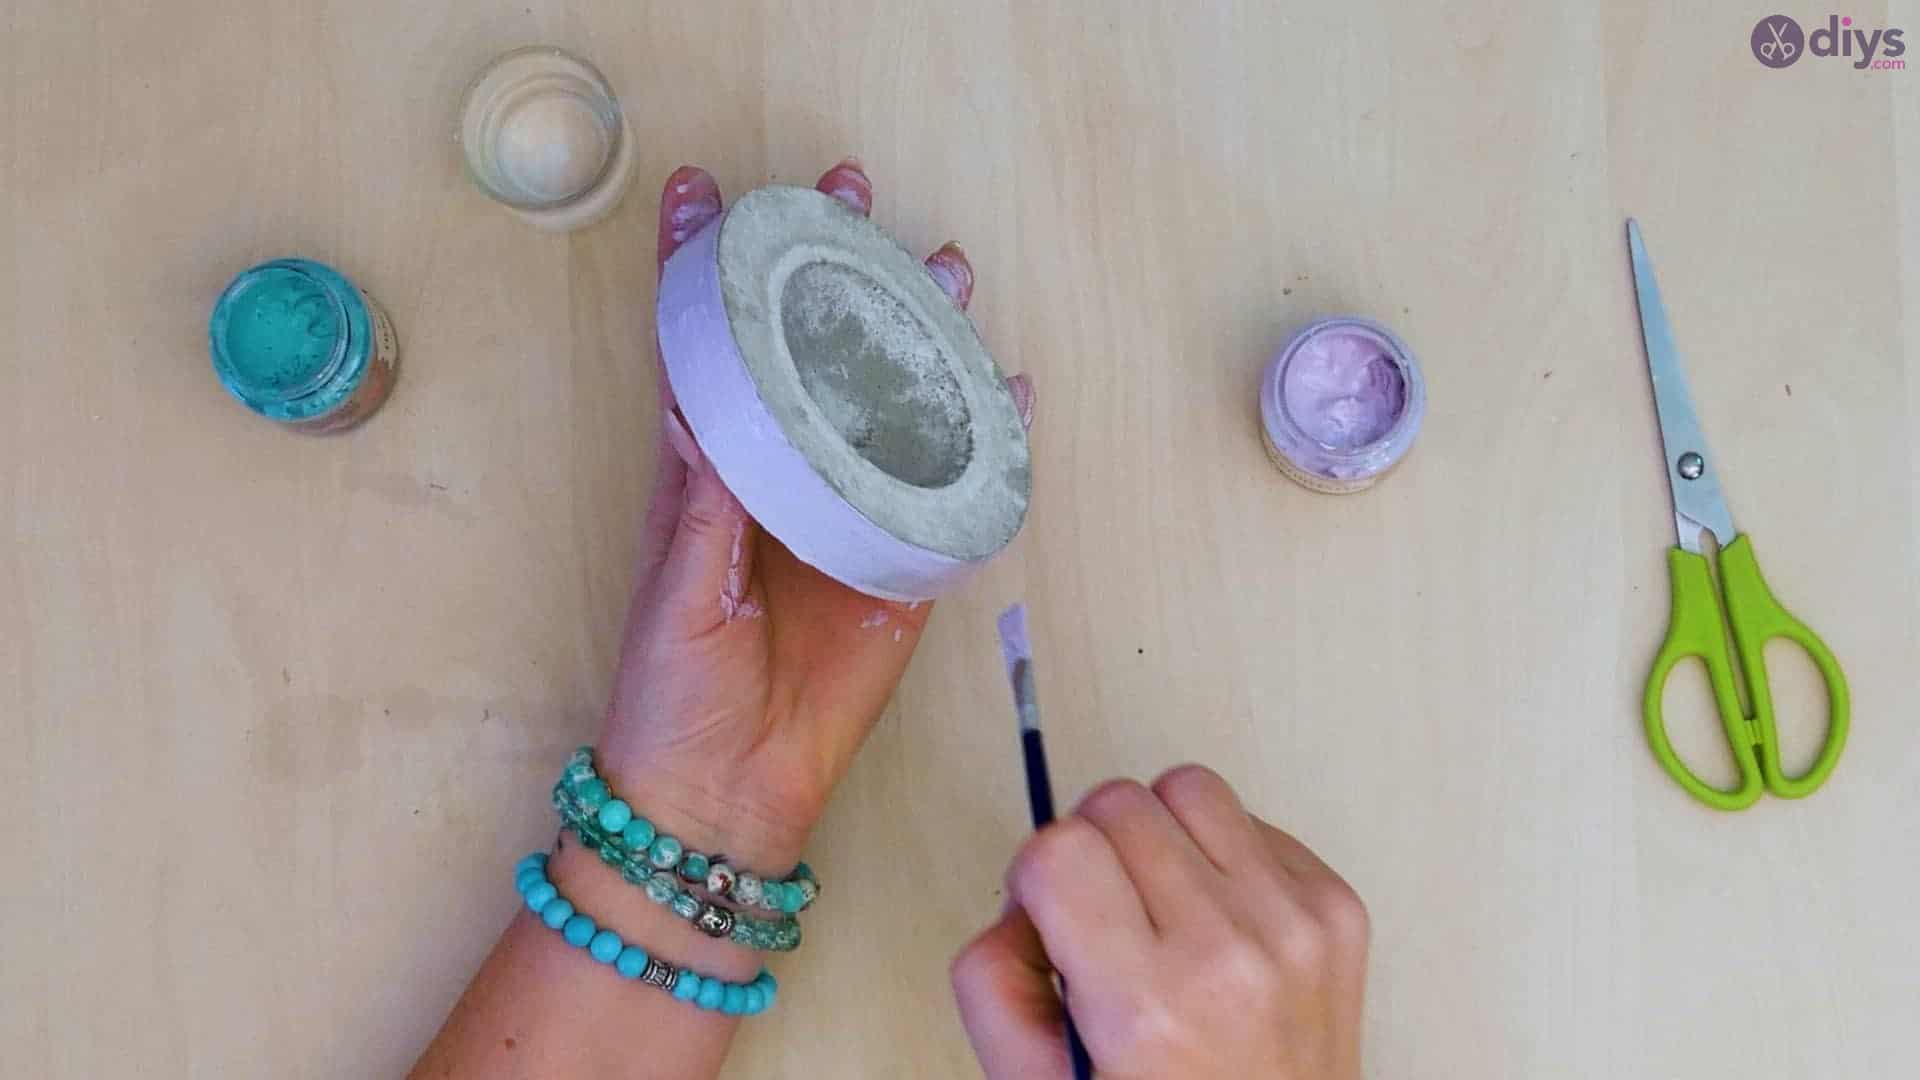
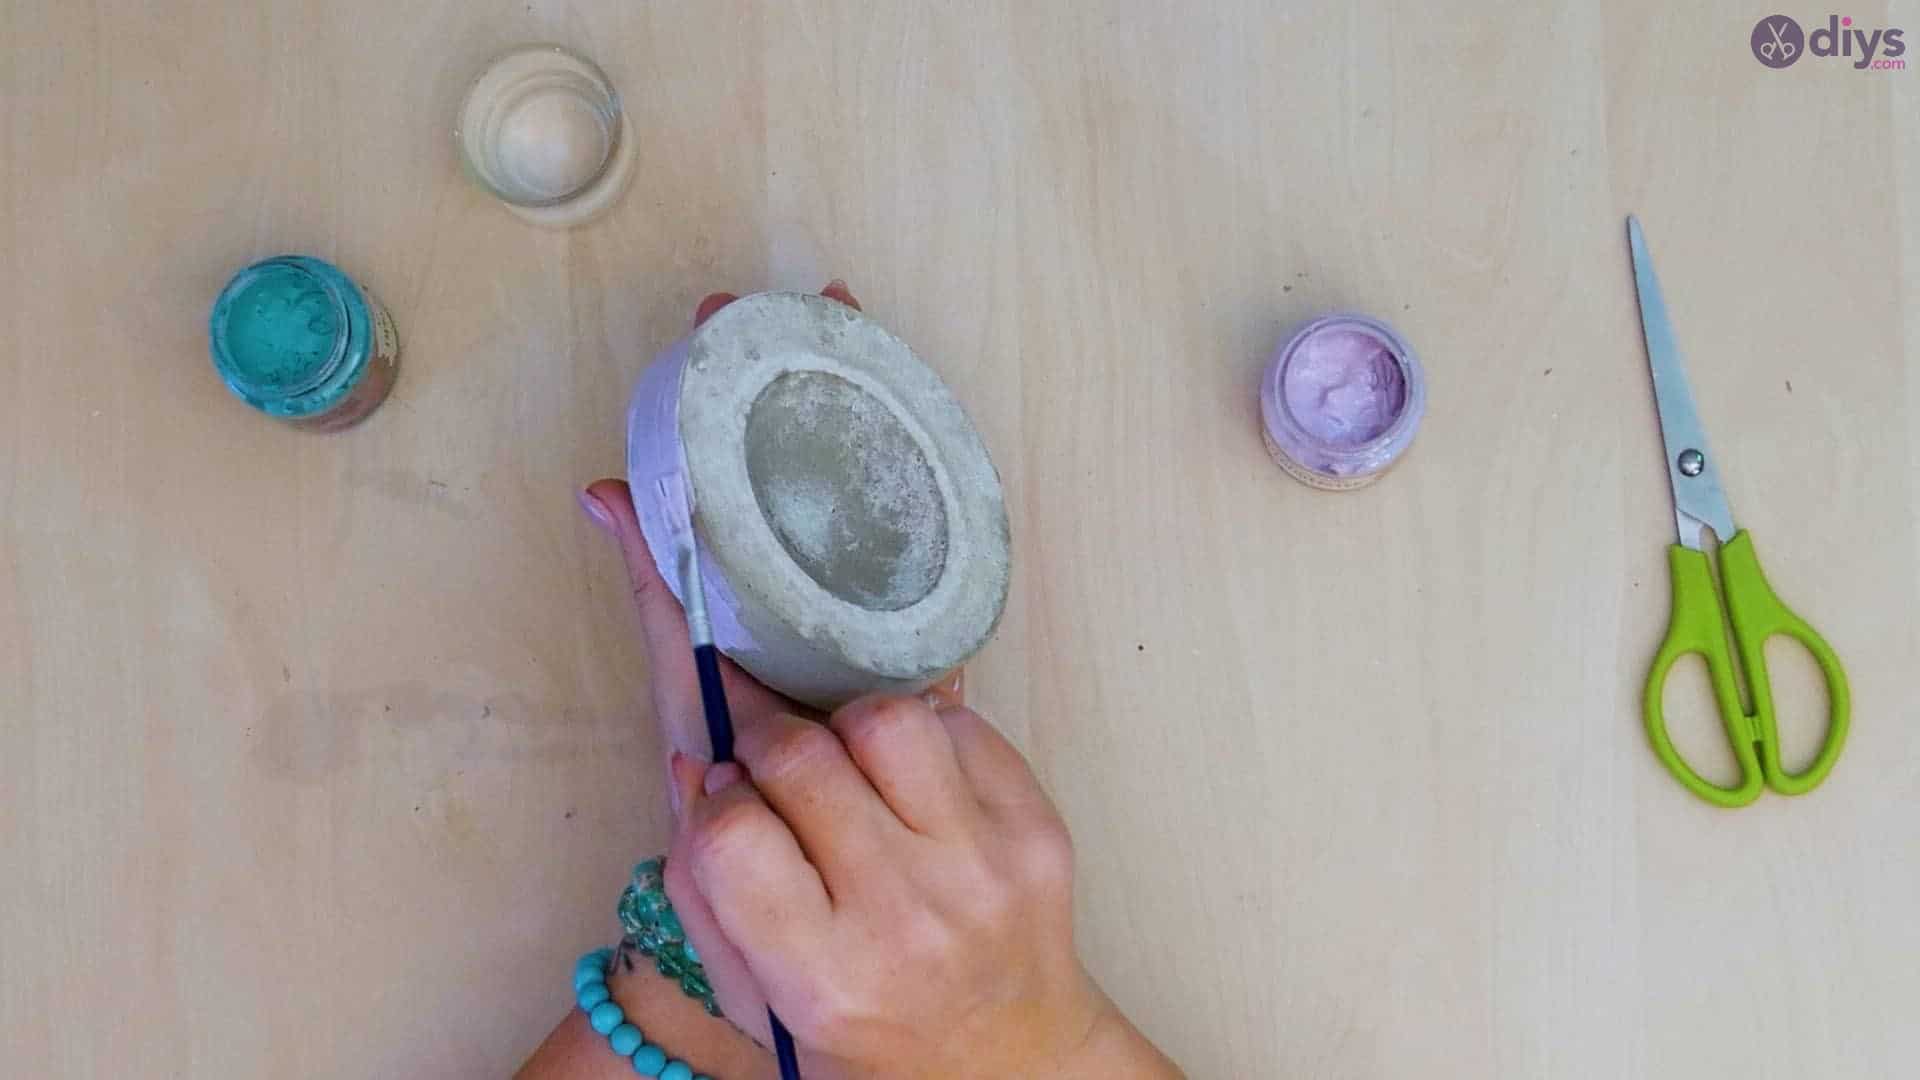
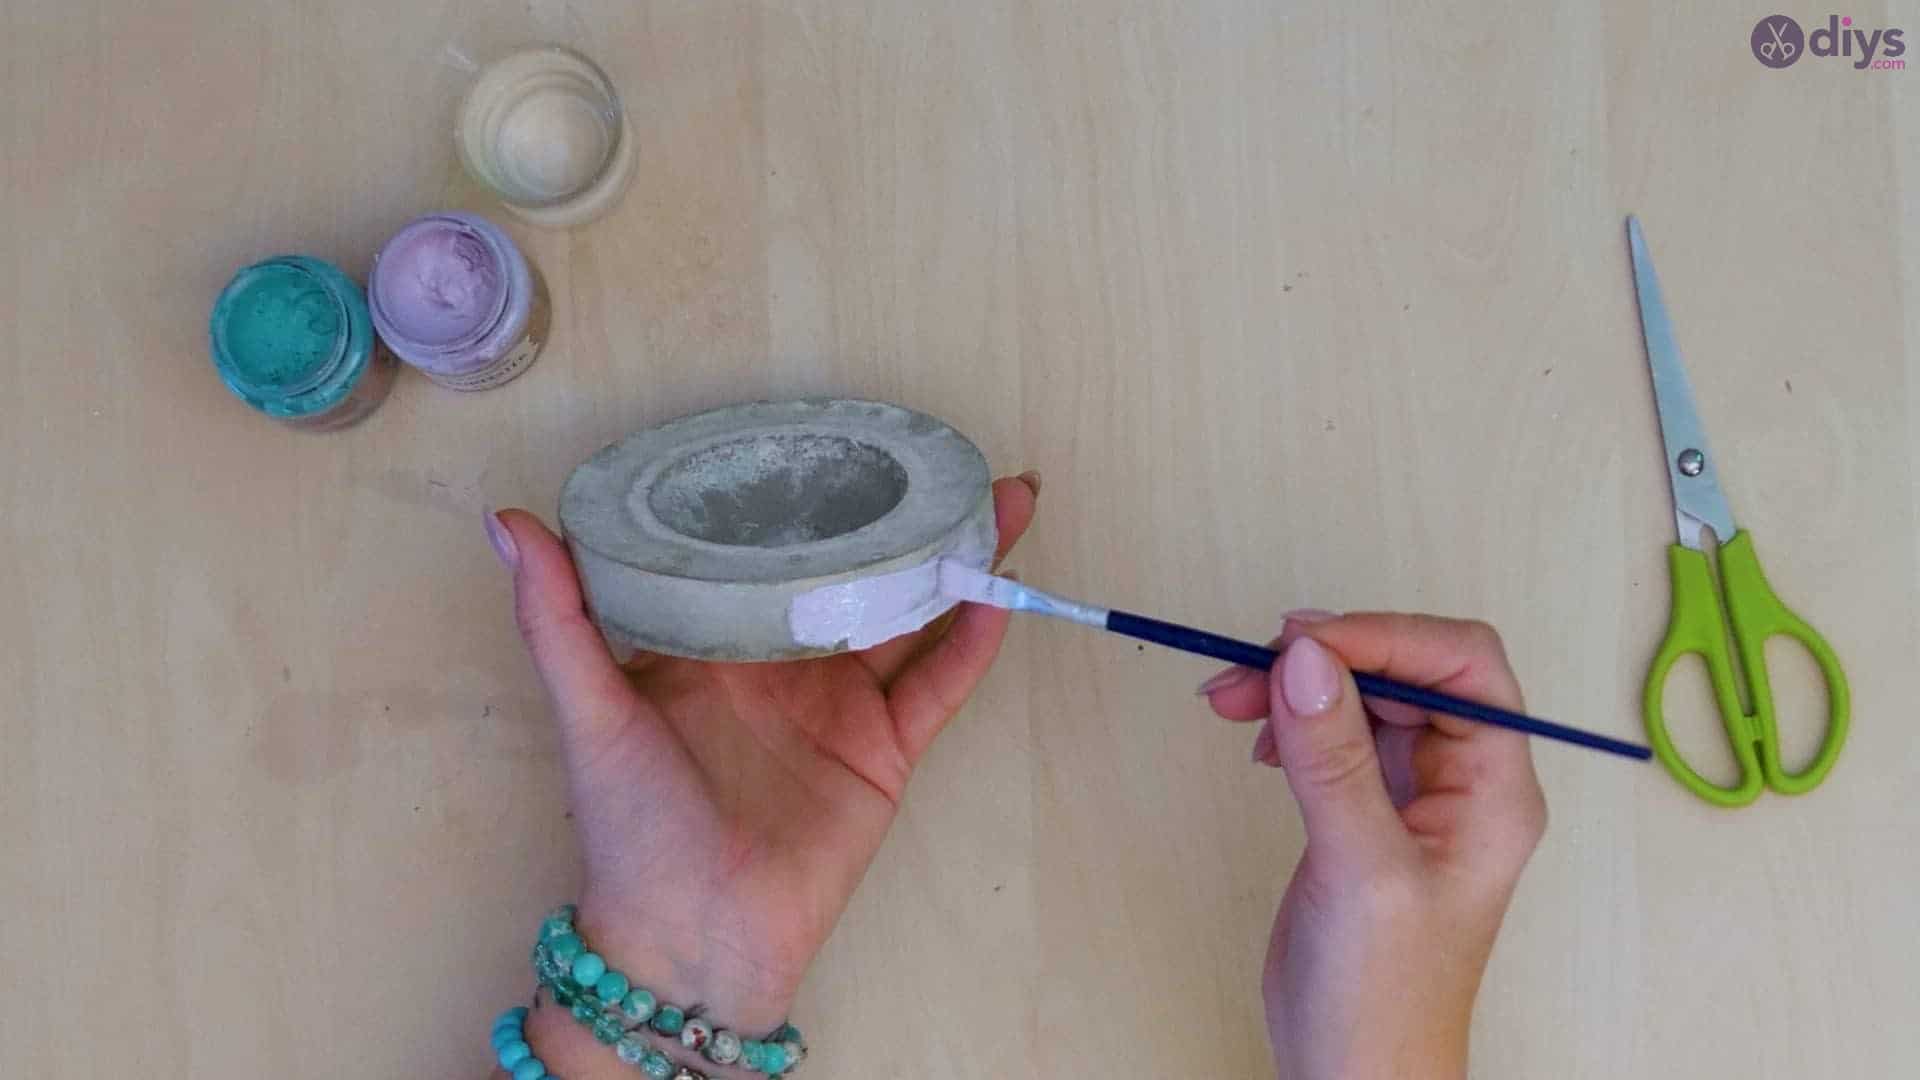
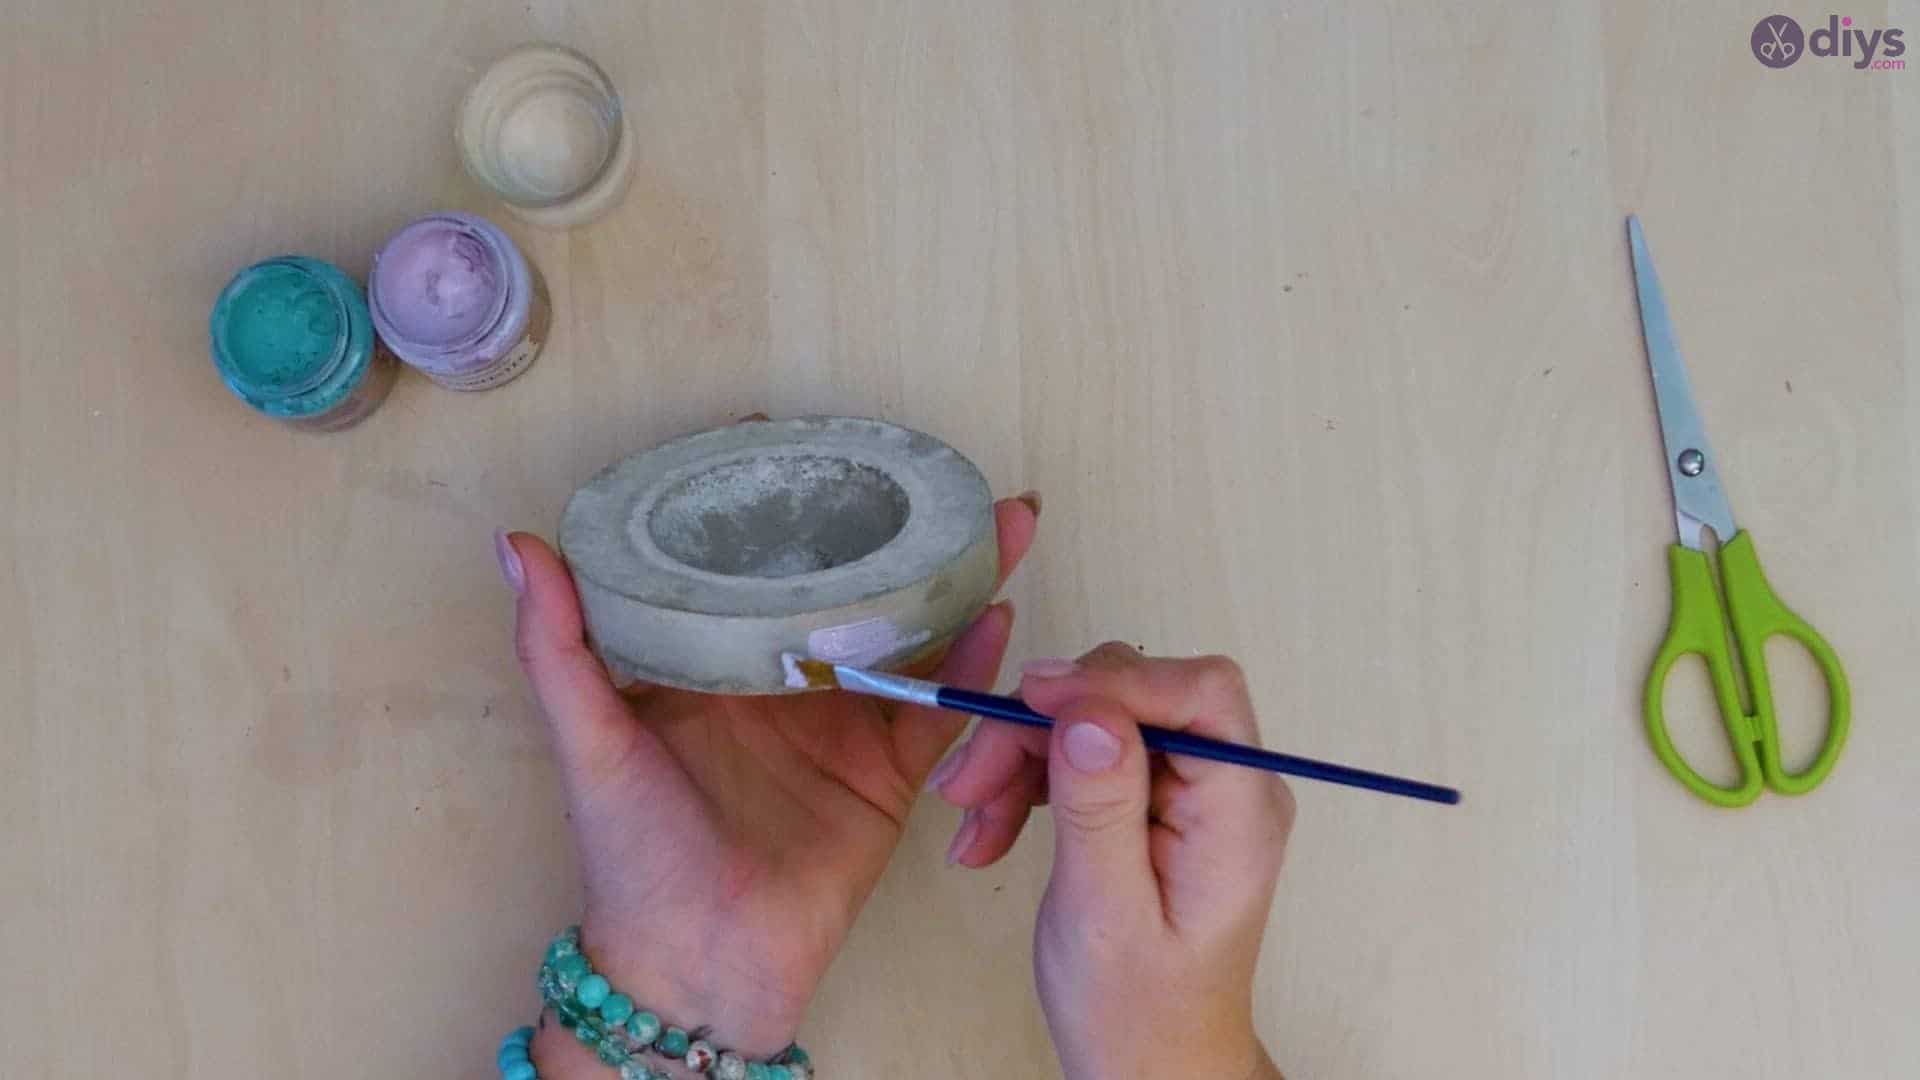
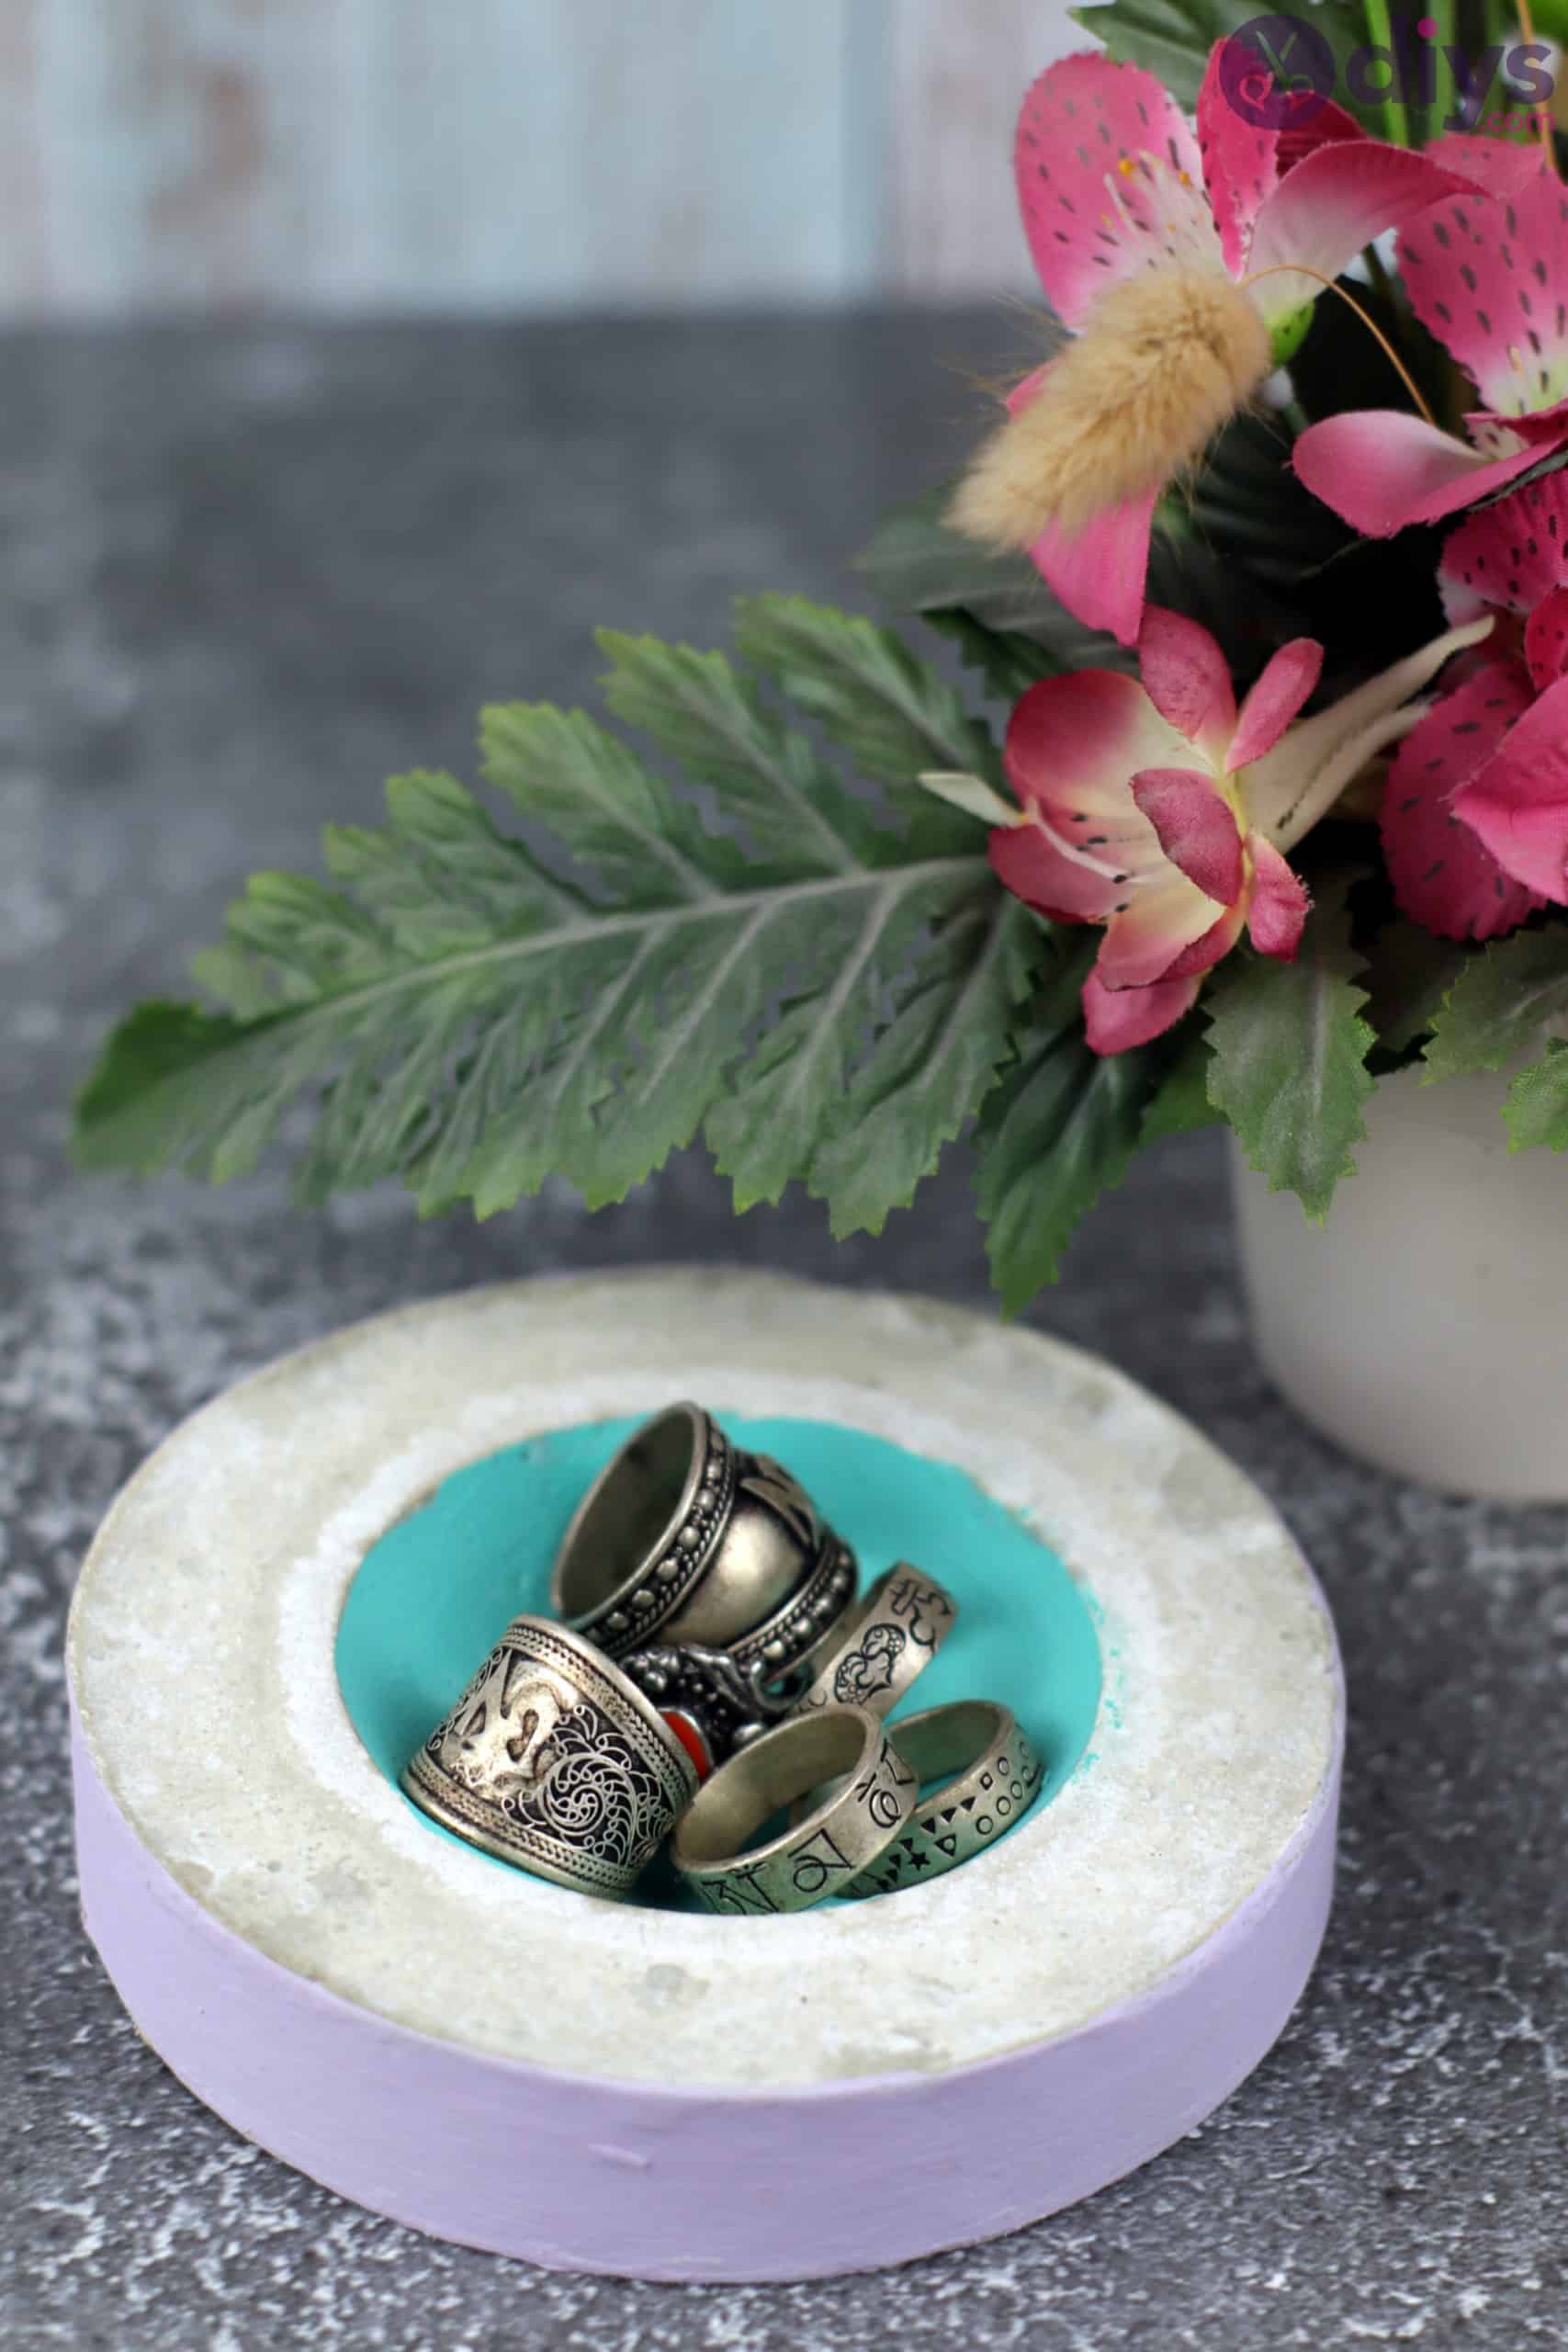
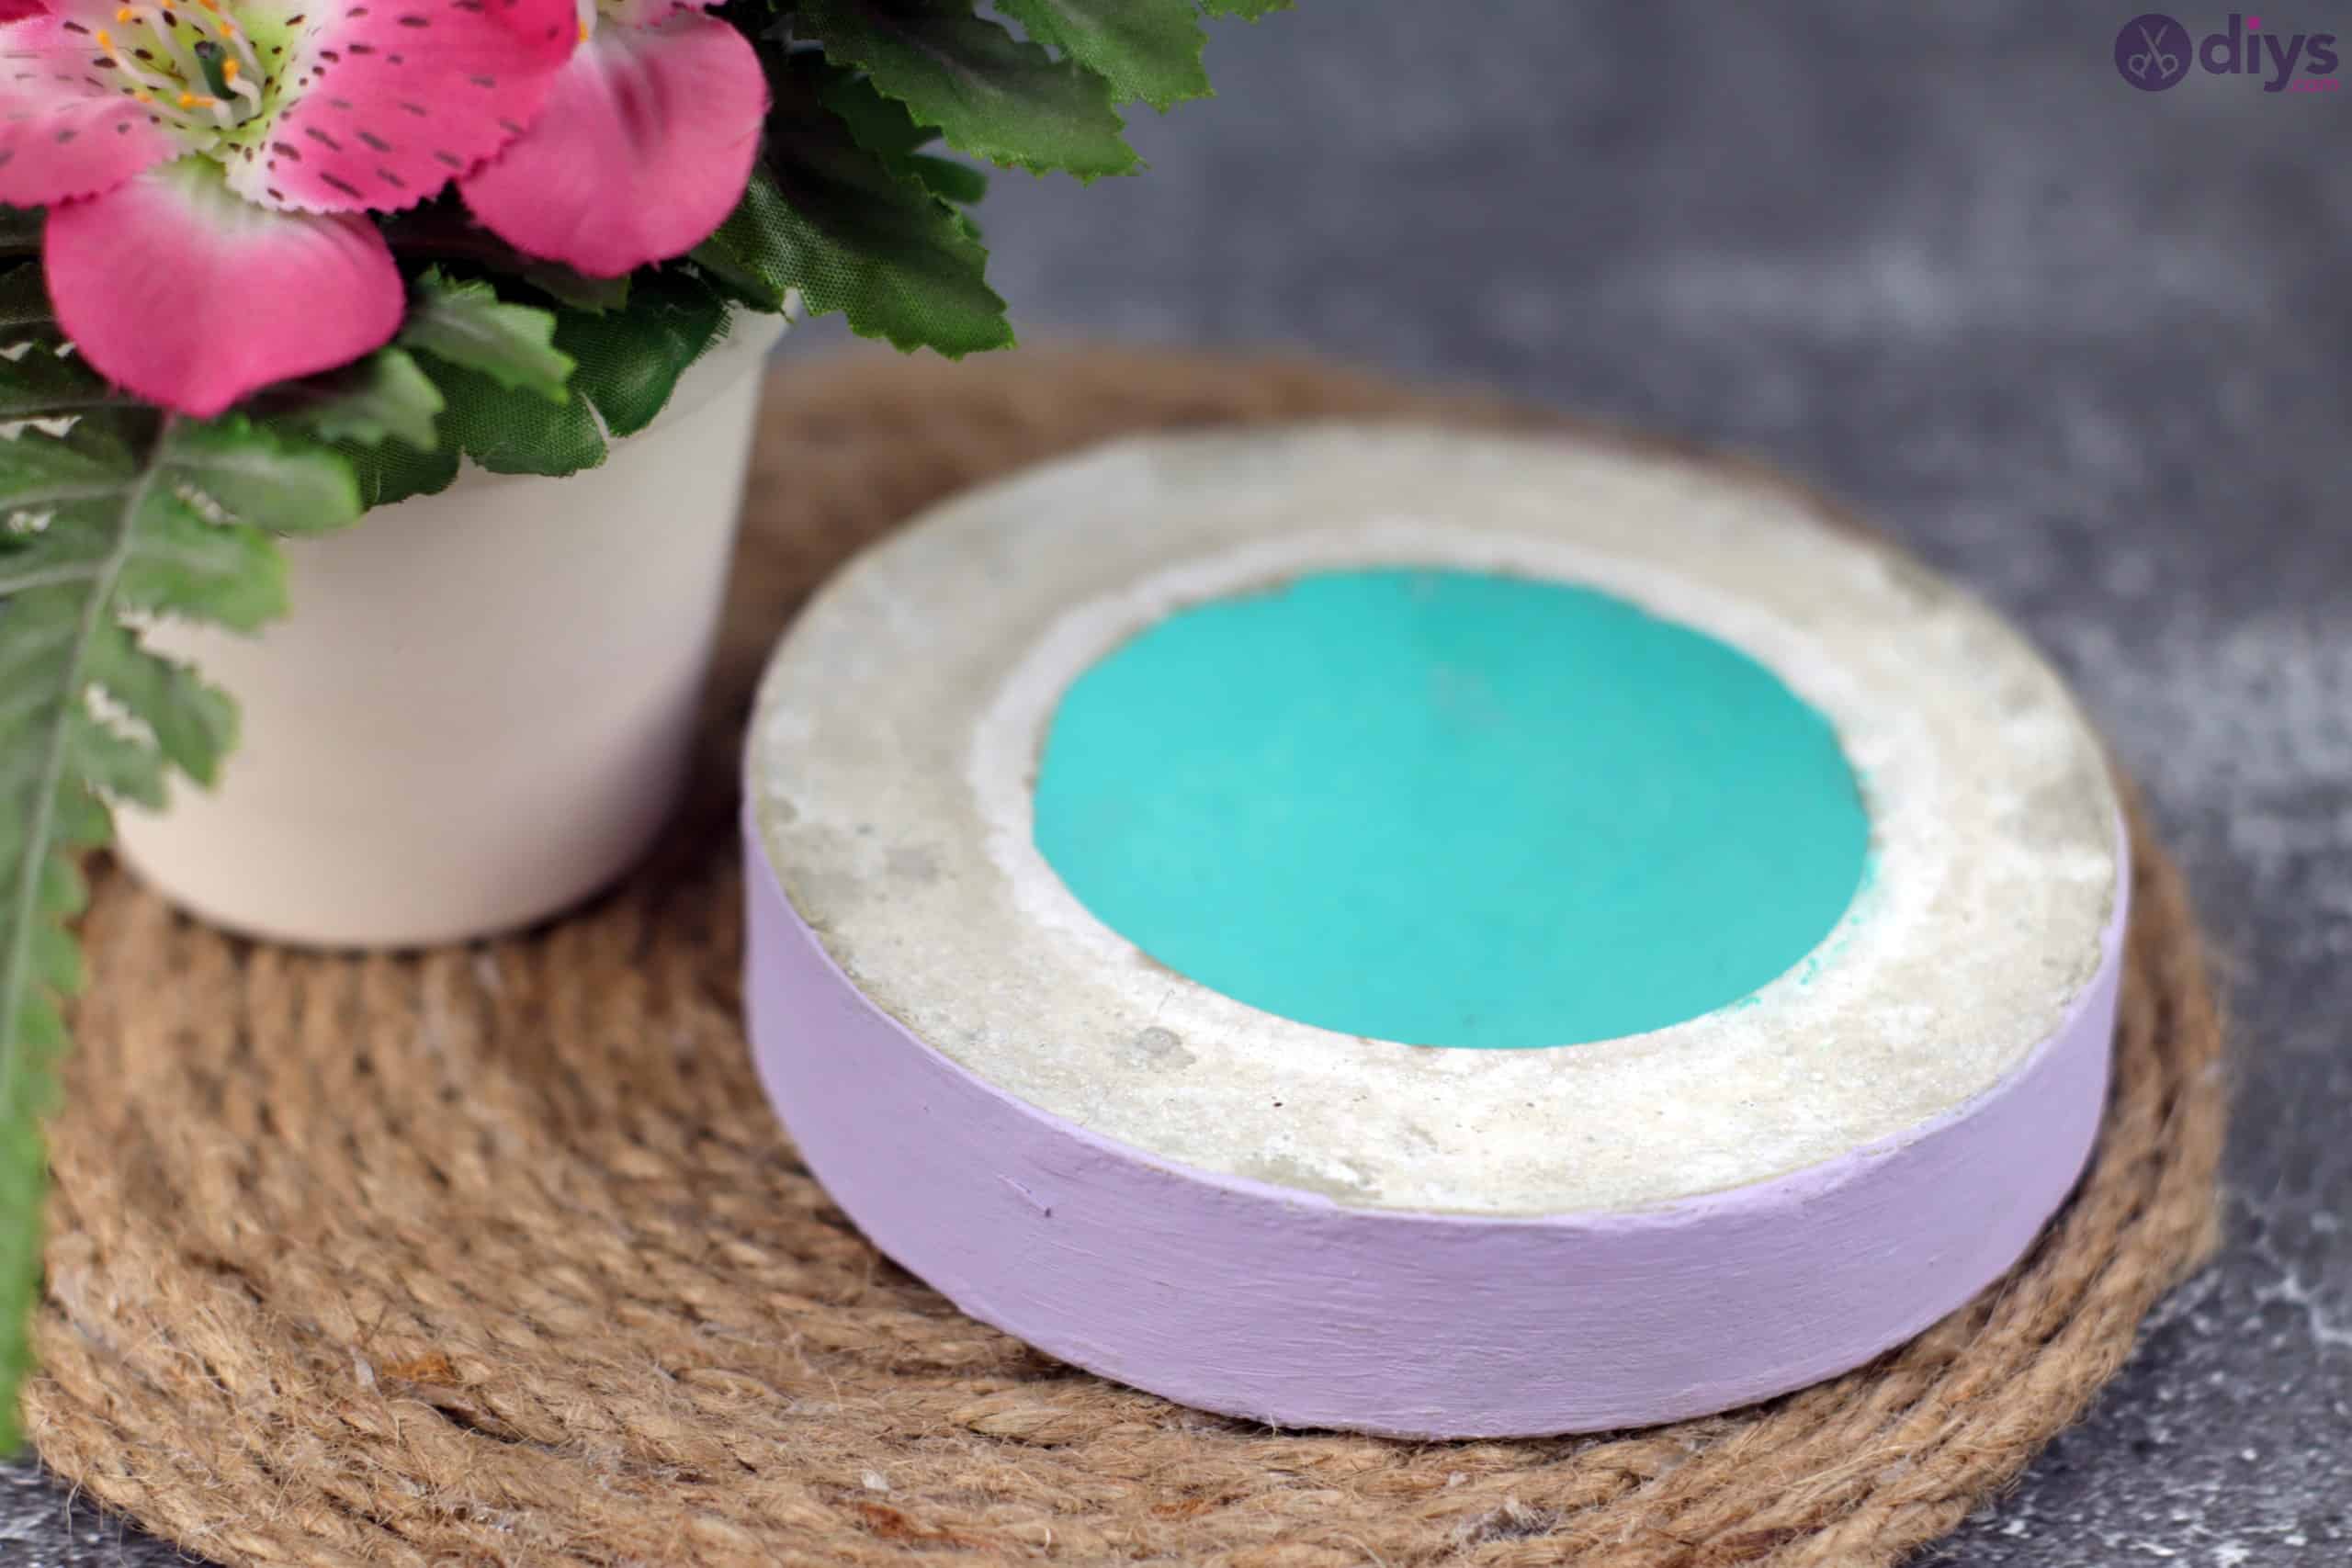
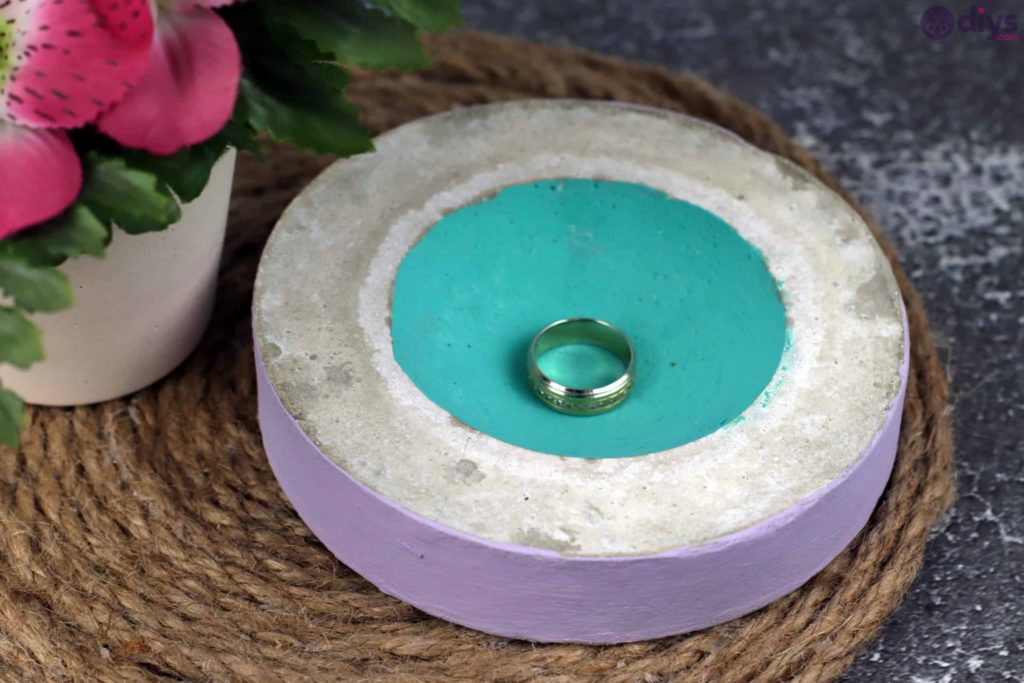
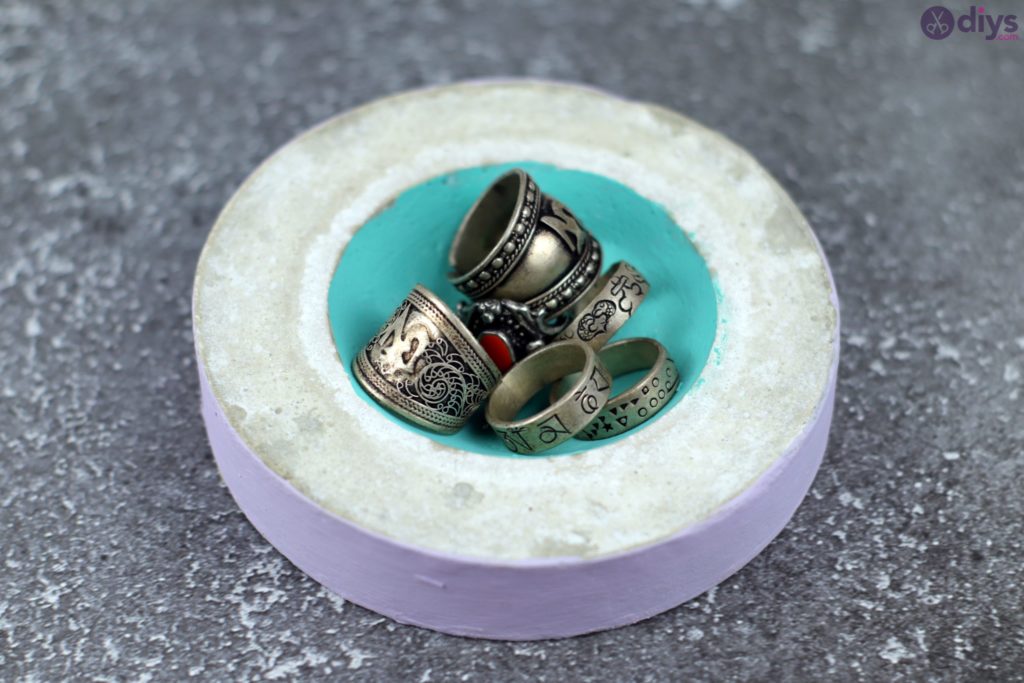
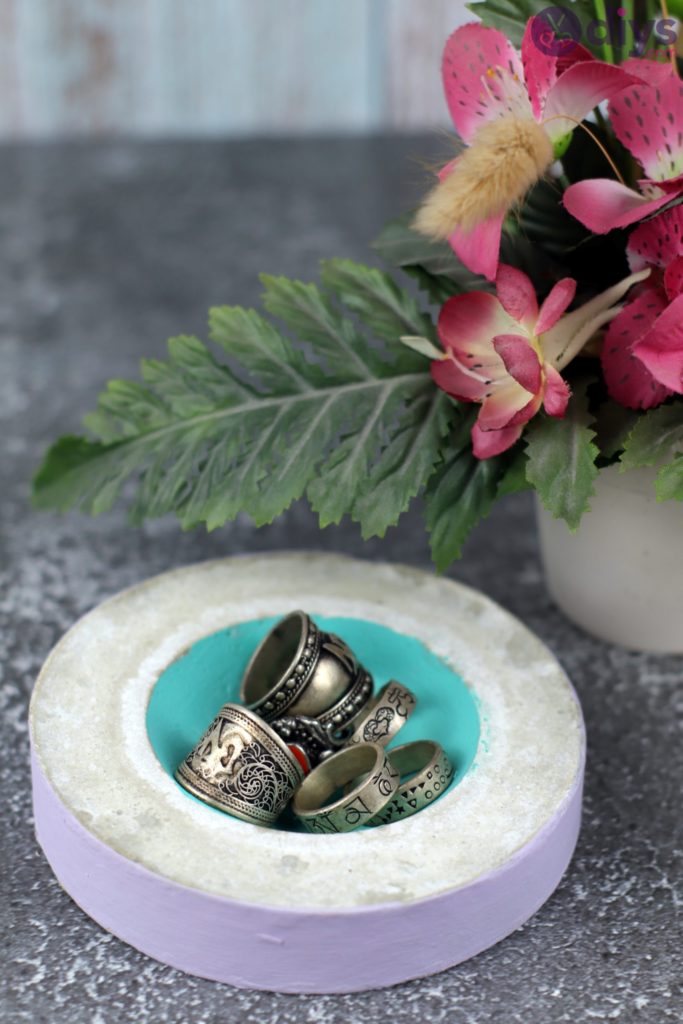
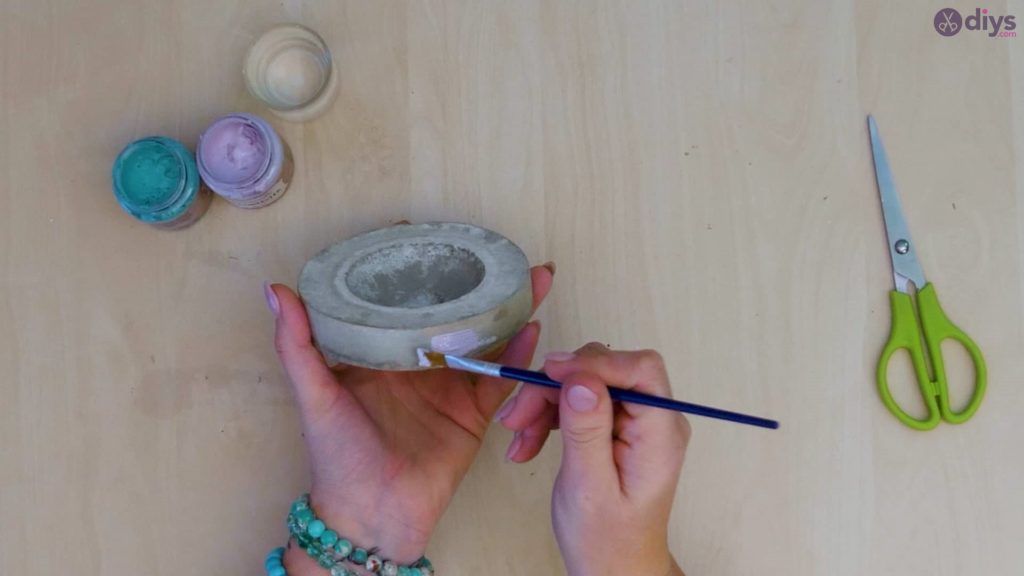
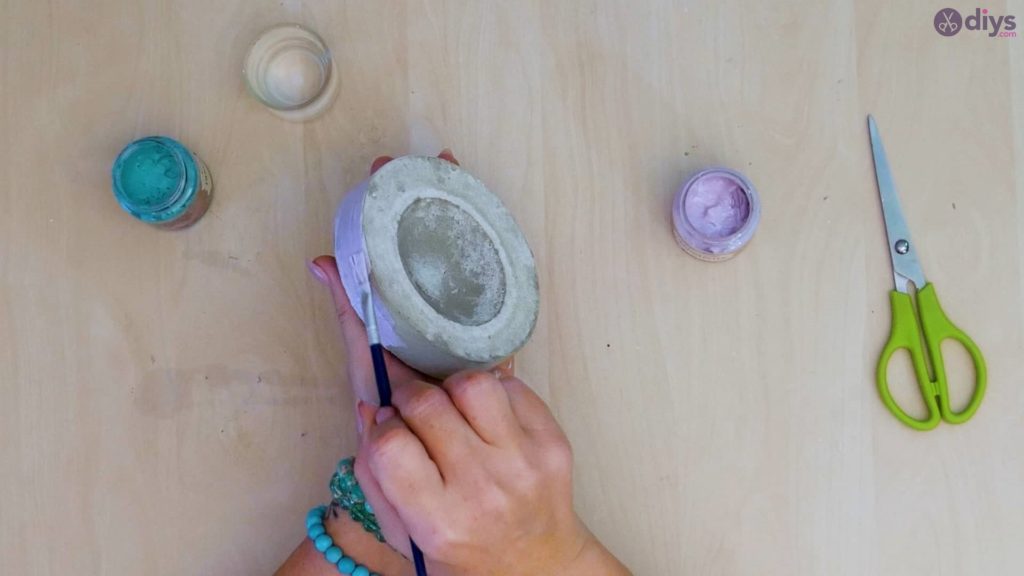
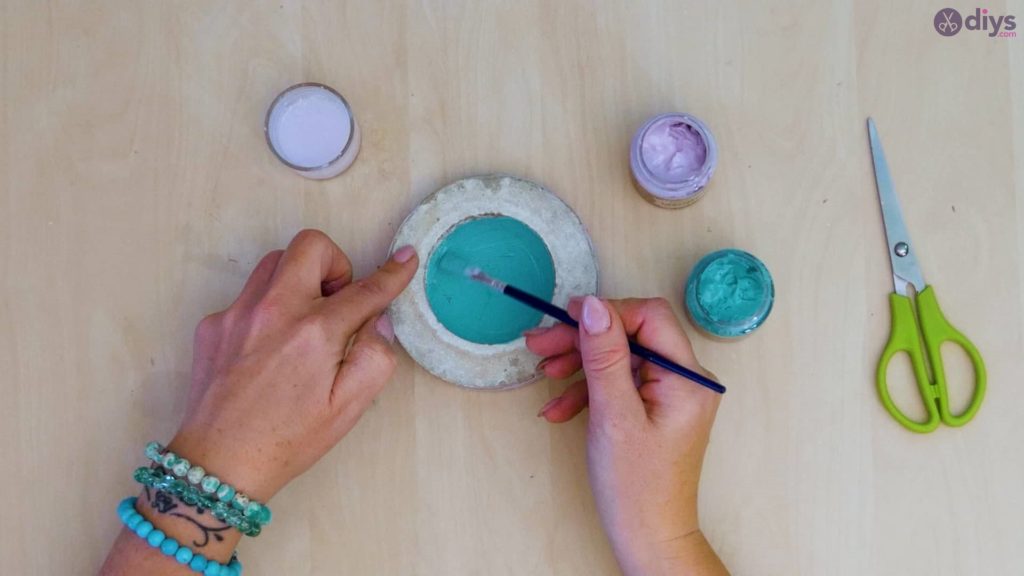
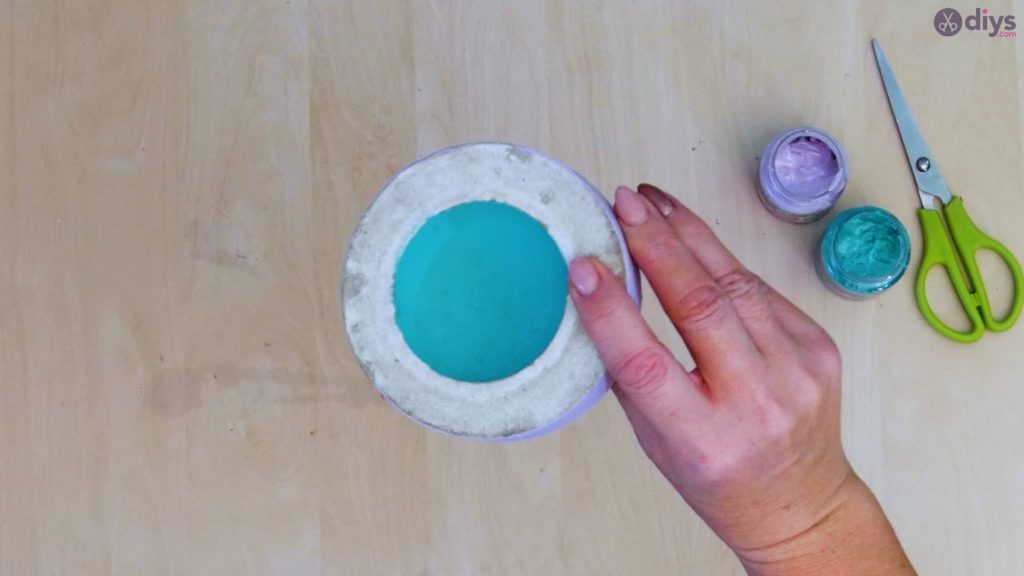
Use your paintbrush to paint the outside edge purple all the way around the bowl. Clean the brush off and then use it to paint the inside of the bowl, in the scoop that things will actually be held in, mint green. Set the bowl aside to dry and then it’s ready to use!


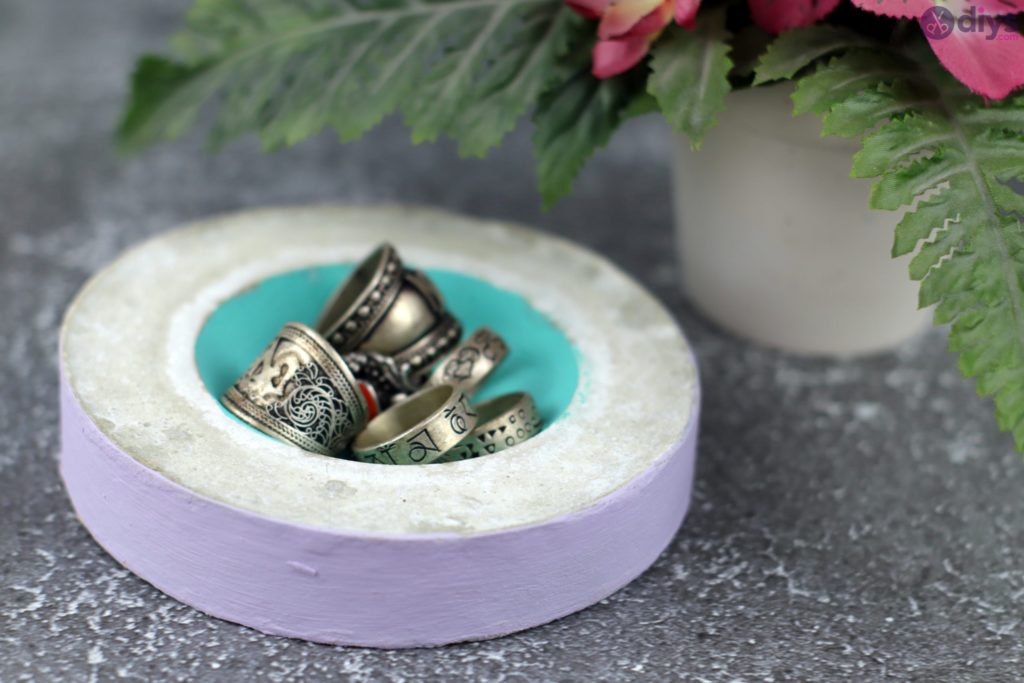

You’re all finished! Of course, you can play with colours and get creative with embellishments and things however you please, using this technique as a basic guide. Just in case you’d like to try this project out for yourself, here’s a fantastic tutorial video to help you!