DIY Christmas Doll Ornament for Tree
Updated on November 19, 2025


Like me, have you been totally intrigued lately by the idea of making your very own DIY Christmas ornaments? I asked my kids recently if they’d like to help me make something simple that we could hang on our Christmas tree and when they said yes, I asked them what they’d like to make. They answered “a doll”, so that’s precisely what we did! The outcome was actually so cute that I decided outline the process so other people can give it a try as well.

Check out these step by step instructions and pictures or scroll to the bottom of this post to find a video tutorial, if you prefer.
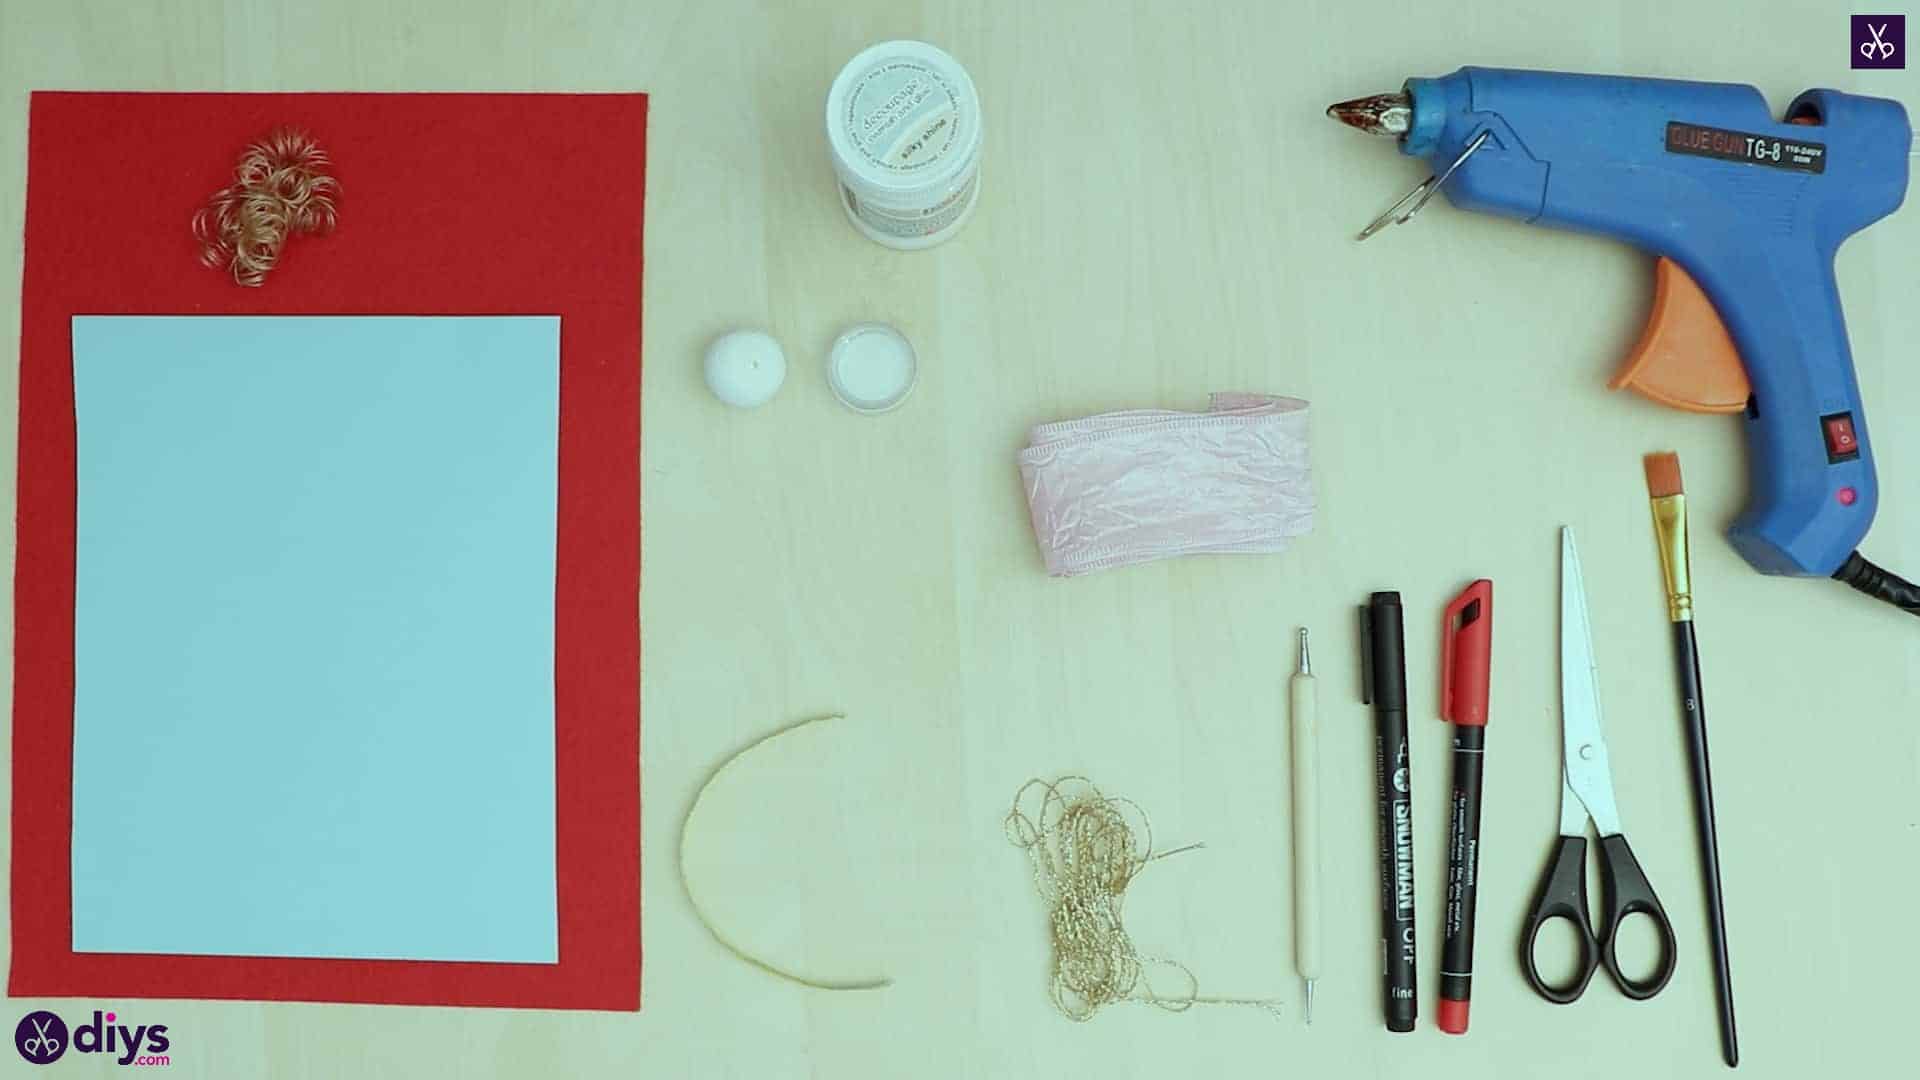
For this project, you’ll need:
- Ribbons (pink and gold)
- Gold thread
- Doll hair (from the local craft store)
- A spun cotton ball
- Red felt
- Markers (black and red)
- Scissors
- Hot glue
- Glitter
- White glue
- A paintbrush
- A dotting tool
Step 1:
Gather your materials!
Step 2:
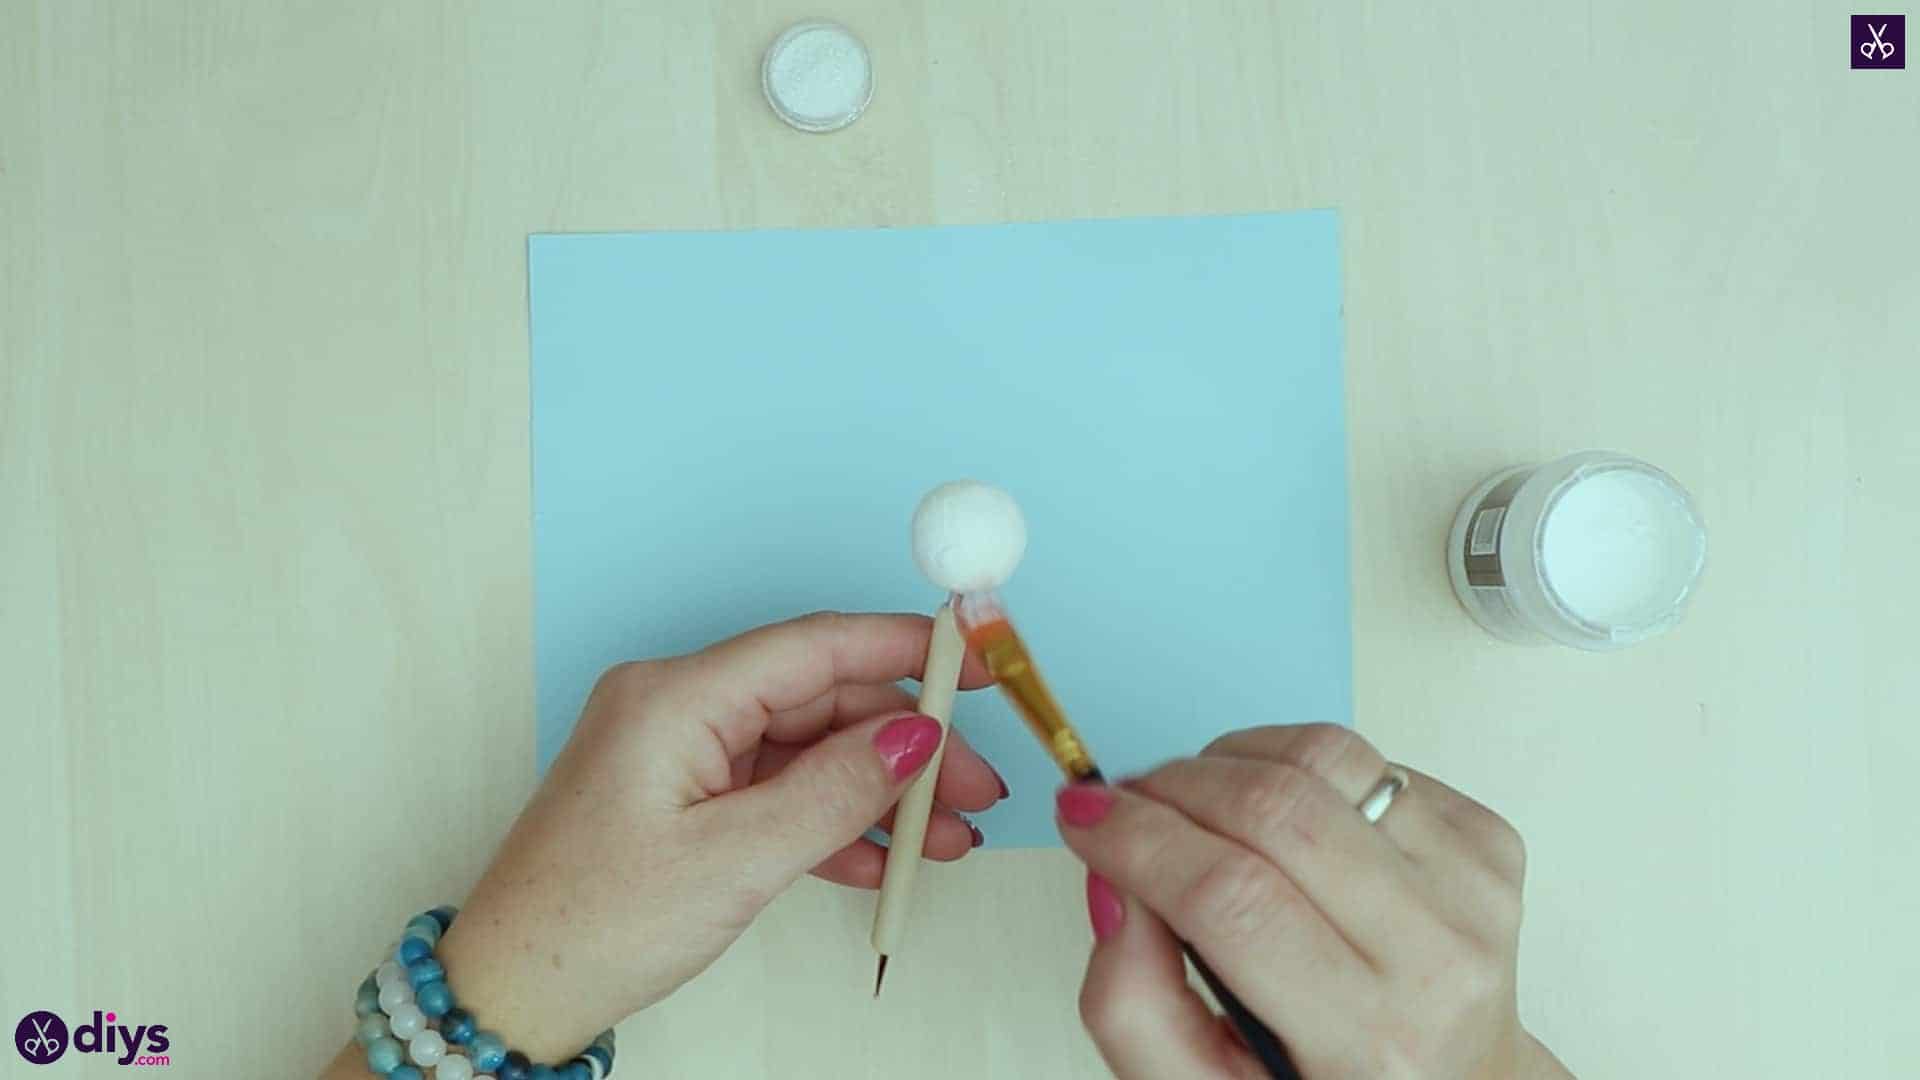
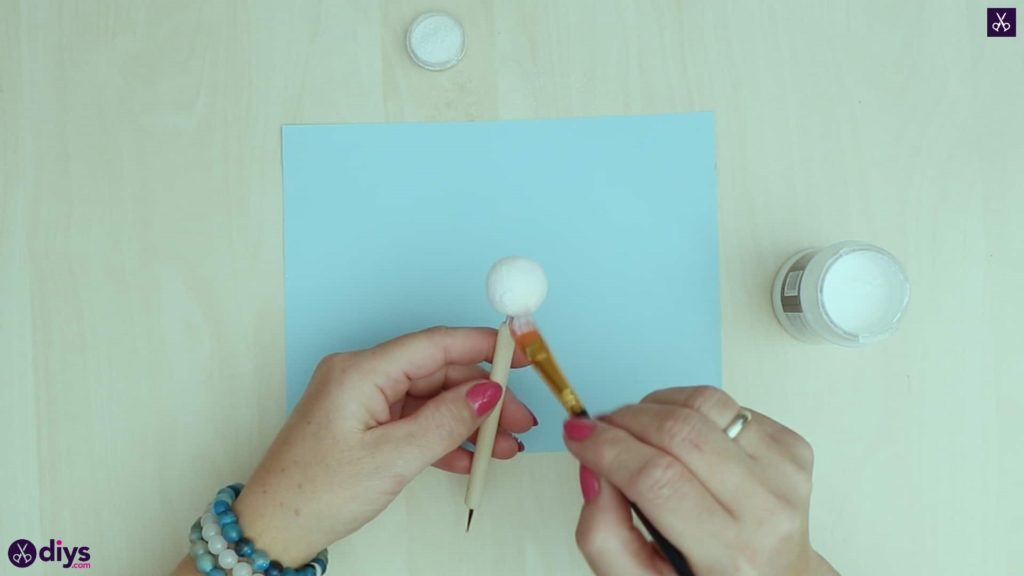
Poke your dotting tool into the spin cotton ball so you can move it around it easily. This ball will become your doll’s head! Holding the dotting tool, dip your paintbrush into your white glue and paint it all over the ball, turning it by the handle as you need. I placed a sheet of paper underneath the ball to cover the table, just in case the glue dripped.
Step 3:
Continue holding the ball over that scrap paper for this next because, because things are about to get messy! Before your glue can dry, sprinkle your white glitter all over the ball. Turn it by the dotting tool to try and get as even a coverage as possible. Set the ball aside to let it dry.

Step 4:
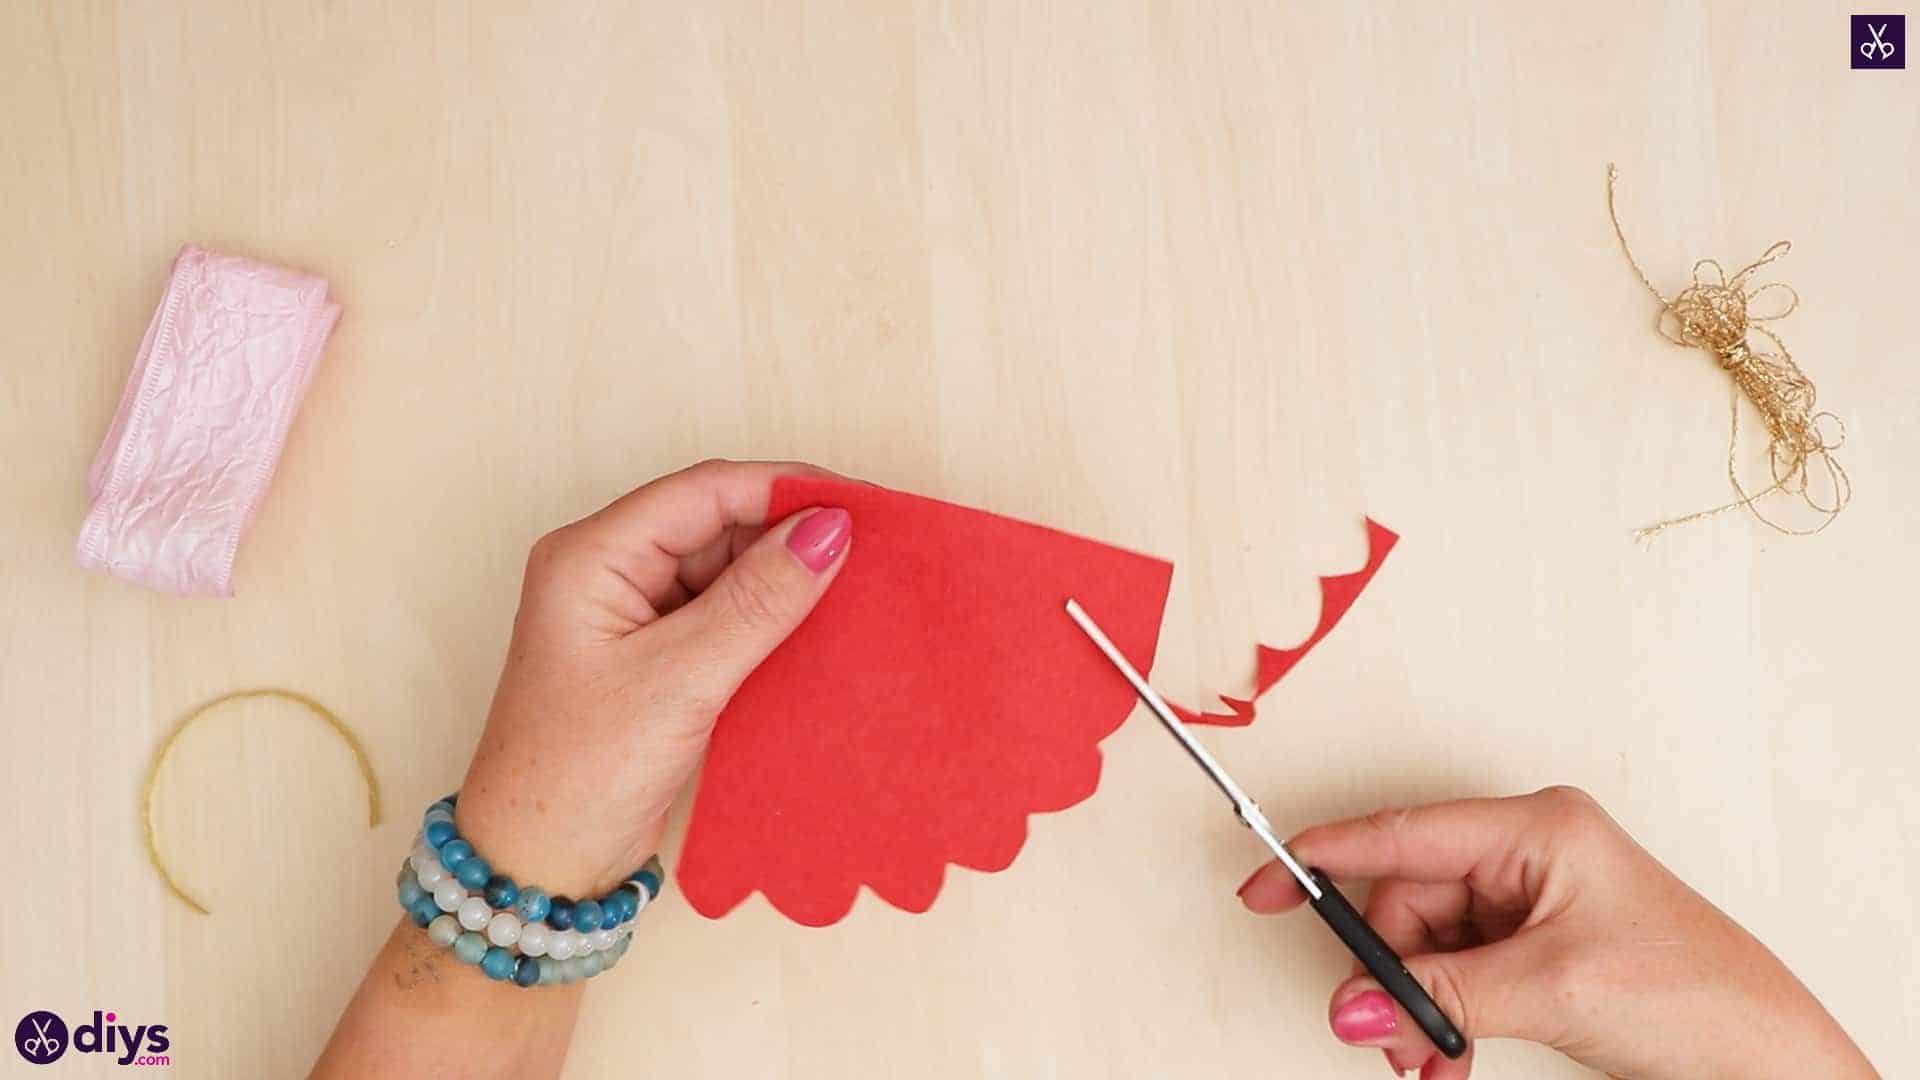
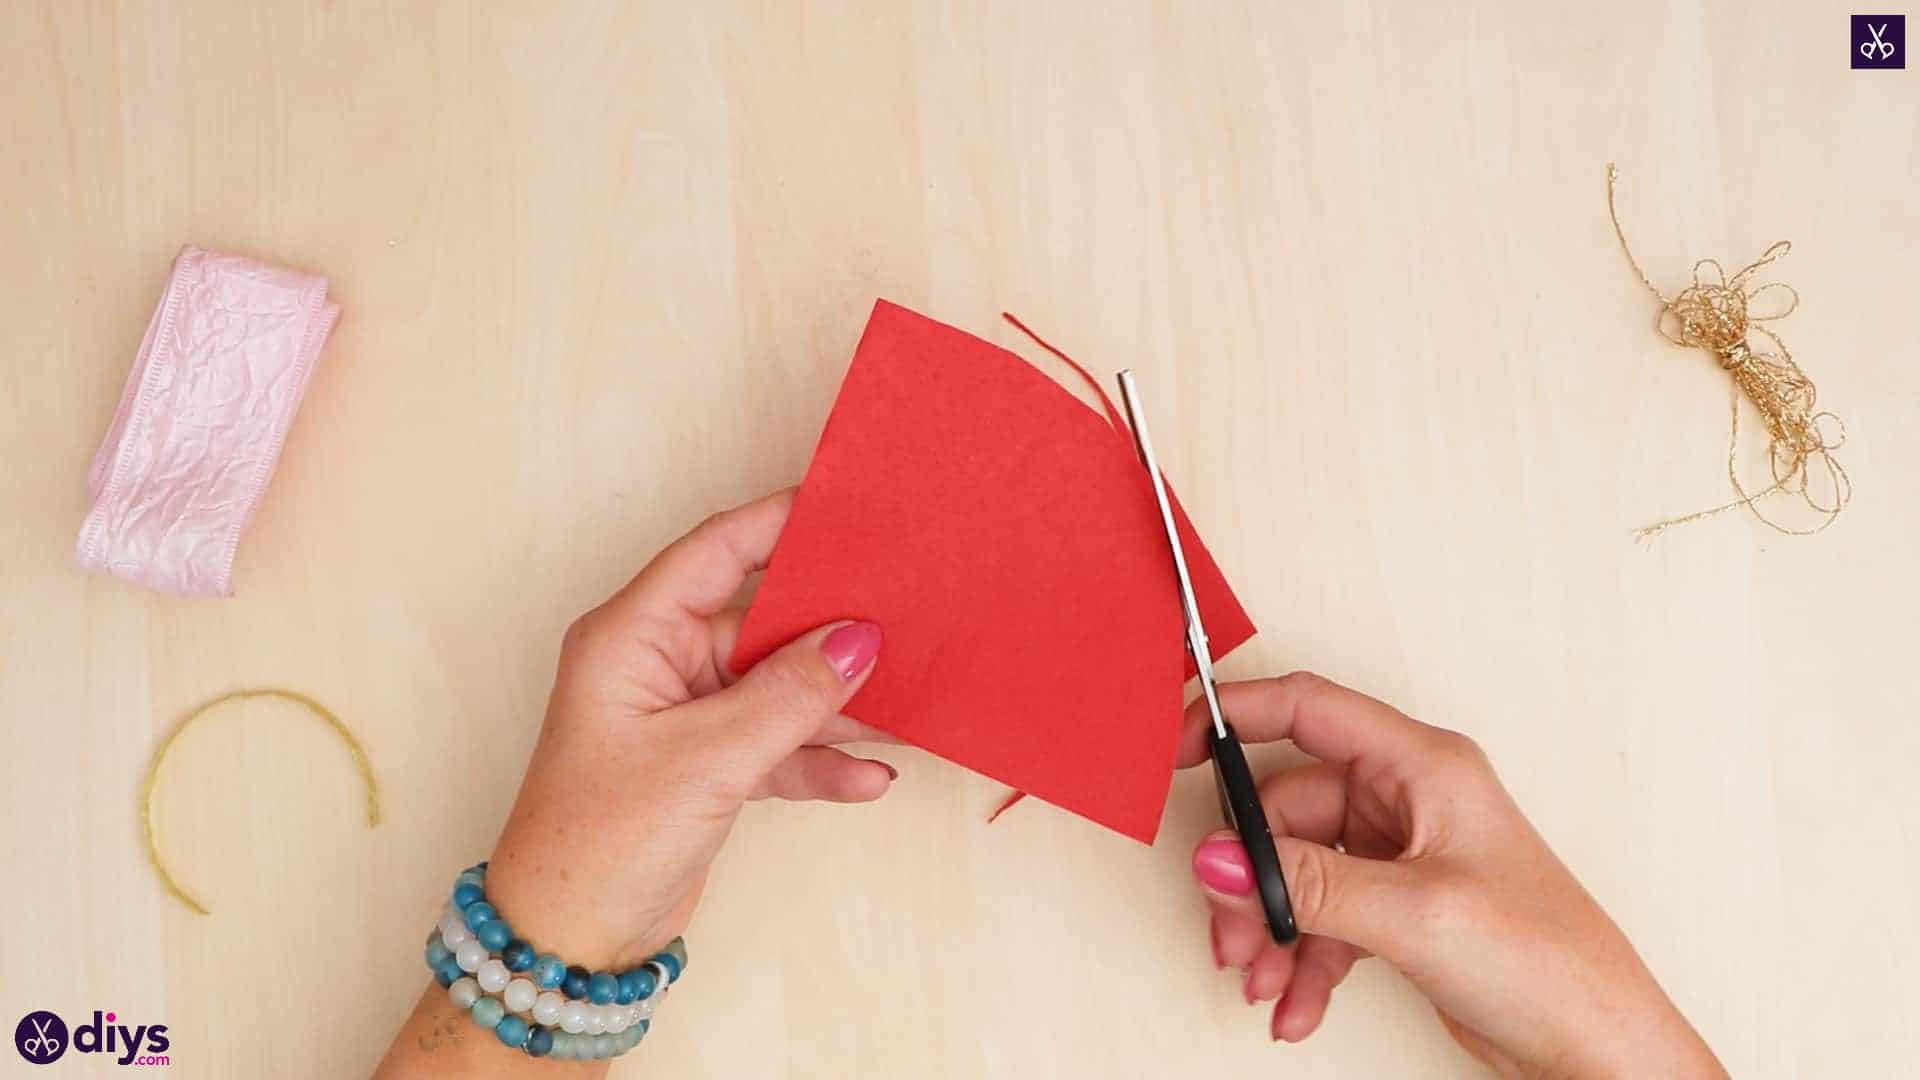
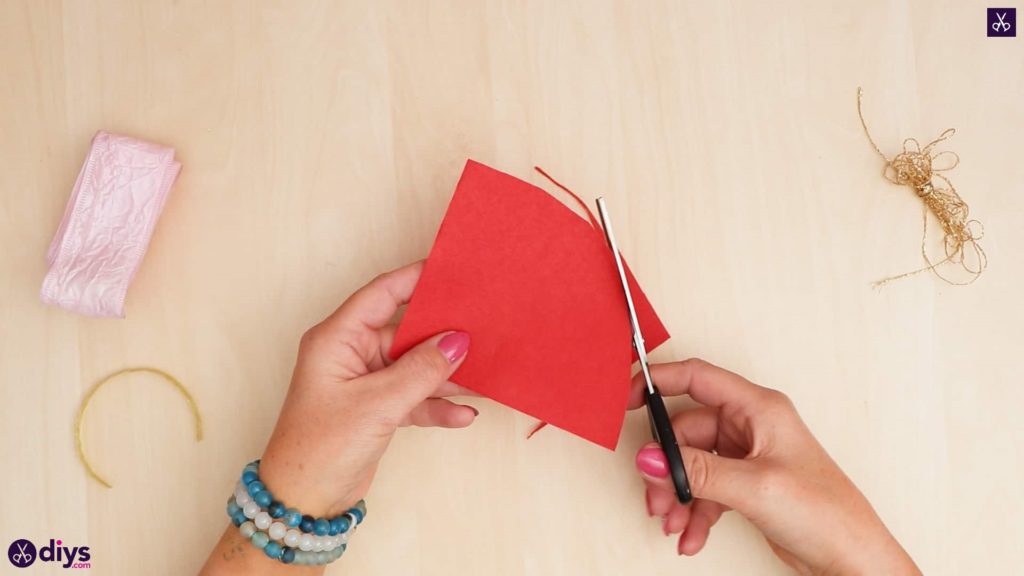
Cut a square from your red paper about three inches by three inches. Starting at one corner and ending at the corner diagonally across from it, round the edges and the spare corner between those two off. I kept my scissors as close to the edge as possible to make sure I didn’t trim off to much while still getting my rounded edge.
Step 5:
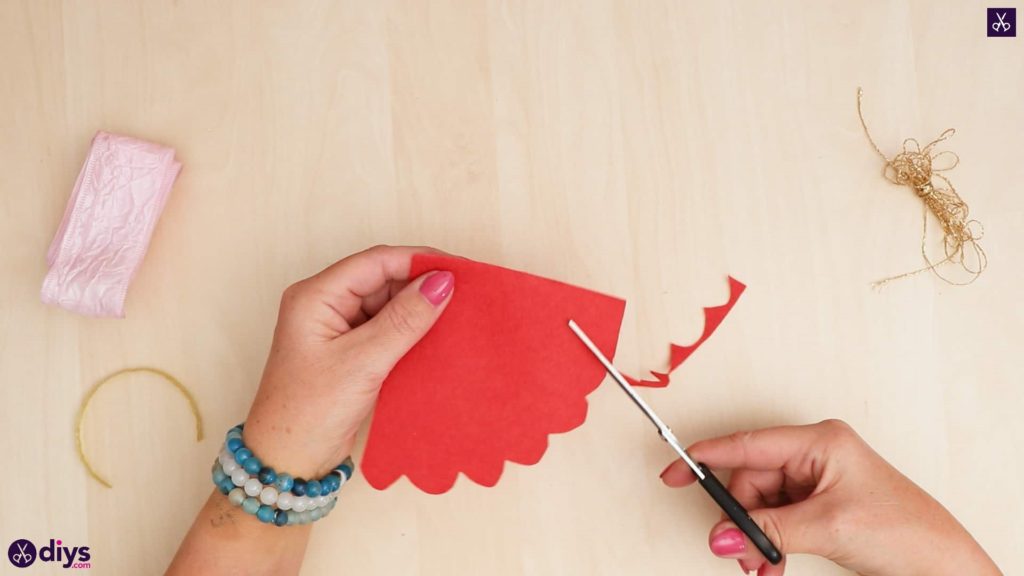
Cut a scalloped edge all along the rounded side you just made, opposite your remaining pointed corner, so it looks like the paper has frills.
Step 6:
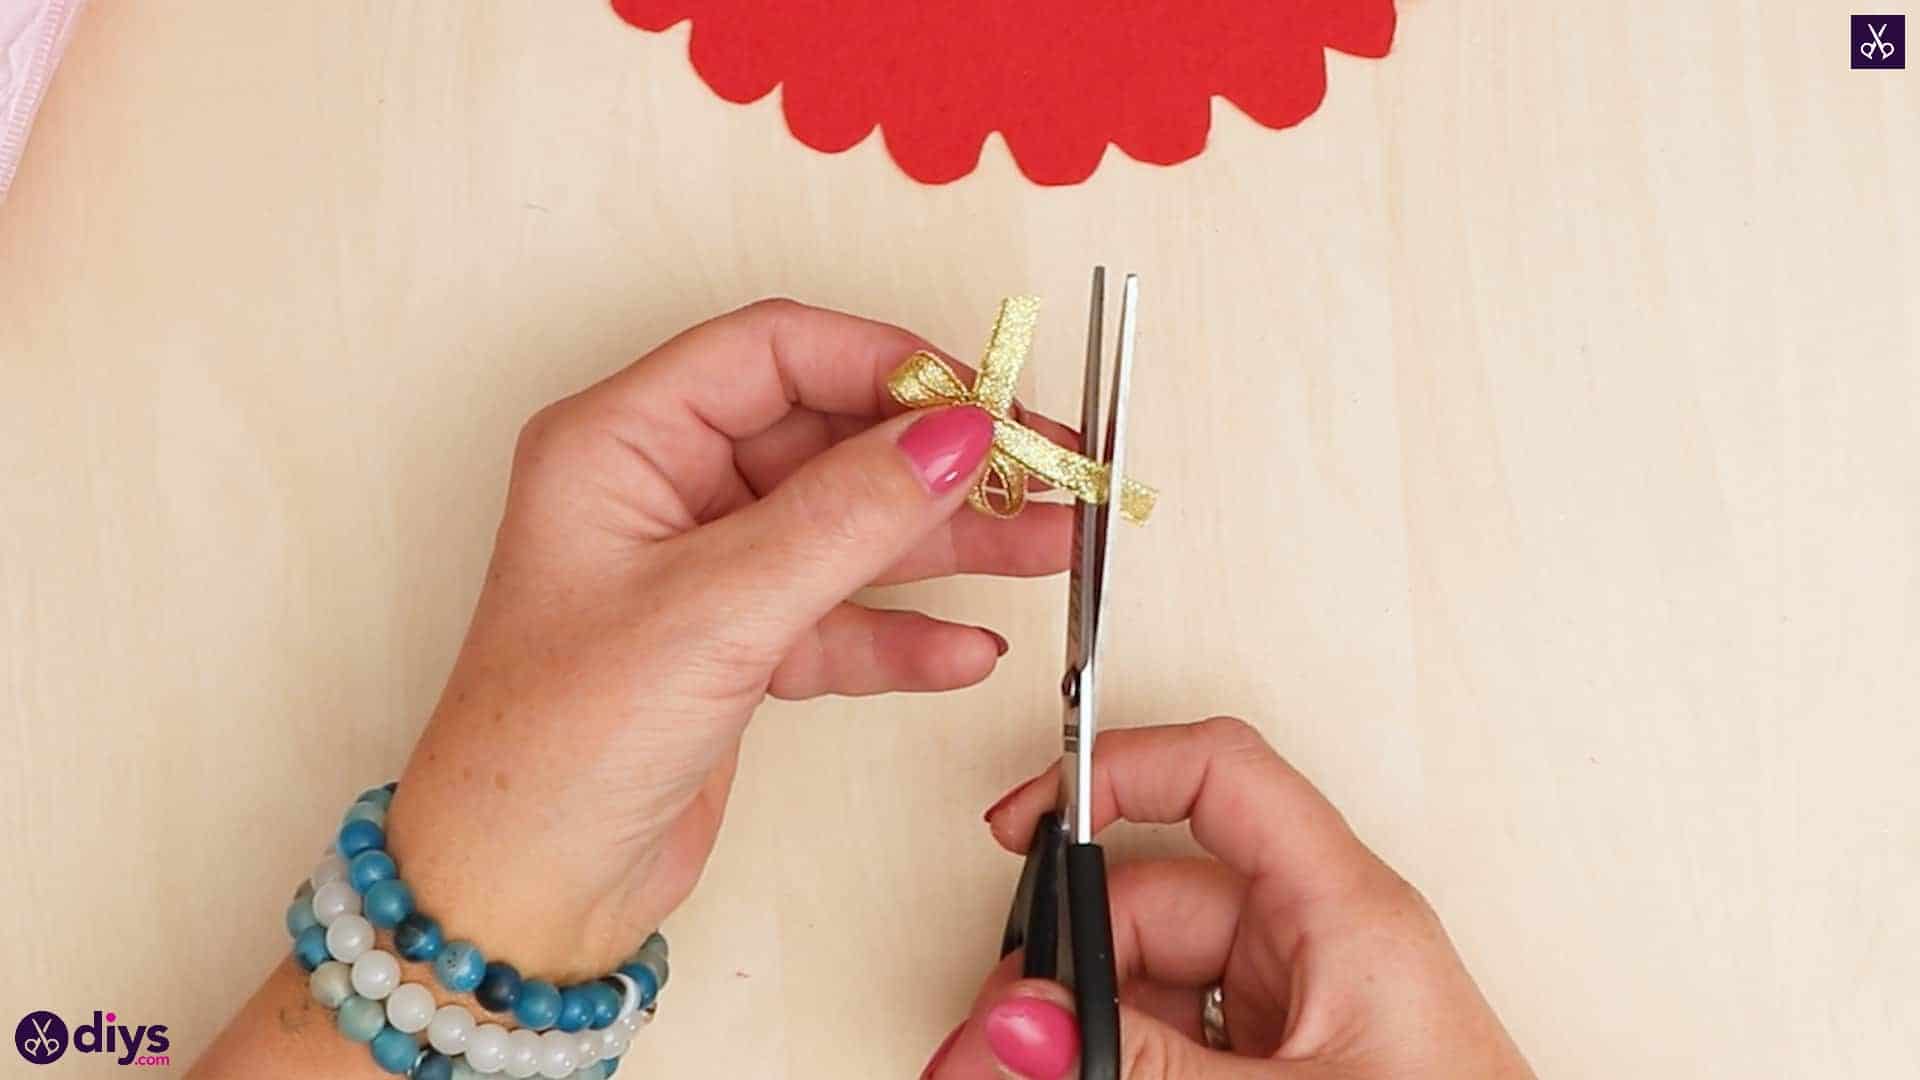
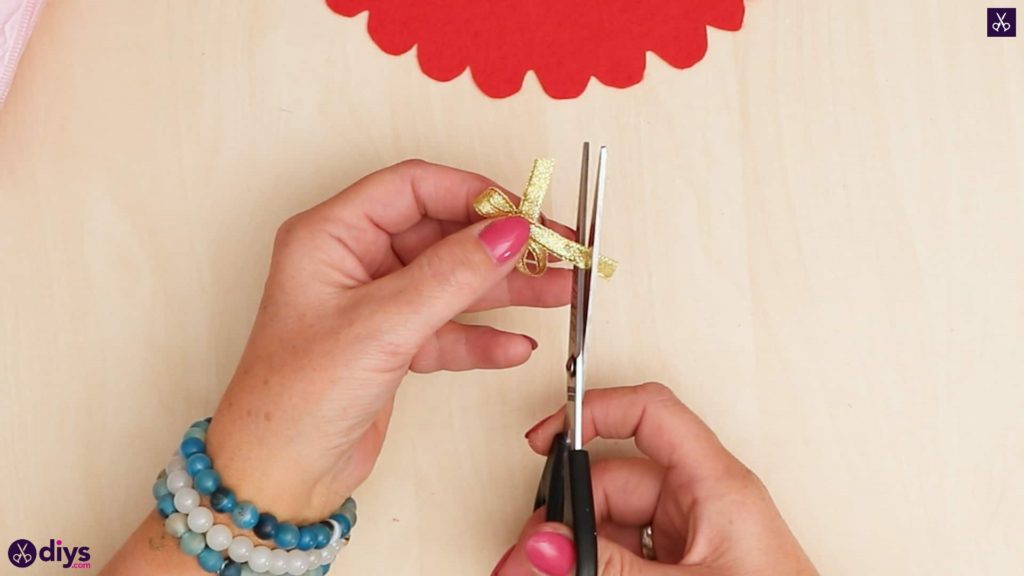
Make a bow from your gold ribbon. Rather than tying one that might slide undone, I brought each end inward in a loop towards the centre and glued them in place. Trim the ends if they’re a little long.
Step 7:
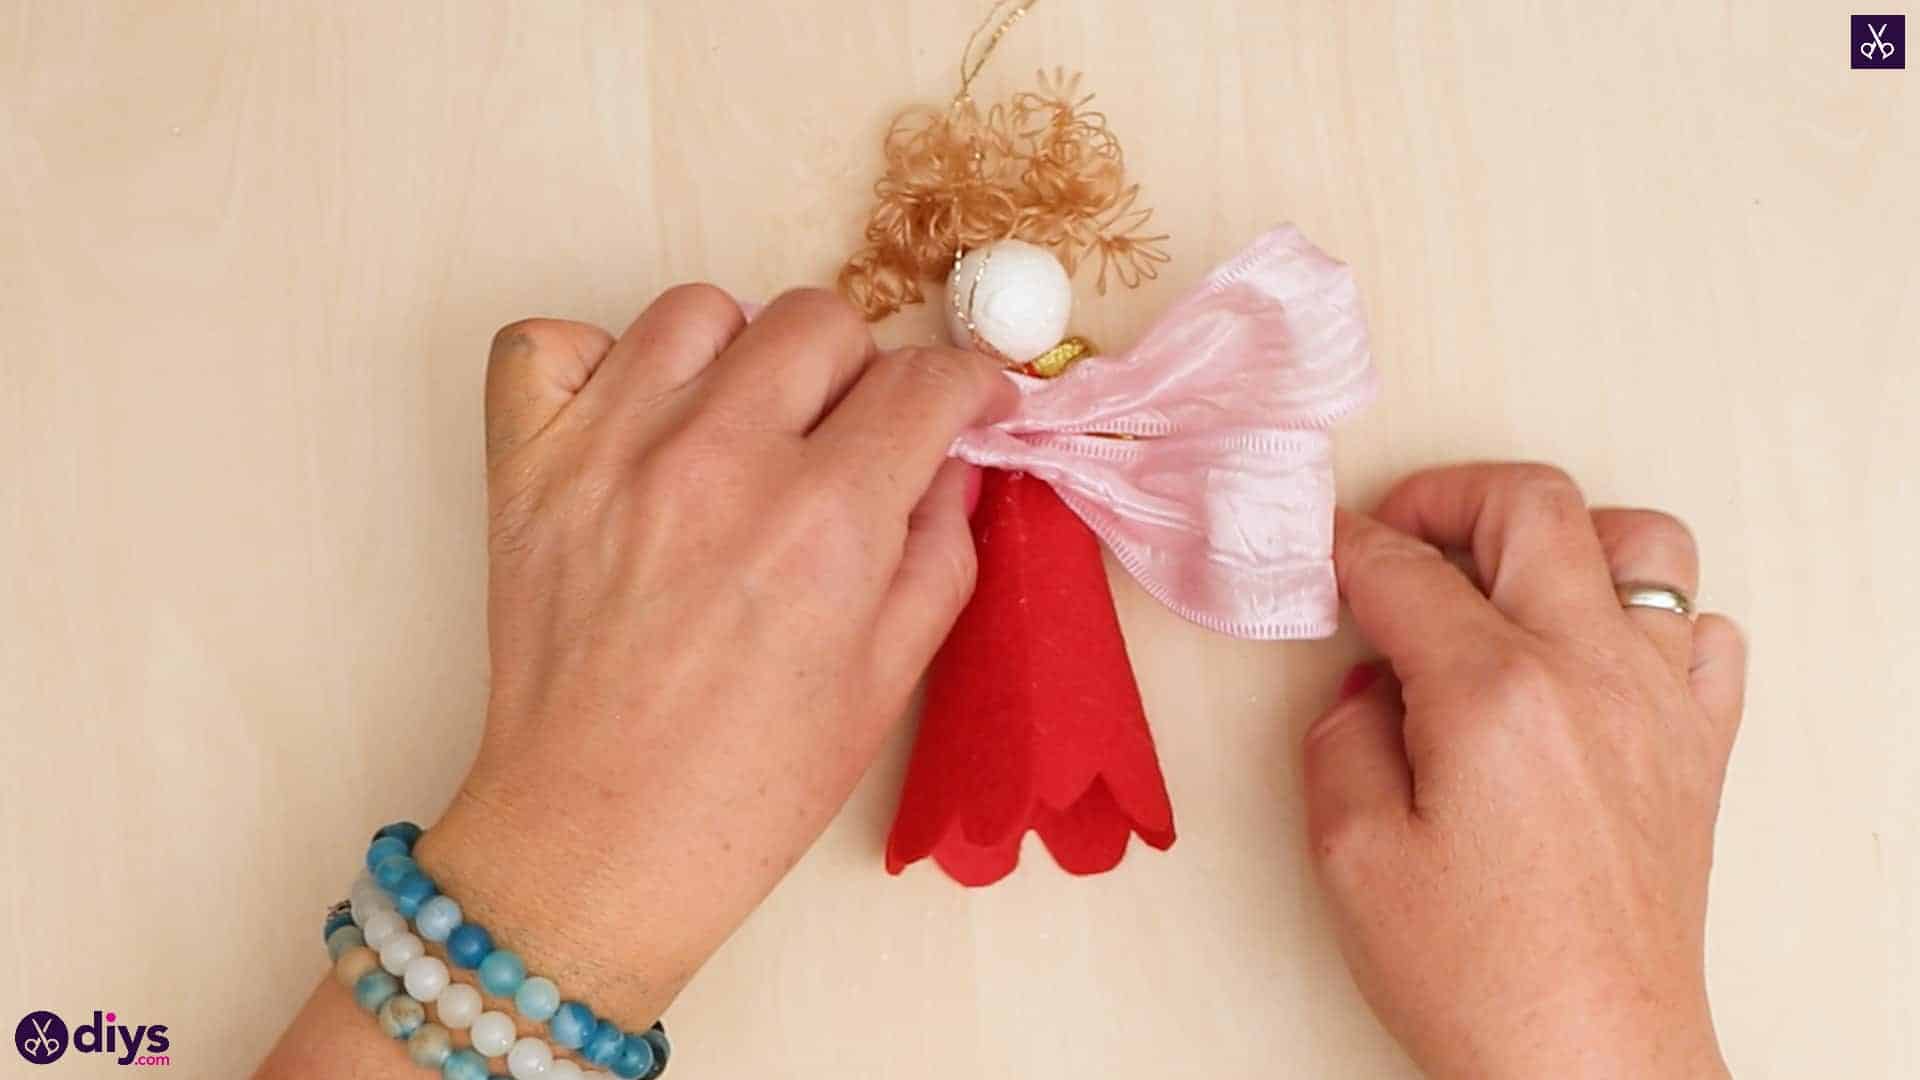
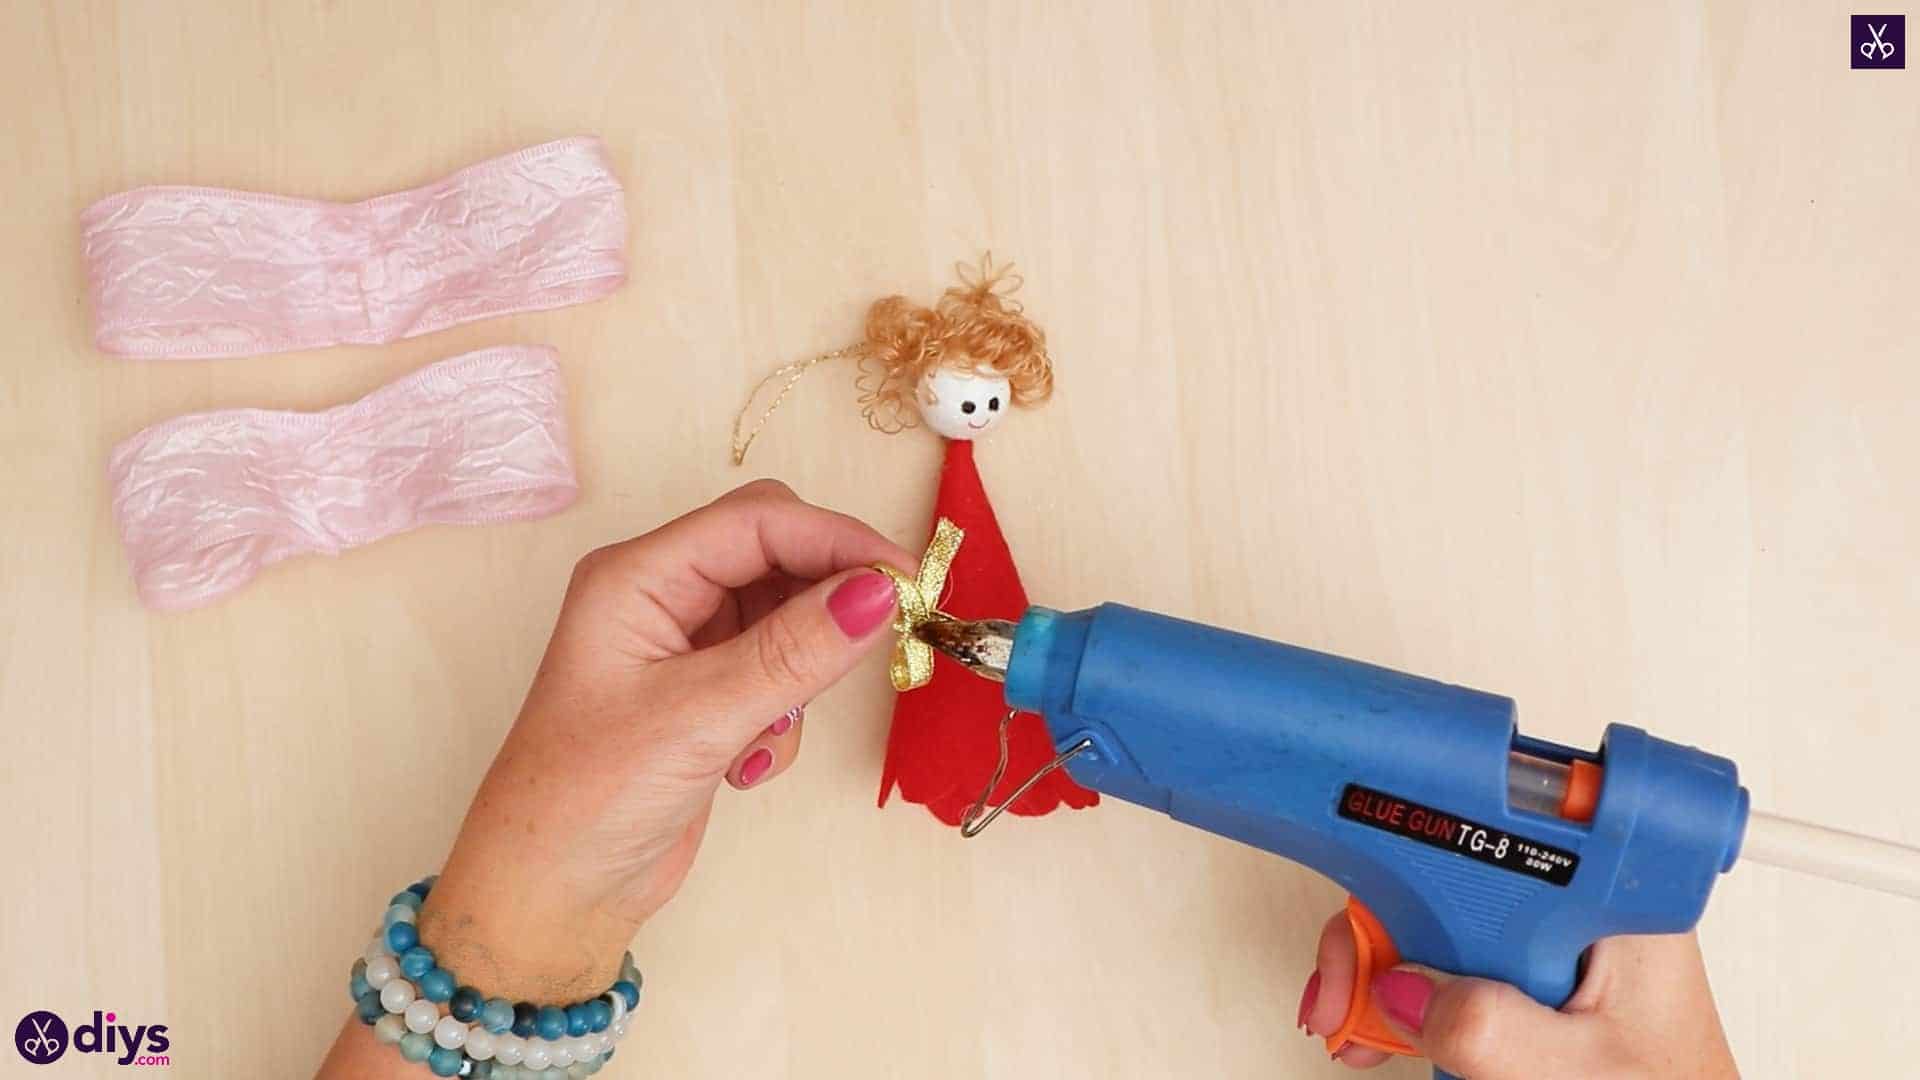
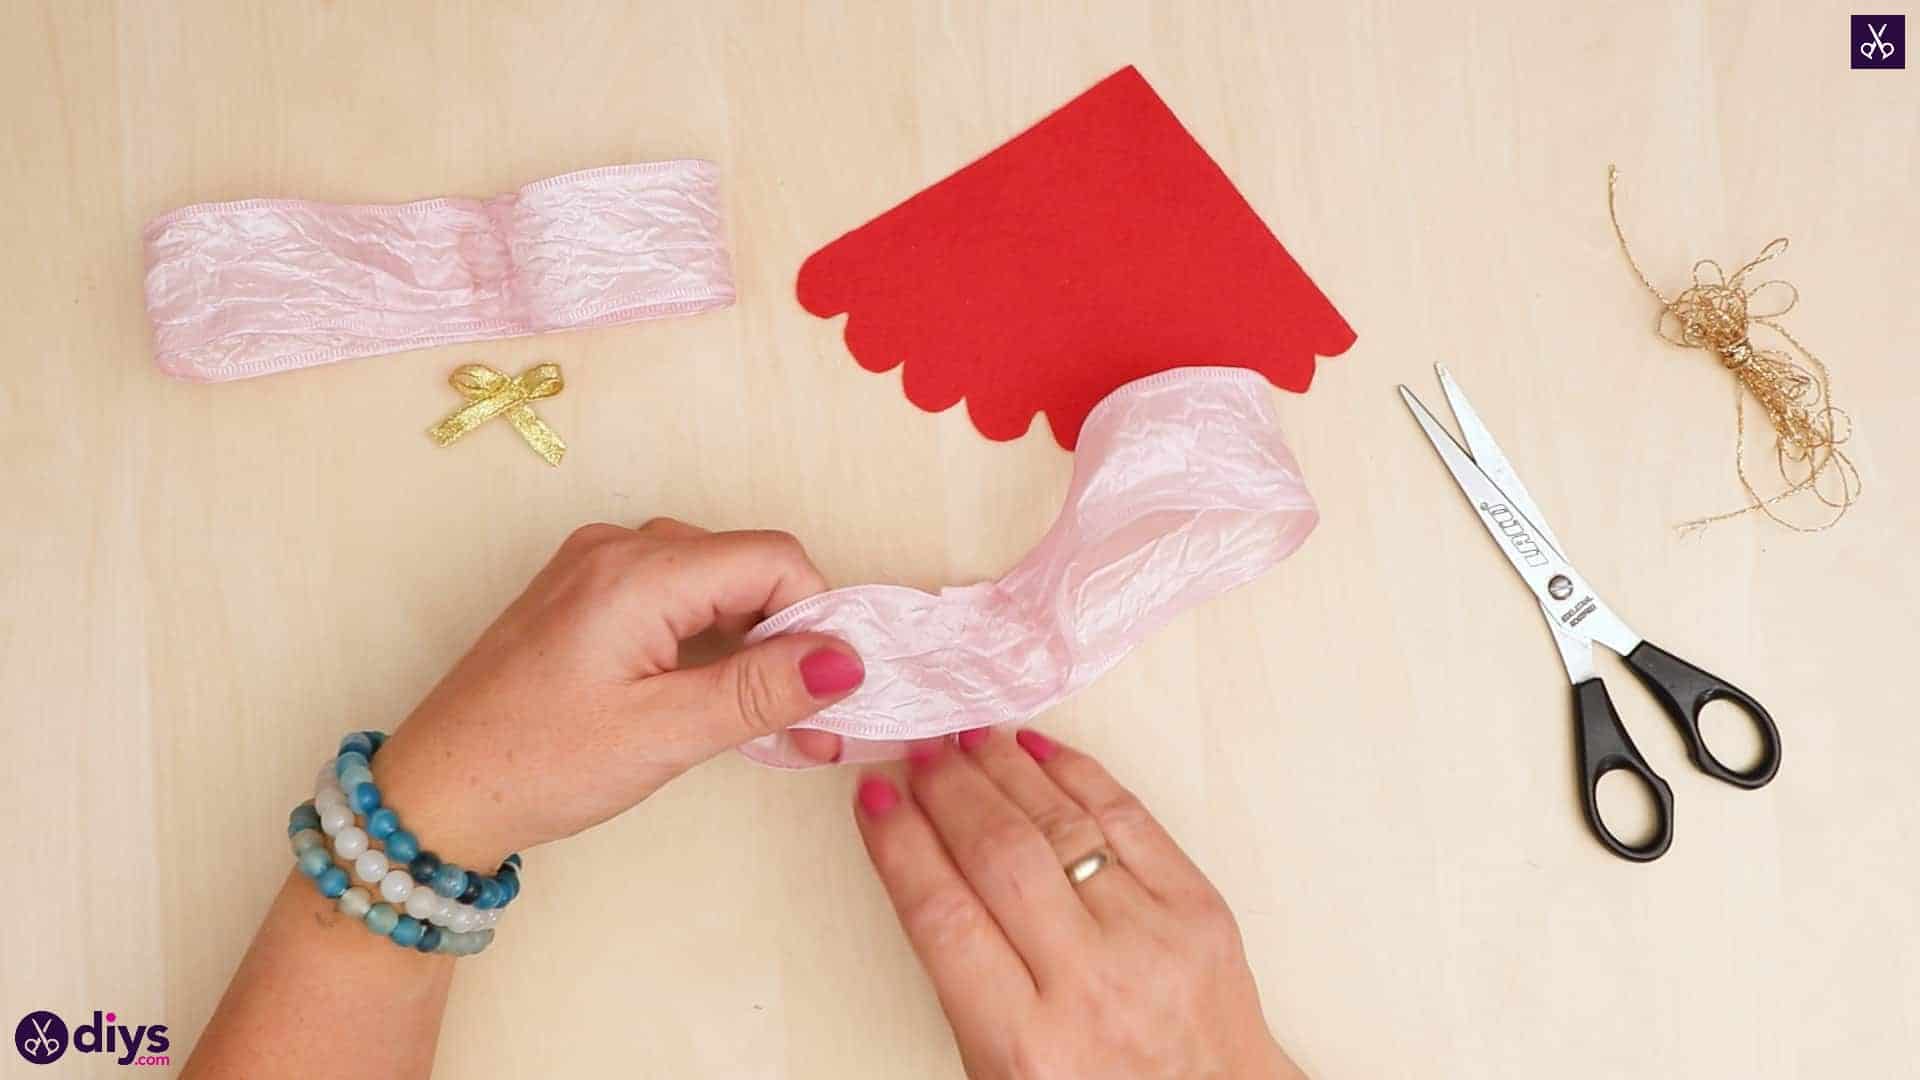
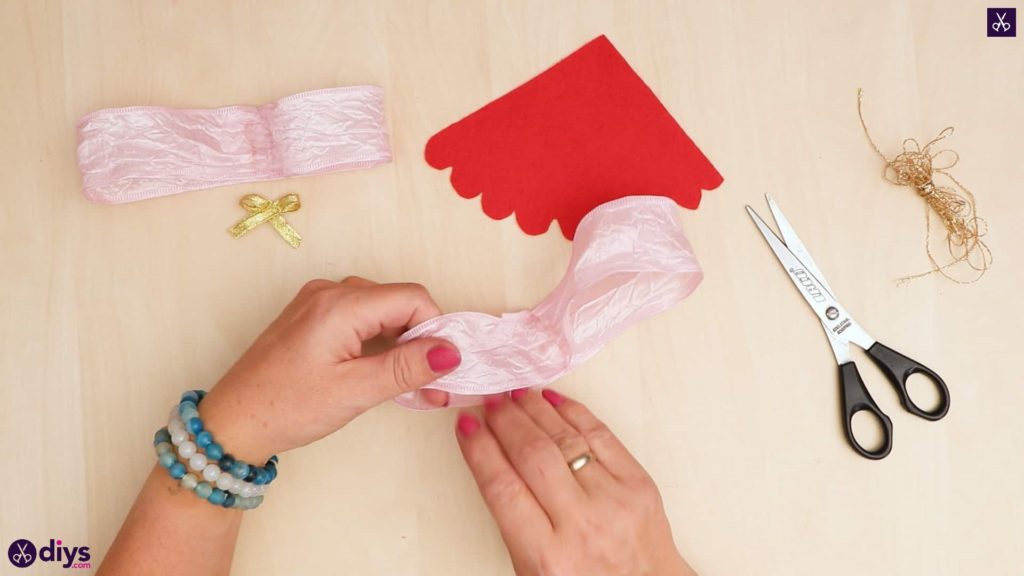
Take your larger pink ribbon and cut a piece about six inches long. Lay it flat and then bring each end inward, curving towards the middle, and glue each one down. You now have a loop on each side. Repeat the process with the rest of your ribbon, or a piece of about the same length, so you have two pairs of loops.
Step 8:
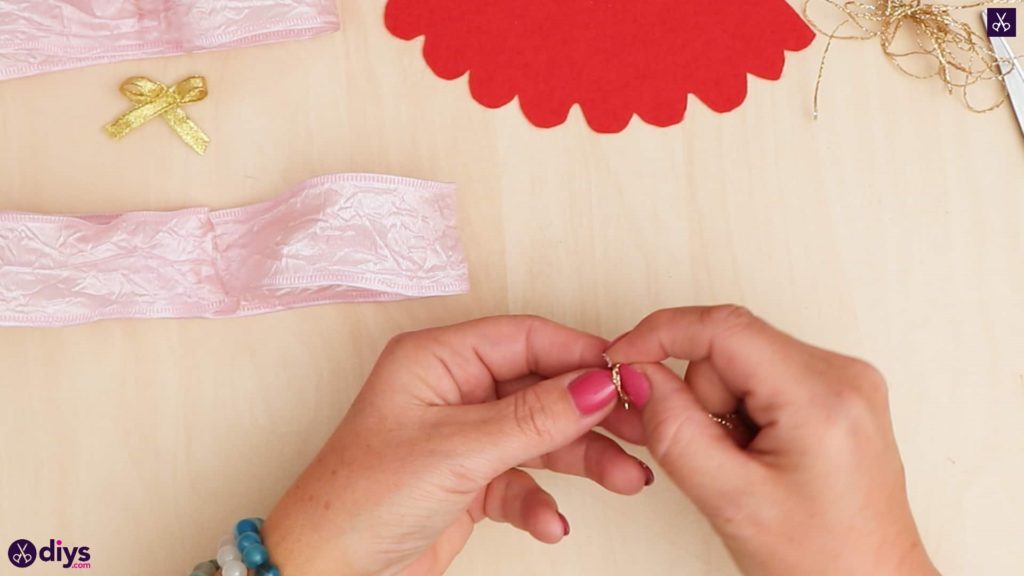
Cut a piece about four inches long from your gold thread. Loop it in half and tie a not in the loose ends so they’re knotted together. This will be what you hang your ornament from.
Step 9:
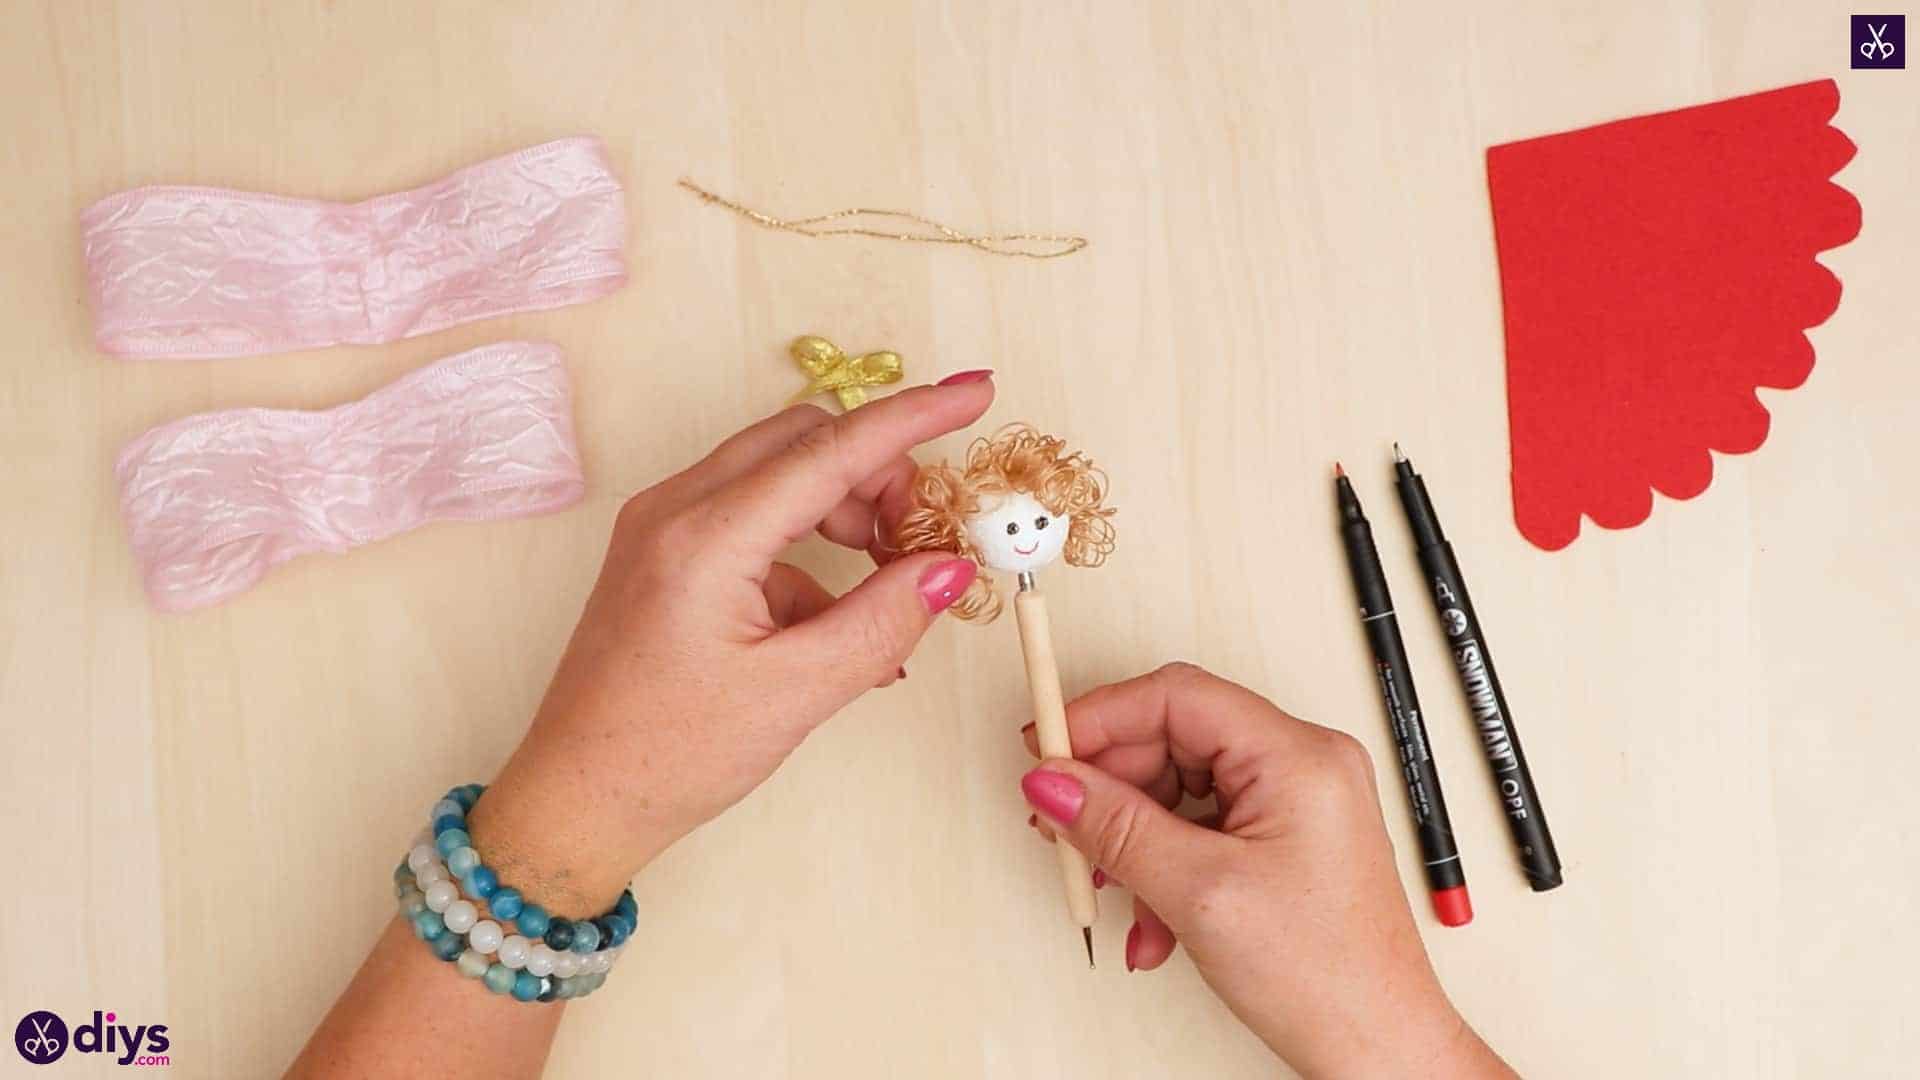
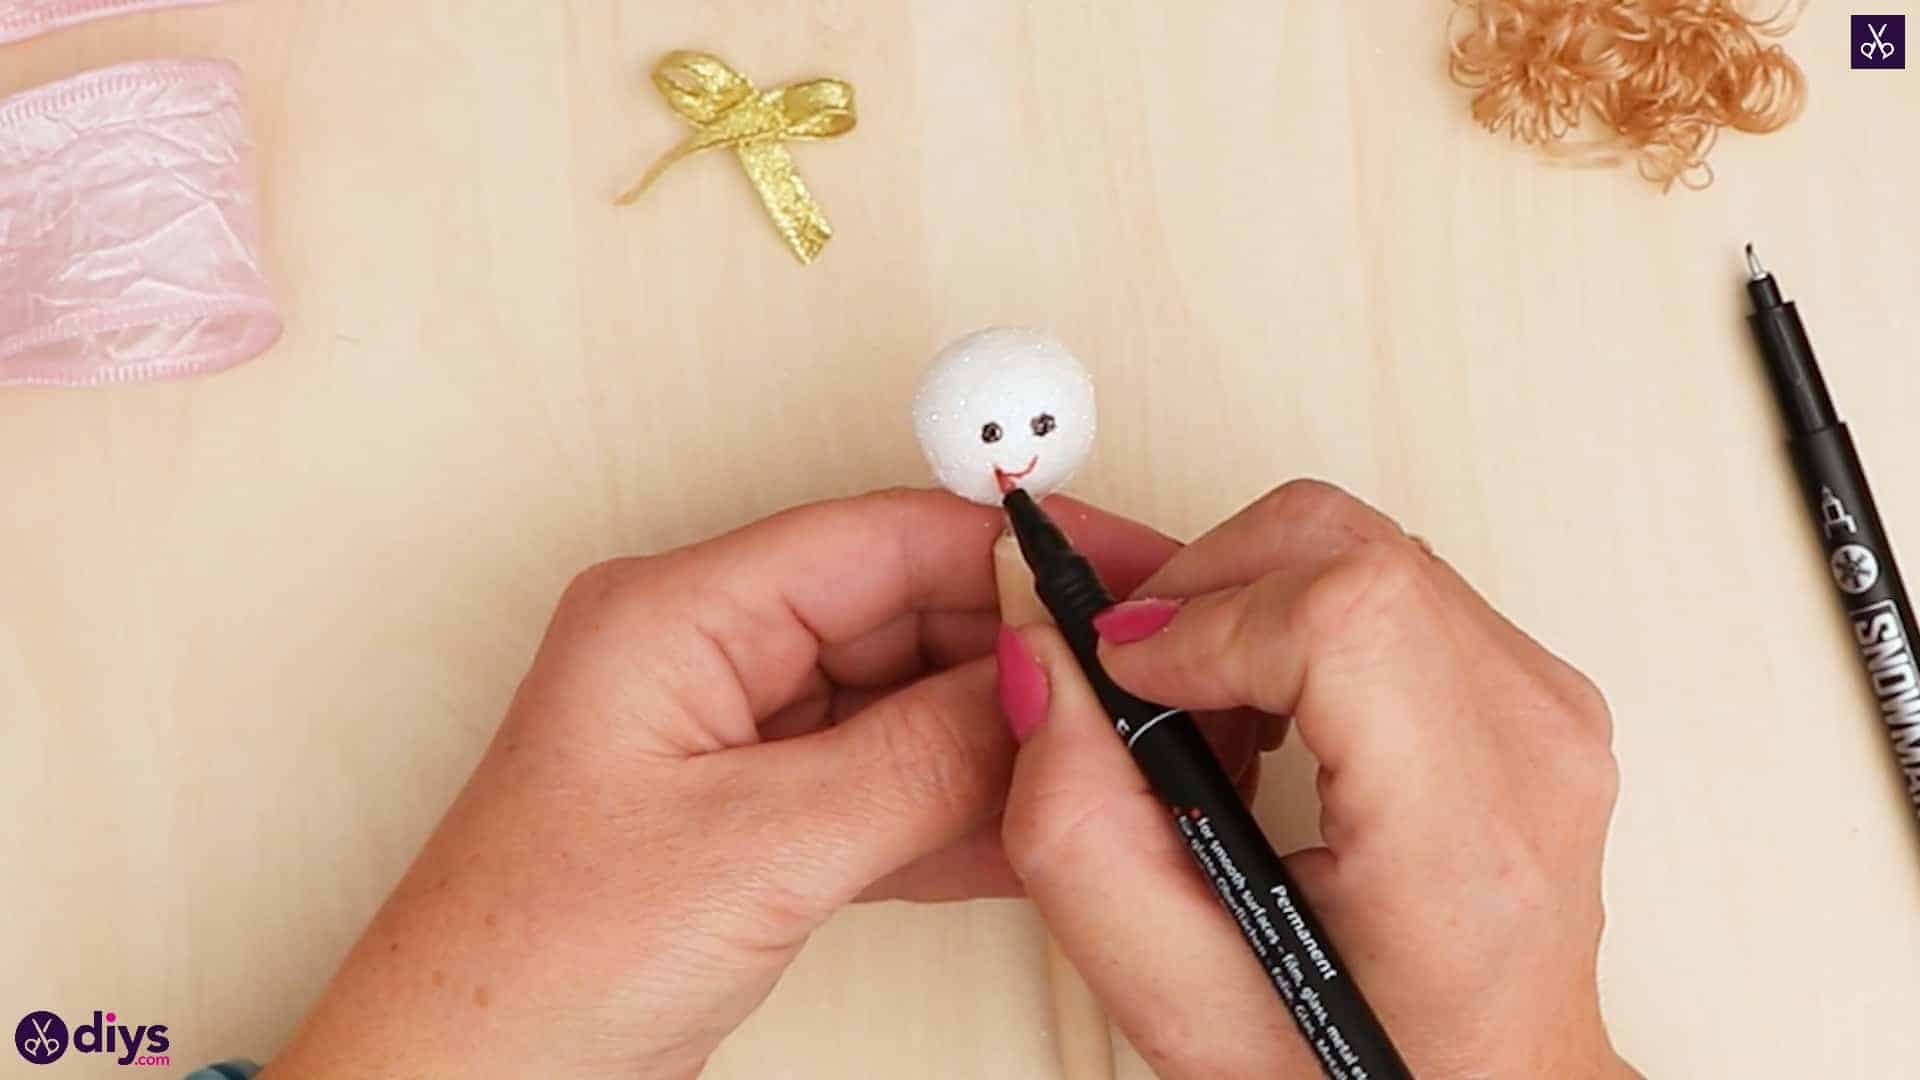
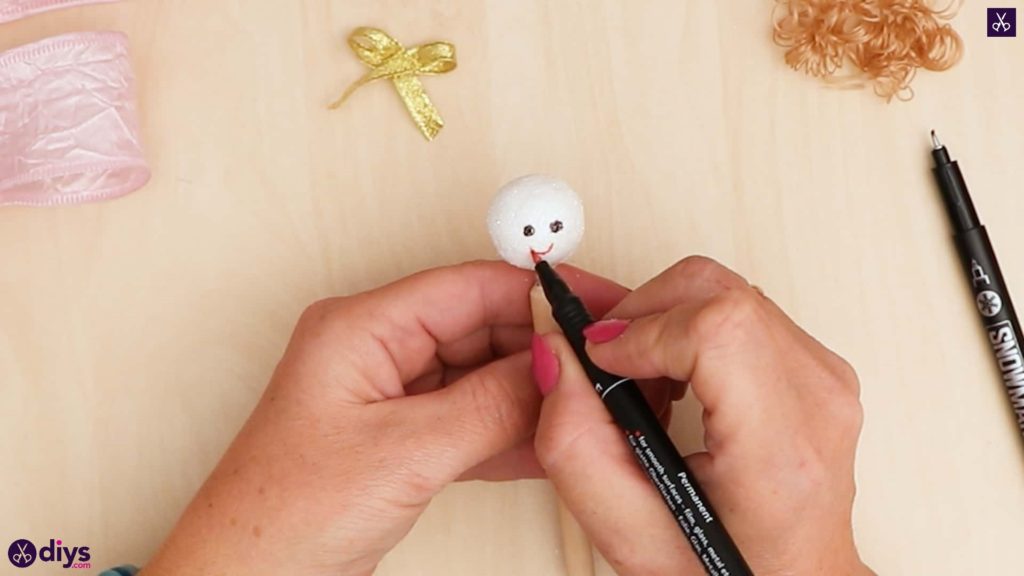
Grab your dotting tool with your glittered white ball on it and use your felt tip pens to draw a face on your doll’s head. I used black for the eyes and red for the mouth; nice and simple.
Step 10:
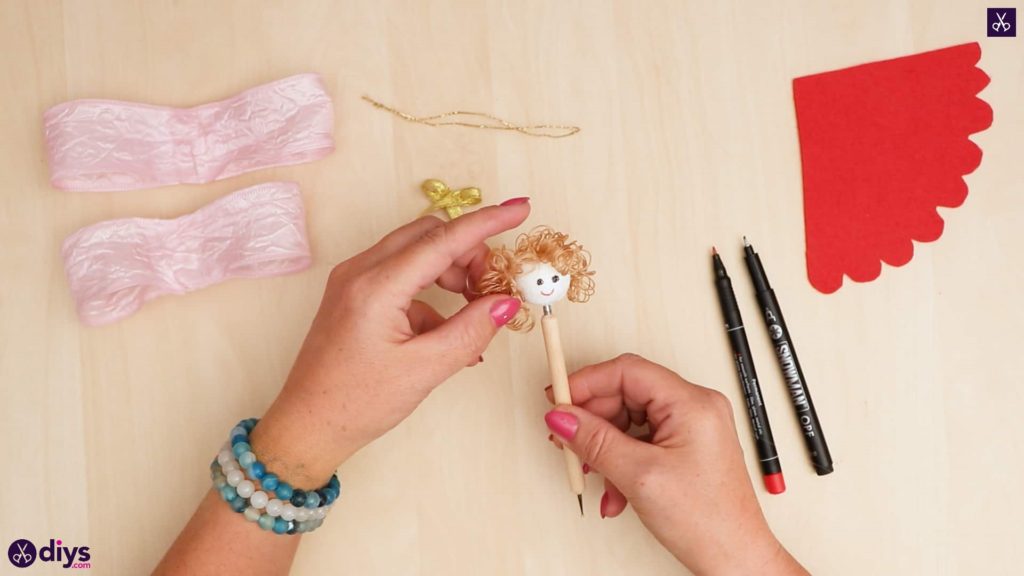
Apply some glue to the top of the head and stick your doll hair down. I chose curly hair this time but you can get all different kinds of dollar hair in crafts stores, or even use yarn or embroidery floss.
Step 11:
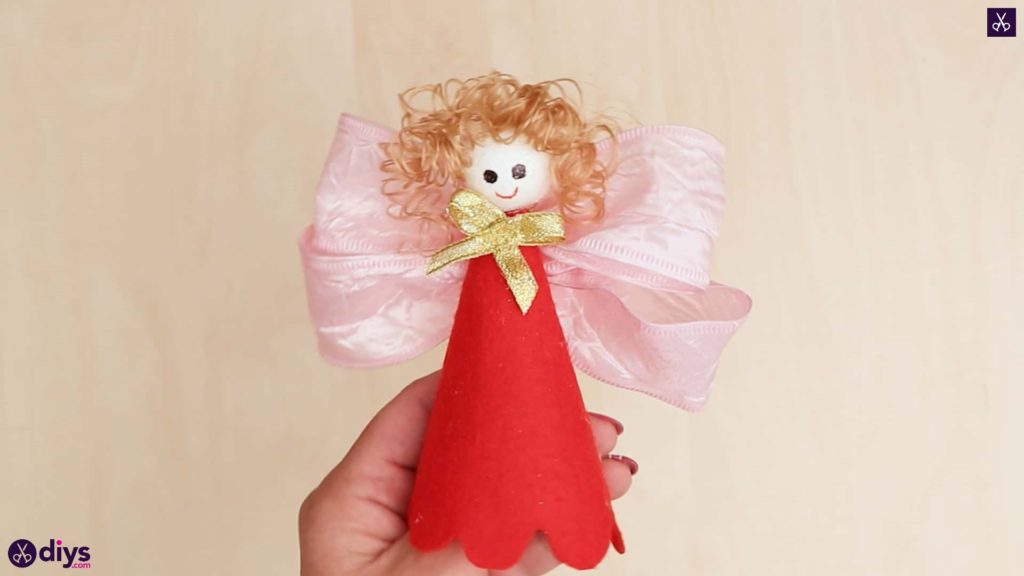
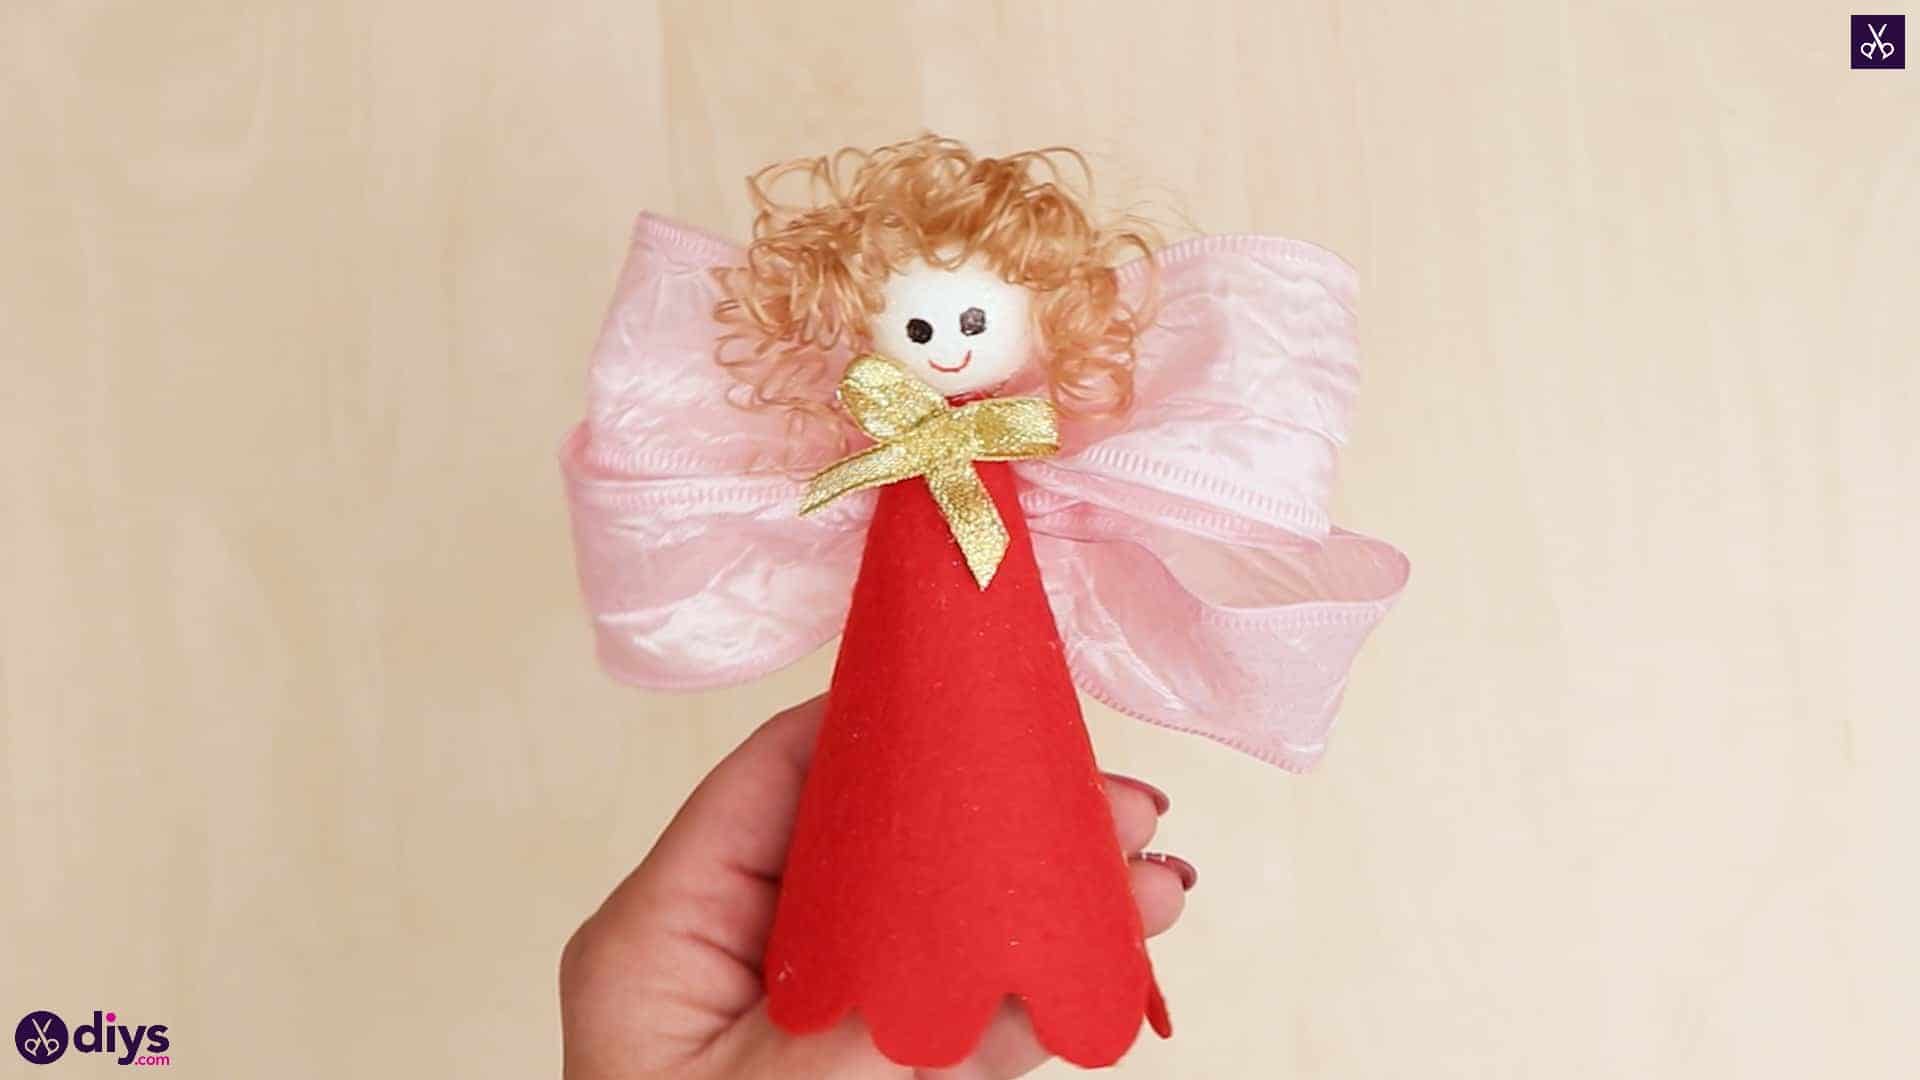
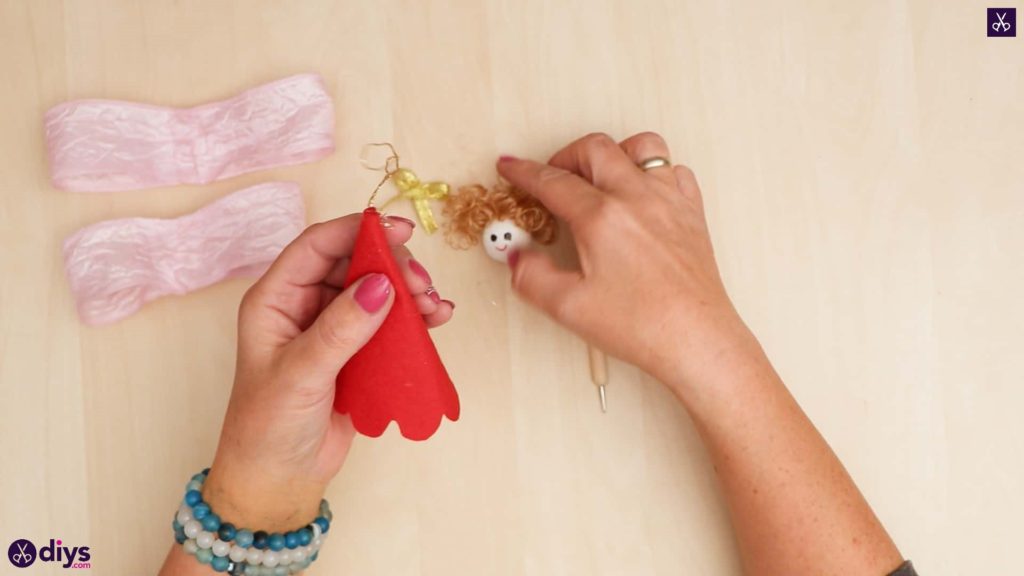
Apply glue all along one of the long, straight edges of your scalloped red paper from before and curve it towards the other edge so it forms a cone shape. Press this edge into the glue. You now have a cone dress with a lacy bottom edge!
Step 12:
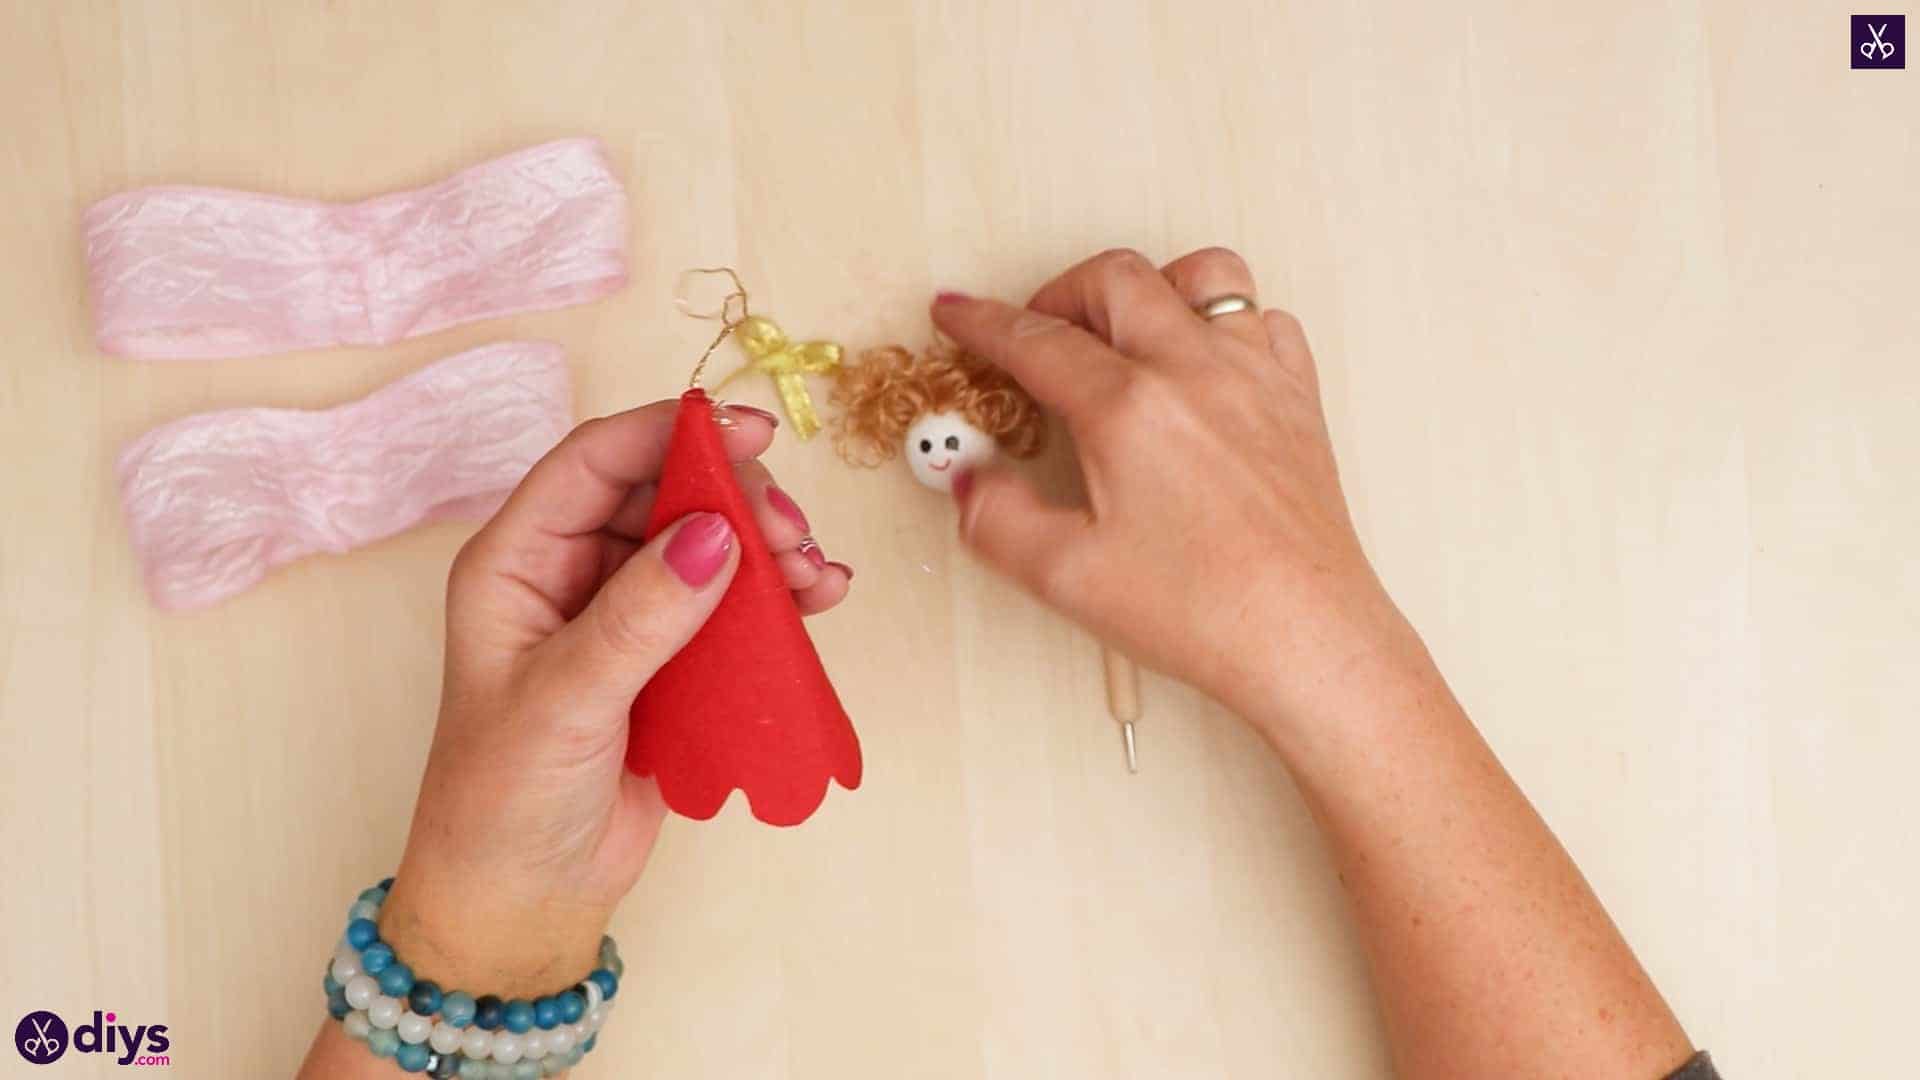
Apply glue to the top point of your red cone, as well as a tiny bit down the back at the same of where the edges met. Stick the ends of your gold thread loop into the glue by the back seam and then stick your head onto the cone tip at the top.
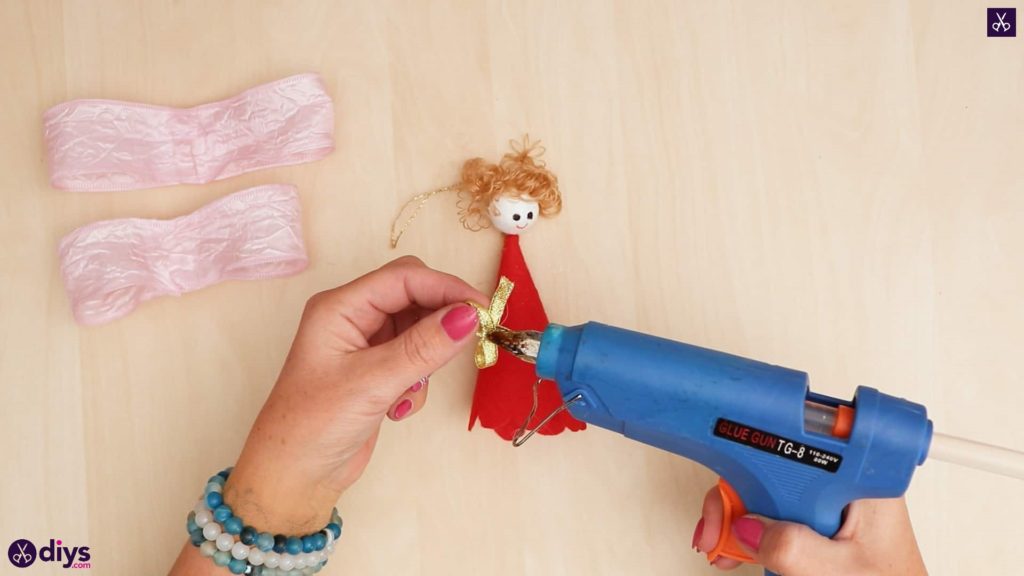
Step 13:
Apply glue to the back of your little gold bow and stick it under your doll’s chin like a pretty collar or dress tie.
Step 14:
Pick up each of your pink looped ribbon pieces and pinch them in the centre. Apply glue there, right in the middle, and stick each one down on the back of your tall, at the top of the red cone under the doll’s head. The loops will stick out the front like the doll is wearing a fancy holiday dress with a big, lovely bow on the back.

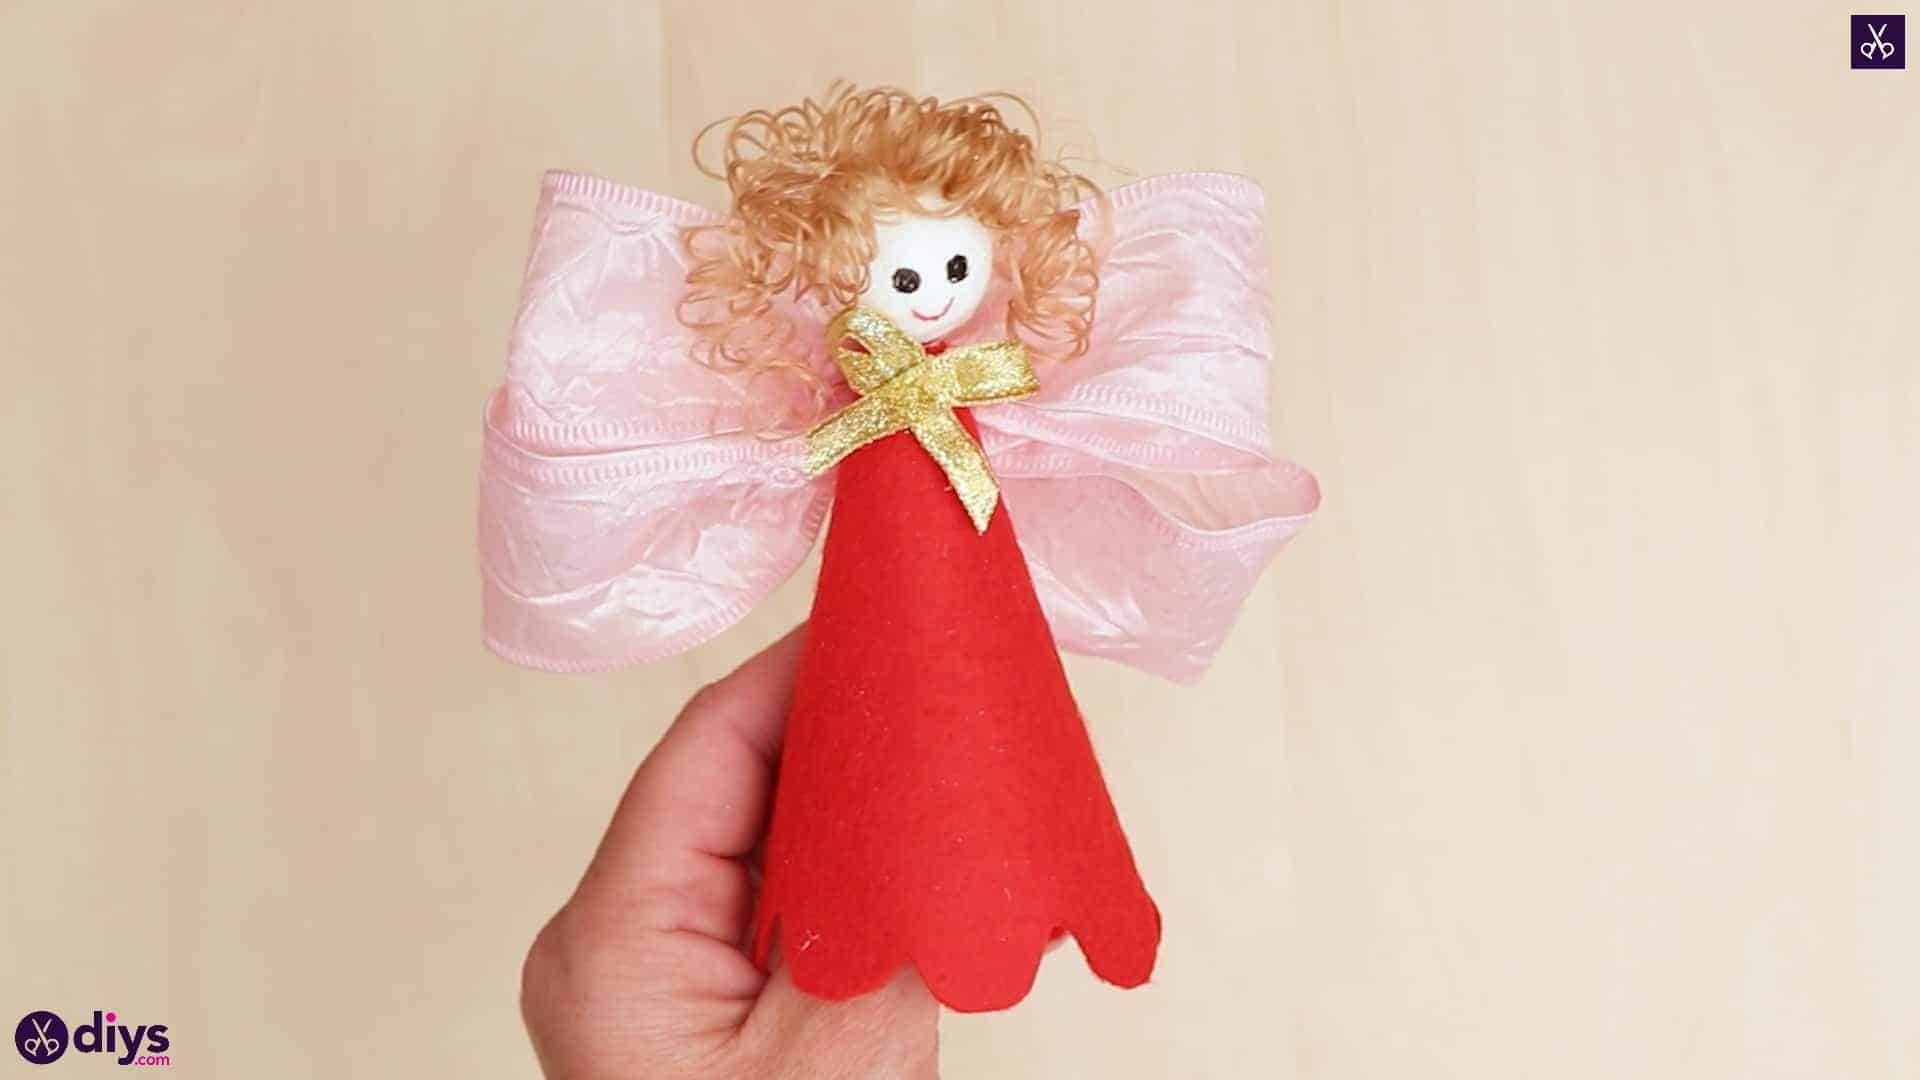
Voila! Your doll ornament is officially complete. Just in case you’d like to try this project out for yourself, here’s a fantastic tutorial video to help you!