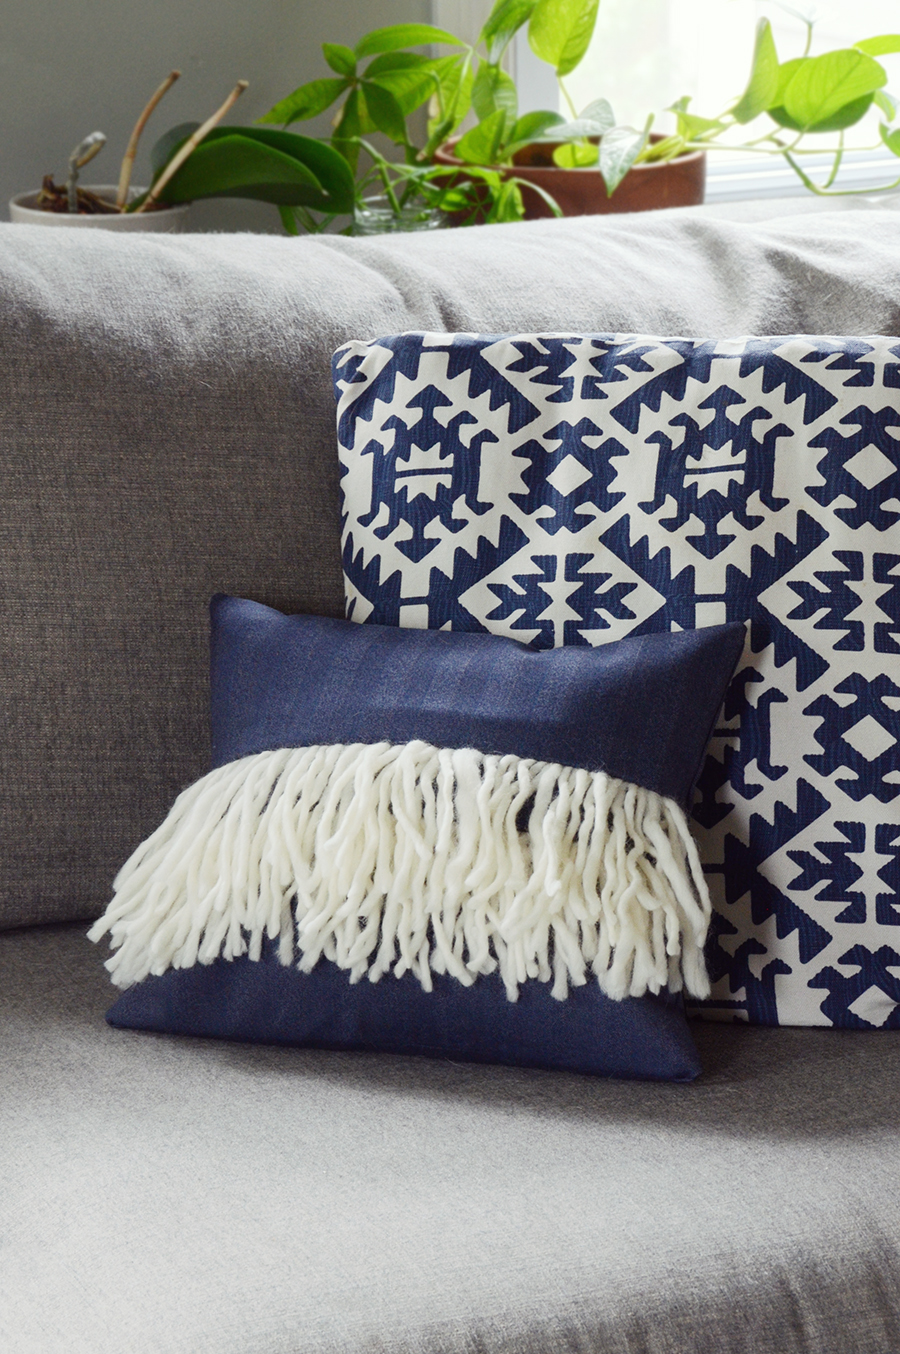
DIY Boho Fringe Pillow Cover
Updated on June 25, 2021
Fringe is super popularthese days, thanks to its unique texture and slightly bohemian vibe… so today we’re showing you how to adorn a throw pillow with it. Just grab some fabric, some yarn and a few other materials and you’ll be ready to go. So let’s get started!
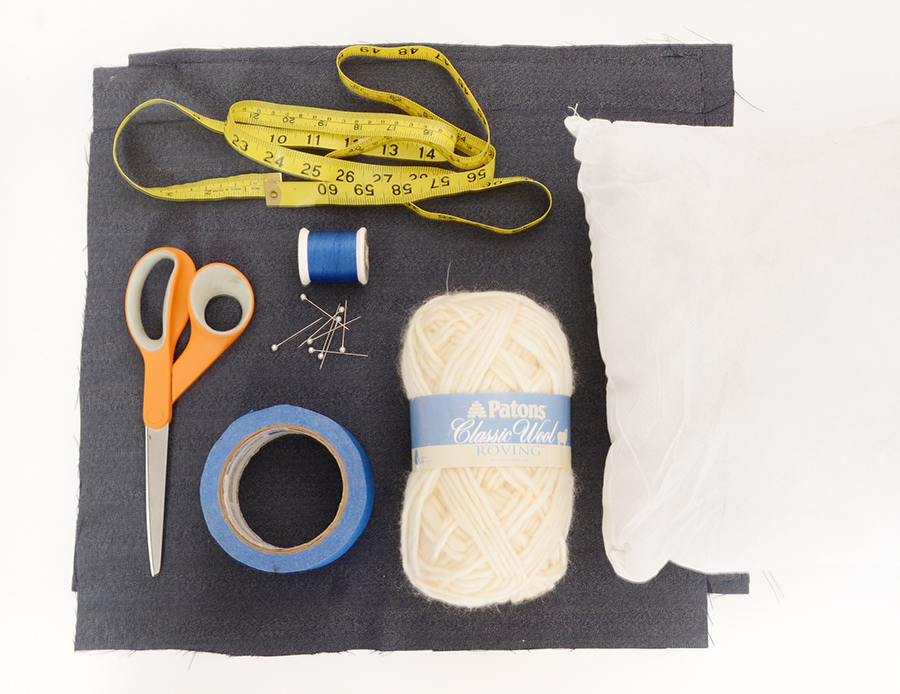
Here’s what you’ll need for your fringe throw pillow cover:
- 10×11.5 inch pillow insert
- (2) 16×12.5 inch piece of non-stretchy fabric (I used a light wool blend)
- Thick yarn or roving
- Scissors
- Tape measure
- Pins
- Painter’s tape
- Sewing machine and thread
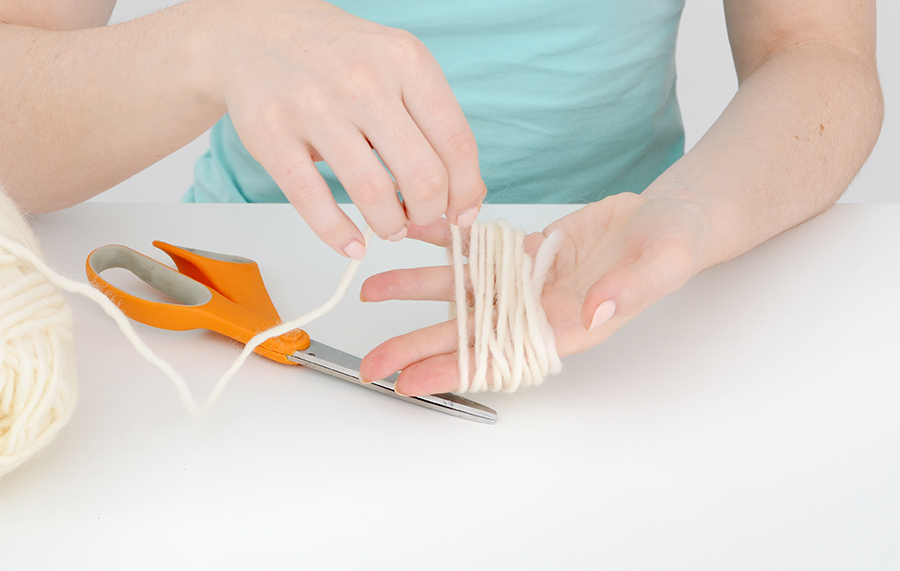
Step 1: wrapping yarn
Begin by wrapping the yarn around your hand over and over again, to create lots of equal-length loopsof yarn.
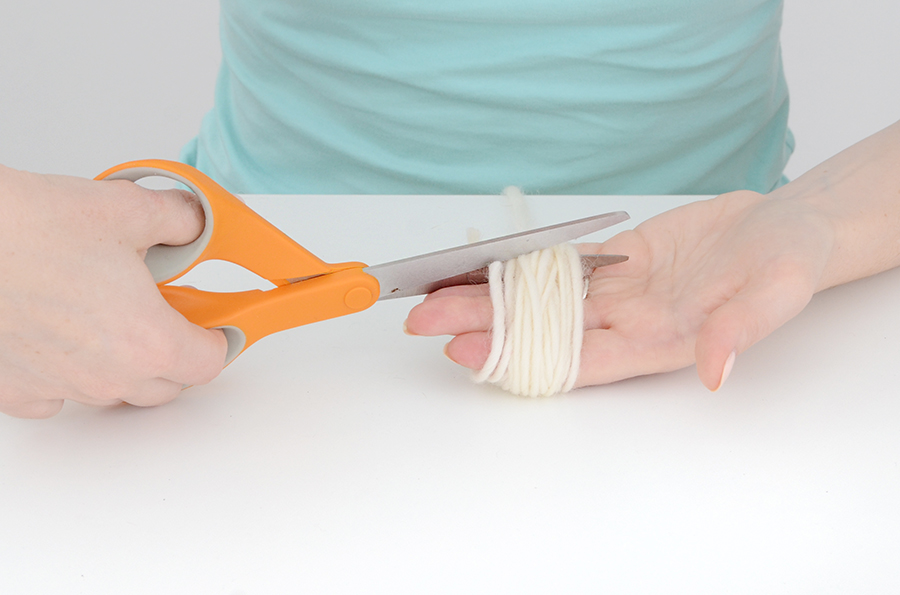
Step 2:cutting
Carefully cut through the cluster of yarn in one spot. You should now have a handful of yarn pieces that are all the same length. Repeat this process a couple more timesuntil you have a decent sized pile of yarn.
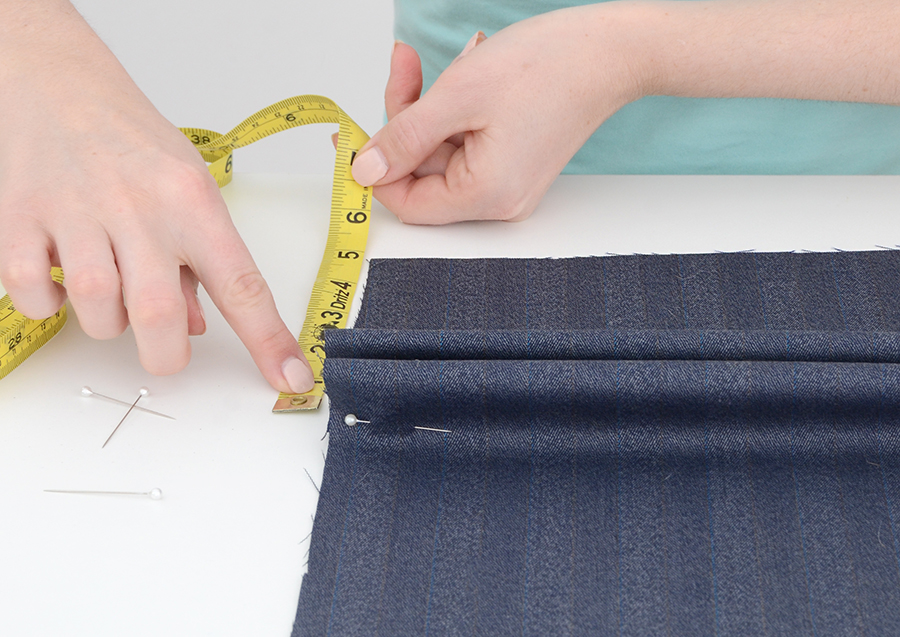
Step 3: lay down fabric
With one piece of fabric laid out in front of you so that the long edge is vertical, measure up from the bottom 5 inches. Fold 3/4 inch worth of fabric and pin it in place all the way across. Then measure down 5 inches from the top and do the same thing.
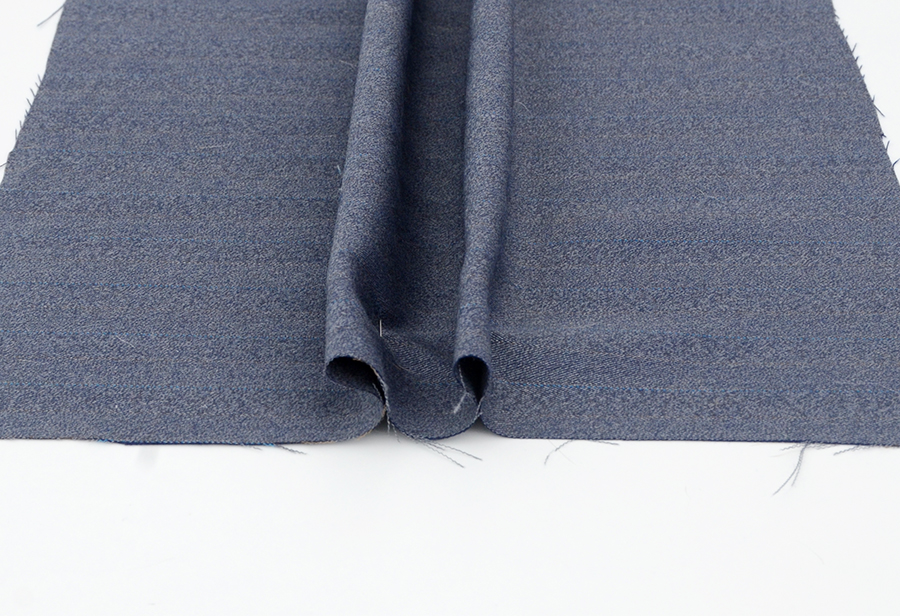
It should now look like this when you turn it sideways. Flip it over so these folds become little pockets.
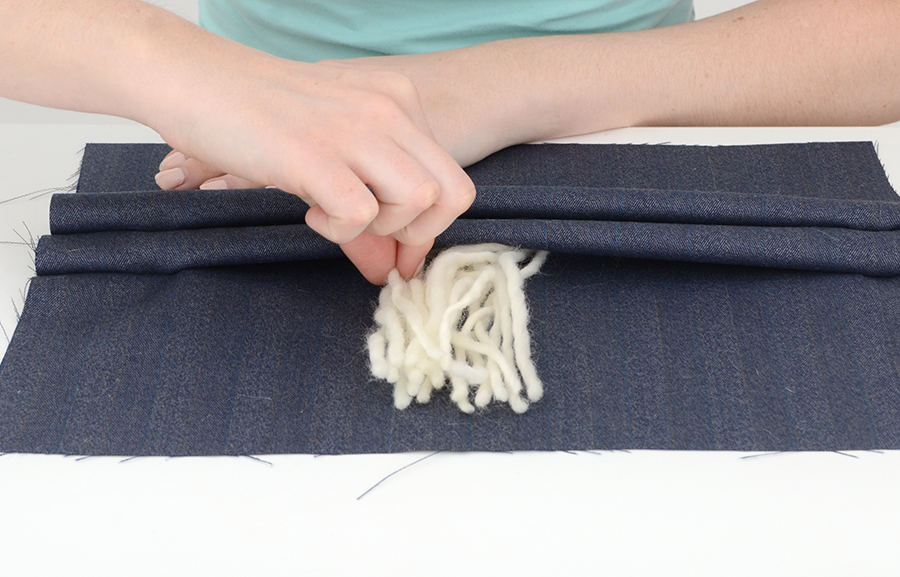
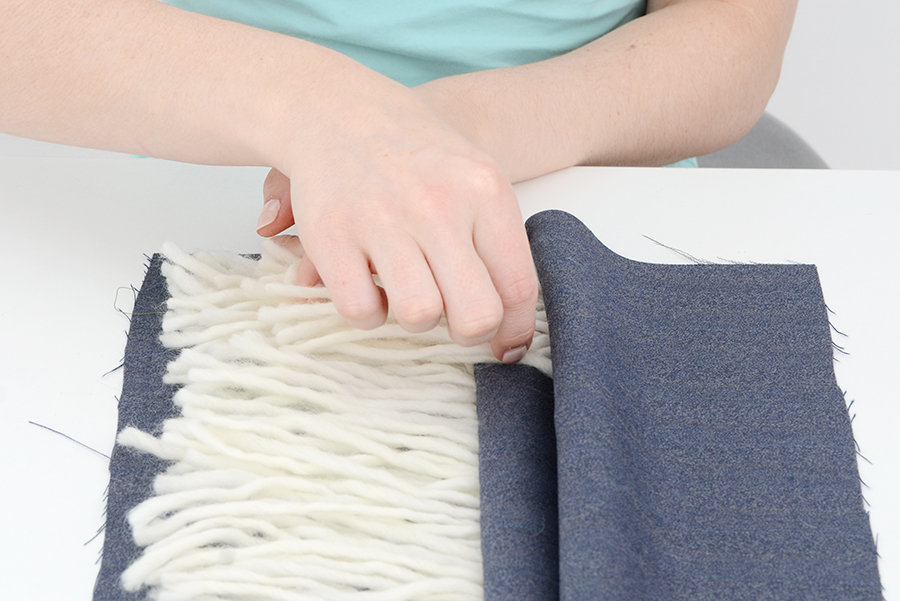
Step 4:bottom yarn
Begin slipping the yarn pieces into the bottom pocket, as shown above. Insert yarn all the way across. Tape the yarn in place with painter’s tape.
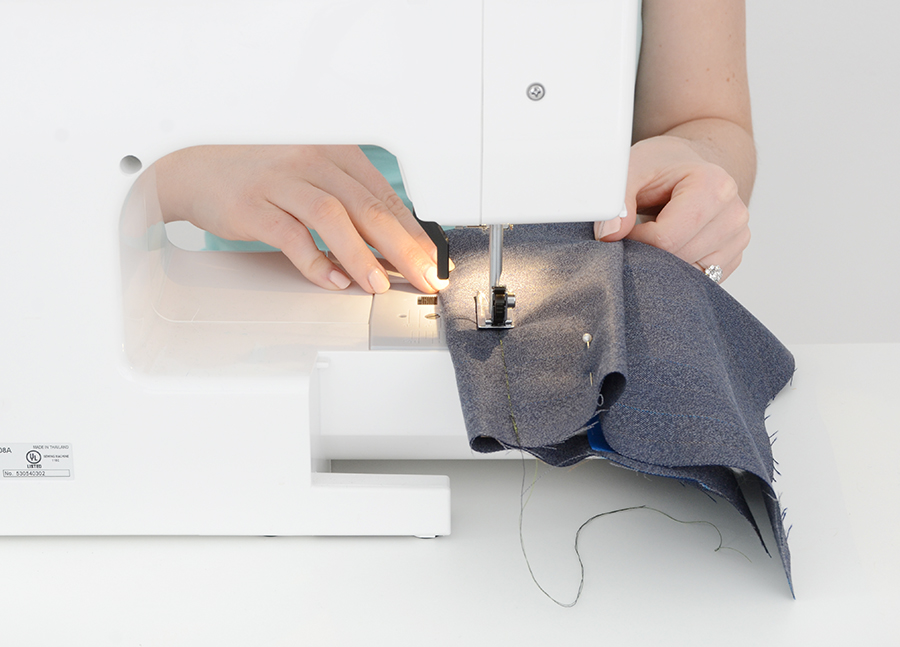
Step 5: sewing process
Holding tightly to the fold where the yarn is, flip the piece so it looks like the image above and sew down the pocket with a 3/4 inch seam allowance. Make sure that the stitches are small so that you secure all of that yarn.
Step 6: flipping
Flip it back over and open it up, and slide the rest of the yarn into the top pocket. Cut more yarn if you need it. Make sure the yarn goes all the way across.

Step 7: sew the second pocket
Flip it over and sew the second pocket with a 3/4 inch seam allowance like you just did. Again, adjust your sewing machine so that the stitches are very small.
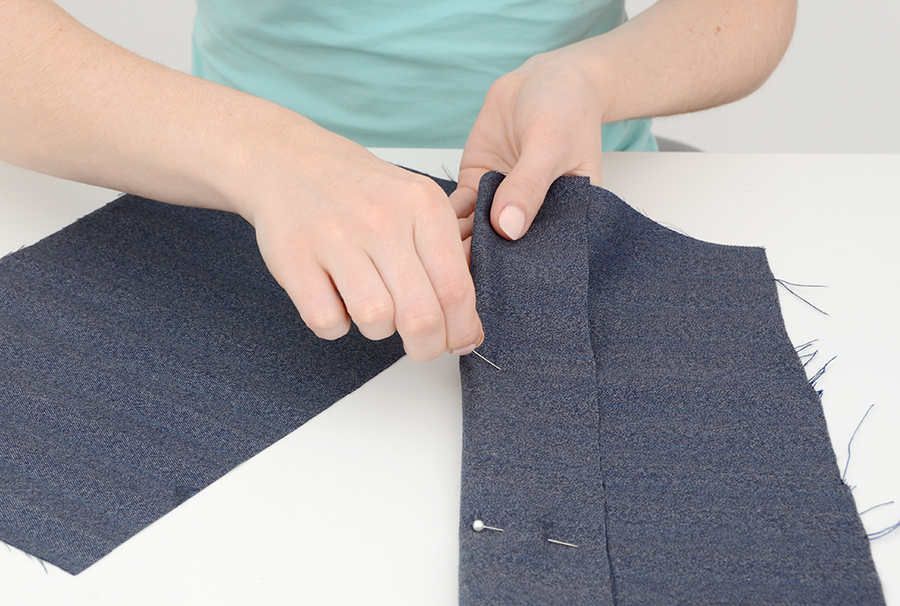
Step 8: the back part
Now it’s time to create the back part of the pillow cover. Cut the second piece of fabric in half, so each piece is now 8×12.5 inches. Fold over one edge by 2 inches as shown above, and sew with a 1.5 inch seam allowance. No need for tiny stitches here.
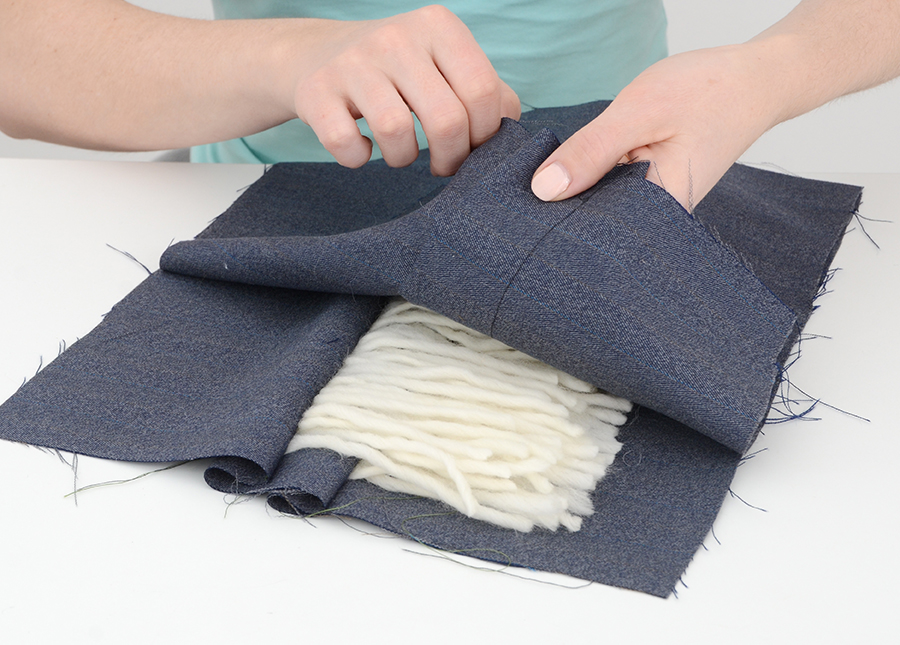
Step 9: assamblation
The last step is to assemble all the pieces and sew the pillow cover together. Place the fringed piece on your work surface face up, and then put the back pieces on top with right sides facing down and the piece with all raw edges on top. Pinaround the perimeter, and sew with a half inch seam allowance. Trim any long threads and turn it right side out.
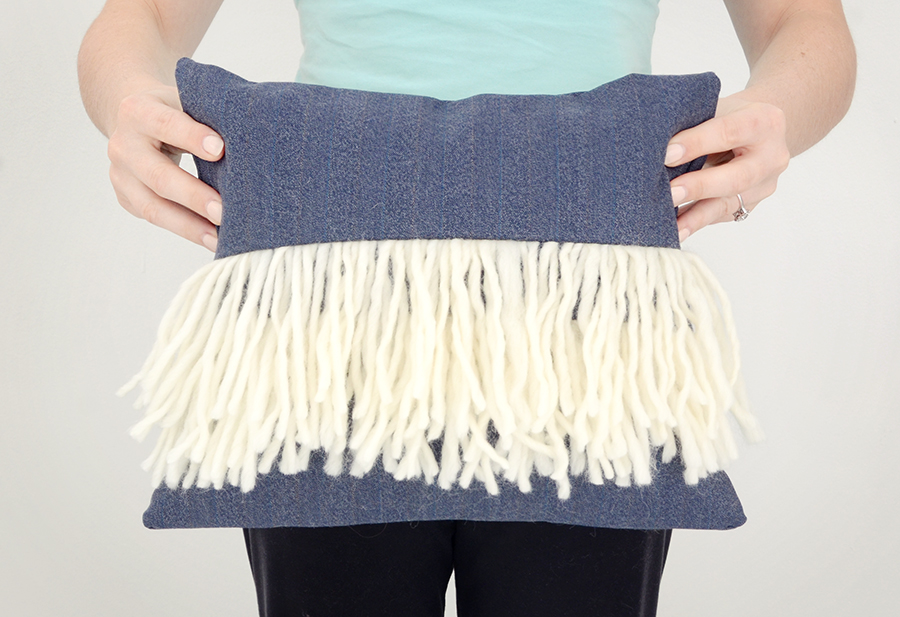
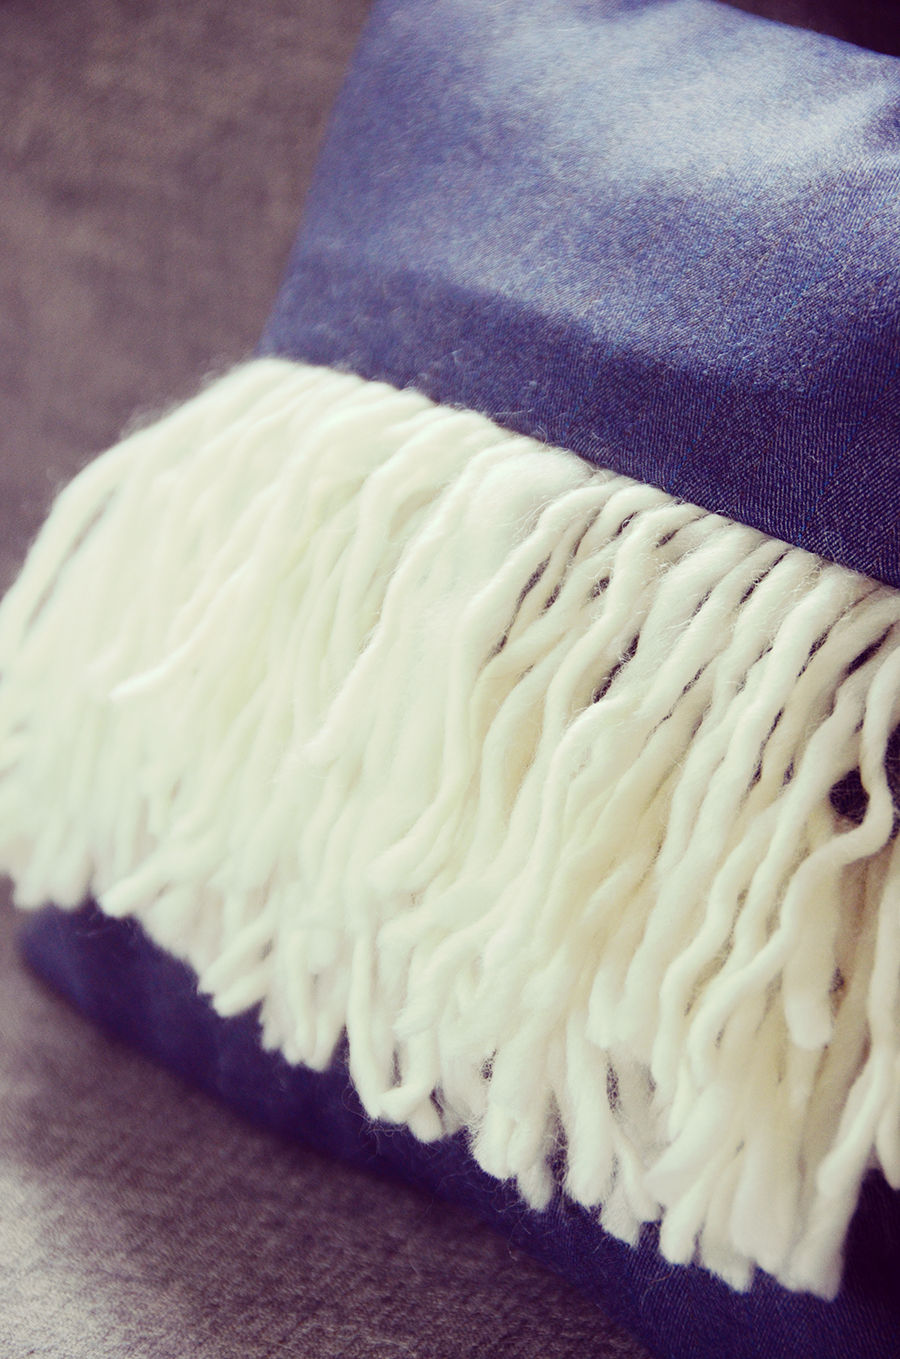
Insert the pillow inside, and you’re ready to display your brand new bohemian style fringe pillow.
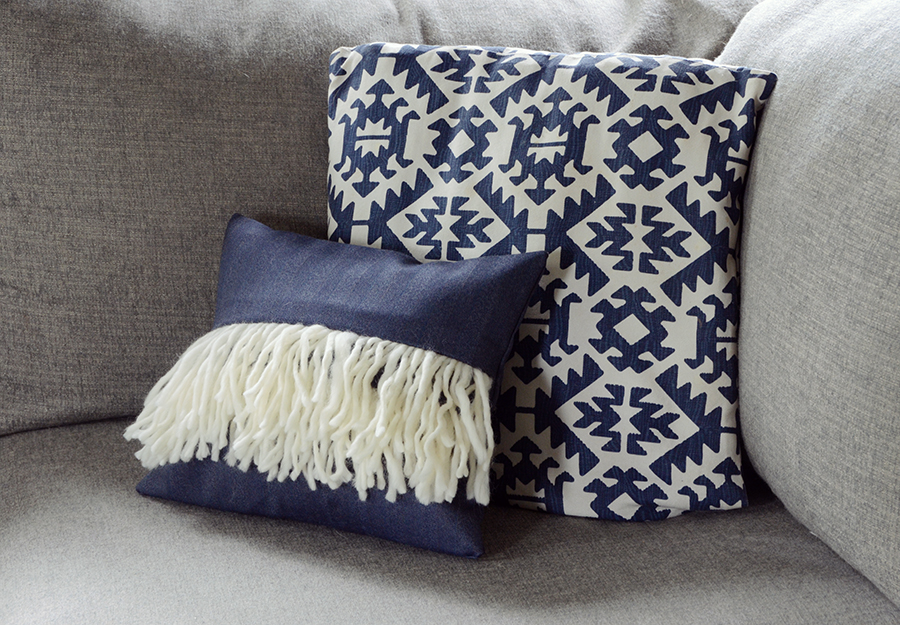
This pillow is super 30unique – odds are it will be a conversation piece the next time your friends come over. Not too many people can say they’ve made their own fringe pillow!
This pillow can be made with printed fabric, and any number of different materials for the fringe. You might try string, cord or even jute twine for a more rustic look. Good luck with your pillow!