Black-Eyed Peas Growing Problems And How To Fix Them
Updated on September 26, 2021
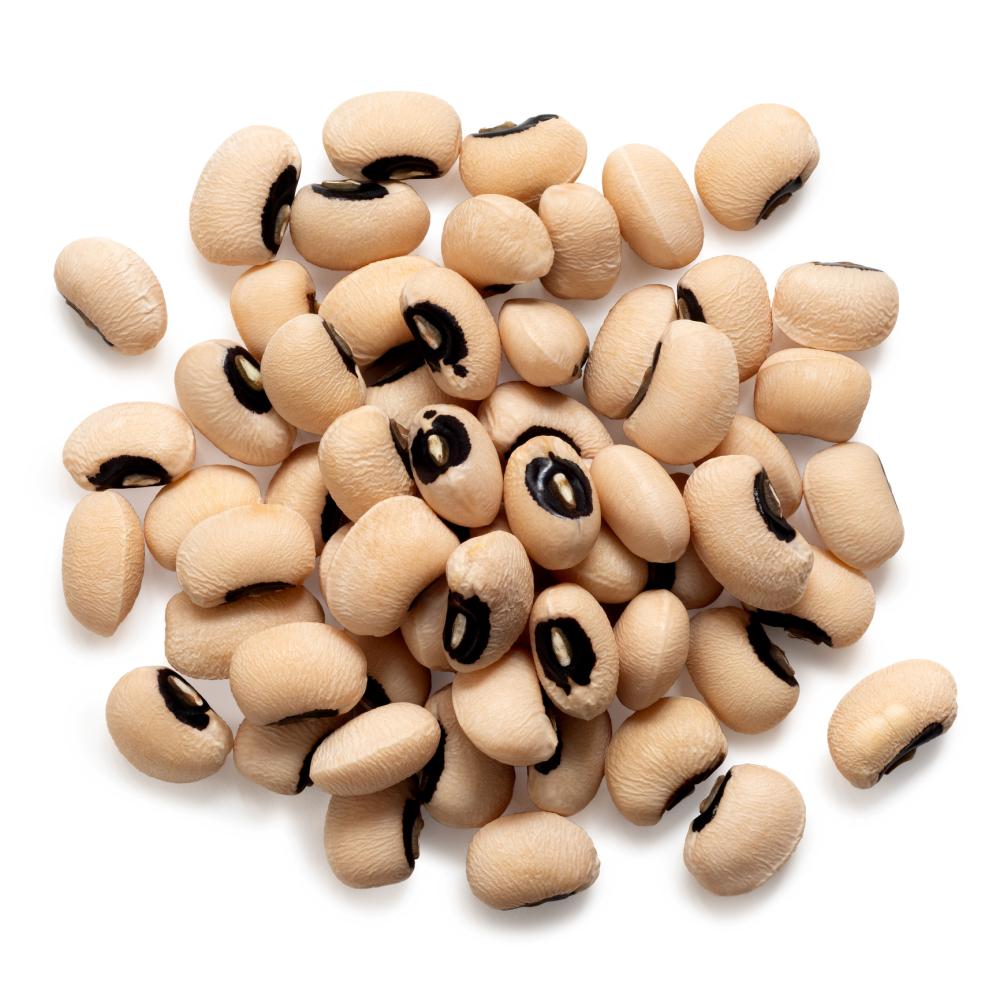
Some people call it black-eyed peas, while others prefer the name cowpeas. And then there are some who call it southern peas. The different names don’t change the fact that these legumes are highly popular and very much nutritious. If you have never planted legumes in your garden before, you can start with the black-eyes peas and enjoy the creamy legumes with a dark spot in the middle.
As with many plants you grow in the garden, black-eyed peas have their fair share of growing problems. The problems even start when the plants are mere seedlings. Diseases and pathogens seem to favor this legume. It’s no wonder then that many experienced gardeners find the legume too bothersome. But after you read this article, you’ll be able to grow this delicious legume and deal with the common black-eyed peas growing problems.
Black-eyed Peas With Burnt Leaves
The leaves of the black-eyed peas are the most sensitive part of the plant above the ground. That’s because it’s exposed to the elements 24/7. Excessive heat, strong wind, heavy rainfall, and dust in the air can all cause some serious damage to the leaves.
This is why the leaves are the first part to look at when checking the health of your legumes. If you notice any discoloration or burnt spots on the foliage, then you might have a problem on your hands. And the reasons for the discolorations are many and varied. It could be chemical fluids, pests, exposure to the summer sun, dry soil, changing pH levels, or lack of enough nutrients in the soil. As you can imagine, this complicates your mission to find the cause of the burnt leaves and remedy the situation before the plant itself is damaged. So let’s see how you can fix this problem.
How to Fix It
There’s no quick fix to the bronzing of the leaves of the black-eyed pea. You’ll probably have to go through a litany of possible causes and fix them one by one until you find the real culprit. Here are a few steps you can follow to fix this difficult health problem.
- Test the pH of the soil and make sure it’s not too low. Garden plants prefer slightly acidic or neutral soil pH because it helps the roots absorb nutrients quickly. Low pH means that the plant will not get enough nutrients to keep the foliage healthy.
- Lack of nutrients such as potassium can cause scalded leaves. Adjust your feeding habits and increase the dosage of potassium to fix this issue.
- Water the peas regularly and provide one inch of water every week. Don’t let the soil dry out since that could cause burnt leaves.
- Many fungi cause leaf spots and, if left untreated, could cause the plant to wilt and die. Check for fungal infections such as Alternaria and Cercospora and treat them with fungicides.
- When they come in contact with the leaves of the legume, concentrated pesticides and herbicides can cause leaf burns. Avoid spraying pesticides where the wind could carry the spray to the legumes.
Black-eyed Peas Curculio Management
When you’re not worrying about the possible cause of leaf burning, you have to look out for some pests that target the black-eyed peas and wreak havoc with the crop. At the top of the list is the curculio. This weevil causes damage throughout its life cycle from the larvae to the adult bug. When the adult female curculio is ready to lay eggs, it times it with the development of the pea pods. Then drills a hole in the pod and slips the eggs inside.
When the eggs hatch, the larvae find the food ready for them and start eating the pod from the inside. To complicate things further, the larvae are harder to detect than the mature curculio. You’ll only notice something is wrong with the crop when you harvest the pods, only to discover that half of them are rotten and empty. So managing this pest should be the top priority of anyone growing black-eyed peas.
How to Fix It
The whole idea behind curculio management is to interrupt the weevil’s life cycle and prevent it from laying its destructive eggs inside the pods of the black-eyed peas. The problem with this approach is that most pesticides in the market are ineffective when it comes to managing the spread of the pest. So your best option is to prevent the weevil from infecting your legumes in the first place. Here’s how you can do that.
- In the fall, do a thorough garden cleaning. Remove all debris, fallen leaves, and dead branches and dispose of them safely. Don’t even use them as mulch since the weevil winters in the debris as it waits for the spring.
- Since the weevil is not prone to fly and stays put in one place, you can prevent infestations by rotating the black-eyed peas and never plant the legume in the same spot two years in a row.
- Plant pea varieties with high resistance to the weevil since that could improve your crop.
- The bug also targets snap beans. So don’t plant the two legumes next to each other.
Black-eyed Peas Cotton Root Rot
Cotton root rot has many names depending on where you live. Sometimes it’s called Texas root rot or southern pea cotton root rot, but botanists call it Phymatotrichum root rot for the most part. The fungus that causes this disease is Phymatotrichopsis omnivoum, and while it doesn’t target black-eyed peas specifically, its damage on the legume can be devastating, especially if you don’t detect it and treat it early.
This fungus also favors soil with high pH. It thrives in clay or loamy soil where the pH is in the high sevens. It also needs warm soil to grow and spread, so it is often most active during the summer in the southern parts of the US.
Since it affects the roots, which are underground, you need to keep an eye on stems for any signs of discoloration. If you see brownish-red spots, there’s a good chance the roots also have the same spots as a symptom of the disease. The plant itself will stop growing as the disease spreads and looks stunted. In severe cases, the leaves will turn yellow, the stems wilt, and the plant succumbs to the disease.
How to Fix It
Unfortunately, by the time the first reddish spots appear on the stems, the disease has already taken over the plant’s root system and damaged most of the root ball. So relying on treatment alone is ineffective since the treatment needs to start as soon as the fungus attacks the roots.
Your best option is to grow seeds that have been treated with pesticides. Some good-quality seeds have already been exposed to Arasan. This fungicide can limit the spread of the fungus. A similar fungicide, Terraclor, can improve the legume’s resistance to the disease, so you can apply it to the soil when sowing the pea seeds.
While caring for the black-eyed peas, avoid sprinkling water on the stems or leaves of the plant, and don’t let the soil come in contact with the lower stems.
Black-eyed Peas Rust Disease
Rust disease in black-eyed peas is no laughing matter. It’s as serious as cancer and can limit the crop and prove fatal for the plant. And since it infects every part of the legume above ground, you can imagine the devastation it causes.
During the peak of summer and with the help of high humidity, the fungus Uromyces appendiculatus strikes the legumes hard. The first signs are yellowing leaves. At first, it’s the lower leaves near the base, but soon the top leaves turn yellow as well. Then brown nodes appear on the stems, which is a sign that the disease is spreading quickly.
As the legume struggles with the infection, there’s little energy left for flowering and pod production. Even the few pods that develop are usually covered with brown spots, which render them inedible. The young pods, which are usually sweet and tasty, become bitter. Even the inside of the stems turns brown as the infection spreads to every part of the plant.
How to Fix It
Like many fungal infections that attack the black-eyed peas, it’s always better to prevent the disease than try to fight it. Following that reasoning, you should take precautions such as cleaning up the garden and getting rid of debris.
The fungus winters on debris, as is the case with many fungal spores and waits for the temperature to rise in the spring. Also, buy good quality seeds from reliable sources. They might be a little pricey, but they will save you a lot of trouble and also save your crop.
Always space out the seeds so that the seedlings don’t become overcrowded. Lack of ventilation and high temperature can accelerate the spread of the infection even among seedlings with no more than a couple of true leaves on them. And remove weeds regularly to prevent the spread of bugs that might carry the fungal spores.
Finally, you should rotate the legume in the garden. Don’t plant the black-eyed peas in the same spot until 4 to 5 years have already passed. This ensures that the fungal spores have been destroyed with soil turning and solarization.
Black-eyed Peas Seedling Diseases
If there’s one thing black-eyed peas rust has taught us it’s that even the seedlings of the legume are not safe from diseases and infections. But it’s not just rust that gives the young black-eyed peas a hard time. The list of diseases that could prove detrimental to the seedlings is quite long.
And it seems that there’s no shortage of pathogens waiting for the pea seeds to germinate before they strike with ferocity. Common among those pathogens are the deadly trio: Fusarium, Rhizoctonia, and Pythium. They cause everything from damping off to root rot.
Moreover, sometimes the pathogens lie in wait in the soil and they might attack the seeds even before they germinate. In which case, the seeds will never sprout and become too damaged to germinate.
By reading the above list of black-eyed peas growing problems, one pattern becomes clear. It’s always the heat and humidity that are triggering factors for the dormant pathogens to become active and start their devastating mission.
How to Fix It
You need to be alert to the rising temperature of the soil, and the increased humidity levels as the spring melts into summer. Don’t allow the soil to become waterlogged, nor water the plants in the afternoon or evening. This leaves drops of moisture on the stems all night which could start a fungal infection.
But not all fungi and pathogens need high temperatures. Some will thrive in cool temperatures as well. However, the common thread here is the high humidity. So you should try to improve air circulation even among the seedlings and water the soil only when the top 2 inches have dried out completely.