Beautiful and Elegant Video Hairstyle Tutorial
Updated on January 22, 2021


I decided to start practicing different styles just by playing around with my favourite hair styling elements to see whether I might come up with a simple but beautiful way of pulling my hair slightly back on my own, and I’m pleased to report that I was actually successful! So check out how I made this beautiful and elegant hairstyle with this tutorial.
This style is based on my love for fishtail braids but its simplicity is inspired by the fact that I have thin hair that doesn’t weave well or hold braids with much success. I found a neat trick for getting a similar look without having too many wisps and strands fall out by the end of the night, so I decided to share my method so other people with hair like mine can try it out! Check out these step by step instructions complete with photos! If you’d rather follow along with a video tutorial instead of written words, scroll to the bottom of this post to find just what you’re looking for.
For this style, you’ll need:
- Hair elastics
- Bobby pins
- A brush
- Hairspray

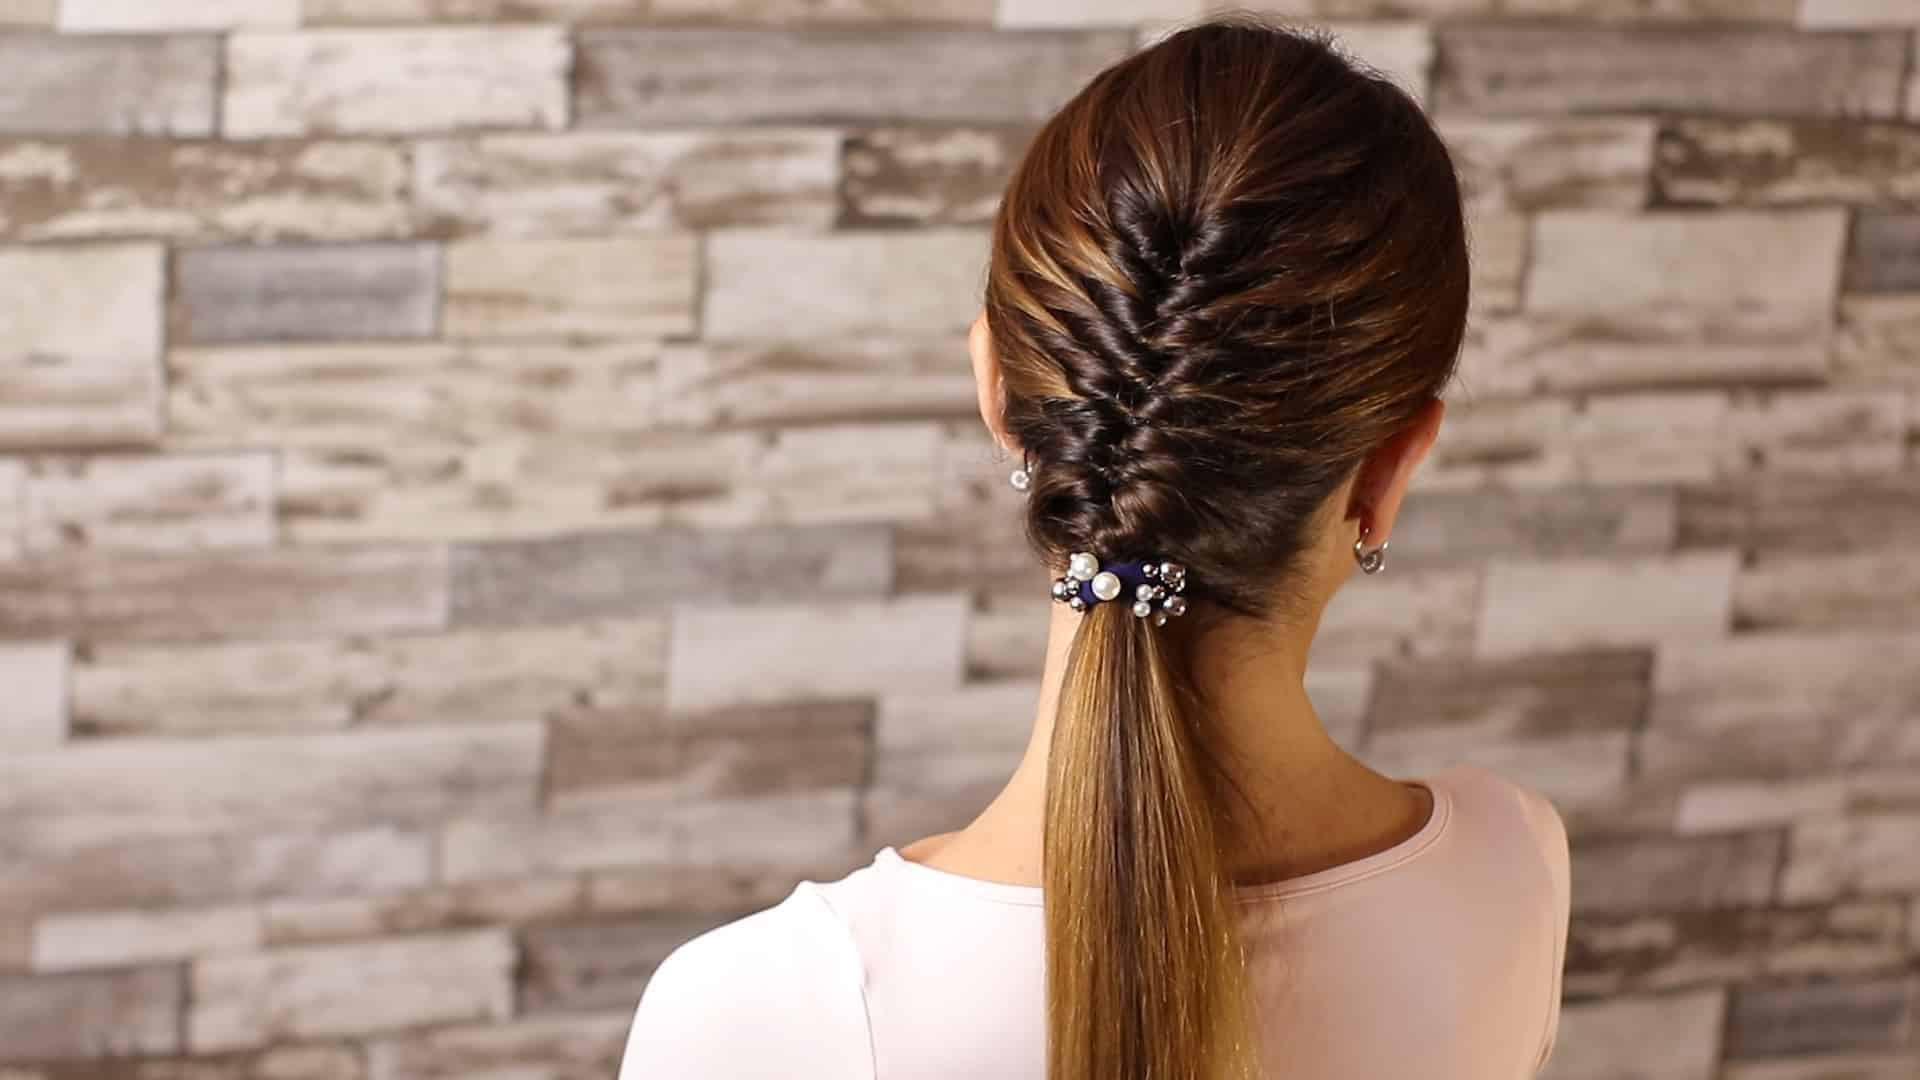
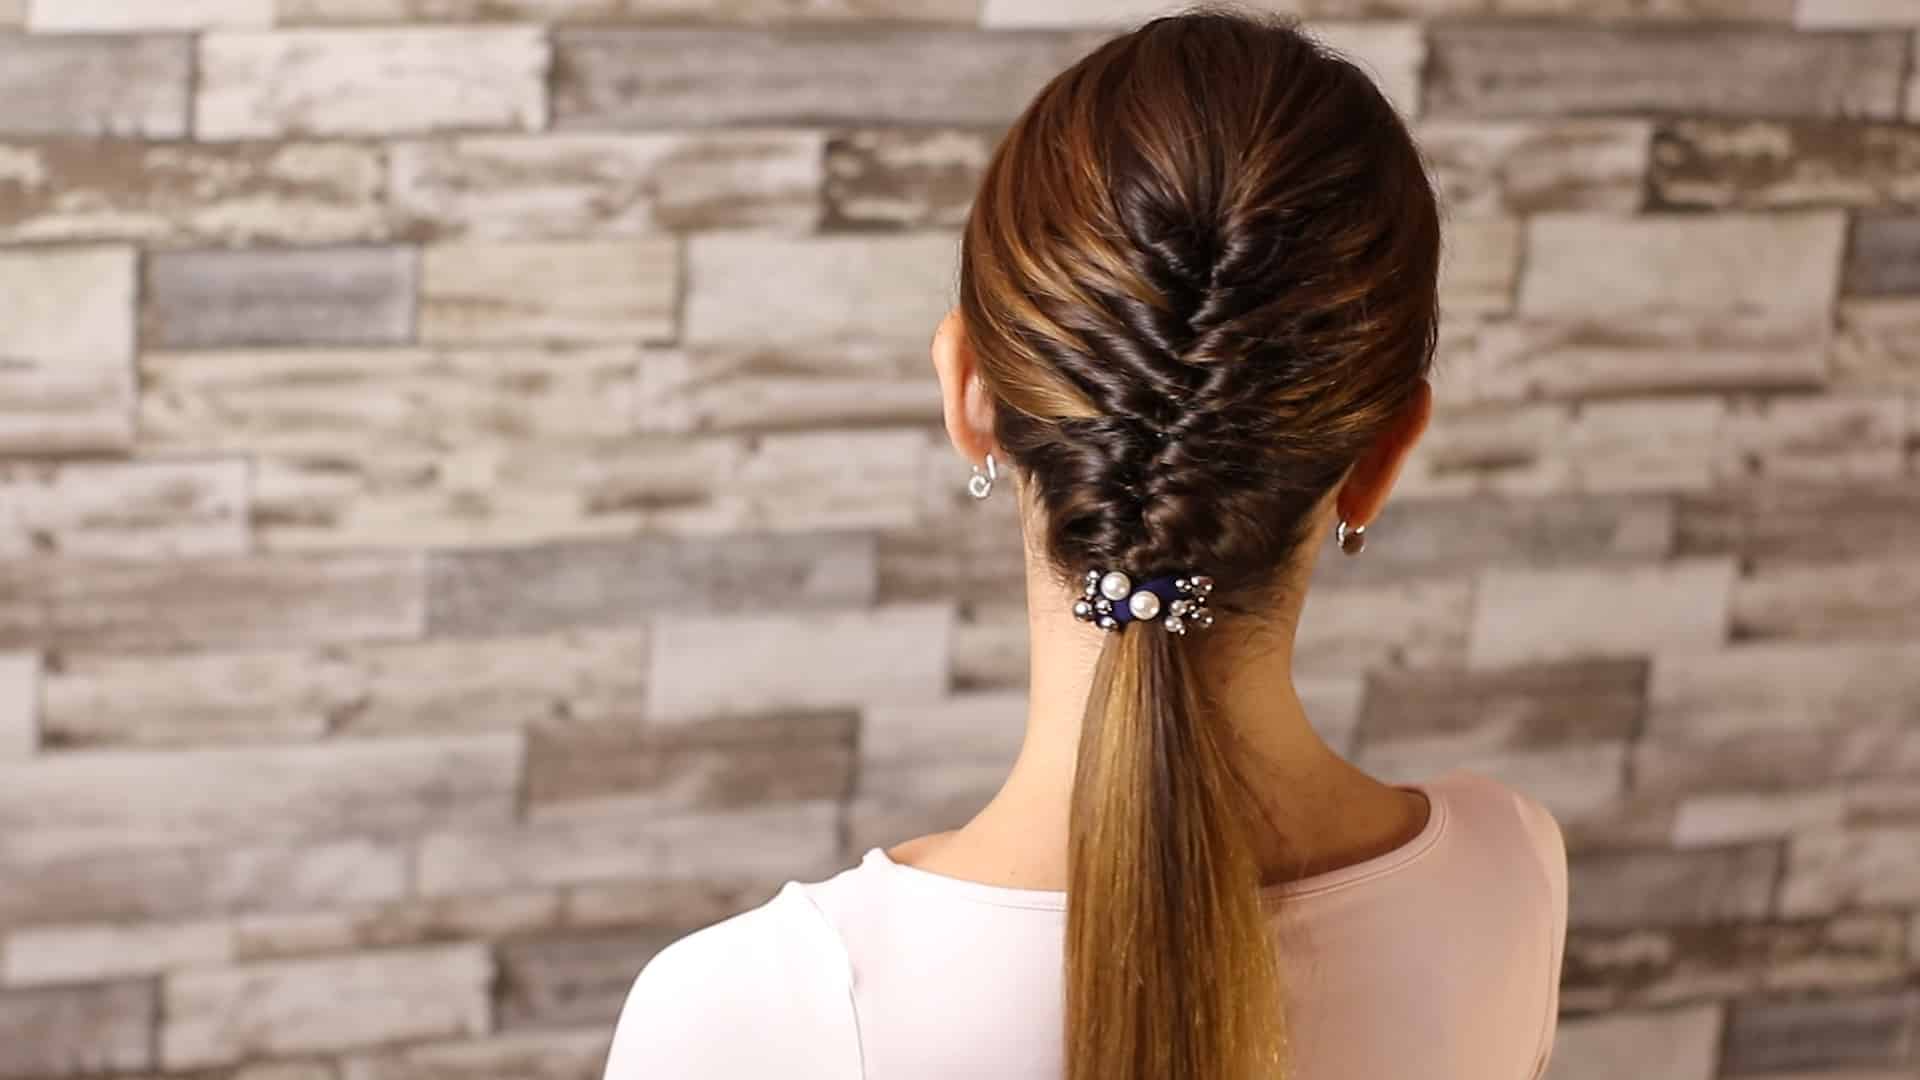
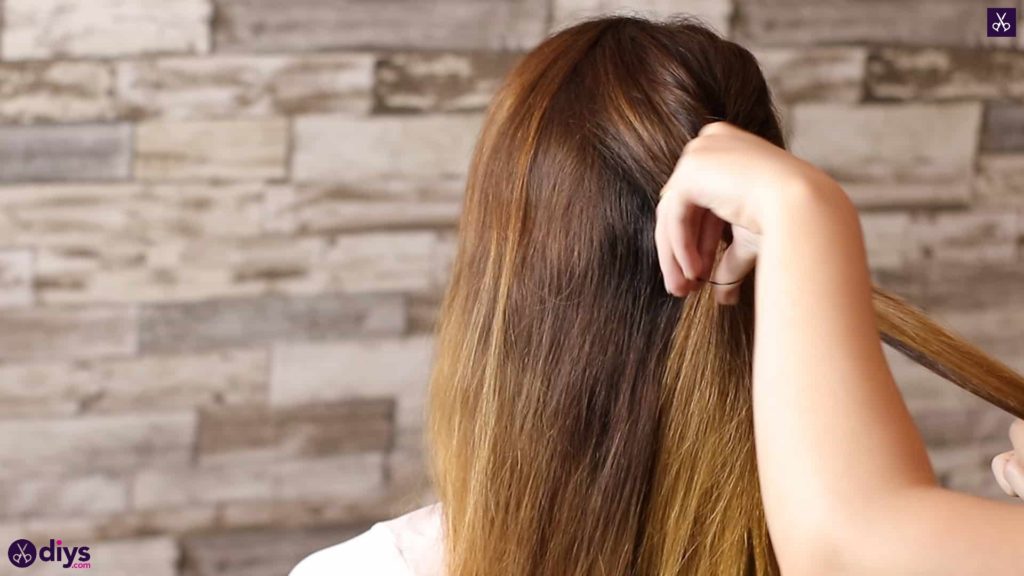
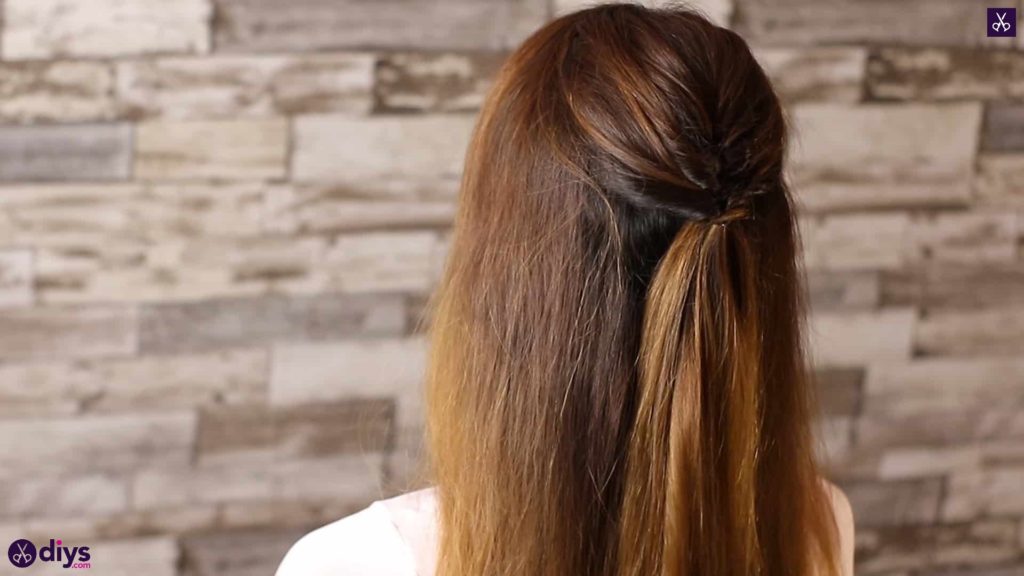
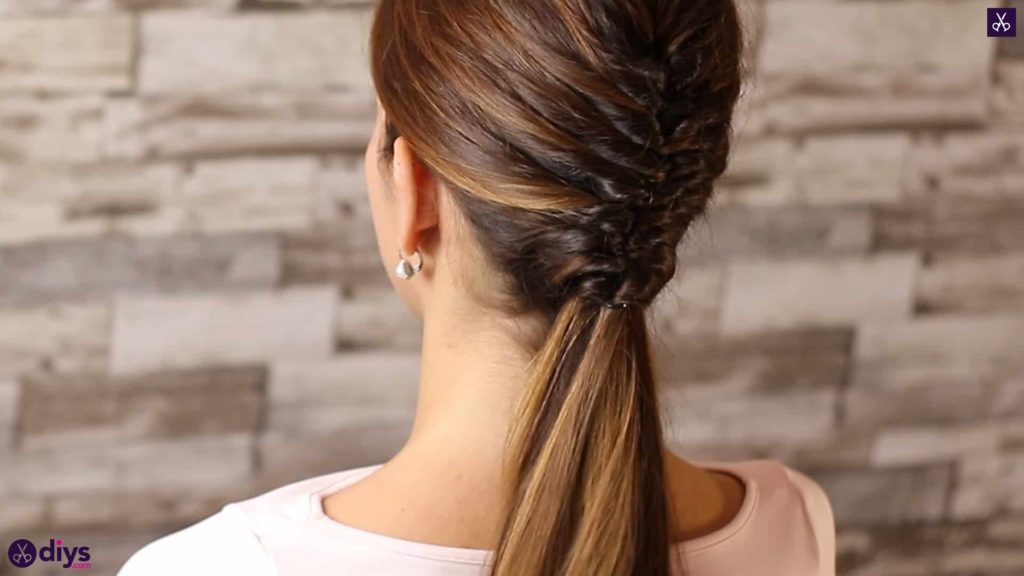
Step 1: start in the middle
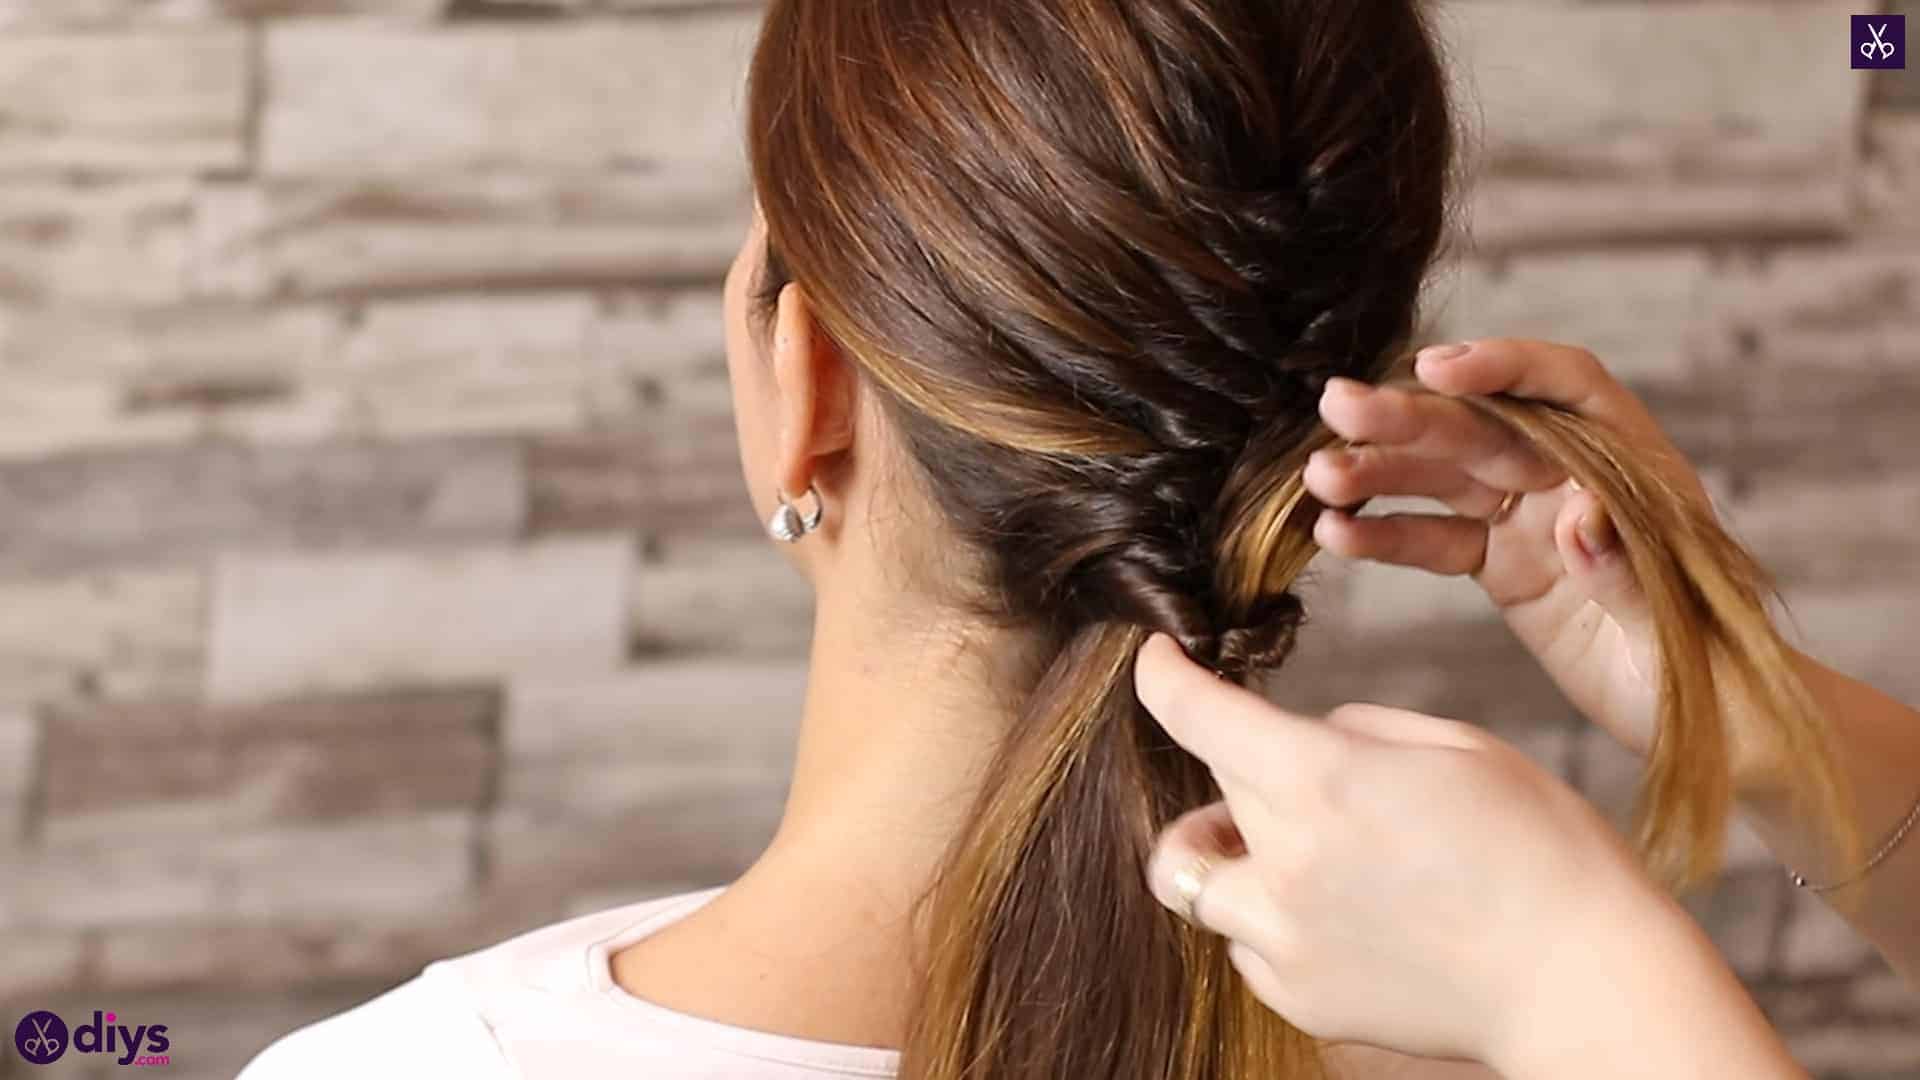
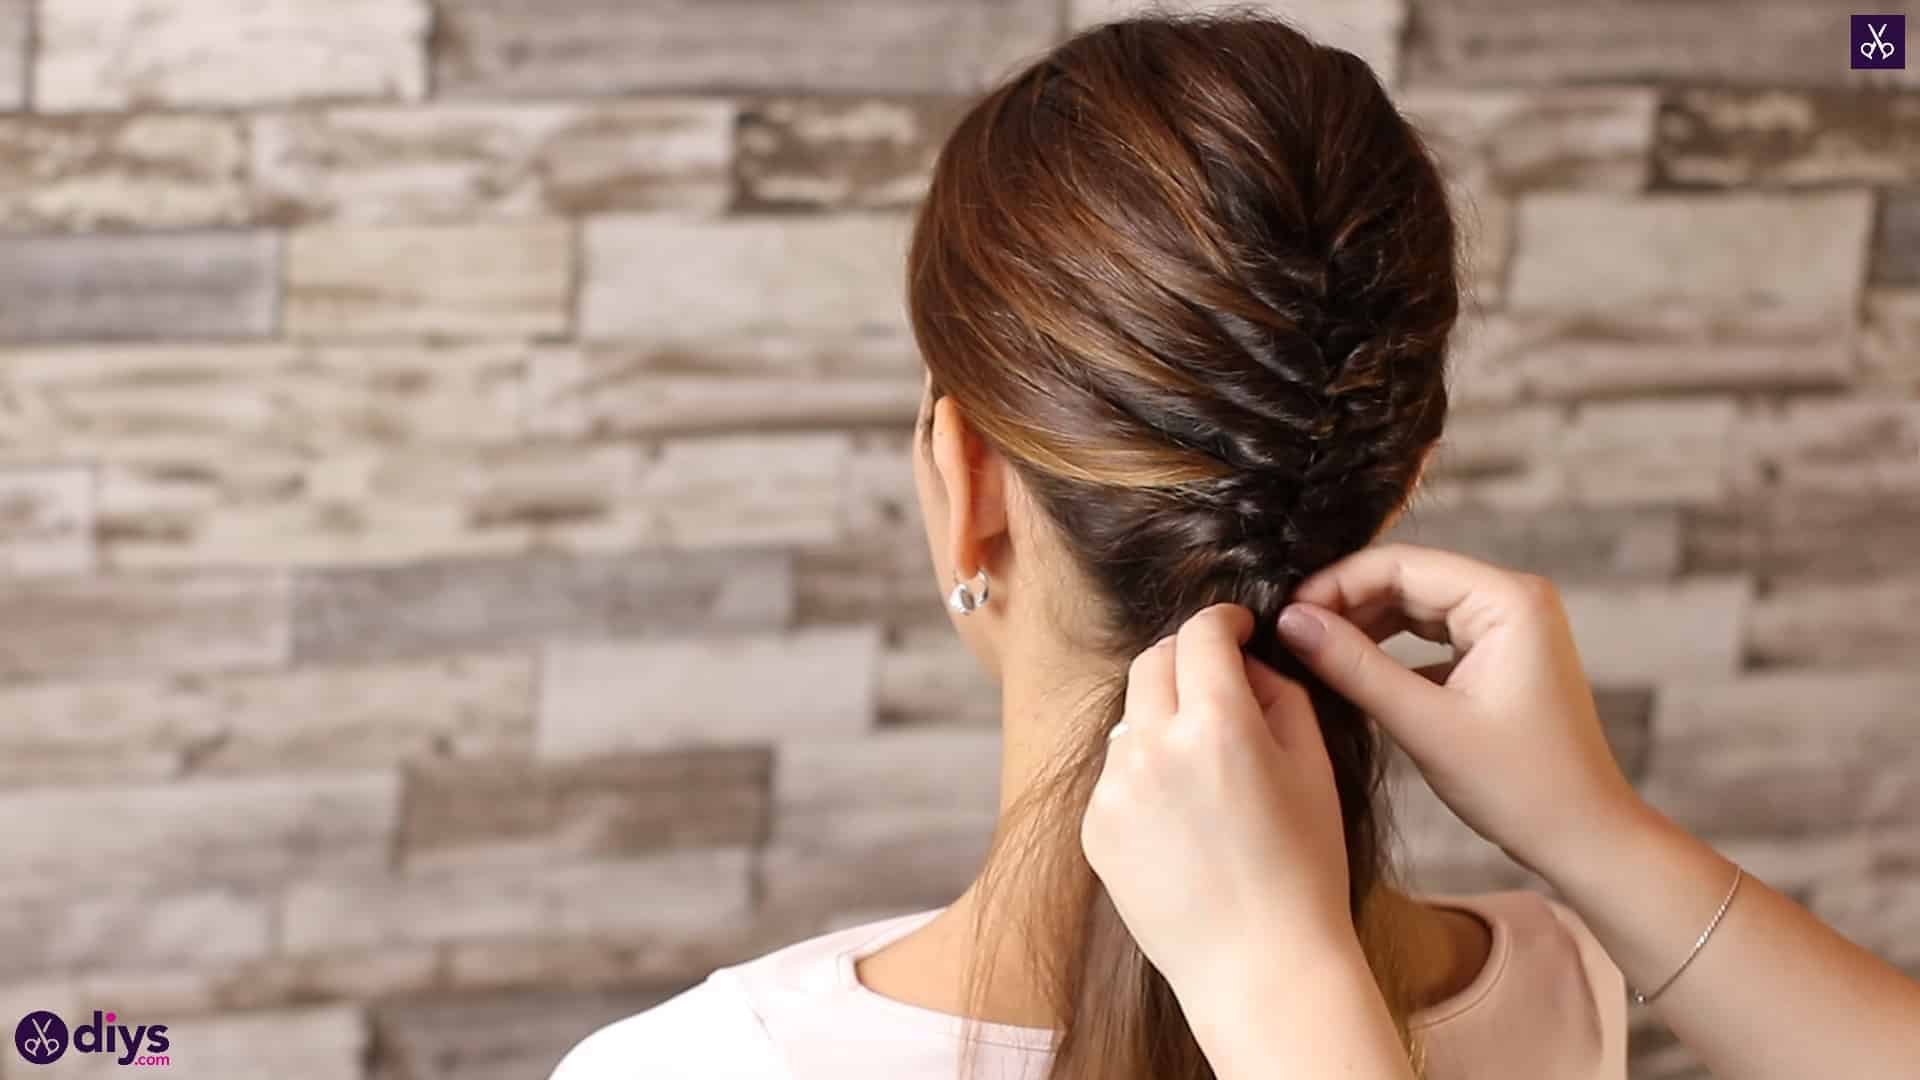
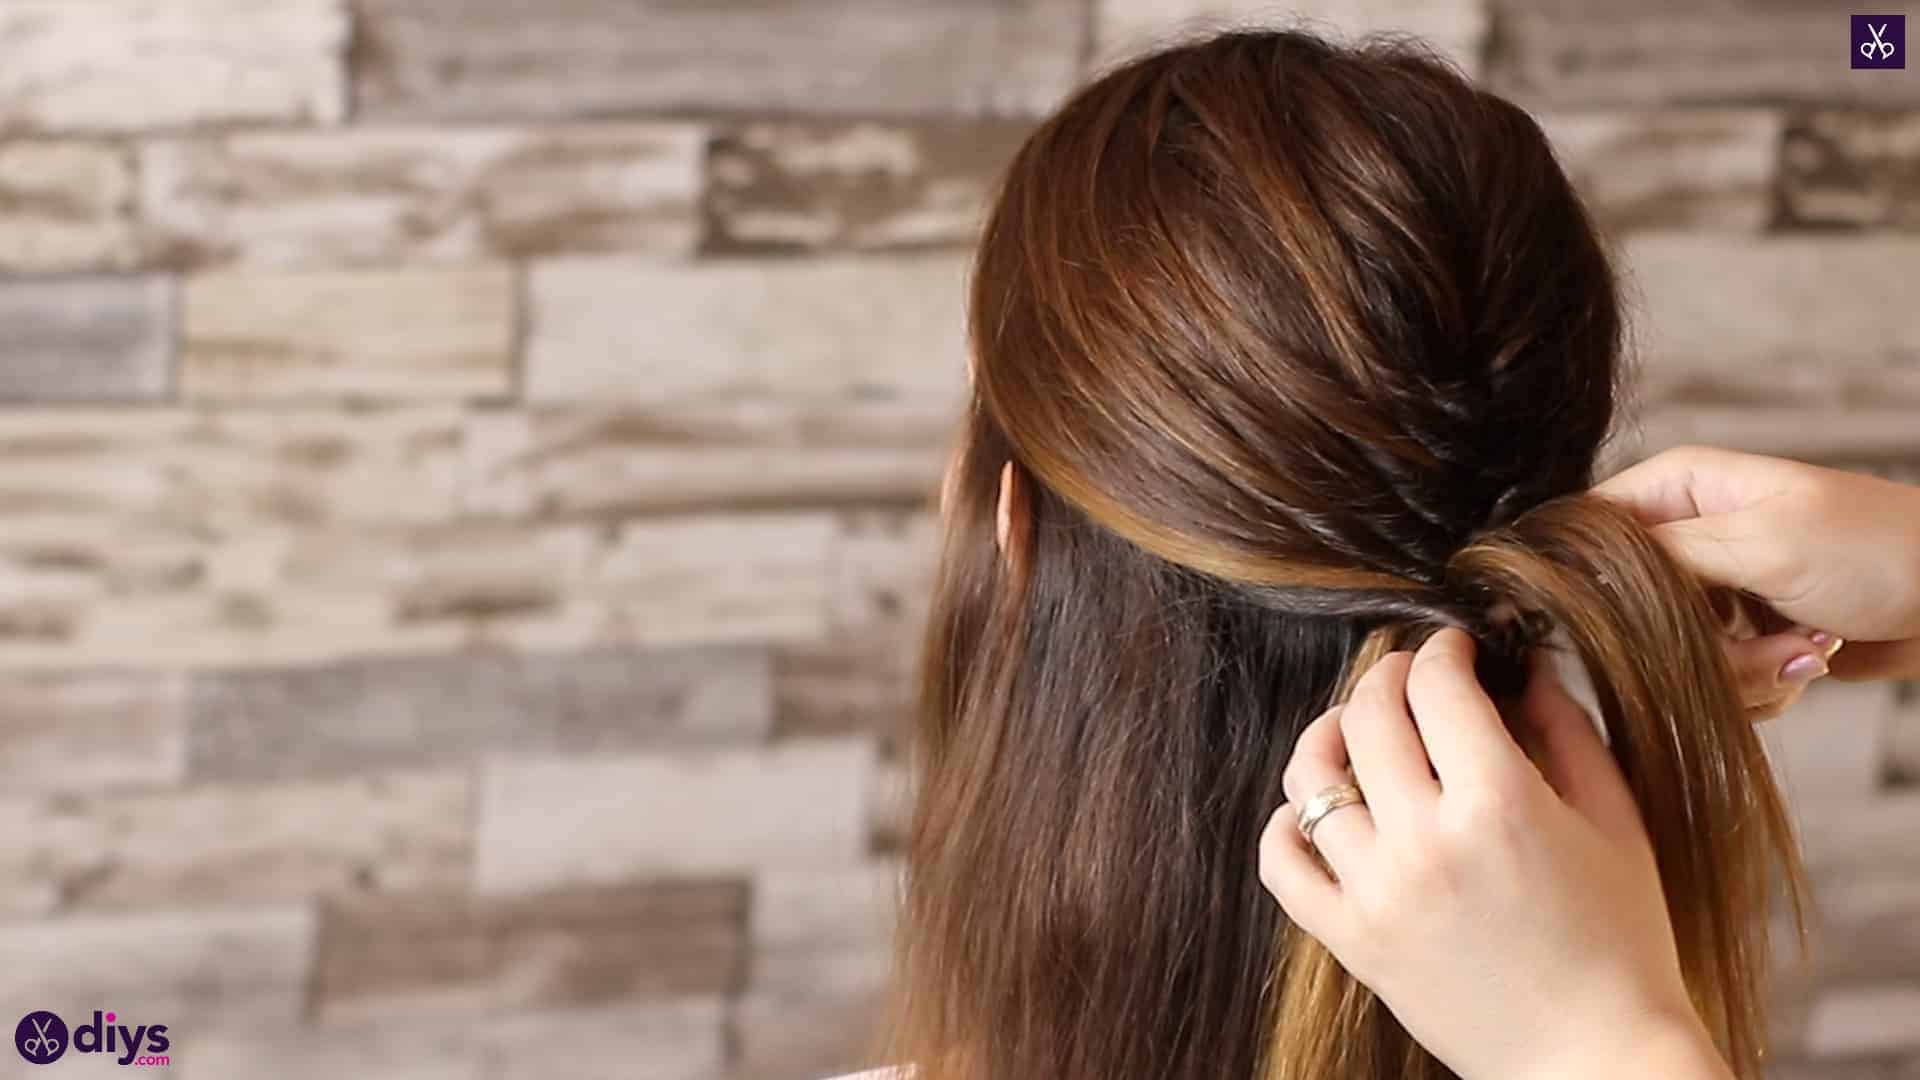
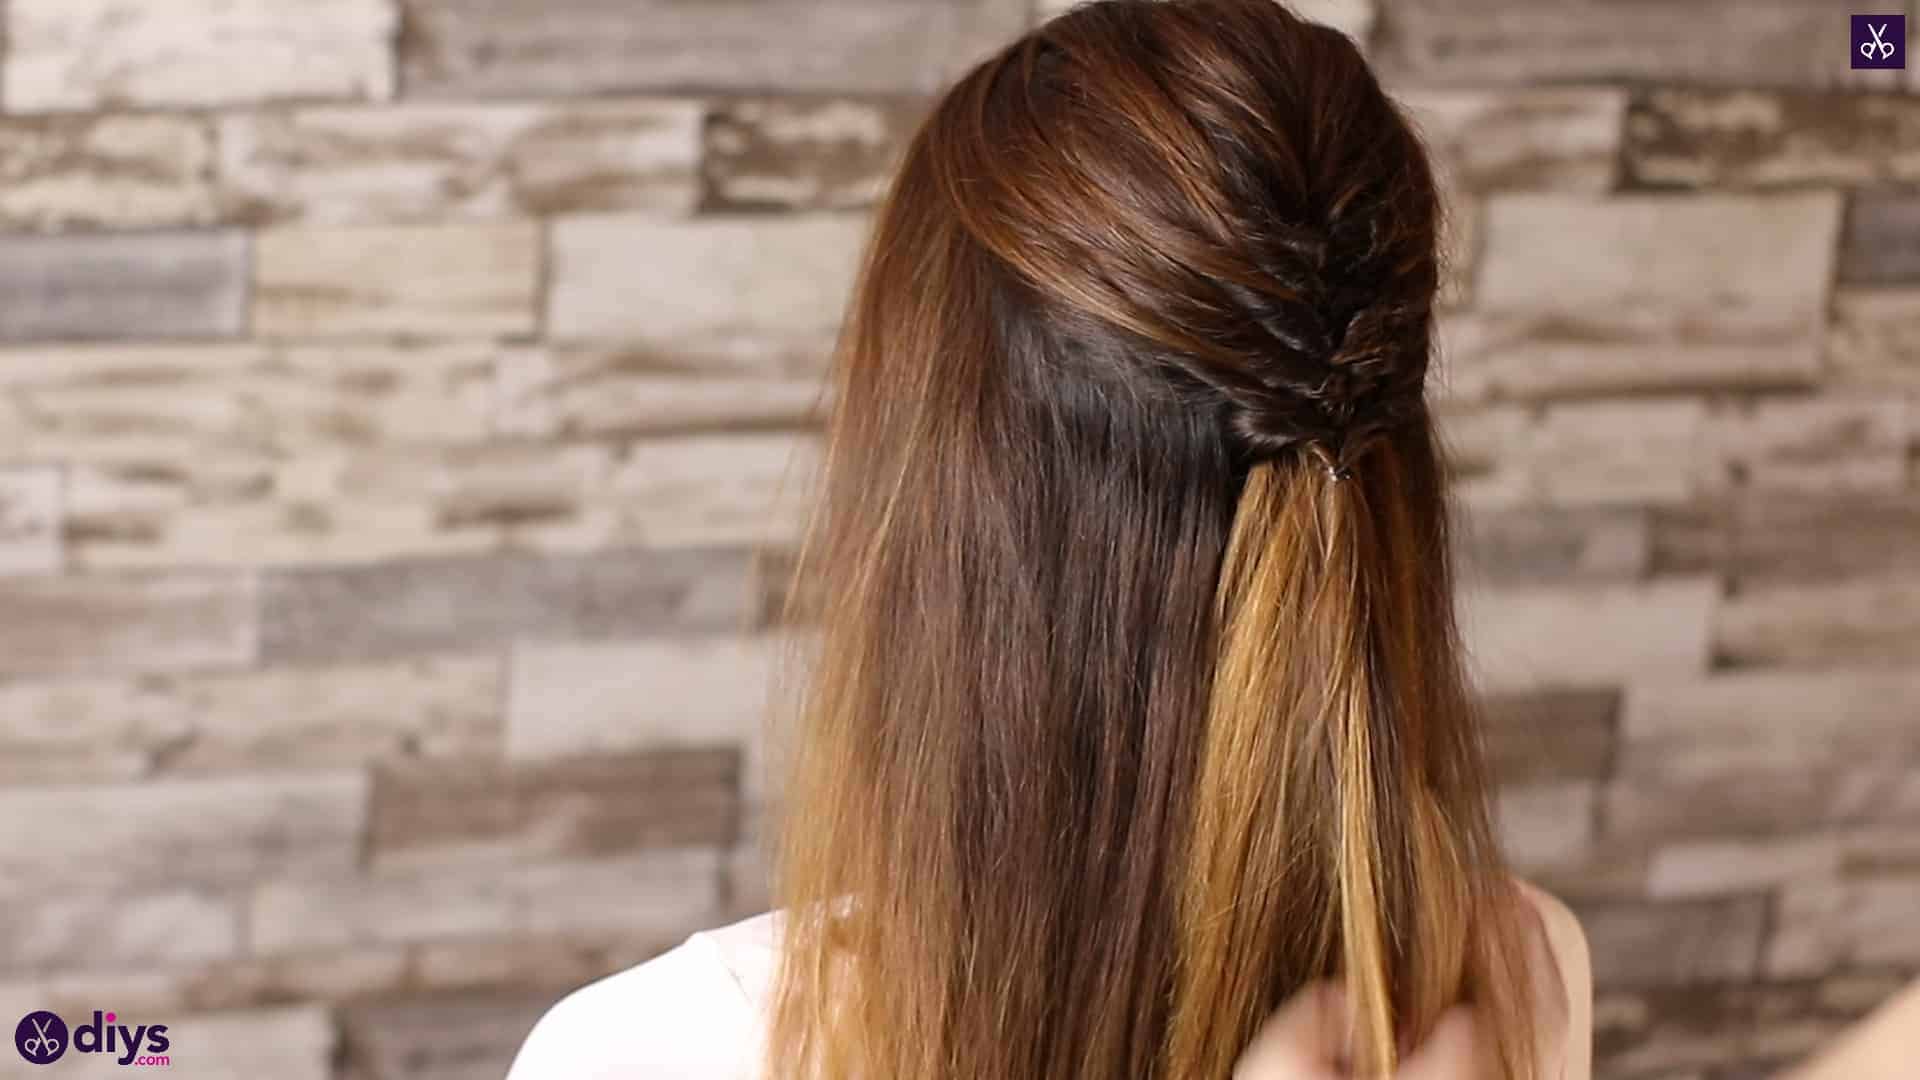
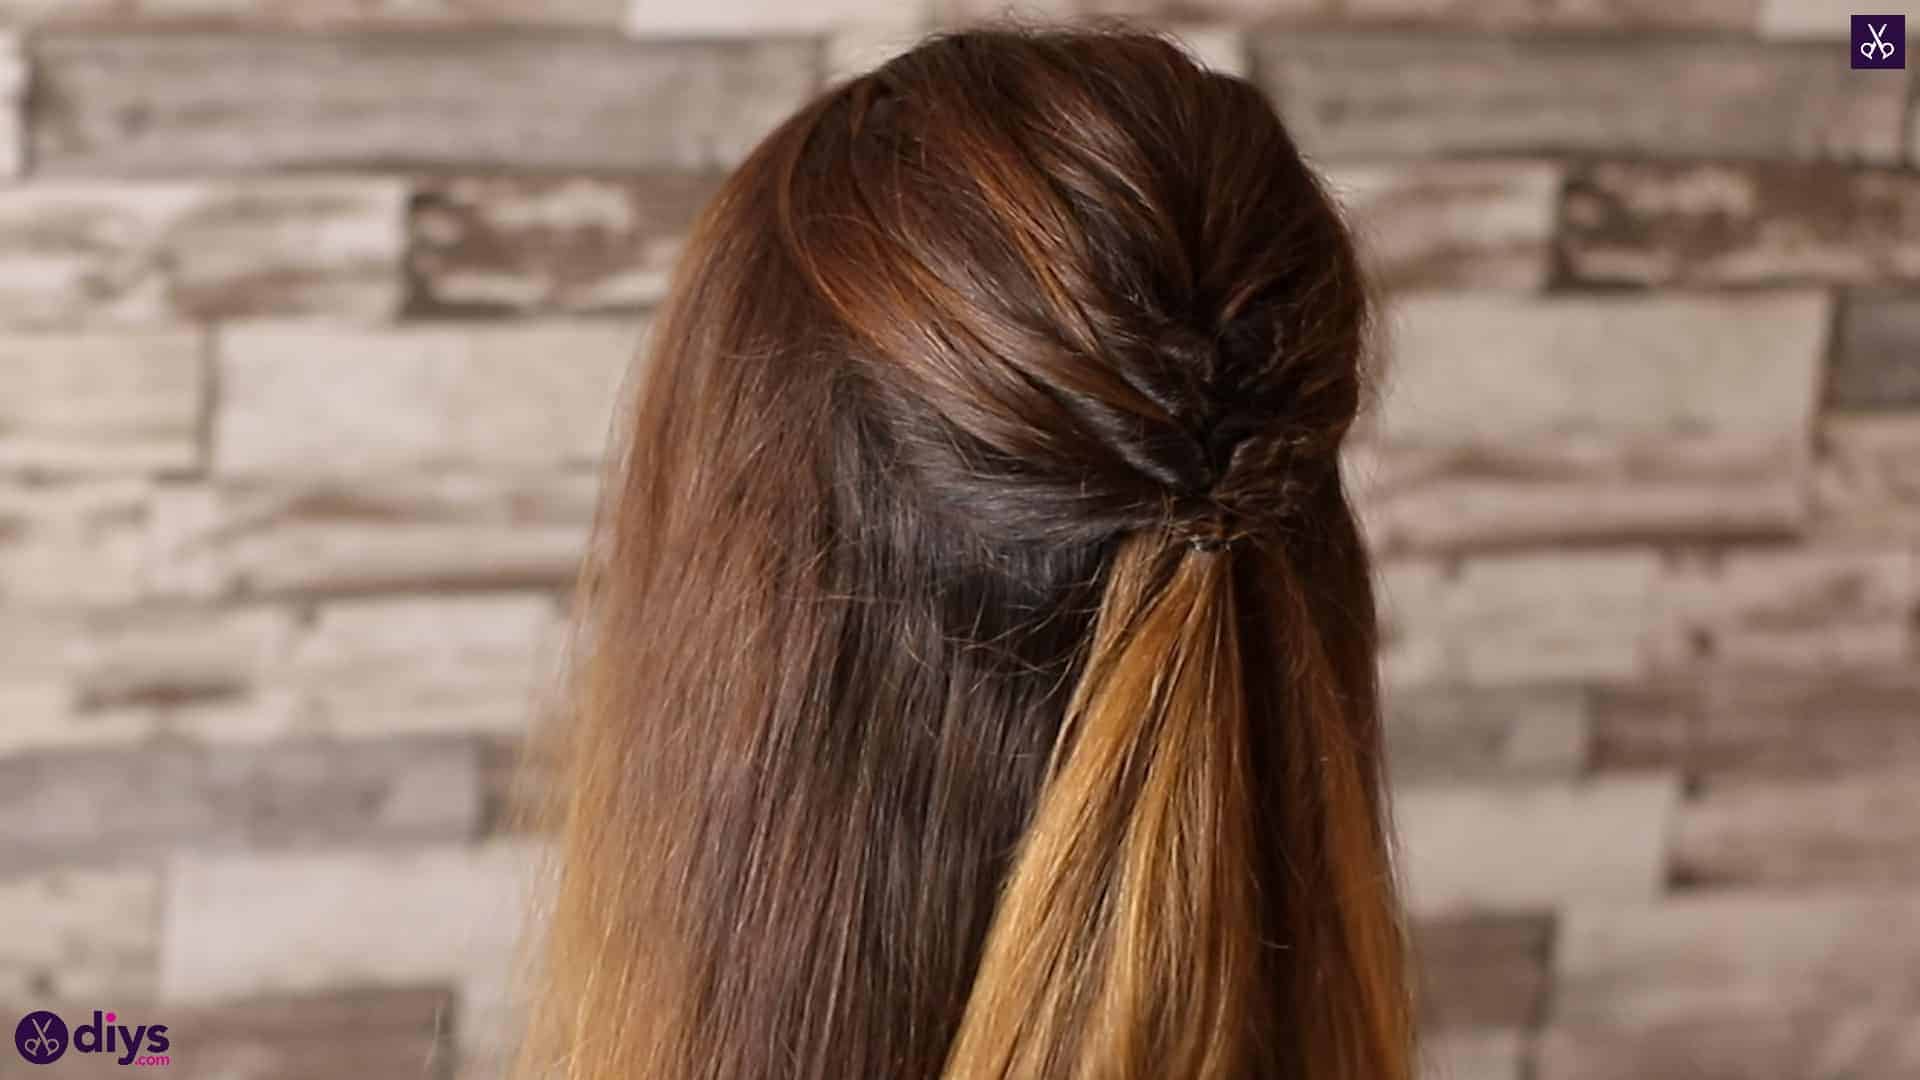
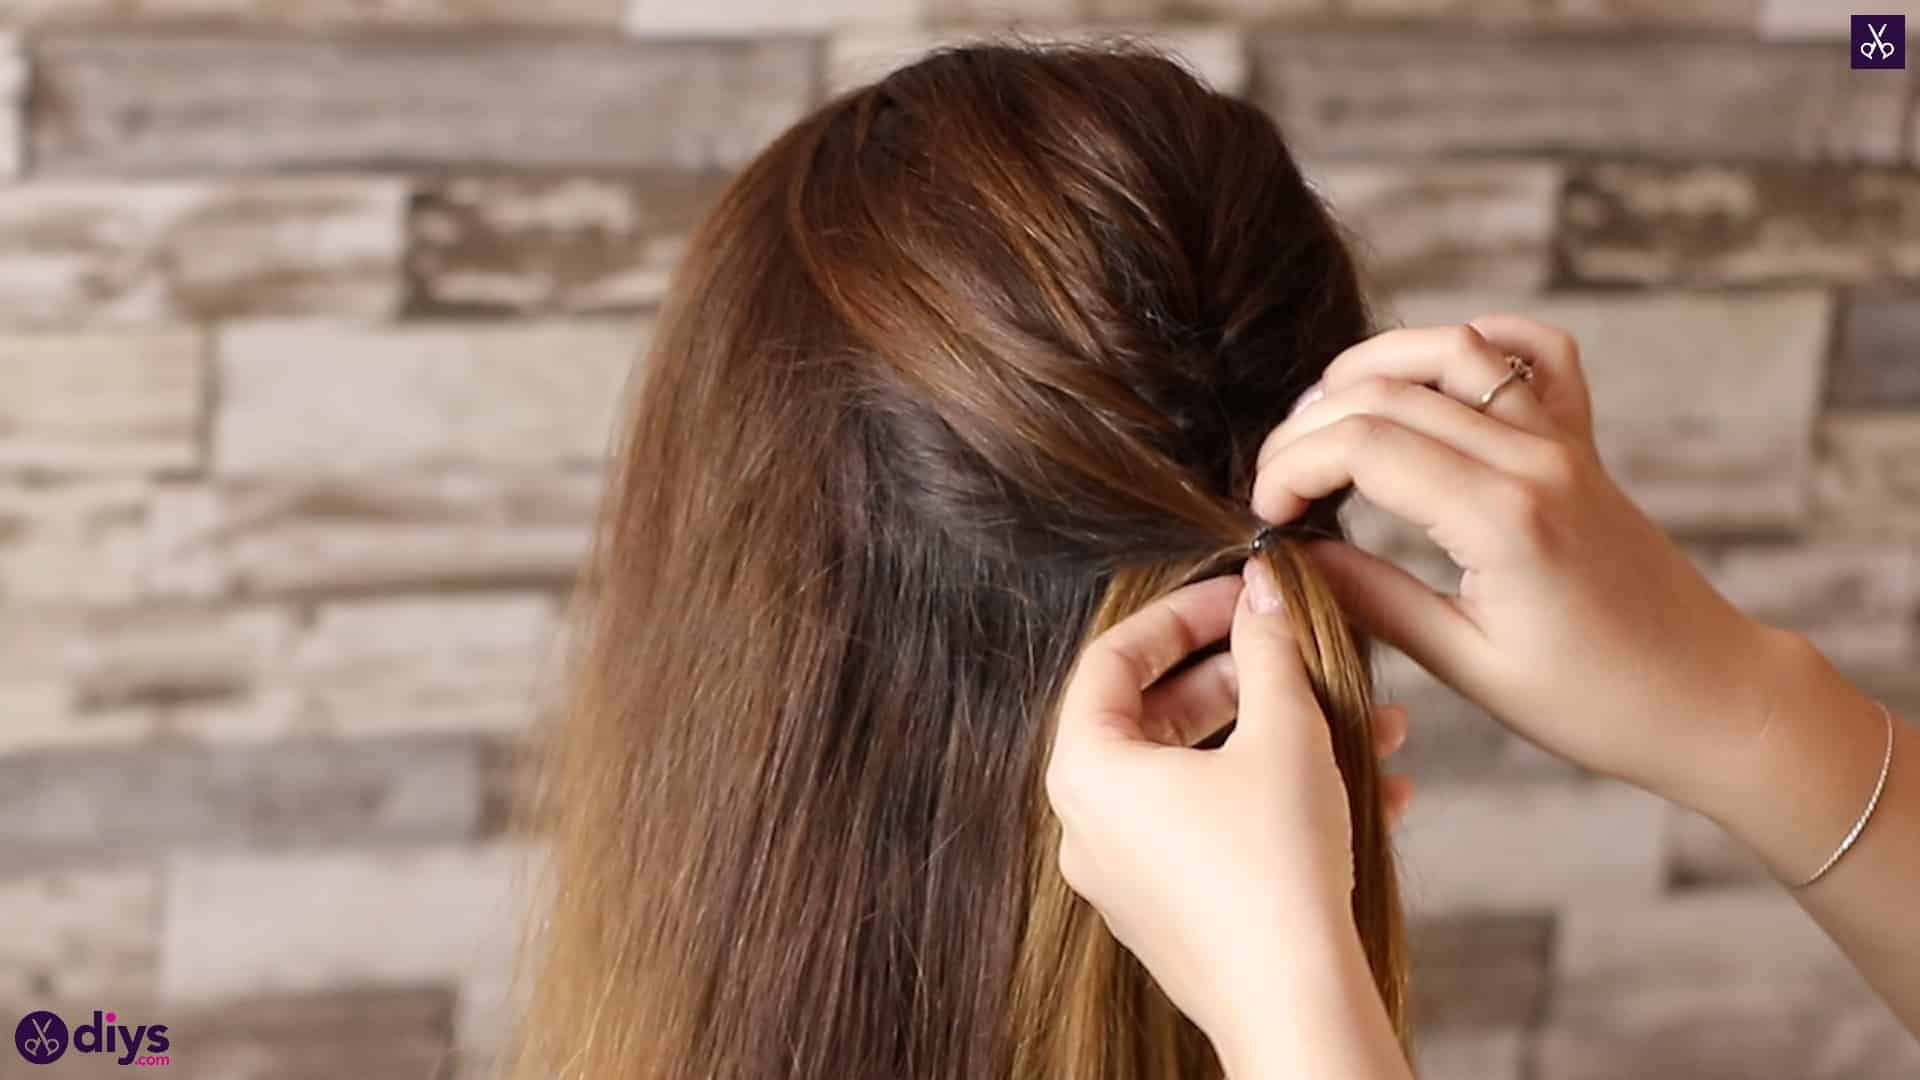
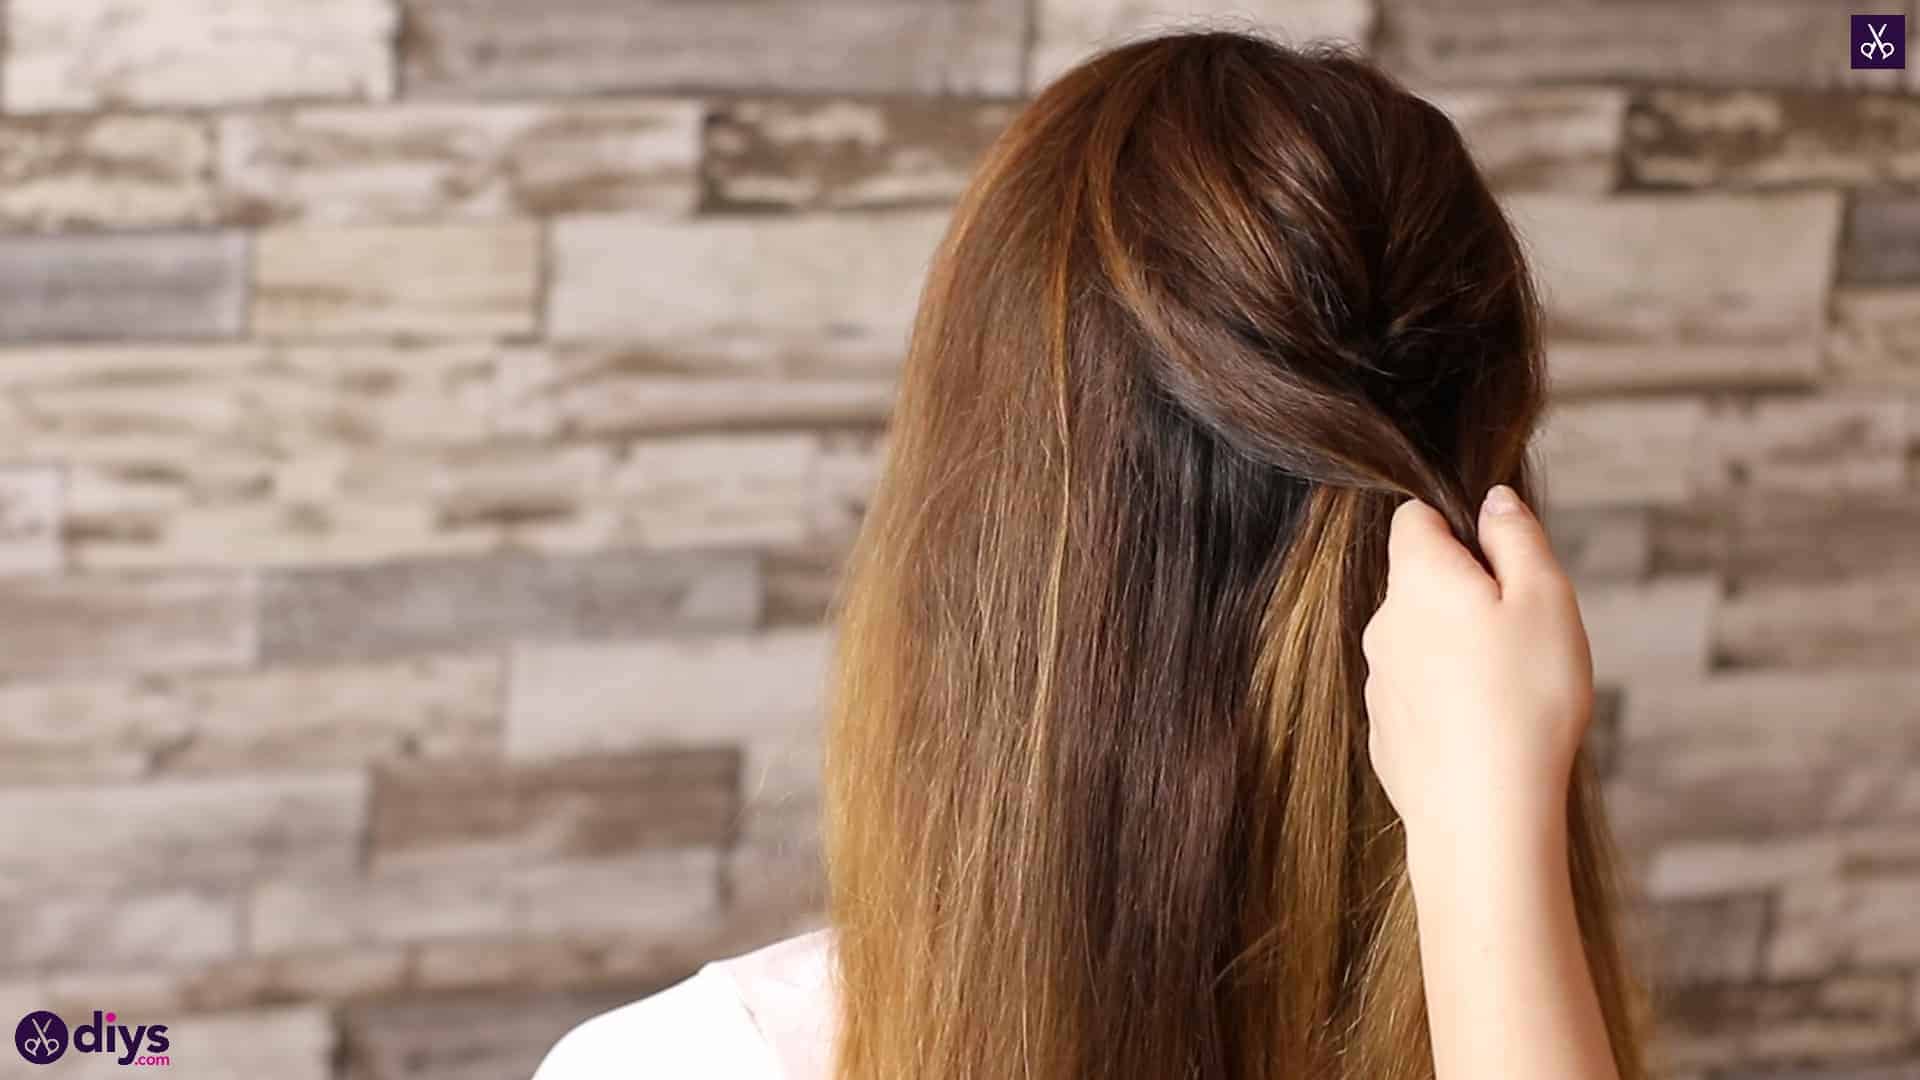
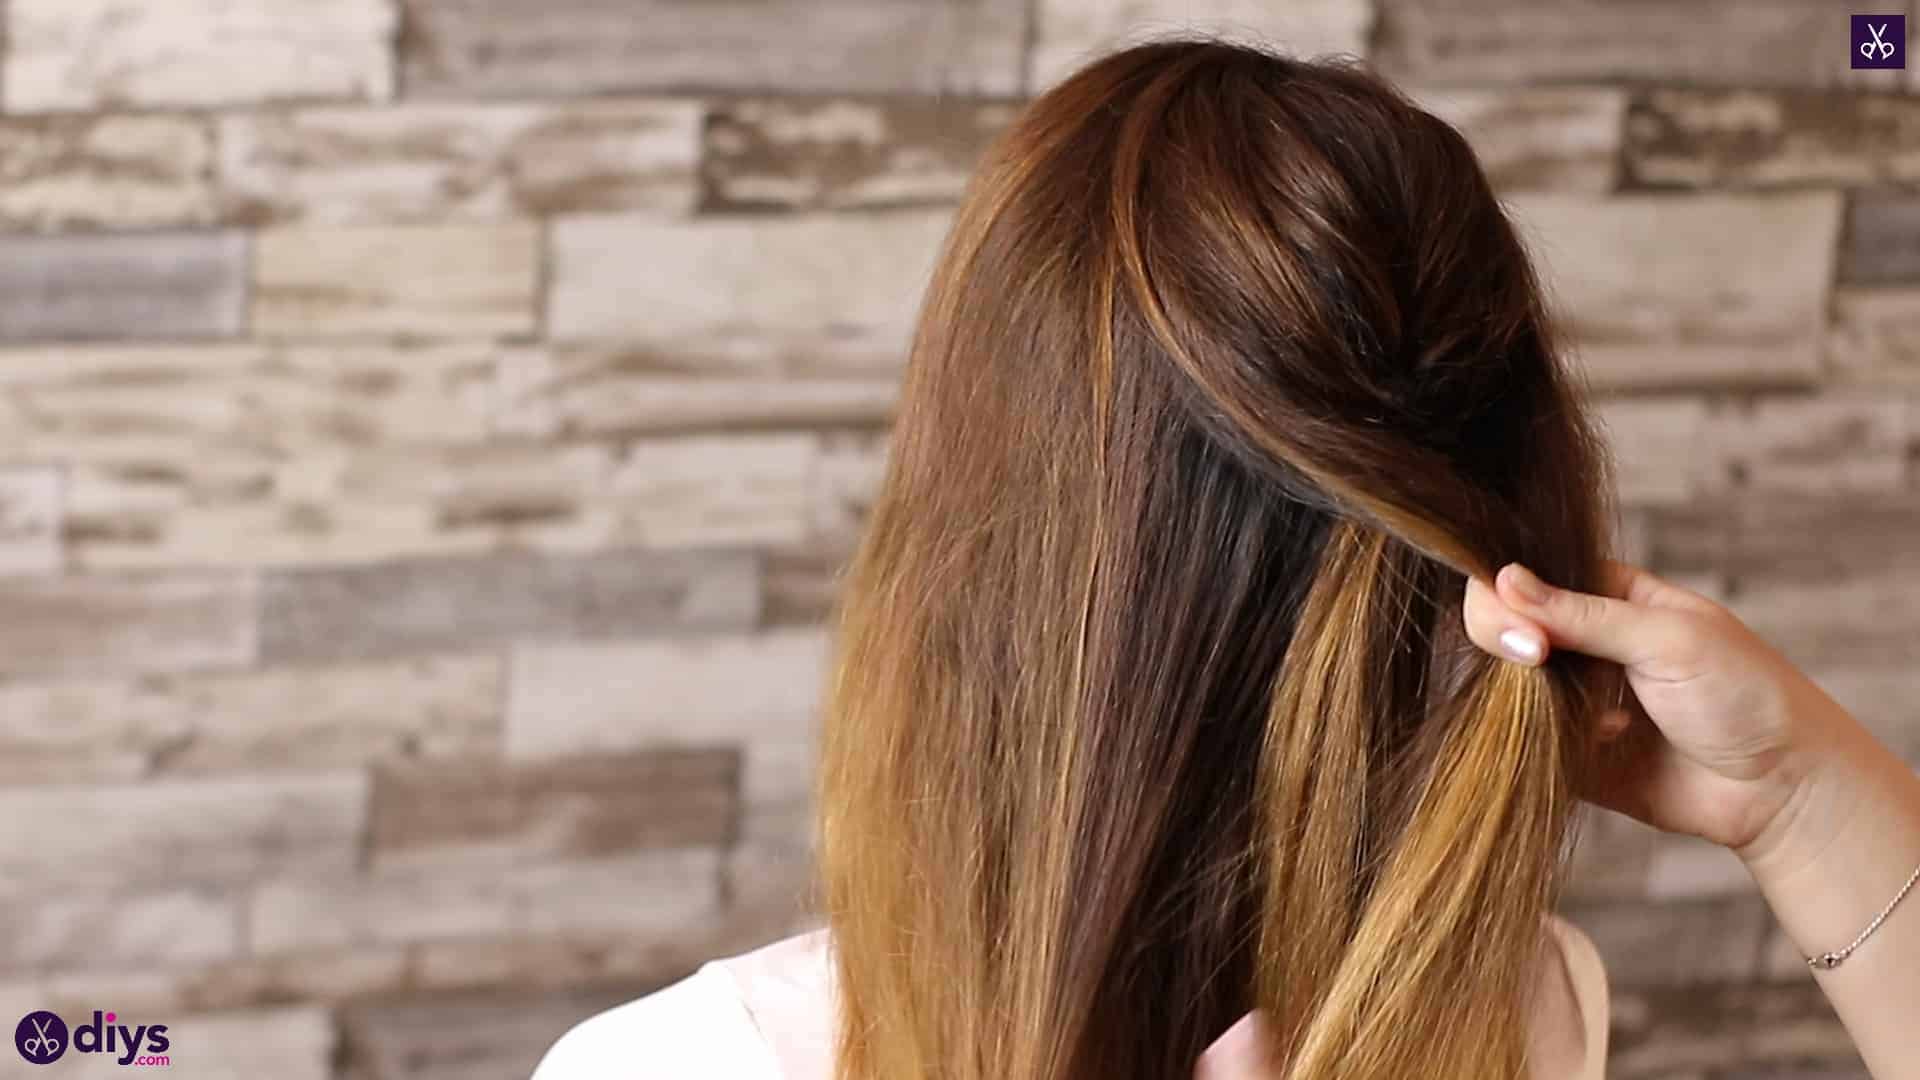
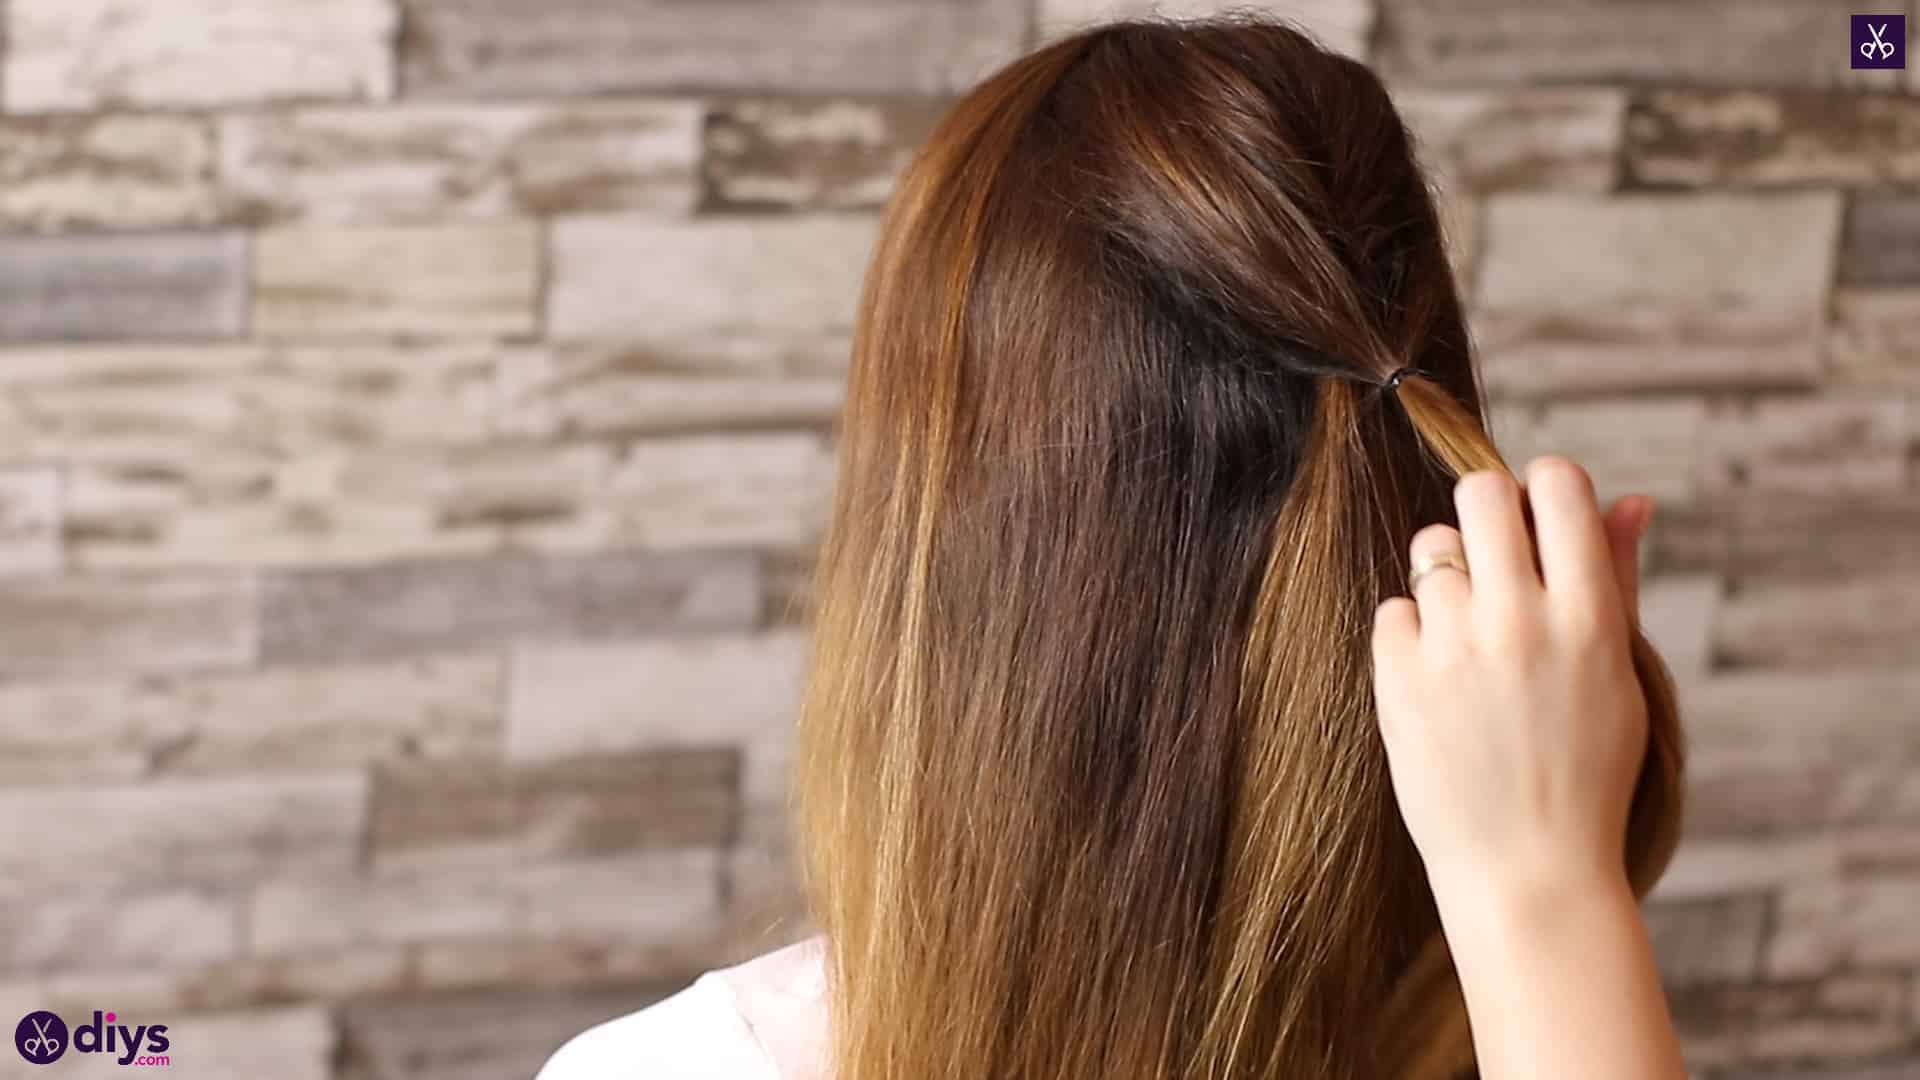
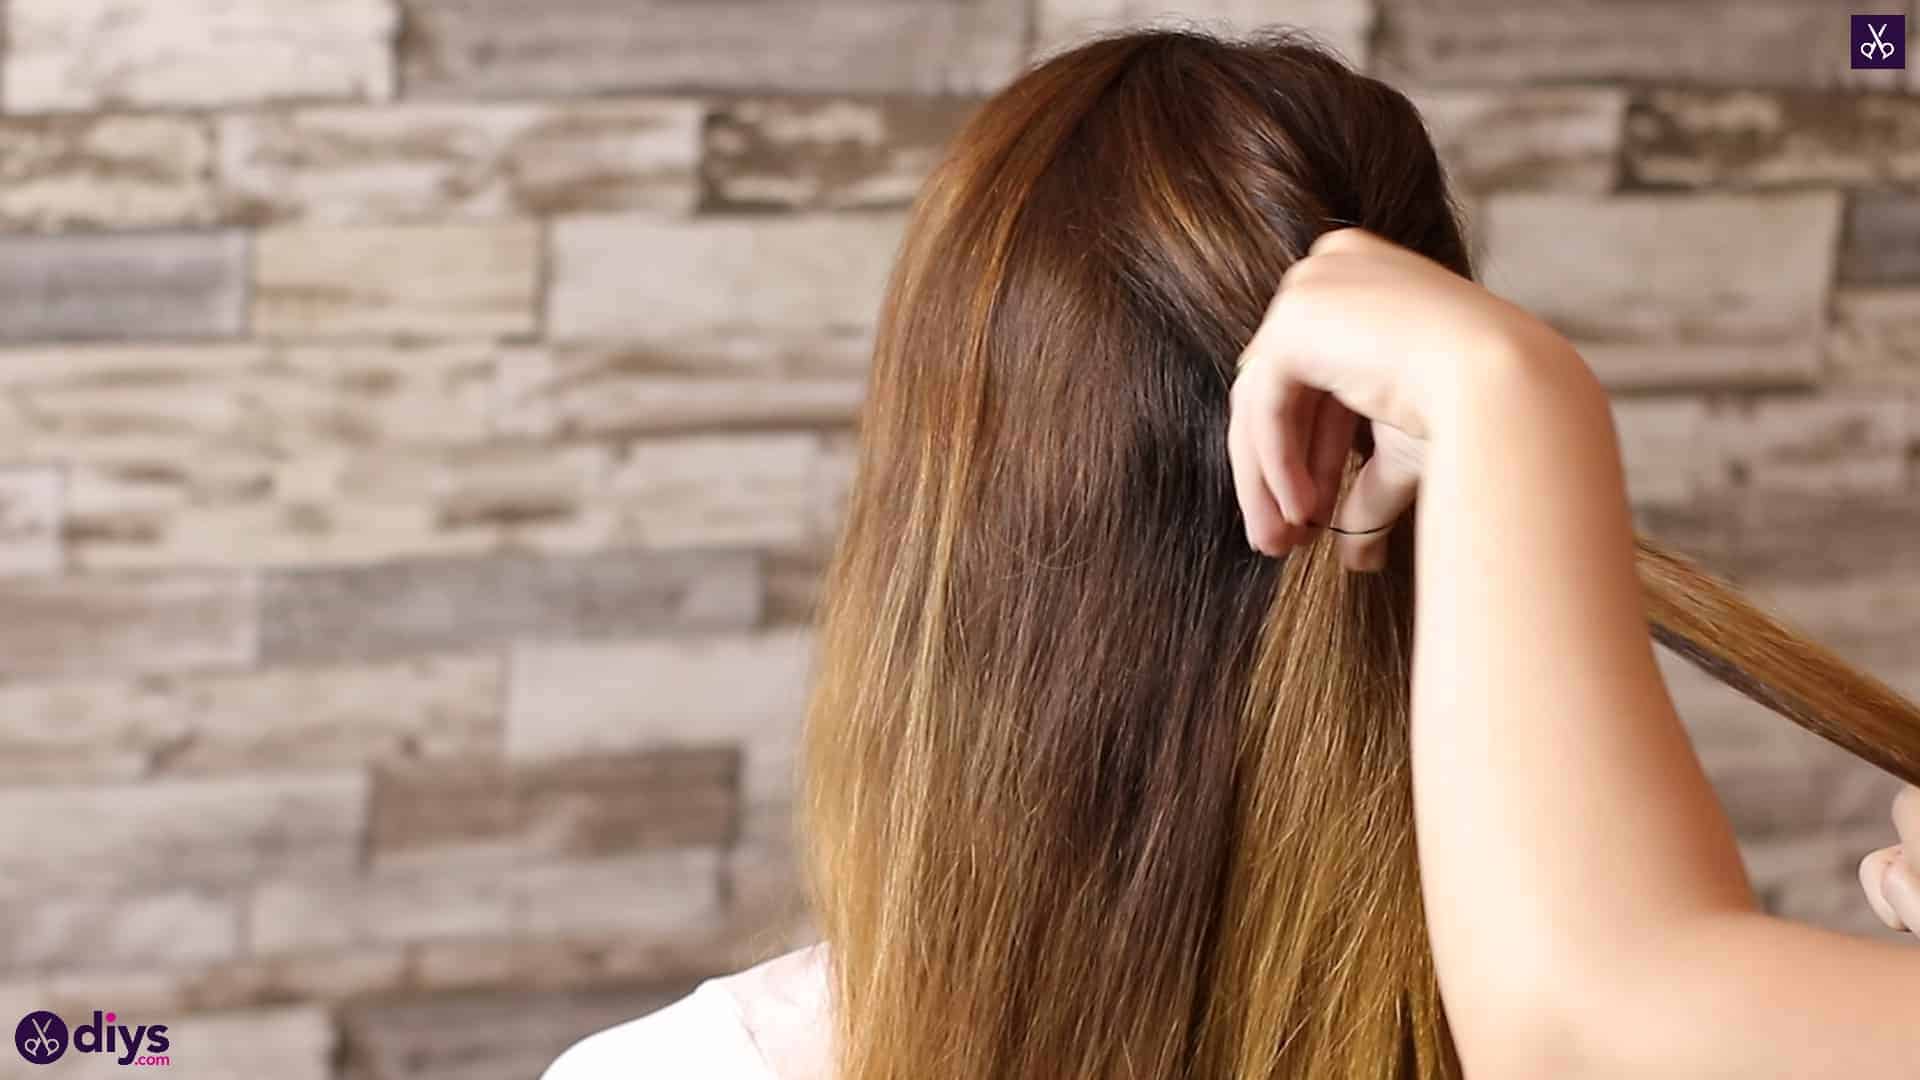
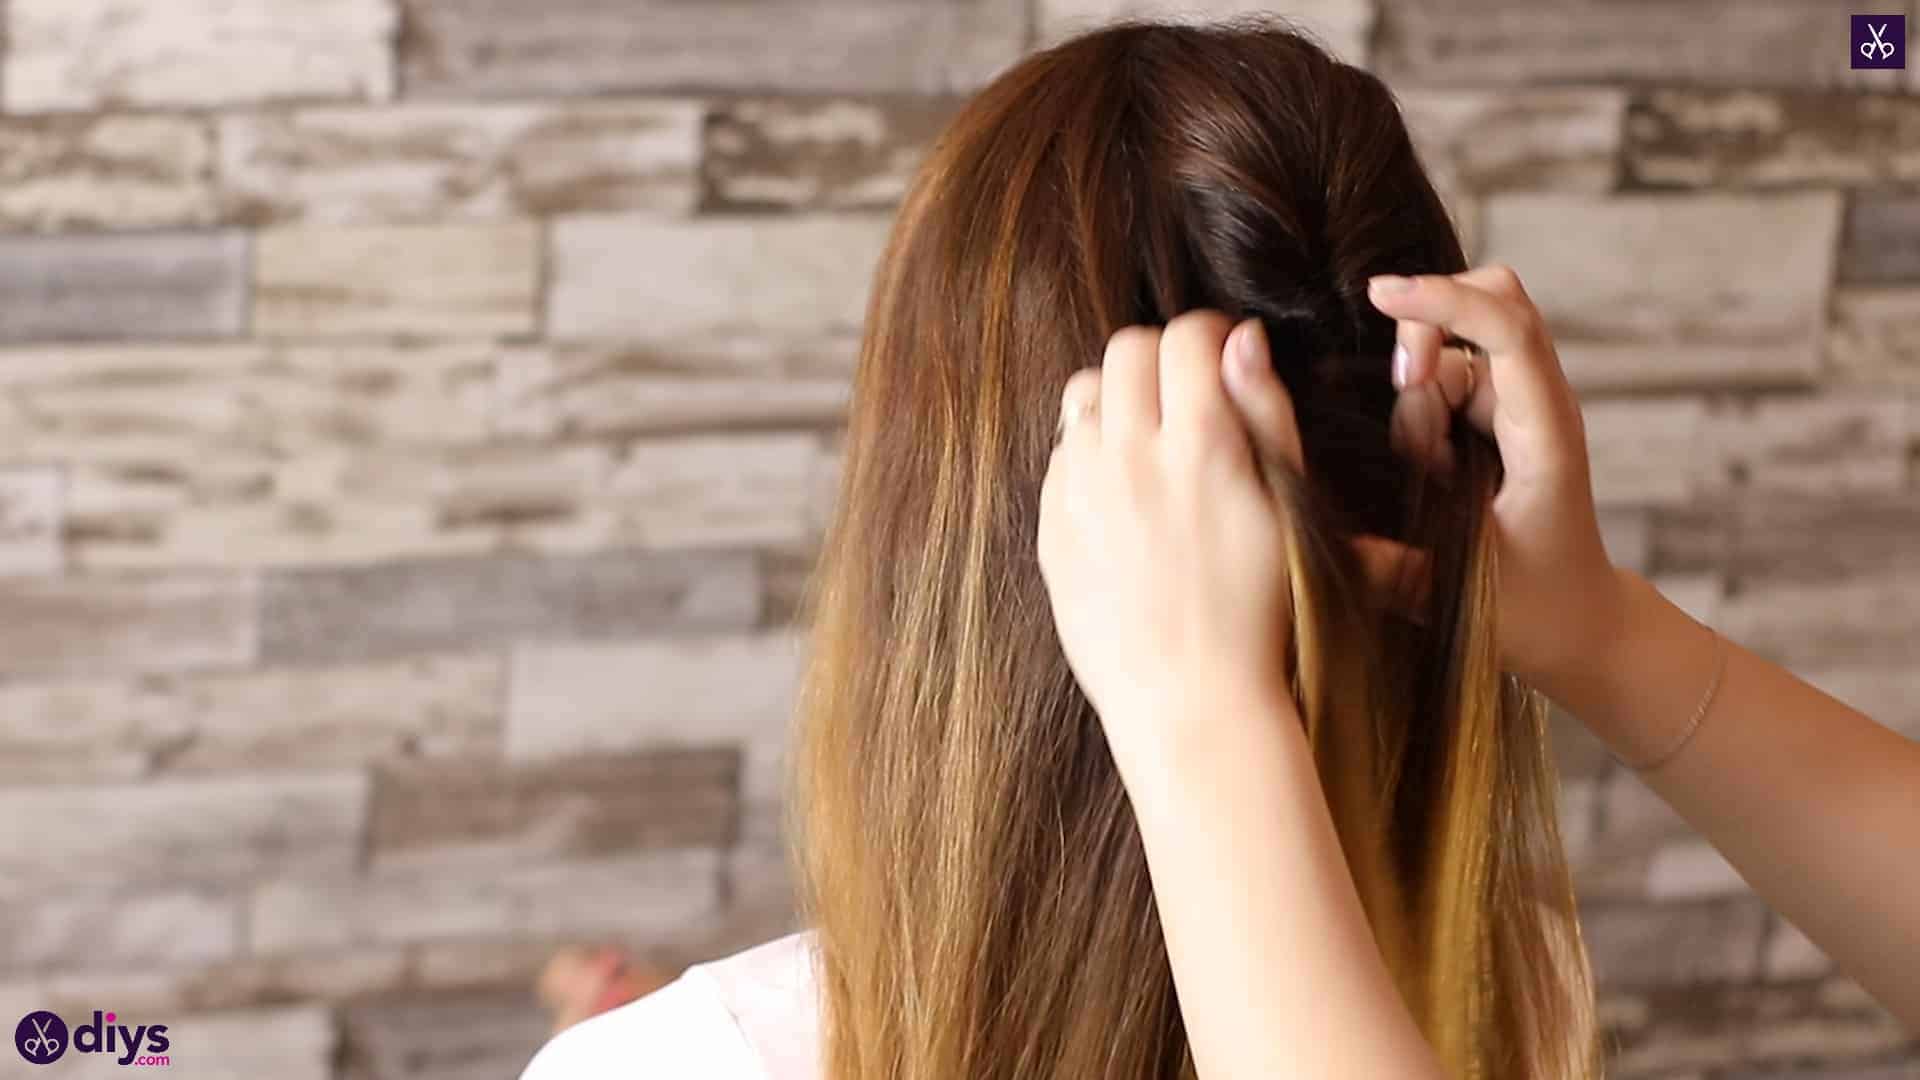
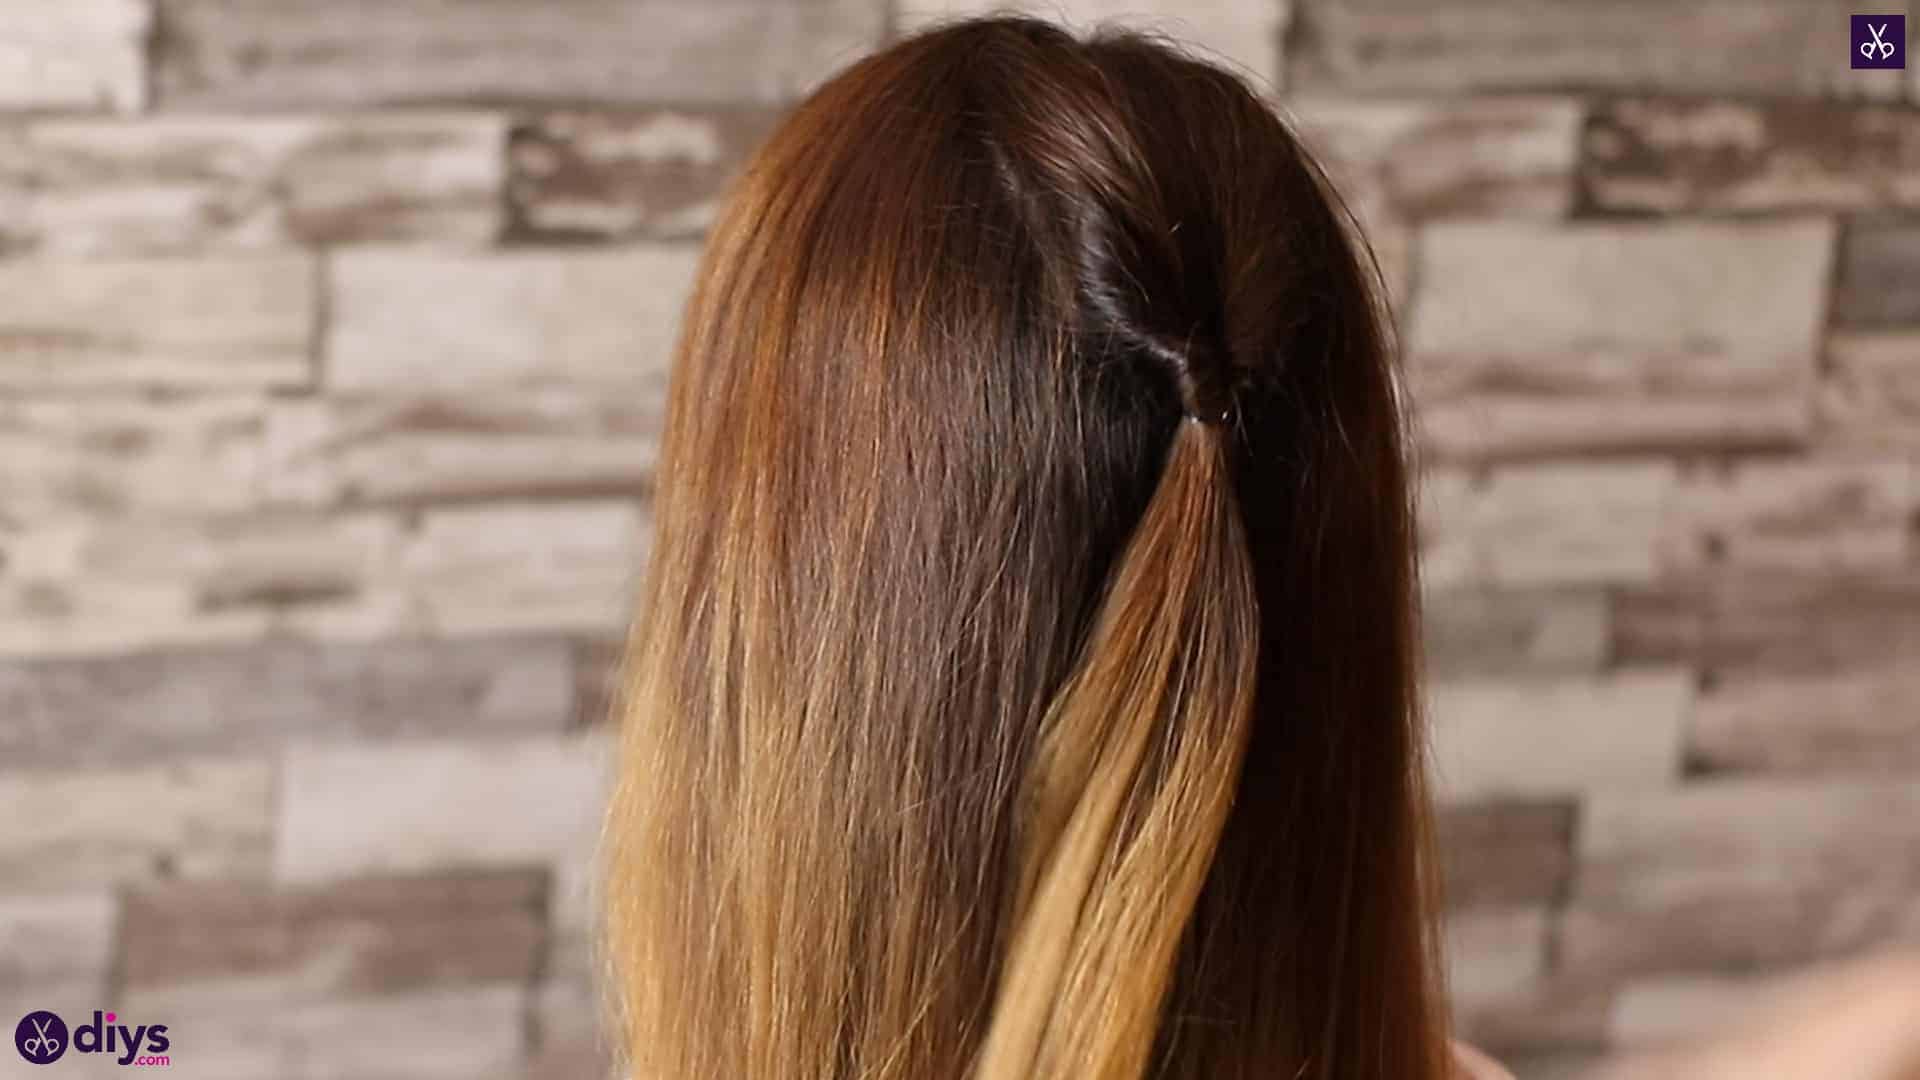
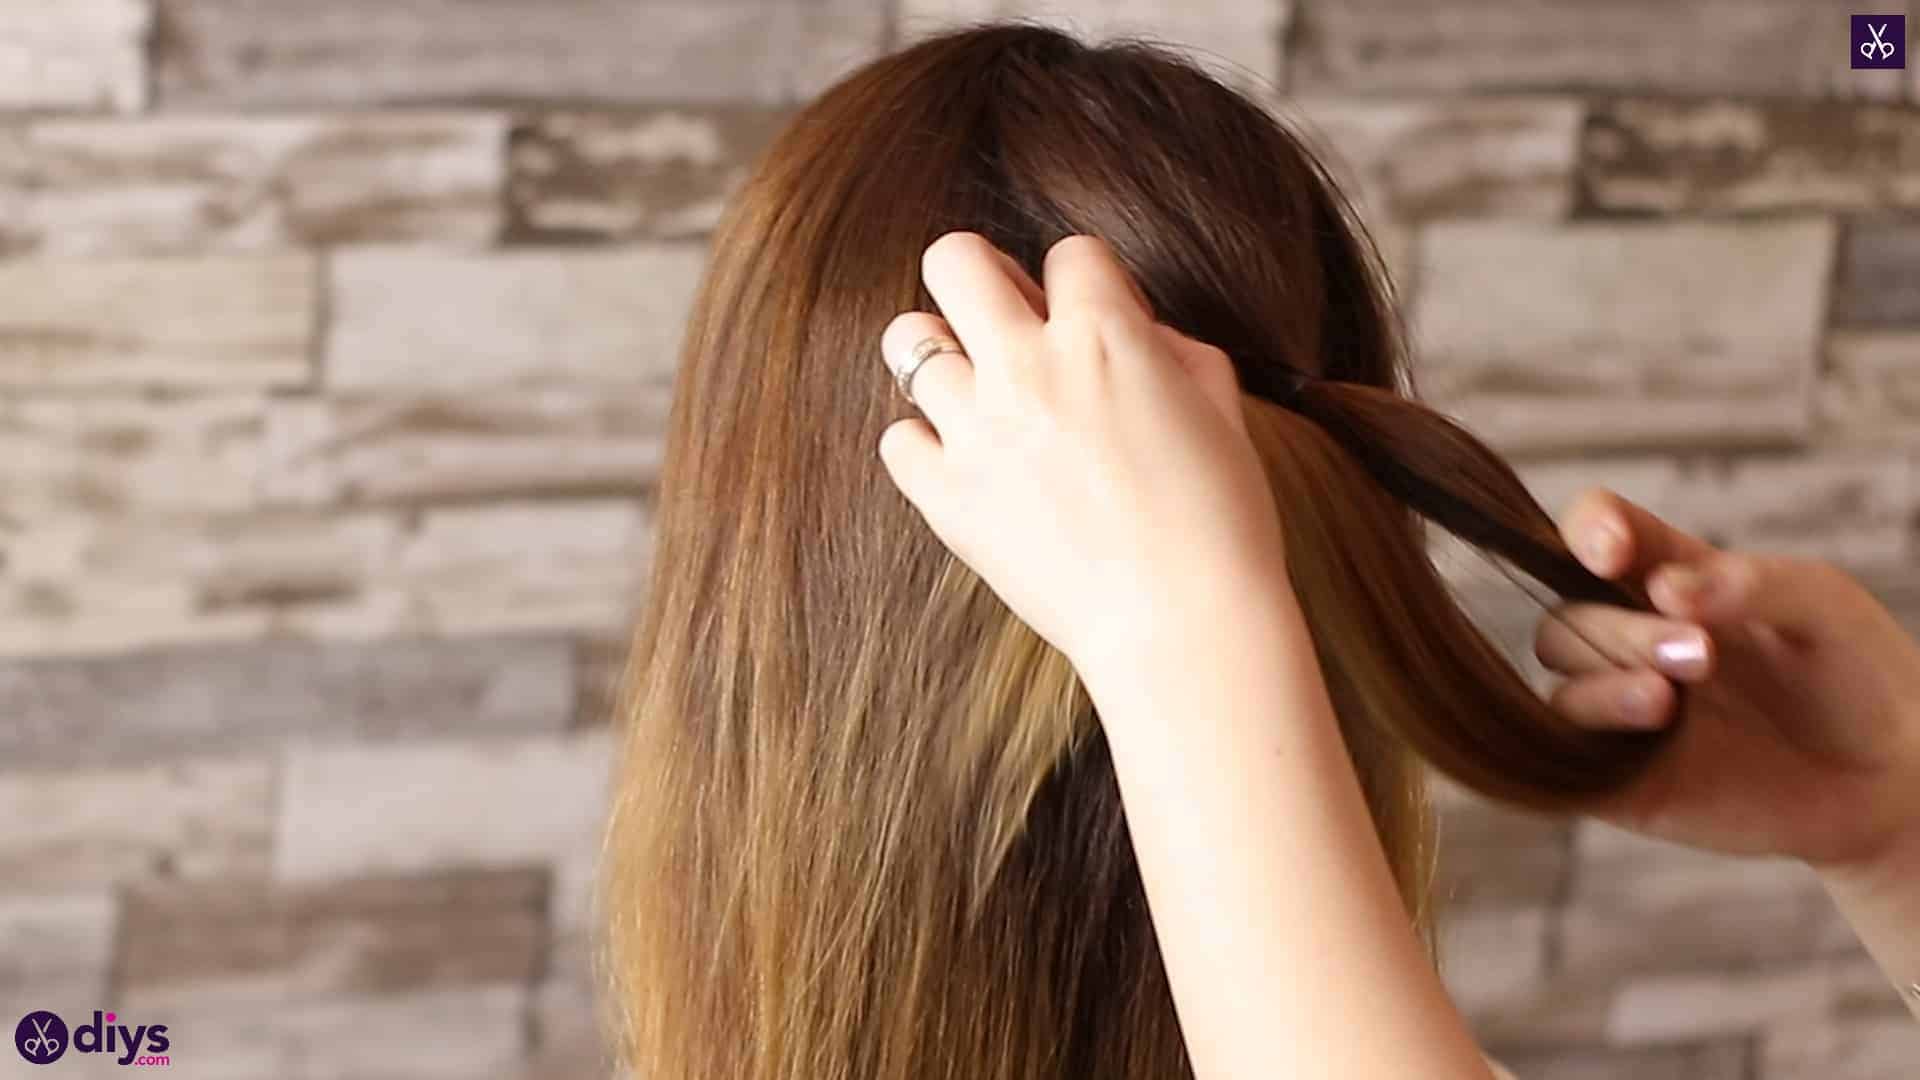
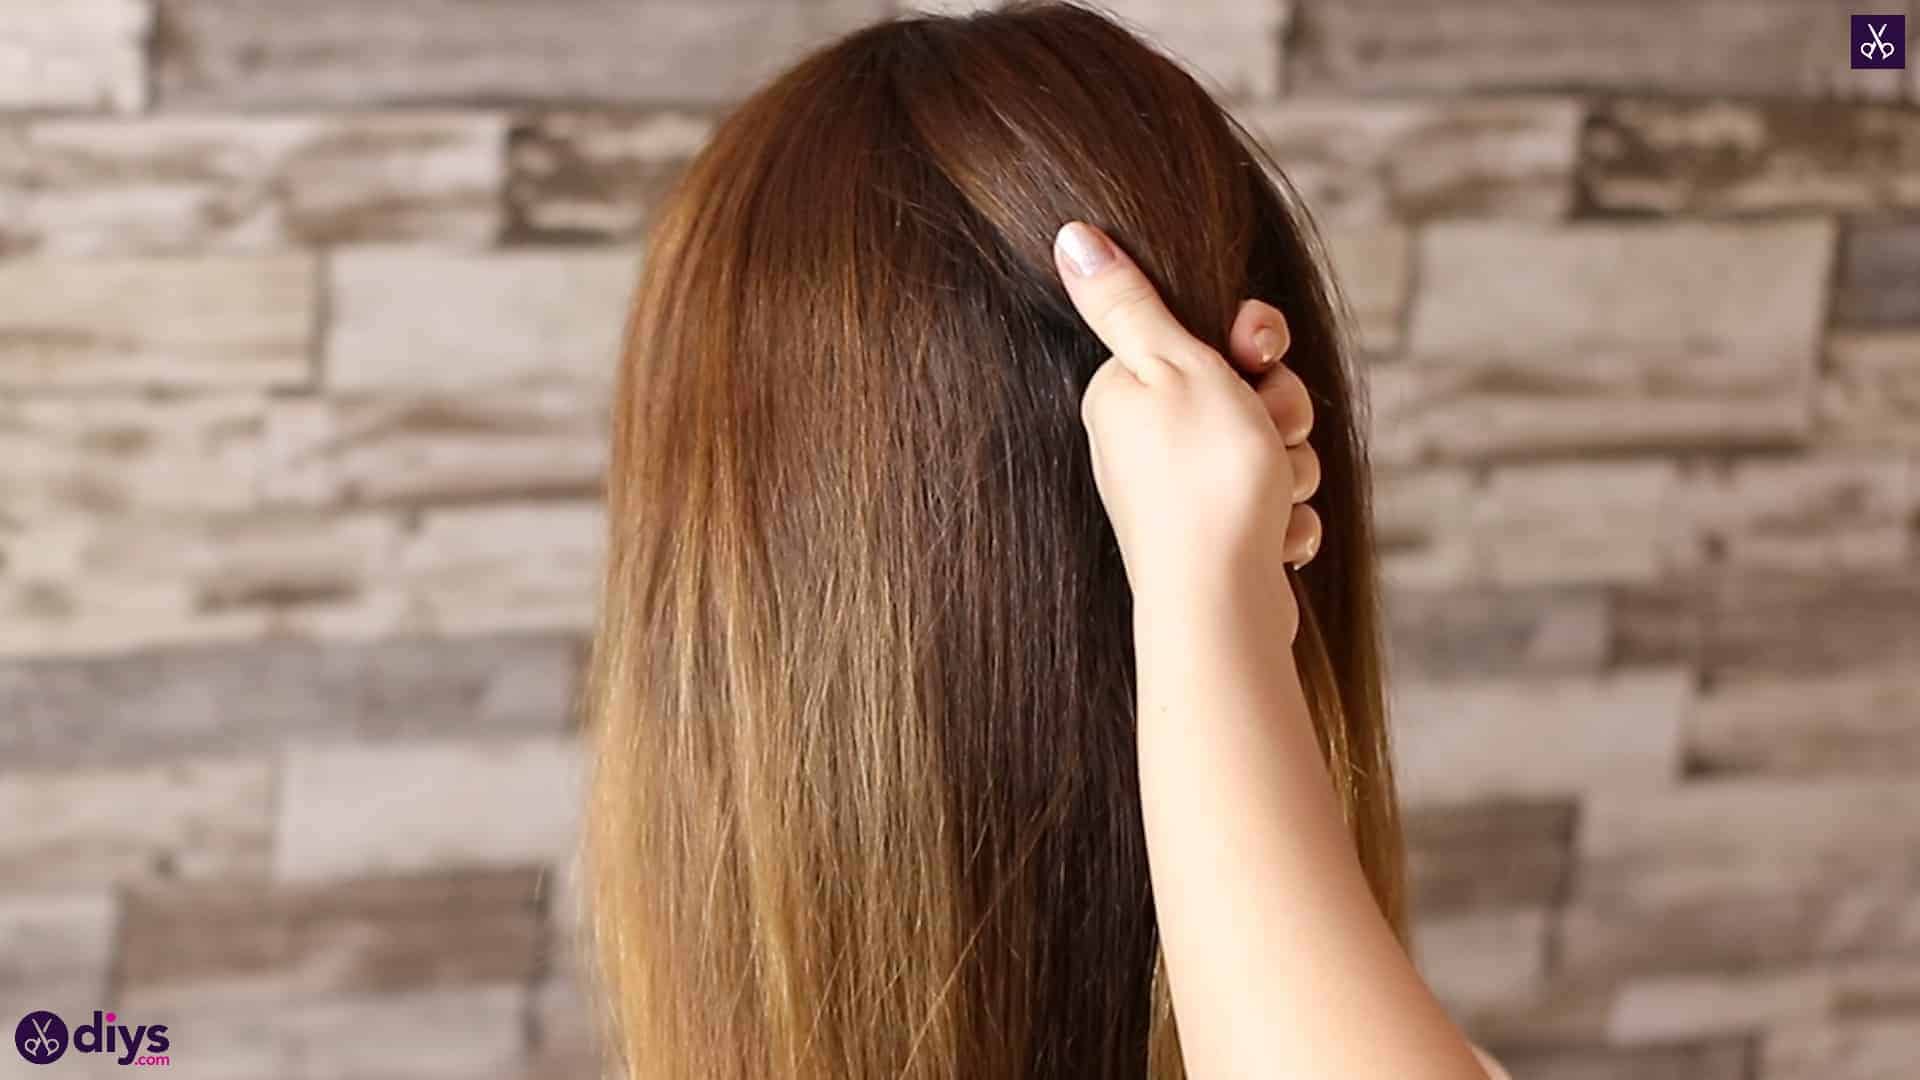
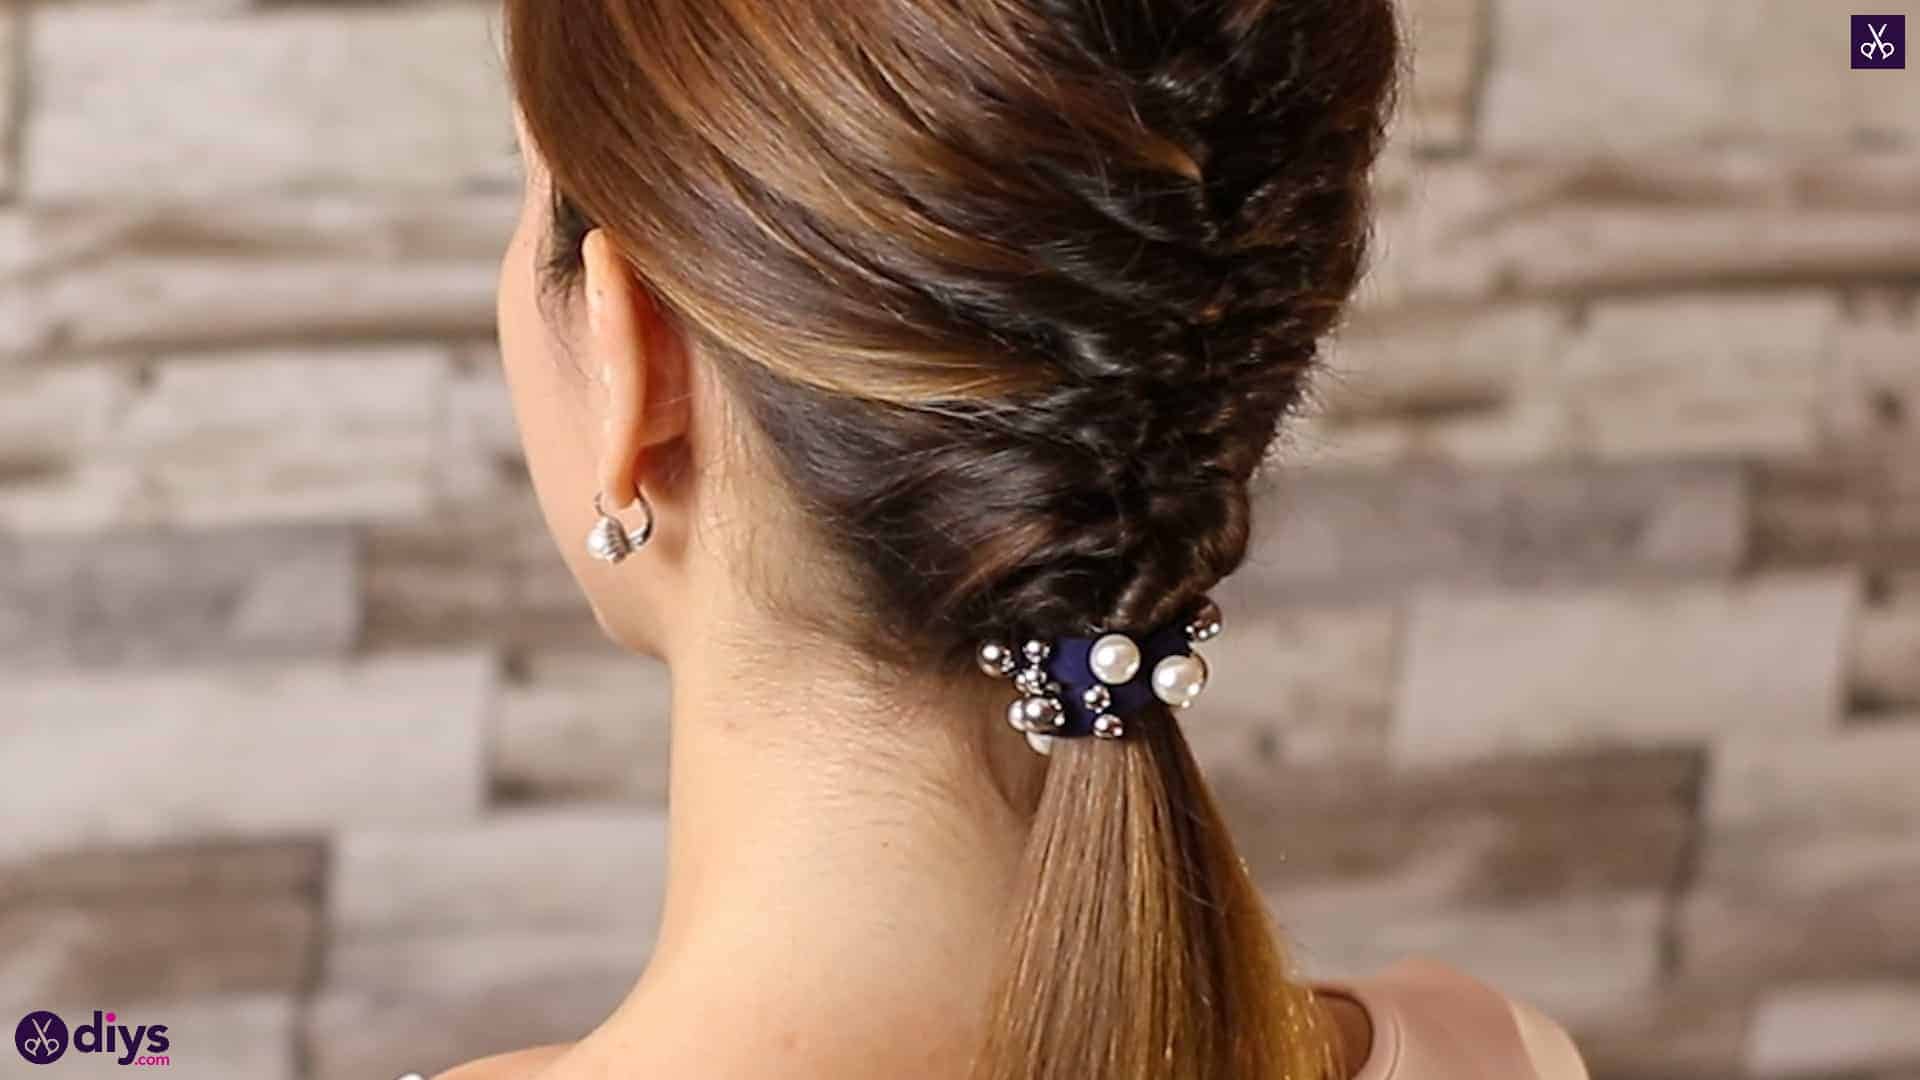
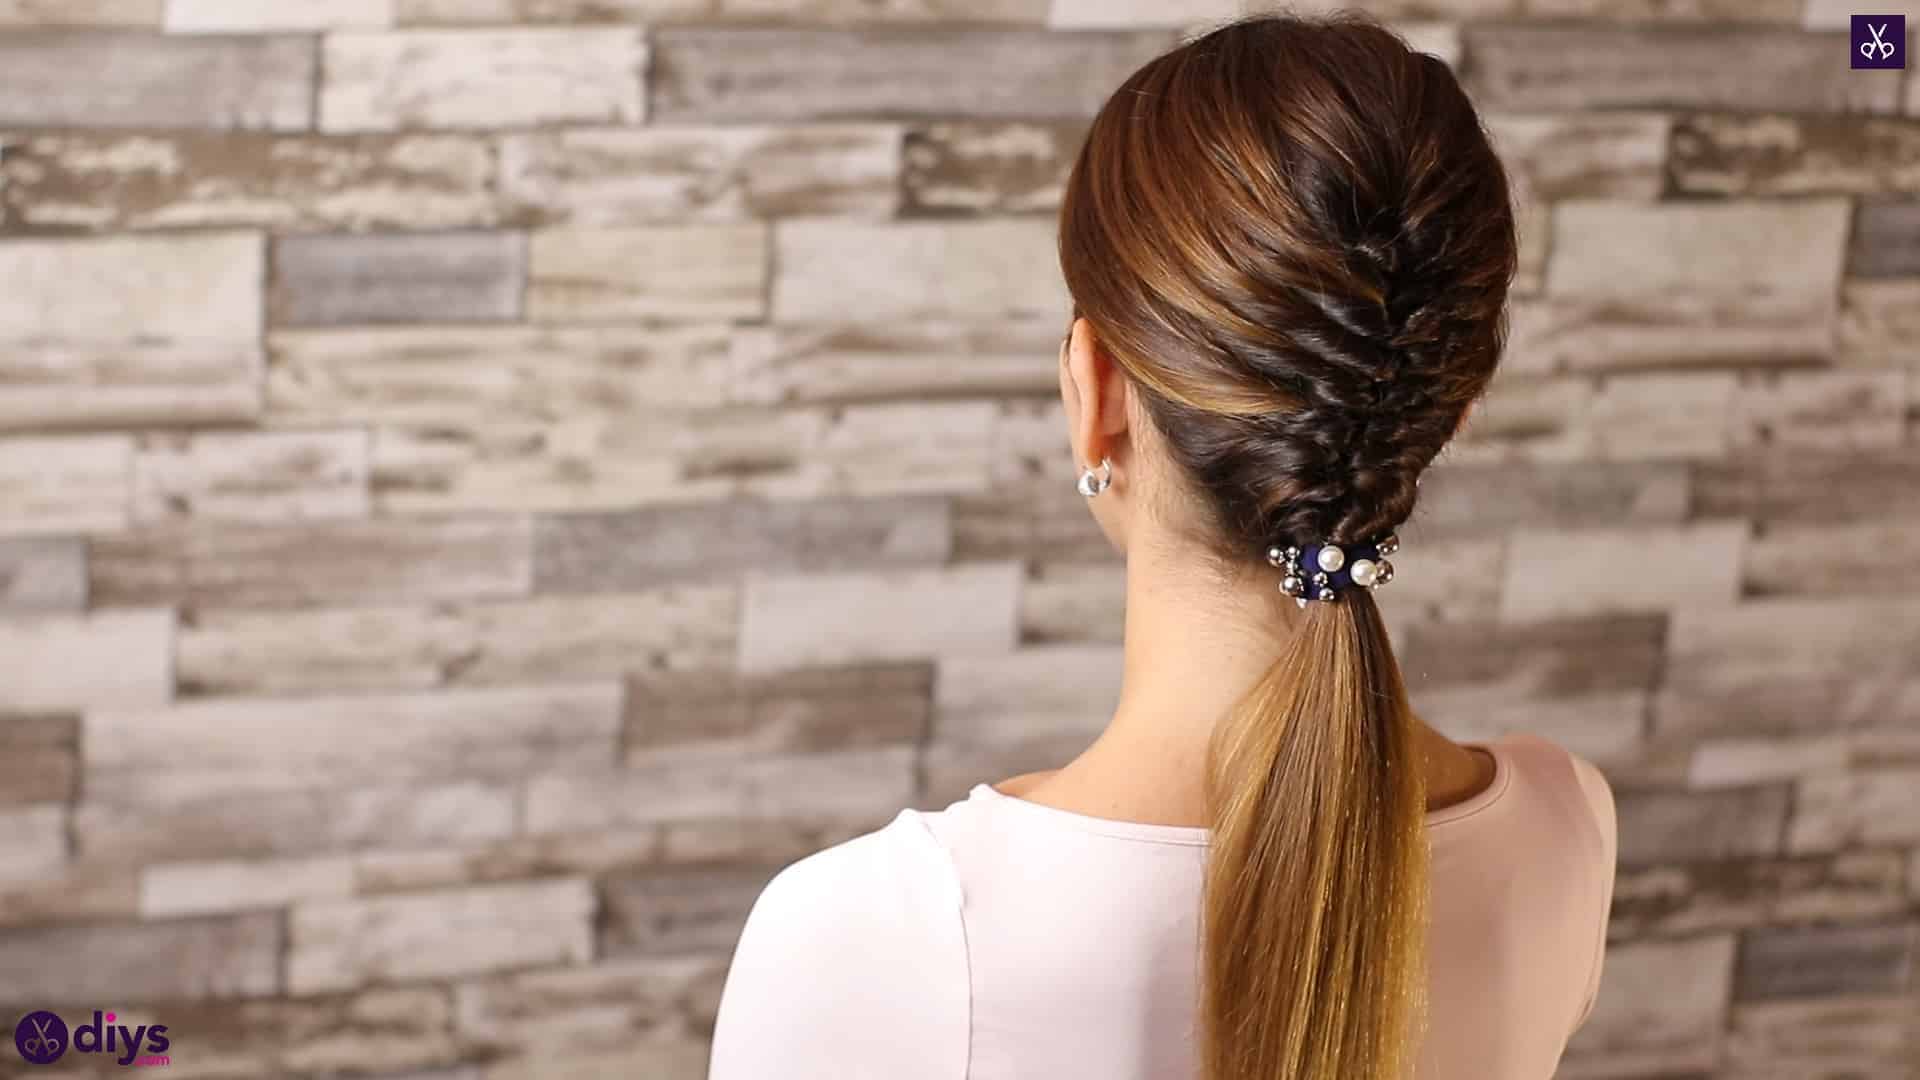
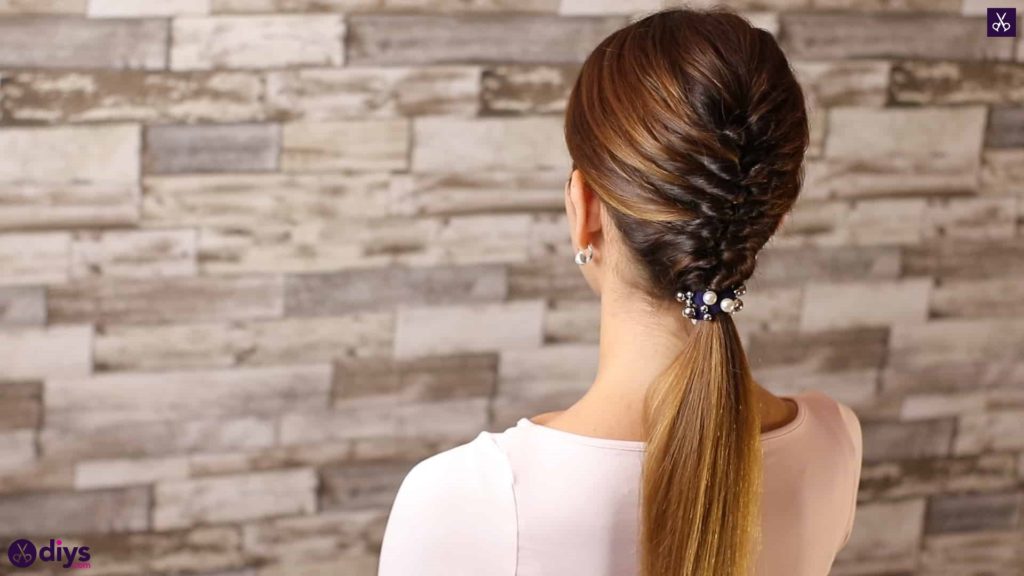
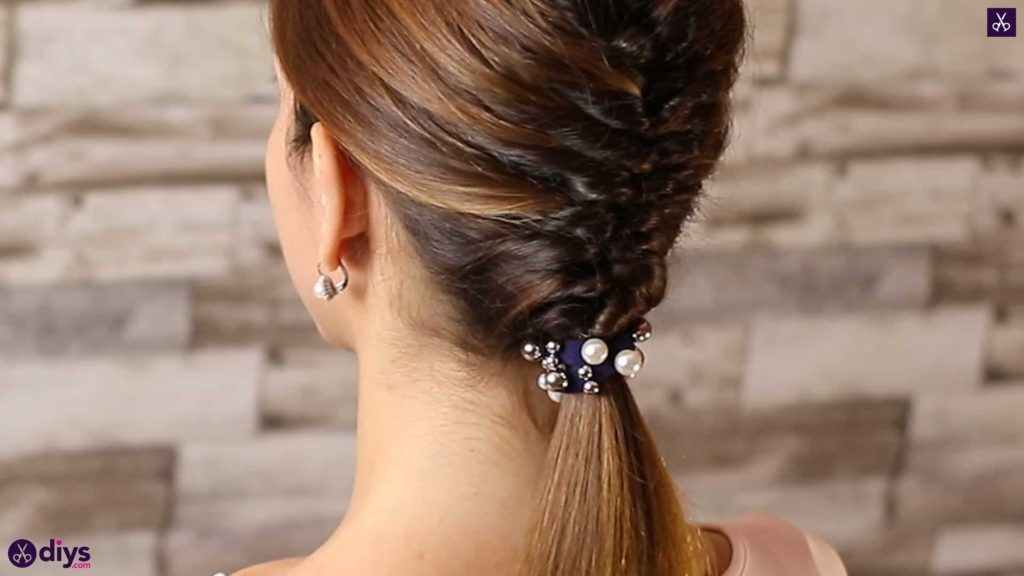
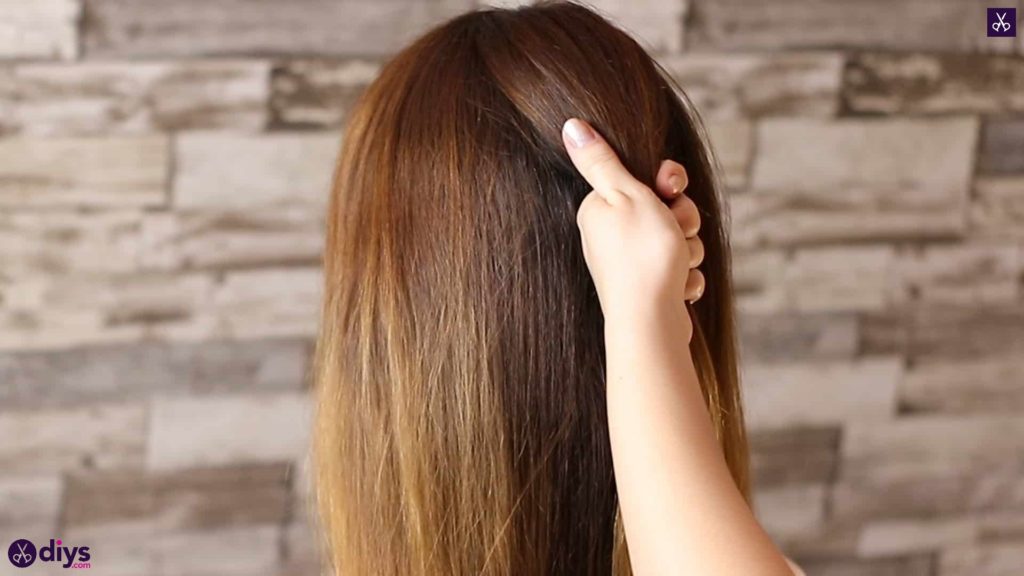
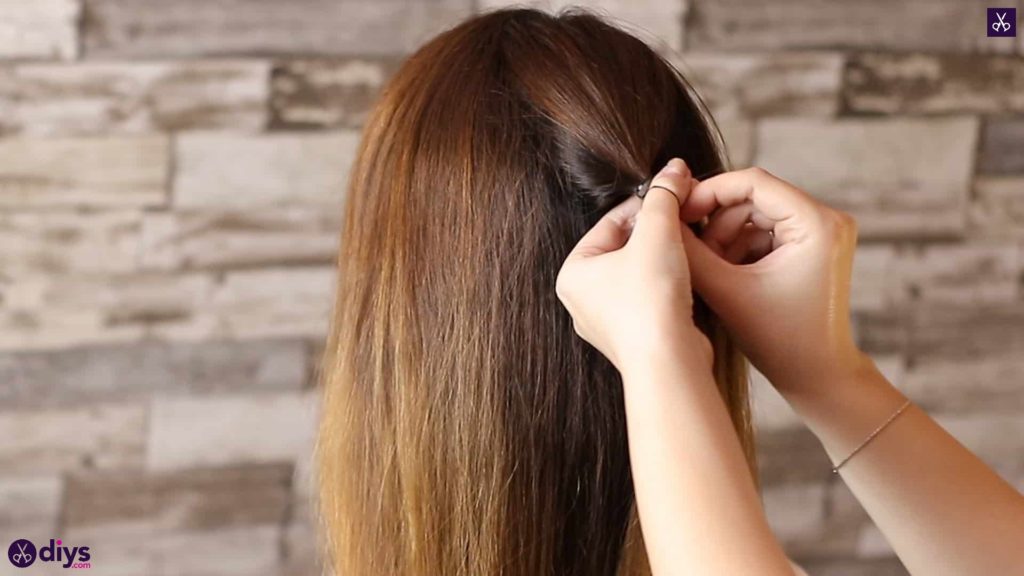
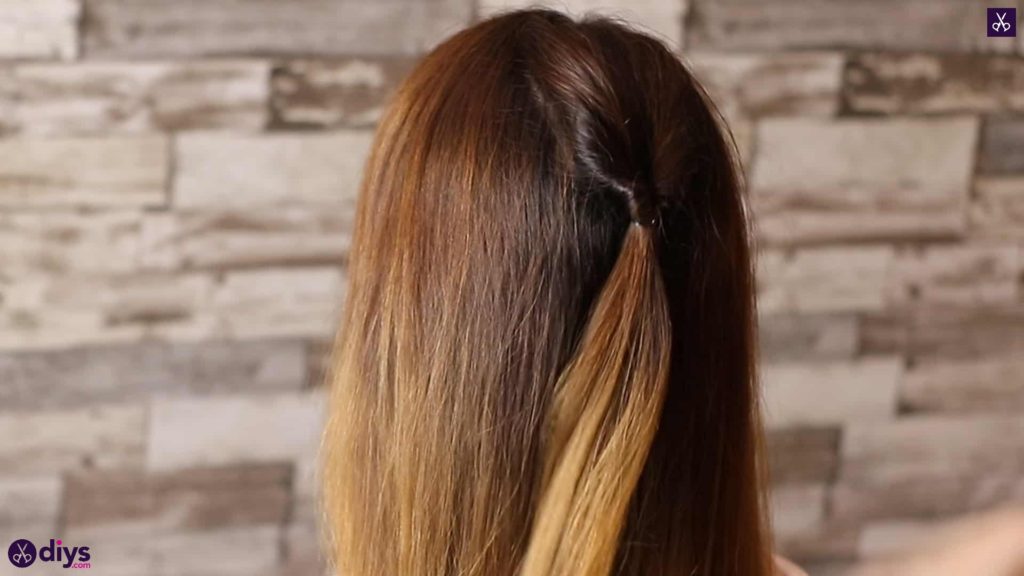
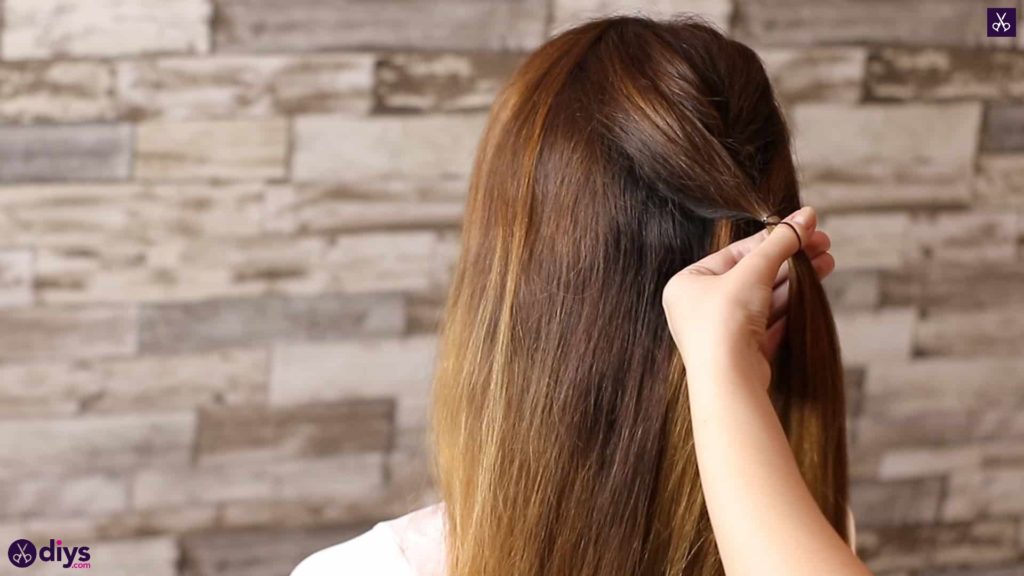
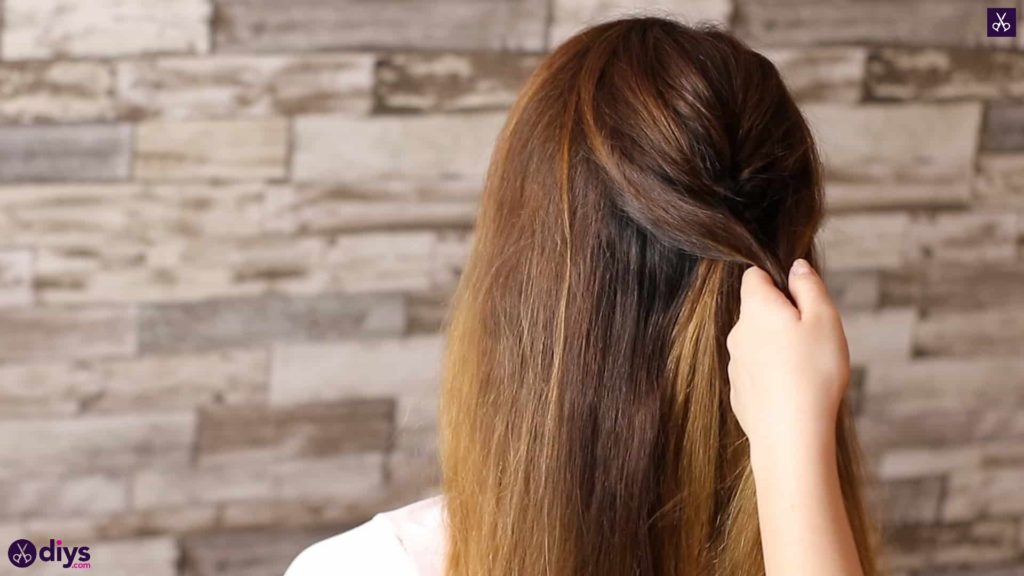
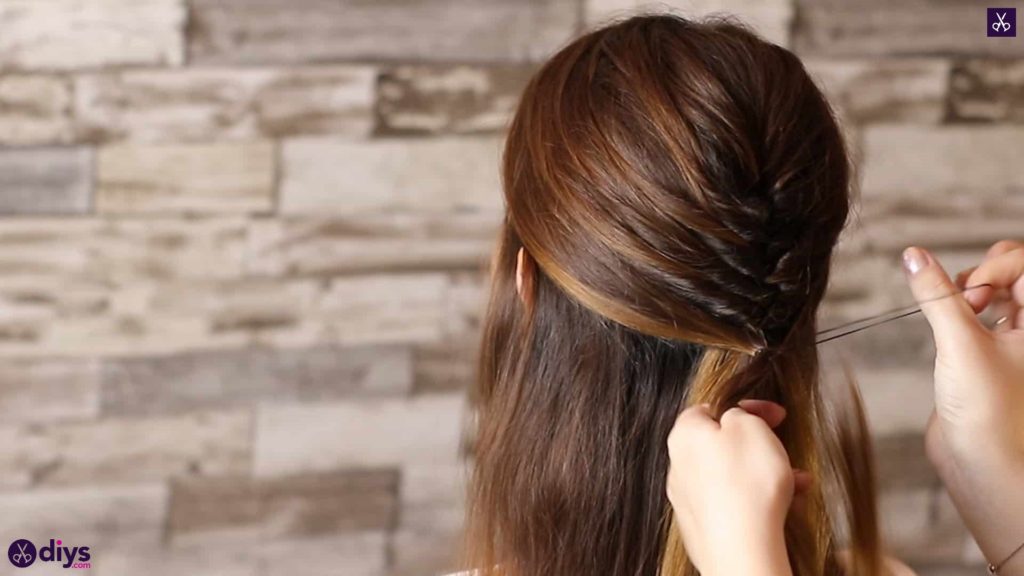
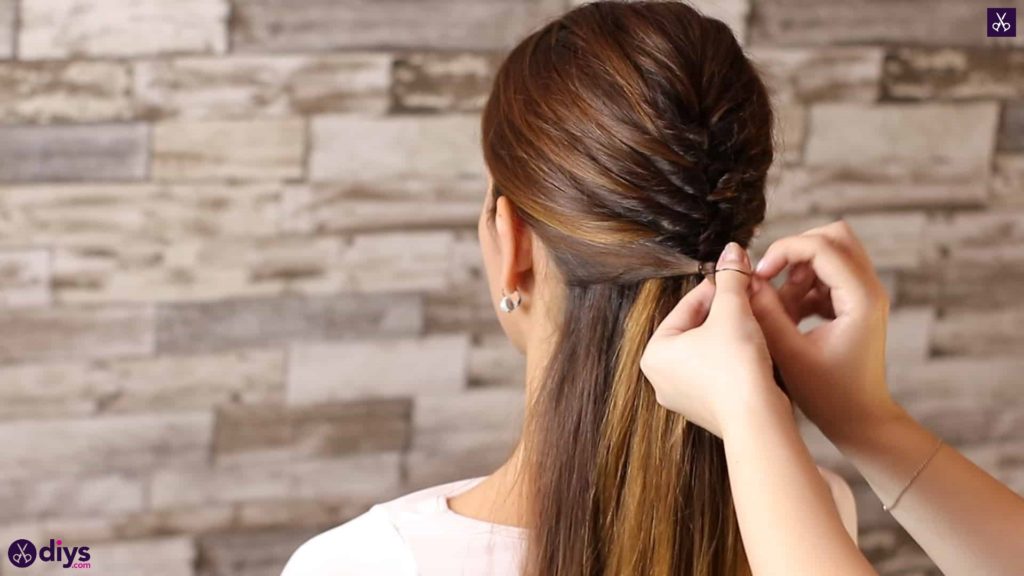
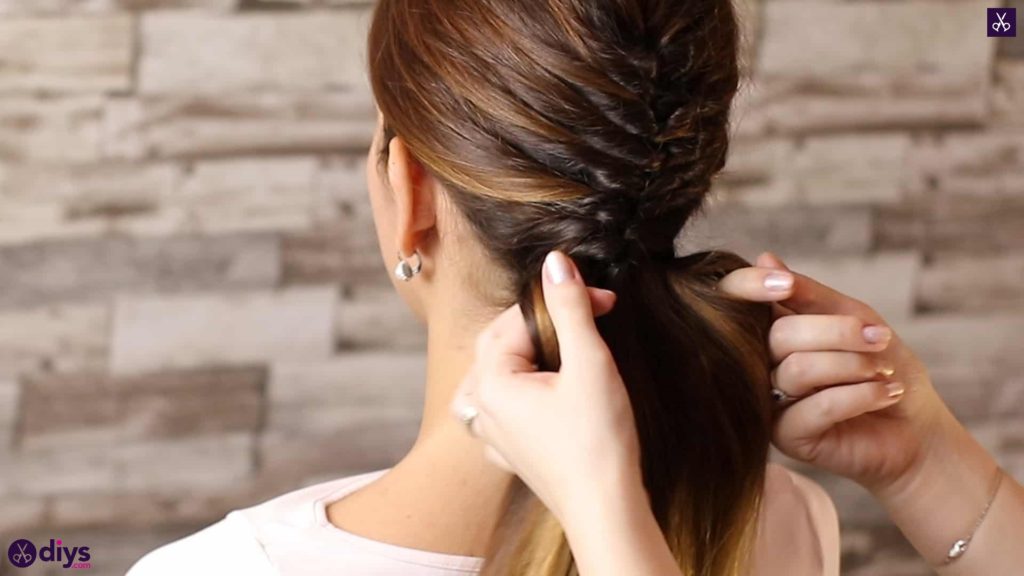
Brush your hair out entirely to rid it of tangles. Let it part where it wants to naturally unless you have a preference. My part was off the the right side. Starting at the crown of your head at the back, near the top, section a piece of hair about an in wide and fasten it into a loose ponytail with a small hair elastic. Don’t pull the ponytail very tight; you want to keep things relaxed because you’ll use a twisting technique that requires a bit of slack and tighten things up as you go. Once your elastic is in place, poke your finger up through the ponytail’s base, right above the hair elastic you just put in, and create a space there big enough for your thumb and forefinger to reach up through. Use your other hand to bring the ponytail upward, grabbing it with the thumb and forefinger to pull the whole ponytail through the hole you created, twisting the based of the ponytail lightly.


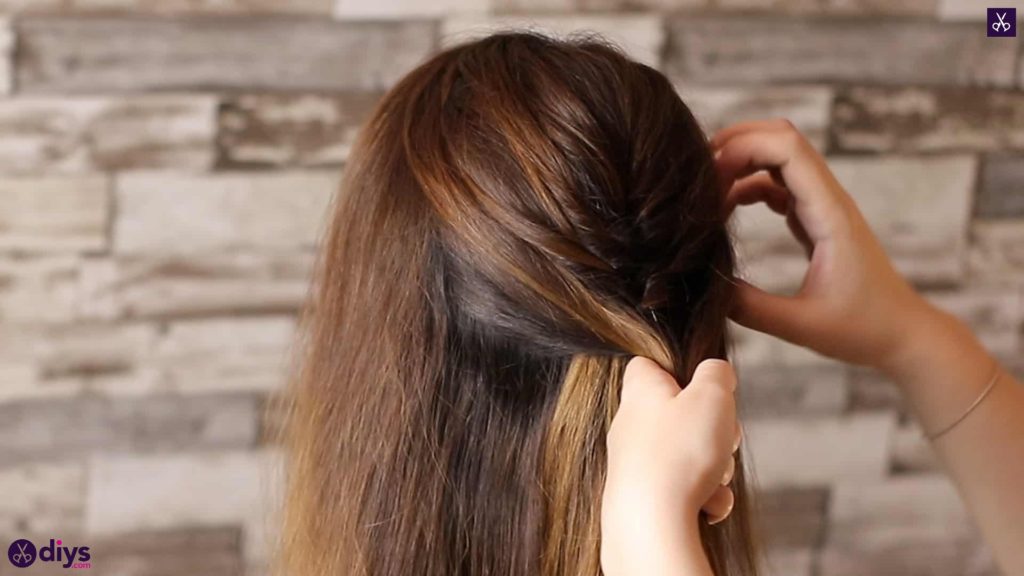
Step 2: continue process
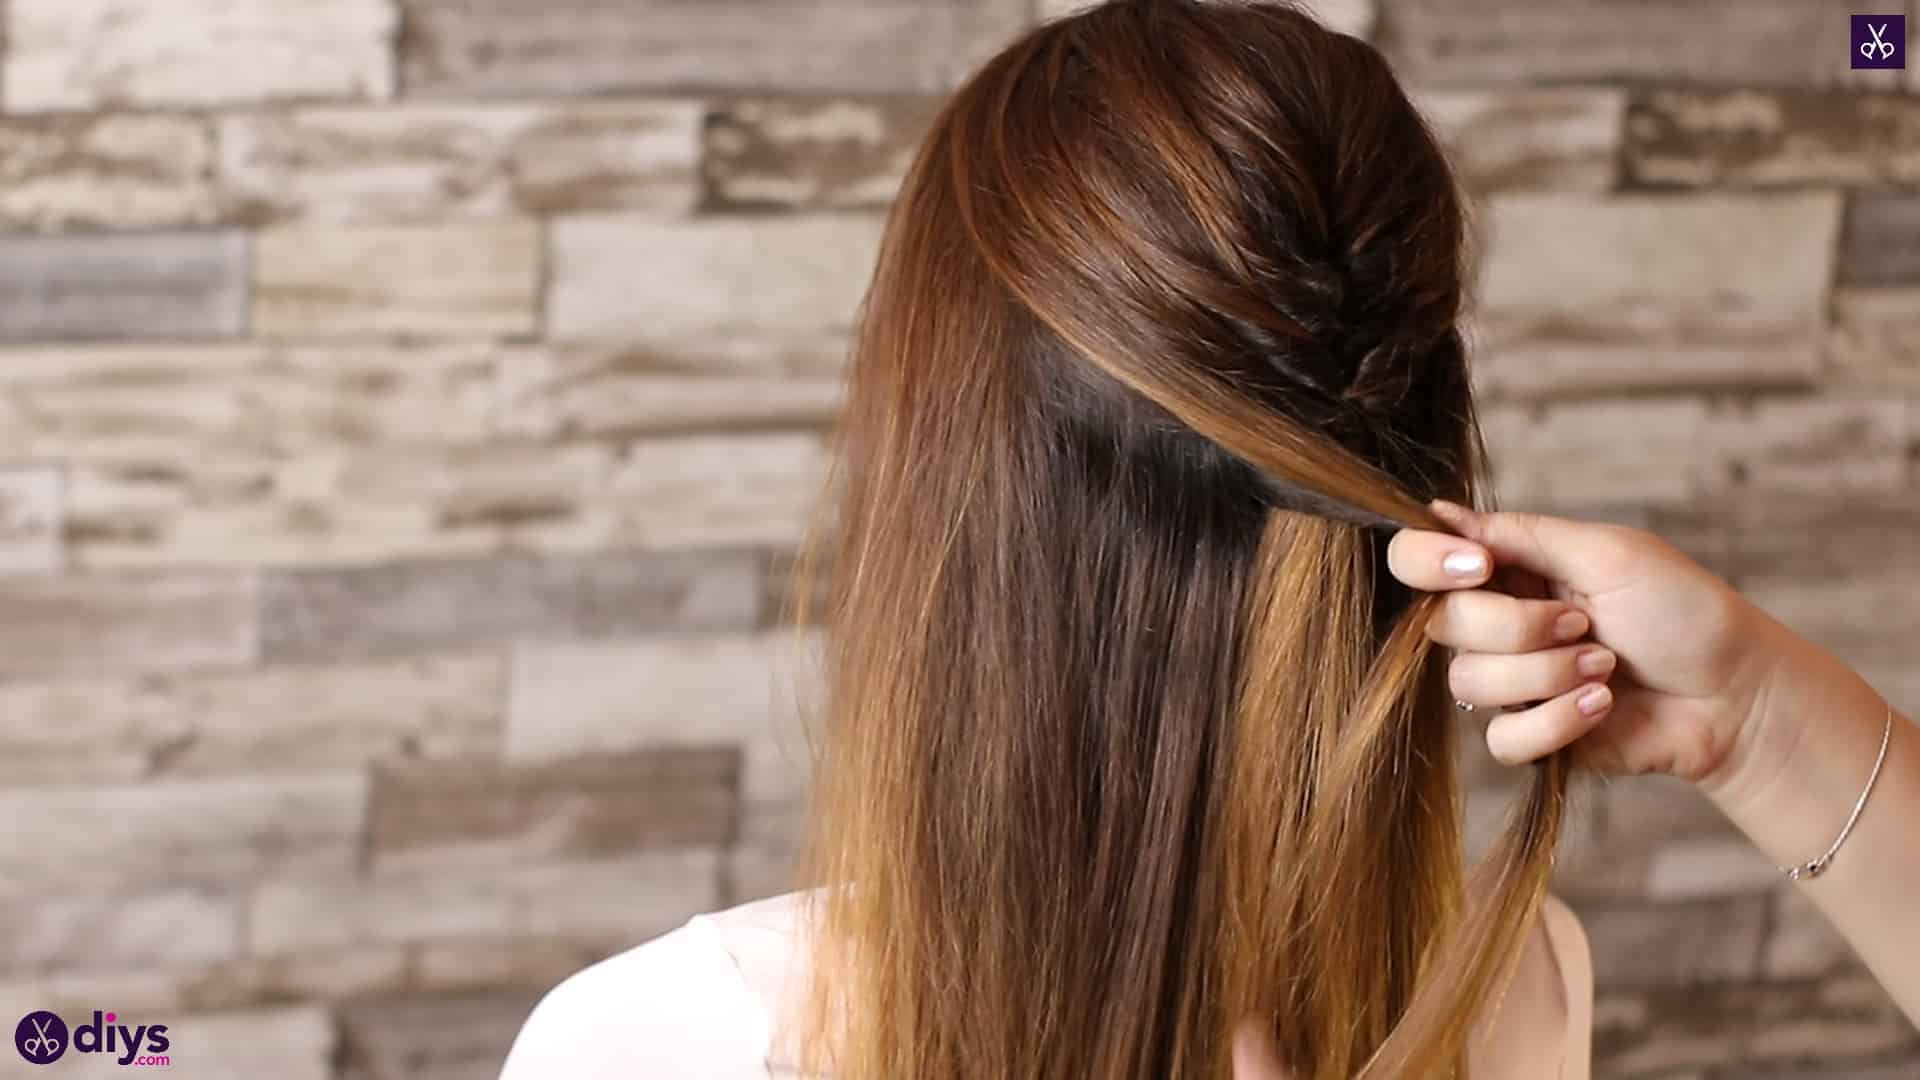
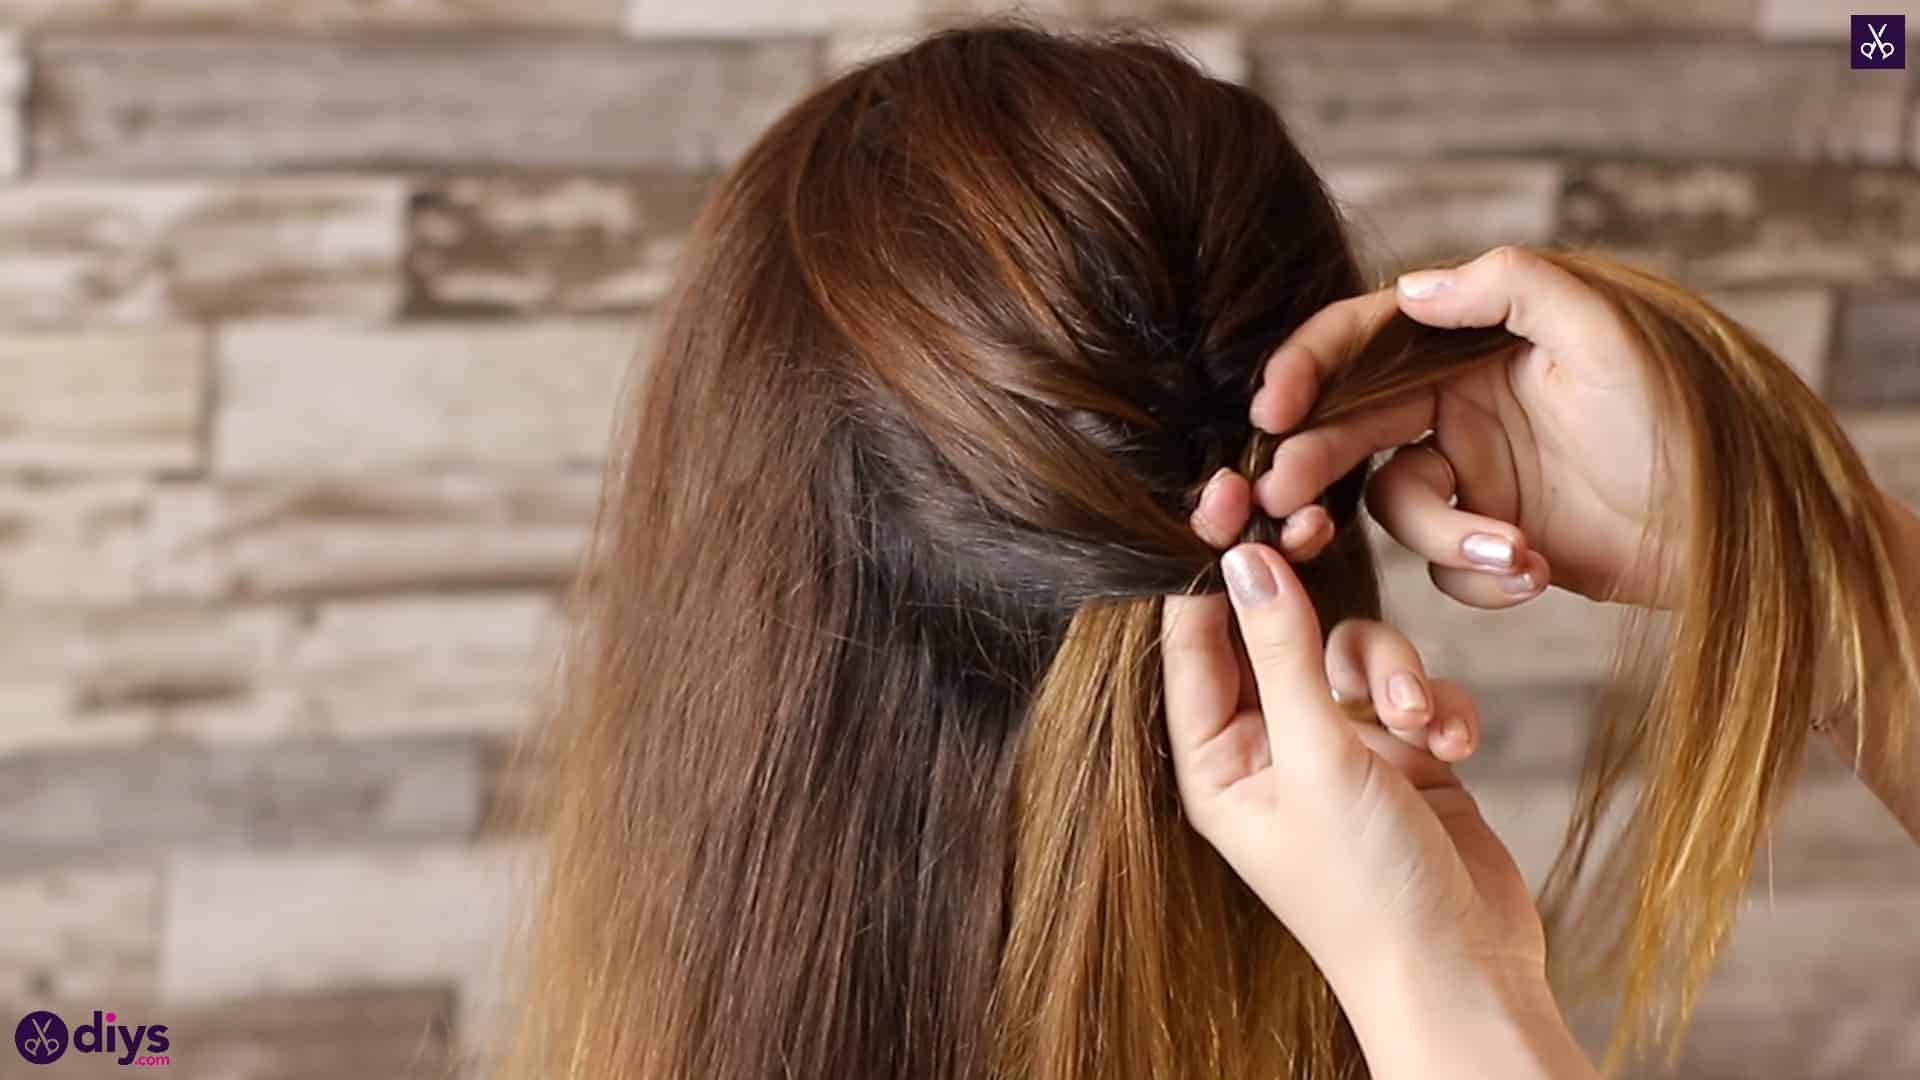
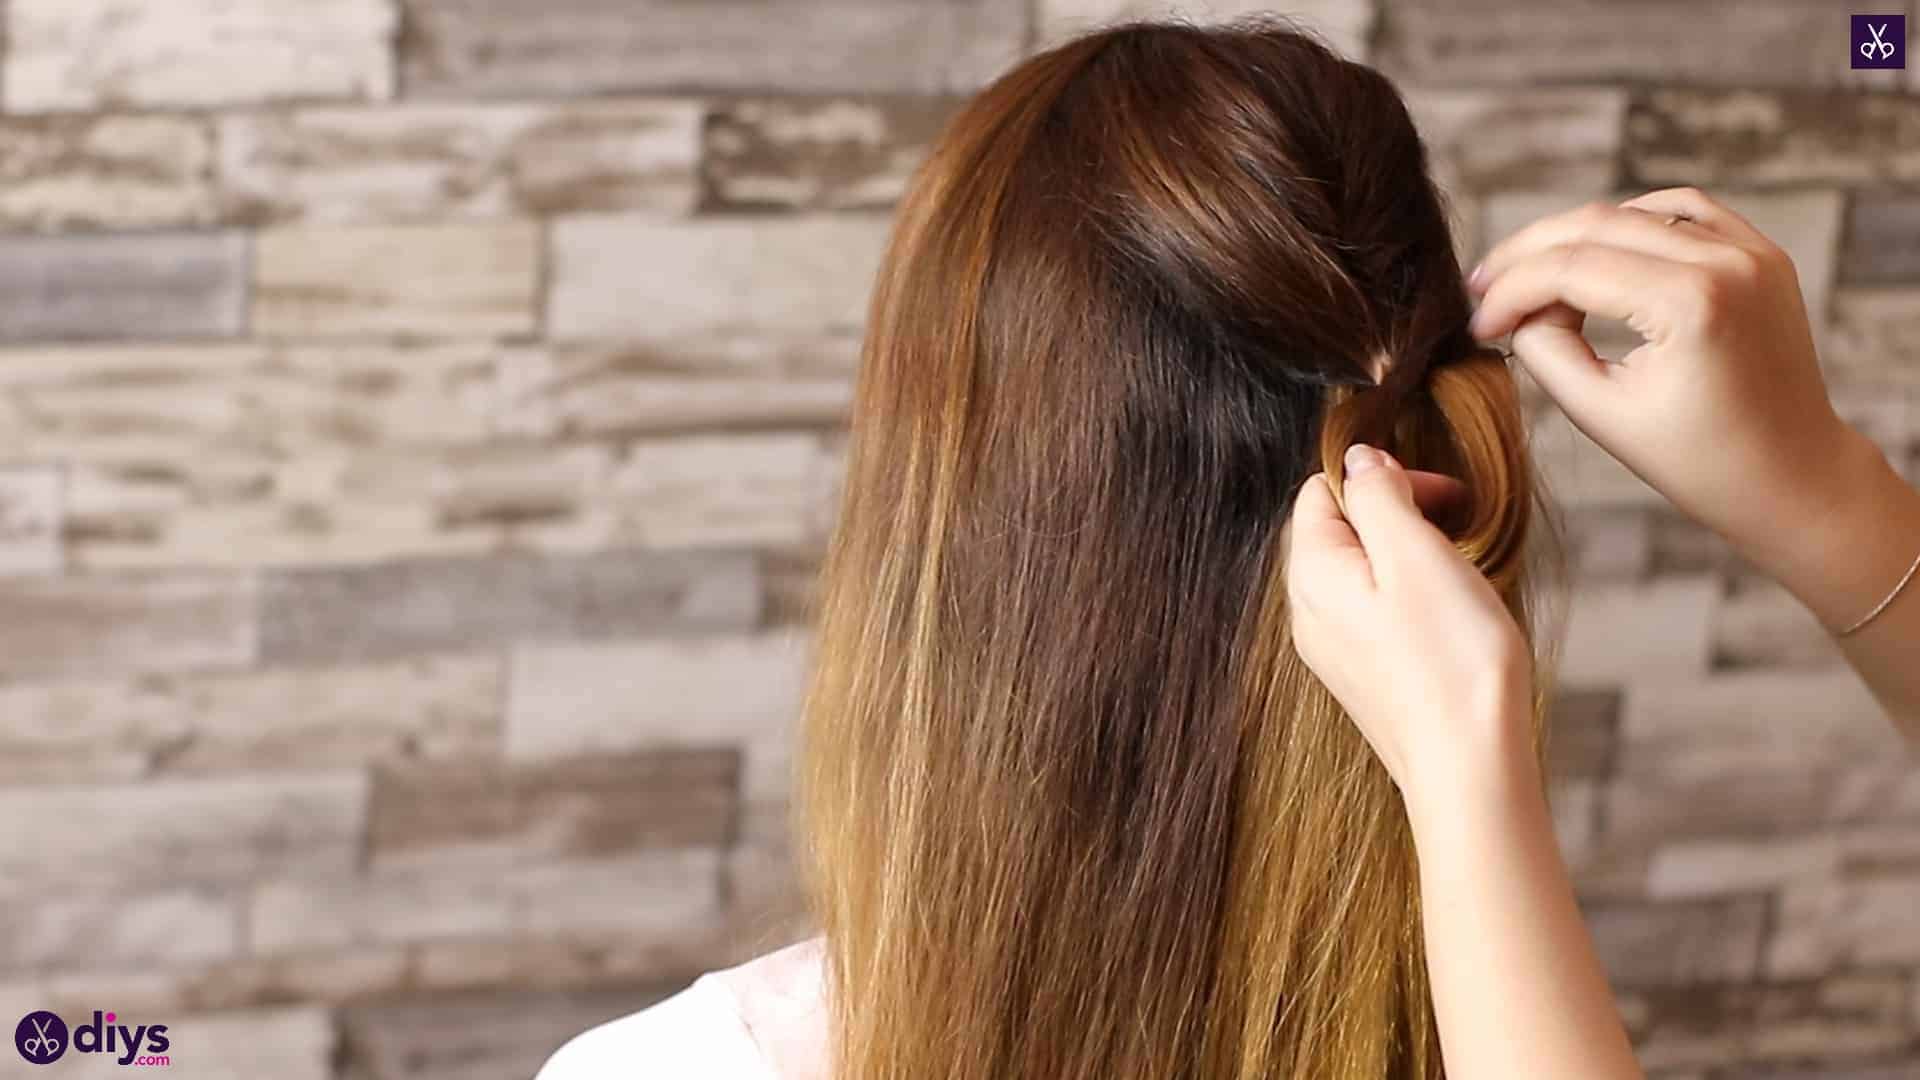
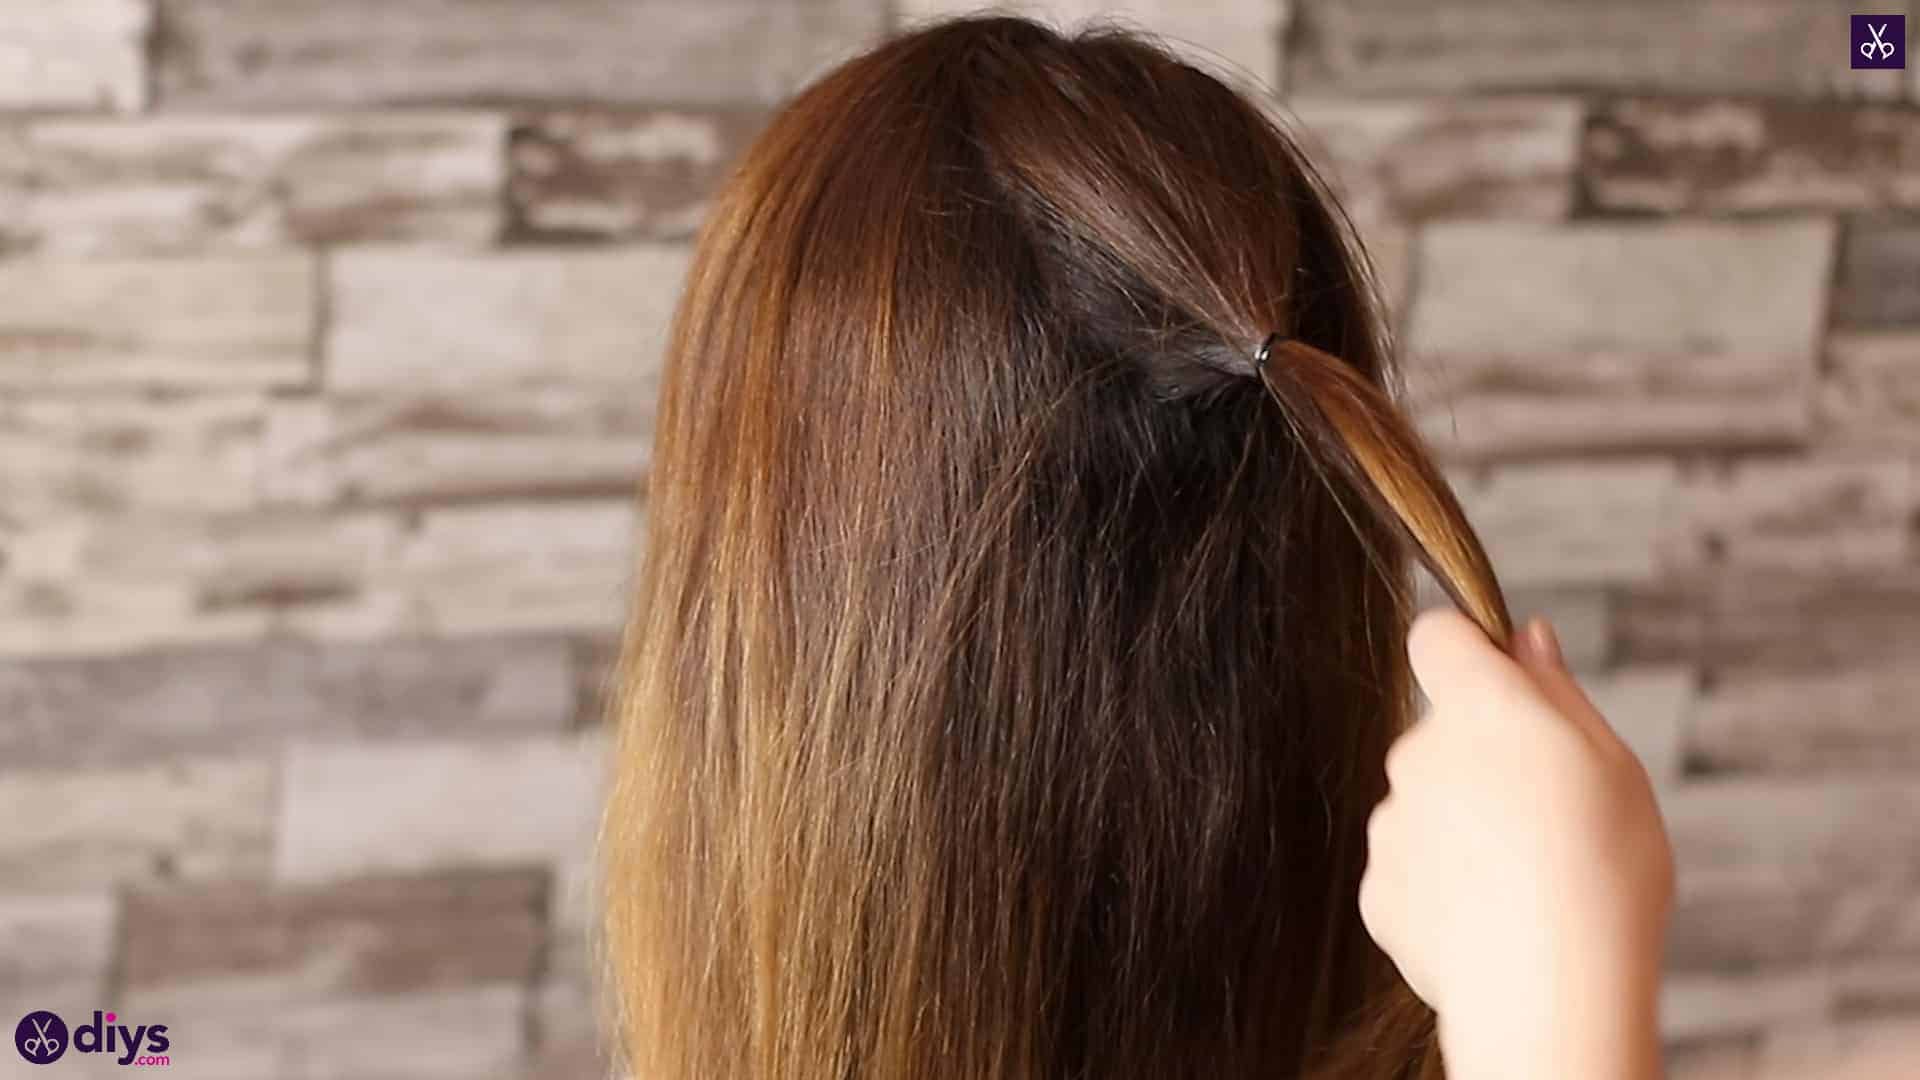
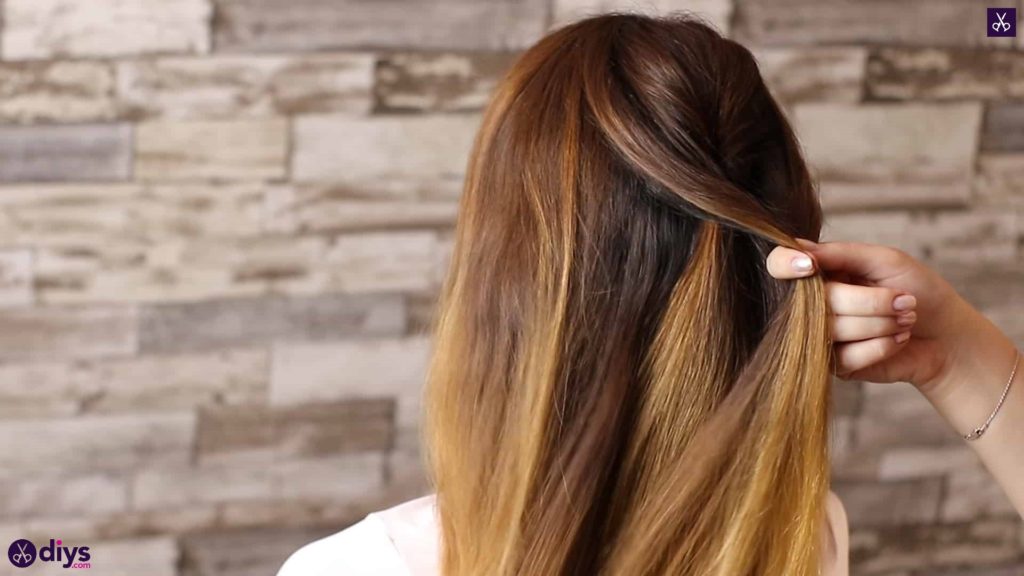
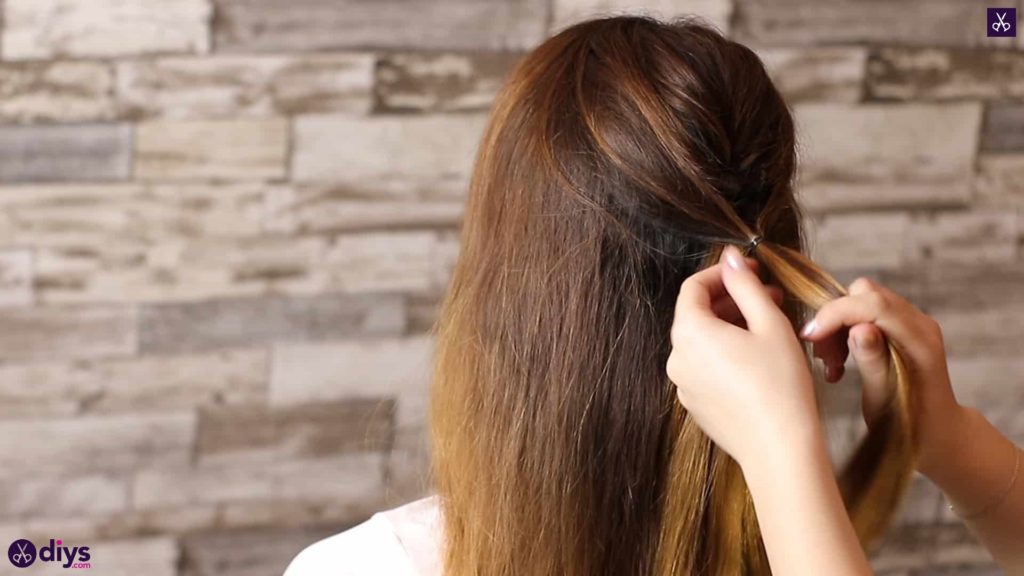
Using a similar gathering technique to French or Dutch braiding, where you take another section of hair from each side of the style each time until you’ve slowly gathered it all towards the back, take a new section of hair from the left and right in each hand, slightly lower on the head than your original, and ring the strands back to meet together in the middle below the first twist you just made. Tie these strands in place with a small hair elastic like you did before, leaving some slack once more. Use the same technique of creating a hole from below and pulling your ponytail up and through to loop the piece back on itself and create a second twist shape underneath the first.


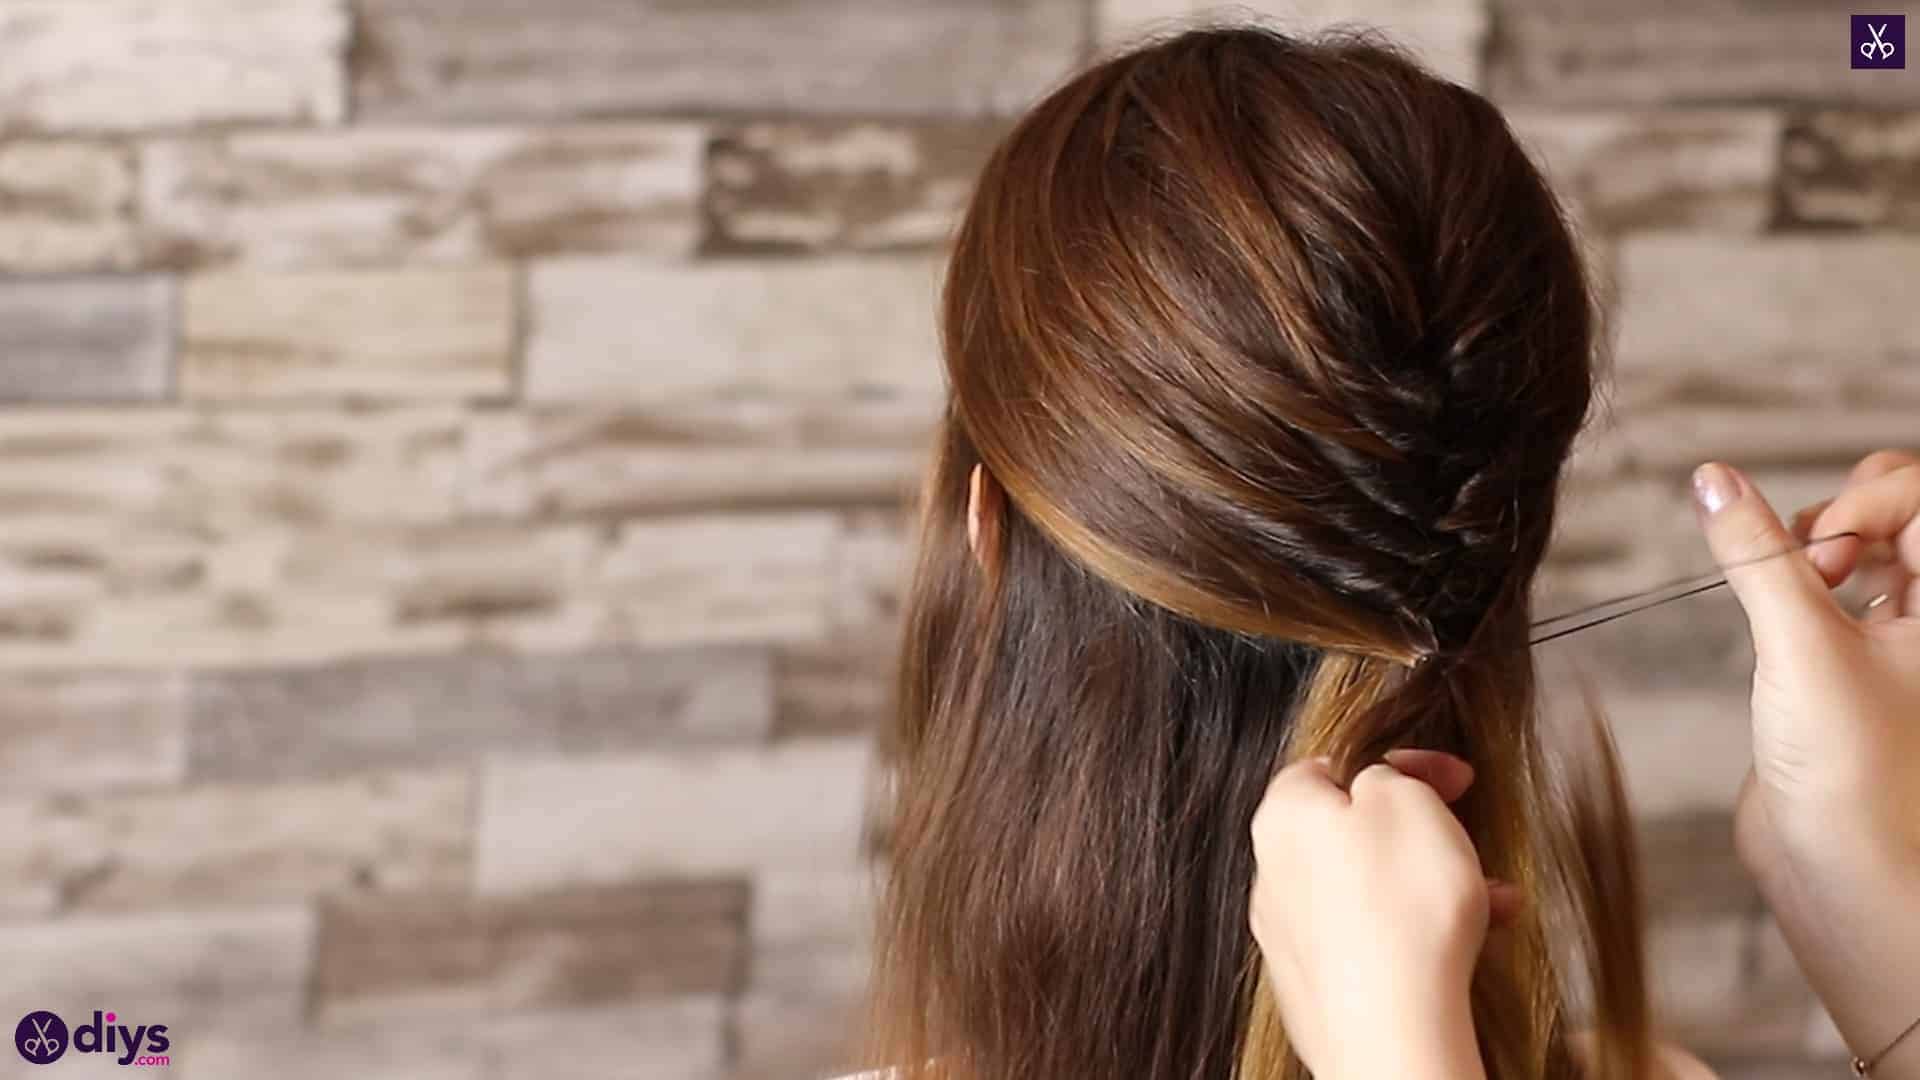
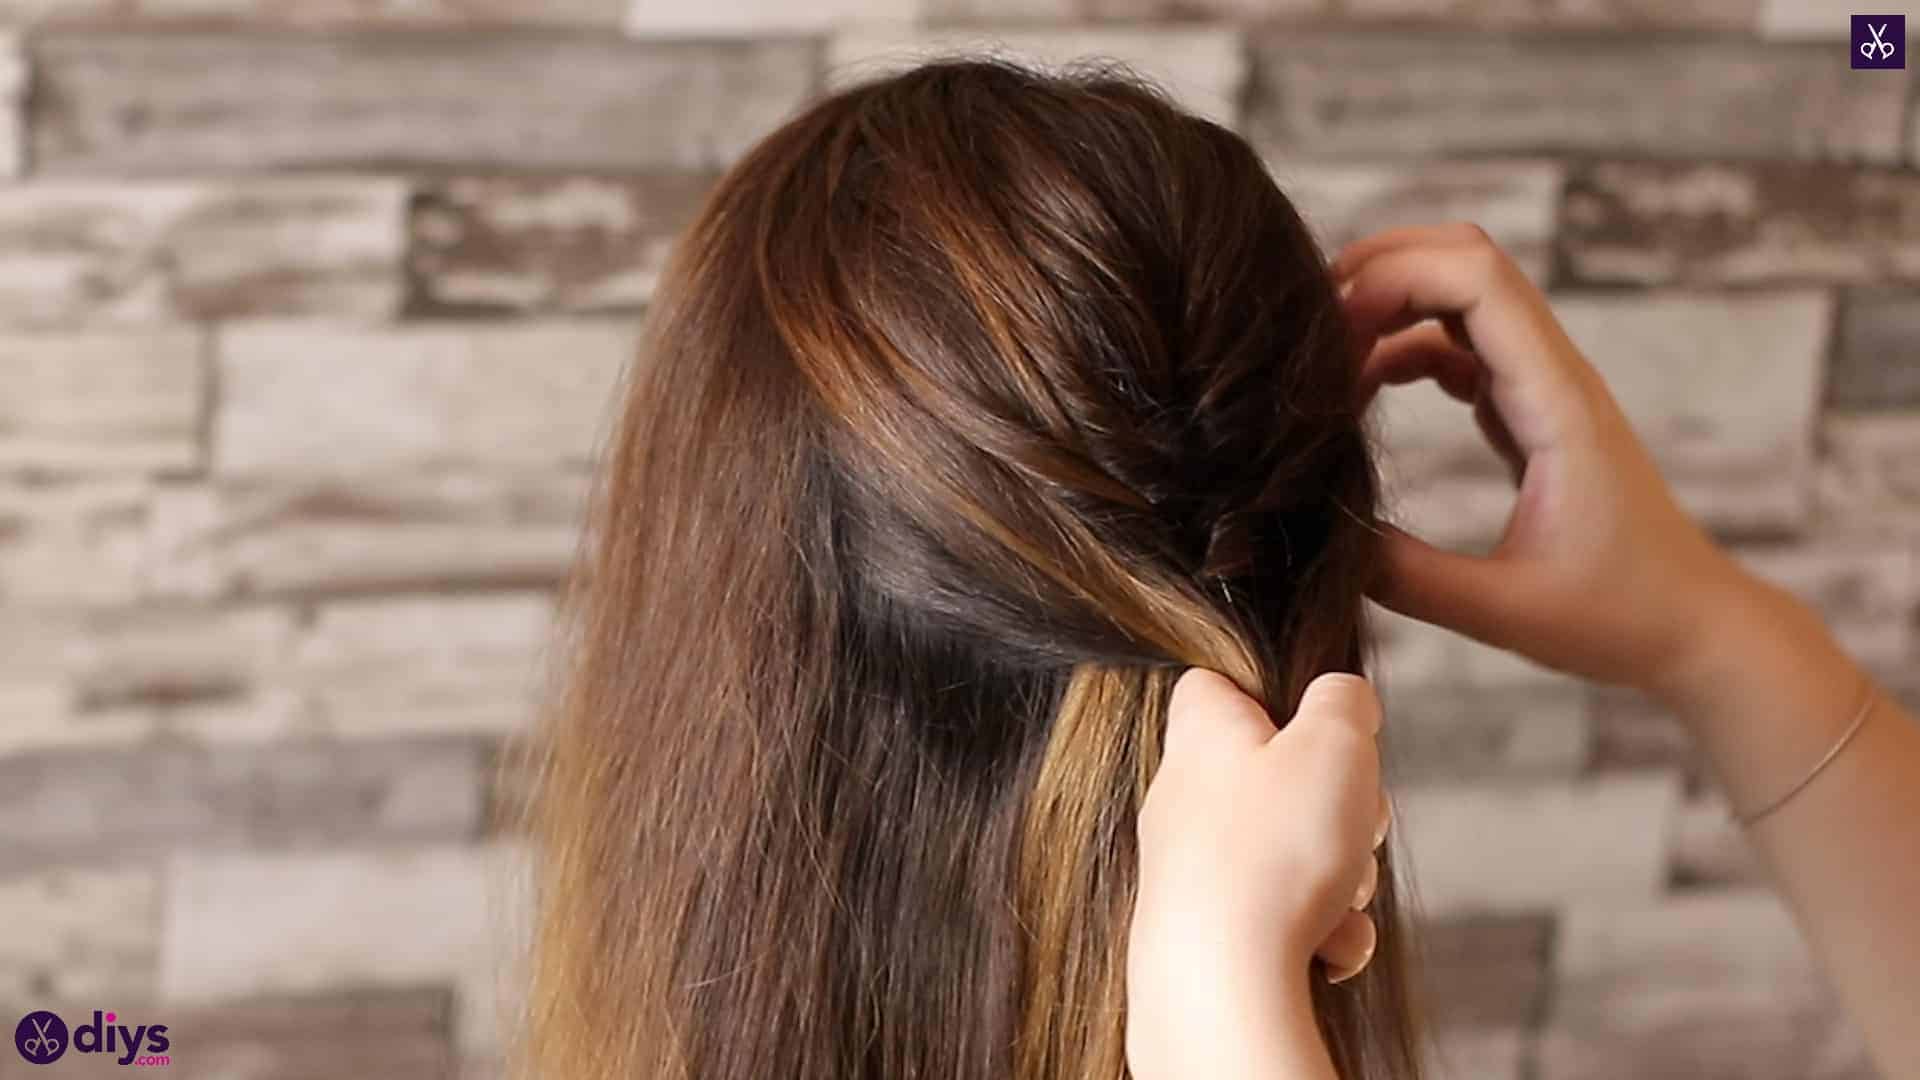
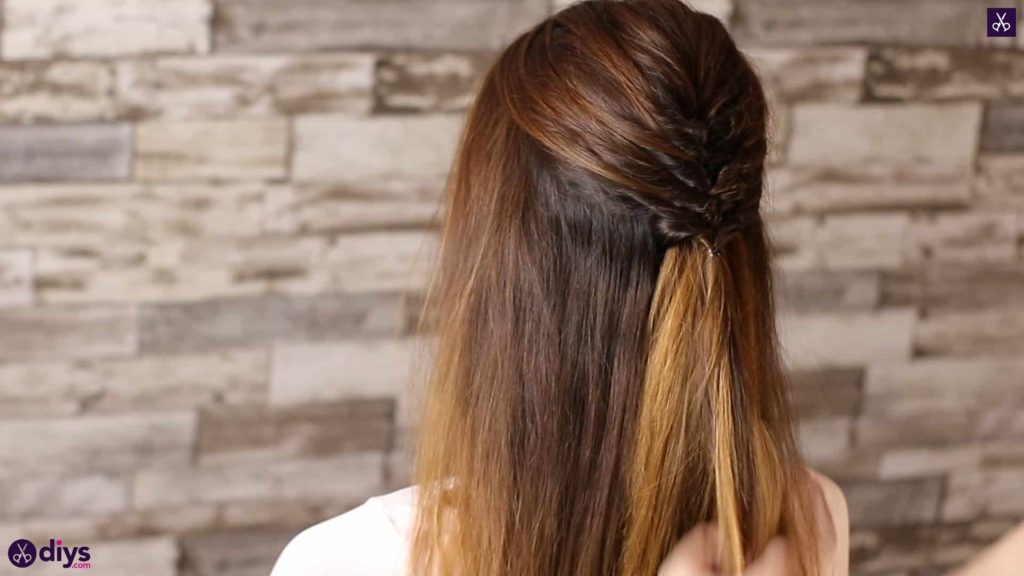
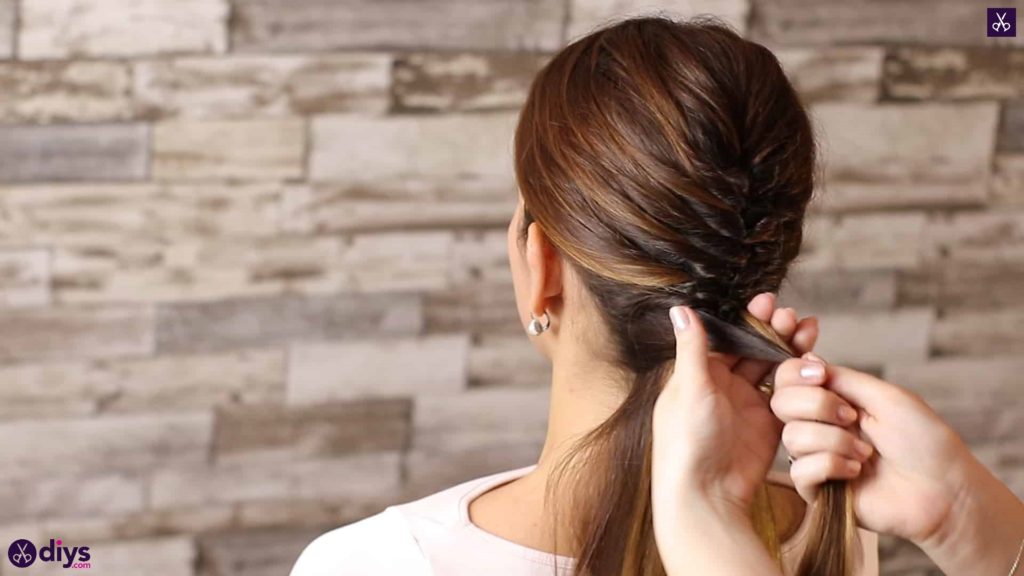
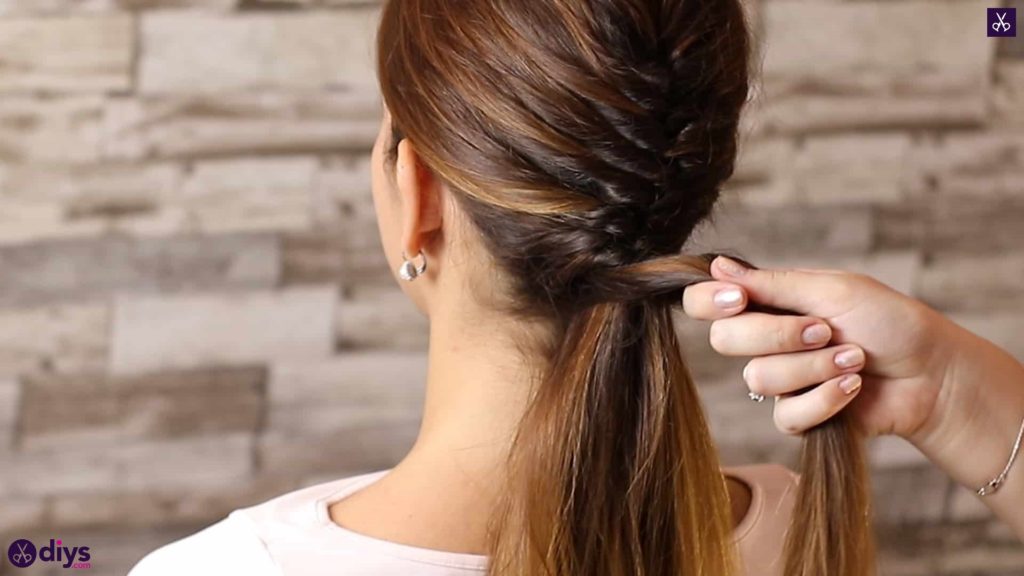
Step 3: repeat and loop
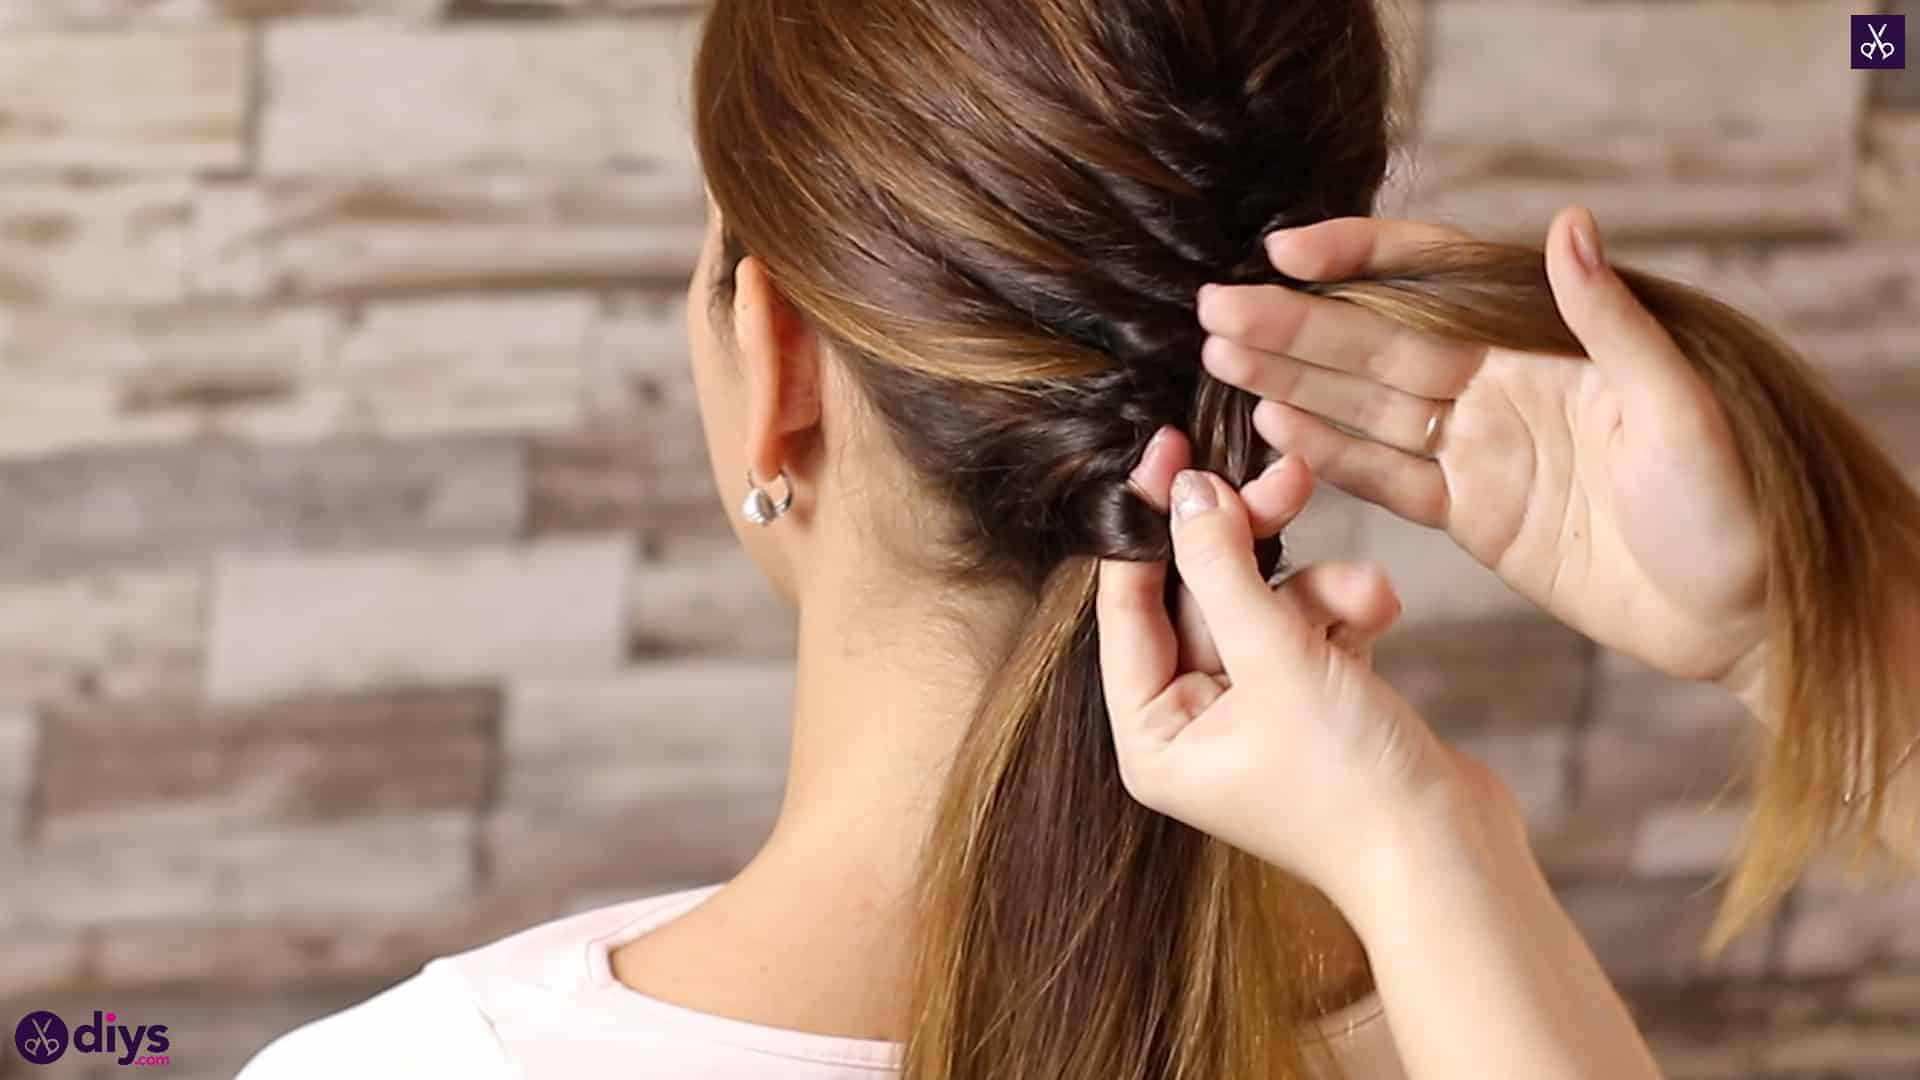
Repeat the entire process a third time, gathering more hair from either side and placing this third ponytailed section right before the second, just as you did before. Your looping over and through technique will be the same every time. Remember to make each sectioned ponytail with at least a little bit of slack so you can loop the hair through its own base easily enough without things pulling tighter and hurting your scalp.


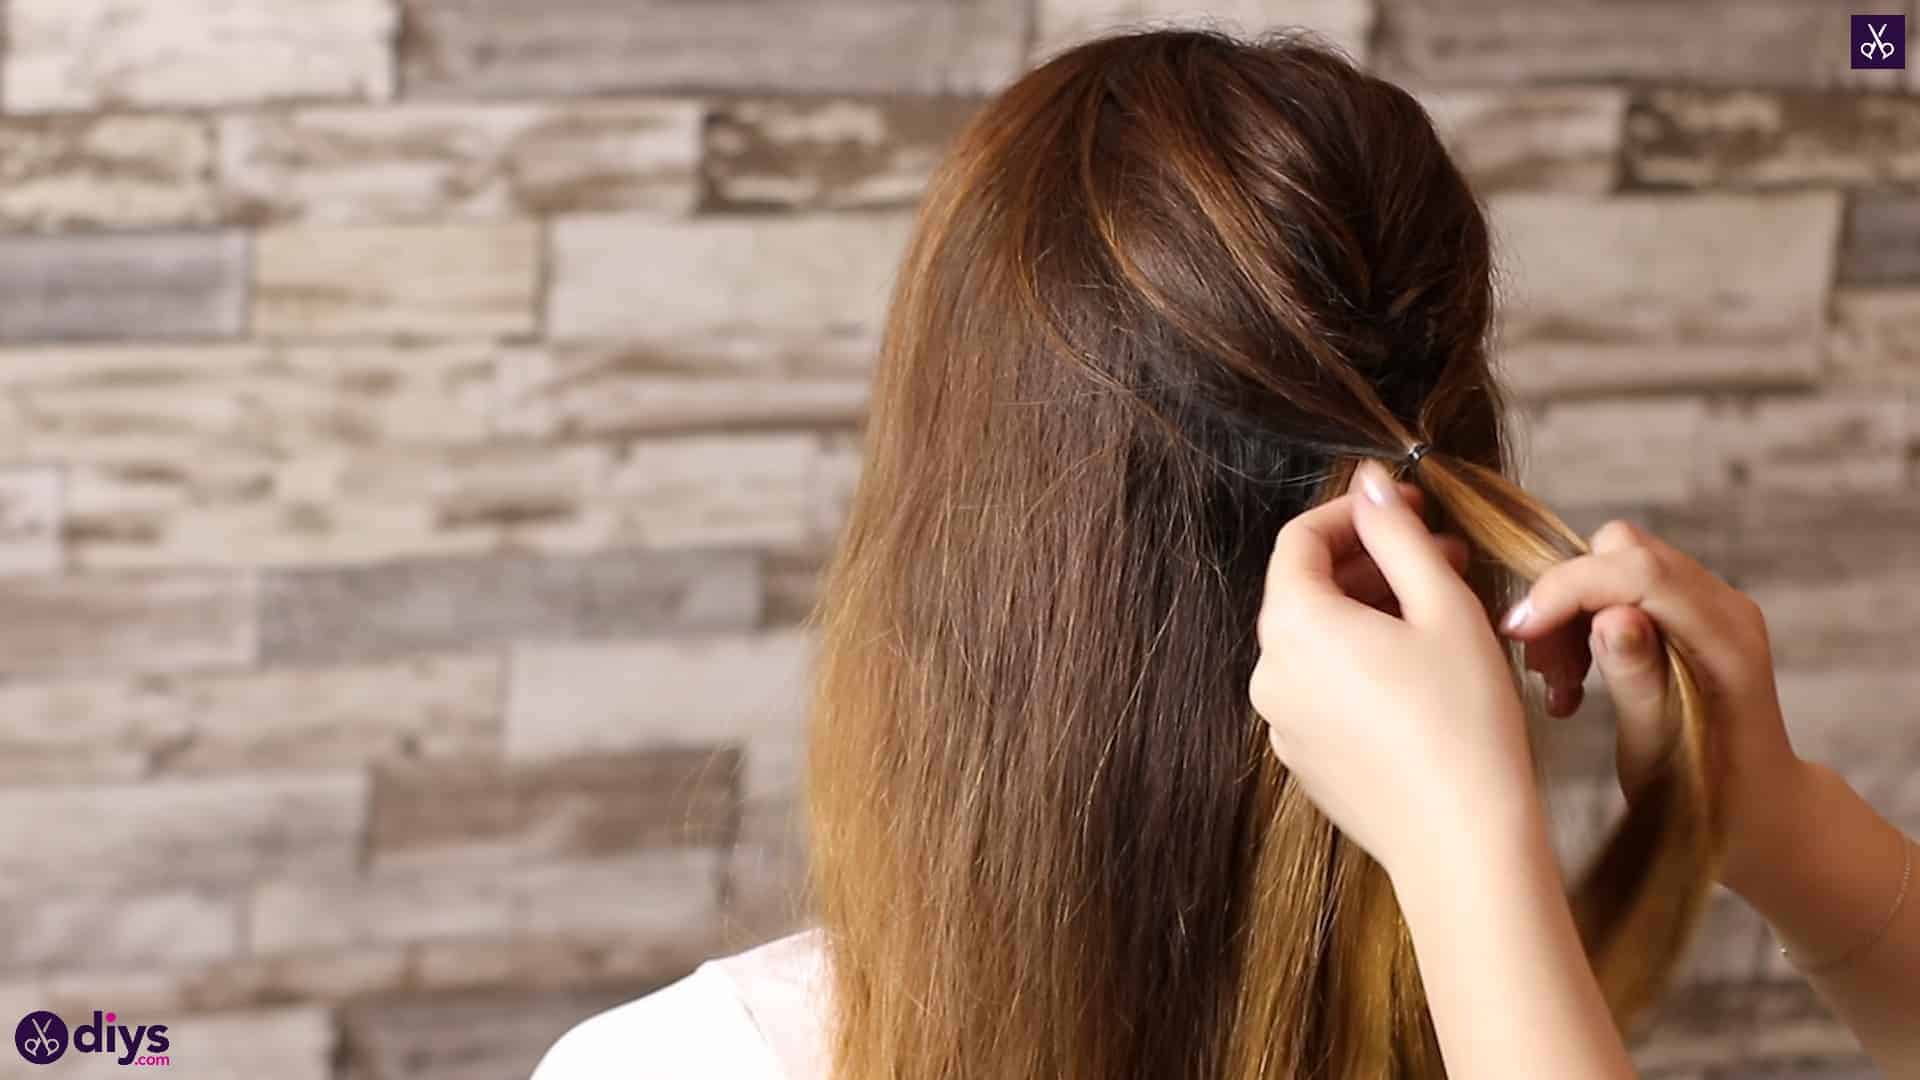
Step 4: continue with rest of hair
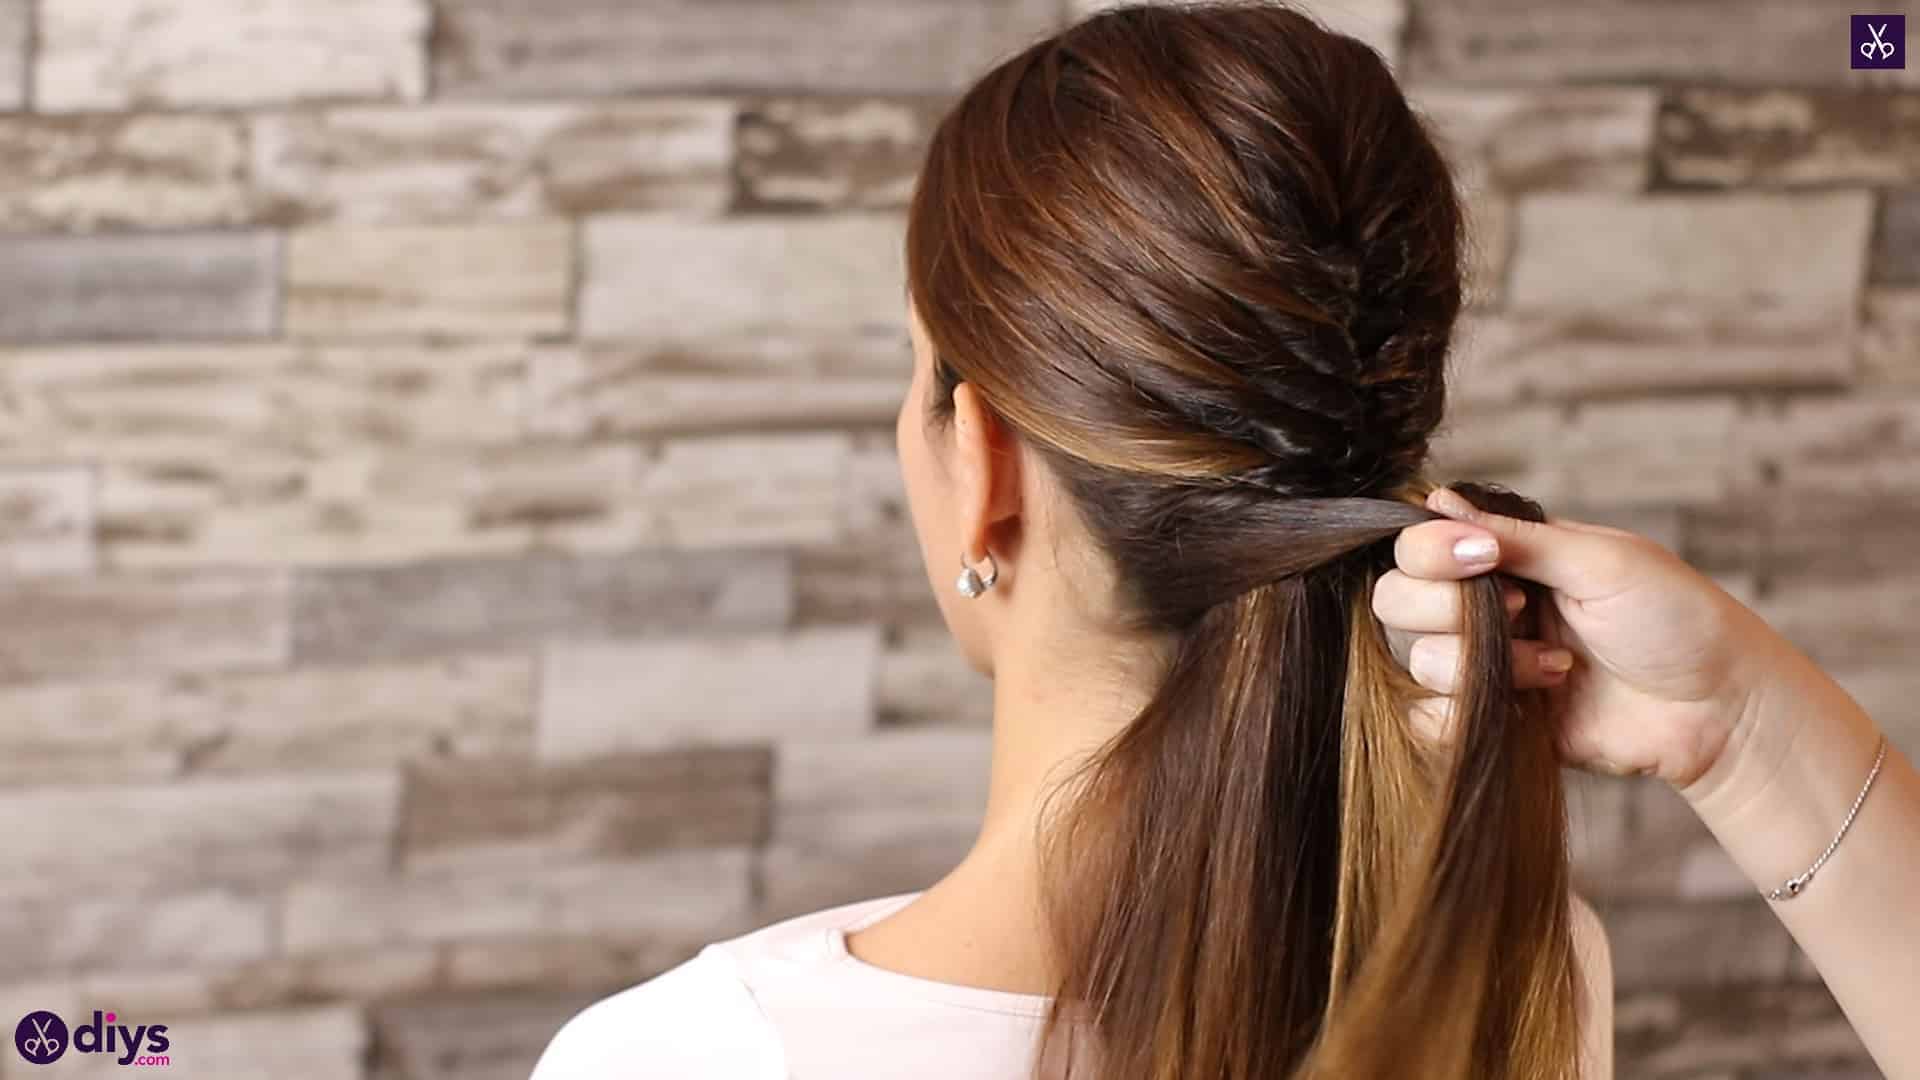
Gather from the side again, moving down further to make a fourth ponytail and loop. The technique is the same as you proceed, so just make sure your positioning the gathered sections and ponytails correctly to help the style travel down the back of the head.


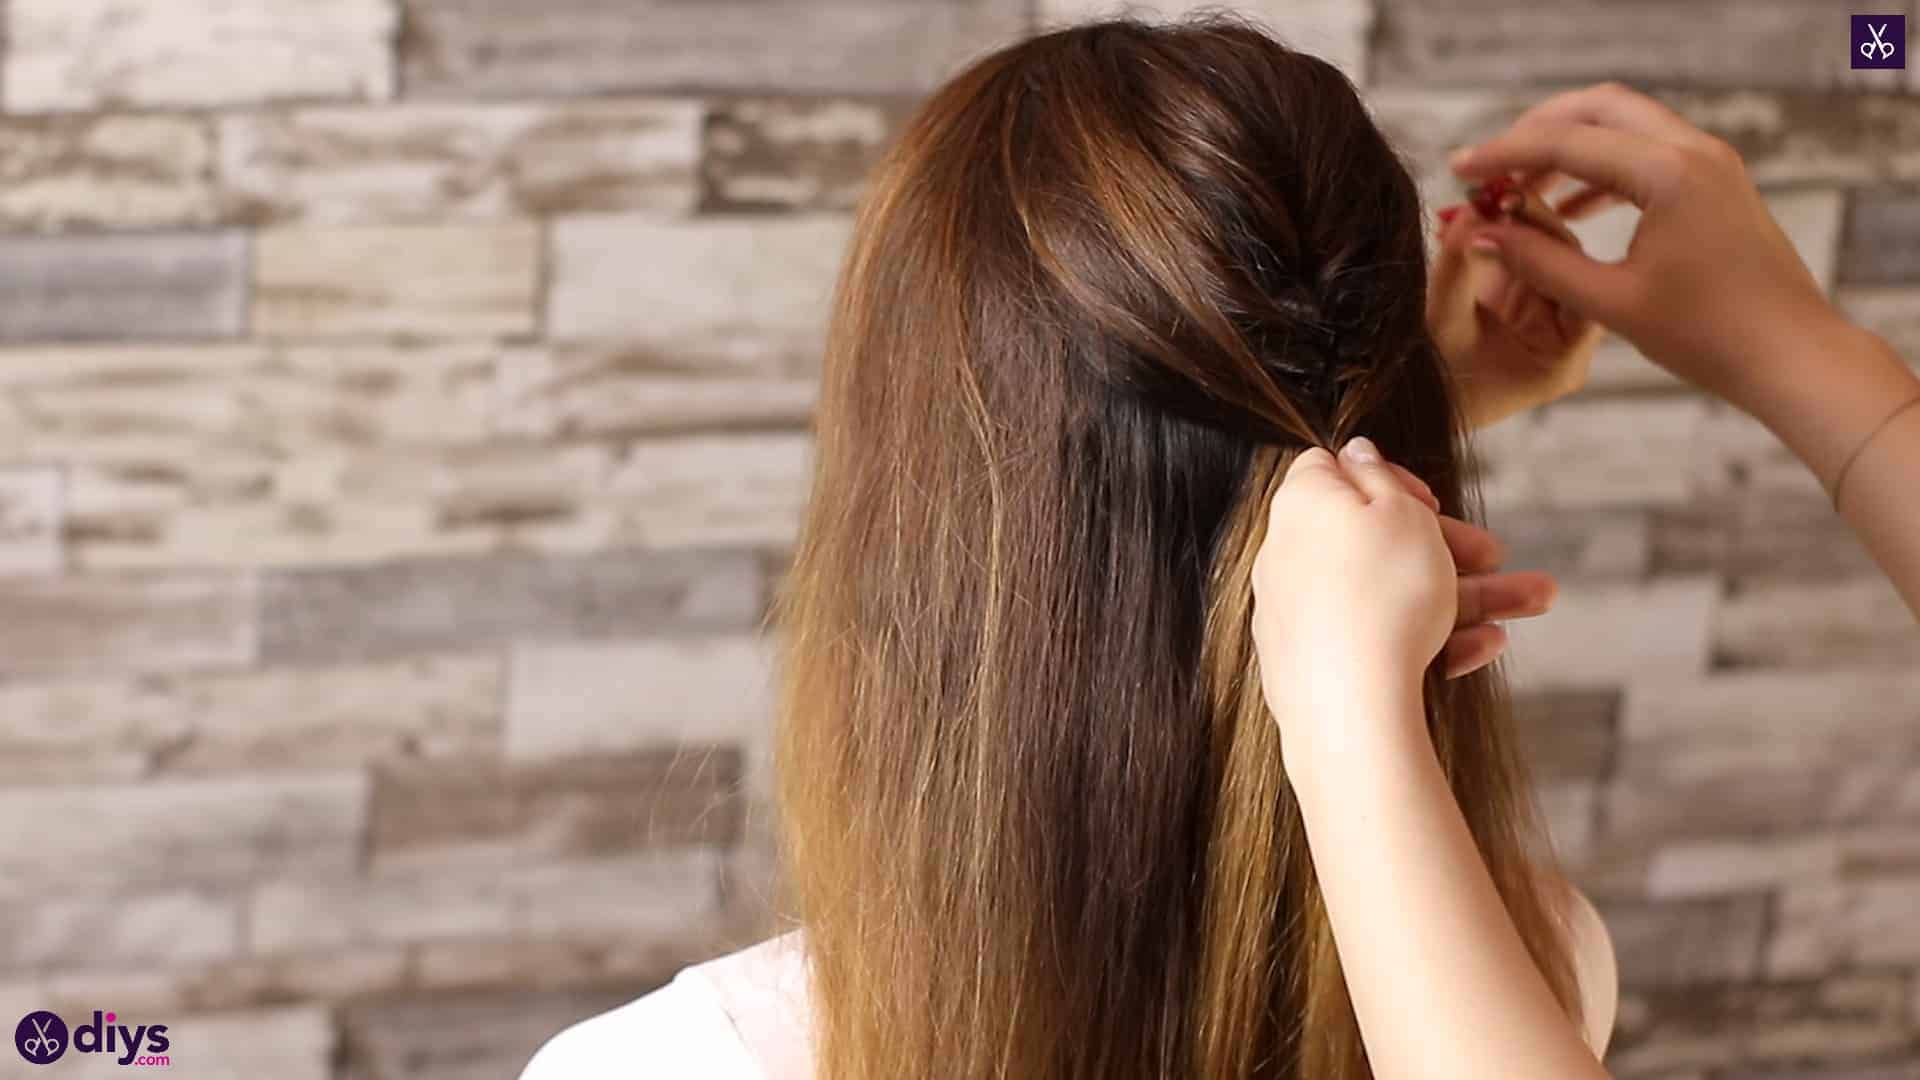
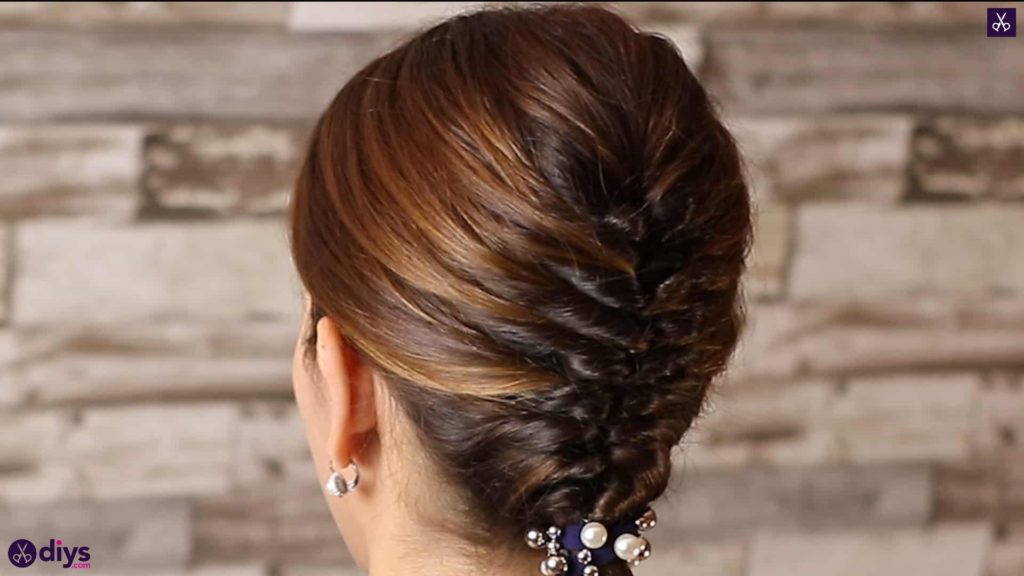
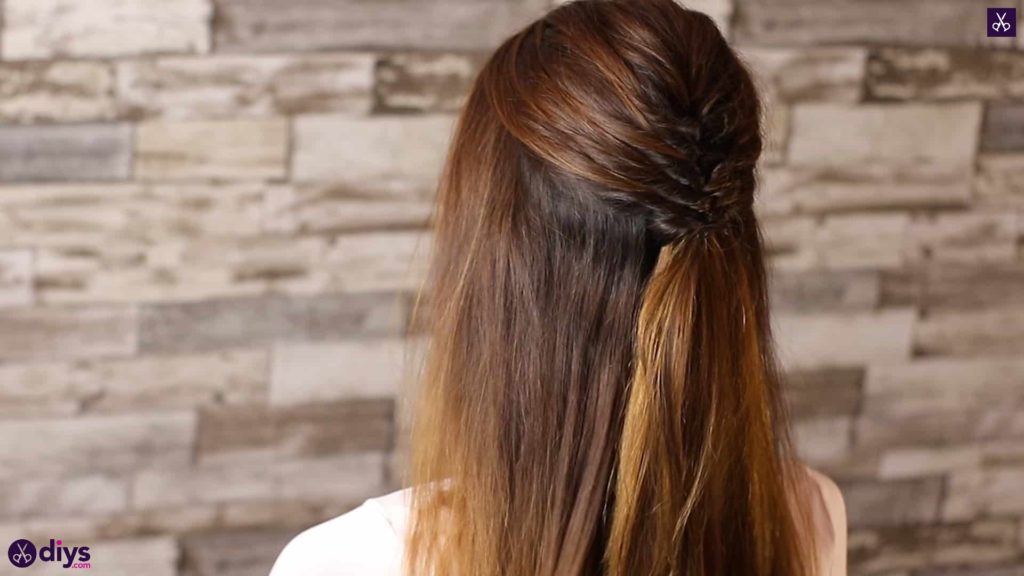
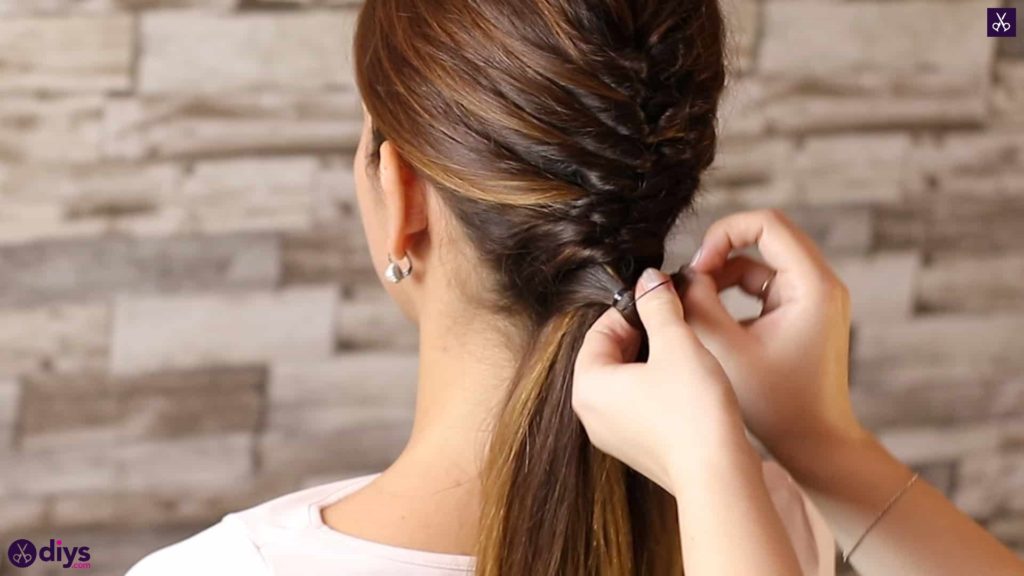
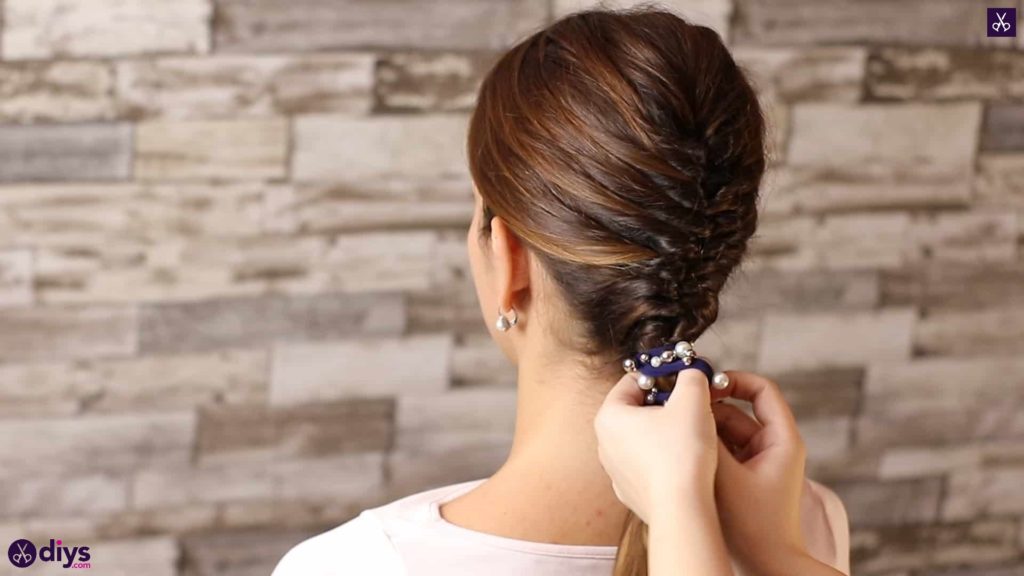
Step 5: gather from the sides
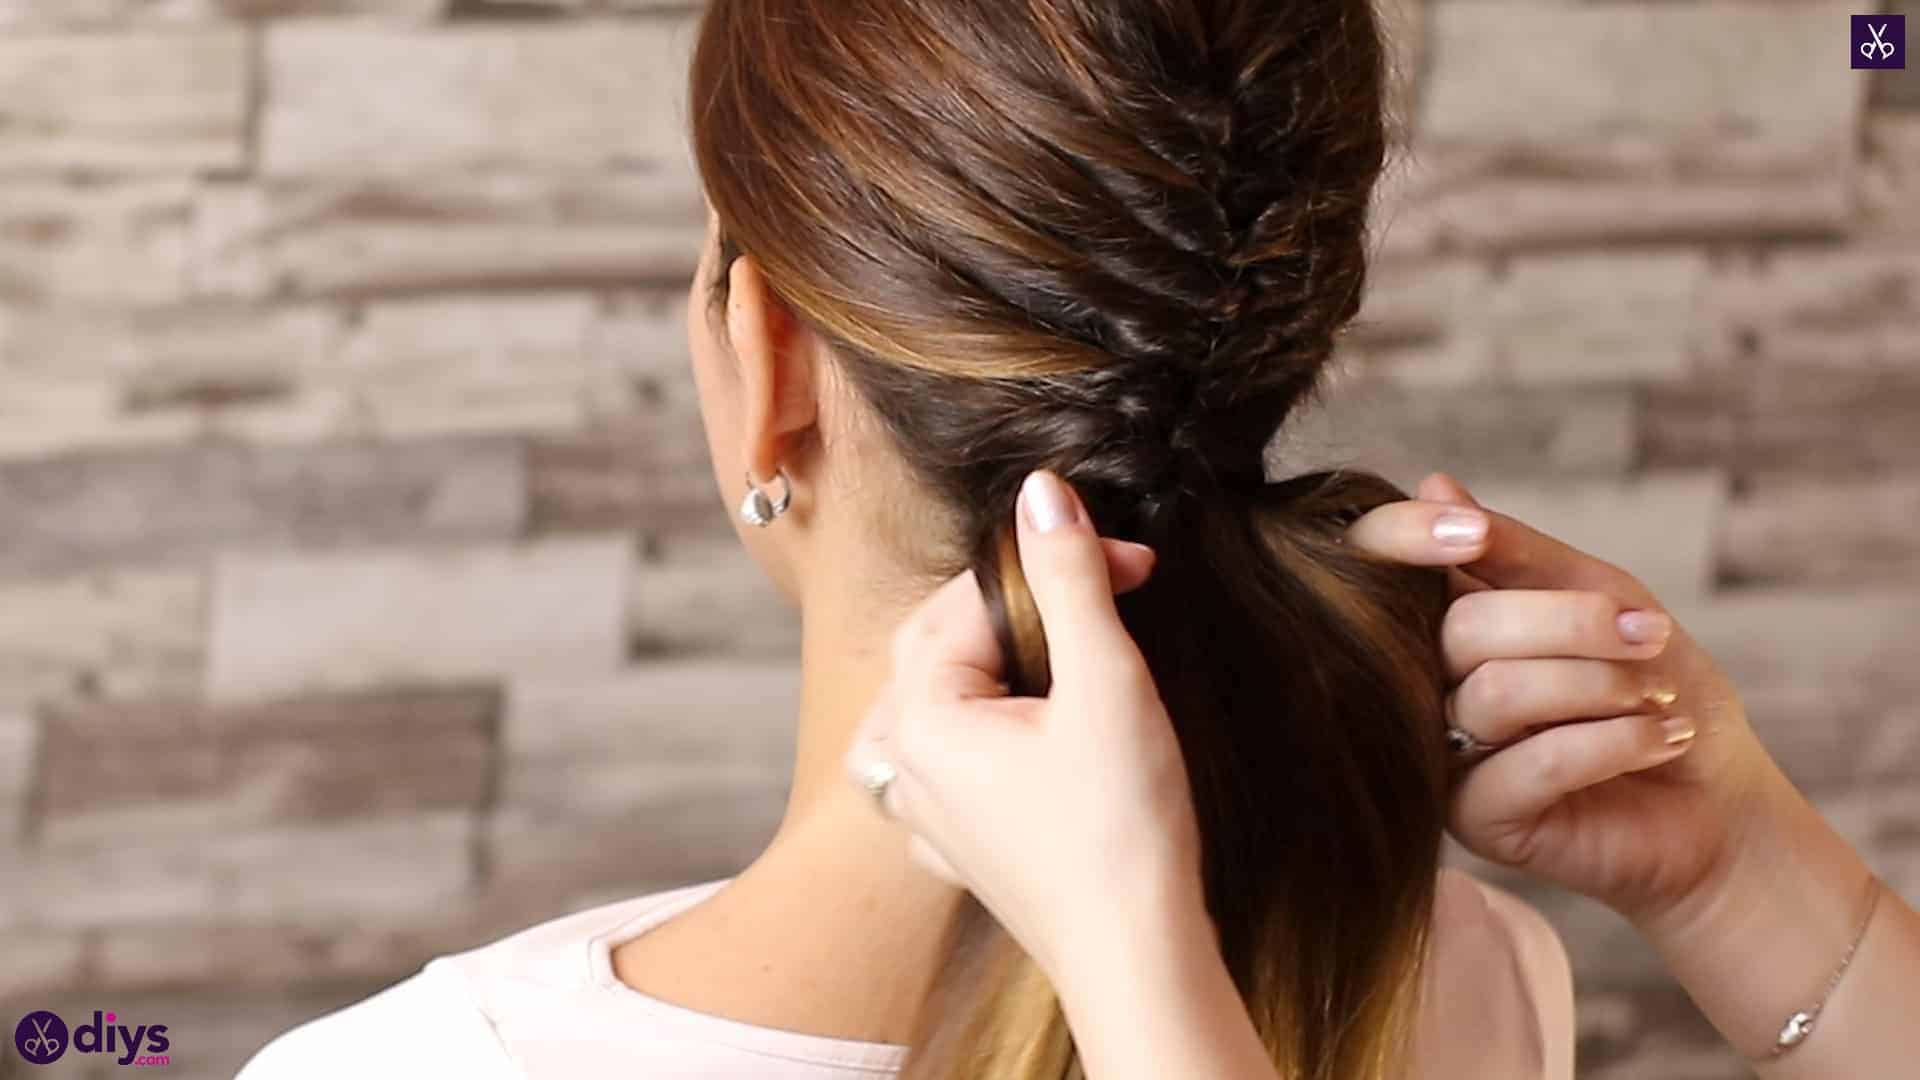
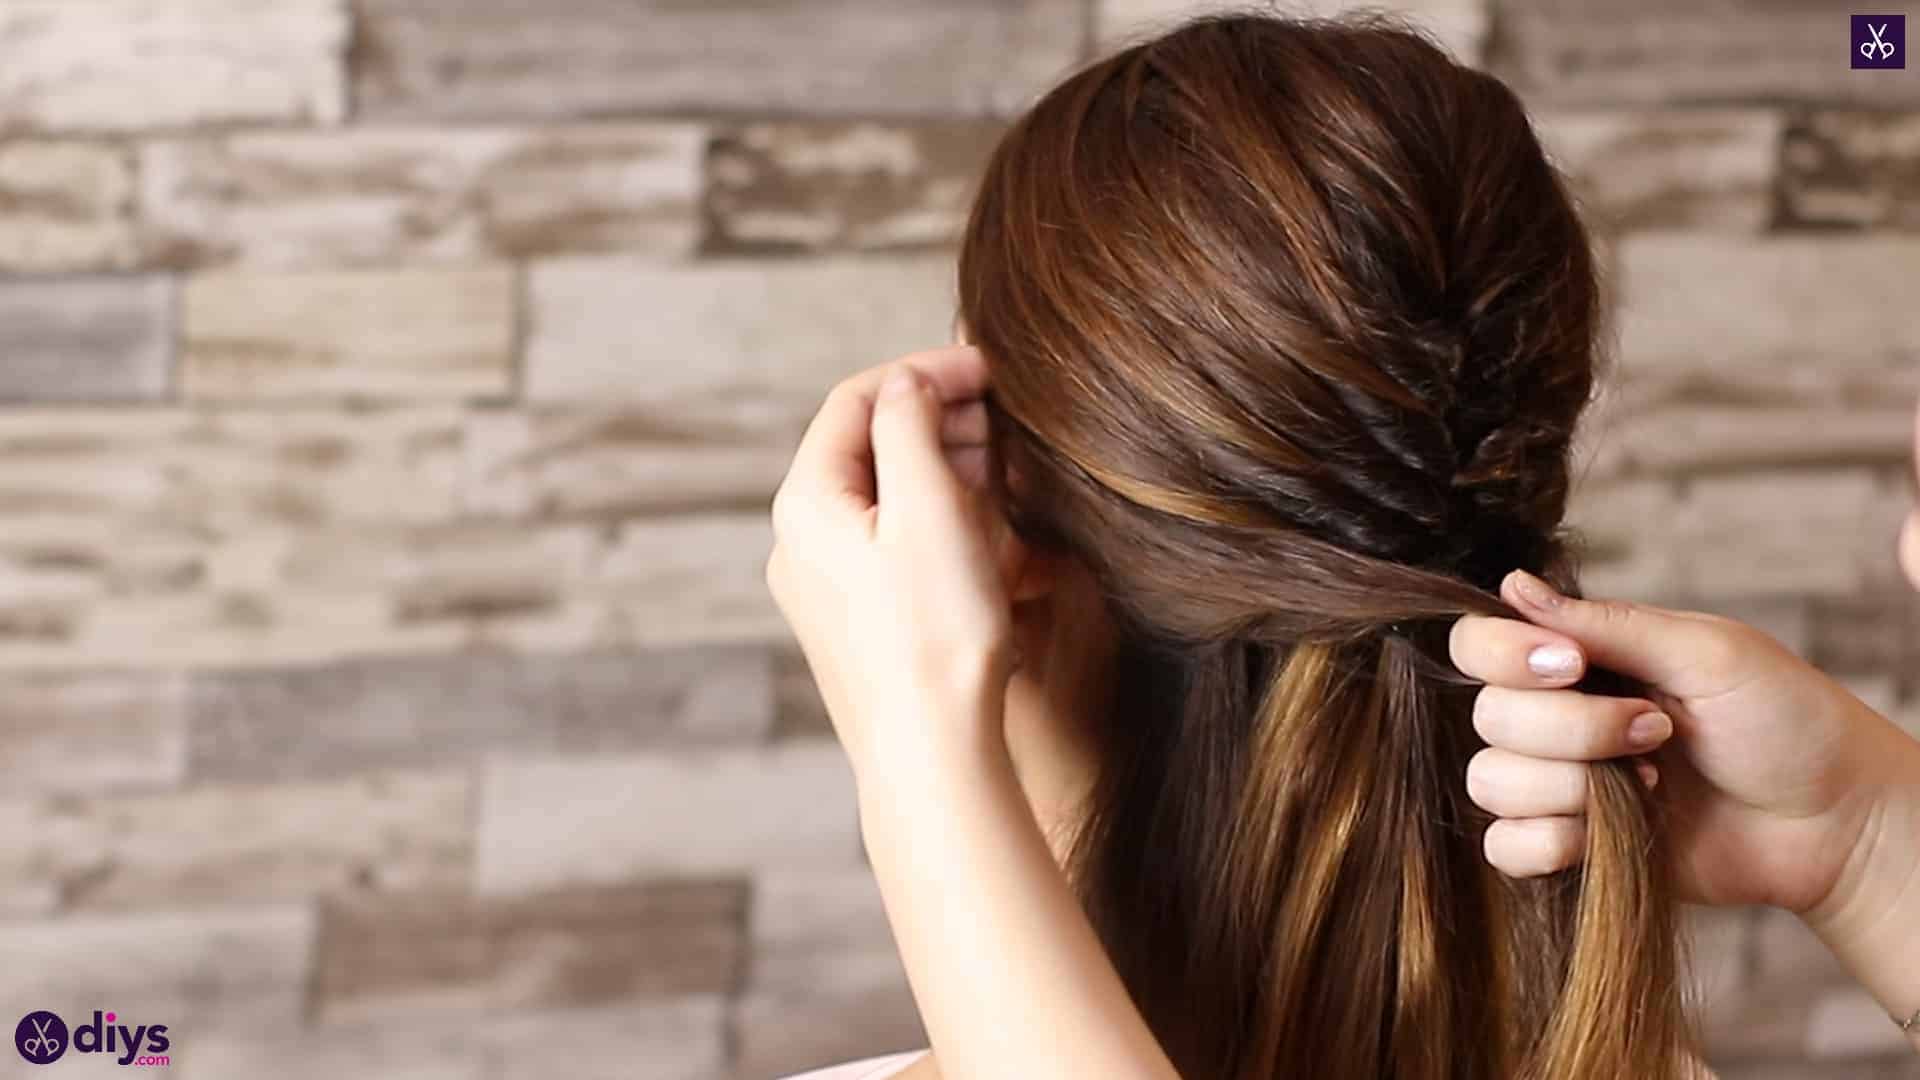
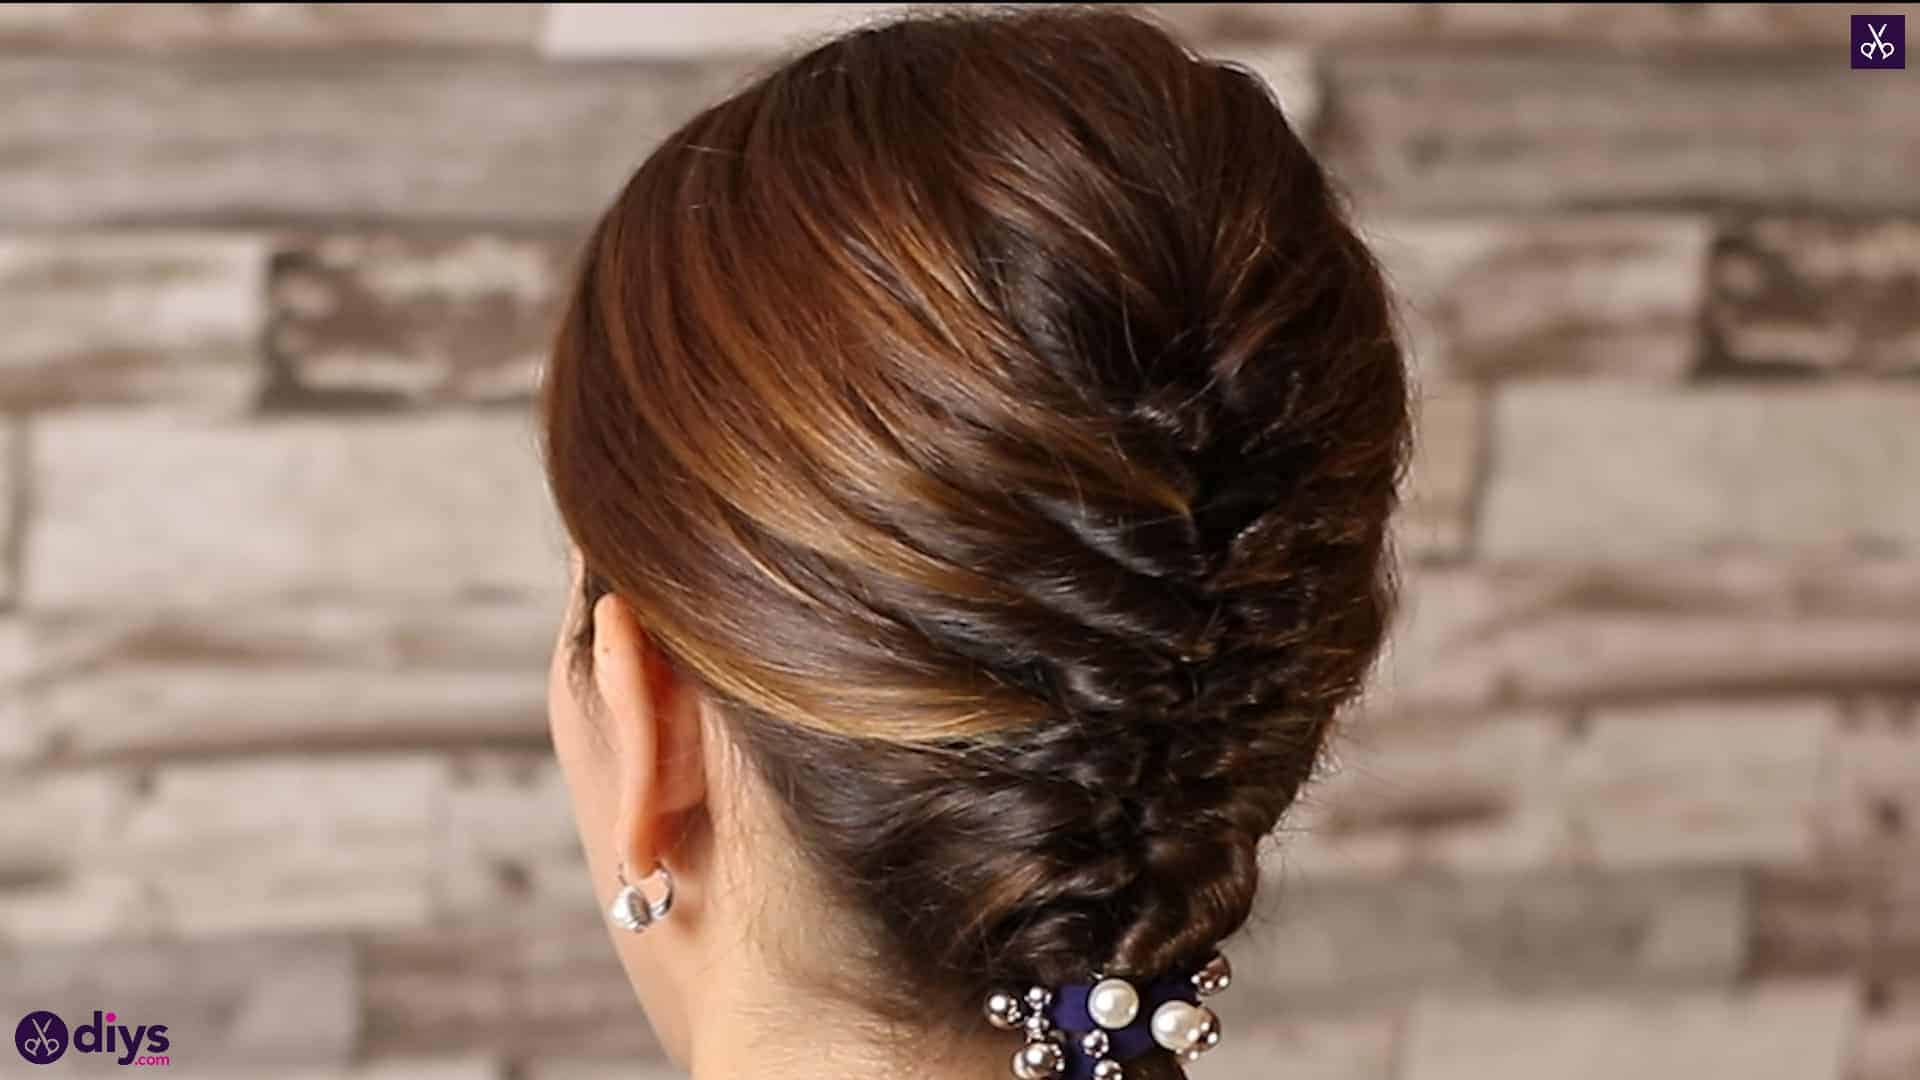
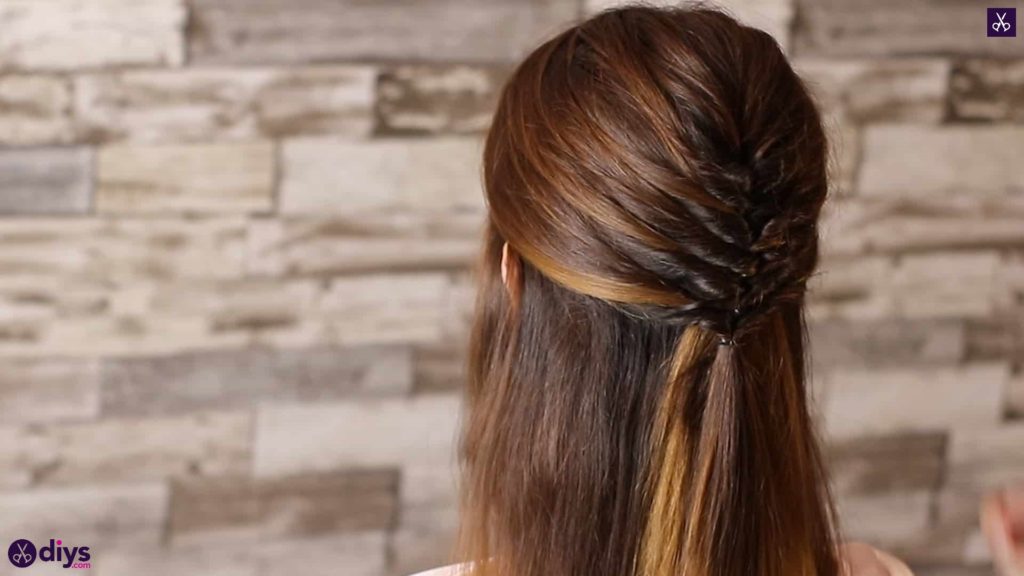
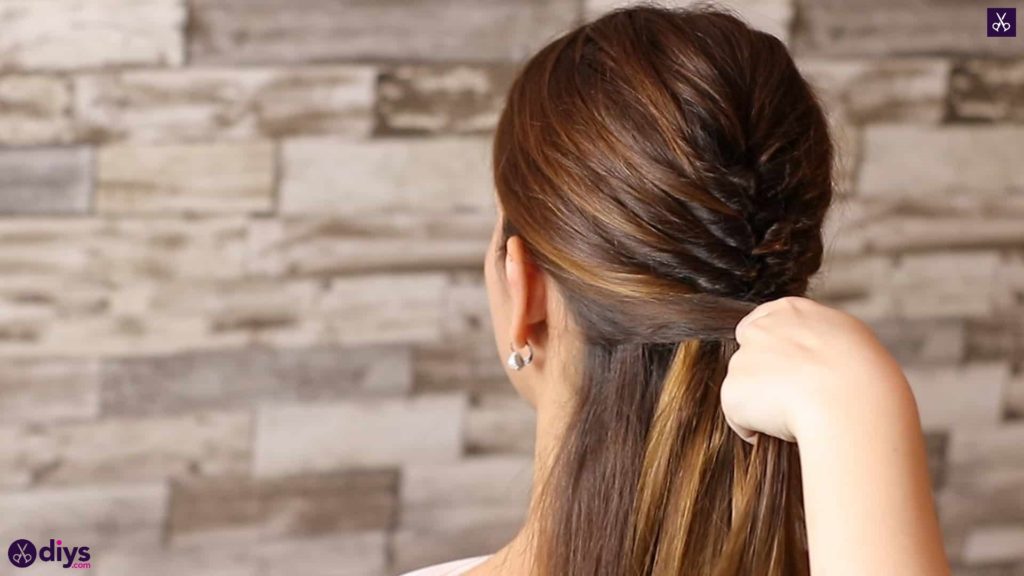
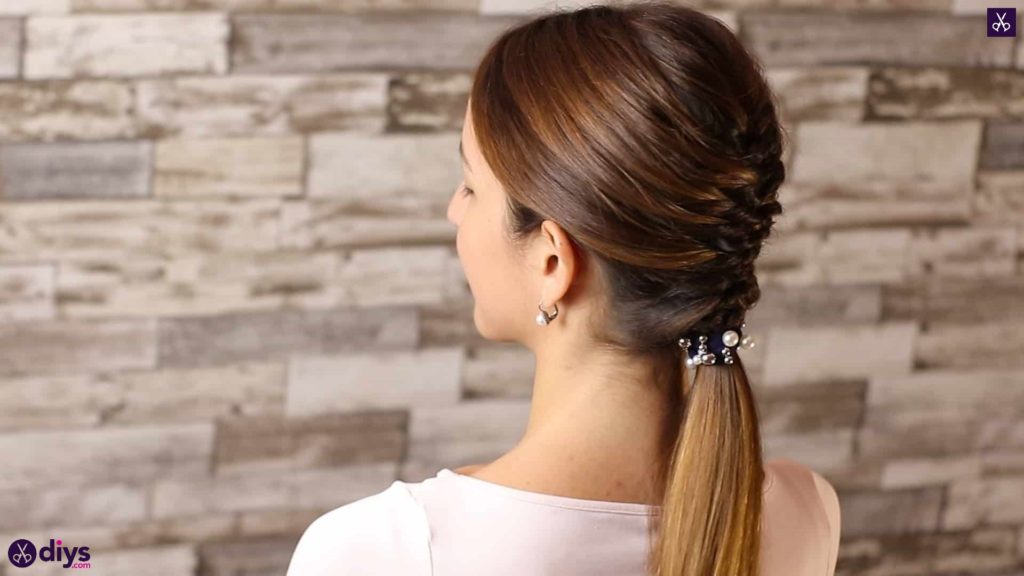
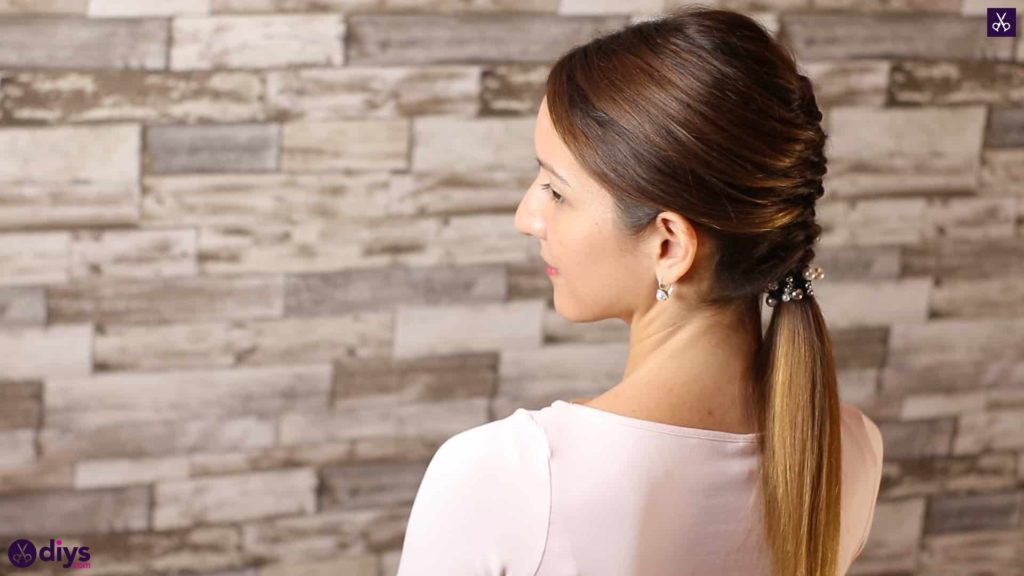
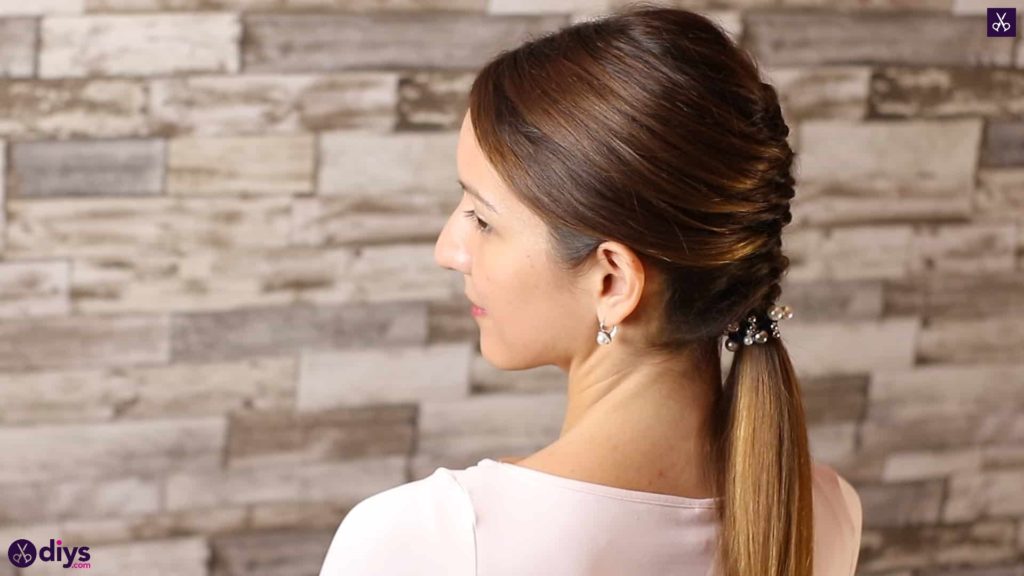
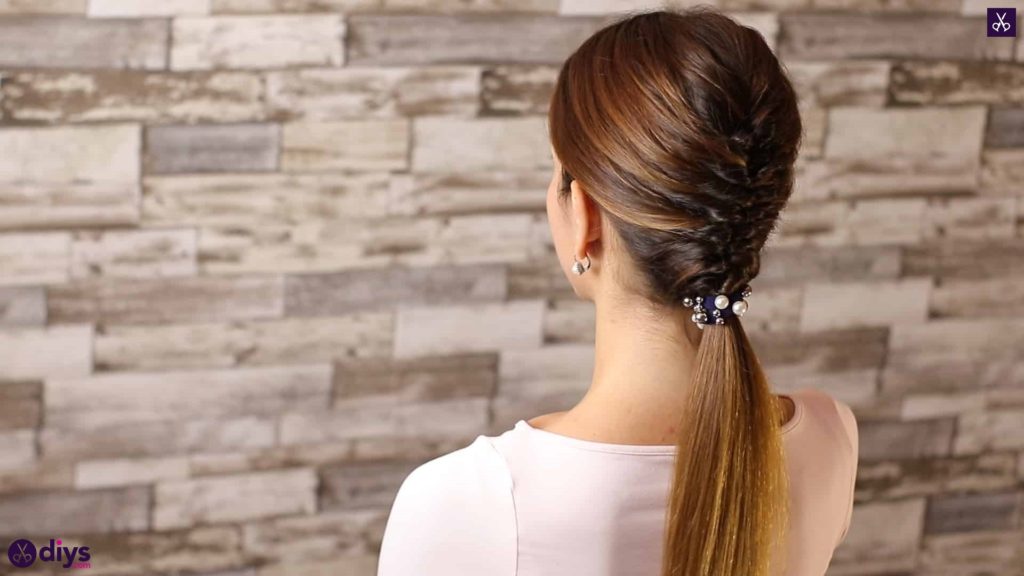
Keep the process going. You’ll gather sections and repeat your ponytail and loop routing all the way down the back of the head until all of the available hair that sat to the sides and in either side of your face has been gathered back into the woven looking style in the back. I ran out of hair right around the base of the neck. You’ll notice you still have loose hair emerging from underneath your woven pattern even once you’ve gathered all the hair from the sides; this is correct, so don’t panic!


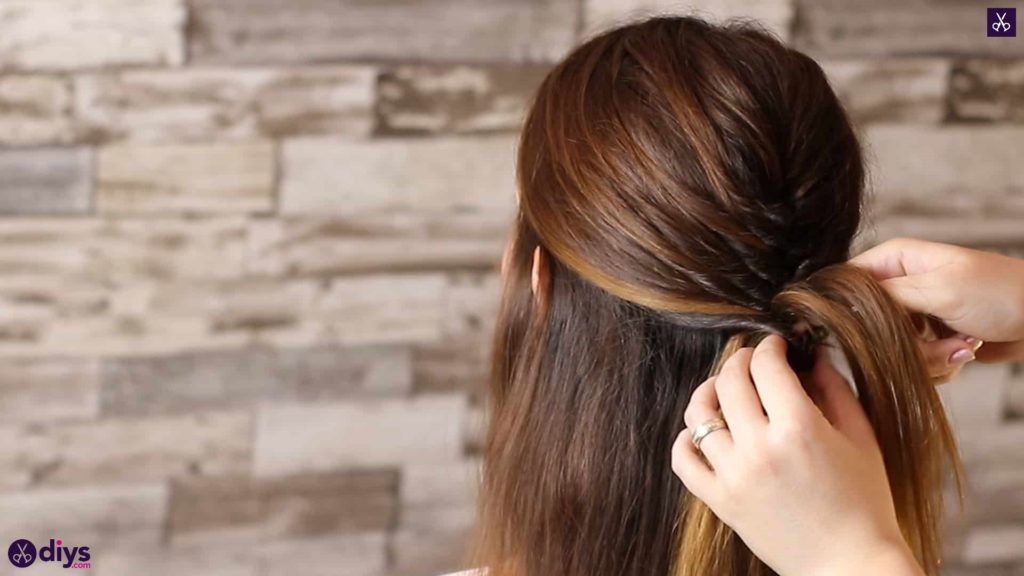


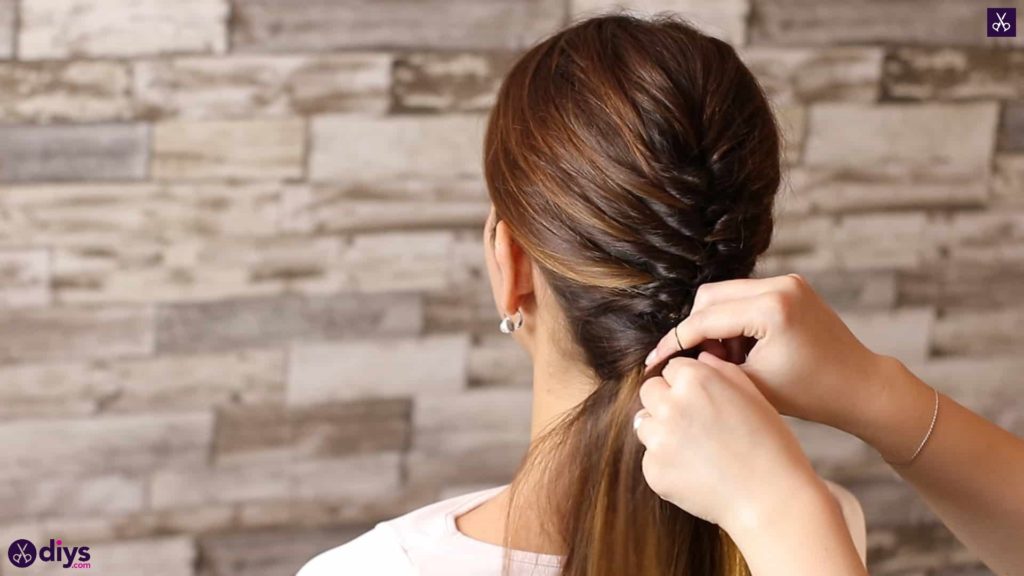


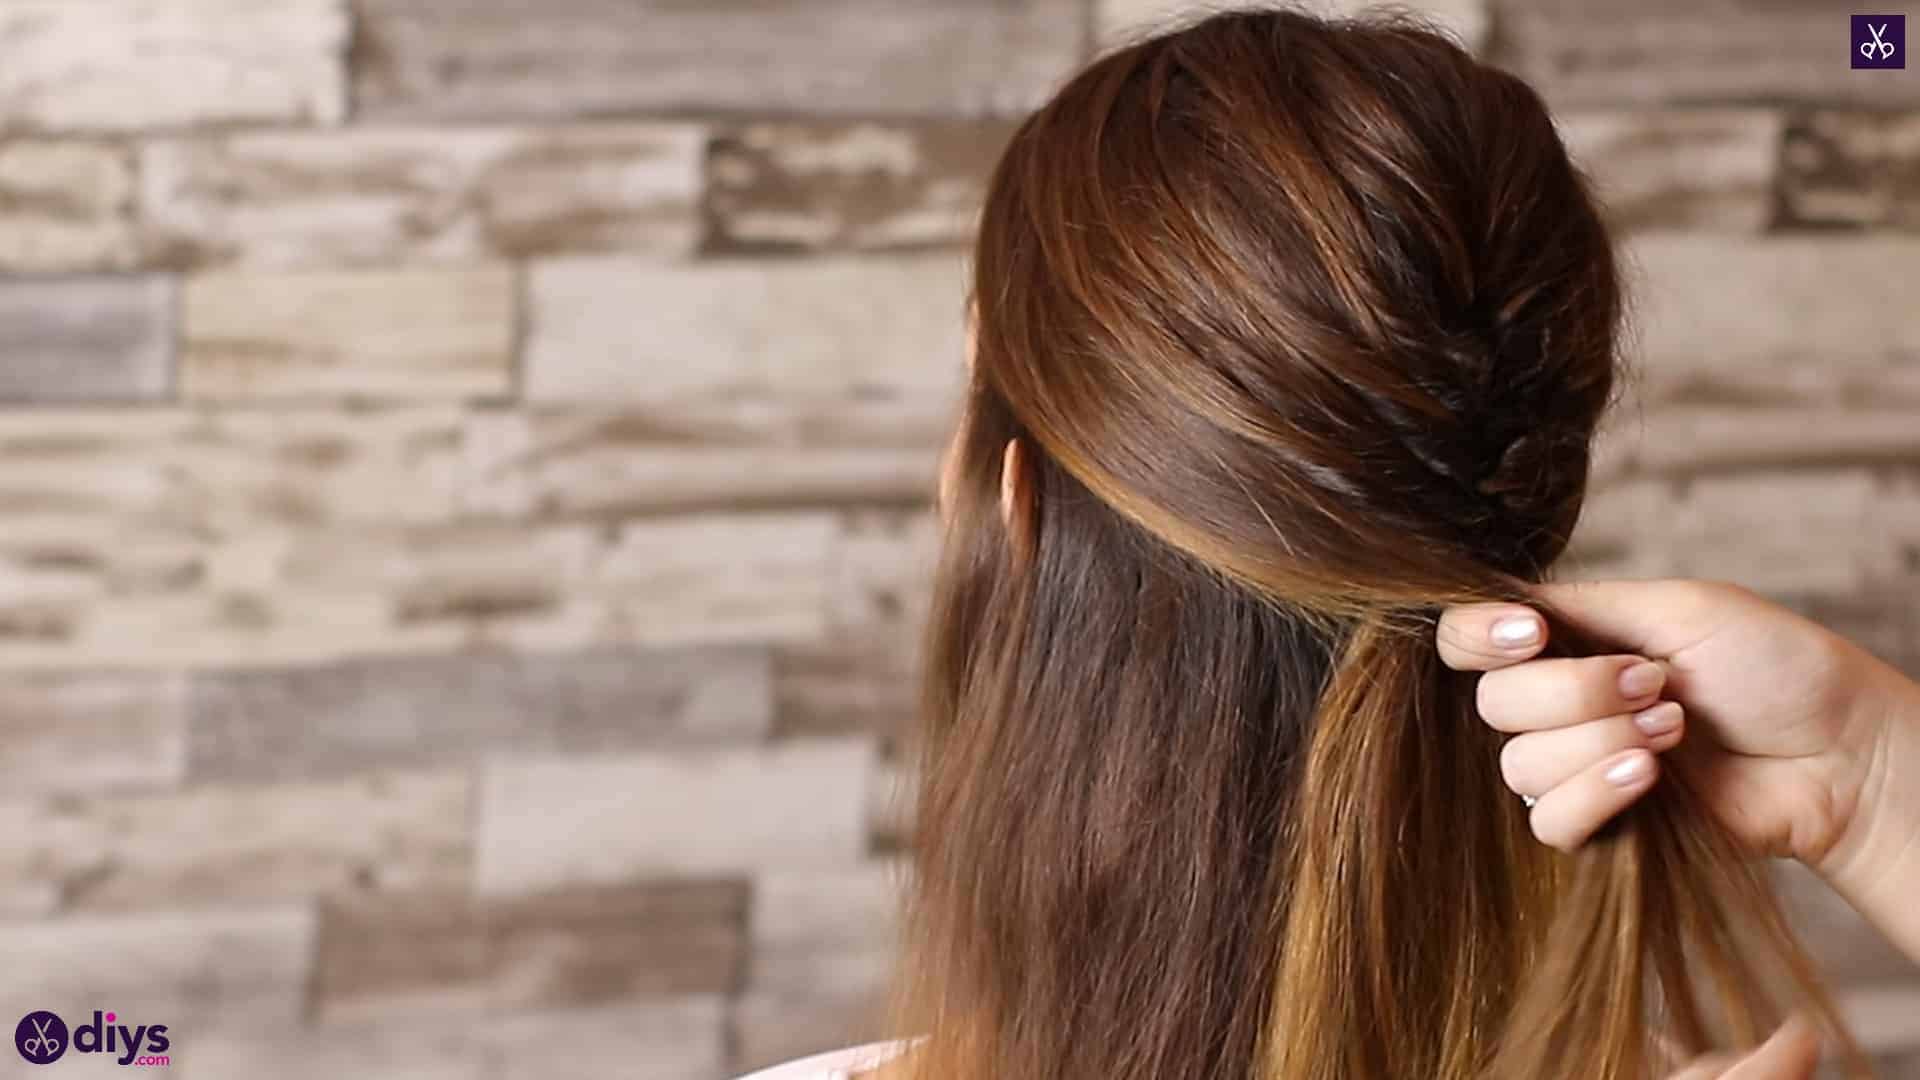
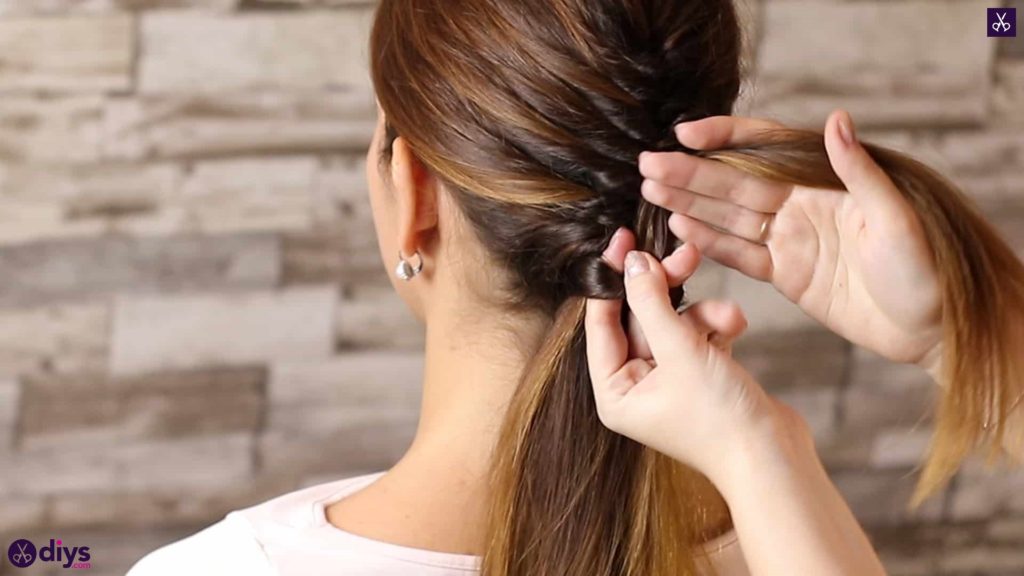
Step 6: one last loop
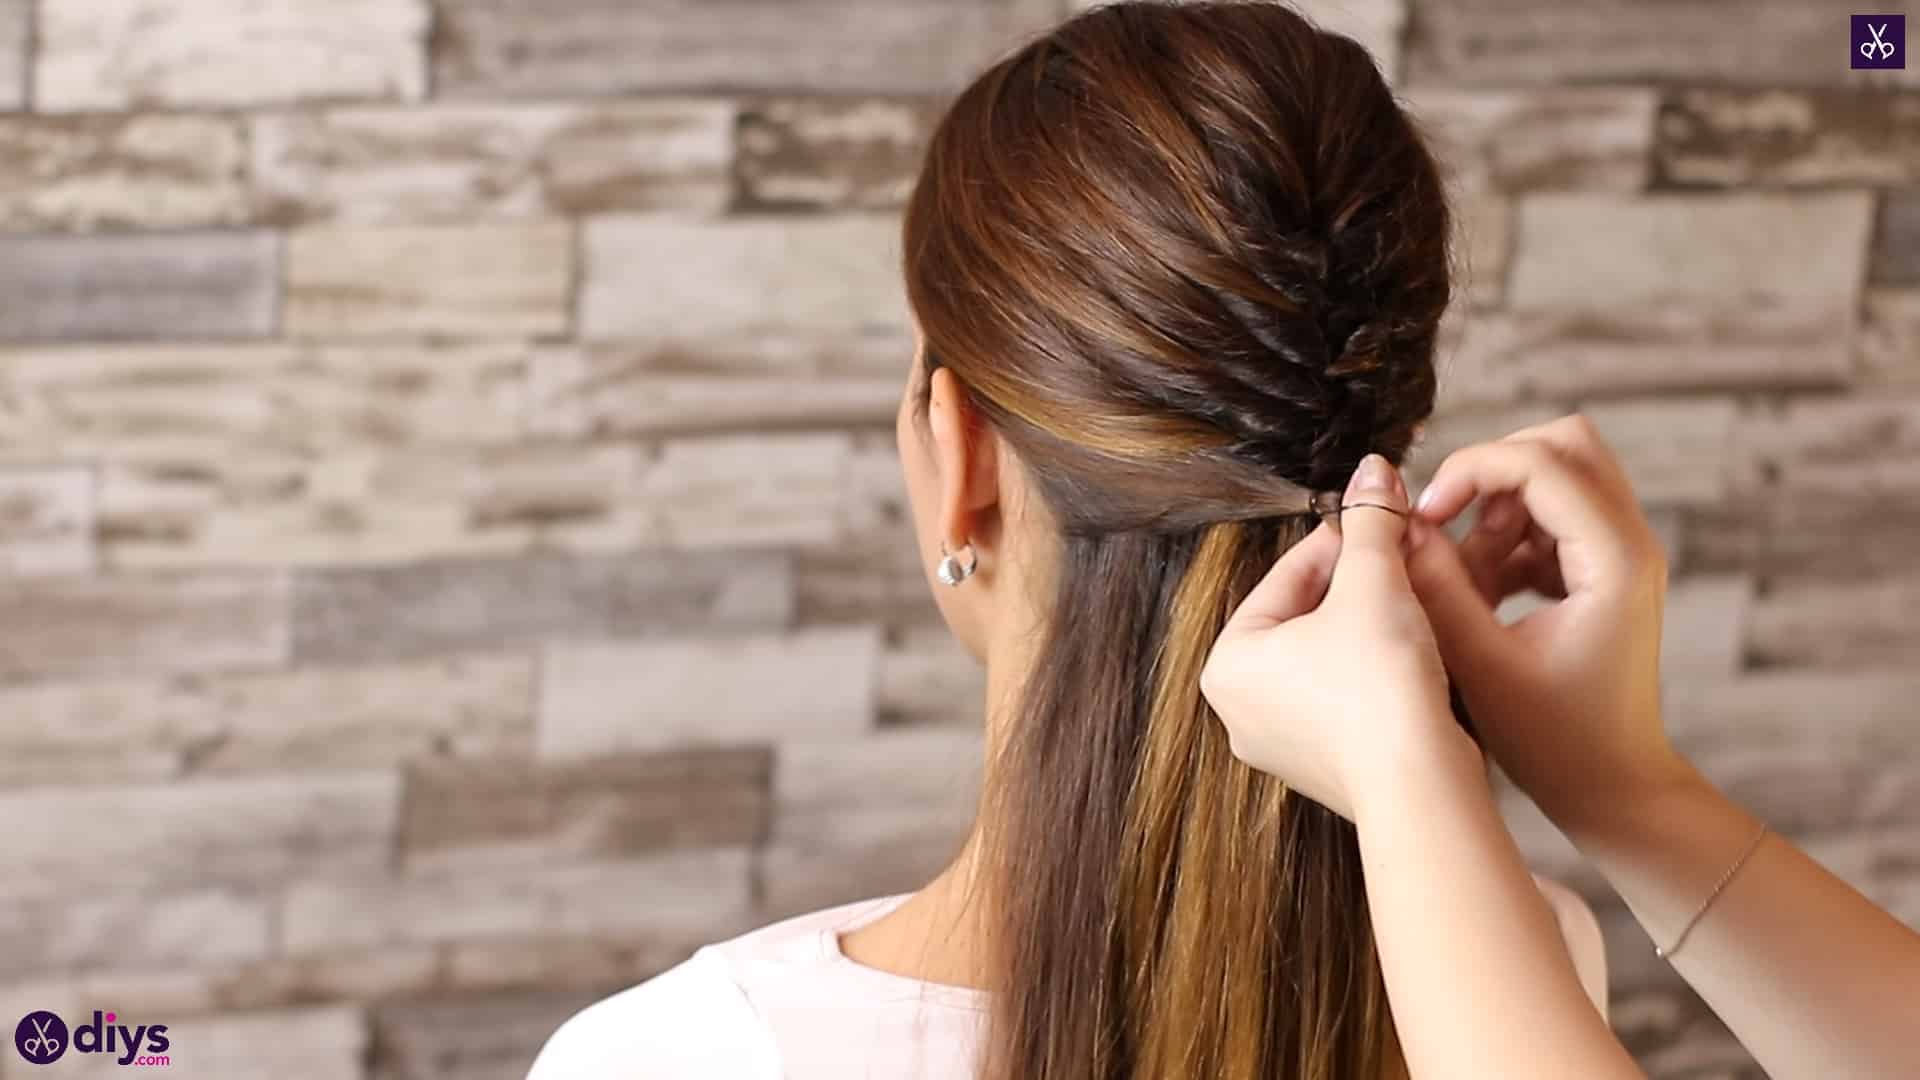
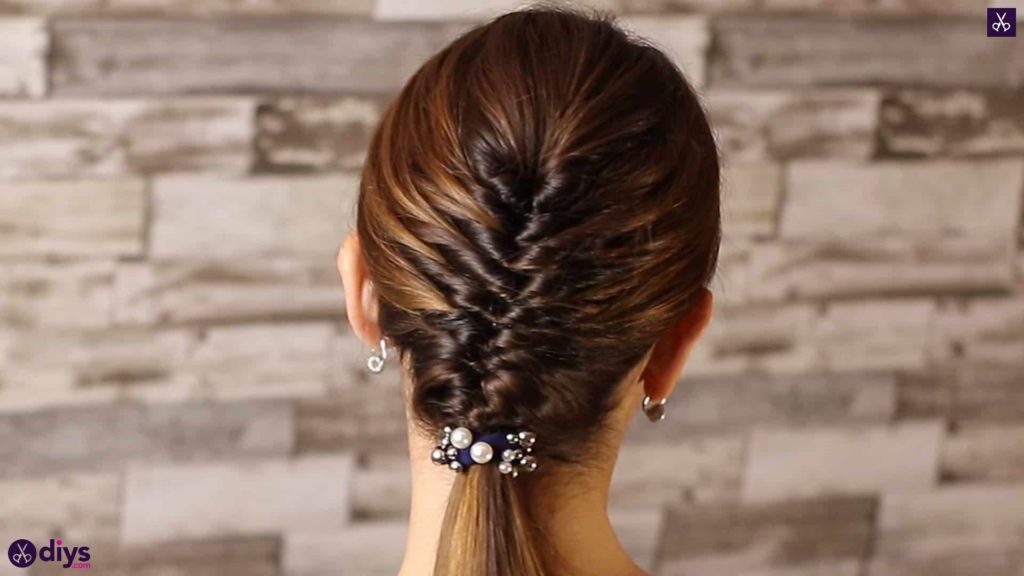
Once you’ve gathered your last available pieces from the sides and all of your remaining hair is coming from underneath your woven pattern, createone more ponytail and loop to really anchor everything into place. This time, however, you’ll take strands from either side of the central hair we just talked about, grabbing two pieces from the underside on the left and right and bringing them up and around to meet at the base of your last twisted loop. Tie them in place with an elastic and loop them like before.

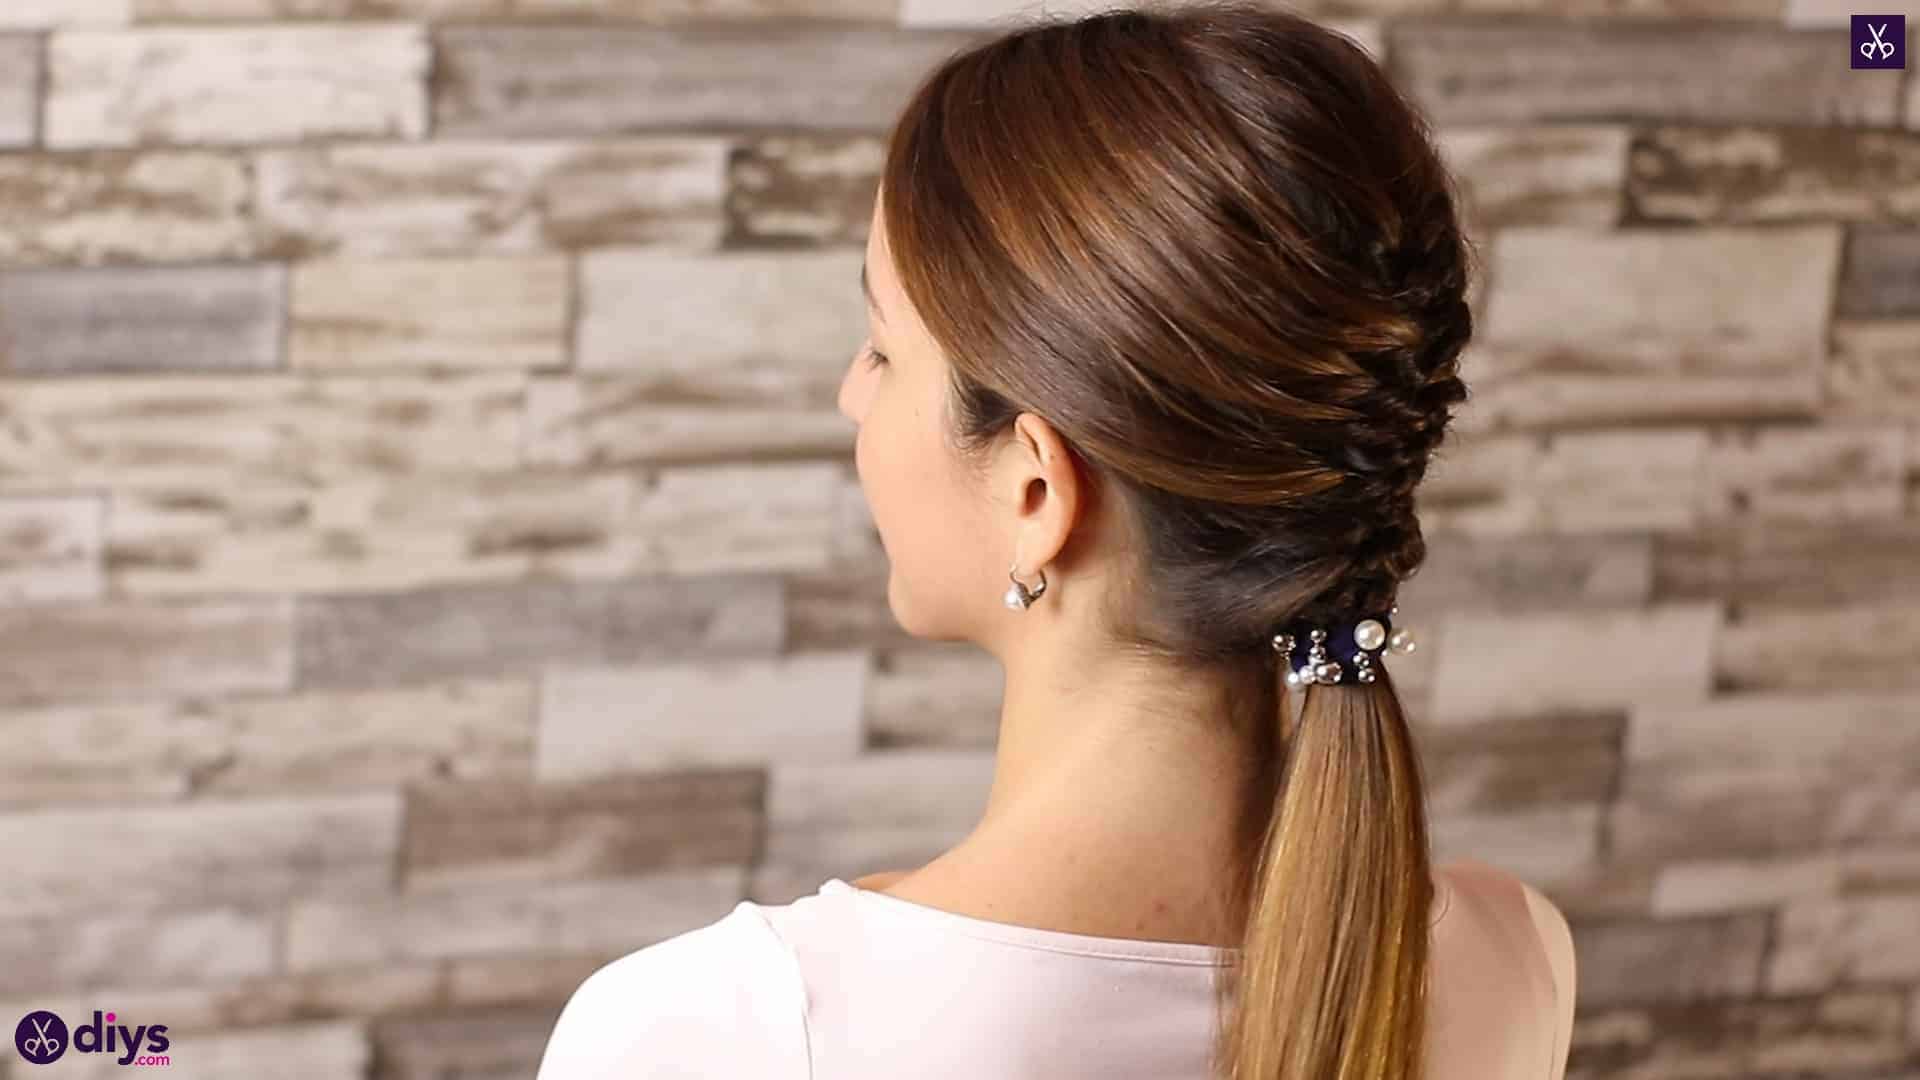
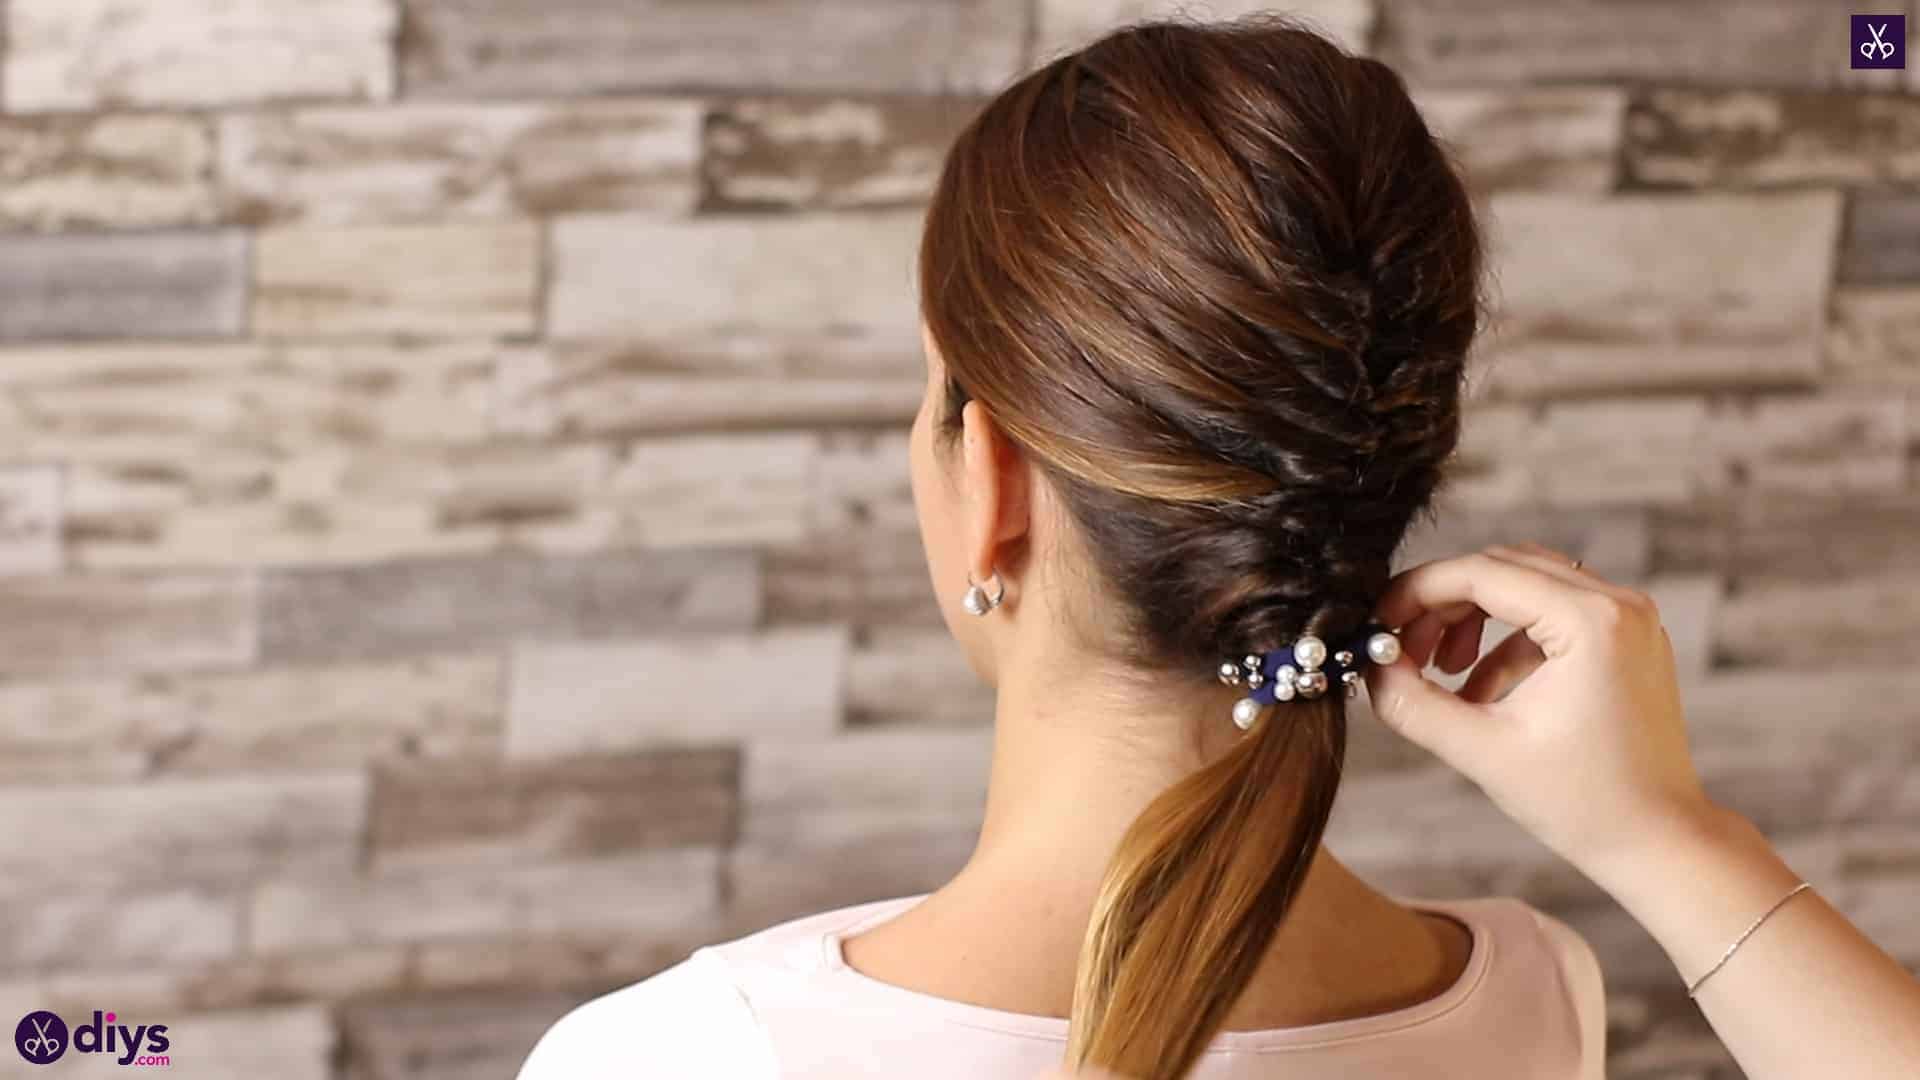
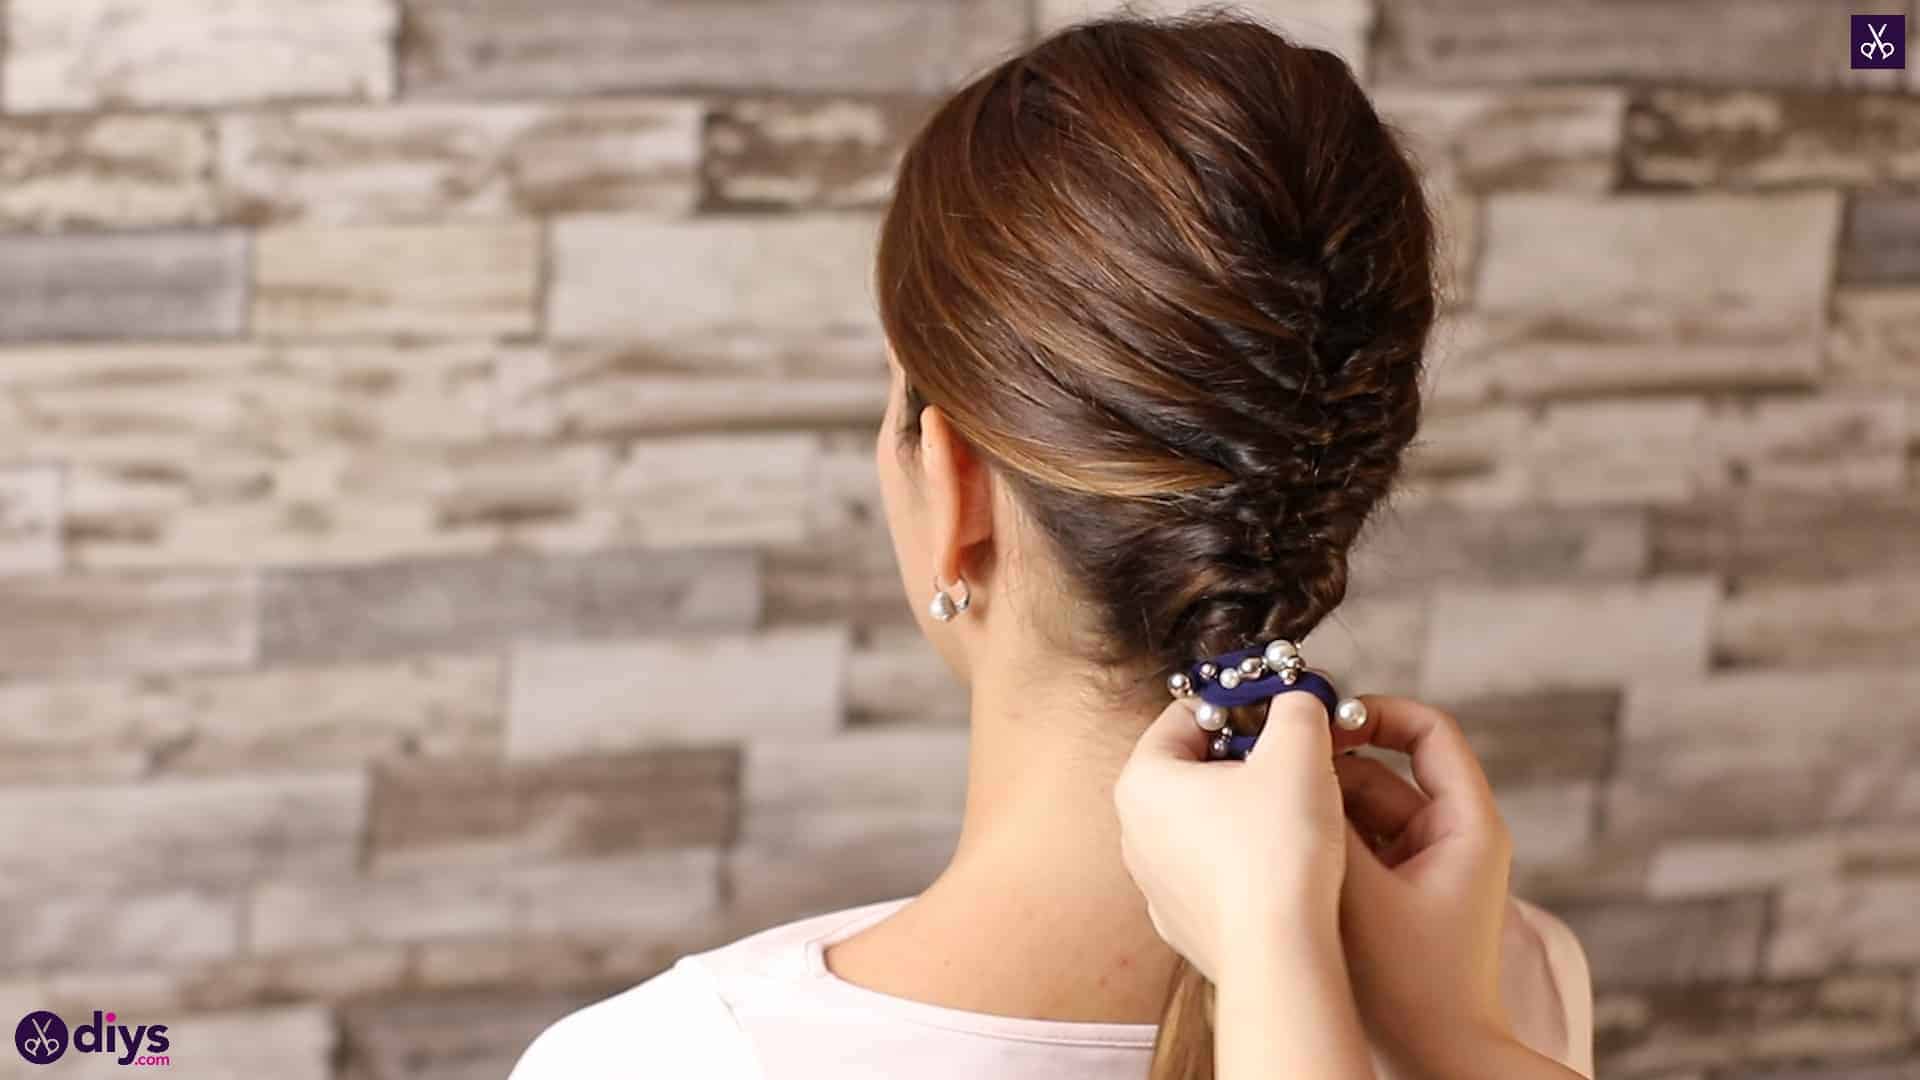
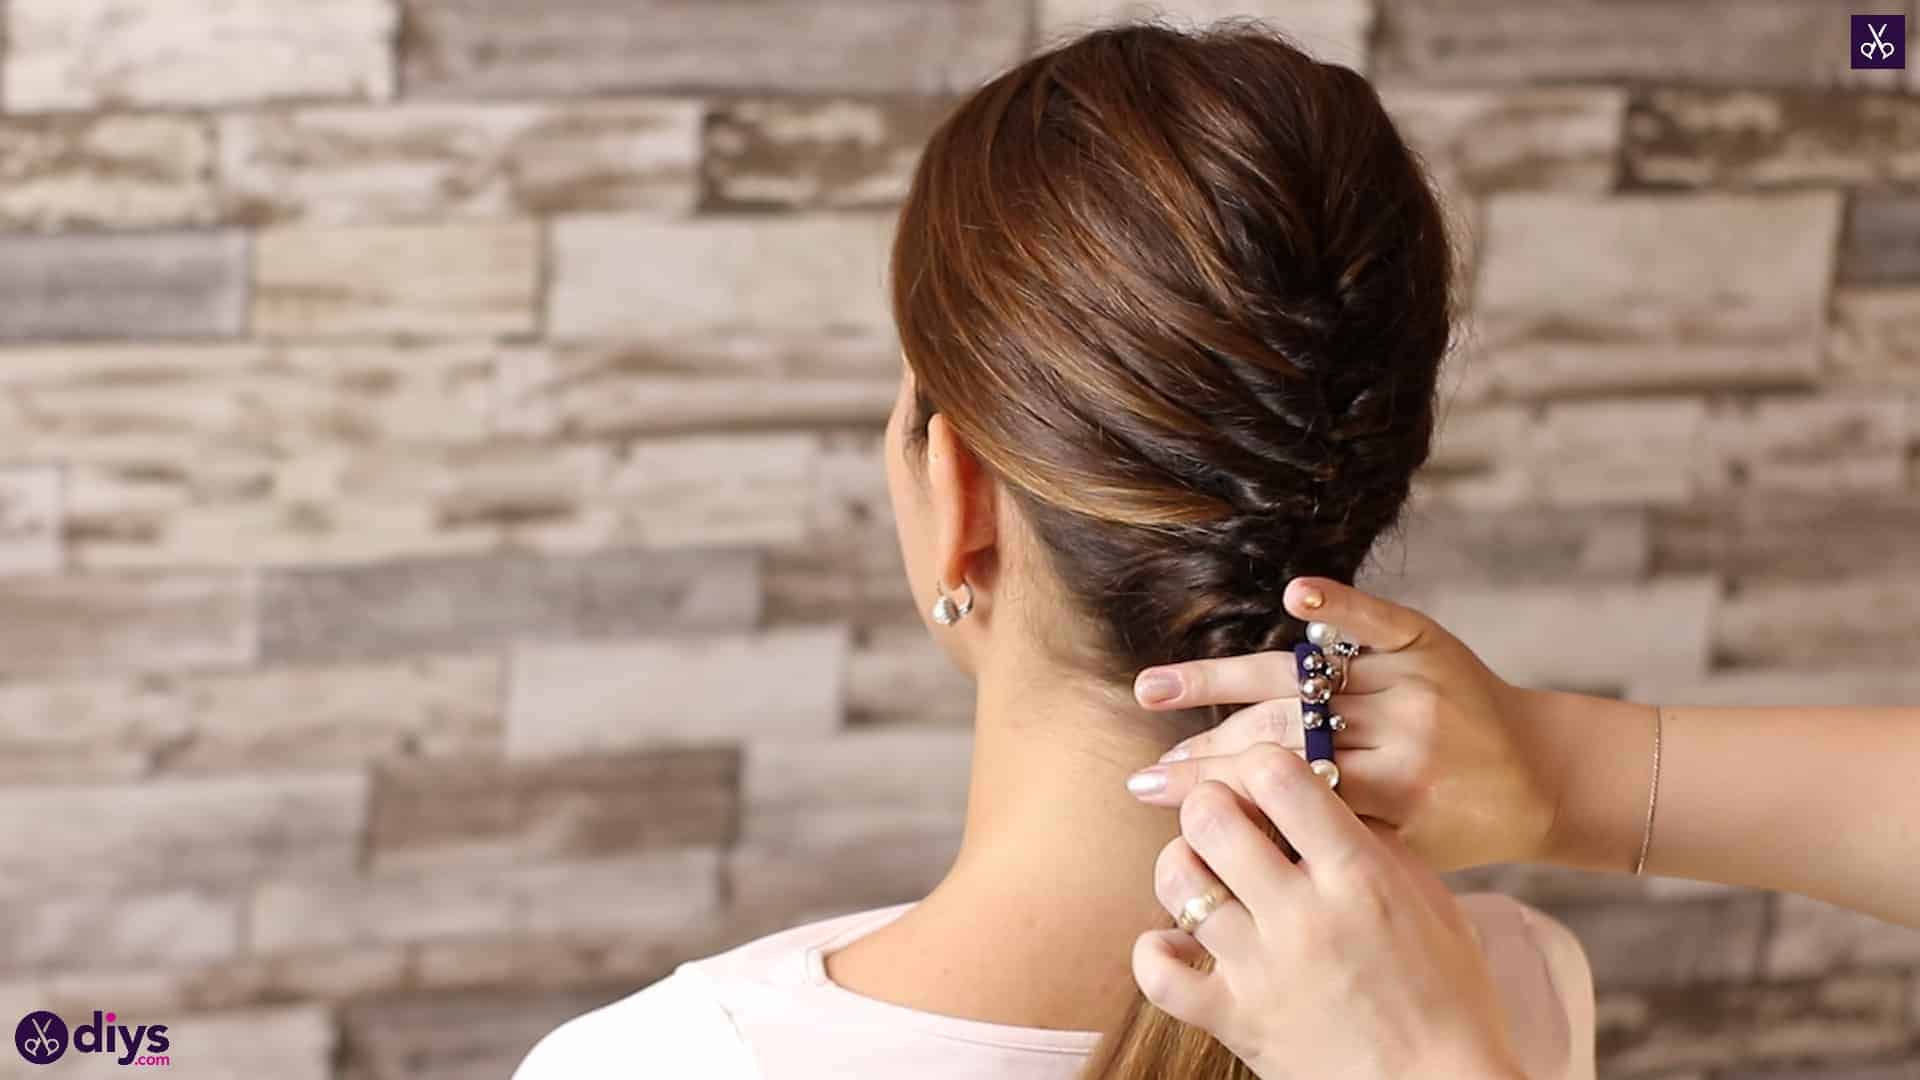
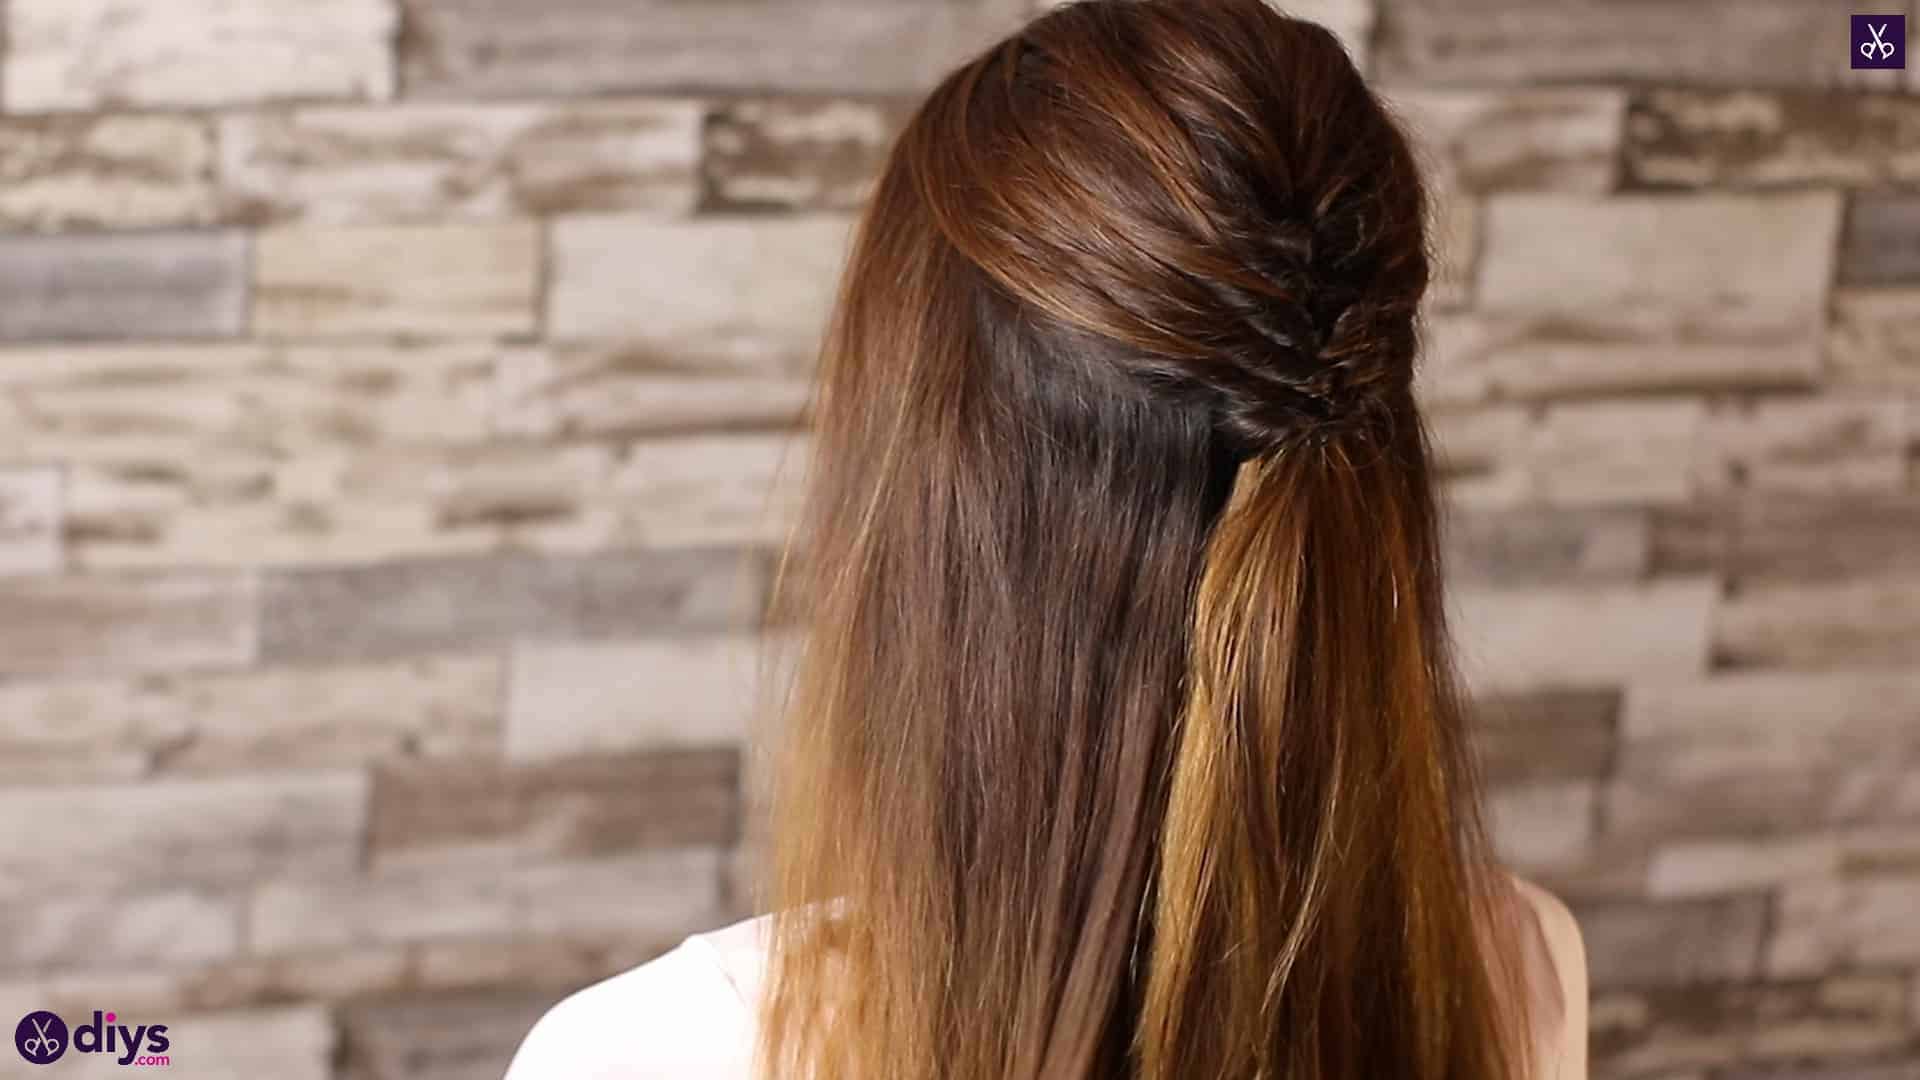
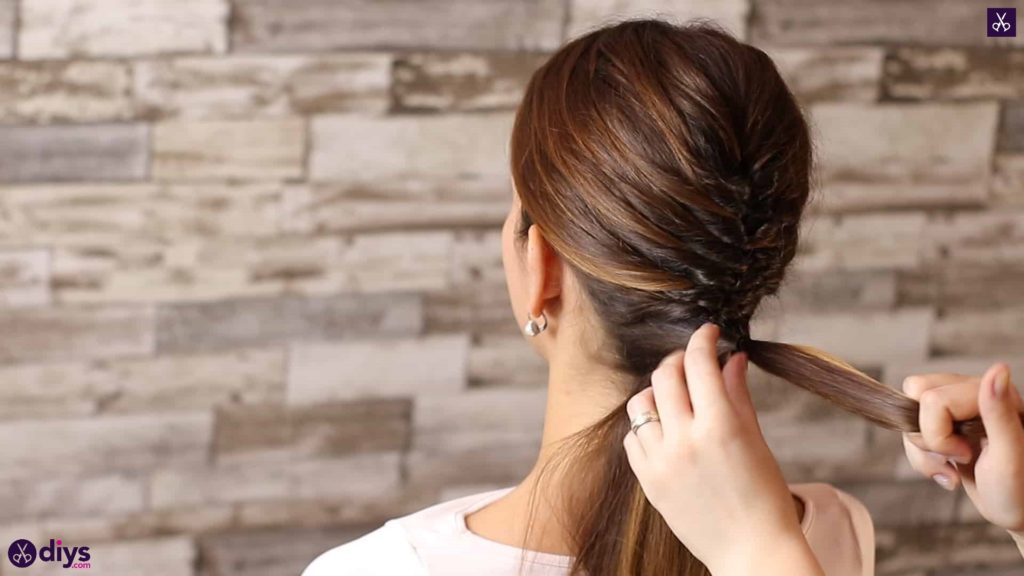
Step 7: add a fancy clip
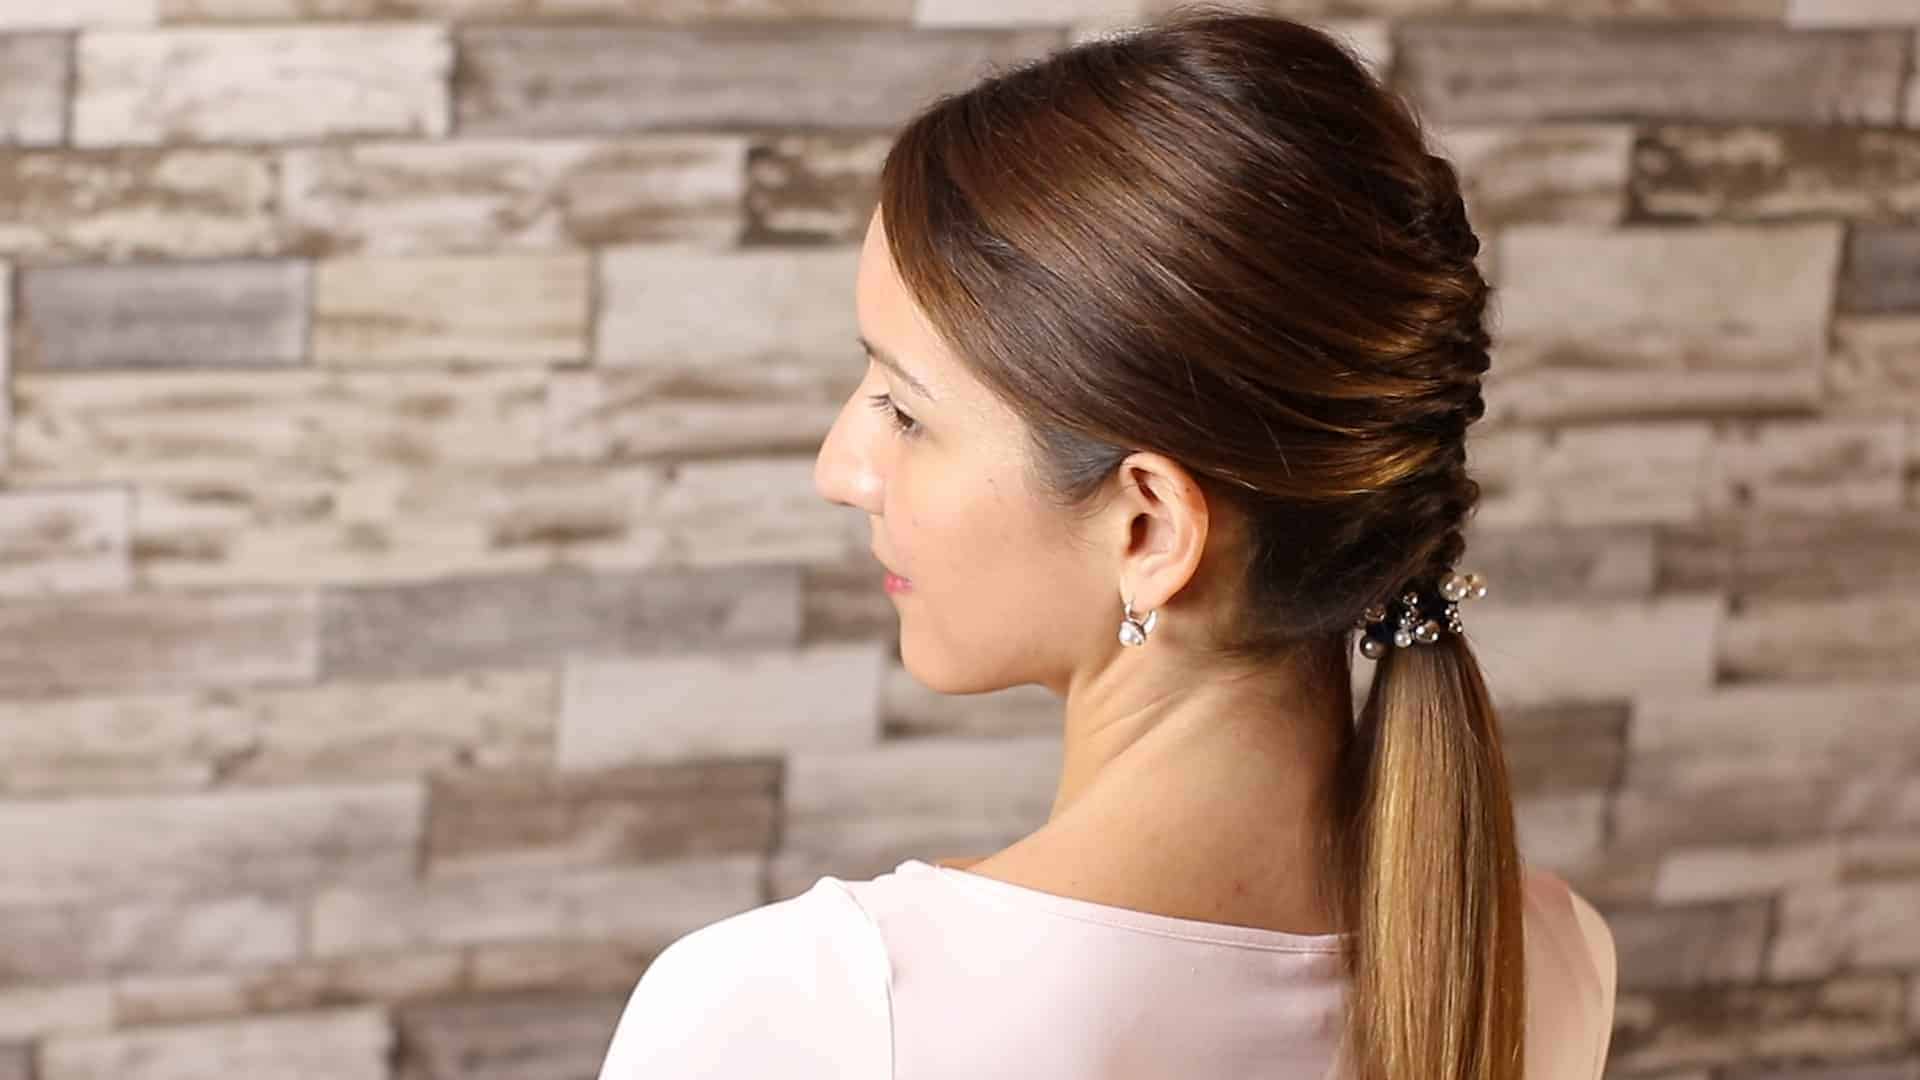
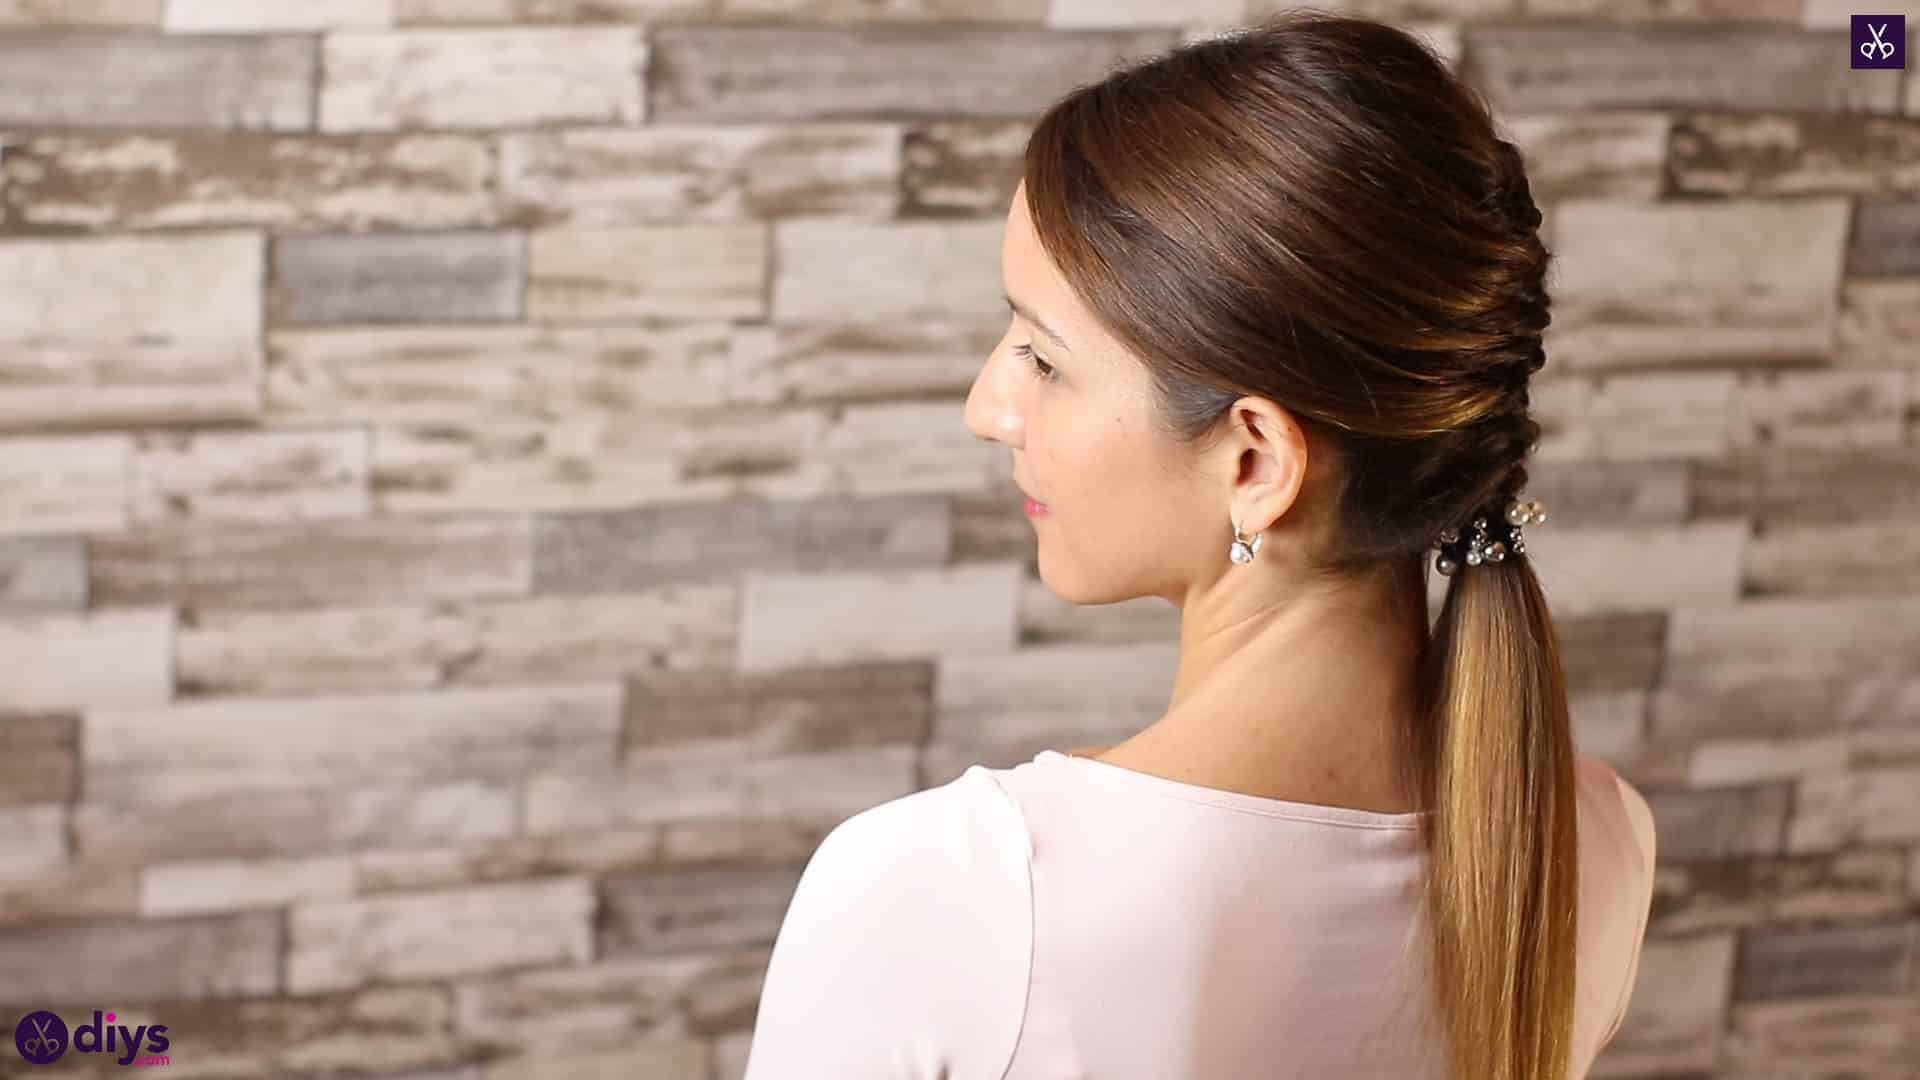
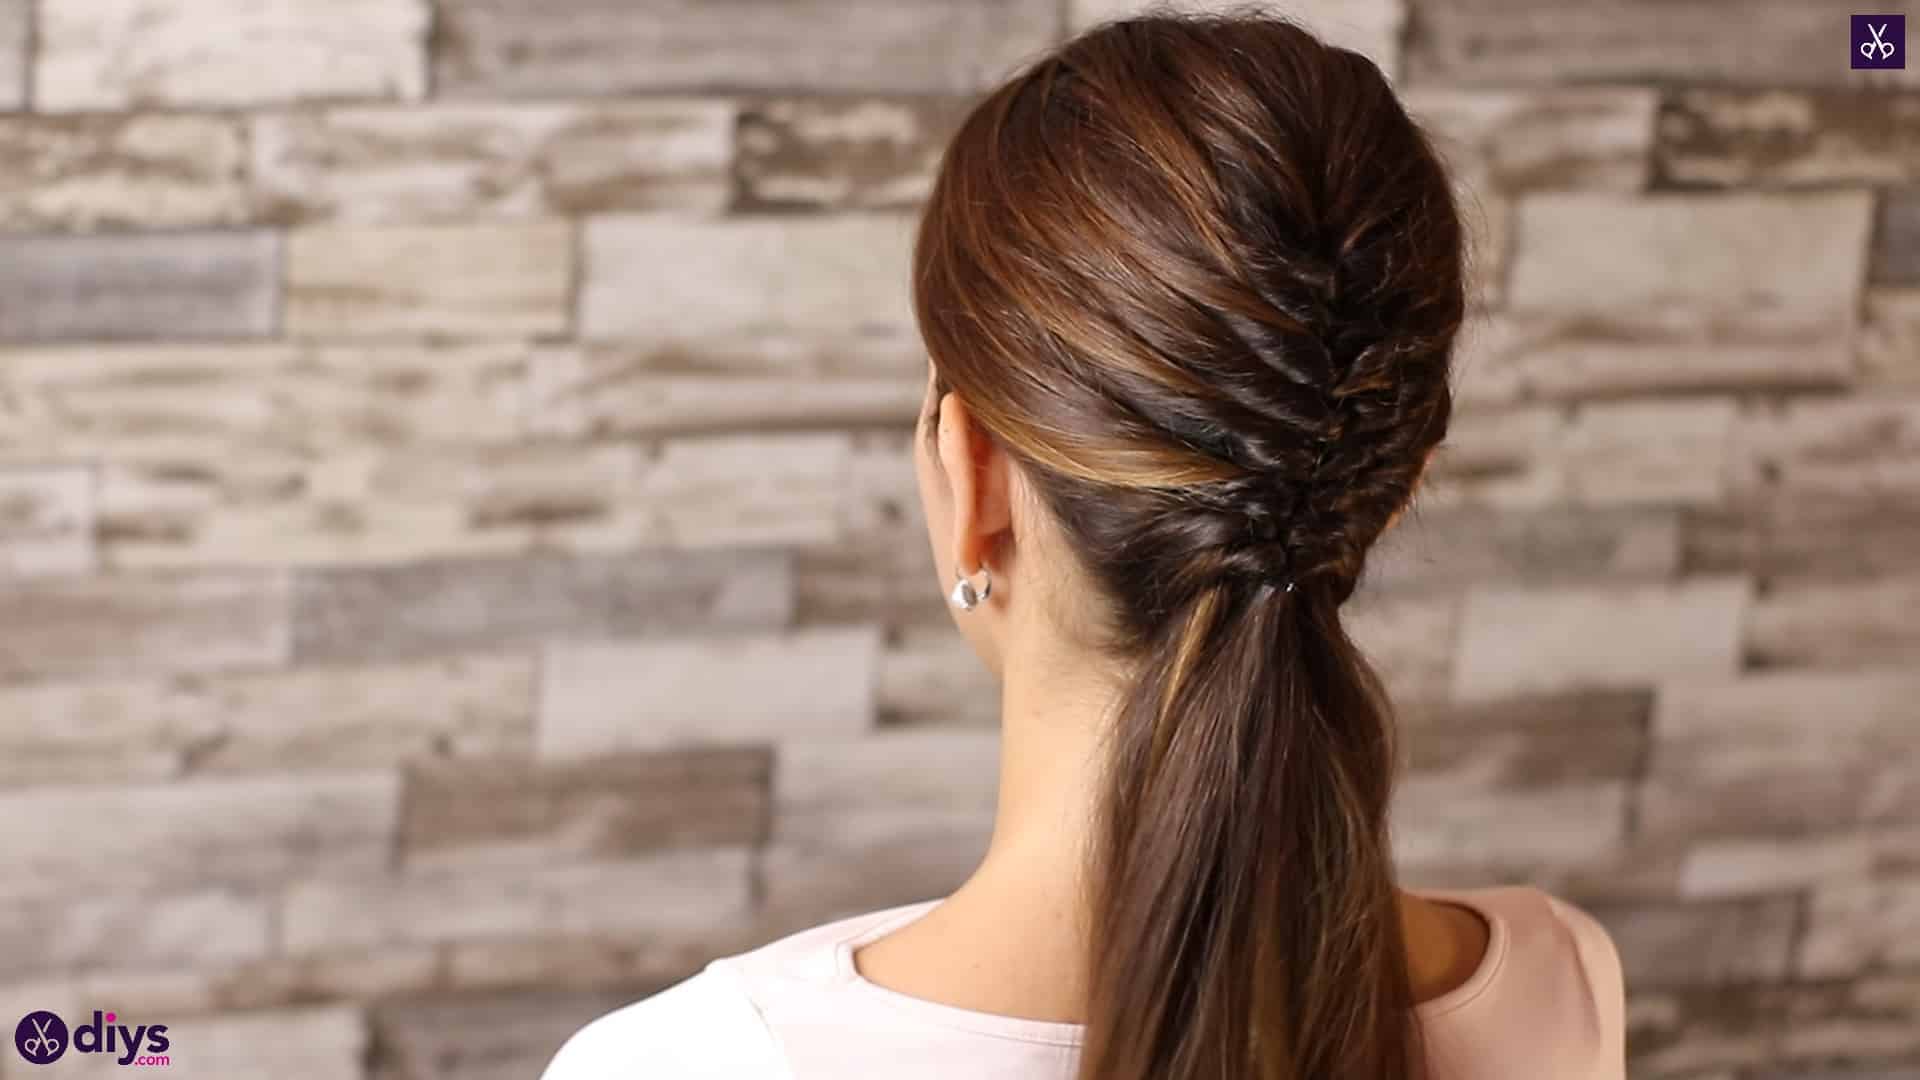
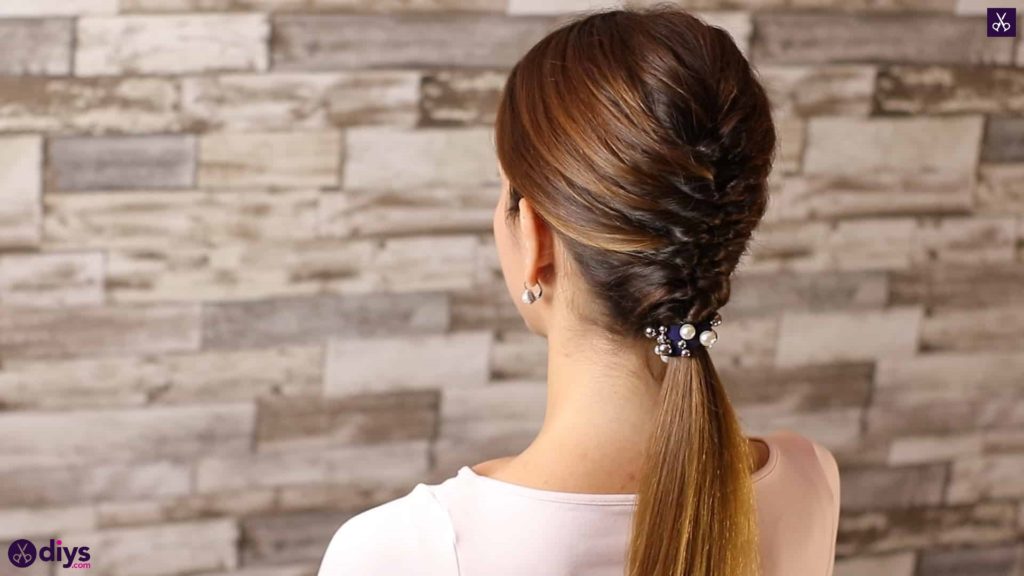
Anchor all of the remaining hair, including your last little looped pony, in place with a larger hair elastic. I chose an embellished one to add some glamour with pearls and rhinestones, but you could also use a regular sized hair tie and then cover it with a ribbon of some kind of clip in hair piece if you prefer!

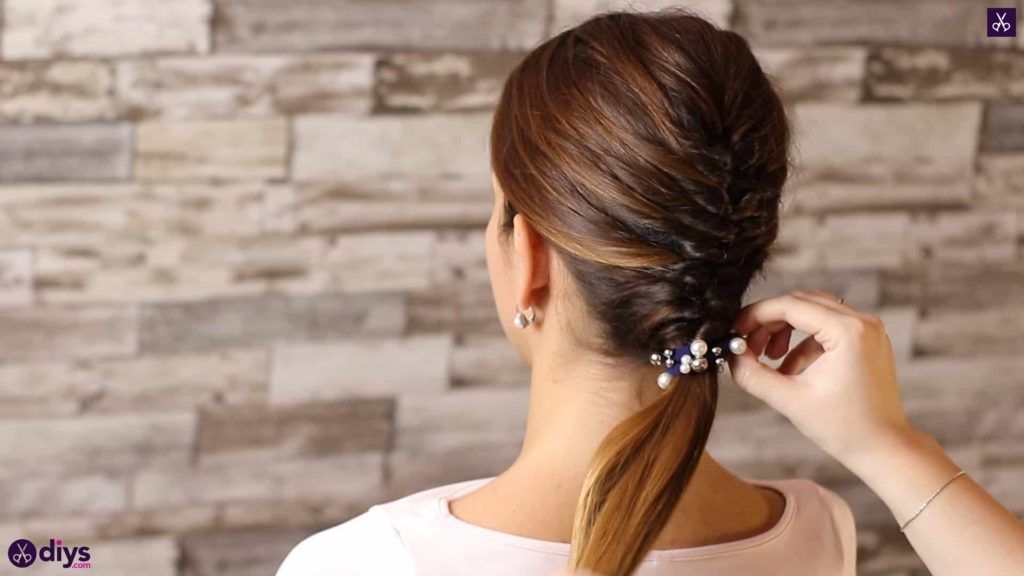
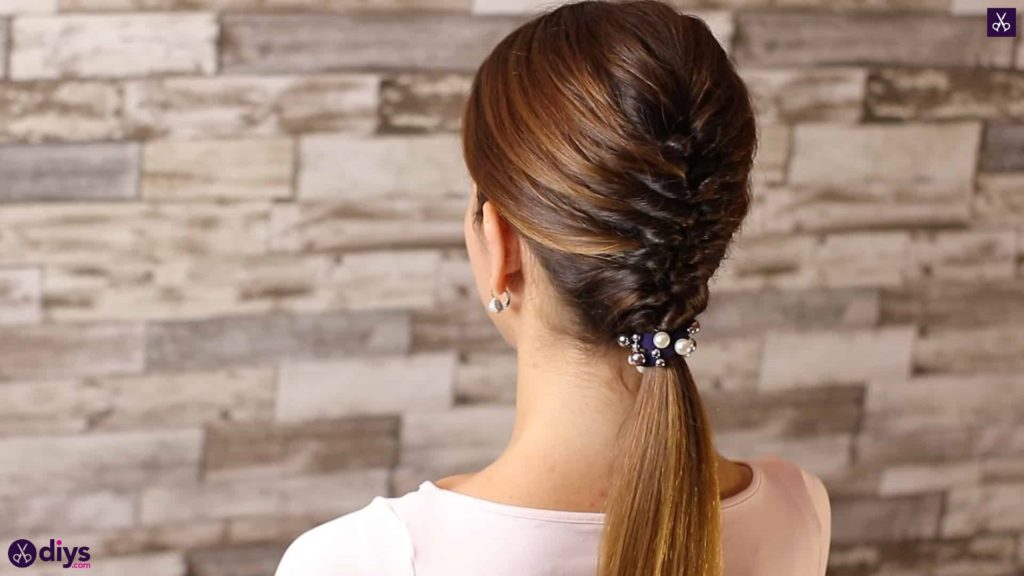
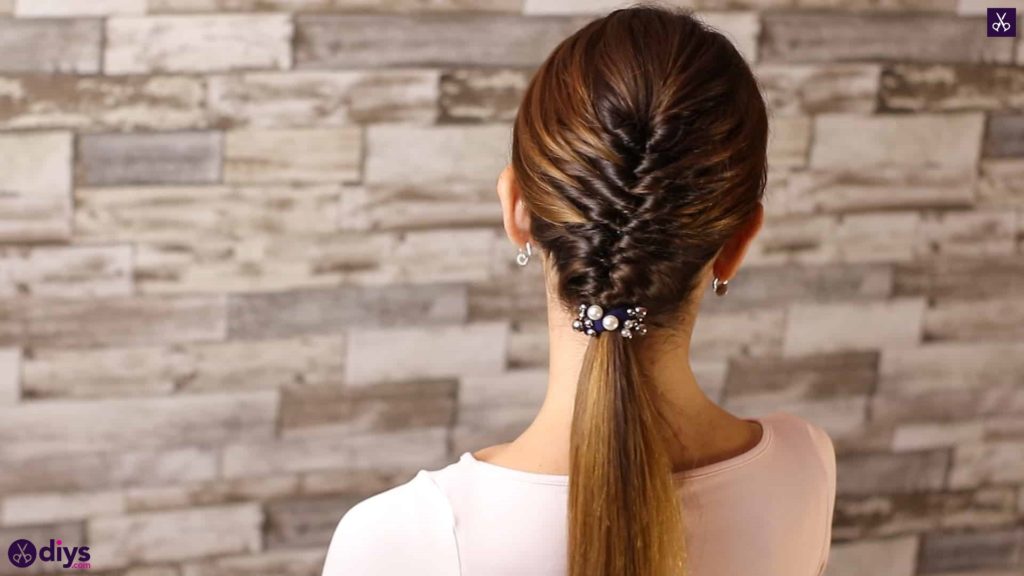
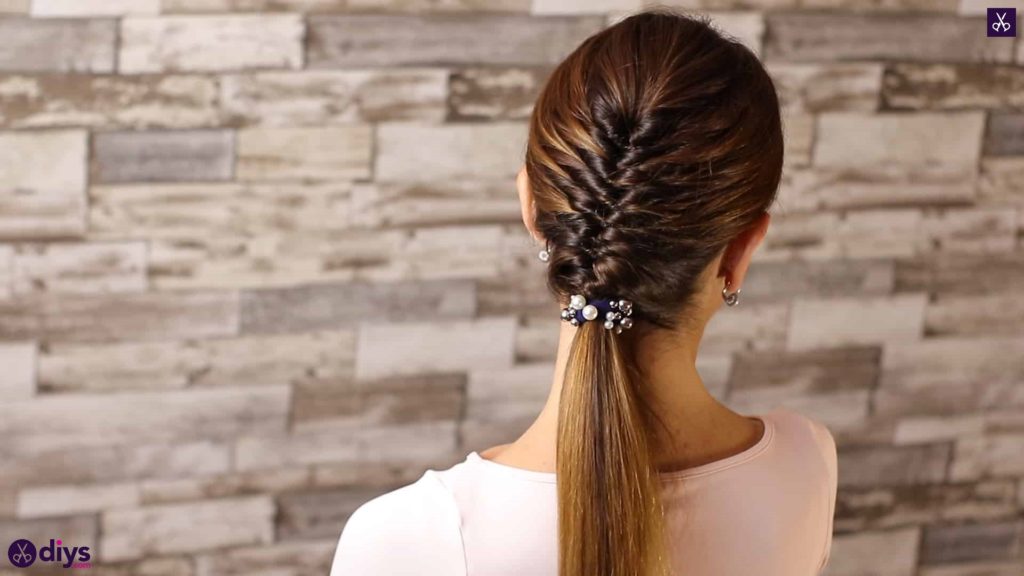
You’re all finished! Give the whole style a light spritz with hairspray to smooth down any flyaways. Just in case you’d like to try this style out for yourself, here’s a fantastic tutorial video to help you!