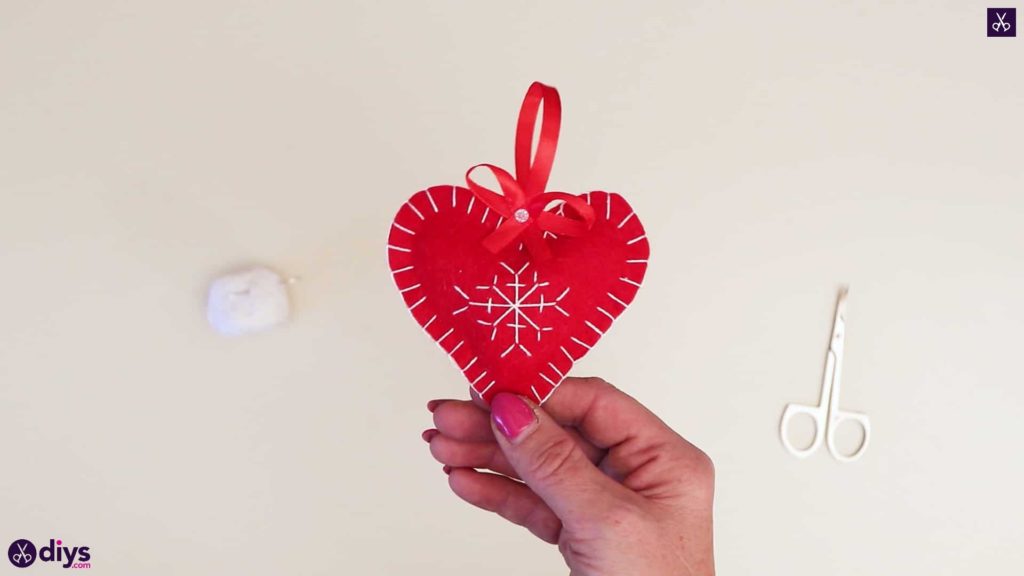
Snowflake Embroidered Heart Ornament for Christmas Tree
Updated on November 19, 2025


As of late, I’ve been looking for very simple things I can make this holiday season that will help me teach my kids how to sew. They’re not quite ready to try the machine, but they’re definitely old enough (and patient enough) to try a bit of hand stitching. That’s how I came up with this snowflake embroidered felt heart ornament idea that I couldn’t help sharing with everyone else too because it turned out so cute.
Check out these step by step instructions complete with photos! If you’d rather follow along with a video tutorial instead of written words, scroll to the bottom of this post to find just what you’re looking for.
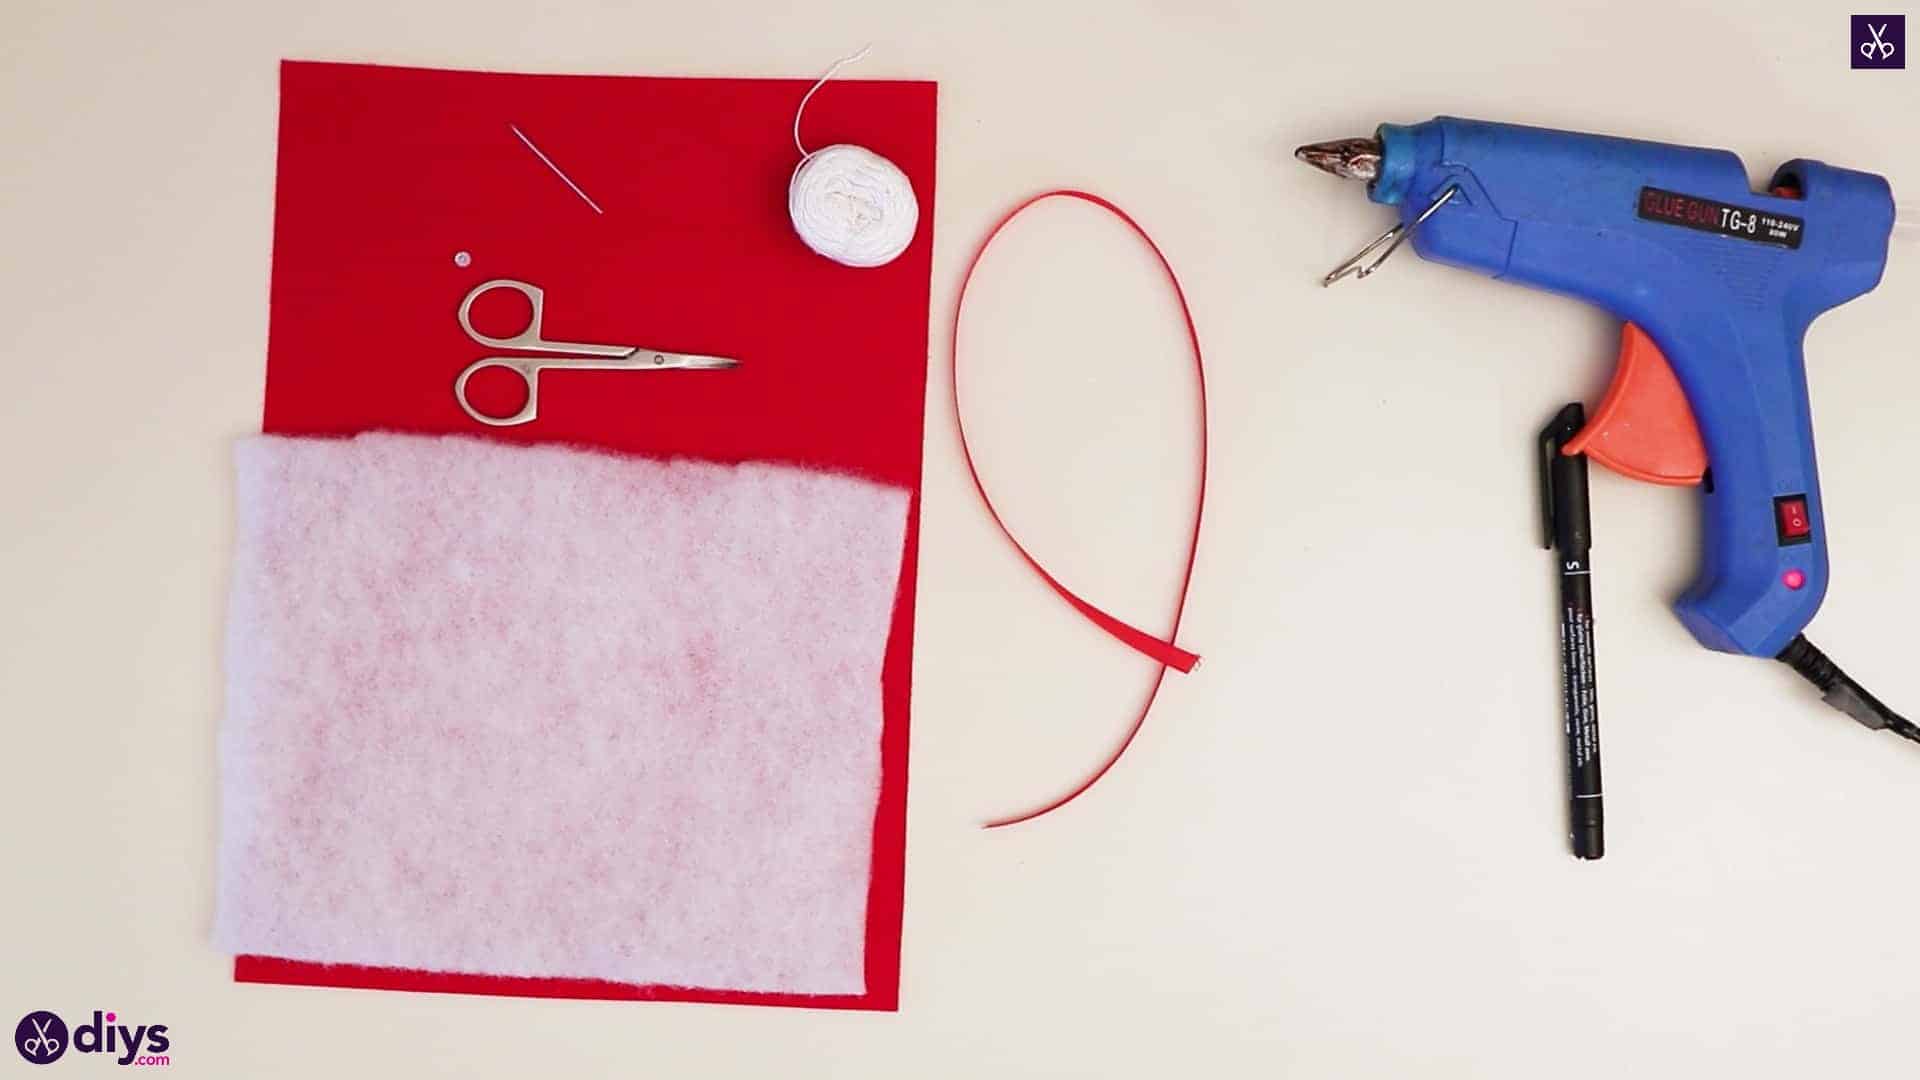
For this project, you’ll need:
- White thread
- A needle
- White stuffing or crafting fluff
- Red felt
- Red ribbon
- Hot glue
- A black marker
- Curved nail scissor
- White rhinestones
Step 1: Gather your materials!
Just like with any crafting project, get what you need.

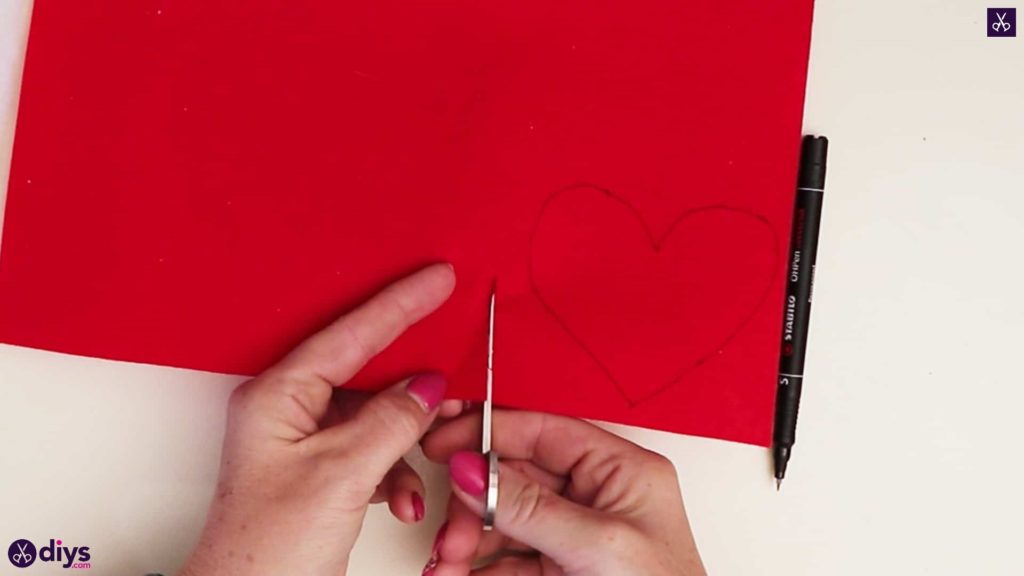
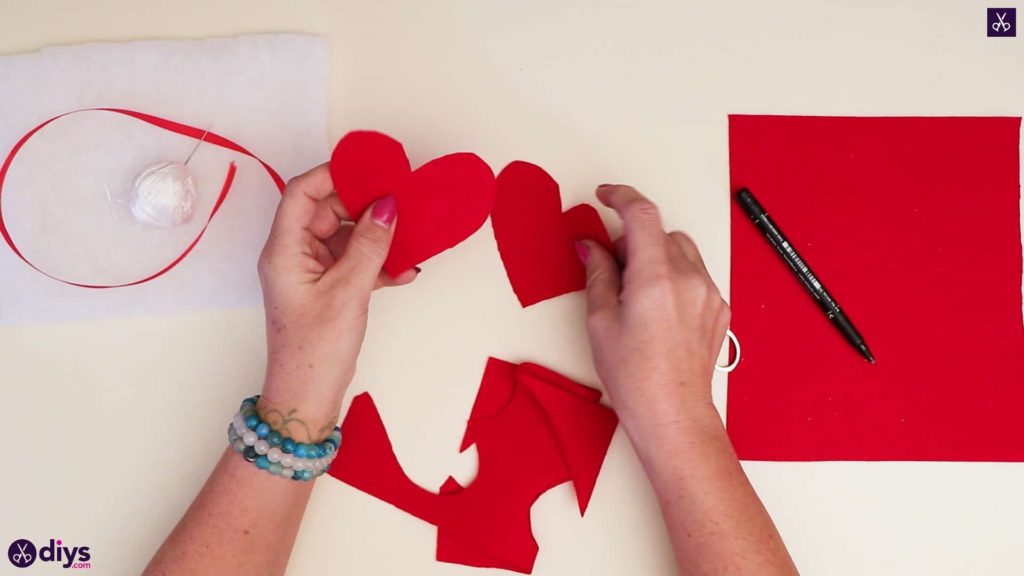
Step 2: make the heart
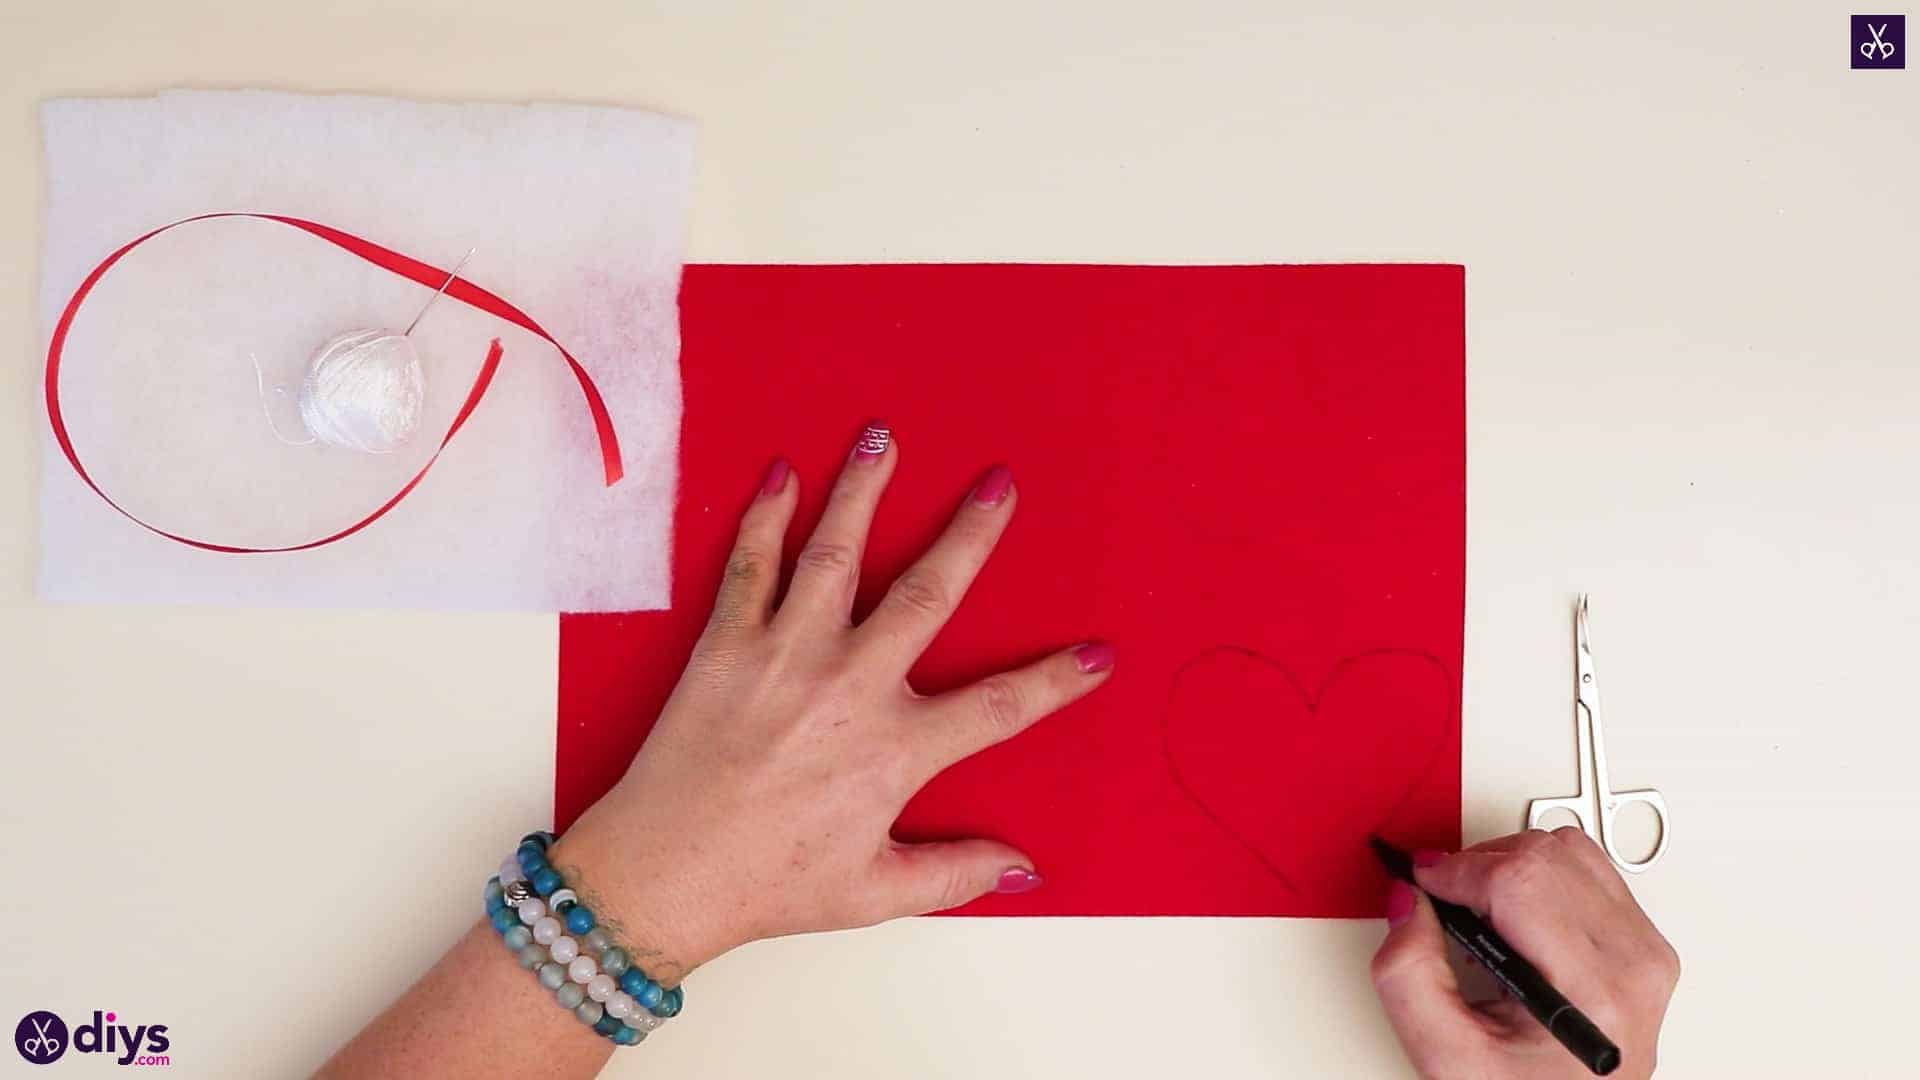
Turn your red felt page sideways so it sits landscape and draw a heart in the bottom right corner. Cut a rectangular strip from the same end as the heart, the full height of the page, so that the heart you draw is part of the strip at one end (rather than cutting around the actual heart shape itself).

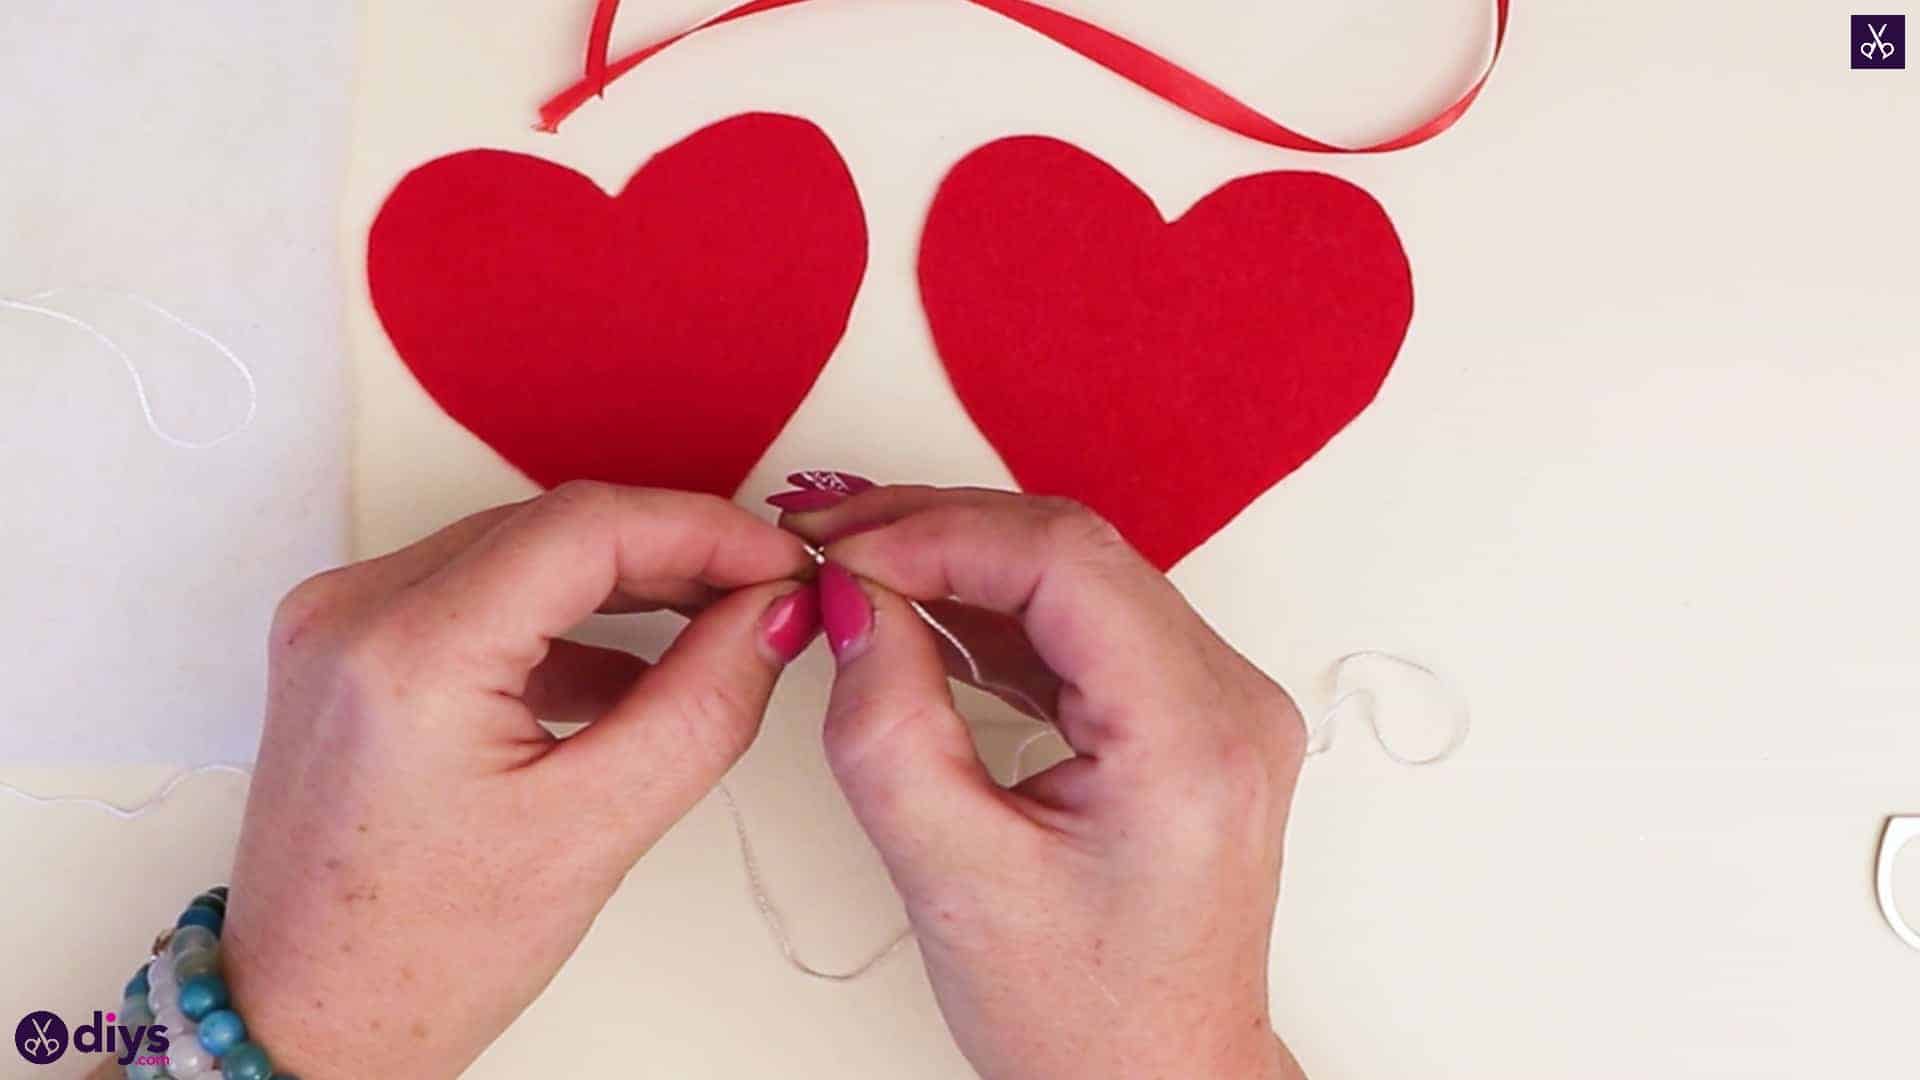
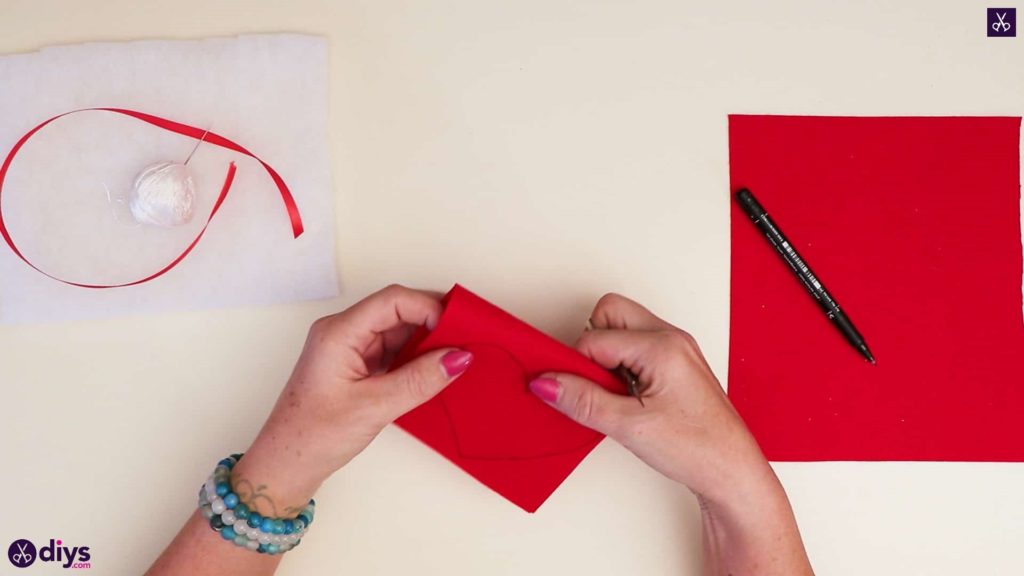
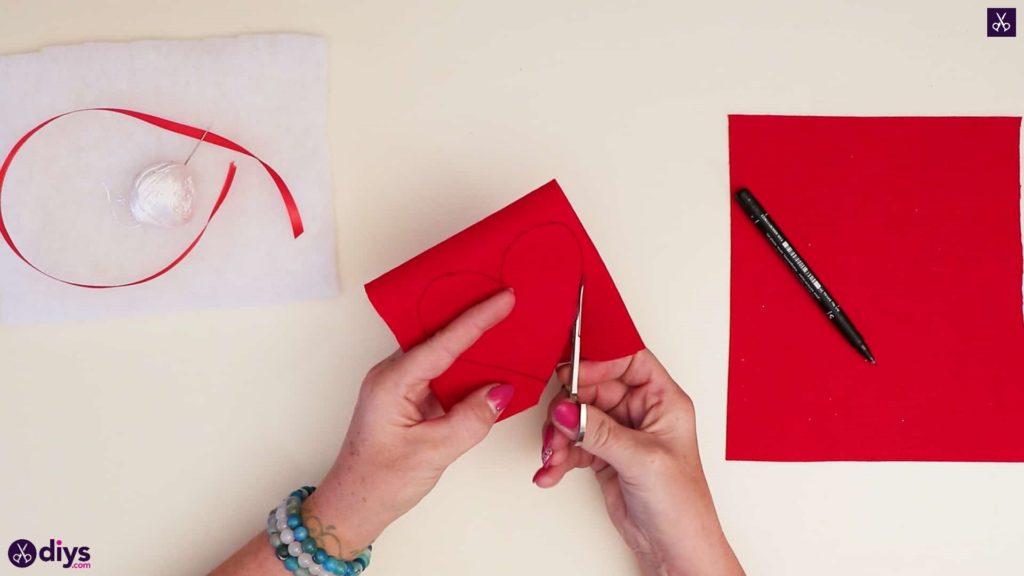
Step 3: make the second heart
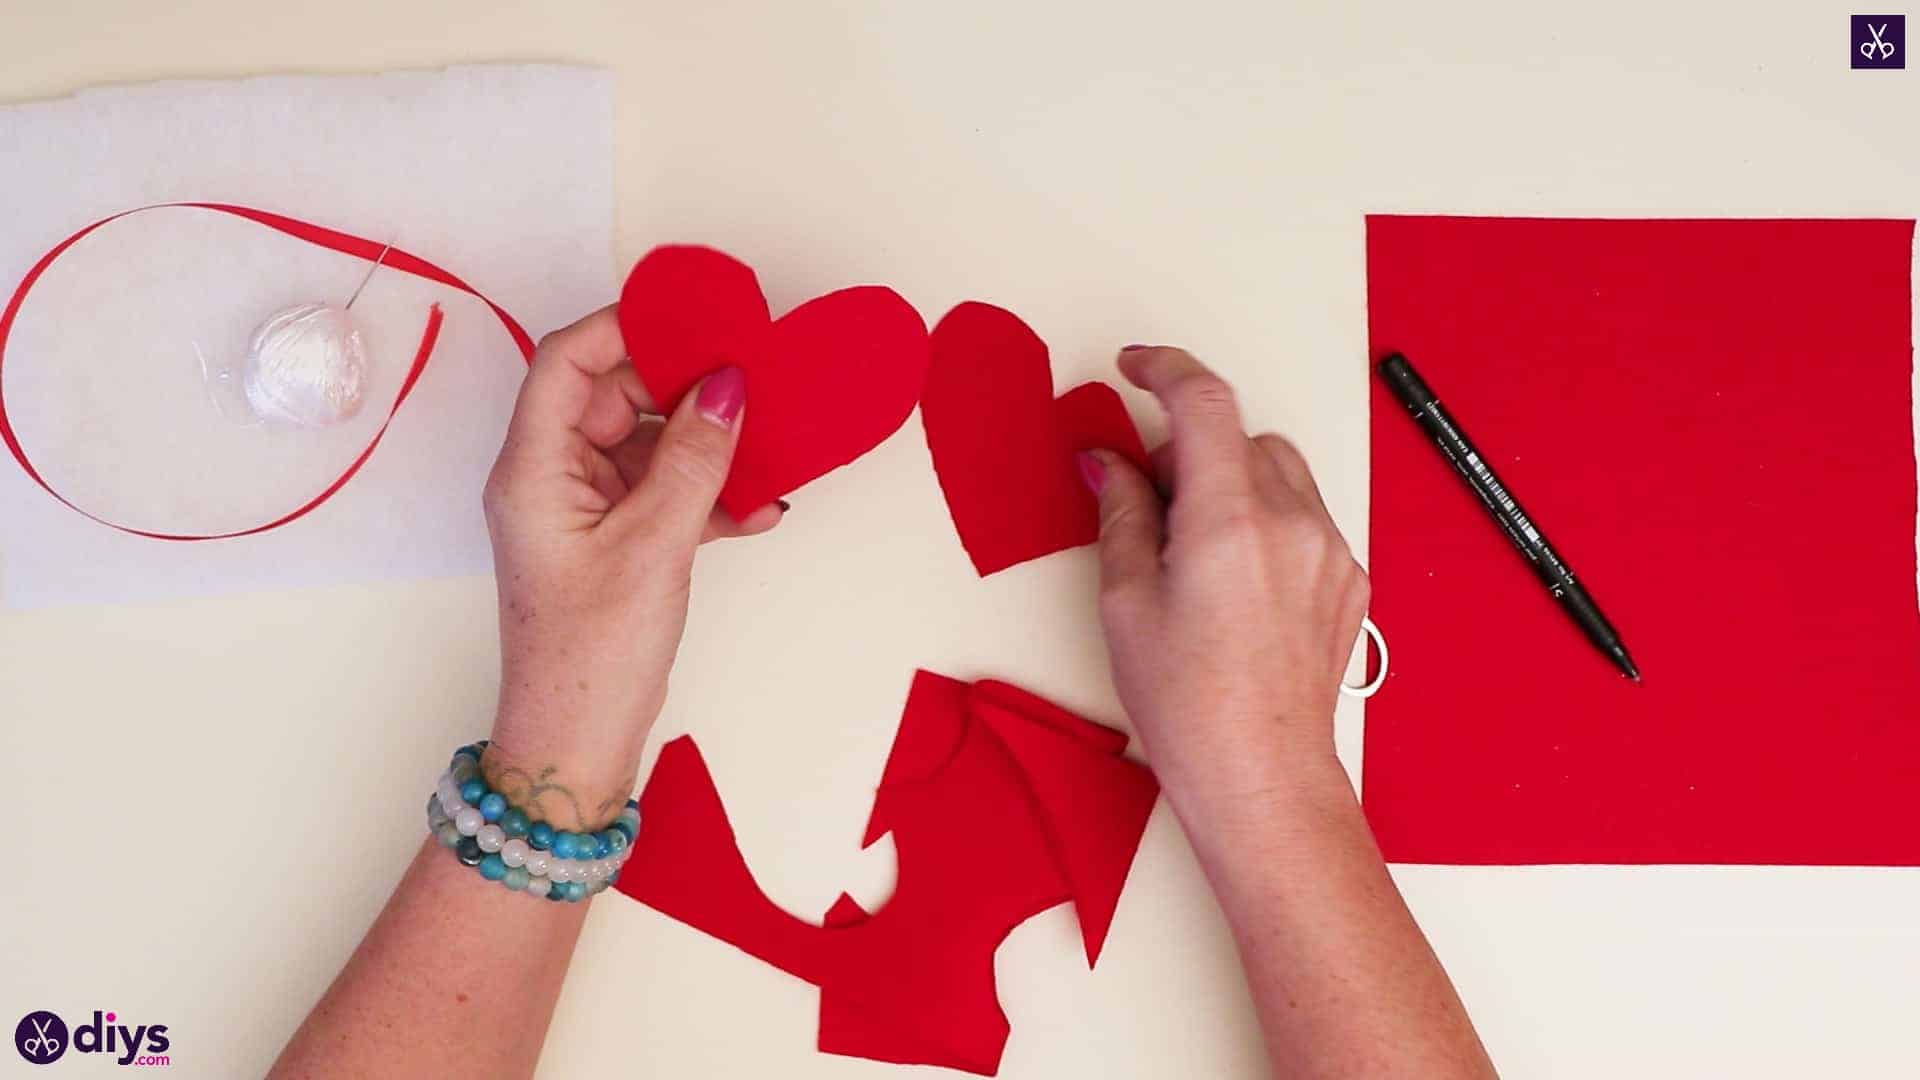
Fold the rectangular strip you just cut in half by pulling the top back and downward so the top edge meets up with the backside of the edge below your drawn heart. Then cut the heart shape out, making sure that you’re cutting through both layers of the new folded shape. When you’re done, you’ll have two hearts!
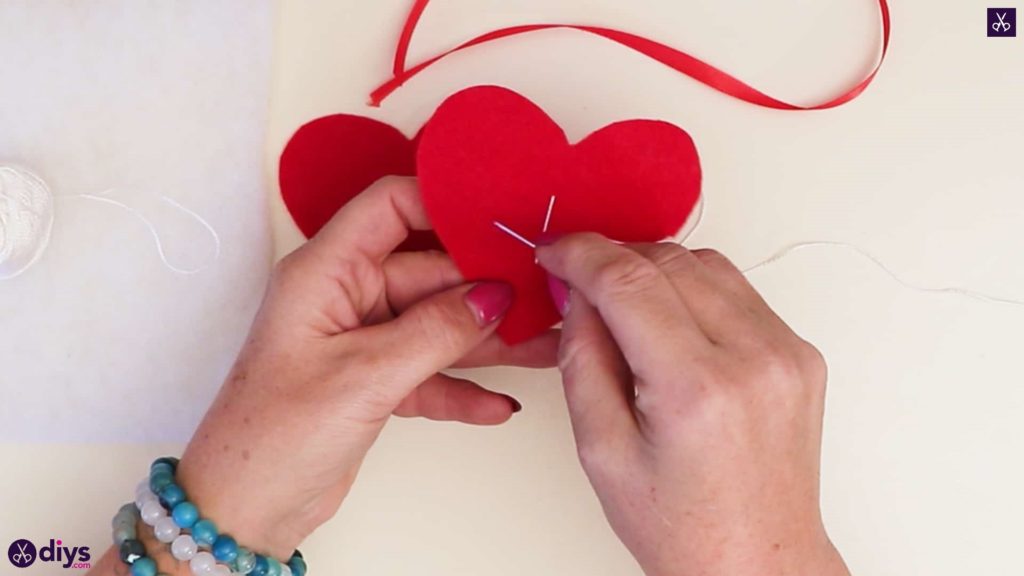
Step 4: stitch the snowflake
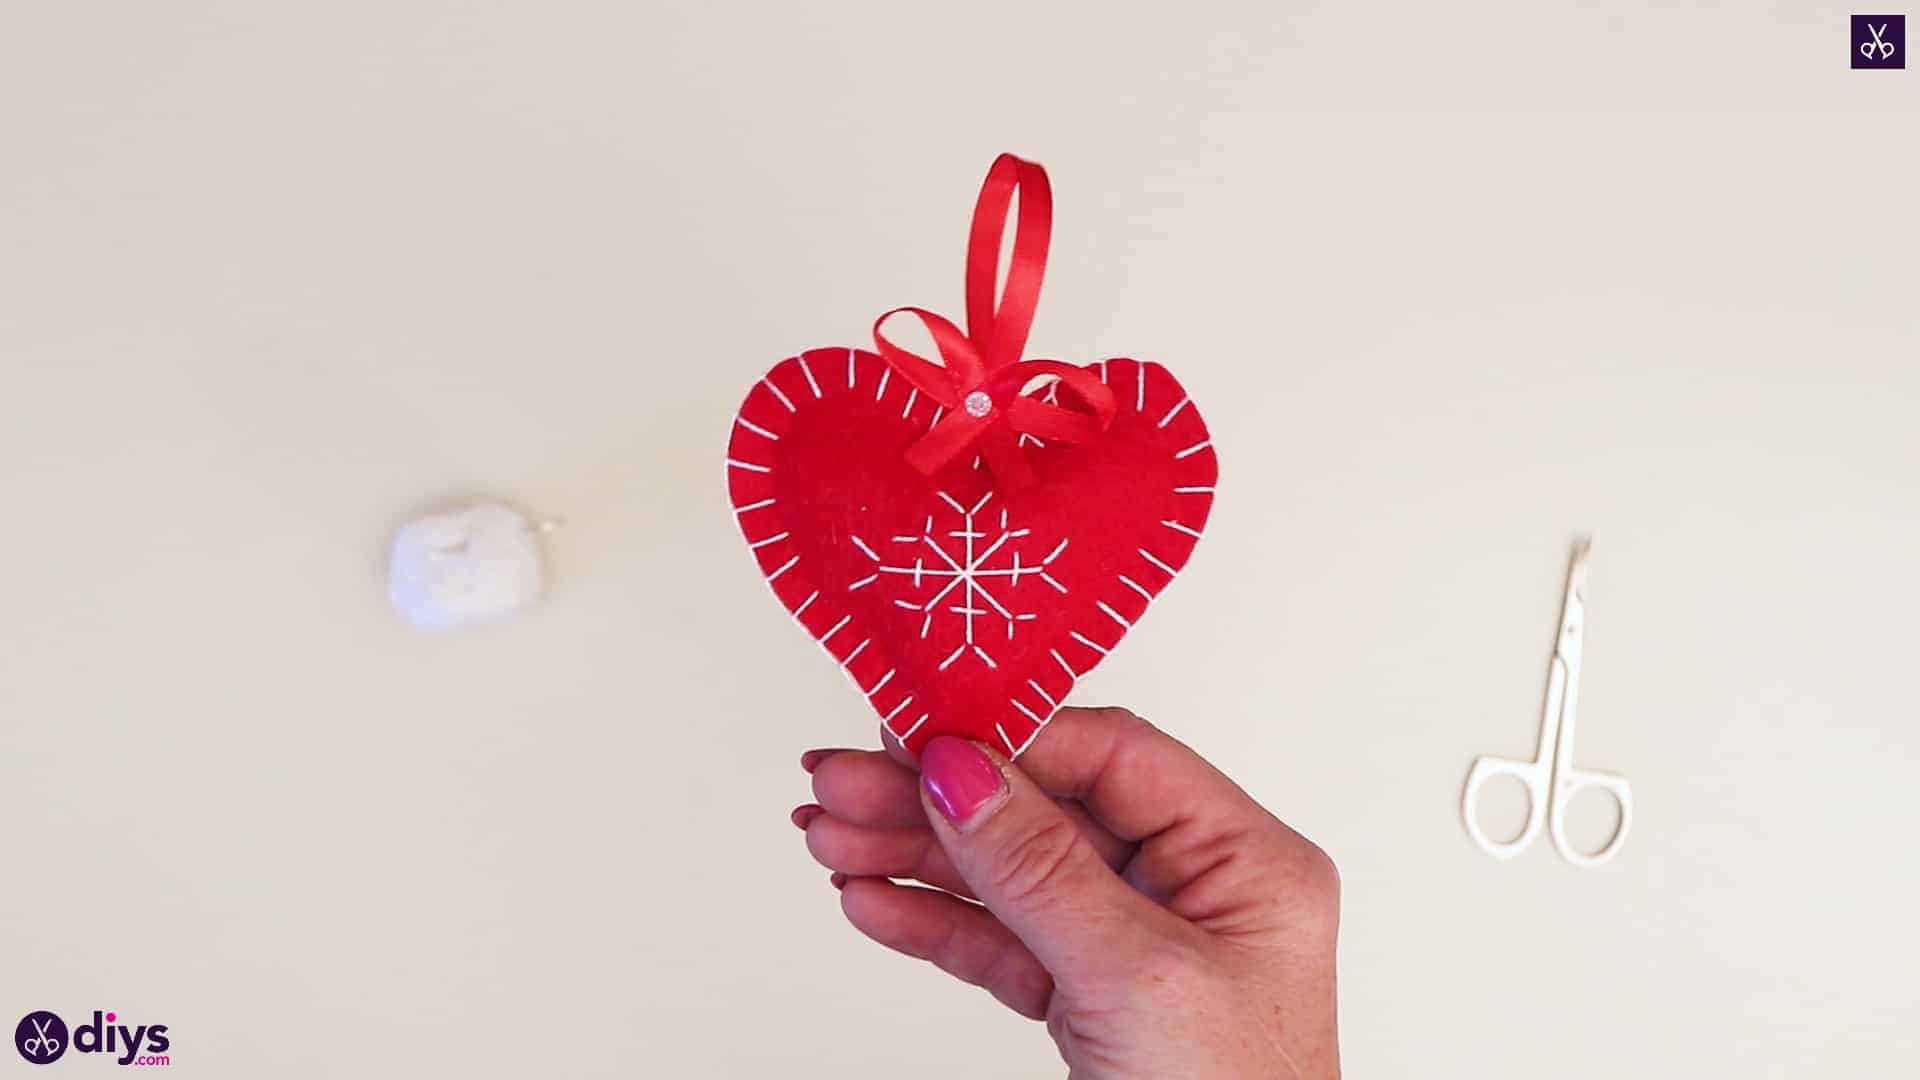
Thread your sewing needle with white thread. Tie a knot in the ends. From the back of one of the red felt hearts, poke the sewing needle through the felt right below the heart’s center. Pull the thread through and then poke the needle through once more to the back side about an inch above where you brought it to the front. Pull all the thread to the back once more to make a single vertical white stitched line. Repeat the process horizontally this time to make a perpendicular line that crosses over your first stitch. You now have a white cross over the center of your heart. Repeat the whole process diagonally as well, crossing over the middle like an X, so you have an asterisk in the center of your heart.

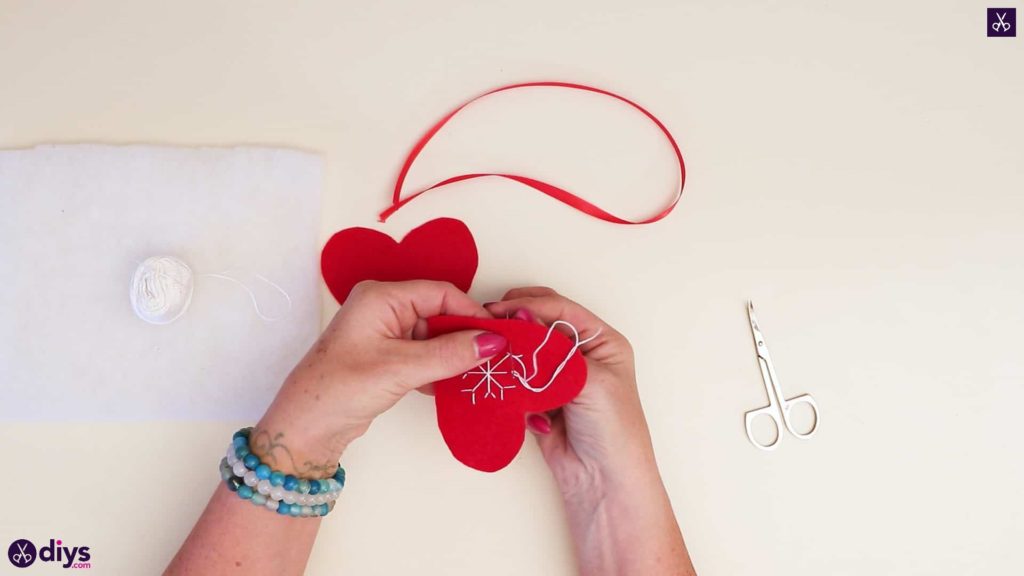
Step 5: finish the snowflake
At each end of the lines you just created, embroider a V-shape by bringing the needle through to the front at the very tip of each line and then pushing it to the back again diagonally and about half an inch out, so each line has a small V at each end. You not have a snowflake! Finish the embroidery by turning your heart around, looping the needle under the crossing lines on the back side, and tying a knot to hold your stitches in place. Trim the excess to cut your needle free.
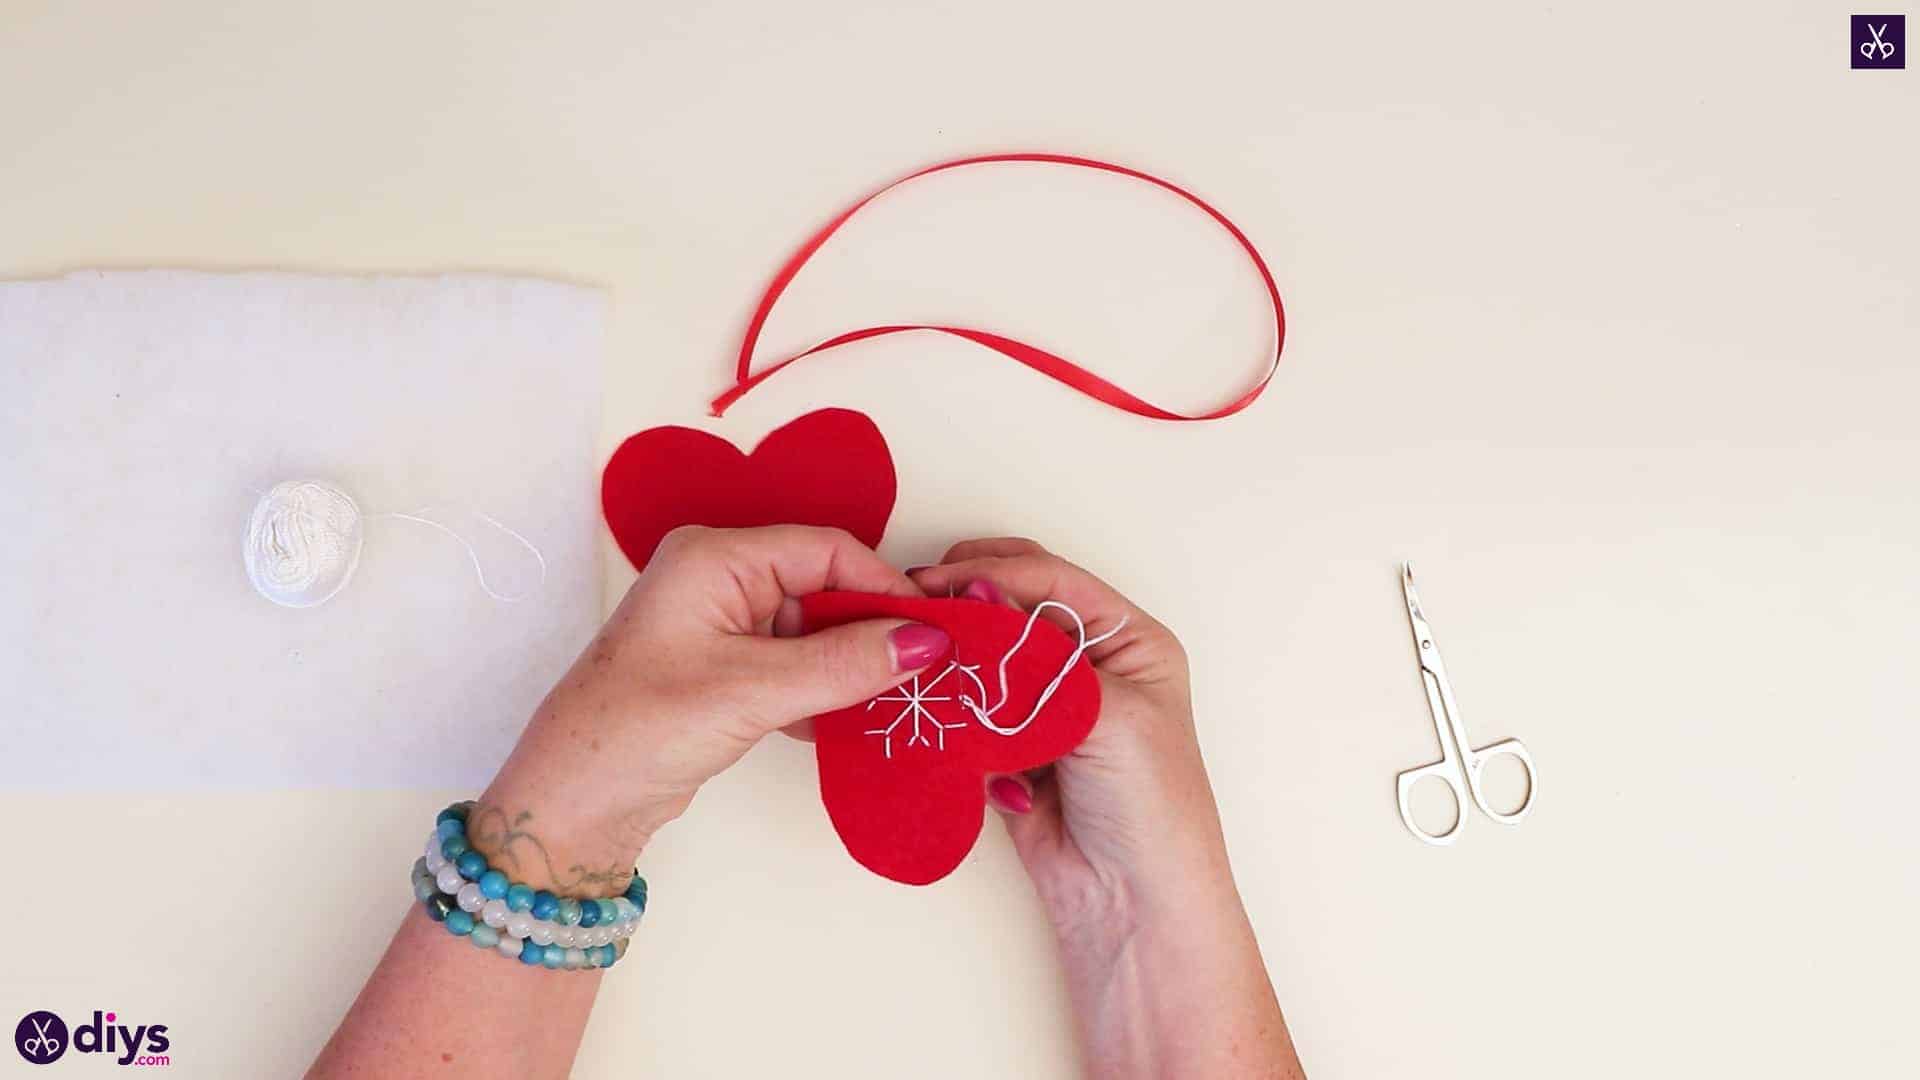
Step 6: sew the edges
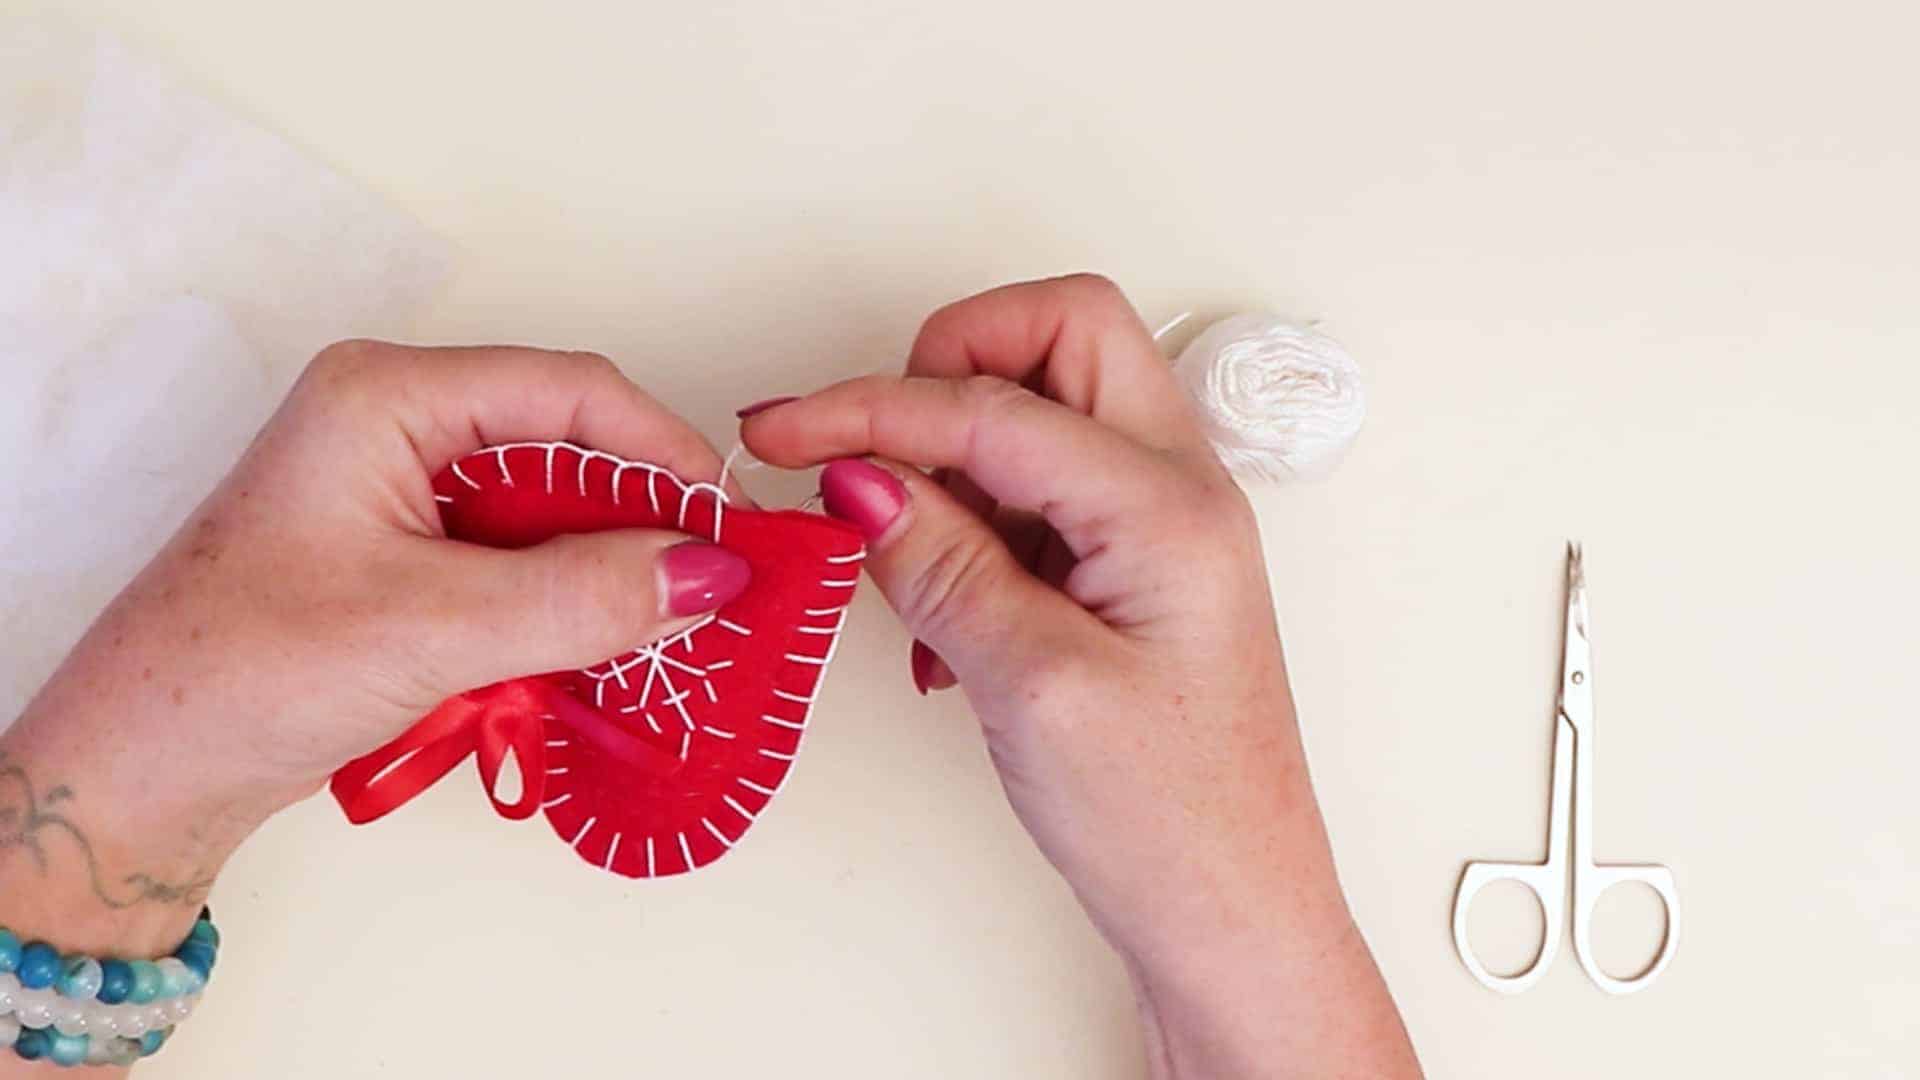
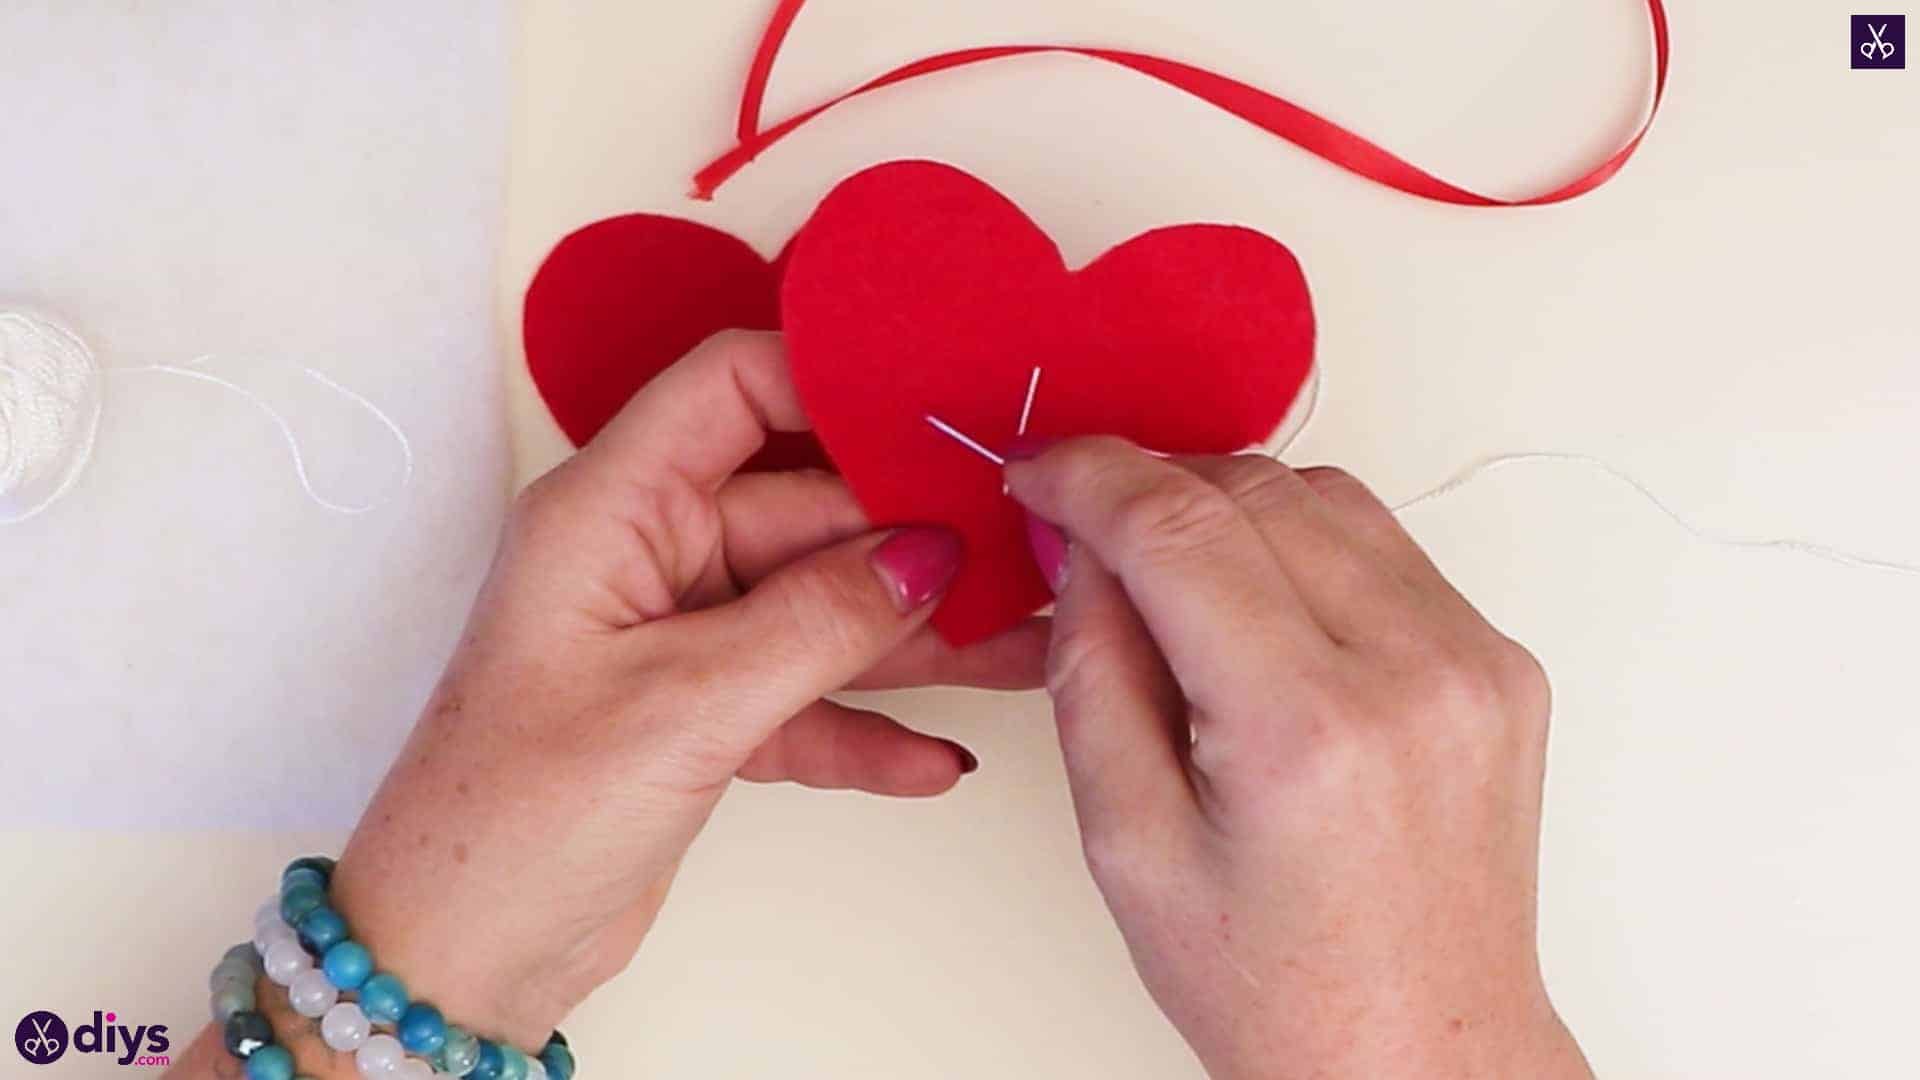
Place the other red felt heart against the back side of the one you embroidered, so the edges line up evenly and the second heart covers the wrong side of your embroidered shape where you tied the knot. Next, re-thread your needle. Part the two felt pieces at the bottom tip and poke your needle through the back layer (the one you did not embroider with a snowflake) and pull the white thread all he way through. Put the layers of the heart’s tip back together and push the needle throughboth layers of the tip this time, front to back so there’s a loop of white thread all the way around the heart’s bottom point. Now, poke the needle’s tip through the back side and out the front, a few millimetres further along the heart’s edge. Start pulling the thread through but leave a small loop of excess this time, then pass the top of your needle through the loop and pull the rest. Don’t pull too hard or the loop will cinch the edge of the heart and make it look crushed. Repeat this process all the way along the edge for half the heart.

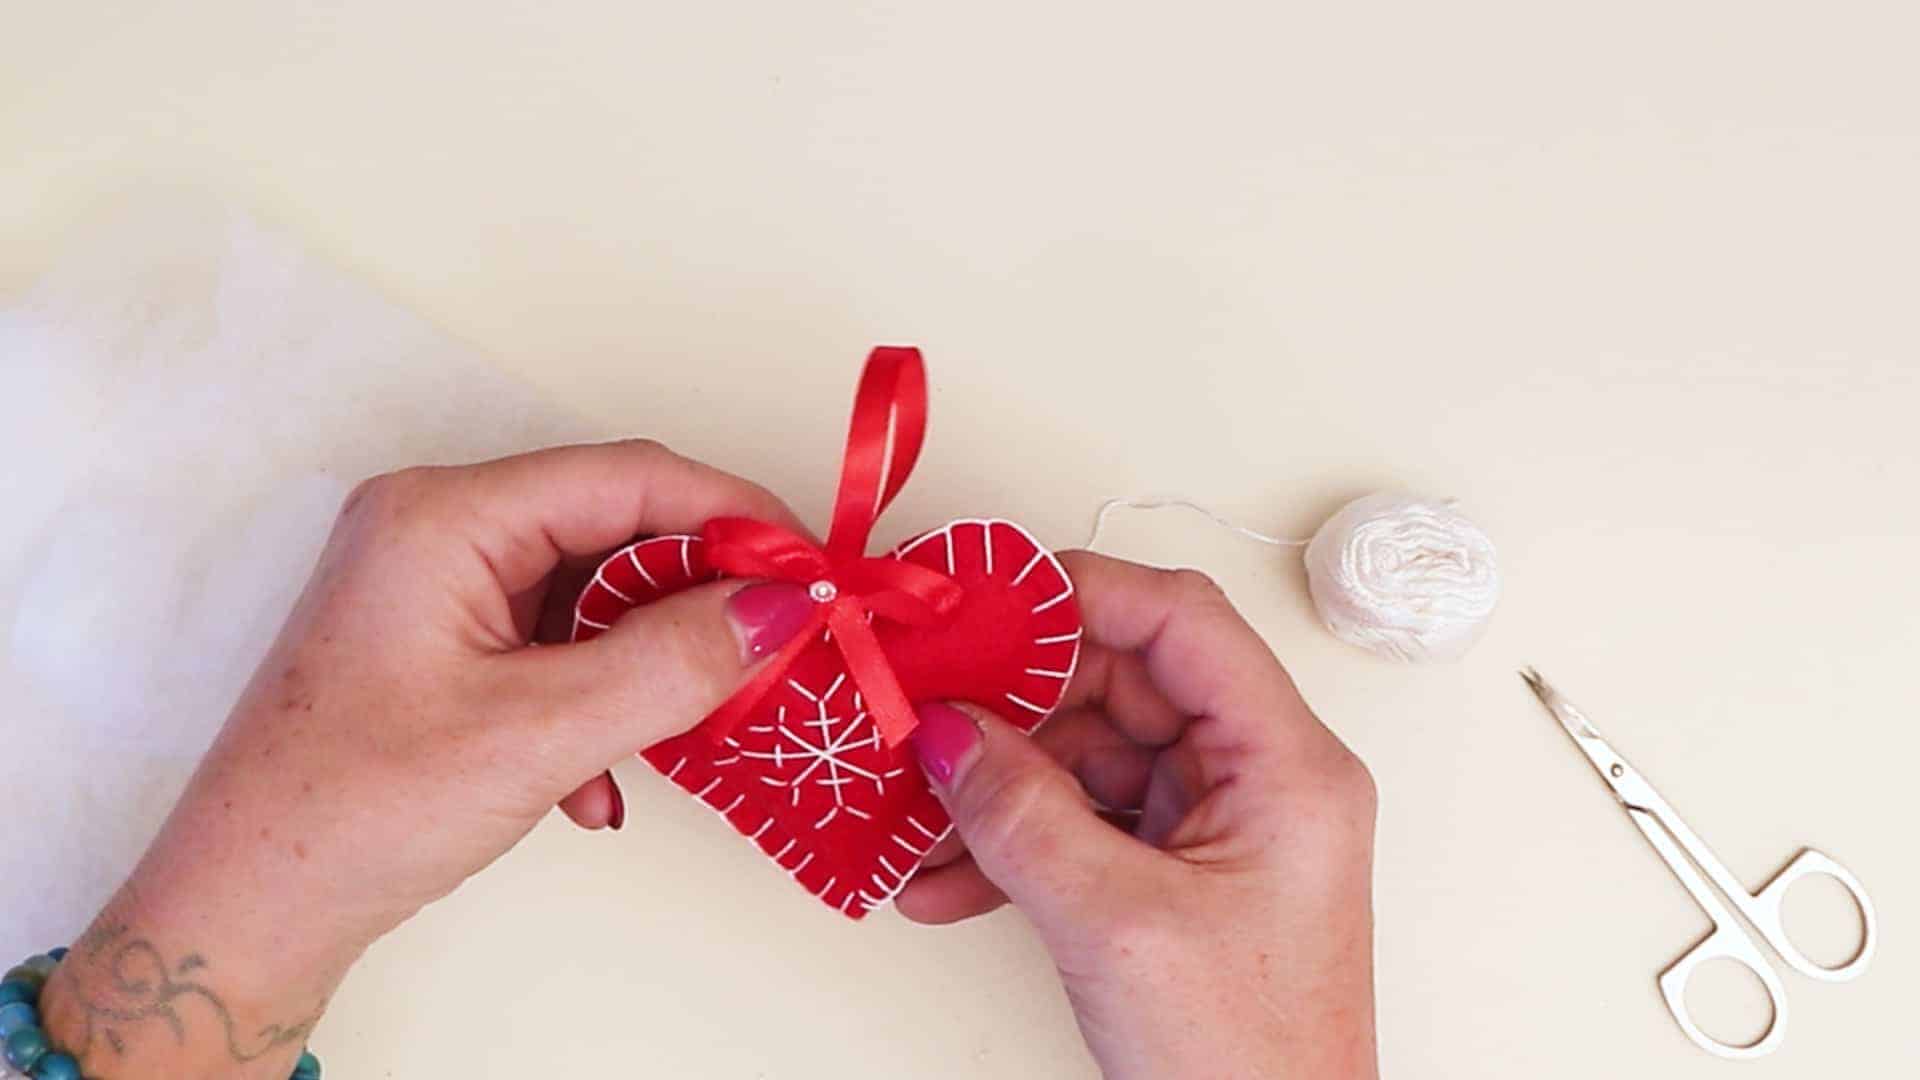
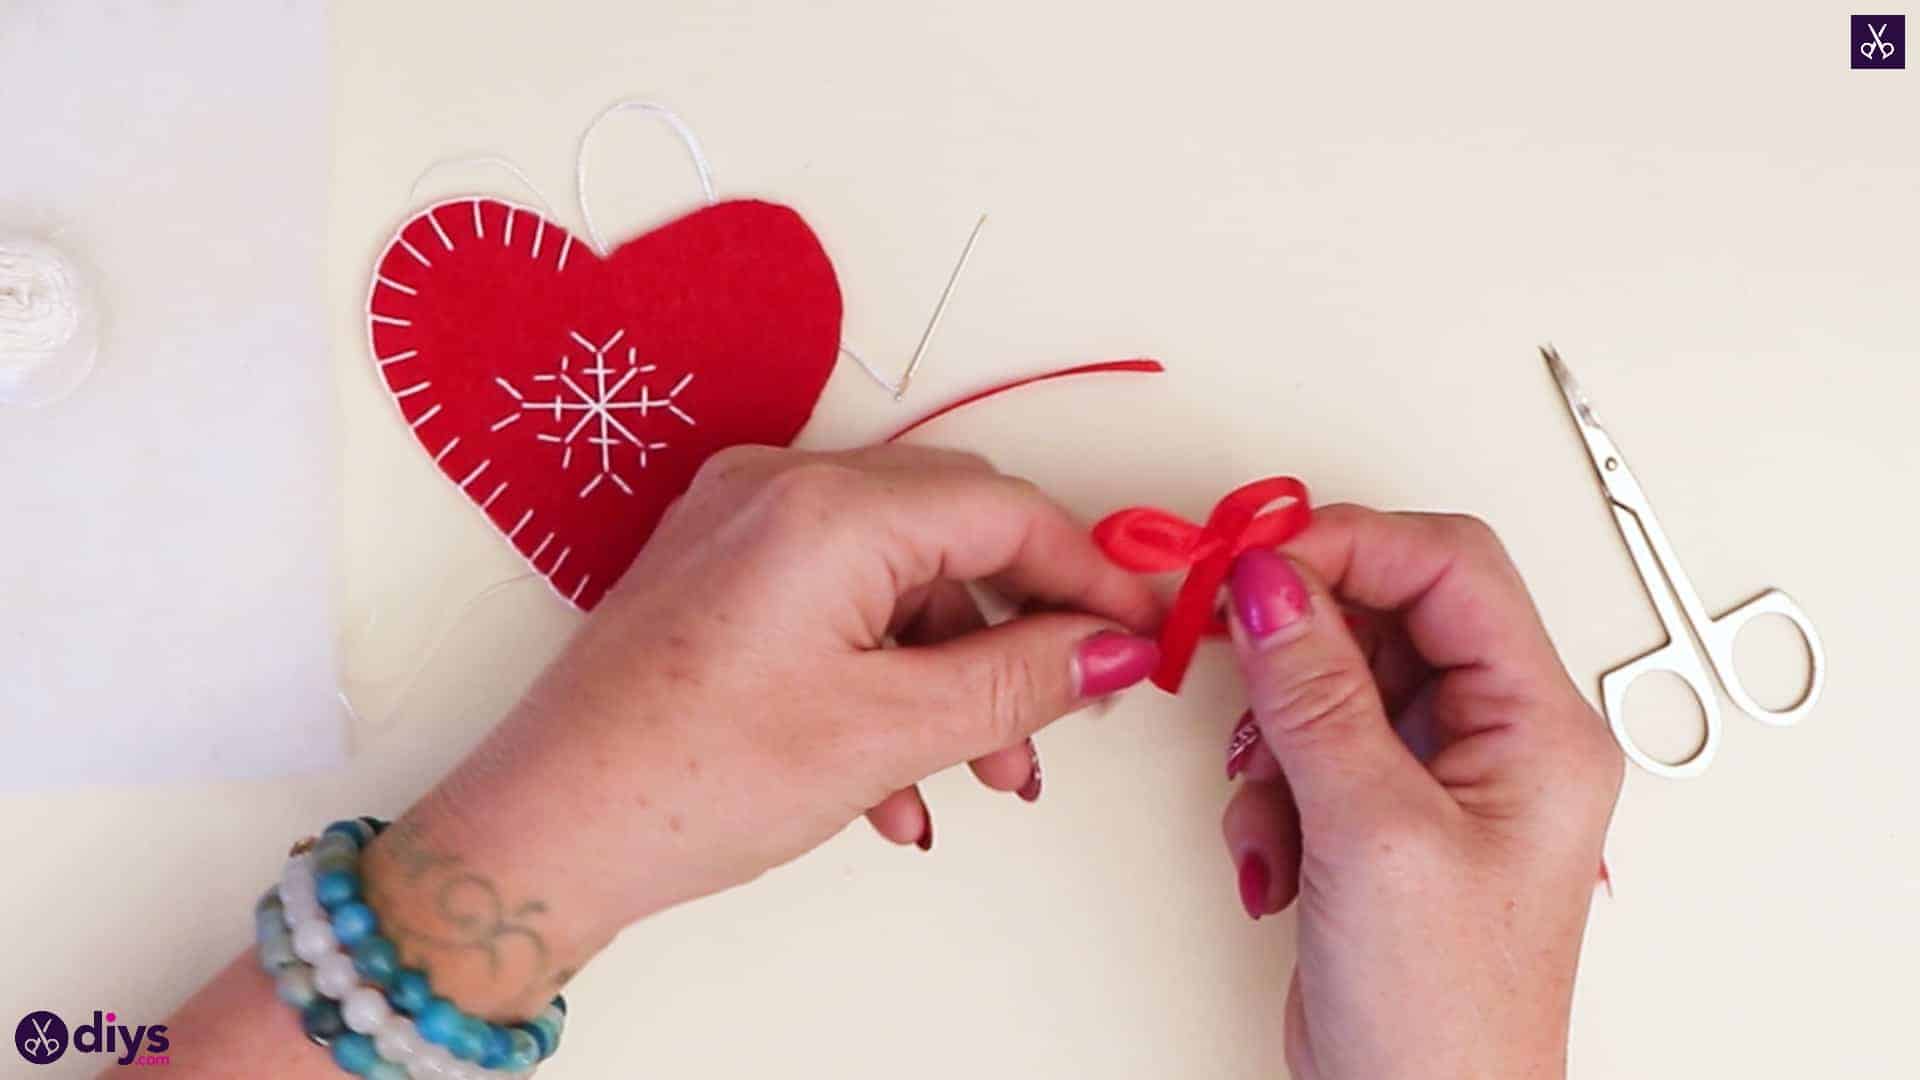
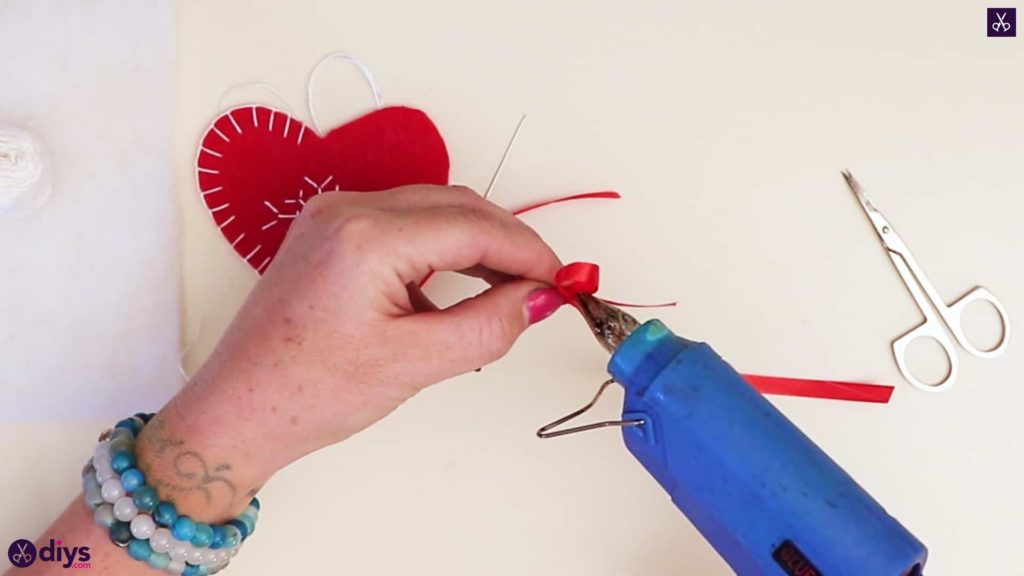
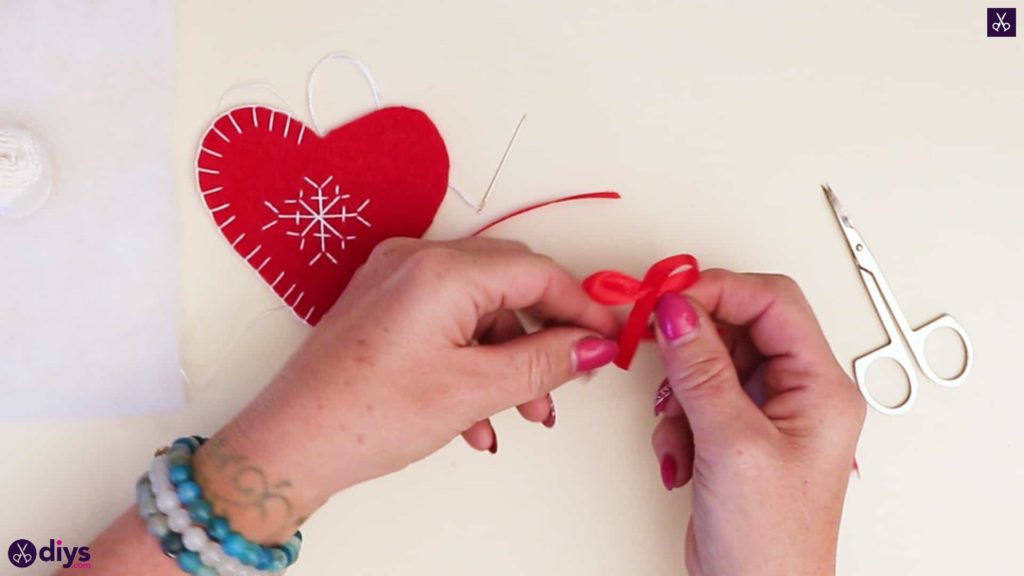
Step 7: make the bow
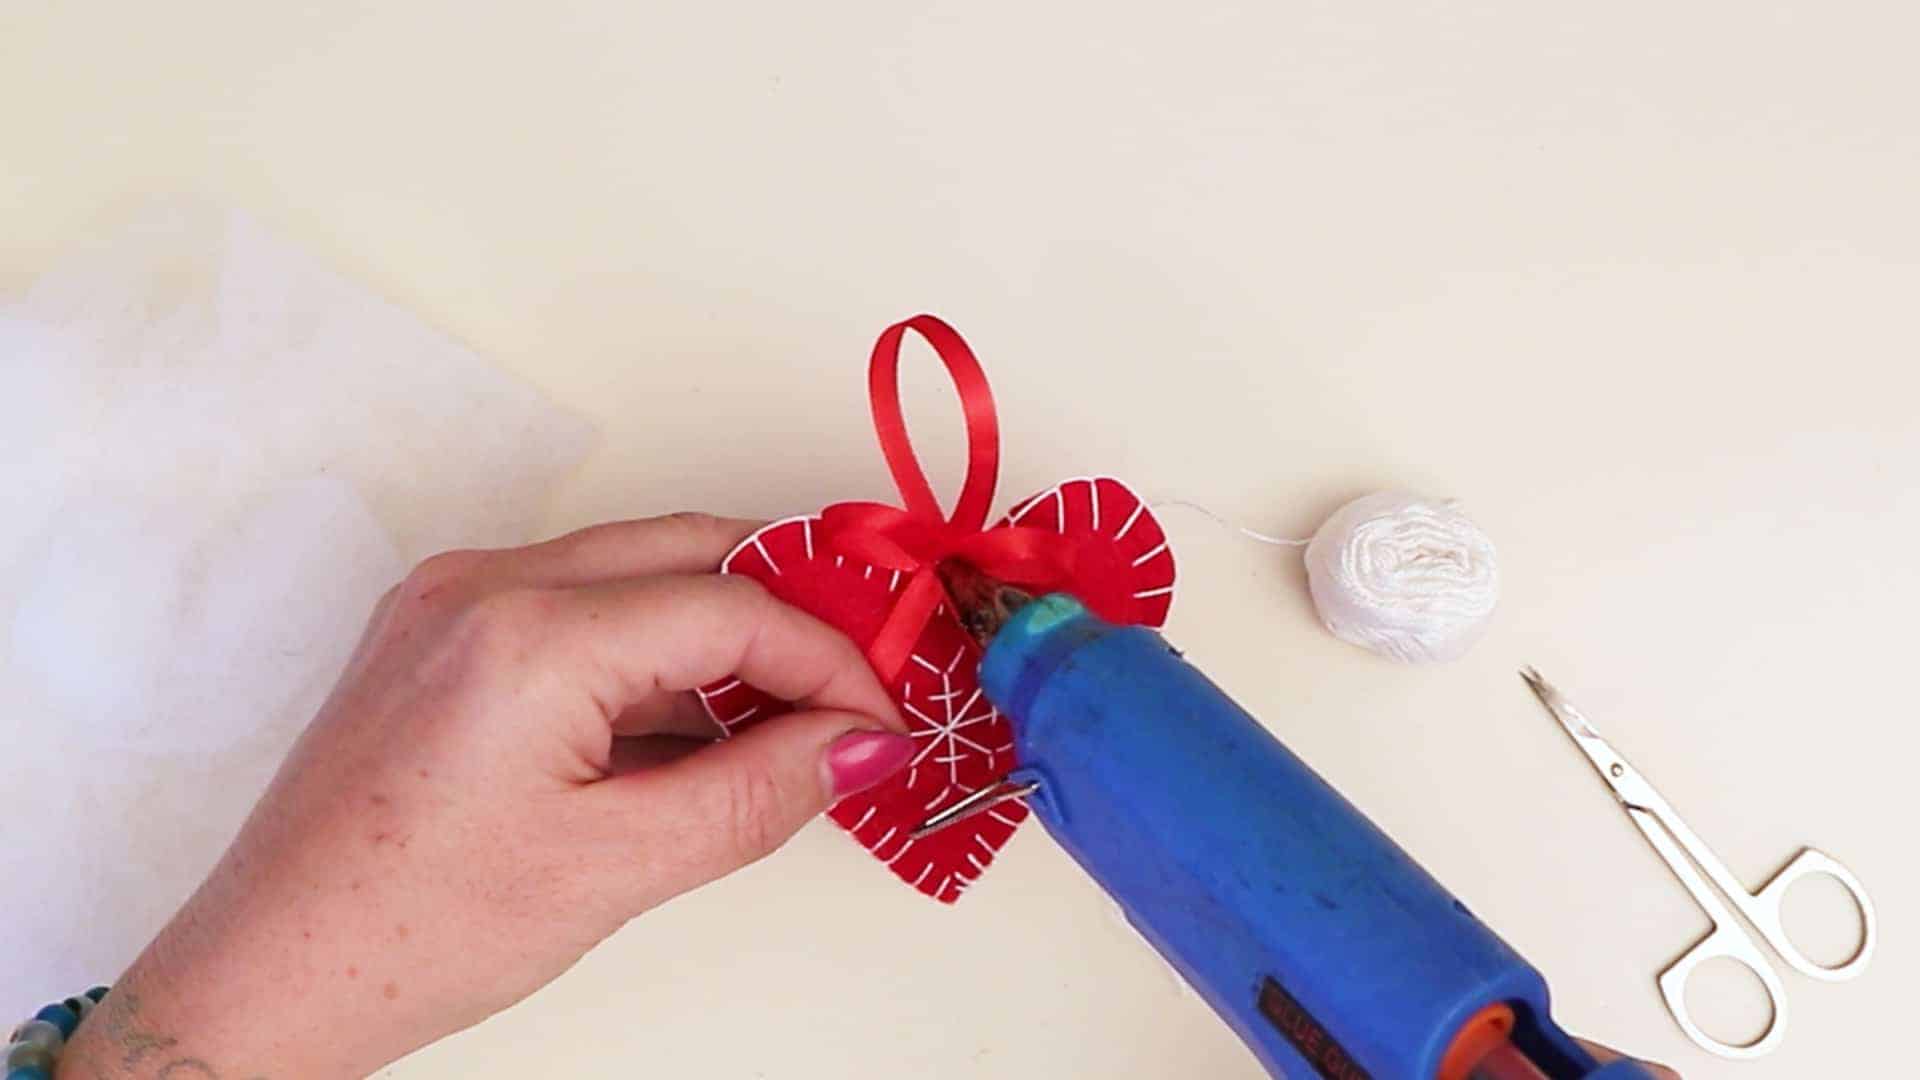
Cut a two inch piece from your red ribbon. Turn it into the shape of a bow by applying hot glue in the center and then bringing each end inward towards the middle, making a loop and sticking the end down with excess below. Trim the ends if you need to.
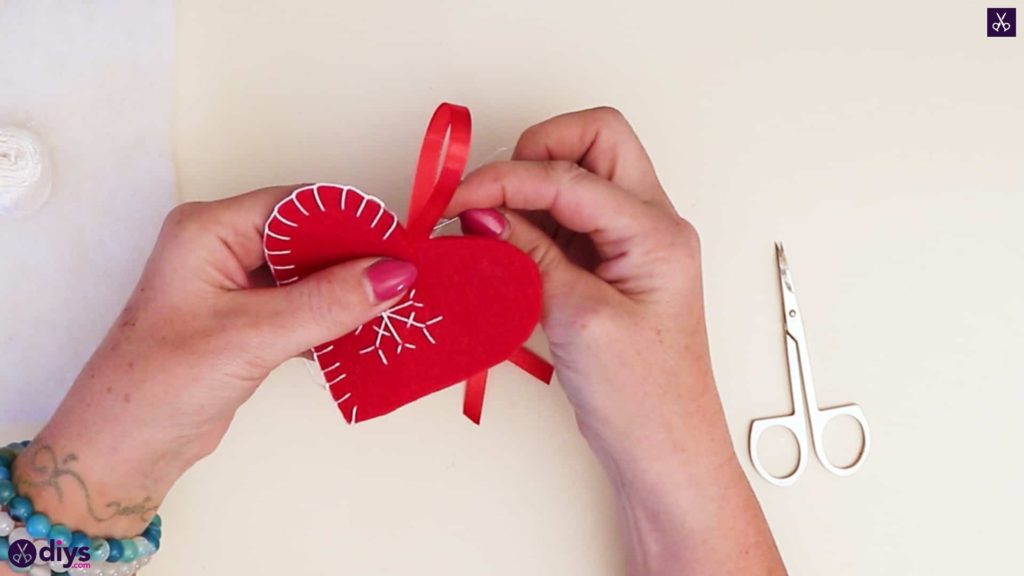
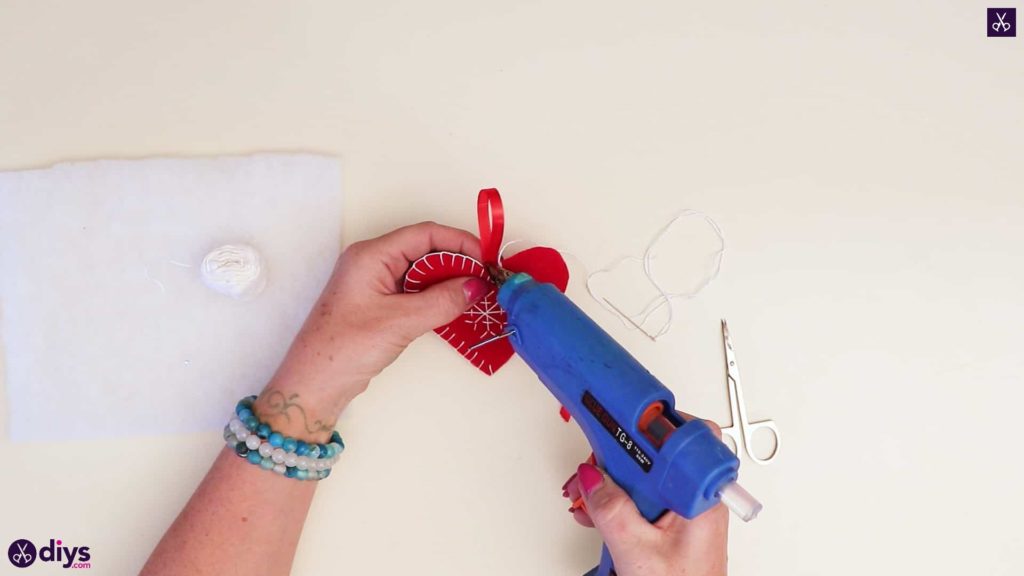
Step 8: make the loop
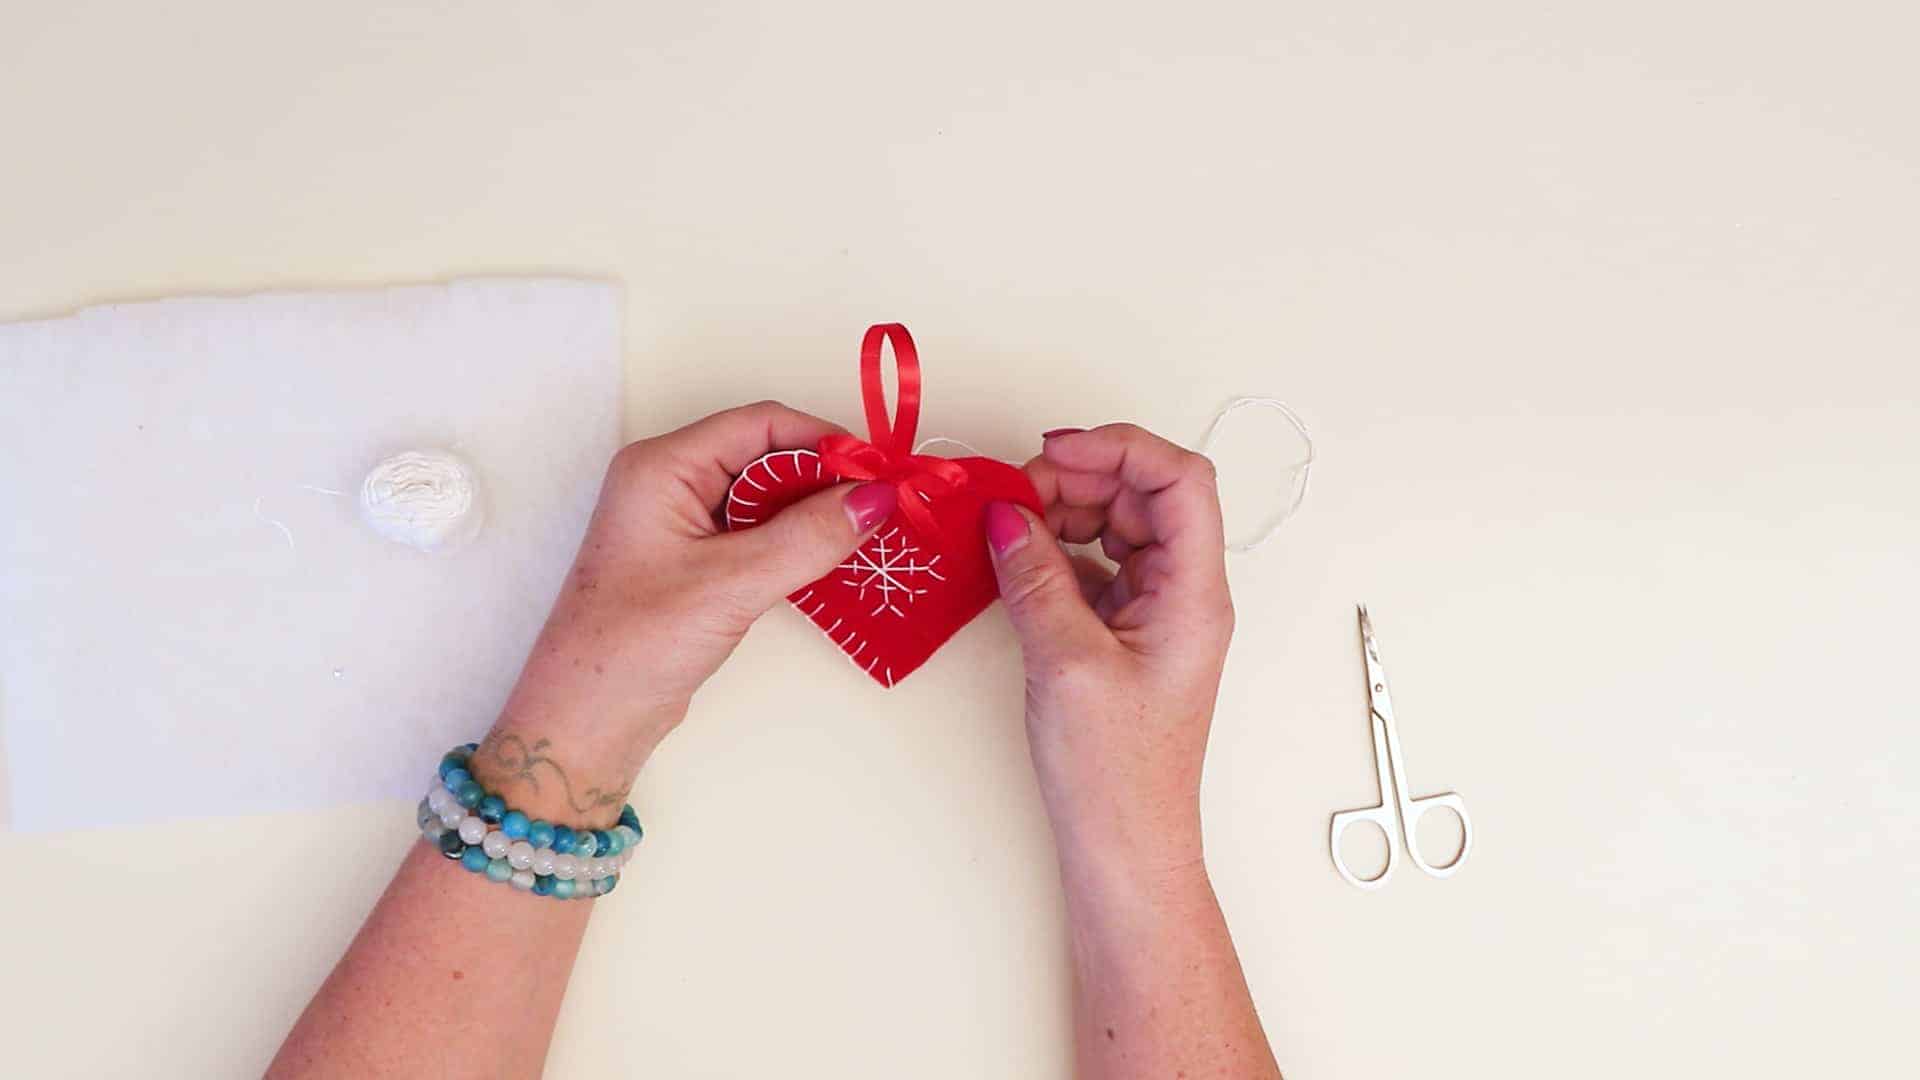
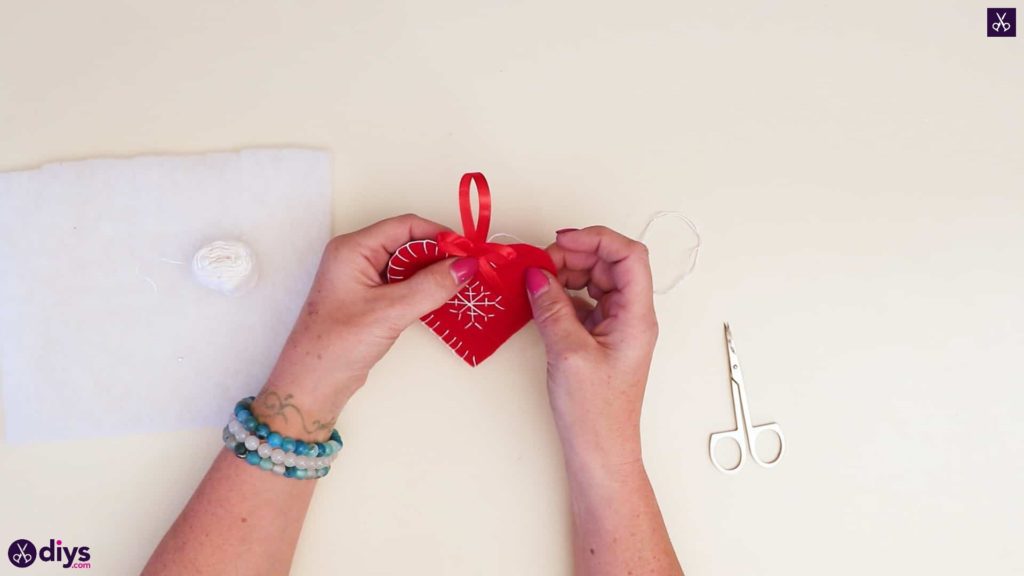
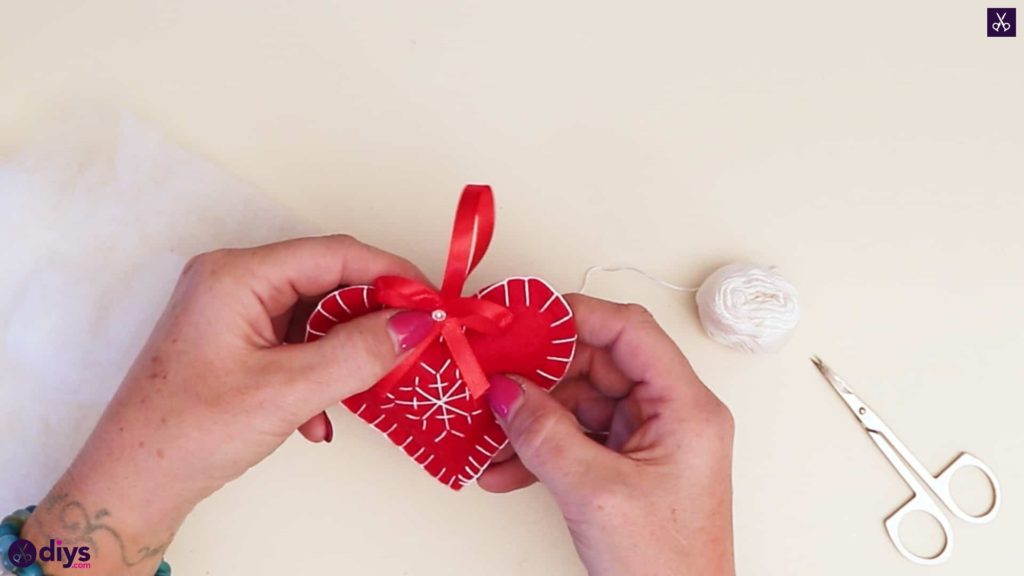
Cut another two inch piece of red ribbon and apply hot glue at one end. Fold the other end over to meet it and stick it down so the edges line up, creating a loop. Part the halves of the heart and tuck the ends into the center where the heart dips down between the heart’s rounded top humps. Continue your looped stitches along the heart’s edge, slopping the loop part in the center where your ribbon loop is tucked in and just using a simple stitch there; start your loops again on the other side. Before you continue stitching, apply a dot of hot glue on the center V of your heart, at the base of where you stitched your loop’s ends, and stick your bow down there.
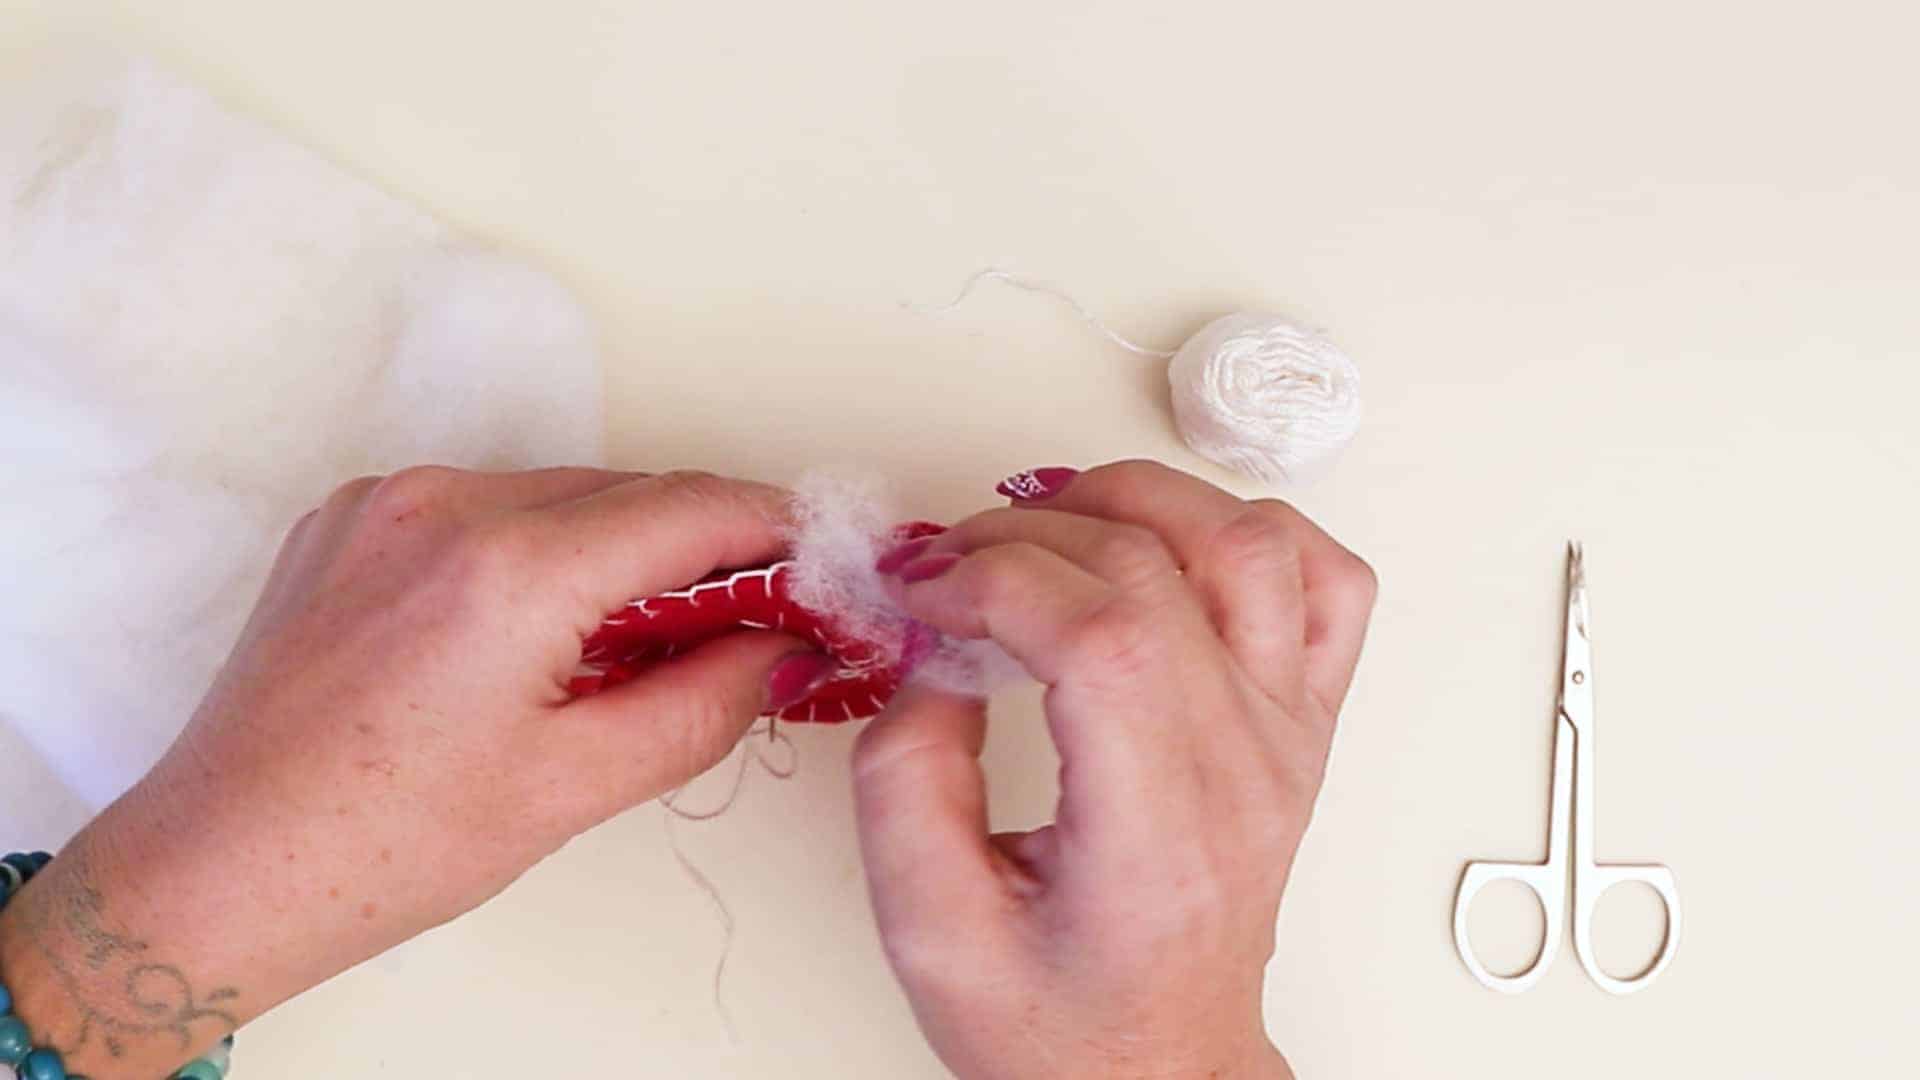
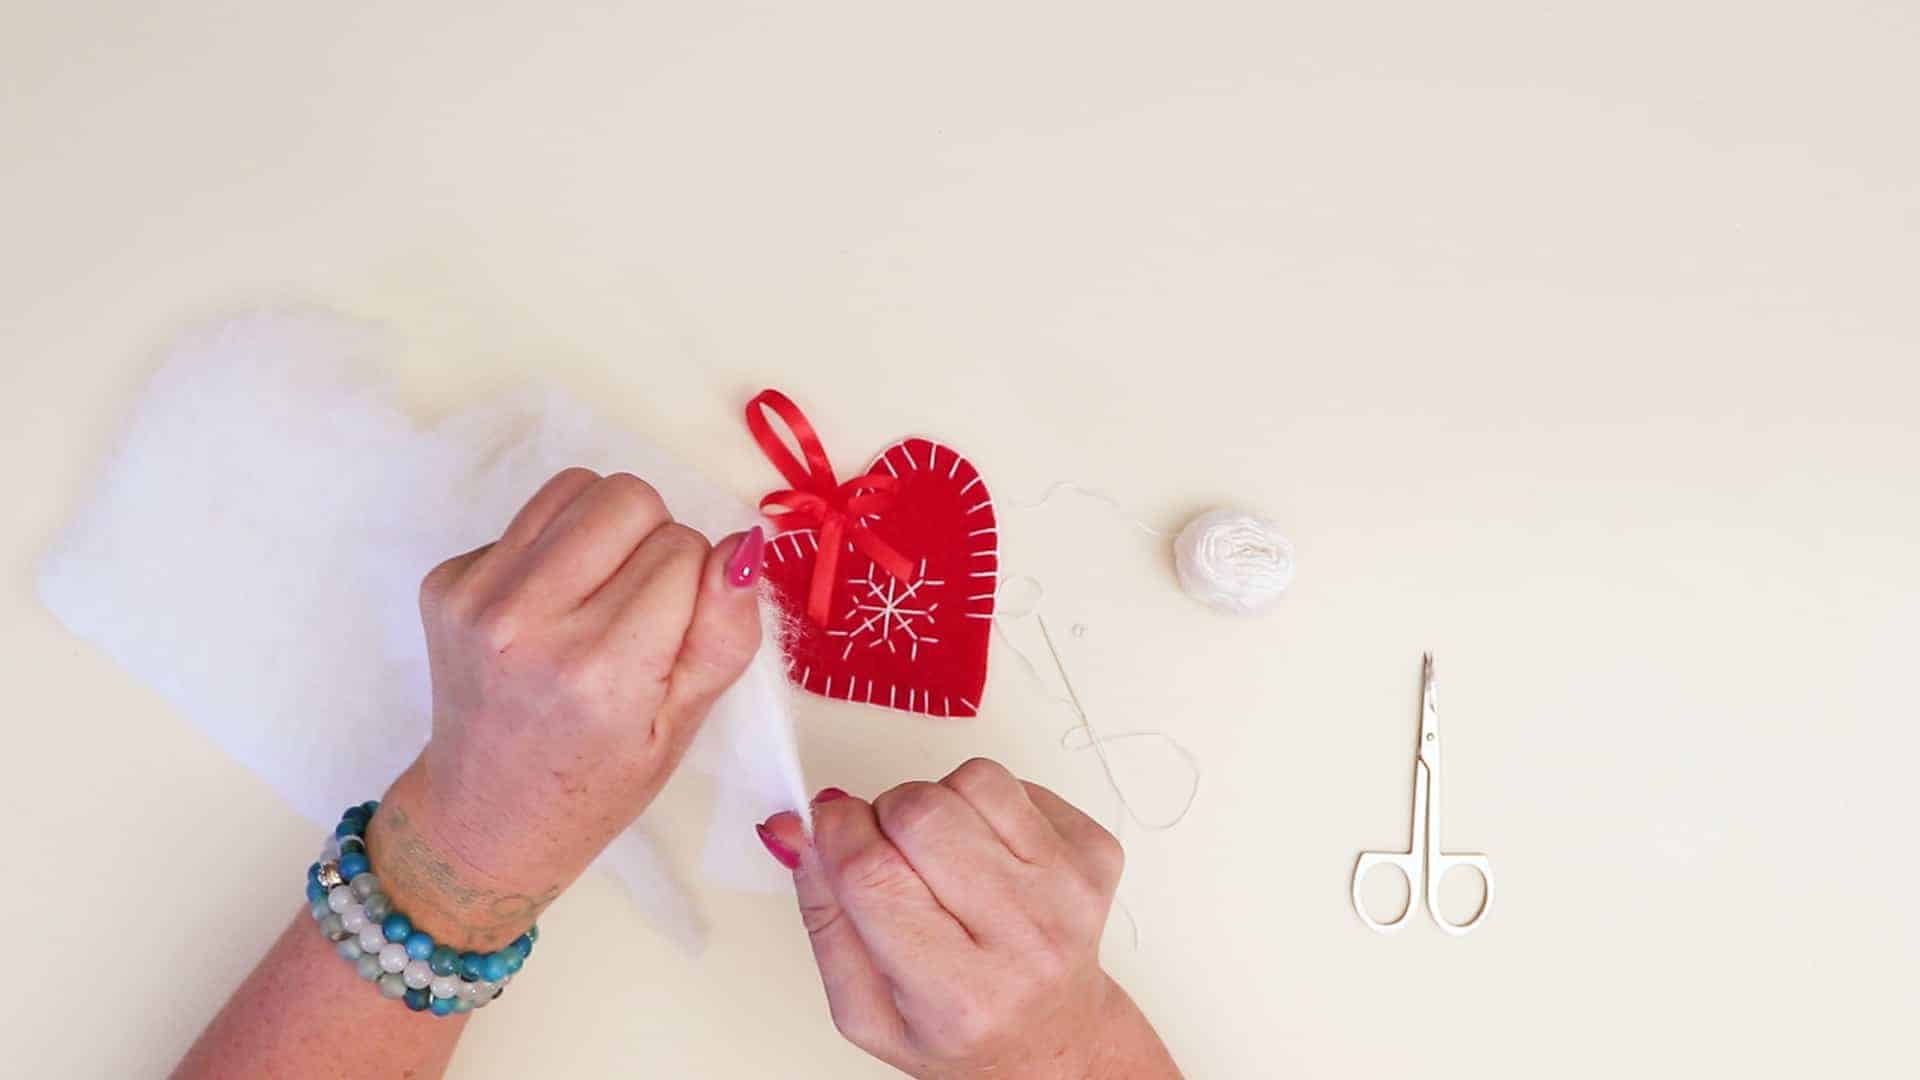
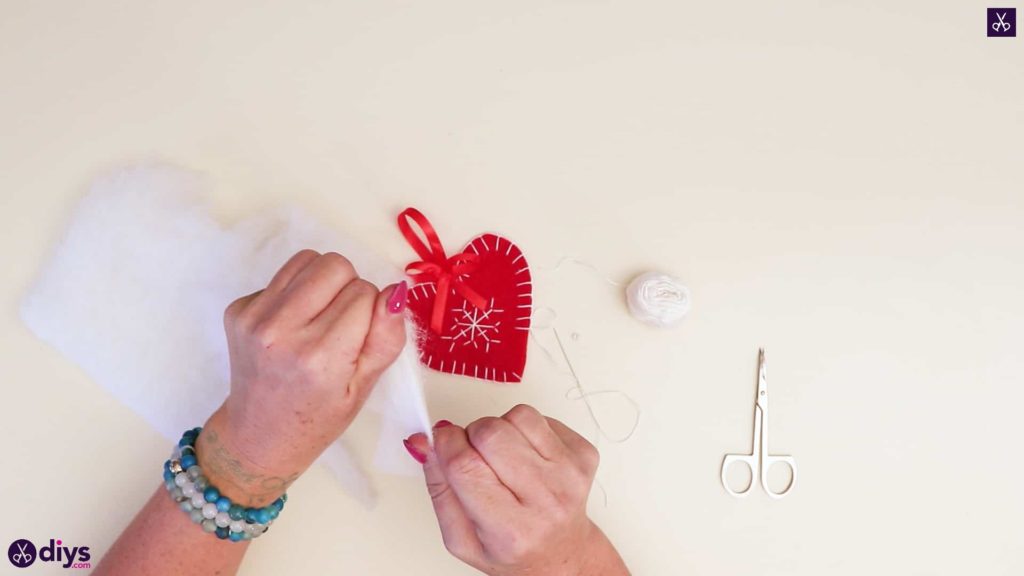
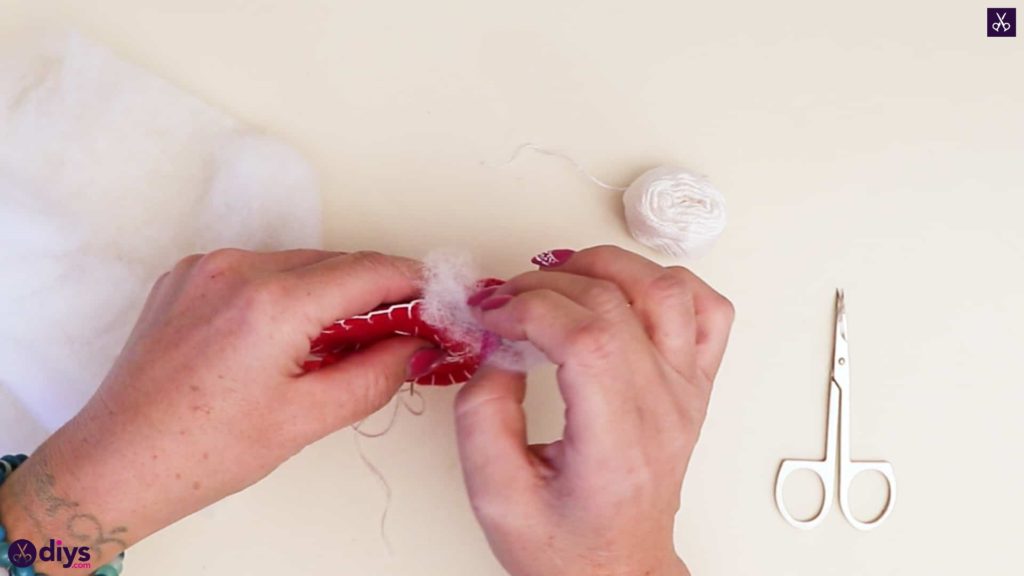
Step 9: stuff it
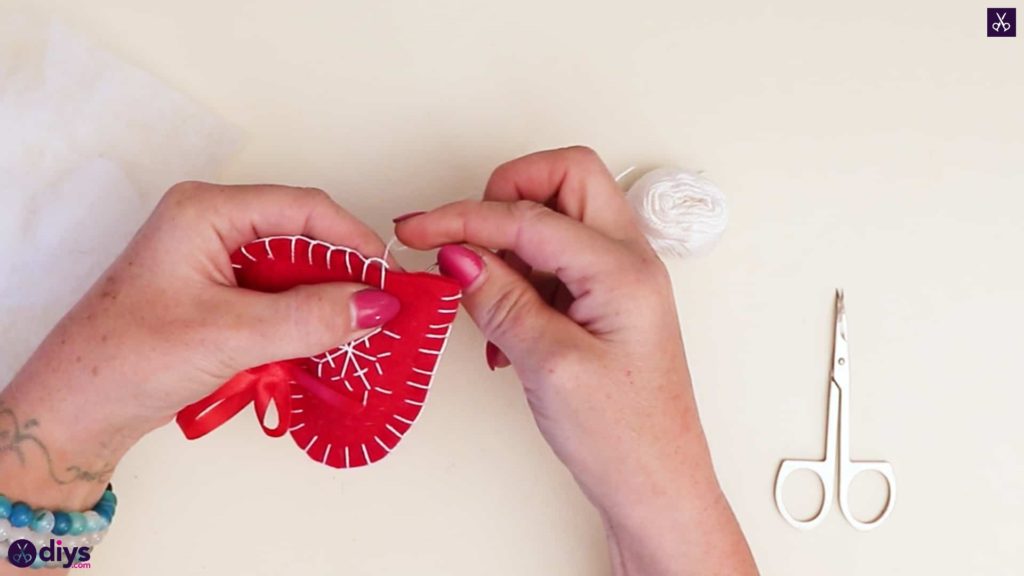
Continue stitching around the rest of the edge of your heart until you’vealmost reached the point where you started again. Before you close the edges entirely, use your stuffing to fill your heart through the hole that’s left without edge stitching to add volume. Once you’ve finished stuffing your heart, finish stitching the edges entirely so it’s sewn all the way around and closed. Repeat the knotting process you used before on the back side of the heart to finish the stitching off. Cut the excess and needle loose.
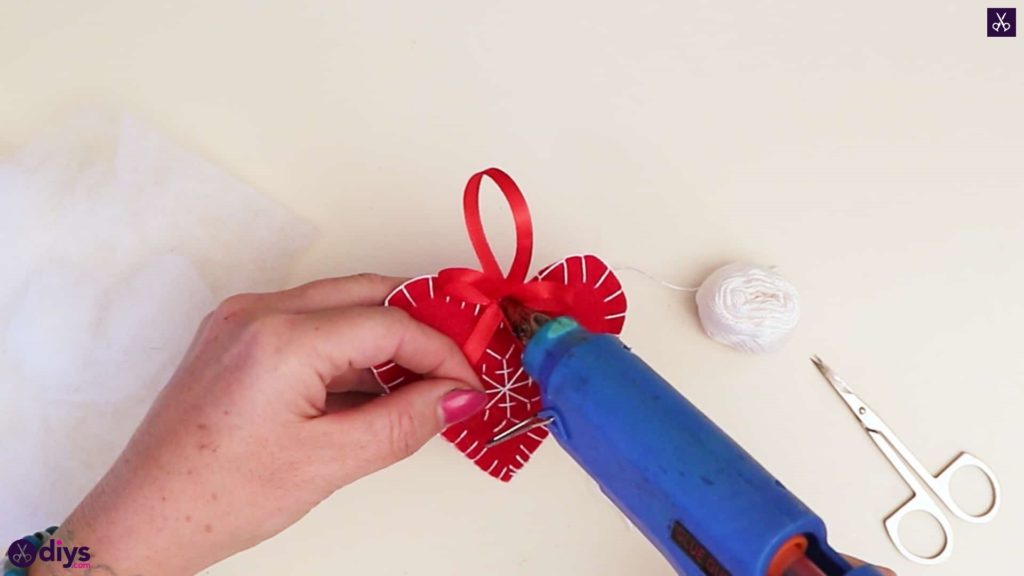
Step 10: finish the edges
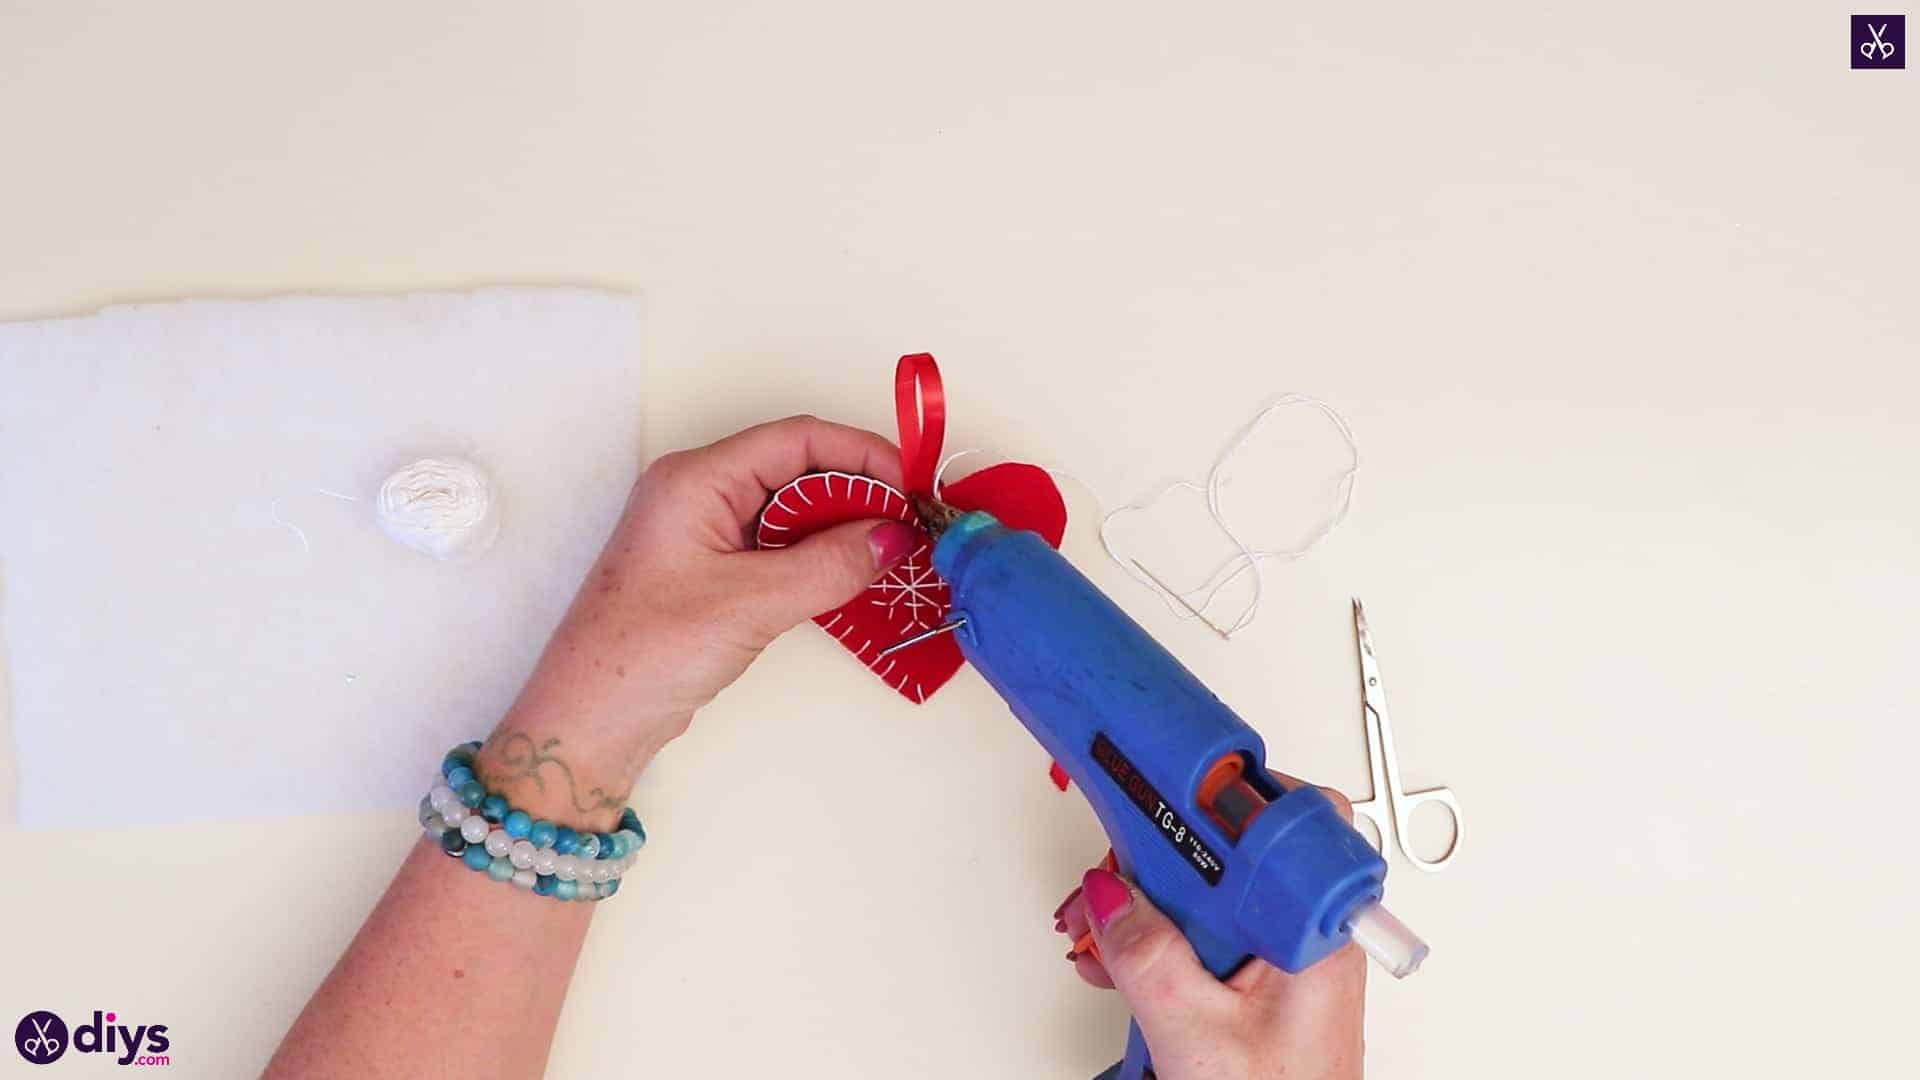
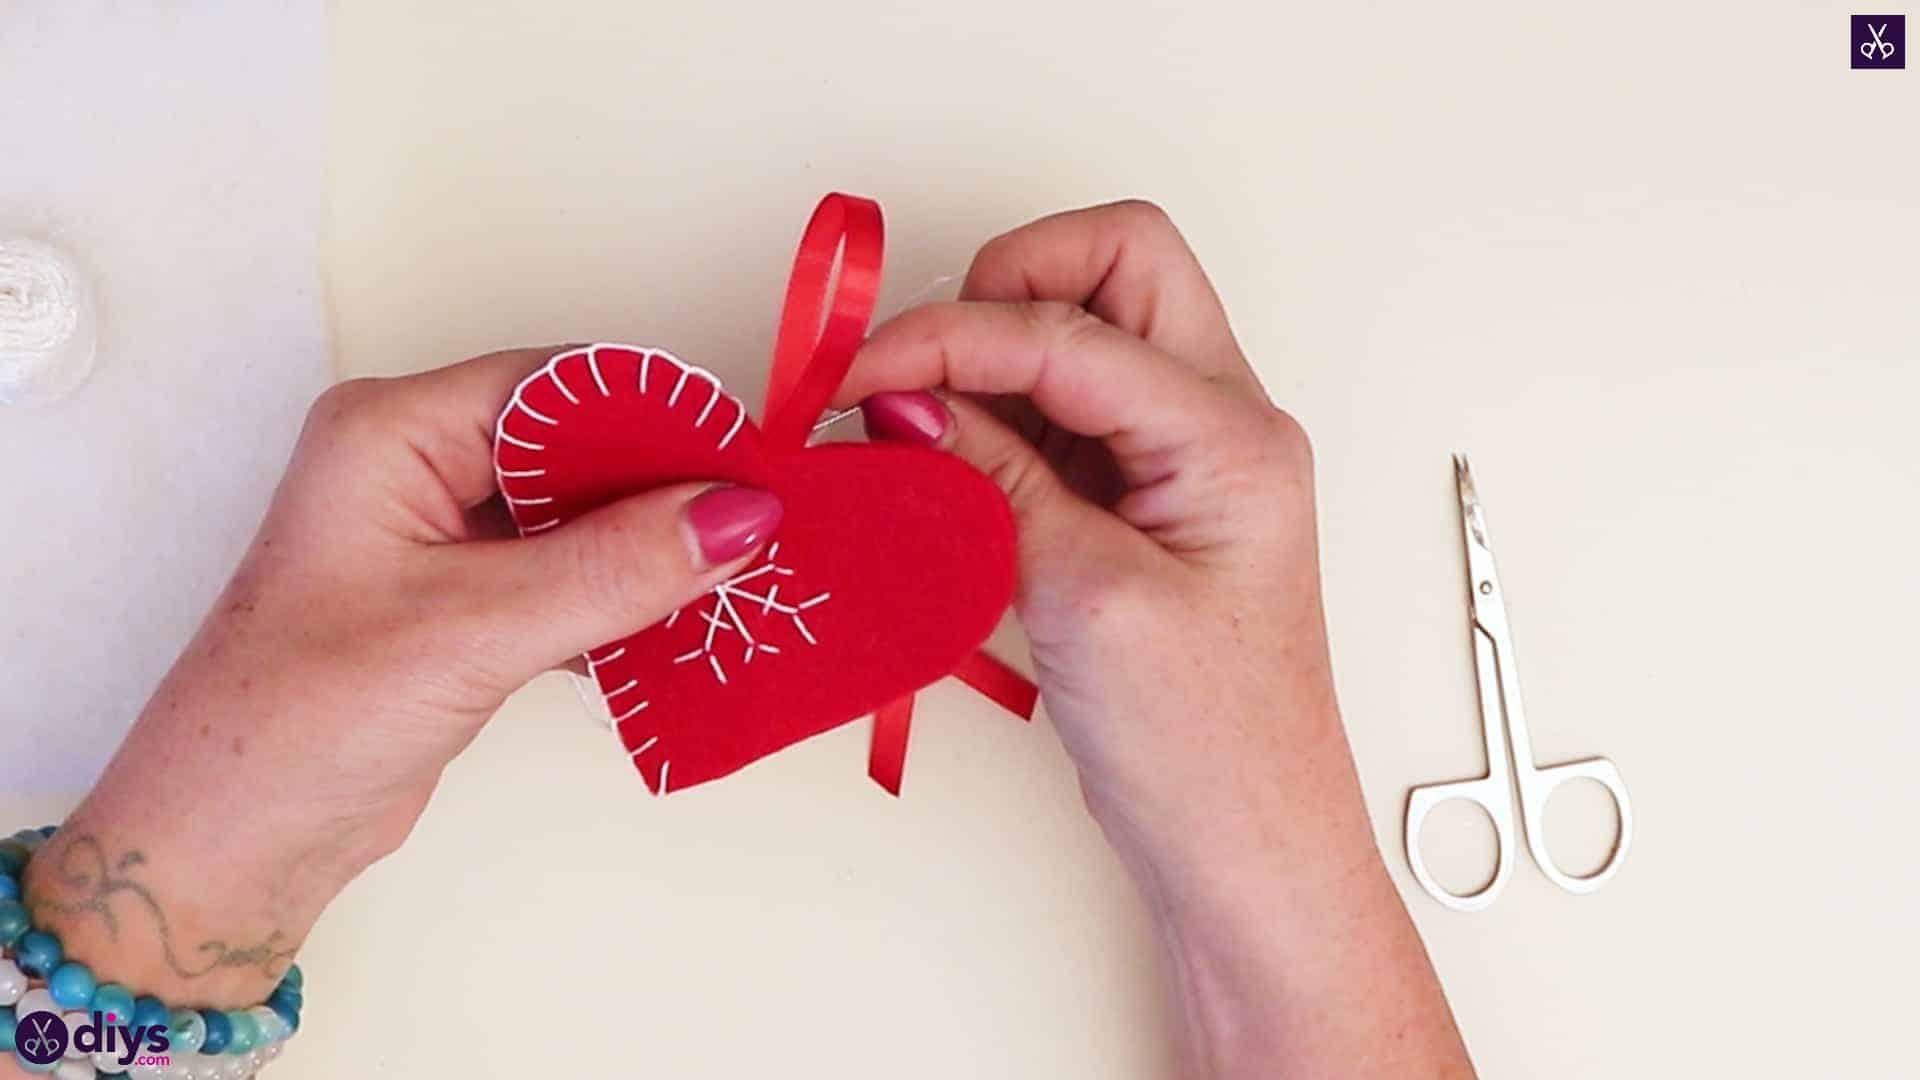
Apply a dot of hot glue in the center of the red bow at the top of your heart and press a white rhinestone down there to finish your heart off.
That’s really all there is to it! Just in case you’d like to try this project out for yourself, here’s a fantastic tutorial video to help you!