DIY No-Sew Rope Basket – Step By Step Tutorial
Updated on November 19, 2025
I was on the hunt for a unique rope basket. Not one of those run-of-the-mill rectangular ones – an unusual, funky-shaped one. And suddenly, as I walked through the aisles of Home Depot, I realized that I could make one! And believe it or not, all I ended up using were a few easily attainable materials. Everything should be available at your local craft or home improvement store. Read on to find out how you can make one of these fun catch-all baskets.


Here’s what you’ll need for this rope basket:
- 50 feet of sisal rope
- Hot glue gun, and lots of extra glue
- Leather strips, 1/2″ x 10″
- 4 silver brads
- Awl
Step by step process to craft a beautiful no-sew rope basket:
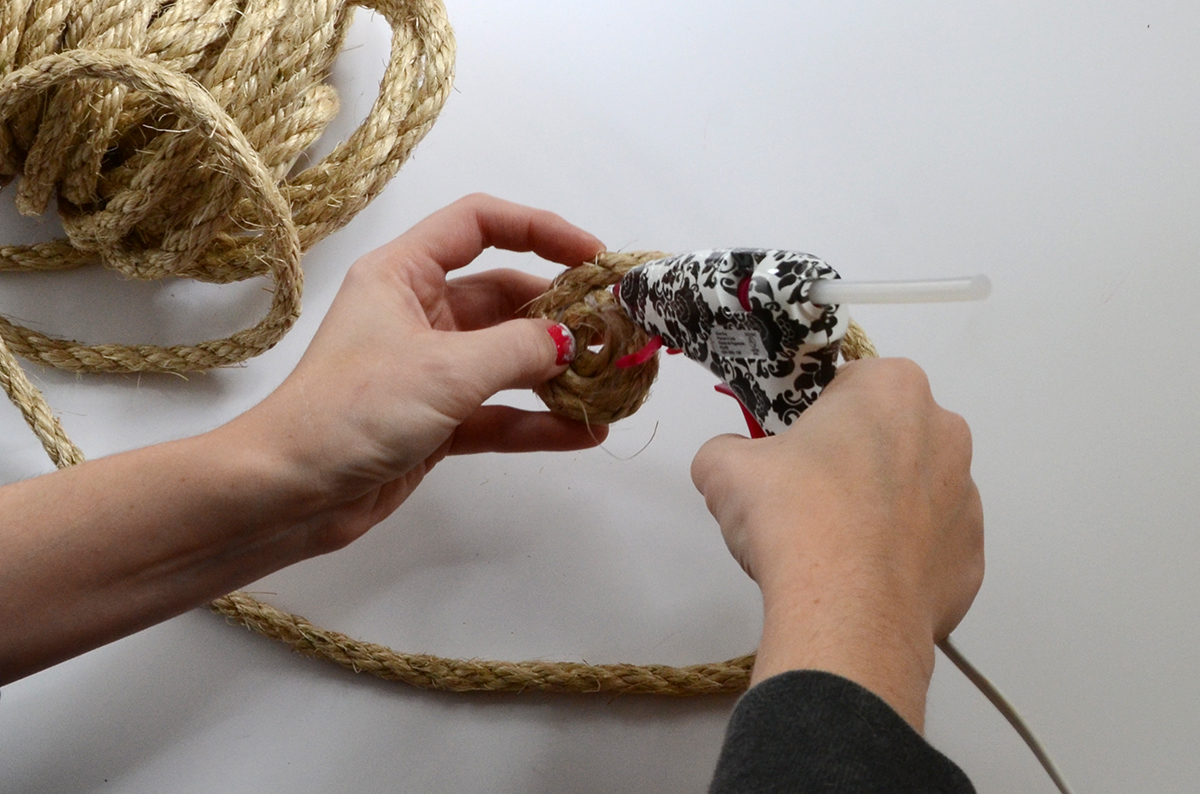
Step 1: wrapping the rope
Begin by wrapping the rope into a coil. Use the hot glue gun to attach the rope to itself.
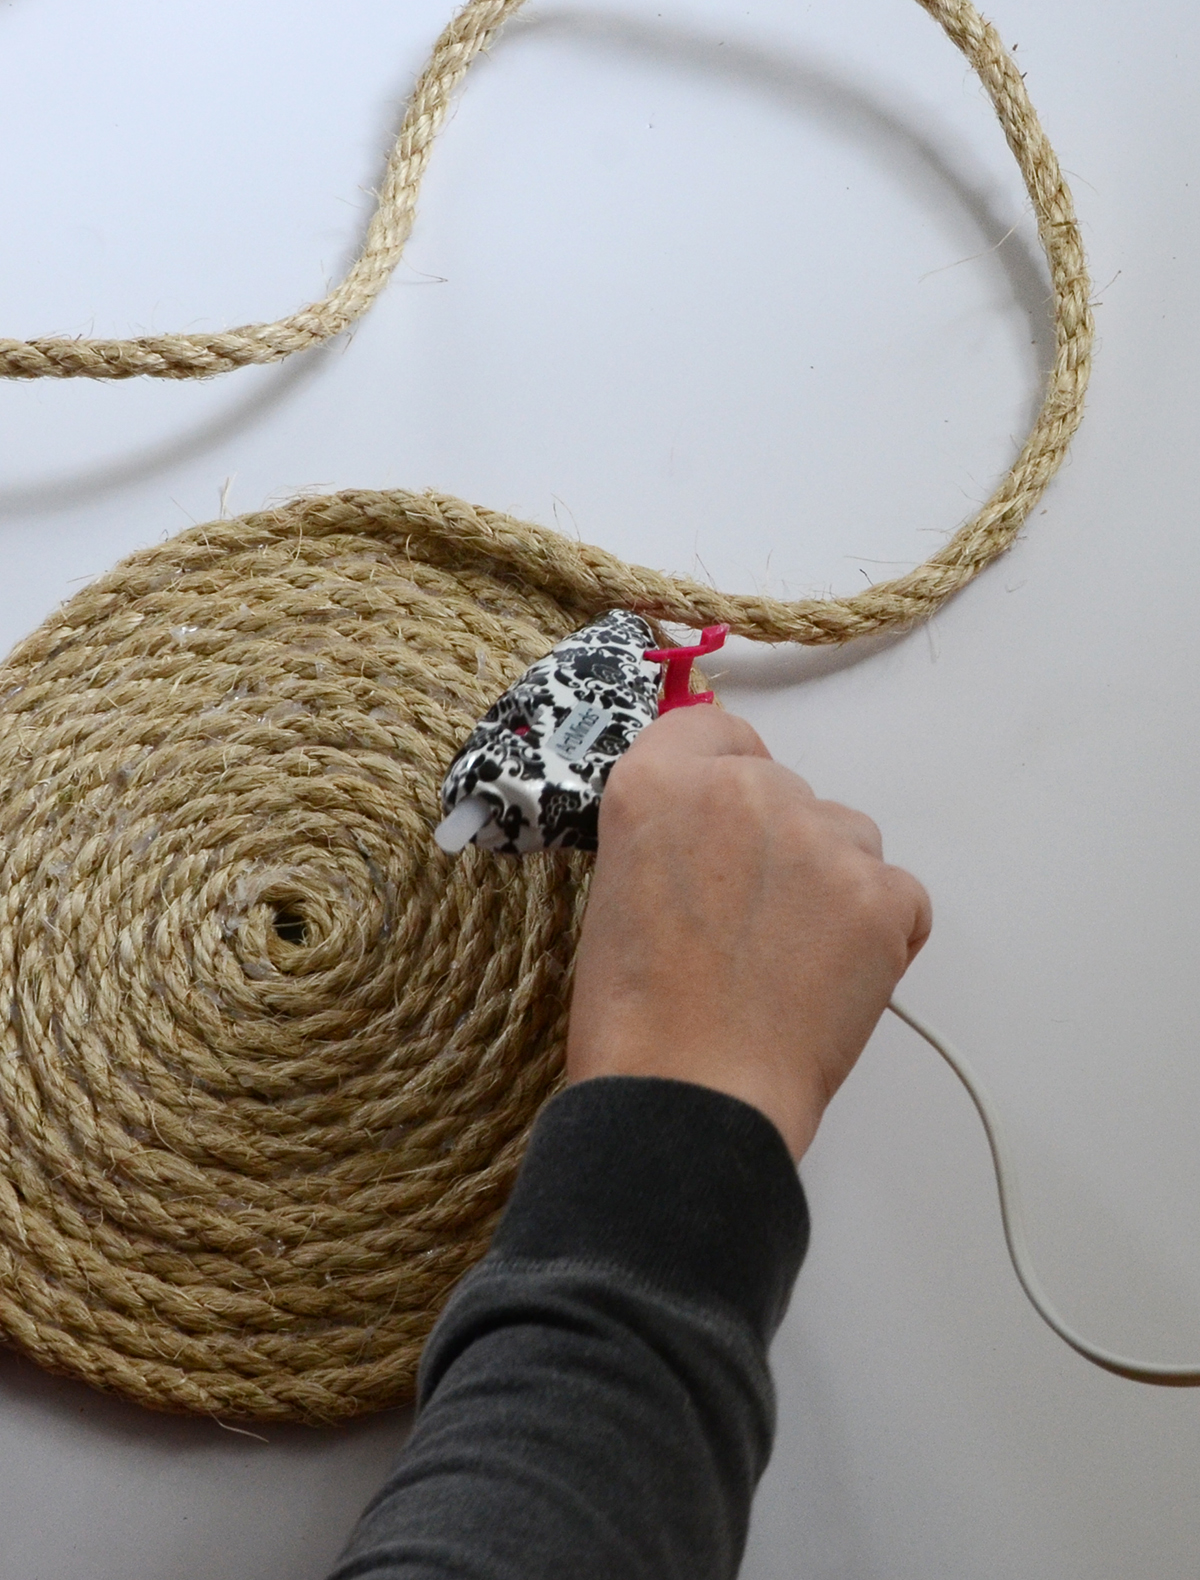
Step 2: Choose your desire size
Keep coiling around and around until your rope slab has a diameter of about 10 inches. Then place the rope on top of the outer ring of the flat slab of rope, and start working upwards to create the walls of your basket. I brought mine in just a touch every time, so the overall shape started to look cone-shaped, but you can do it however you like.
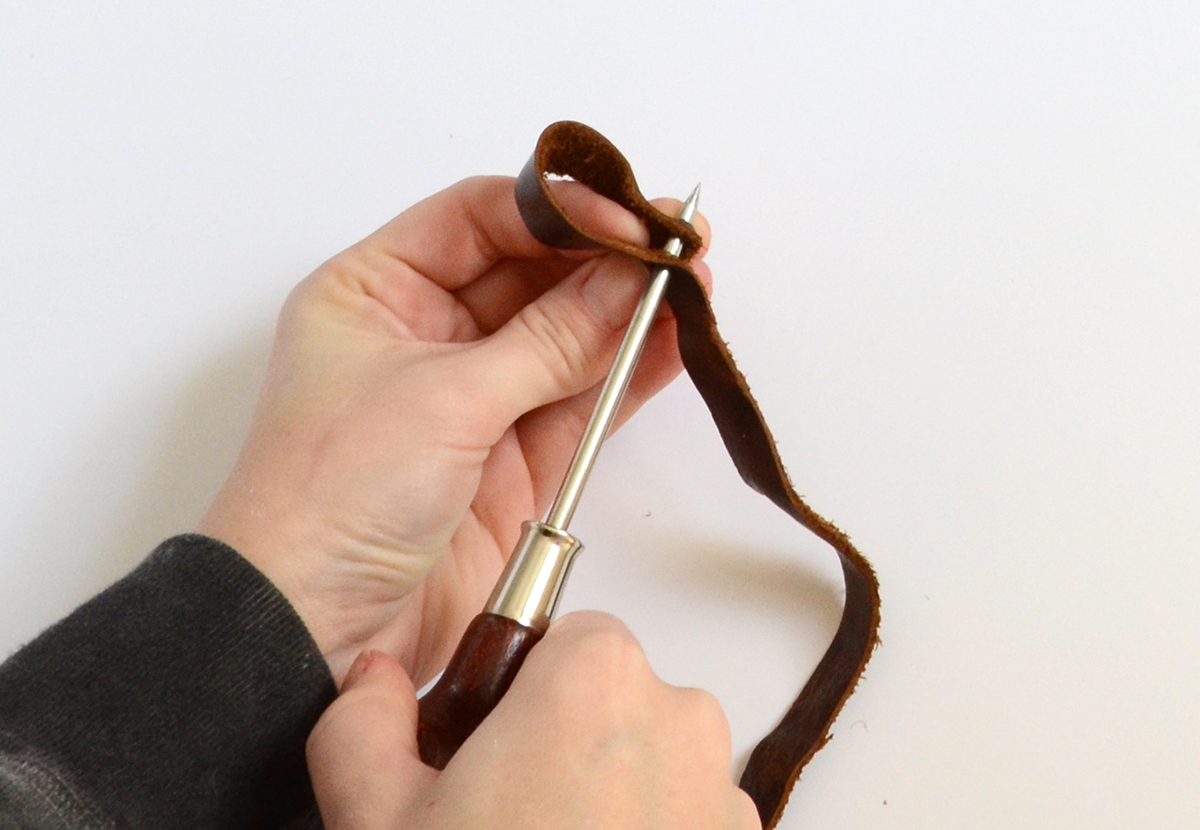
Step 3: Handles
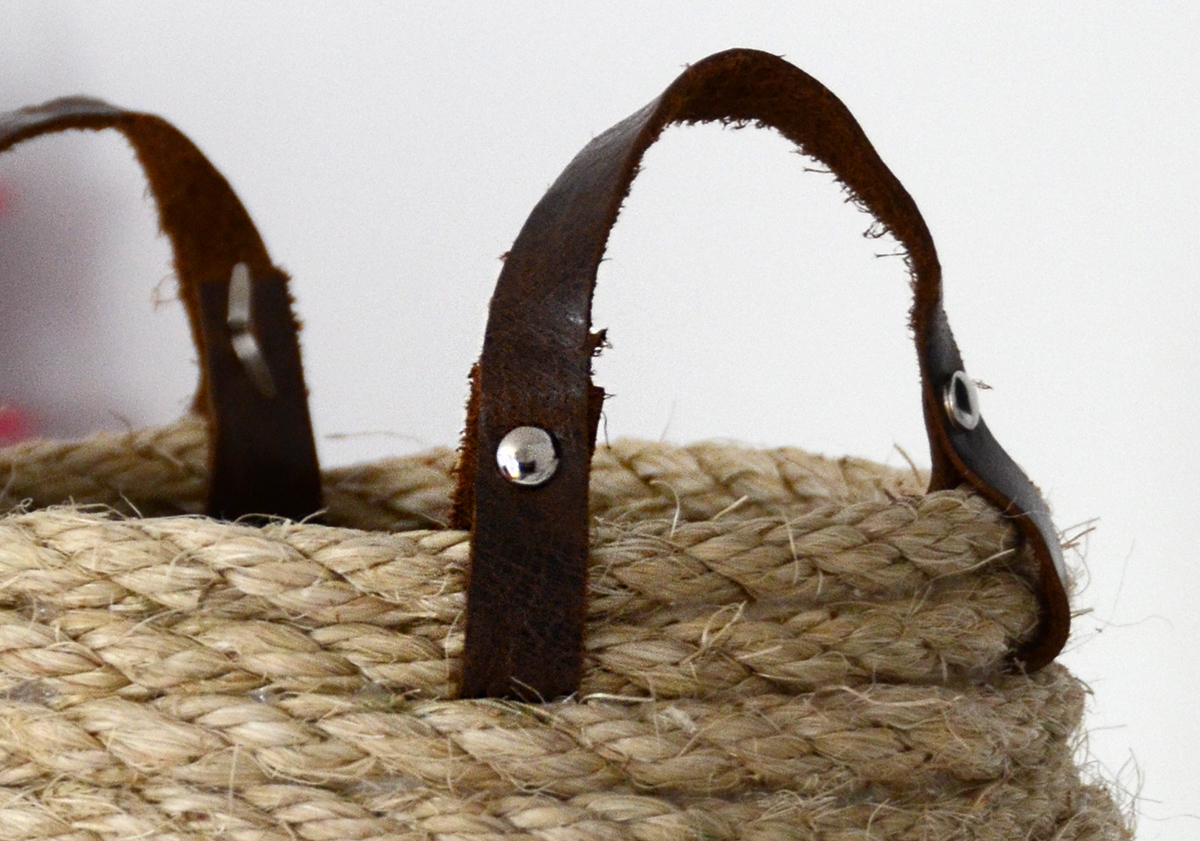
Once you get towards the top, stop when you have 2 or 3 coil’s worth of rope left. Fold the end of one piece of leather over about an inch and a half and use your awl to poke holes through both pieces of leather. Do the same on the other end, and on the other piece of leather.
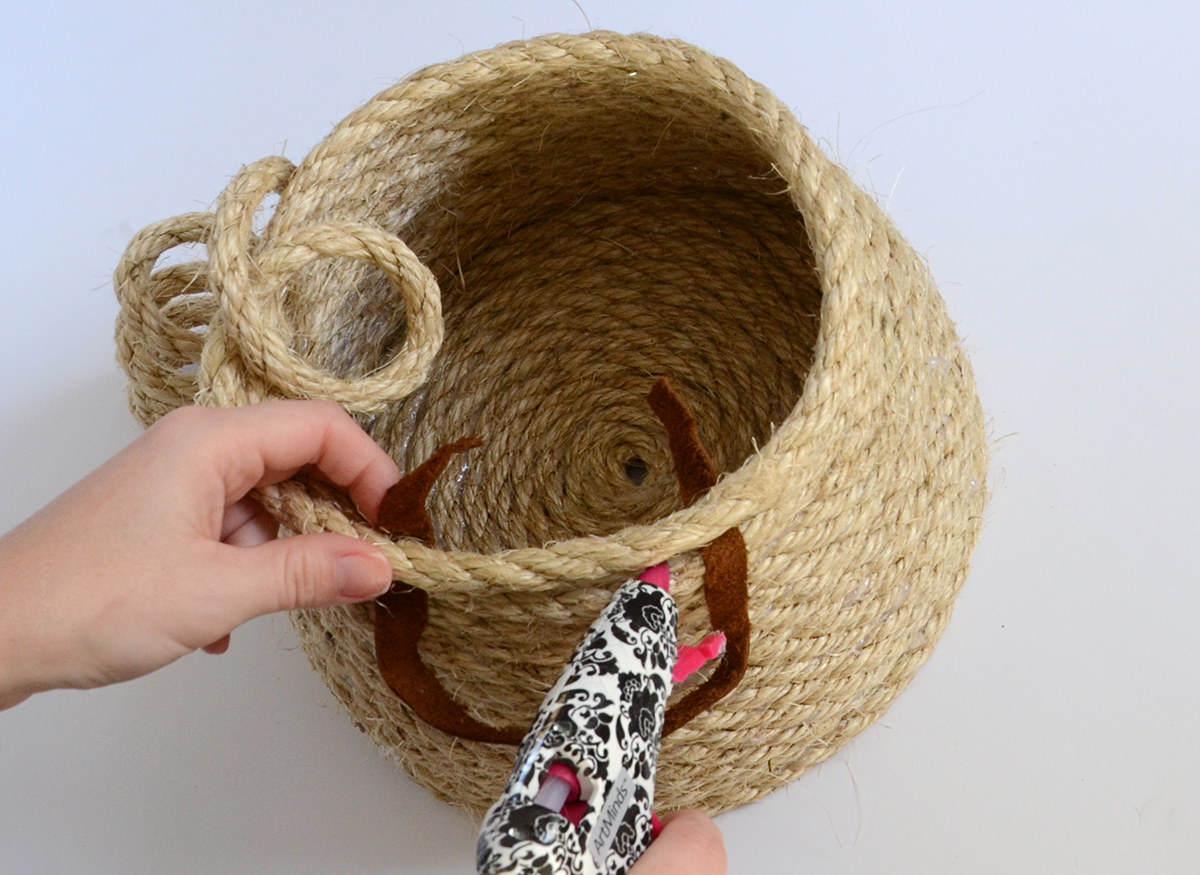
Step 4: Glue them
Lay your leather between the top piece of rope and the rope that you’ll be gluing next, and glue in between the leather pieces as shown above. Keep gluing your rope down, and do the same on the other side. Continue gluing the rope around for one more rotation and stop right behind a strip of leather. Trim off the extra rope.
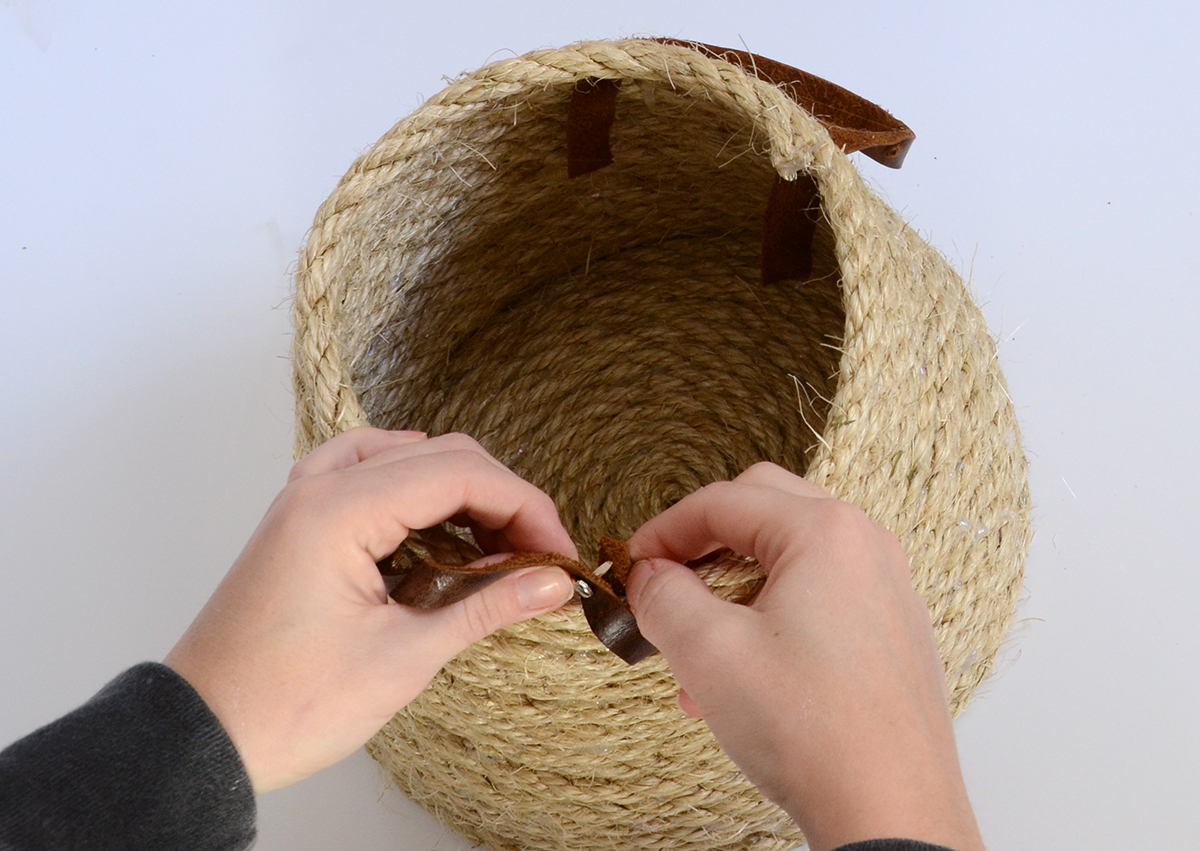
Step 5: leather hole
Push one of the brads through one hole in the leather and then fold the leather tail up and put the brad through that hole as well. Fasten the brad so the metal pieces run vertically. Do the same for the other three sets of holes.
Conclusion
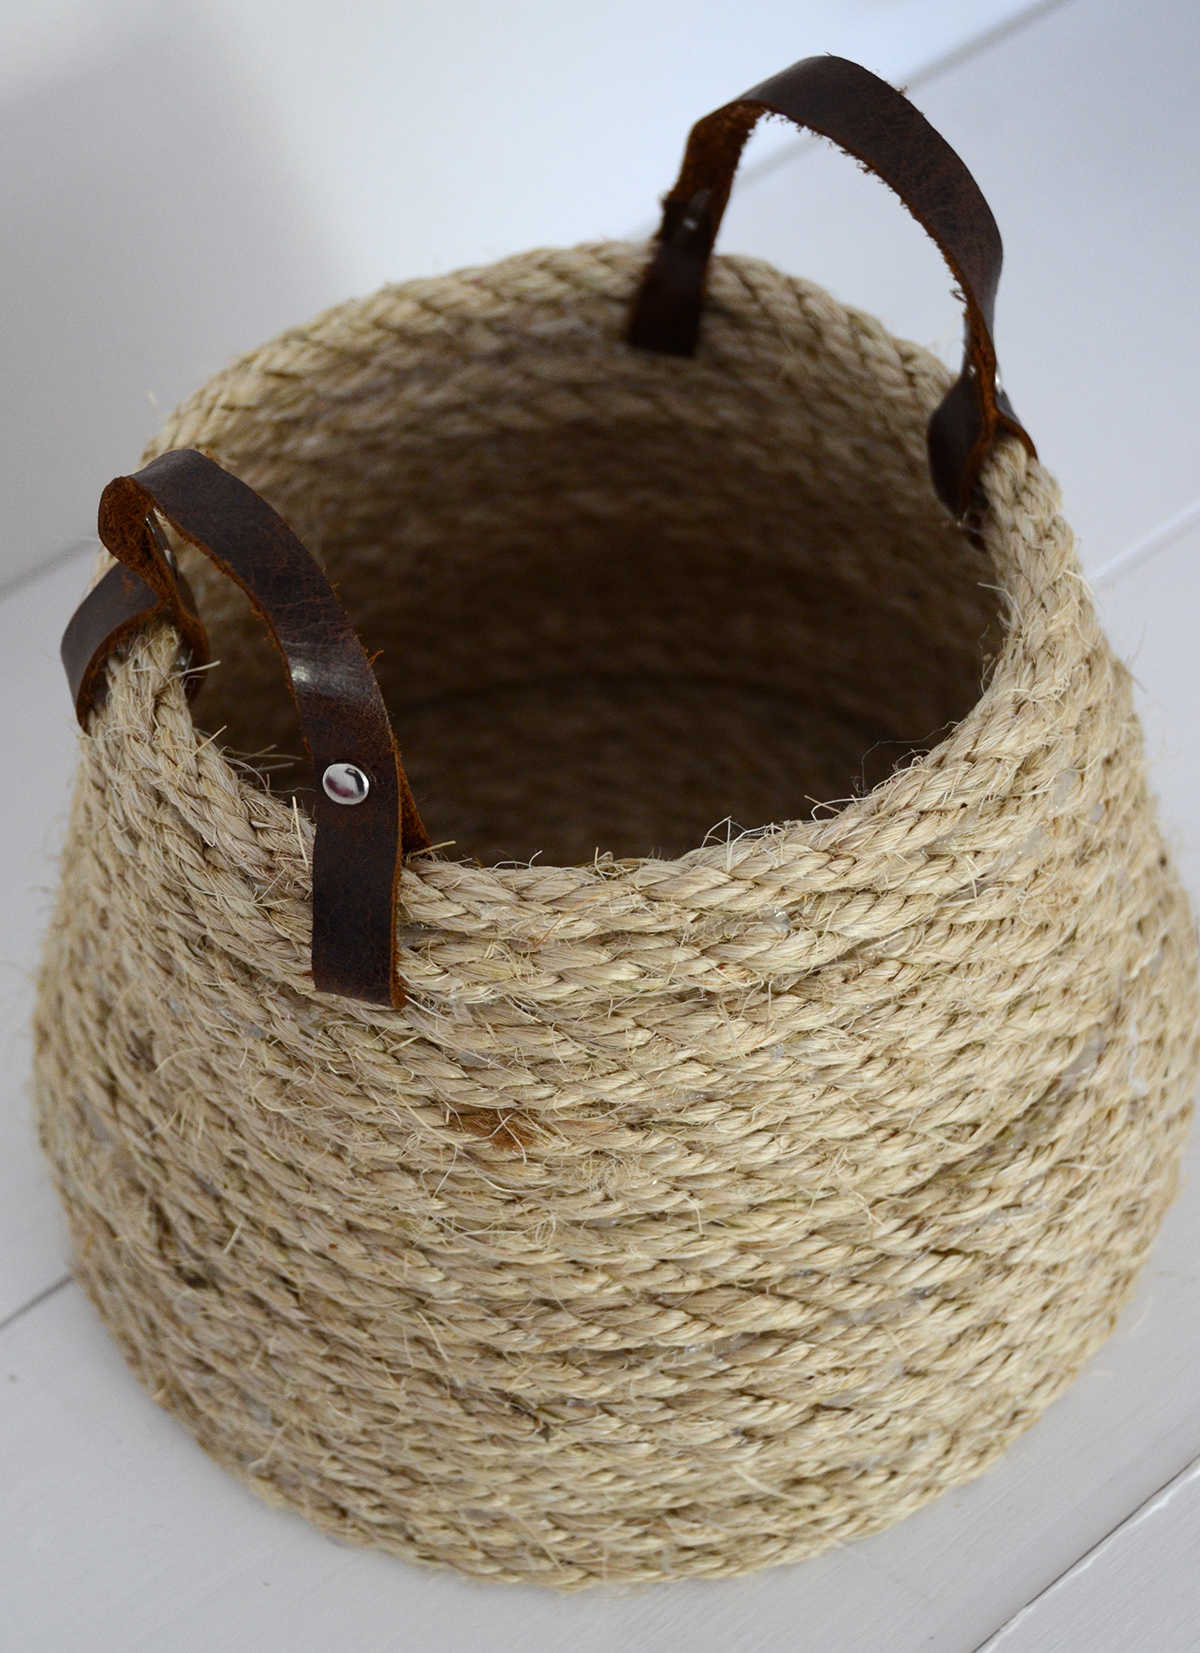
And that’s it, you’re finished! You’ll want to clean it up a bit… trim off the longer pieces of rope that are sticking out, and also pull off the glue strings that are bound to be there.
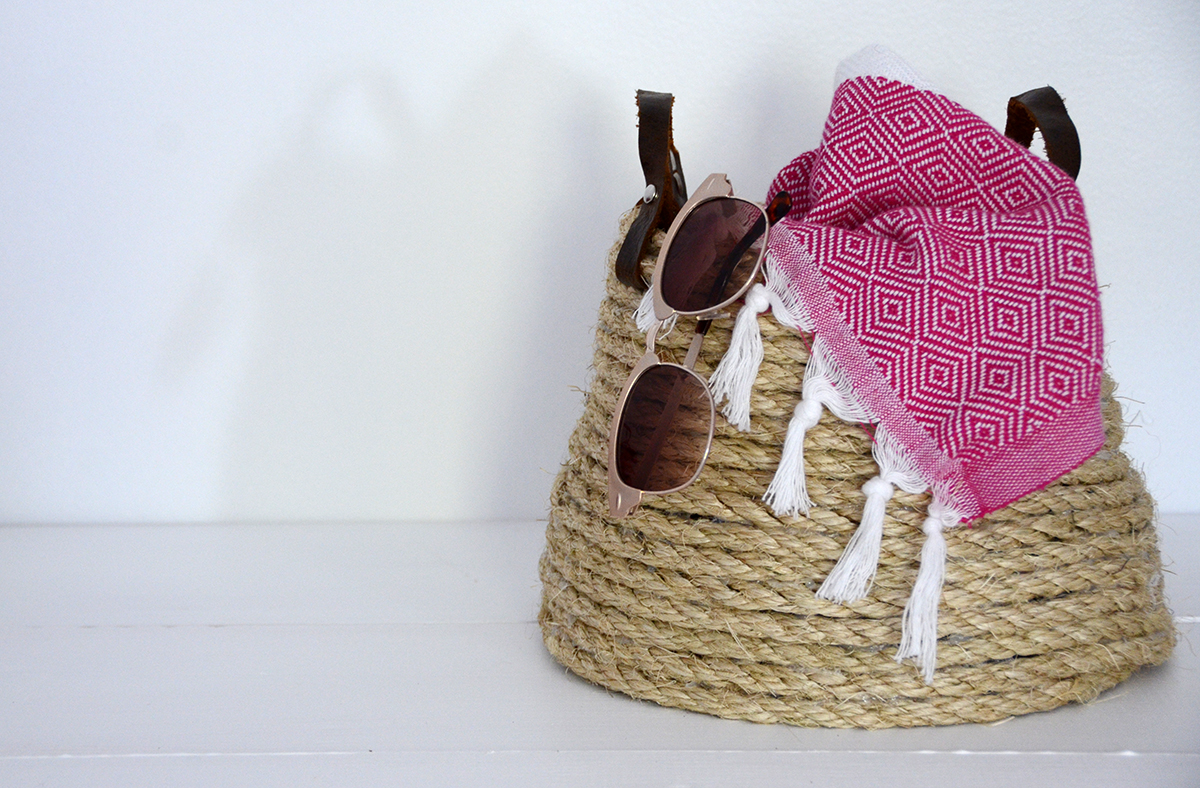
Now go fill it up with goodies… I put a shawl and a pair of sunglasses in mine, but it would be a great receptacle for mittens and hats in the entryway, or craft supplies in your home office. Enjoy!
This little basket is so sweet! I love this! I have to try this, thank you for sharing x
Love the basket! Is it possible to make a larger version as well? Can’t wait to get started for Christmas! Thanks for inspiration 👍