Pinecone Snowman Ornament For Christmas Tree
Updated on November 19, 2025


We might still be waiting on Halloween to arrive, but that doesn’t mean my kids aren’t already excited about wintery things! That’s partially because we live in the kind of chilly place where it’s already snowing some days even though it’s still technically fall. Since our kids always get excited about the snow, I like to try and incorporate it into the crafts we make together nice and early so keep them interested. They also adore crafting with bits of nature that they find in the backyard, and that’s how we found ourselves making pinecone snowmen! They turned out so cute that I couldn’t help making another snowman and outlining the process so you can all follow along as well.
Just in case you want to learn how the pinecone snowman was done, here’s a simple written guide complete with photos. If you’re the kind of person who likes following along with video tutorials more, keep scrolling to find one at the end of this post!
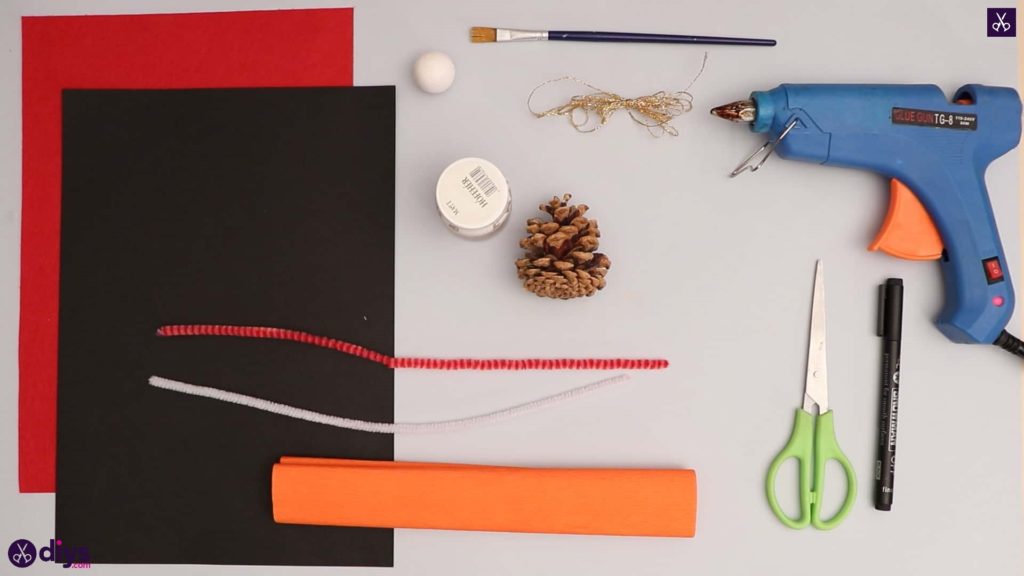
For this project, you’ll need:
- Construction paper (red and black)
- A paintbrush
- A small styrofoam ball
- White paint
- A pinecone
- Gold string
- A glue gun
- Crepe paper (orange)
- A black felt tip pen
- Pipe cleaners (red and white)
Step 1: prep
Gather your materials so you have everything you need!
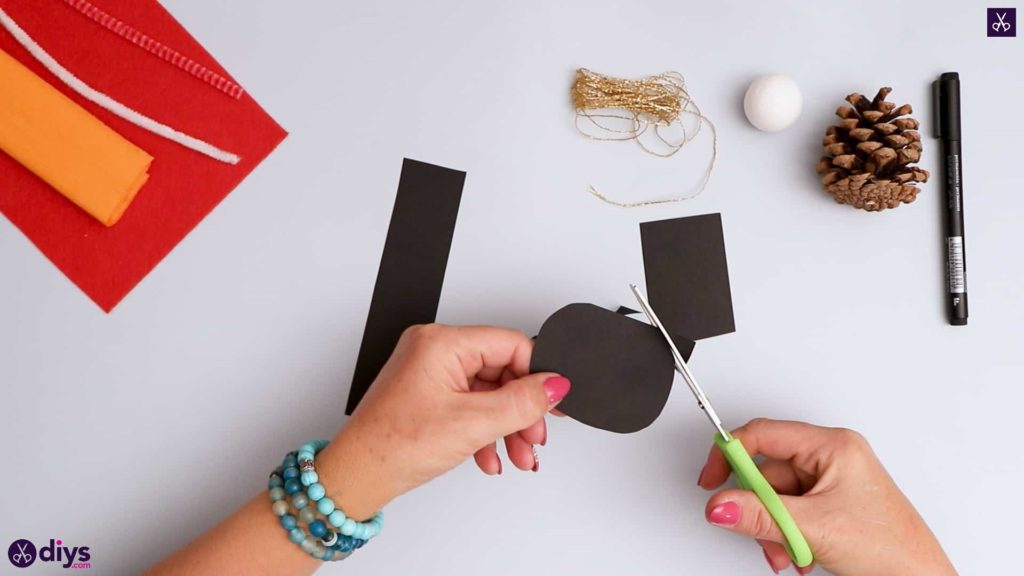
Step 2: cut the black paper
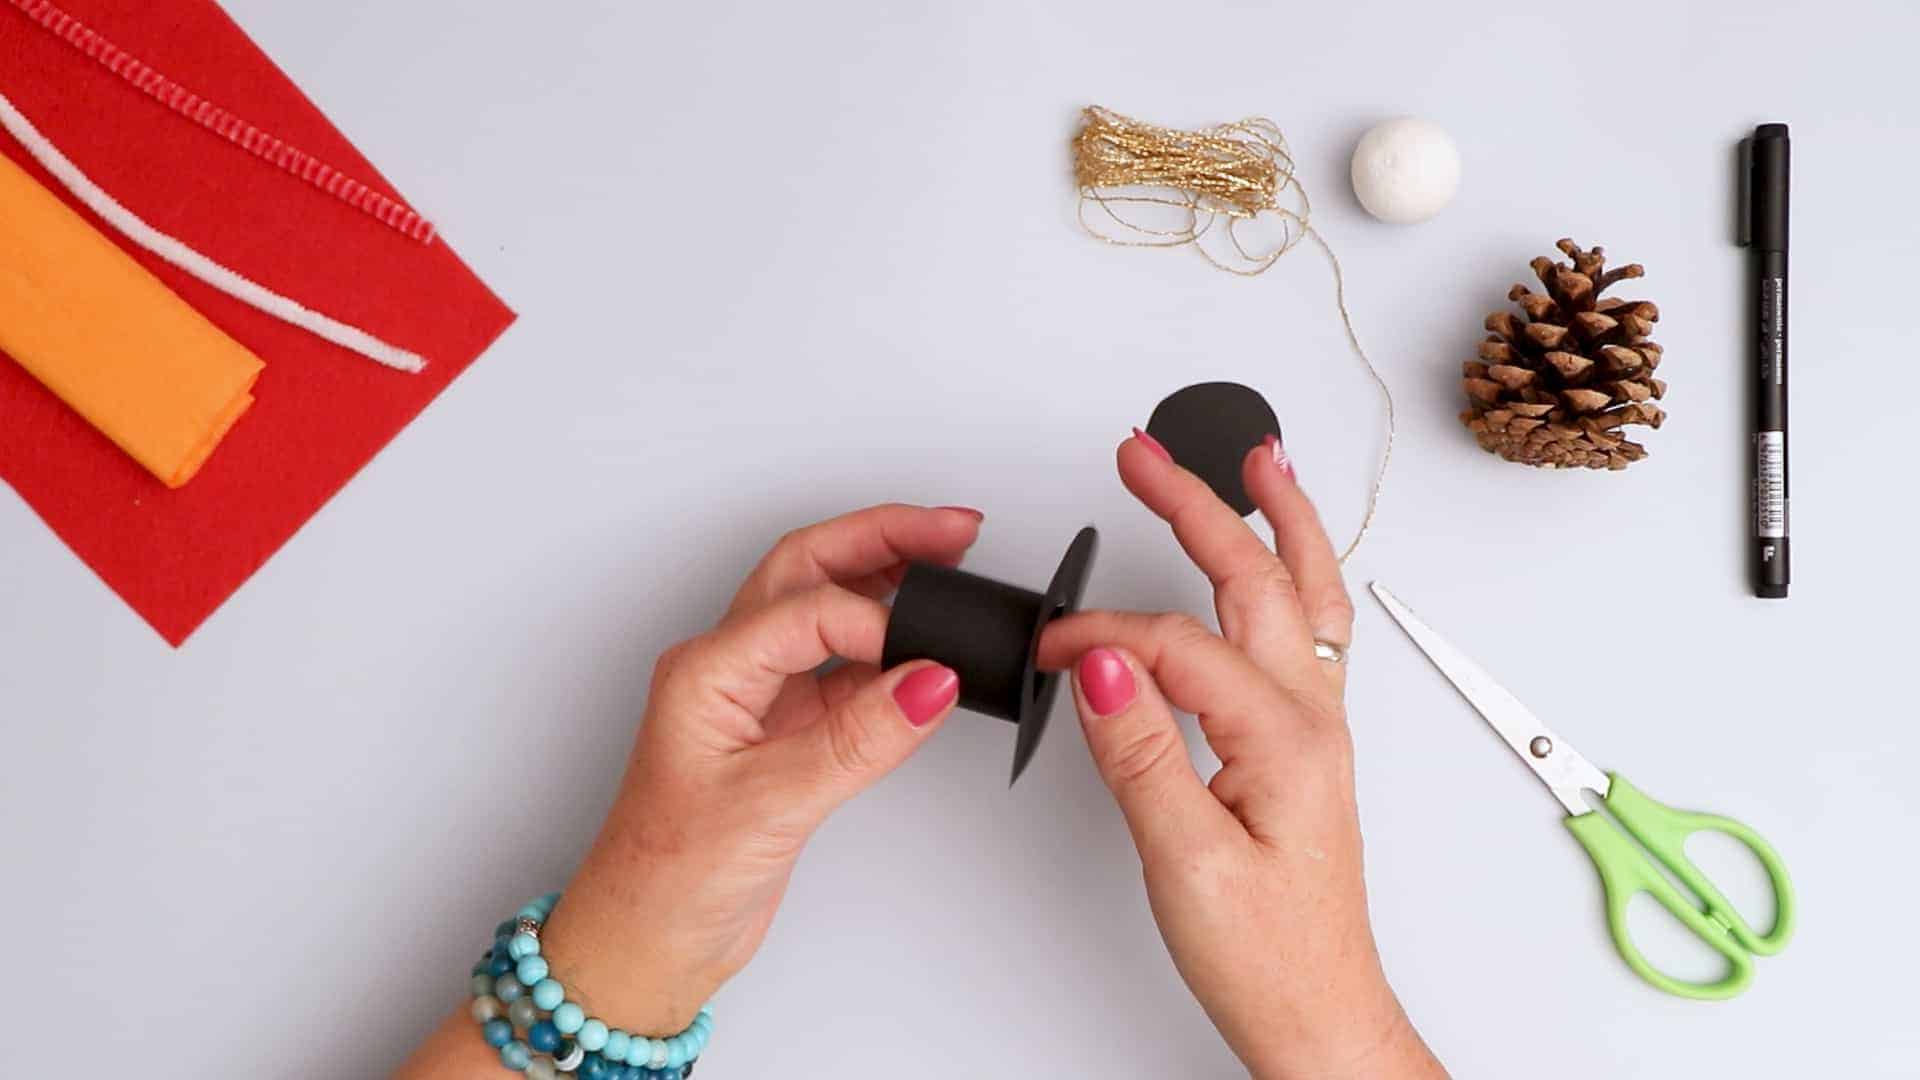
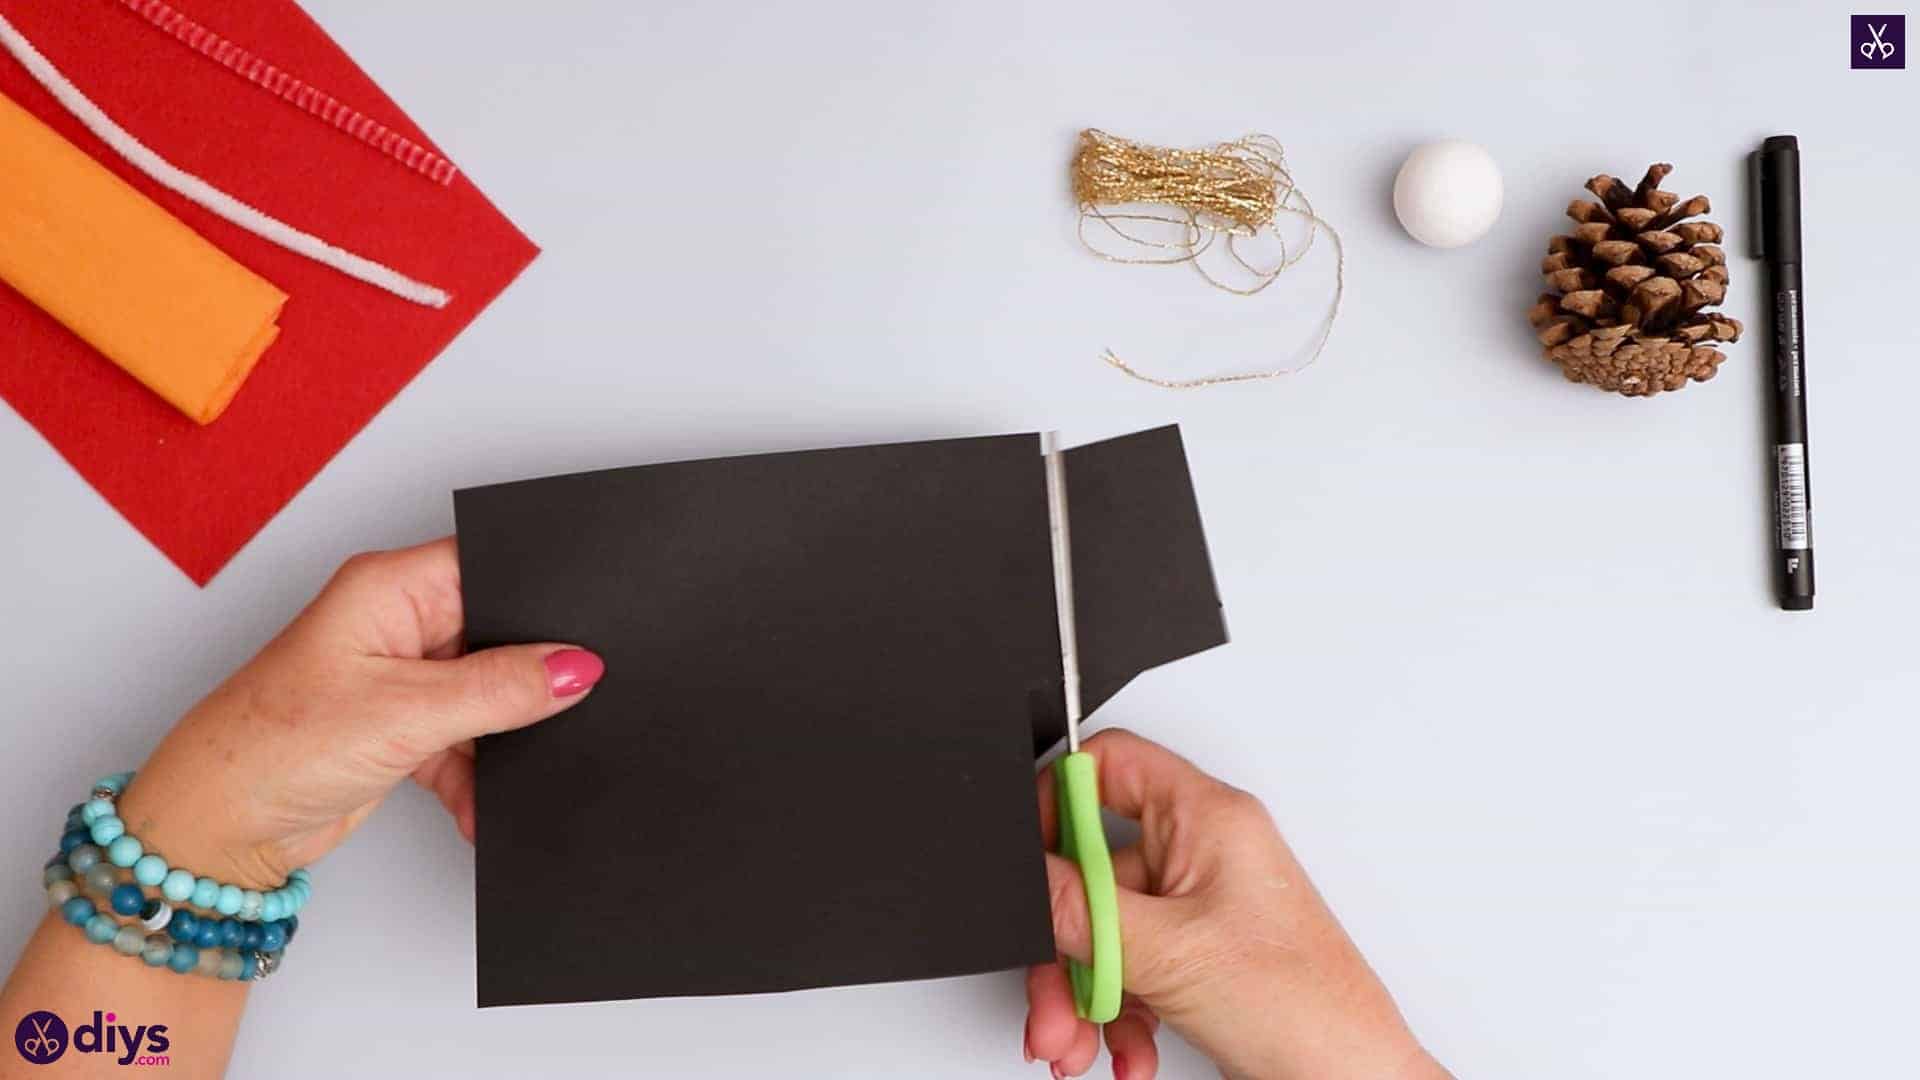
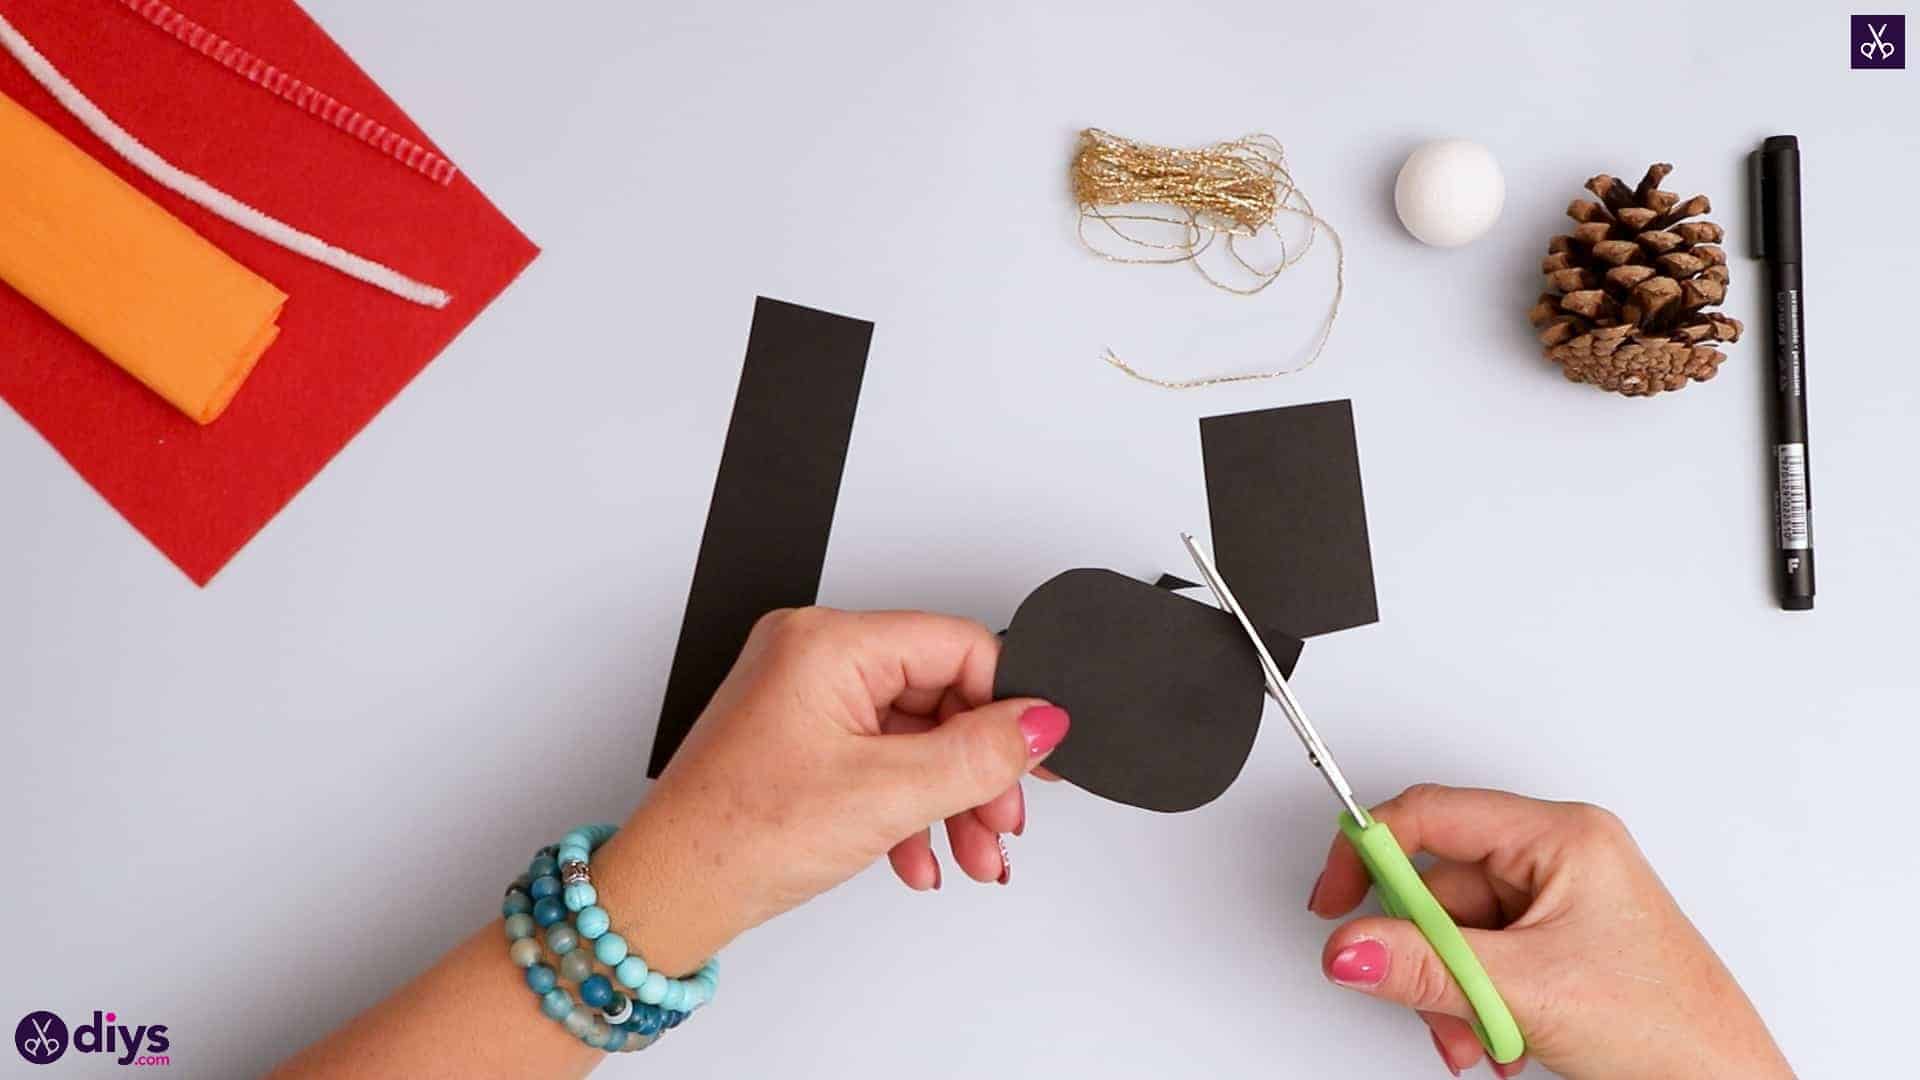
From your black paper, cut two squares that are equally sized and a rectangle that is roughly the same size as the two squares set end to end like one piece. From the first black square, begin rounding off the corners and edges to make an oval shape. From the second square, round off the edges and corners a little further than you did in the first one to create a circle rather than an oval.
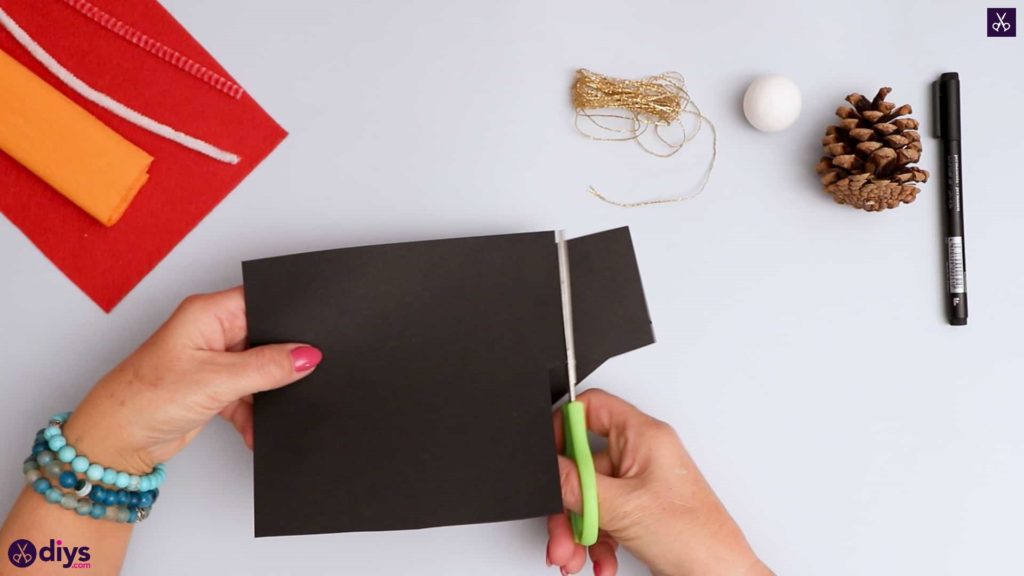
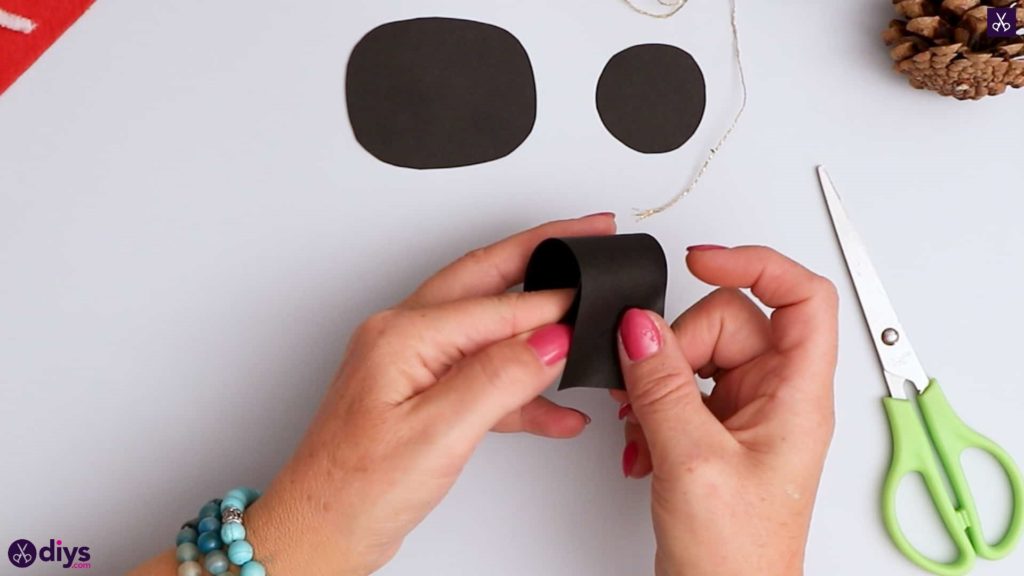
Step 3: make a cylinder
Take your black rectangularly cut piece and roll it onto itself to make a cylinder shape. Tighten or loosen the cylinder until its opening is roughly the same size as the circle you cut earlier or a little smaller. Trim the excess of this rolled triangle and then glue the ends in place to complete your cylinder.
Step 4: start making the hat
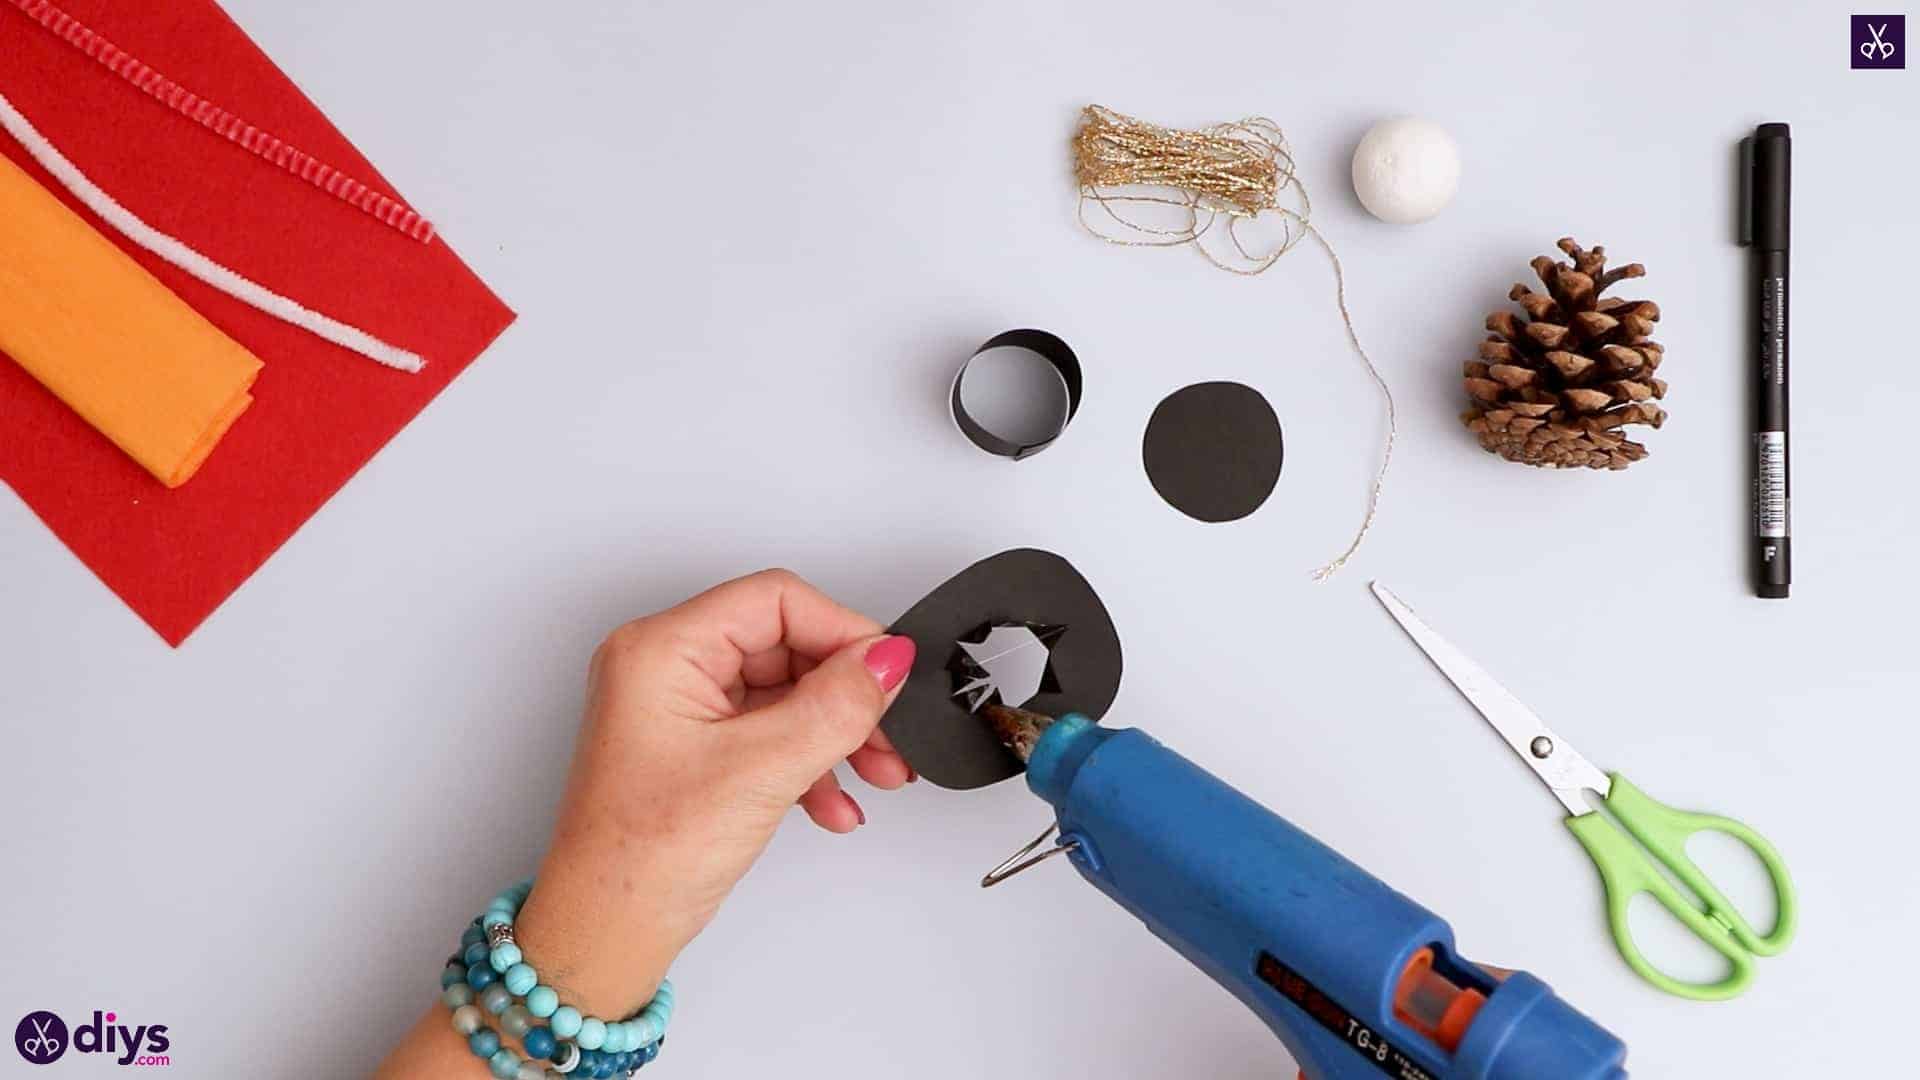
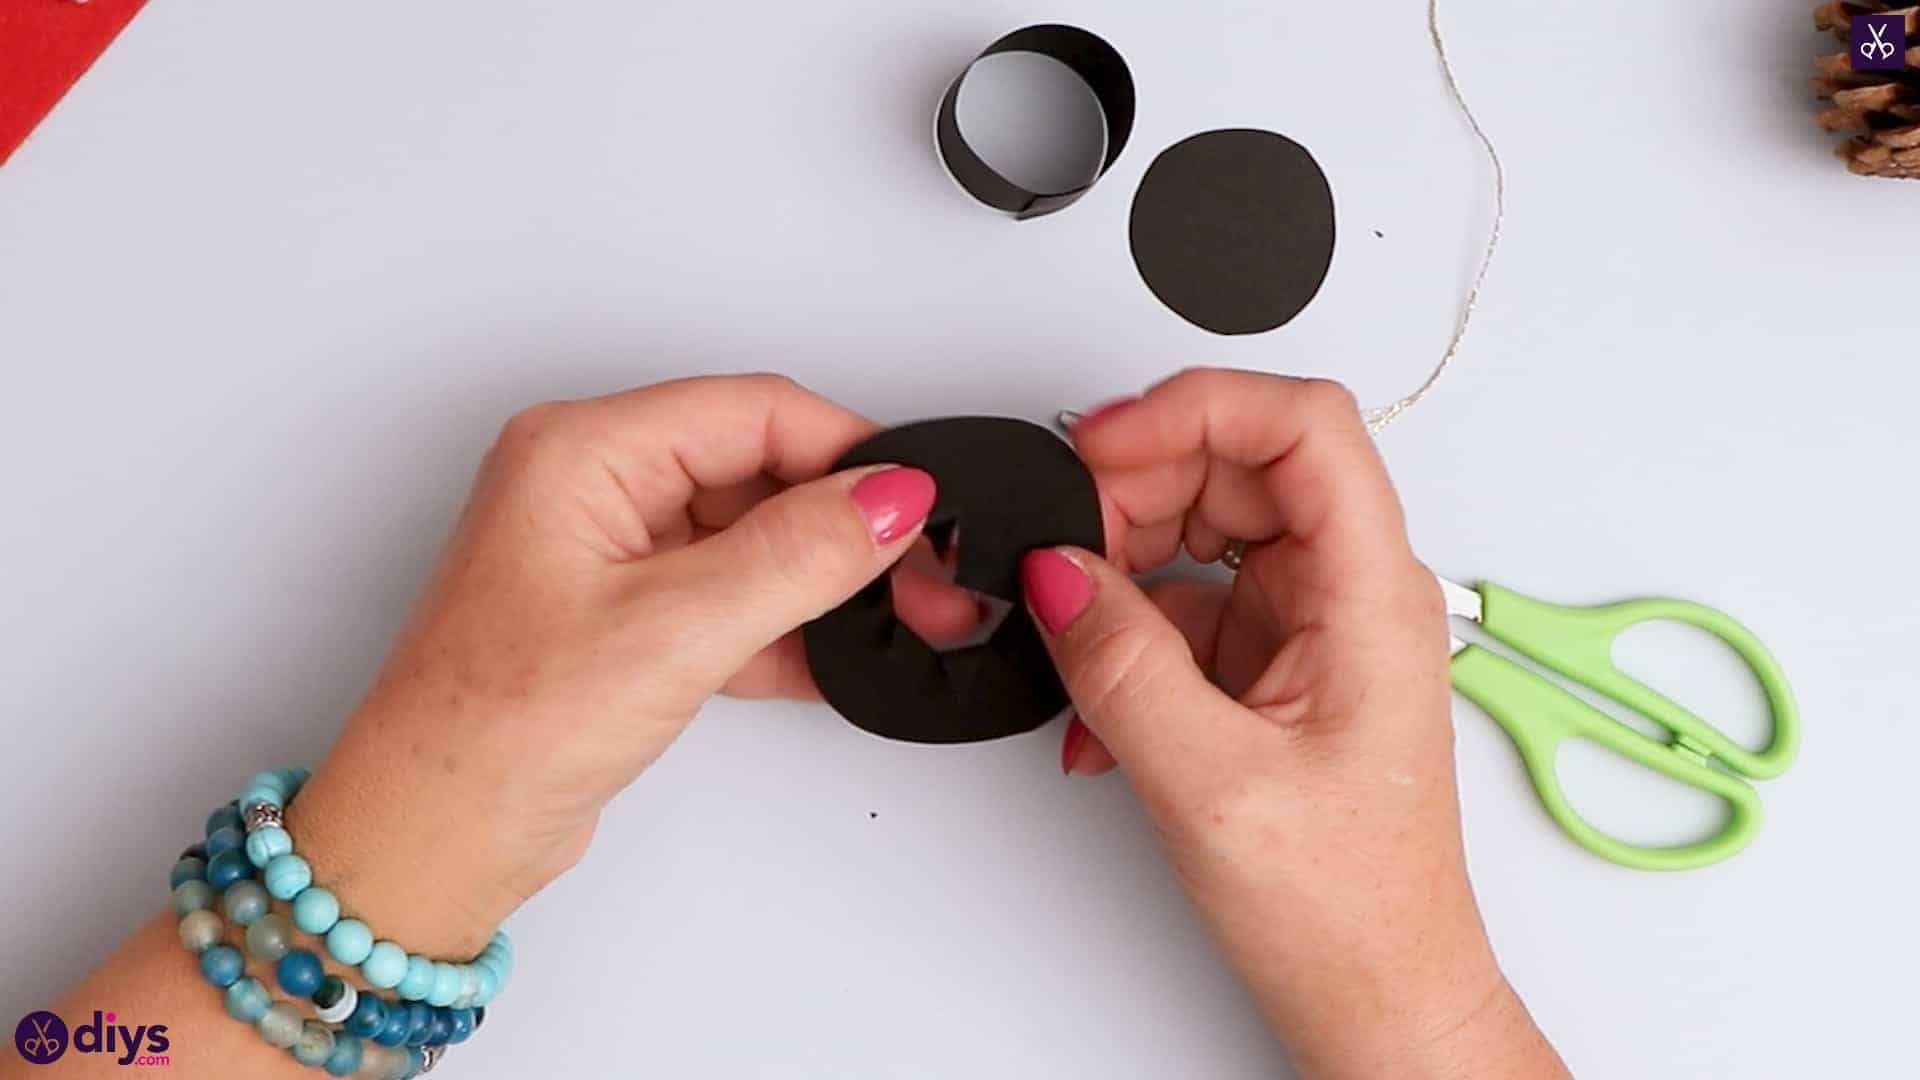
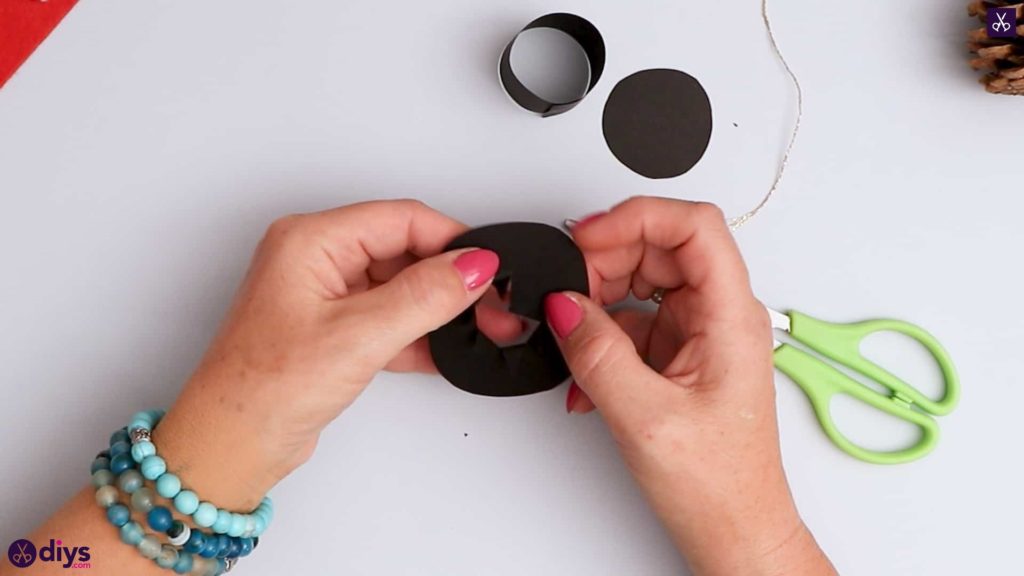
Take your black oval shape and poke a hole in the center with your scissors, then make several cuts all the way around that hole out towards the edges of your shape without actually cutting the shape all the way out. If you bend these new spiked shapes that you’ve created upwards, you’ll see that you’ve created a circular hole in the center.
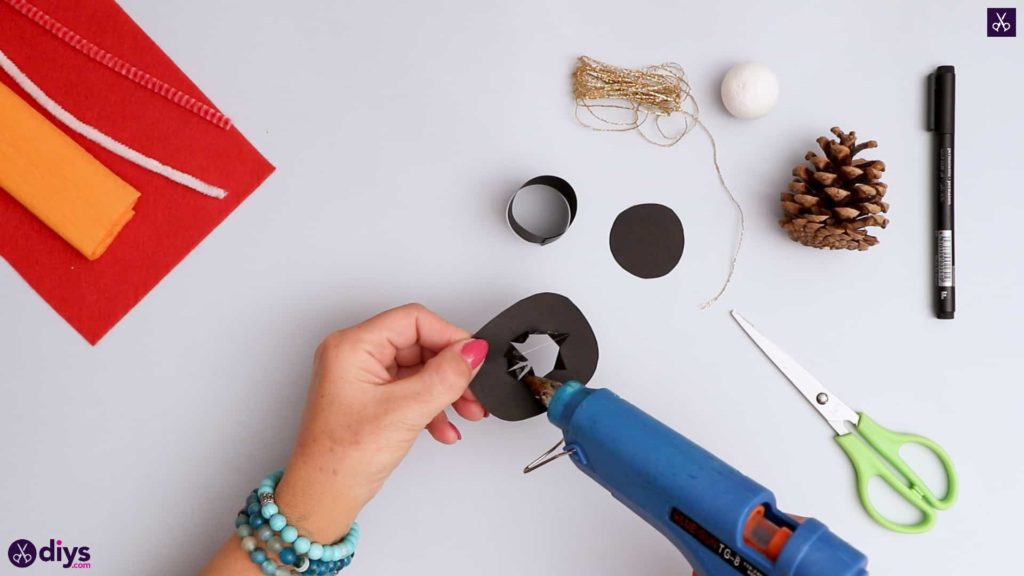
Step 5: glue together
Apply some glue on the outside of the spiked pieces of the oval you just bent upwards. These will be what holds your cylinder in place when you put the two pieces together in order to make the brim and body of your snowman’s top hat. Fit the spikes carefully inside one opening in either end of the black cylinder, using your finger to smooth those spikes to stick flush against the paper on the inside.
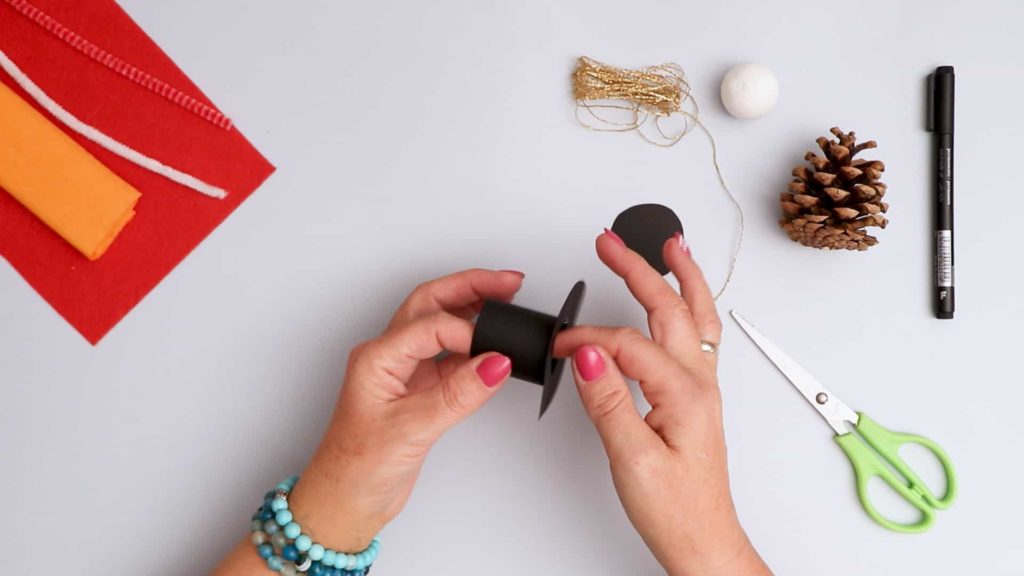
Step 6: finish the hat
Apply glue around the edge on one side of your black circle and fit it across the top opening of your cylinder to close and complete your snowman’s top hat. Trim around the edge of the circle if there’s excess, so its edges lie even with the side of the cylinder.

Step 7: make the arms and hands
Cut a piece of white pipe cleaner about four inches long and bend it in the center. Curl each end of the pipe cleaner inward. This piece will make up your snowman’s arms and hands.
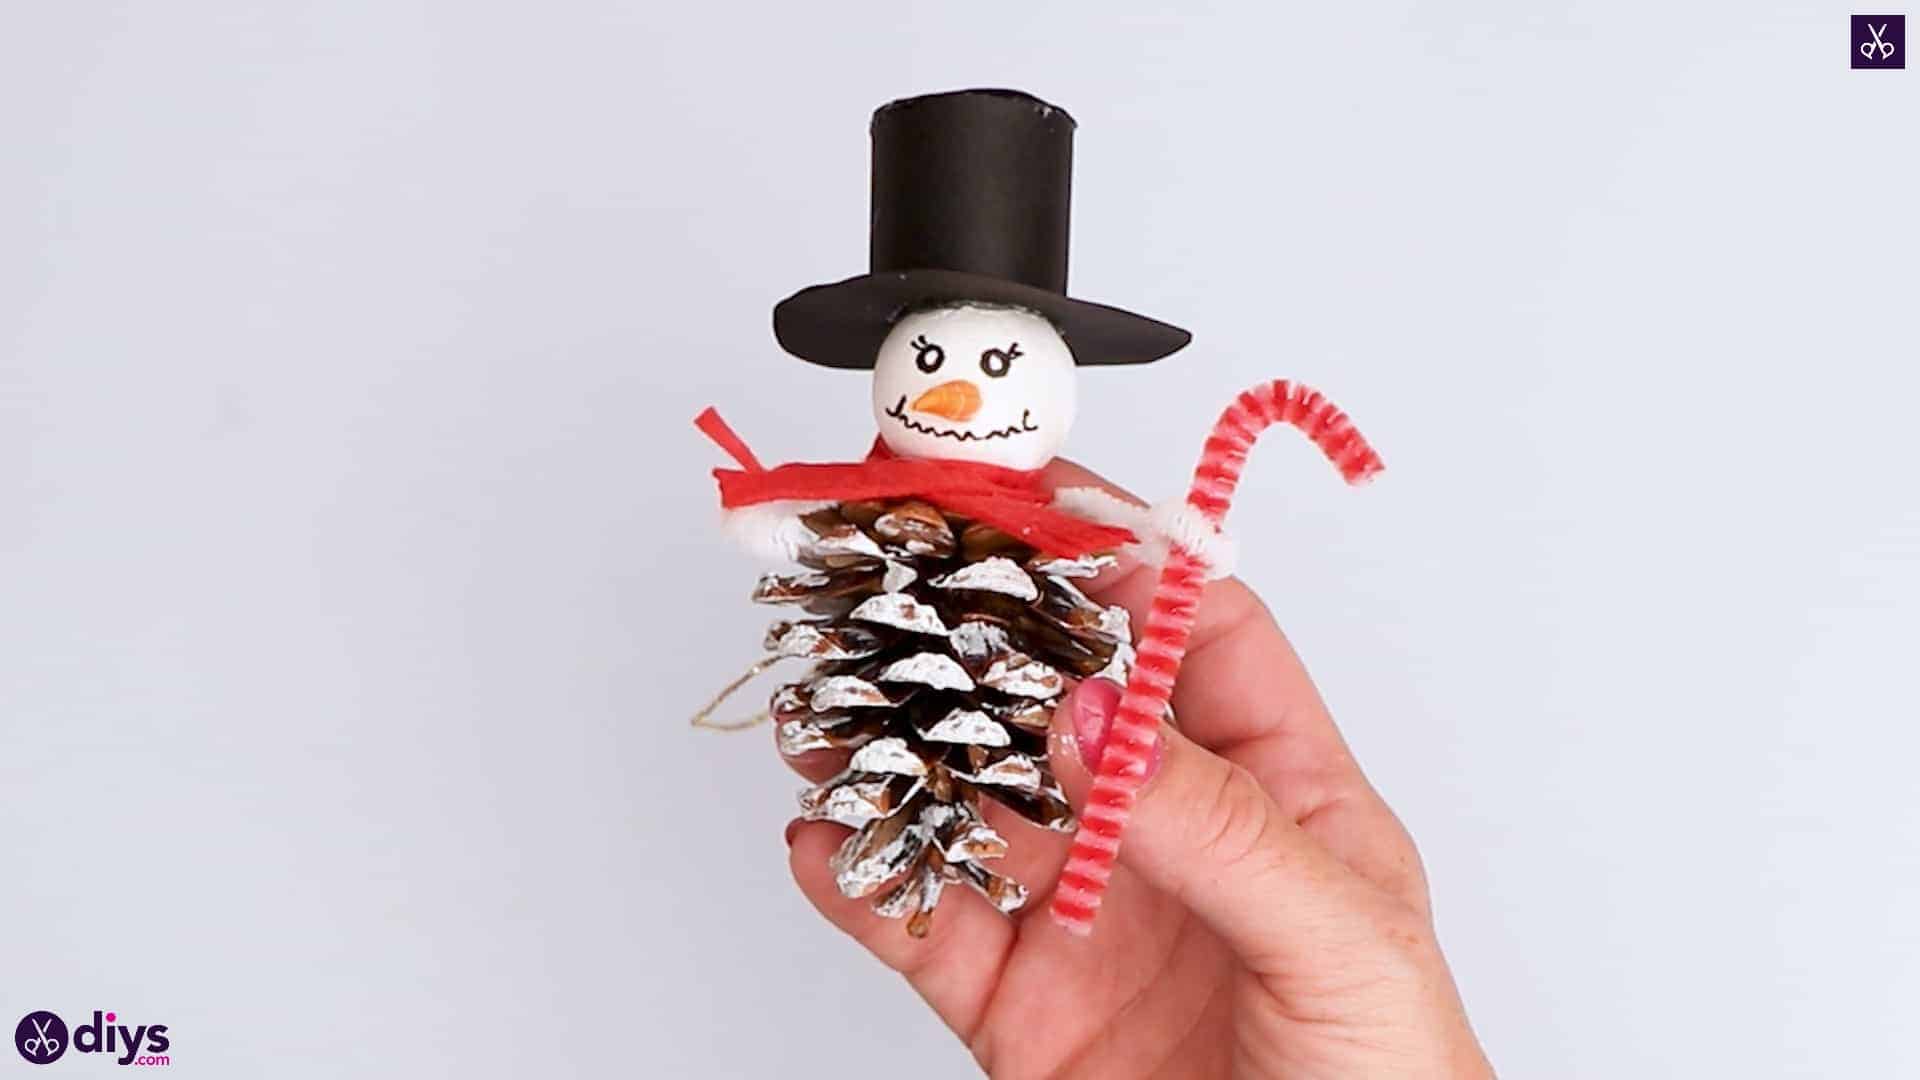
Step 8: make the cane
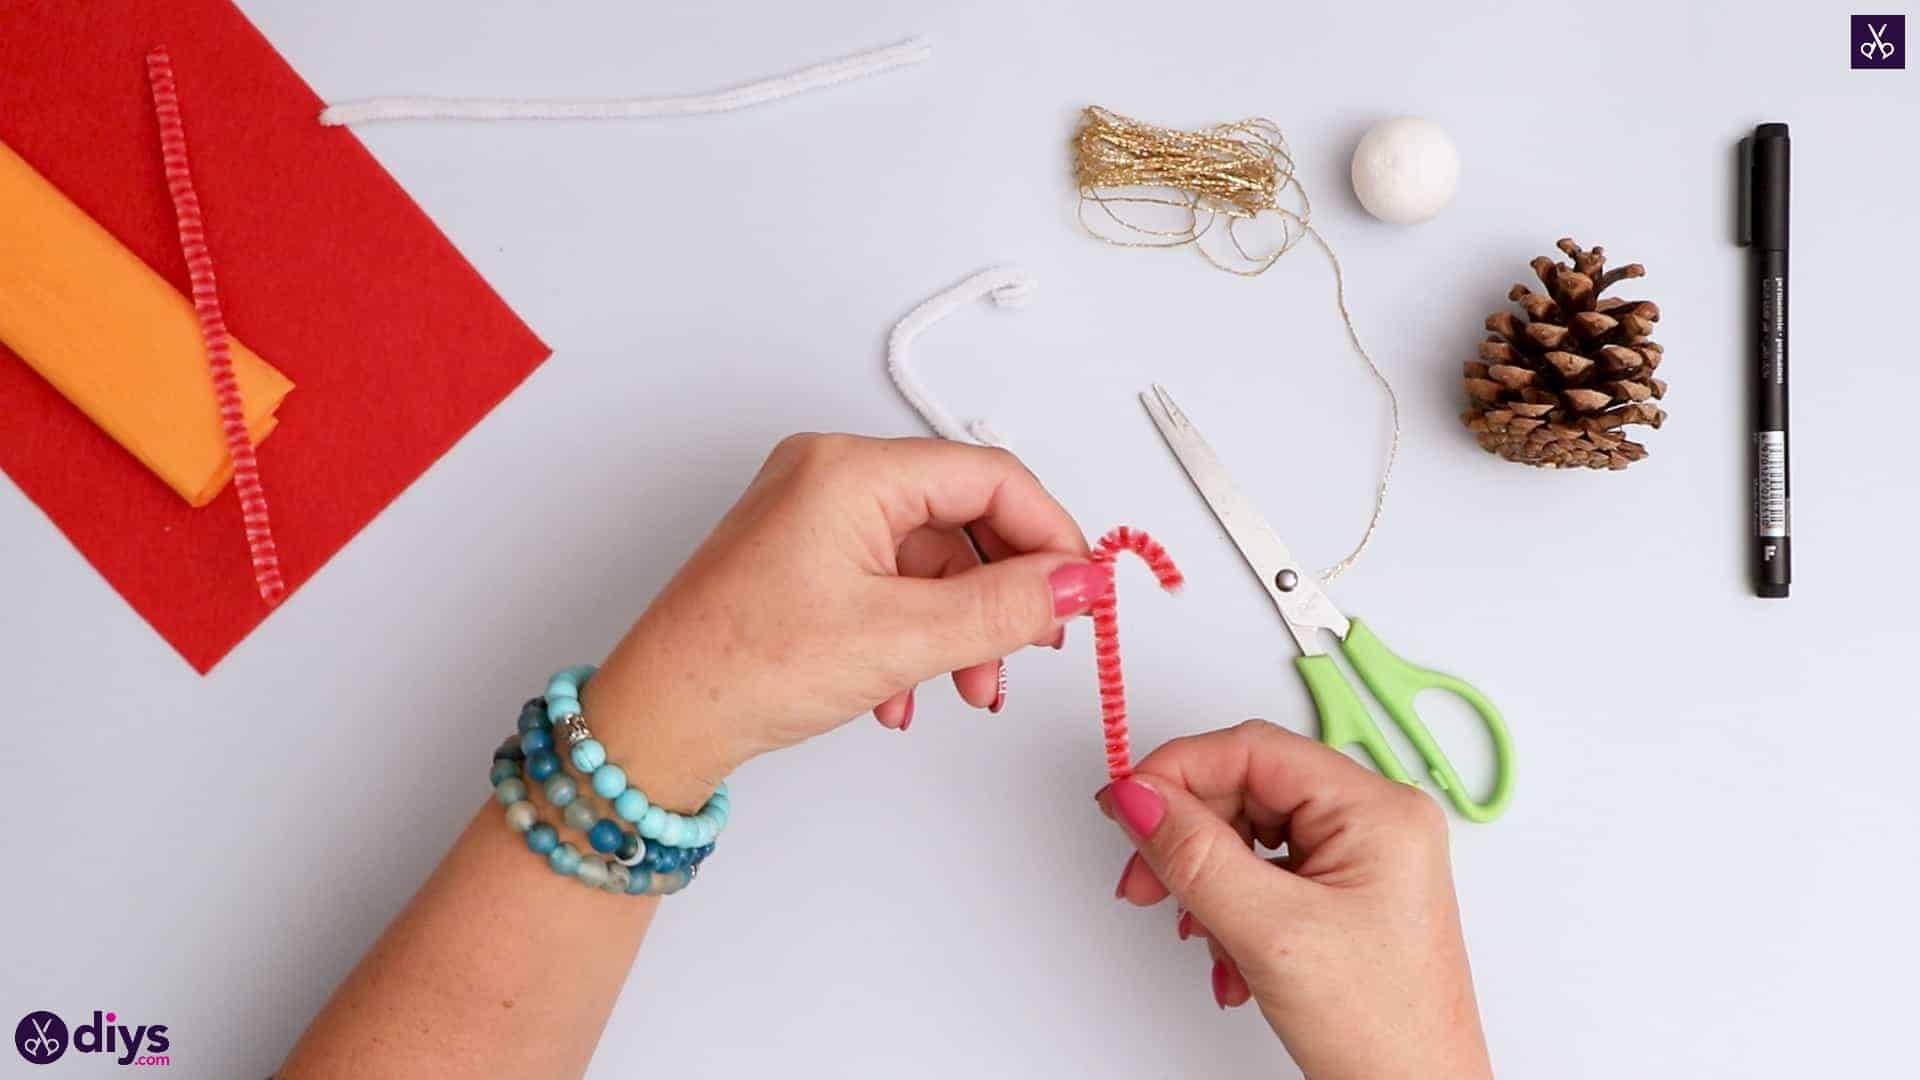
Cut a slightly shorter piece from your red pipe cleaner and curve it over at one end so it looks like a candy cane. Your snowman will hold this like an actual cane, even though itis supposed to look like the minty holiday candy.
Step 9: make the loop
Cut a two inch piece of gold string and fold it over to make a loop, knotting the end. You’ll use this later to hang your snowman up like an ornament, but set it aside for now. Next, cut a rectangular piece about half an inch wide and two inches long from your orange crepe paper. Turn it horizontally and fold each end diagonally inward so you get a triangular shape. Fold each side once more in the same way and then, starting on the right, start rolling the side inward towards the left until the entire orange piece is rolled up. Cut off some excess on the end opposite the pointed one if your piece is very long. You’ll have a pointed orange piece that will become your snowman’s carrot nose! Apply some glue between the last edge and the main shape you’re rolling it against to make the piece hold its shape.

Step 10: make the scarf
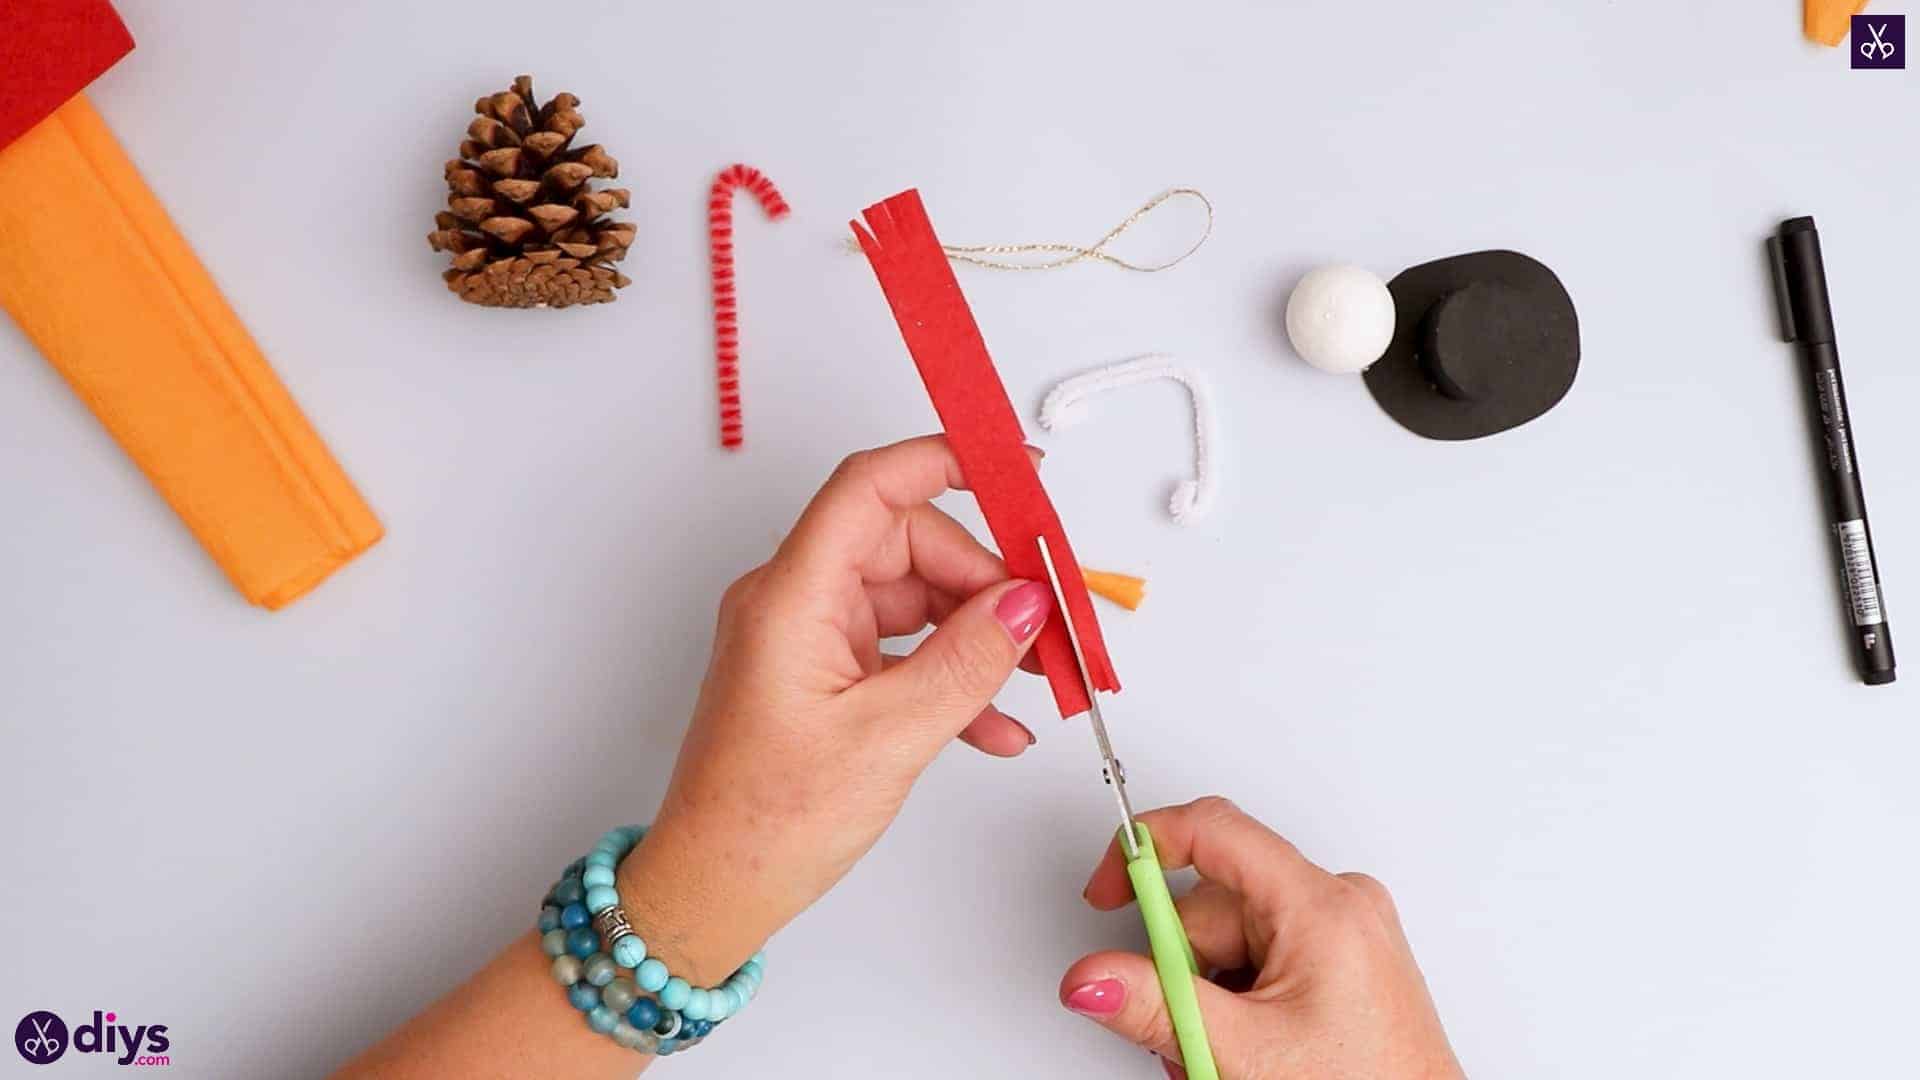
Cut a thing rectangular strip from your red paper about half an inch wide and four inches long. Cutting inward from the straight side, make several cut to fringe the short ends of the strip on both the top and the bottom. This will become your snowman’s scarf.

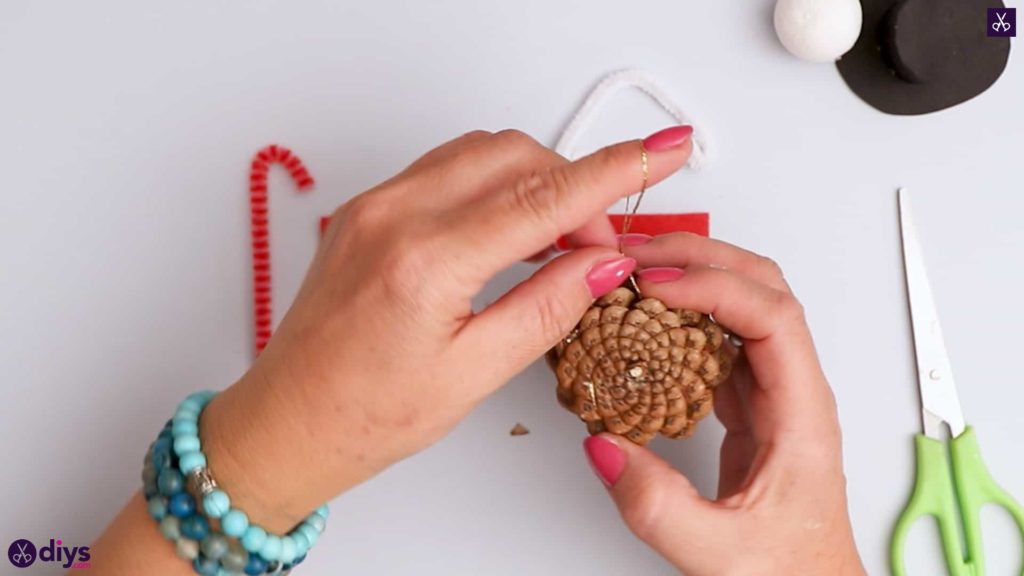
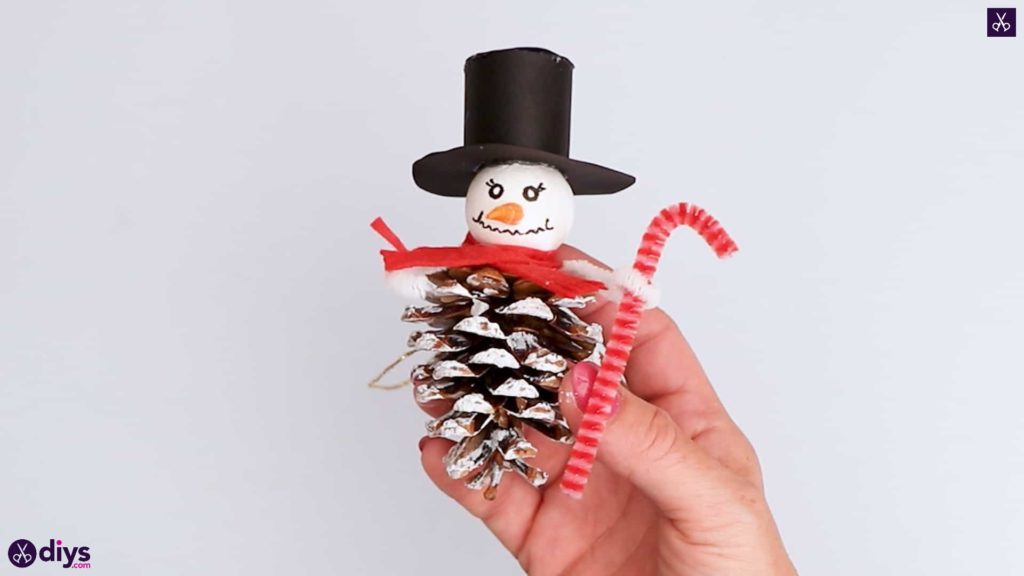
Step 11: make the head
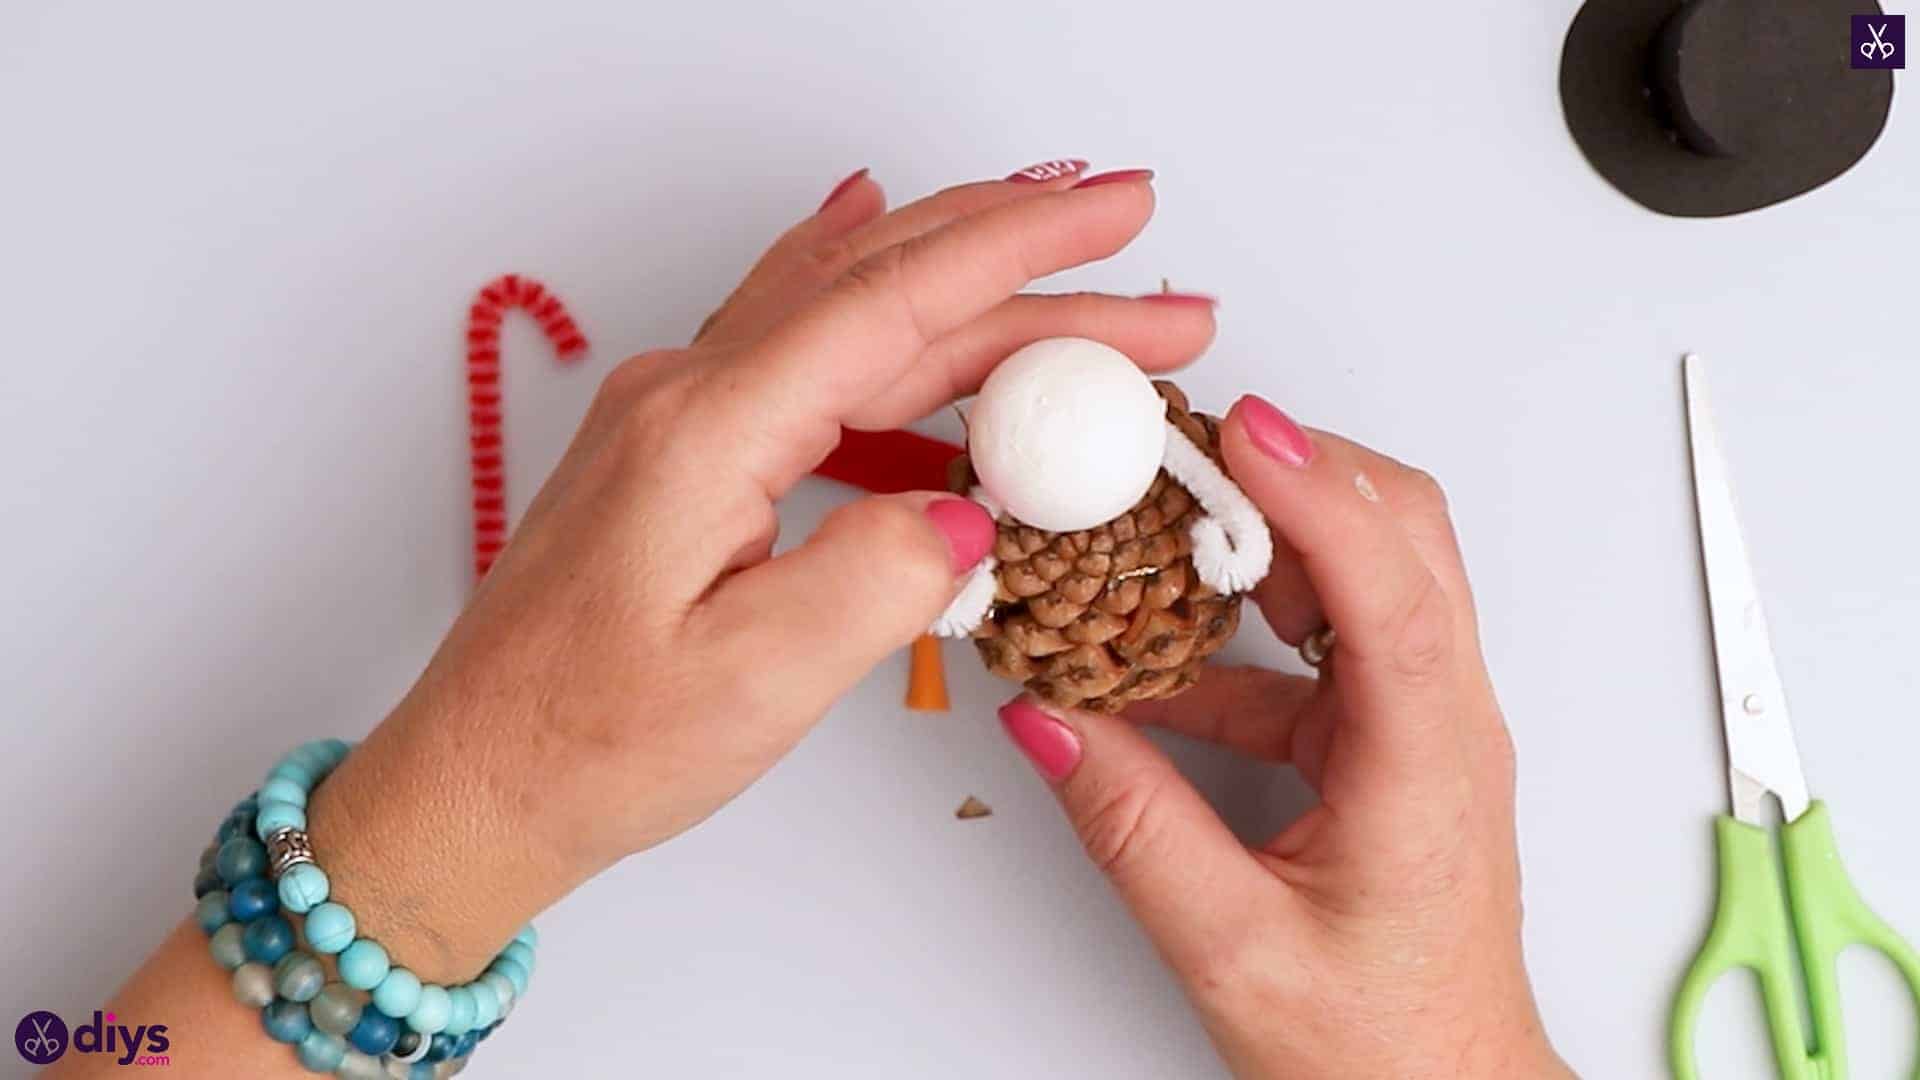
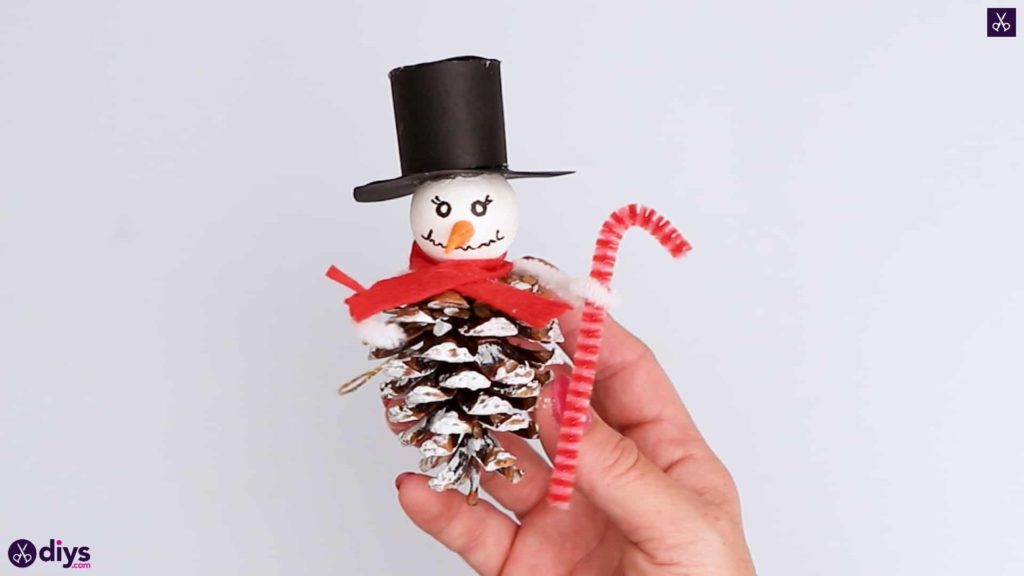
Pick up your pinecone and turn it upside down. Wrap the looped piece of gold string you prepared earlier around the solid looking bottom piece and twist it to hold it into place. Feel free to place a dab of glue on the underside of the piece and press the twisted part of the string into it if your piece won’t stay in place. Then apply some glue on the very top (what was once the bottom) of your pinecone in the center and stick your Styrofoam ball down. This is now your snowman’s head!
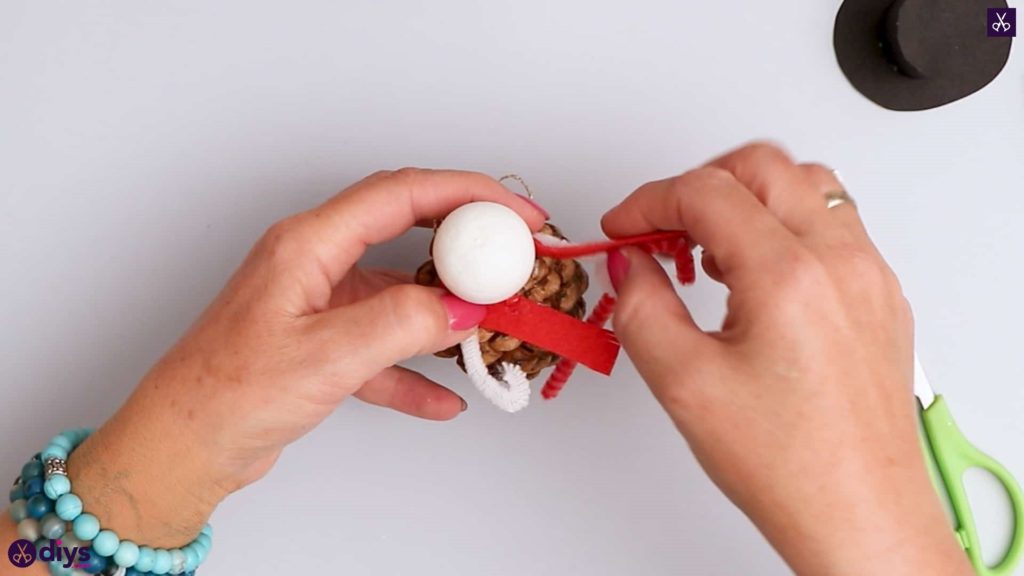
Step 12: slide the arms on
Apply some glue in the bend of your white piece of pipe cleaner and fit it around the base of where your snowman’s foam head and pinecone body meet. Glue it so the bend is at the back, which is whichever side your gold string loop sits on. Then slide your pipe cleaner candy can into one of your snowman’s hands (you can also keep this in place with a tiny dot of glue if you like).

Step 13: add the scarf
Attach your snowman’s scarf by curving it around the back of the snowman’s head where the arms sit and passing them over the white pipe cleaner towards the front so the ends cross over at his chest like a scarf. I fastened mine in place by putting a dab of glue on the front of the pinecone and sticking the bottom crossed end of the scarf there, and then applying a dab of glue to the other side of that part and sticking the other end of the scarf down over it so it stays in place.
Step 14: glue the hat on and make the face
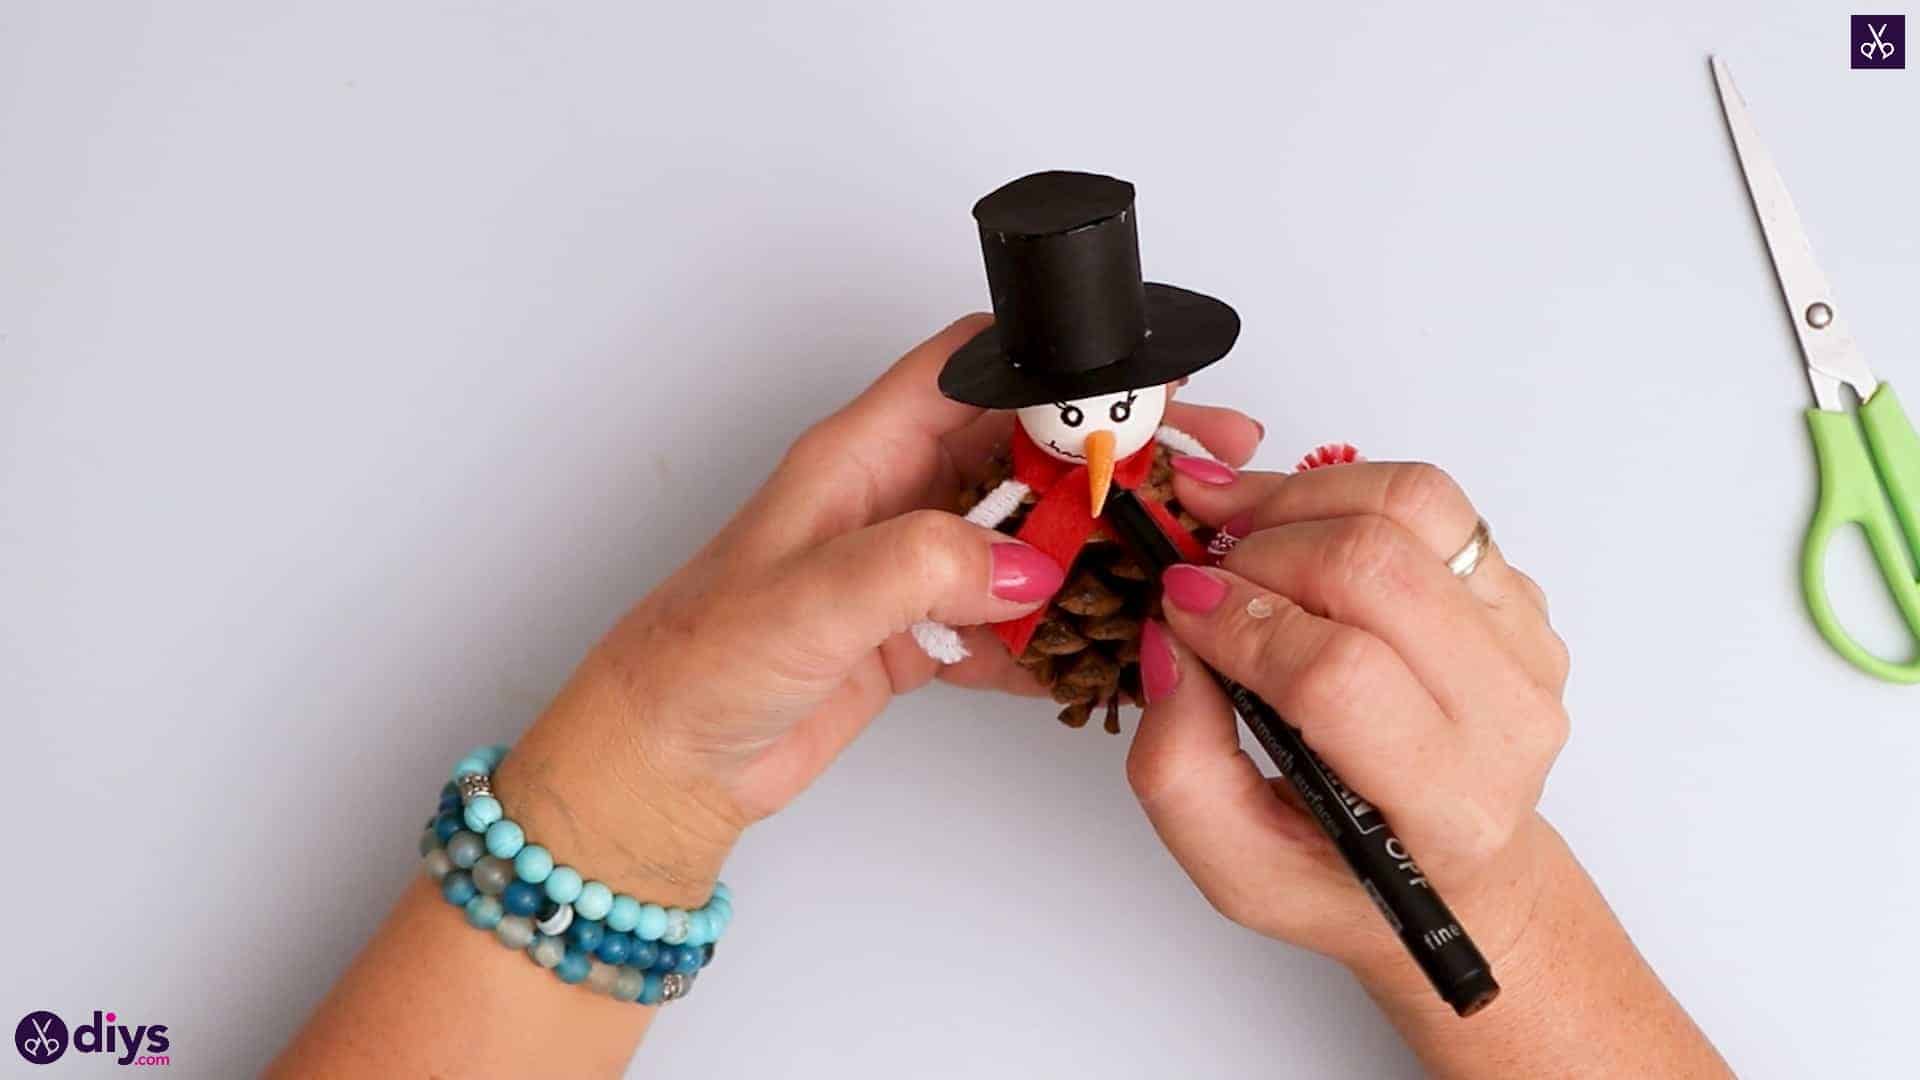
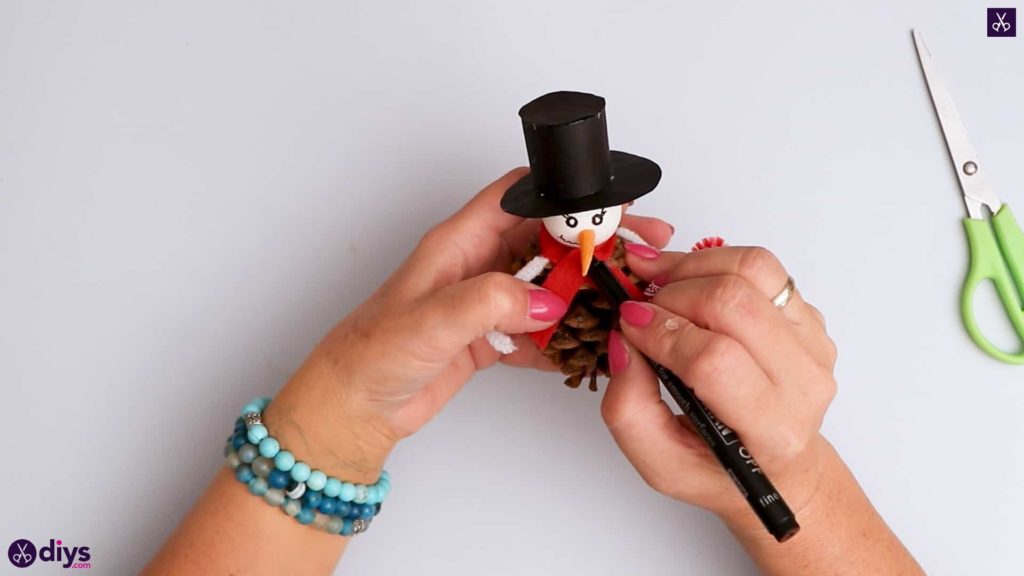
Apply glue around the edge of the hold on the underside of the top hat, where the snowman’s head will go, then press the hat lightly down onto his head so it fits snugly without going too far down to hide where his face should be. Then take your black marker and draw two circles for his eyes on the white foam, below the brim of the hat.
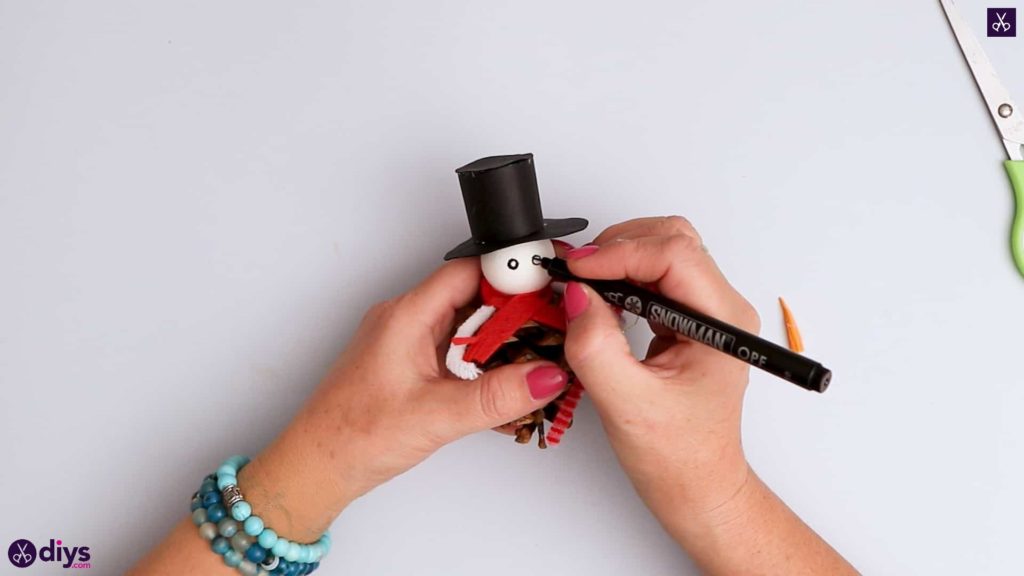
Step 15: glue the nose
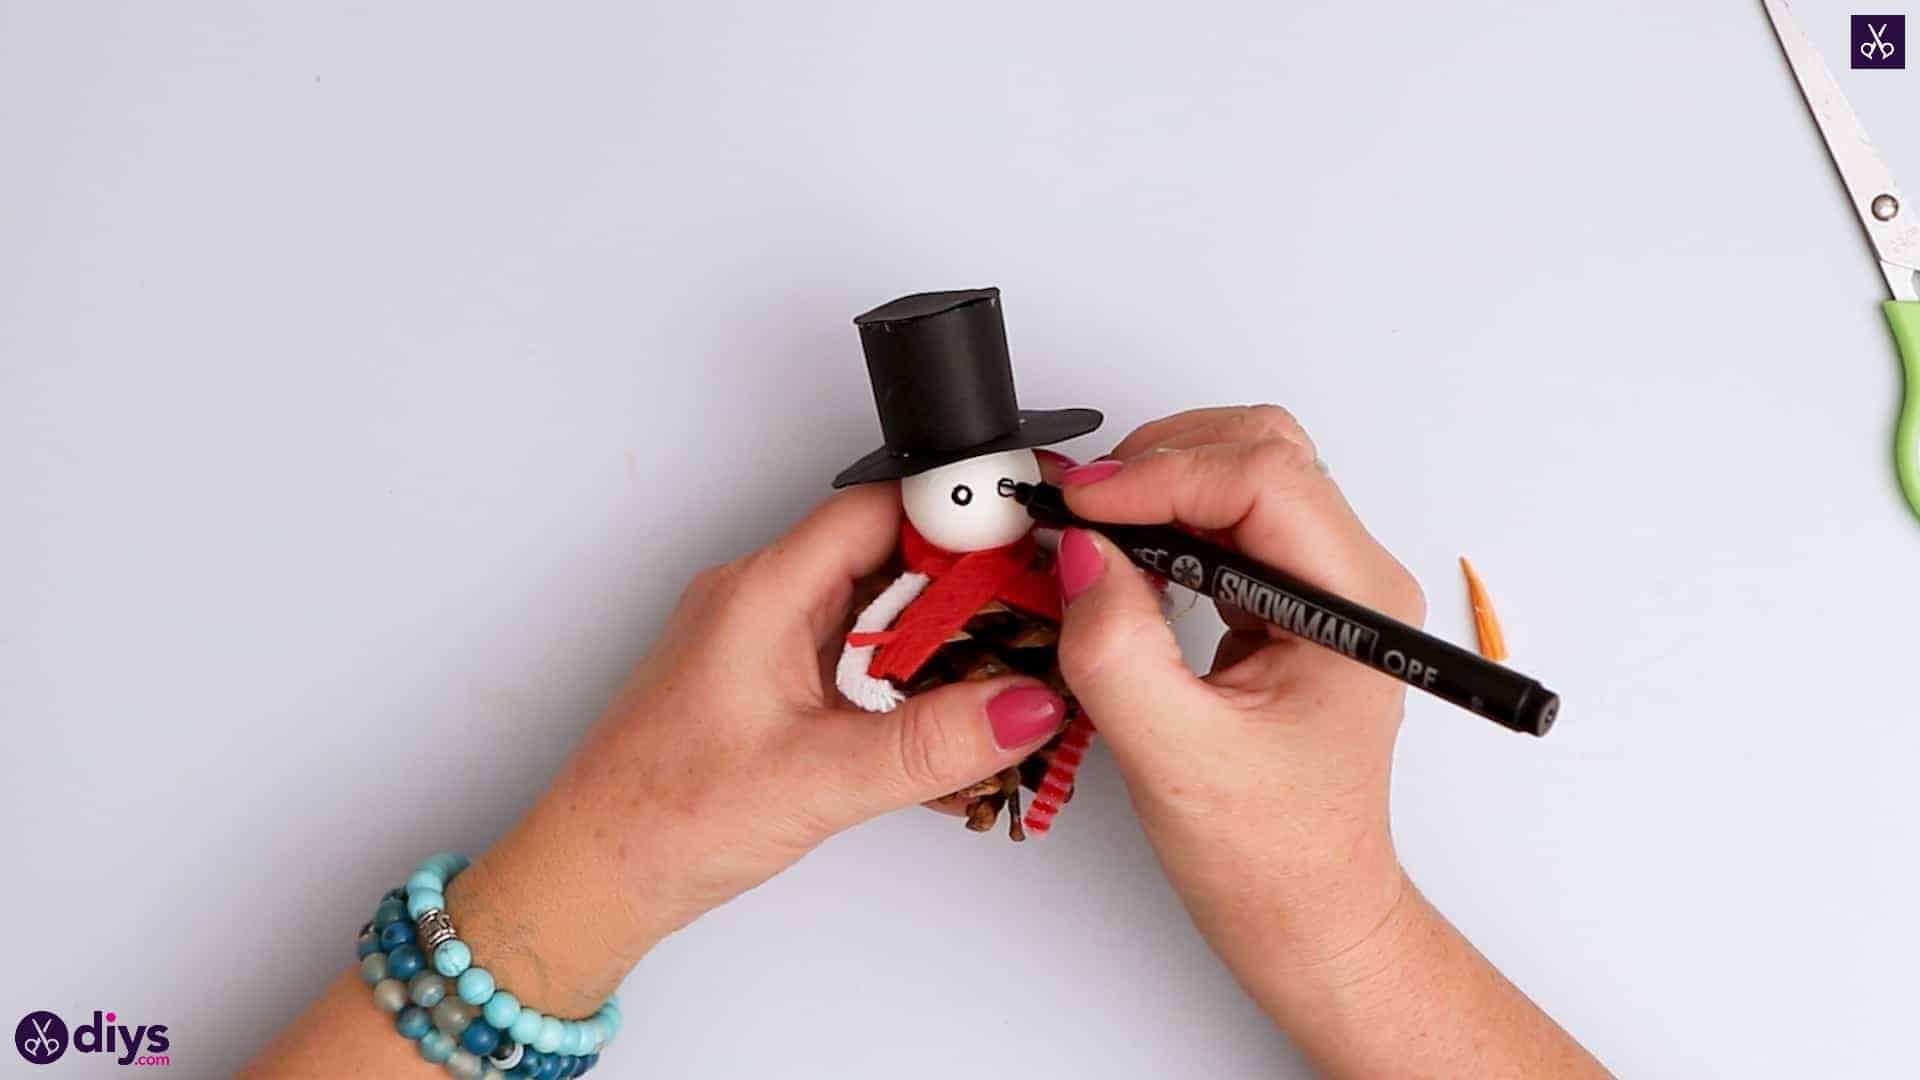
On the cut end of your orange nose piece, apply some glue before sticking it onto the center of the snowman’s face, just below his eyes. Then take your black marker and draw him a smile below the carrot nose.
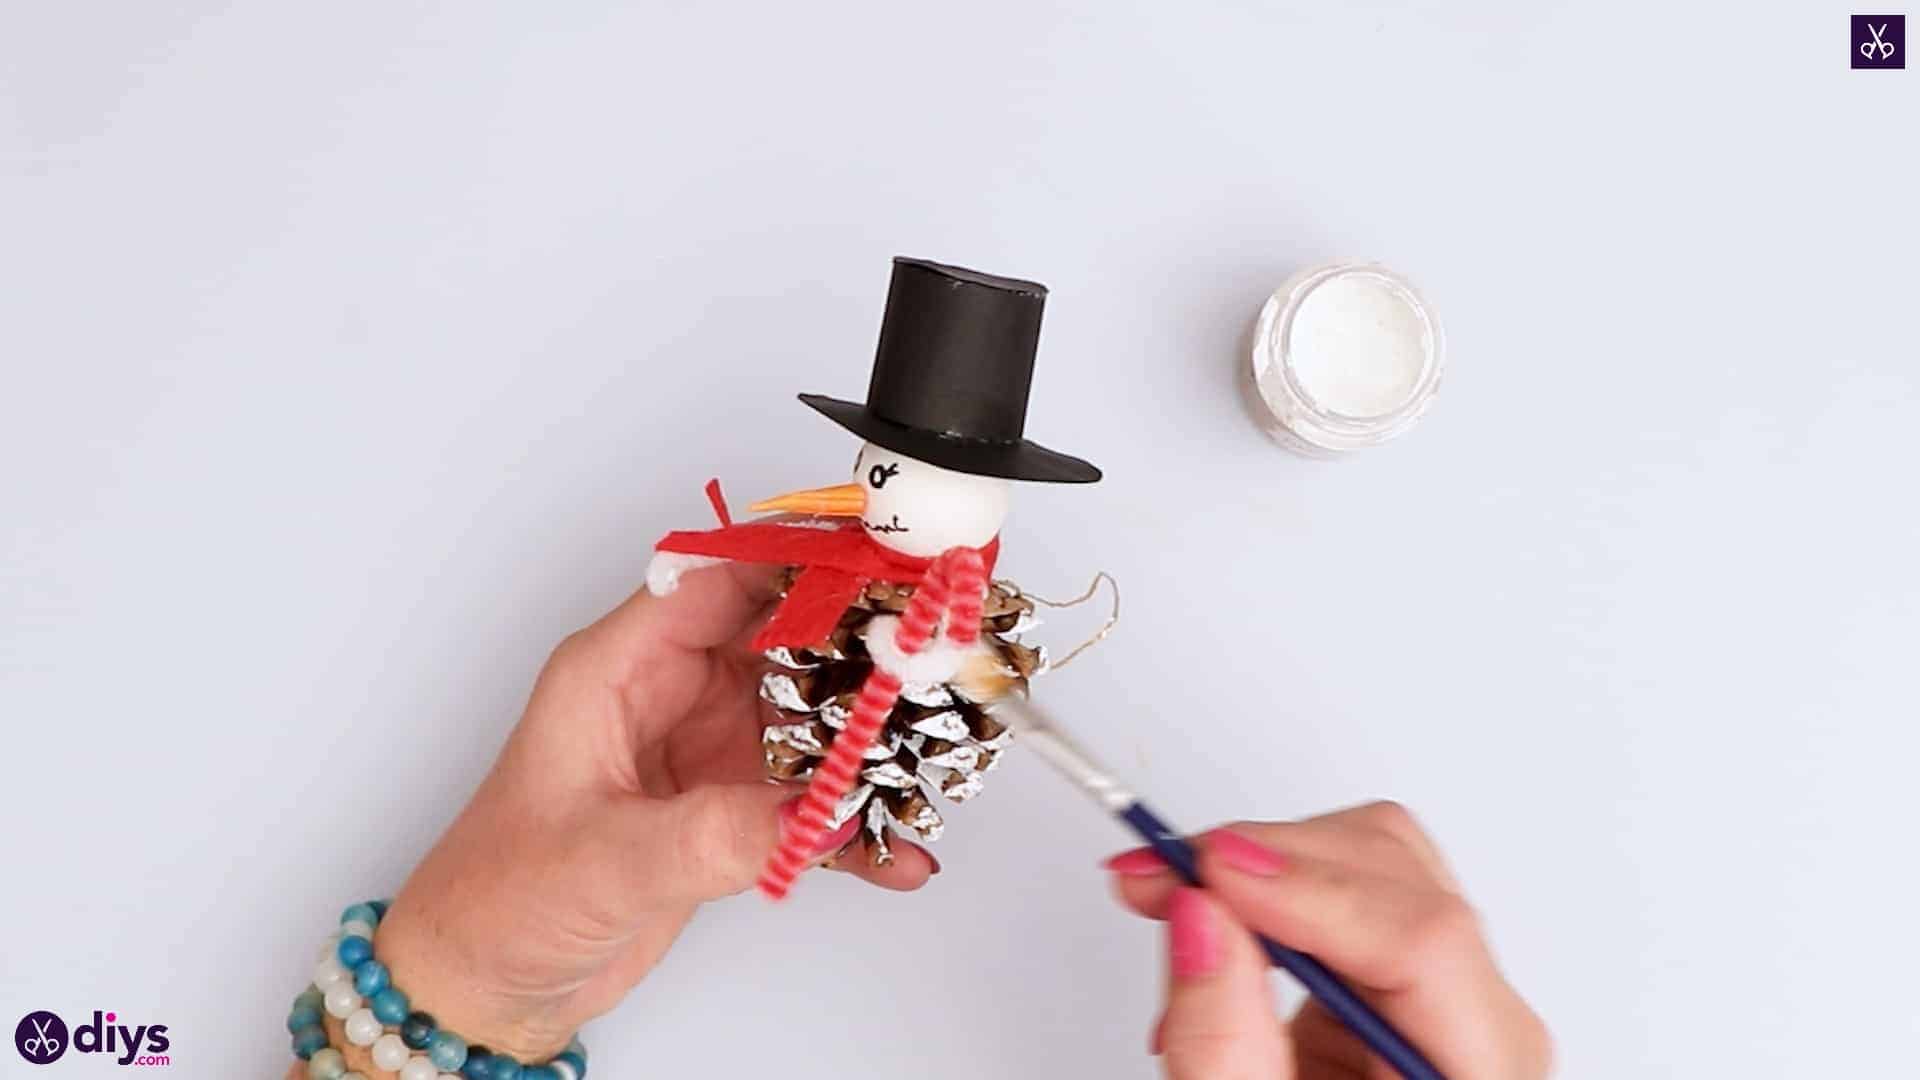
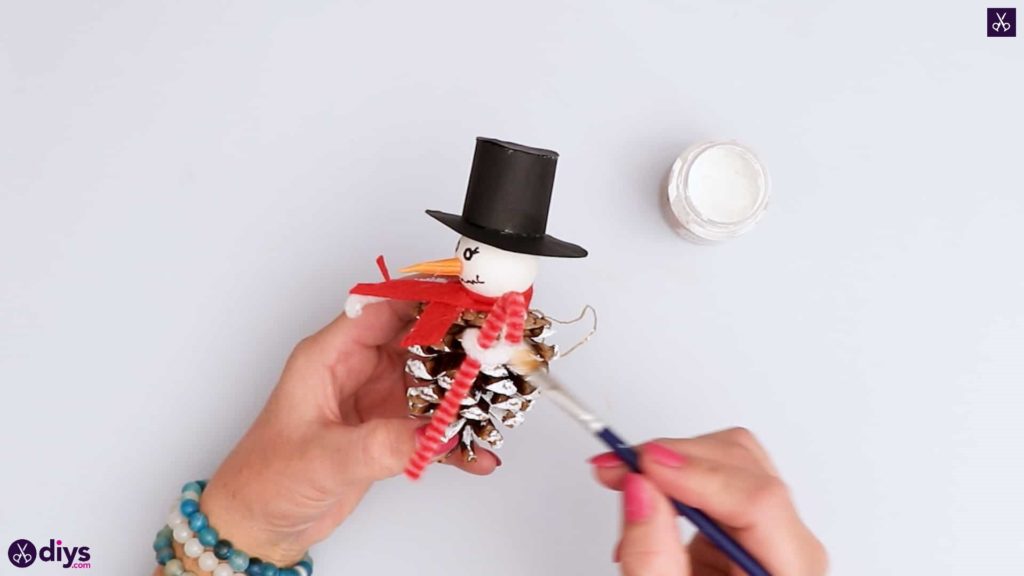
Step 16: paint
Use your brush and white paint to create the look of snow on the tops of your snowman’s pinecone body! This adds a finished look and makes the snowman look like he’s been sitting outside as the snow falls.
There you have it! I think we might hang our snowman on the Christmas tree this year. Just in case you’d like to try this project out for yourself, here’s a fantastic tutorial video to help you!