DIY Leather and Pearl Dragonfly Keychain
Updated on November 19, 2025


If you love dragonflies and crafting then you’ll adore this DIY leather and pearl dragonfly keychain! It was super easy to make and you can switch up the colors and materials to suit your tastes. Check out how I made it right here!

Check out these step by step instructions complete with photos! If you’d rather follow along with a video tutorial instead of written words, scroll to the bottom of this post to find just what you’re looking for.

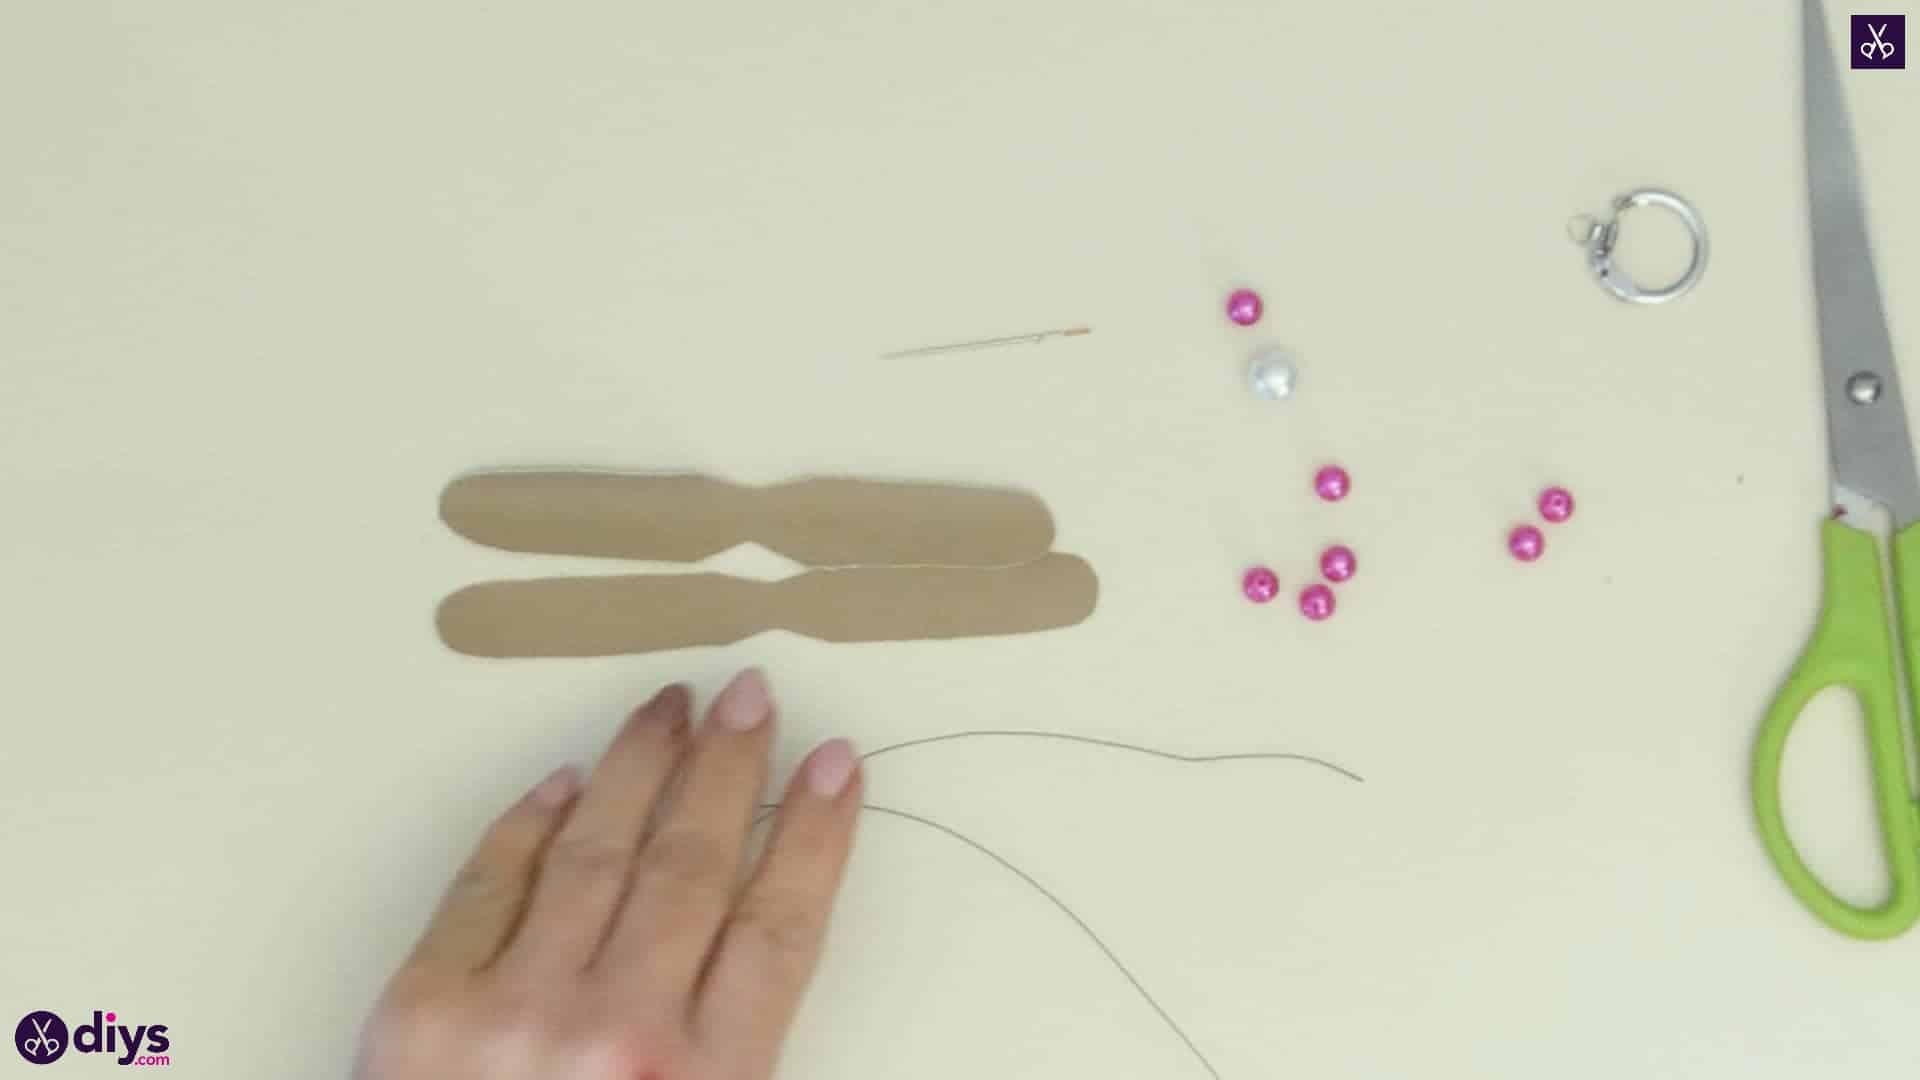
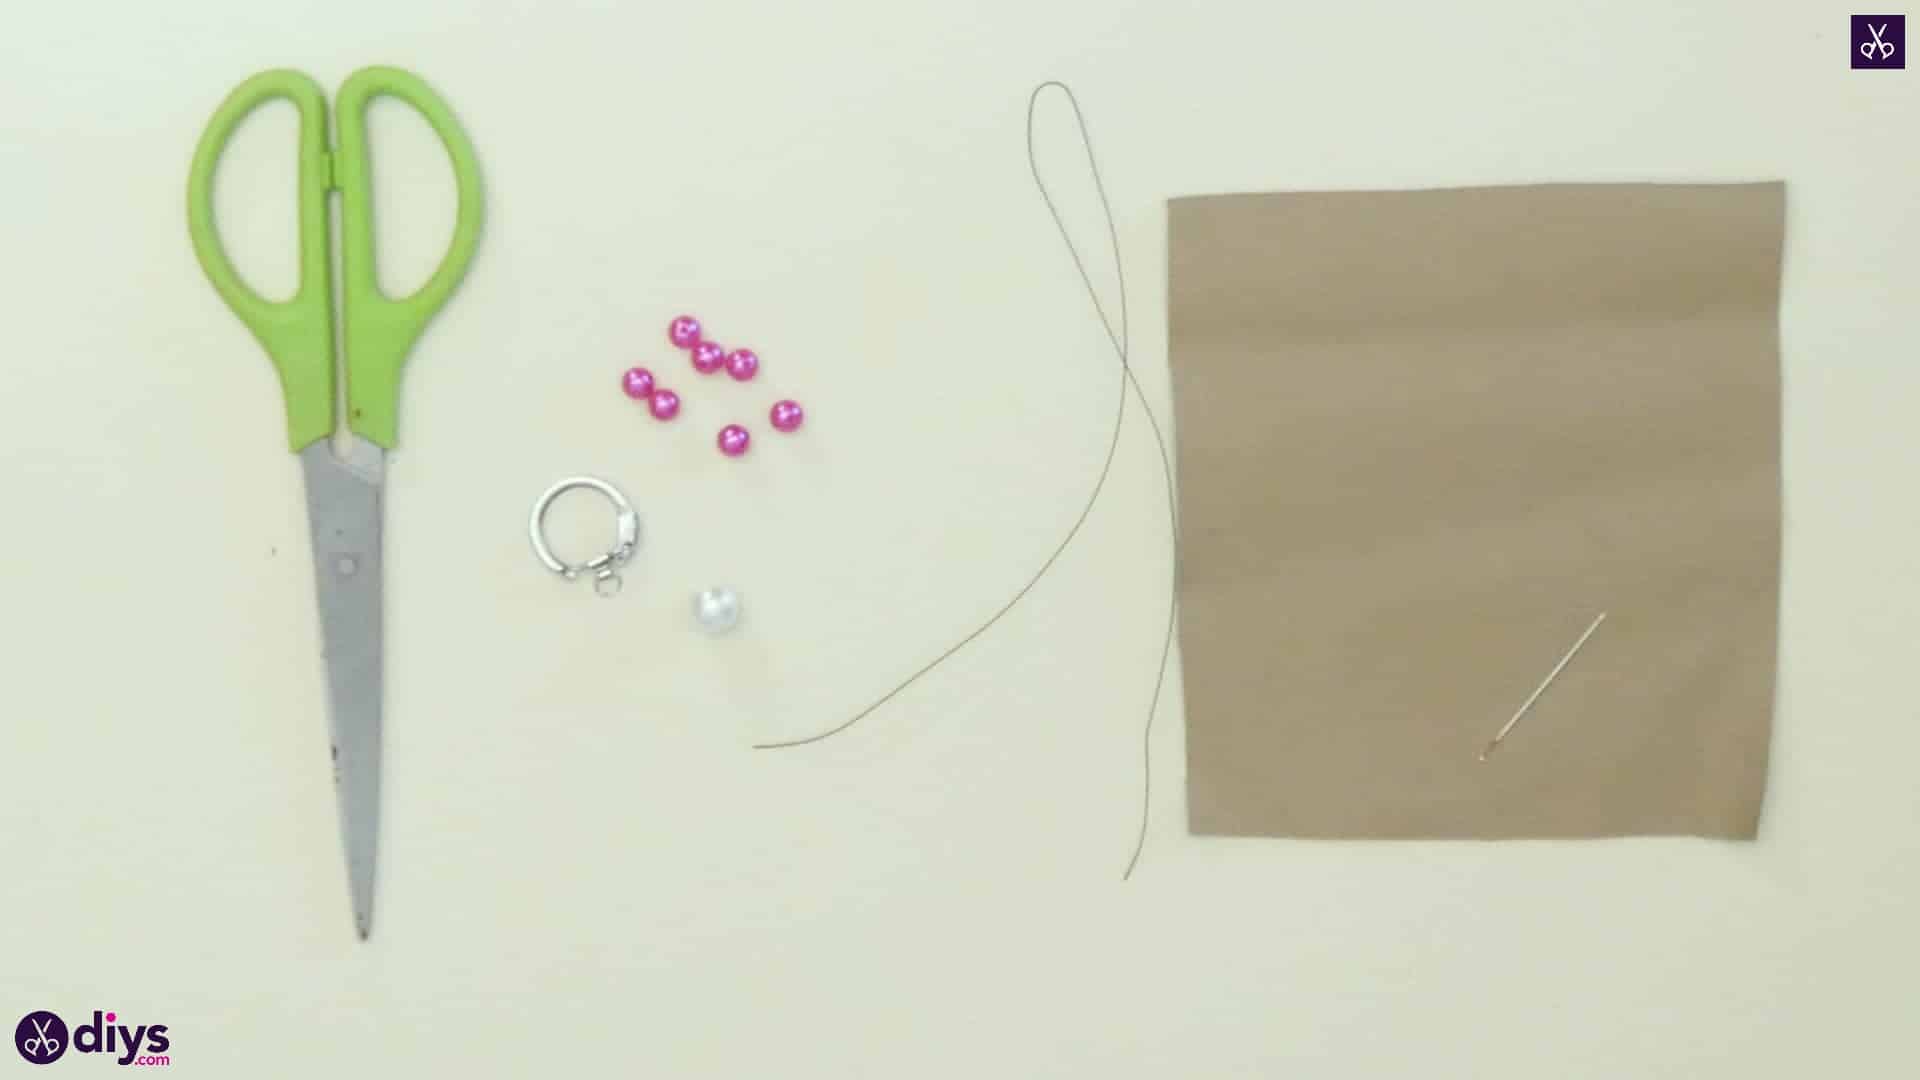
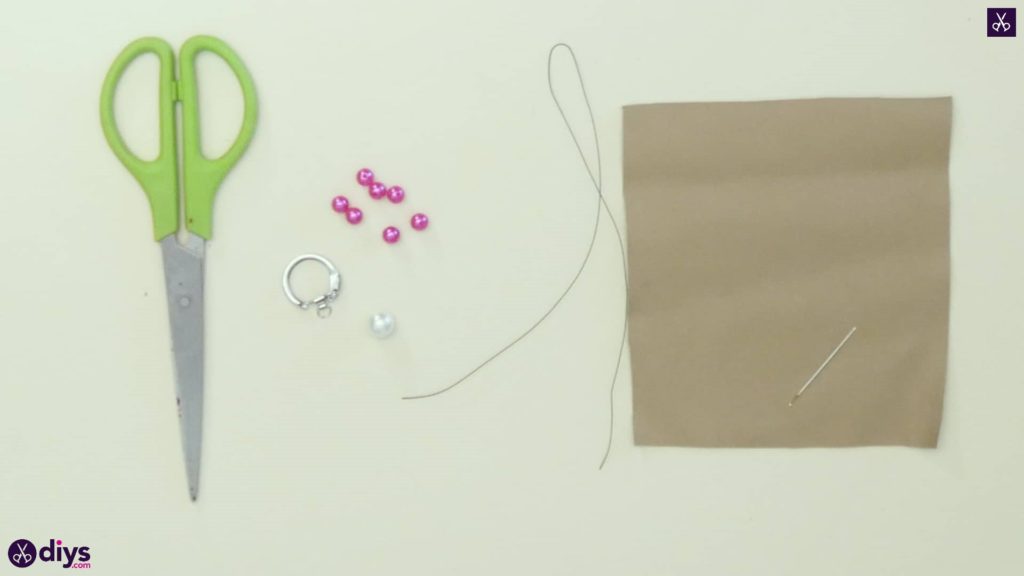
For this project, you’ll need:
- Brown leather
- Pearl beads (a slightly larger white pearl and and smaller pink pearls)
- Crafting wire
- Scissors
- A key ring
- A large sewing needle
Step 1: Gather your materials!
Get everything from your list together in front of you before you begin.
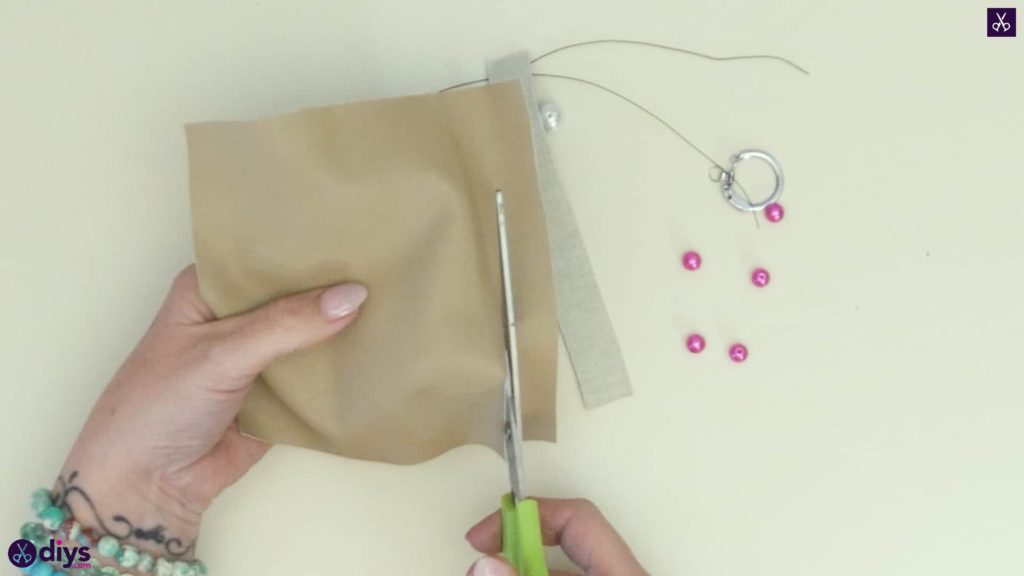
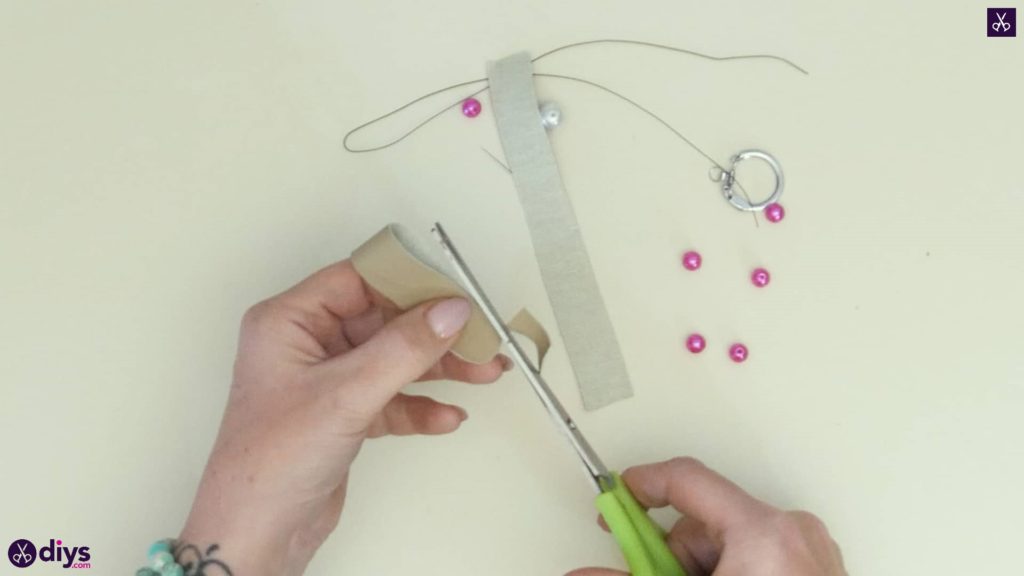
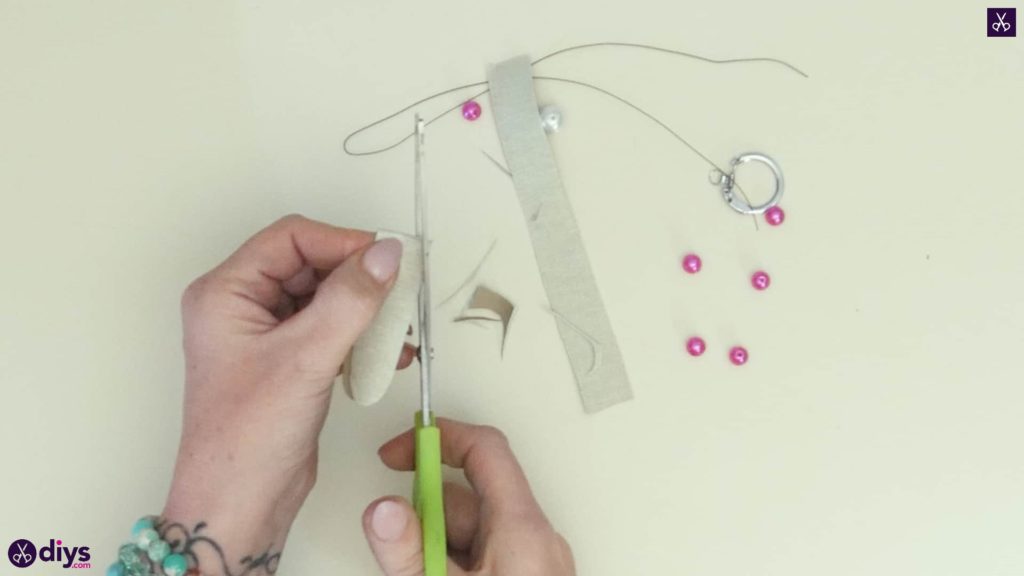
Step 2: cut your wings
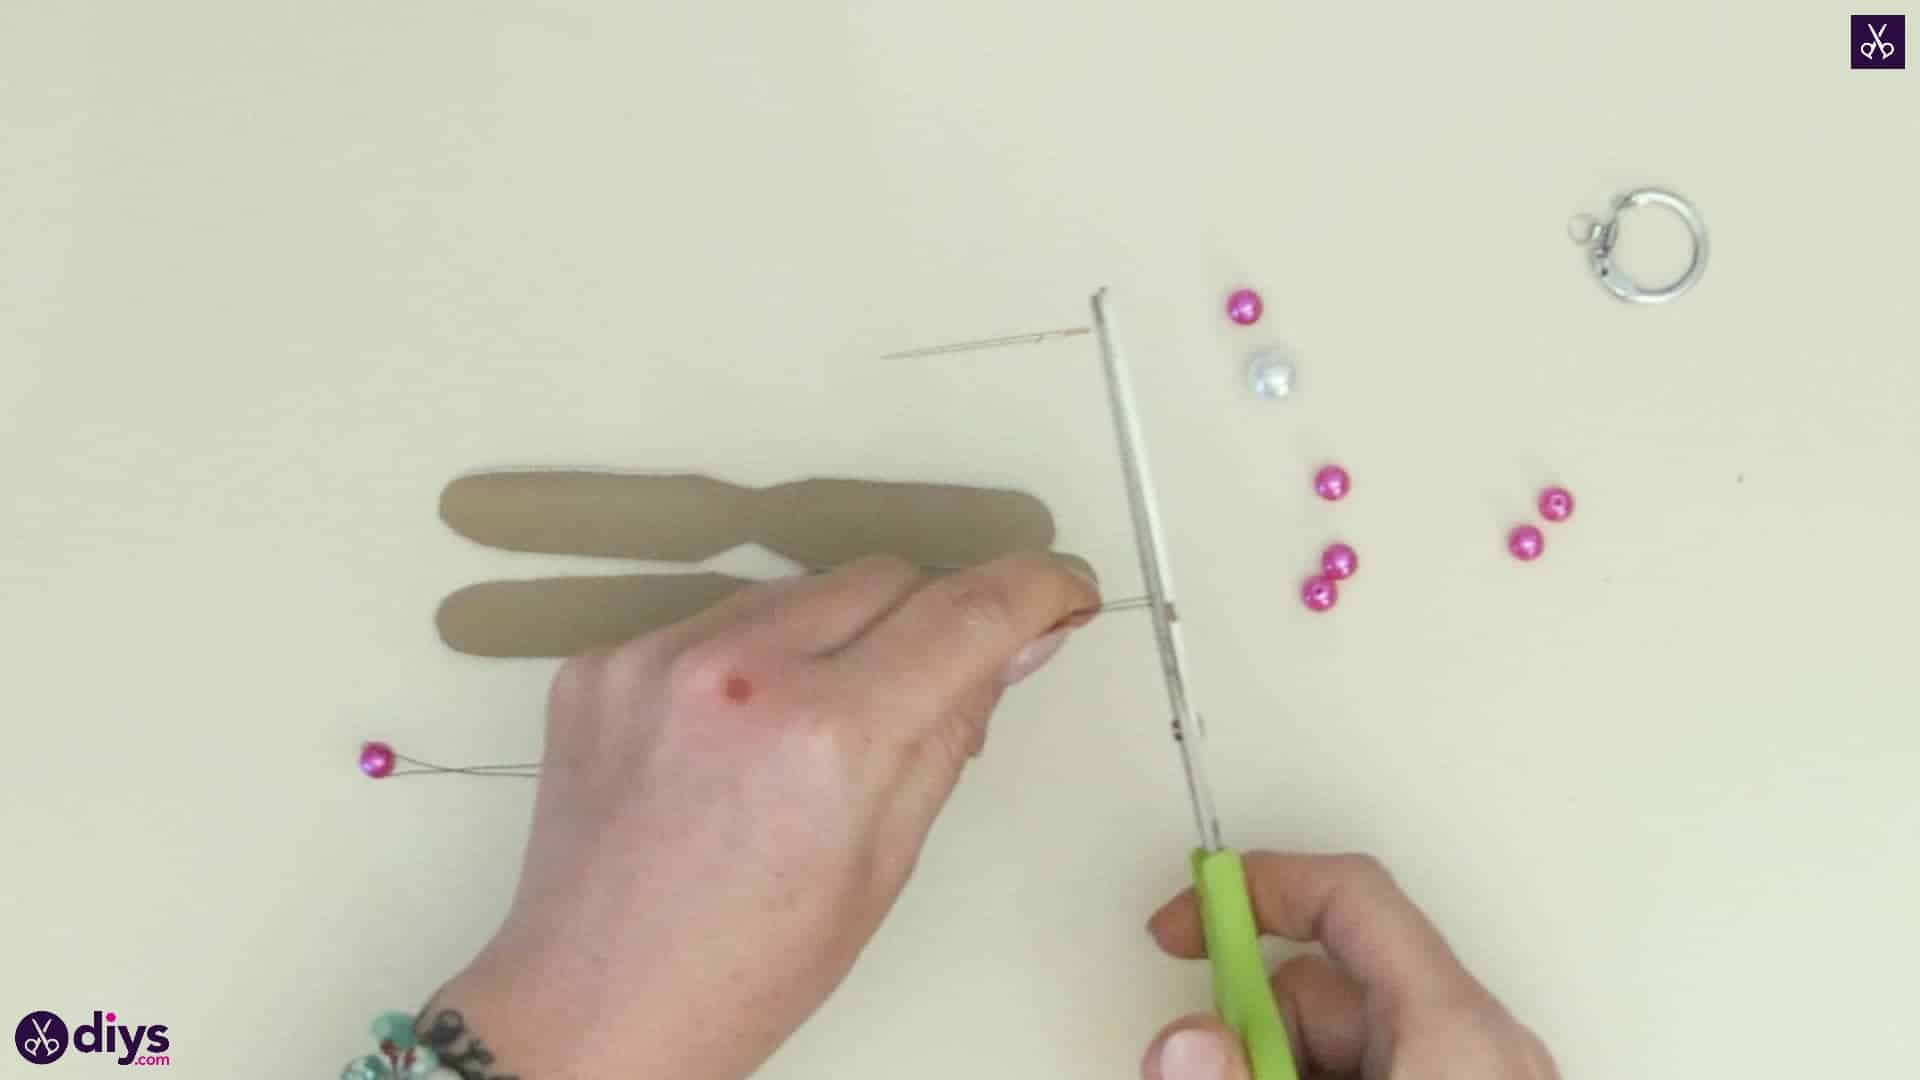
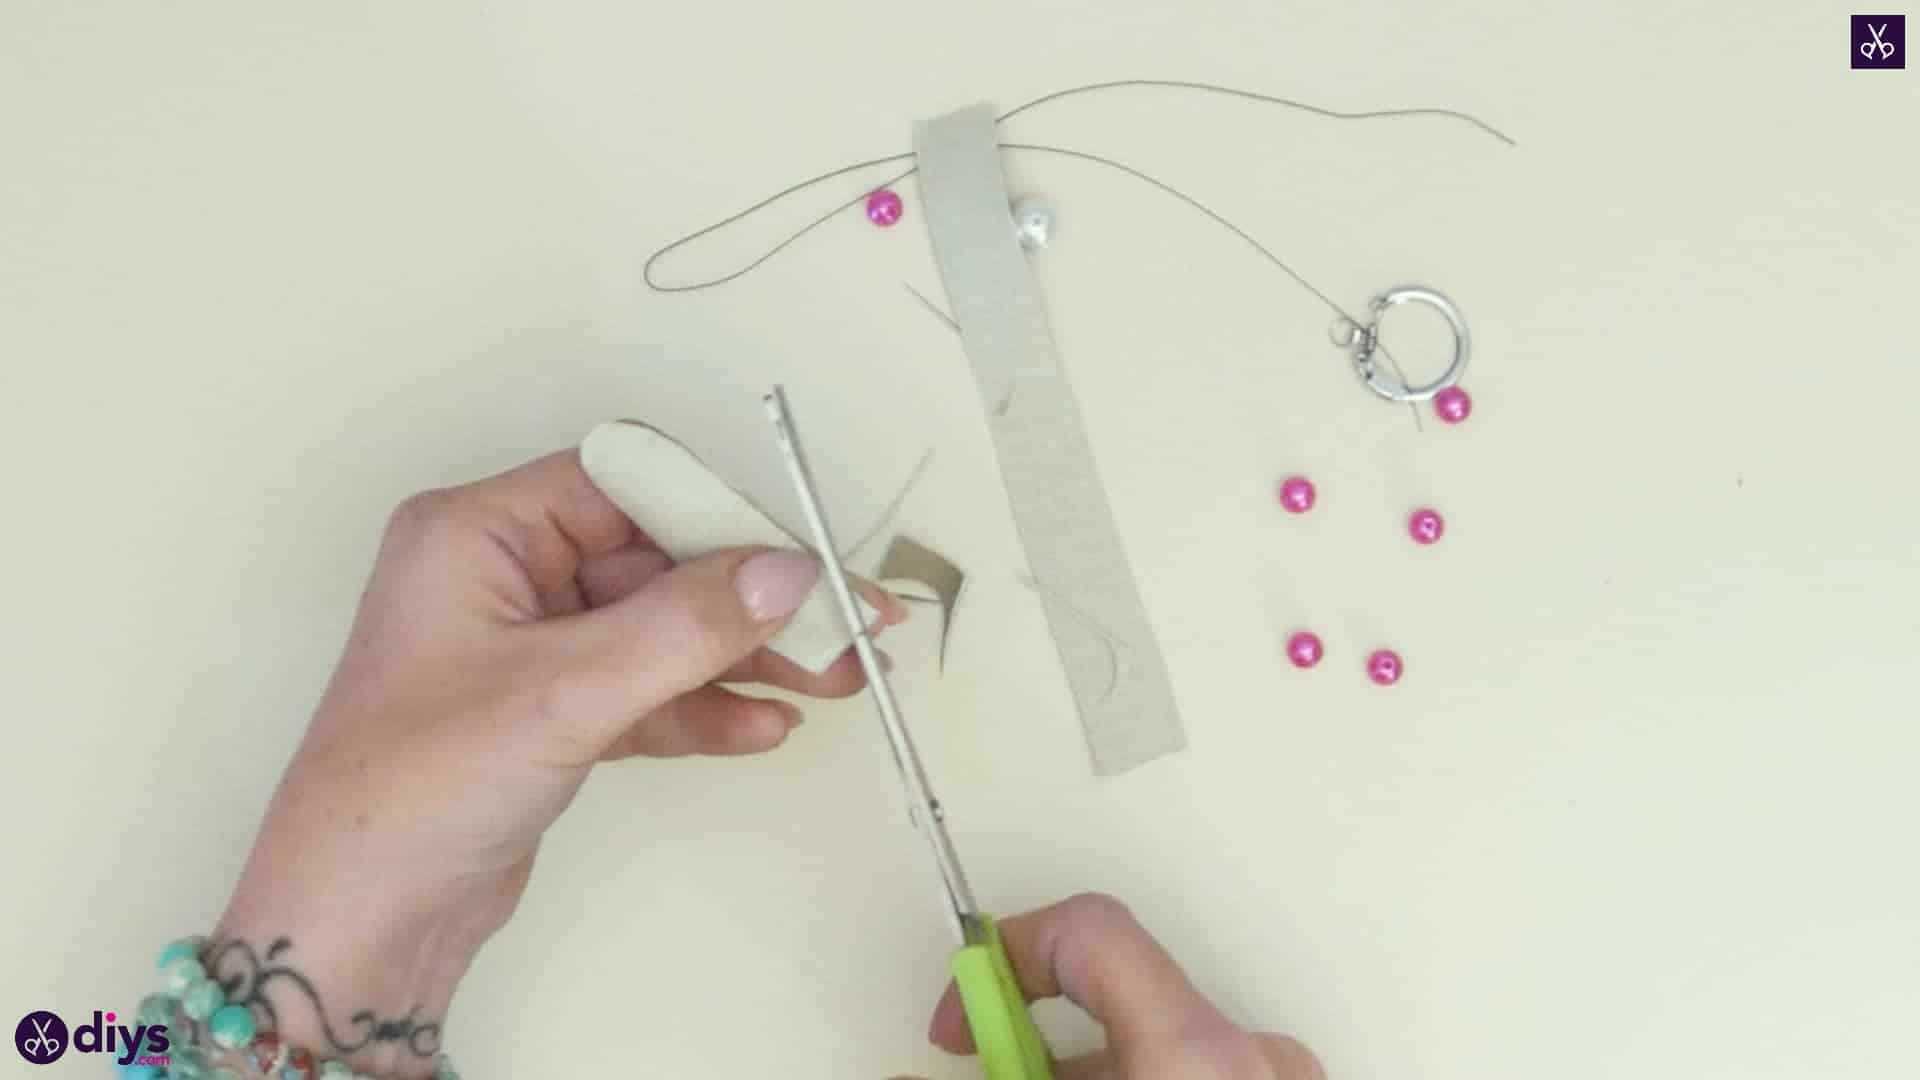
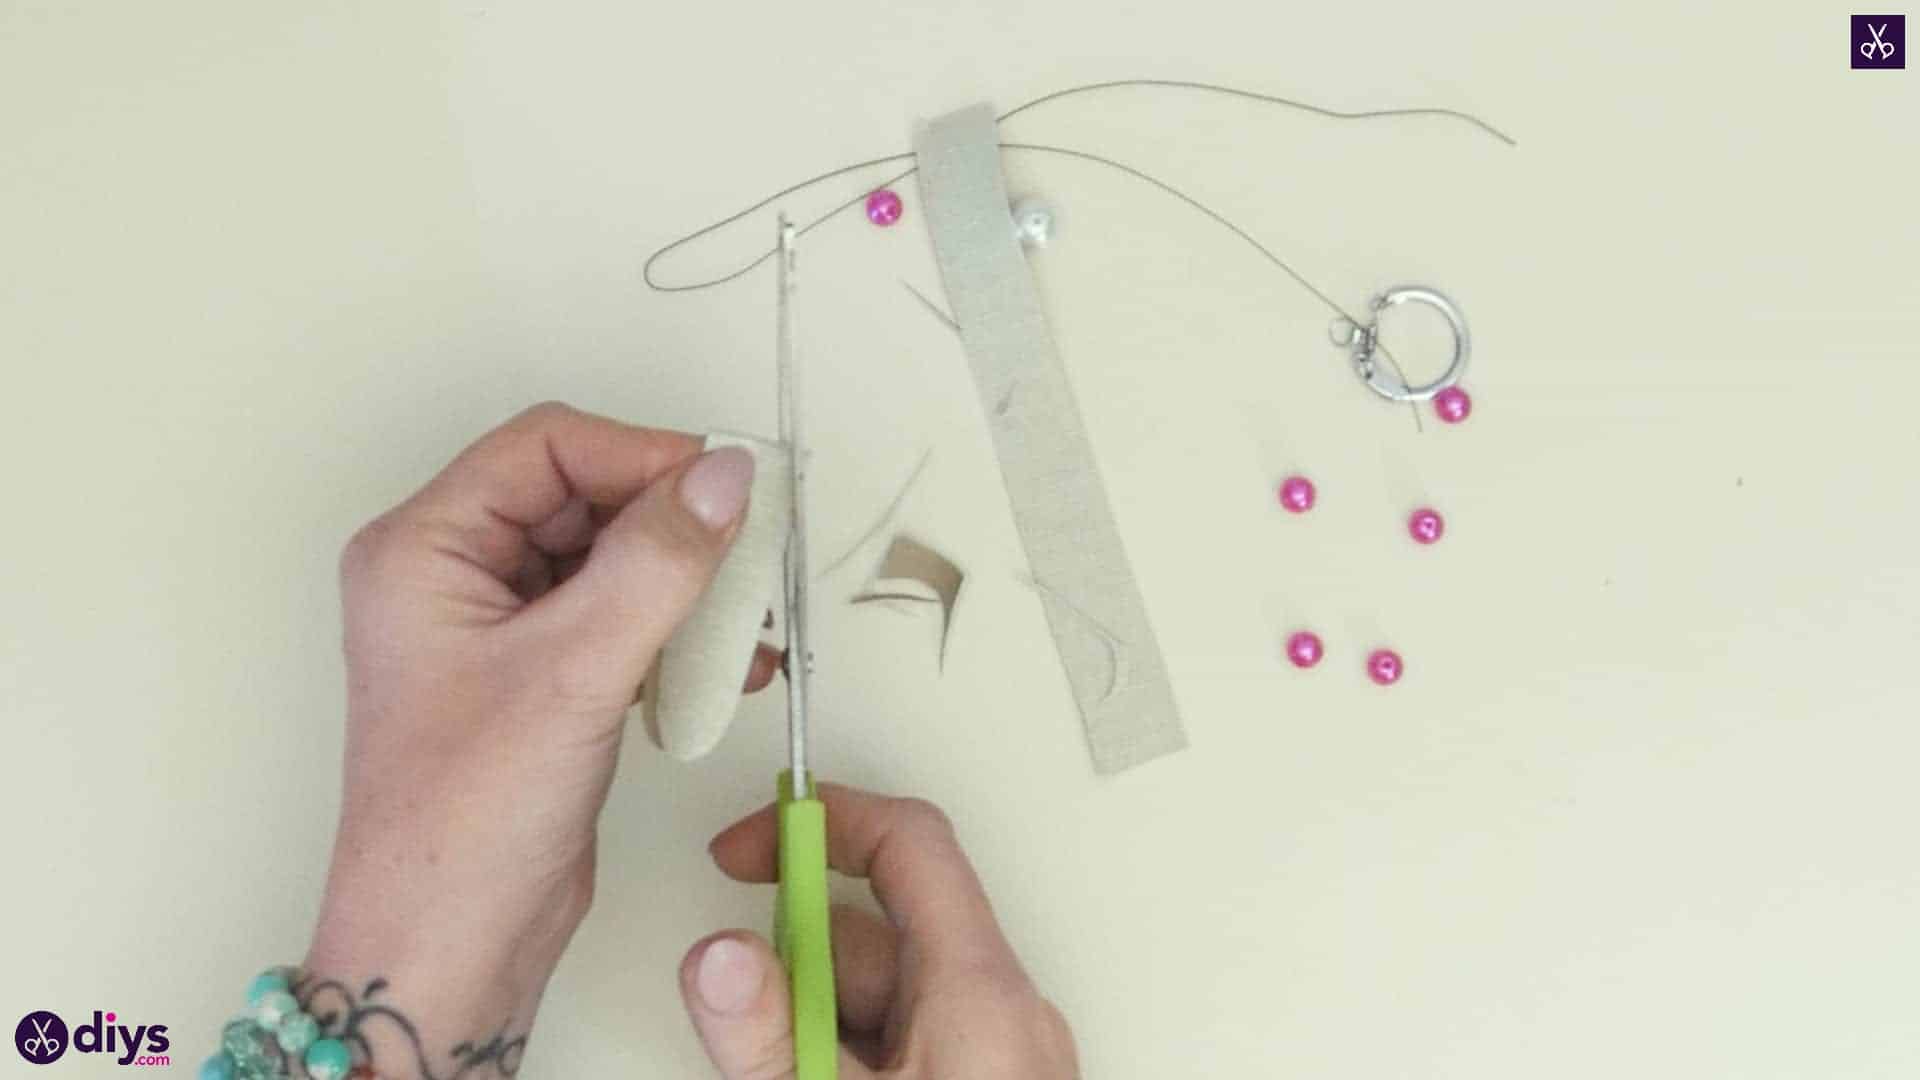
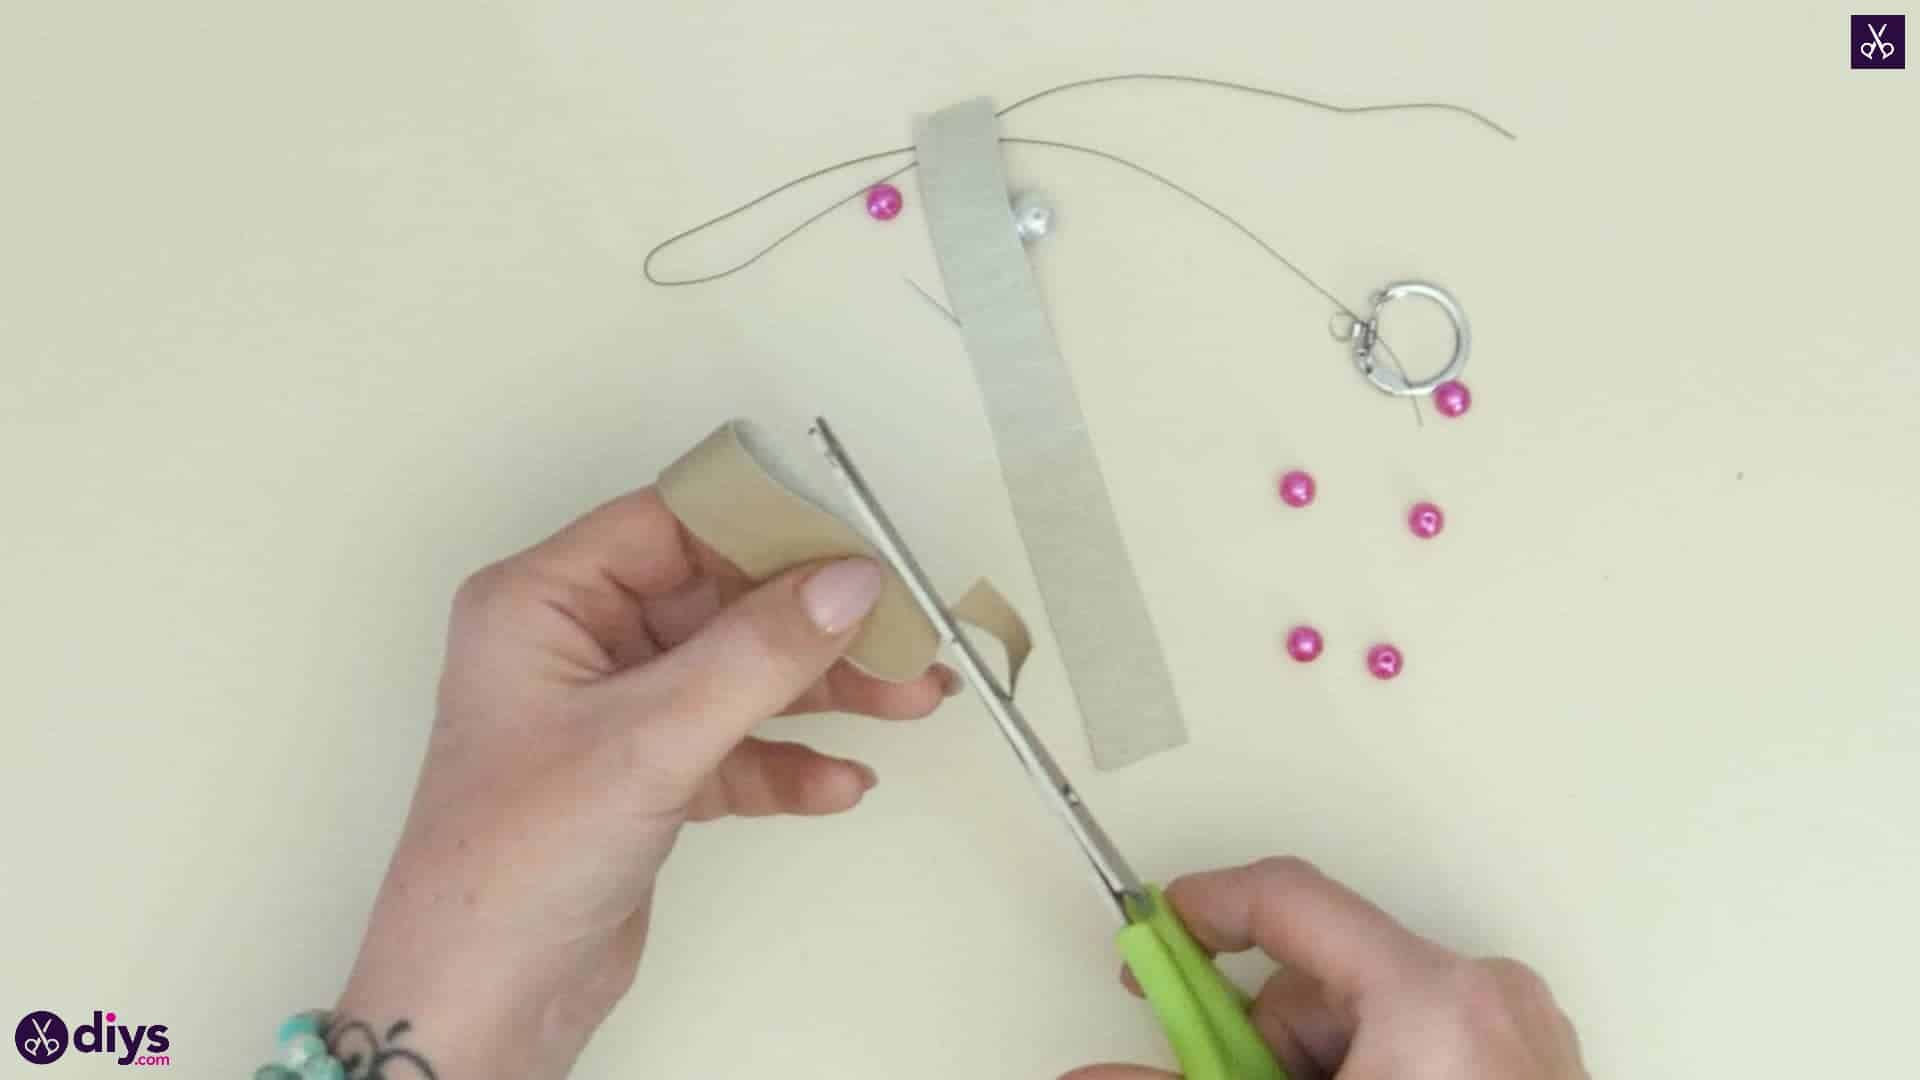
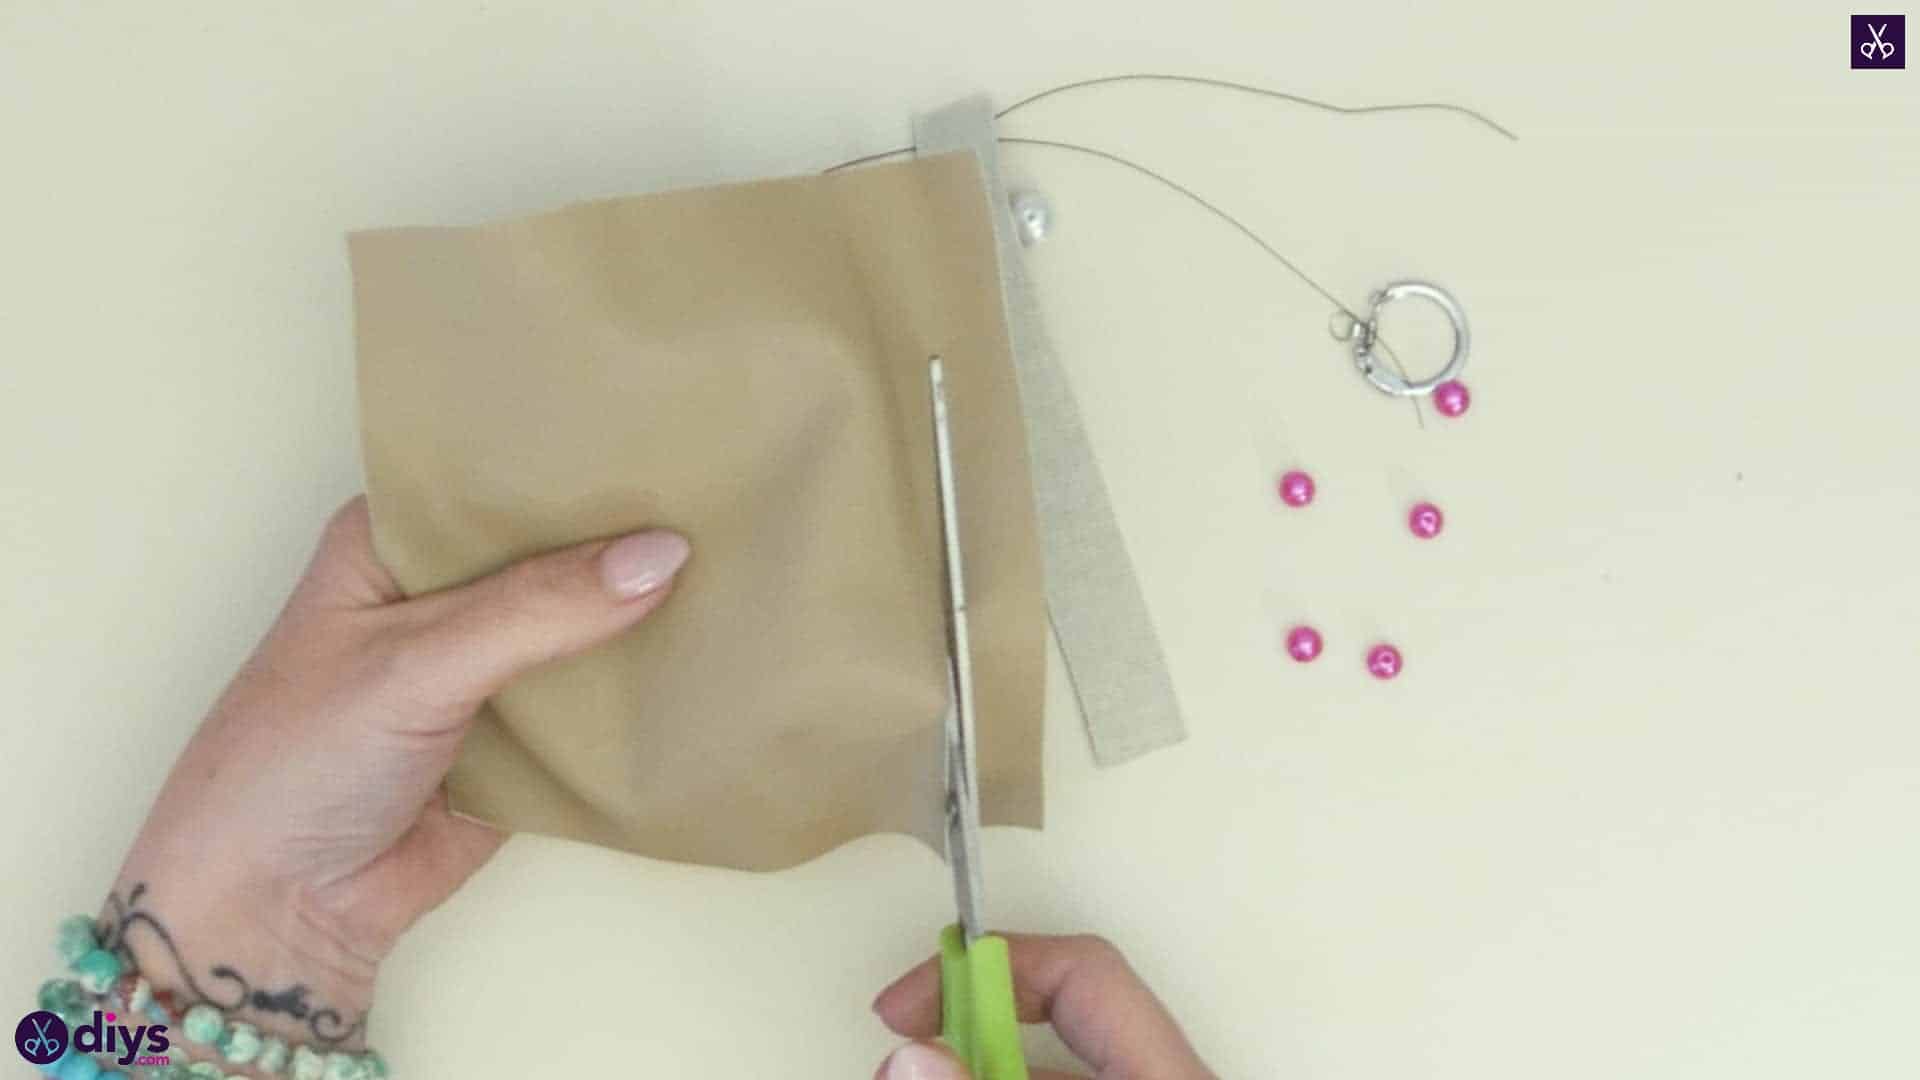
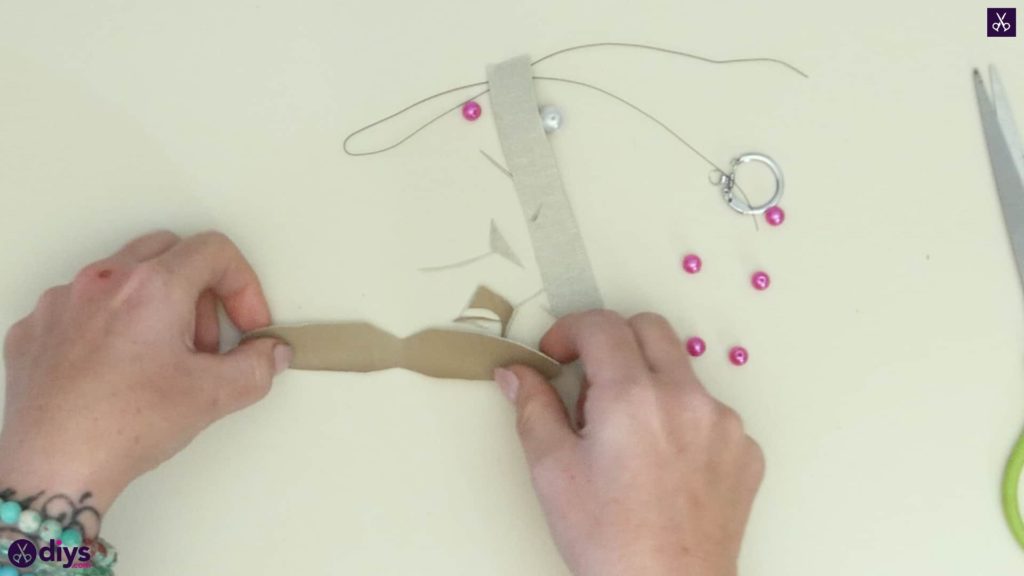
From one side of your leather sheet, cut two stripes that are about two inches long and half an inch wide each. Take your first one and fold it in half end to end so its shortest edges meet evenly and a crease is made across from that, at the strip’s halfway point. Use your scissors to round off the corners on each side of the lined up loose ends, making sure that you’re cutting through both layers at once. Then turn your piece to the creased side and, cutting through both folded layers again, angle your scissors to diagonally trim off the corners there and make a central notch on each side that you’ll see when you unfold the piece. This will be your wing shape! Repeat this entire process with the second leather strip. Set both of these aside for a moment.

Step 3: measure your wire
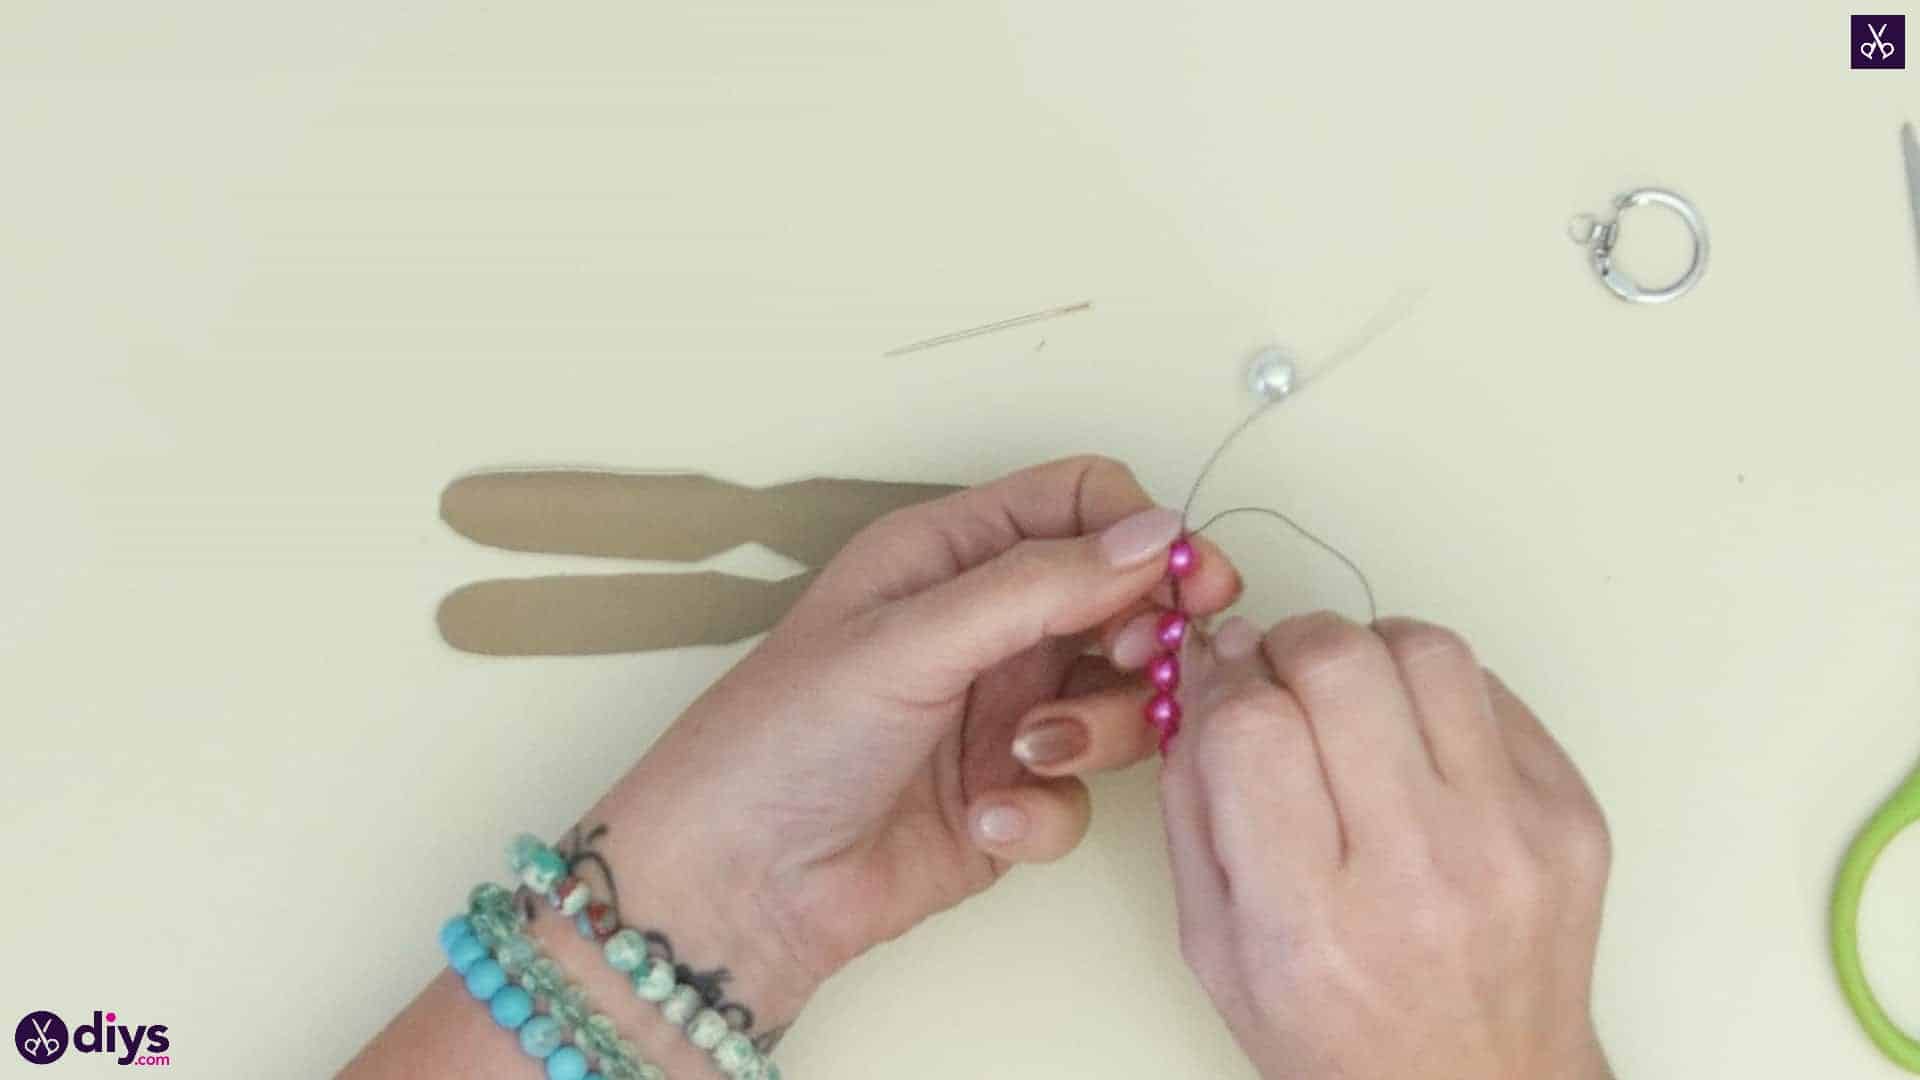
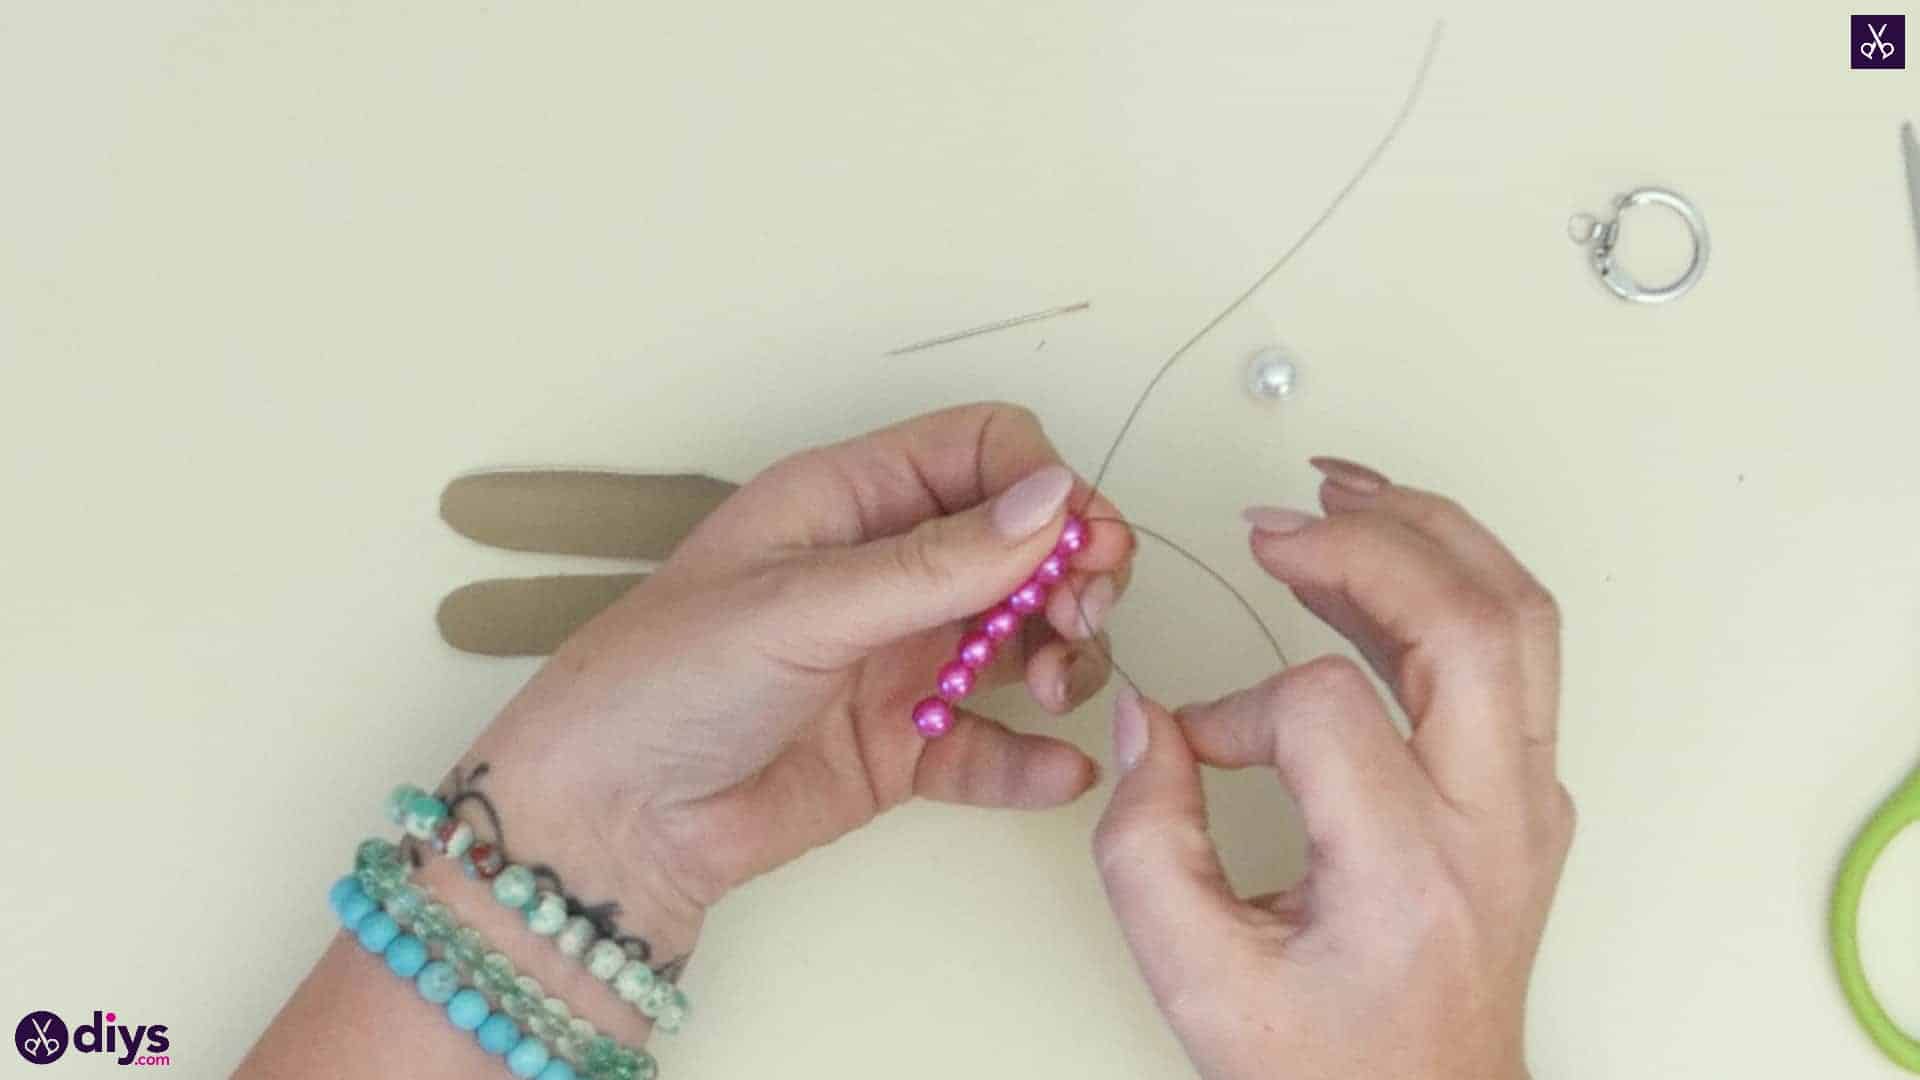
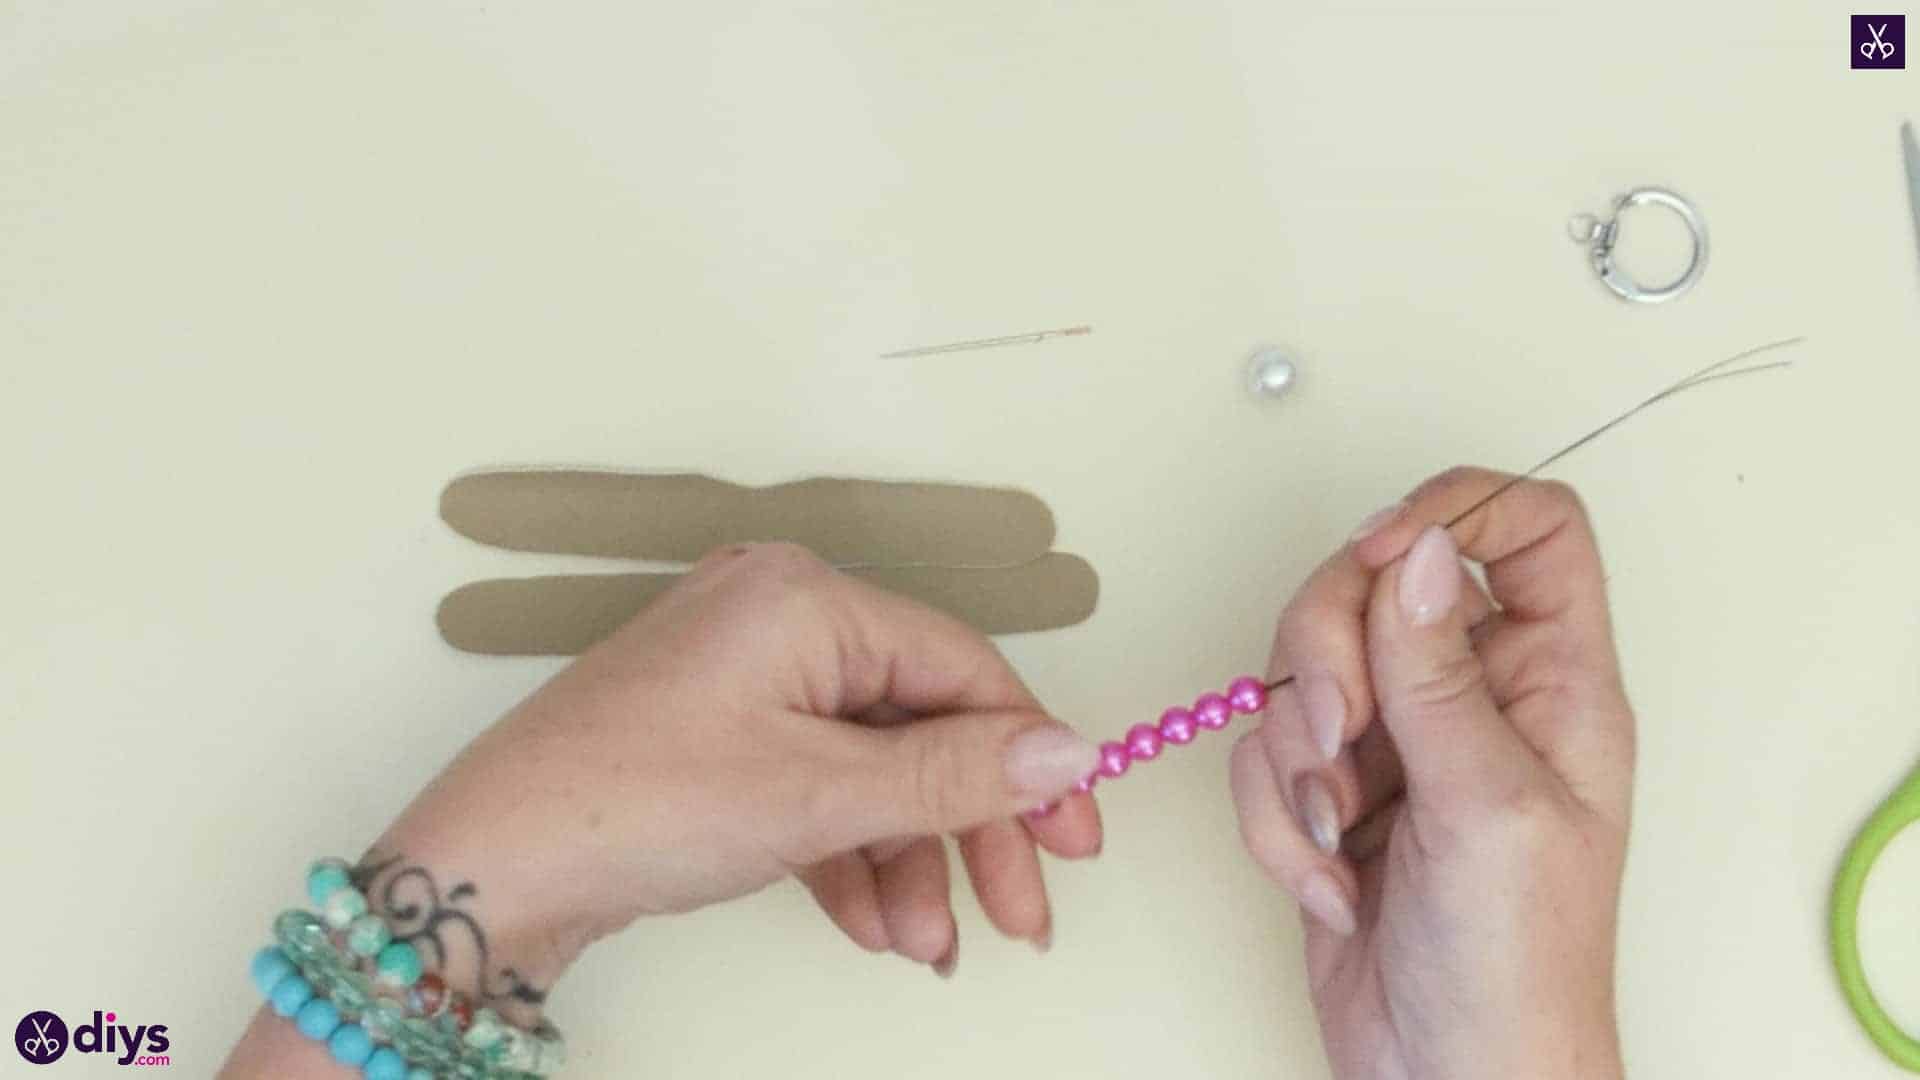
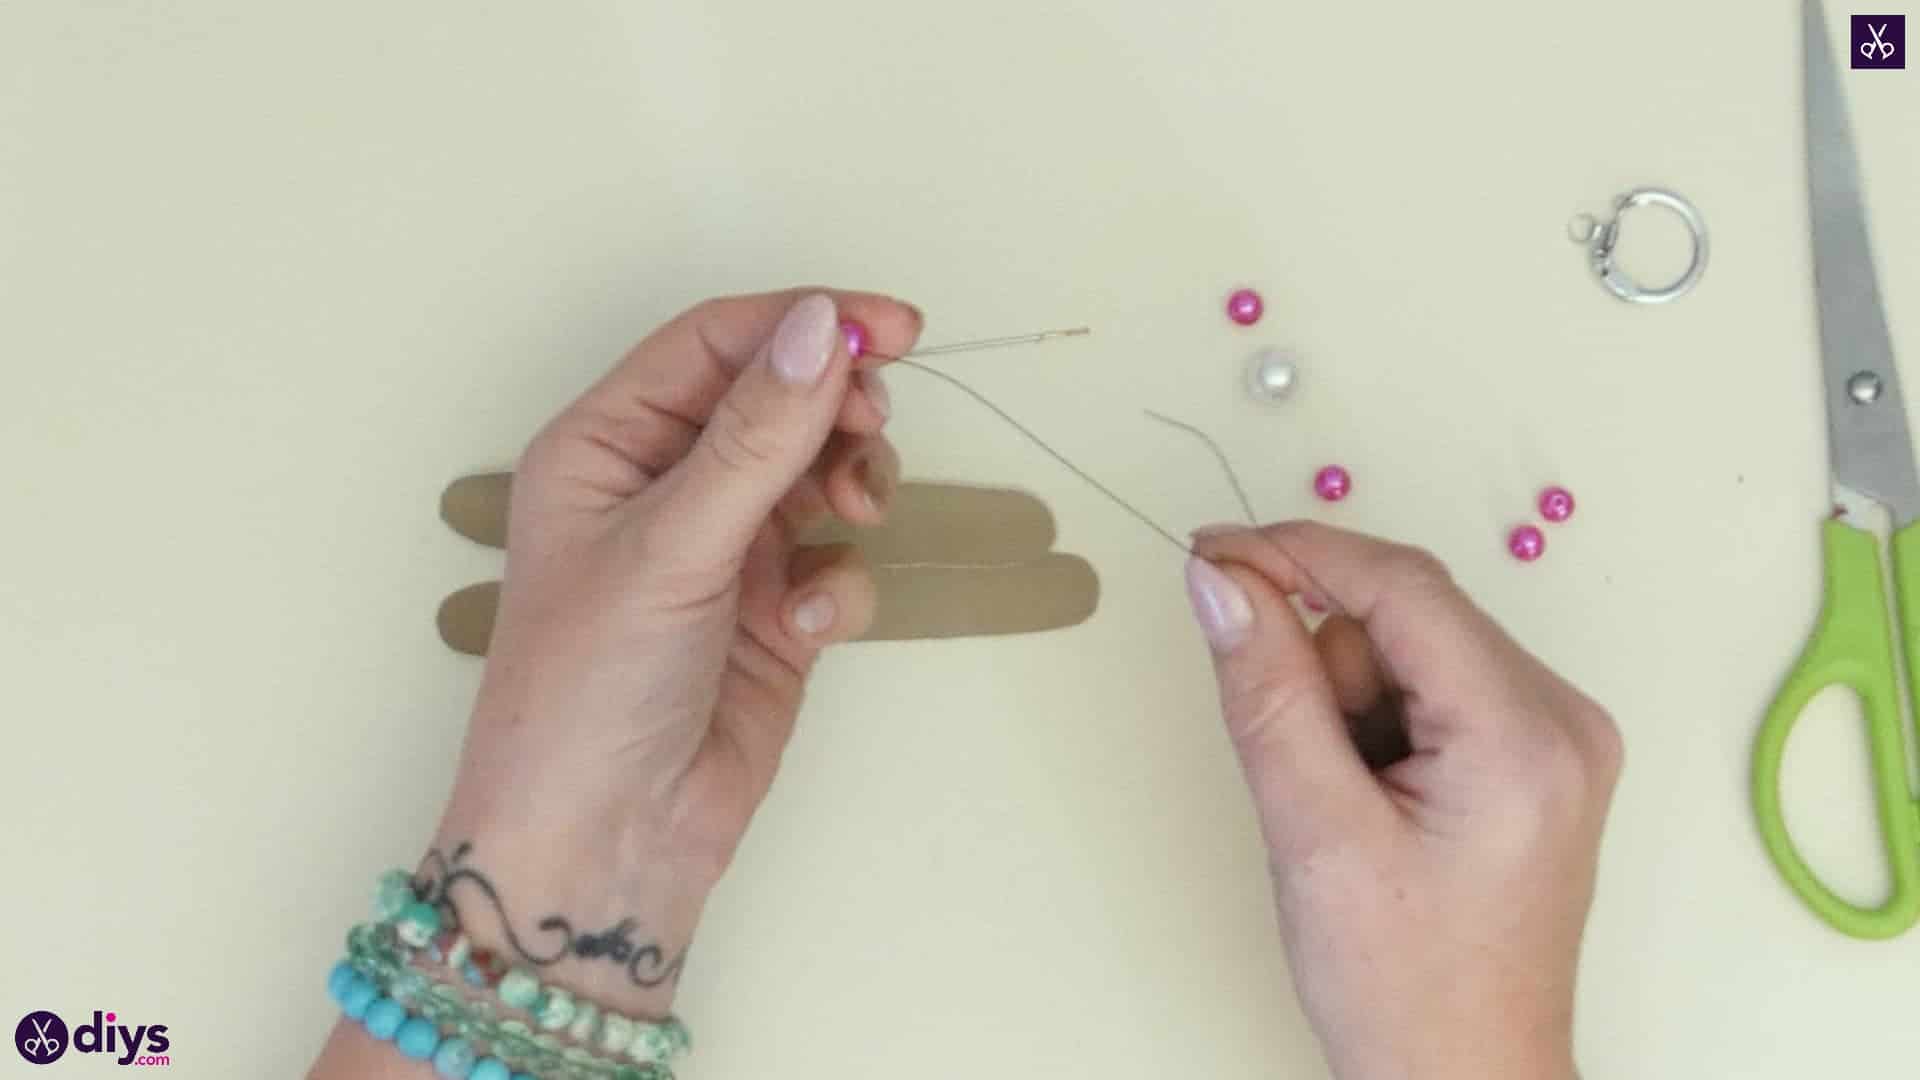
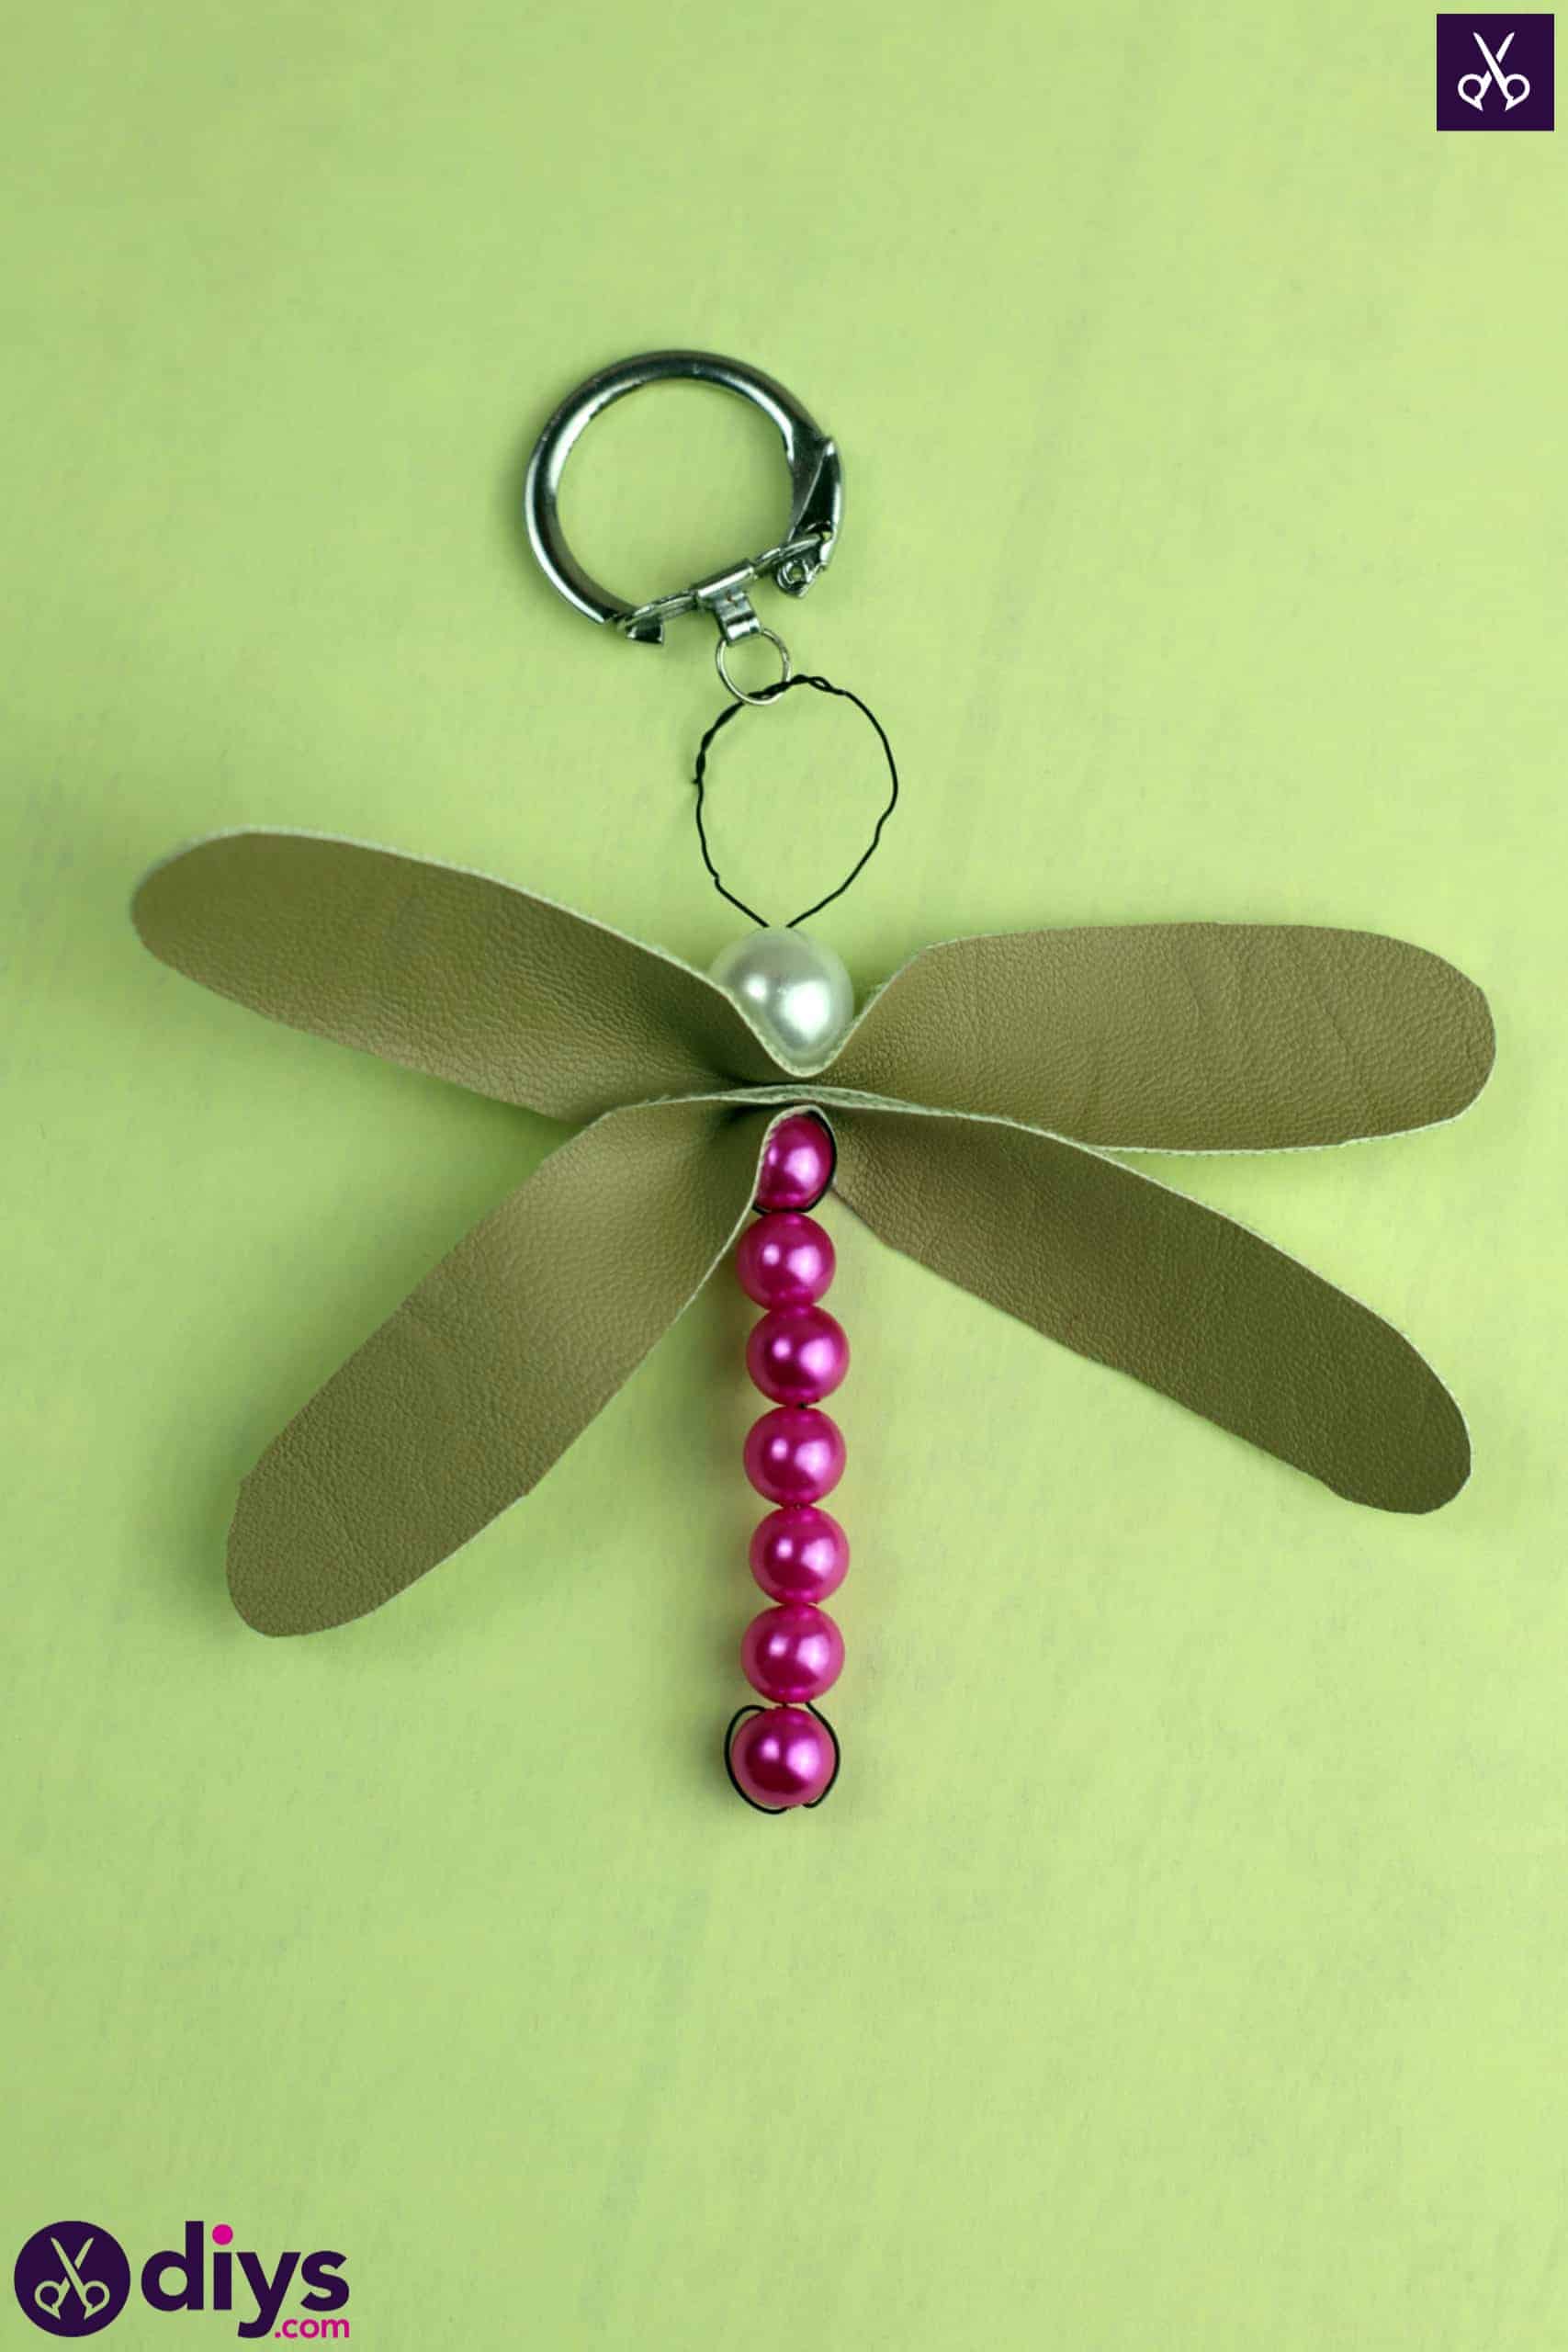
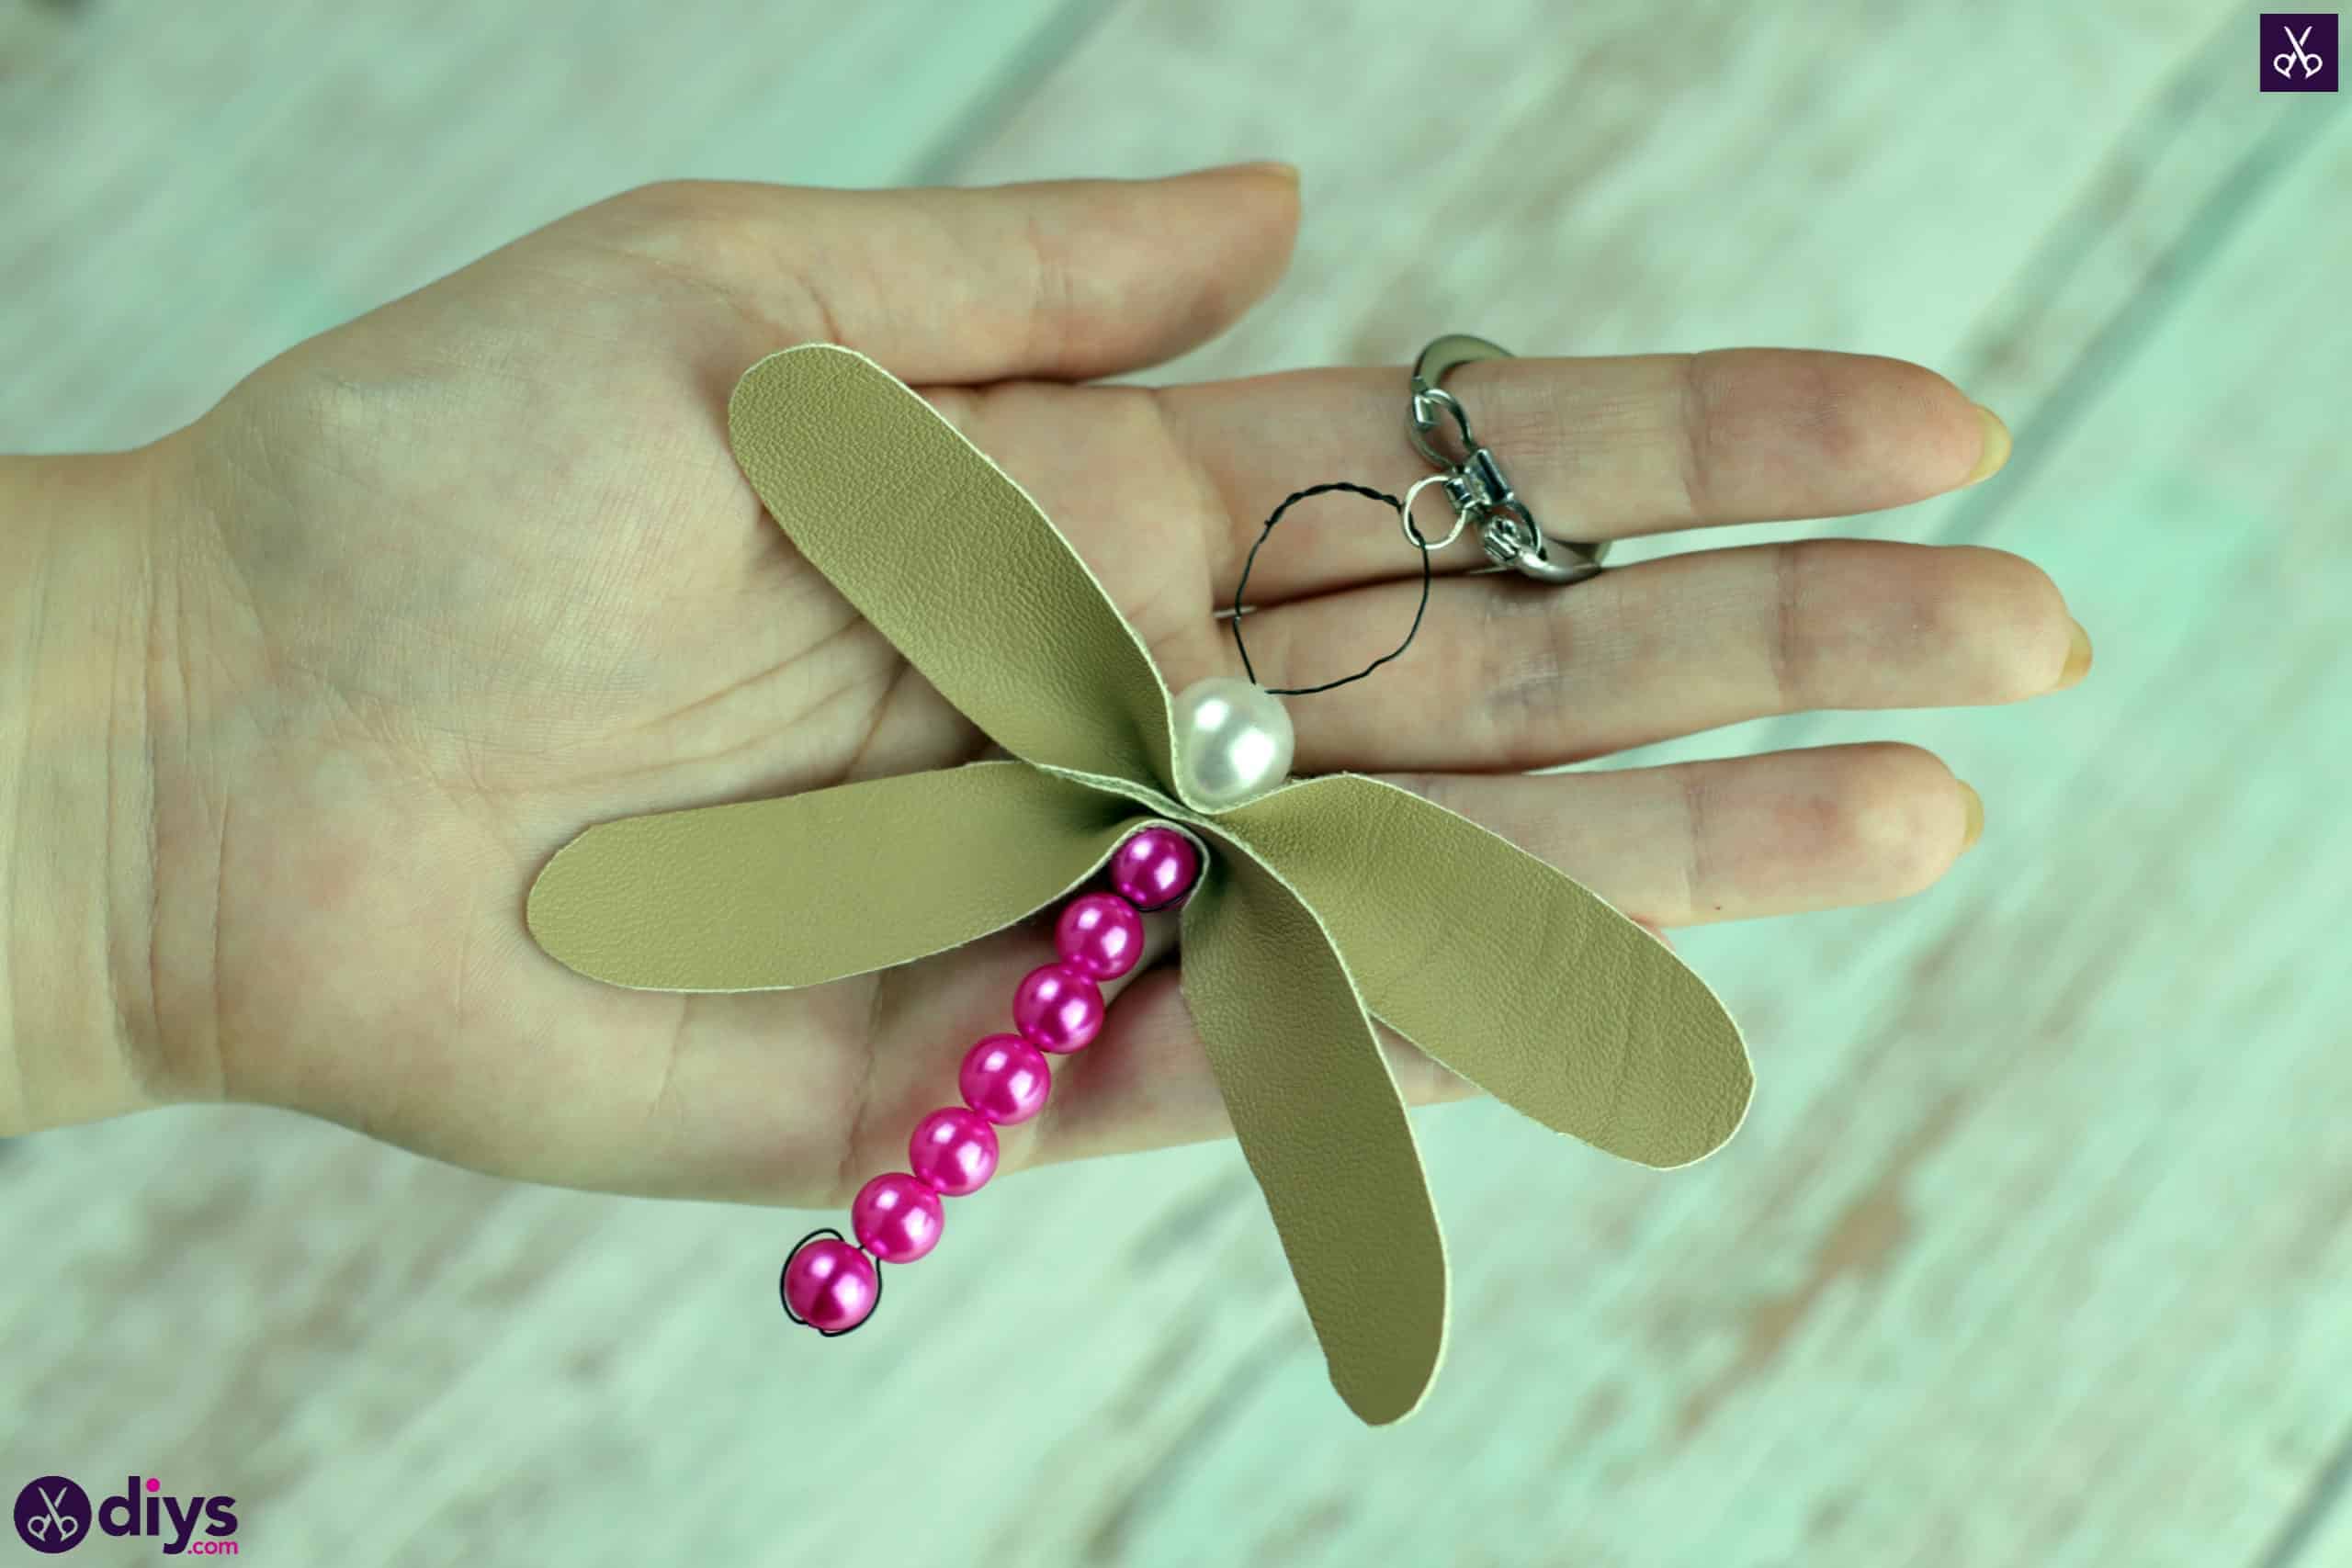
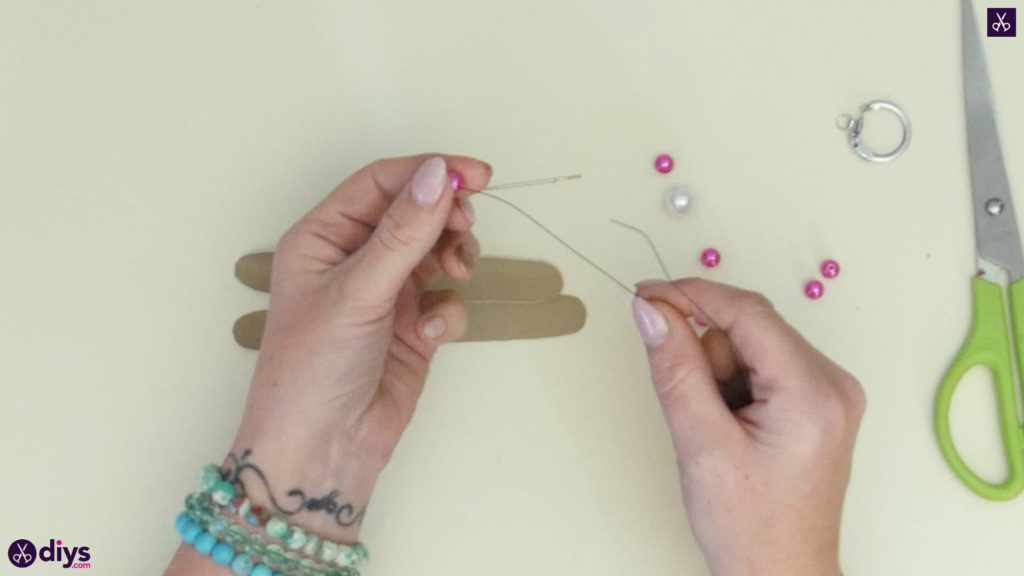
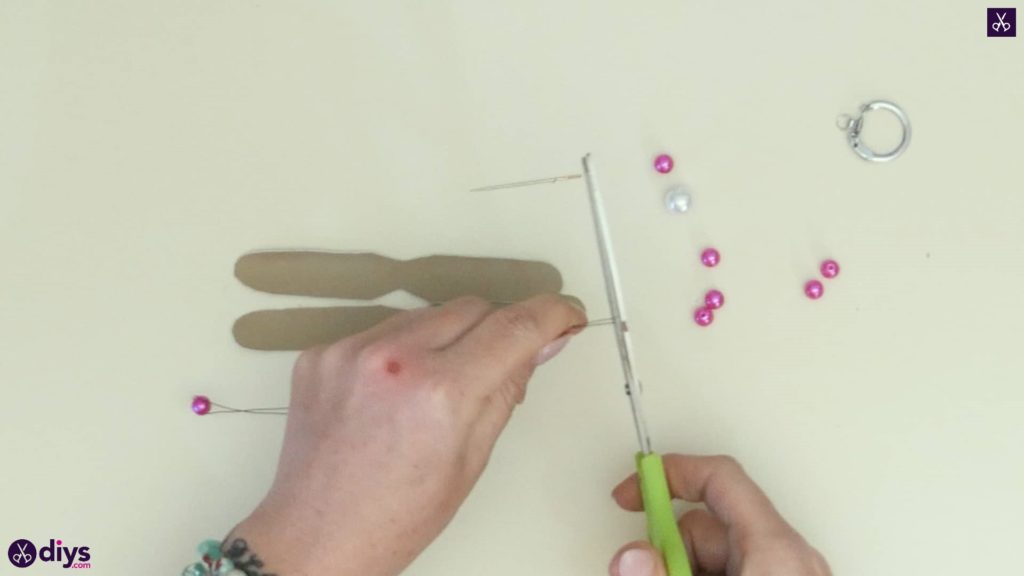
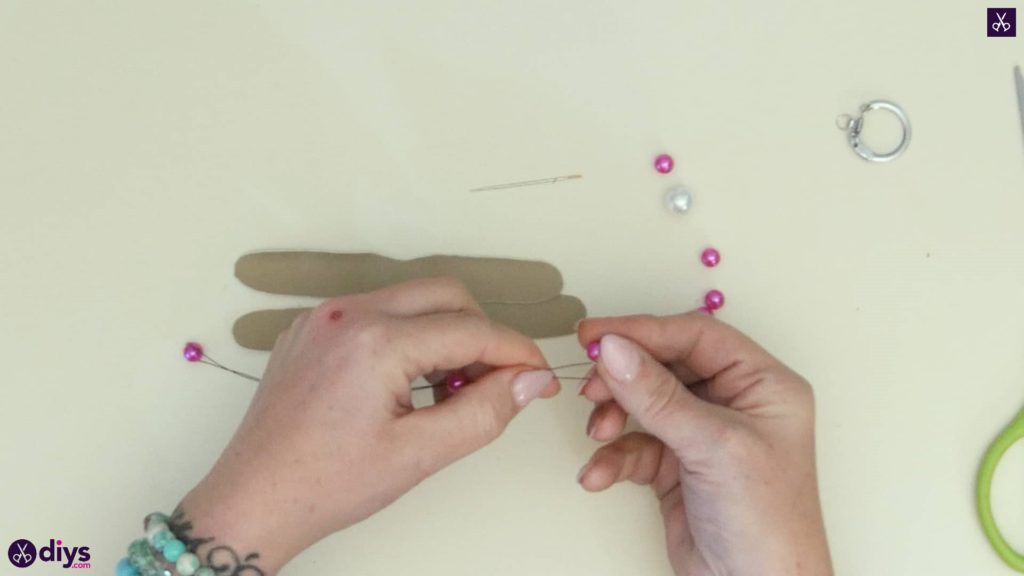
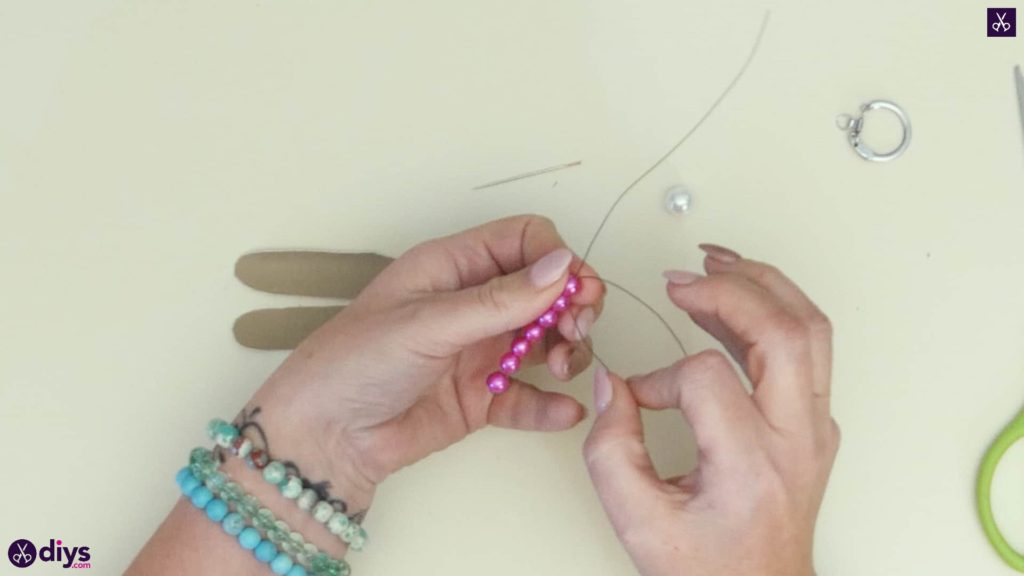
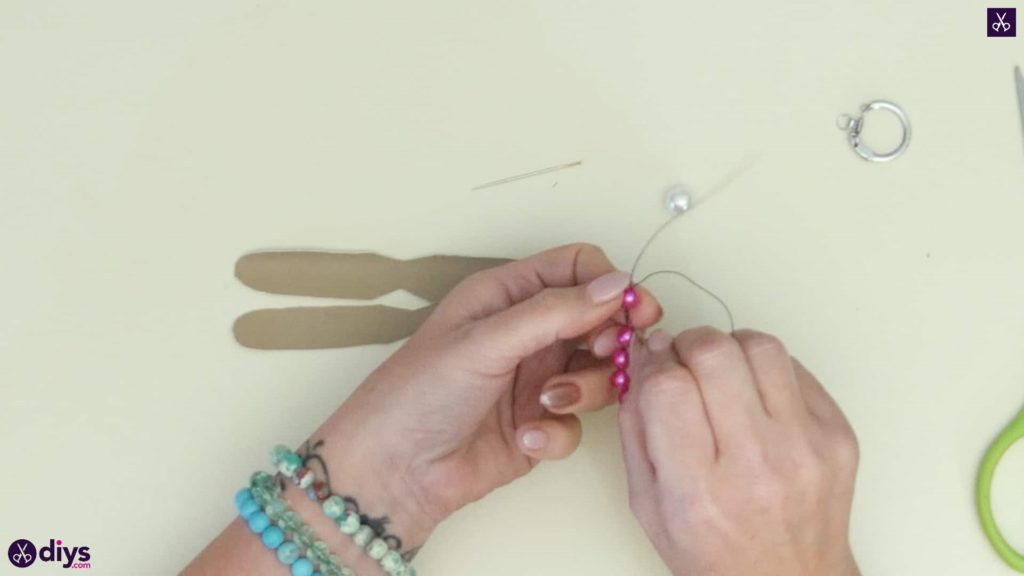
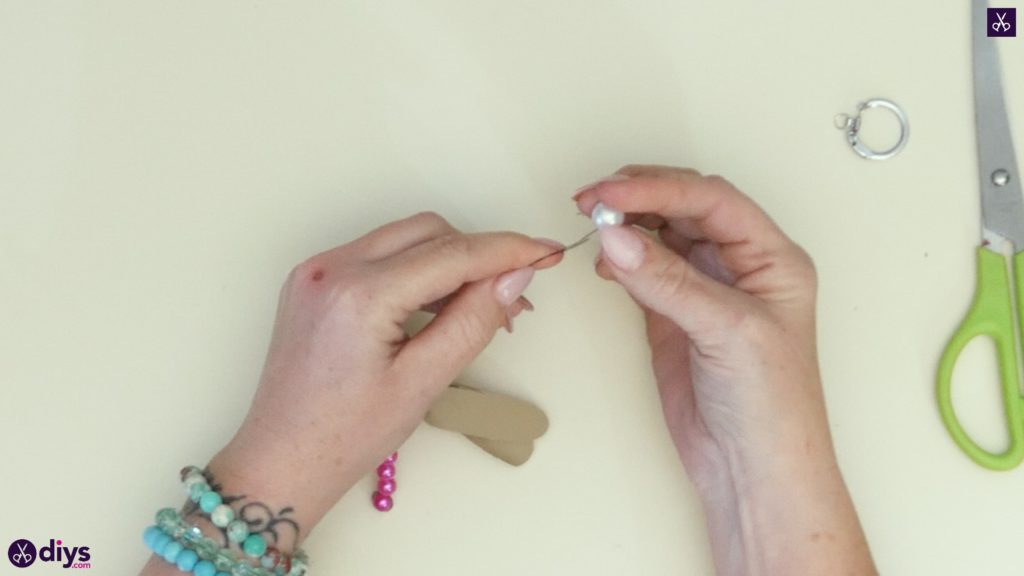
Cut a piece of thin crafting wire that’s about ten inches long and fold it in half end to end so the tips are even with each other and there’s a crease at the other end. Take your first pink pearl bead and put one end (on either side, it doesn’t matter which) through the hole in the centre, pulling the bead all the way down to the bottom to sit in the crease. Now, take the end of the other side of the bent wire and bring it towards your bead, curving the end downwards and bringing it back up under the bead until you can pass it through the hole in the bottom and out the top. Then pull the wire upwards again, back towards the other tip at the top. This makes the wire wrap around the bead and anchors it in place. Use your scissors to trim the ends so they’re even again. Now, pinch those wire ends together and put both of them through the hole in the centre of another pink pearl bead and slide it all the way down until it sits on top of the first bead that you wrapped and anchored in place. String another bead down on top of that second bead over both wire ends like you did before. Repeat this process until you’ve got a total of seven beads strong onto your wire; your anchor bead plus six more. Now, you’ll wrap the top bead using the same process as you did on the very bottom bead, anchoring it (and therefore all the beads below it and between bottom and top beads) in place.


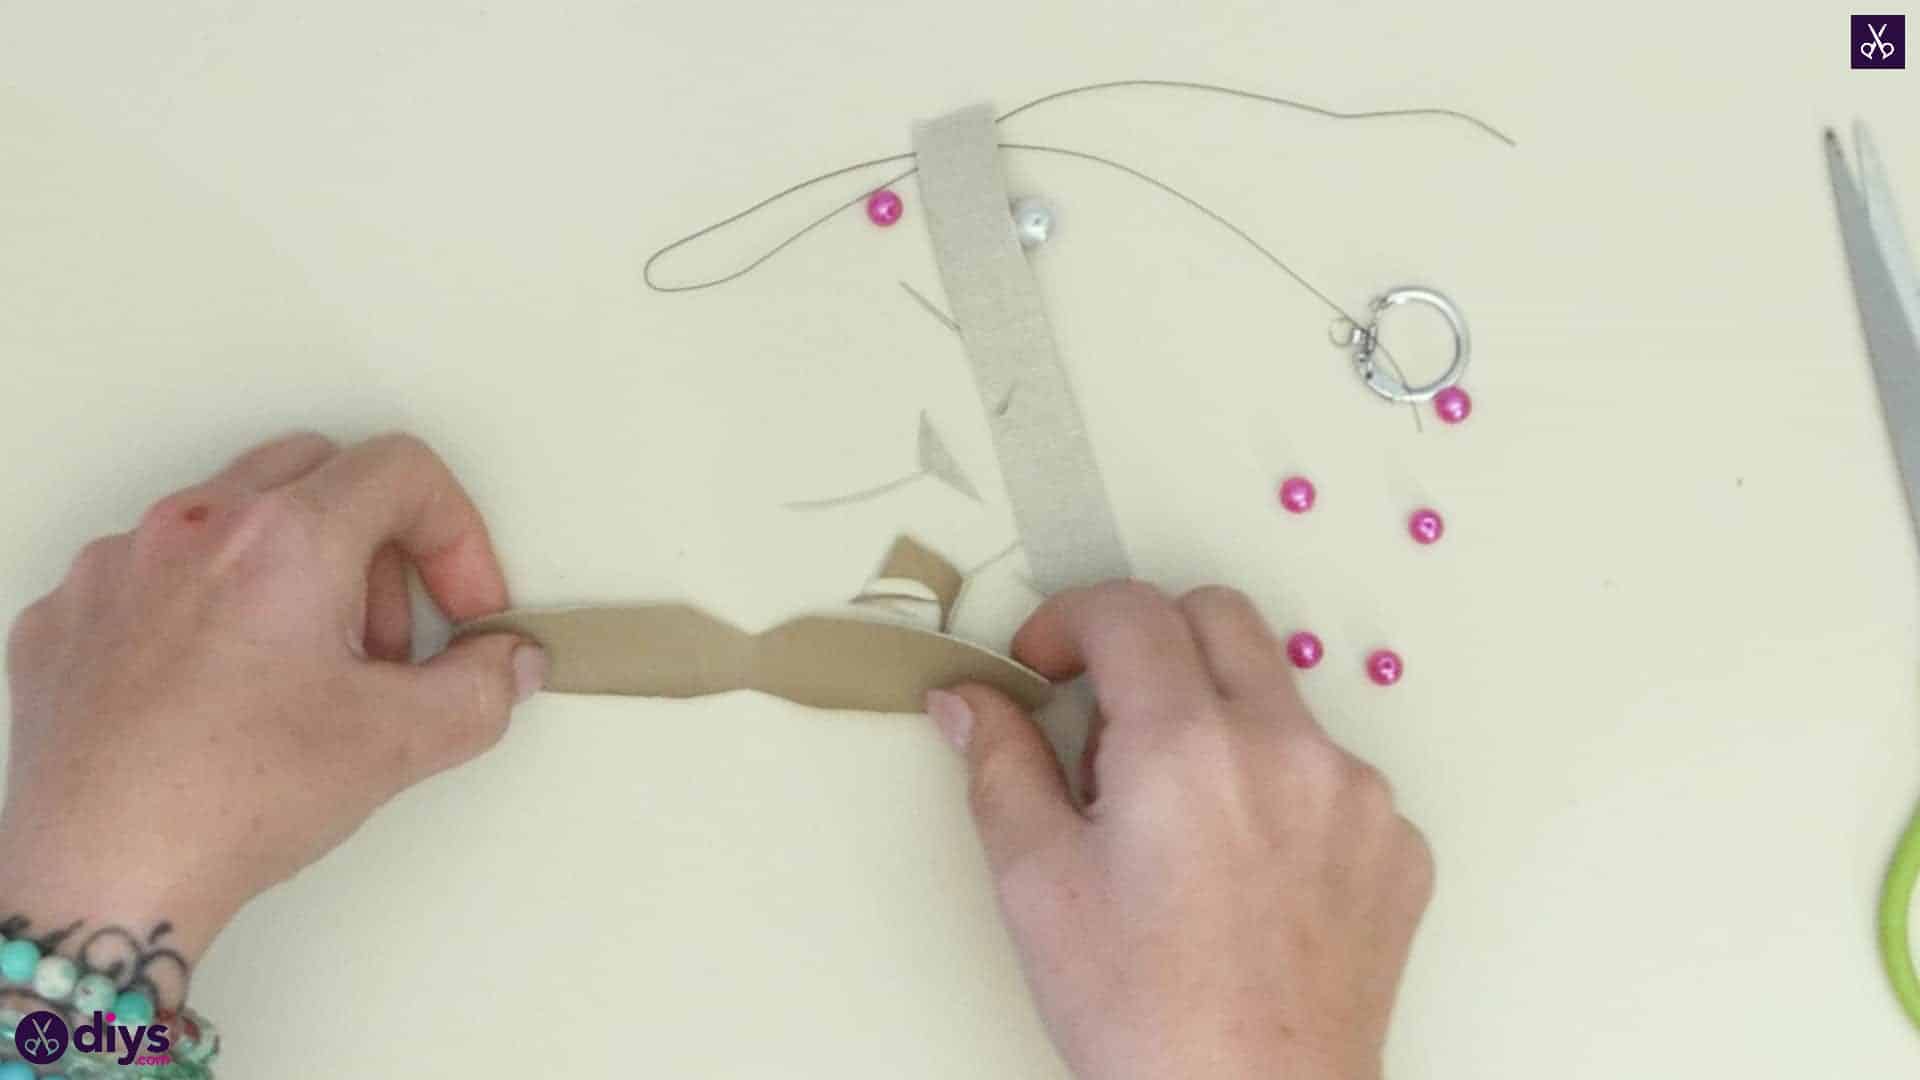
Step 4: start assembling
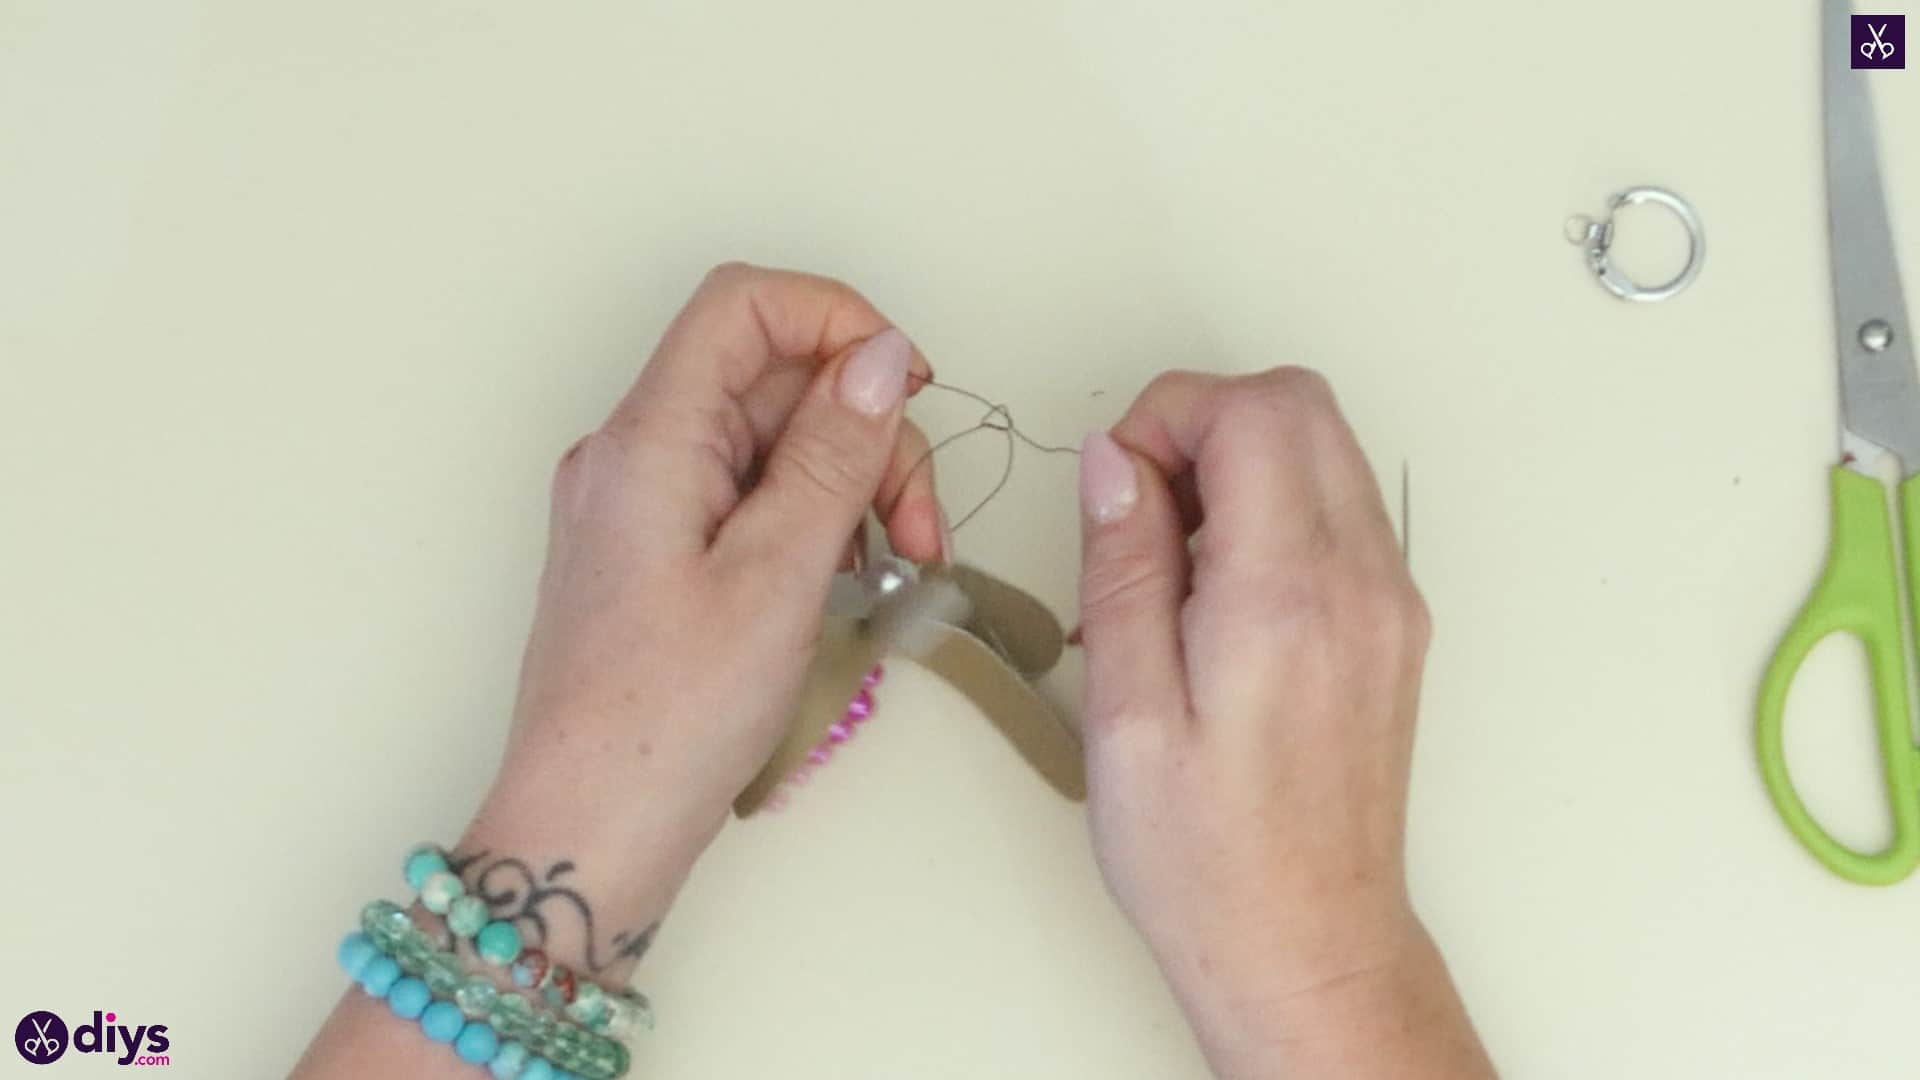
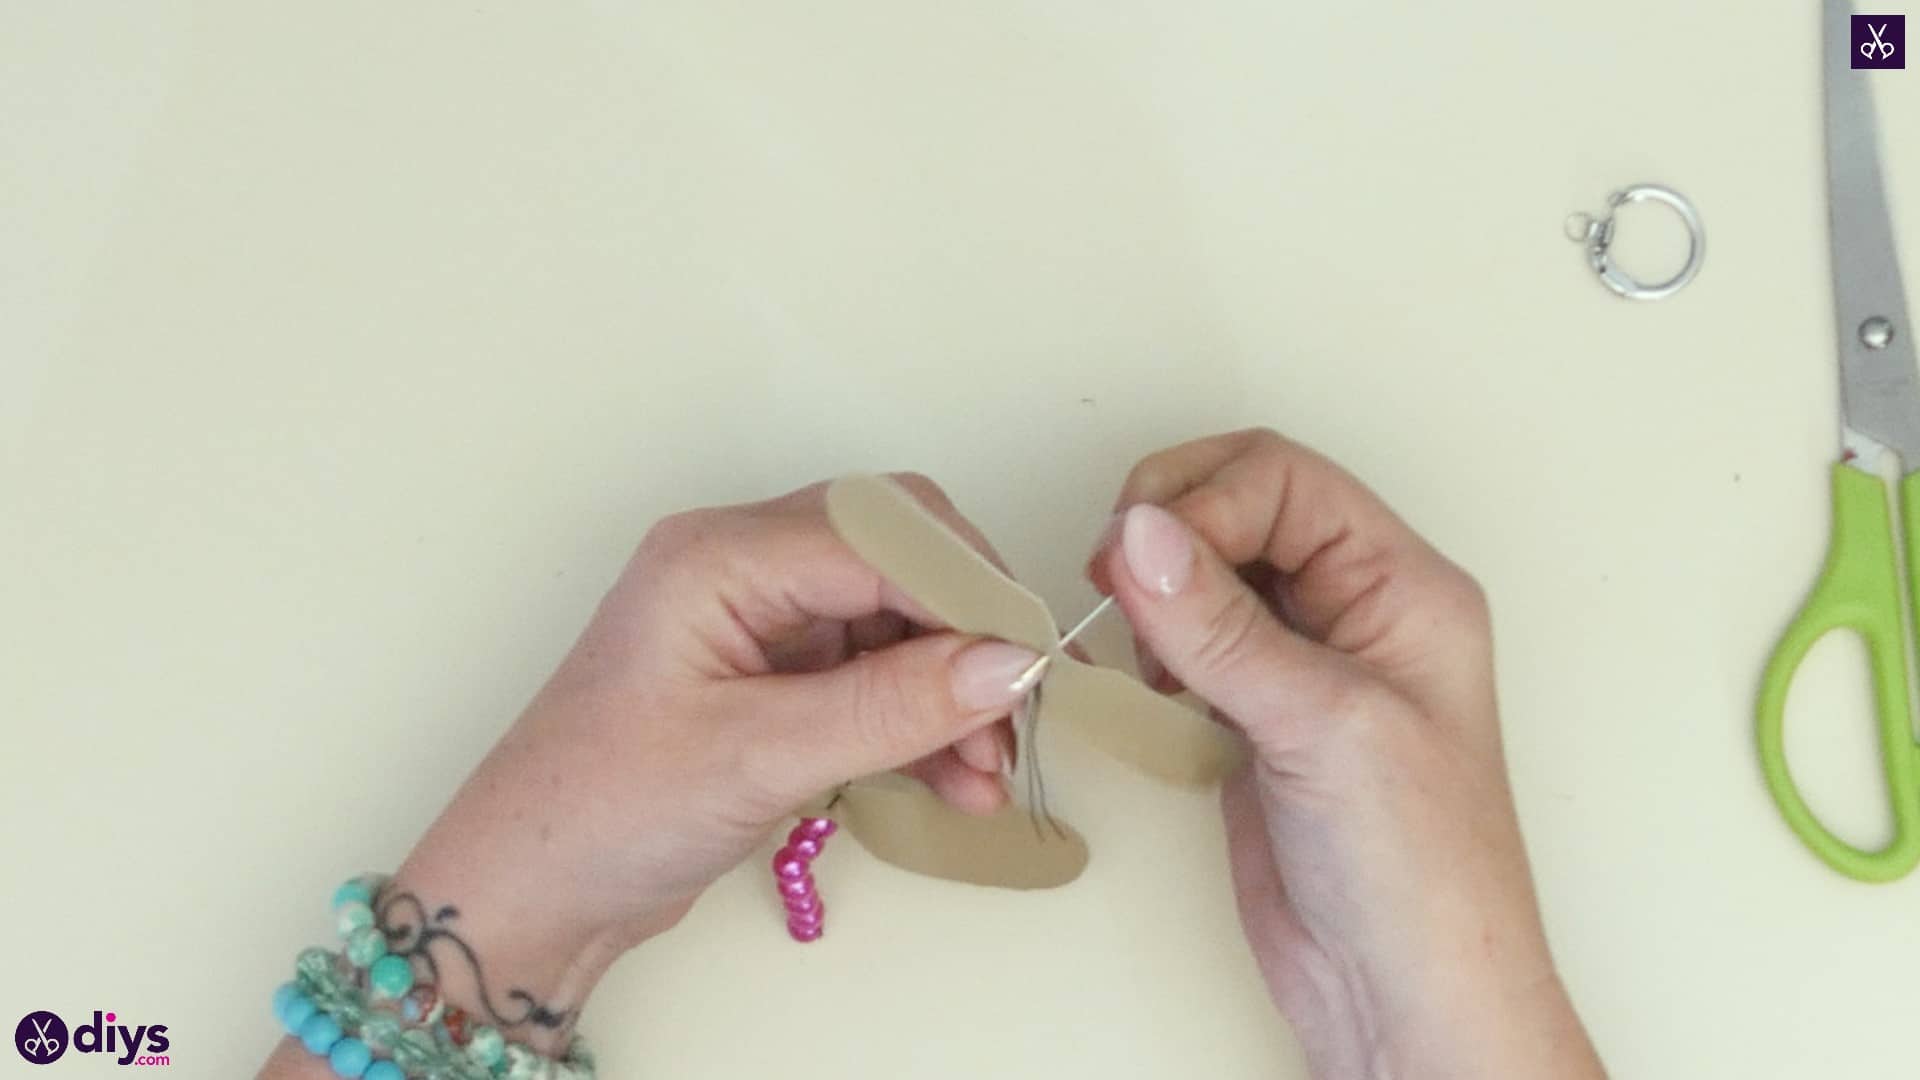
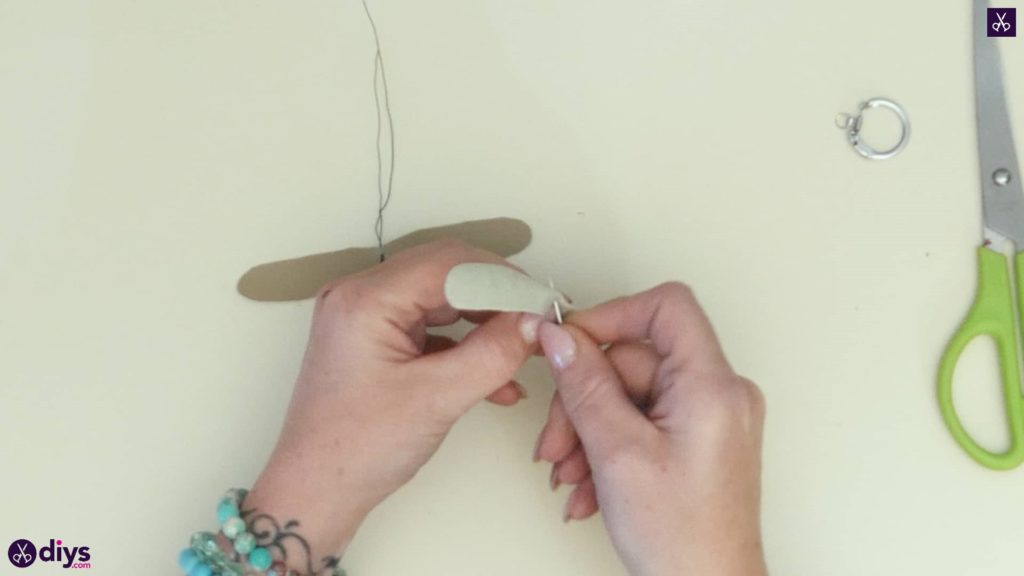
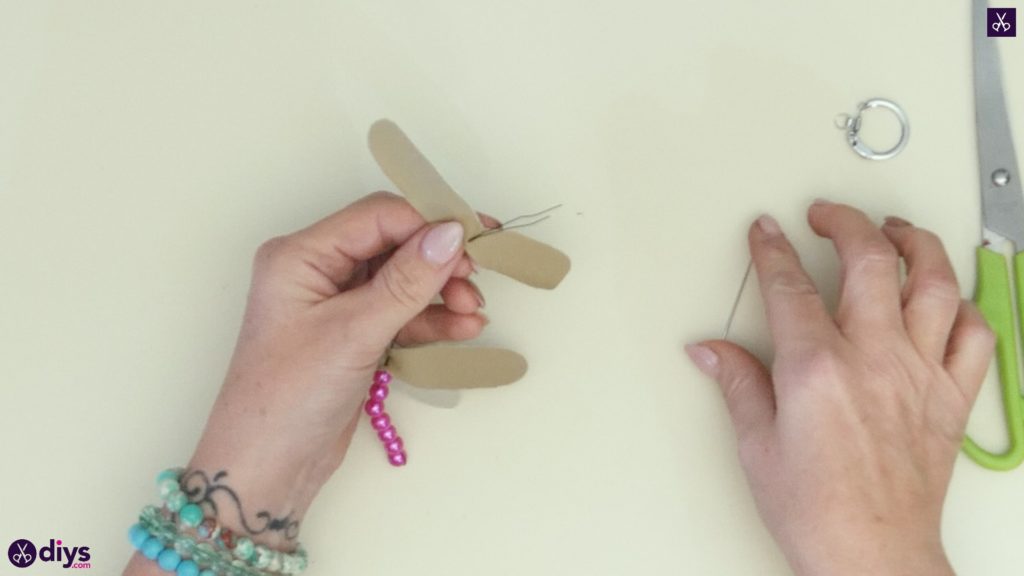
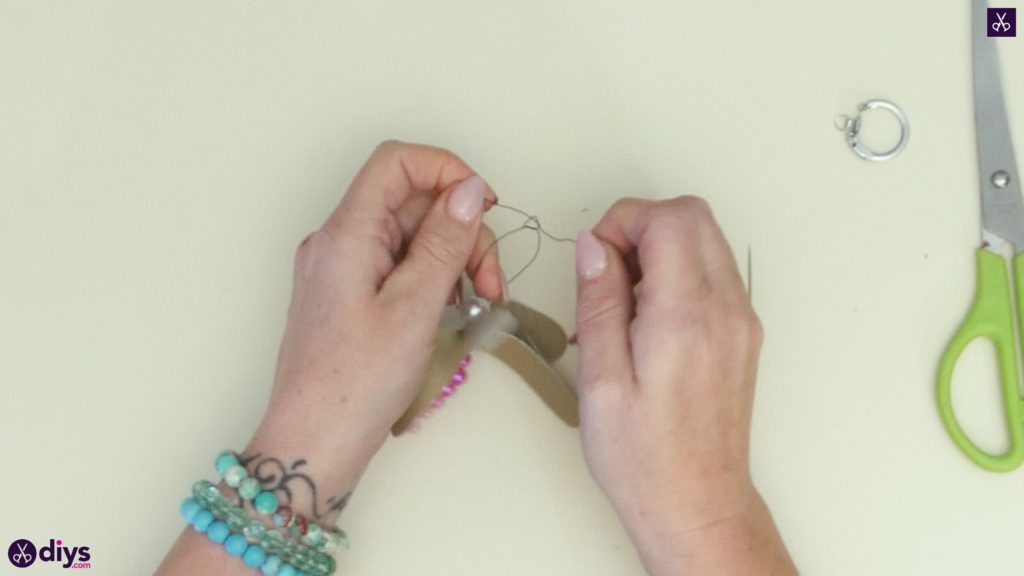
Hold your first wing piece horizontally so the side that you want to be the top of the wings (for me it was the shiny side) faces upwards. Use your thick sewing needle to make a hole in the leather, front to back, near the bottom edge. Poke your two wire ends pinched together through the hole from back to front. Then use your needle to poke a hole through the leather from front to back and then poke the two wire ends through the hole in that same direction so they come out the back of the leather. Then repeat this same process with the second piece of leather and pull the two together so they slide against each other and look layered.

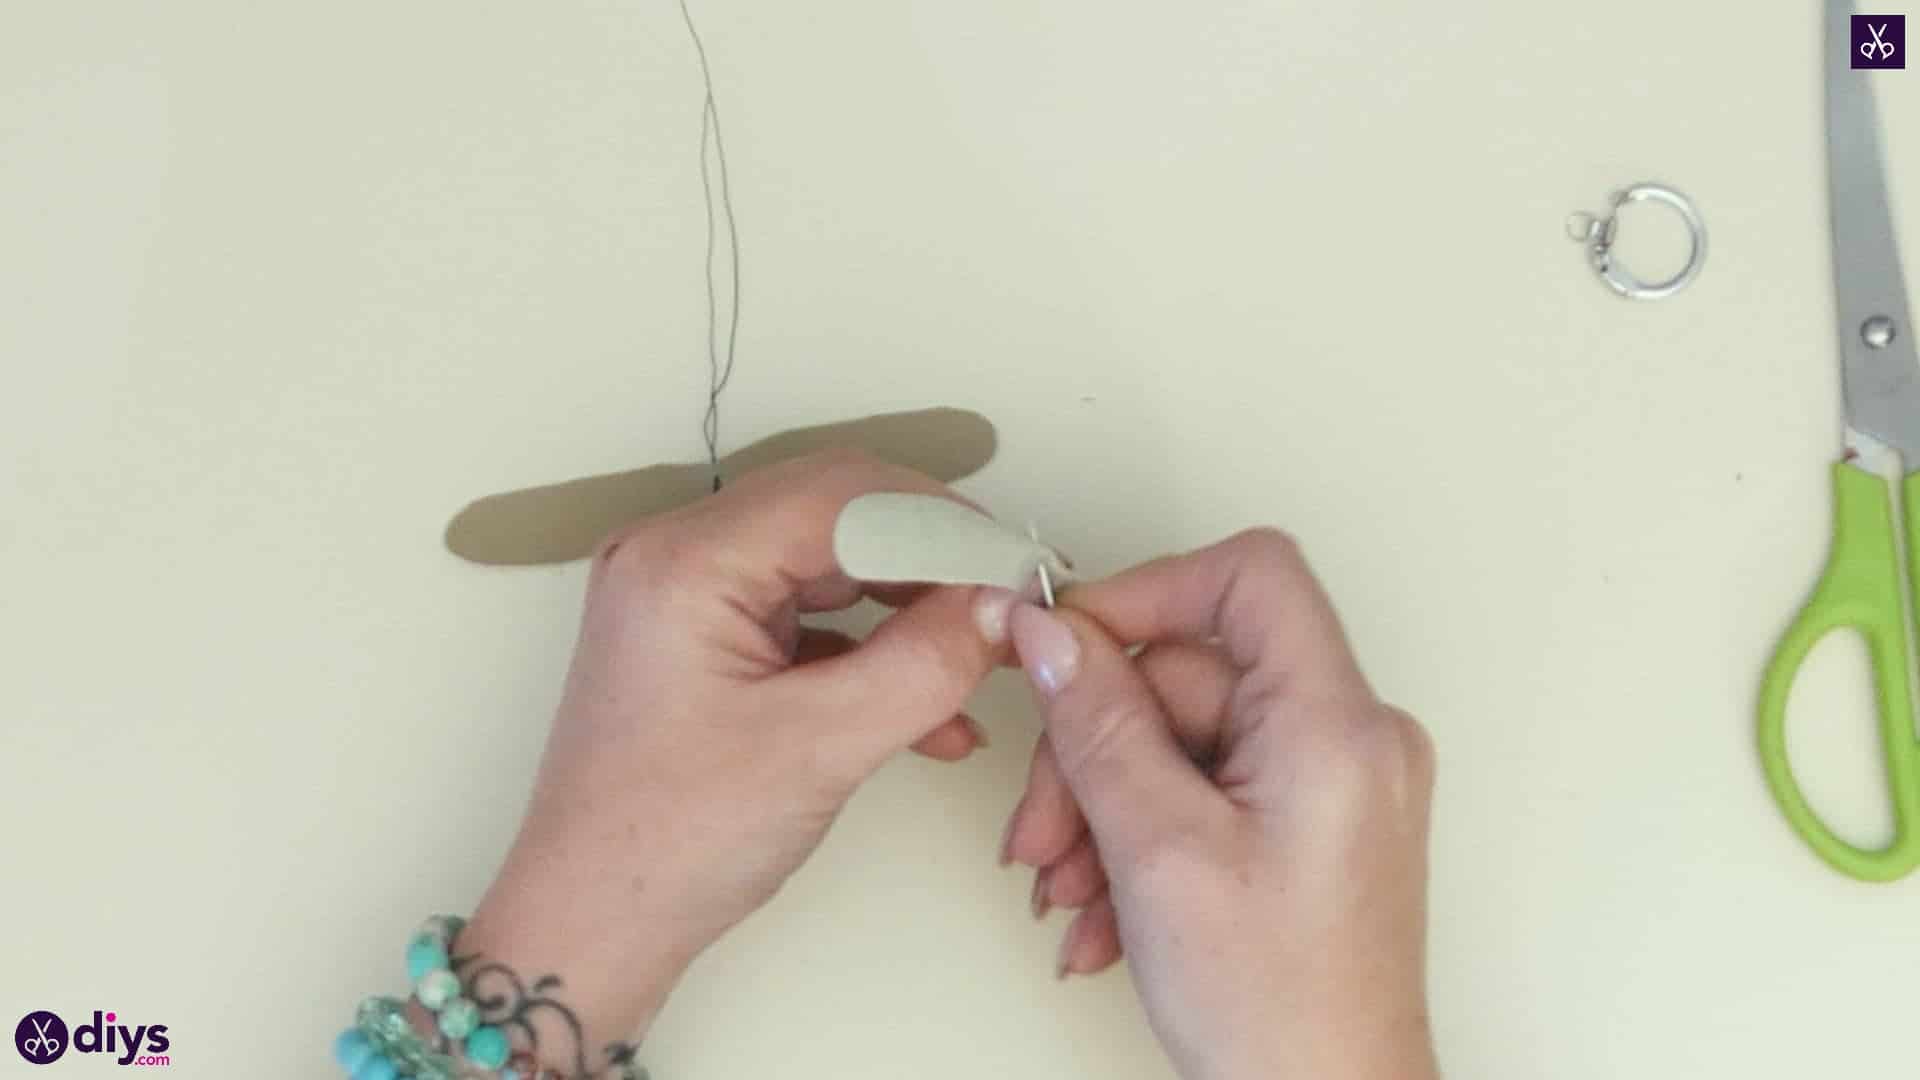
Step 5: add the pearl
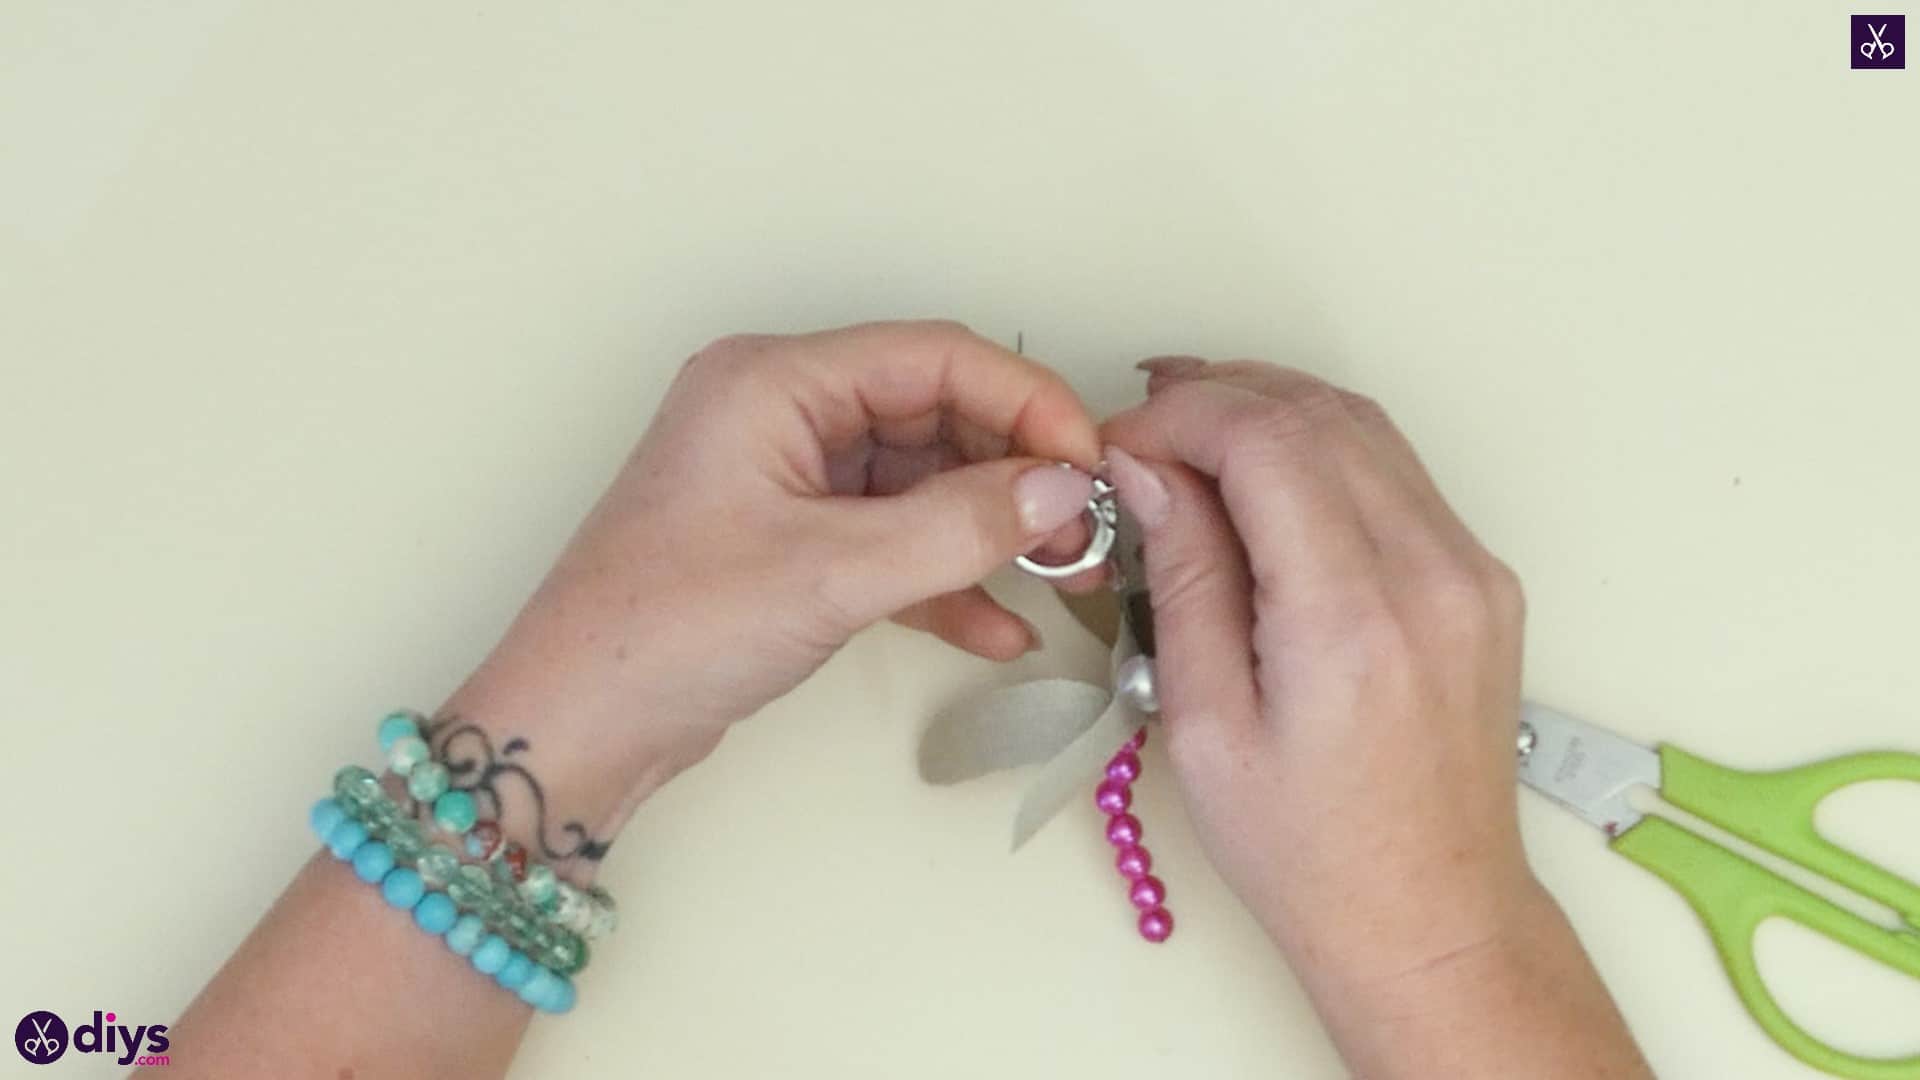
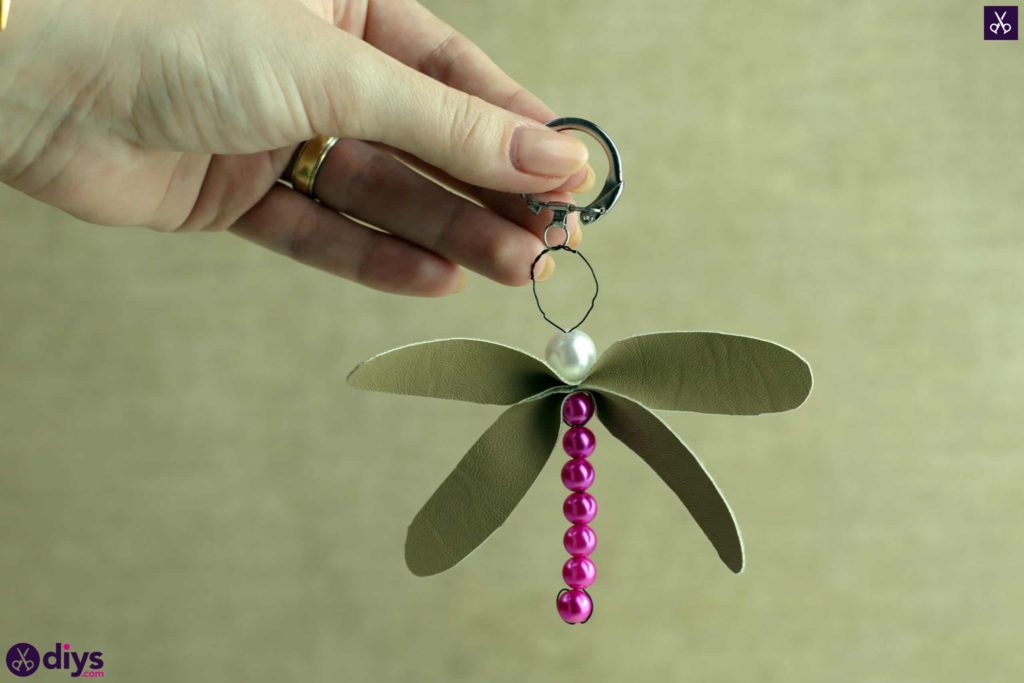
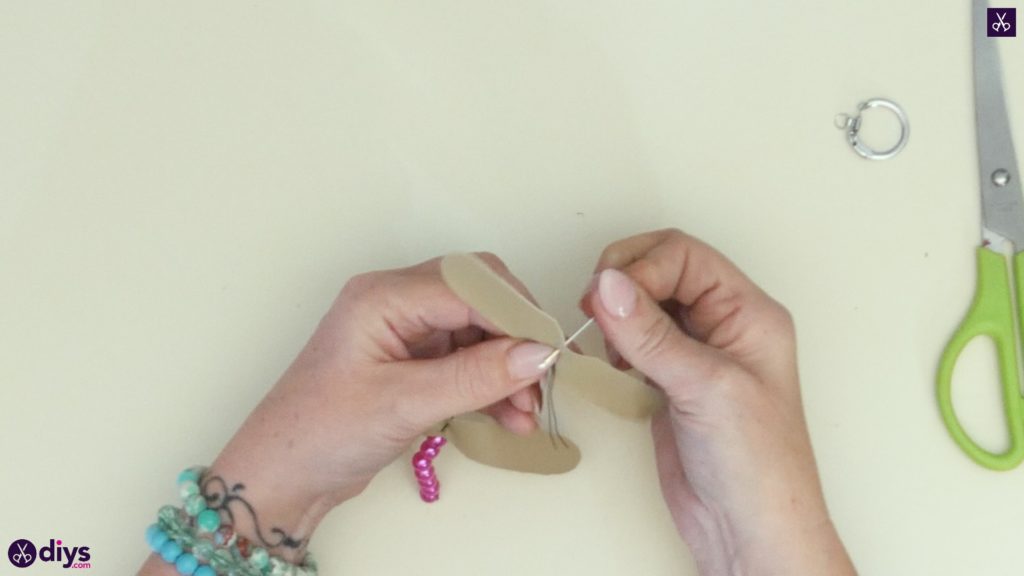
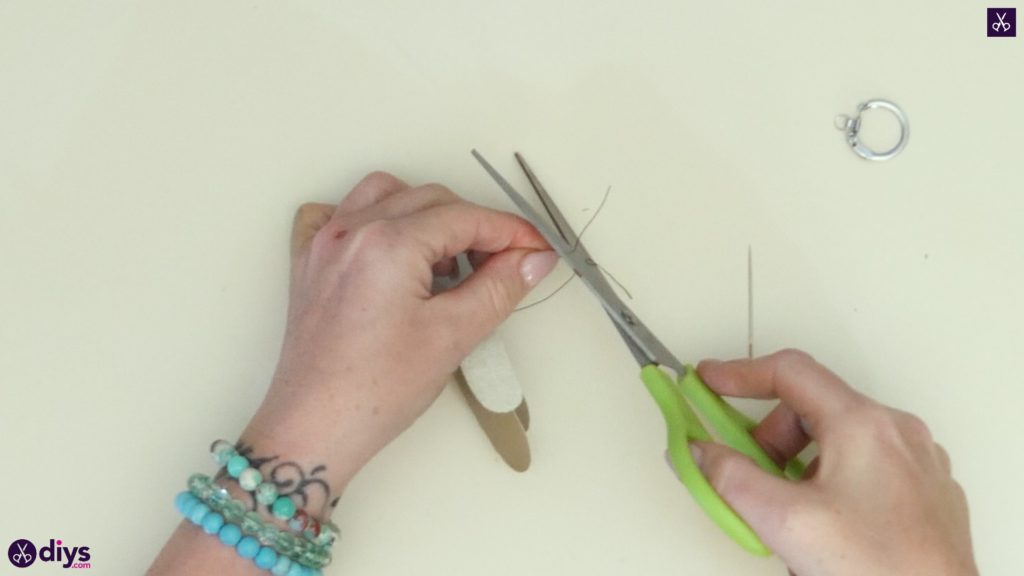
Pinch your wire ends together again and slide them both through the hole in the middle of your larger white pearl bead. Slide the bead down the wire to rest against the centre of your layered wings. This will be your dragonfly’s head. Once it’s nestled in place, tie your wire ends together in a knot that tightens against the top of the bead to hold it in place. Feel free to double knot it if you need to. Next, you’ll knot your ends together twice again, but this time you’ll keep the knot at the top, closer to the ends themselves, rather than sliding it down to tighten it against the bead. This leave you with a loop between the bead and the knot you just made. Trim the excess from the wire tips. Finally, open up the metal ring on the actual keyring and slide the edge of the wire loop you just made through it and close the ring once again so the two are attached.

That’s all there is to it! As always, you can feel free to play with your colours and elements. This project would look pretty cute with coloured leather or a patterned stiff fabric instead of what we used! Just in case you’d like to try this project out for yourself, here’s a fantastic tutorial video to help you!
This is SO Cool! Making this for lots of ladies in my family!