DIY Gilded Polymer Clay Triangle Necklace
Updated on November 19, 2025
Polymer clay (also sometimes referred to by their brand names, Sculpey and Fimo) have a lot of DIY potential on their own, but it occurred to me that it might combine well with gold leaf, since the metal wouldn’t be harmed during the cooking process. And I came up with a geometric statement necklace that combines flat gold leaf with little speckles of it, to create a triangle necklace piece of jewelry with lots of texture and shine. And today I’m going to show you how to make it yourself.
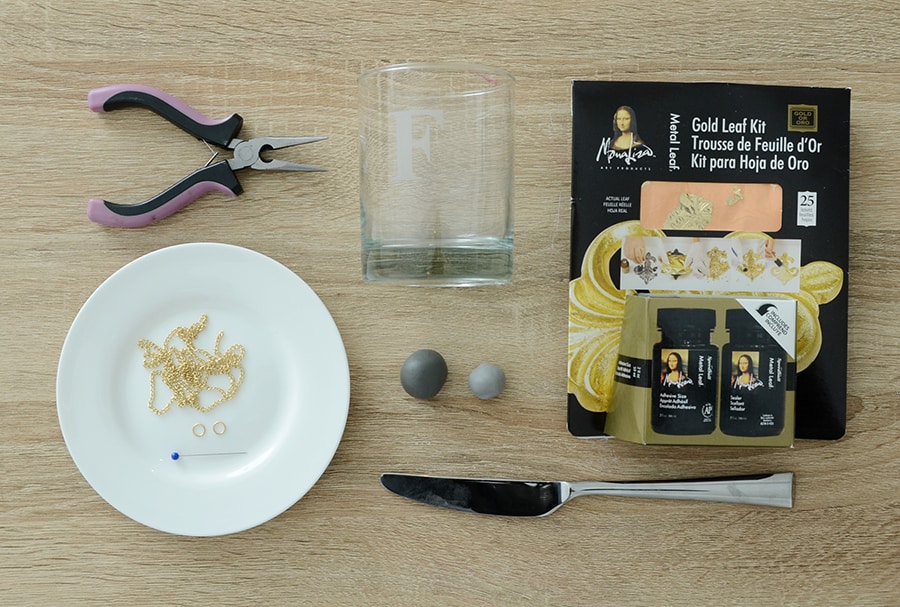
Here’s what you’ll need for your triangle necklace:
- Gold leaf
- Polymer clay in two or more colors
- Knife
- Cylindrical glass (a makeshift rolling pin)
- Gold chain in your desired necklace length
- Two gold 1/4 inch jumprings
- A pin
- Pliers
- Super Glue (not pictured)
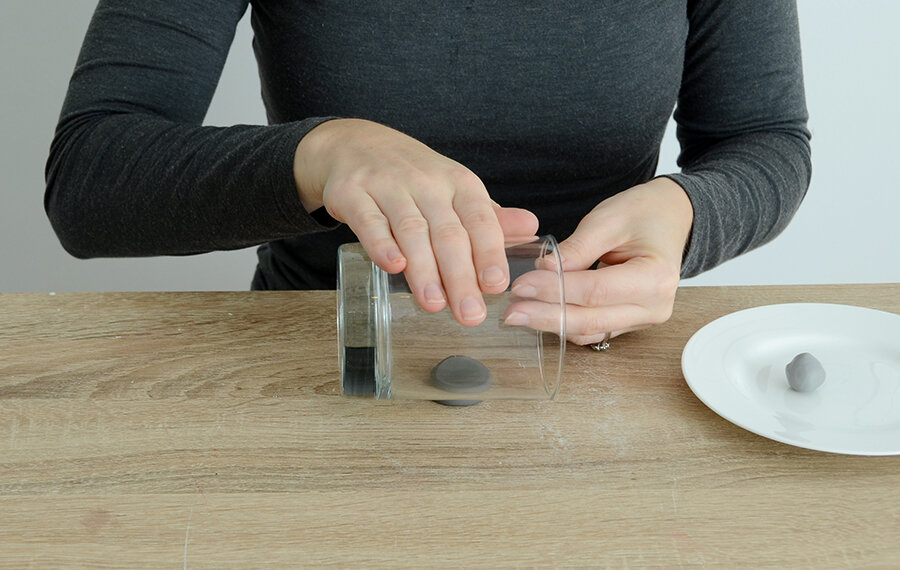
Step 1: rolling clay
Begin by rolling out your darker piece of polymer clay with your “rolling pin” (aka a glass). Roll it gently until it is about 1/8 inch thick.
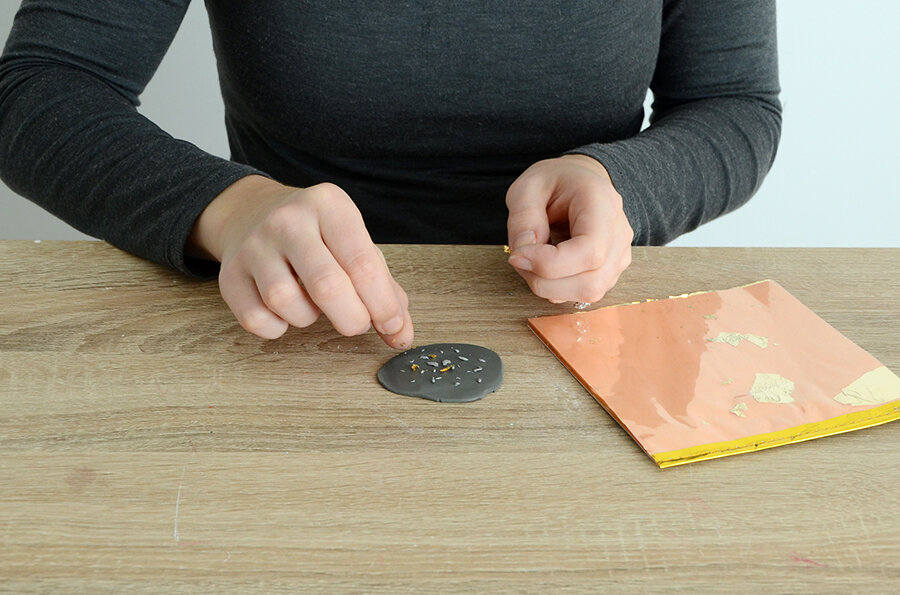
Step 2: tiny pieces
Drop teeny tiny pieces of the contrasting clay color onto the surface of your flattened piece. Then drop small flakes of gold leaf onto it as well.
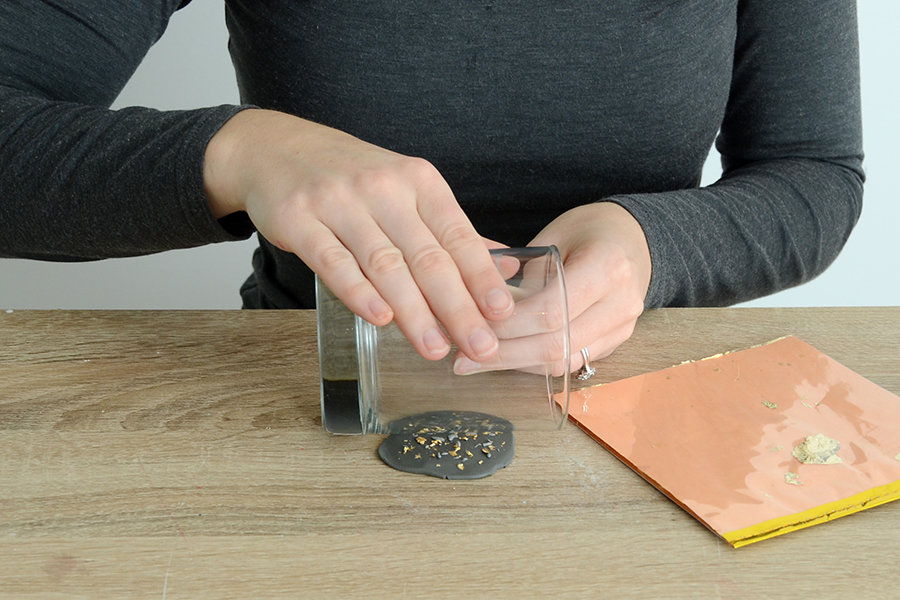
Step 3: use a flat piece
Roll over the surface again to adhere everything to the flat piece.
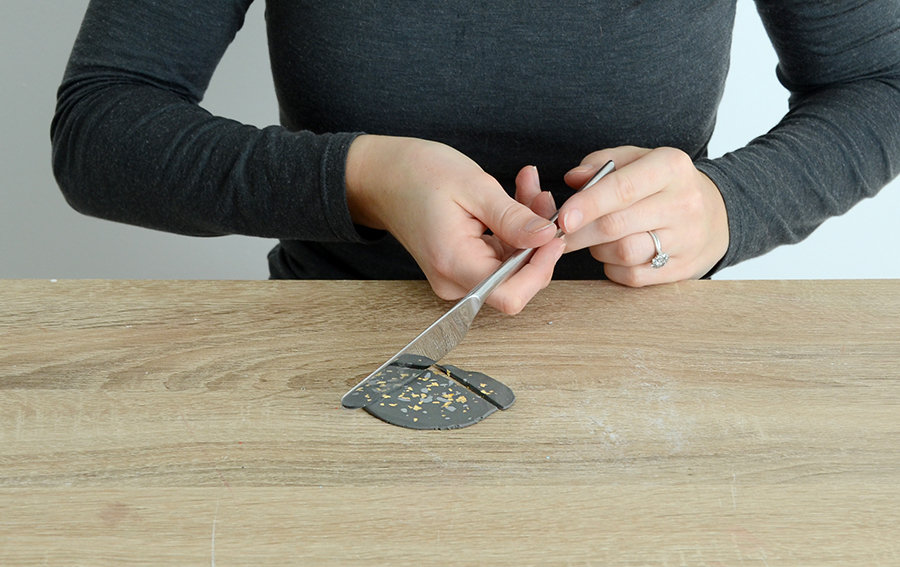
Step 4: cutting clay
Cut out a triangle using a butter knife, and gently peel it off of your work surface. Smooth the edges with your fingers.
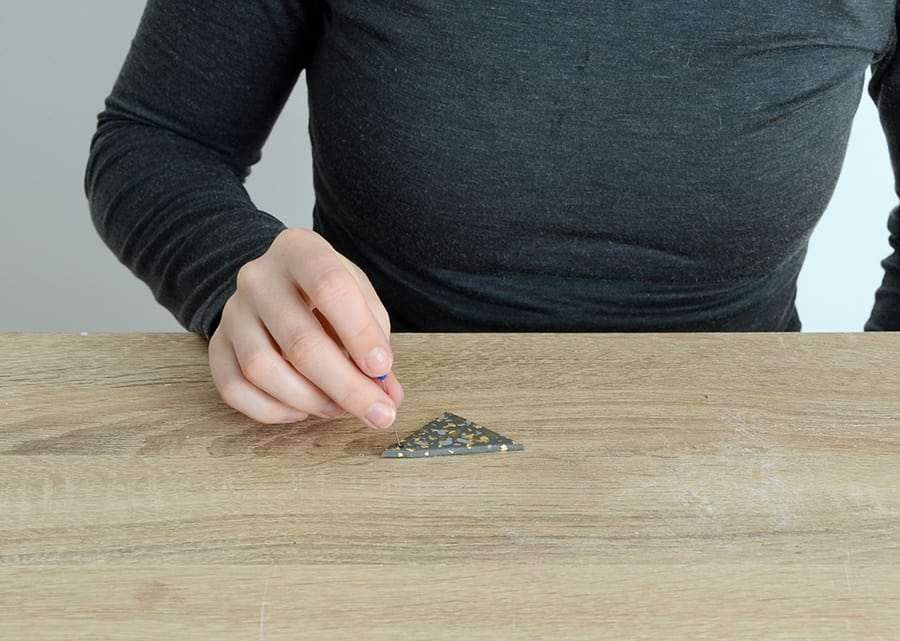
Step 5: wiggle the pin
Poke a hole in the two top corners using a pin. Wiggle the pin around so that the hole will be large enough to comfortably accommodate the jump rings.
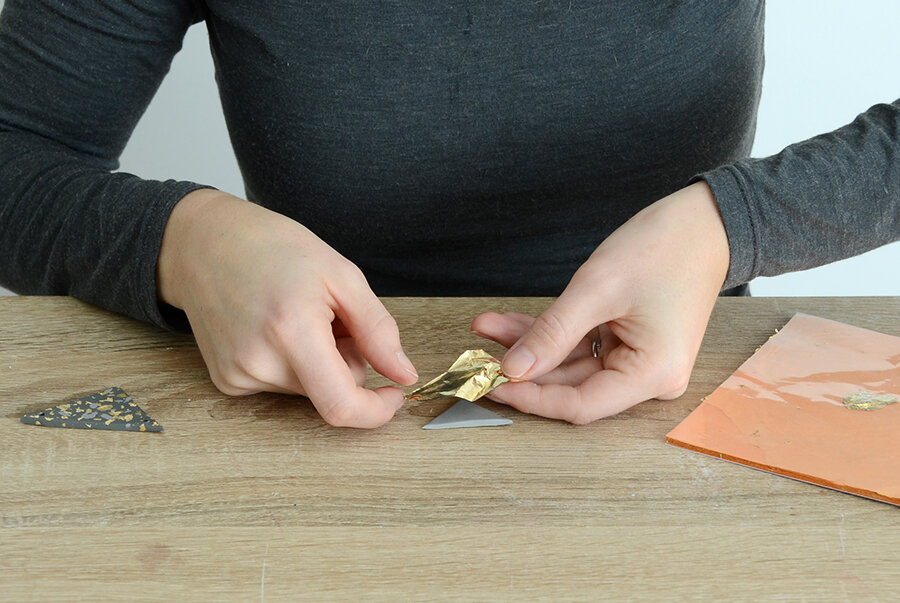
Step 6: add another color
Set it aside, and cut another smaller triangle out of any color. Place a large piece of gold foil onto the surface and very gently press it onto the face of the triangle. Then smooth it around to the back and remove any excess. Bake them on a flat pan in the oven at 275 degrees Fahrenheit for 8 minutes.
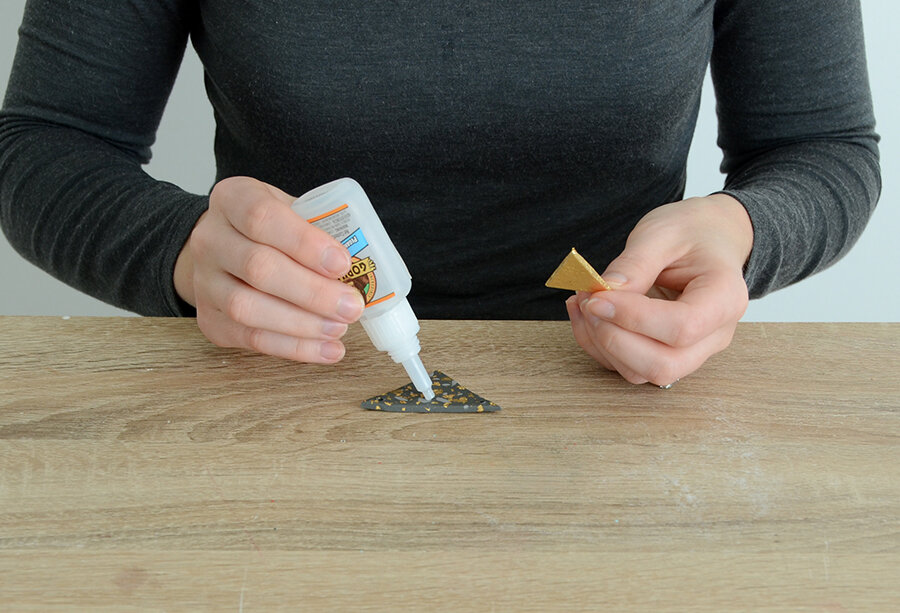
Step 7: glue
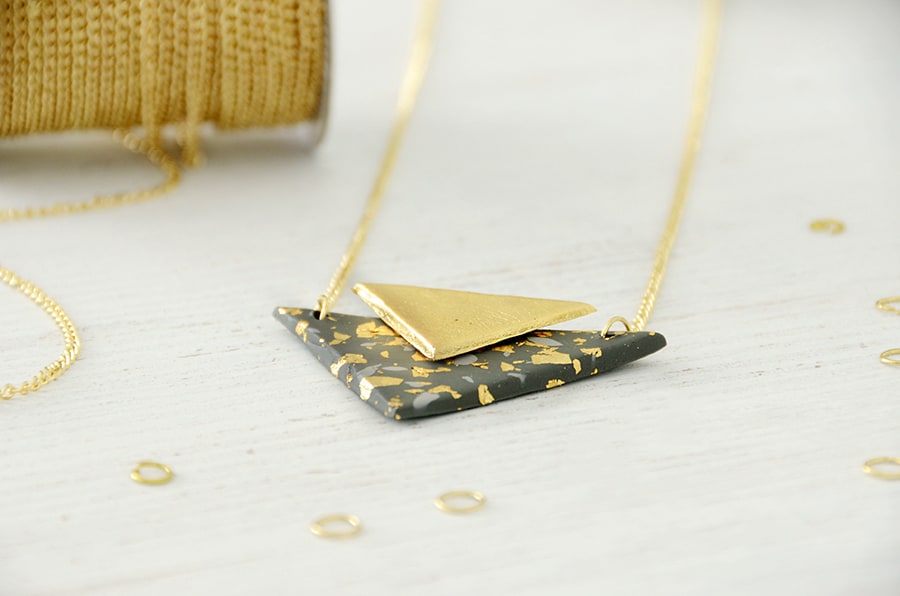
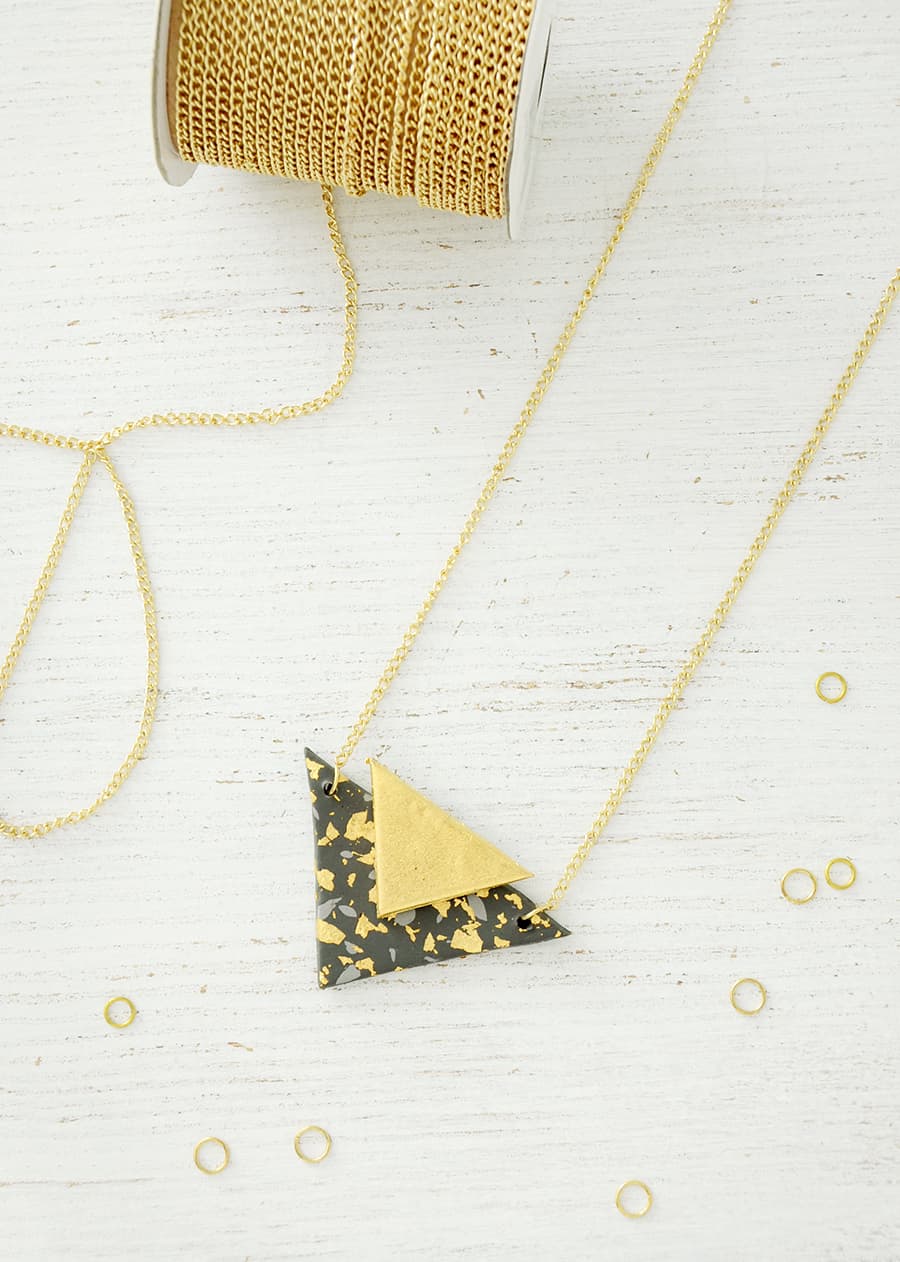
Once the pieces have cooled, super glue them together so the top of the smaller triangle is situated a bit above the top of the larger one.
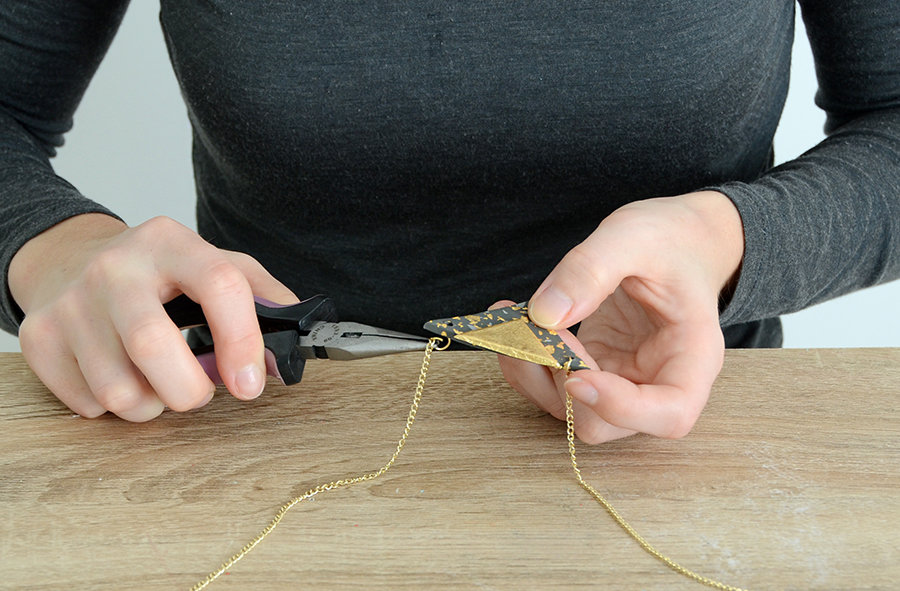
Step 9: attach a string
Attach the jump rings to the ends of the chain and then place them through your pre-made holes and close them up.
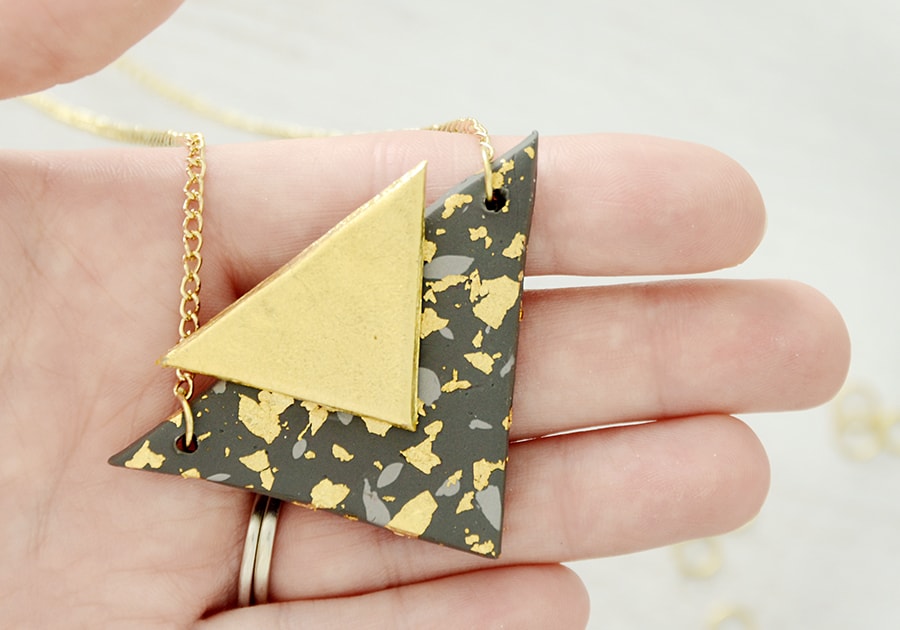
Conclusion
And your necklace is complete! It looks a bit like granite, thanks to the texture of the different materials along with the shine of the gold leaf.

It’s a great way to dress up a plain white top, with its bold pattern and geometric shape. You can customize this project too, using any colors along with the gold… or you might even mix metals. Have fun with it!