Easy DIY 3D Paper Flower
Updated on November 19, 2025

Recently I made a pretty little DIY 3D paper flower and I was so happy with it that I ended up making about five more of them before the week was out. I documented it all here so you can see just how I put these together and try for yourself!
I’m the kind of sharing crafter who loves keeping track of how I’ve made certain things just in case another DIY enthusiast wants to try that project out for themselves, so I doubt you’ll be surprised to learn that I documented my whole paper flower process. Check out these step by step instructions complete with photos! If you’d rather follow along with a video tutorial instead of written words, scroll to the bottom of this post to find just what you’re looking for.
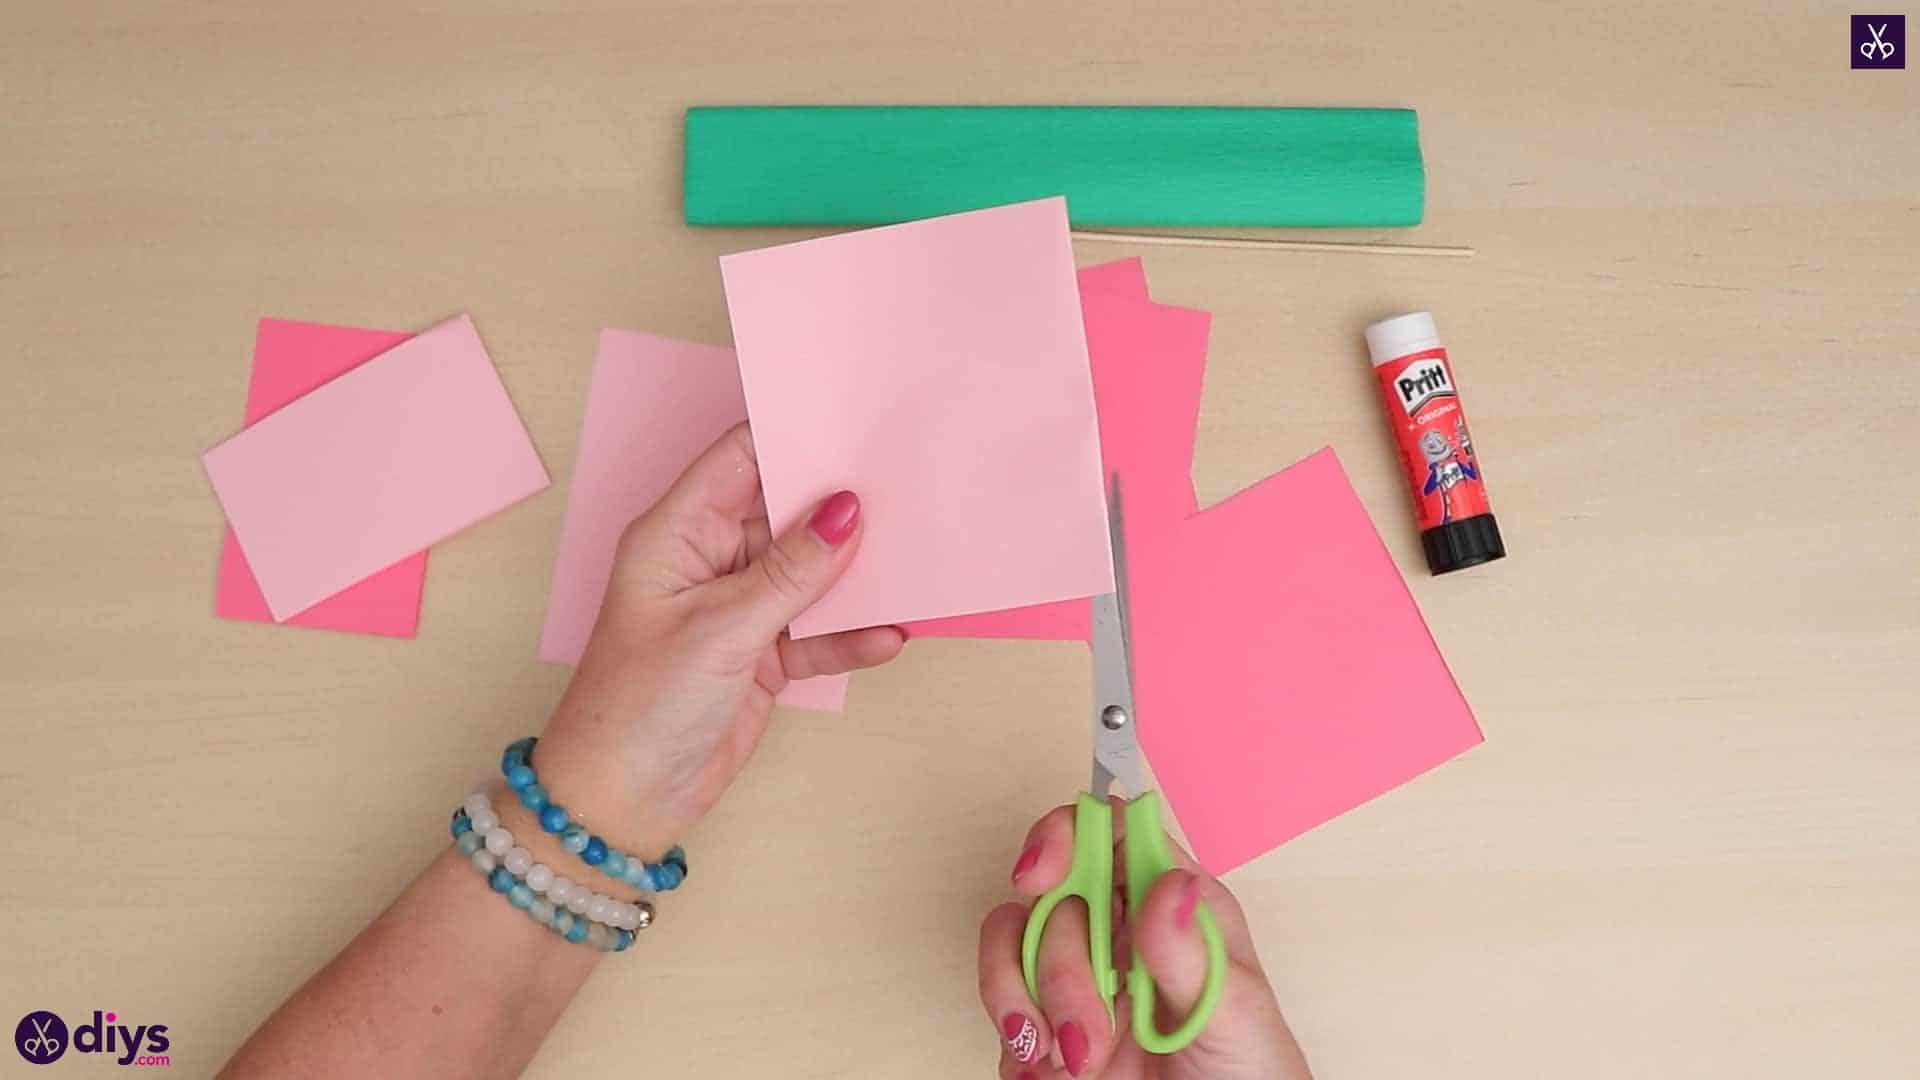
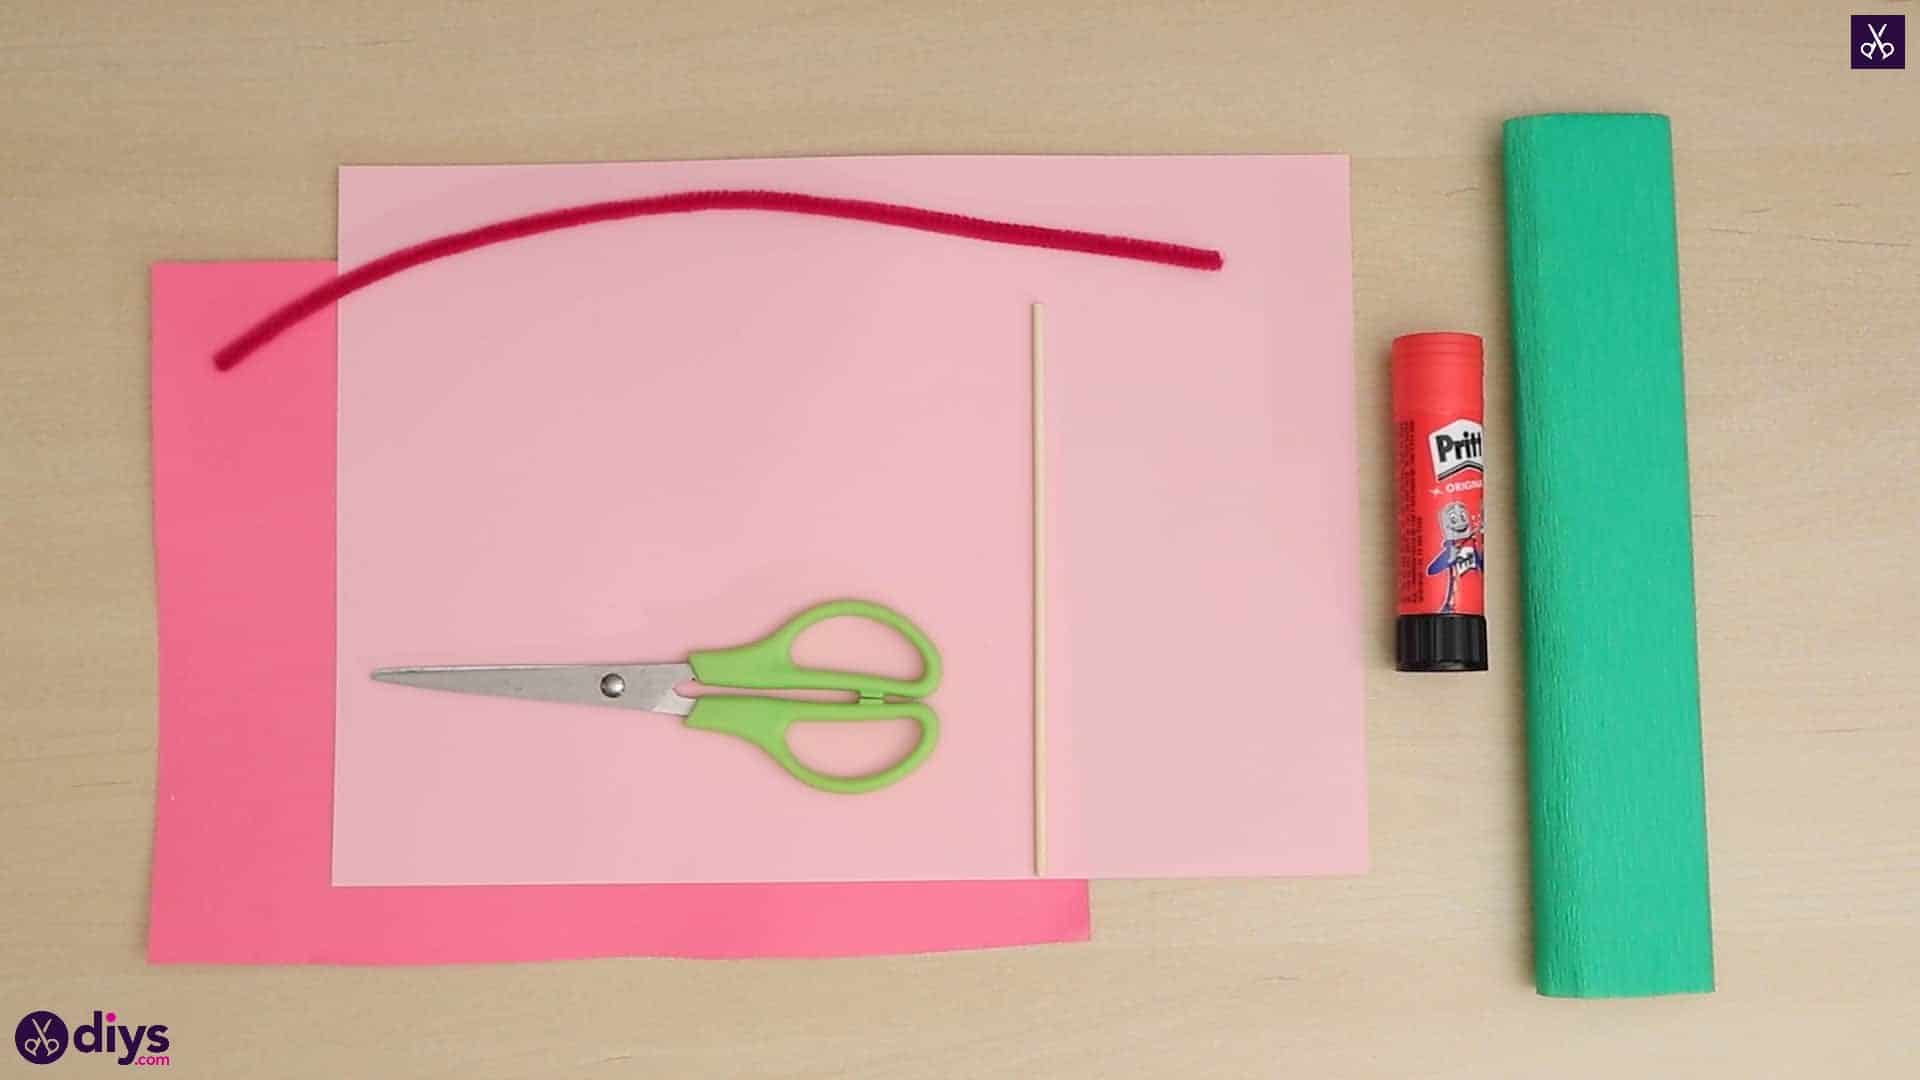
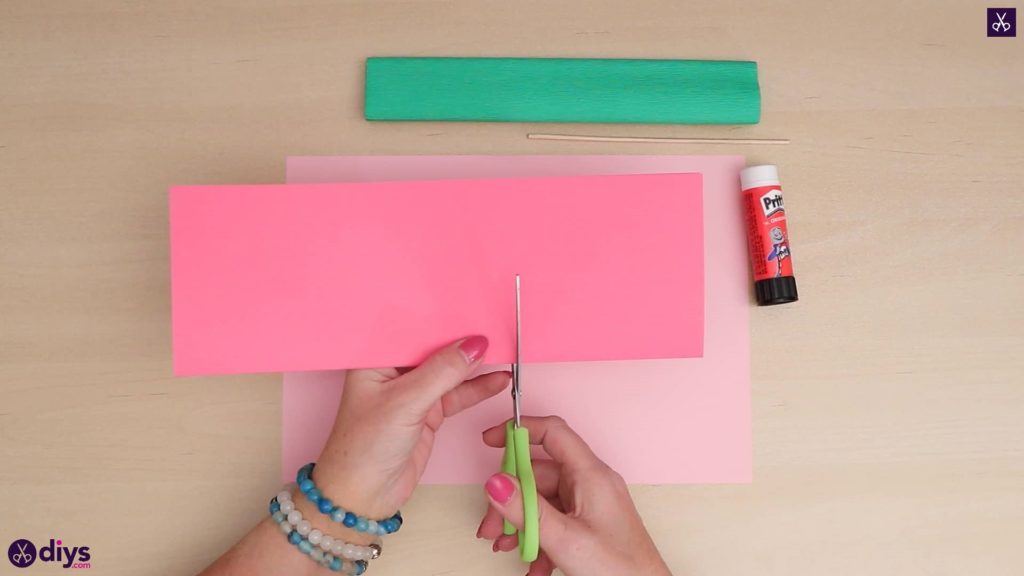
For this project, you’ll need:
- Pink paper (light and dark)
- Scissors
- A glue stick
- A wooden skewer
- Pink pipe cleaner
- Green crepe paper
Step 1: Gather your materials!
I like to make sure I have everything I need before starting.

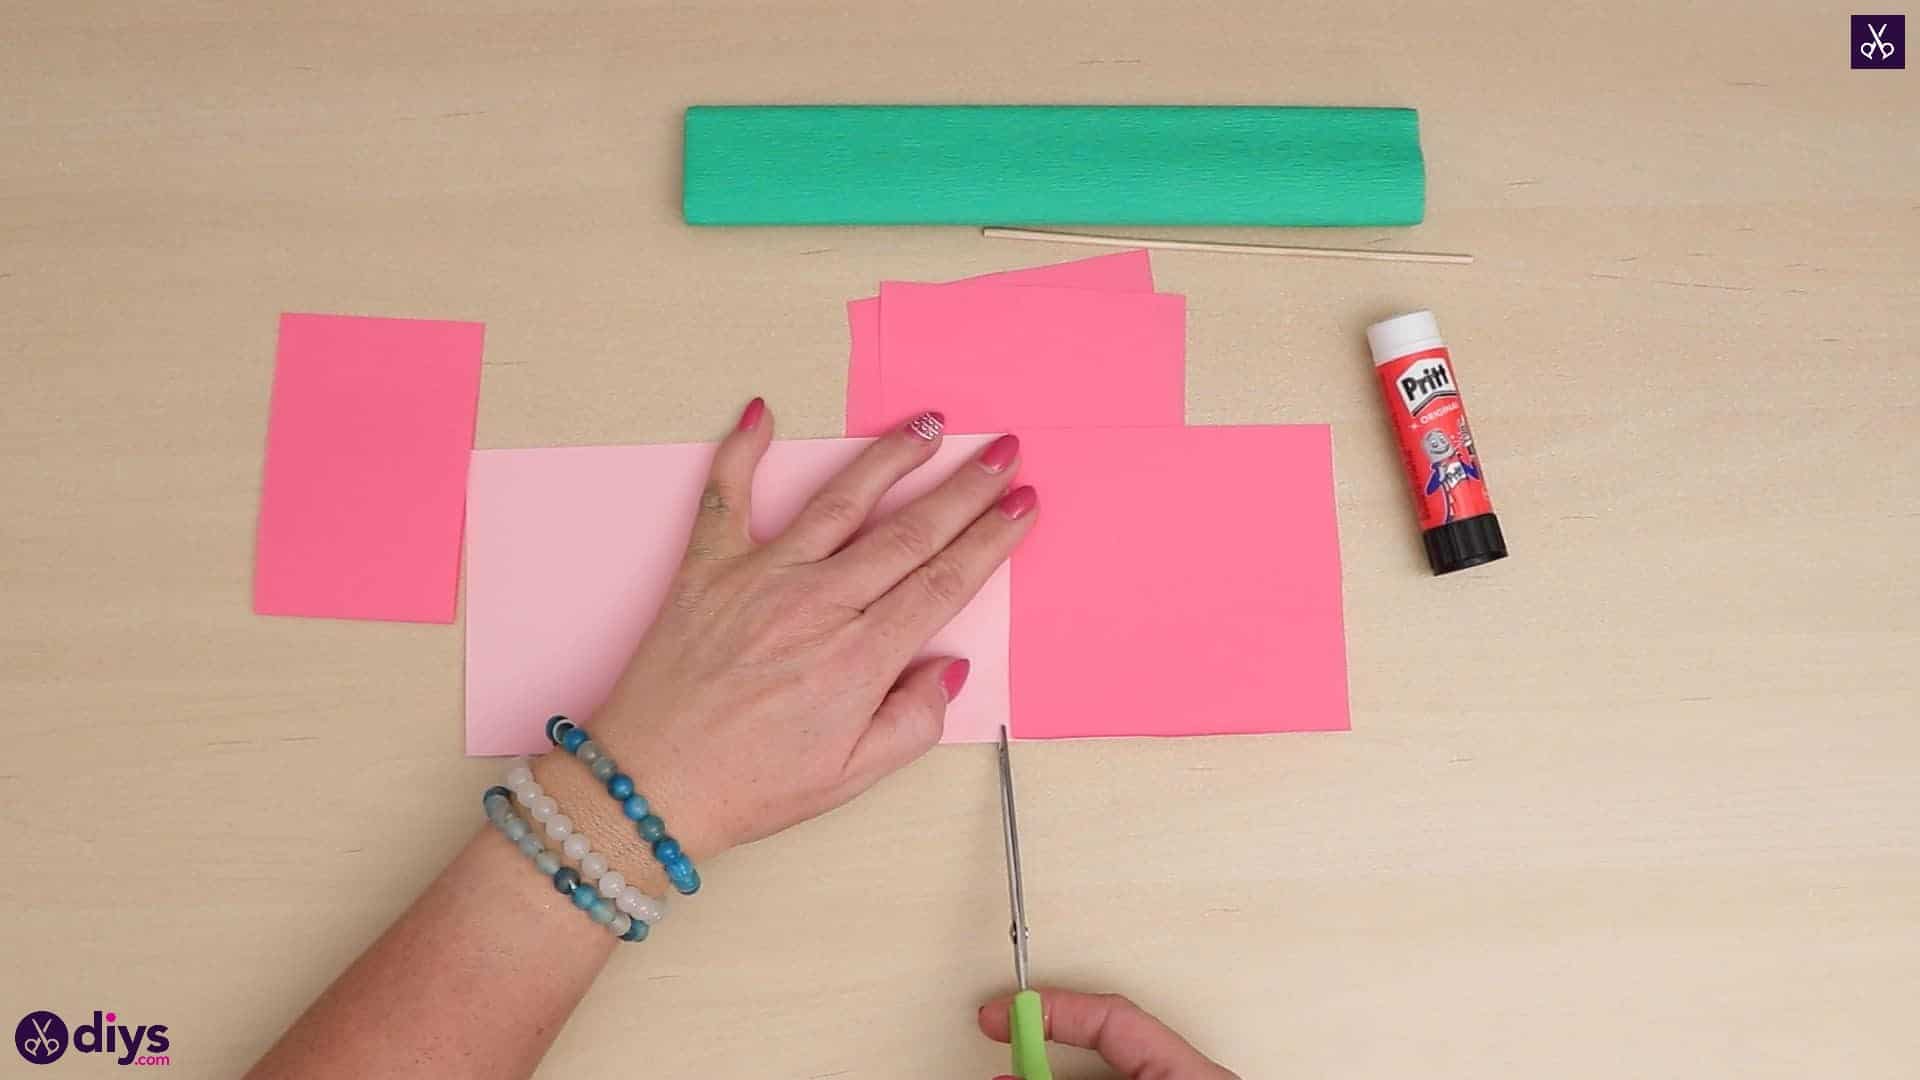
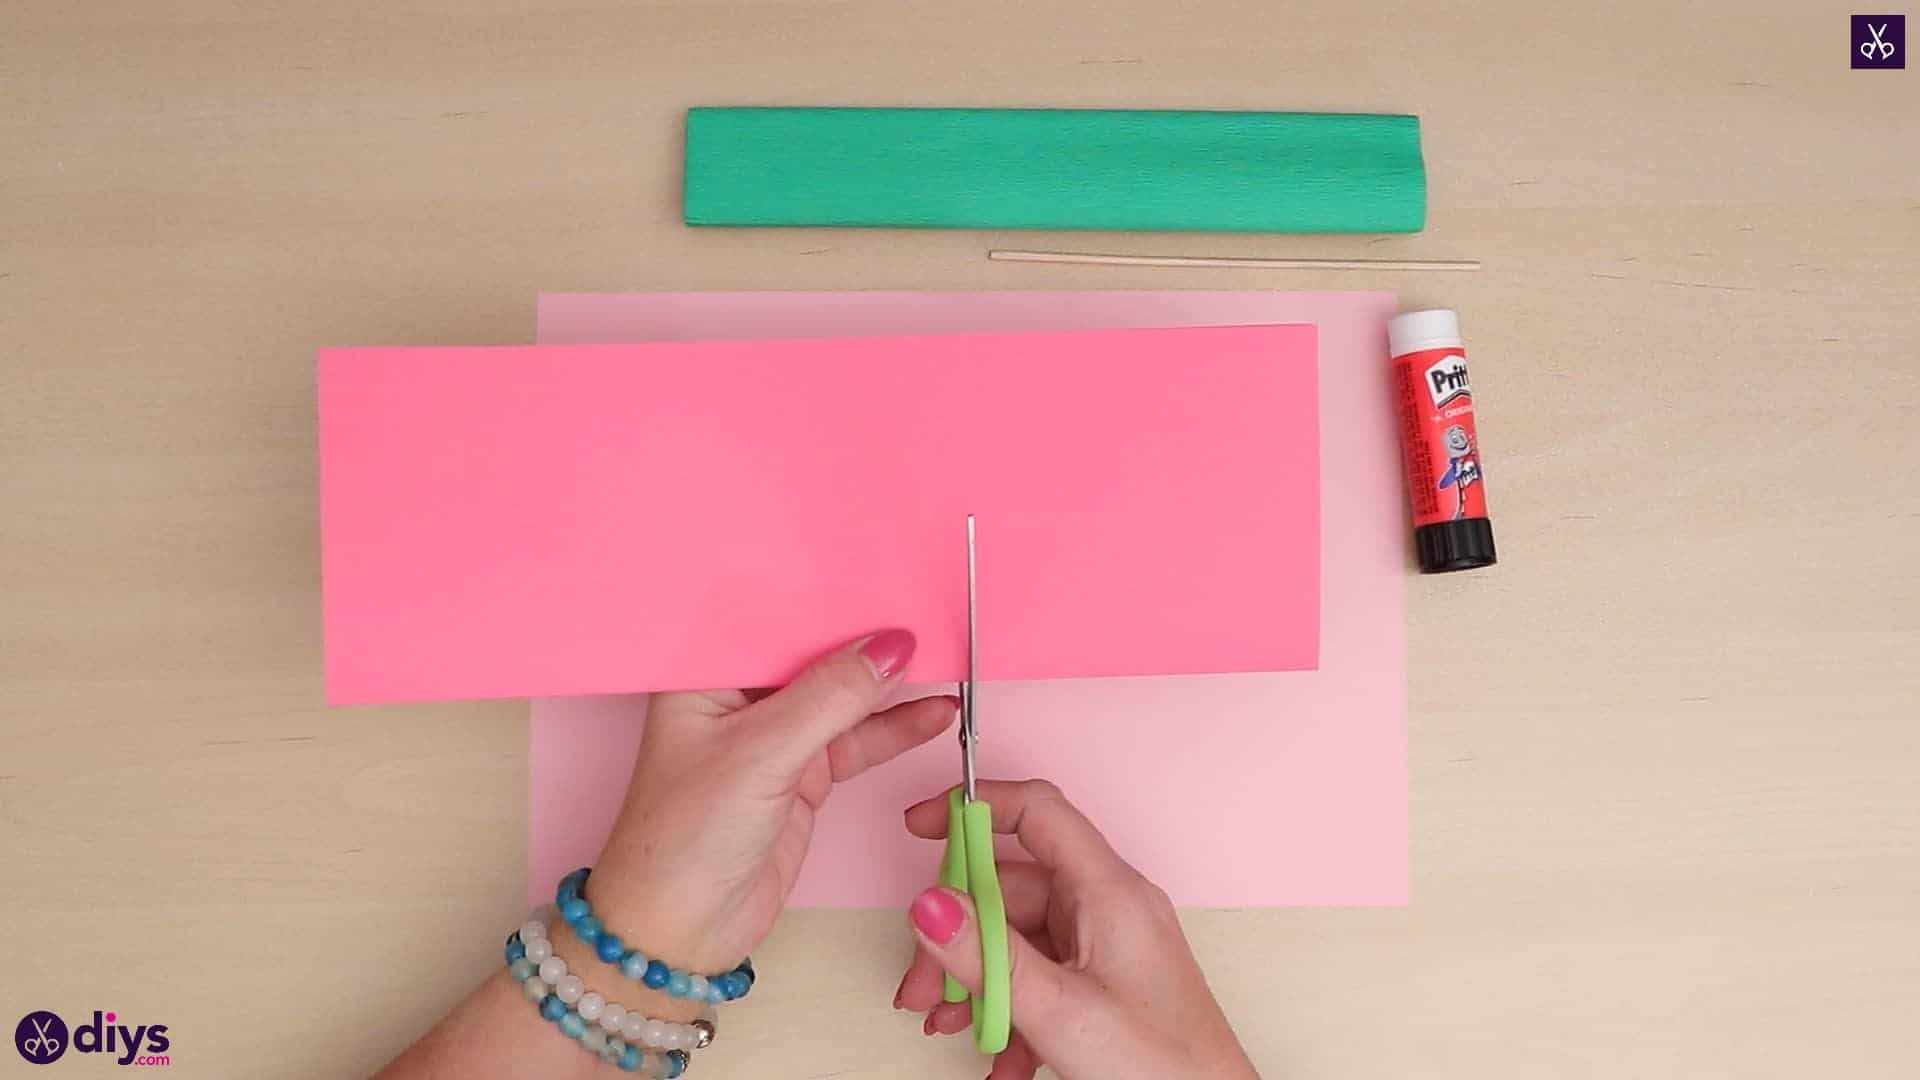
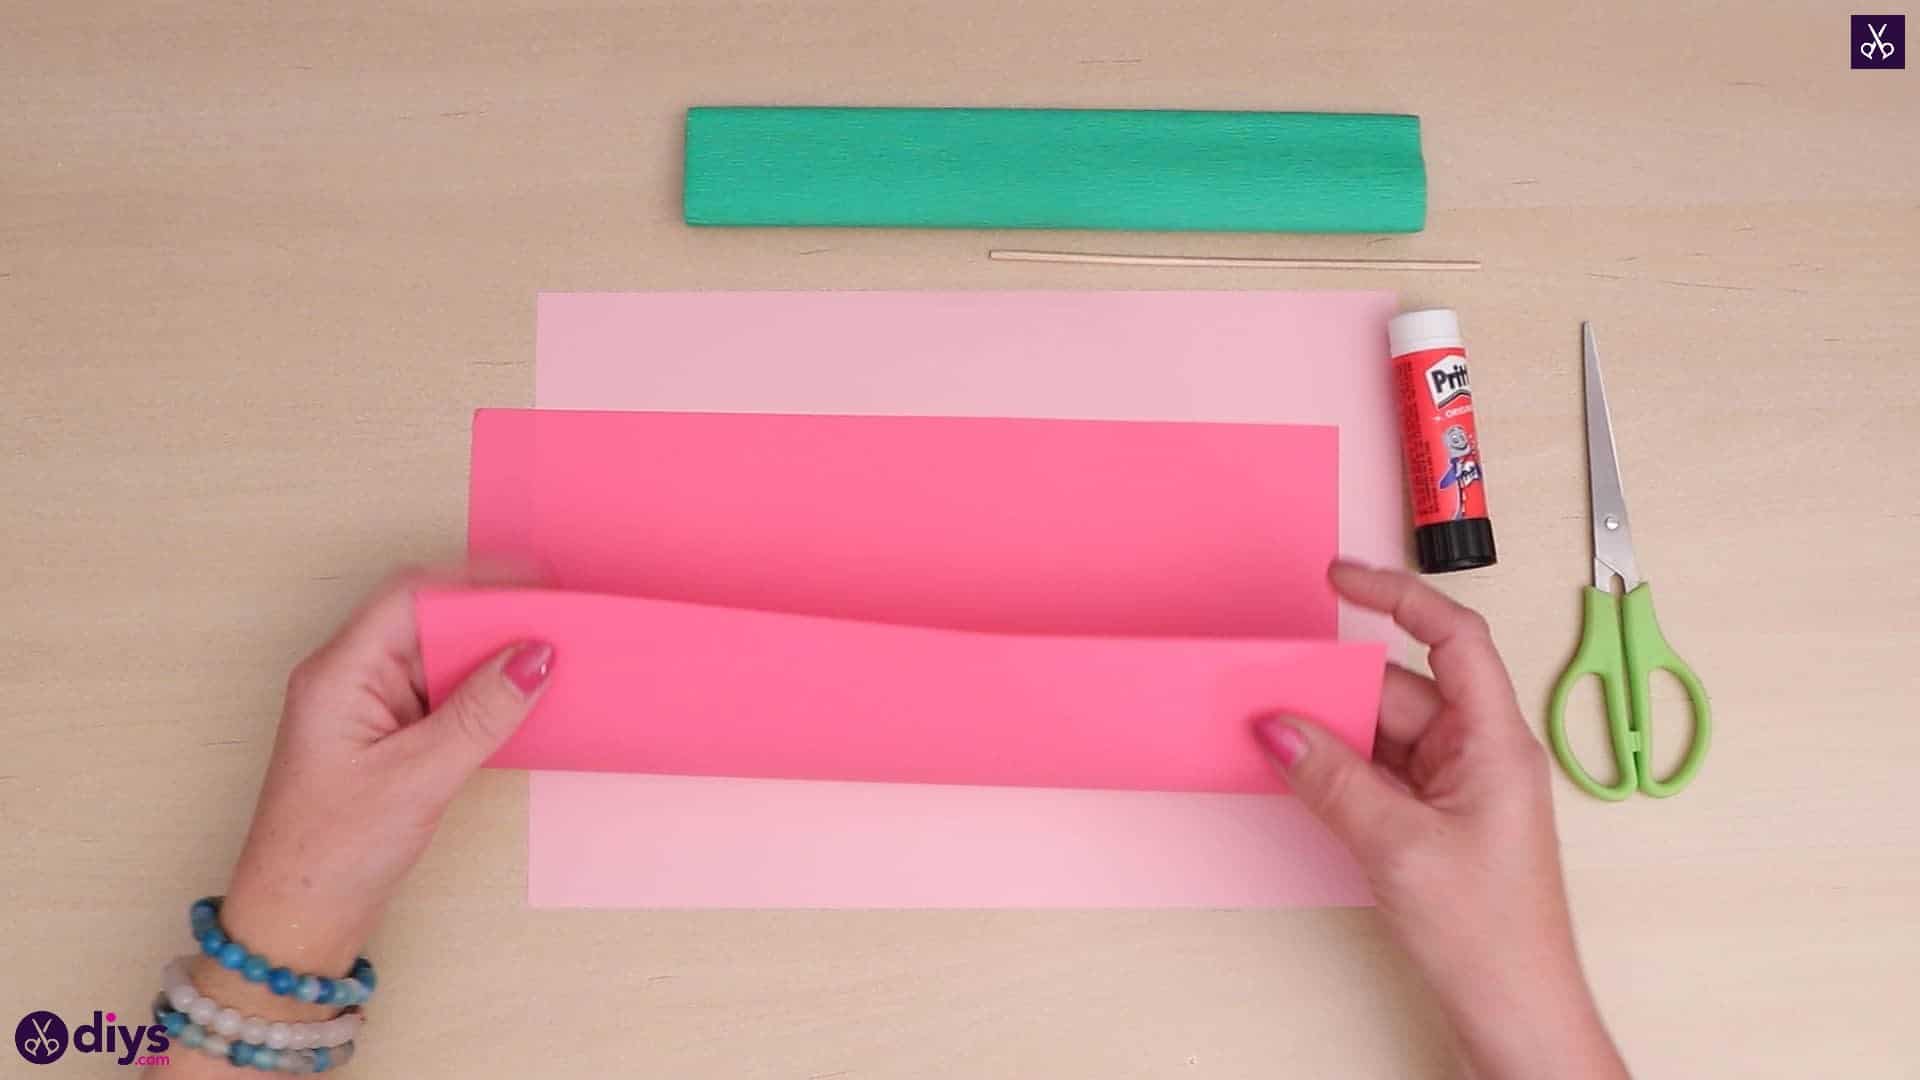
Step 2: fold and cut
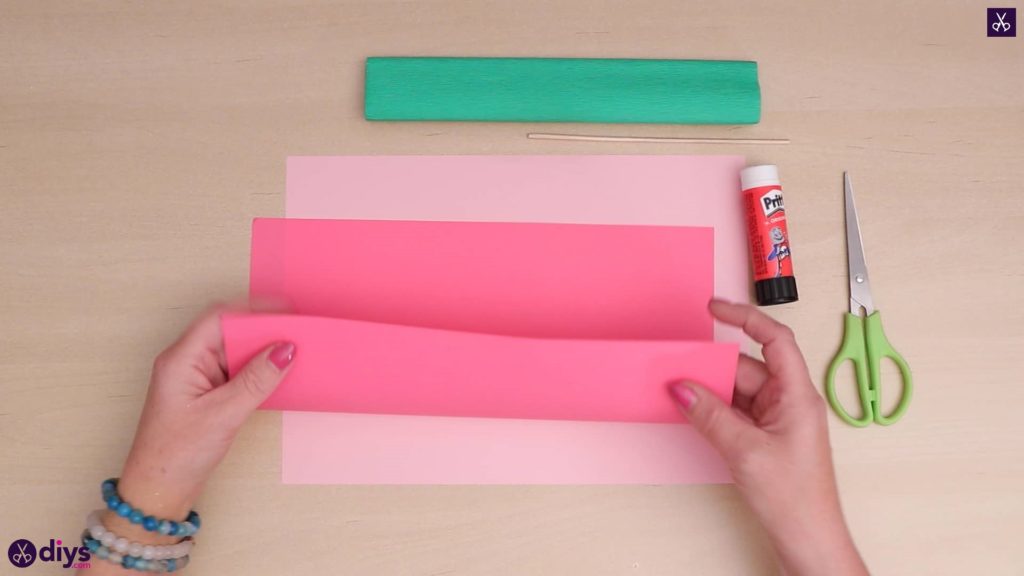
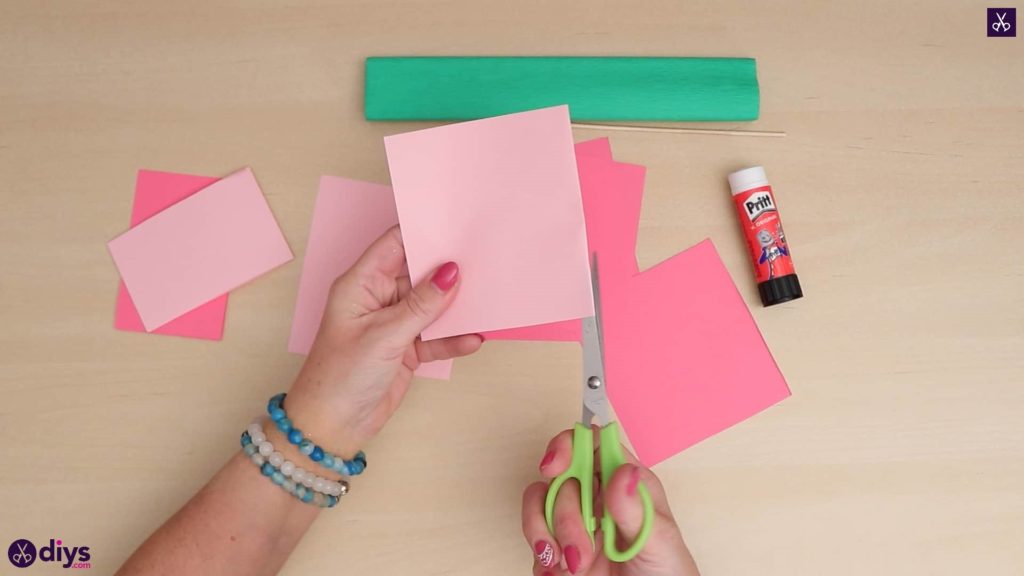
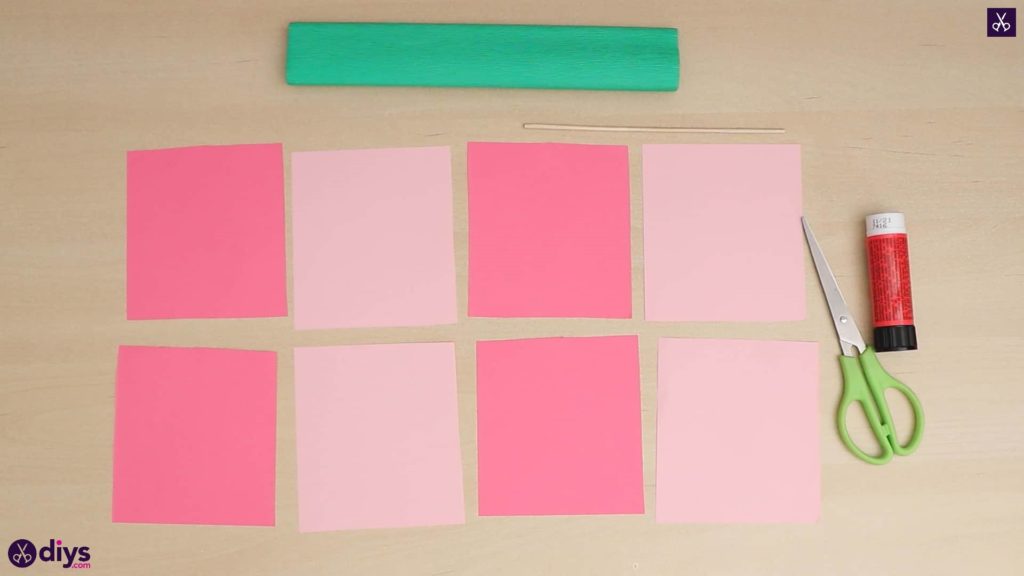
Cut your two pieces of pin paper, light and dark, into eight evenly sized little squares; four of each shade. To do this with the right sizing, turn the dark pink paper sideways to sit horizontally or landscape. Fold the bottom long edge upwards to meet the top long edge and crease the fold. Place your scissors about two inches from the righthand short side and cut upwards (from the creased edge to the one across from it) to give you a folded piece. Line this piece up on top of your longer dark pink piece, lining its edge up with that righthand side again, and use it as a template to cut another piece the same width. Set the remainder aside (you won’t need it) and cut along the crease of each folded dark pink piece in order to cut the two shapes into four even squares. Make sure the edges are even by piling all for pieces on top of each other, tapping the bottom edge on the tabletop to line that side up perfectly, and trimming any excess around the edge off carefully so the squares line up neatly on all sides. Next, turn the light pink page horizontally or landscape, fold its bottom long edge up to meet its top edge, and crease the fold the same way as before. Use your dark pink squares as a template to cut two light pink sections the same size, then cut those two pieces along their crease until you have four light pink squares that are the same size as each otherand the dark pink ones. Feel free to put them together and trim the edges again to make things neater.

Step 3:using the squares
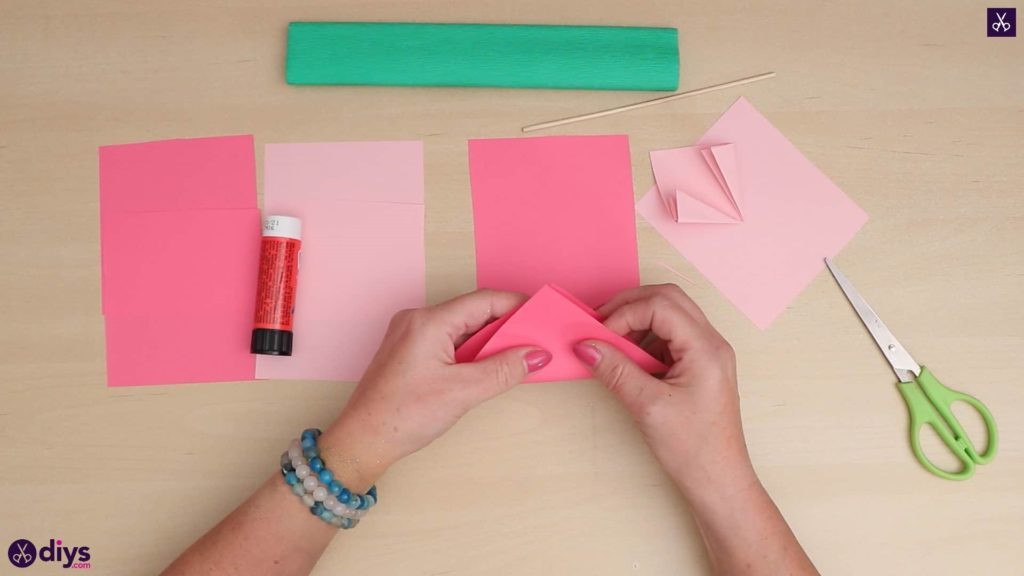
Foreach of your eight squares, no matter their colour, follow these folding steps:
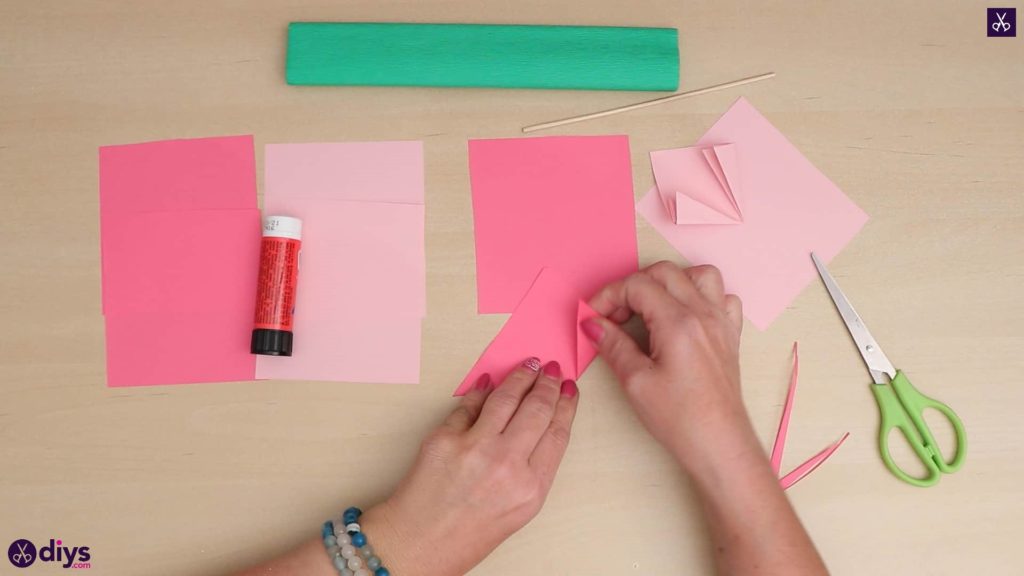
- Turn the square a quarter turn on the tabletop so its corners point up and down, and side to side, like a diamond.
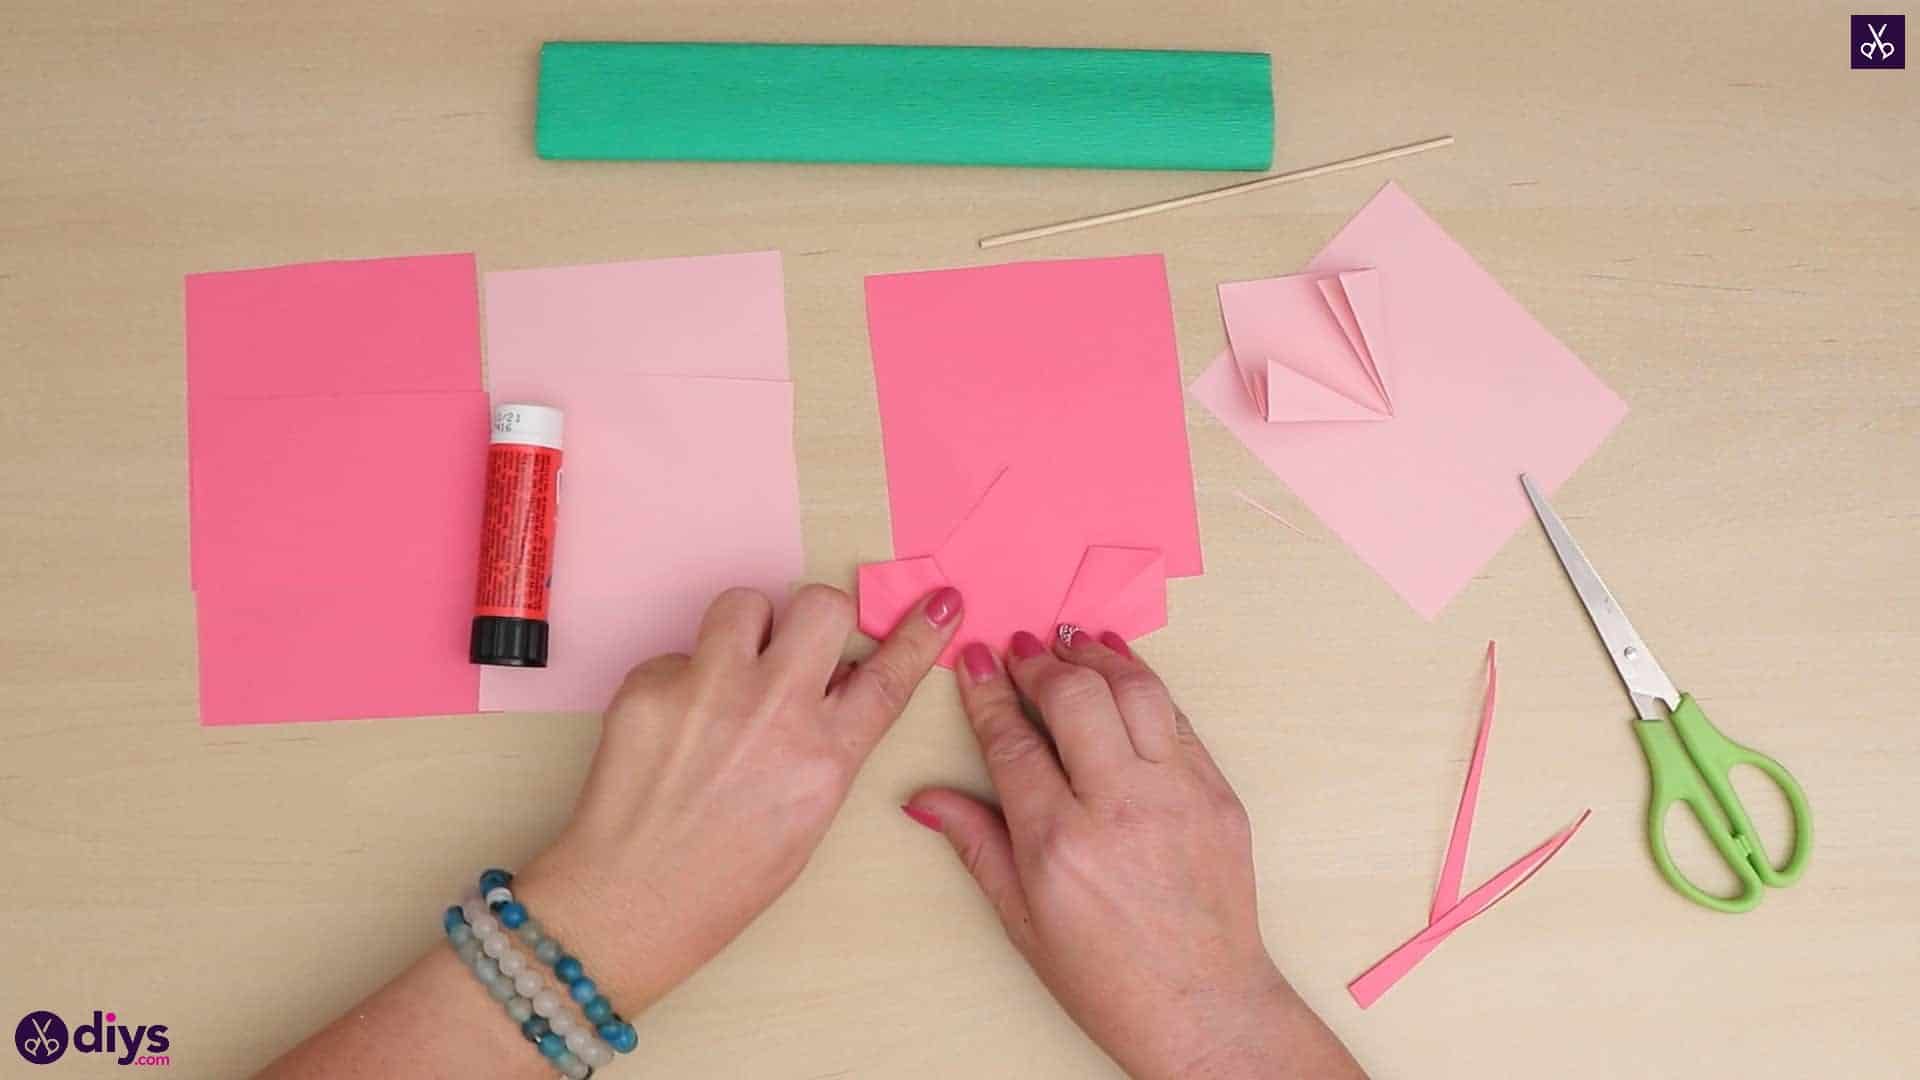
- Fold the bottom point upwards to line up with the top point. If you need to trim a little off the diagonal sides here to make even edges, that’s fine and will only make things more even, so feel free to do so.
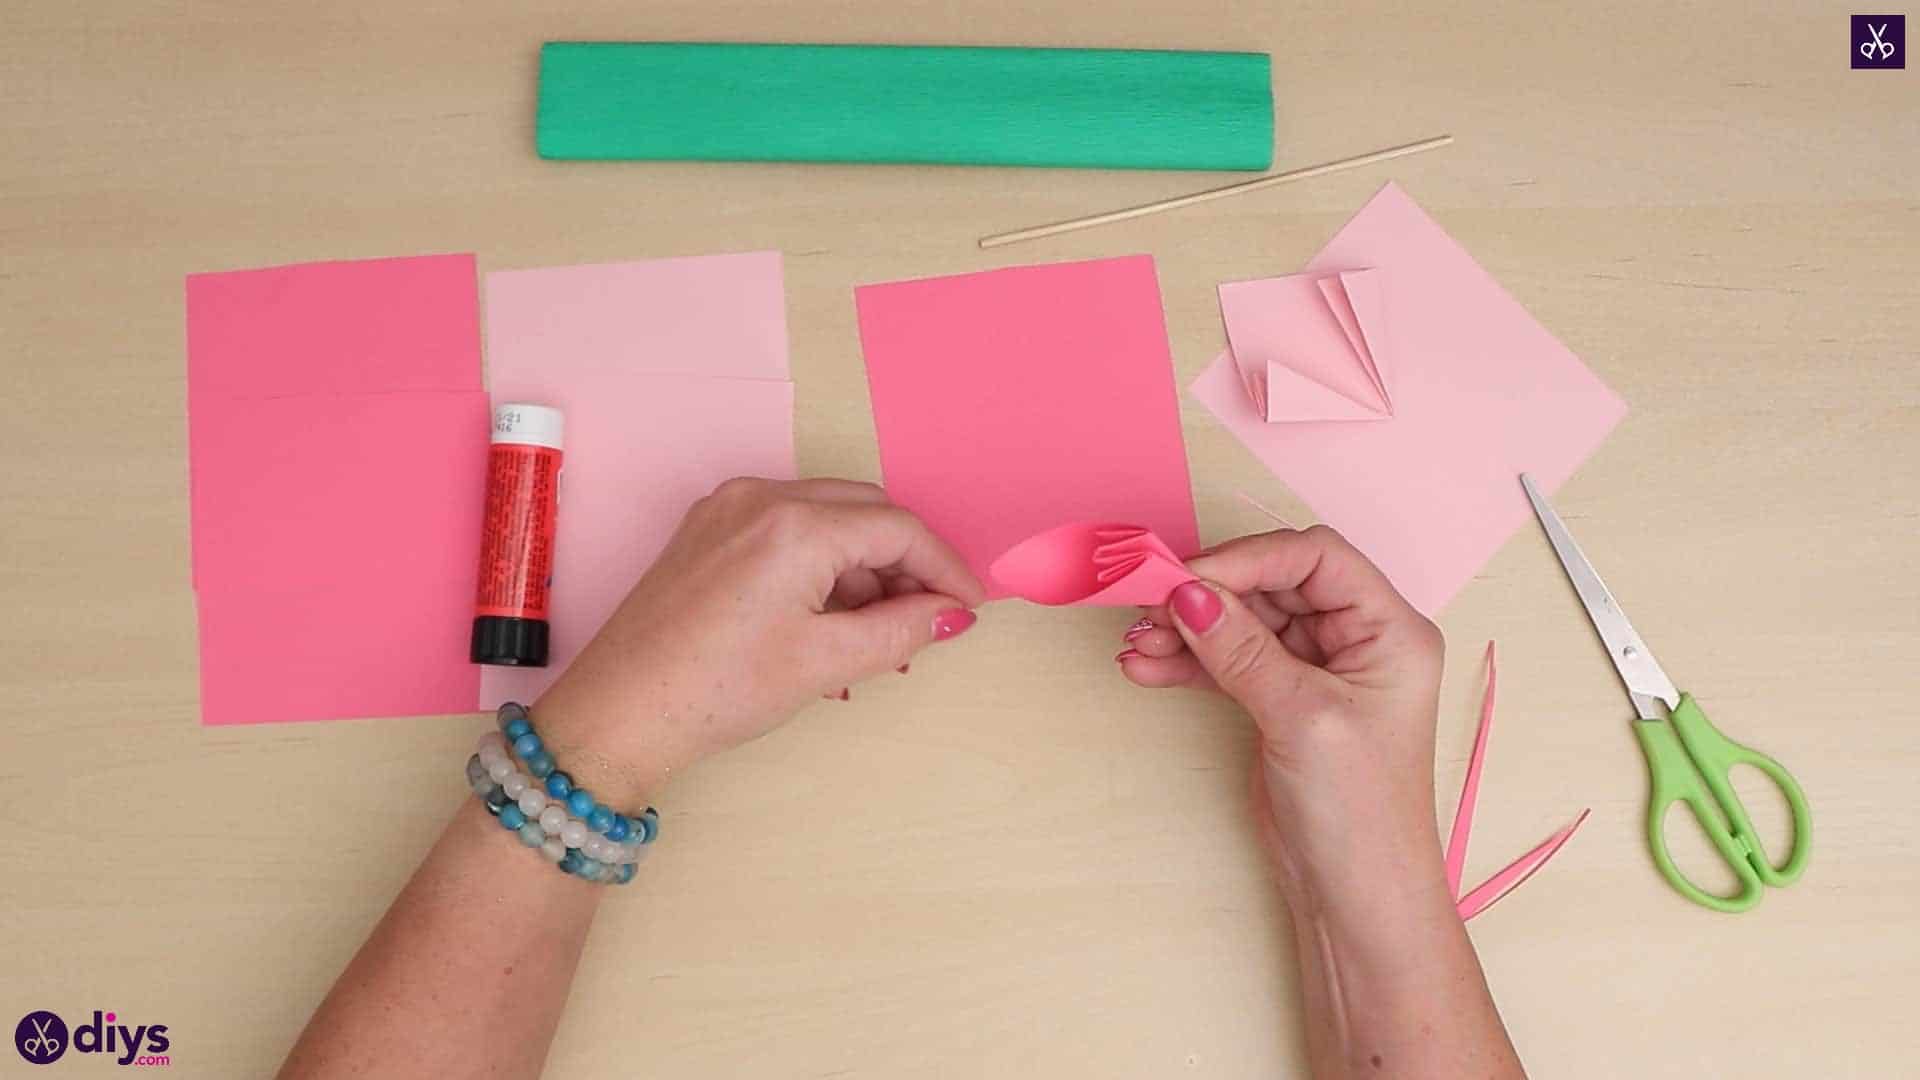
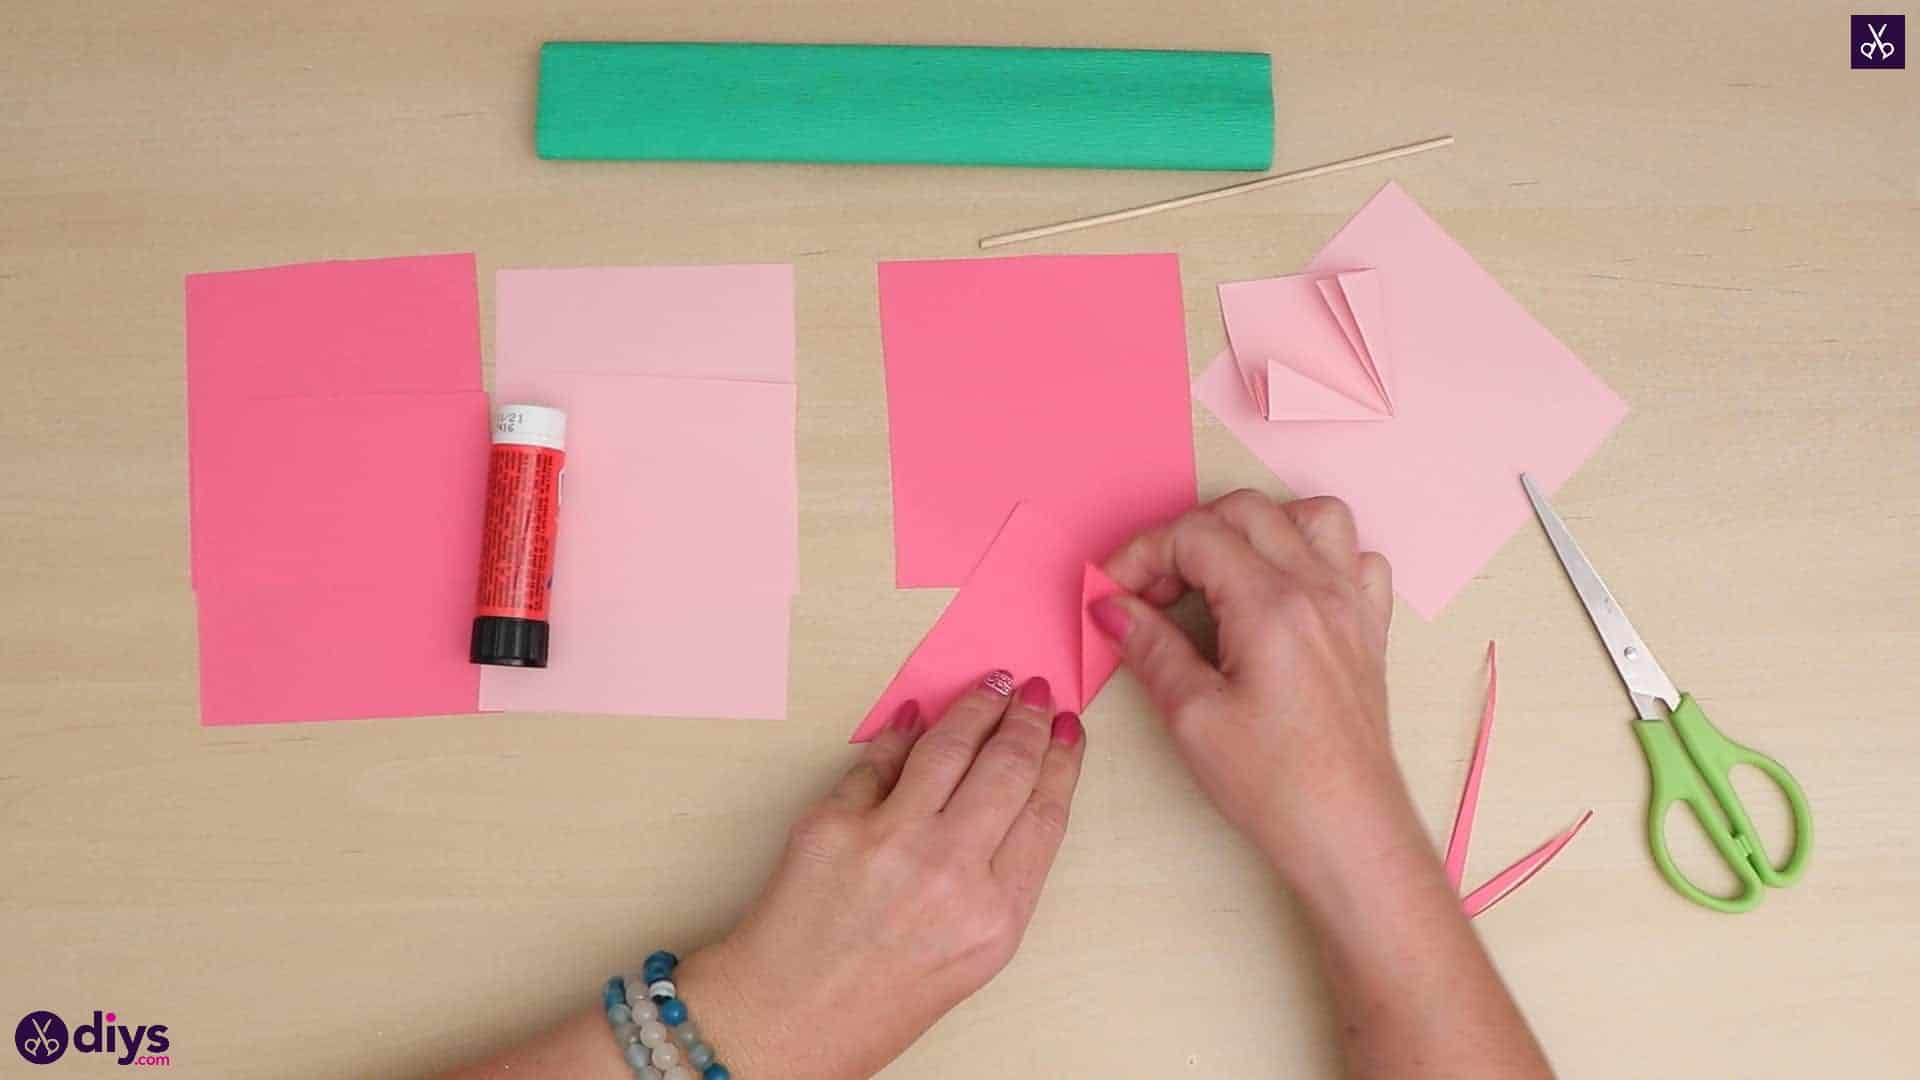
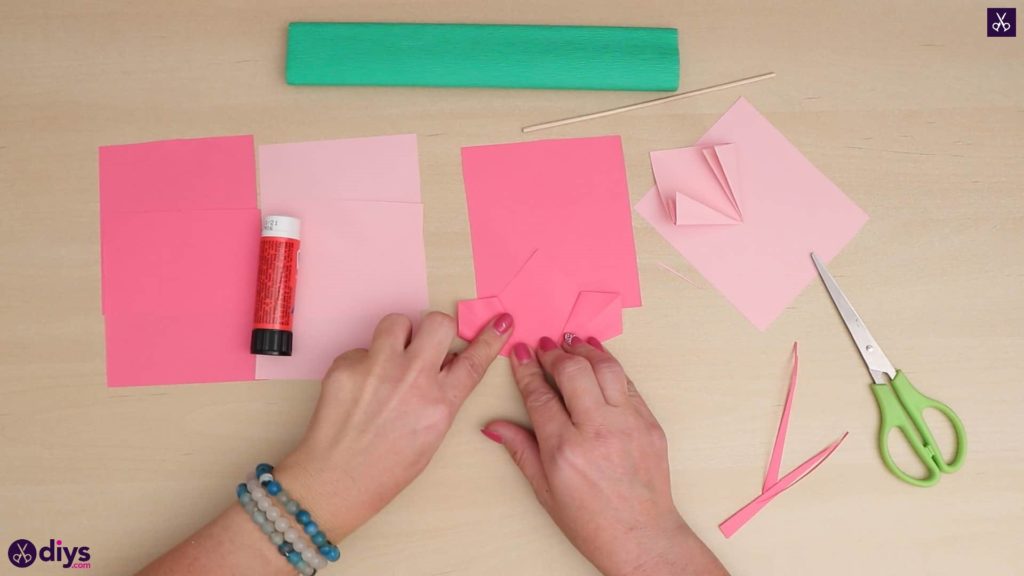
- Lay the new triangle shape you just made flat on the table and fold the right bottom corner in and upwards until it meets and sits flush with its own diagonal side; you’ll notice a natural stopping point to fold on because if you go any further, that diagonal side will either sit too low and not meet the edge or go too far and overlap it and neither of those are correct. Once you’ve folded the right side, make the exact same fold on the left but in the opposite direction (fold inward, to the middle). You’ll still have a little blunt edge in the middle that sits lower than your new upwards angled creases.
- Slide your finger inside the centre “pocket” of the folded piece you just made on either side and open it up a little until you can flatten it, pushing the crease down against the table so the sides extend outwards in a shape like a kite on each side.
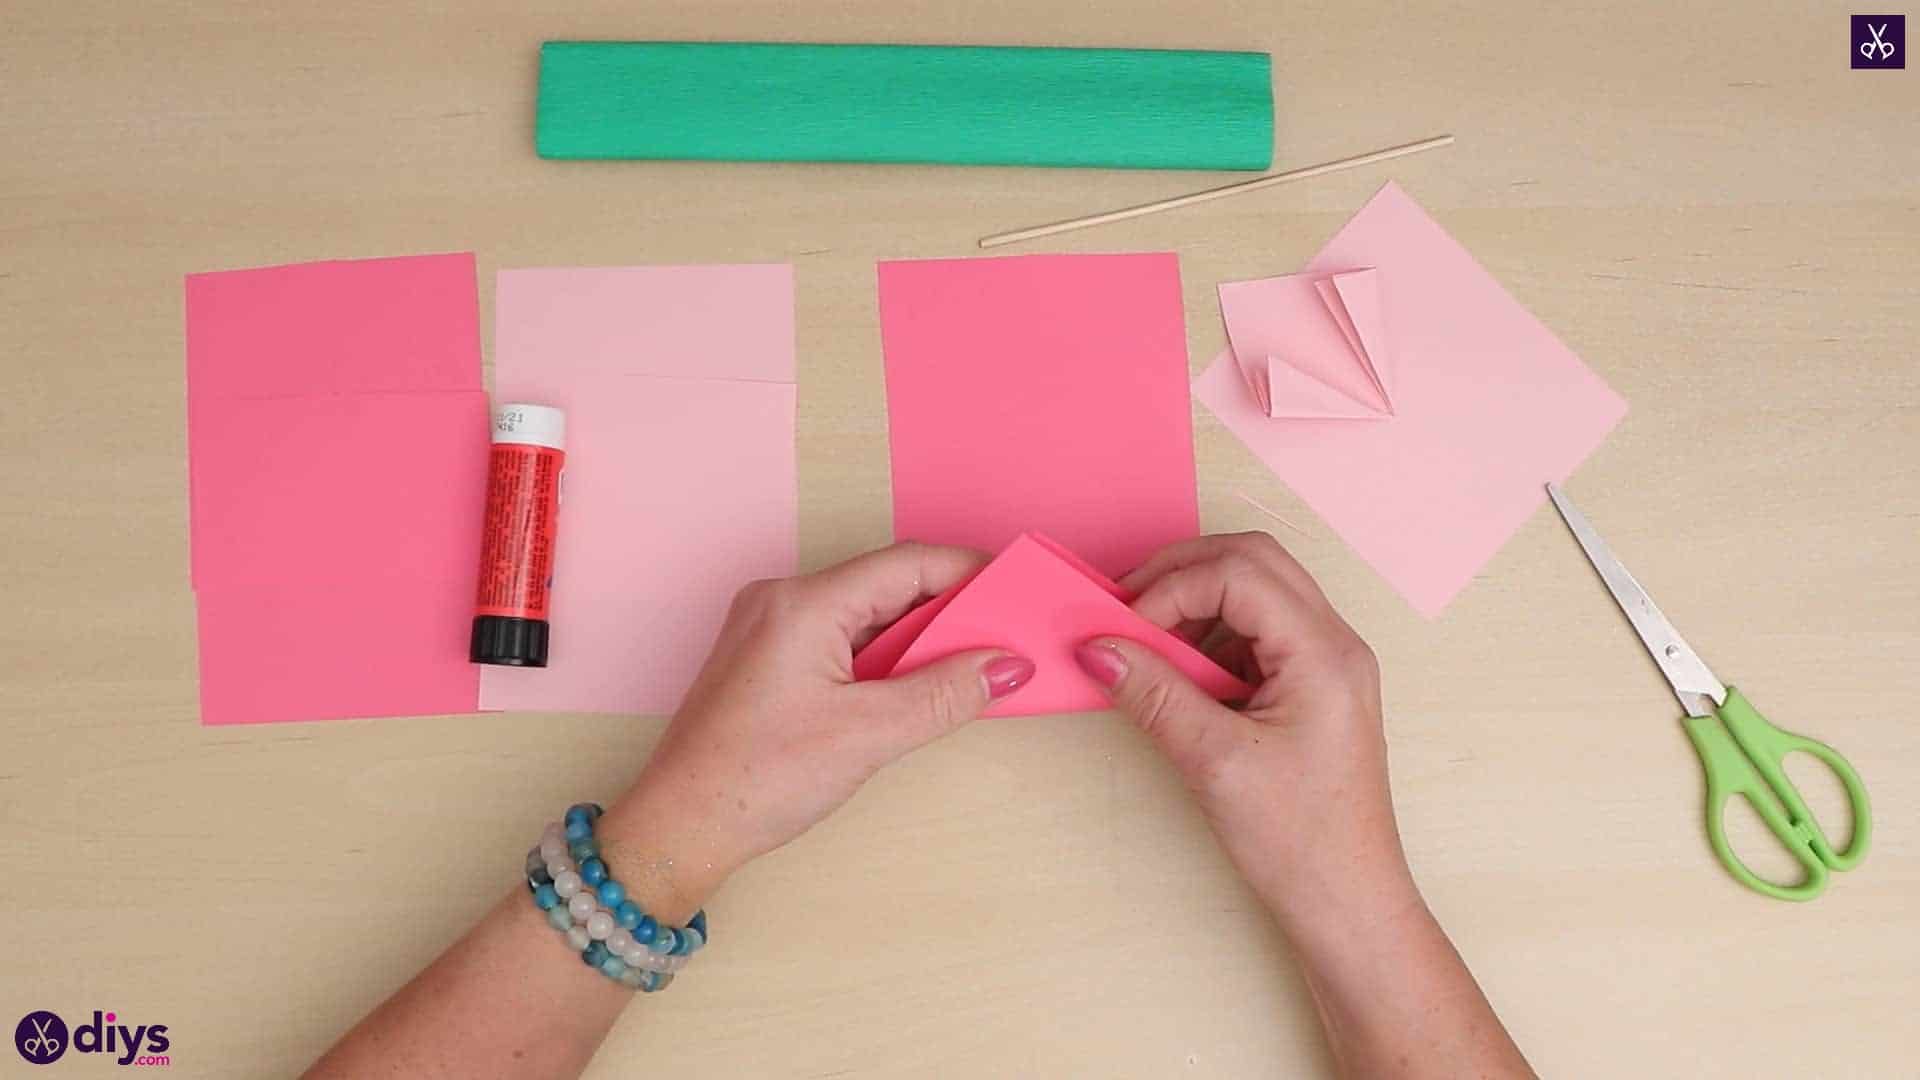
- Take the lower edge of that new little “kite” shape and fold it upwards to meet its upper counterpart, so its crease lines up evenly with the kite’s other crease. Do the same on each side. You now have what look like little pizza slice shapes on each side, but each one layered like an accordion.
- Fold the whole shape along its vertical centre line down the middle so its lower angled outer edges meet up evenly. You’ll see that you have a shape along like a cone, but with little folded spikes inside.
Repeat these steps witheach of your eight squares, giving you four finished folded shapes in dark pink and four in light pink.
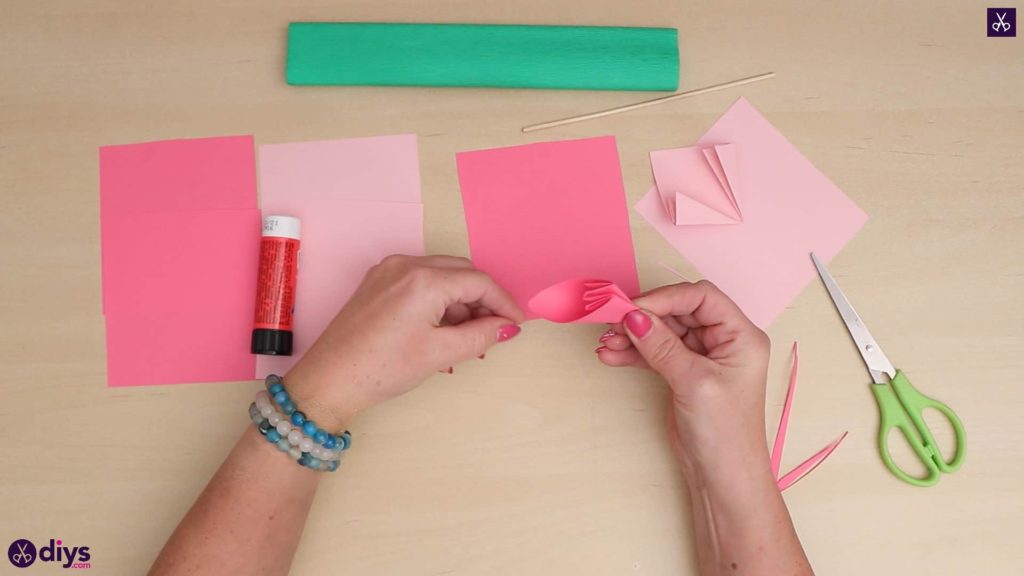
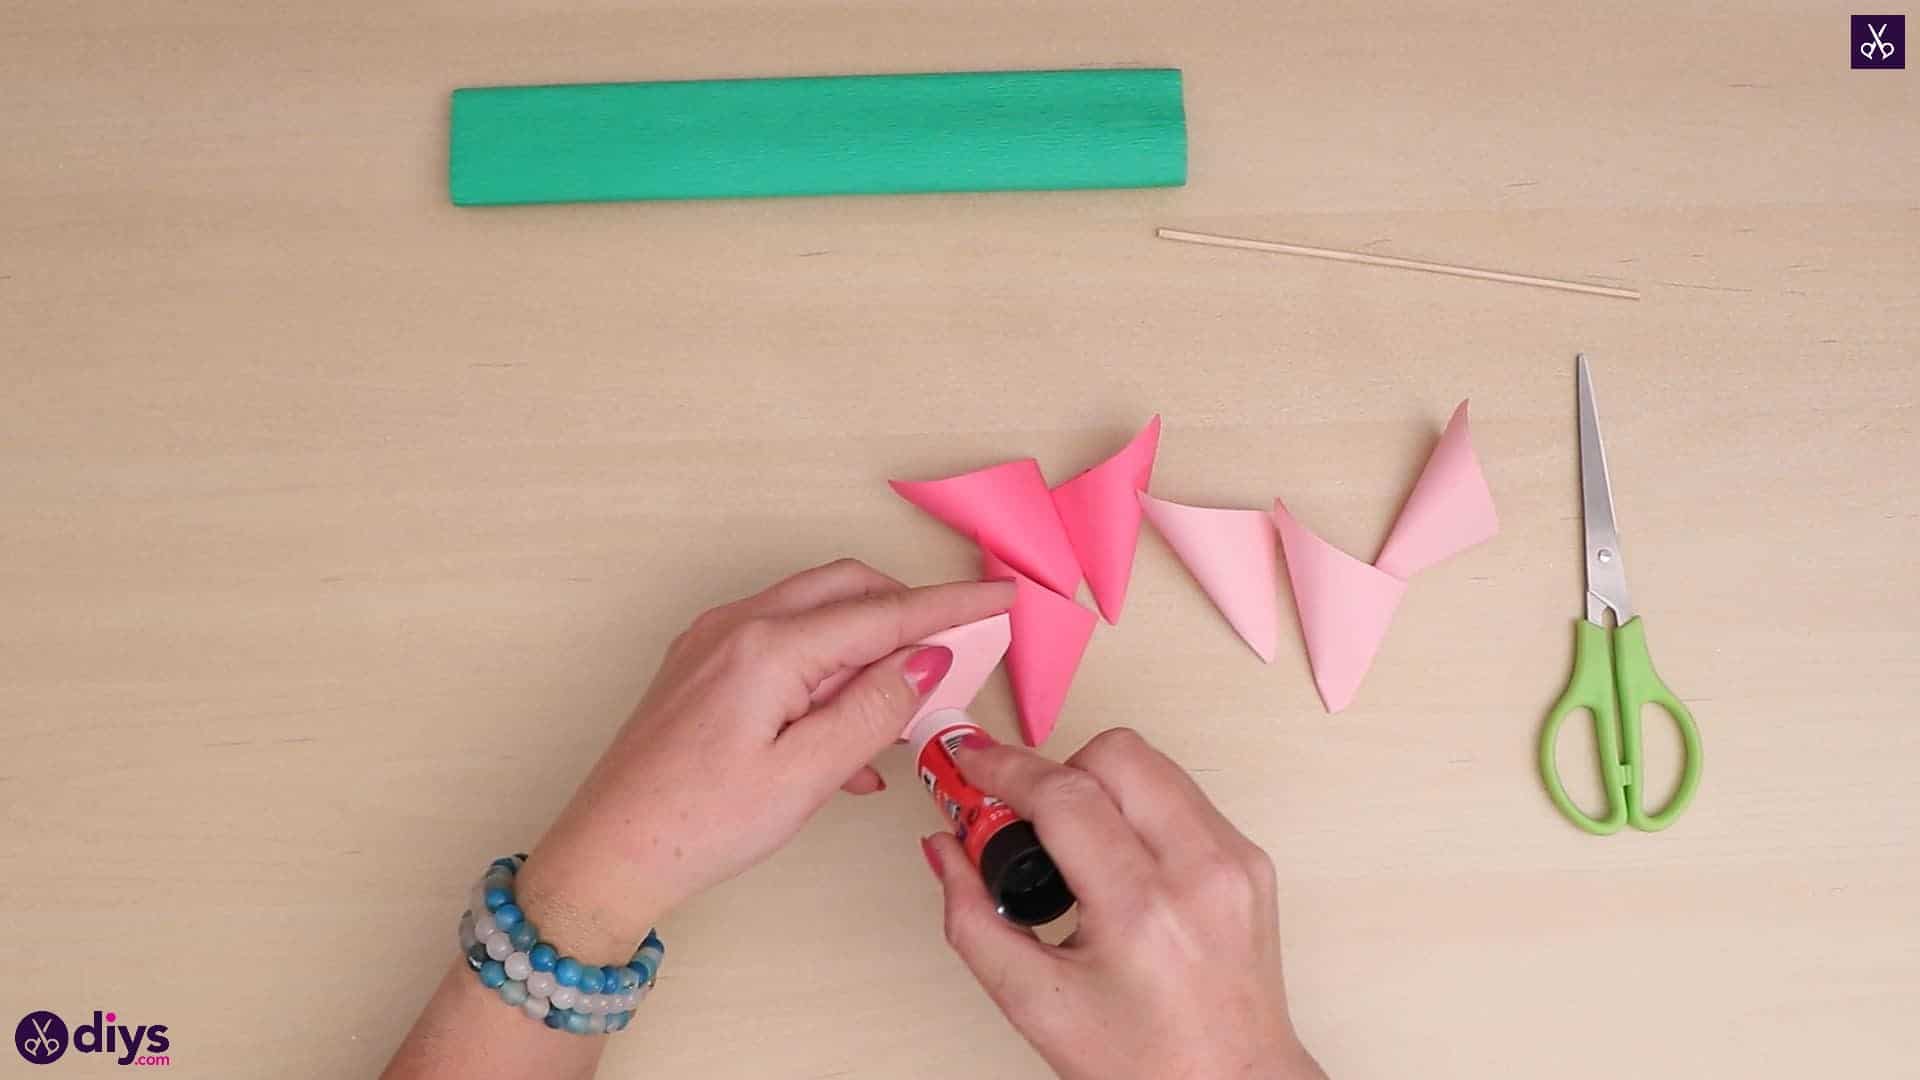
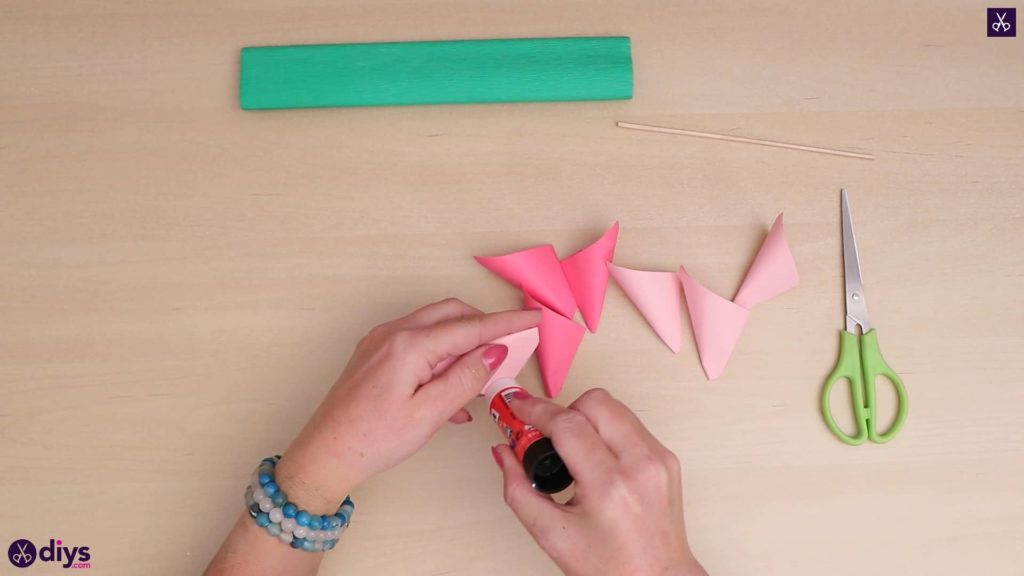
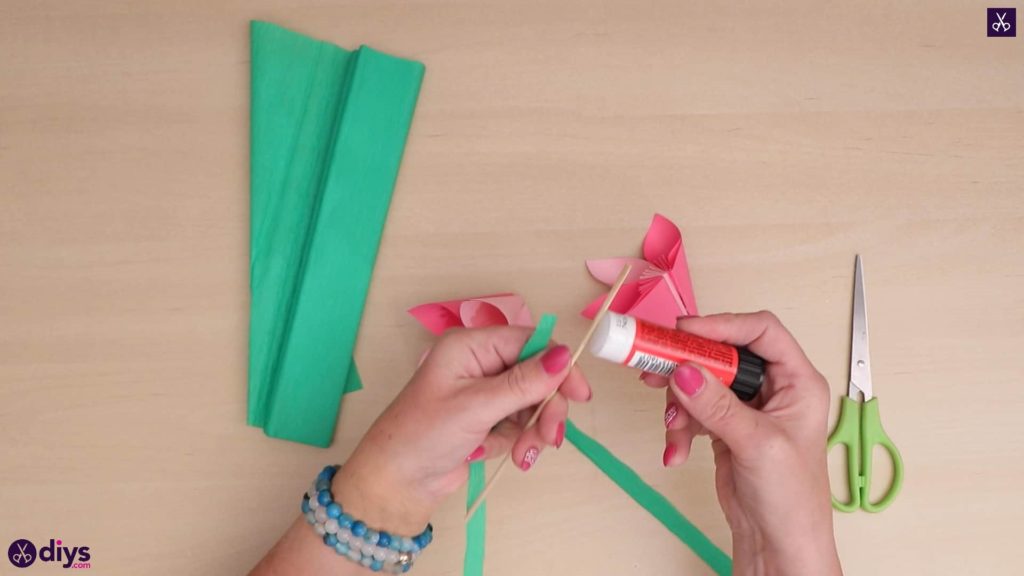
Step 4: glue
Apply glue along the inside edges where the two folded sides meet when you fold your new cones, sticking each of your eight pink pieces closed. You know have whole petals! Start forming your flower by applying glue to the sides of their seamed centres and sticking them side by side, lining up those closed seams in the middle. The rounded shape of the cones will naturally make the shape that forms a curved one, with the rounded, uncreased backs of the cones and their top points facing outward. Alternate your colours as you glue them together, so a light pink always sits between two dark pinks and vice versa. Don’t complete your entire flower yet; start with two sides of three (one with two dark pink on either side of a light and one the exact opposite) and set these aside with your two leftover spare cones (which should be one of each shade). You’ll make your stem before you complete the flower.
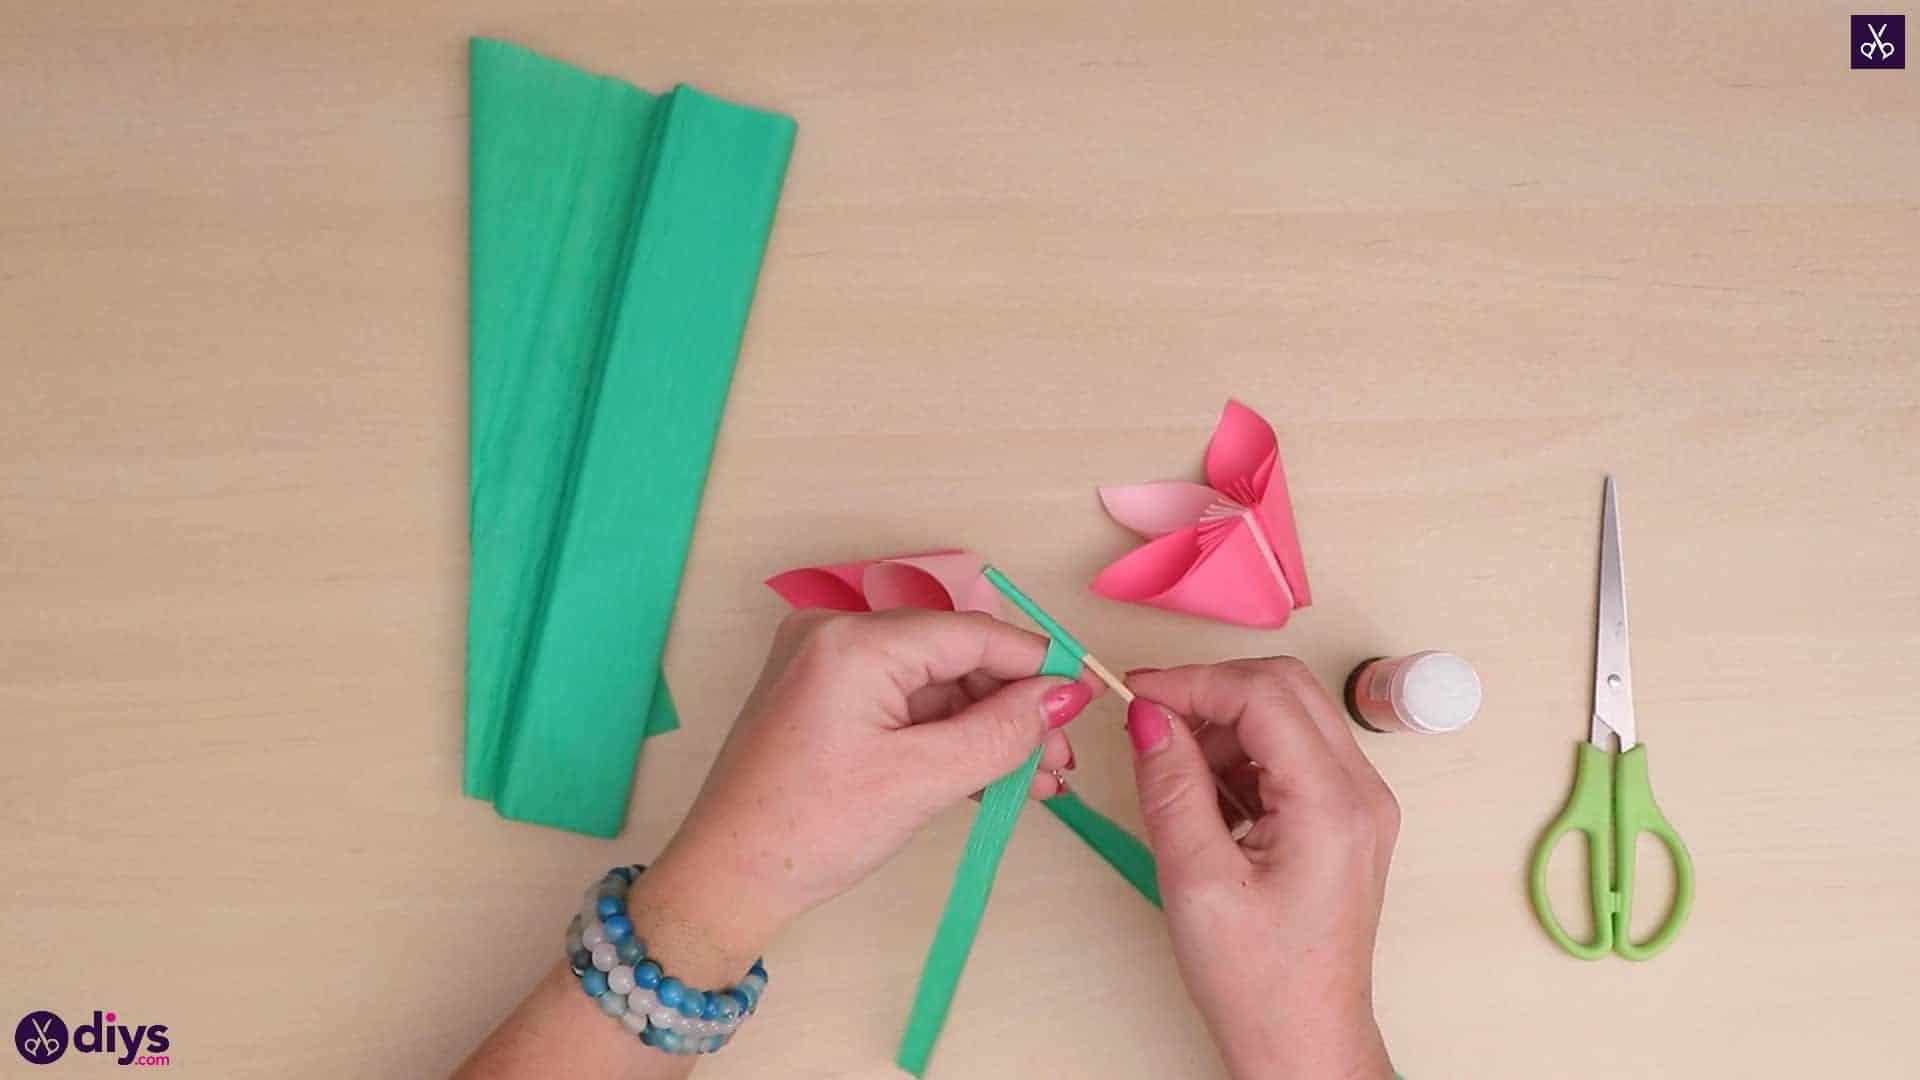
Step 5: making the stem
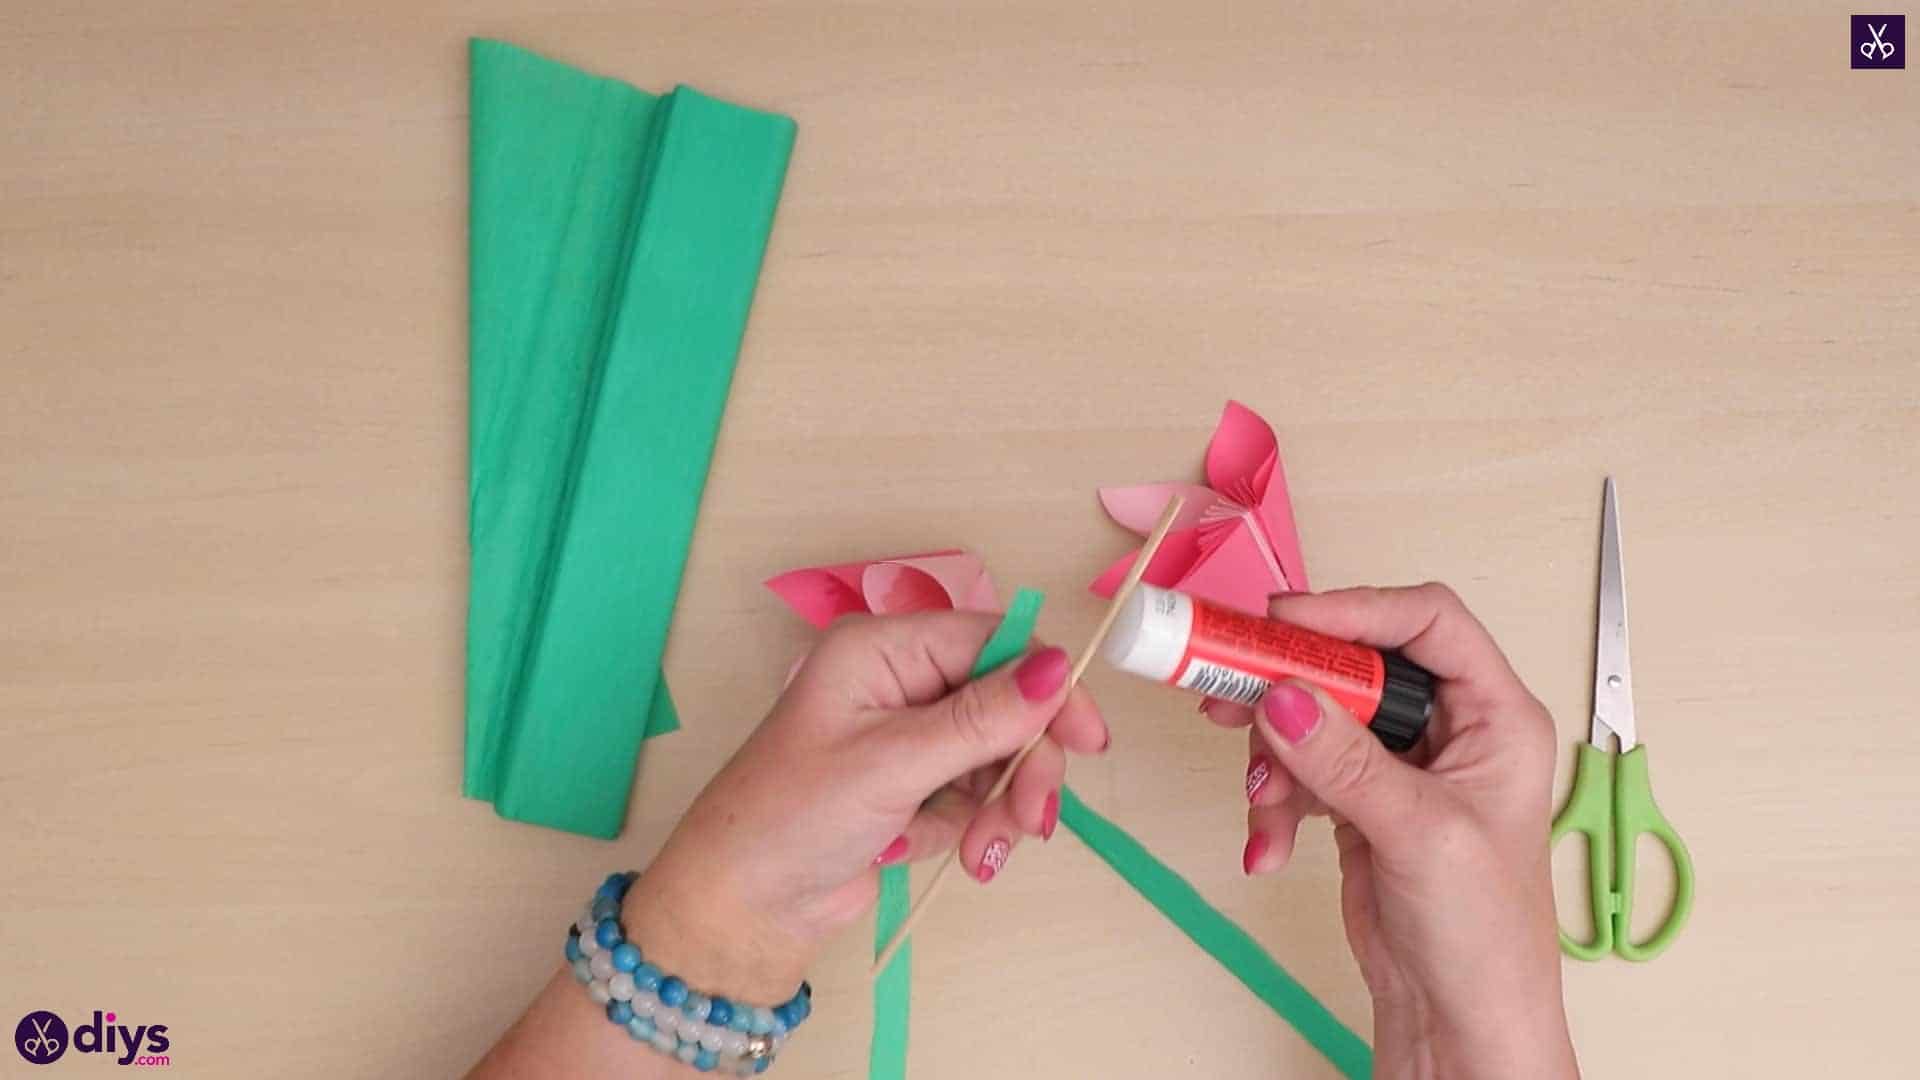
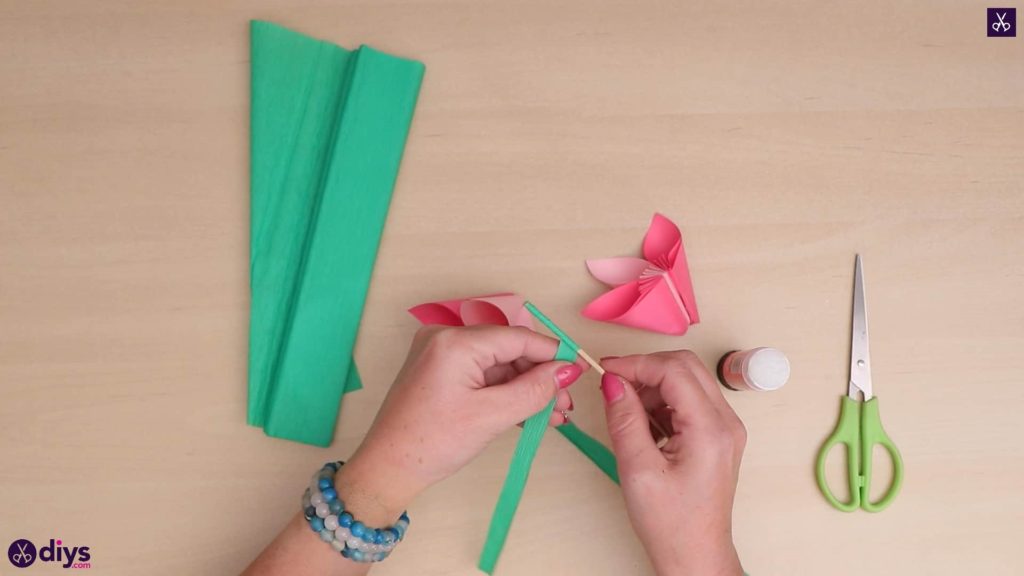
Make your flower’s stem! Cut a strip of crepe paper that is the full height of your roll’s free end and about half an inch wide. Apply glue to one end of your wooden skewer and stick the end of your green crepe paper strip down here, horizontally so the strip is perpendicular to the skewer. Wrap the strip fully around the skewer so it covers the wooden end entirely and then keep wrapping, but angling your paper strip downward slightly so that the green crepe covers all of the wood as it spirals down the length of the skewer. Apply glue at the other end, trim off excess green crepe paper, and stick the end down there. Once the stem is done, apply glue to one end, stick it to the inside centre of one of your petal curves, and close the circle fully in the same way we talked about before, alternating shades of petal cone and completing the circle.

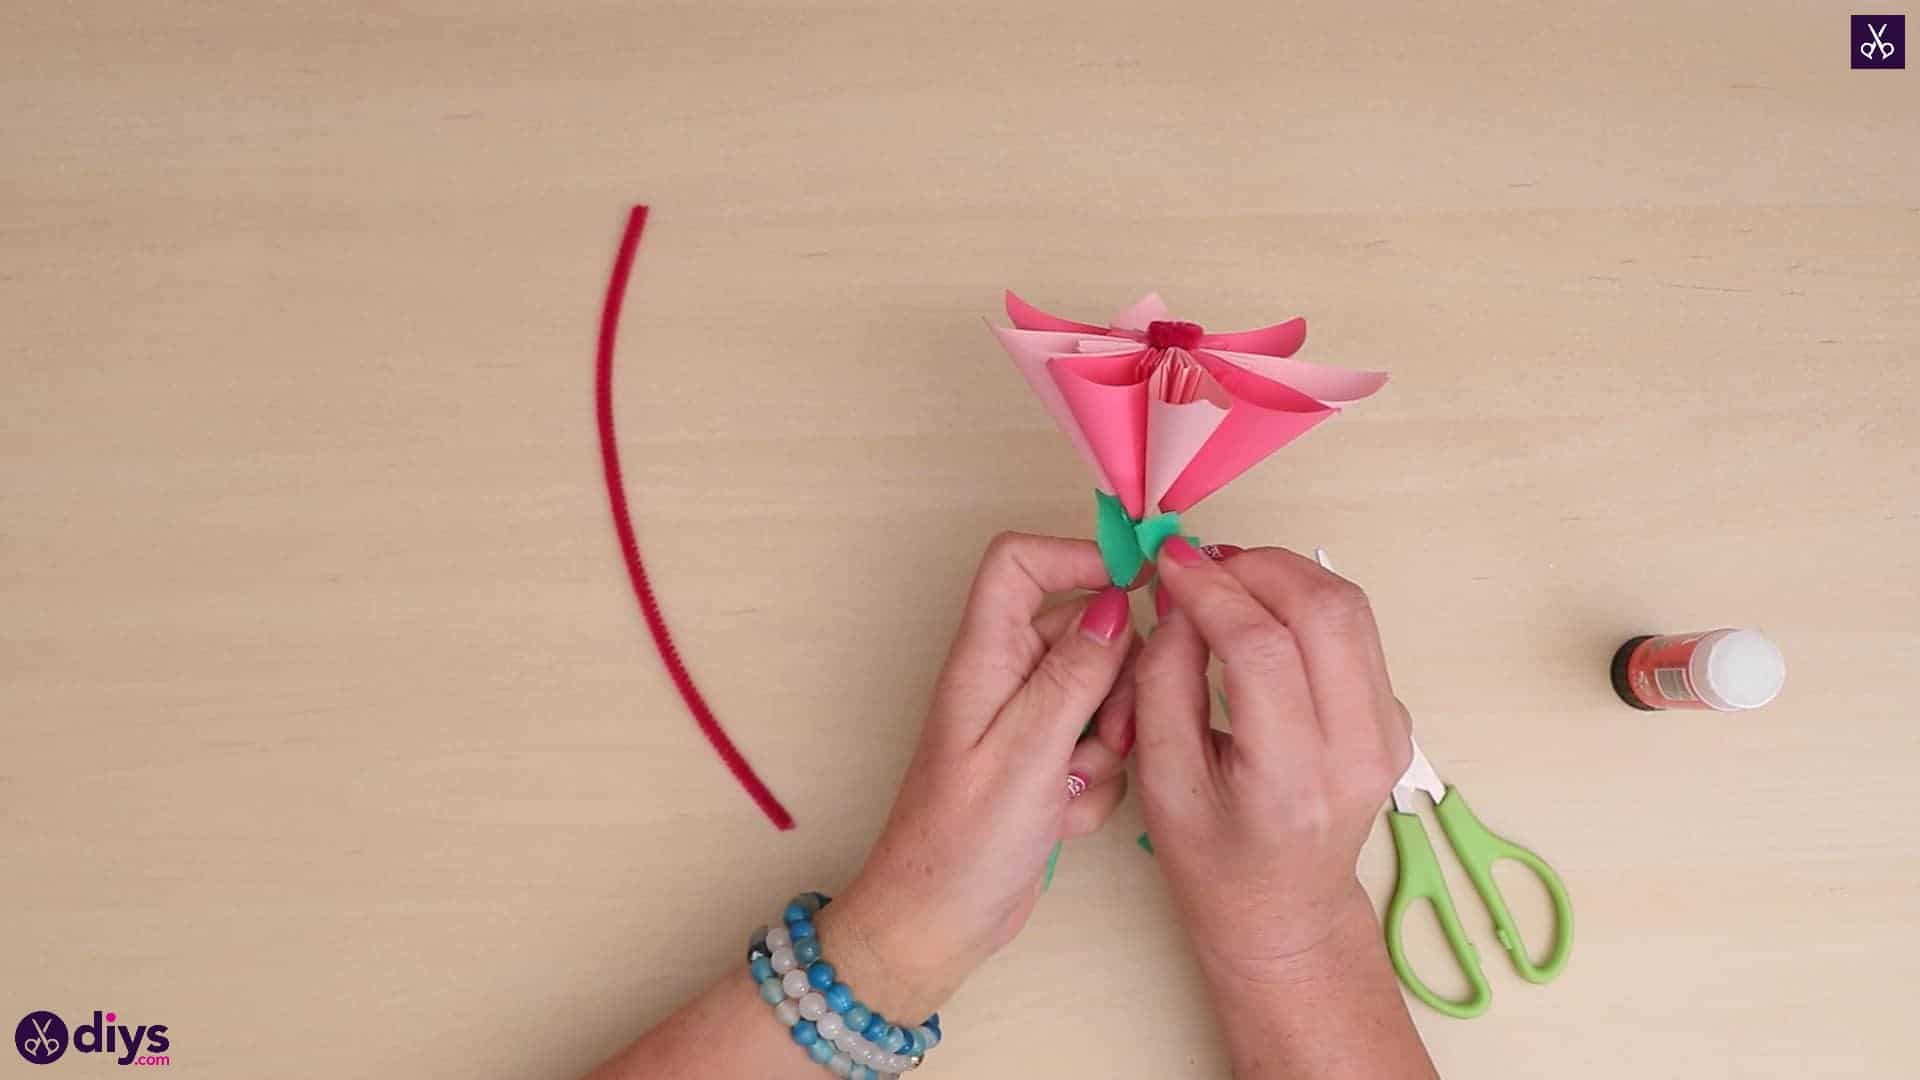
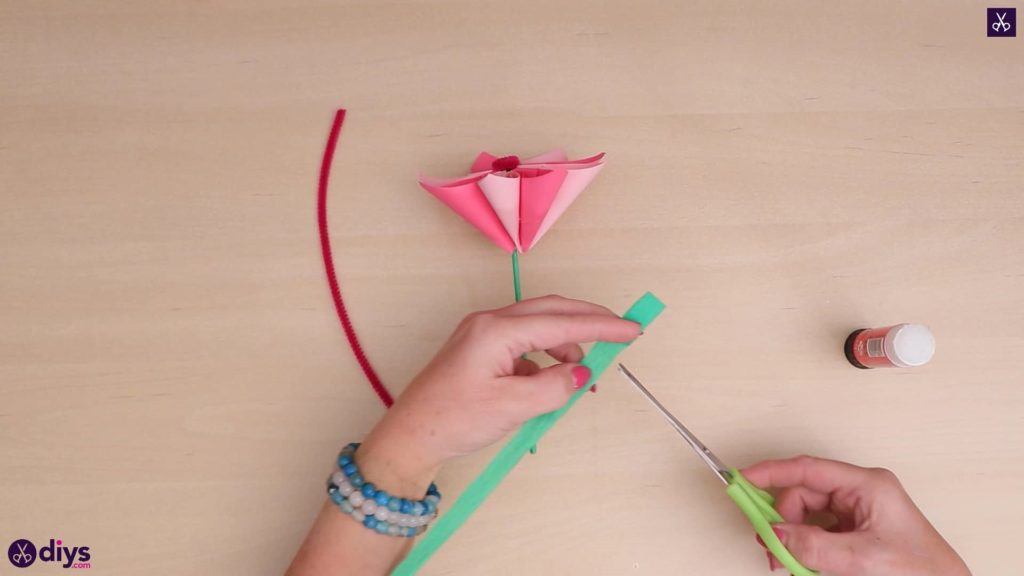
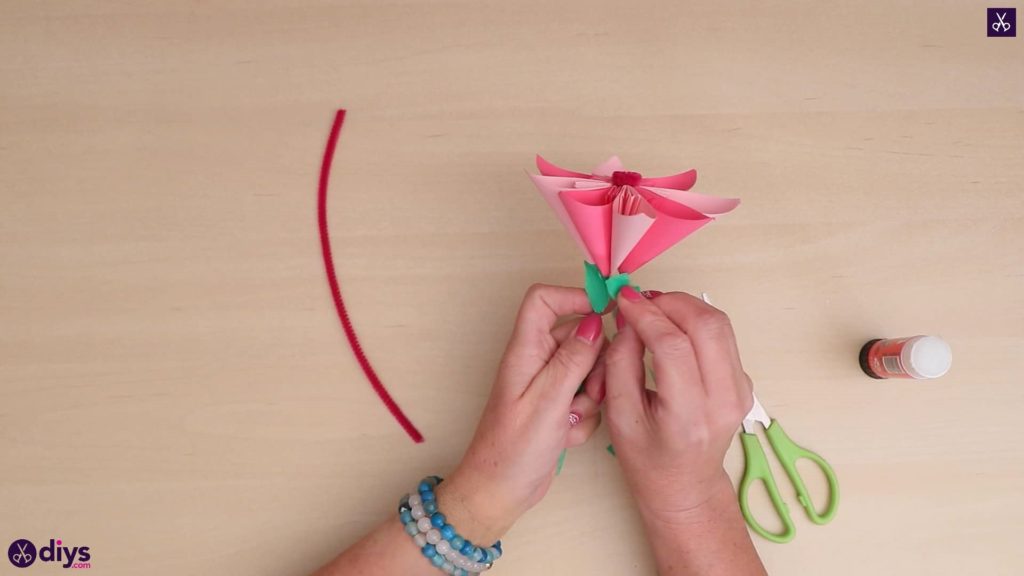
Step 6: adding details
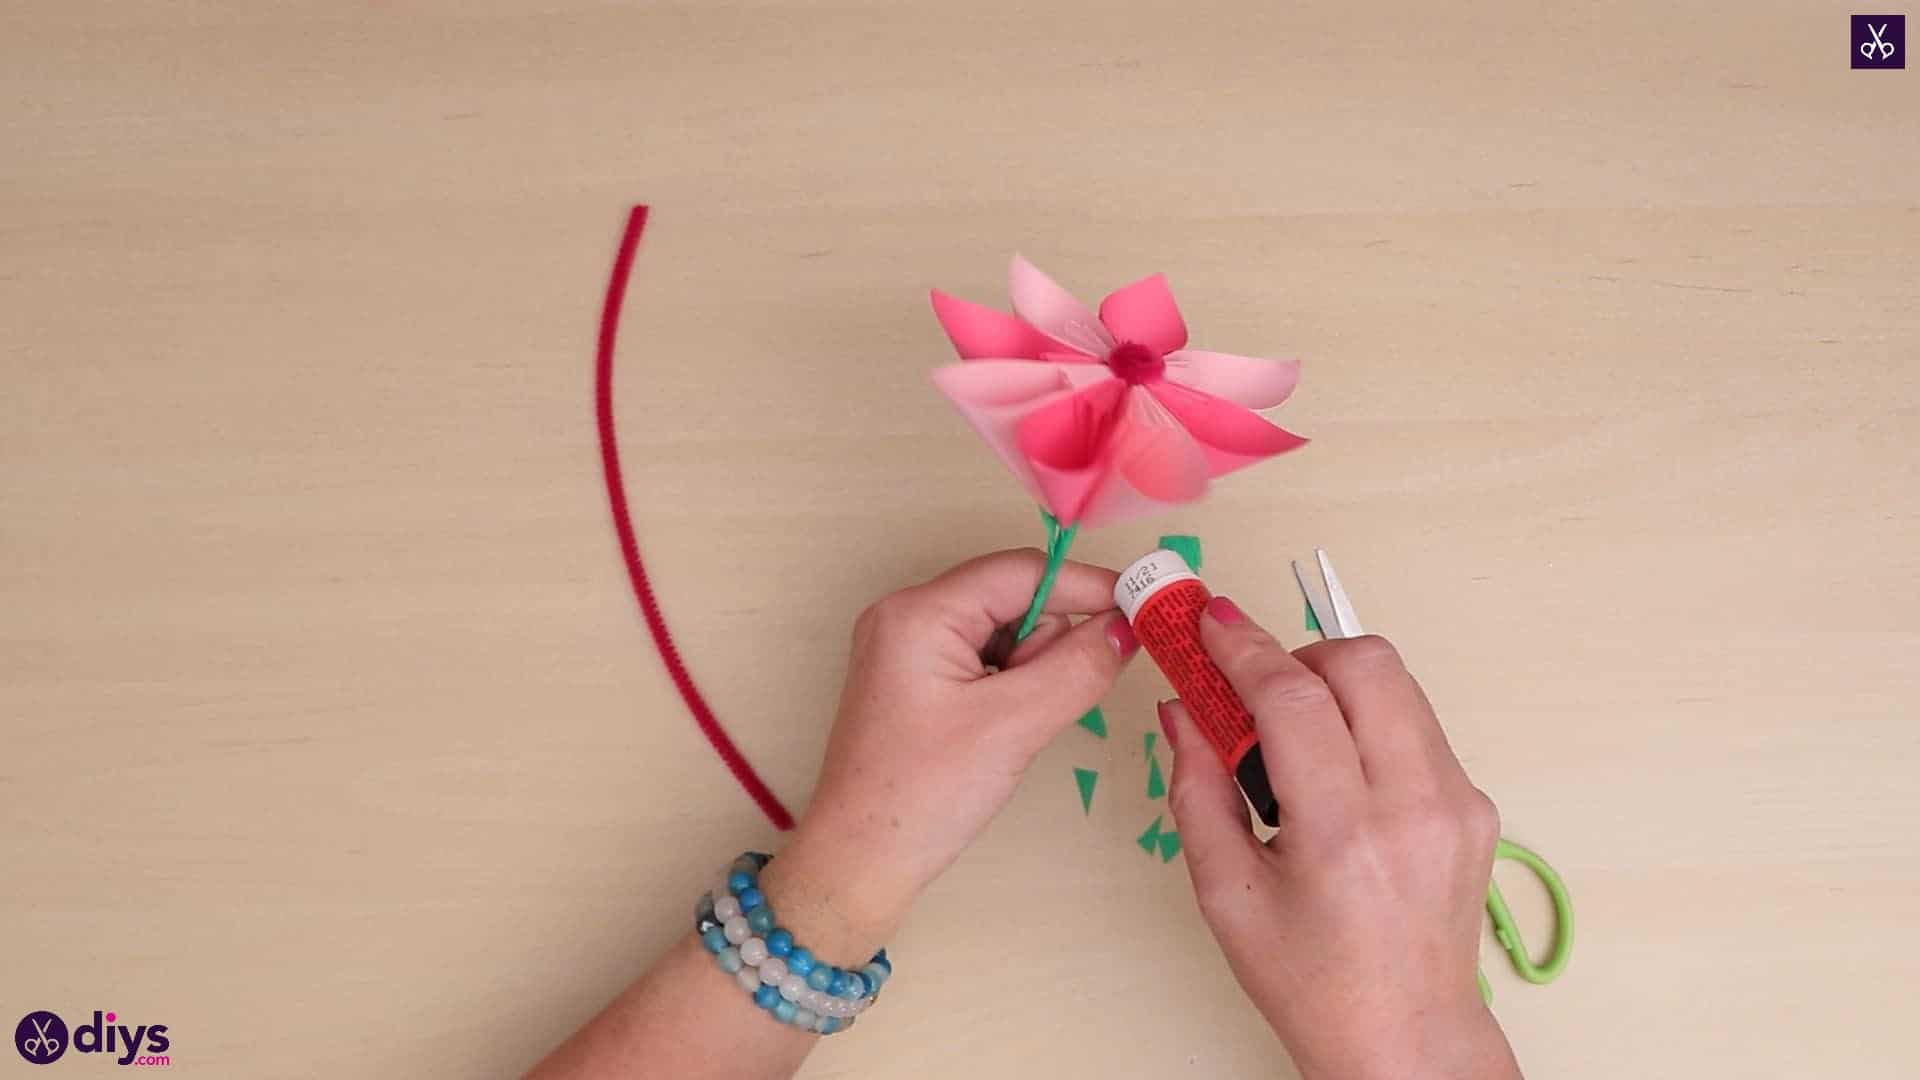
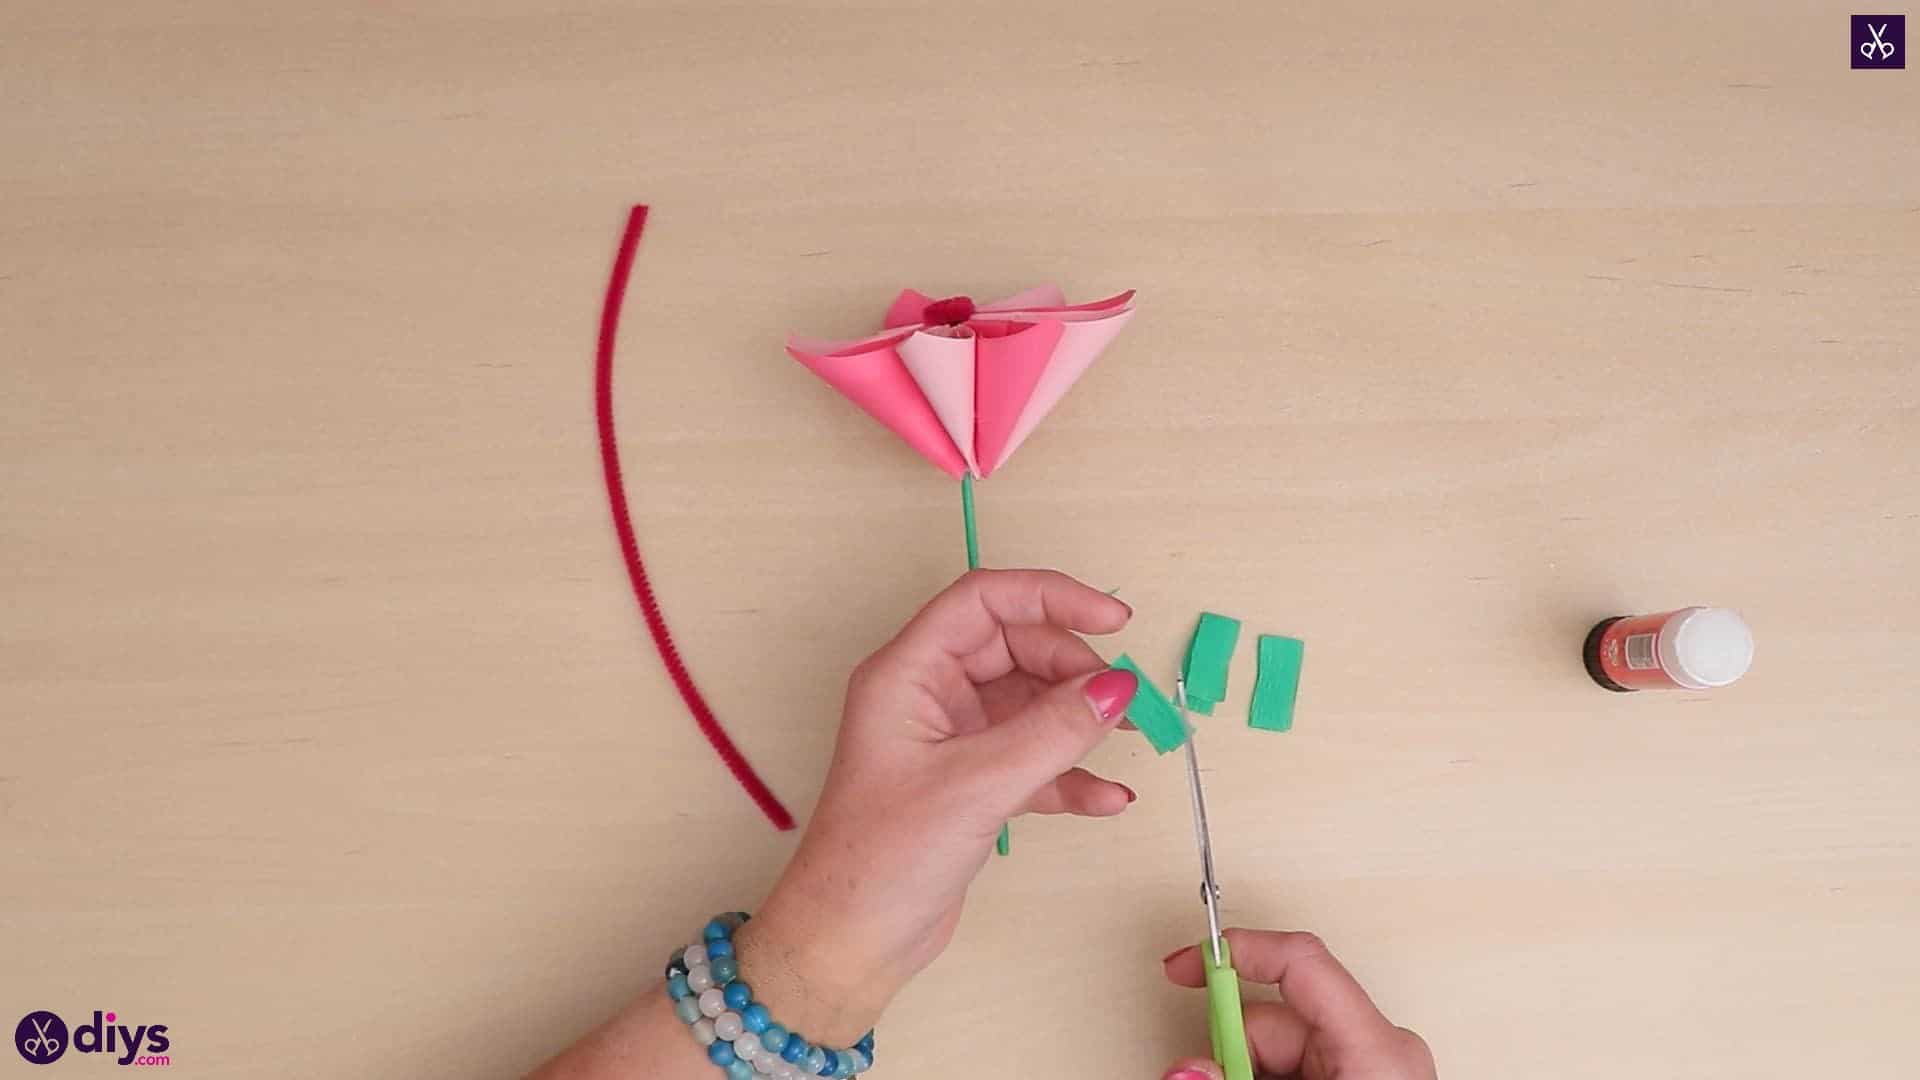
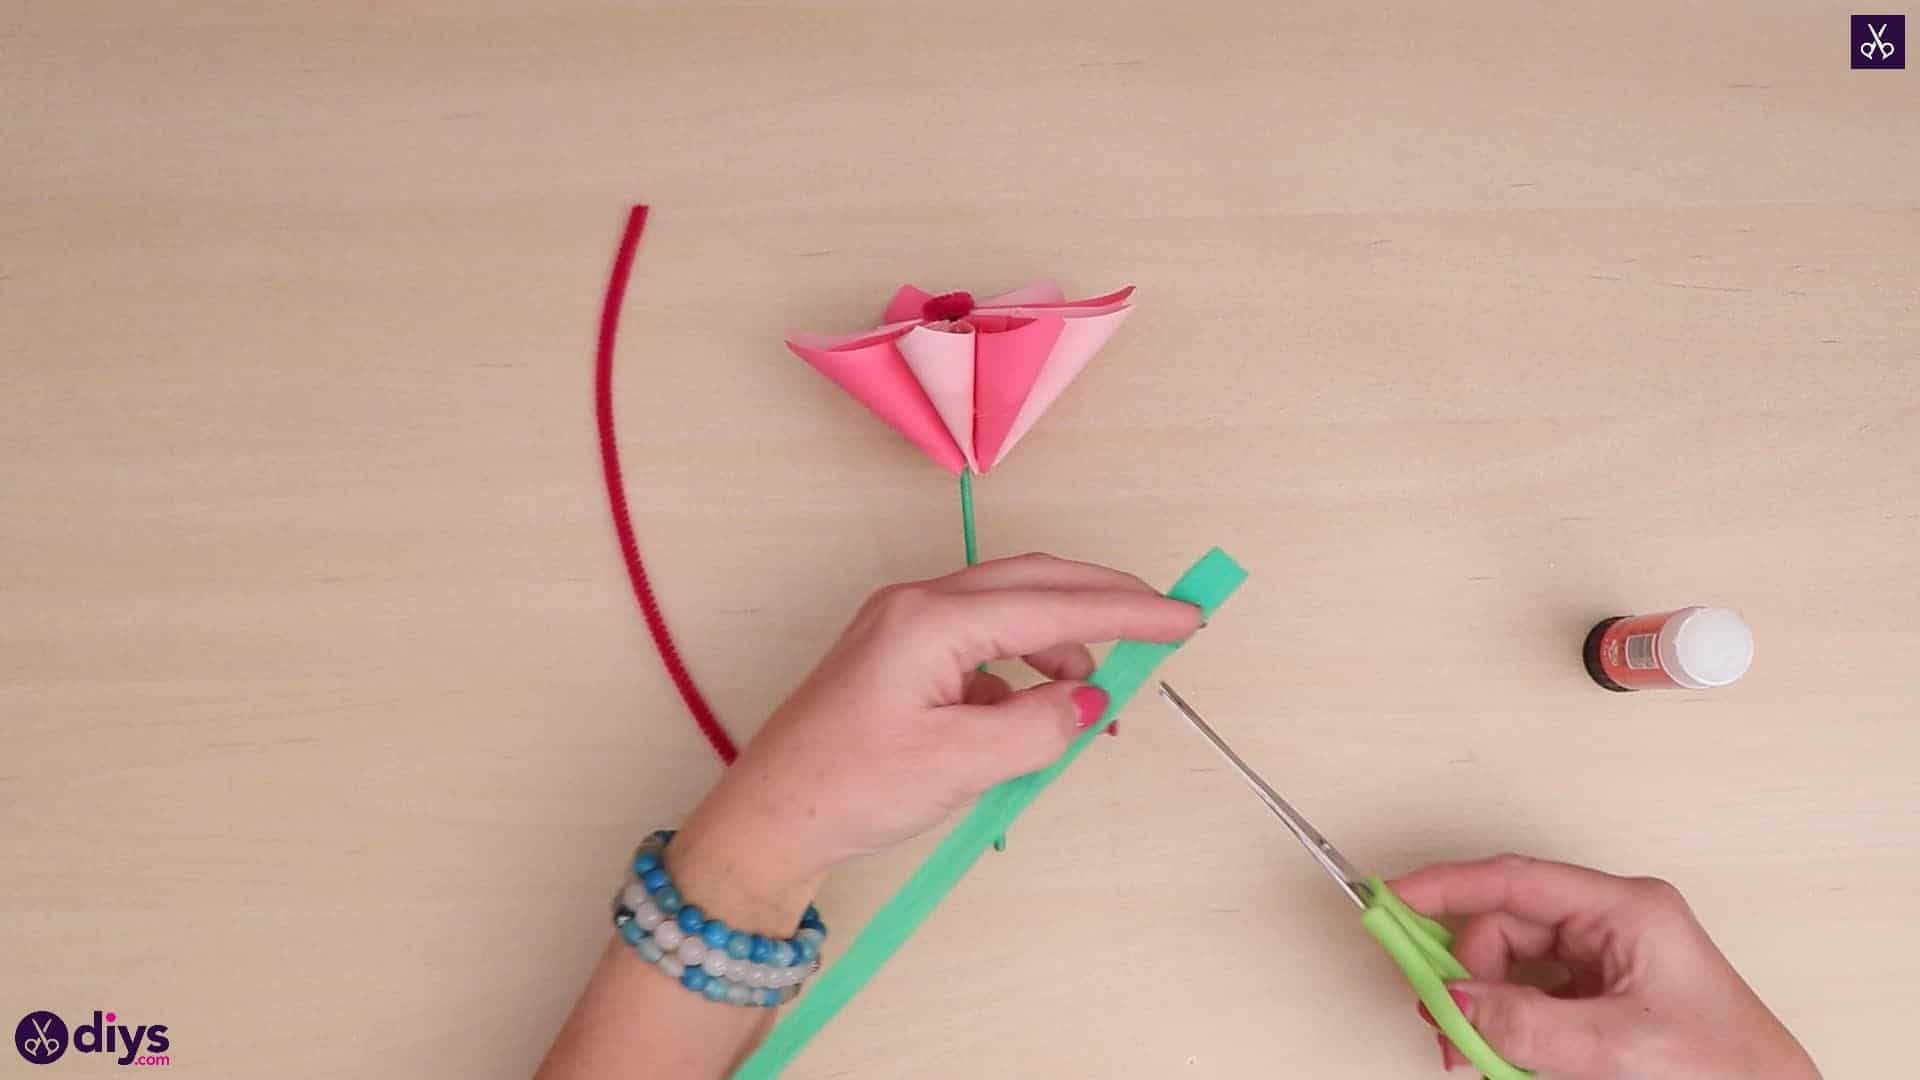
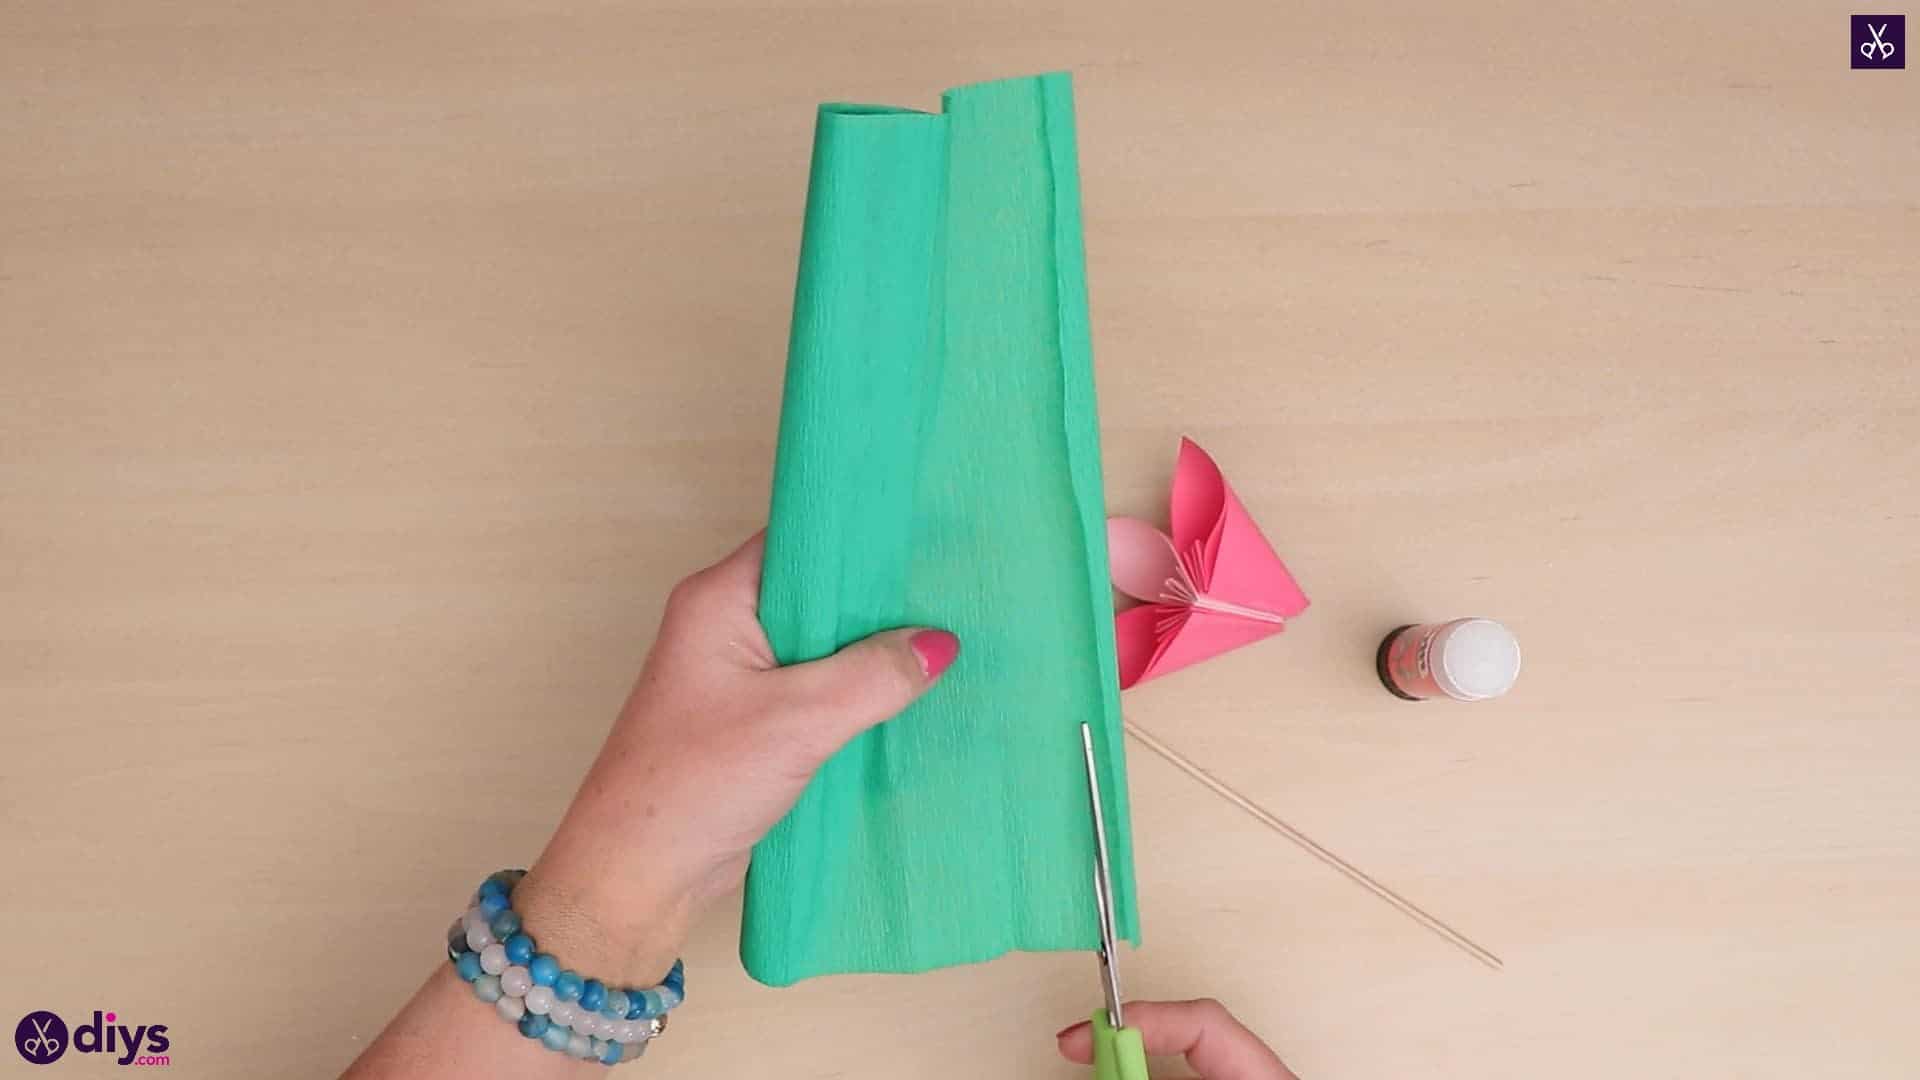
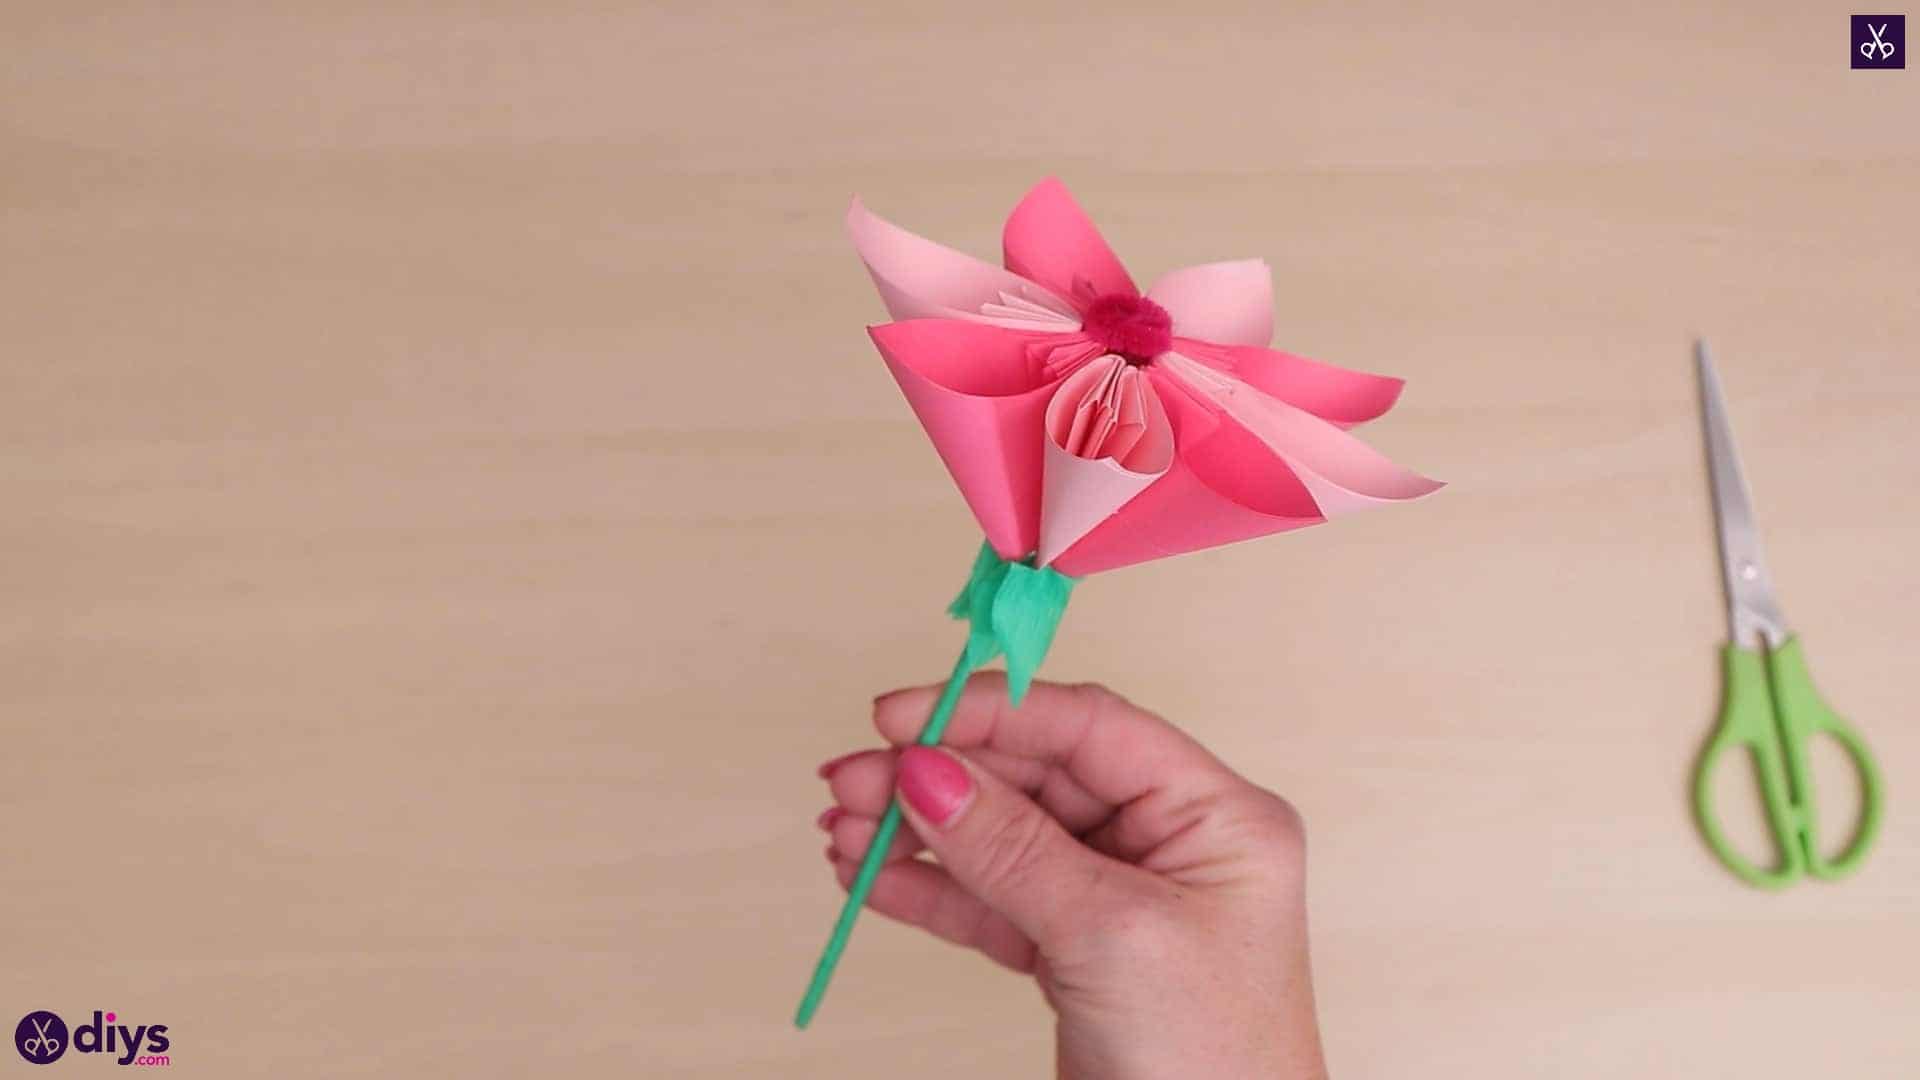
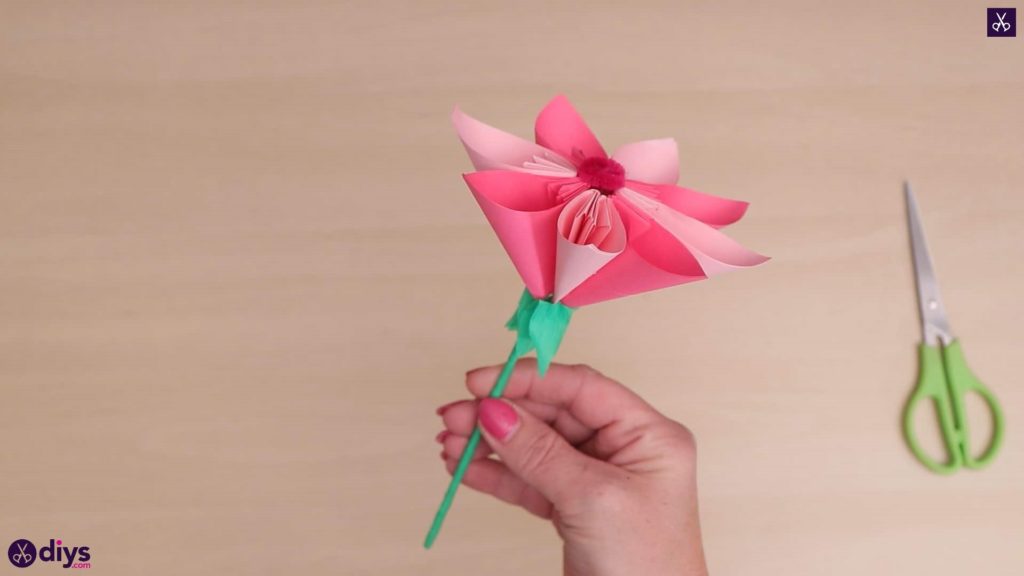
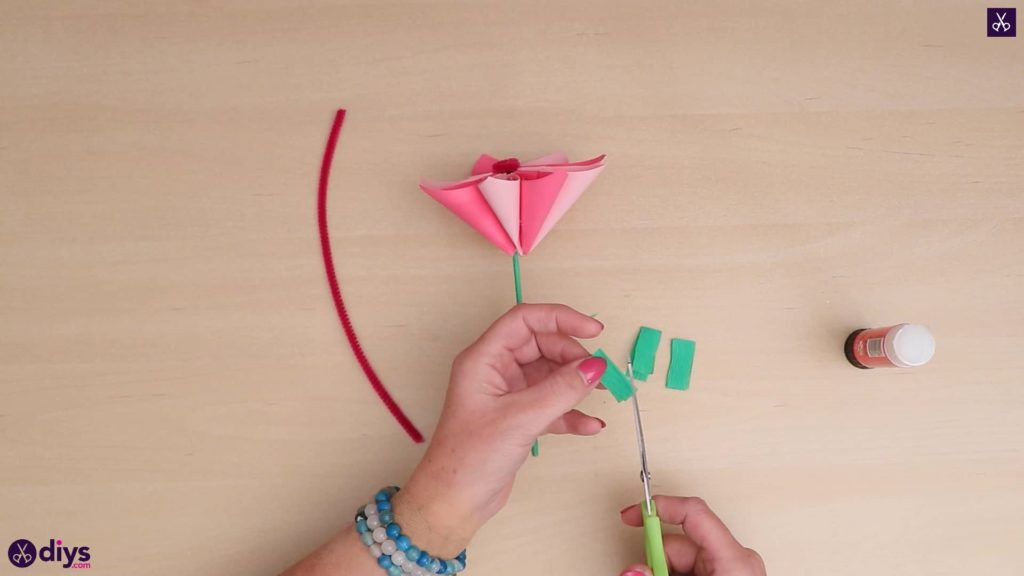
Cut a piece about two inches long from the end of your pink pipe cleaner. Curl one and in like a little spiral and leave the other sticking straight down. Apply glue to the center of your flower, where all the petals meet in the center, and wedge the stem of your pink pipe cleaner piece into the middle so the curl you made rests right on top in the glue, like the central pollen of a flower. Then, cut another strip of green crepe paper the same size as before. Cut it into four even pieces and fold each of those in half. Cut the corners off of each of these where their ends meet, opposite the creased fold side. Apply glue on one side of each of these folded pieces an stick them down at the outside base of the flower, where the petal cones point downward to the spot where the skewer or stem emerges. This will look like the bud the flower bloomed from.

You’re all finished! Put your flower wherever you please or make more in all different colours to create a paper flower bouquet! Just in case you’d like to try this project out for yourself, here’s a fantastic tutorial video to help you!
</div<