DIY Ribbon Wall Hanging
Updated on November 19, 2025


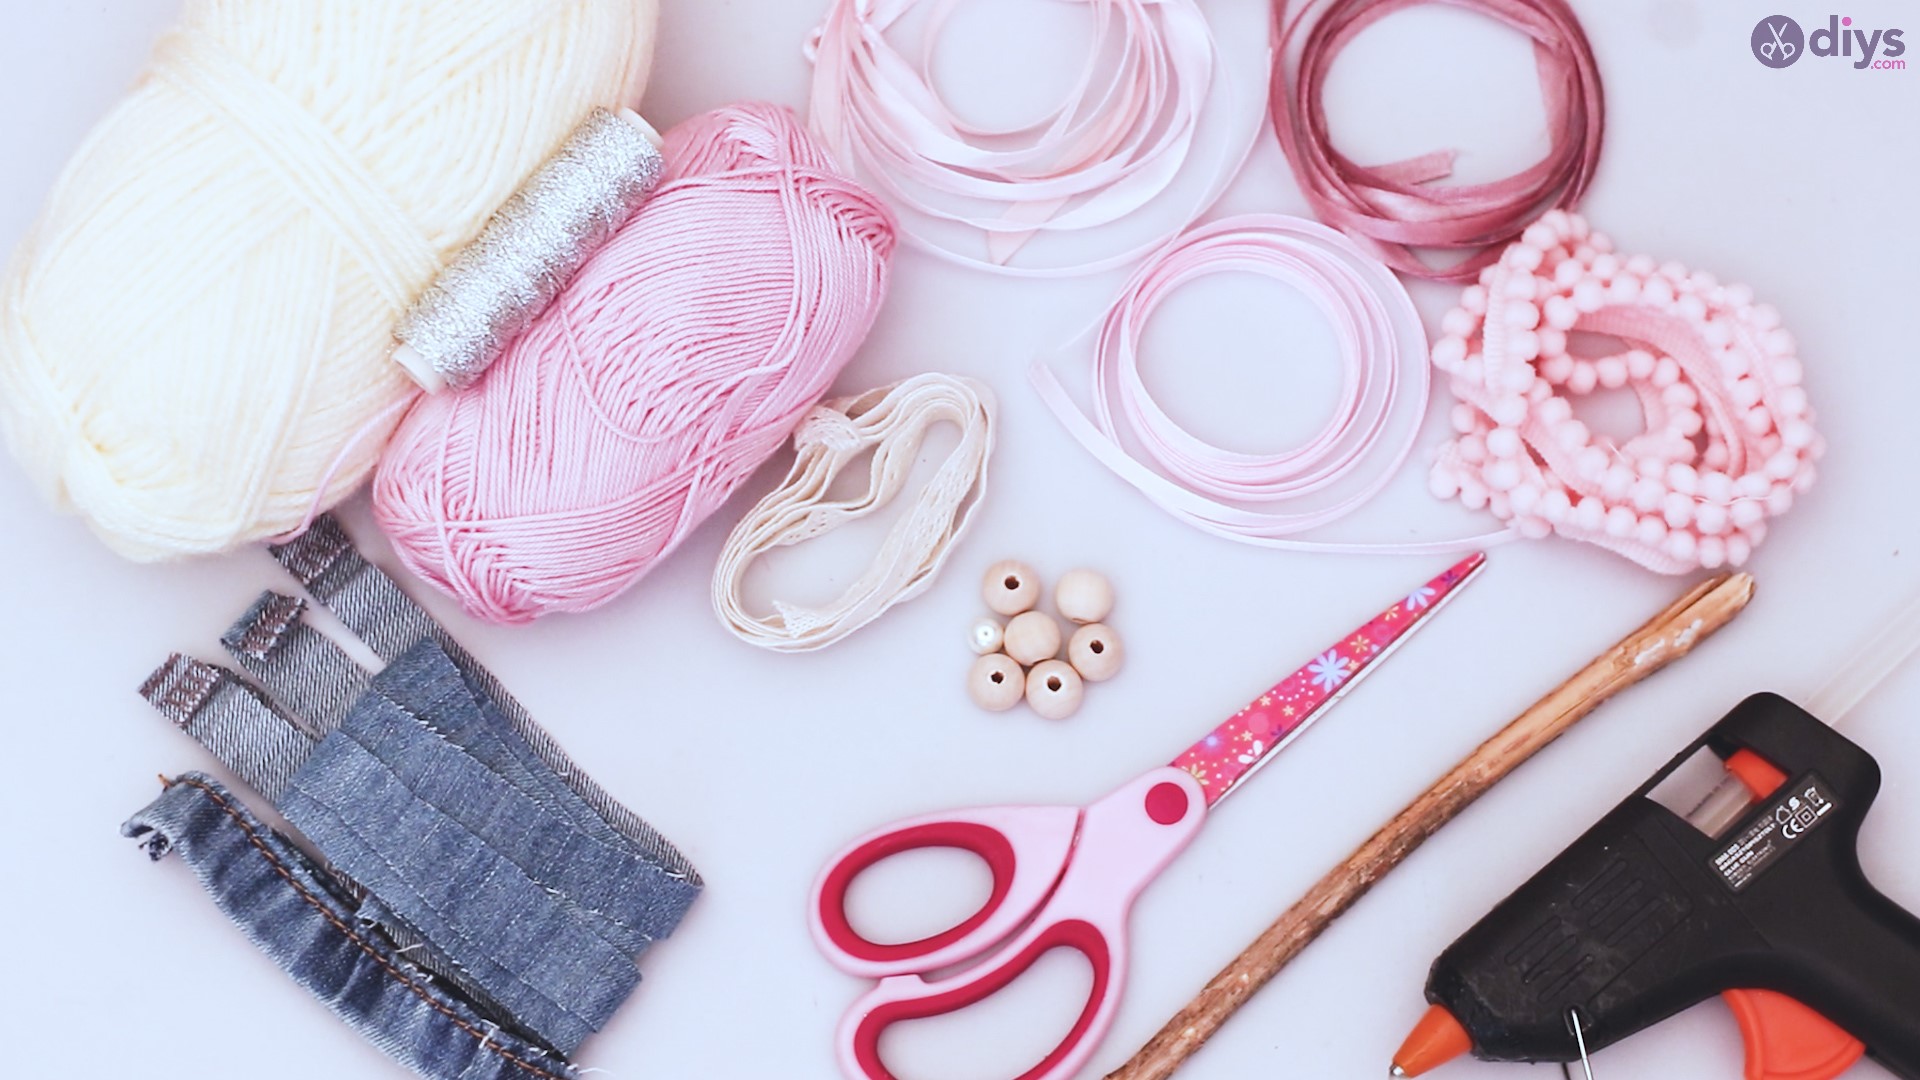
When it comes to arts and crafts, most people have an abundance of ribbon, string, and yarn. Let’s face it, as crafty people, we love these things, for texture and color and variety. So, why aren’t we all busy, putting together a new project that is based almost entirely on the use of these materials? A ribbon wall hanging is a great way to display artwork that utilizes many colors and types of these materials, and it’s both fun and simple to create. Take a look at the materials you’ll need and the easy process to create it.
Materials for Ribbon Wall Hanging:
- Branch
- glue gun
- scissors
- wood beads
- pearl beads
- lace ribbon
- silk ribbon
- 3 kinds of silk ribbon
- jeans material (denim)
- silver twisted yarn
- creme and light rose yarns
- pompom ribbon
Step by step instruction:

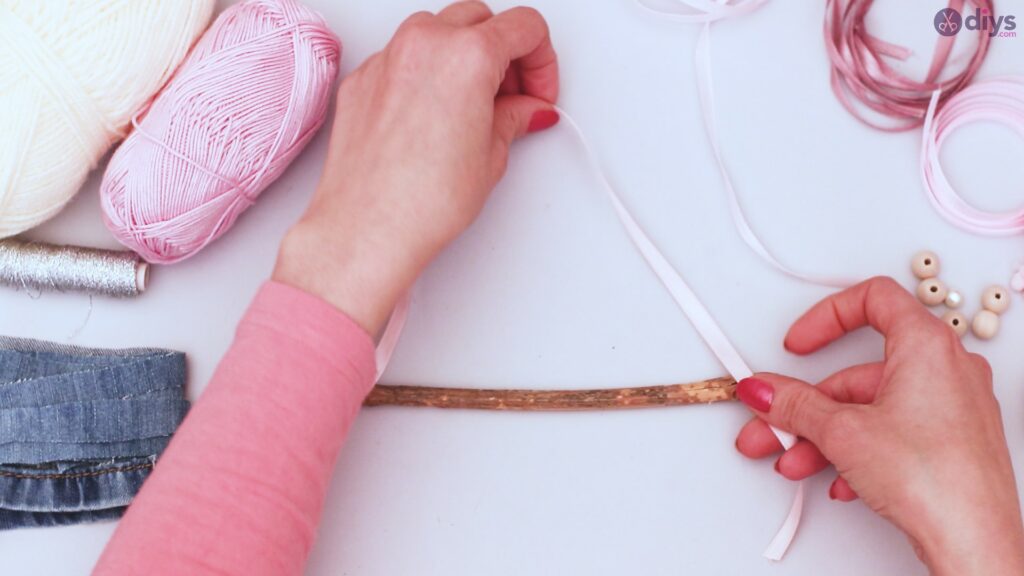
Step 1: Prepare to hang
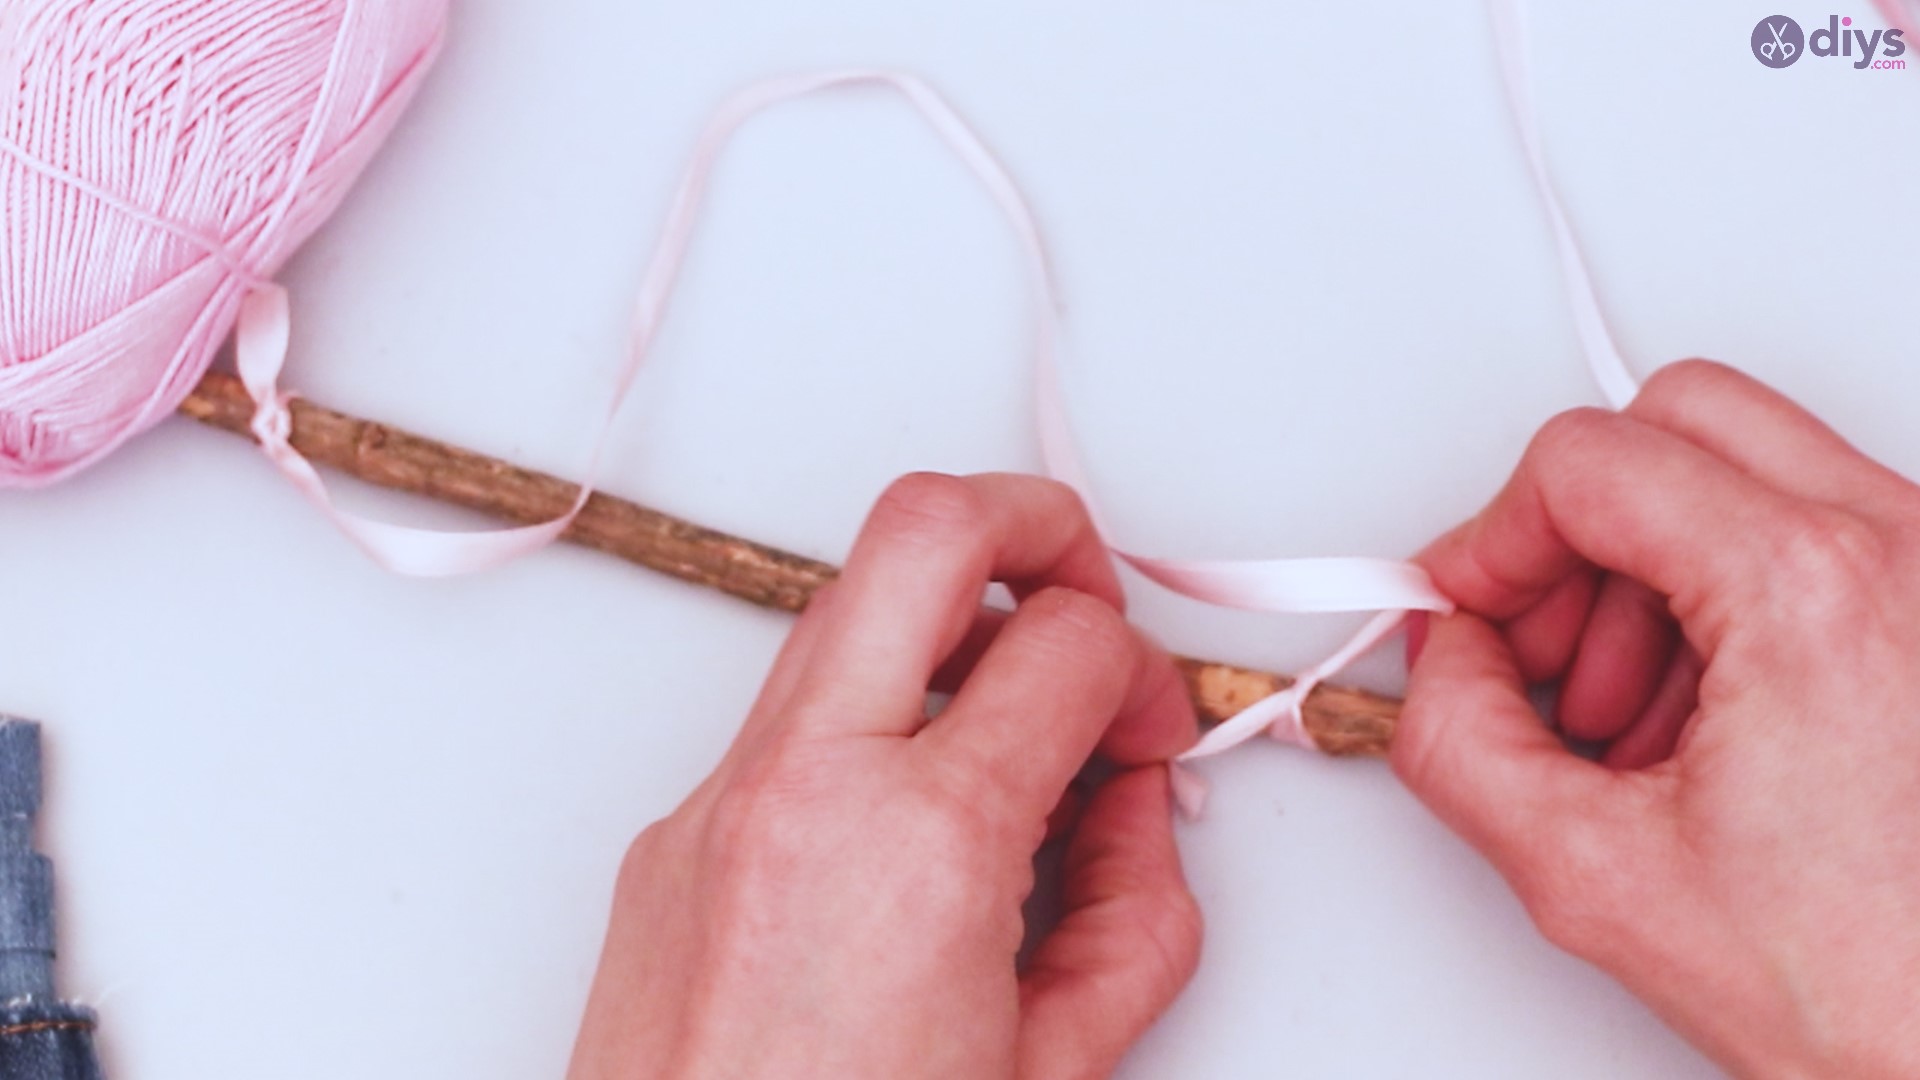
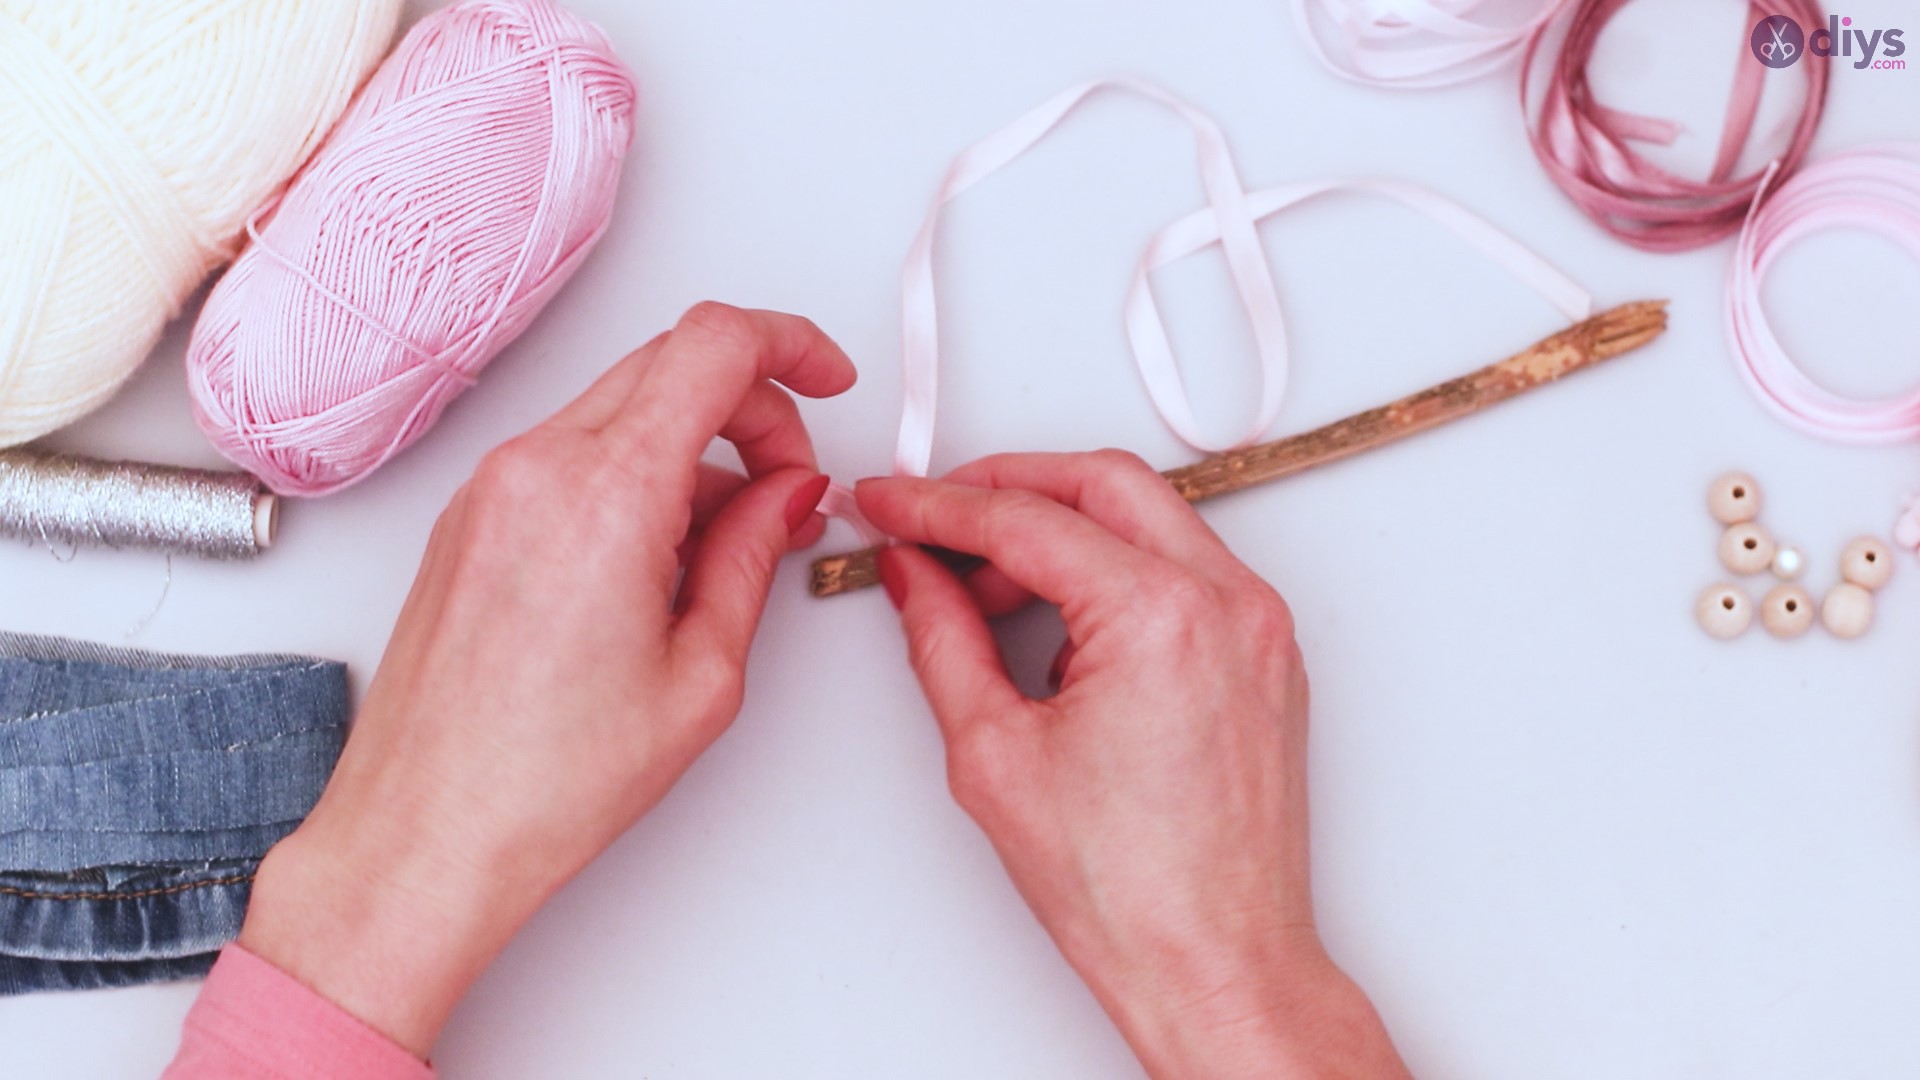
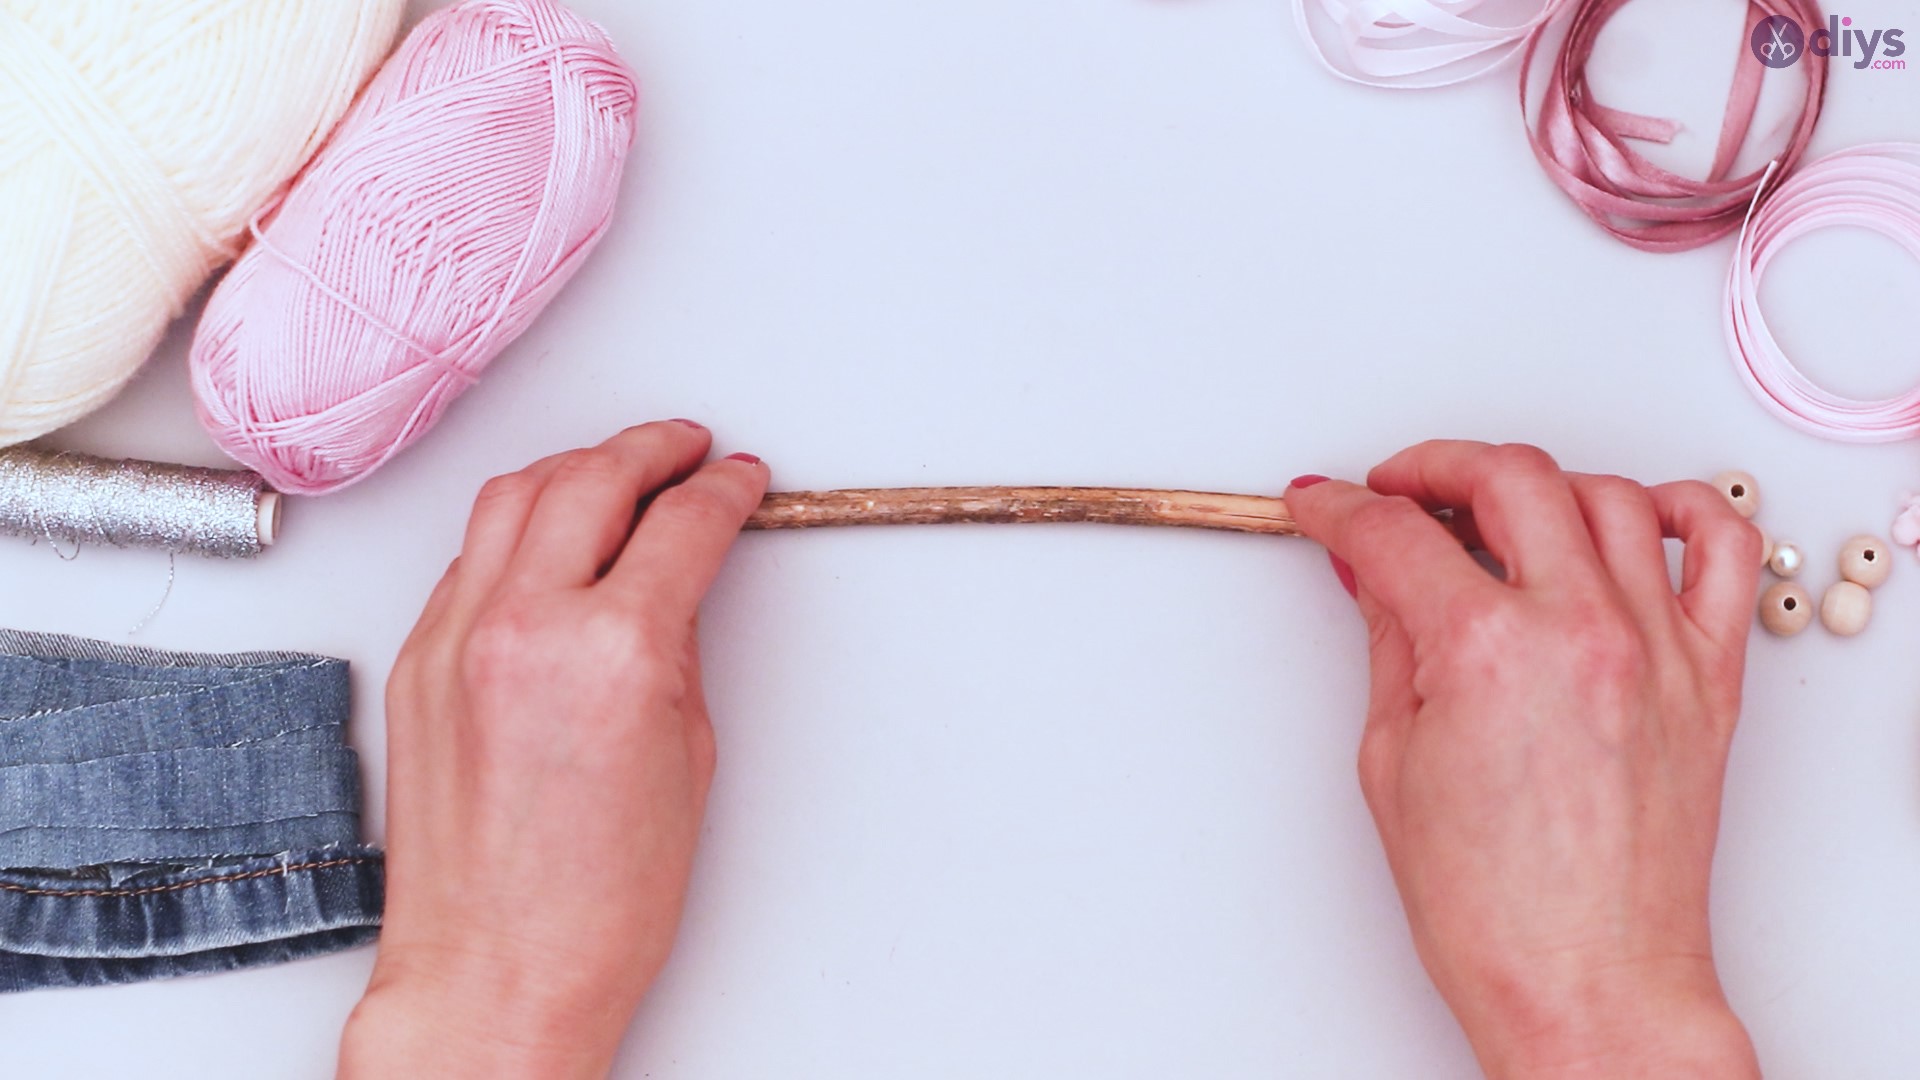
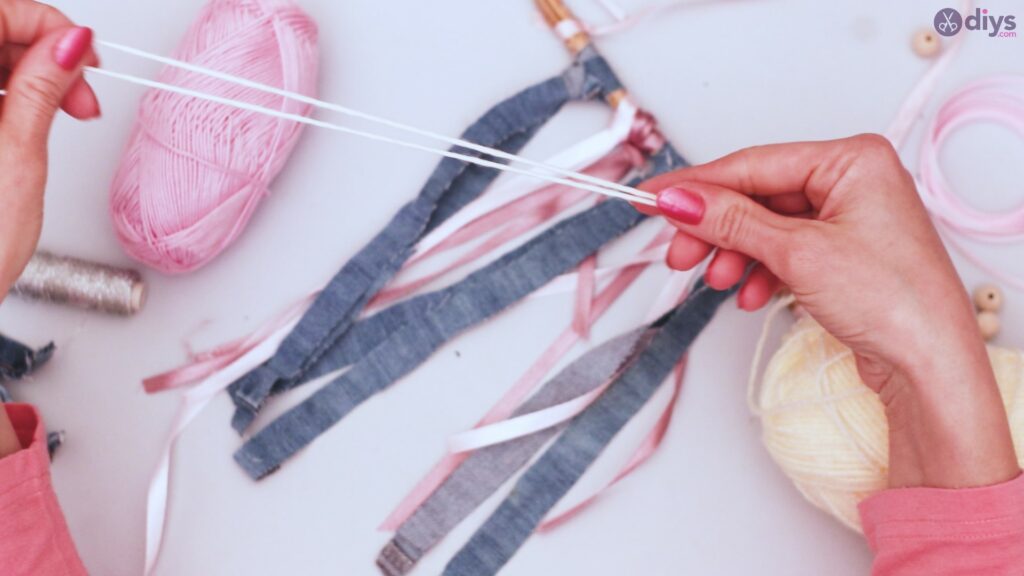
Start with your branch and one color of silk ribbon. Cut your branch to be about 6 to 8 inches long. From your silk ribbon, cut a length at least twice as long as your branch.

Tie each end of your length of ribbon around one end of your branch, making a tight knot.

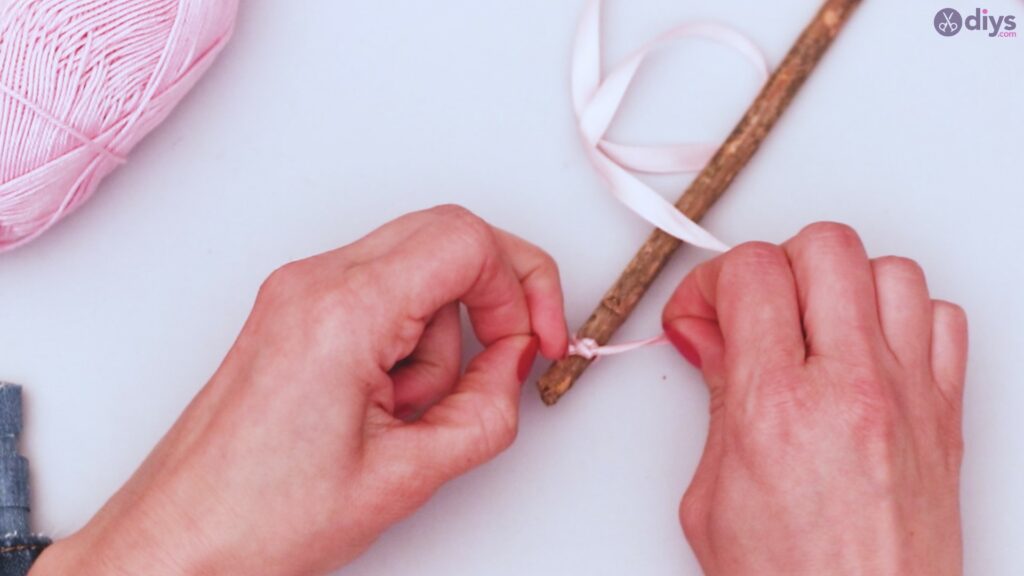
Make sure your knots are both on the same side. This should be the back of your hanging.

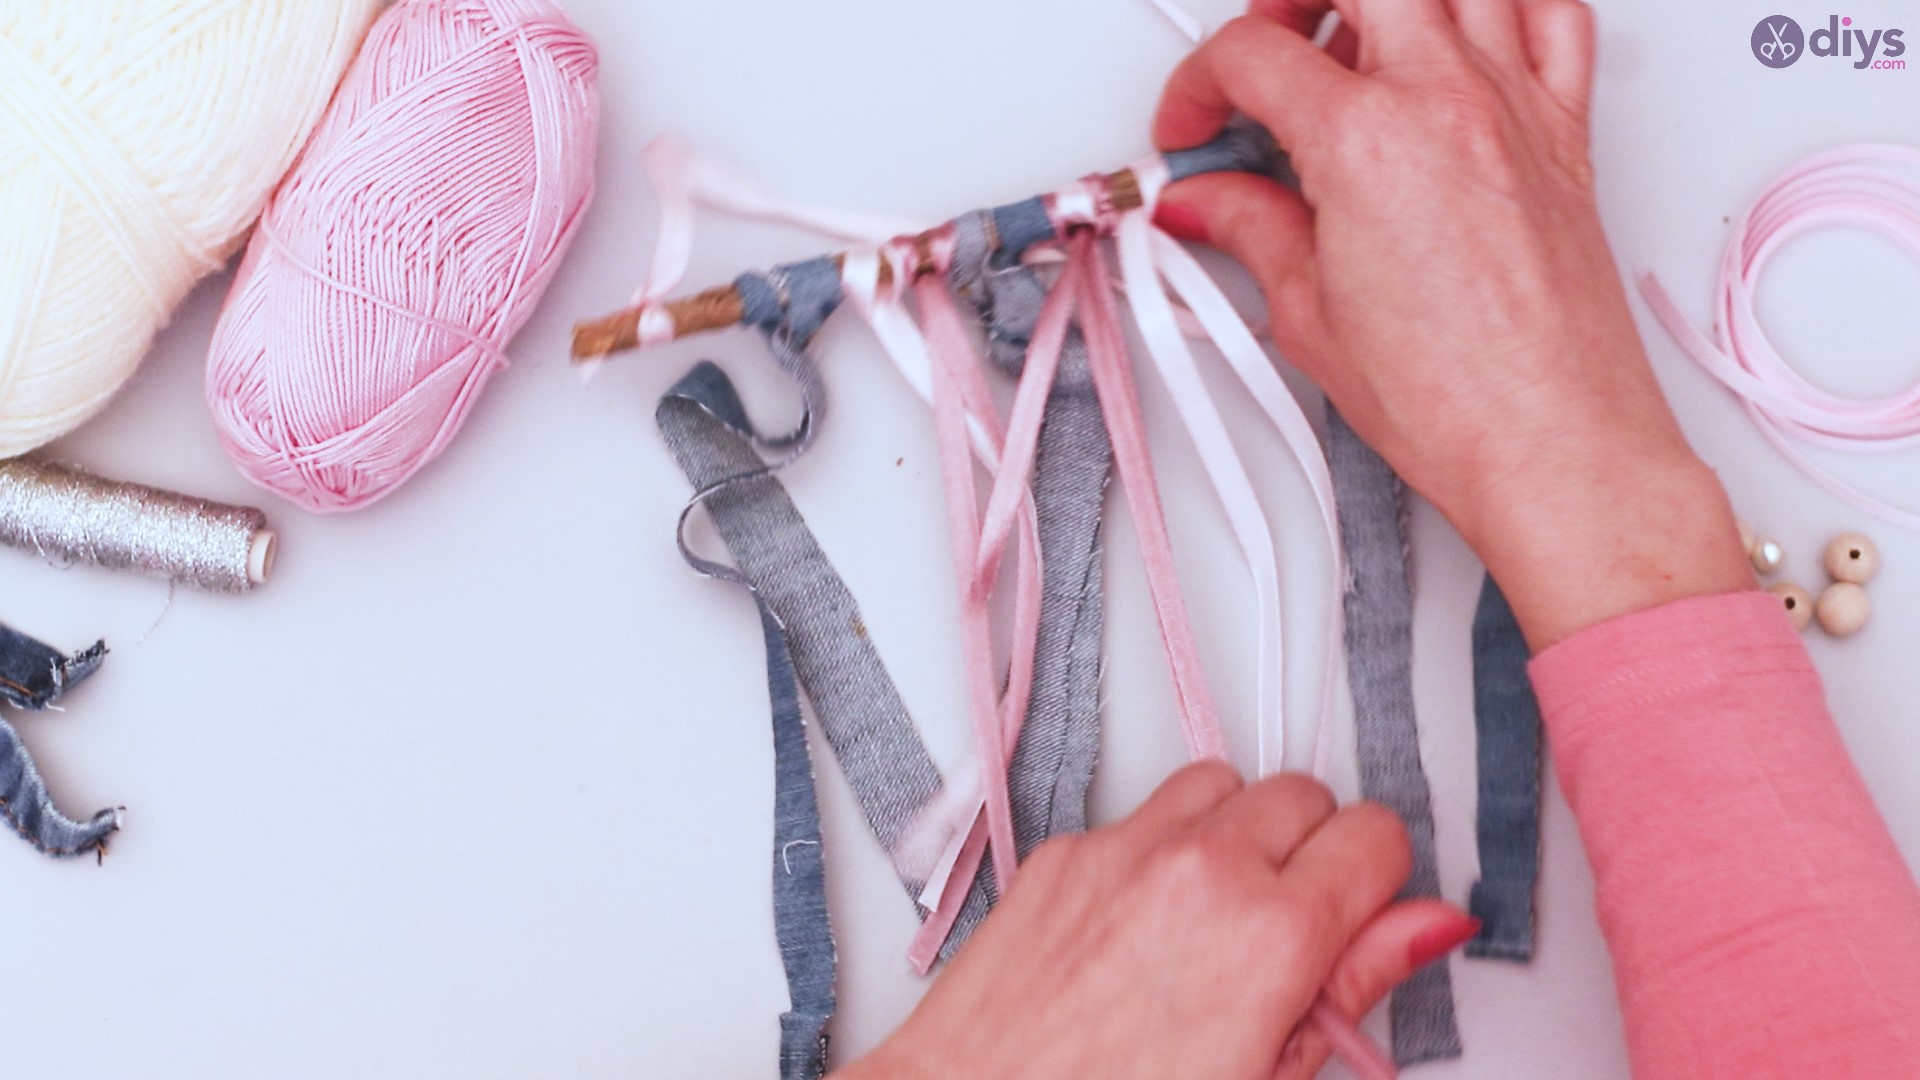
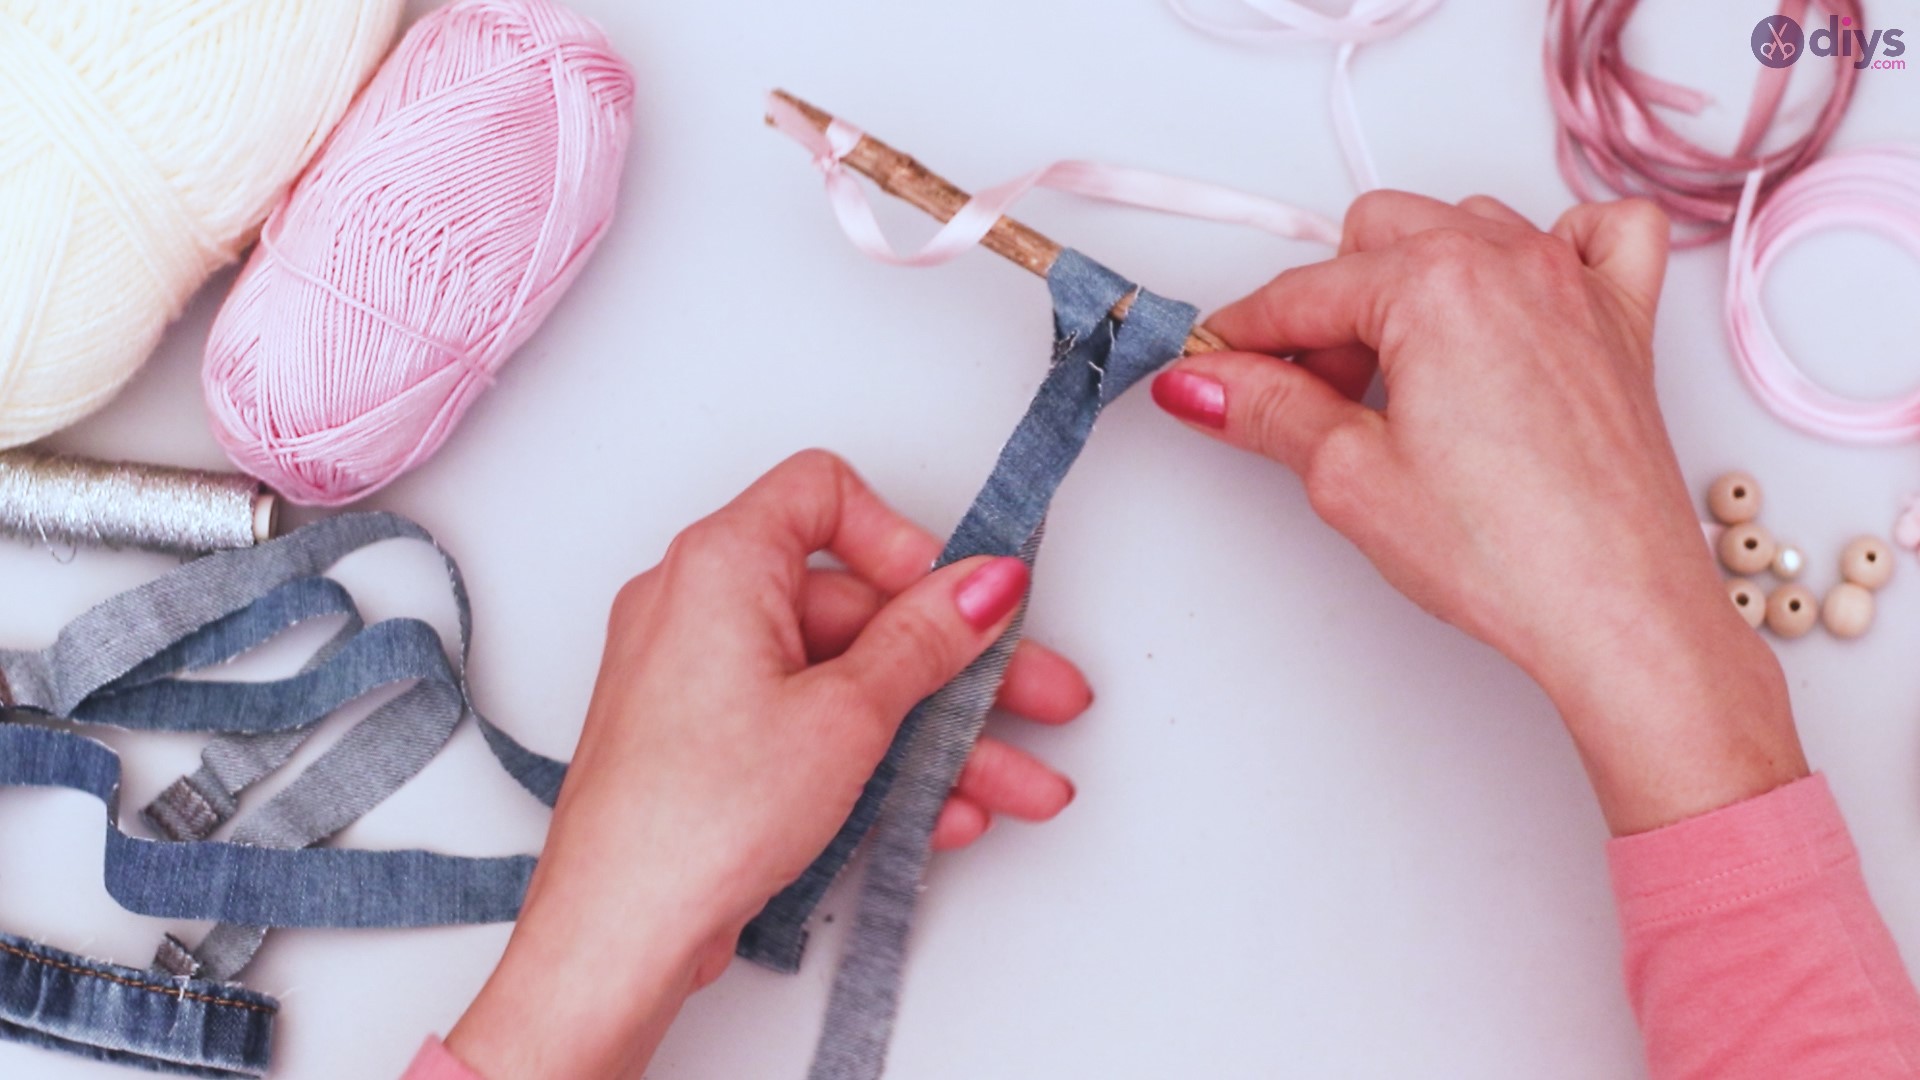
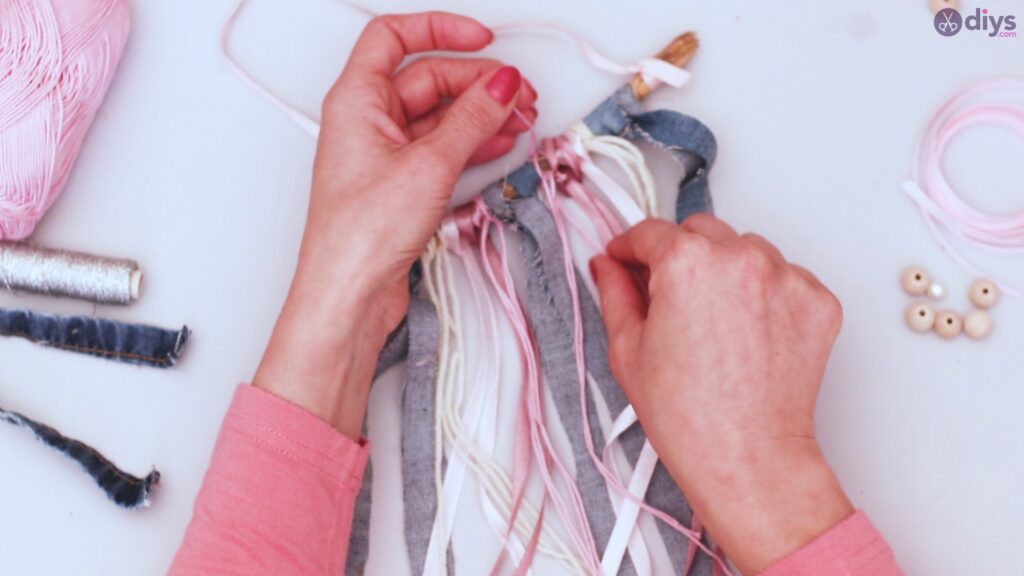
Step 2: Add your denim
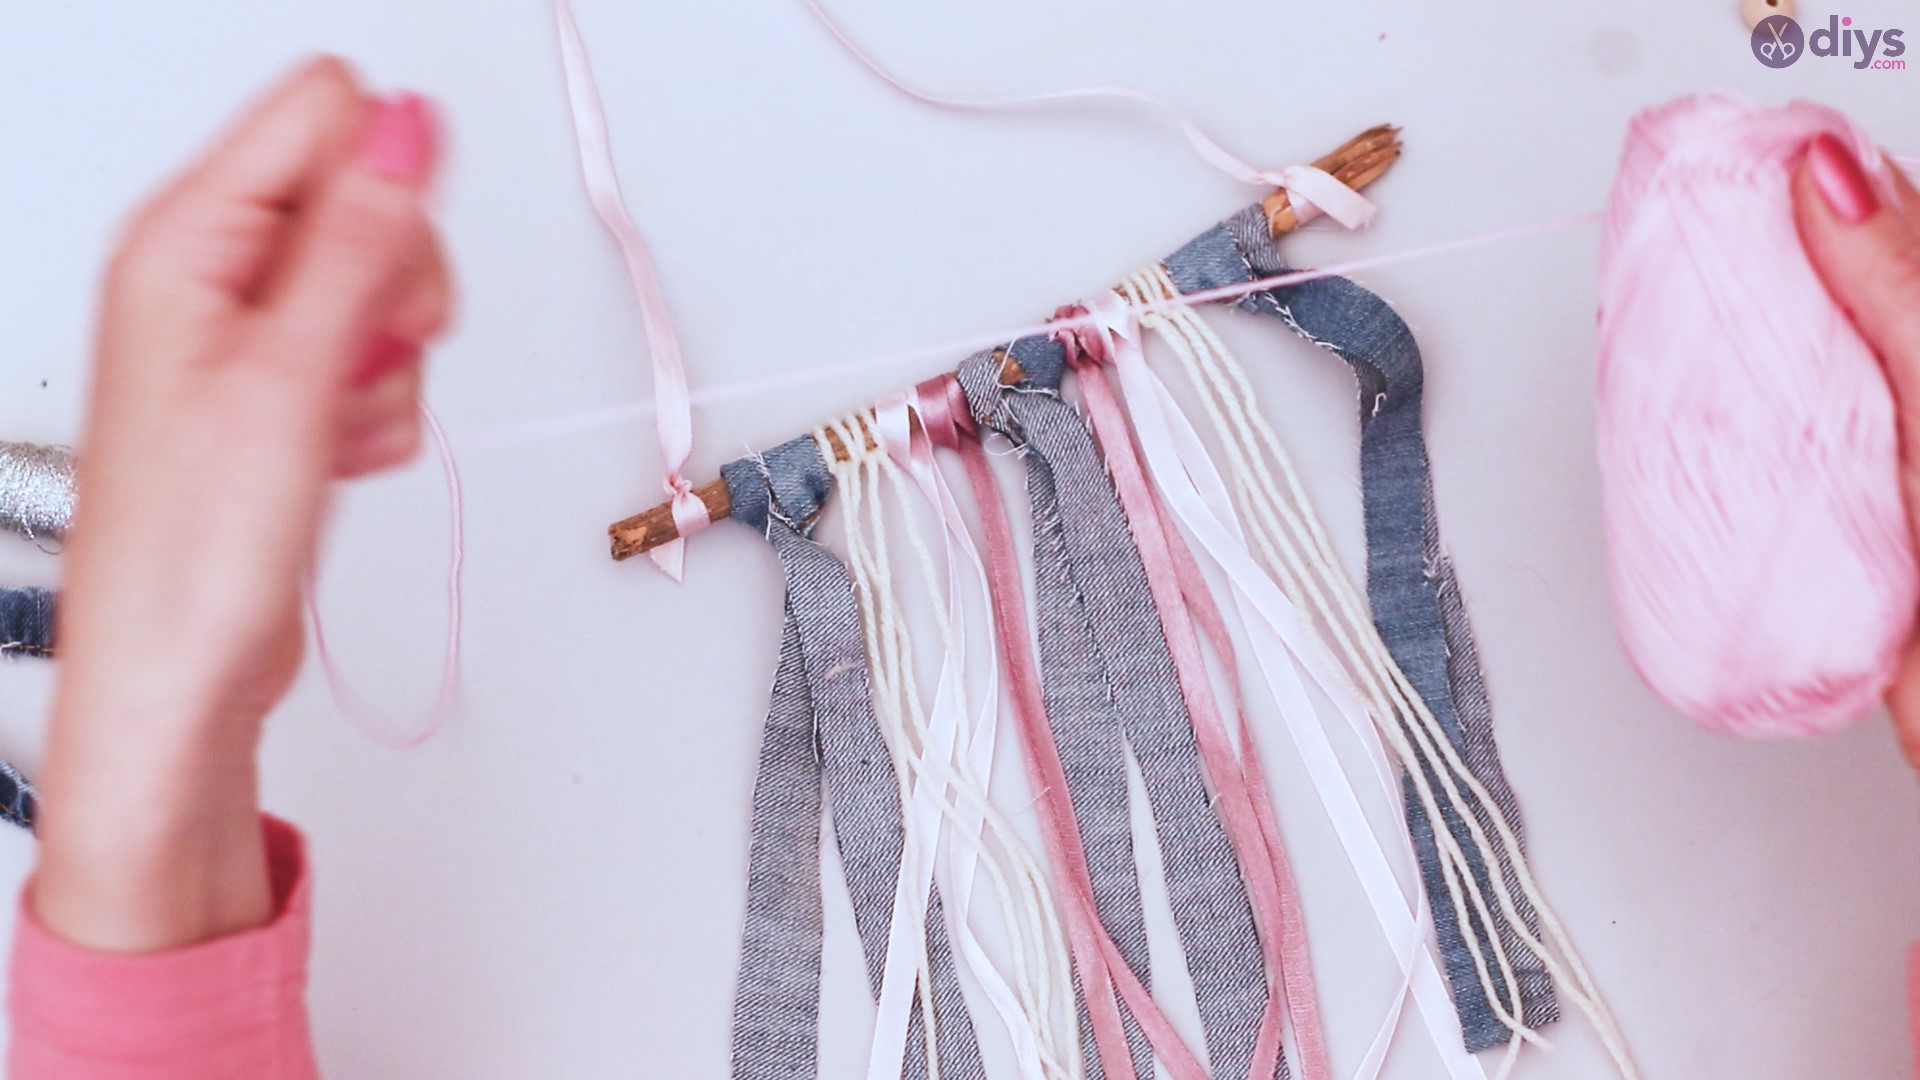
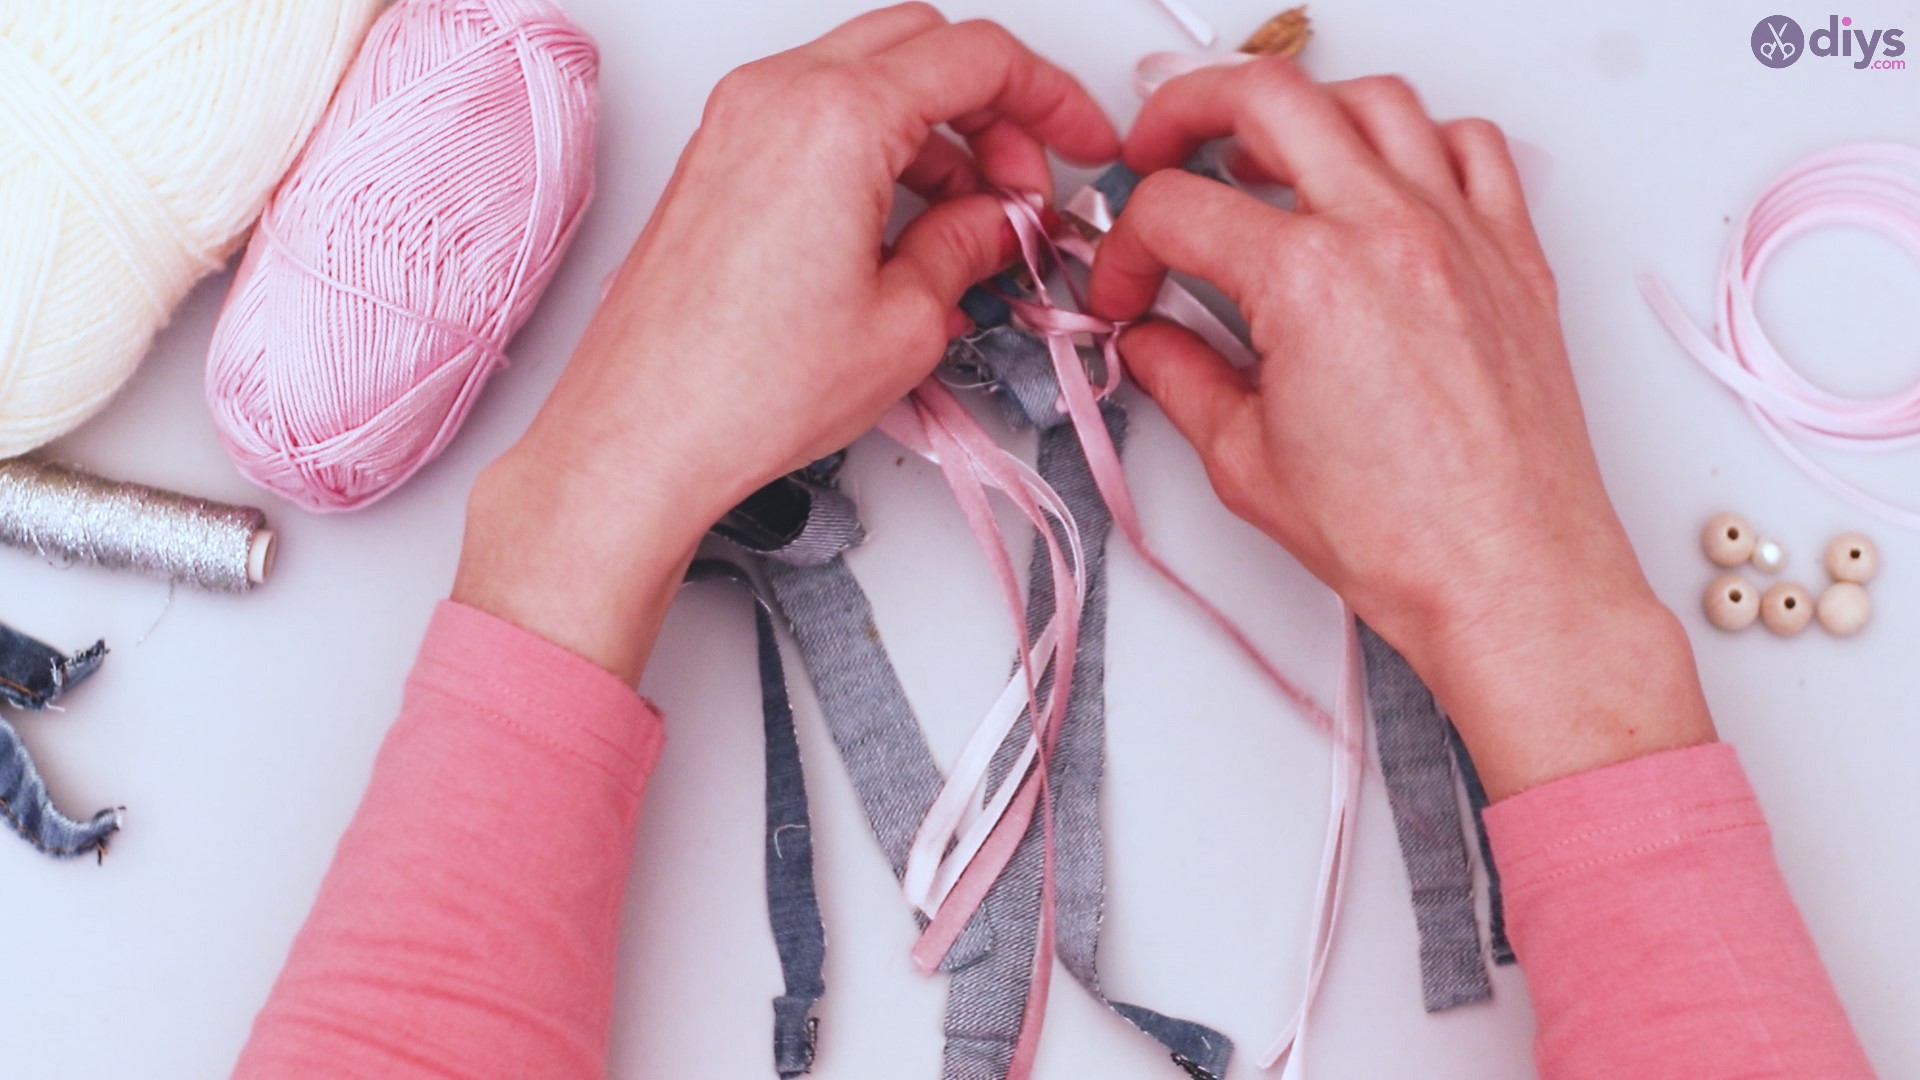
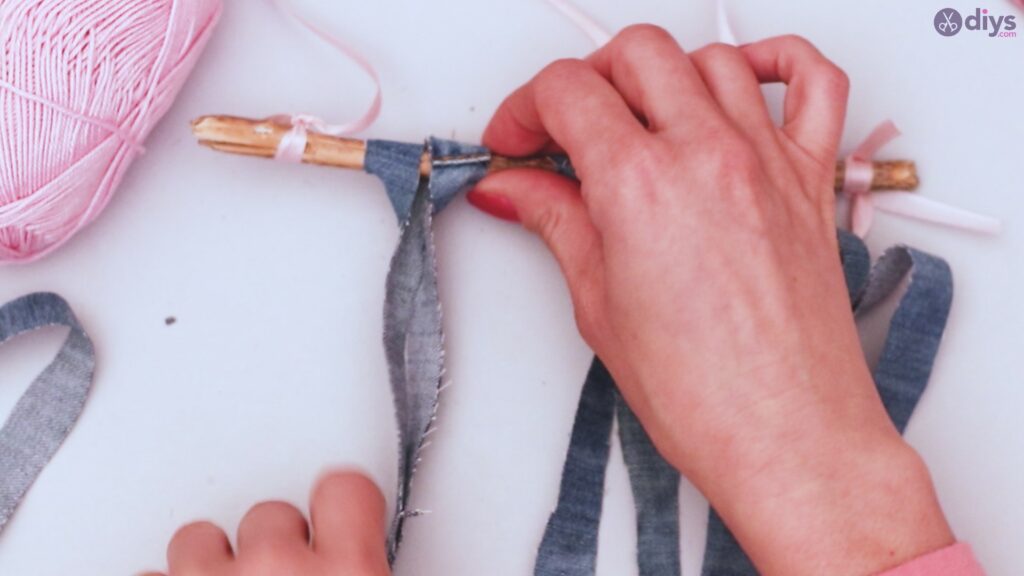
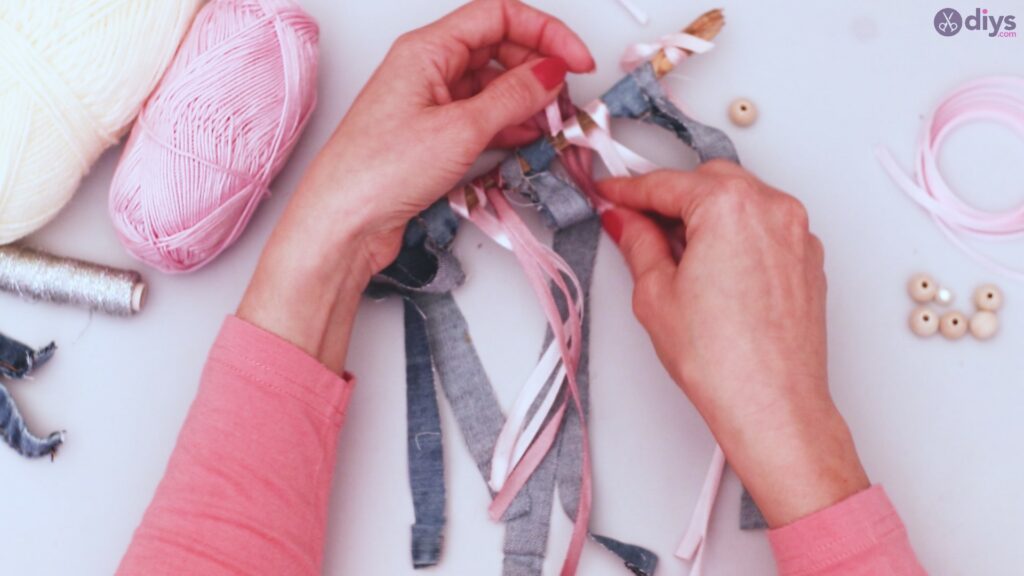
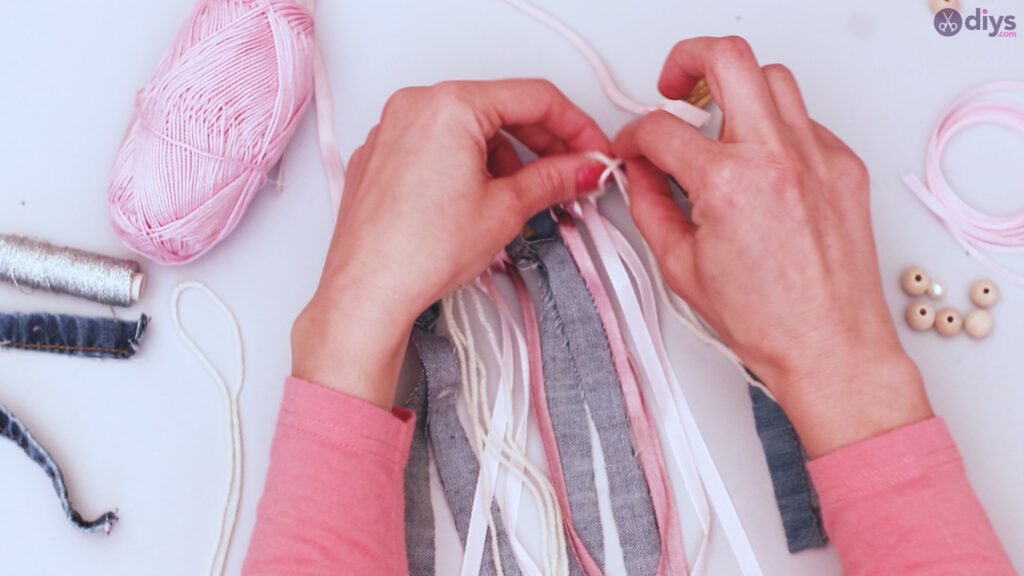
Cut 4 strips of denim, or other material if you prefer. These strips should be around half an inch wide and about twice the length of your branch, or longer if you prefer. Set one strip aside for later.
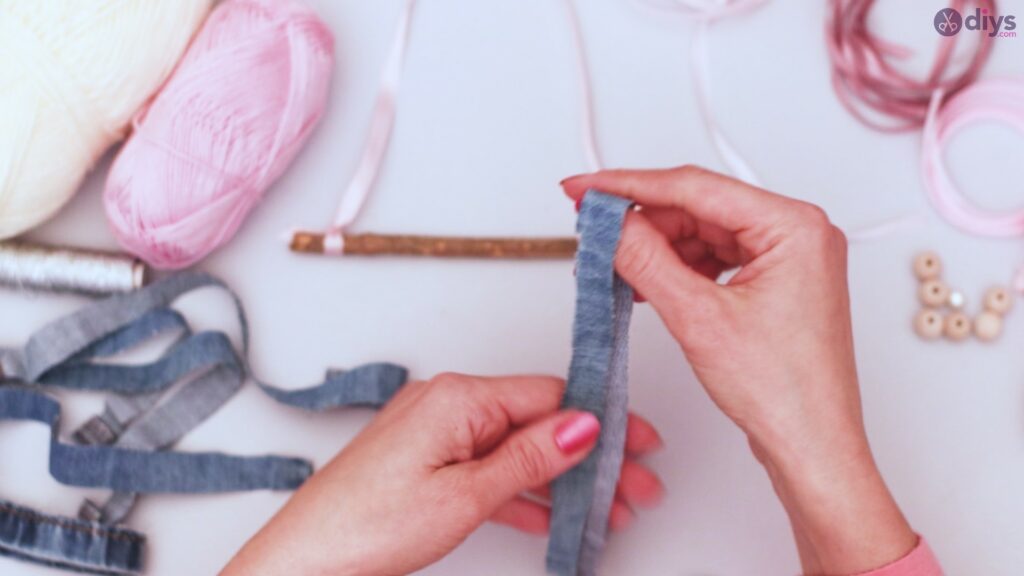
Fold 1 strip of denim in half. Thread the loop end of the denim under the branch. Aim for the center of the branch.

Take the loose ends of the denim strip, and feed them through the loop end of the denim strip. Slide your denim until you have it in the middle of the branch, and tighten the loop around the denim by pulling on the loose ends.

Repeat this process with your other 2 strips of denim. Place one close to where the ribbon is tied on each end of the branch.
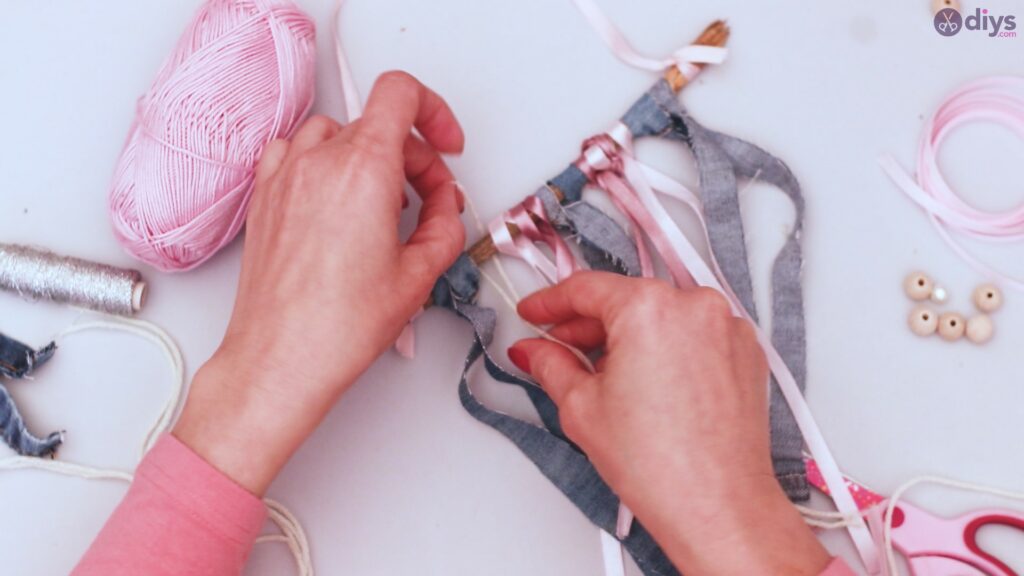
Step 3: Add silk ribbon
Cut 2 lengths of one color of silk ribbon, approximately the same length as the denim.
Fold each length of ribbon in half. Feed the loop end of one length under your branch, as you did with the denim. Place it close to, but not right against, the center strip of denim. Feed the ends of the ribbon through the loop and tighten it down. Repeat this process, using your other length of ribbon on the opposite side of the central denim strip.
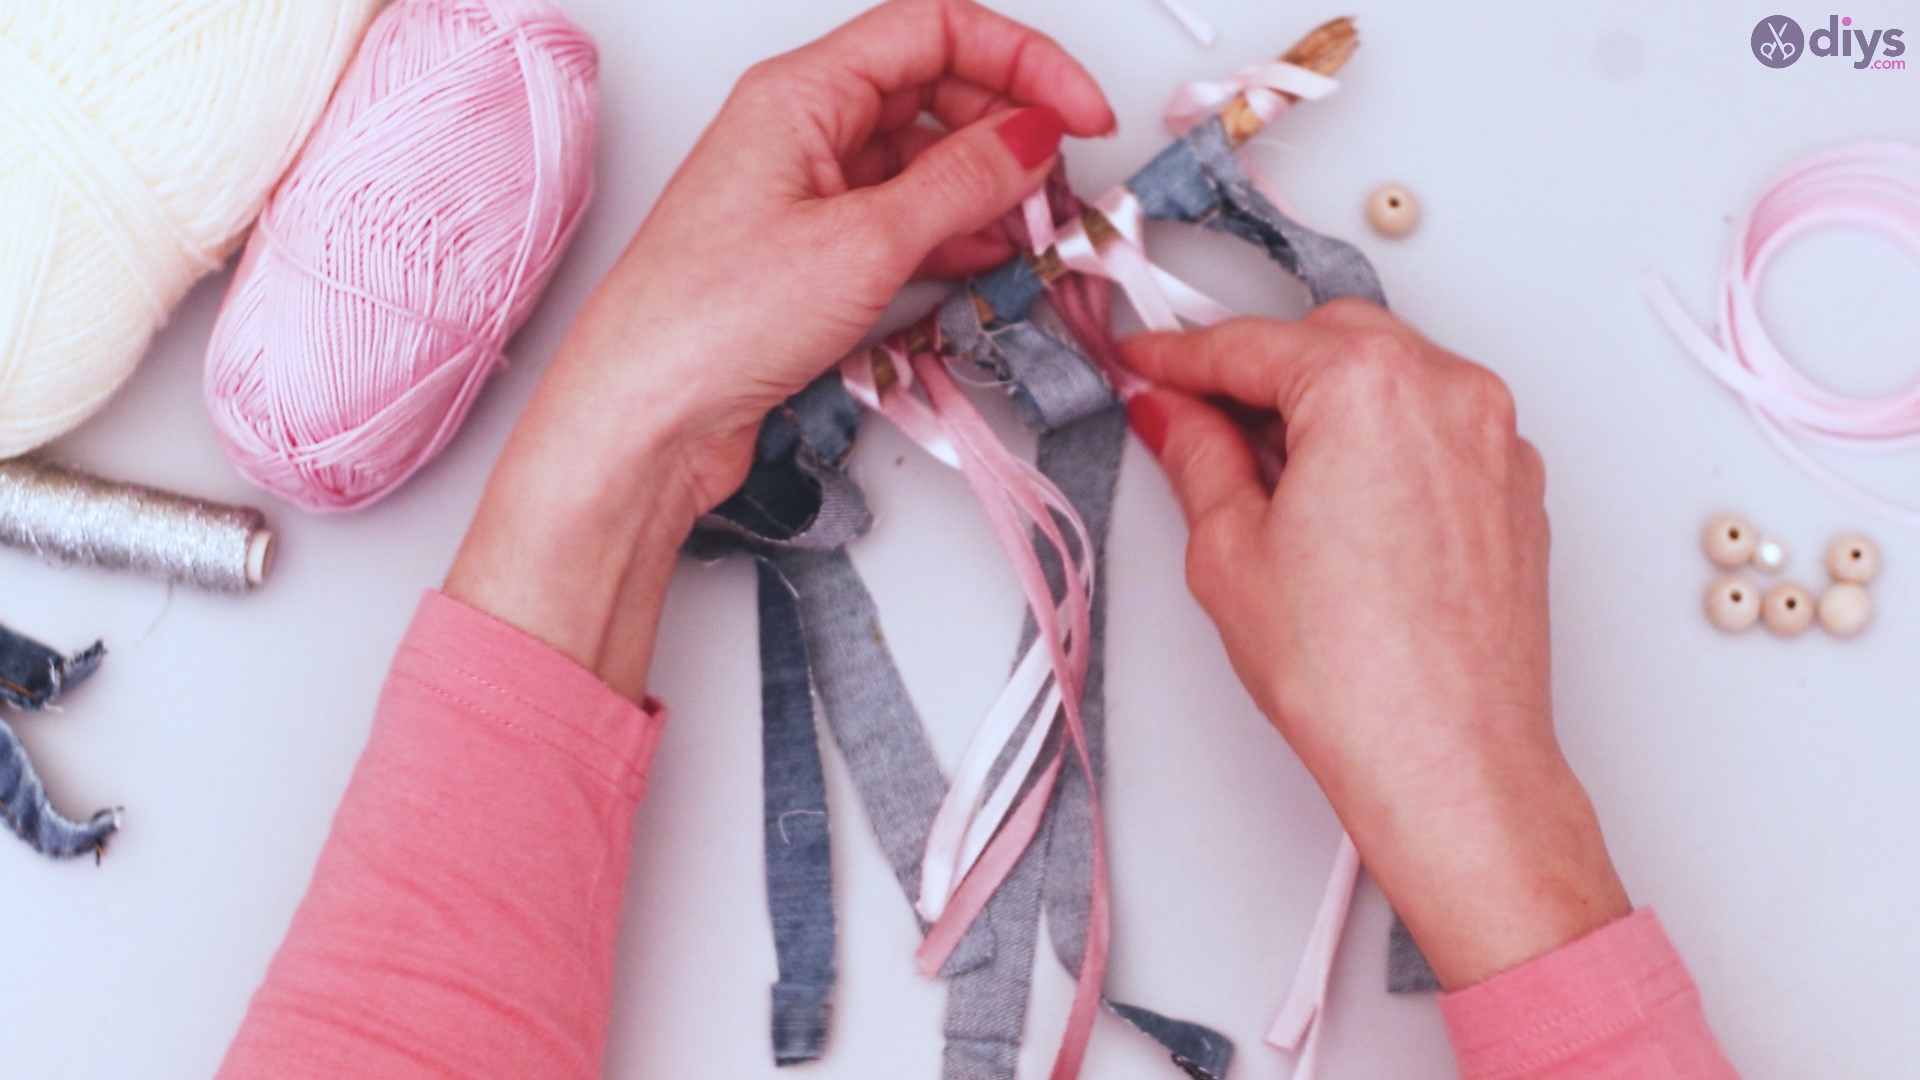
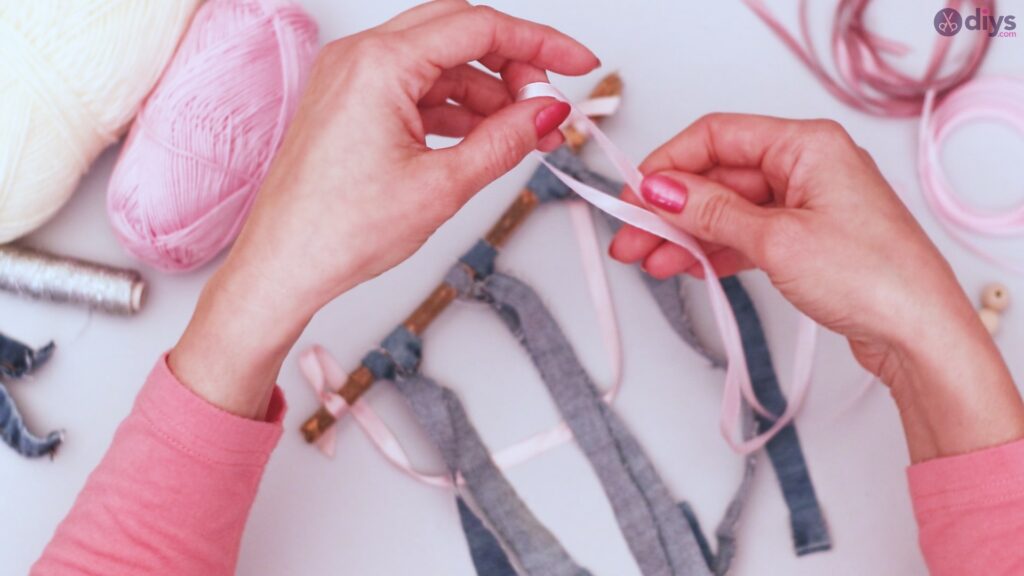
Step 4: Second silk ribbon
As with the previous color of silk ribbon, cut 2 similar lengths of your other color of silk ribbon. Fold each of these in half.
Between the first color of silk ribbons and the central denim strip, feed your new silk ribbon loops under the branch to attach as before.

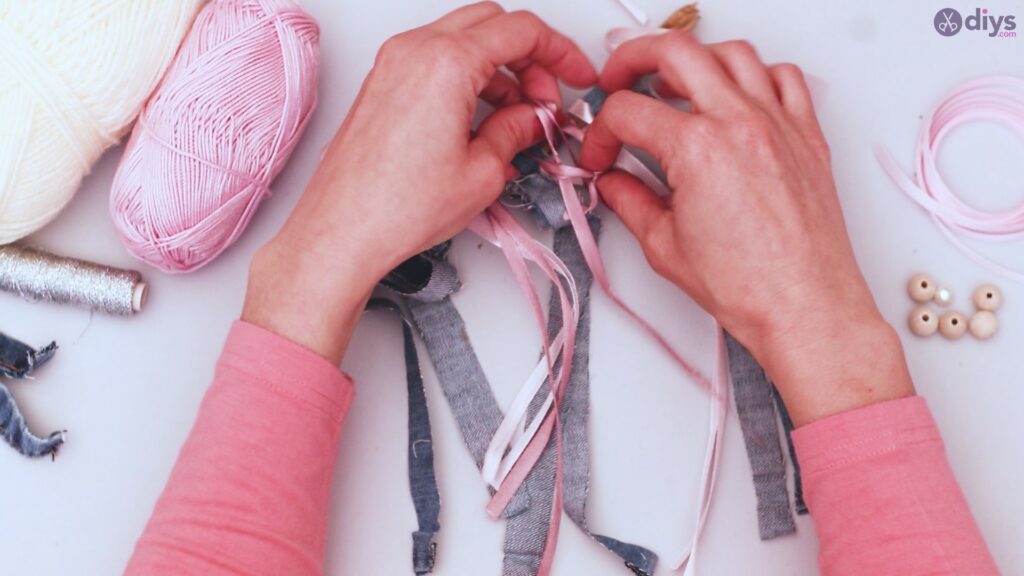
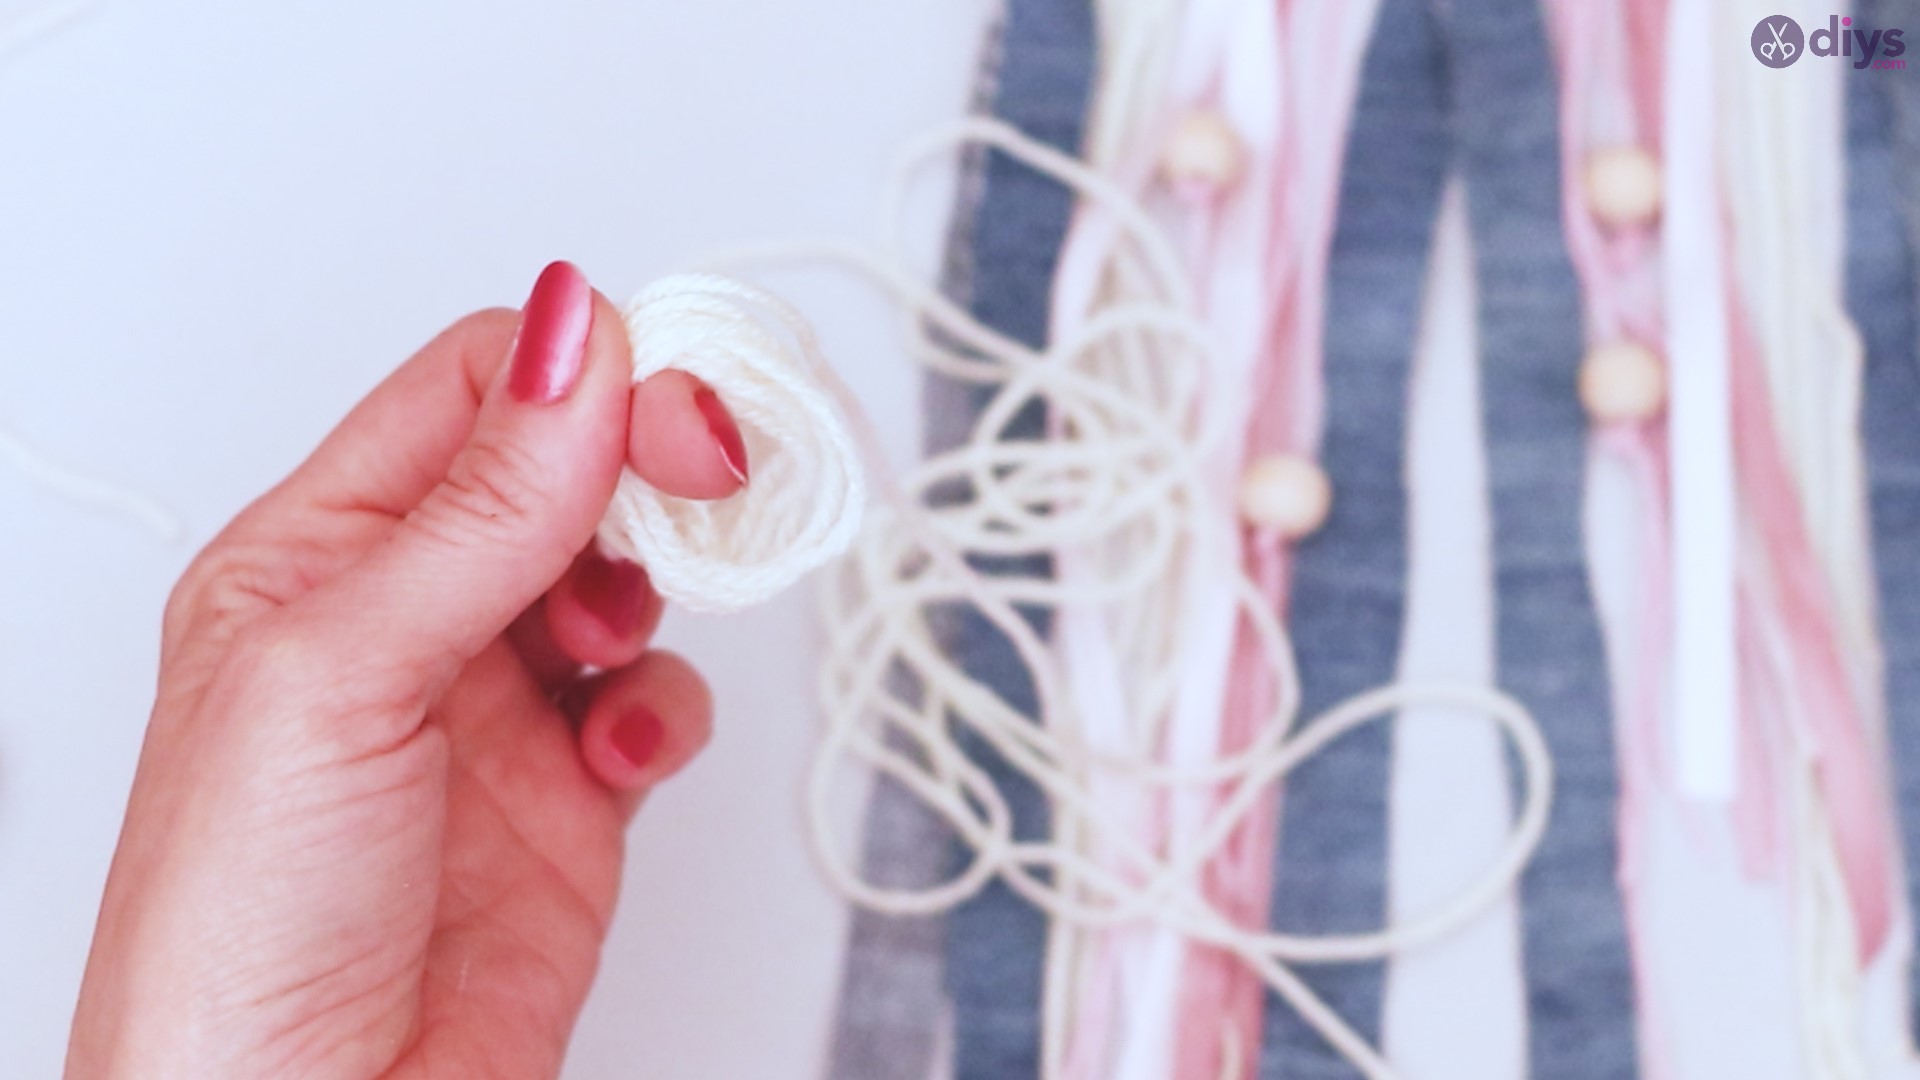
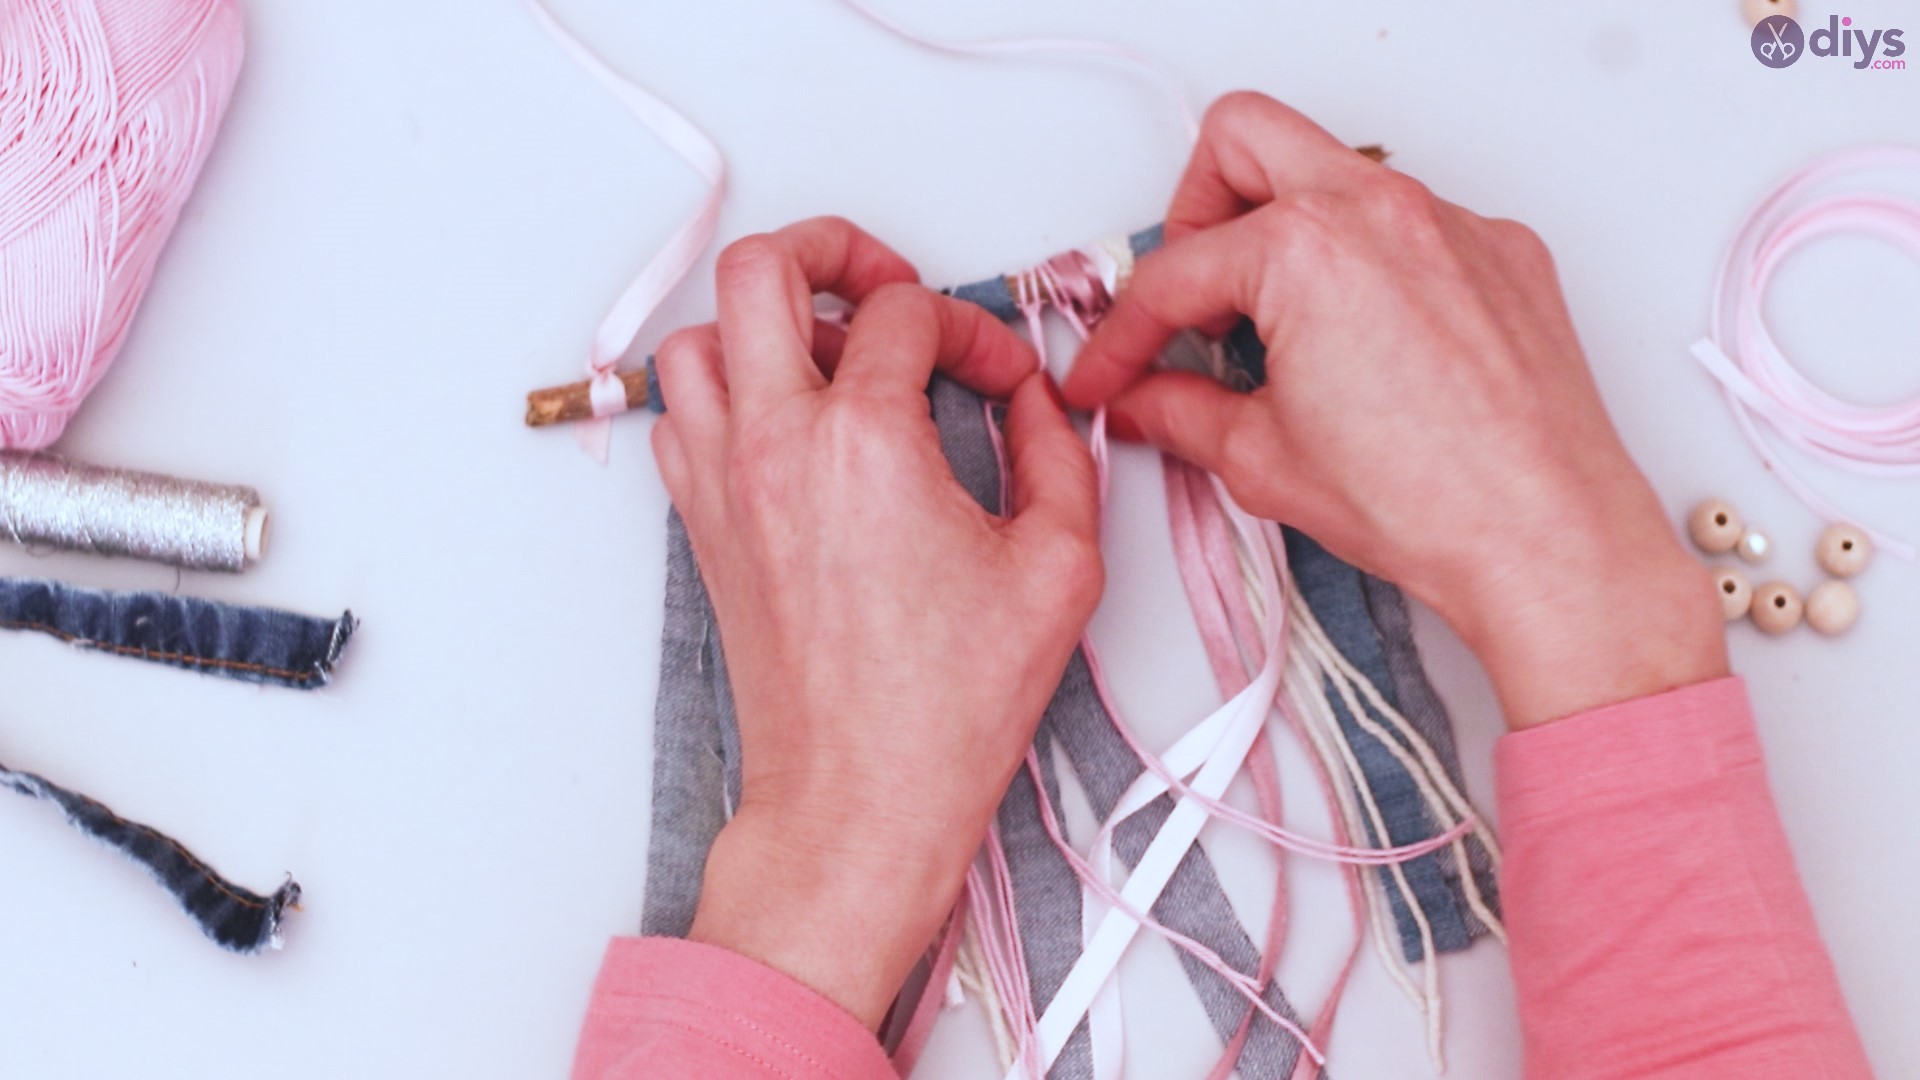
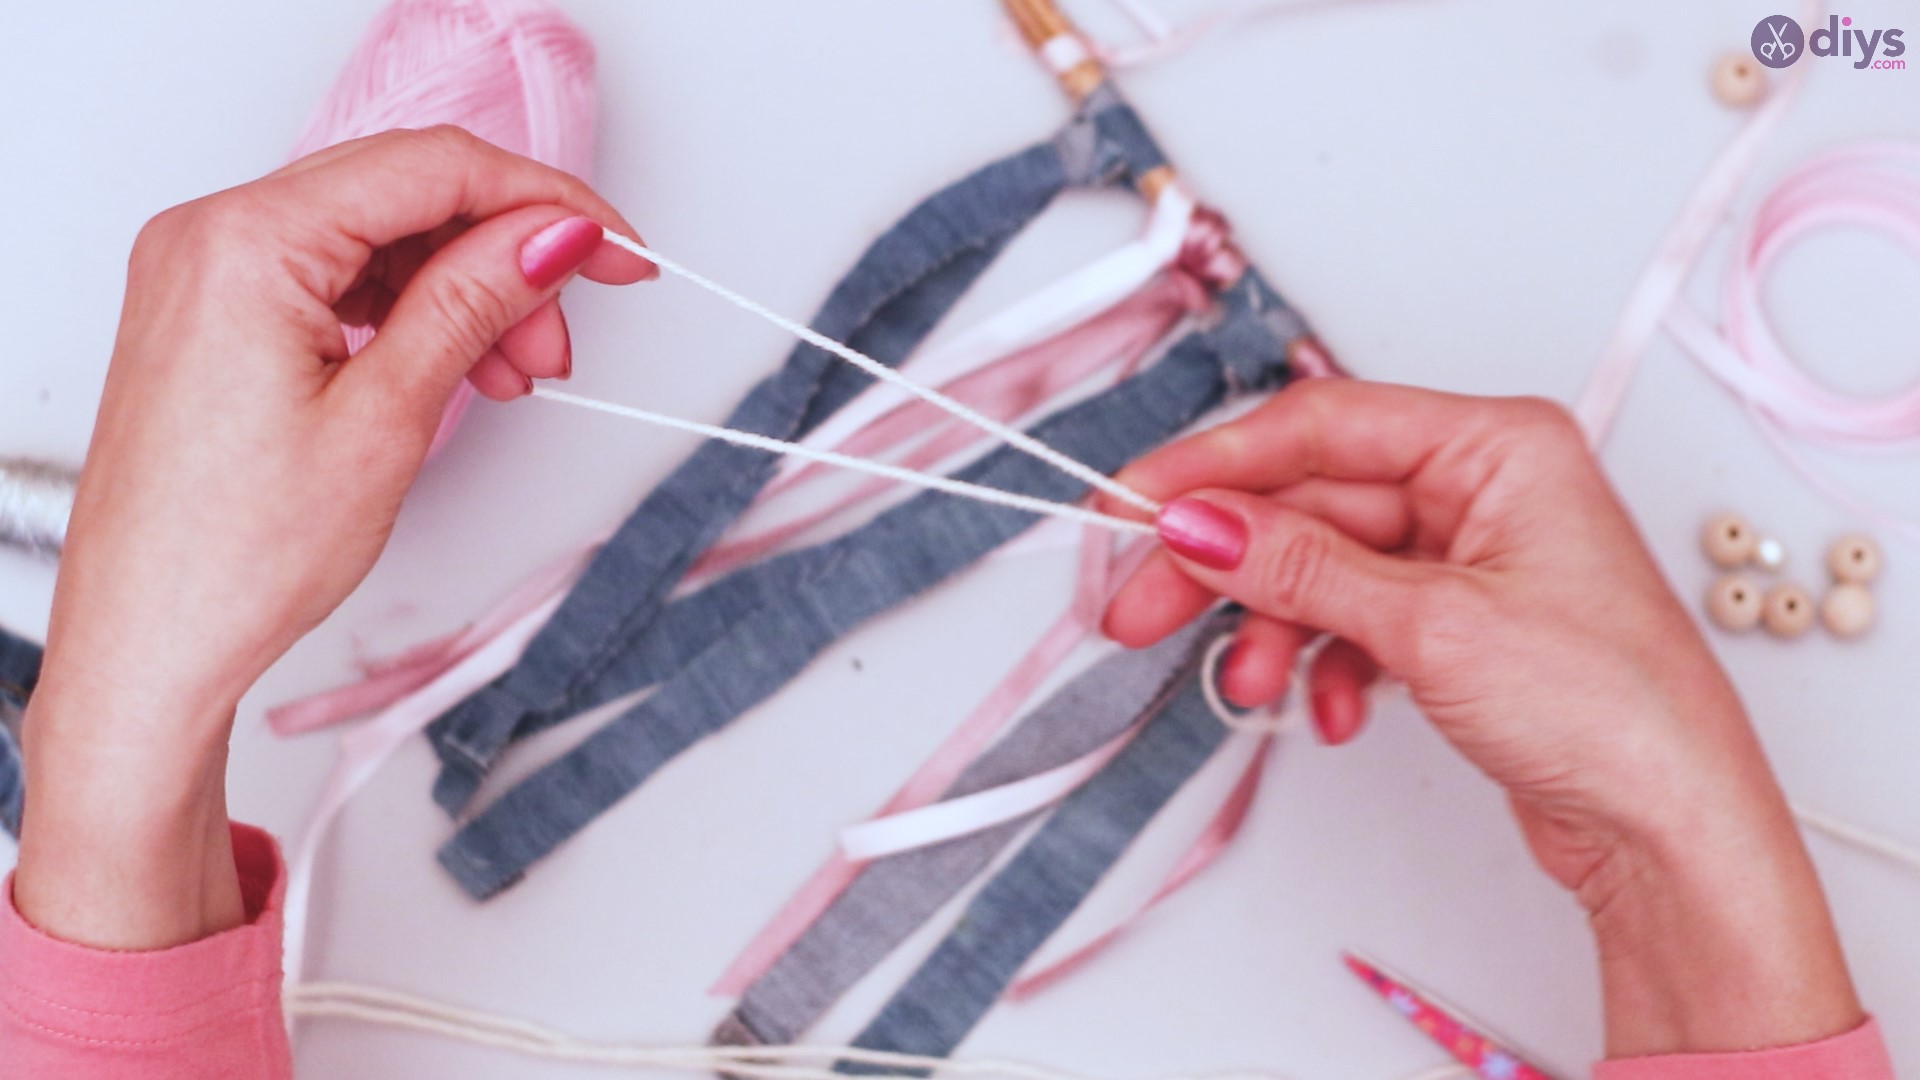
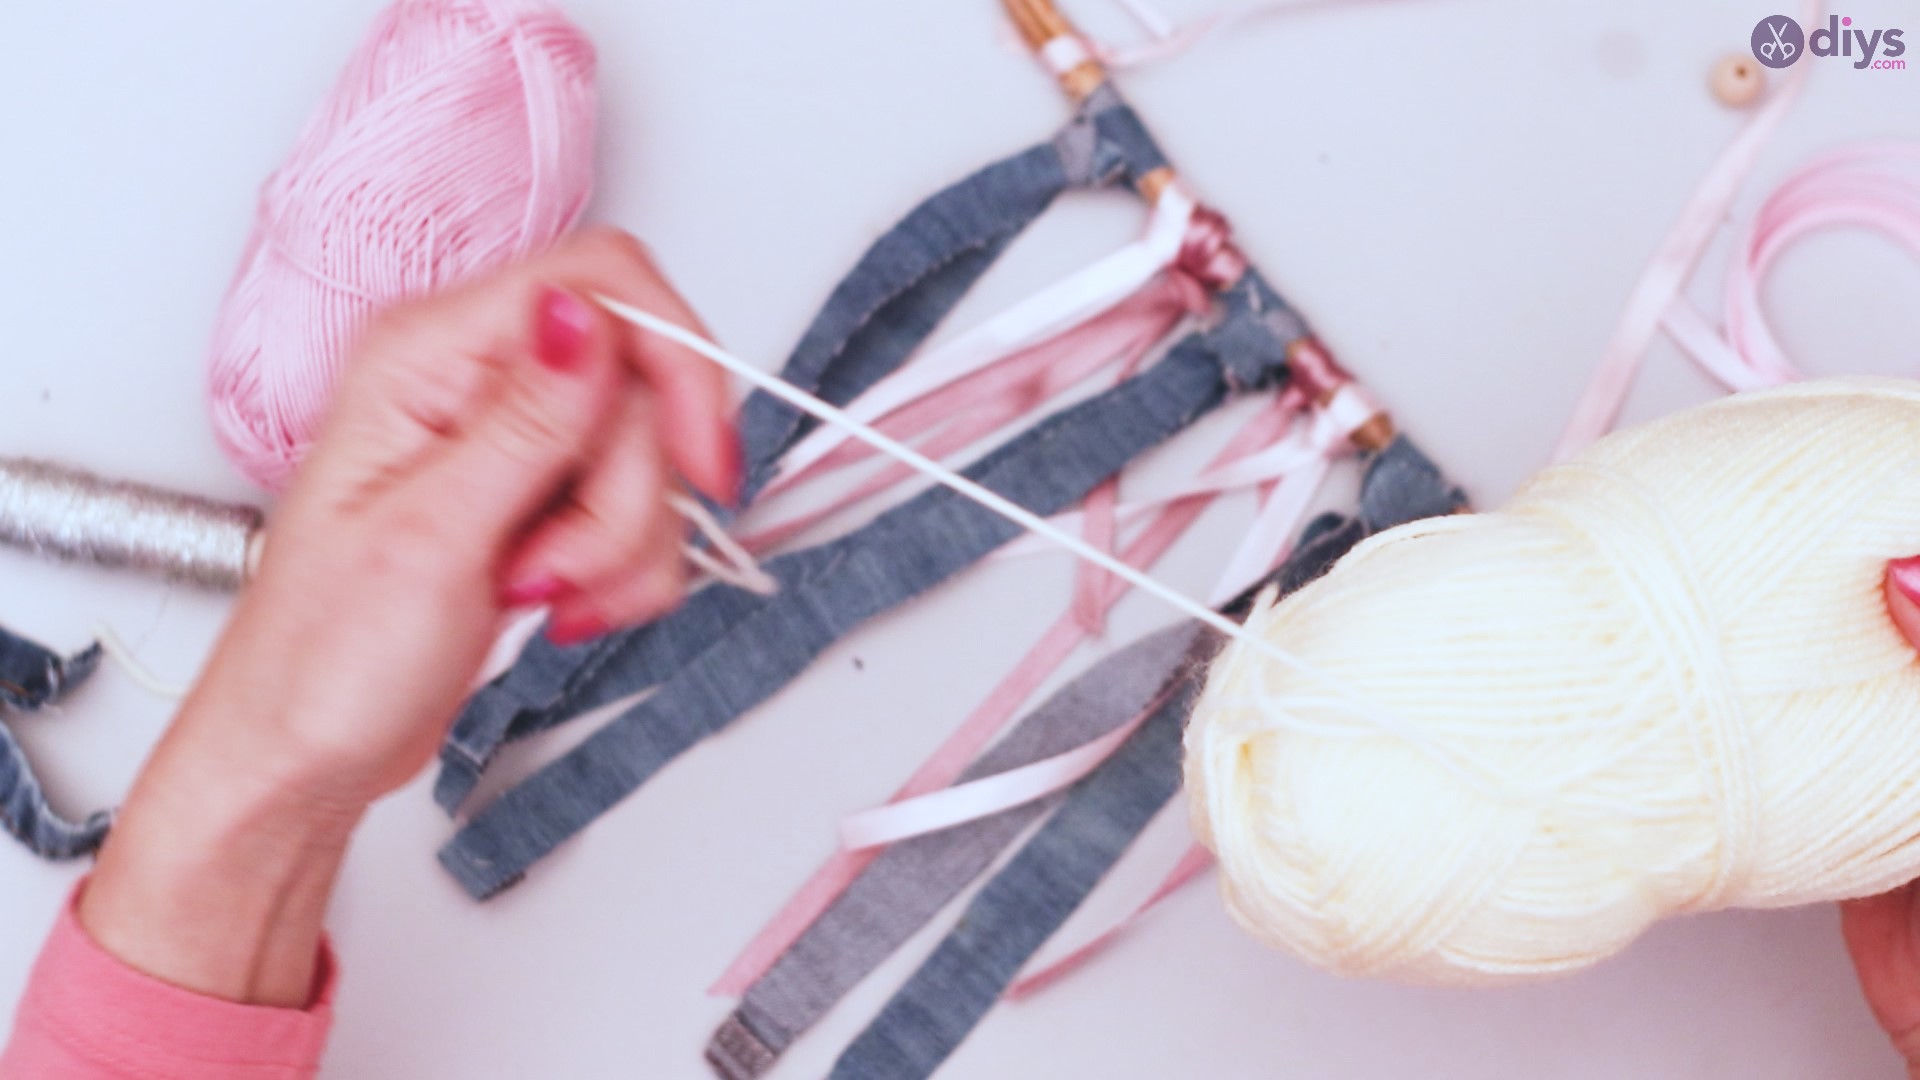
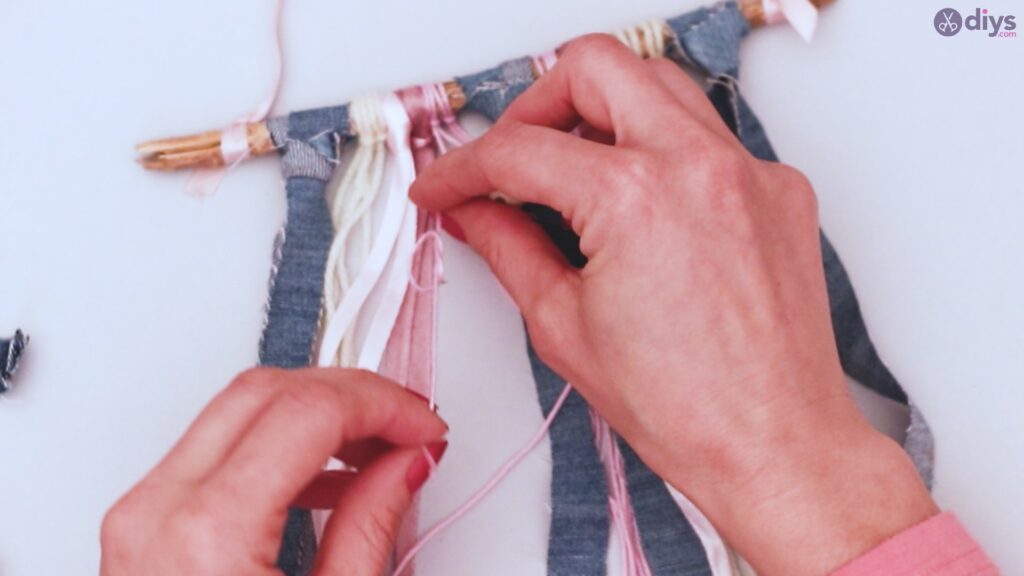
Step 5: Add yarn
Cut 4 lengths of one color of yarn about the same length as all your other strands.
As before, fold these lengths in half, and feed the loop end under the branch. You should attach 2 of them between the ribbons and the outside strand of denim on each side of the branch.
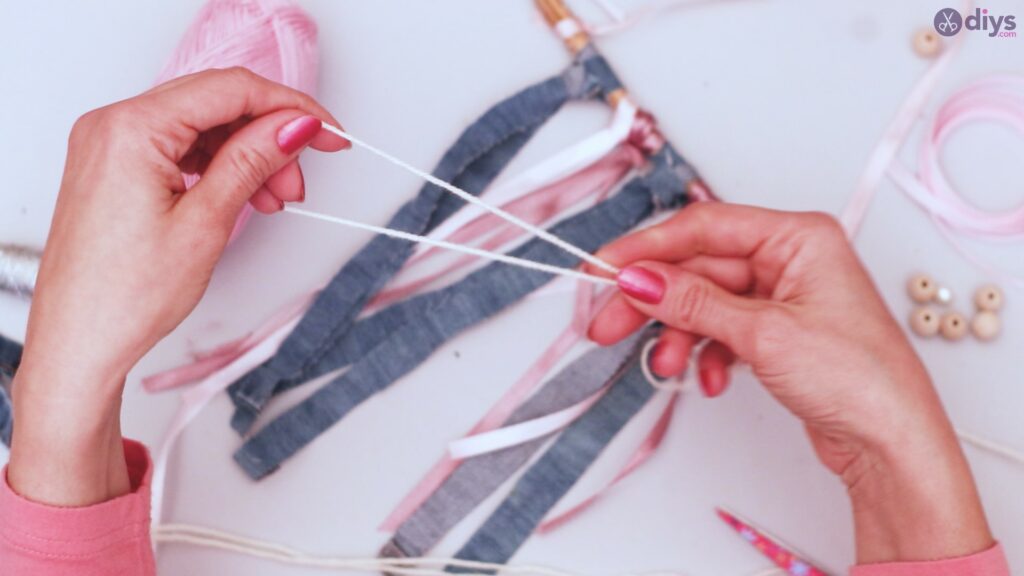

Pull the loose ends through, make sure the yarn is in the right position, and tighten.


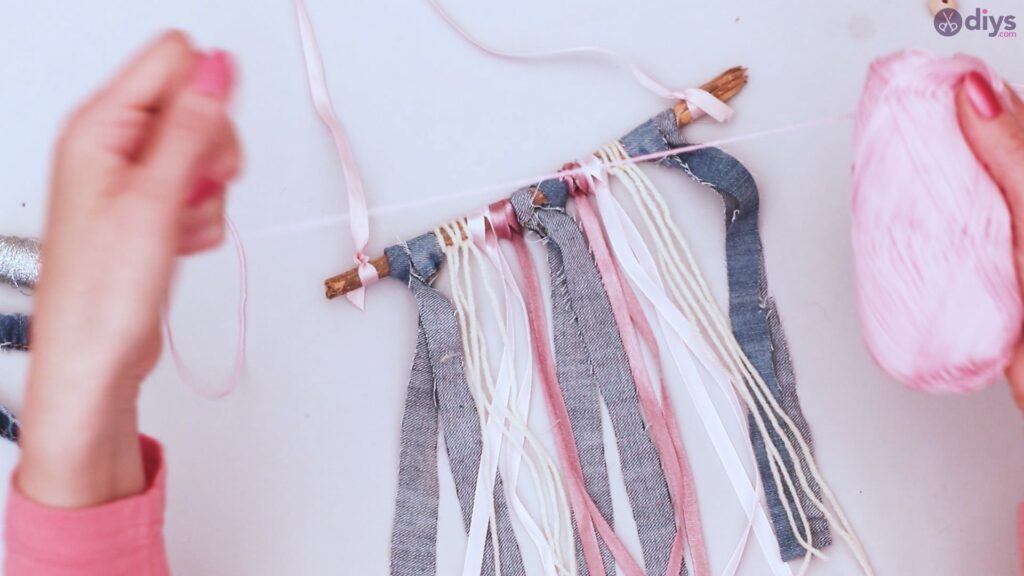
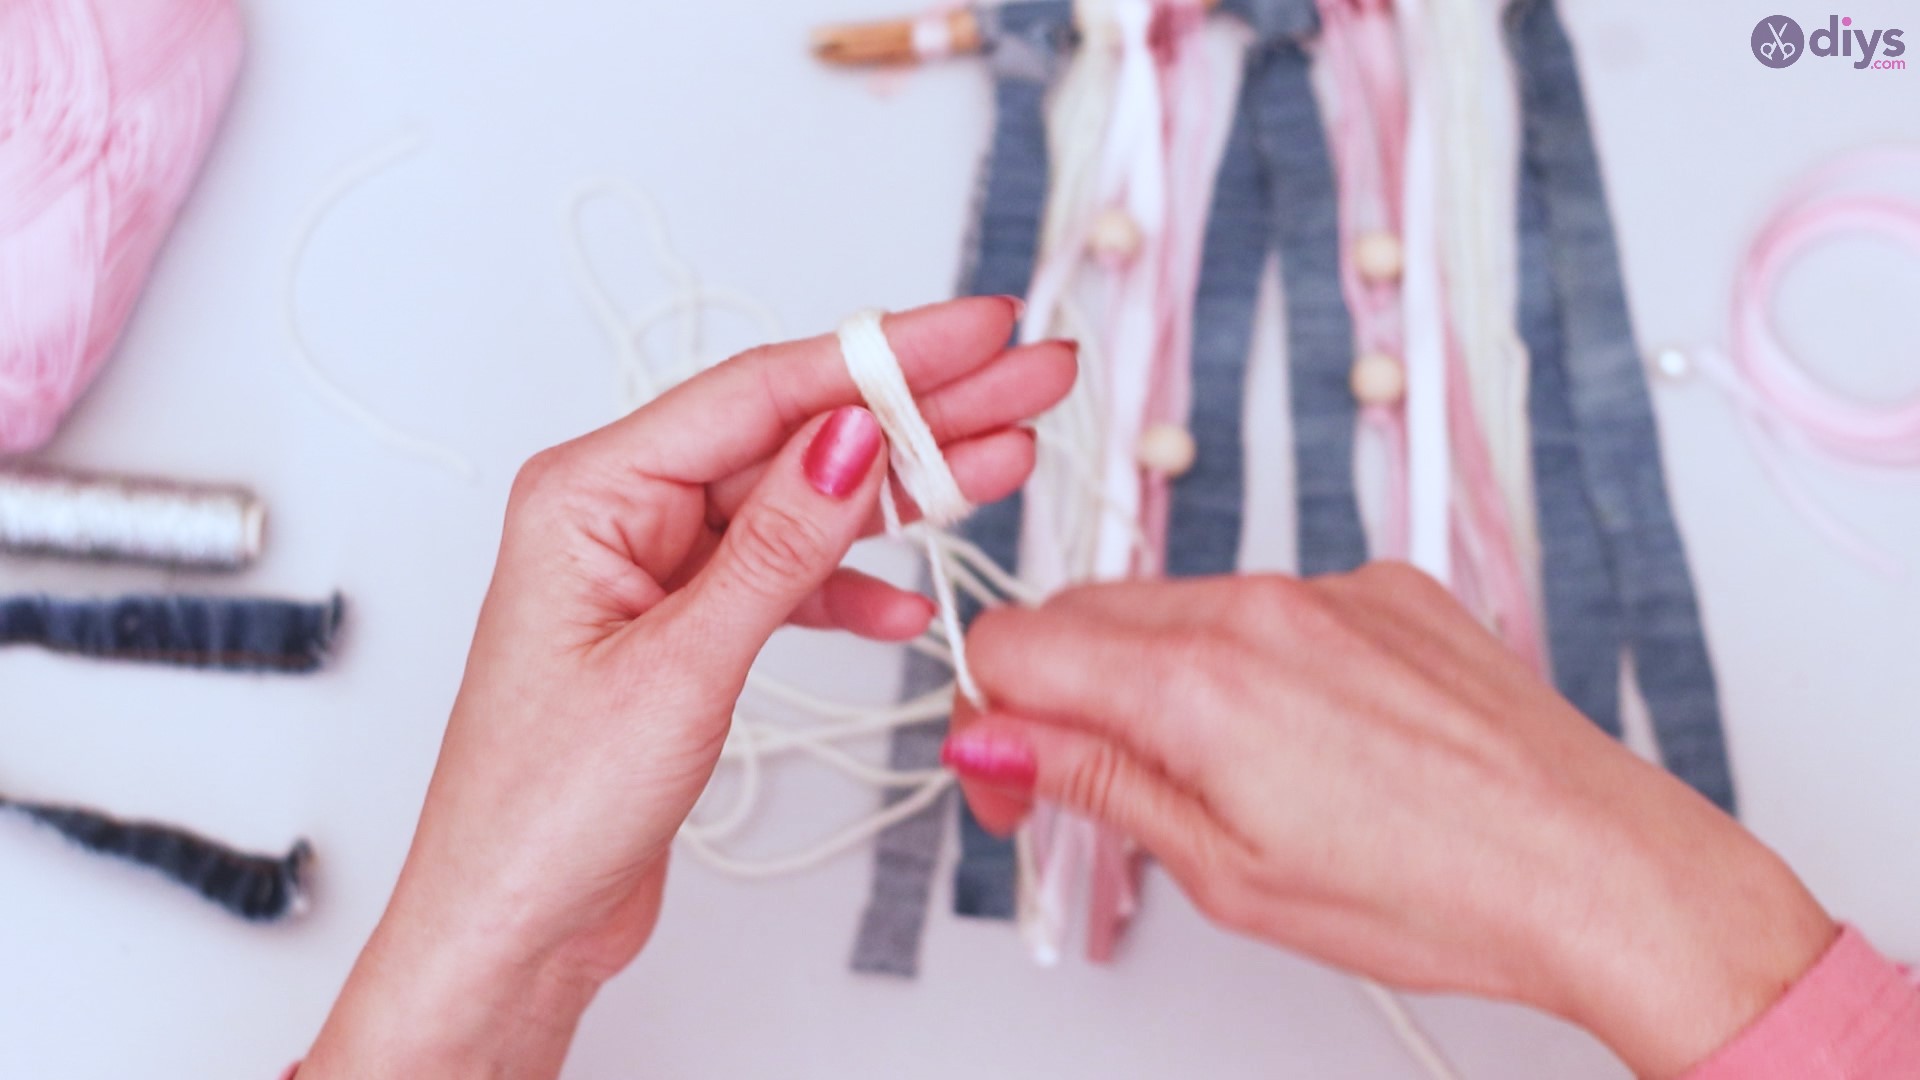
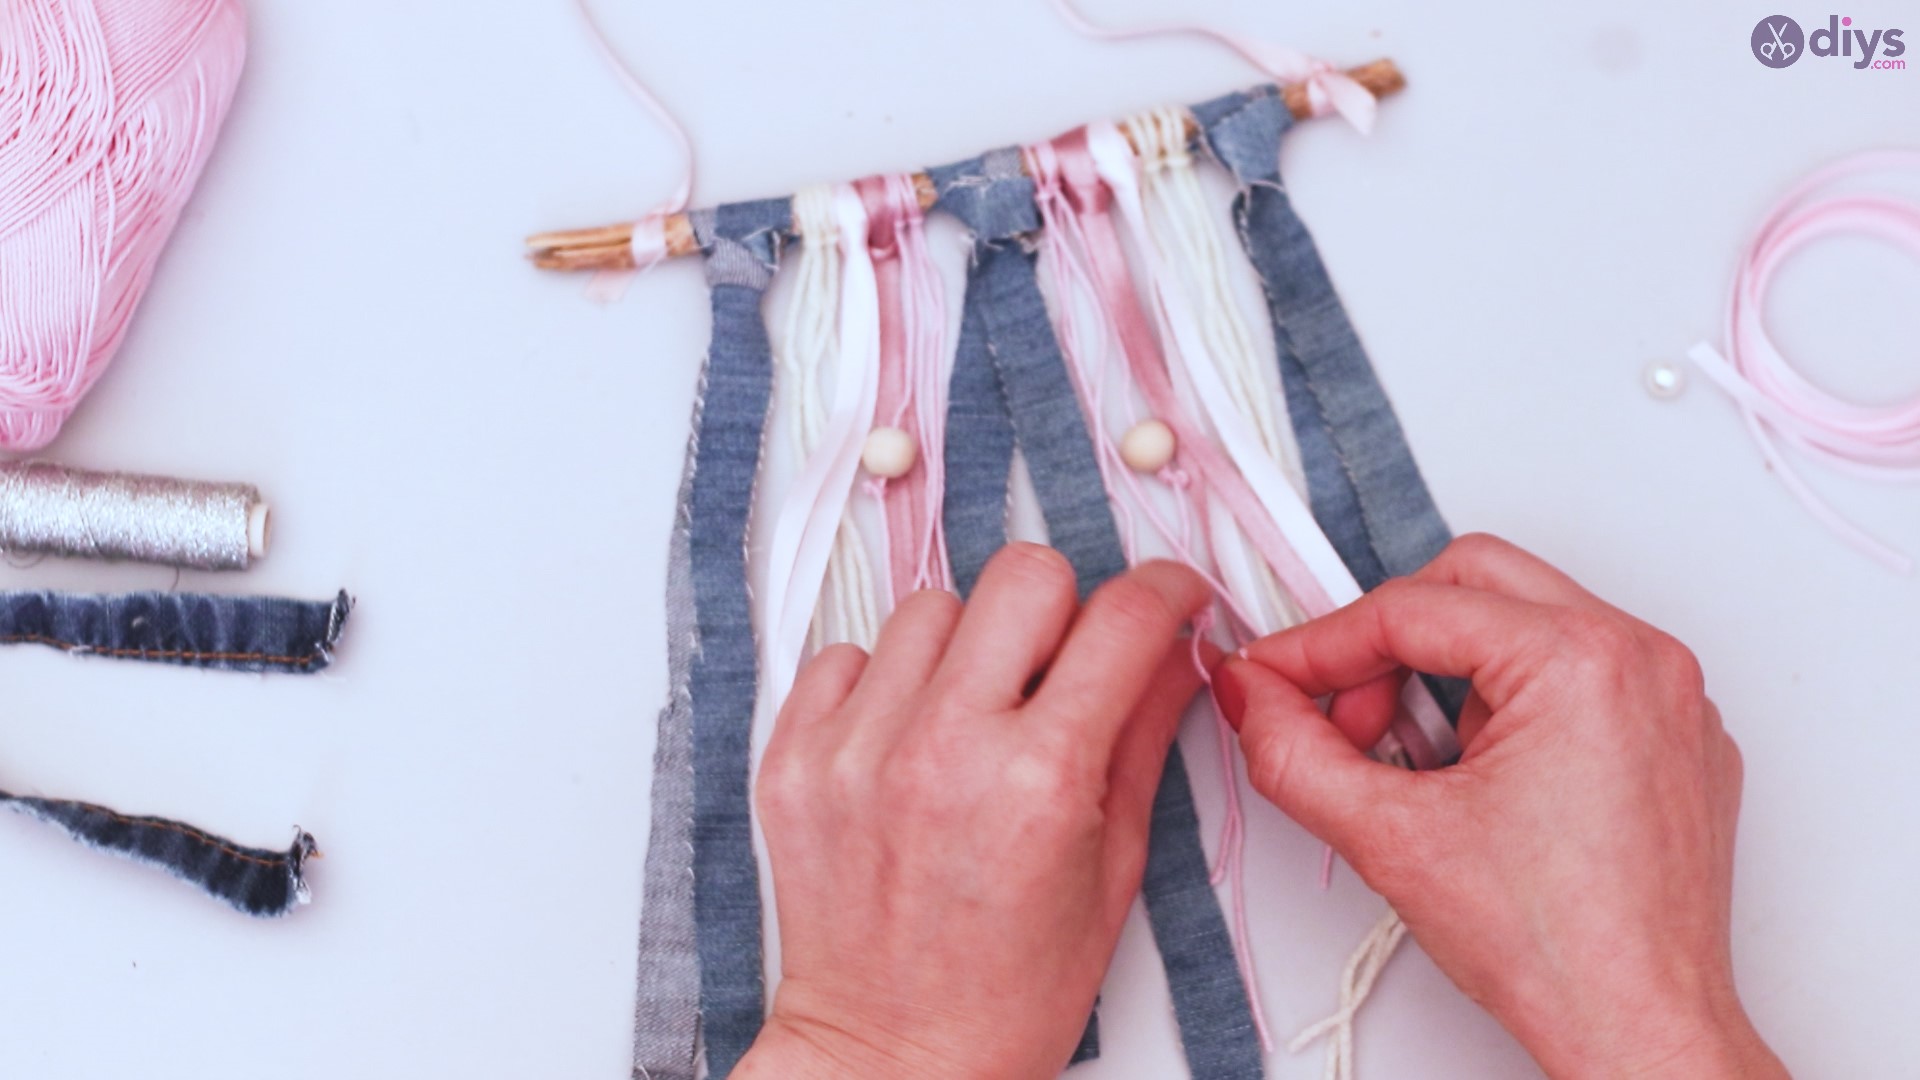
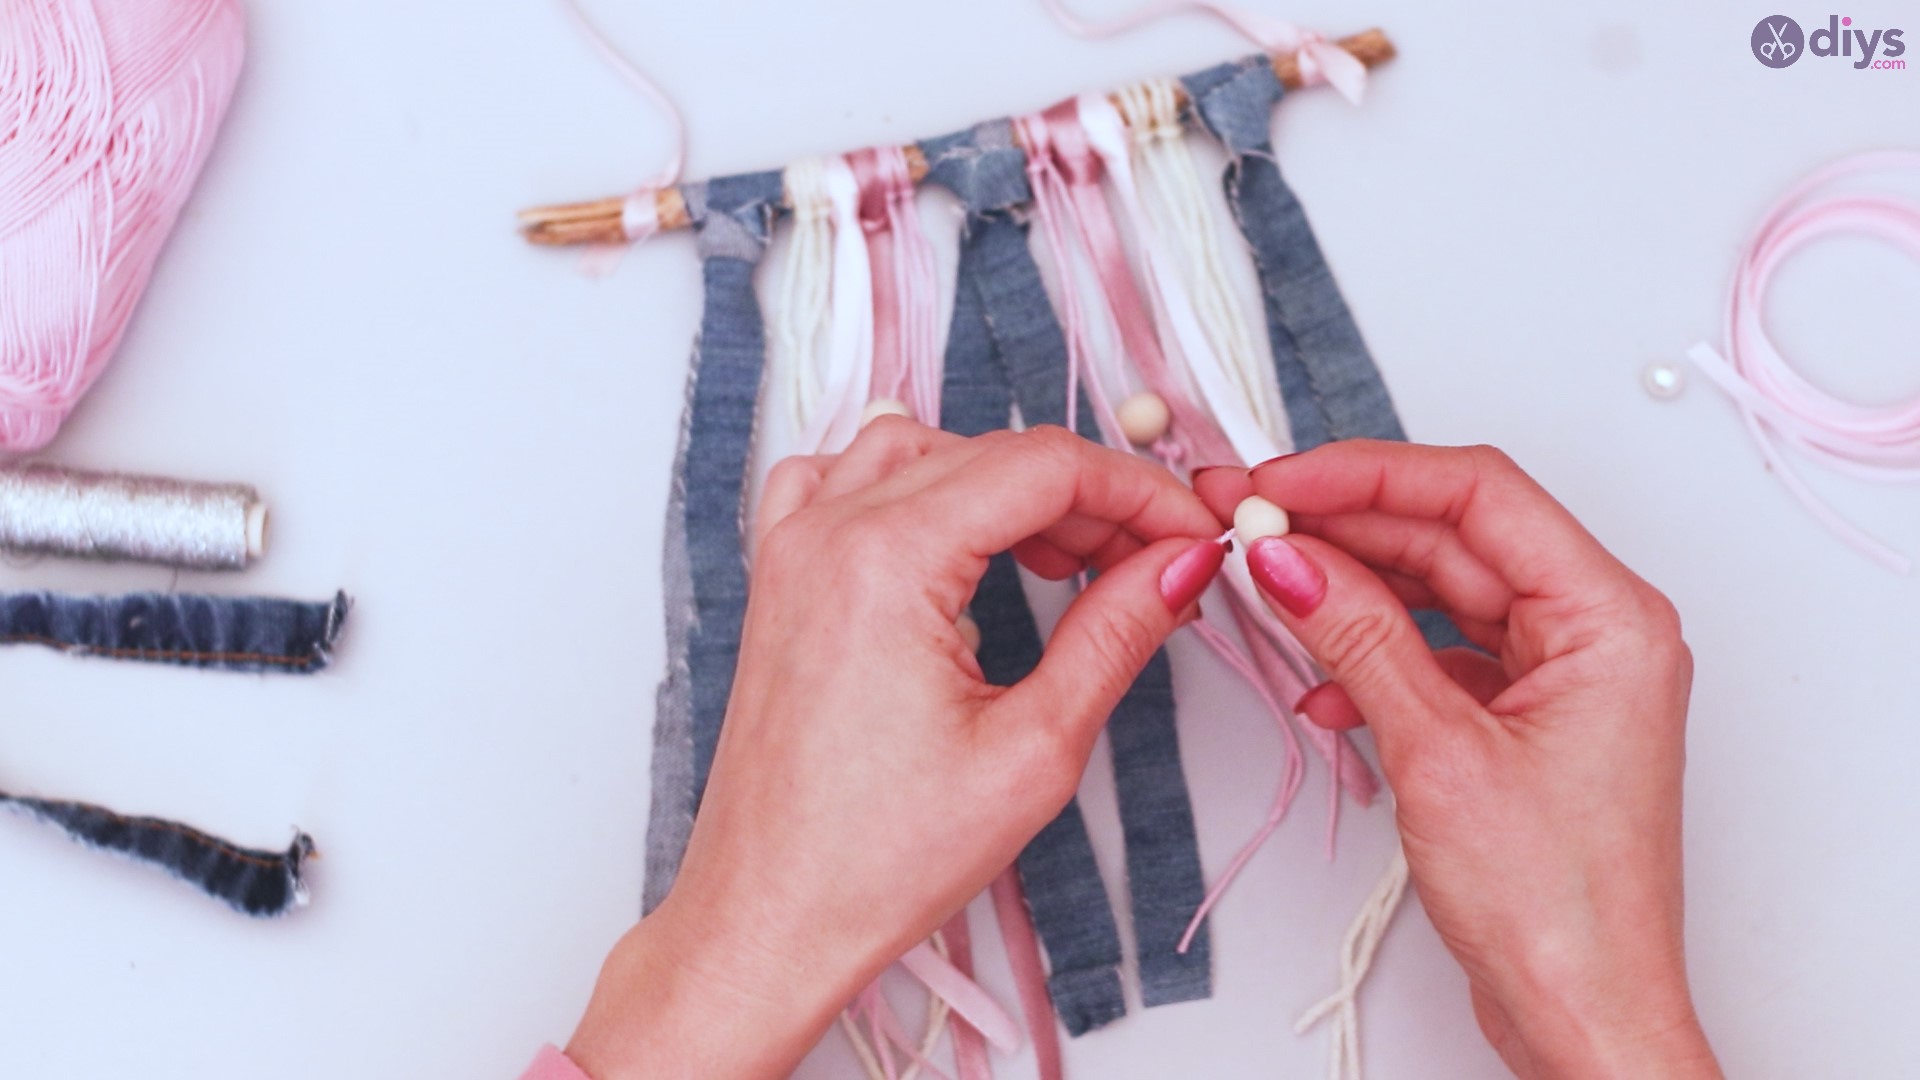
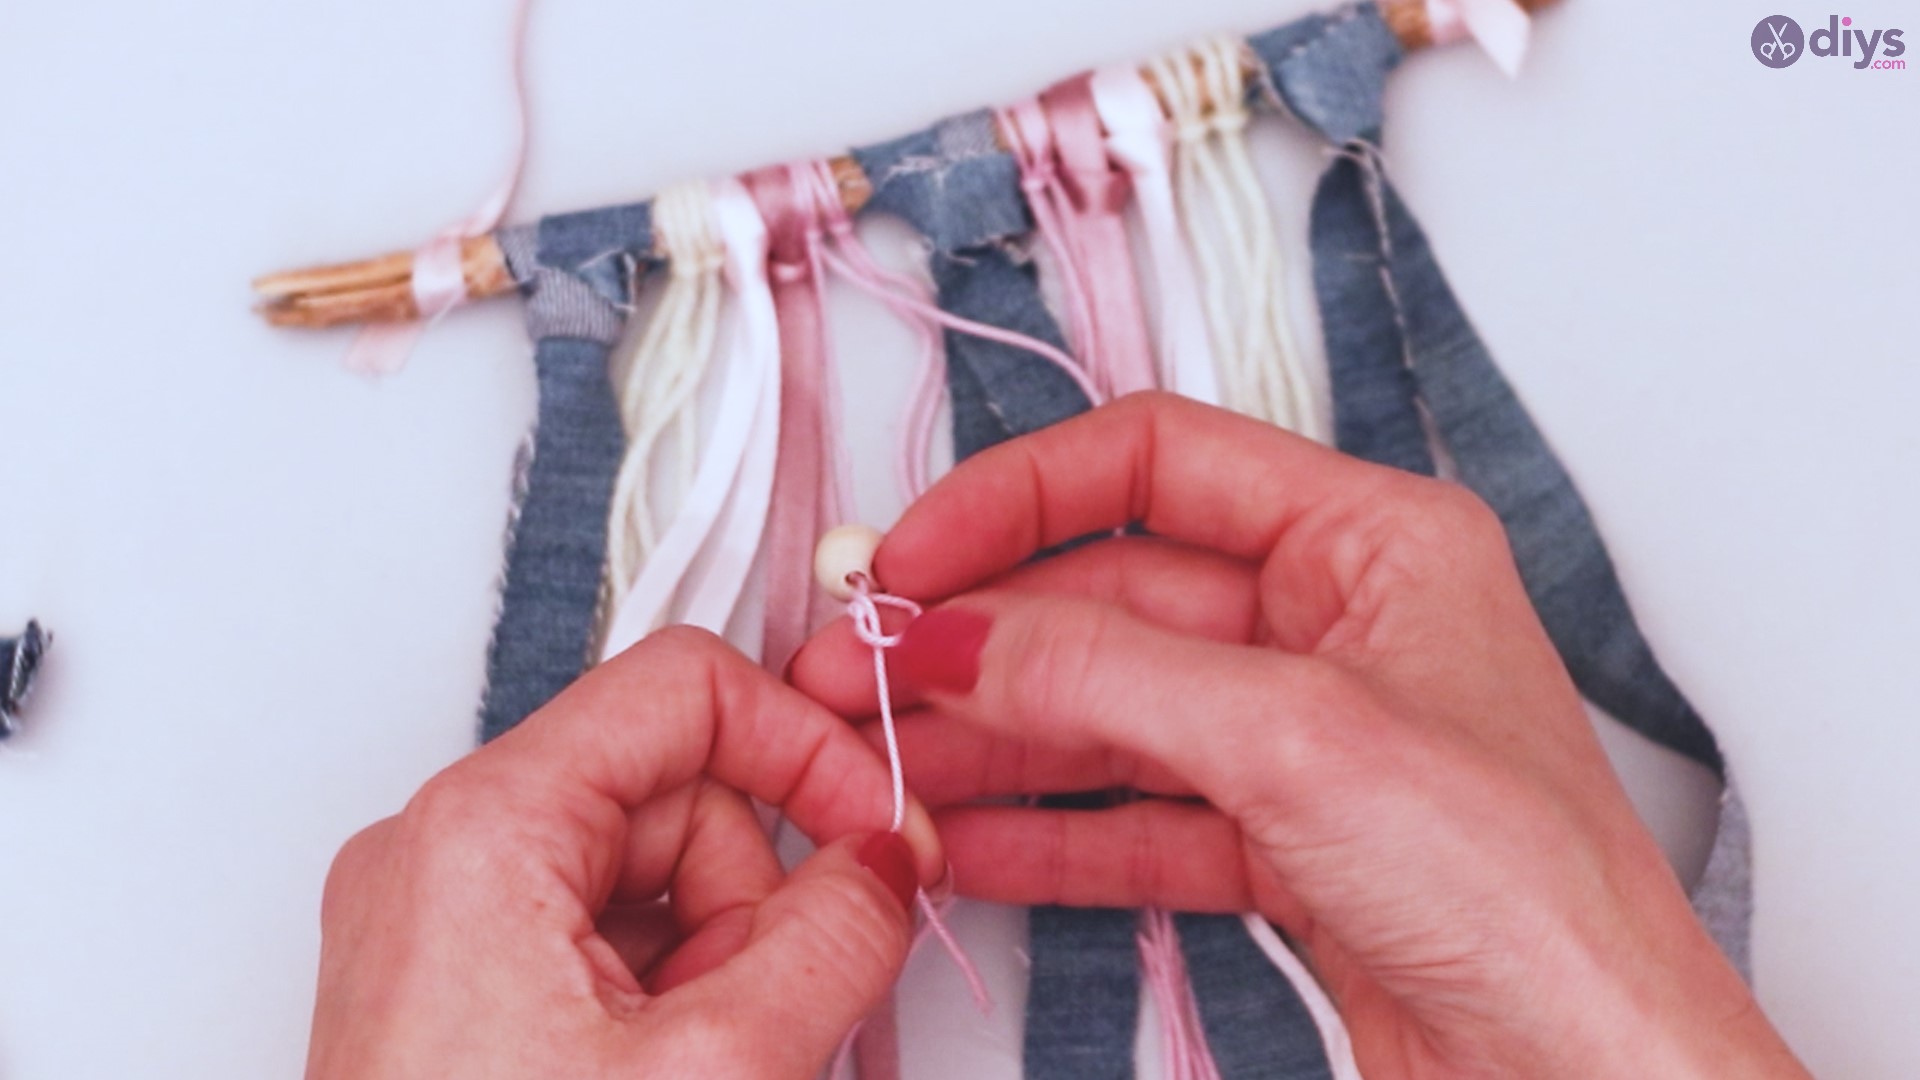
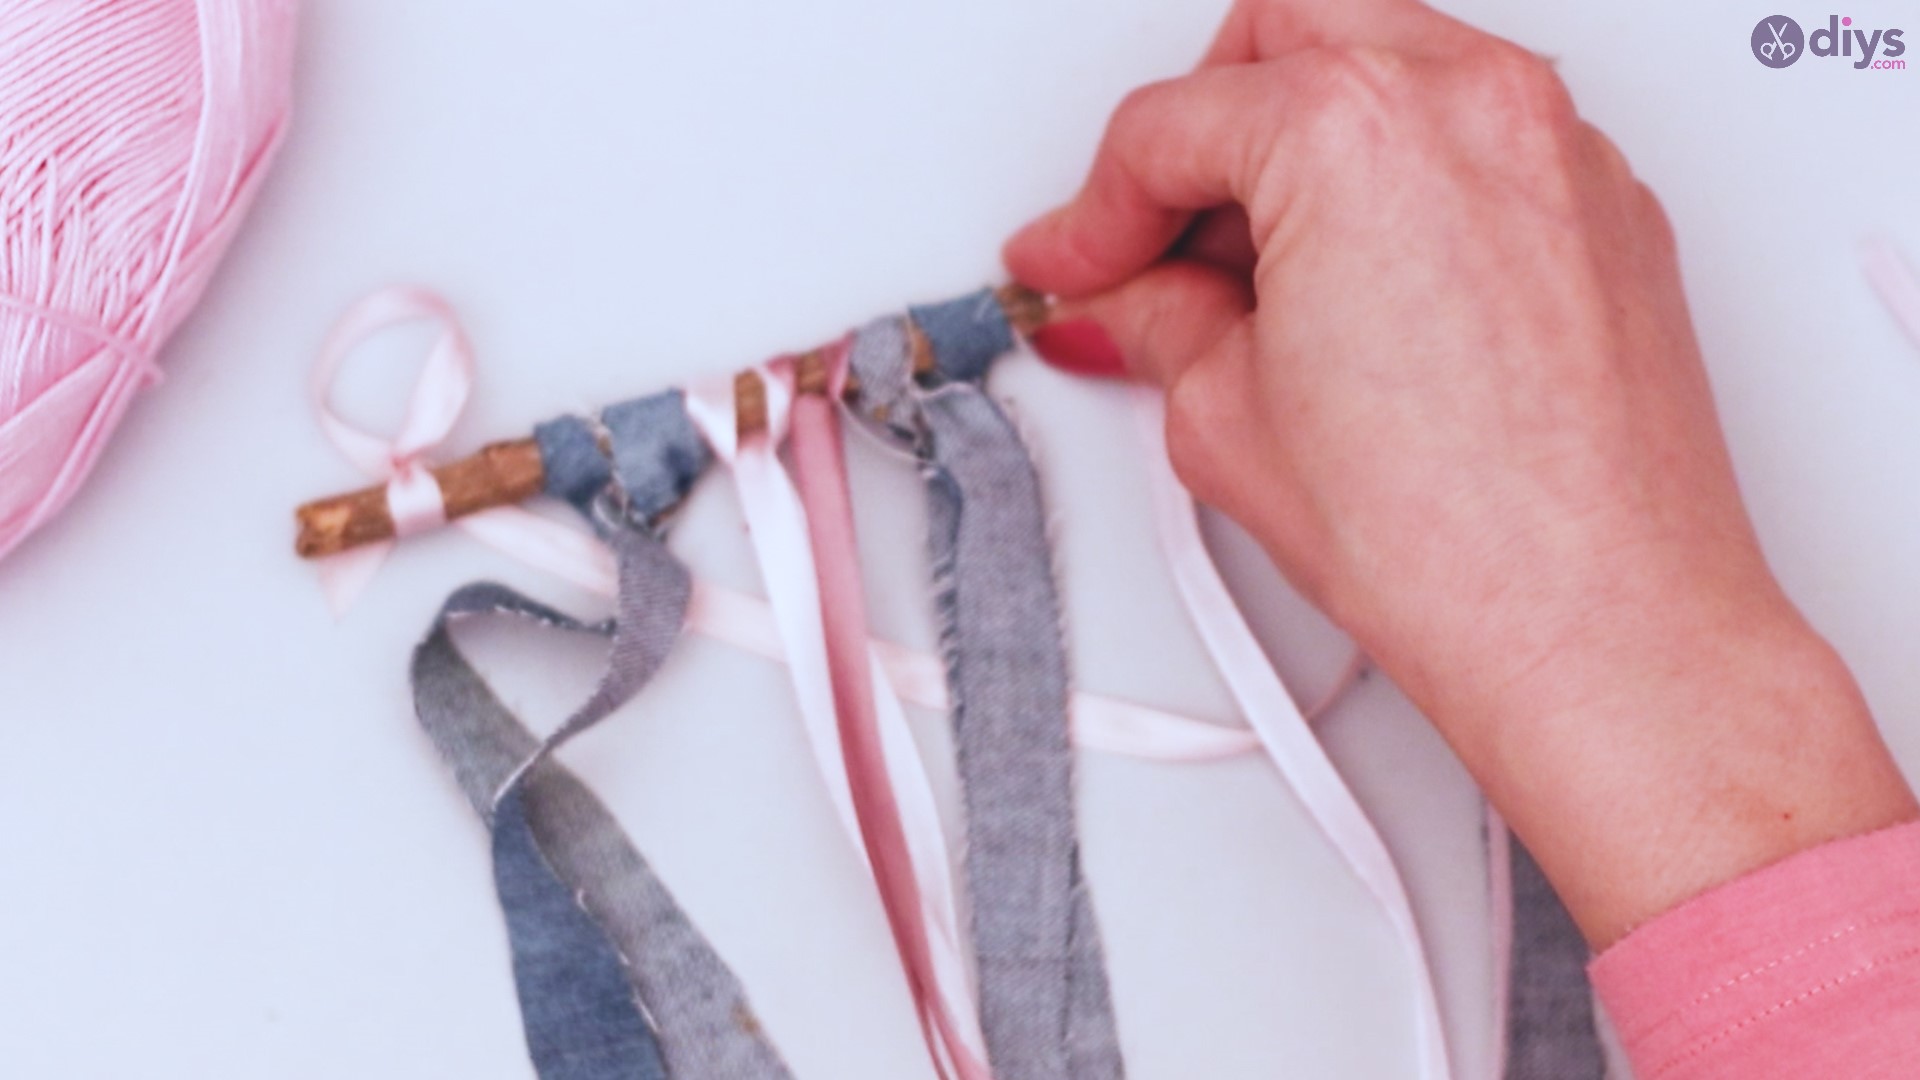
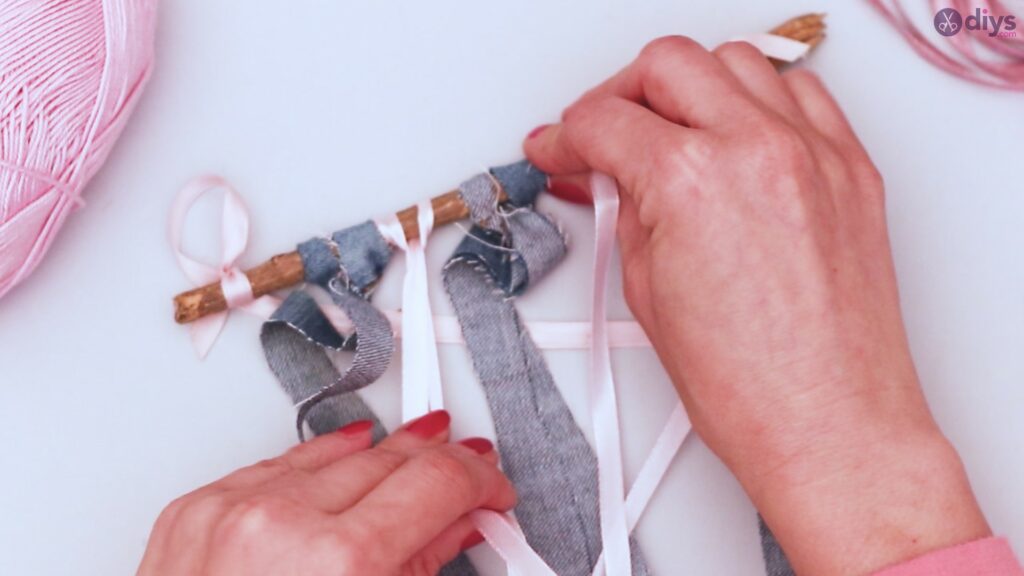
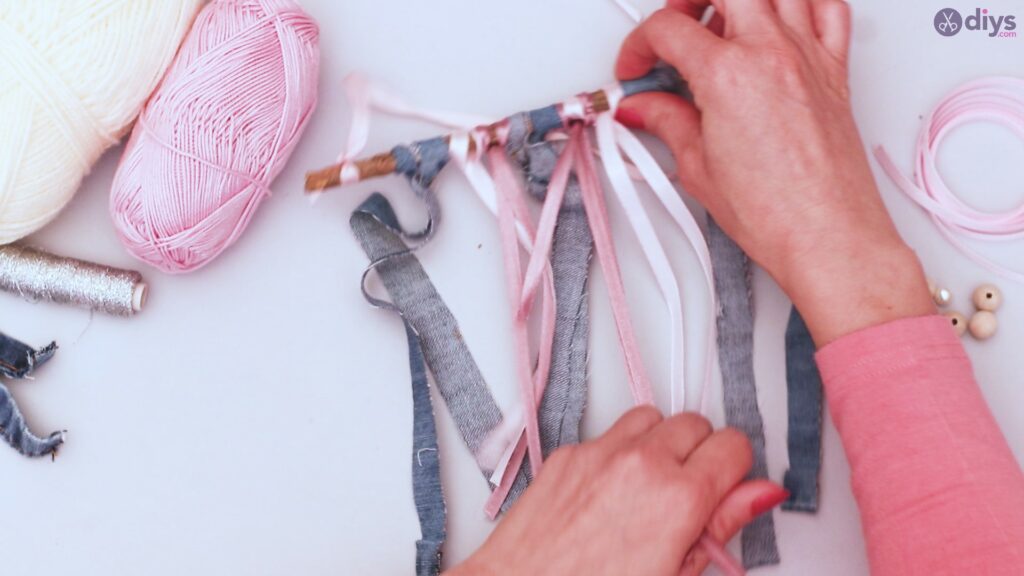
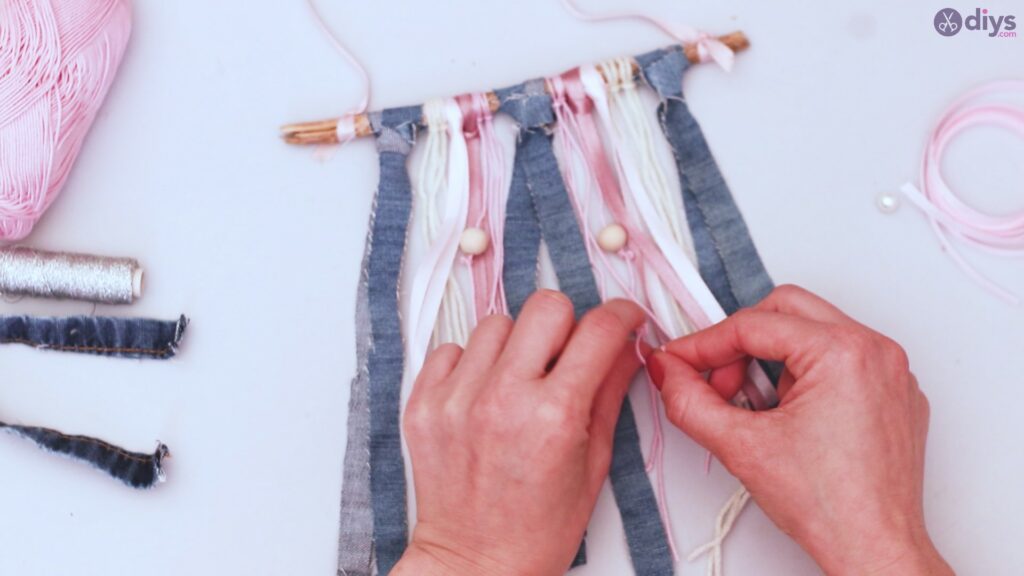
Step 5: Beaded yarn
Using your other yarn color, cut 2 more similar lengths of yarn. Attach them to the branch in the same manner as before, placing them directly on either side of the denim strip in the center.

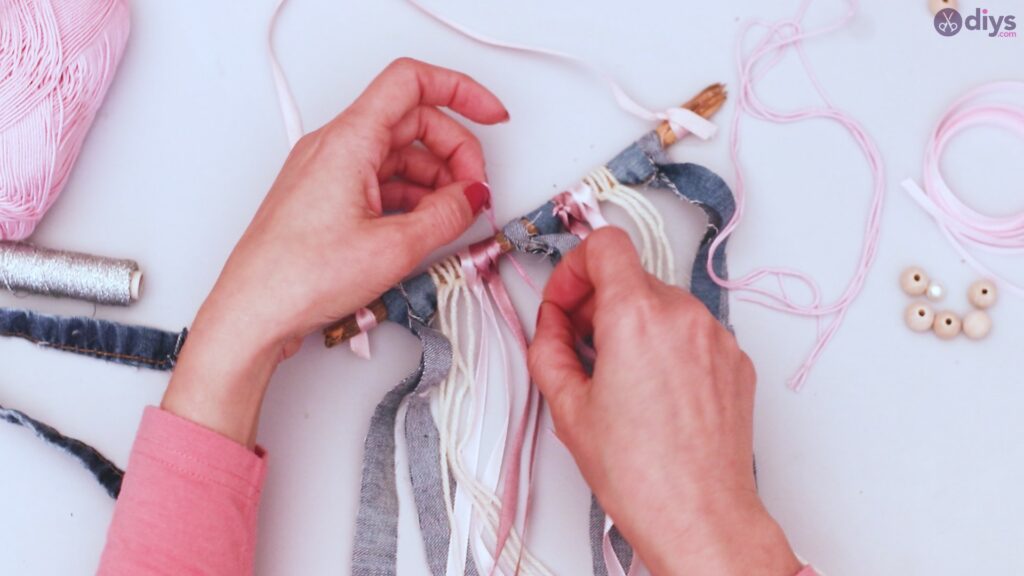


On each piece of yarn, tie a knot in the 2 sides of the thread, about halfway up.
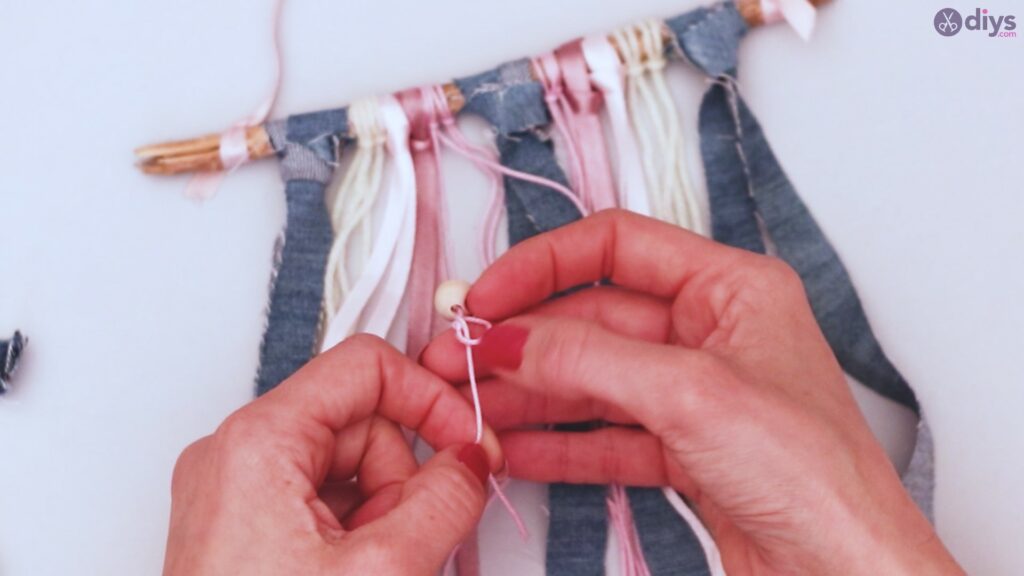
Take a pearl bead, and thread it onto one of the ends of one of your pieces of yarn. Push the bead up to the knot you made.
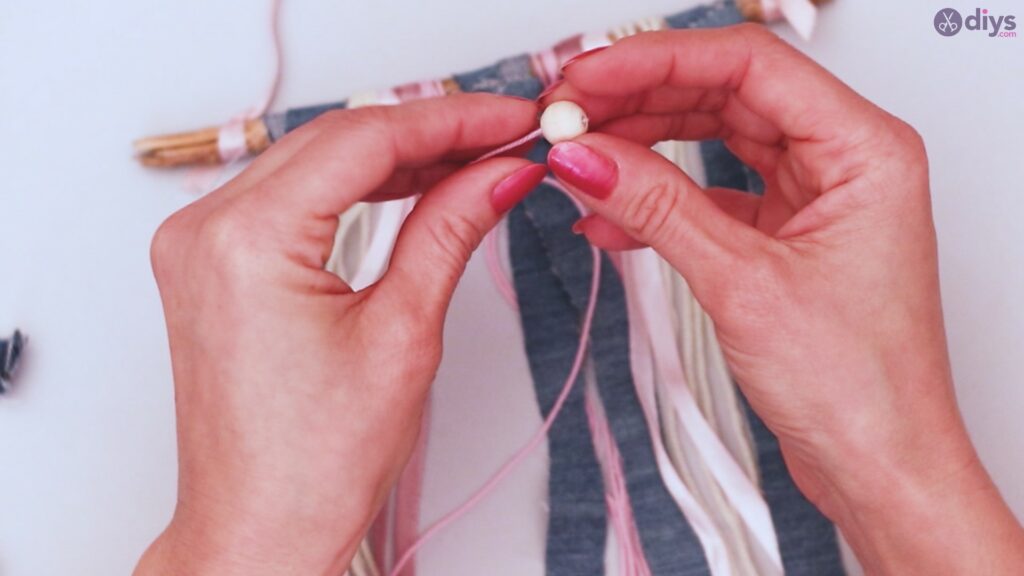
Tie an additional knot in only this end of the yarn, just beneath where the bead is sitting, to hold it in place. Repeat this process for the second bead on the other side.

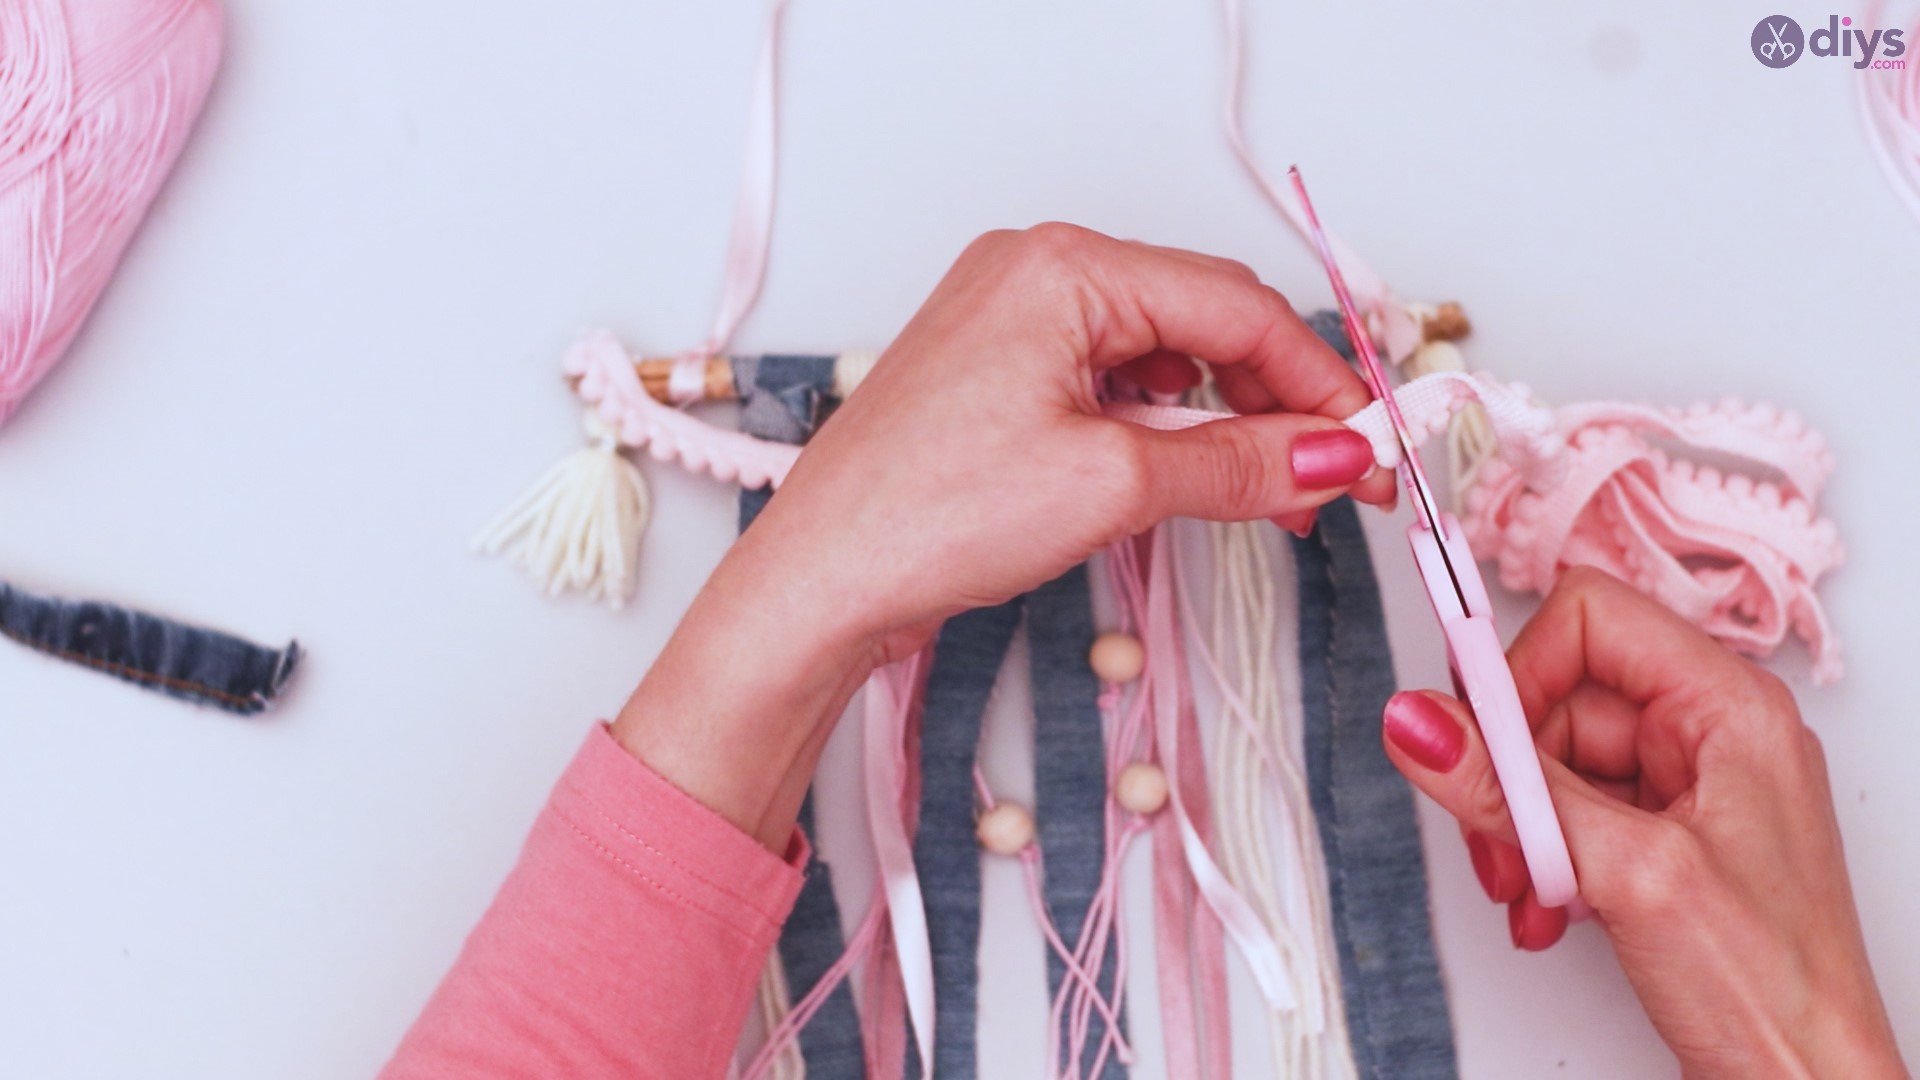
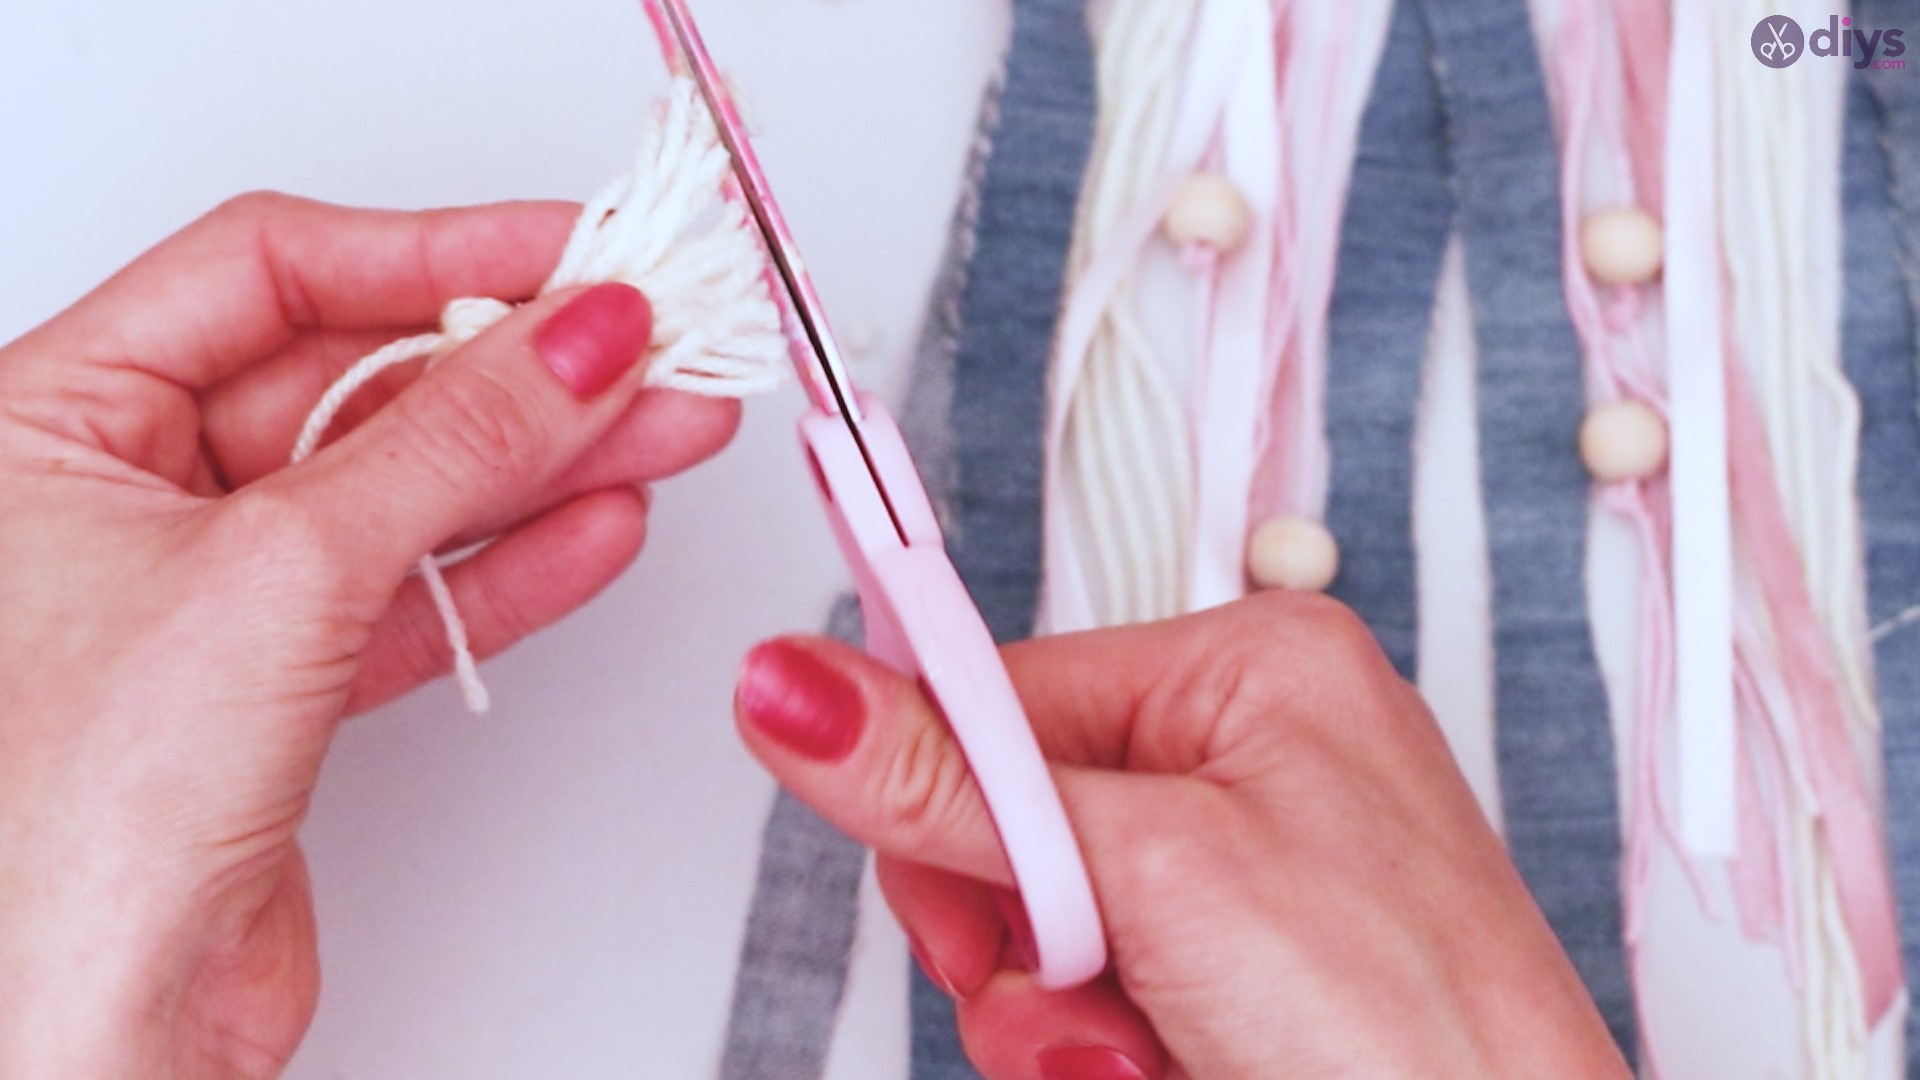
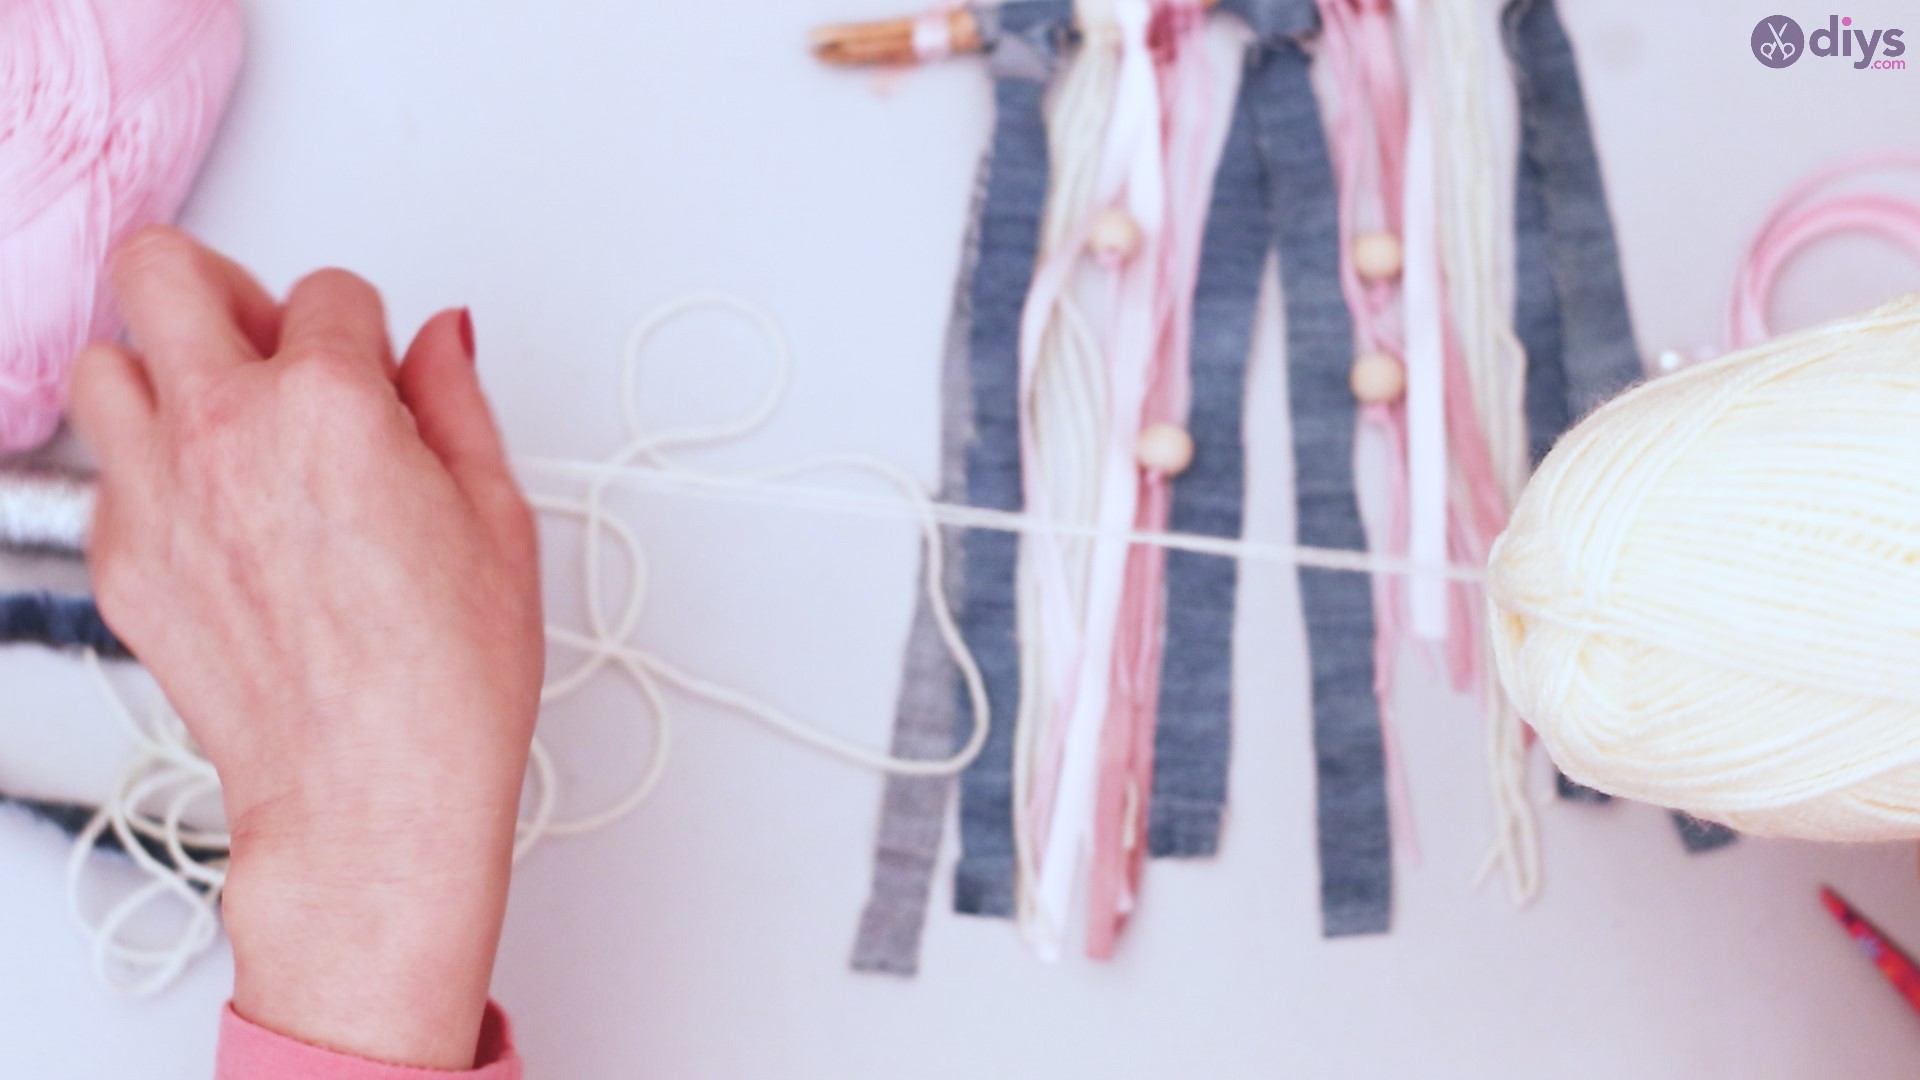
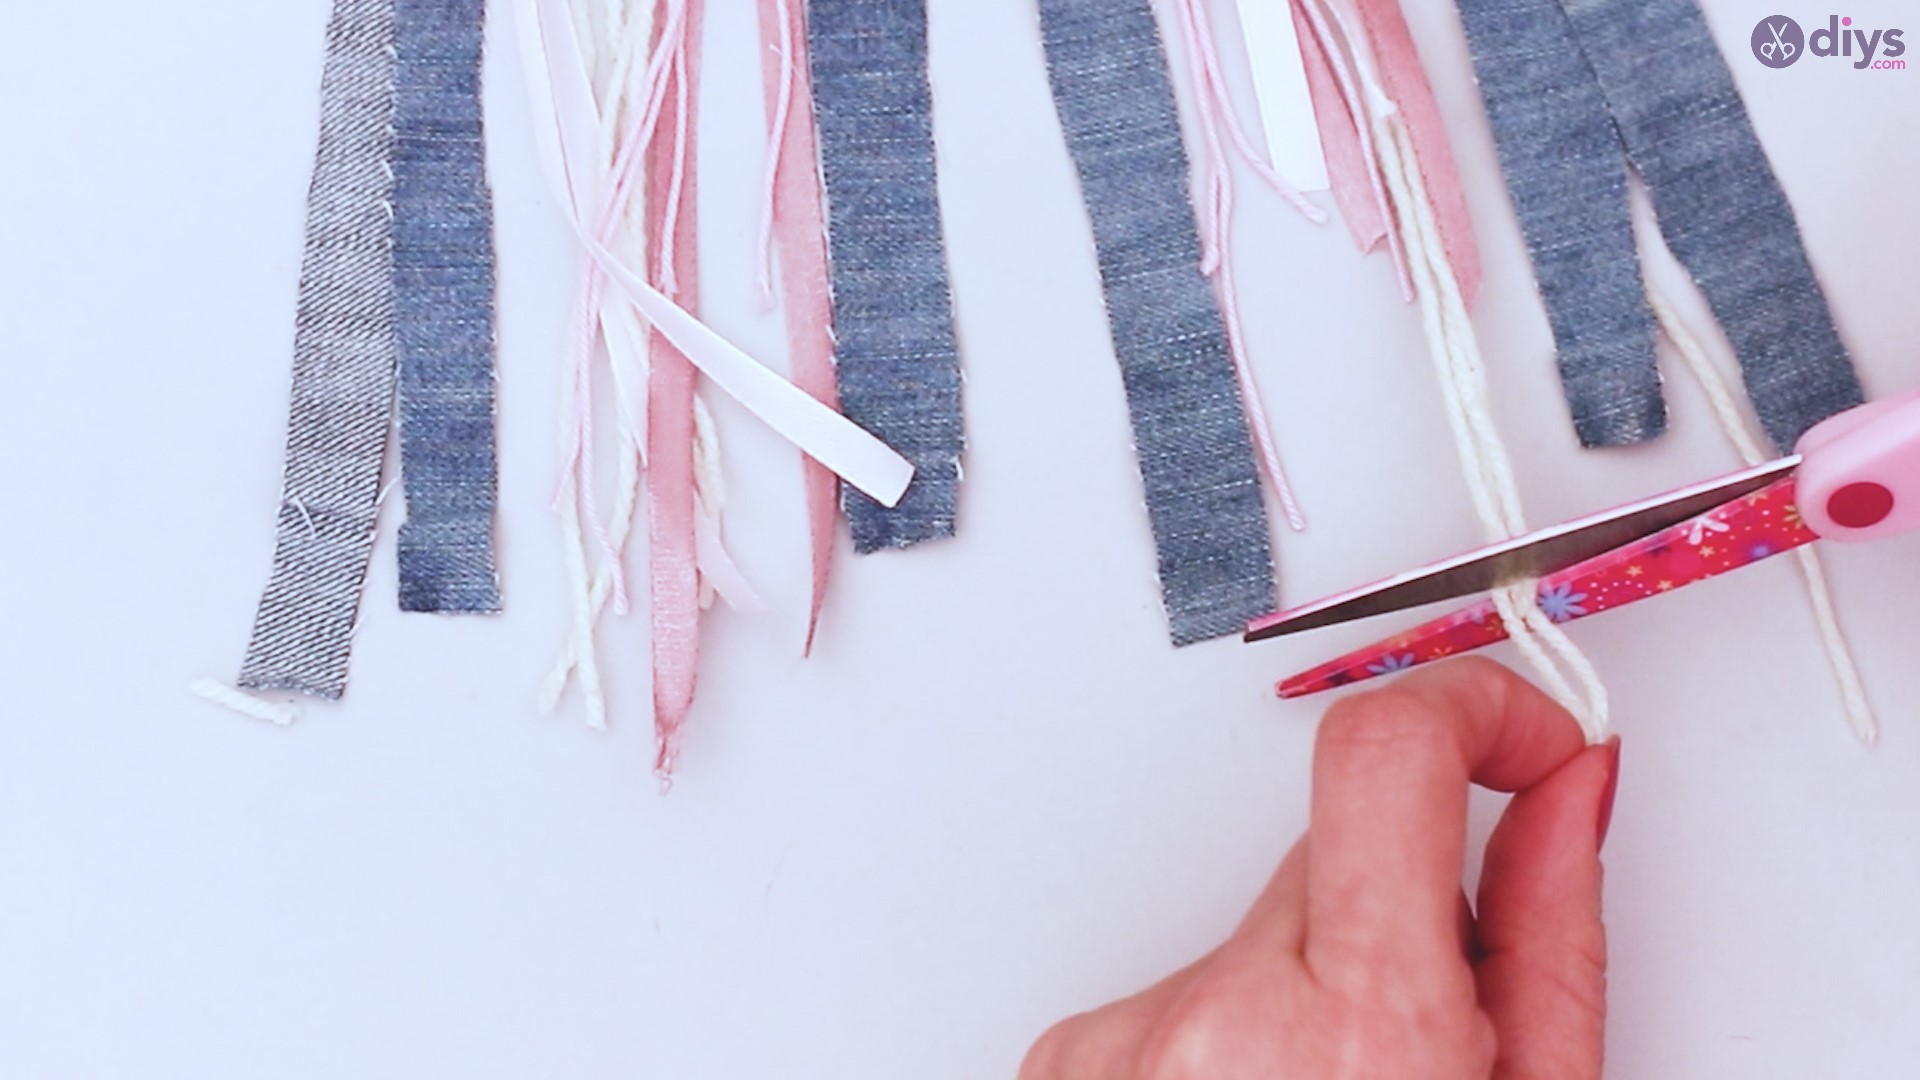
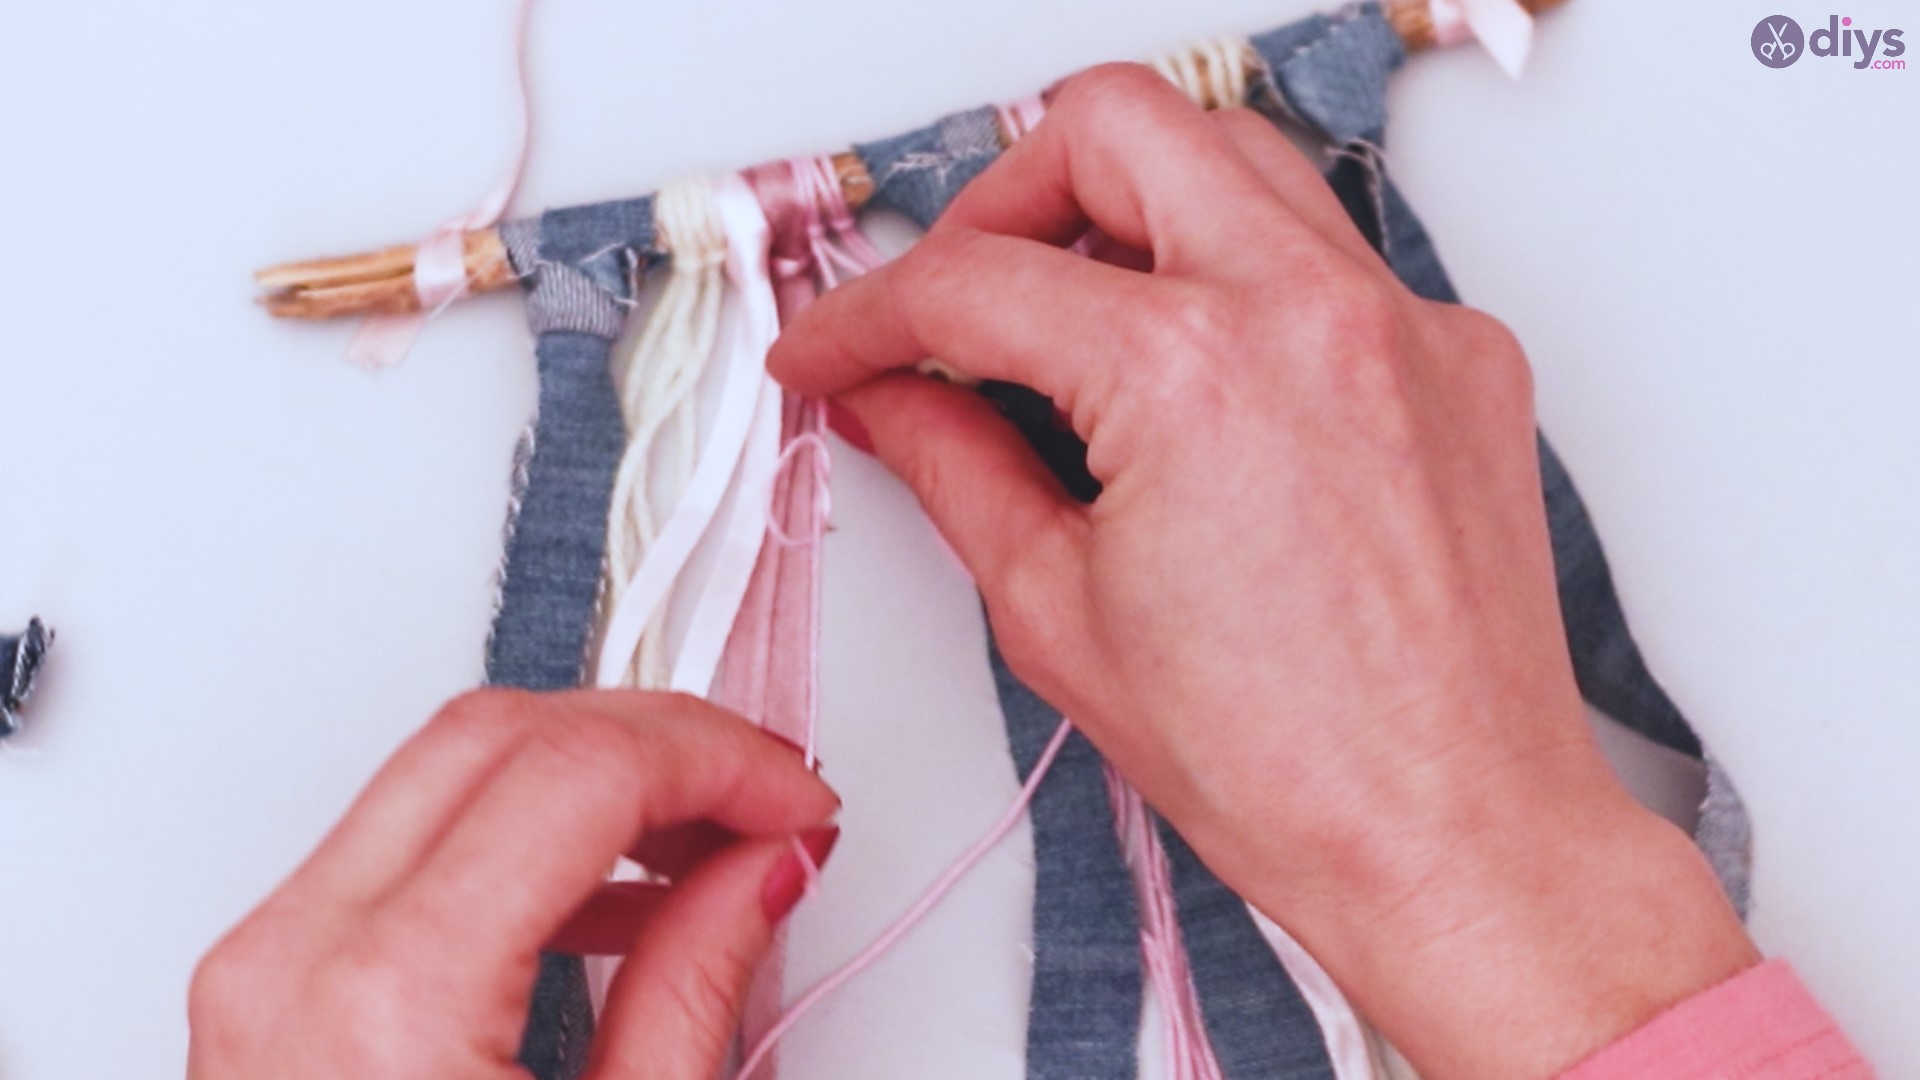
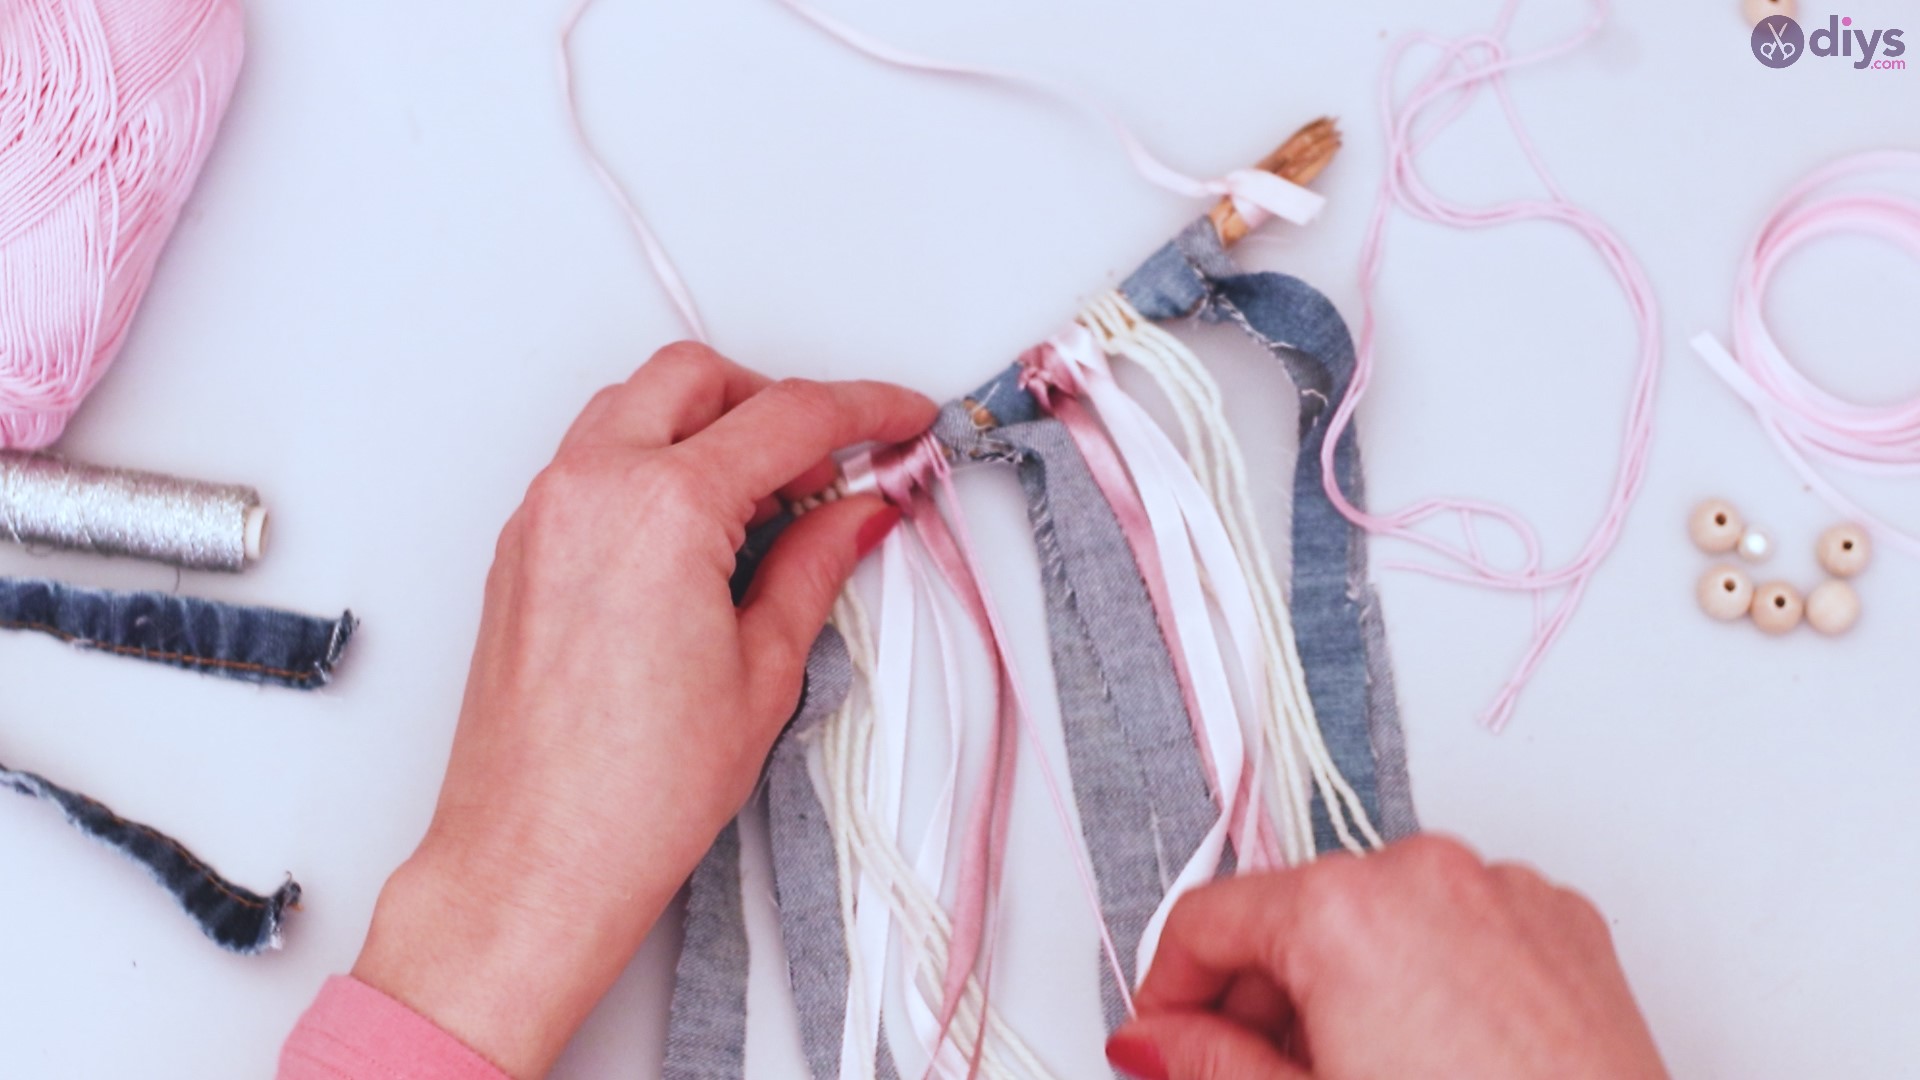
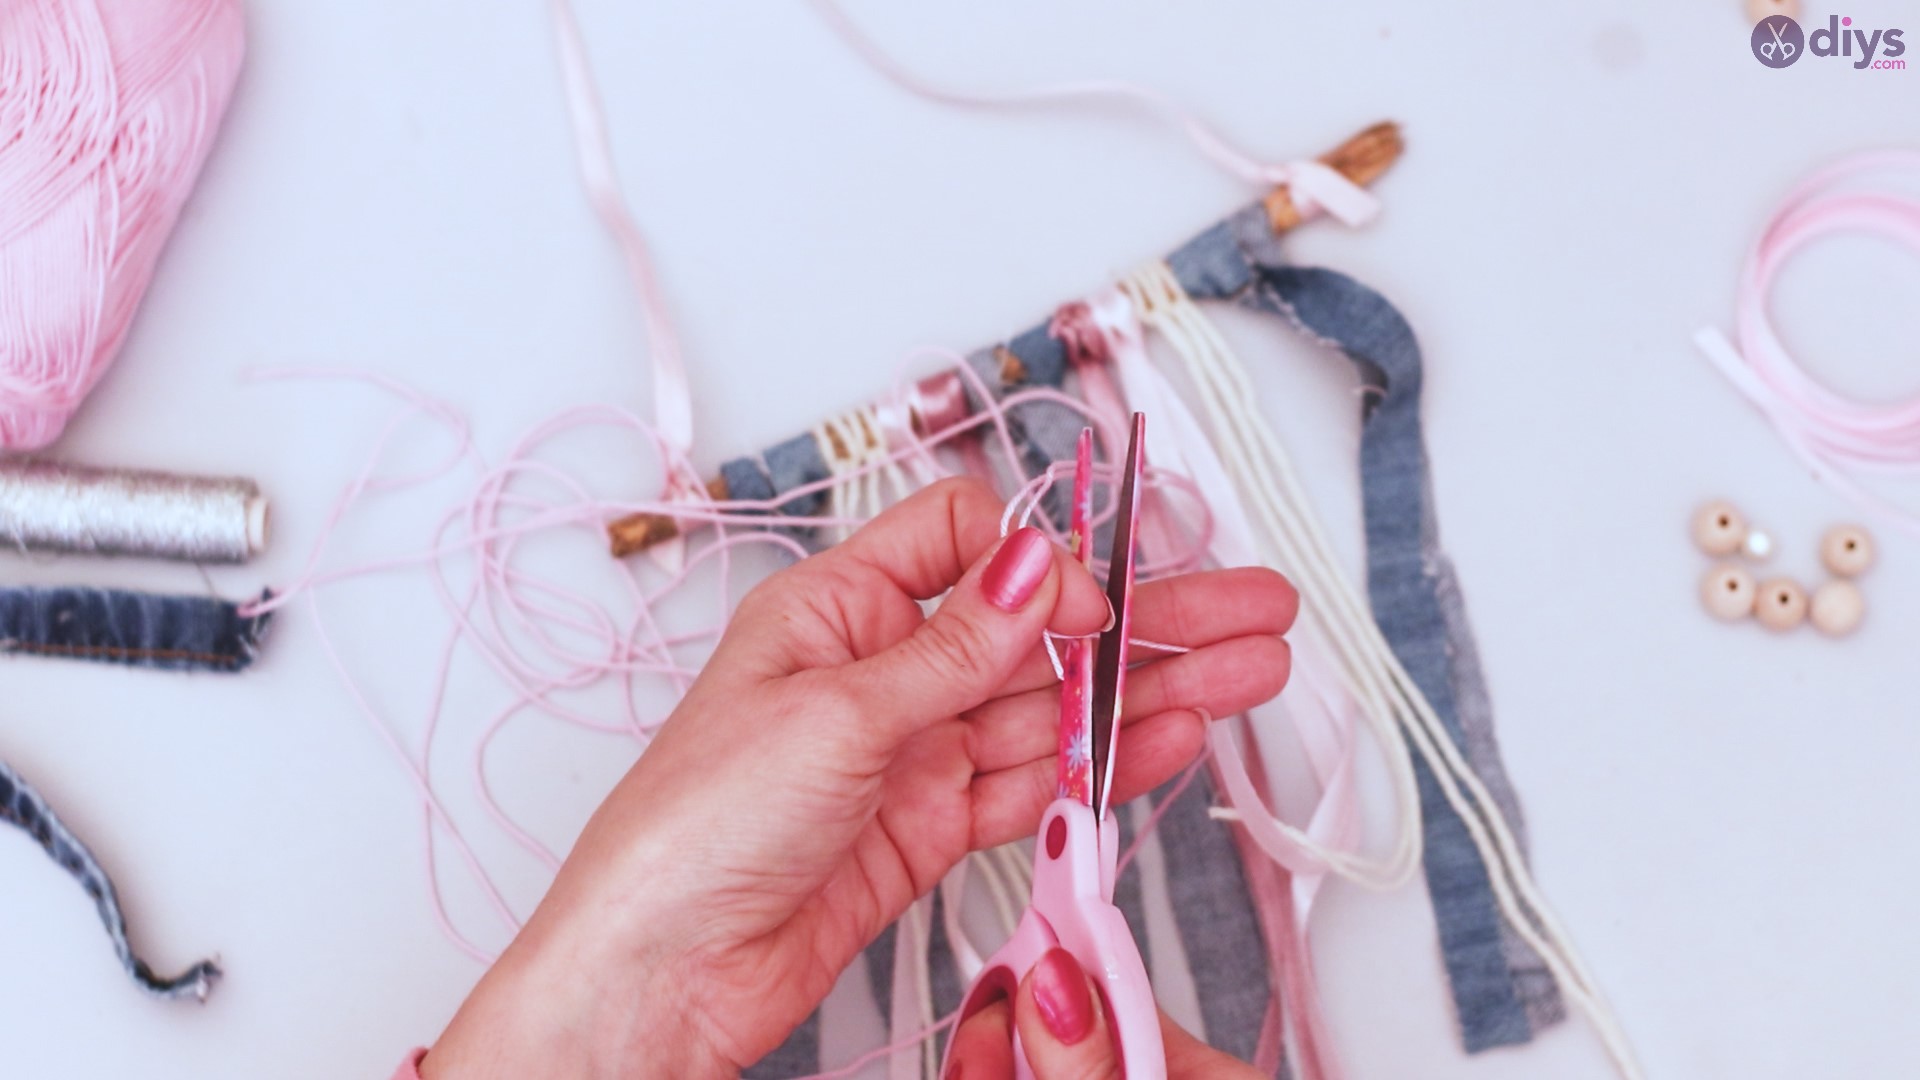
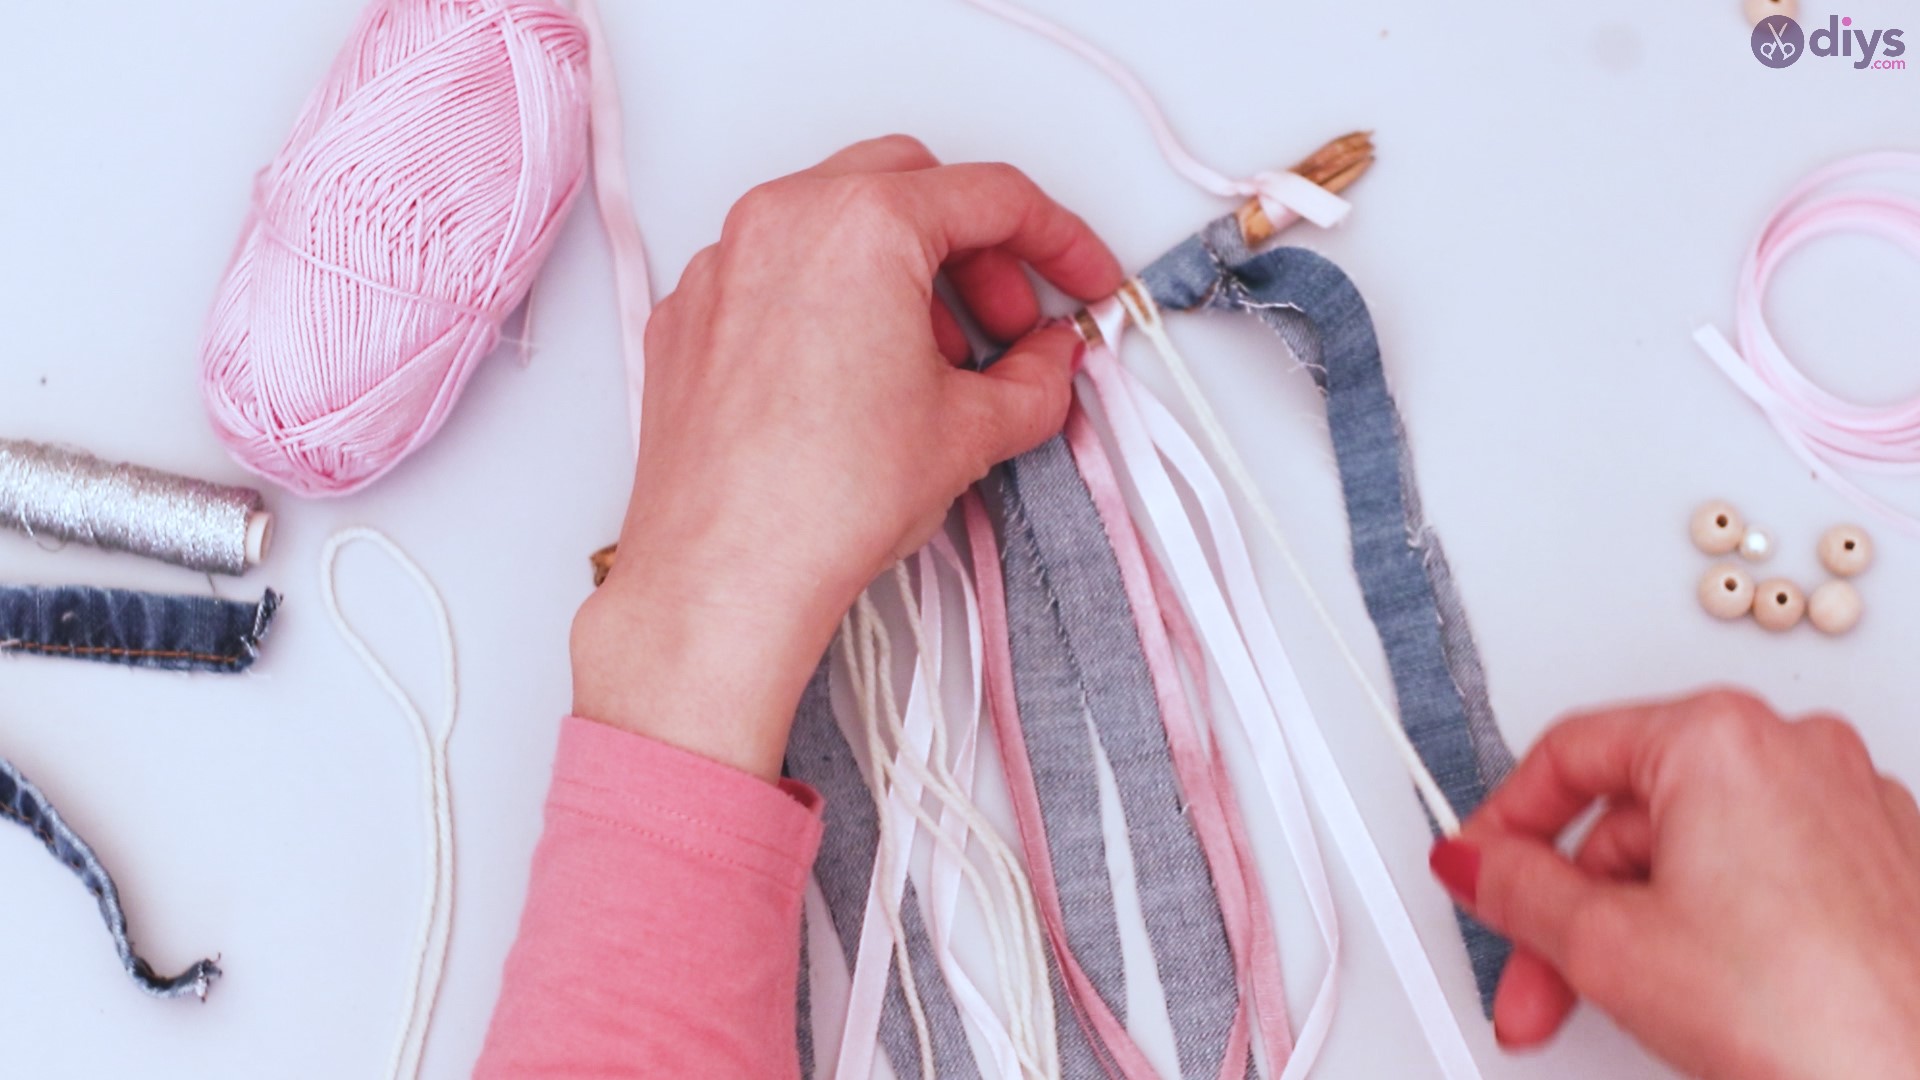
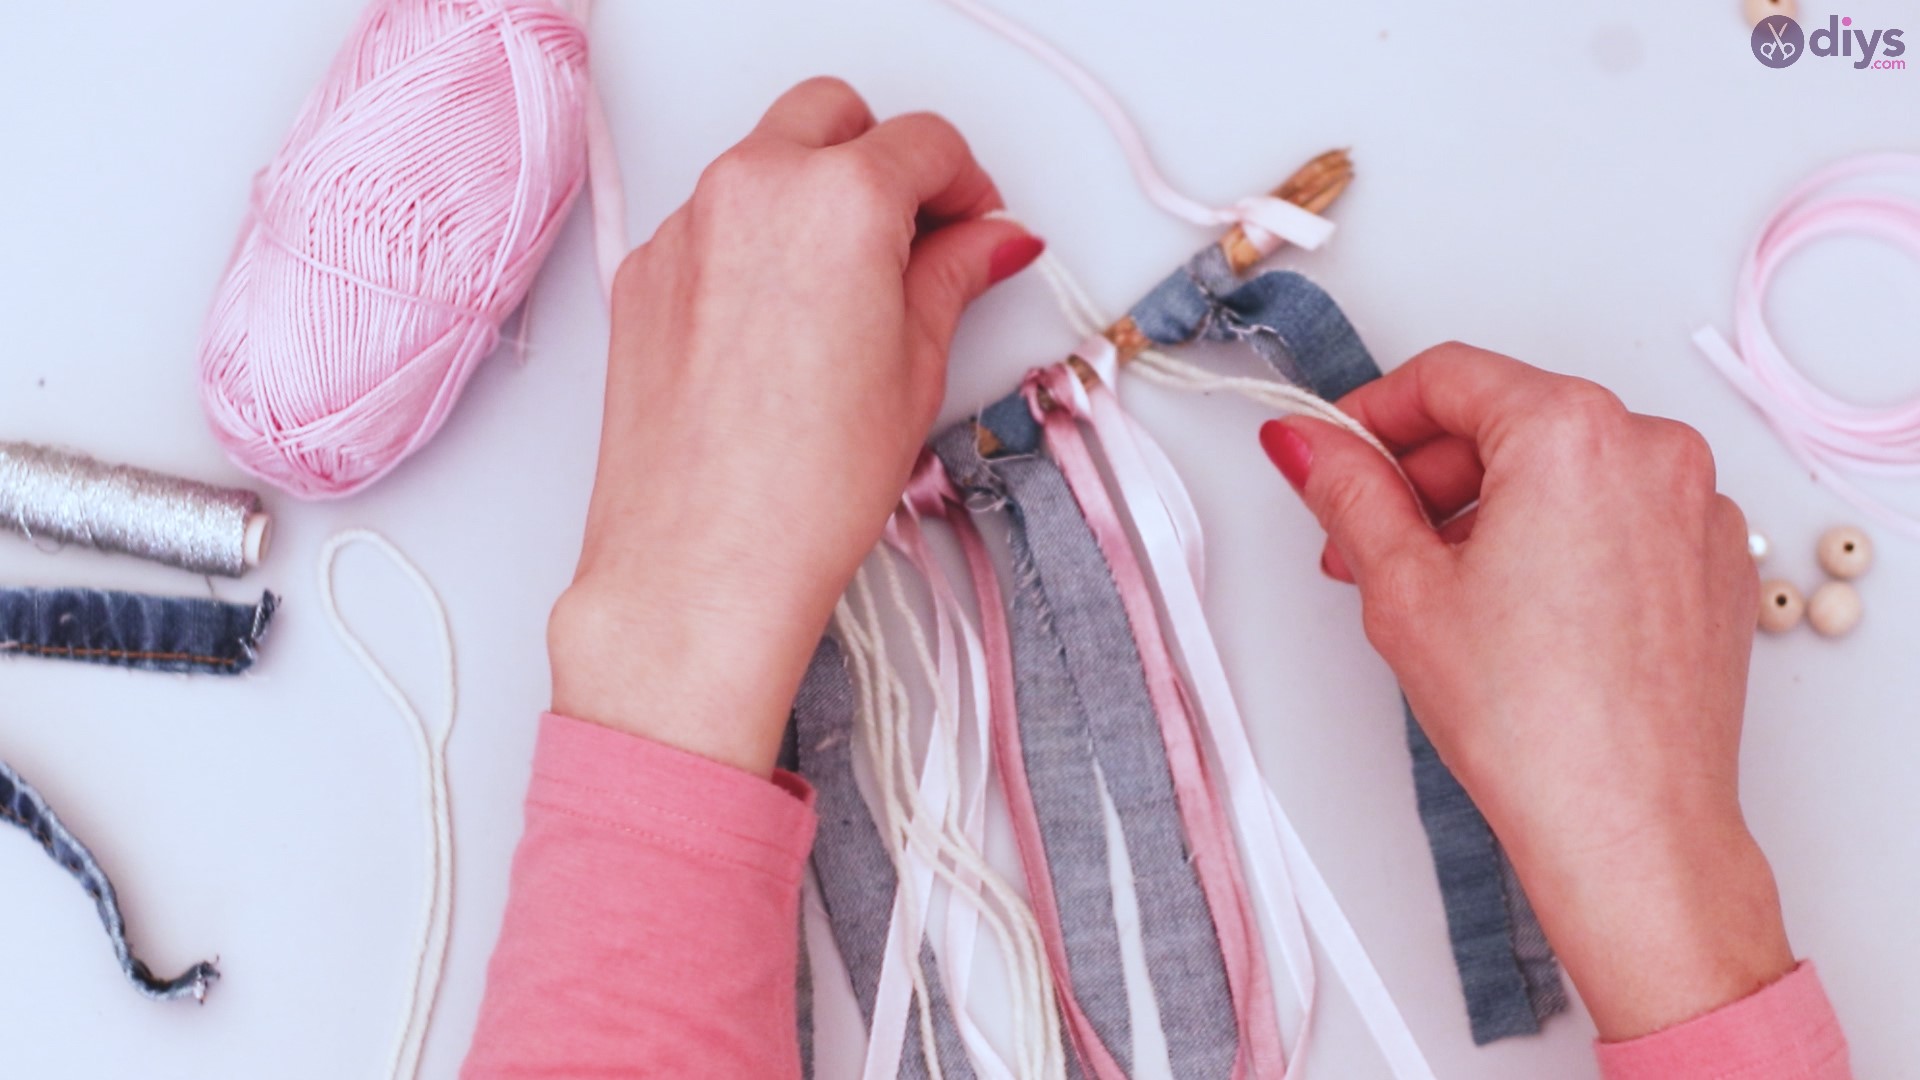
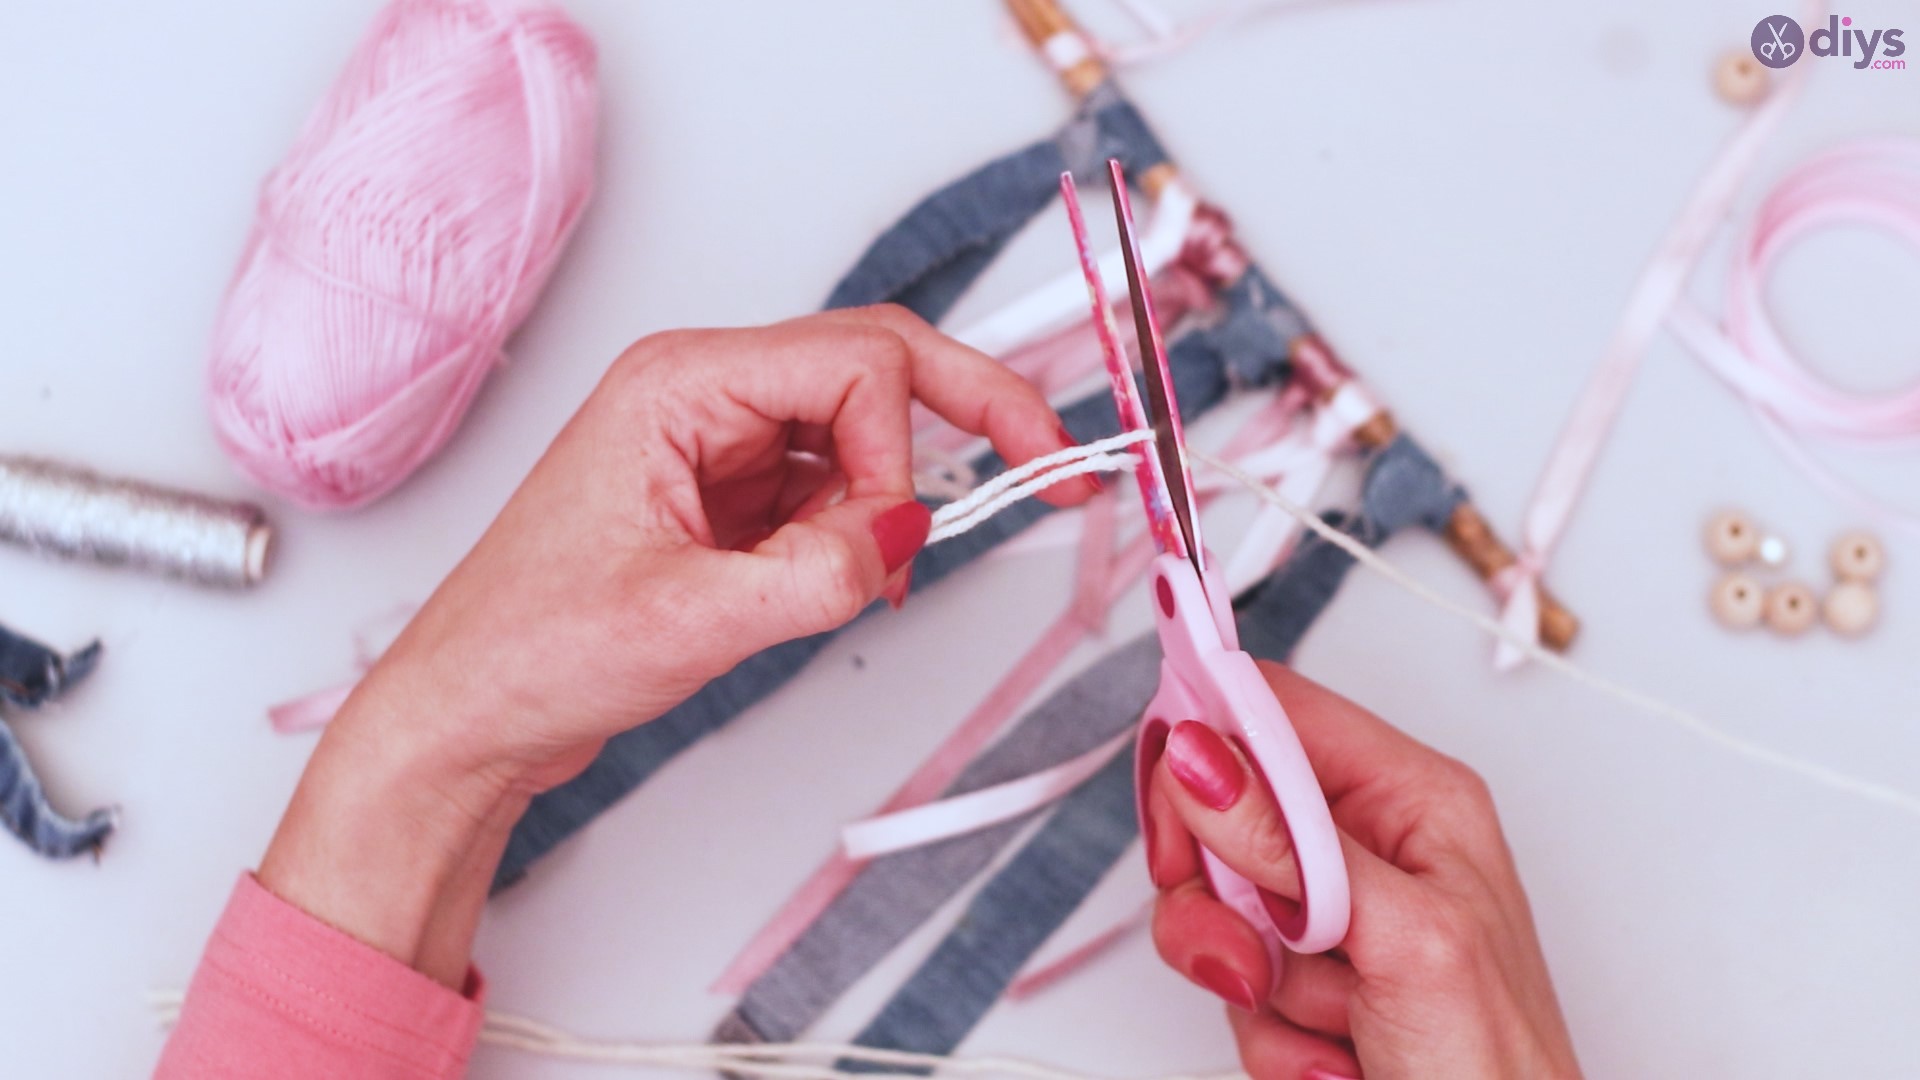
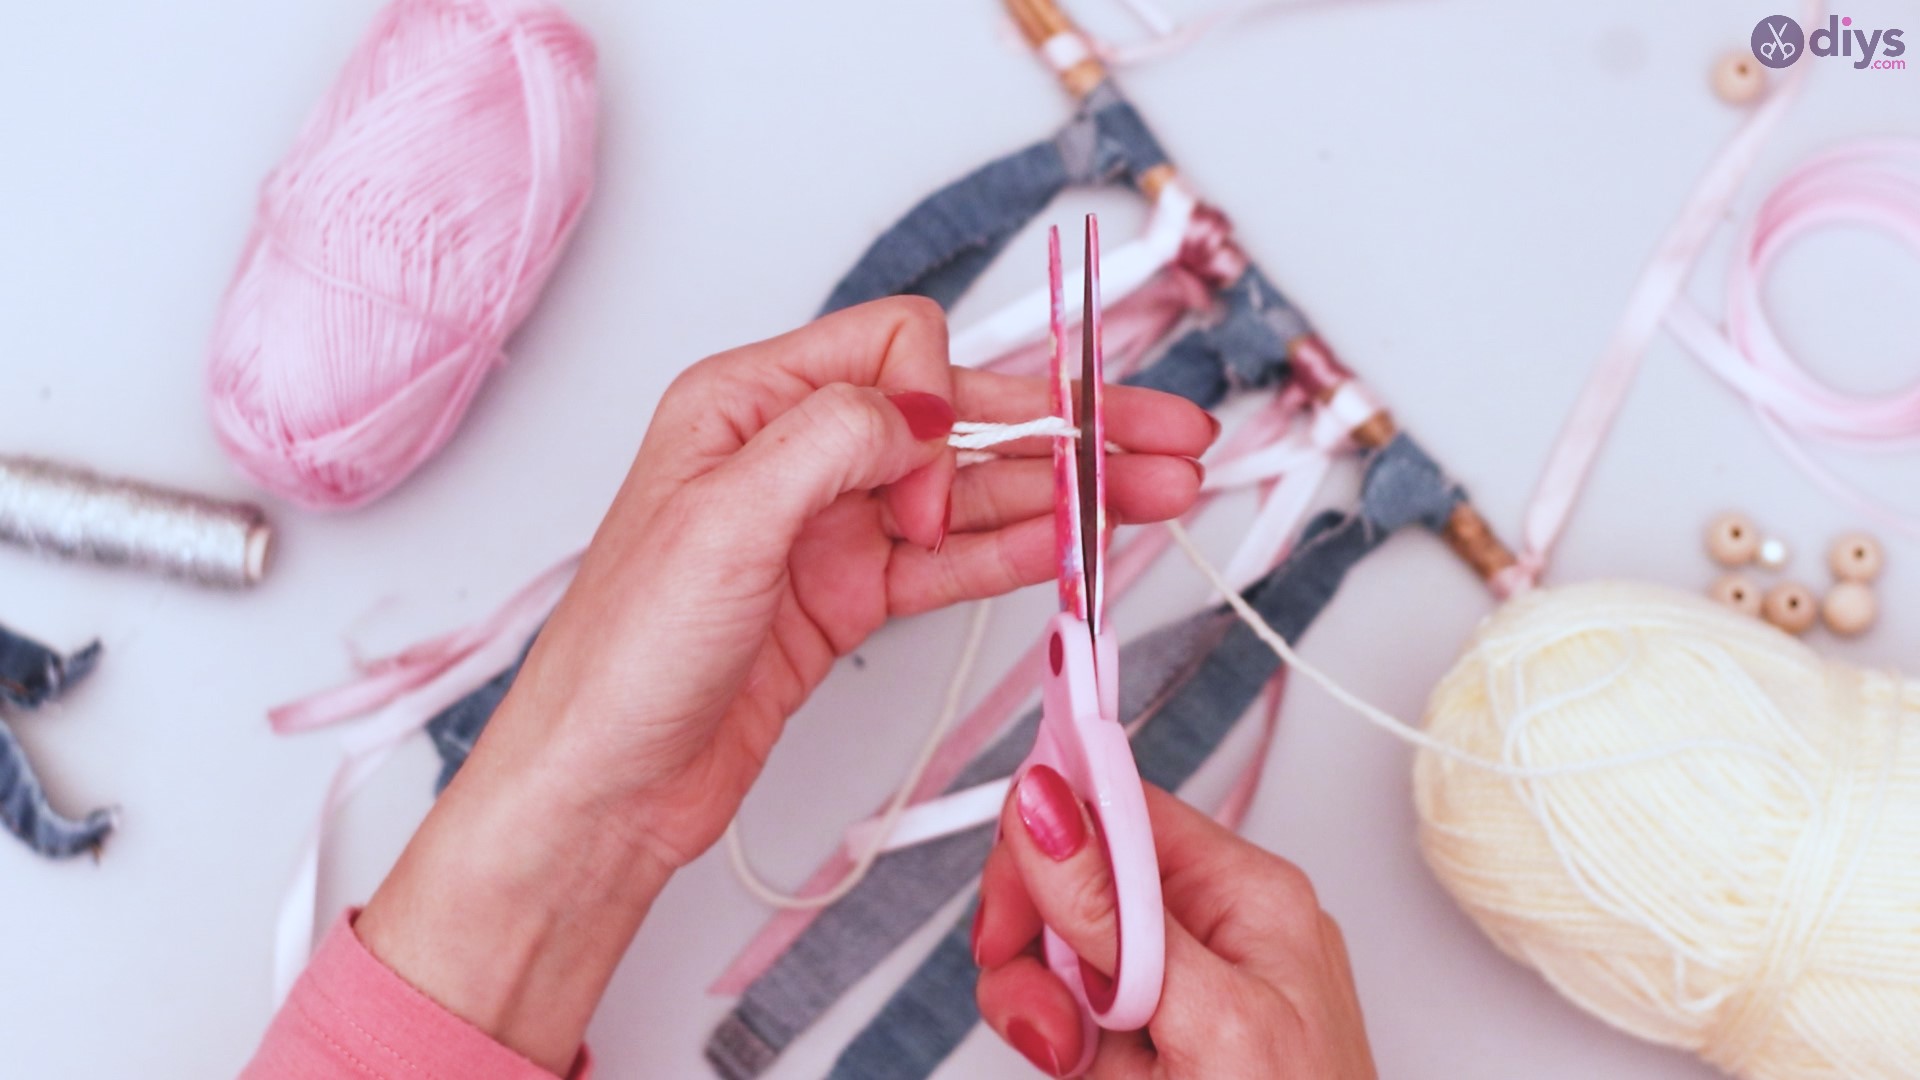
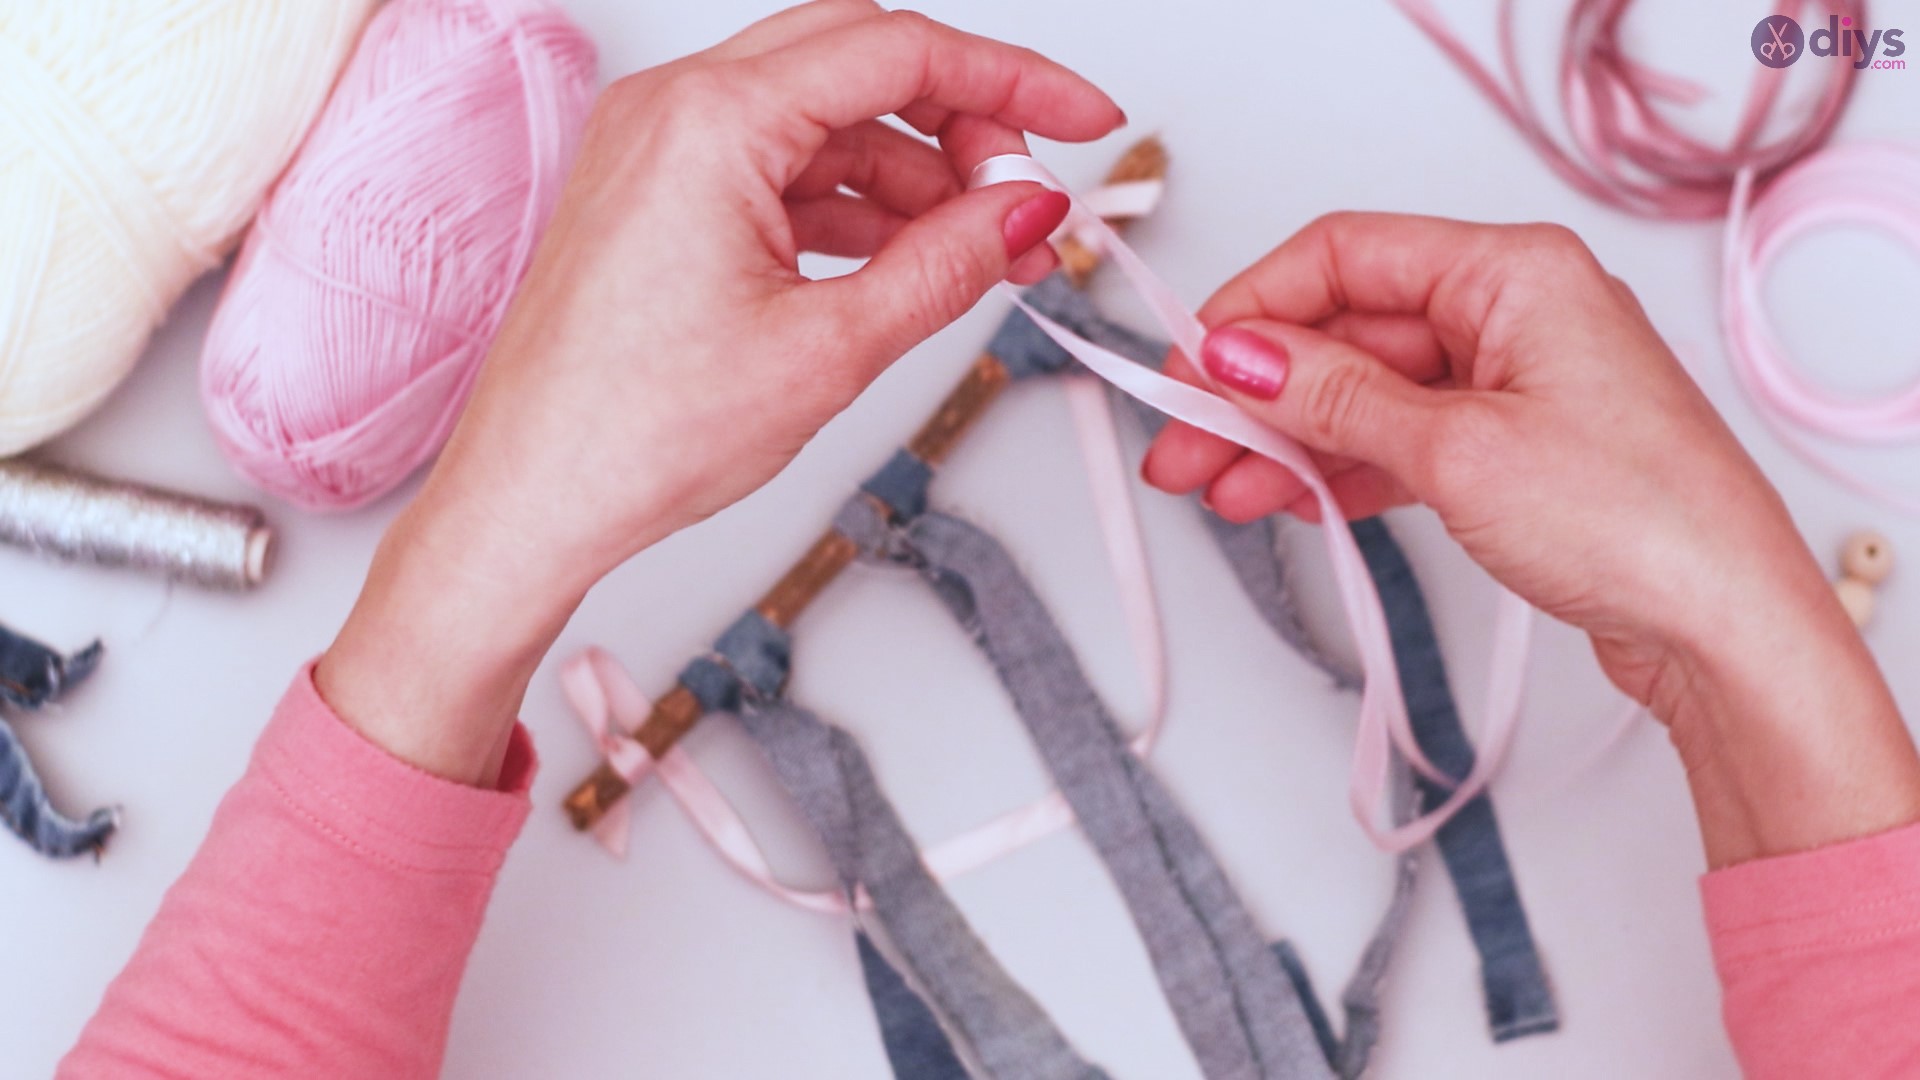
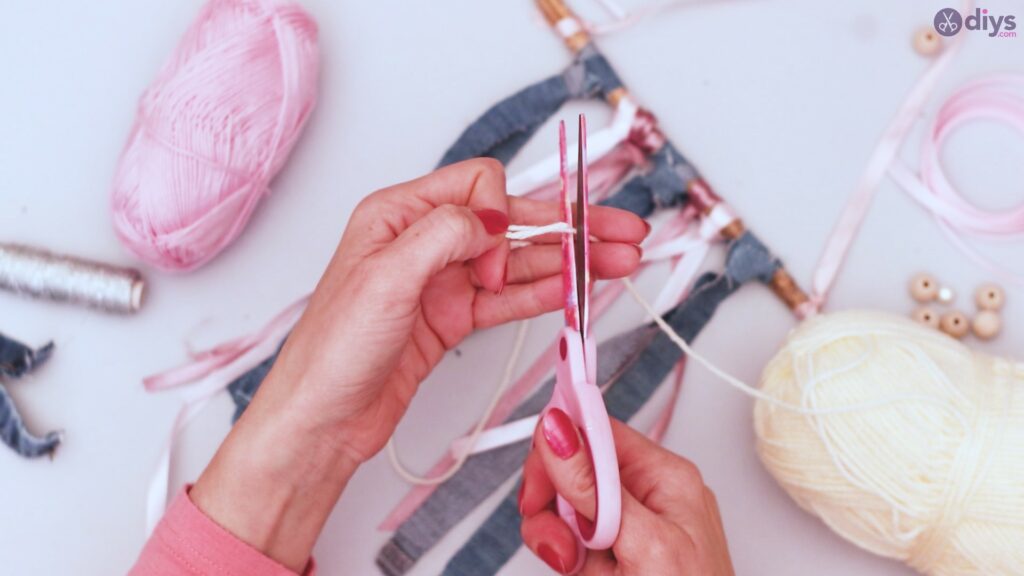
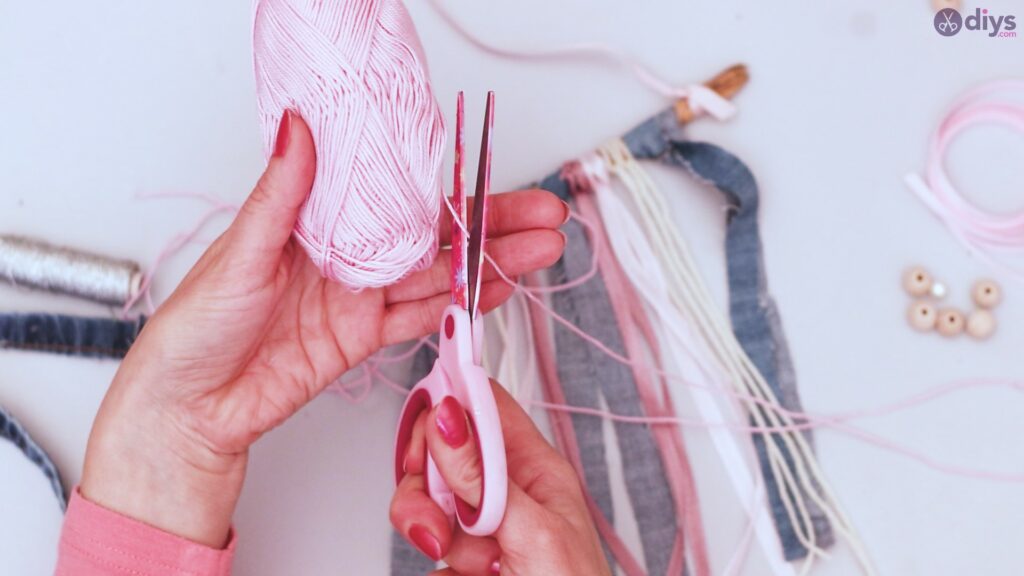
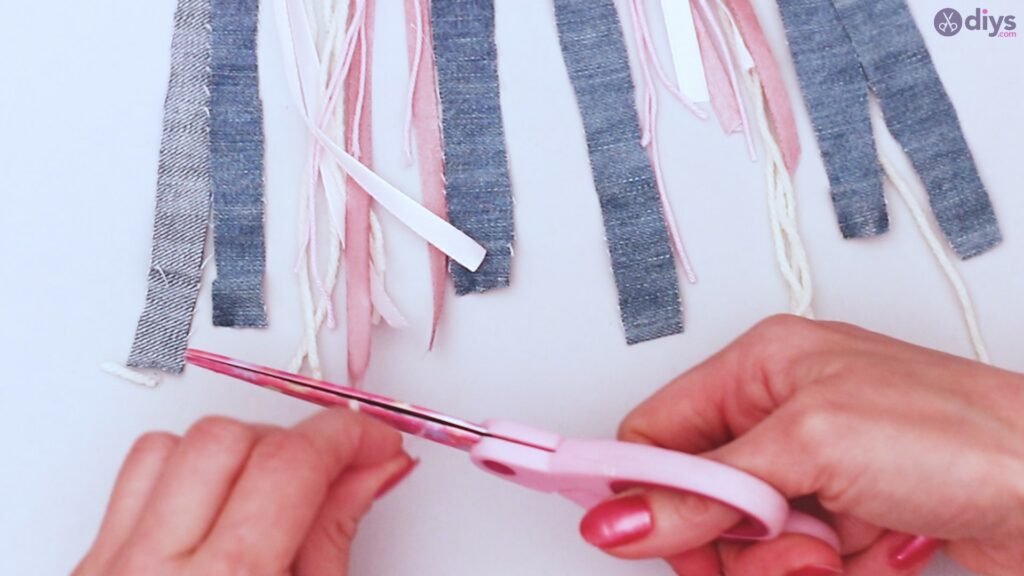
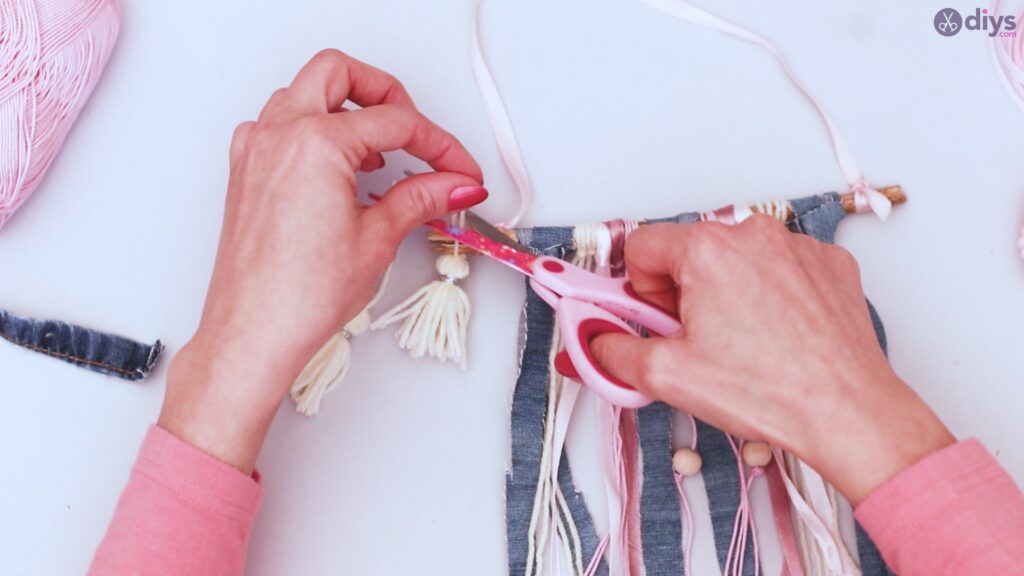
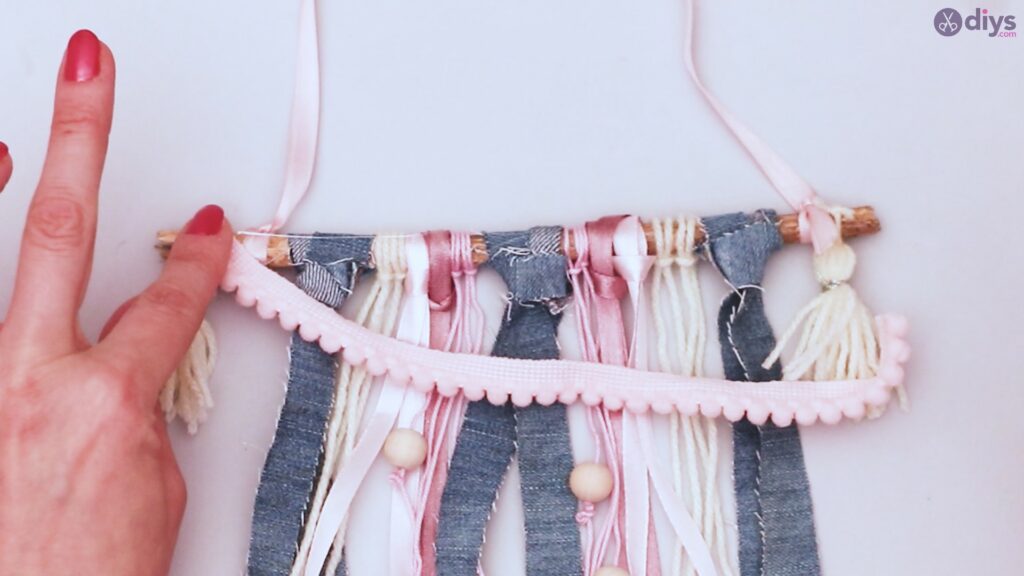
Step 6: Trimming
Now that you have all of your yarn, ribbon, and denim strands attached, use your scissors to trim the ends of each length so they are even, nice, and straight.

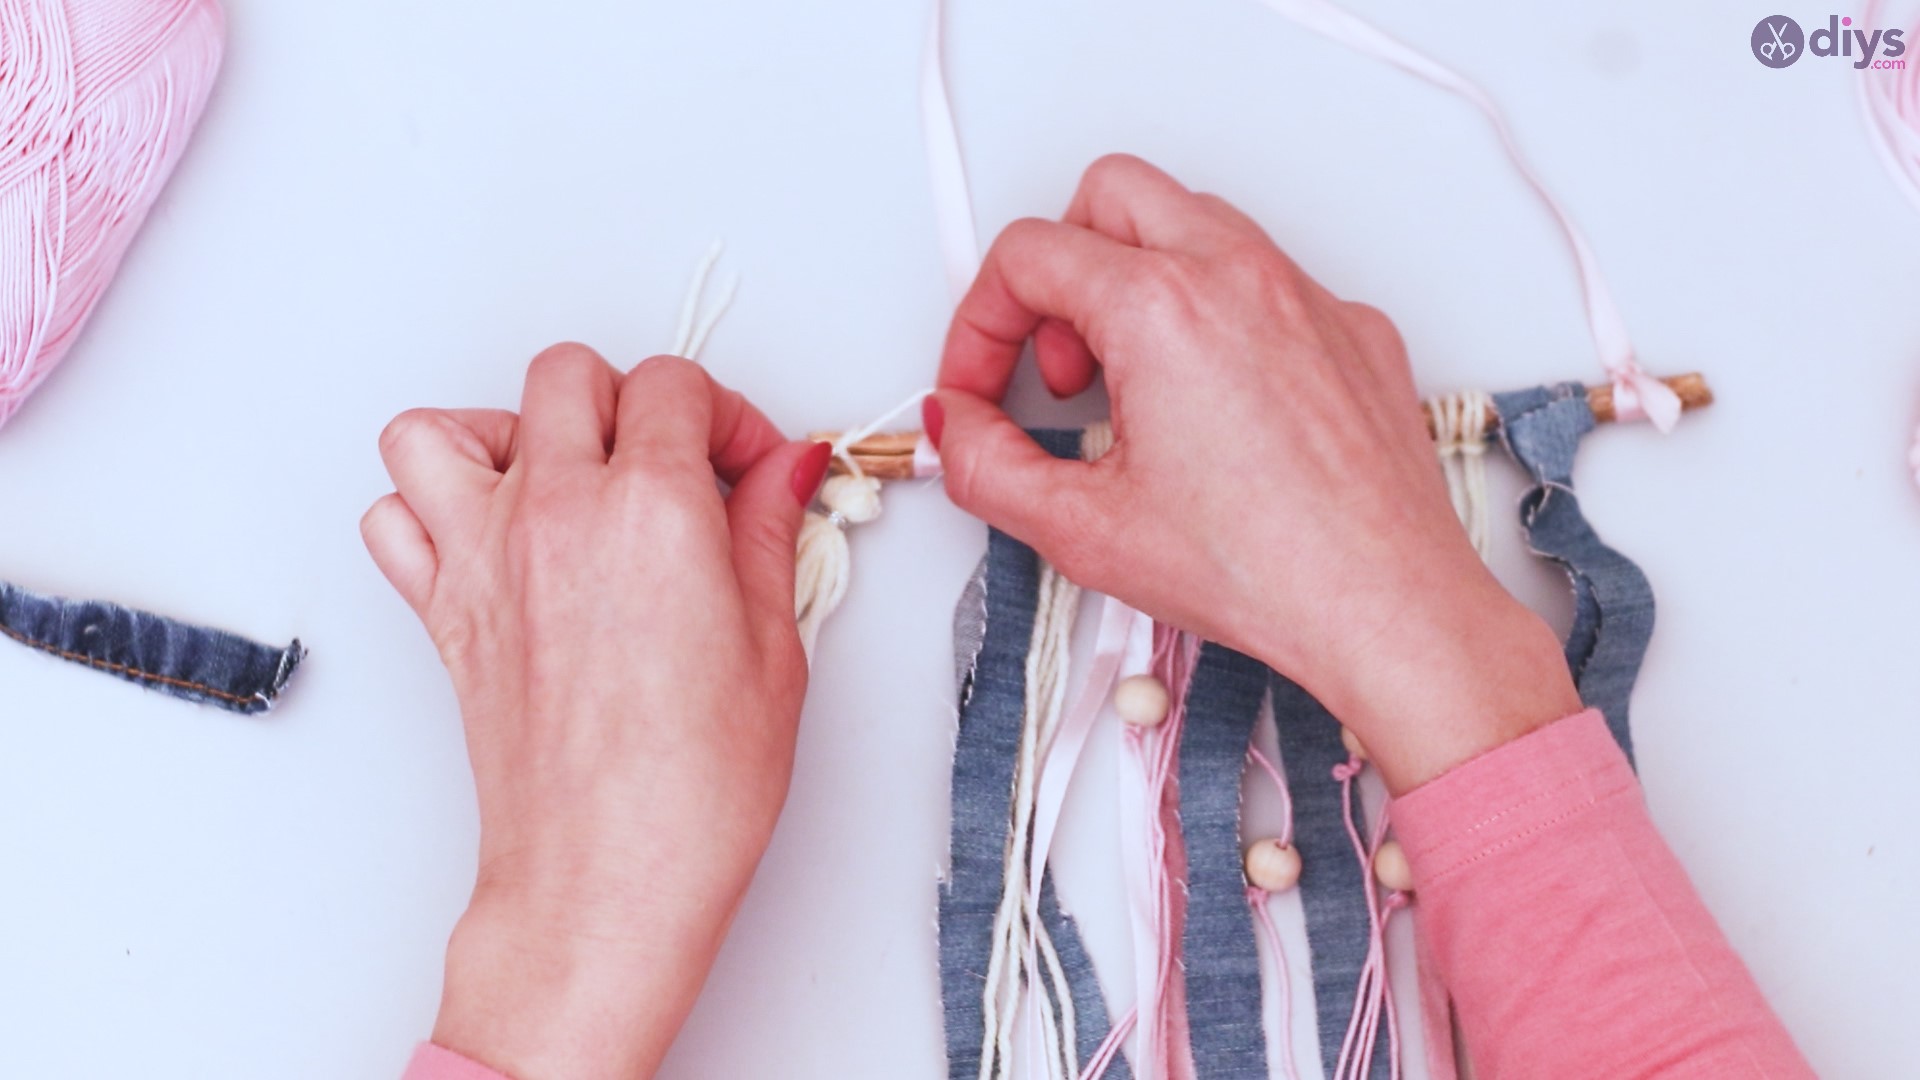
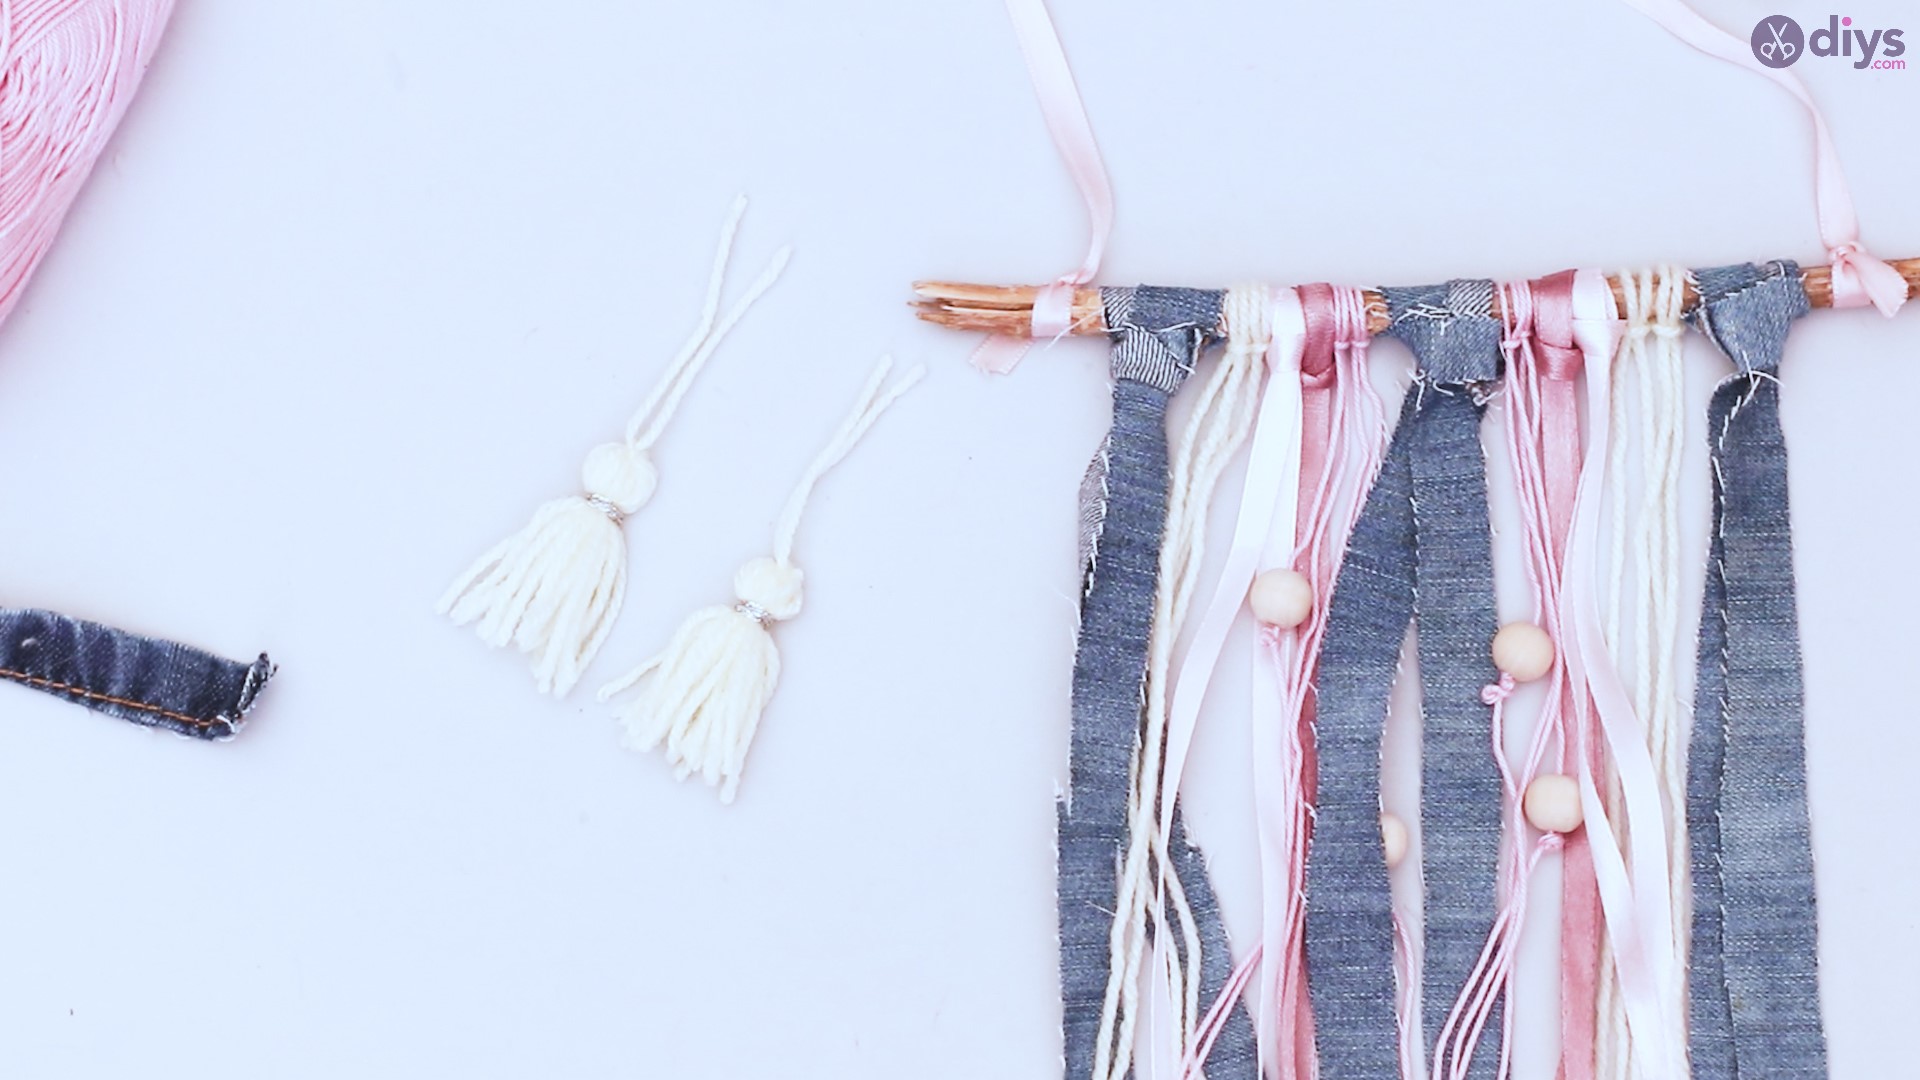
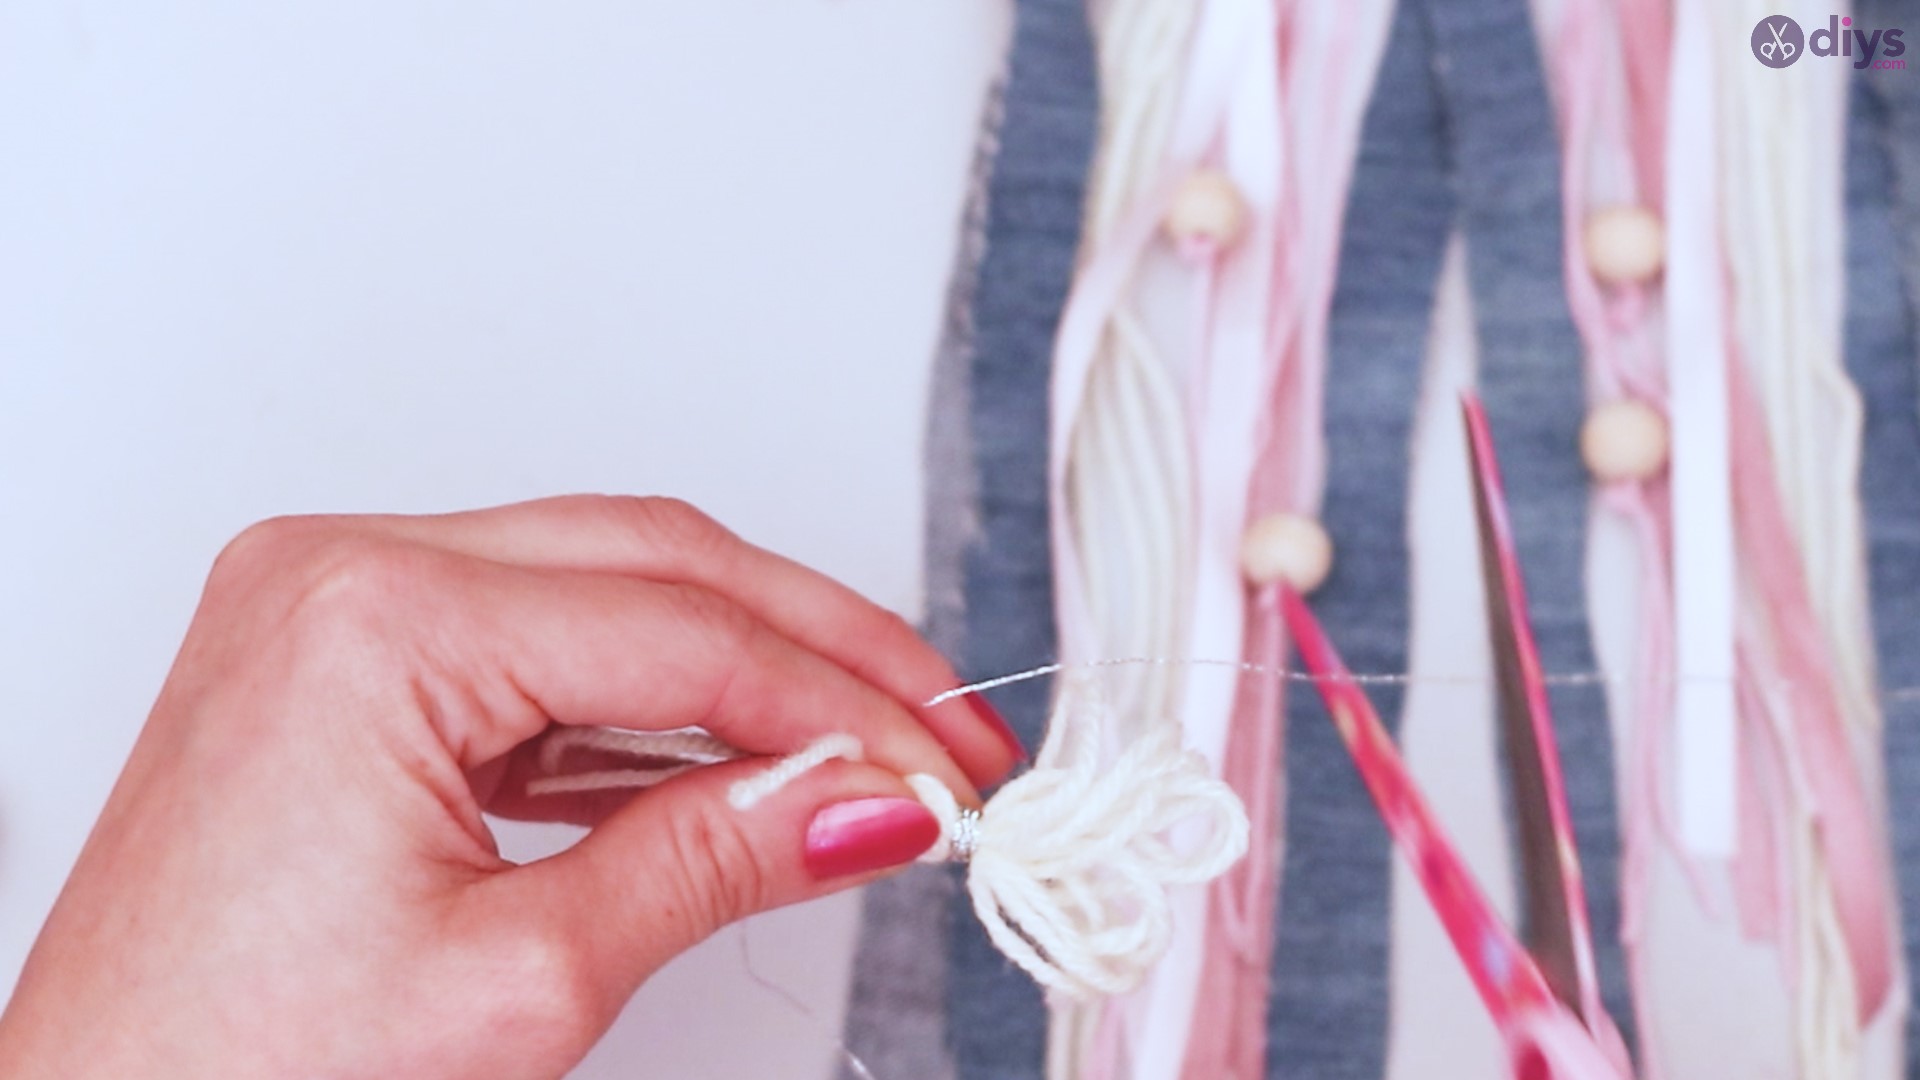
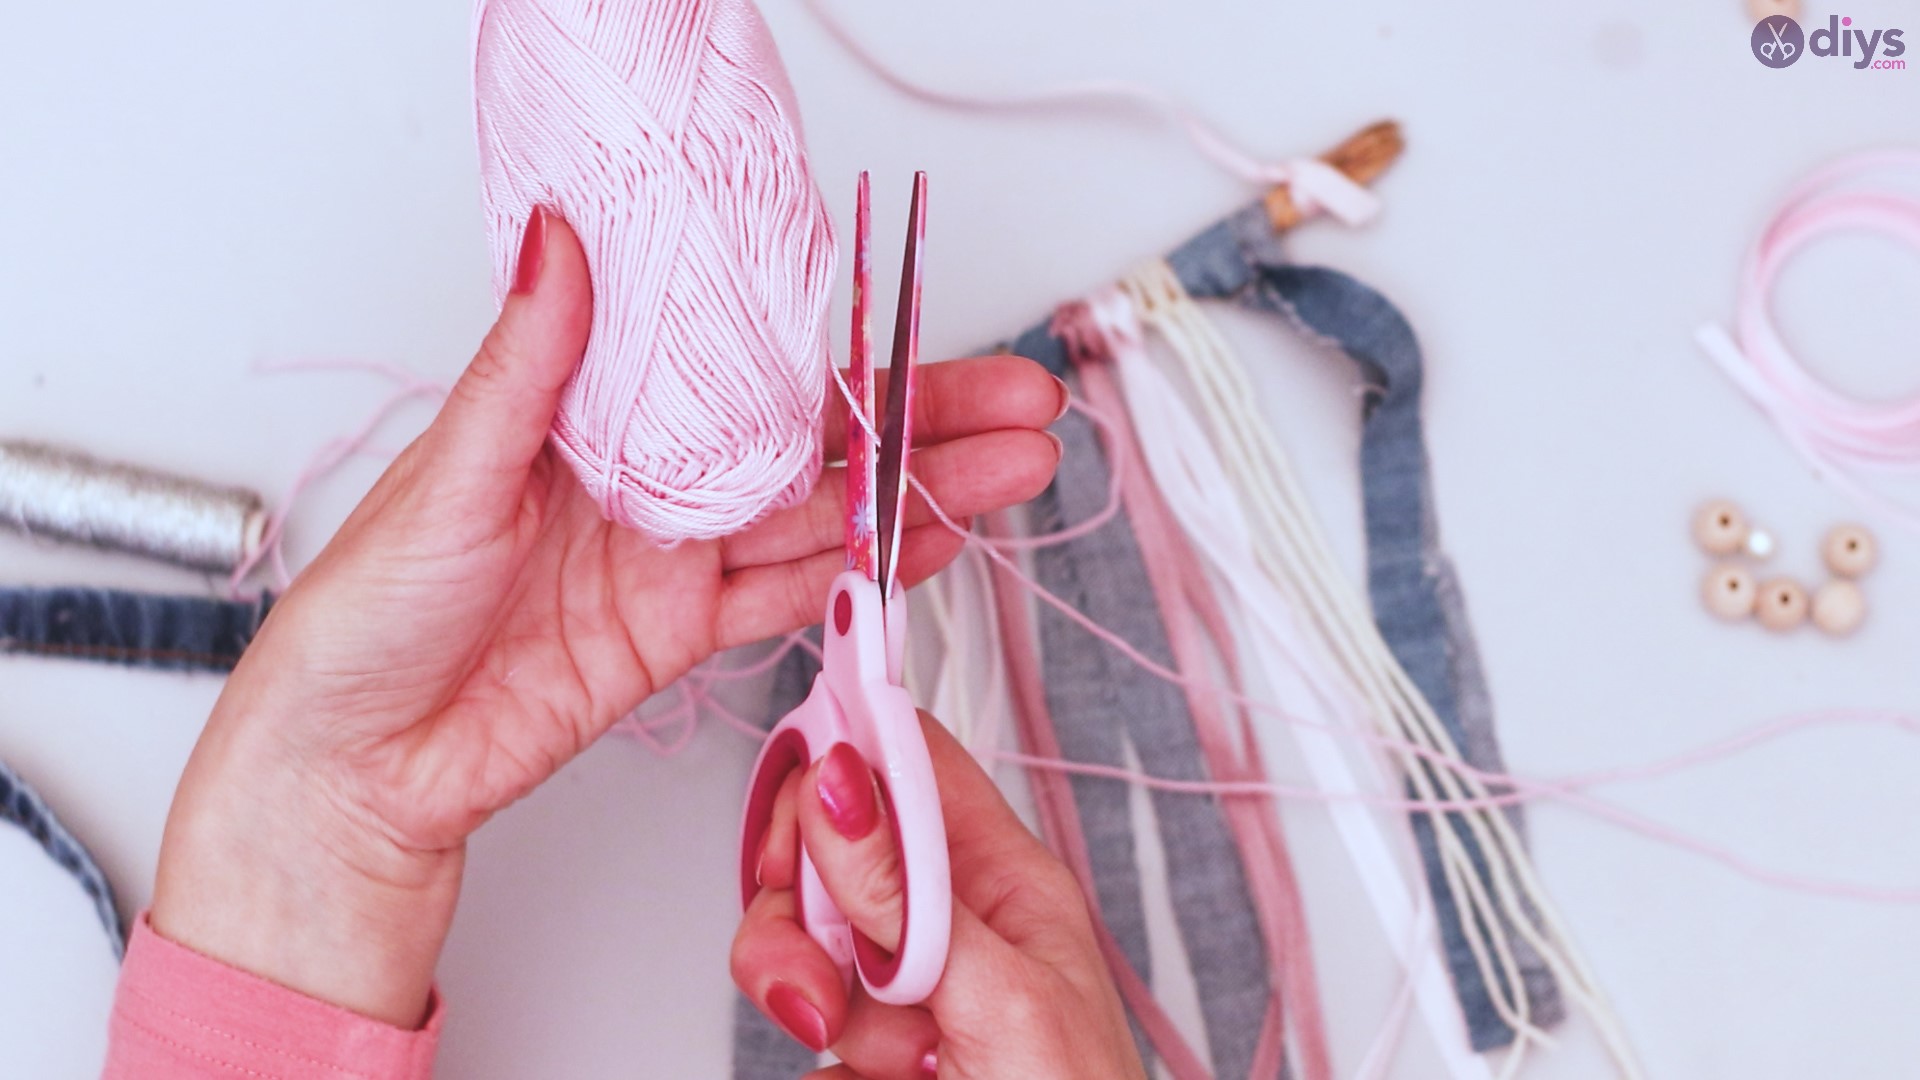
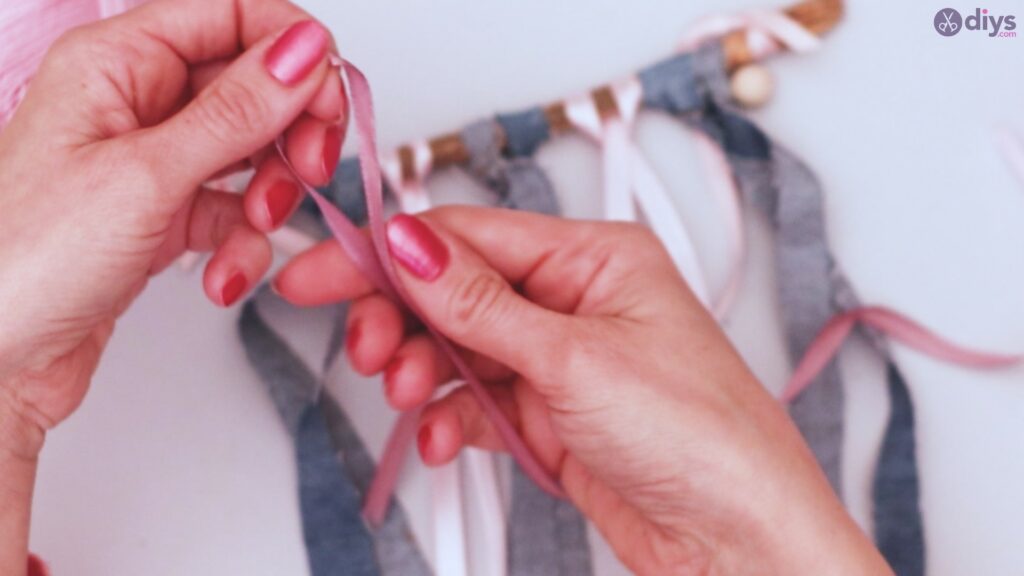
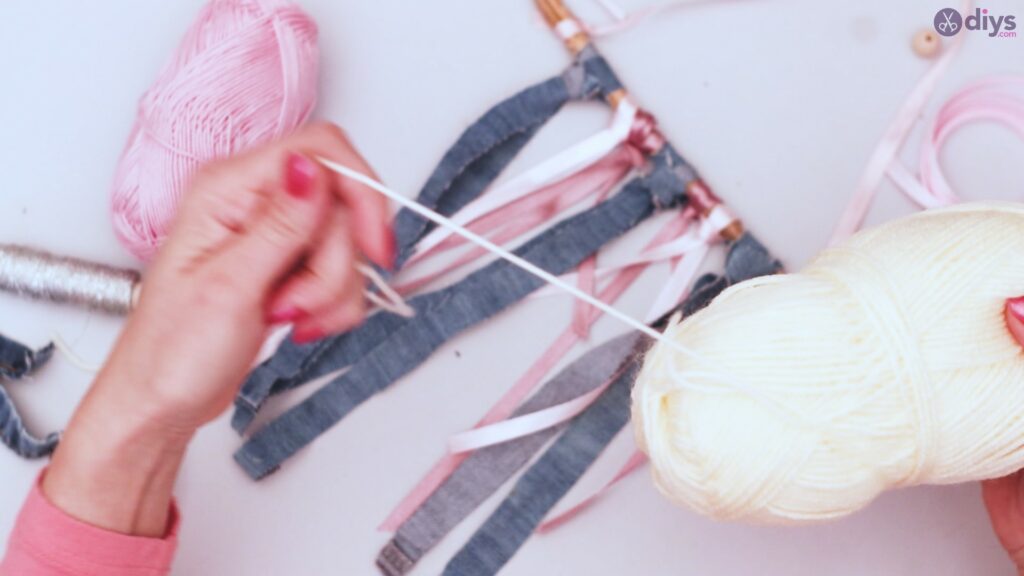
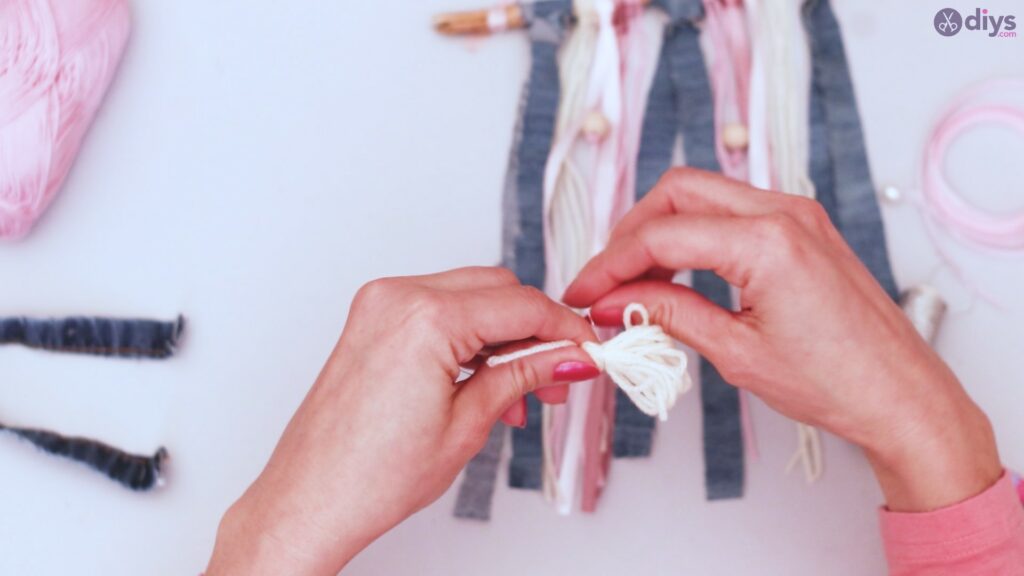
Step 7: Tassels
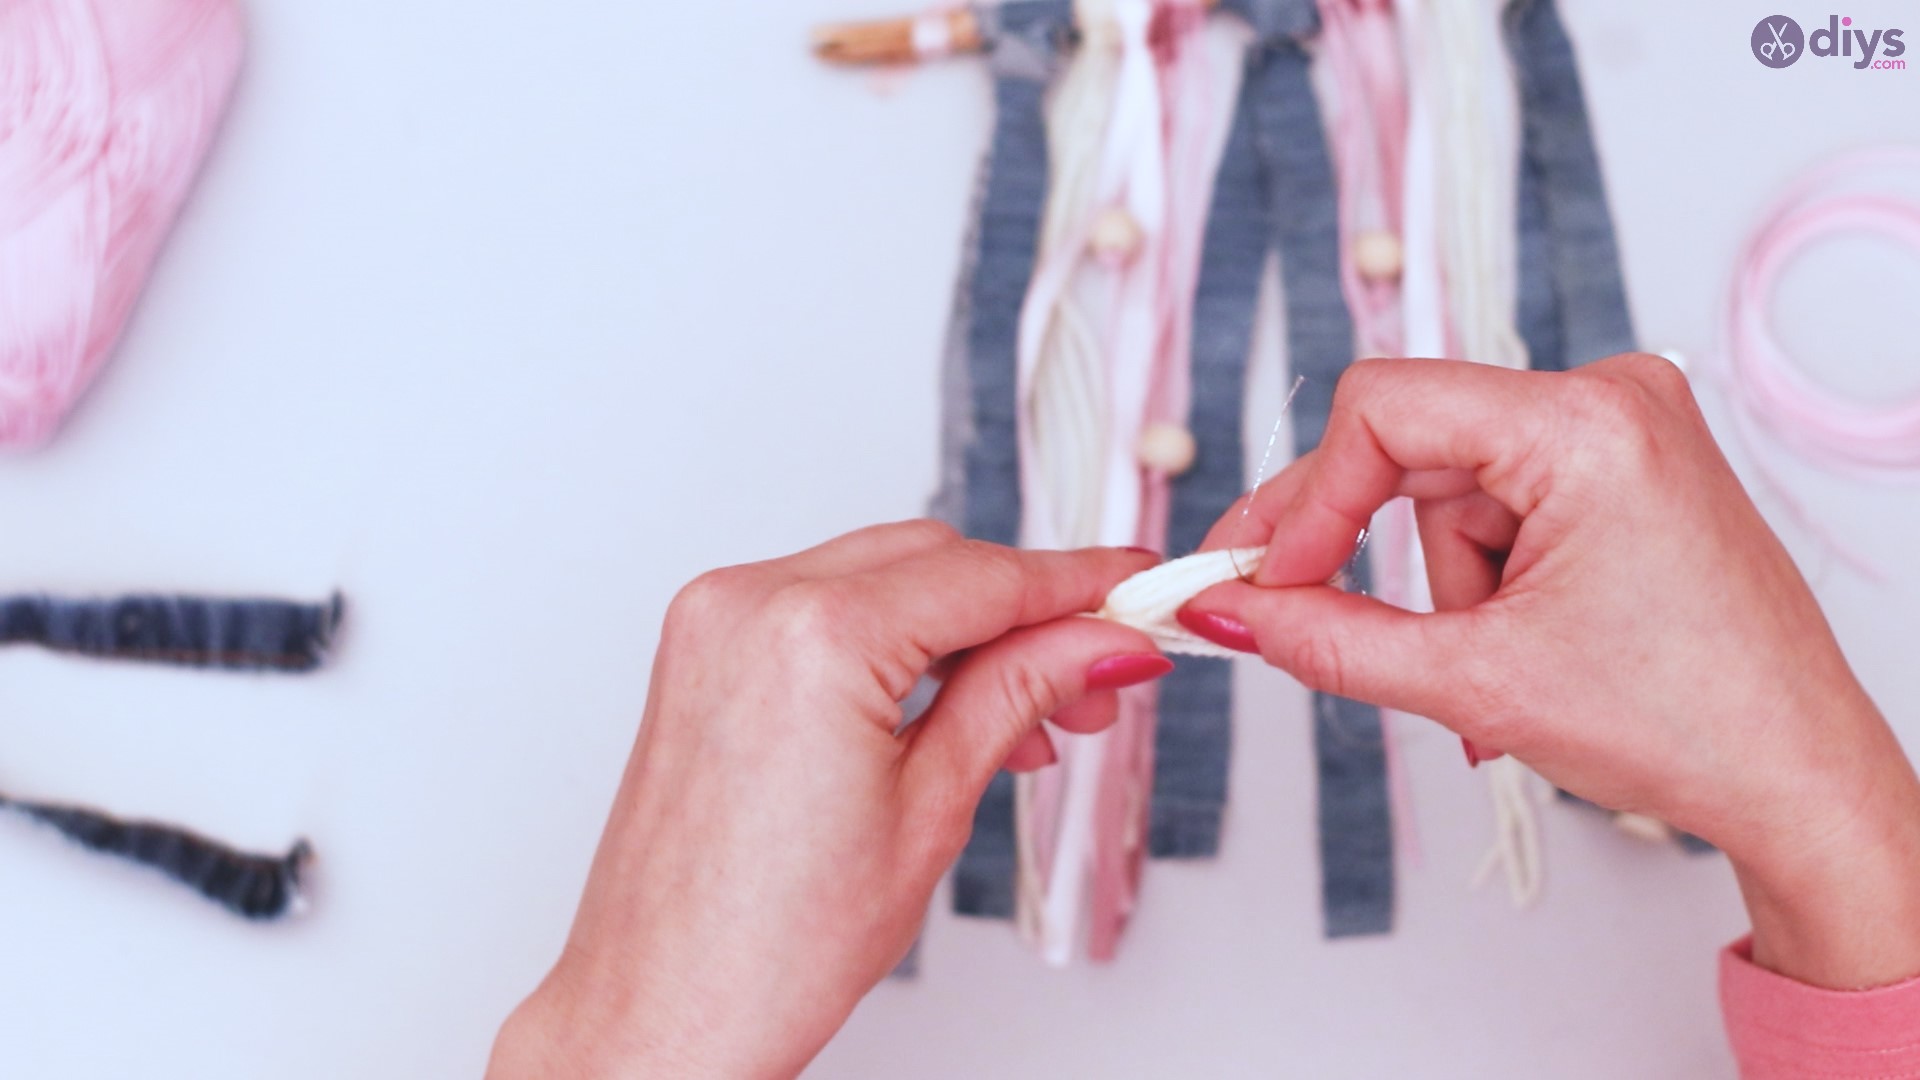
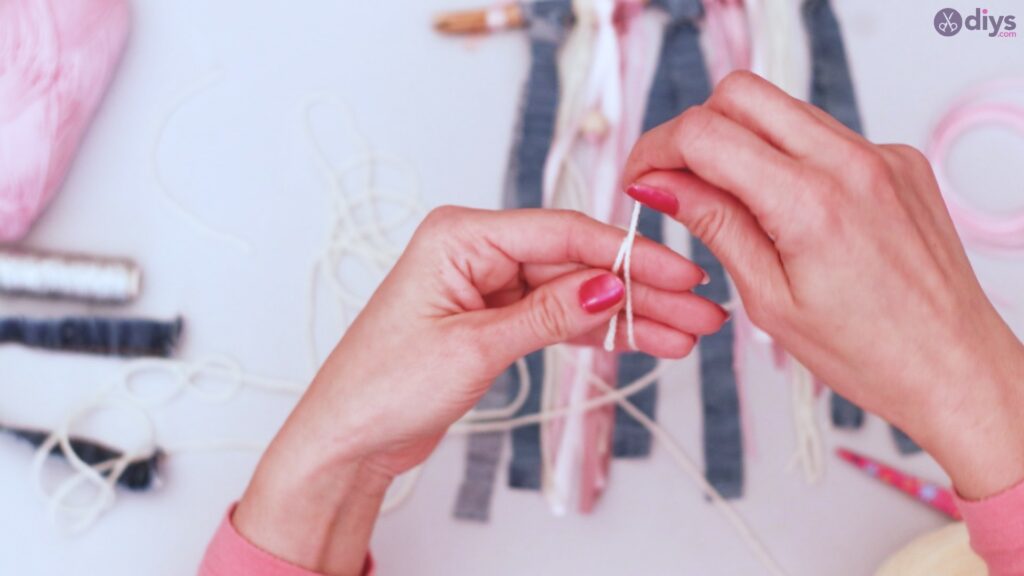
Choose one of your yarn colors, and measure out a very long piece. Cut the yarn, and use it to measure out another equally long piece.
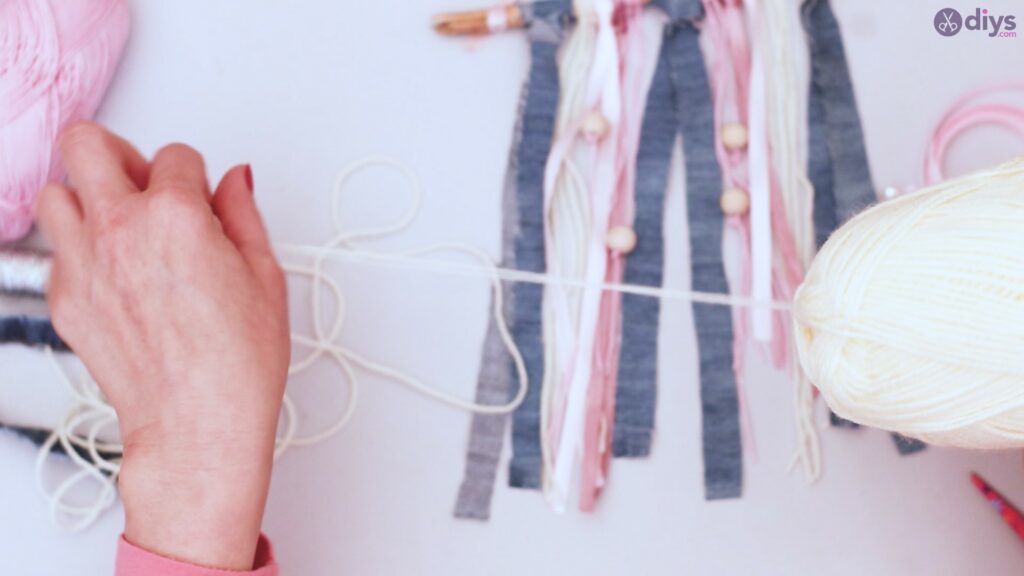
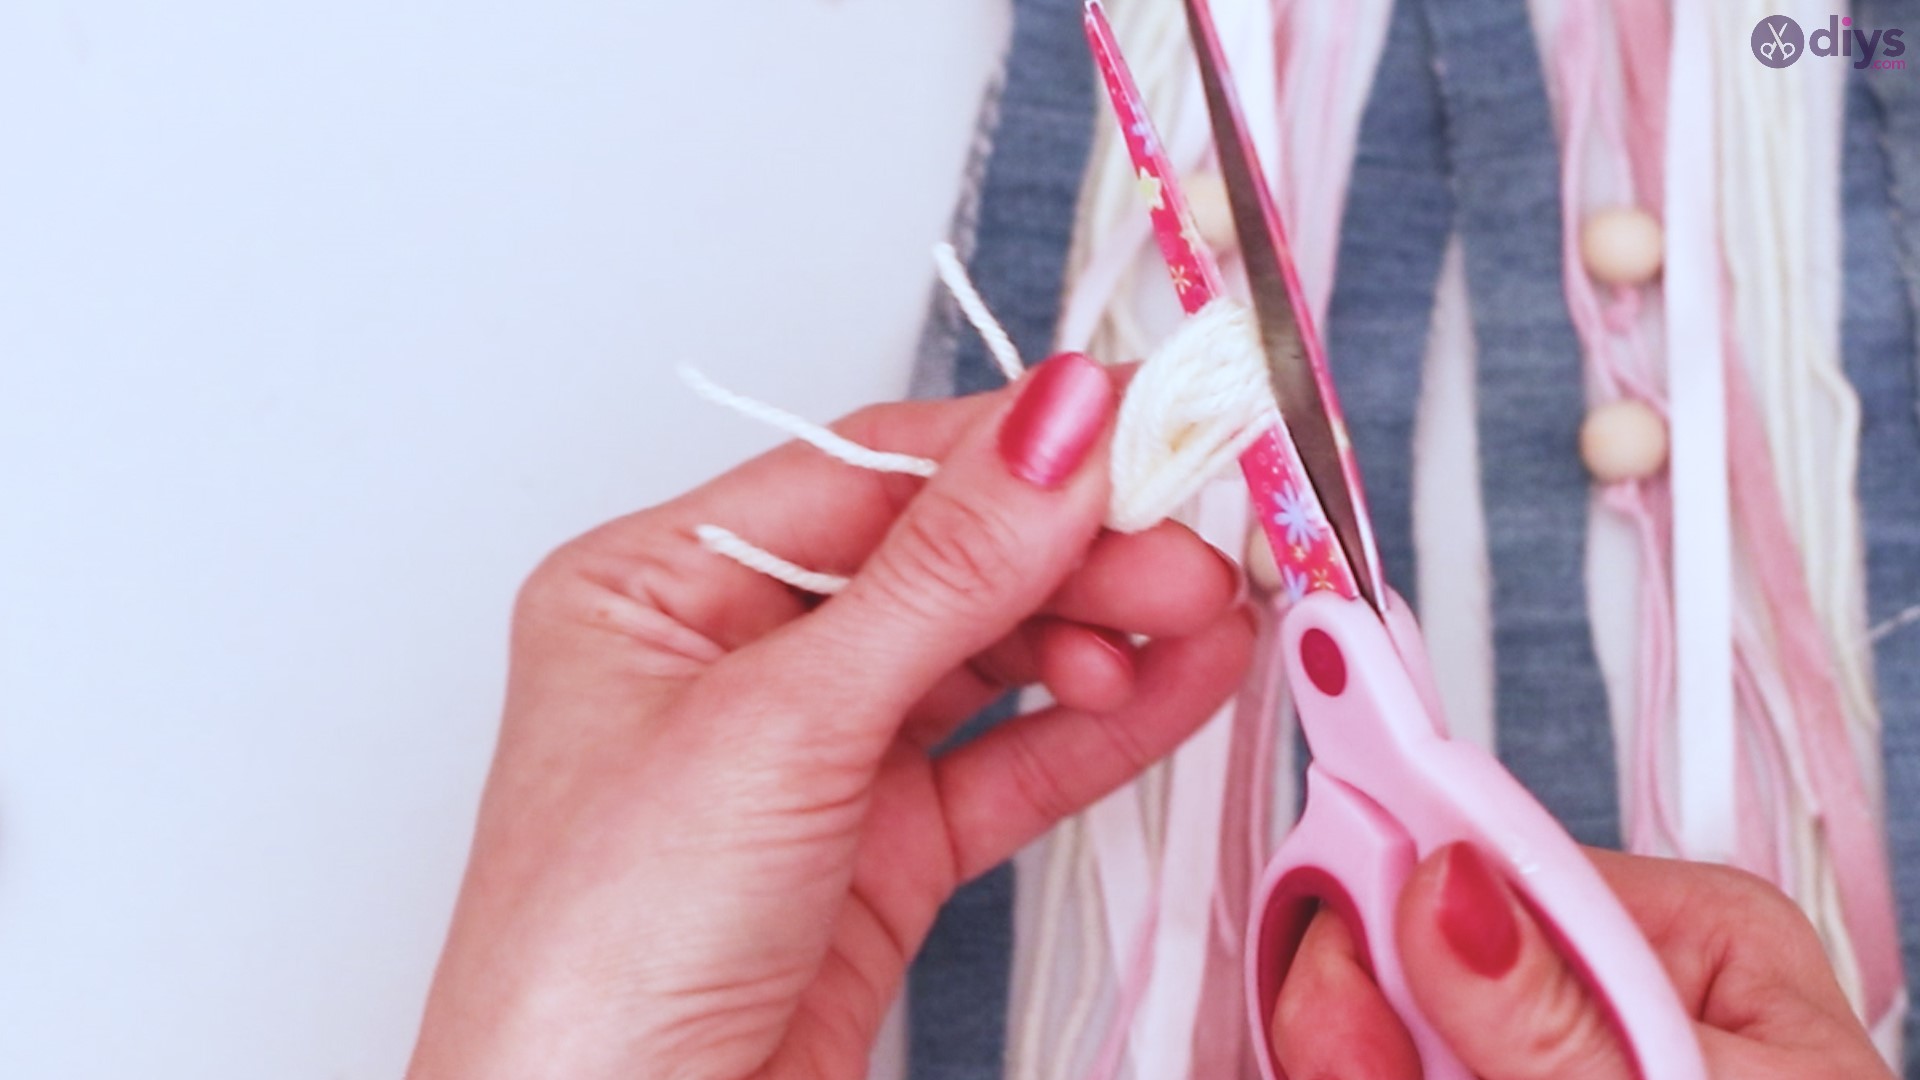
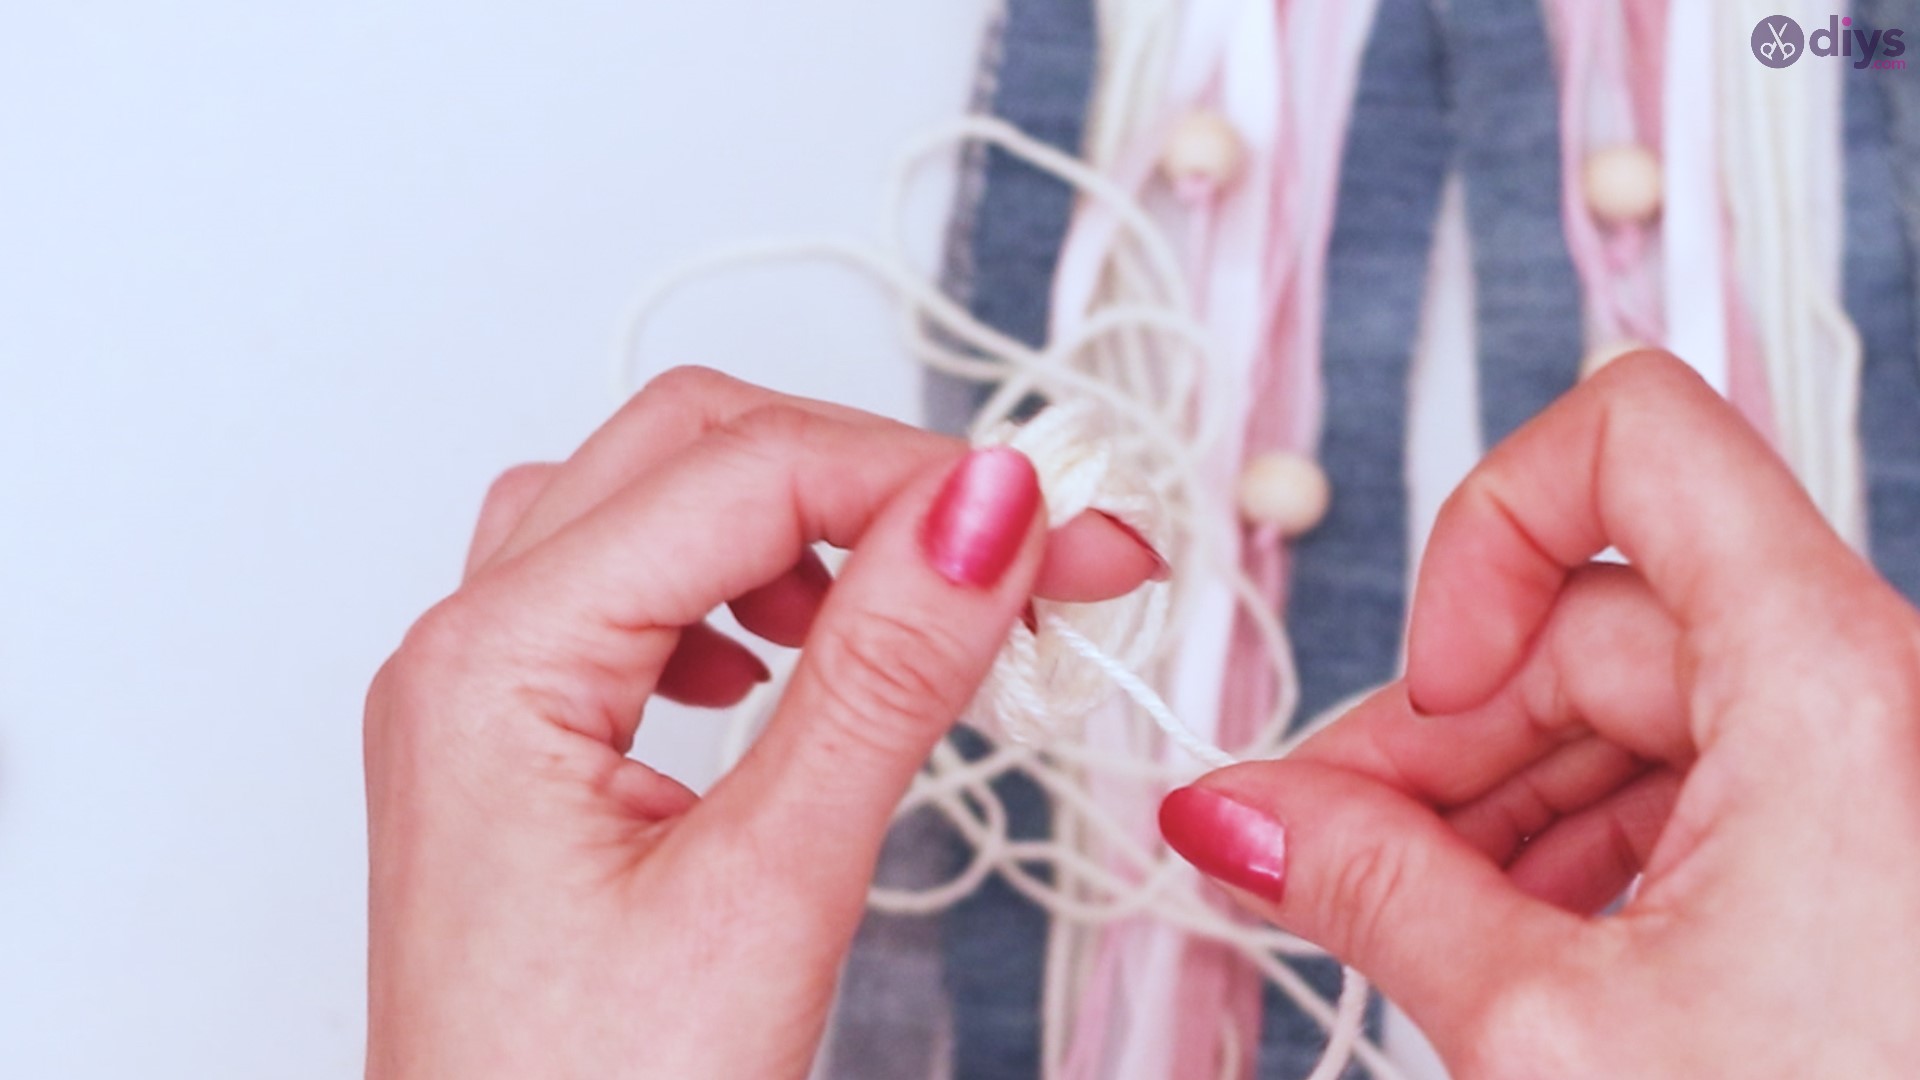
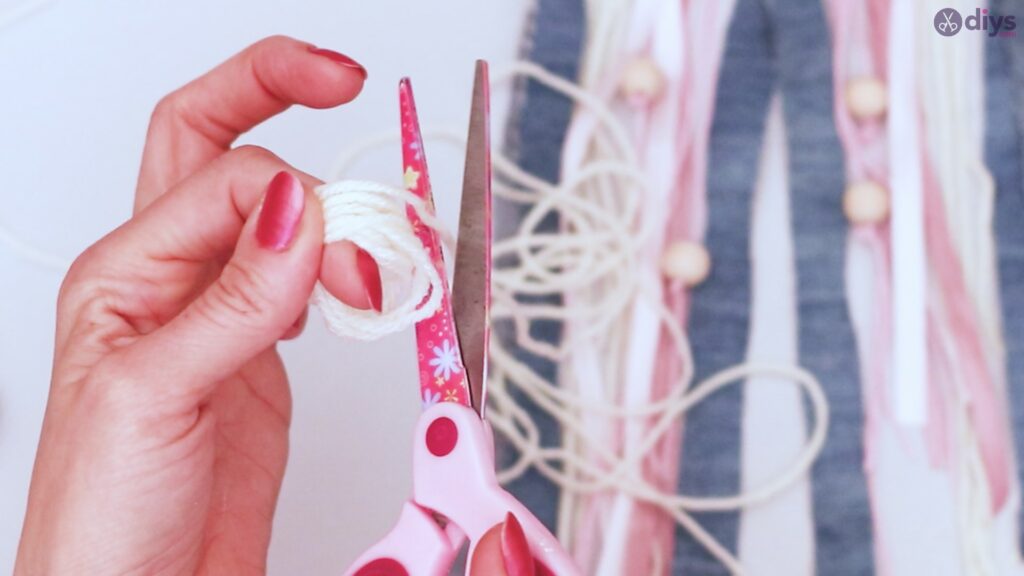
Taking the first cut, wrap it around 2 fingers over and over, until you’ve used it all up.

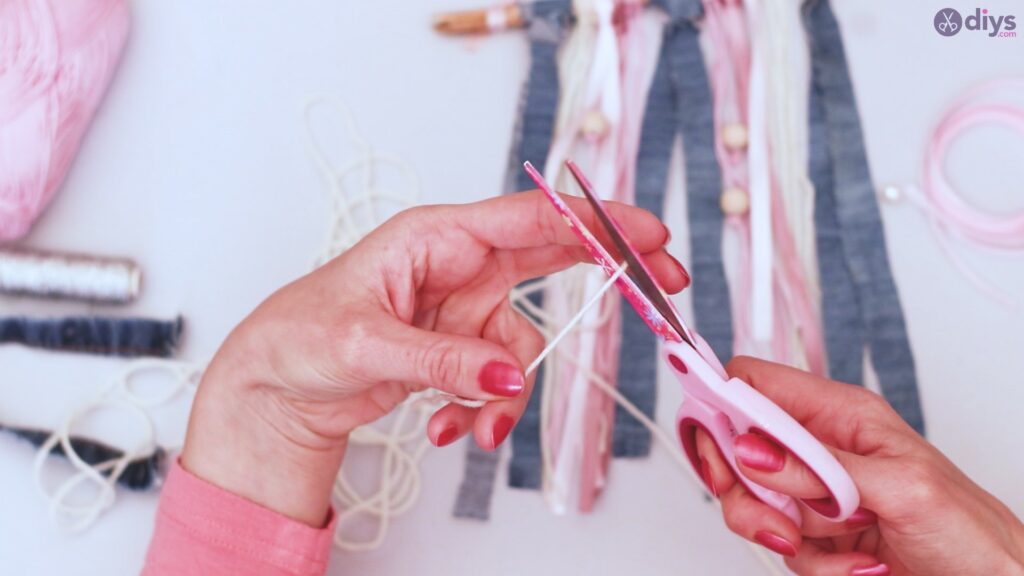
Pull the bundle off your fingers, and if there is any remaining longer than the bundle, trim it off.

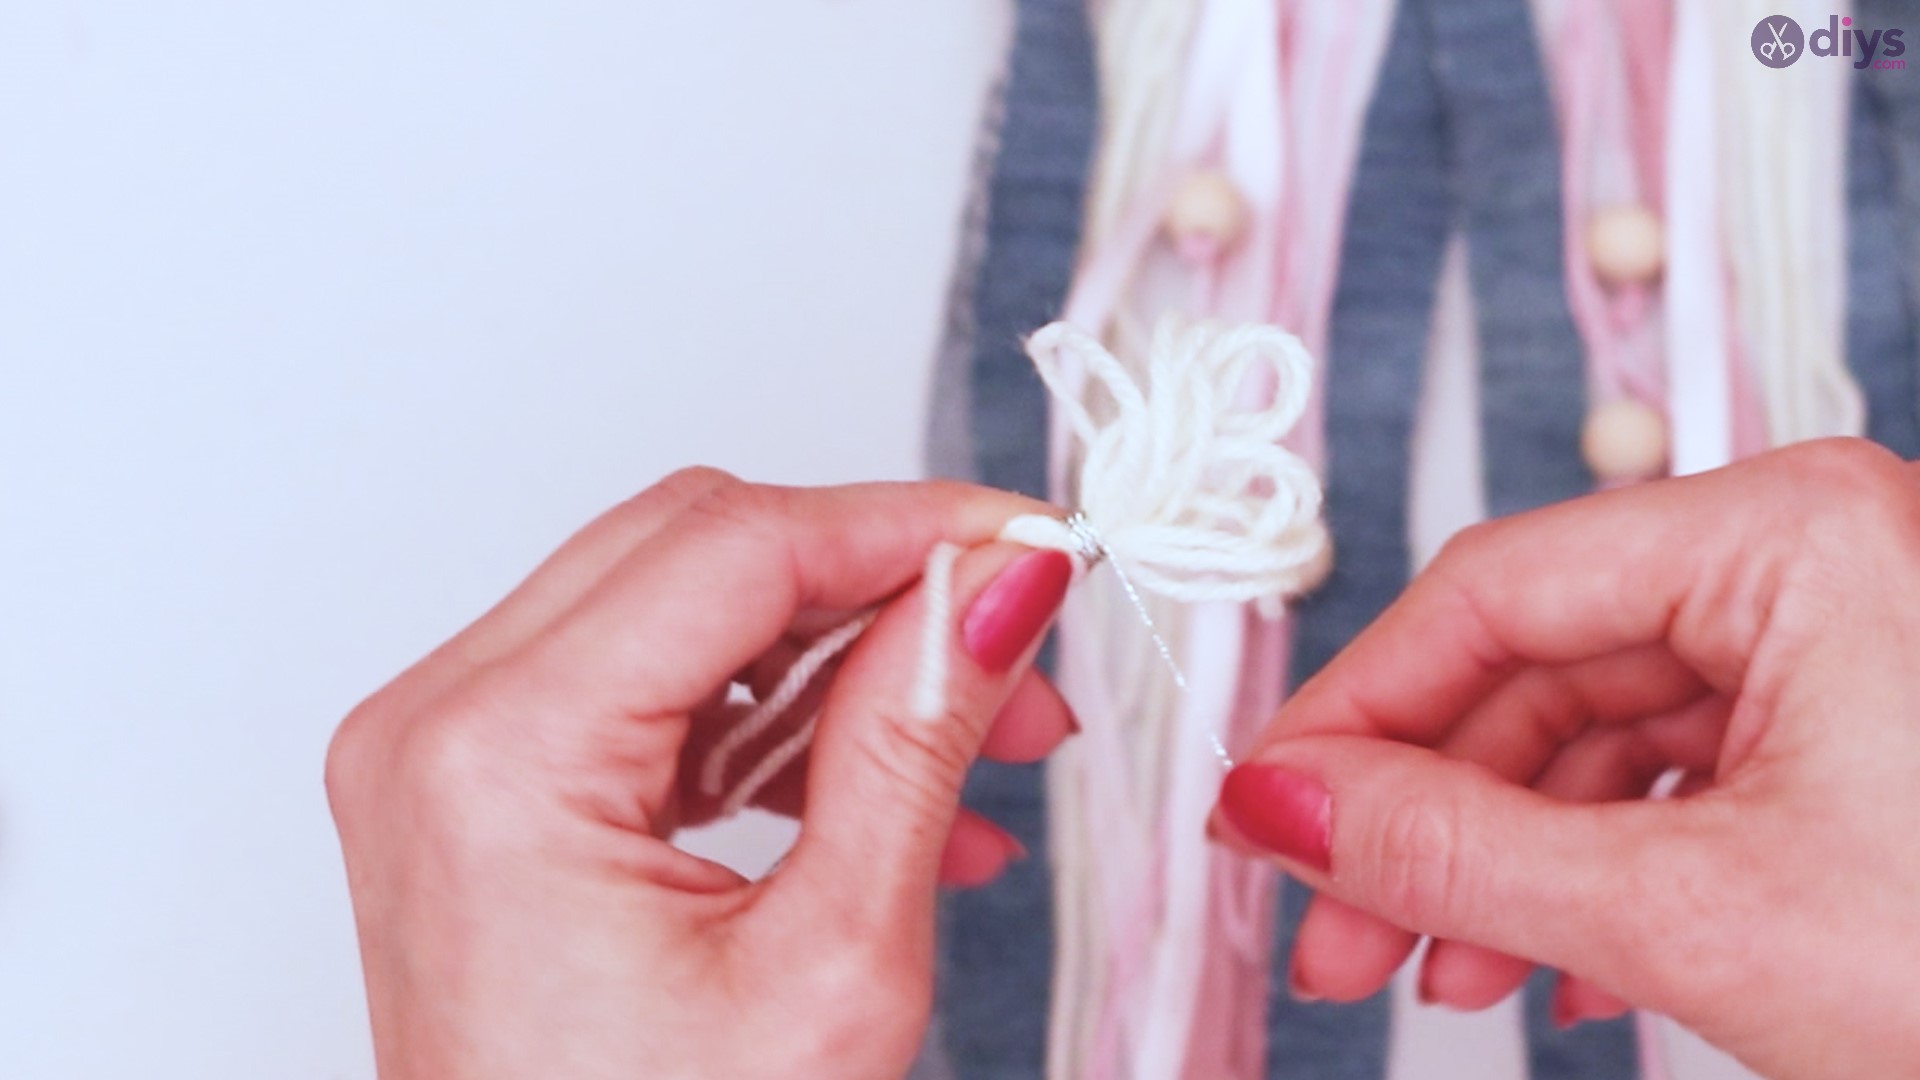
Cut a shorter piece of yarn, and feed it through the loop, knotting it to hold the loop tight.

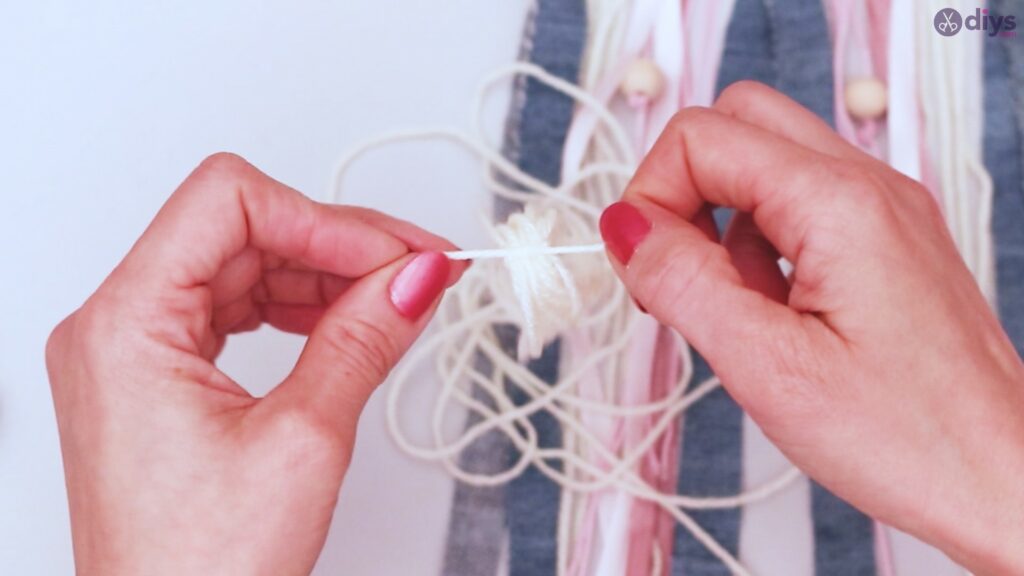
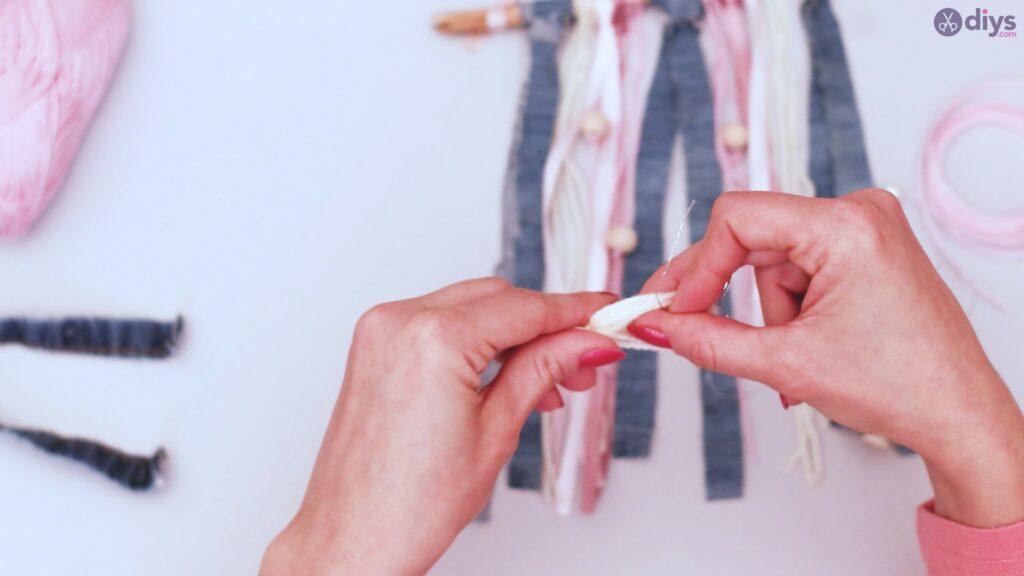
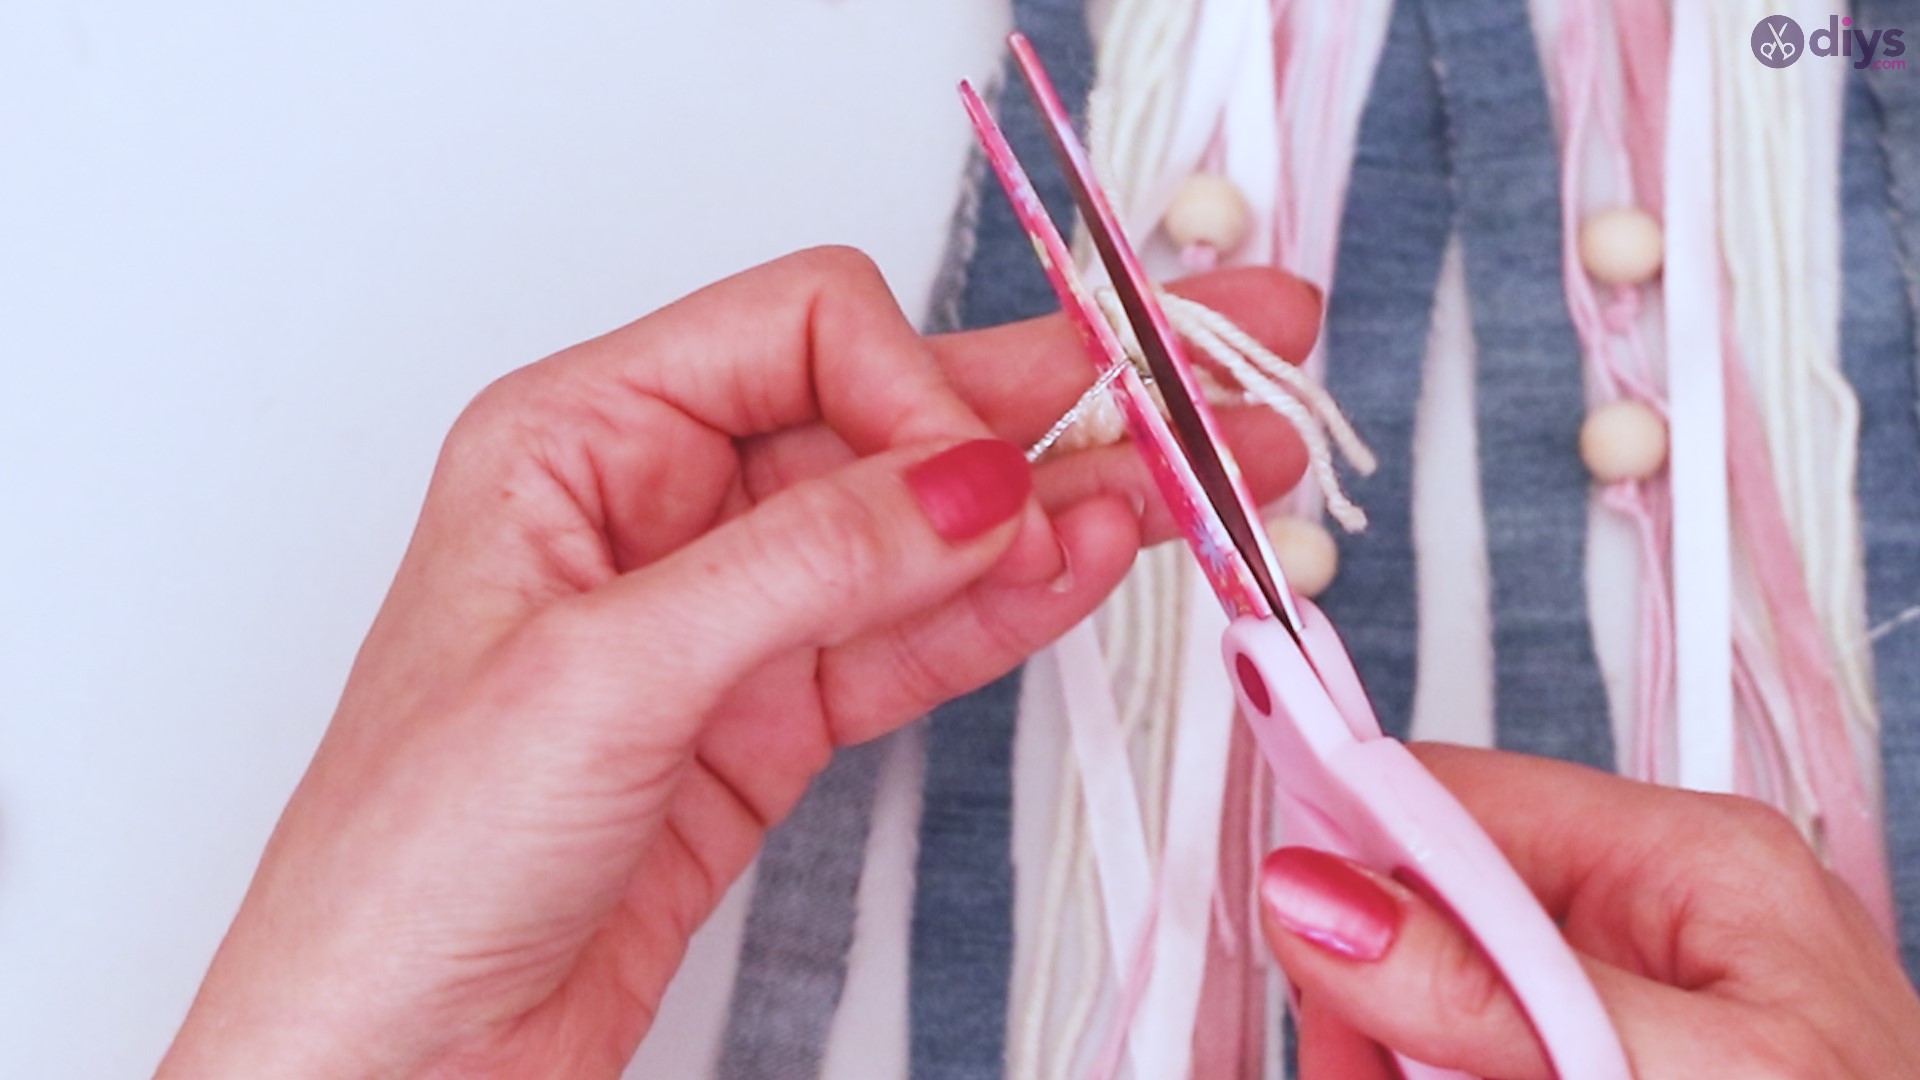
With your silver twisted yarn, start to wrap around your loop. Place the silver yarn just below where the small piece of thread runs through the loop. You want most of the colored yarn to be on the opposite side.
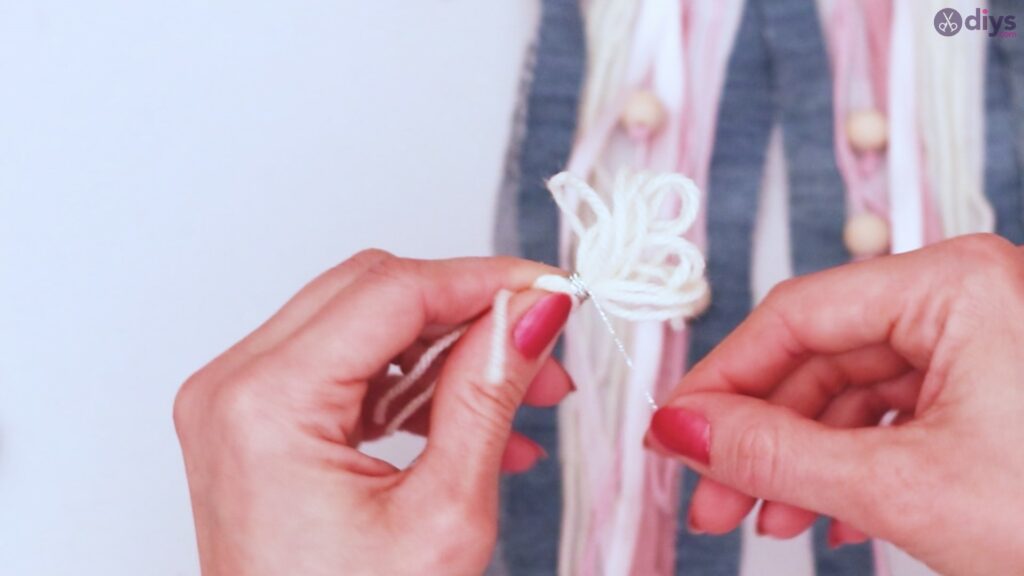

After you’ve wrapped it several times, knot it and trim the excess.

Feed your scissors through the longer loop of the bundle, and snip to create your tassel.

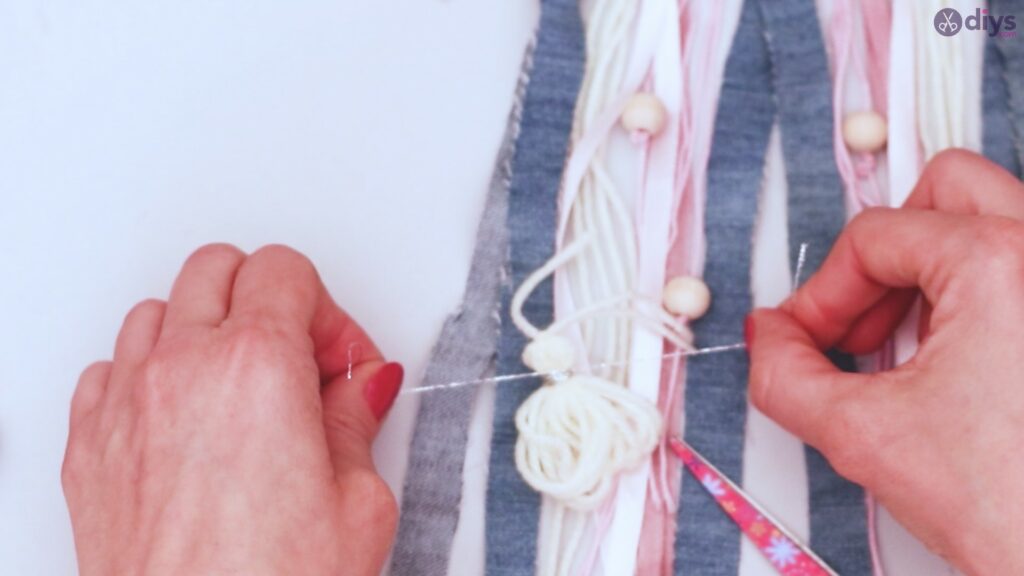
Repeat this with the second long strand of yarn for the second tassel.

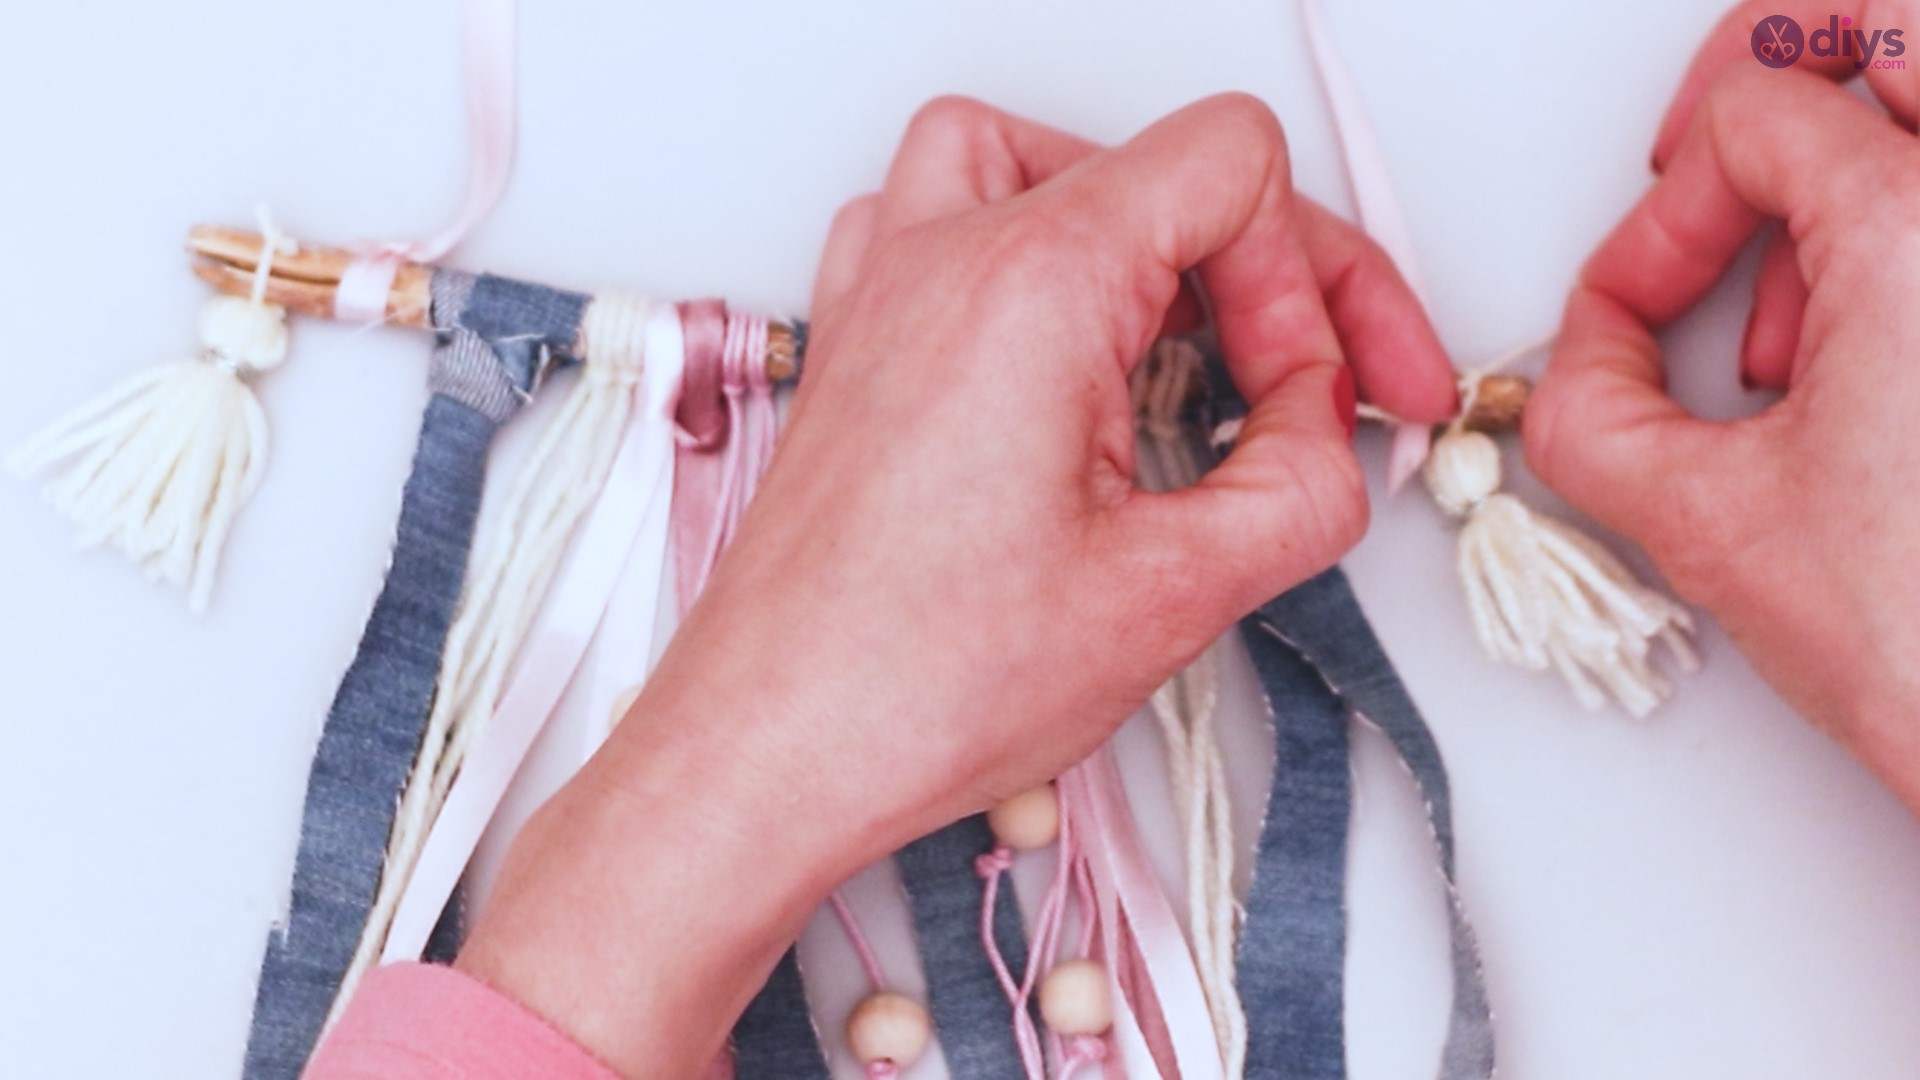
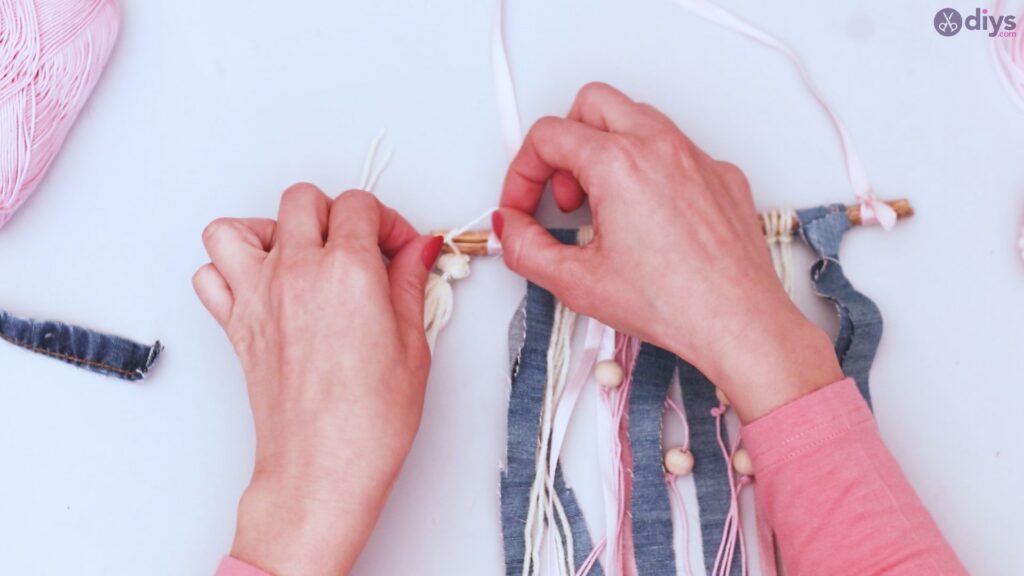
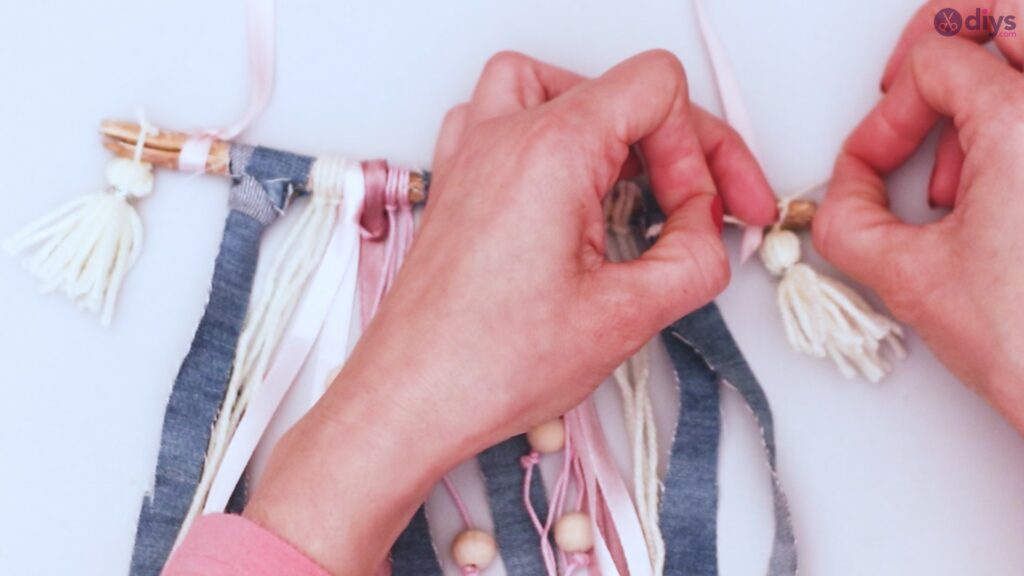
Using the string you tied to the top of each tassel, tie one to each end of the branch.
Trim any excess length of yarn.
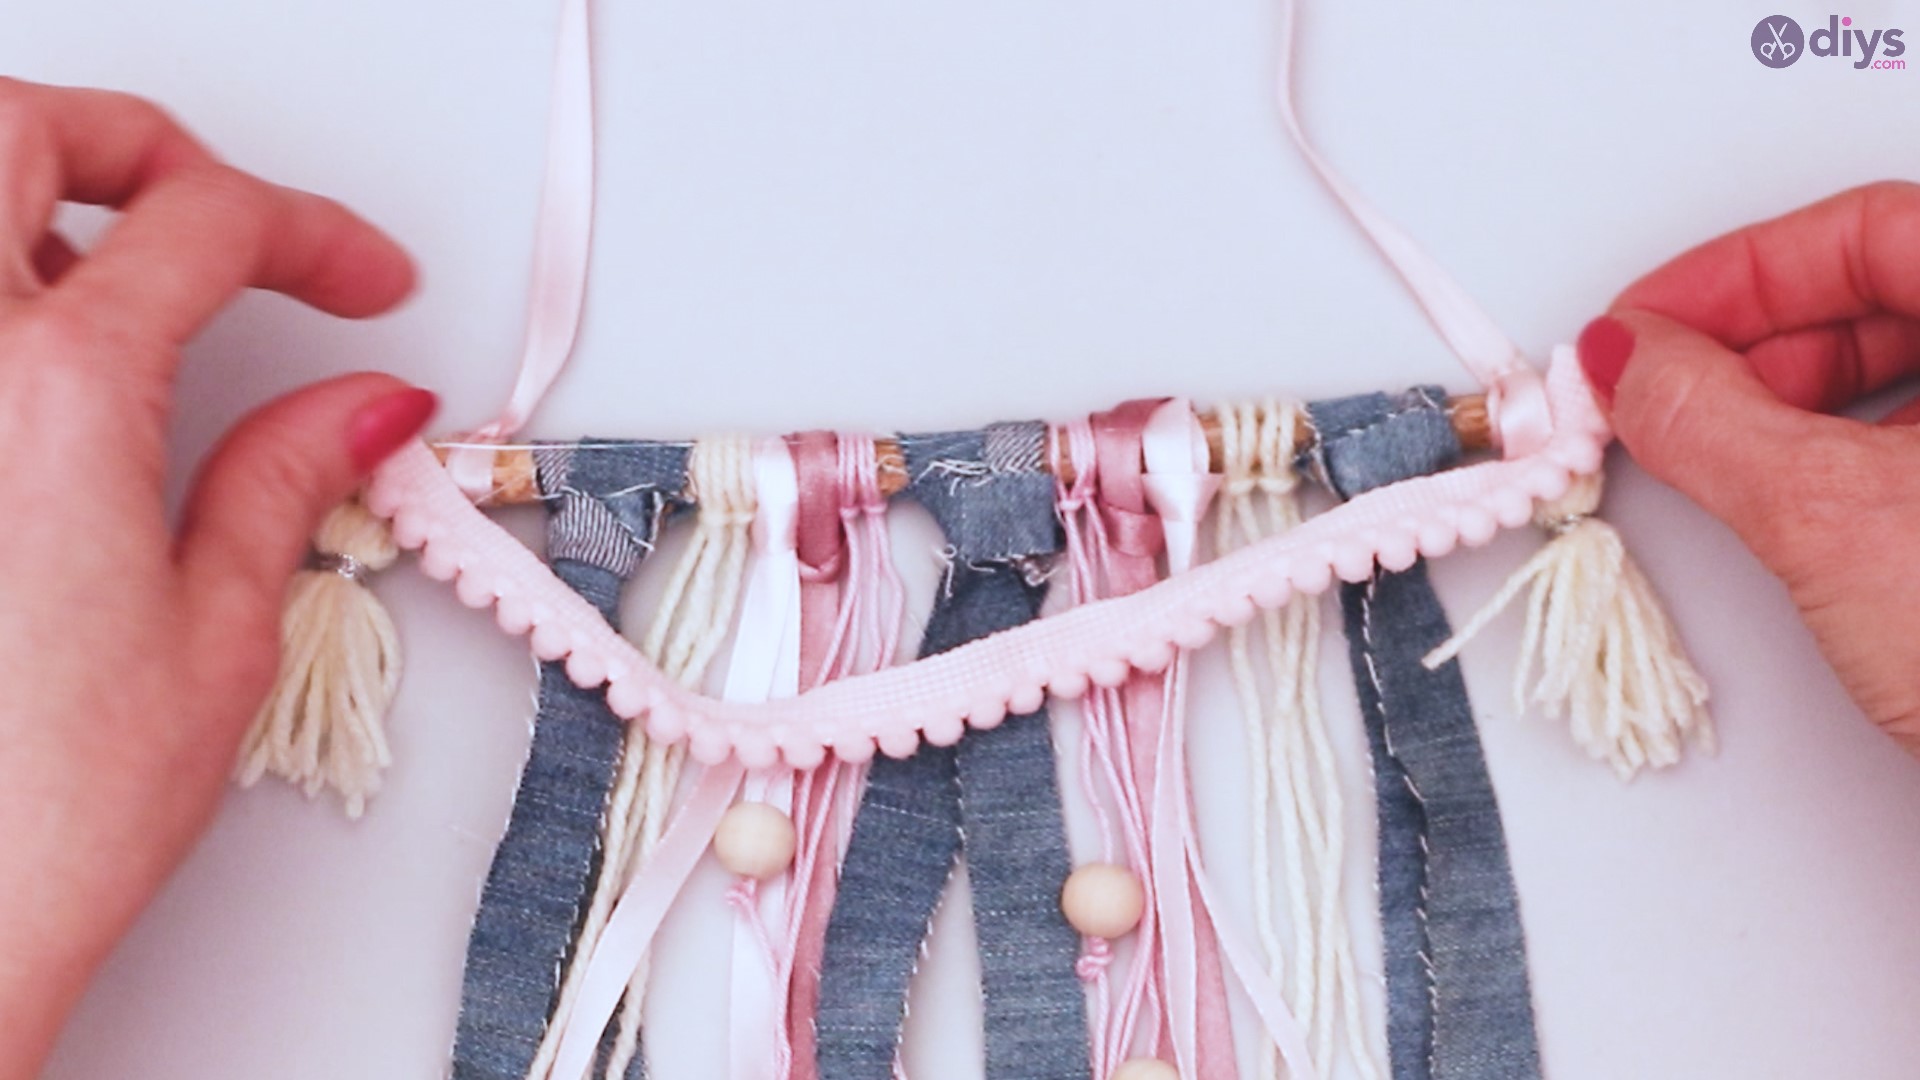
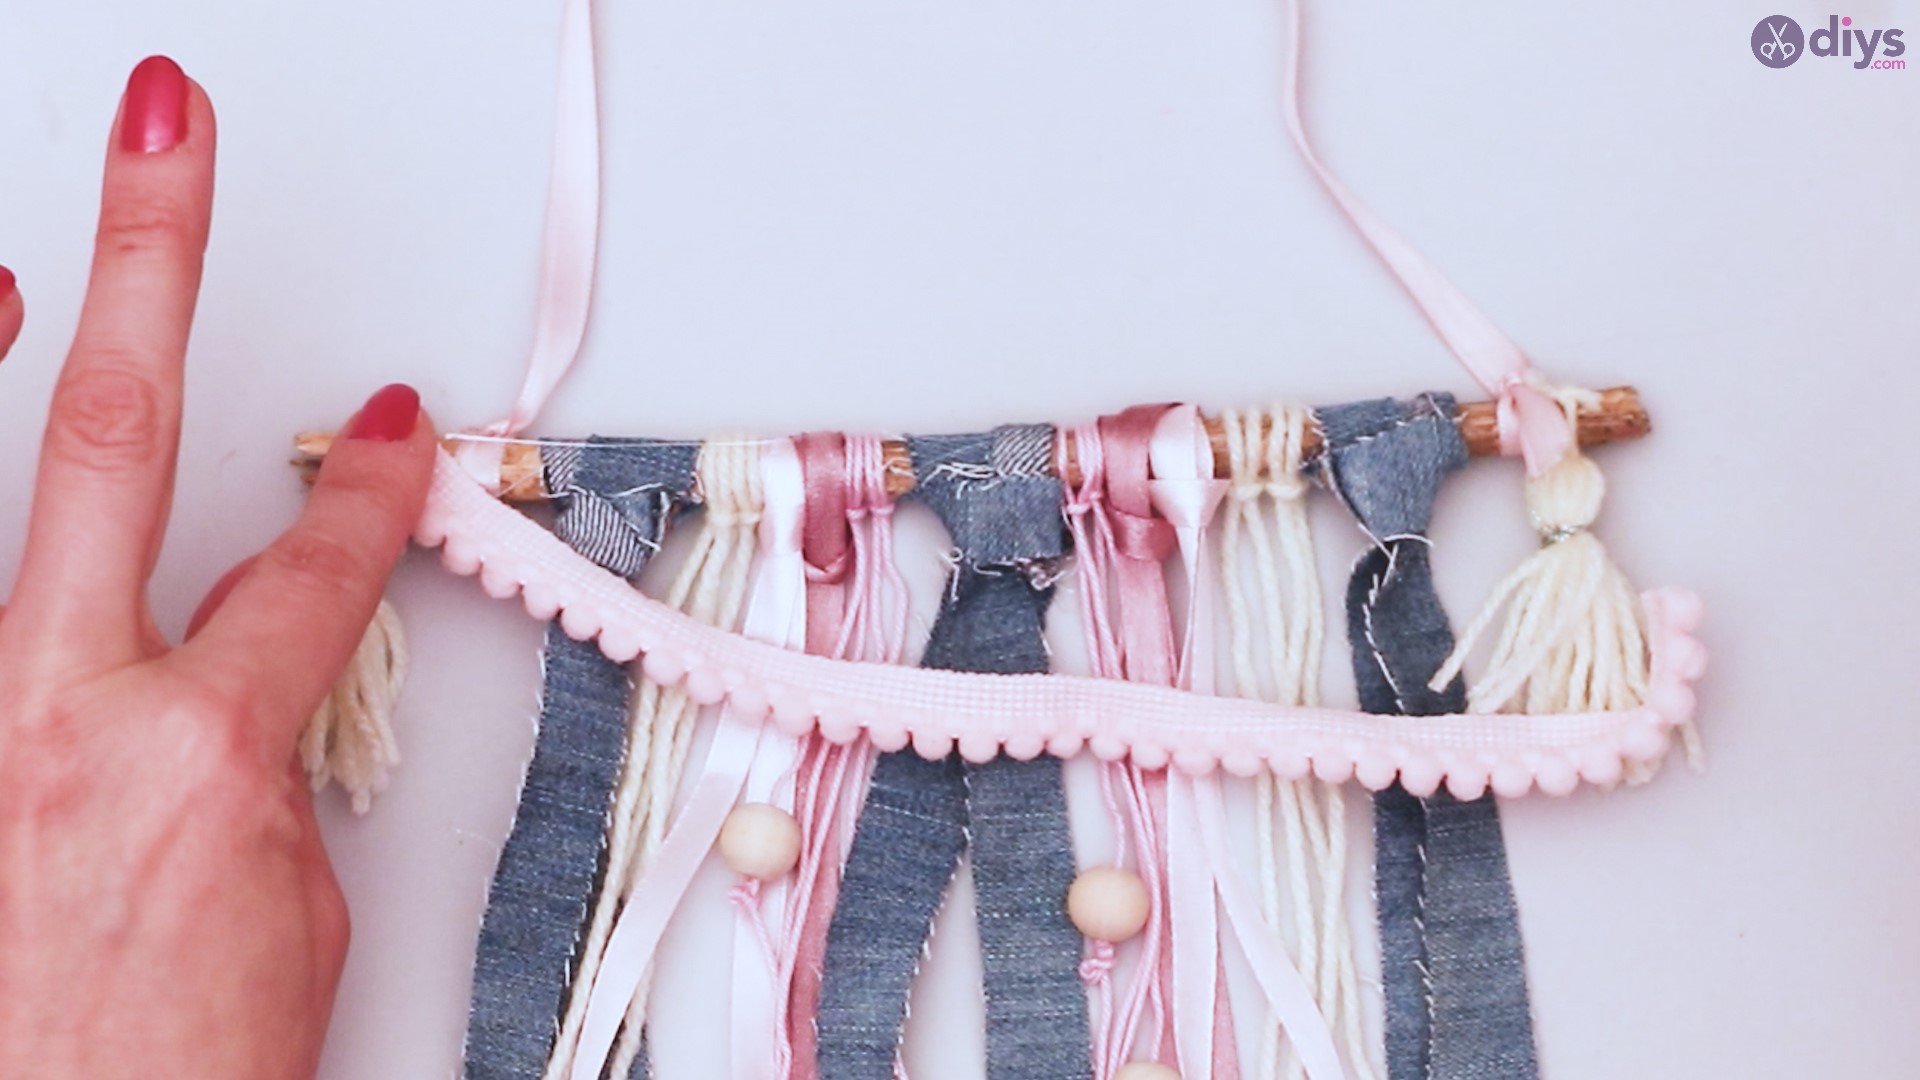
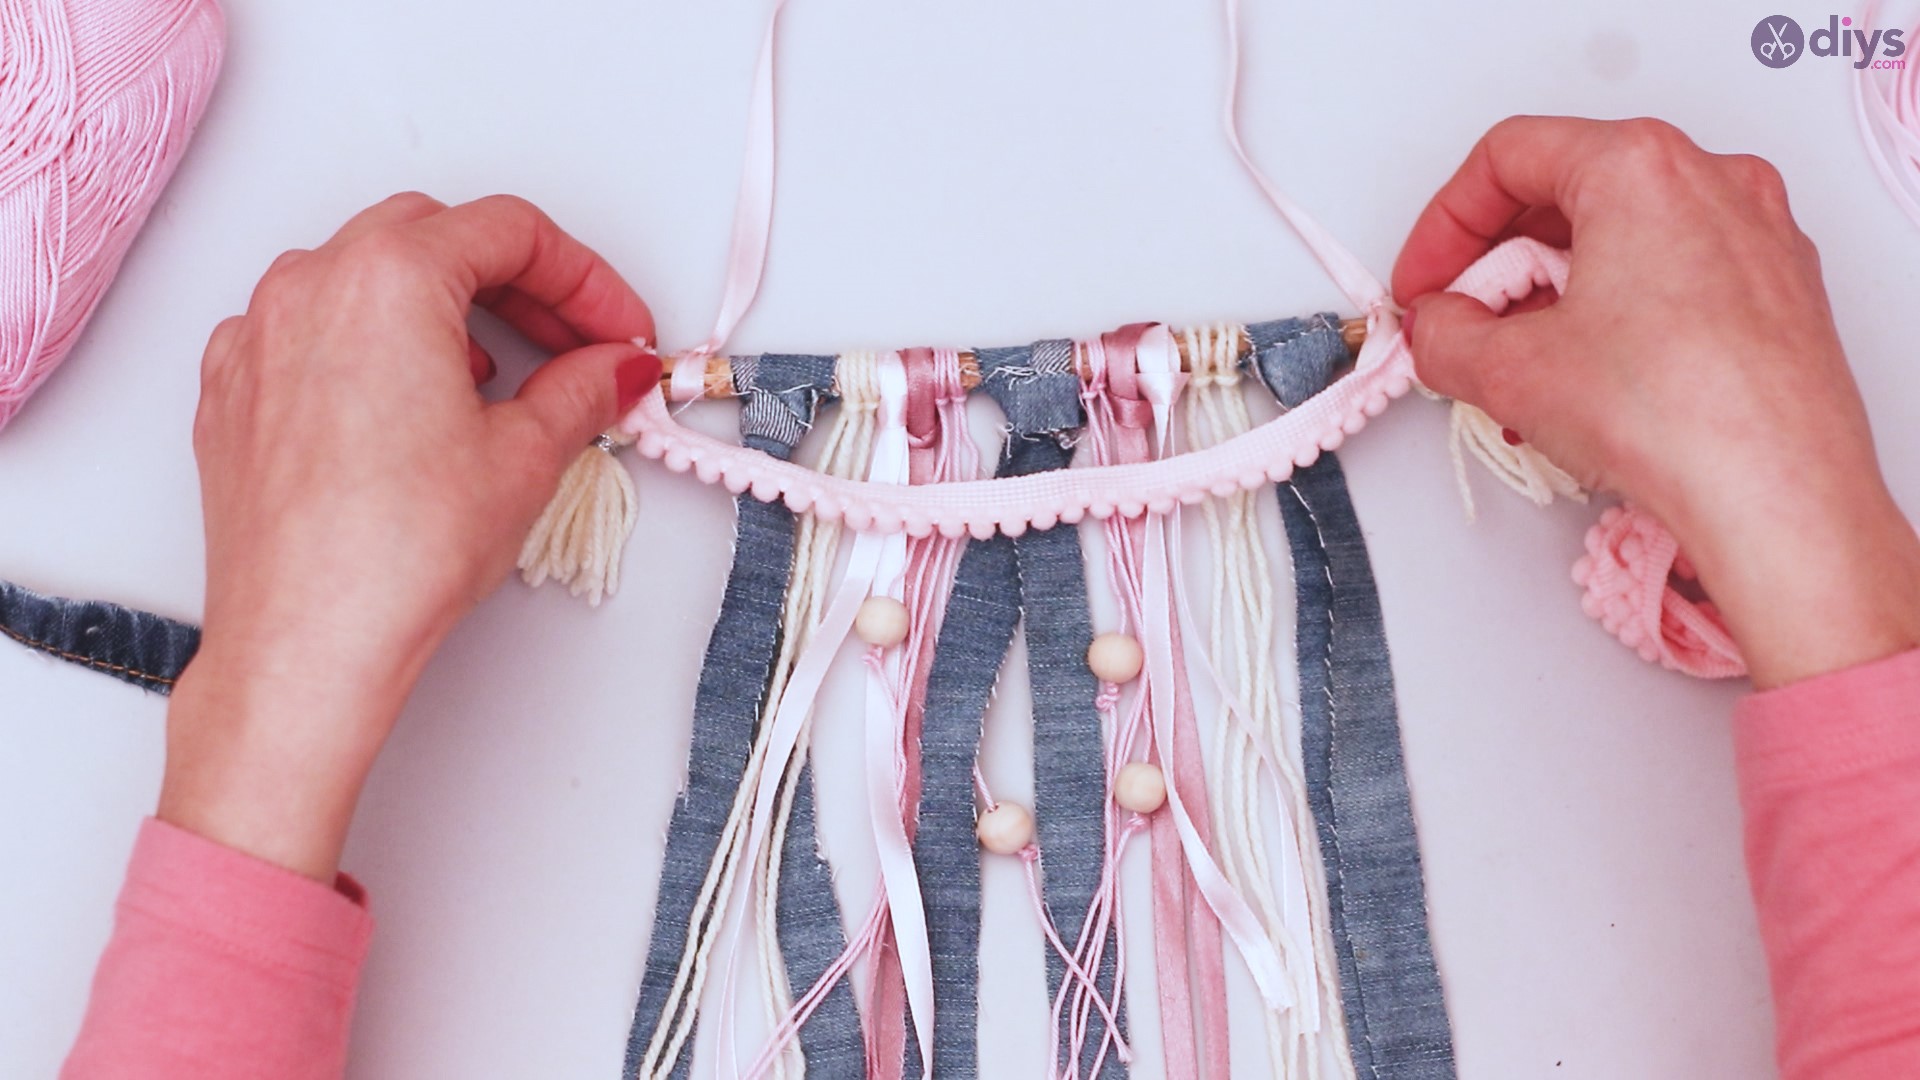
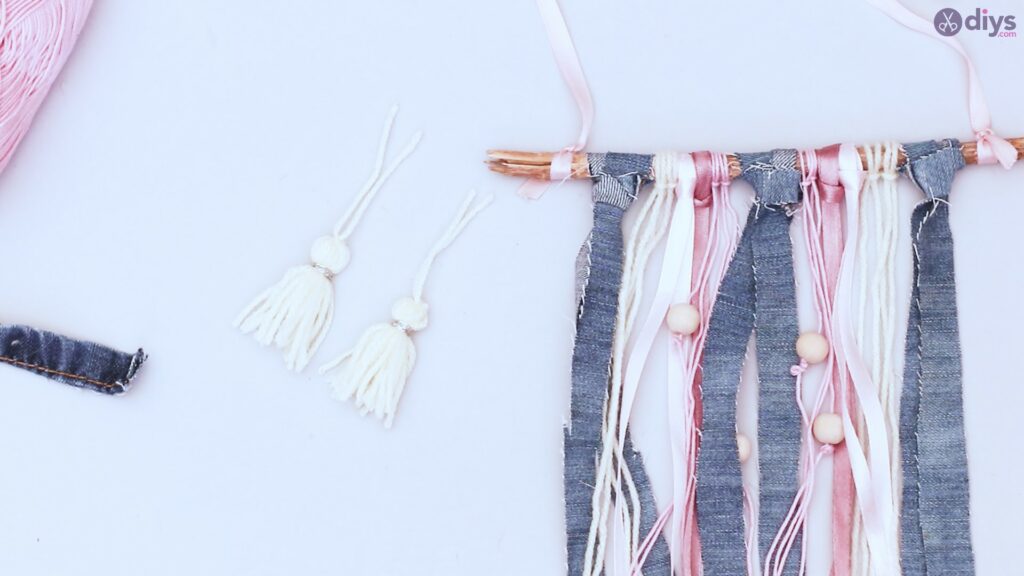
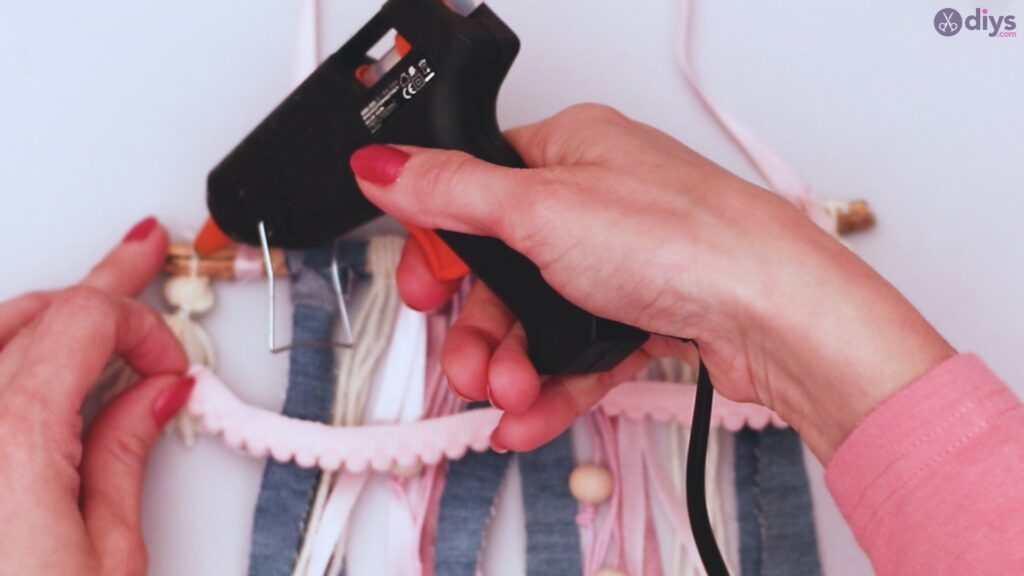
Step 8: Pom Pom ribbon
Measure out a length of pom pom ribbon that is 2-3 inches longer than the branch so that it will drape.
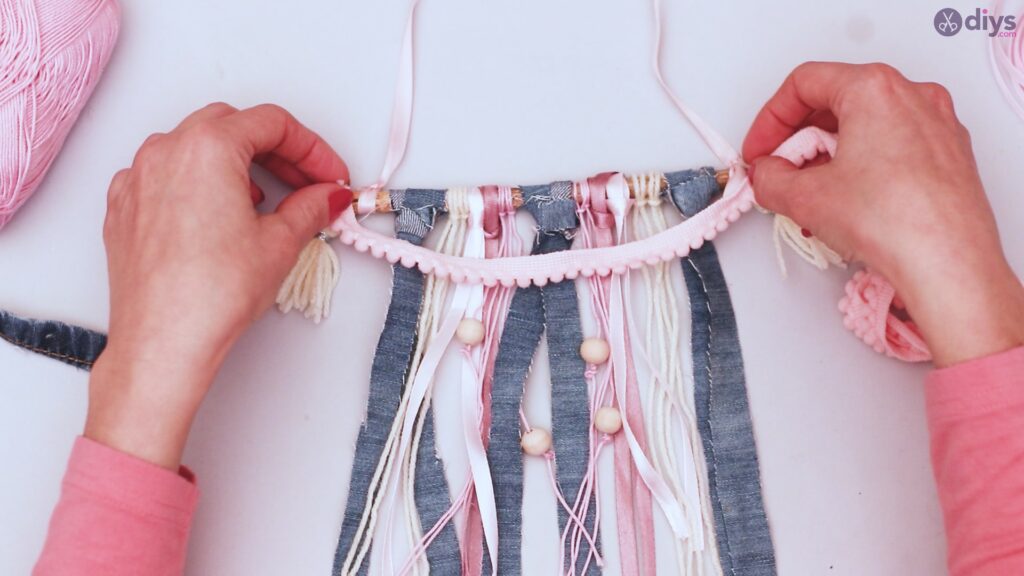

Using your glue gun, attach the ribbon at each end to the branch, just inside where the tassels hang.

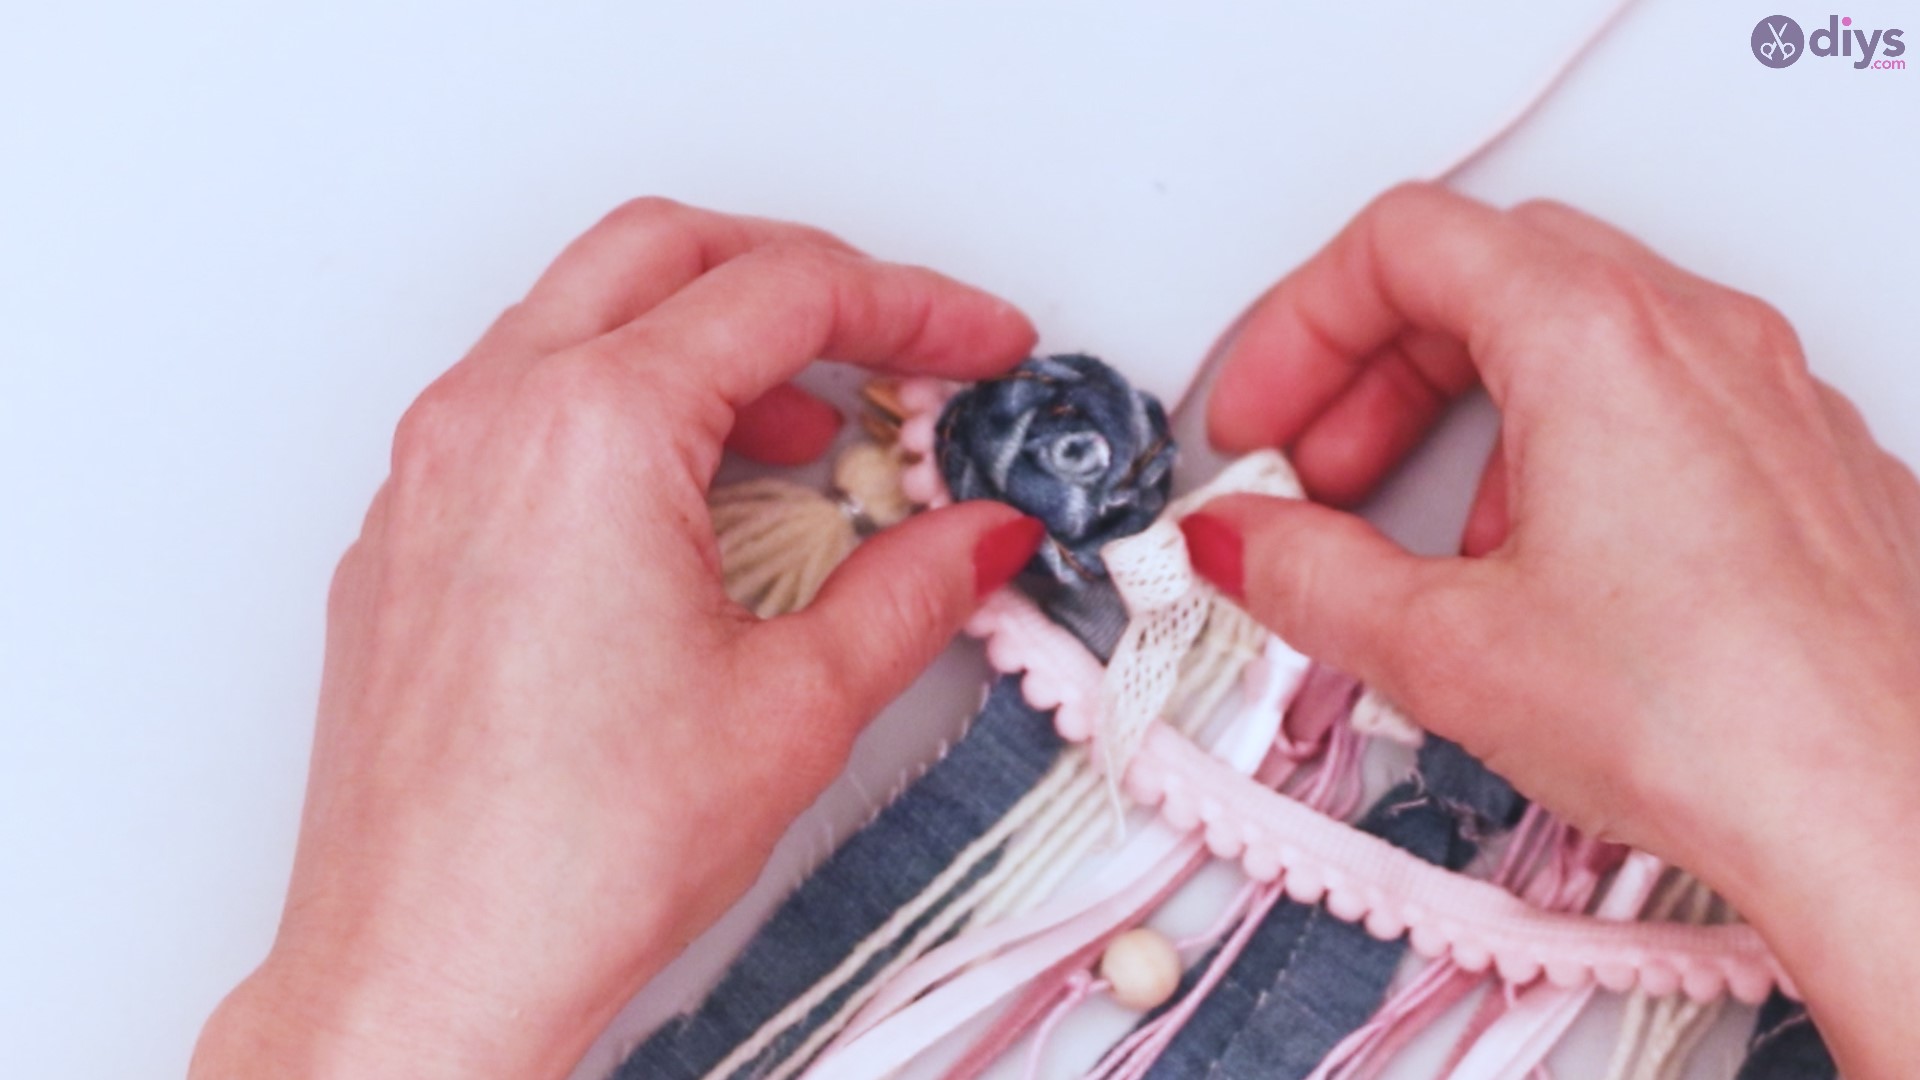
Step 9: Wood bead wrap
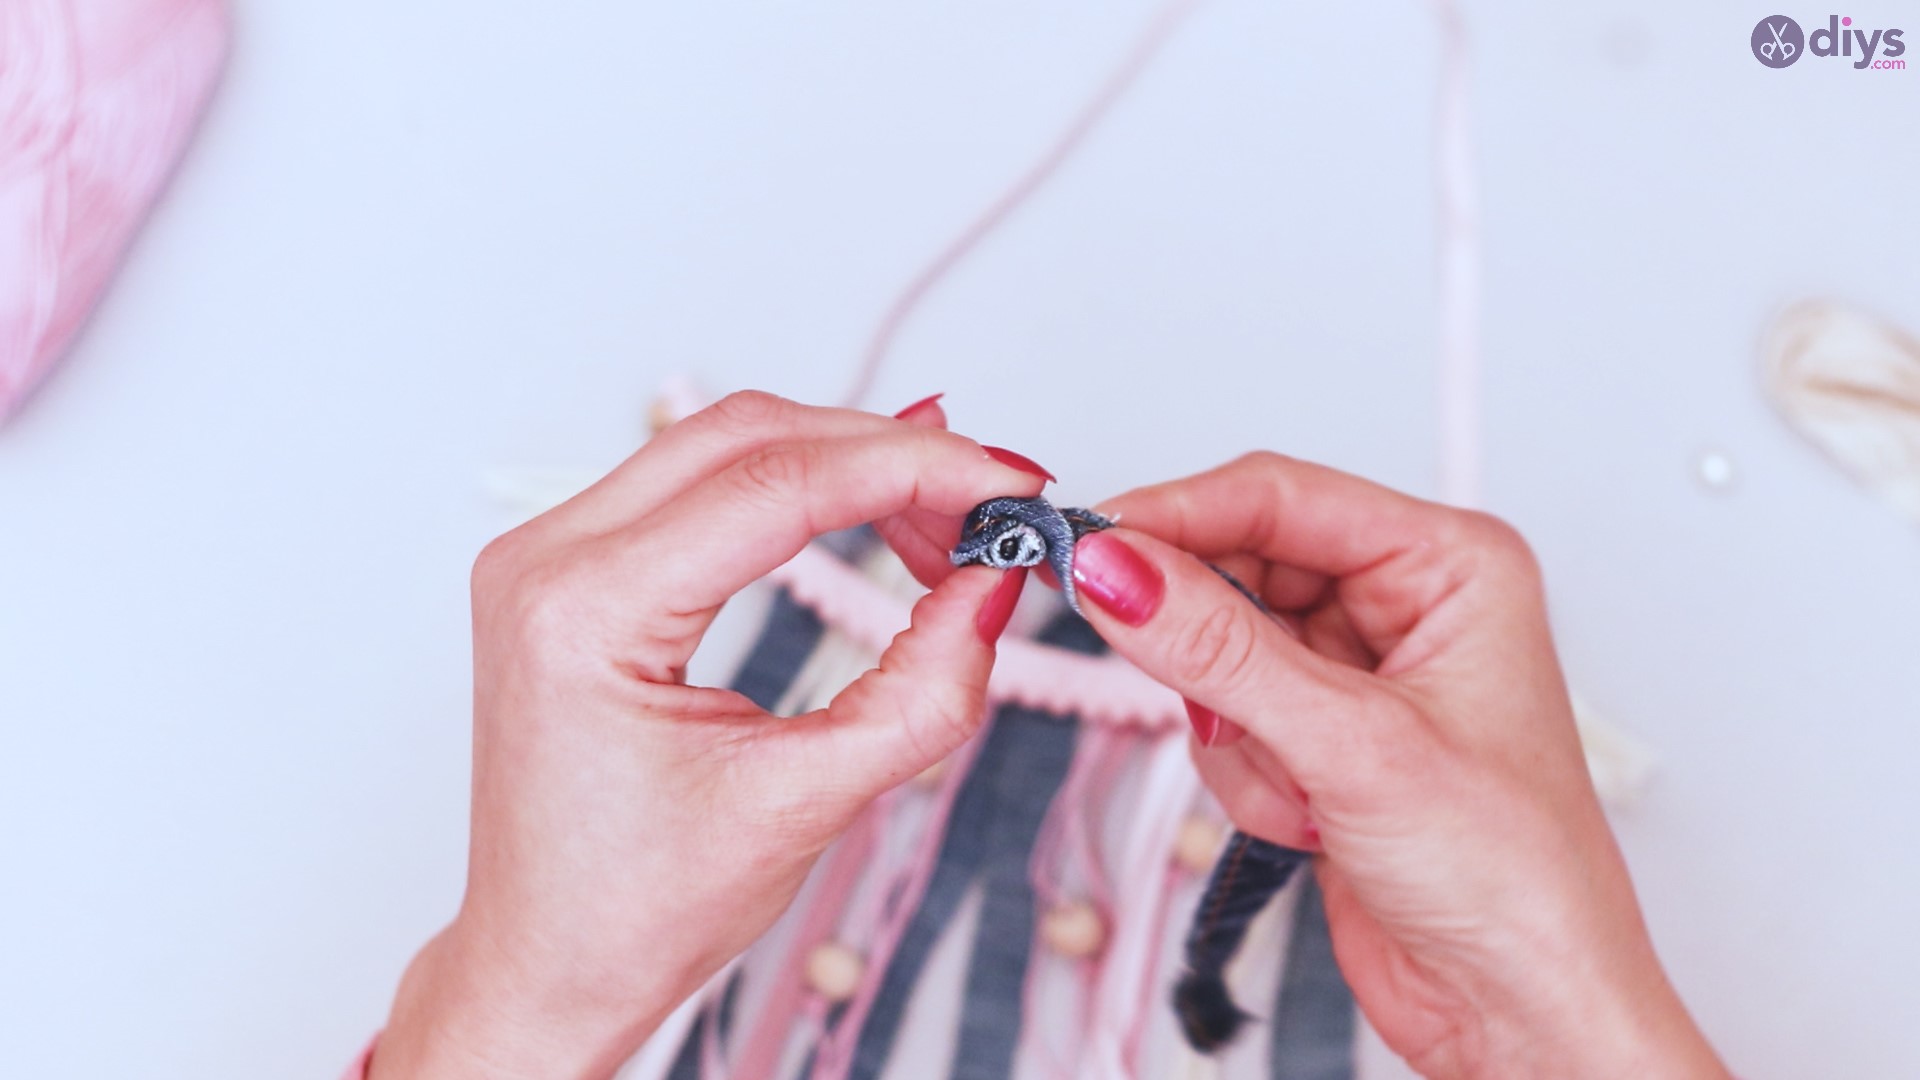
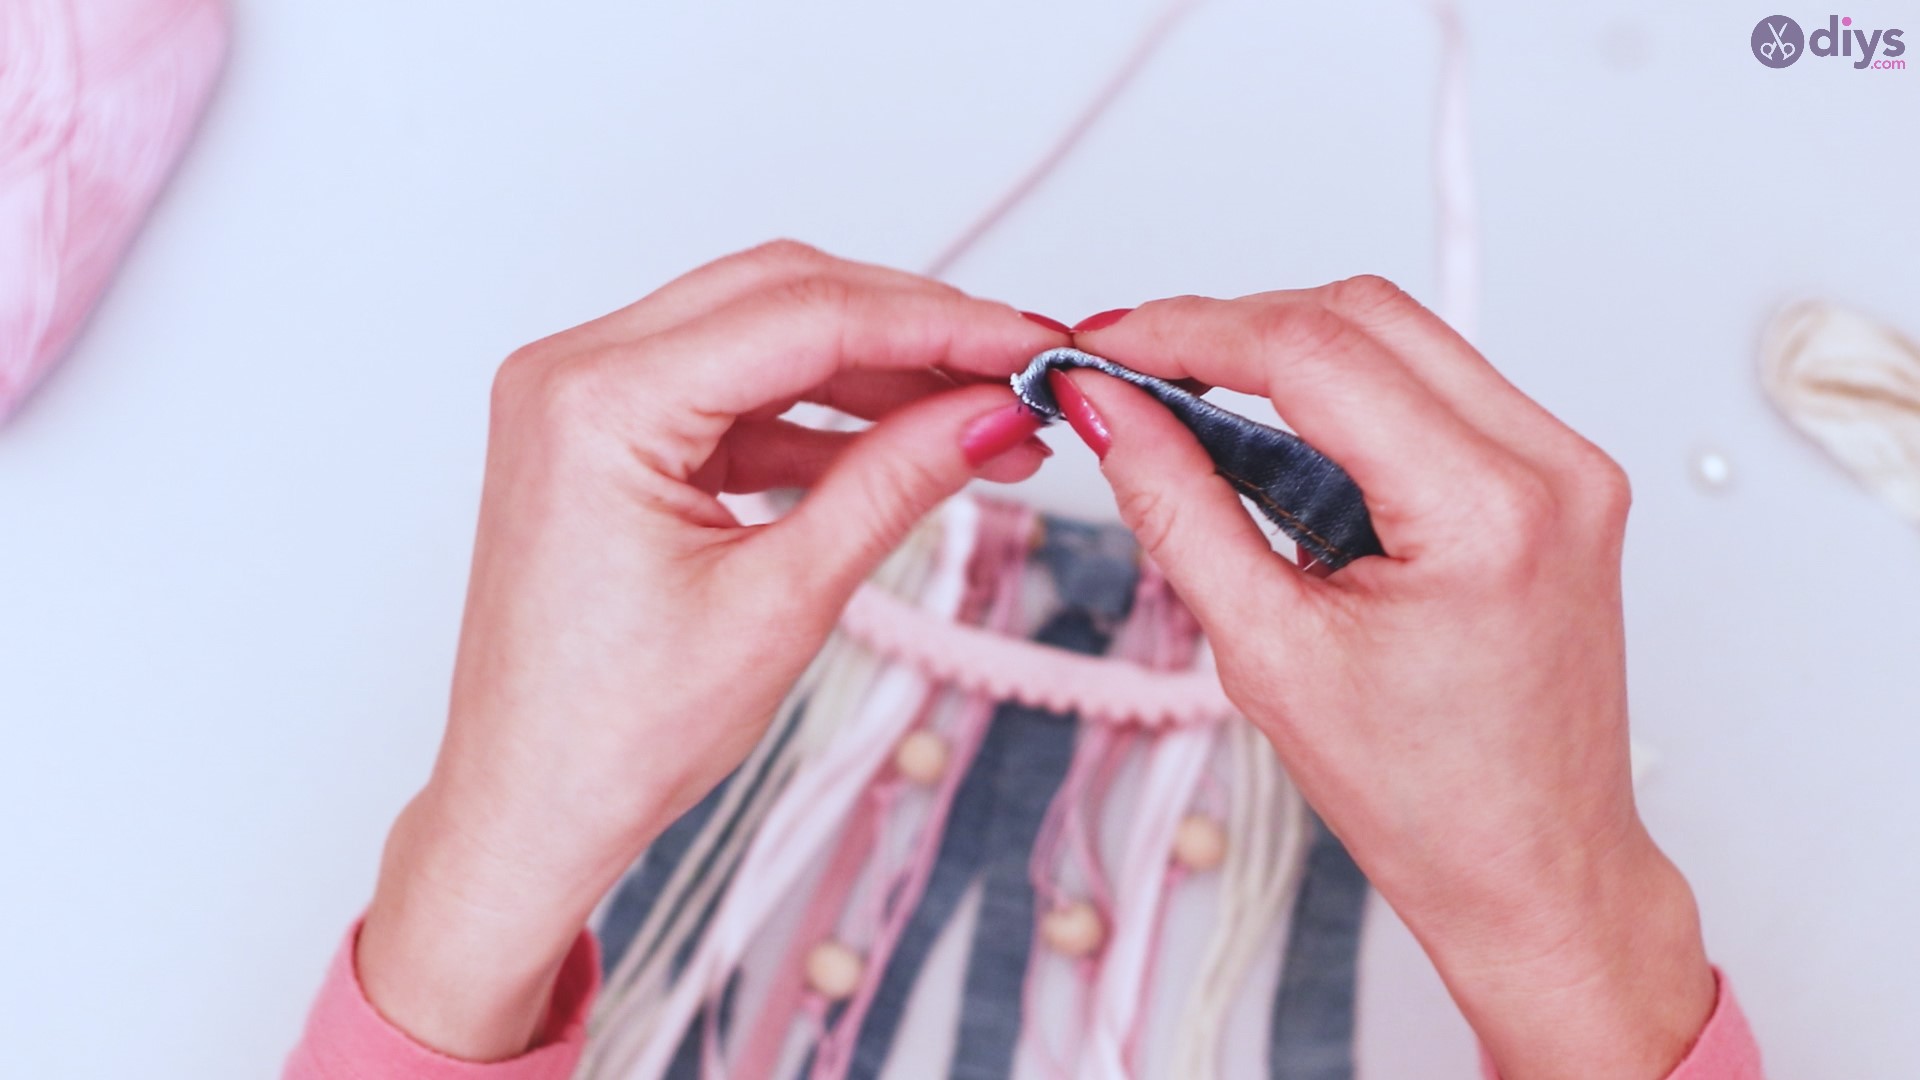
Using a wood bead and another strip of denim, cover the bead with glue, and begin to wrap it with the end of the strip of denim.

Twist the denim, add a dot of hot glue, and wrap again, twisting as you go.
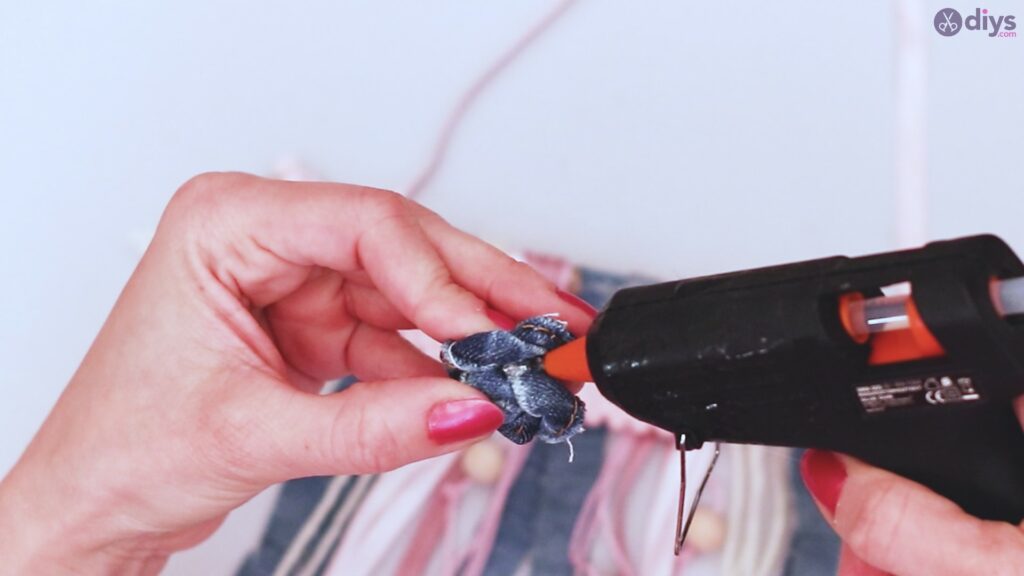
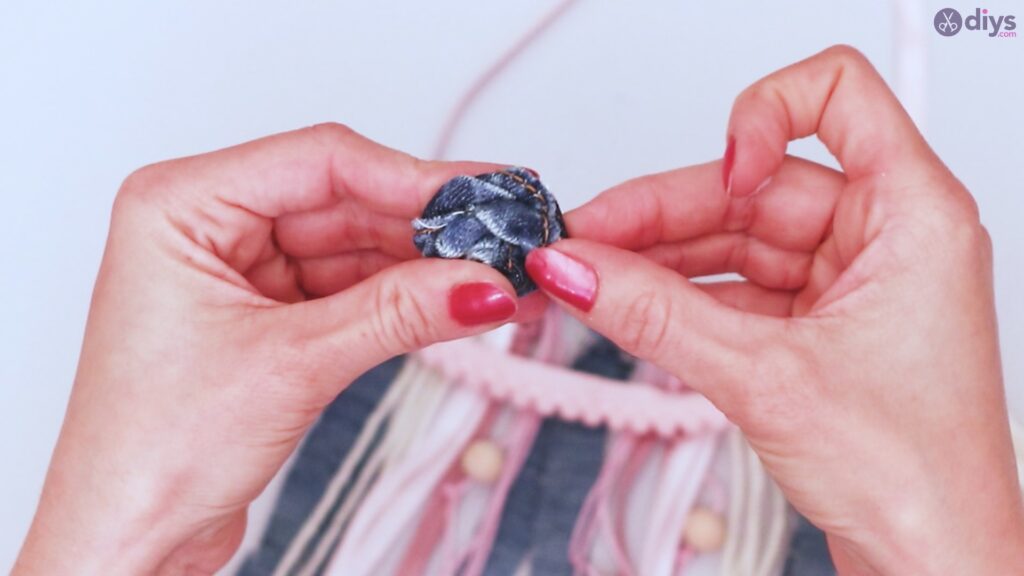
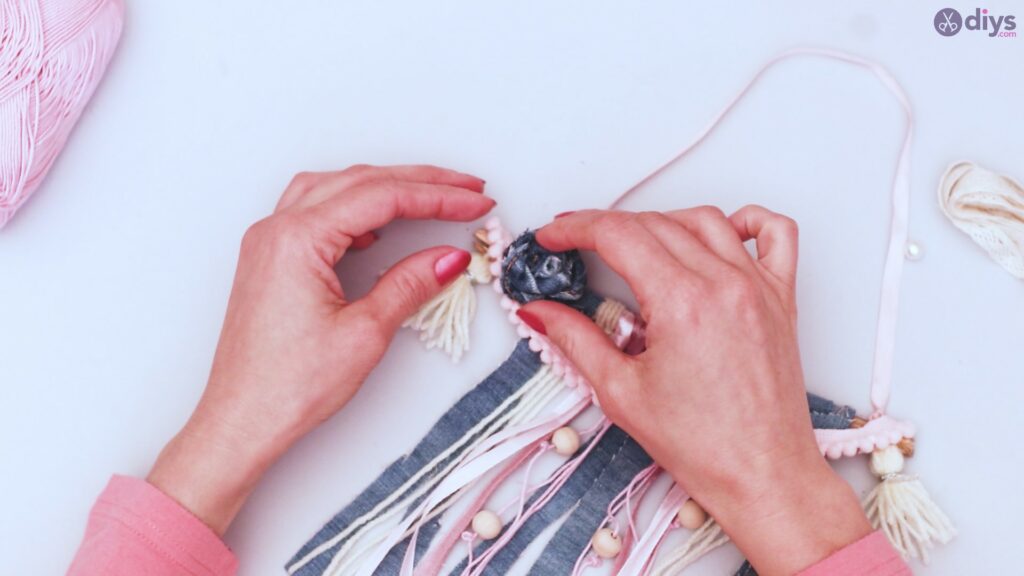
When you have 3 to 4 layers, you should have a denim flower. With hot glue, attach this to one end of your branch, inside where you’ve attached the pom pom ribbon.
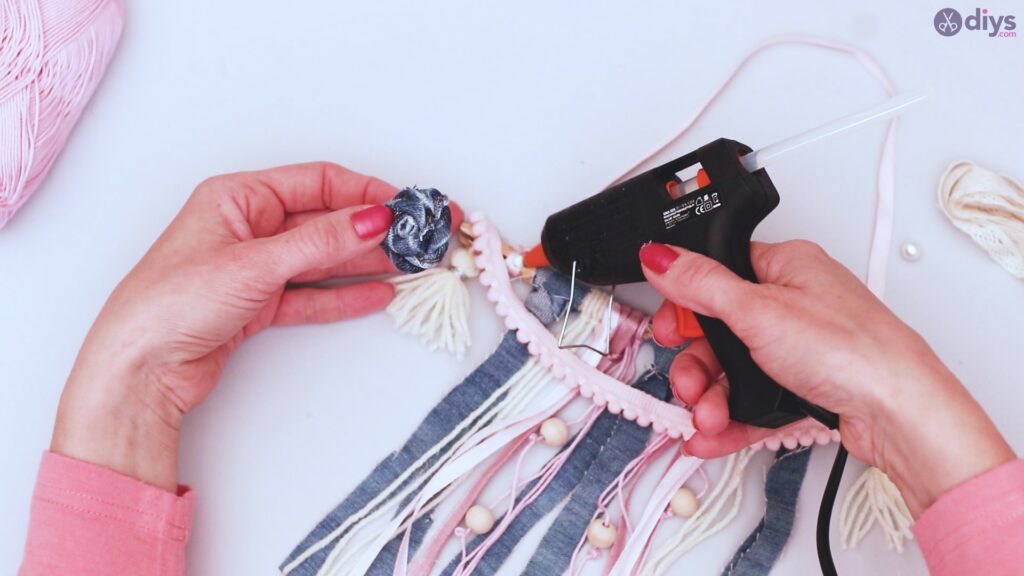
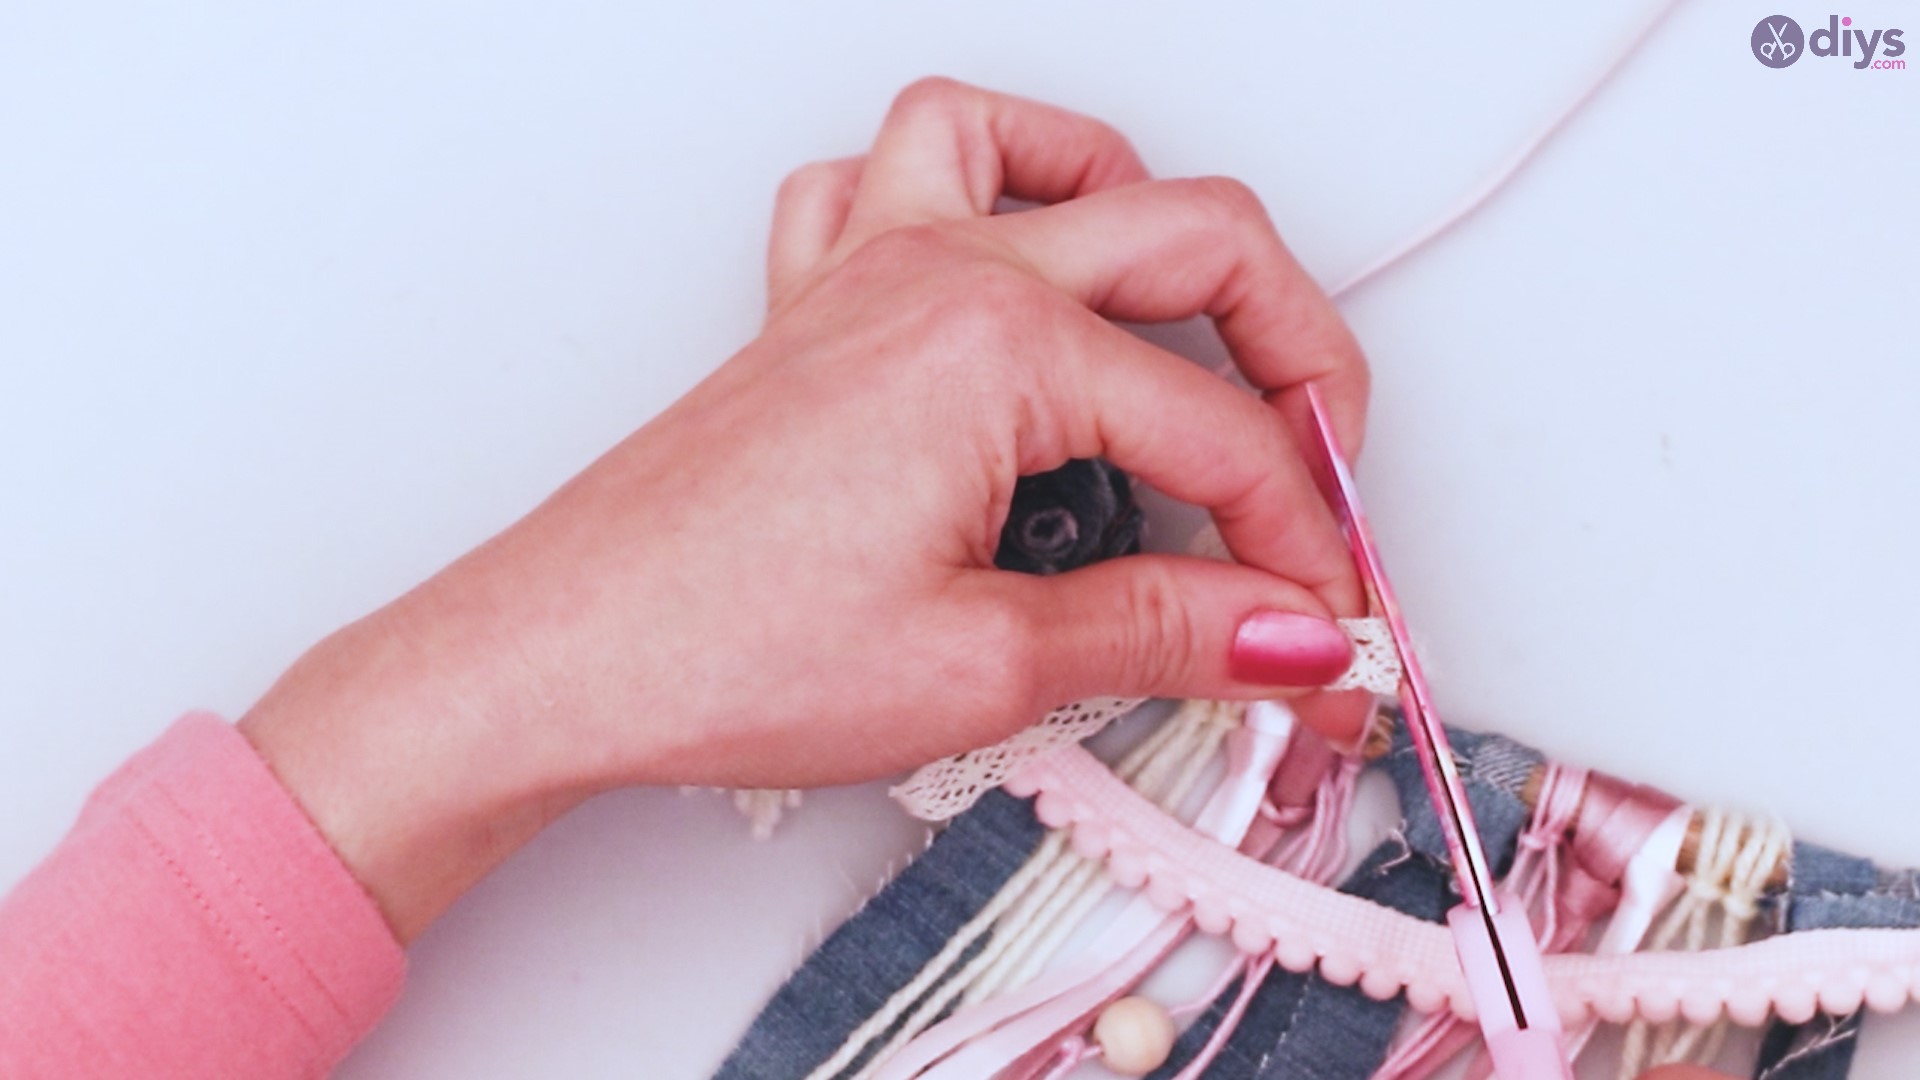
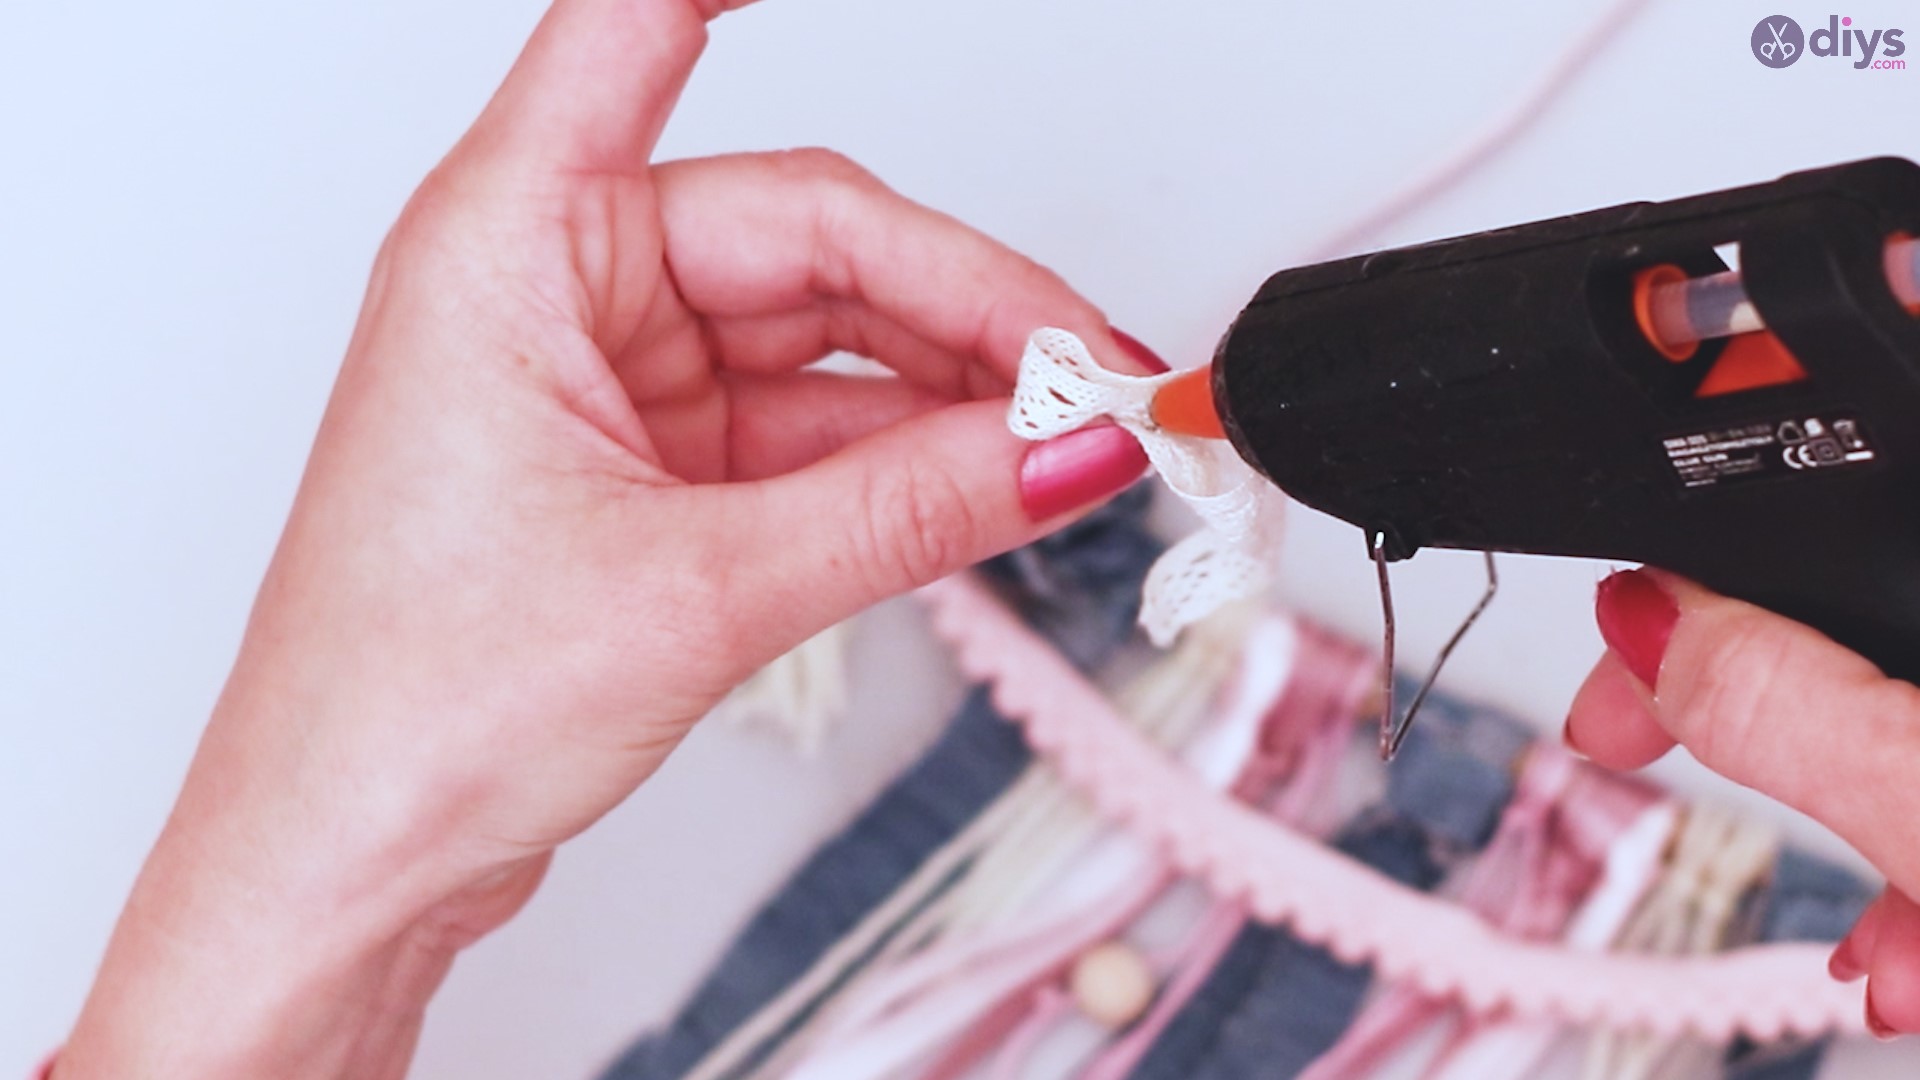
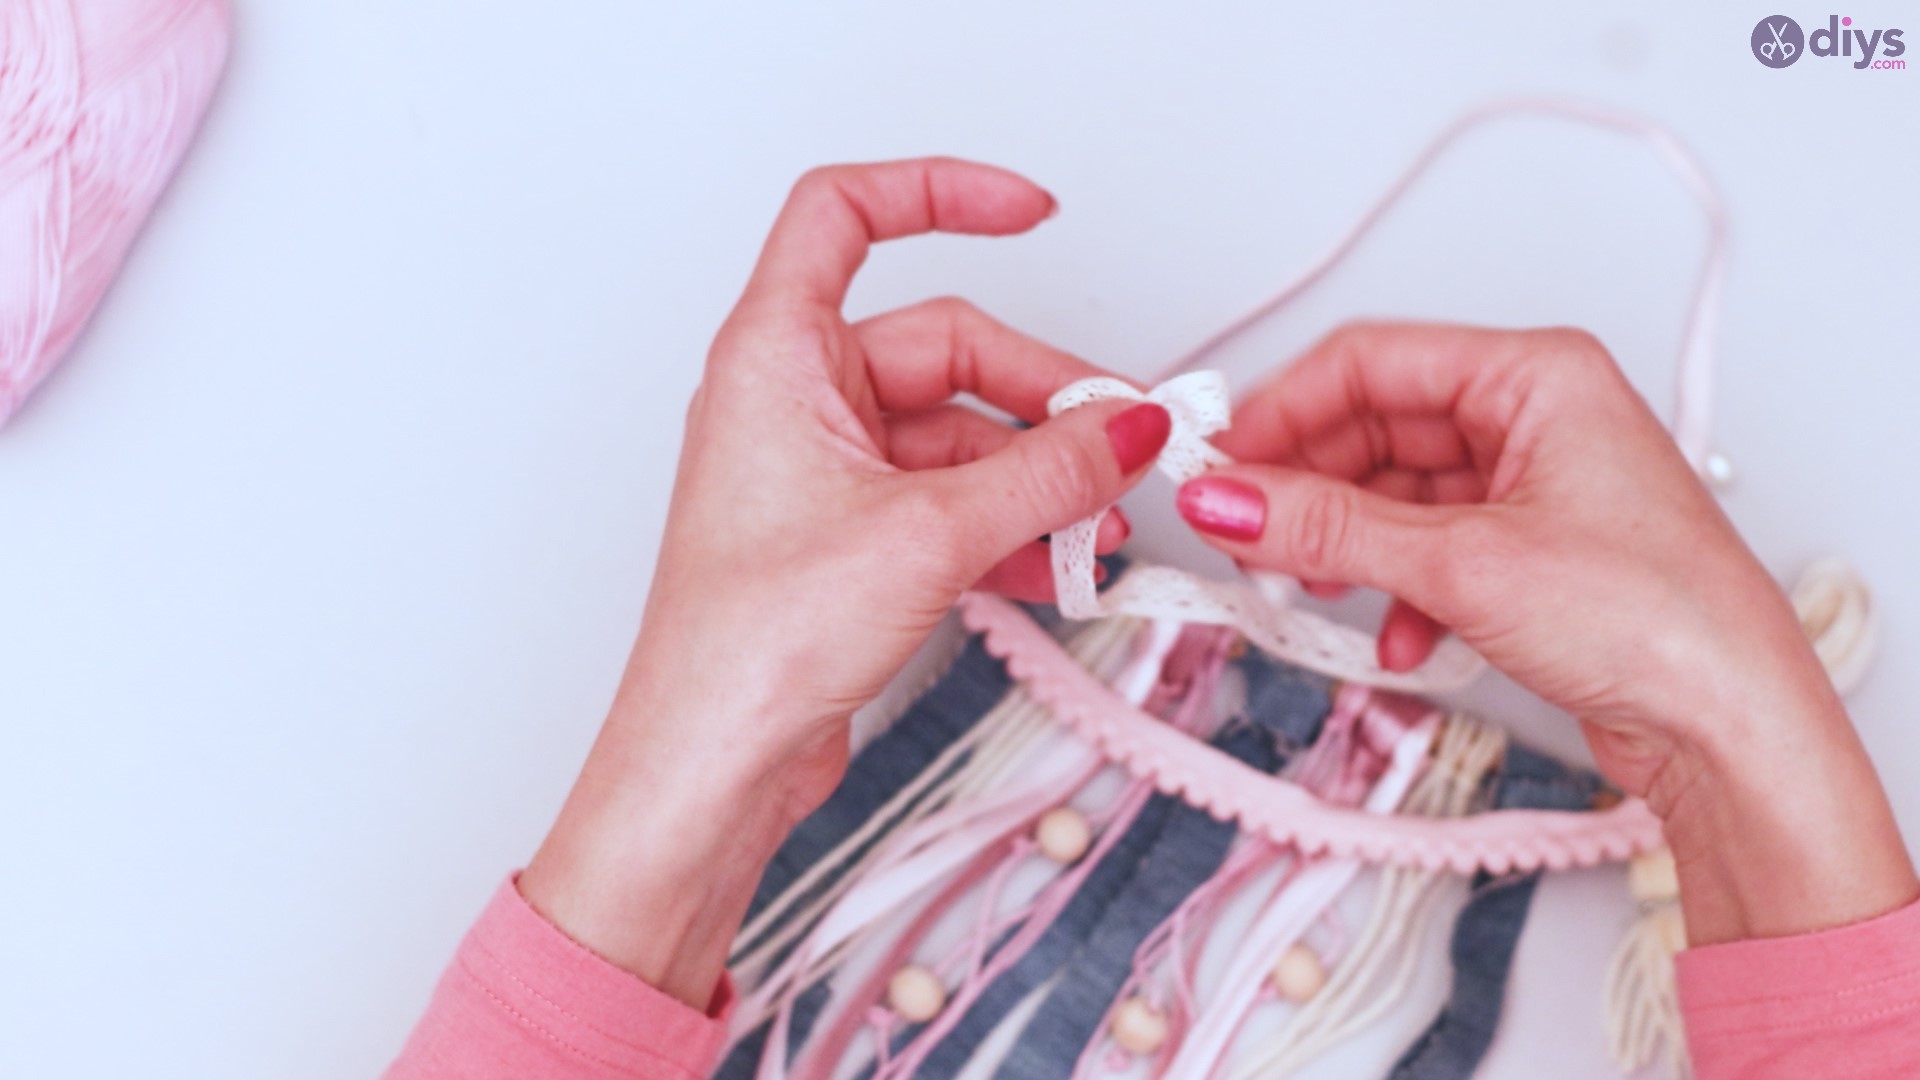
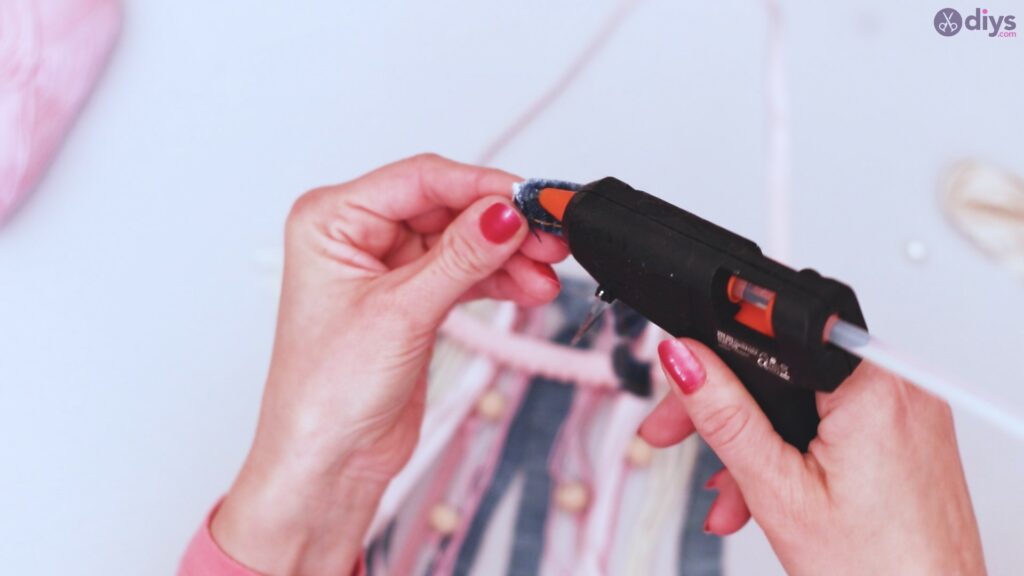
Step 10: Lace ribbon bow
Taking your lace ribbon, fold it into a small bow.

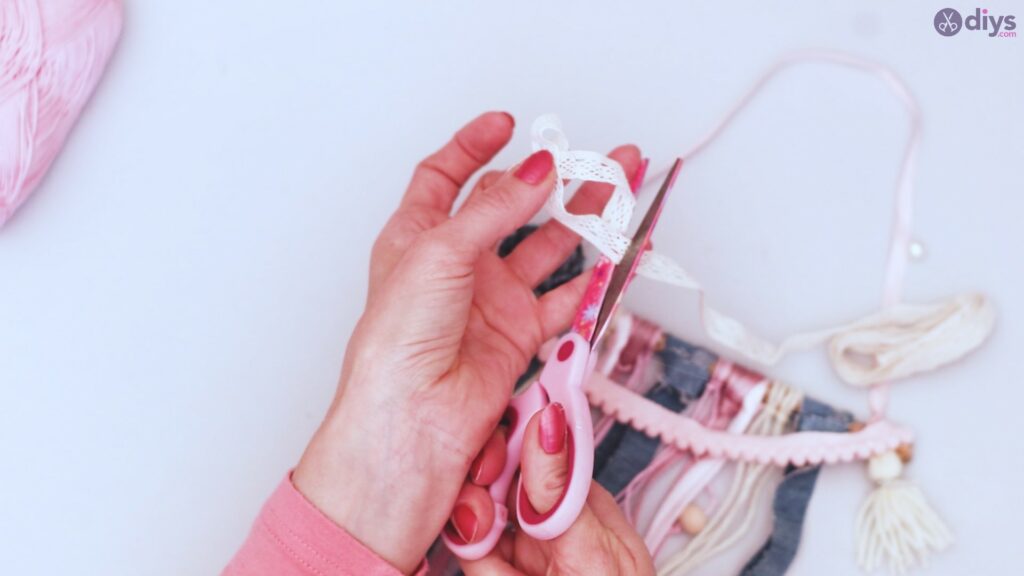
Add a dot of glue to the back. This will help hold it together and allow you to place it on your branch.


Adhere to the branch next to your denim flower.


Trim as needed.

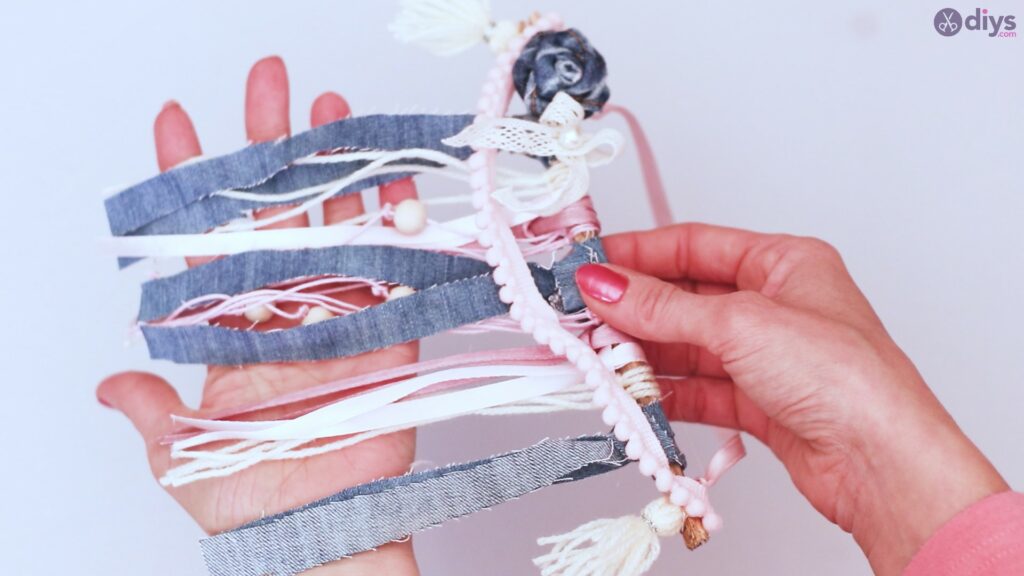
Your completed ribbon wall hanging will display all your favorite colors and textures, and you’ll get a sense of satisfaction at having used some of your favorite things to spice up a space in your home or office. Have fun with it, and consider mixing and matching materials and colors so that you get something uniquely your own every time!
Me and my cousin made this but the denim was replaced with twine! #socute!!😆