DIY Pinecone Gnome for Christmas Decorations
Updated on November 19, 2025


Make your own cute DIY pinecone gnome to add to your tree this year, or simply make a few as handmade gifts for friends and family. Either way, check out just how I put this gut together right here in this simple tutorial!
Check out these step by step instructions, complete with photos! If you’re more of a video tutorials mind of person, scroll to the bottom of this post to find one of those instead of a written guide.
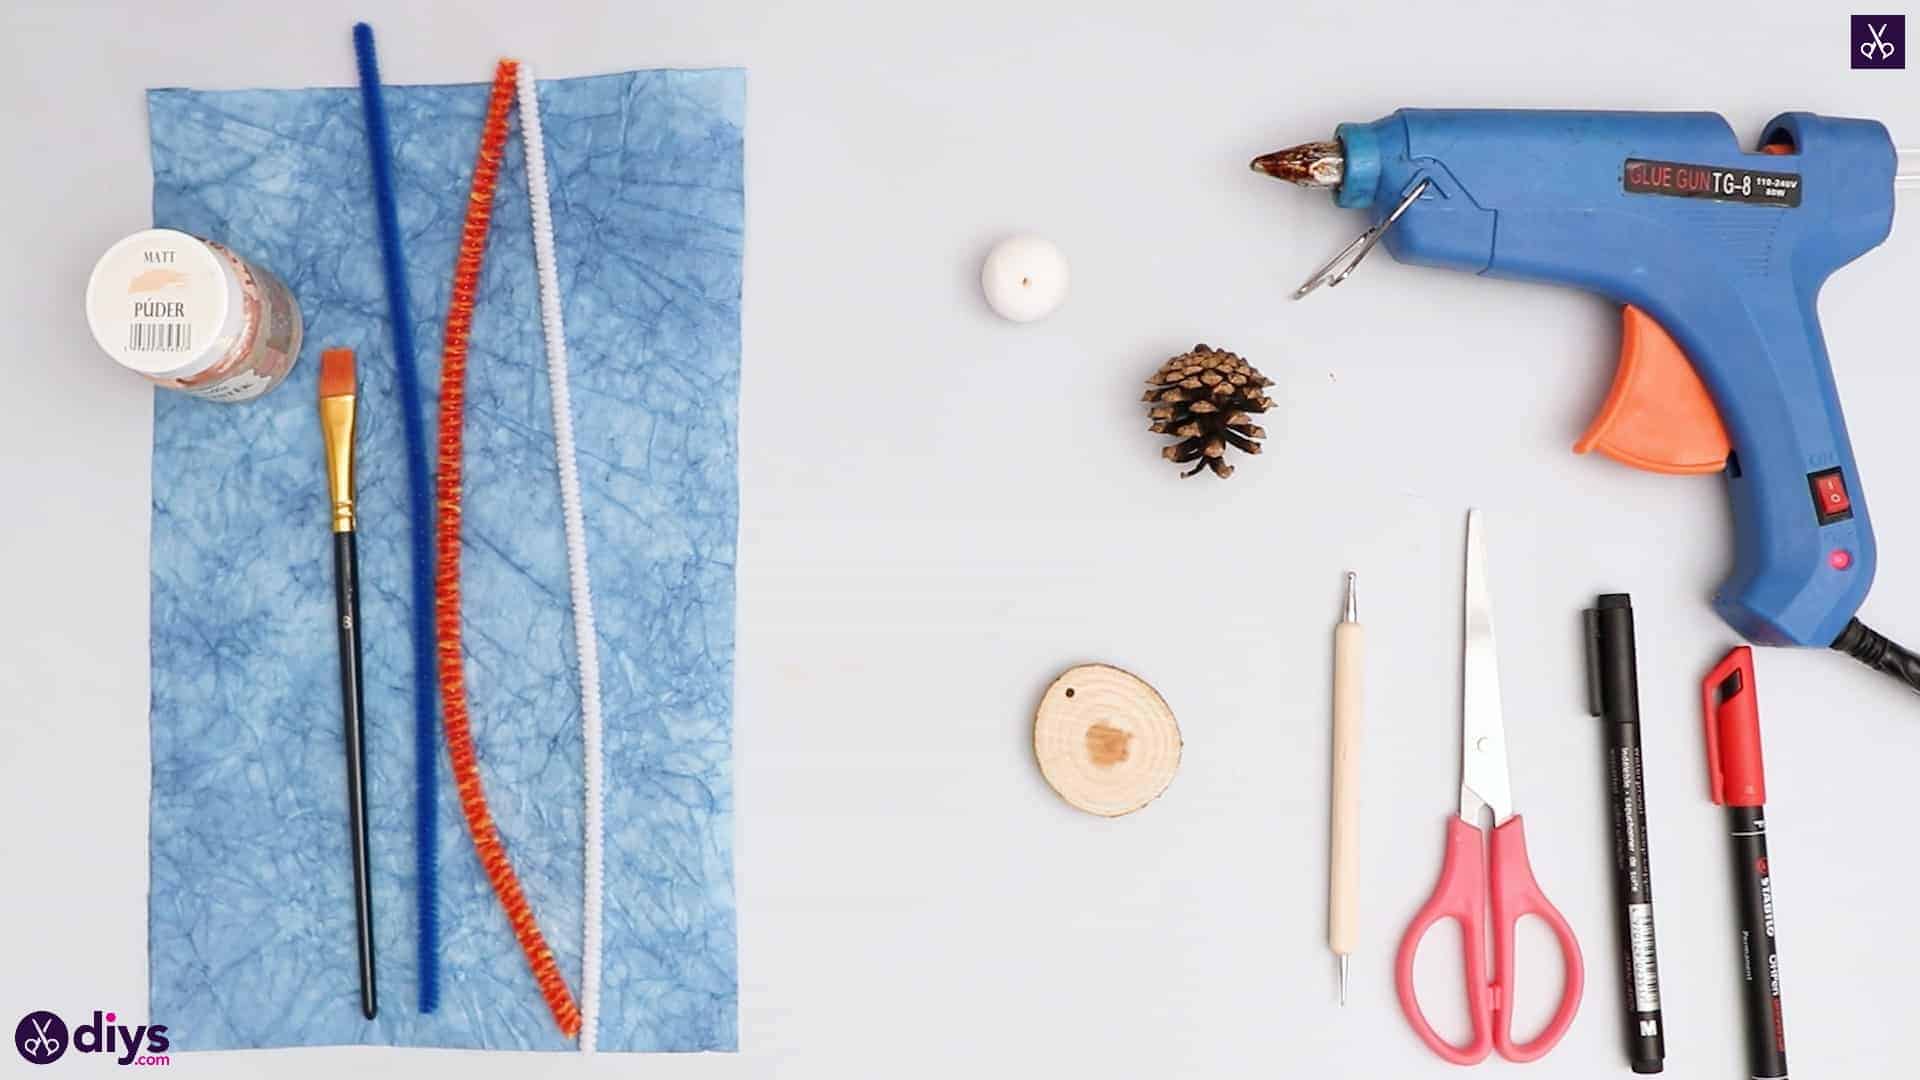
For this project, you’ll need:
- Blue batik paper
- A wooden disc
- A spun cotton ball
- Pink paint
- A paintbrush
- Red and black felt
- Pipe cleaners (blue, white, and orange)
- Scissors
- Hot glue
- A dotting tool
Step 1: preparation
Gather your materials for the craft!

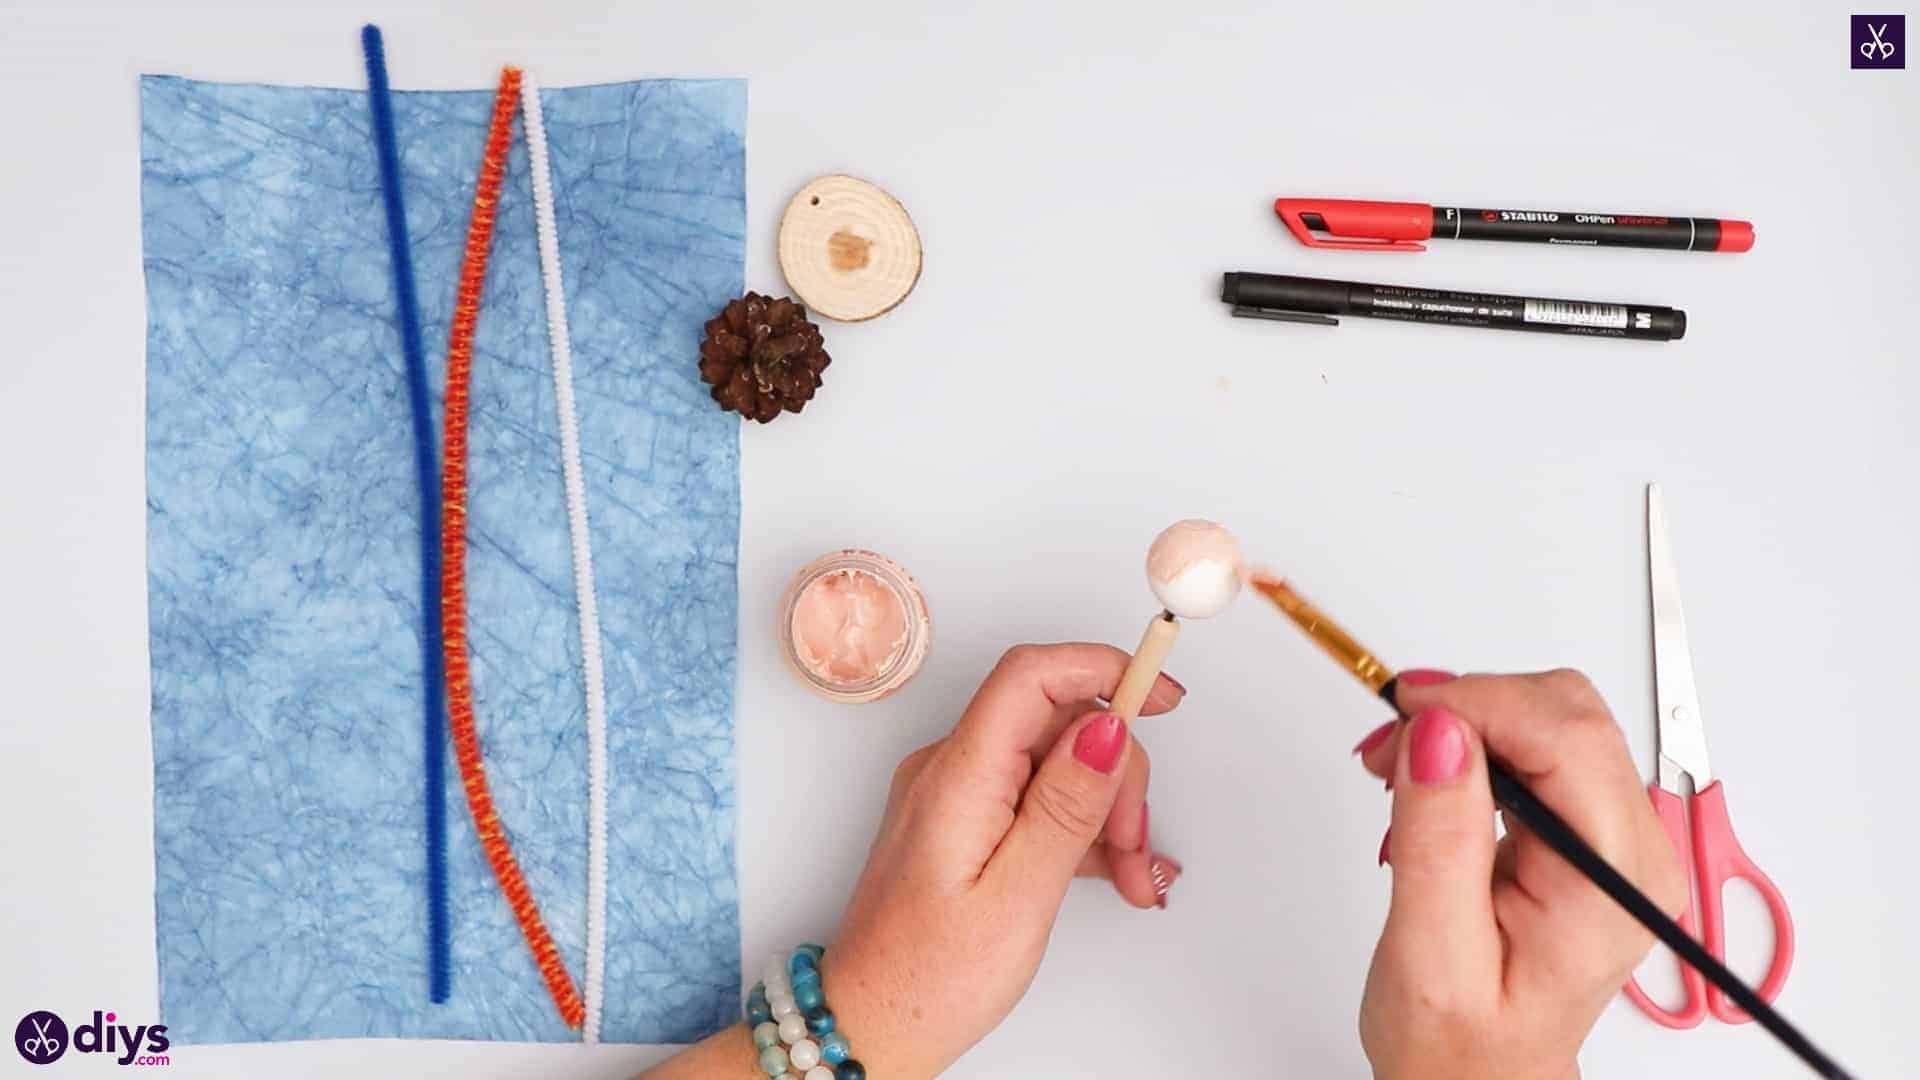
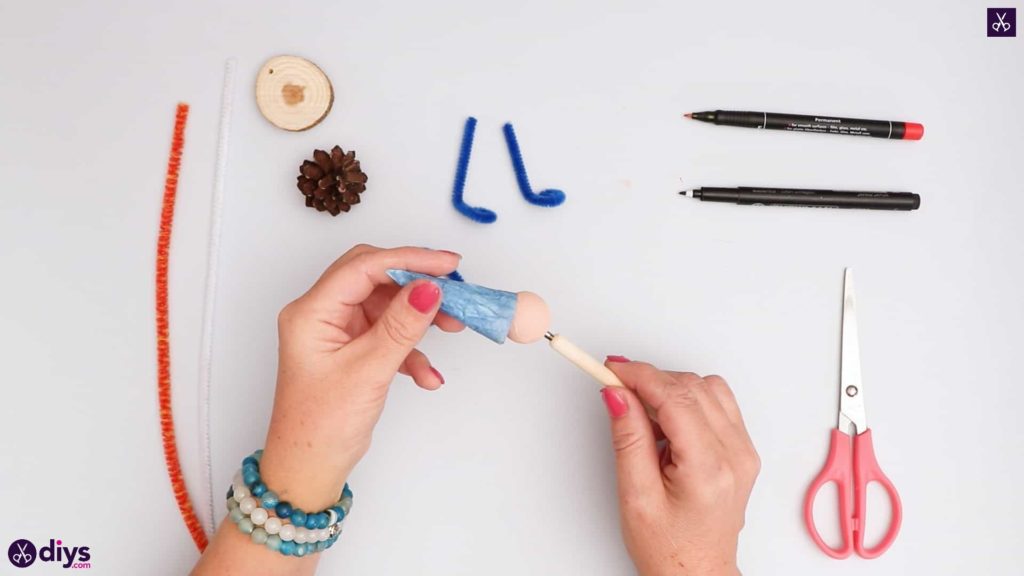
Step 2: paint the head
Poke your dotting tool into your spun cotton ball and then use your paintbrush to paint the entire thing light pink. Set it aside to dry. Set it aside to dry.

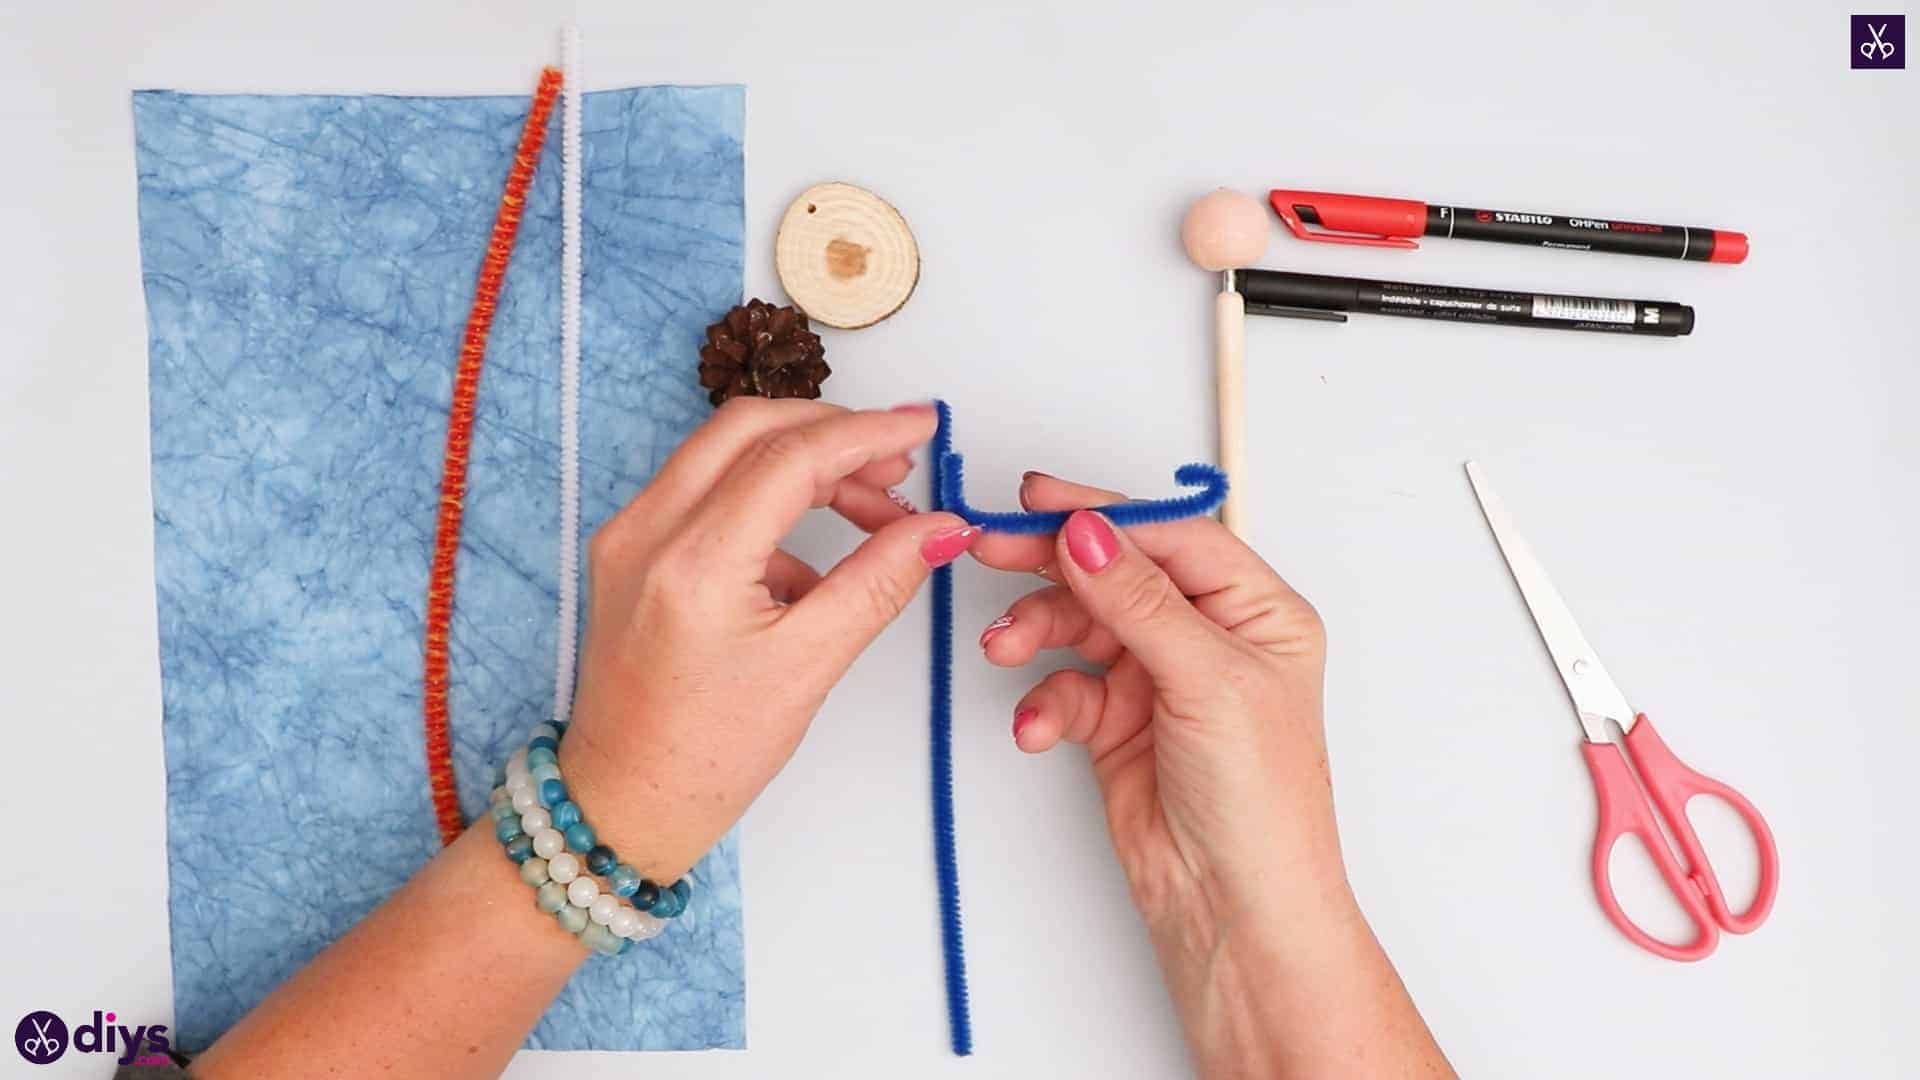
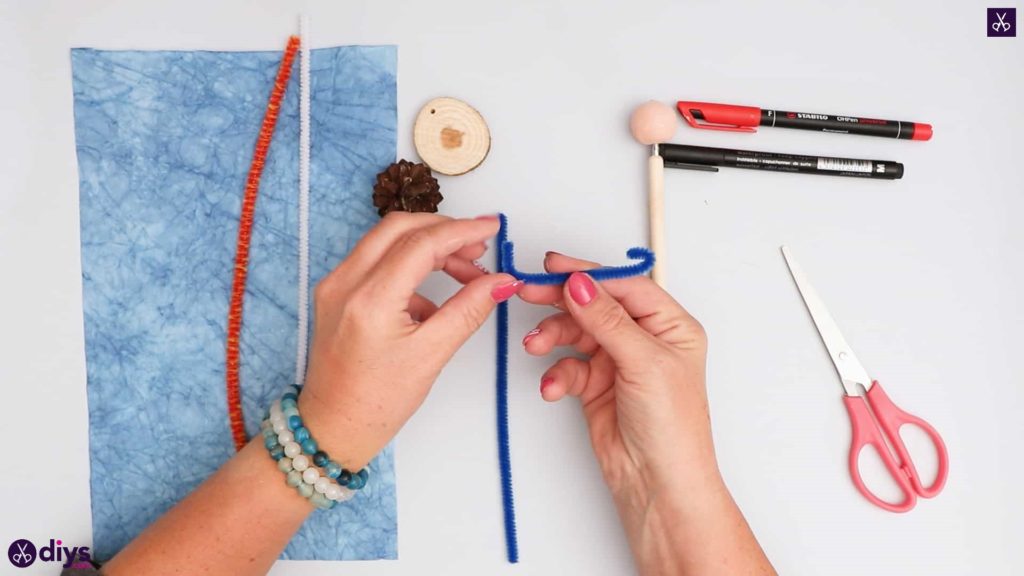
Step 3: make the hands and arms
Cut a piece about two inches long off your blue pipe cleaner. Turn the ends of this new piece inward, making each one look like a curl. Then bend the piece in half, not creased sharply into a V-shape but more arced into a U-shape. This piece will be your gnome’s hands and arms.
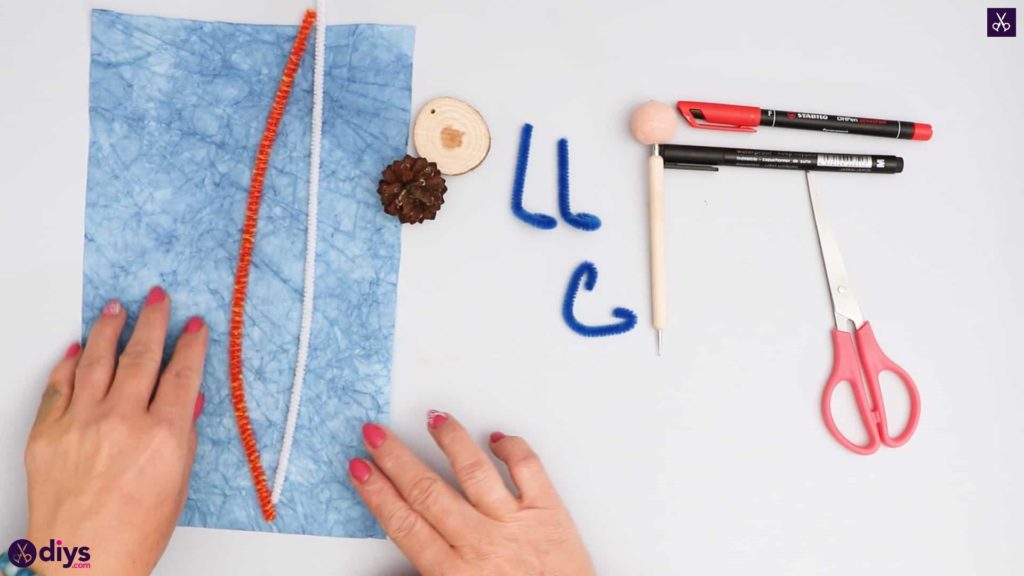
Step 4: make the legs and feet
Cut what’s left of your original piece in half. Curl one end of each of these pieces inwards again, creating more of a spiral now than just a curl but leaving the other end of each piece straight. These will be your gnome’s legs and feet.
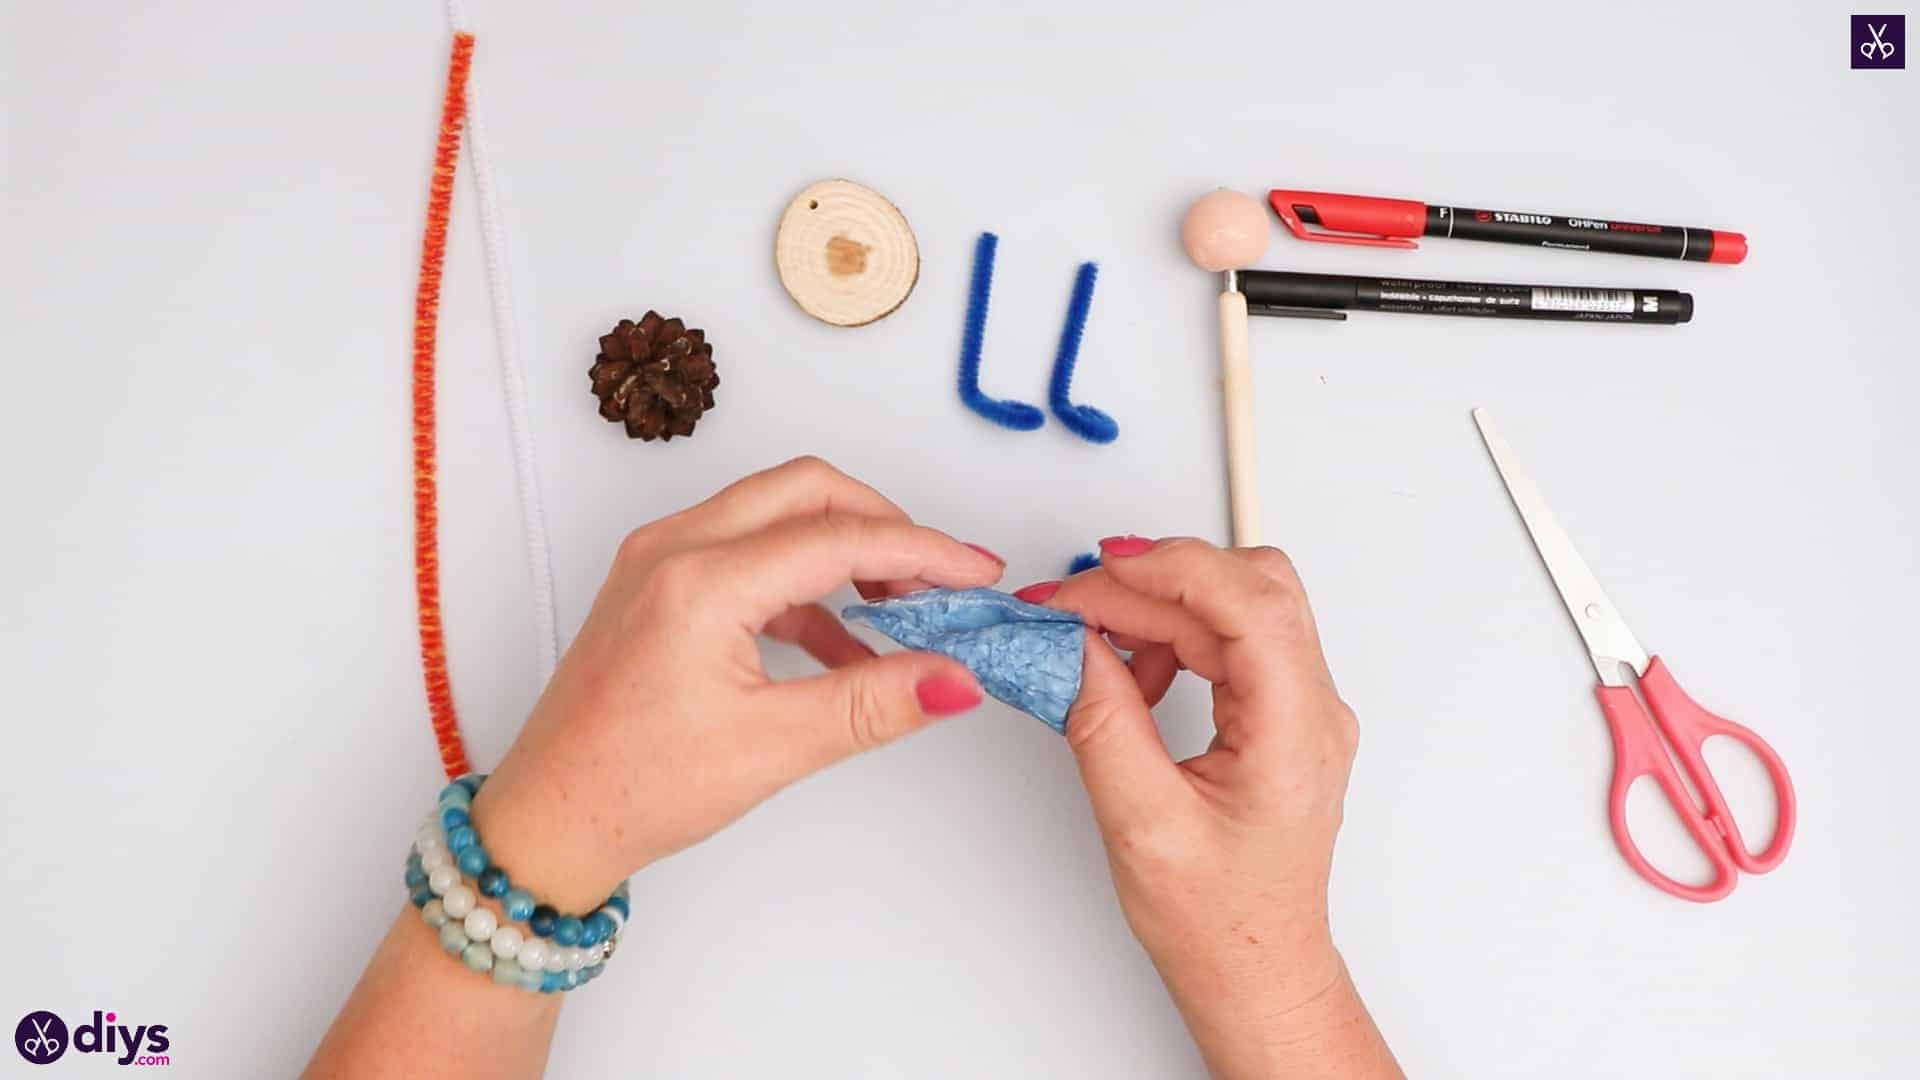
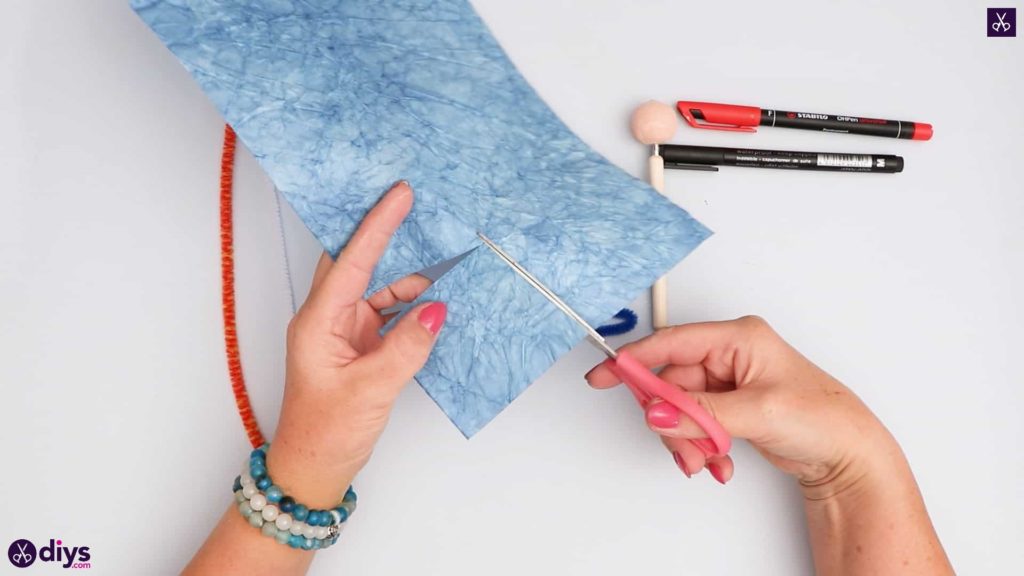
Step 5: use the blue paper
Cut a square piece about two inches by two inches from the corner of your piece of blue paper. Then, starting at one corner and arcing over to the one diagonally across from it, cut a curved line that rounds off the corner that sits between the two.
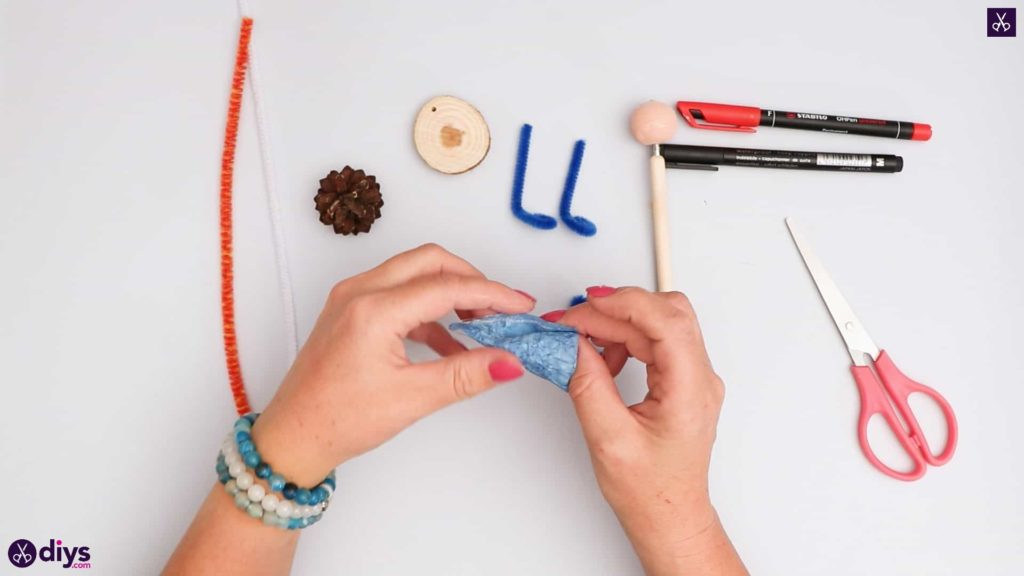
Step 6: glue the hat
Apply hot glue along one straight edge of your new blue shape, from pointed tip to rounded off edge. Curl the other edge inward, rolling it towards the edge with the glue. You should see a cone shape forming, with a pointed tip at one end and a circular opening at the other end. Stick the glued edge down where it meets in your curling. This will be your gnome’s hat!
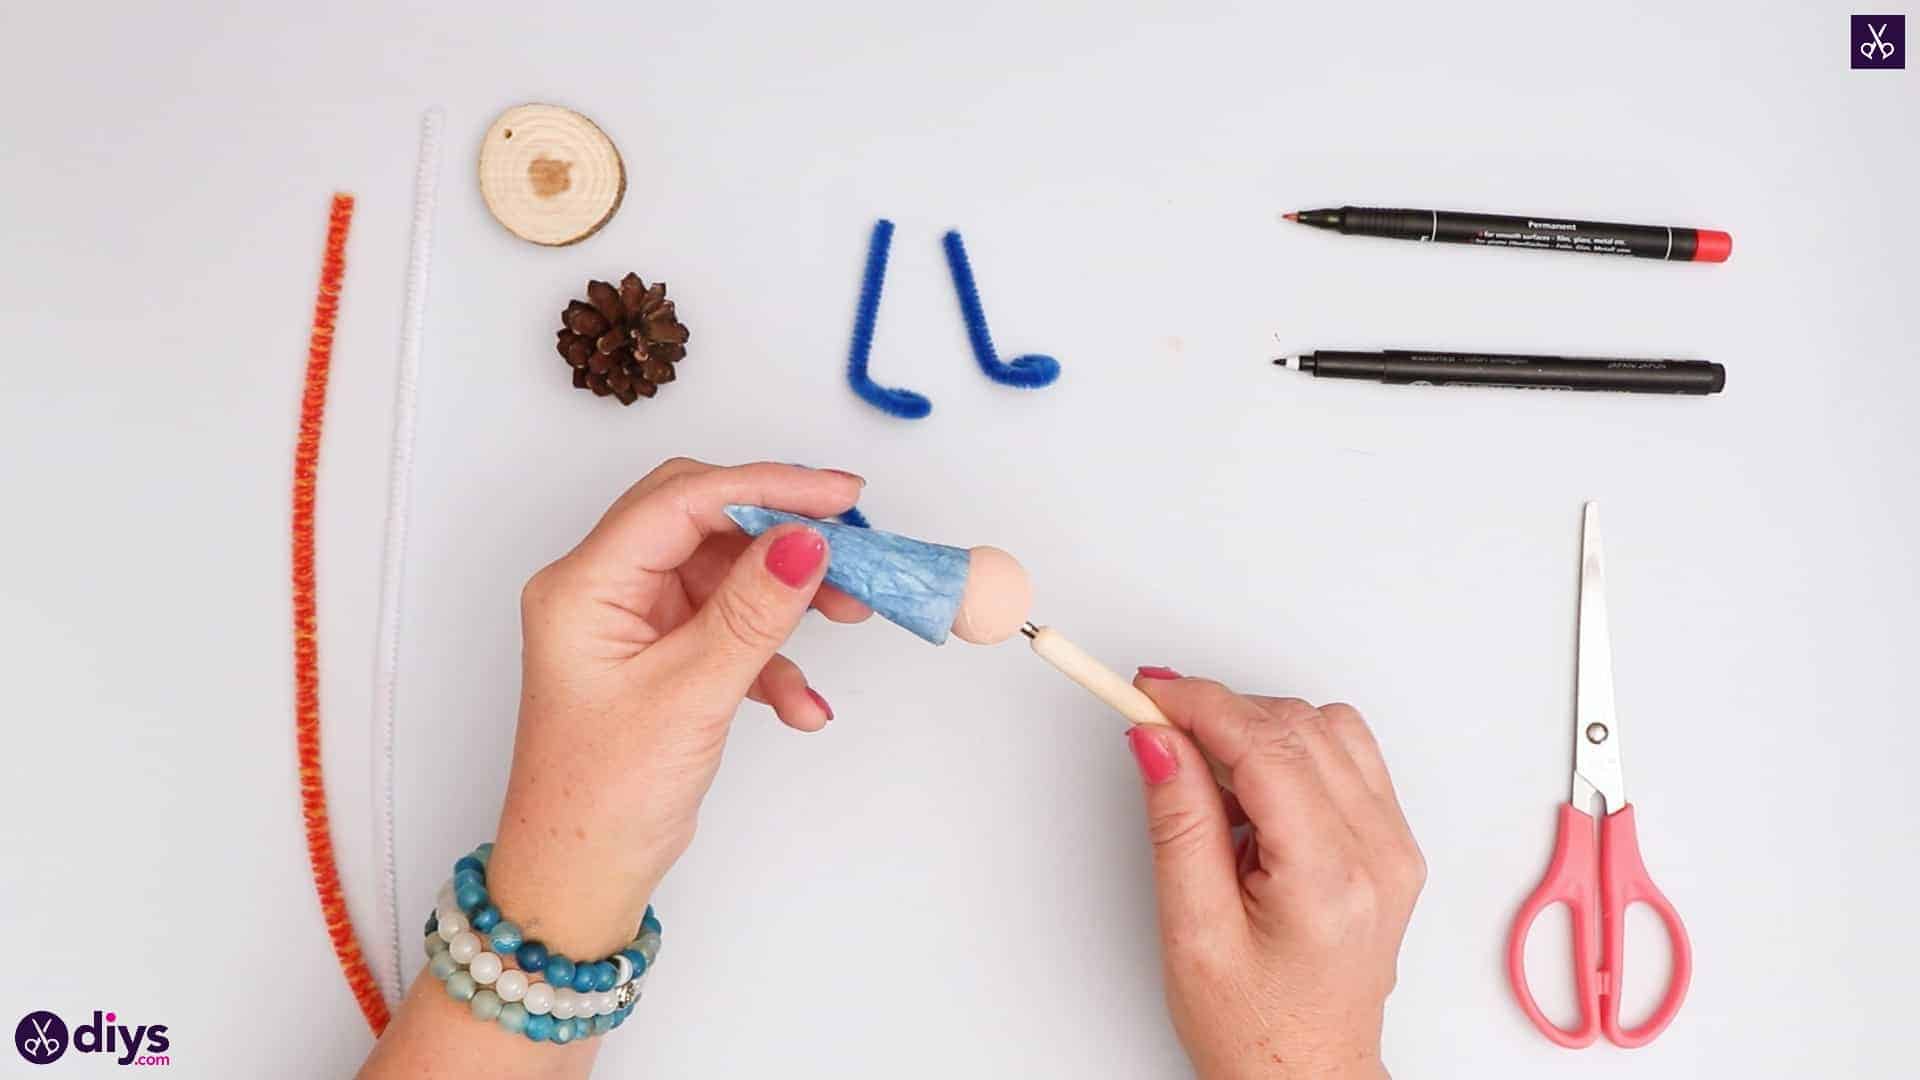
Step 7: glue the head
Apply glue in the inside edge of the circular opening and fit the hat onto the gnome’s head, still on your dotting tool.
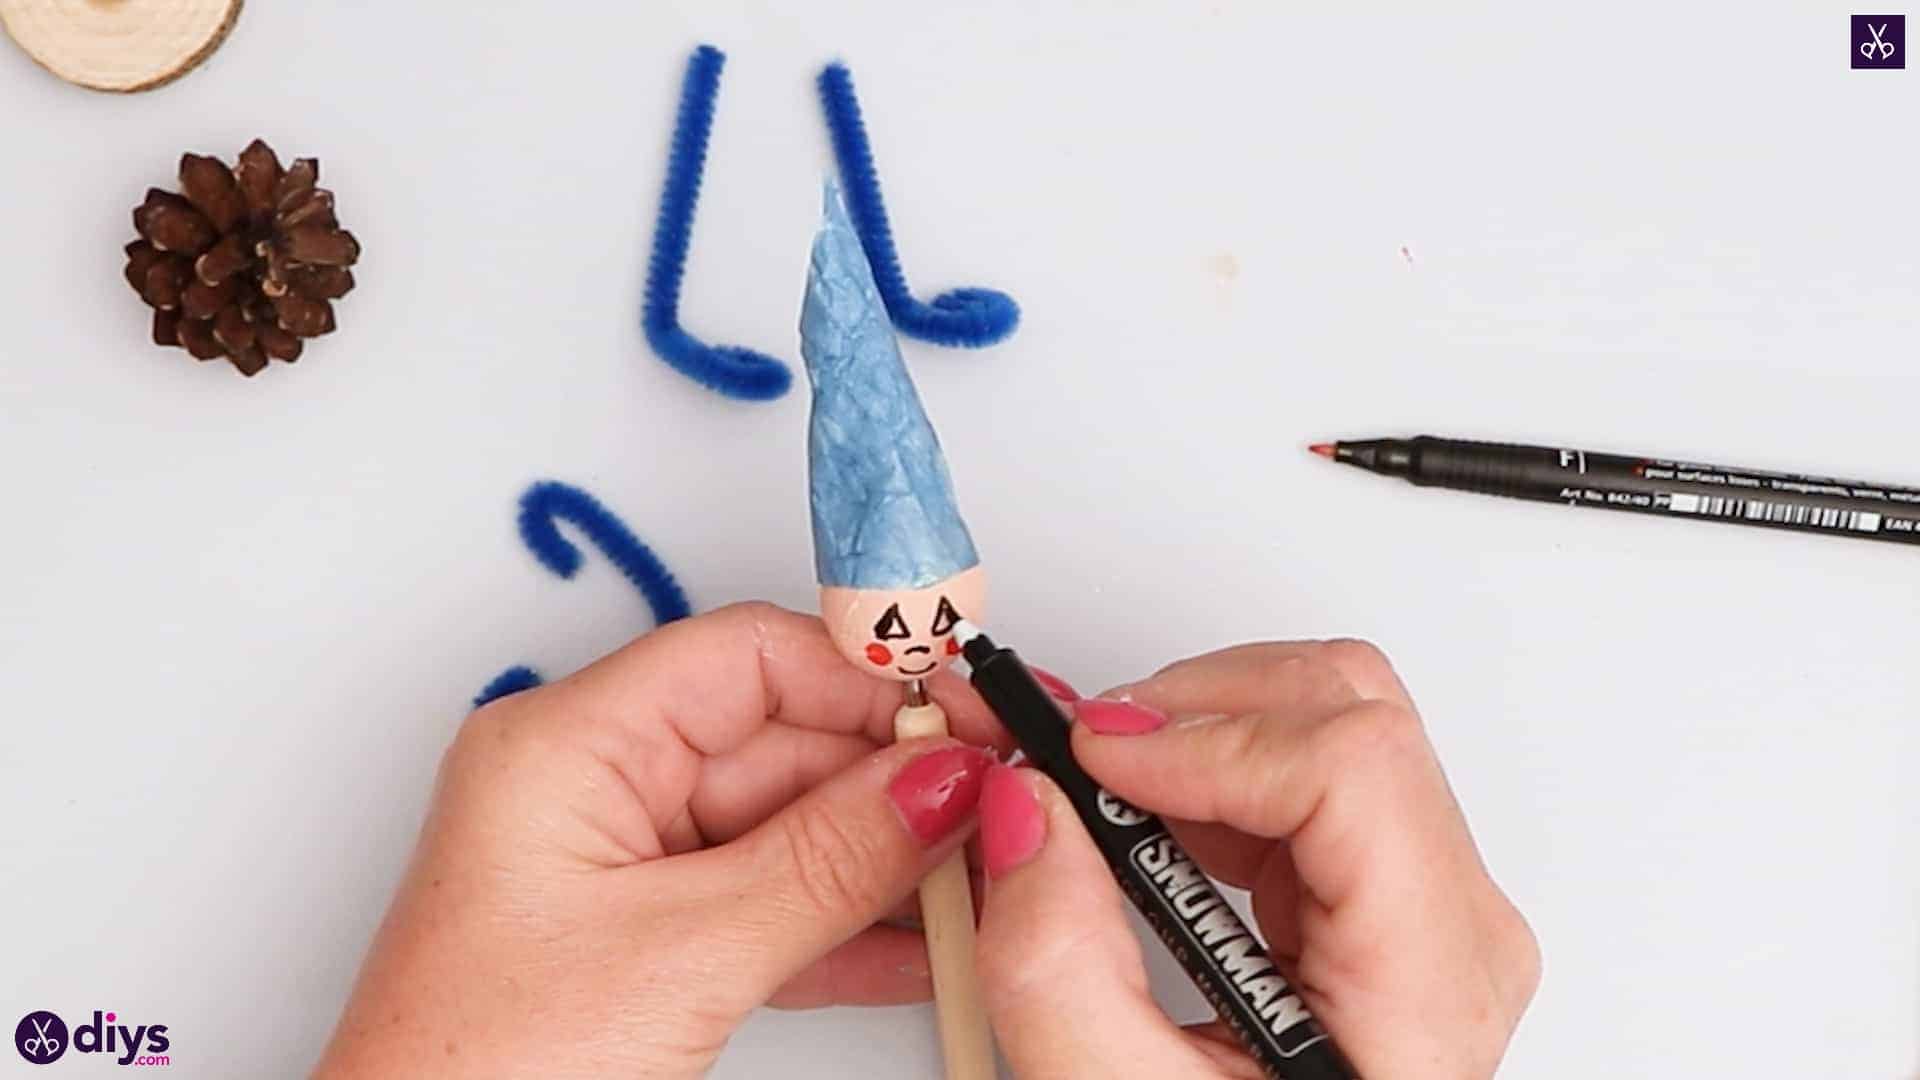
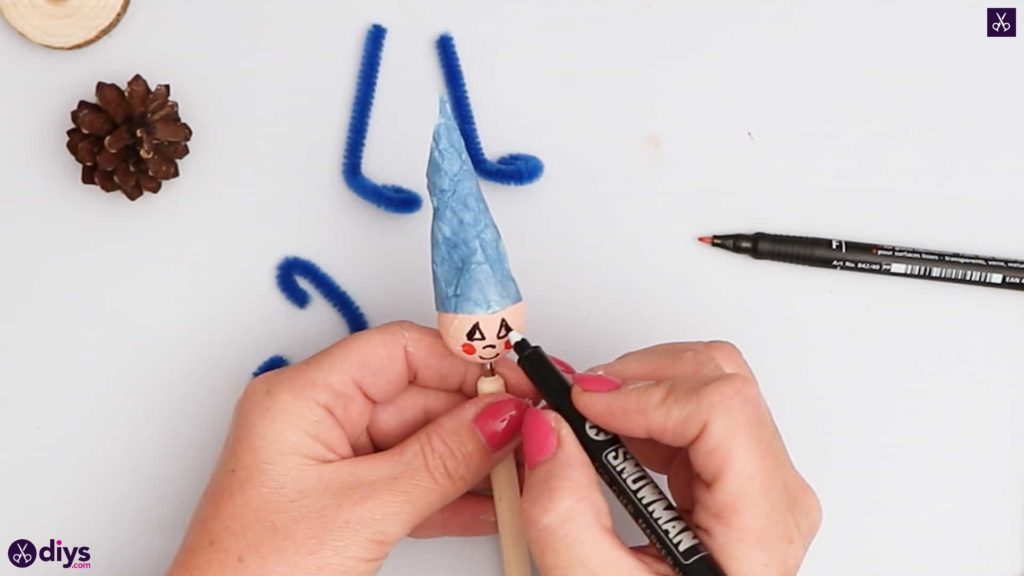
Step 8: draw the face
Use your markers or felt tipped pens to draw your gnome’s face on the painted spun cotton ball. I used black for the eyes, nose, and mouth and red for the cheeks.
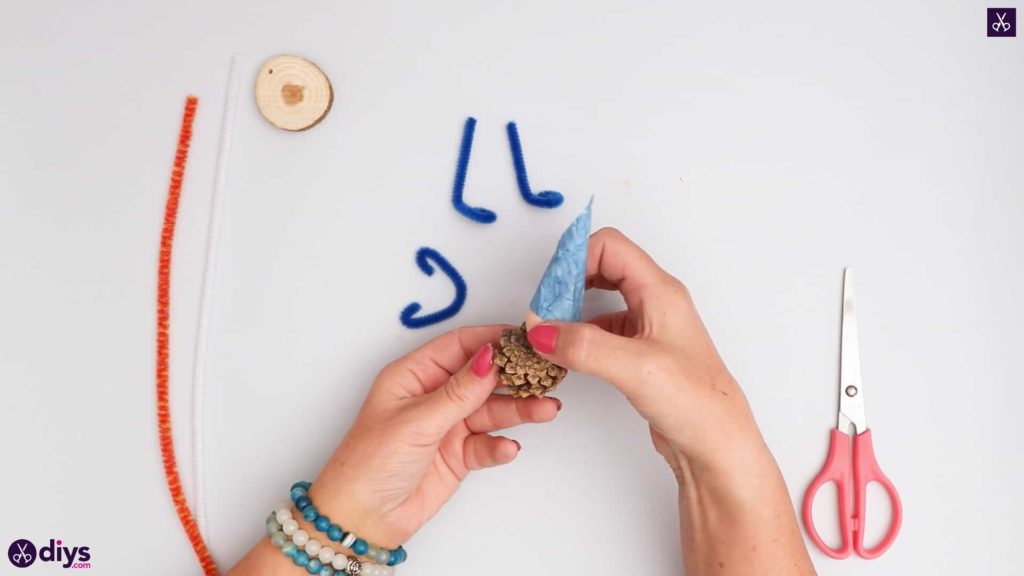
Step 9: glue the pinecone
Turn your pinecone upside down so the flattest part is at the top and apply hot glue. Stick your gnome’s head down there.
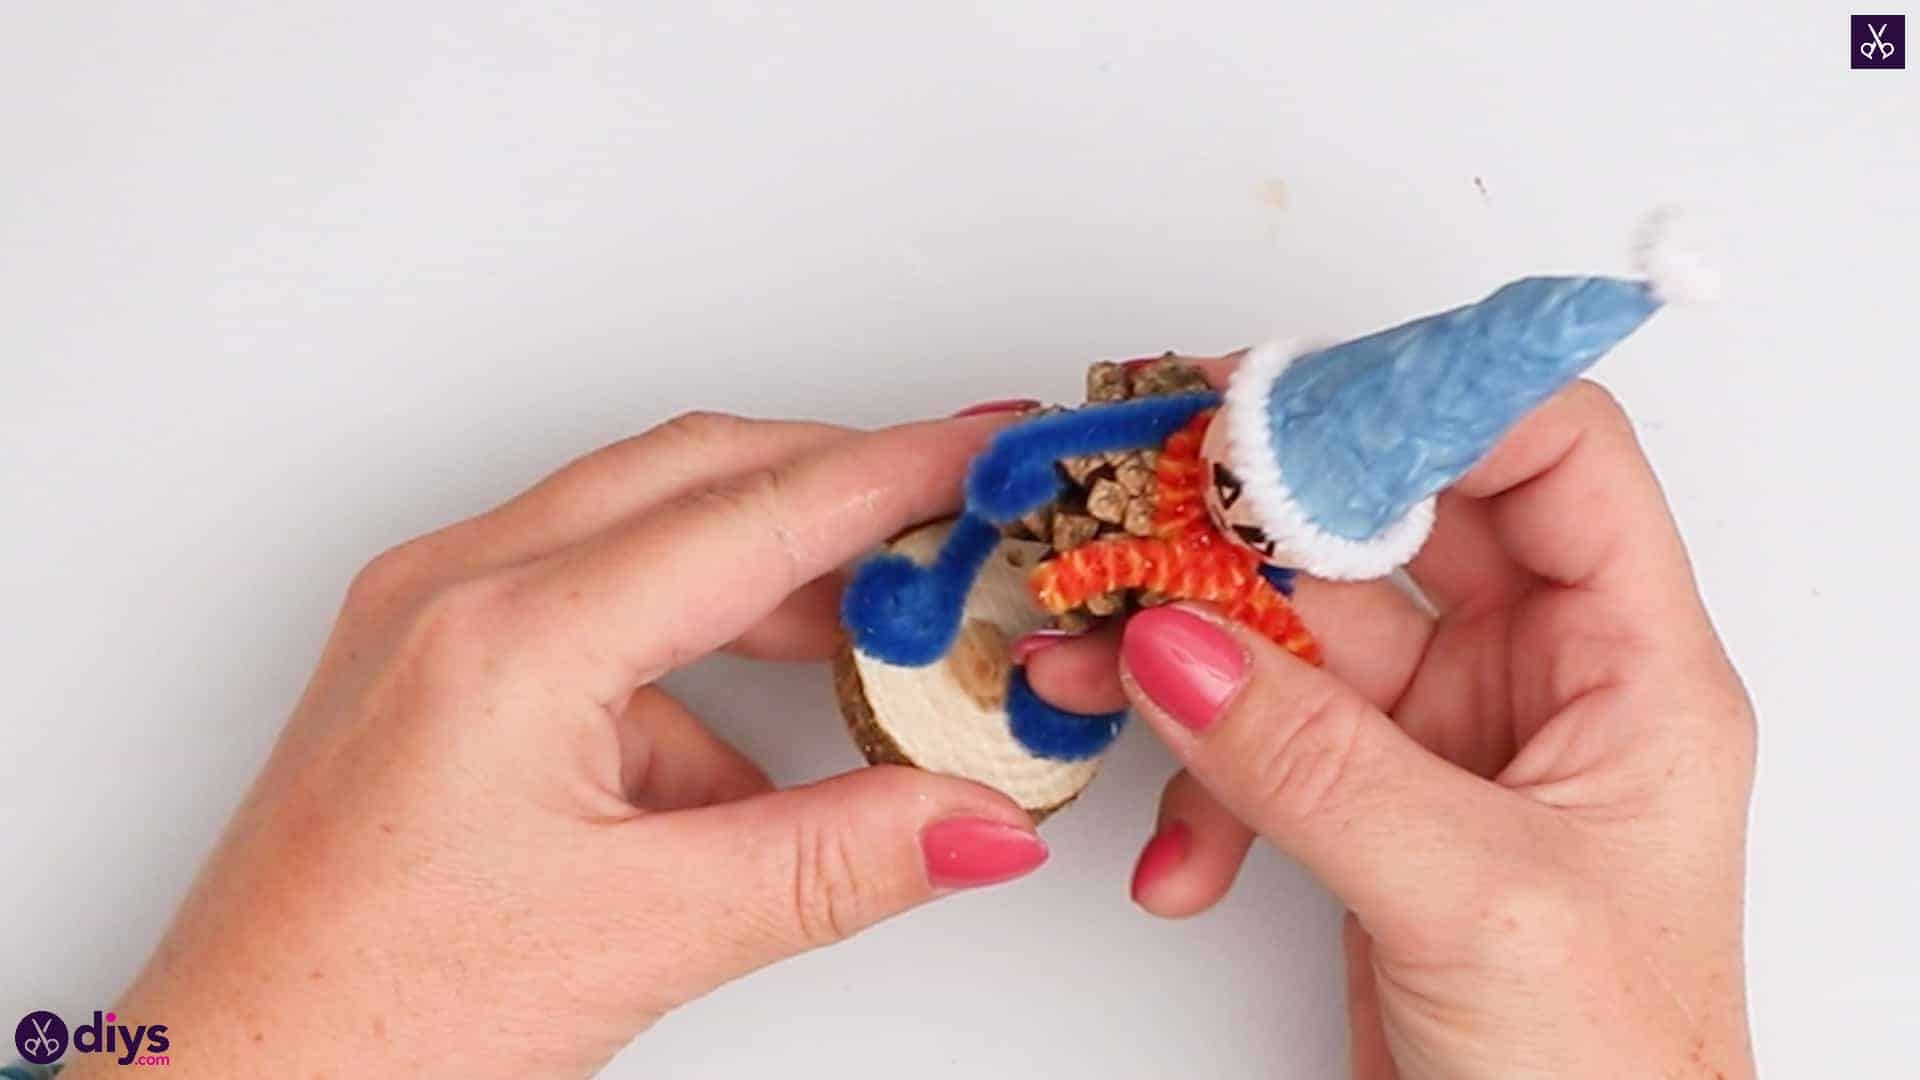
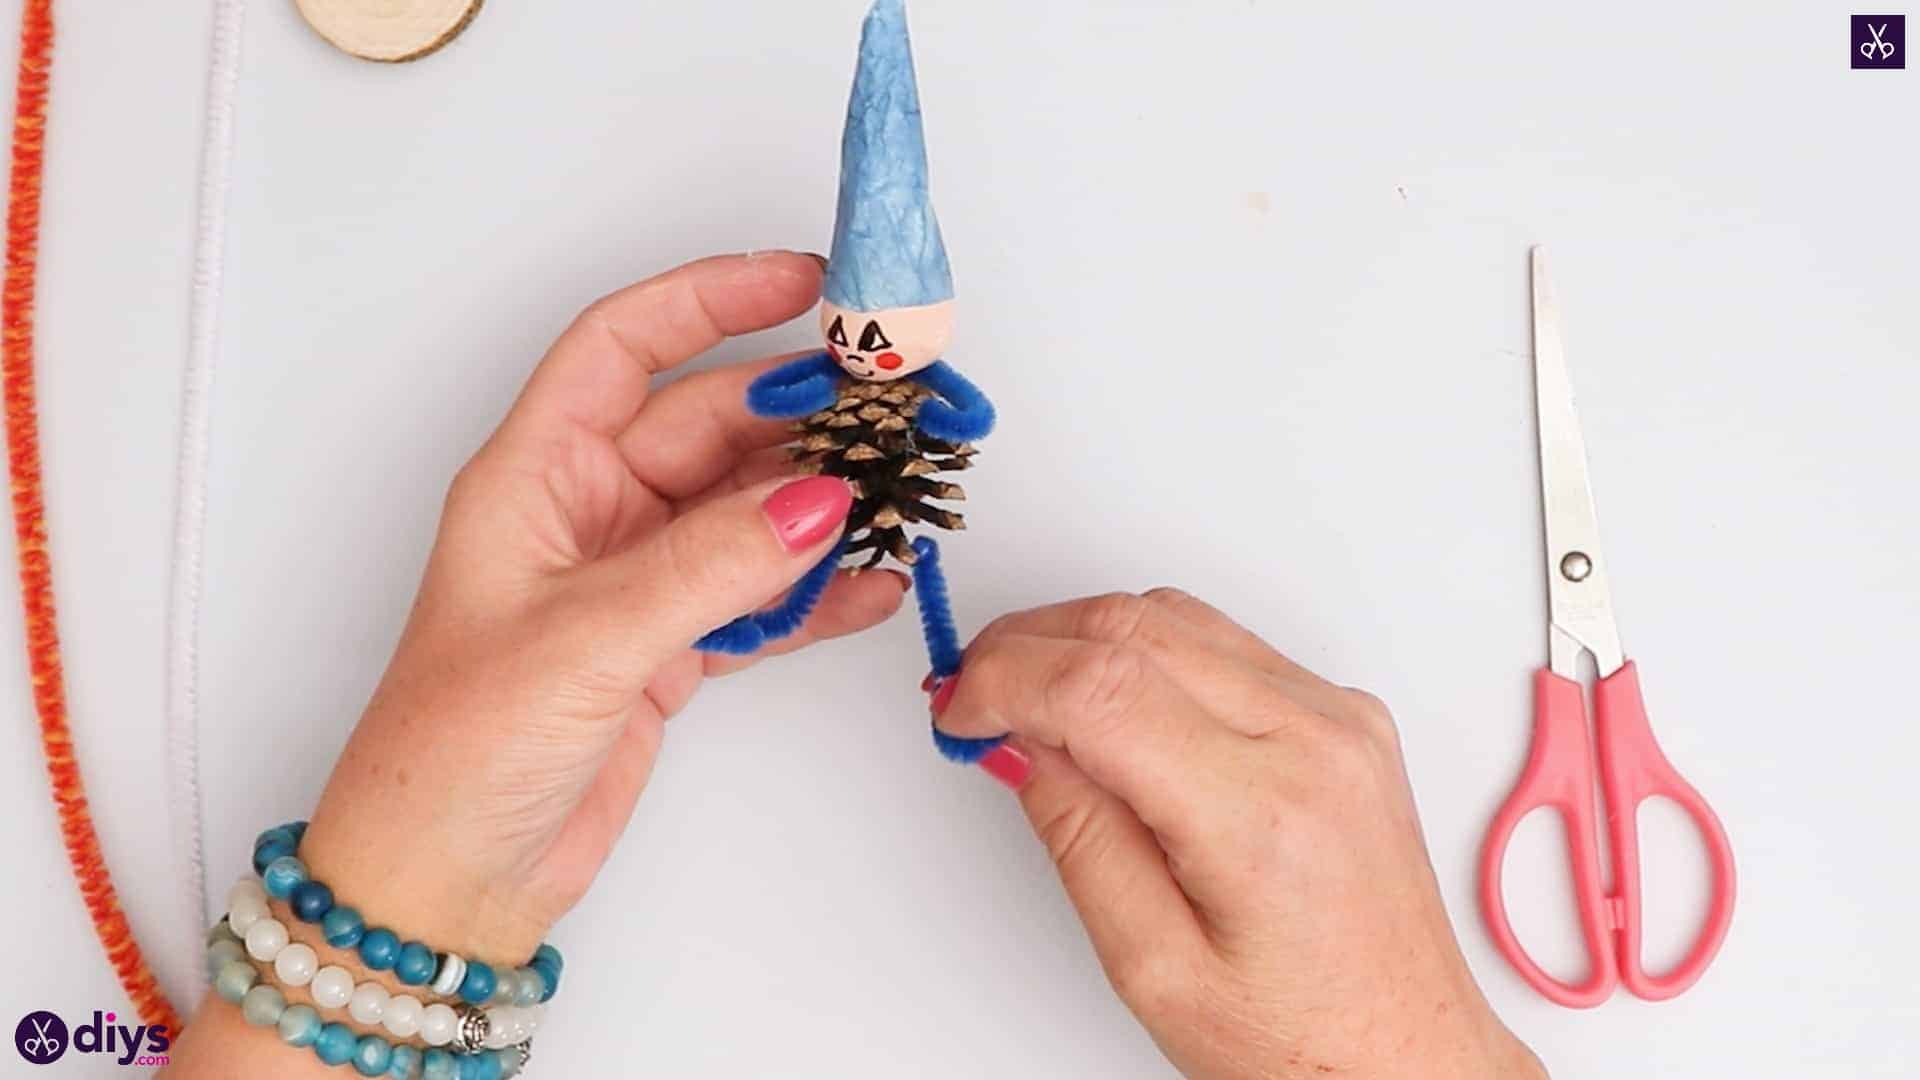
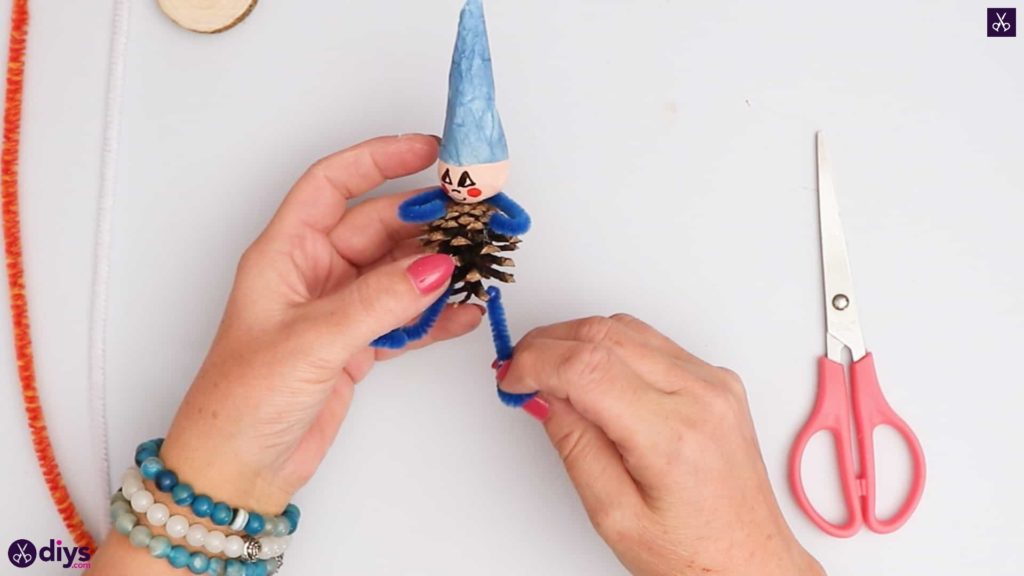
Step 10: add the limbs
Apply hot glue to the bend in the U-shaped arm piece you made earlier and stick it behind the gnome’s head, where the spun cotton ball and the pinecone meet. Then apply hot glue to the uncurled tips of the pipe cleaner legs you made earlier and stick them to the pointed bottom of the pinecone, between the pieces.
Step 11: details
Cut a two inch piece from your orange pipe cleaner and apply glue in the middle. Stick it down behind the gnome’s head again, around the same spot as where you stuck the blue pipe cleaner arms. Bend the ends of the orange piece around the front of the gnome’s neck and twist them together. Your gnome now has a scarf!
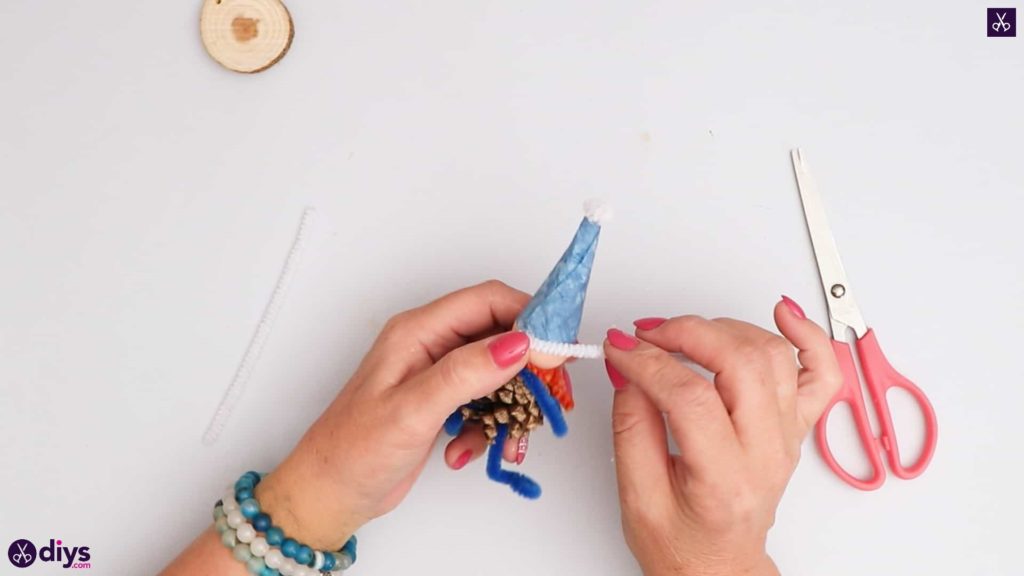
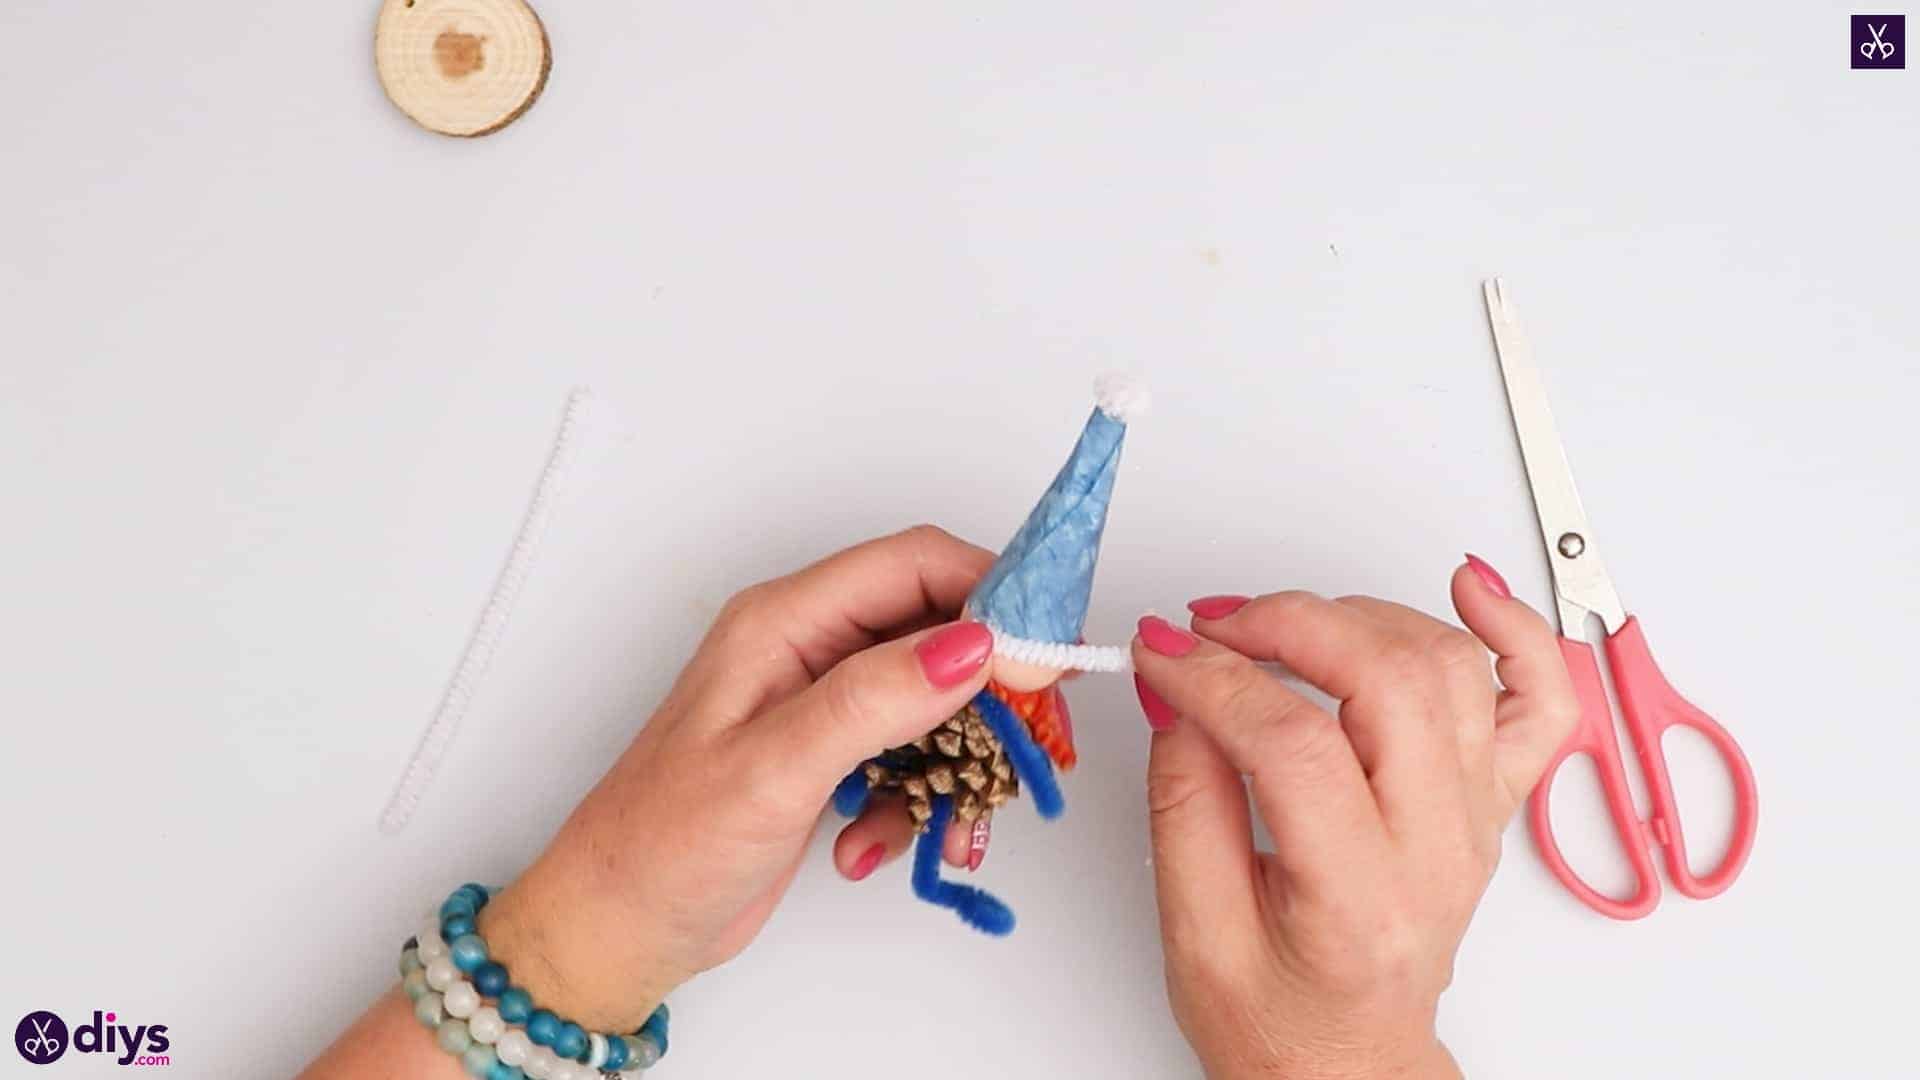
Step 12: finishing up
Cut a one inch piece from the end of your white pipe cleaner and curl it into a little ball. Apply glue to the bottom of the ball and stick it to the tip of the blue hat. Next, cut another piece of white pipe cleaner about an inch or so long. Apply glue to the back of the gnome’s head near the edge of the blue hat where it meets the spun cotton ball and stick one end of your white pipe cleaner down. Curl it carefully all the way around the rest of the hat’s edge until it meets again with its other end at the back. Trim off any excess and glue your loose end down.
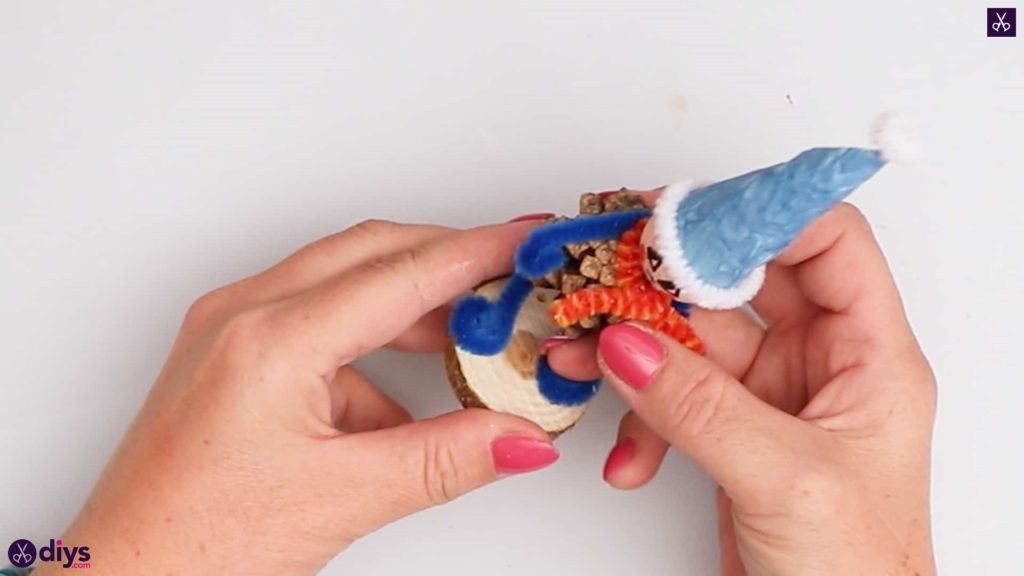
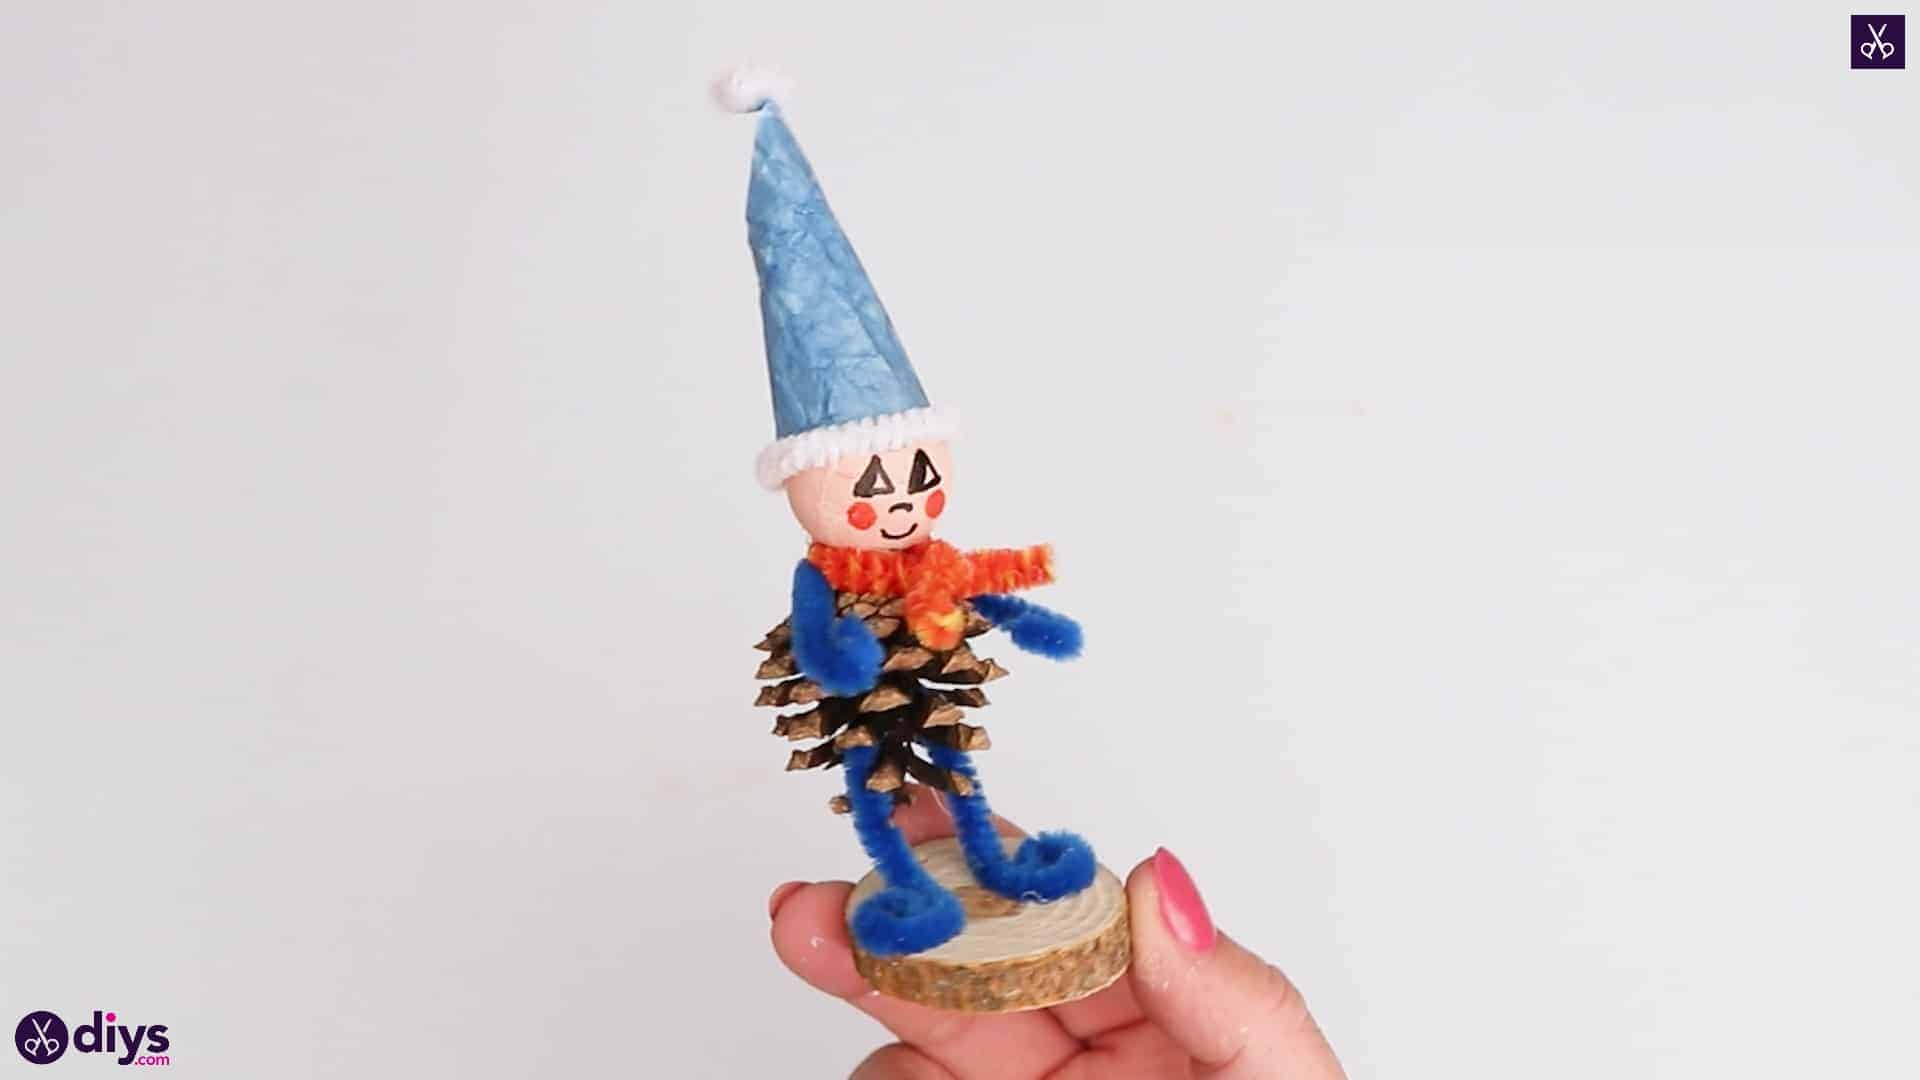
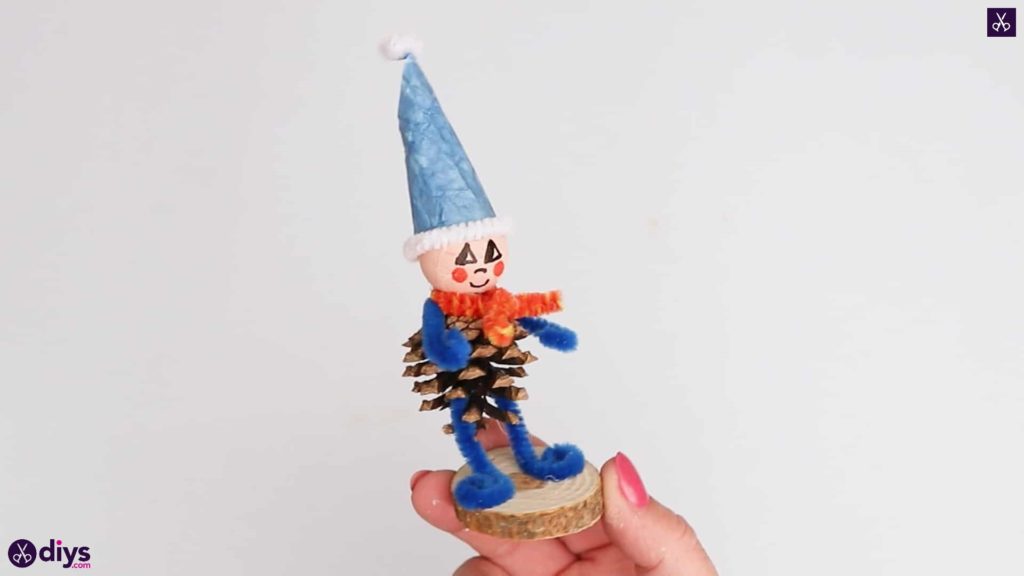
Step 13: voila!
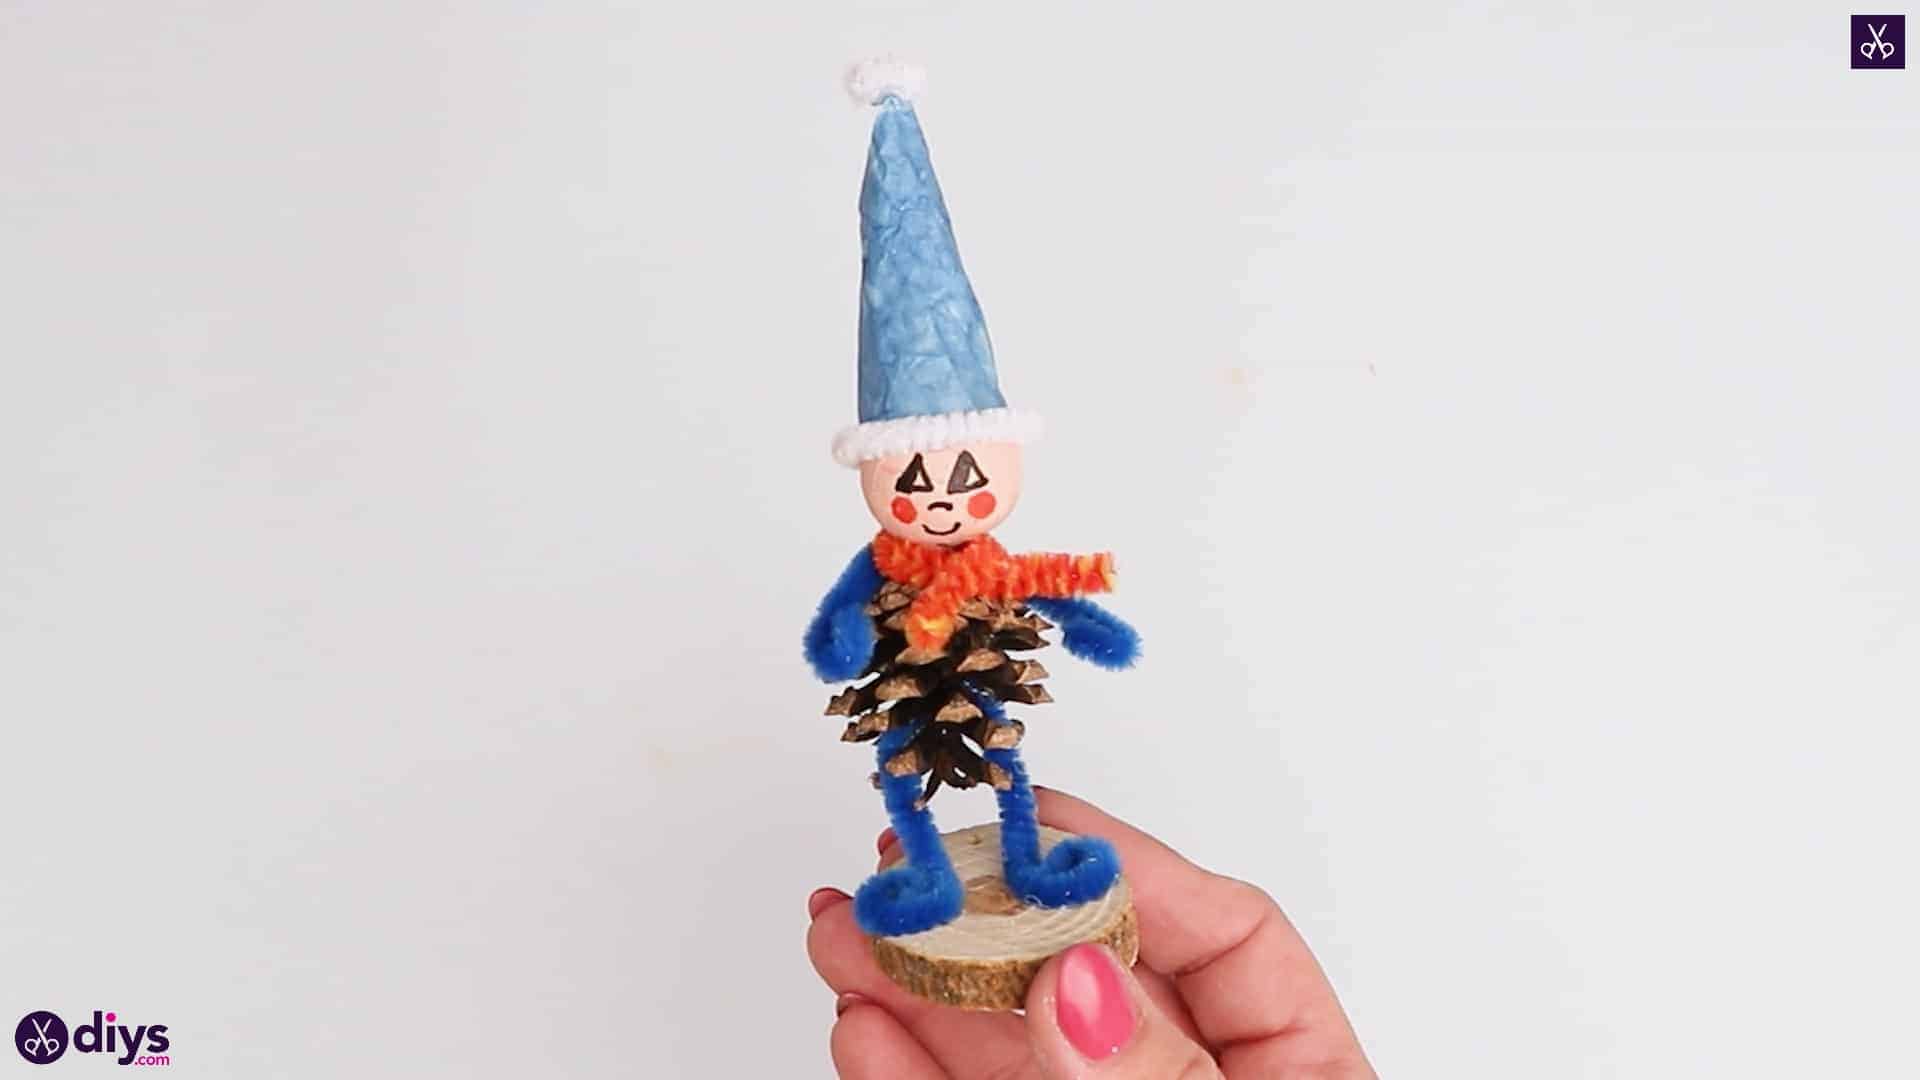
Apply hot glue to the bottom of your gnome’s feet and stick it in place on the wooden disc. Feel free to bend and shape the legs and feet however you need to get the gnome to stand upright the way you want.
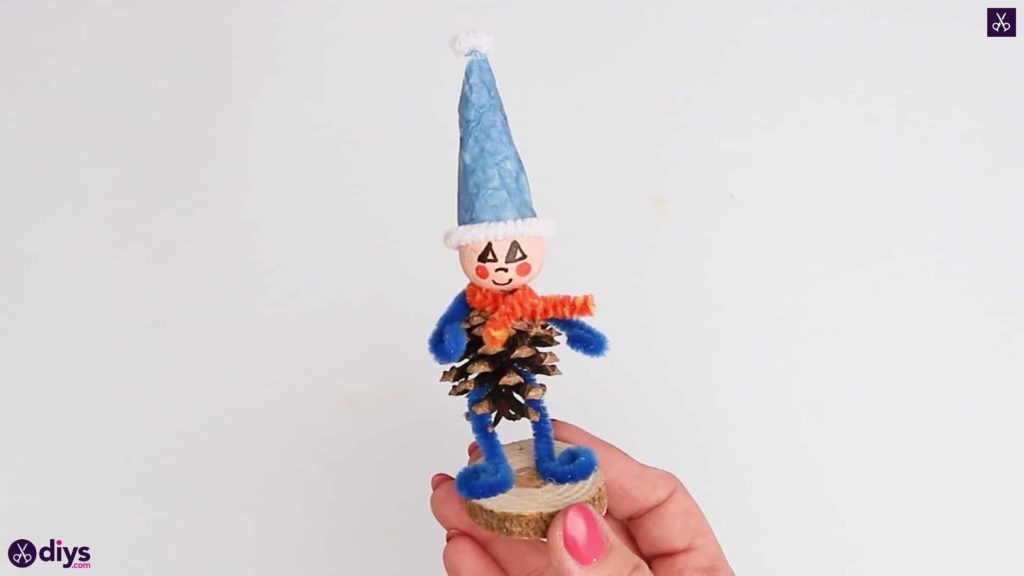
You’re officially done once your gnome can stand on his disc! Just in case you’d like to try this project out for yourself, here’s a fantastic tutorial video to help you!