DIY Floral Wall Hanging
Updated on November 19, 2025


Have you ever thought about the number of things you can do with a silly piece of string? Sure, we get frustrated when an errant string from clothes gets in the way on a daily basis, and we use them to tie things together or close come containers. But string can do so much more, especially if you have any sort of experience with knots.

No, this isn’t just something for a Boy Scout to learn, it’s a valuable tool, even when it comes to crafting. In fact, you can make some beautiful wall décor using string and some knots. Take a look at a little floral wall hanging you can create simply by employing a few strings, some semi-intricate knots, and random craft supplies you have laying around.
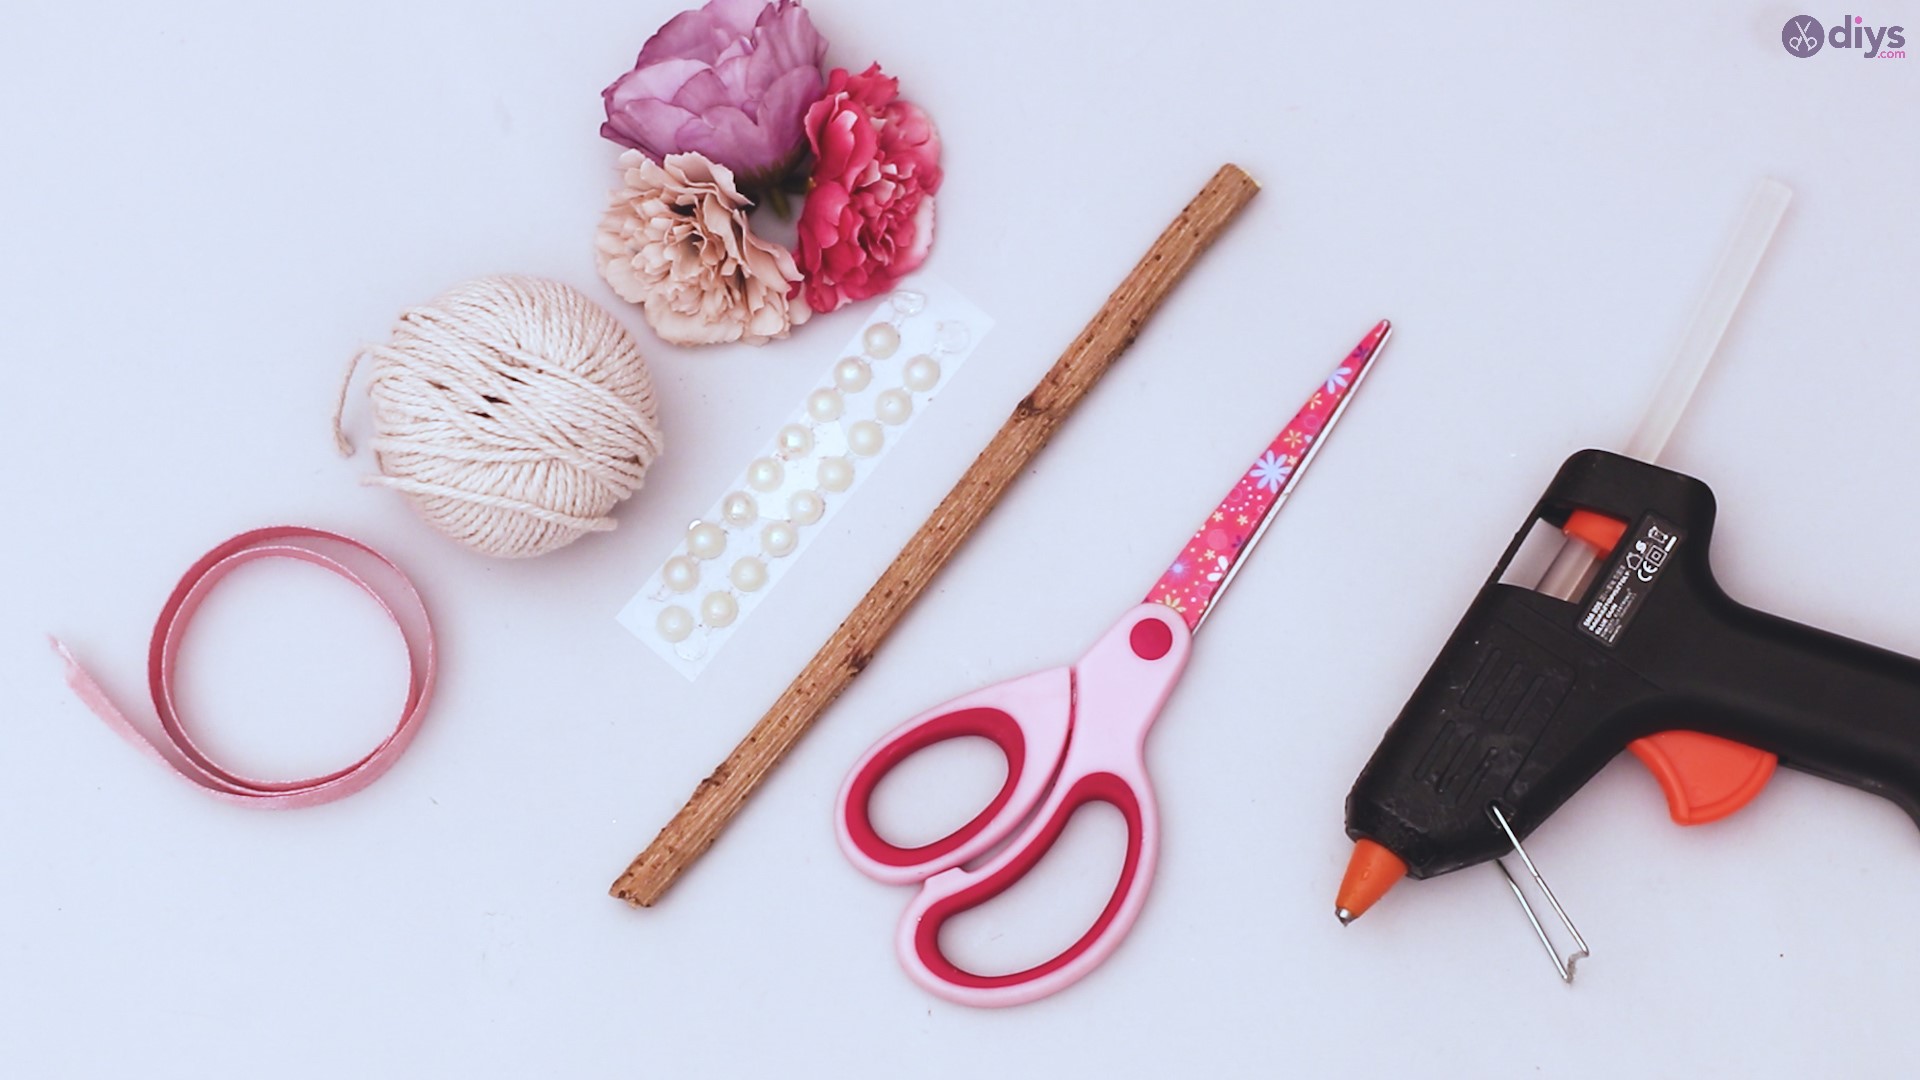
Materials you’ll need for a beautiful Floral Wall Hanging:
- artificial flowers
- rope
- branch
- scissors
- decor bead
- glue gun
- silk ribbon
How to craft a floral wall decor.

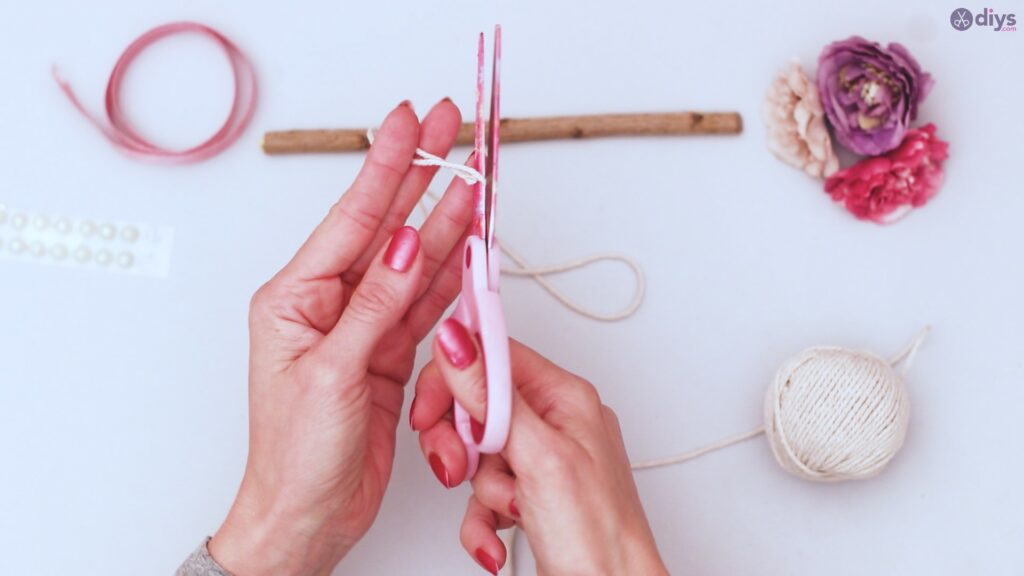
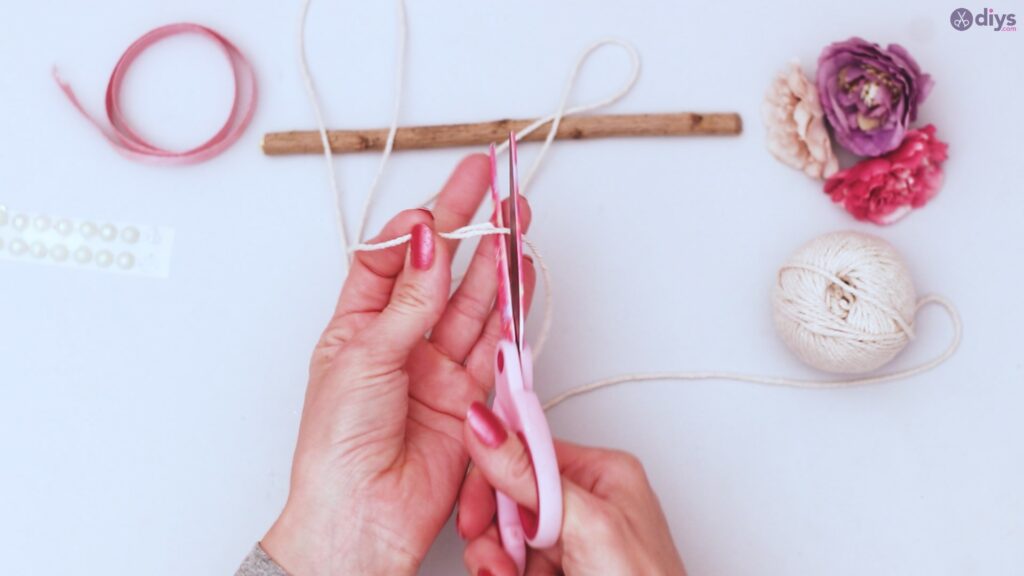
Step 1: The First Cut
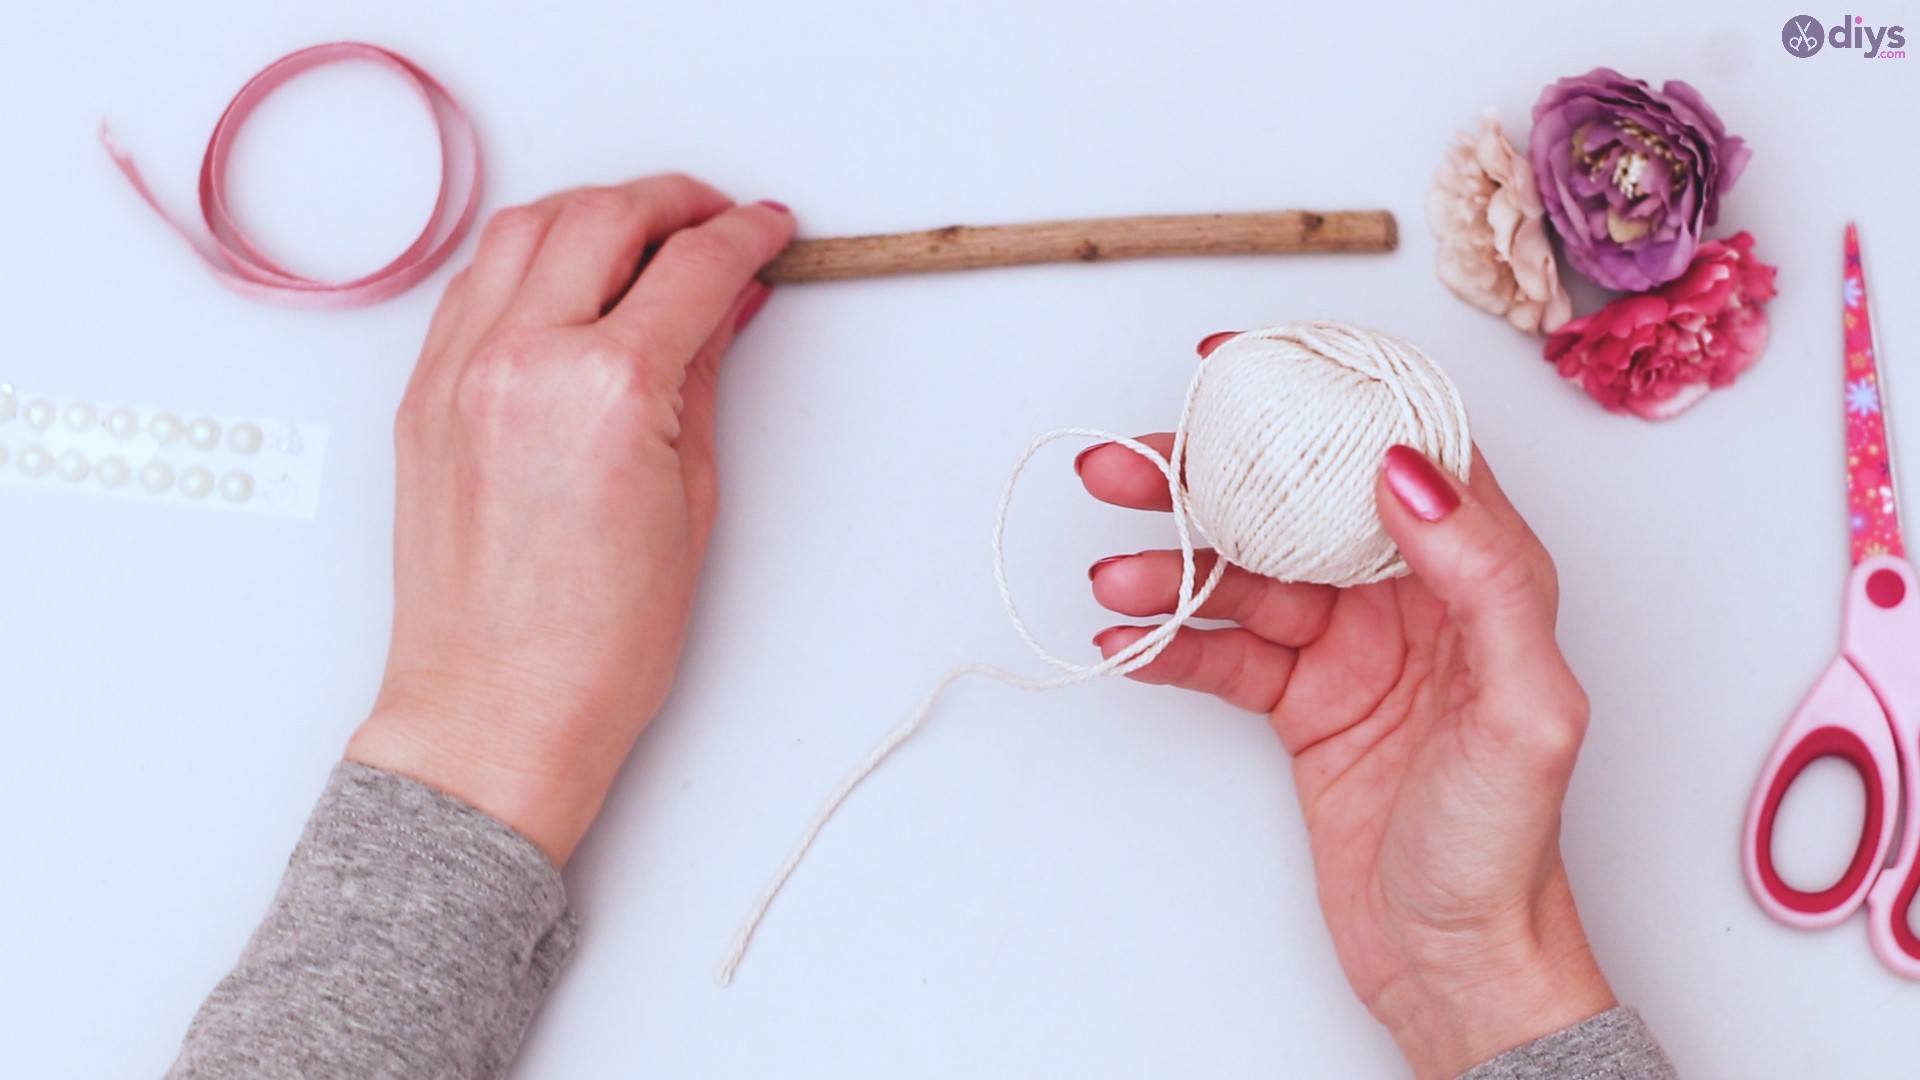
When you start this project, you’ll want to decide how long you want the string to be. This, in turn, might depend on the length of your branch, since you want it to be proportionate. Here, I used a branch that’s about 9 inches long and cut my first 4 pieces of string to be about 30 inches, in case I needed a little excess.

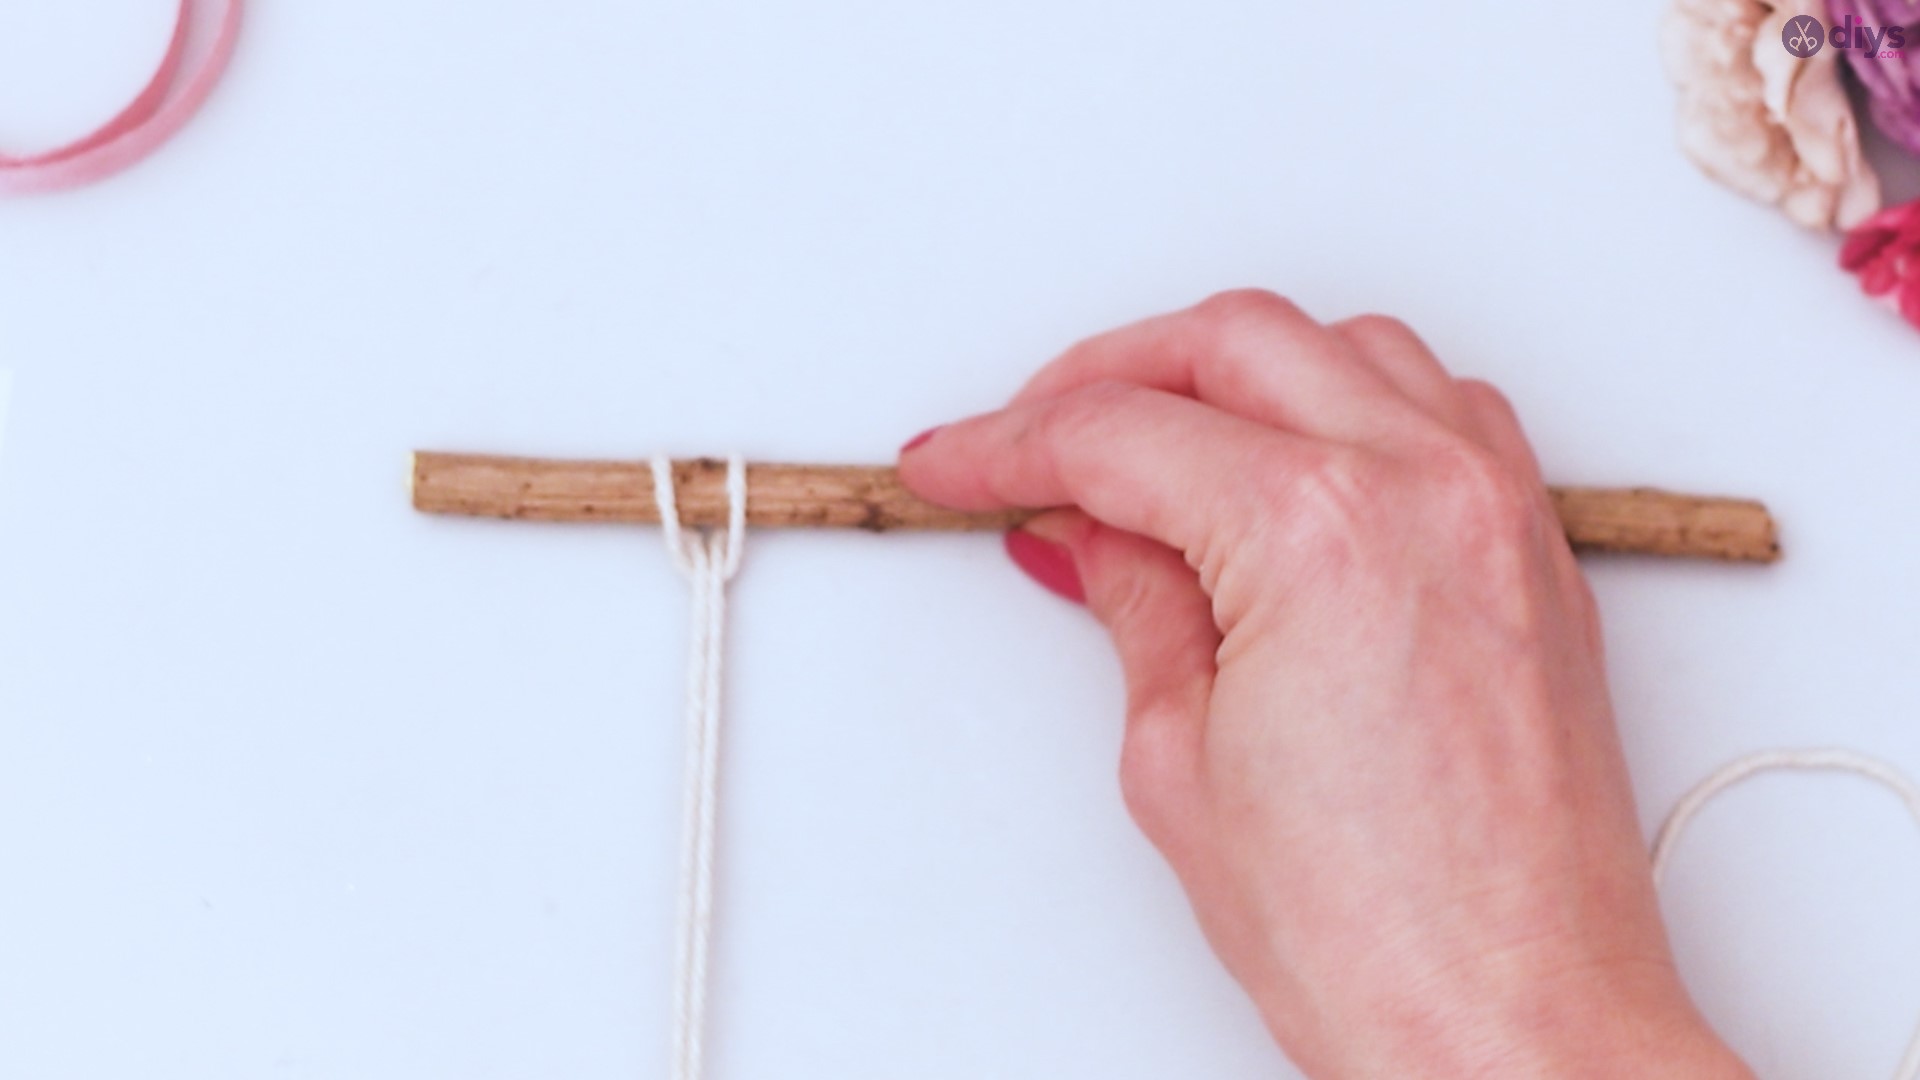
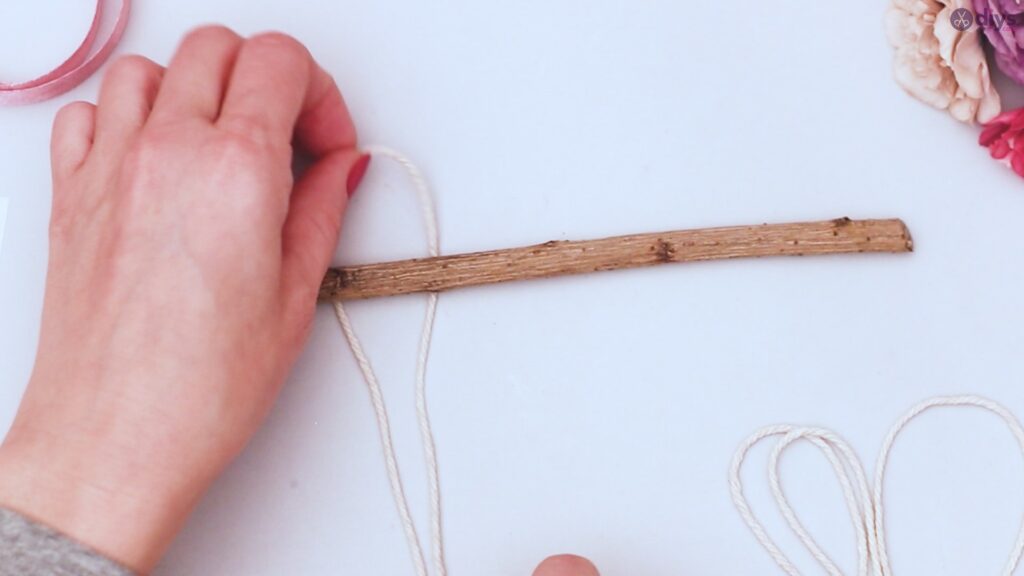
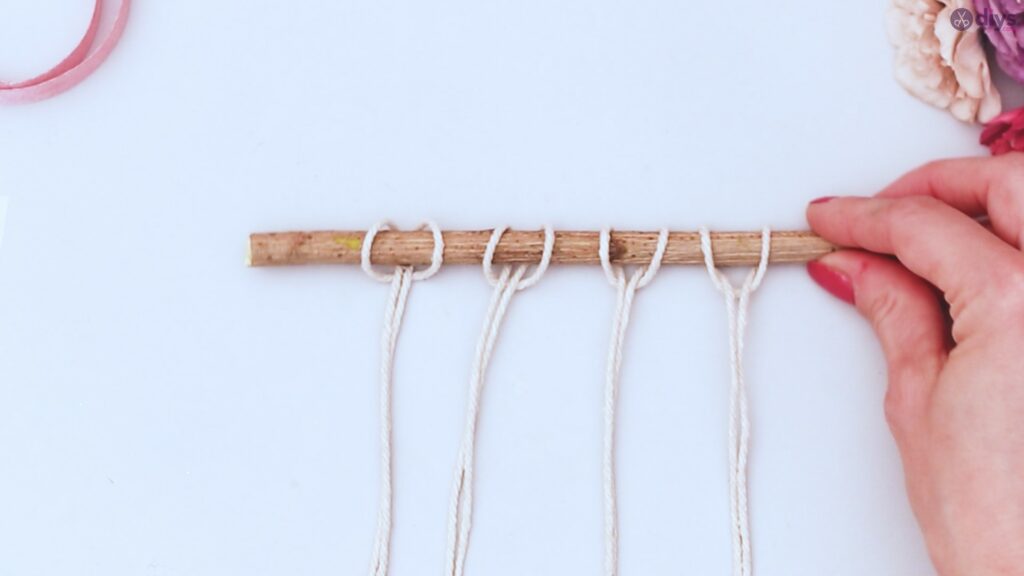
Step 2: Prepare the Branch
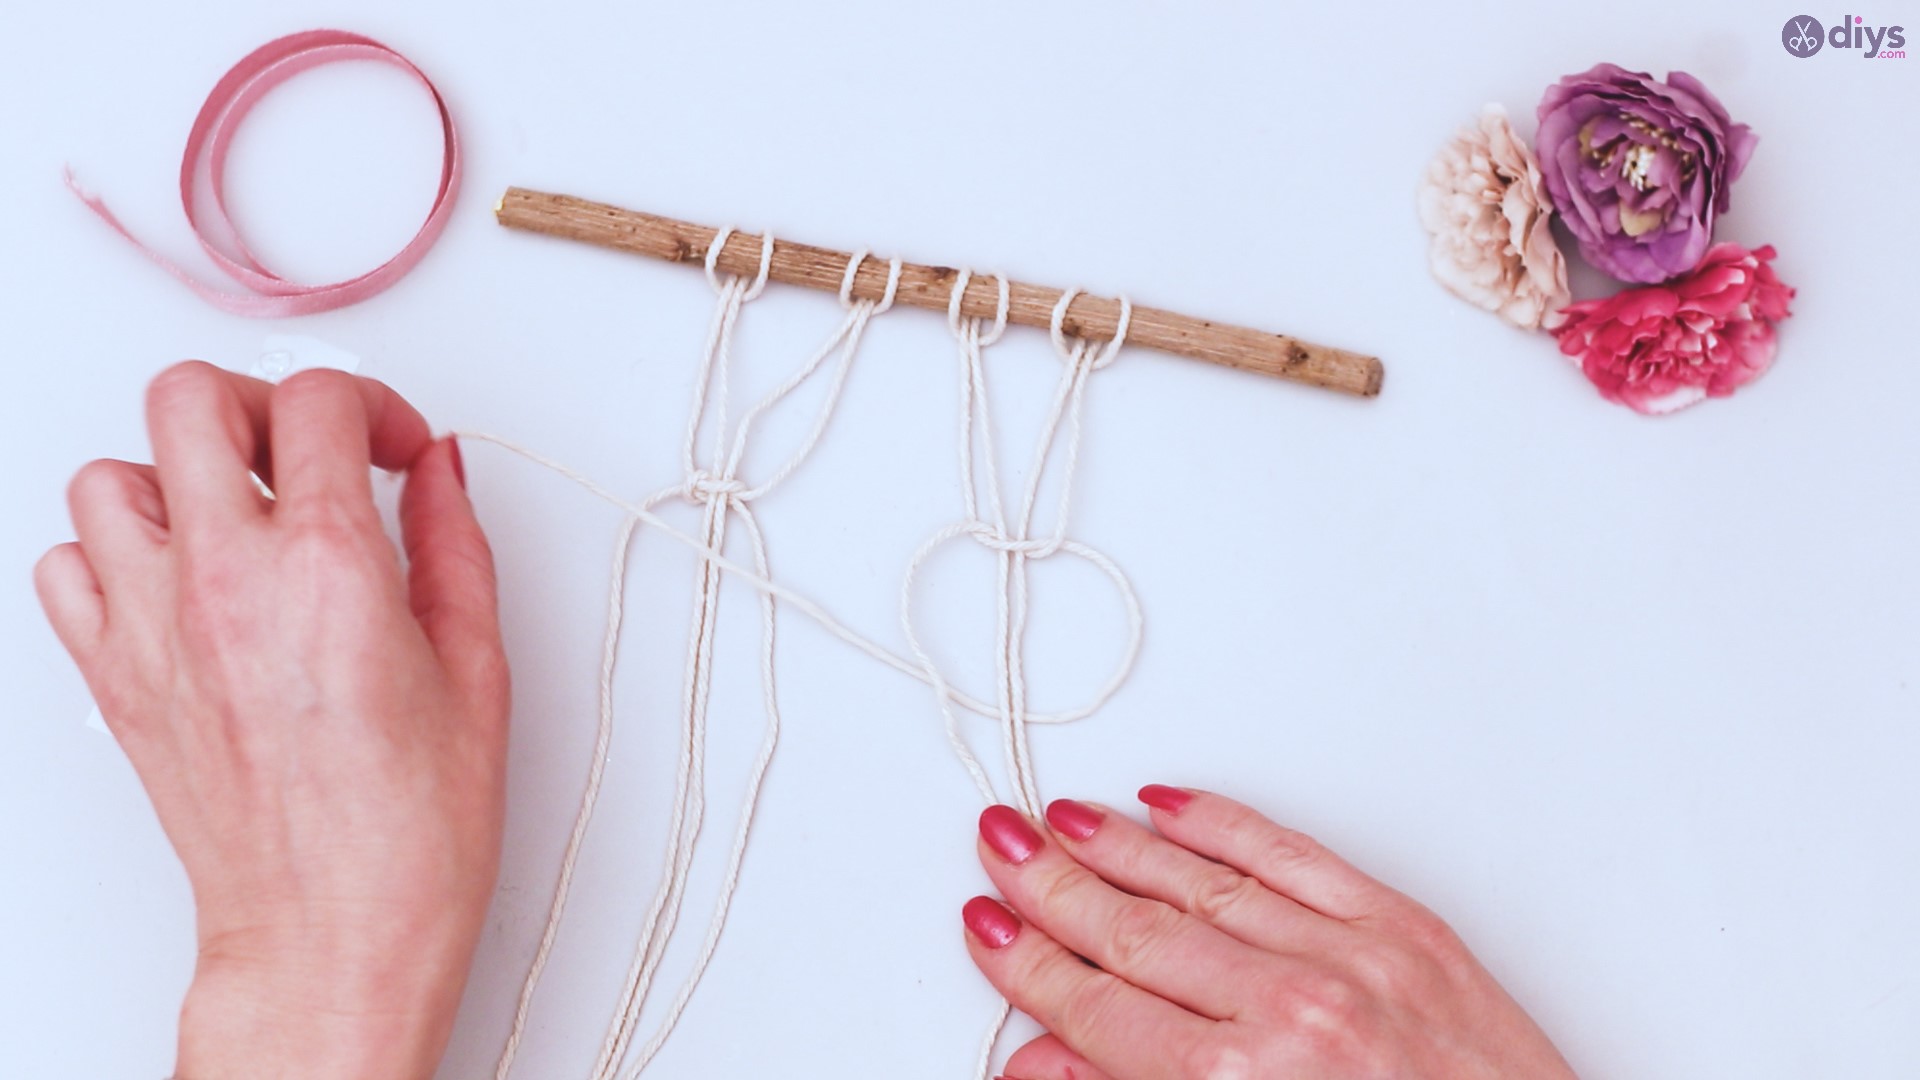
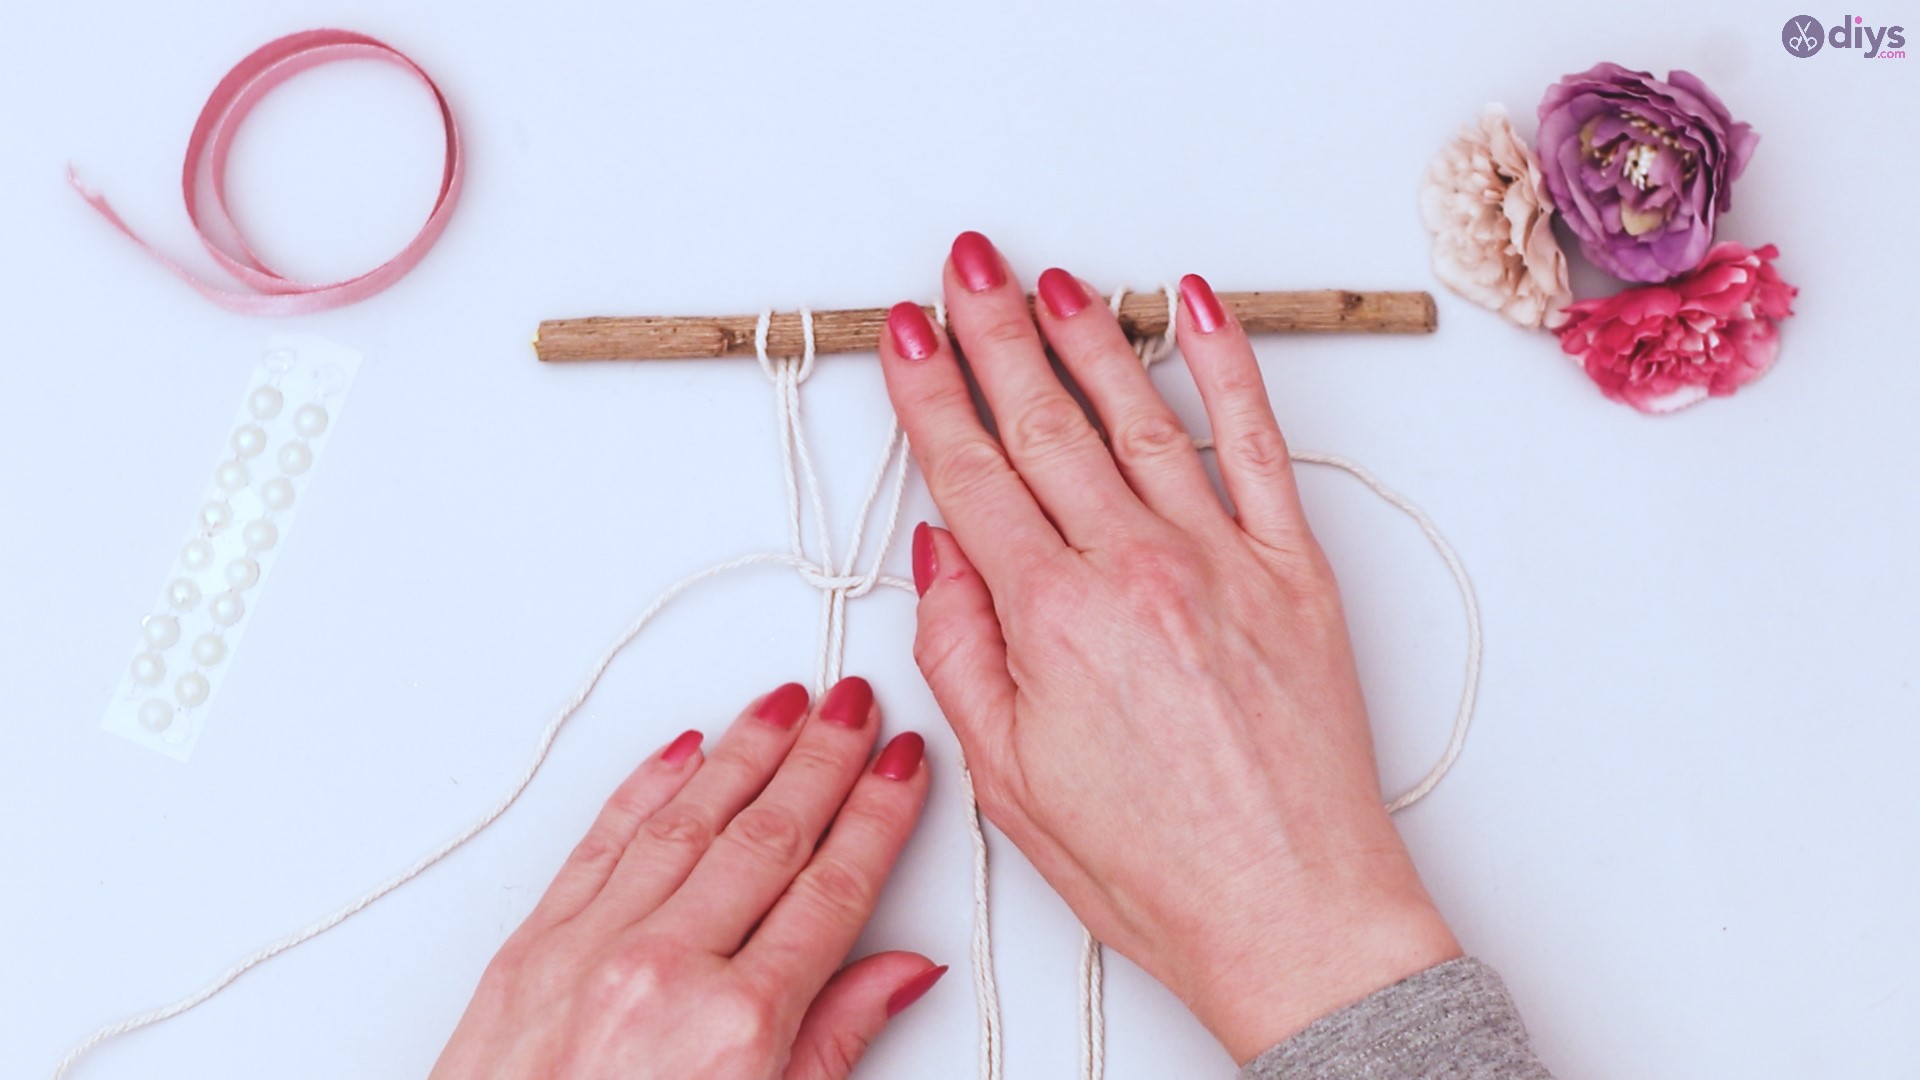
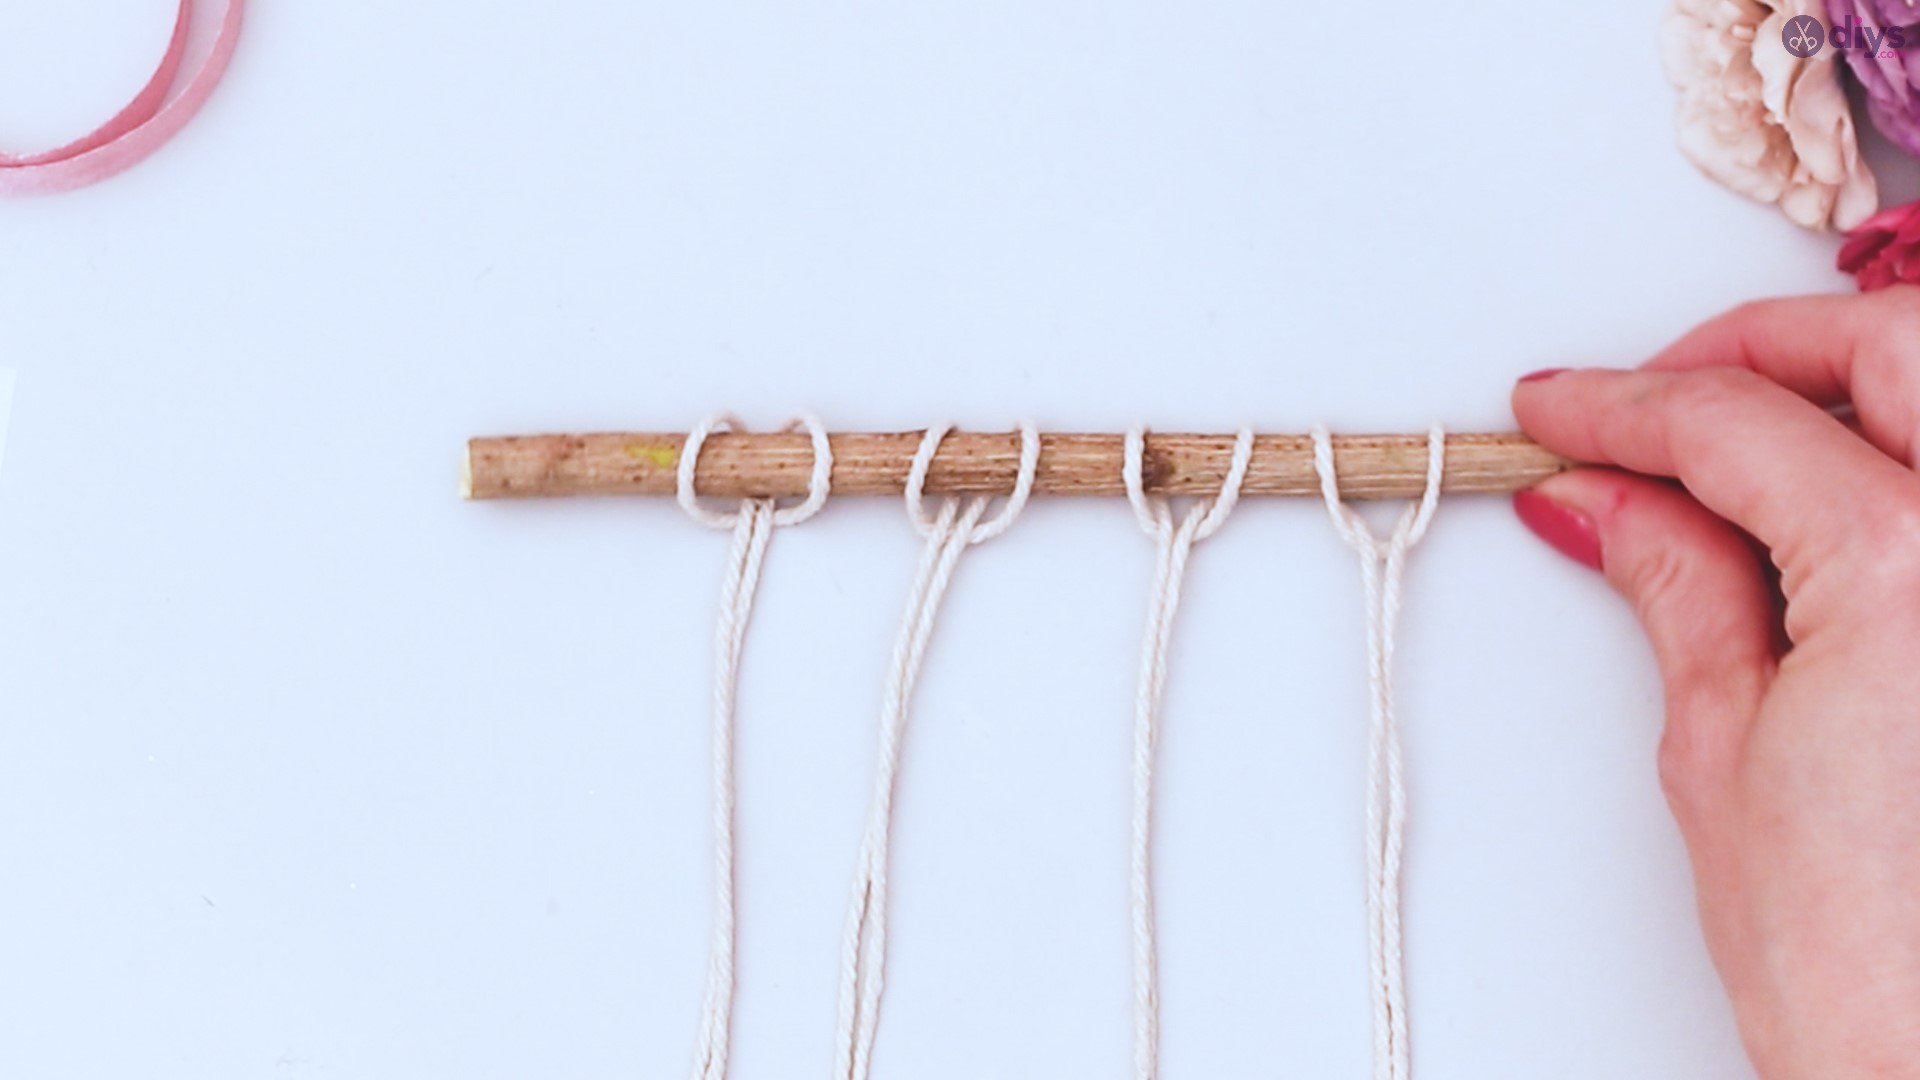
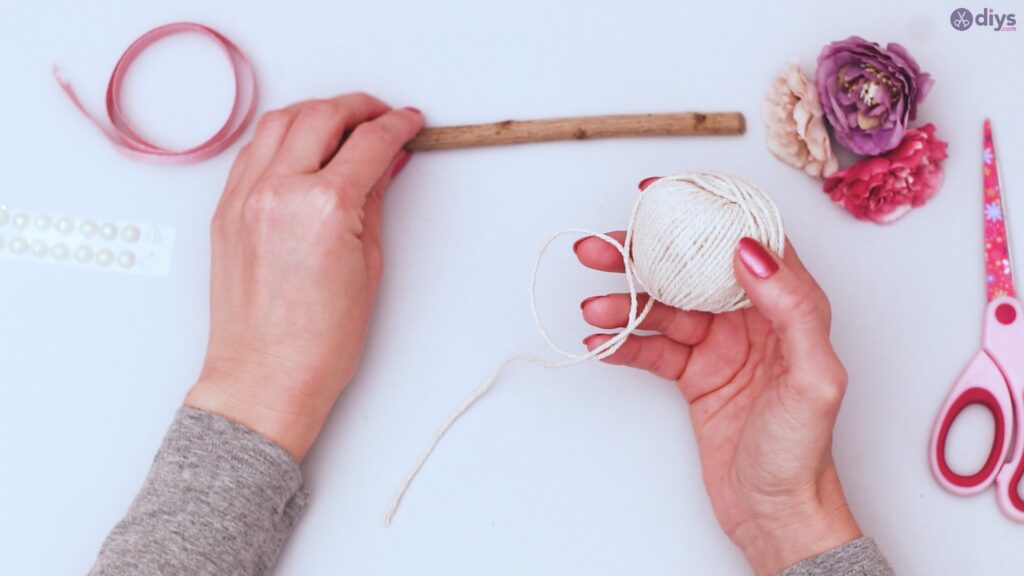
Take the 4 pieces of string you cut and double them. Lay them down with the loop end of each string at the top. Place the branch near the top of those loops, with an inch or so of room, laying the branch on top of the strings, trying to space the strings evenly apart.
Pull the loop of the first string up over the branch, and put the 2 ends of the string through it. Pull it taut.


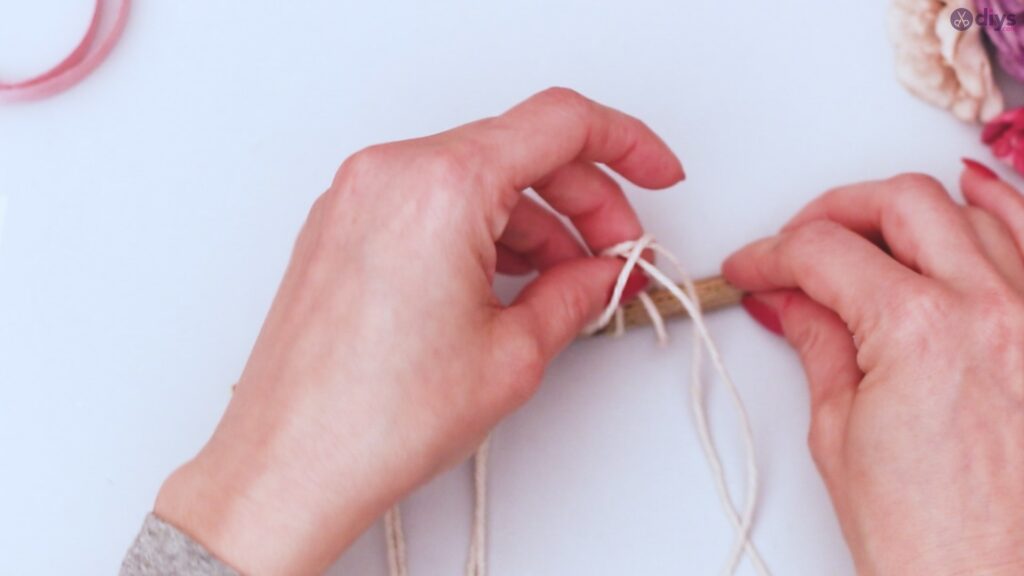
Repeat this process for the other 3 strings.
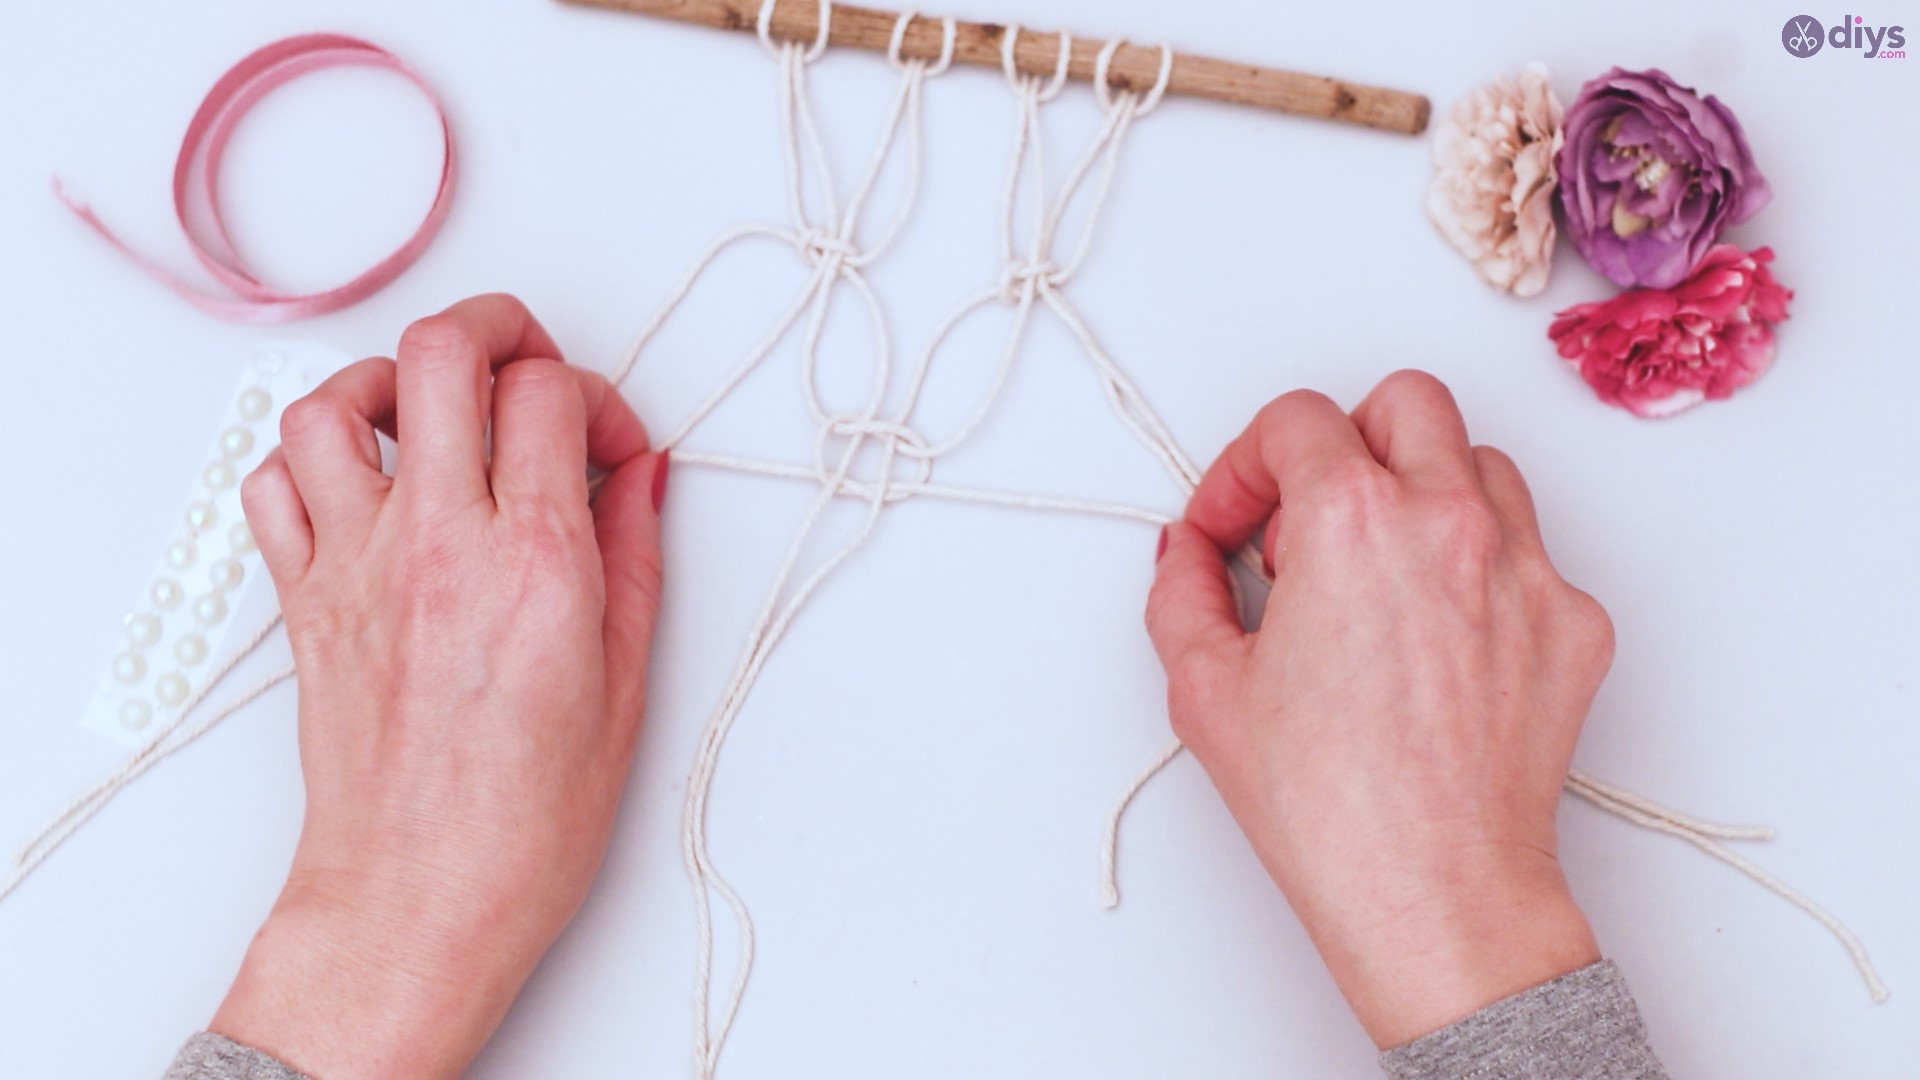
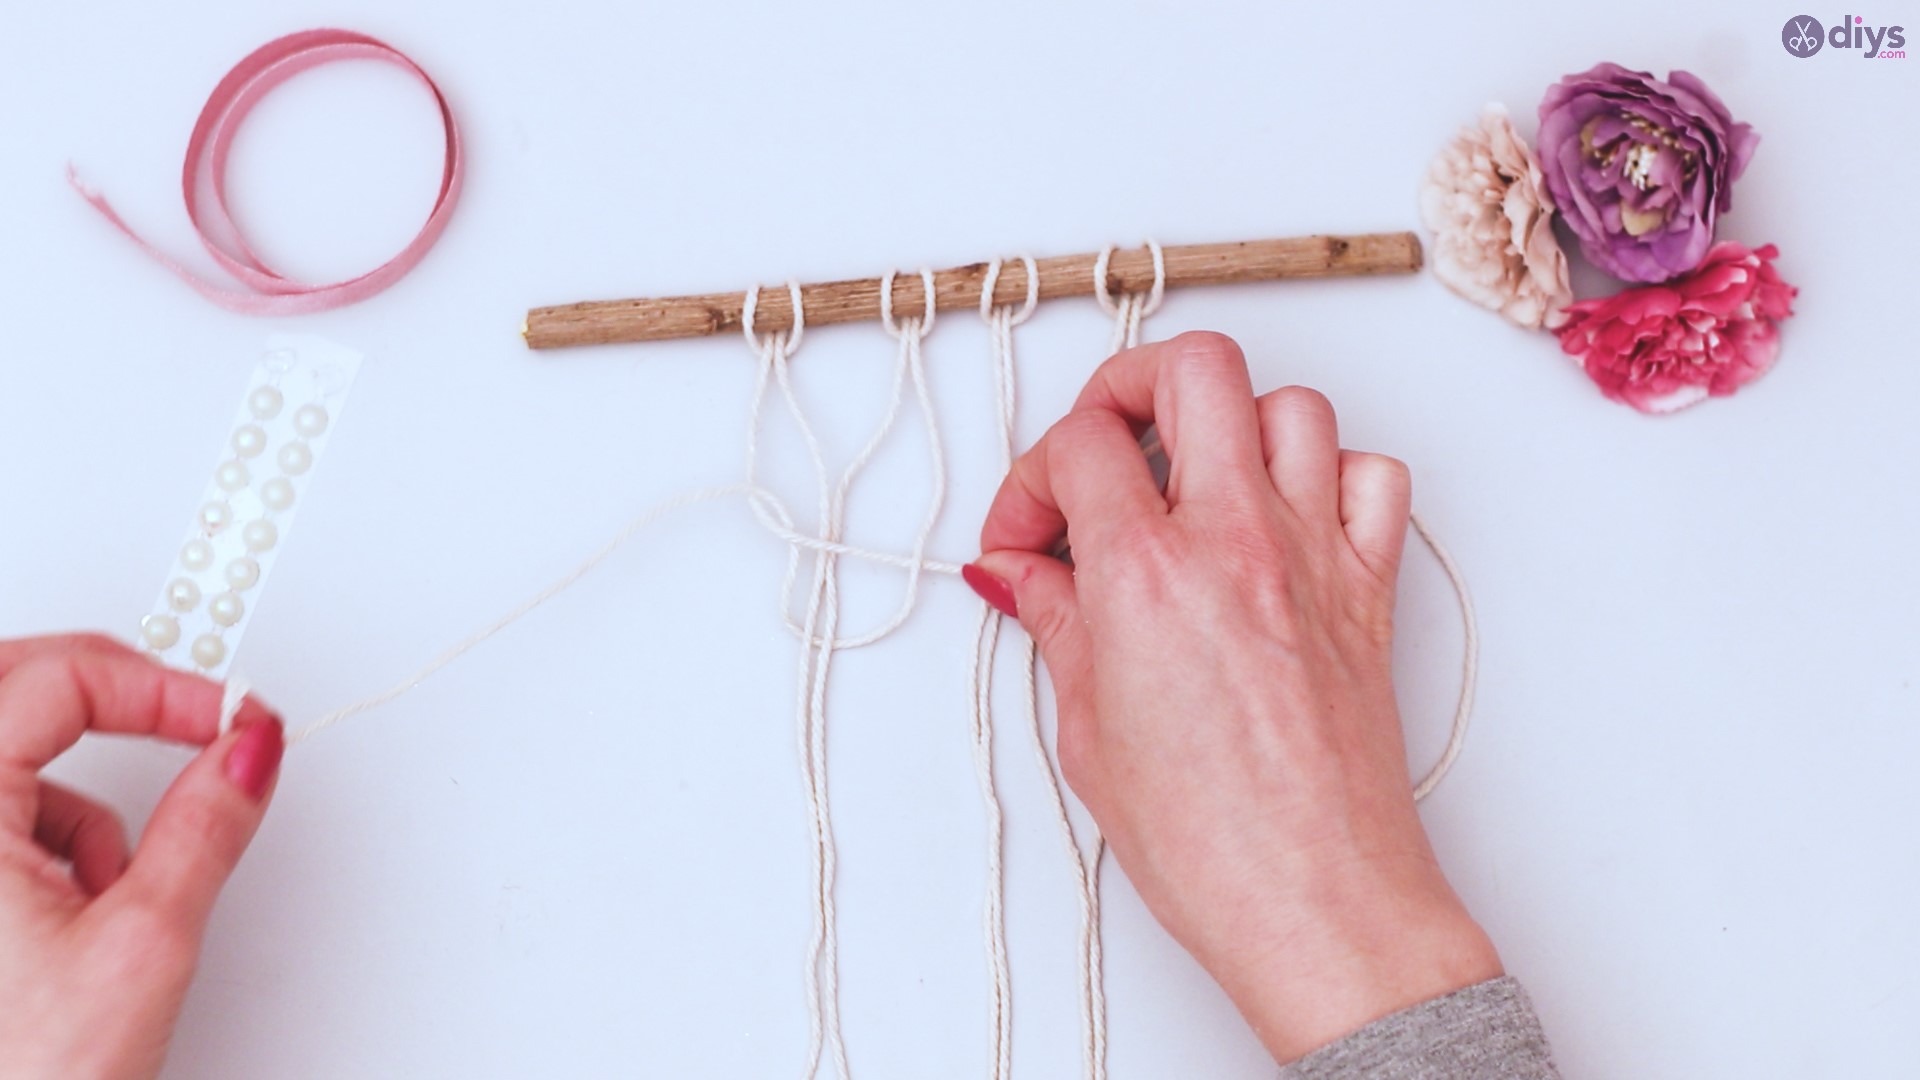
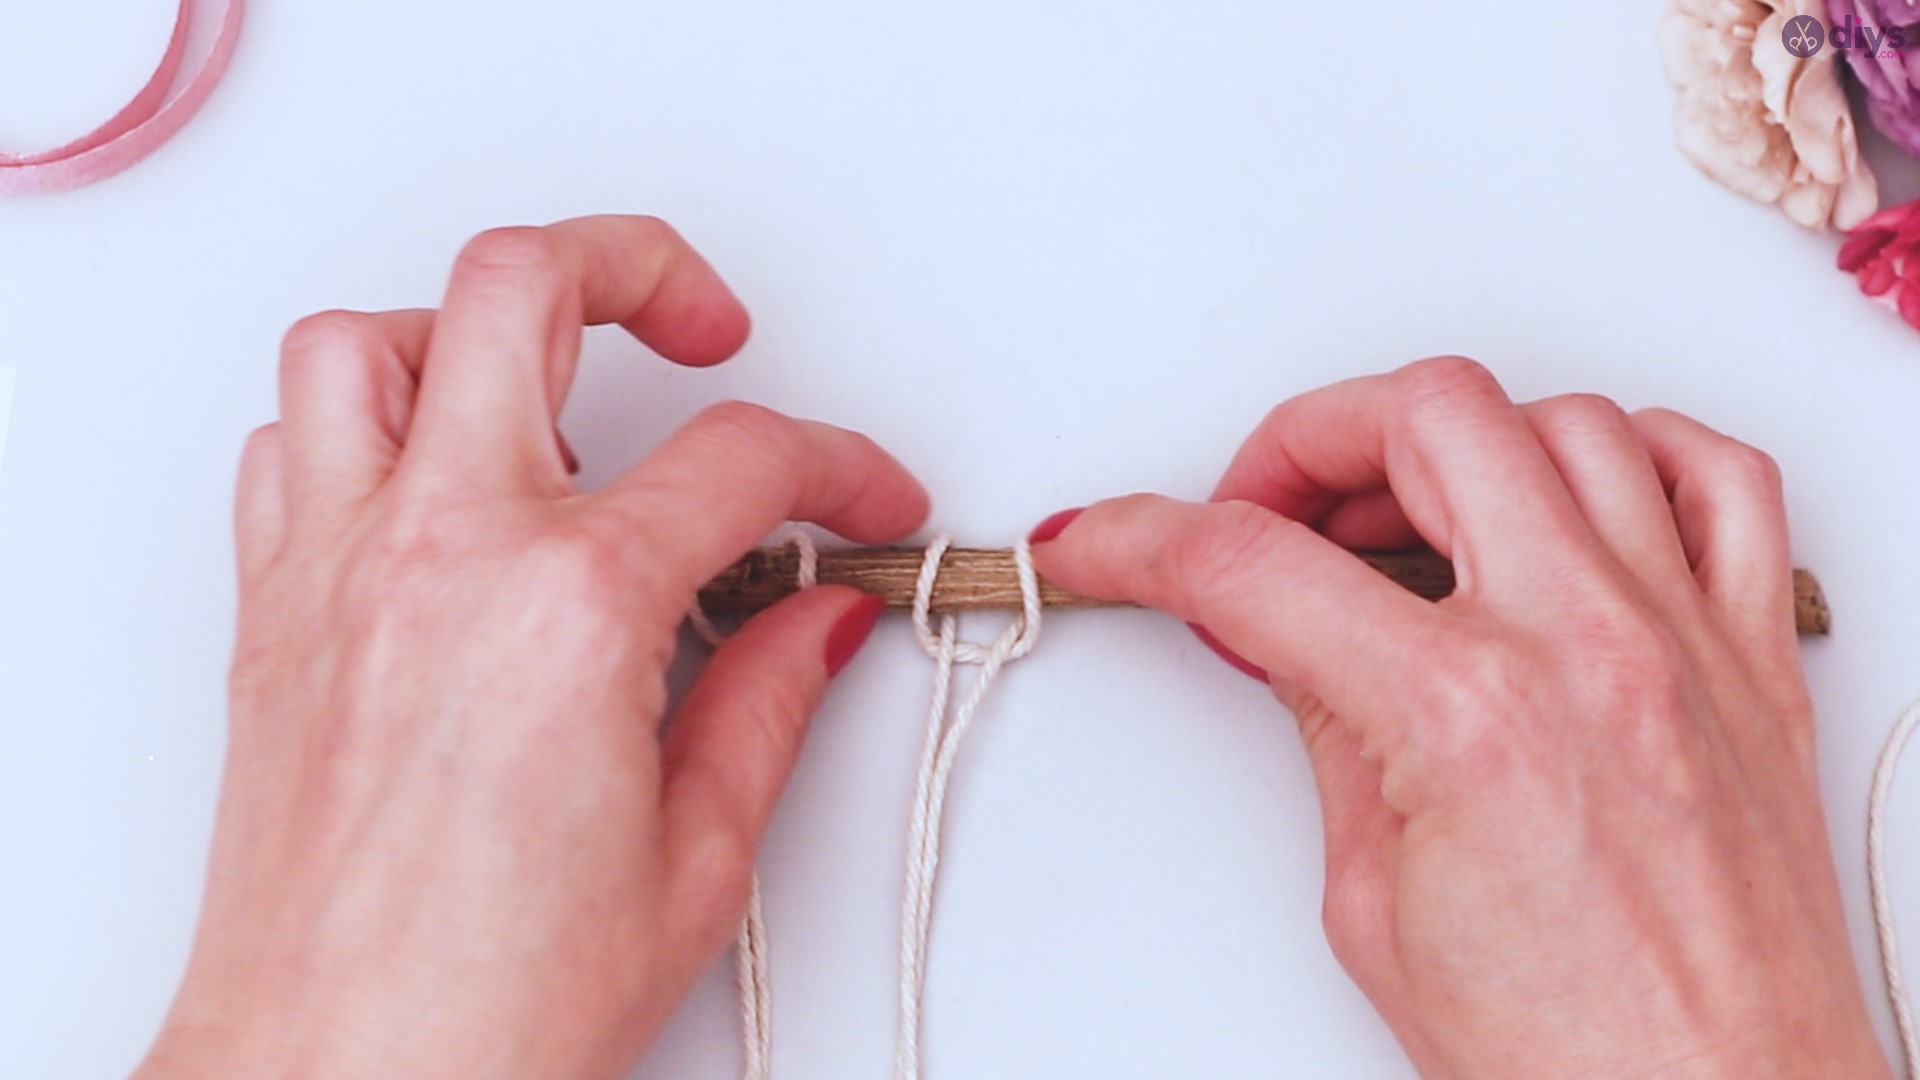
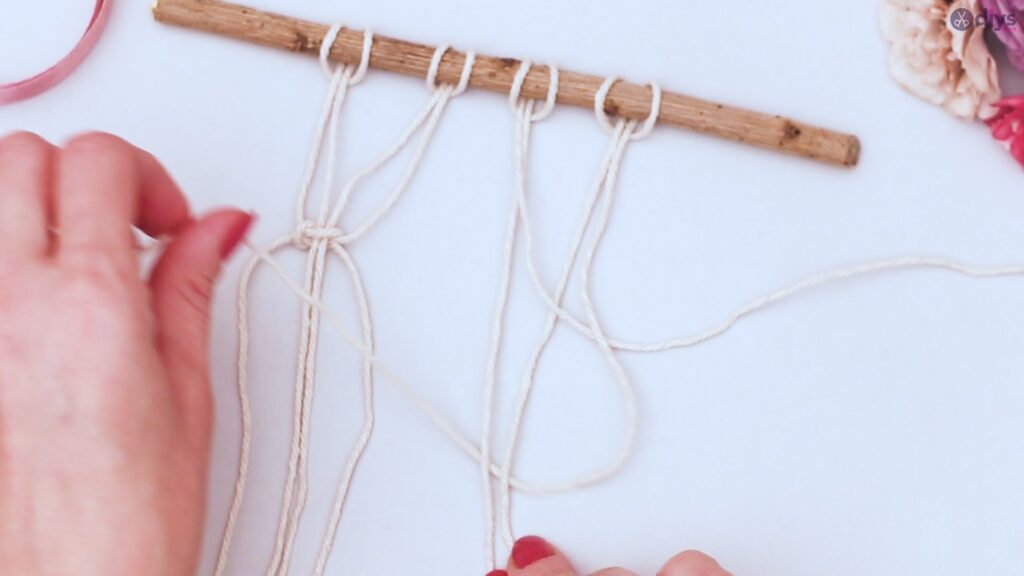
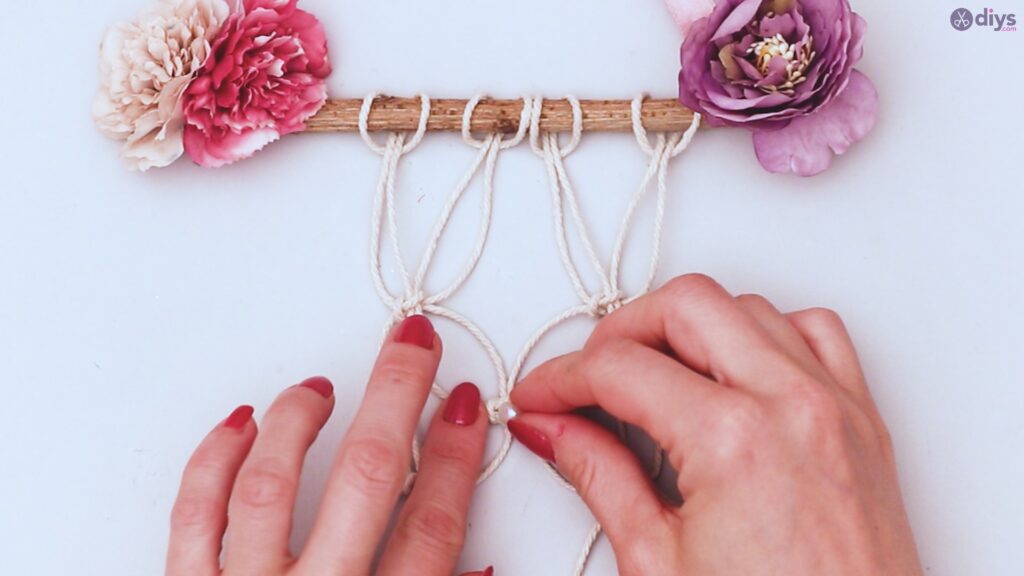
Step 3: Tying the Knot
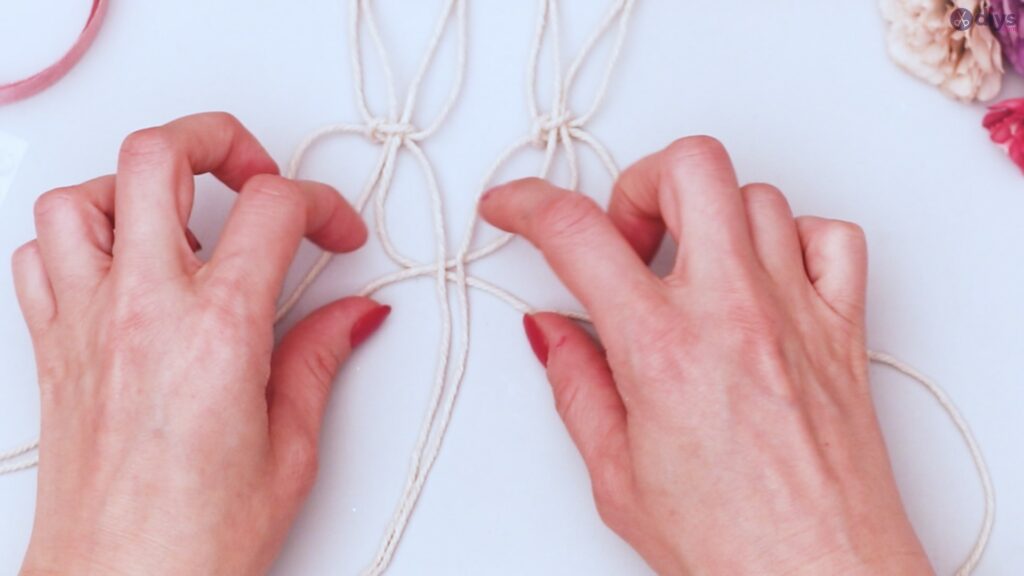
Here’s where we start to have fun with knots. Yes, we’re going to marry our strings in multiple places – imagine the scandal! Looking at your strings from left to right, you have 8. Think of them as numbers 1 through 8. Right now, we’re only going to work with the first 4.
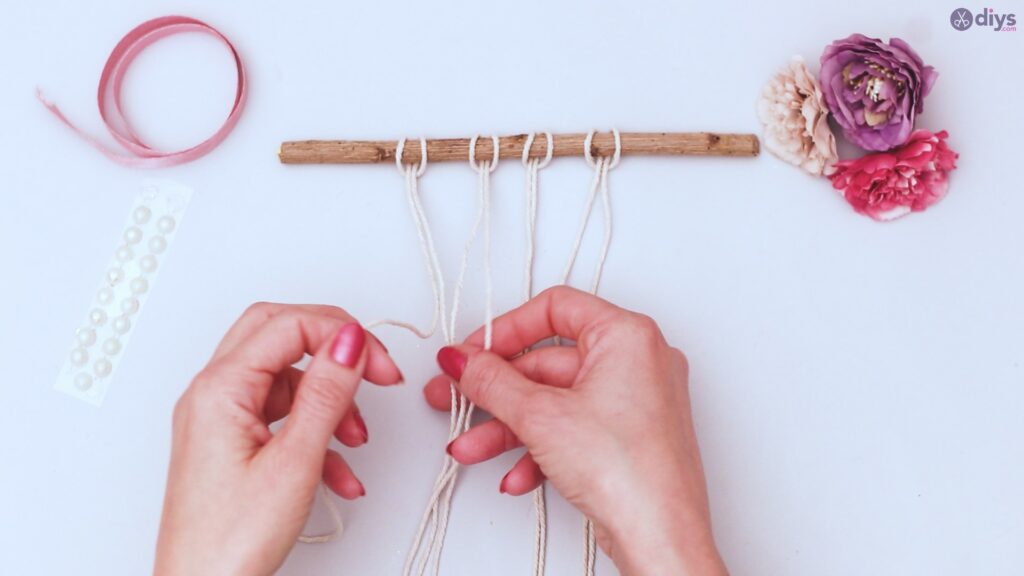
Take String 1 and loop it over Strings 2 and 3. Leave it there for a moment, and take string 4 in your hand. Make sure it’s over Strings 2 and 3 and well, and tie Strings 1 and 4 like the first step of tying your shoe laces (the crossover tie).
Don’t make it too tight. You want to pull strings 2 and 3 taut through that loop. This should be 3 or 4 inches down from where the strings loop the branch.

Now, String 1 is on the right, and 4 is on the left. Take String 1 and create another crossover tie with String 4, making sure that Strings 1 and 4 cross UNDER Strings 2 and 3 this time.
Pull the new knot up against the original crossover tie. Tighten, but leave it loose enough for movement.

Repeat this same process with Strings 5 through 8 so that you have an identical appearance.
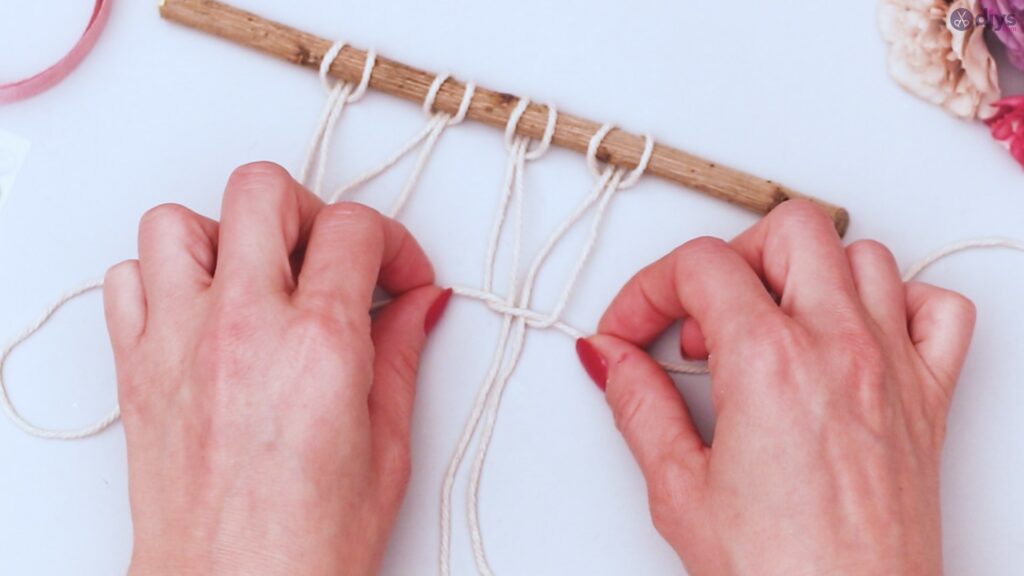
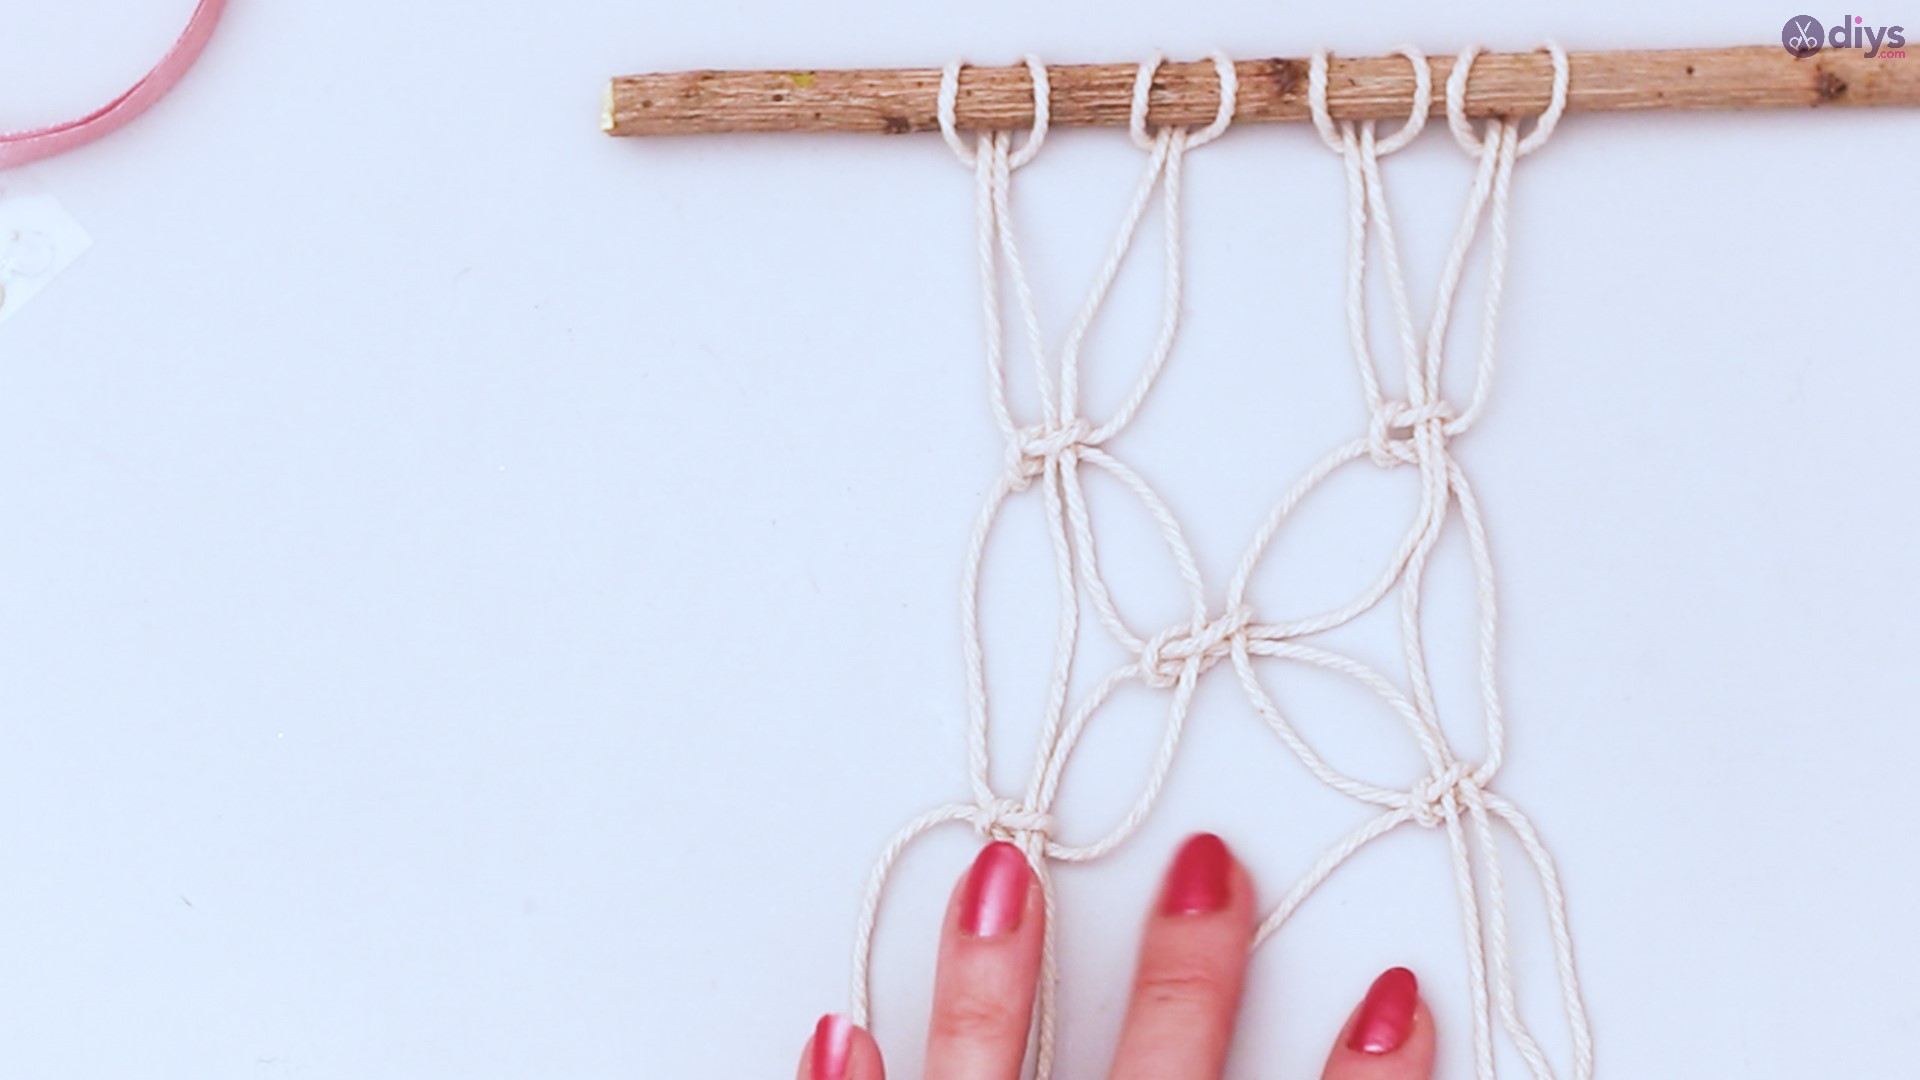
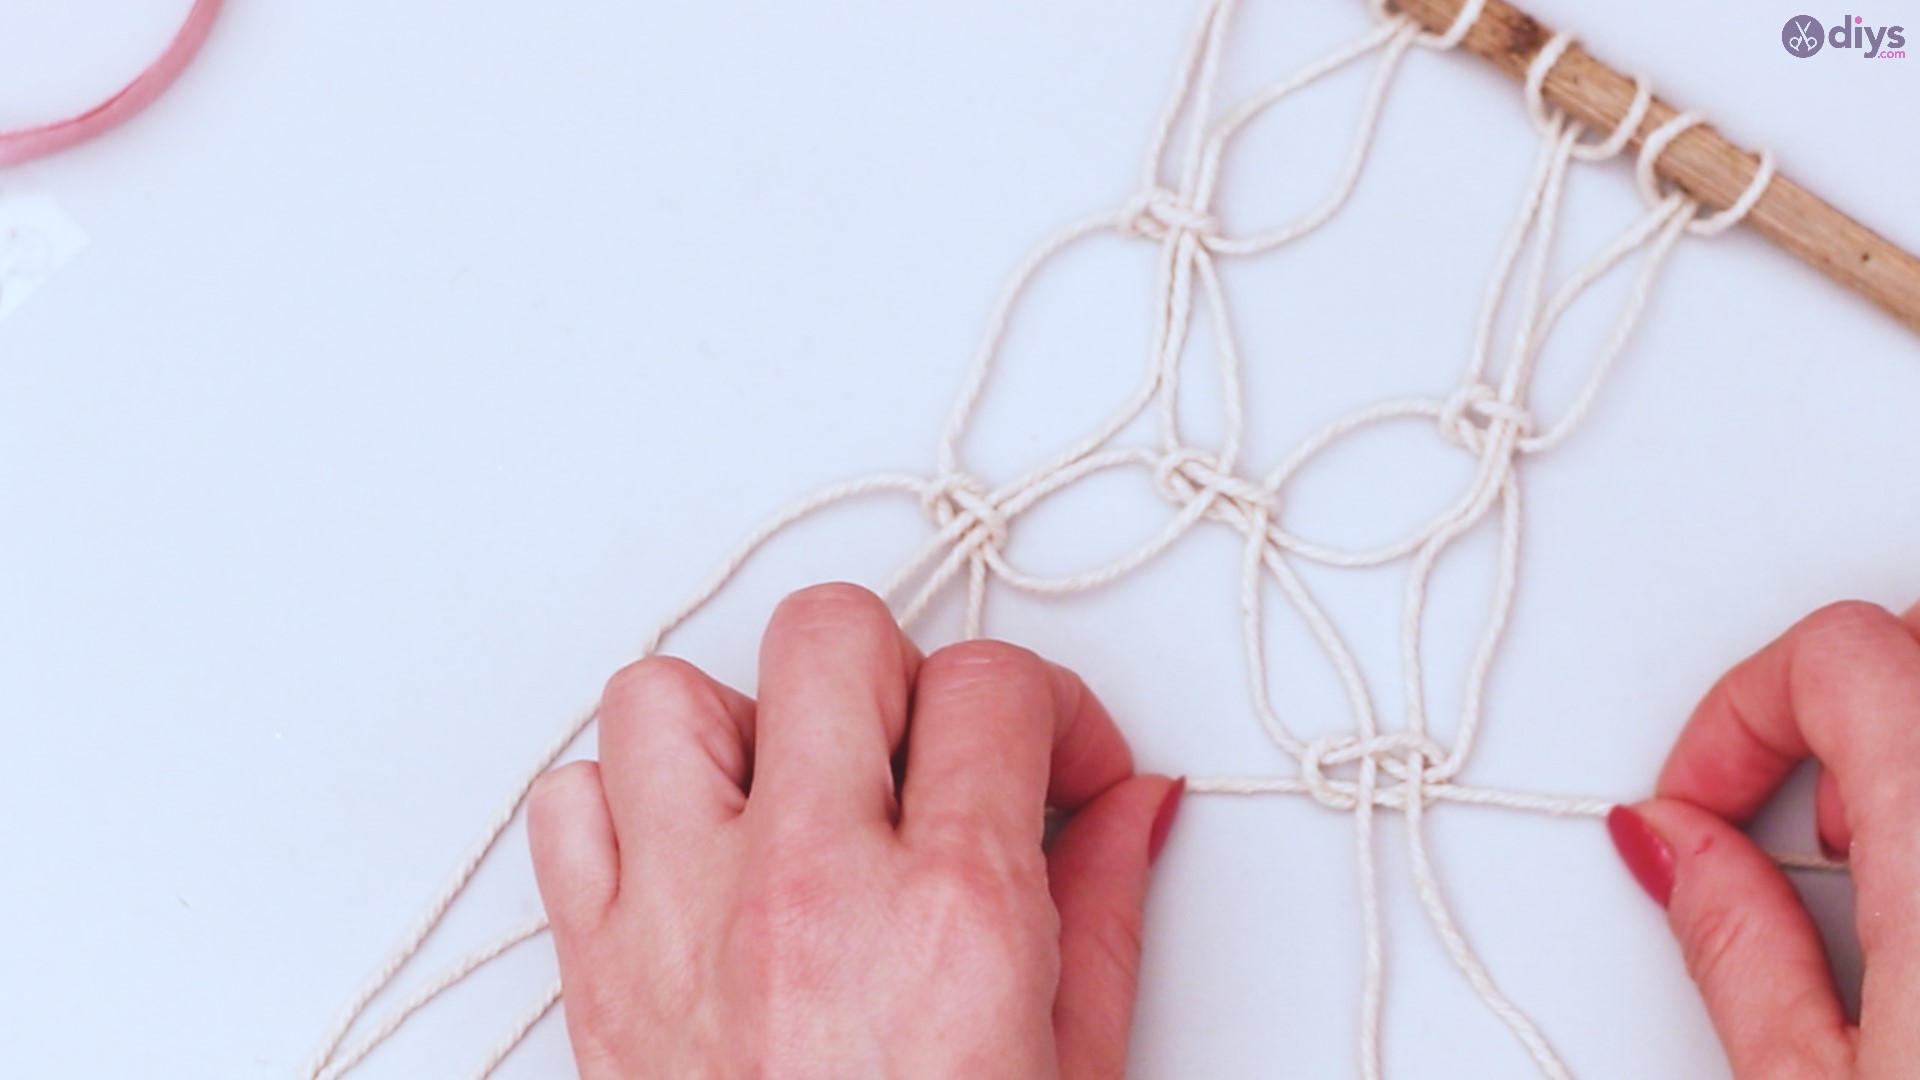
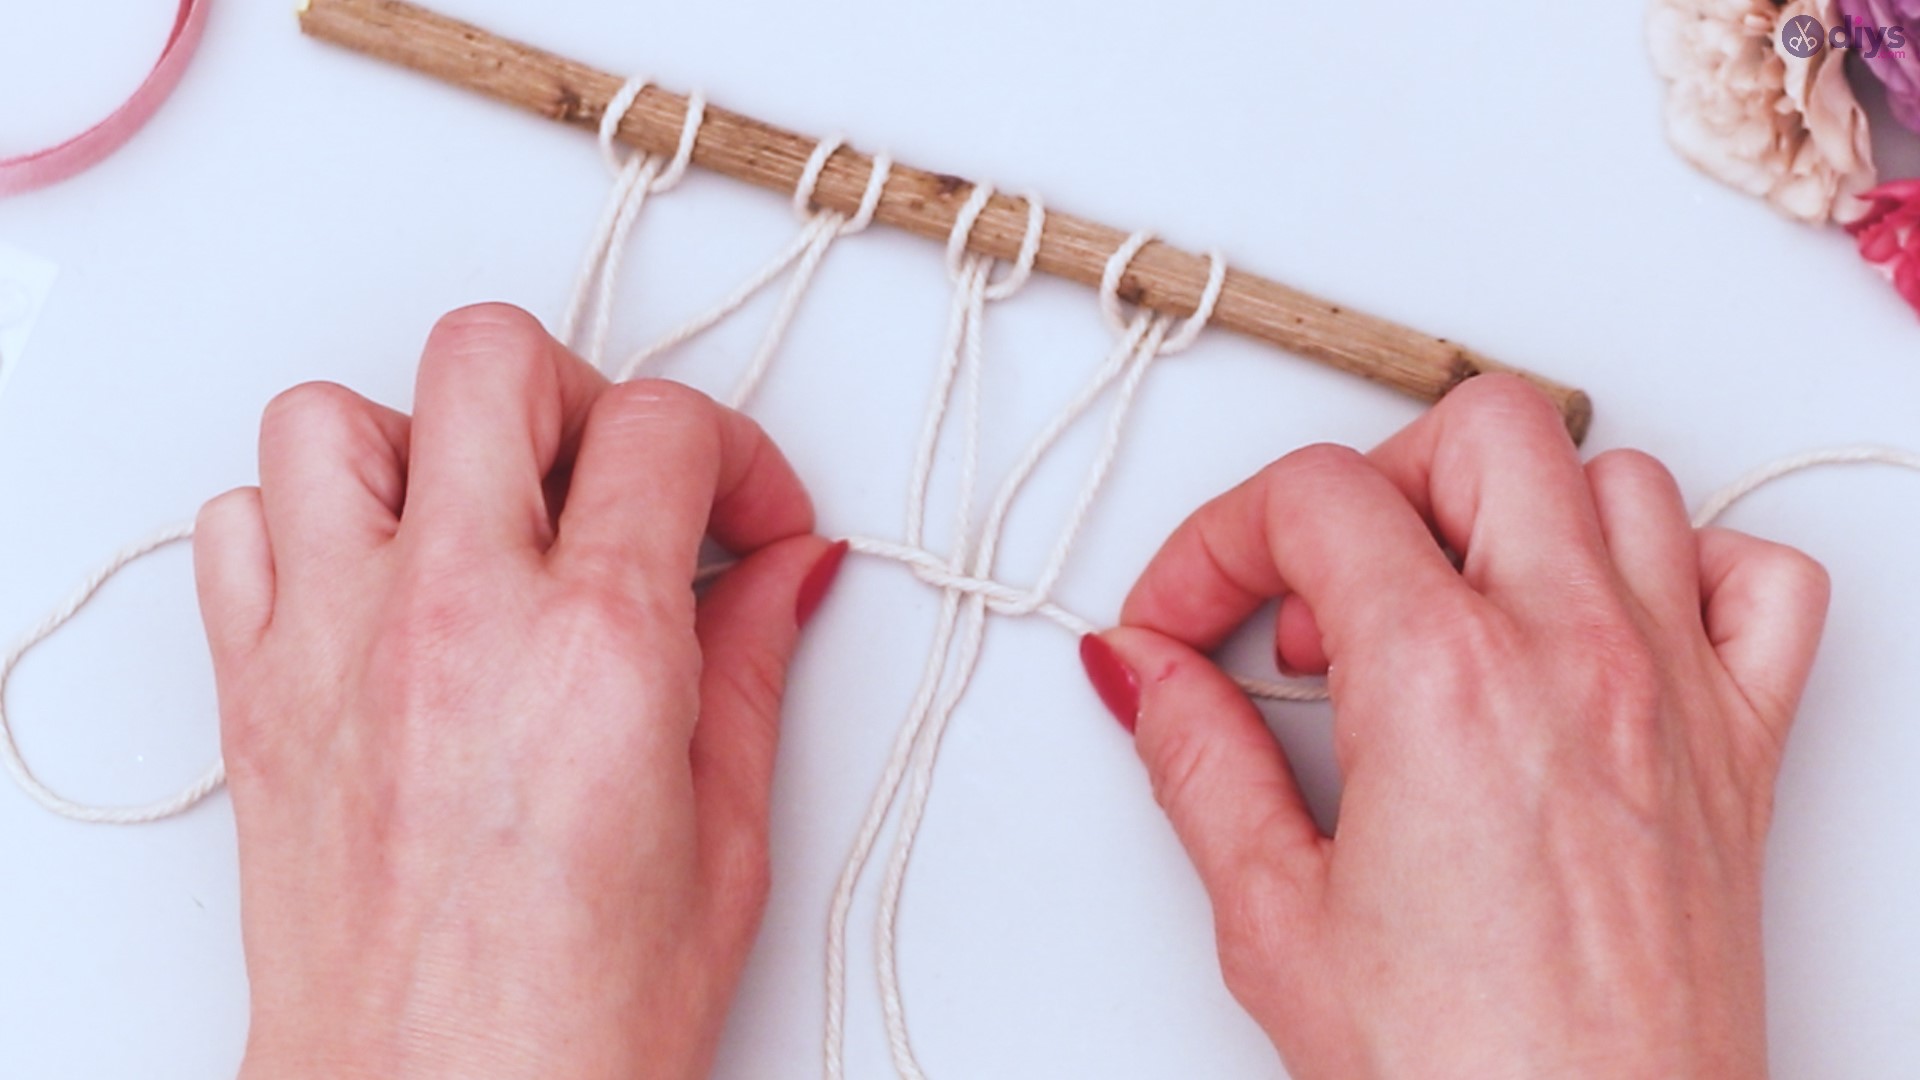
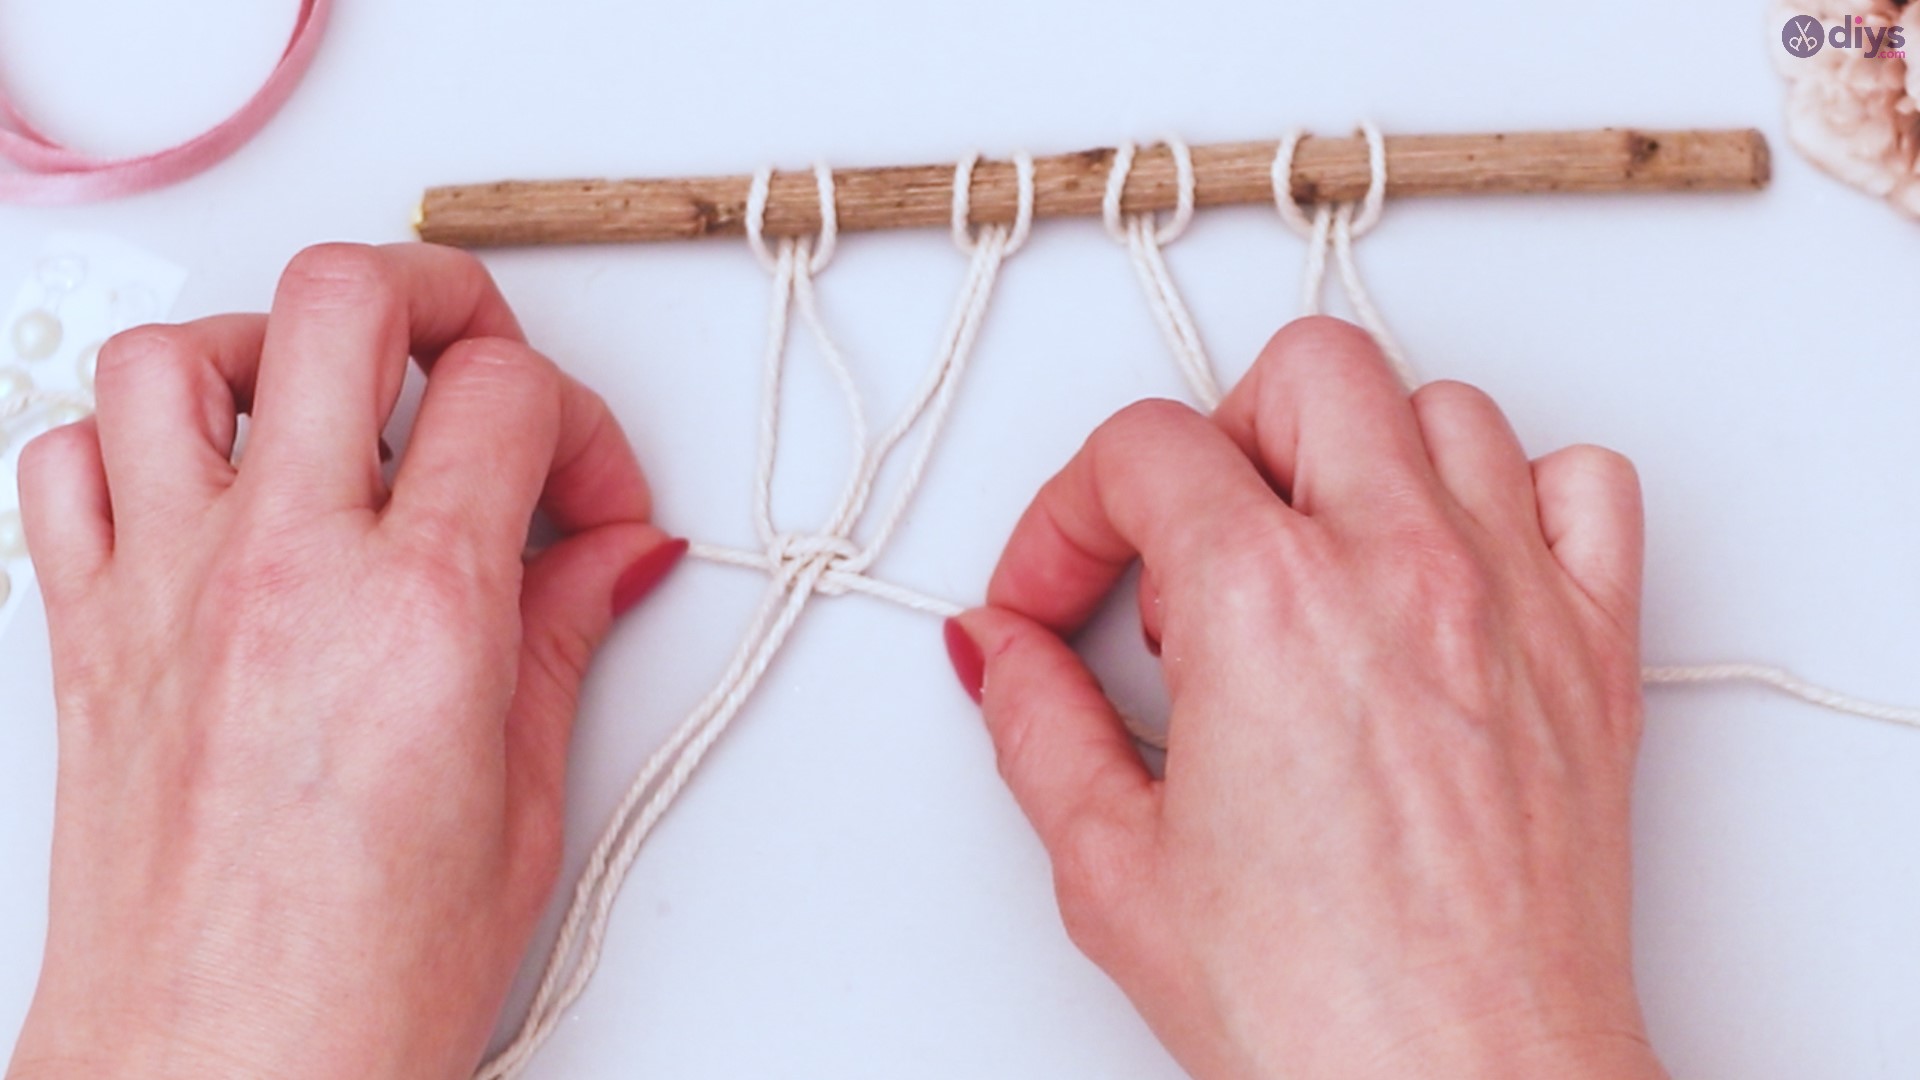
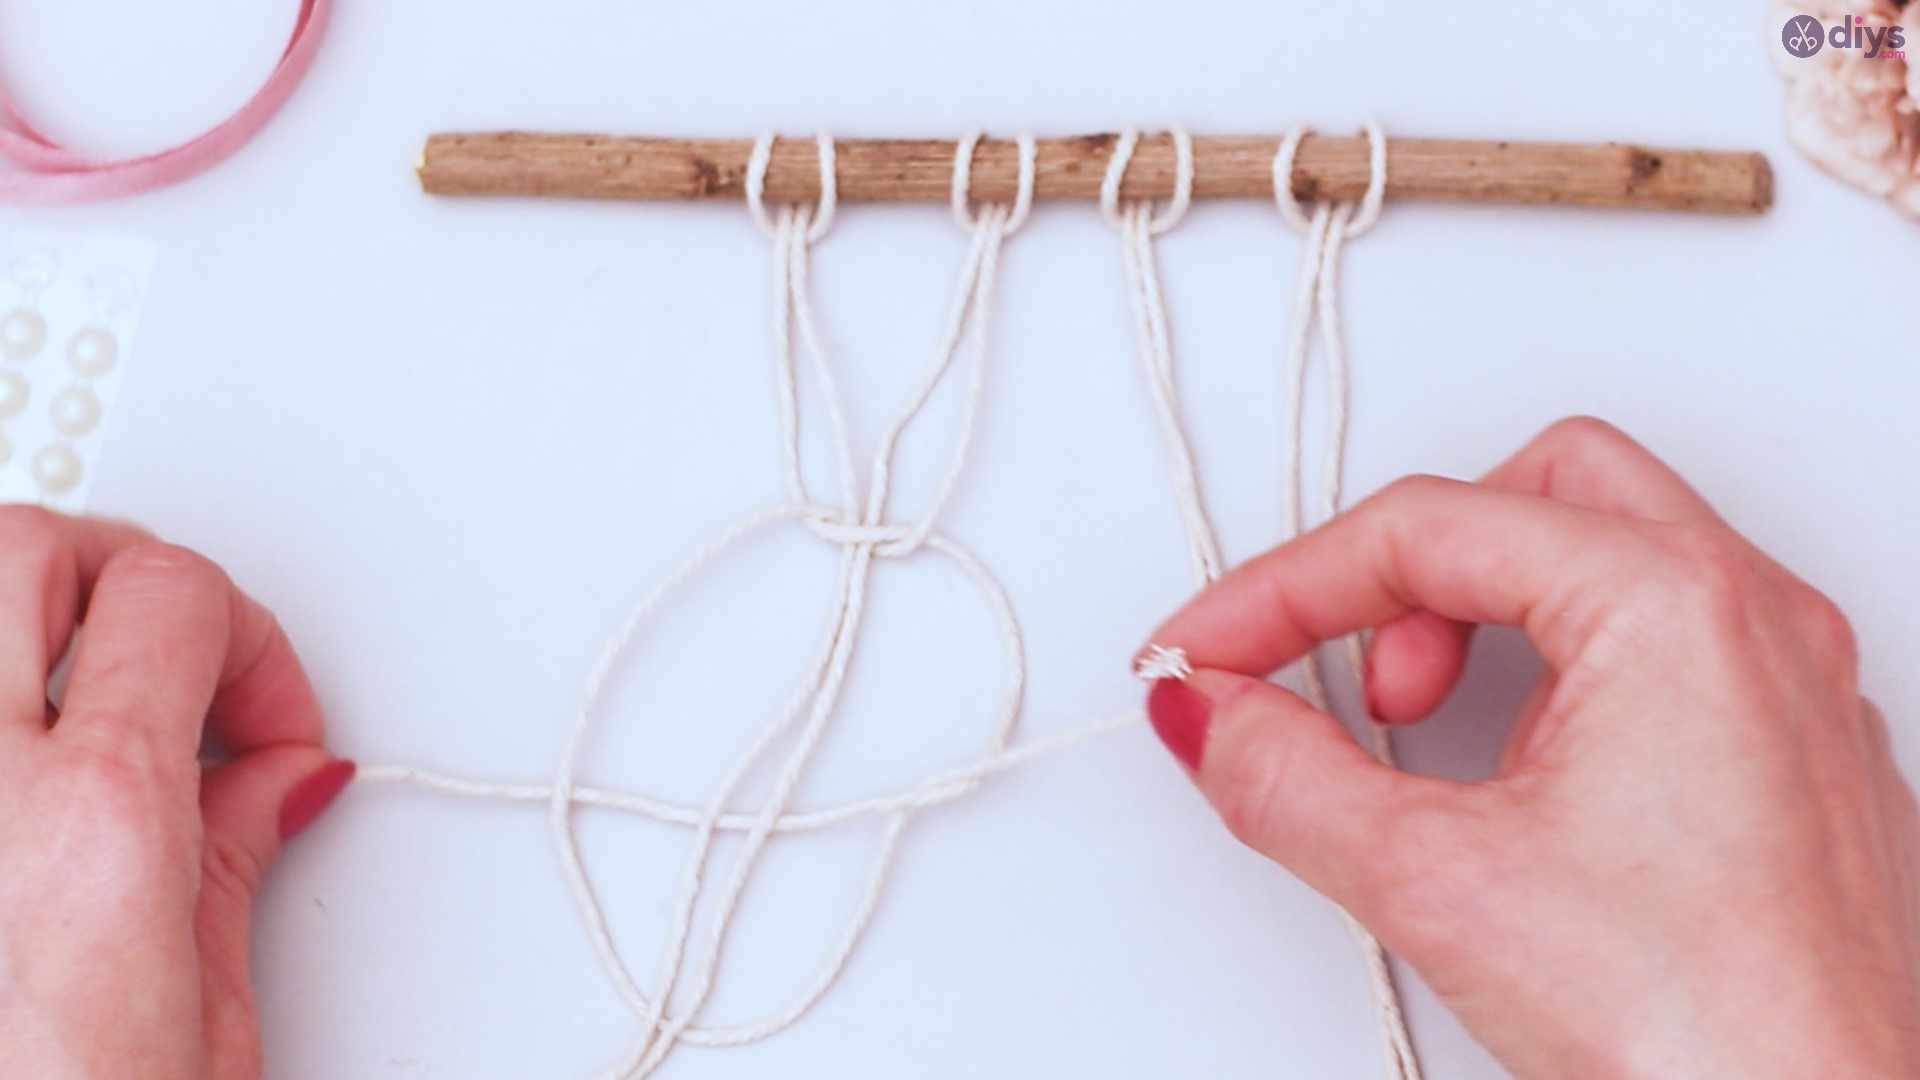
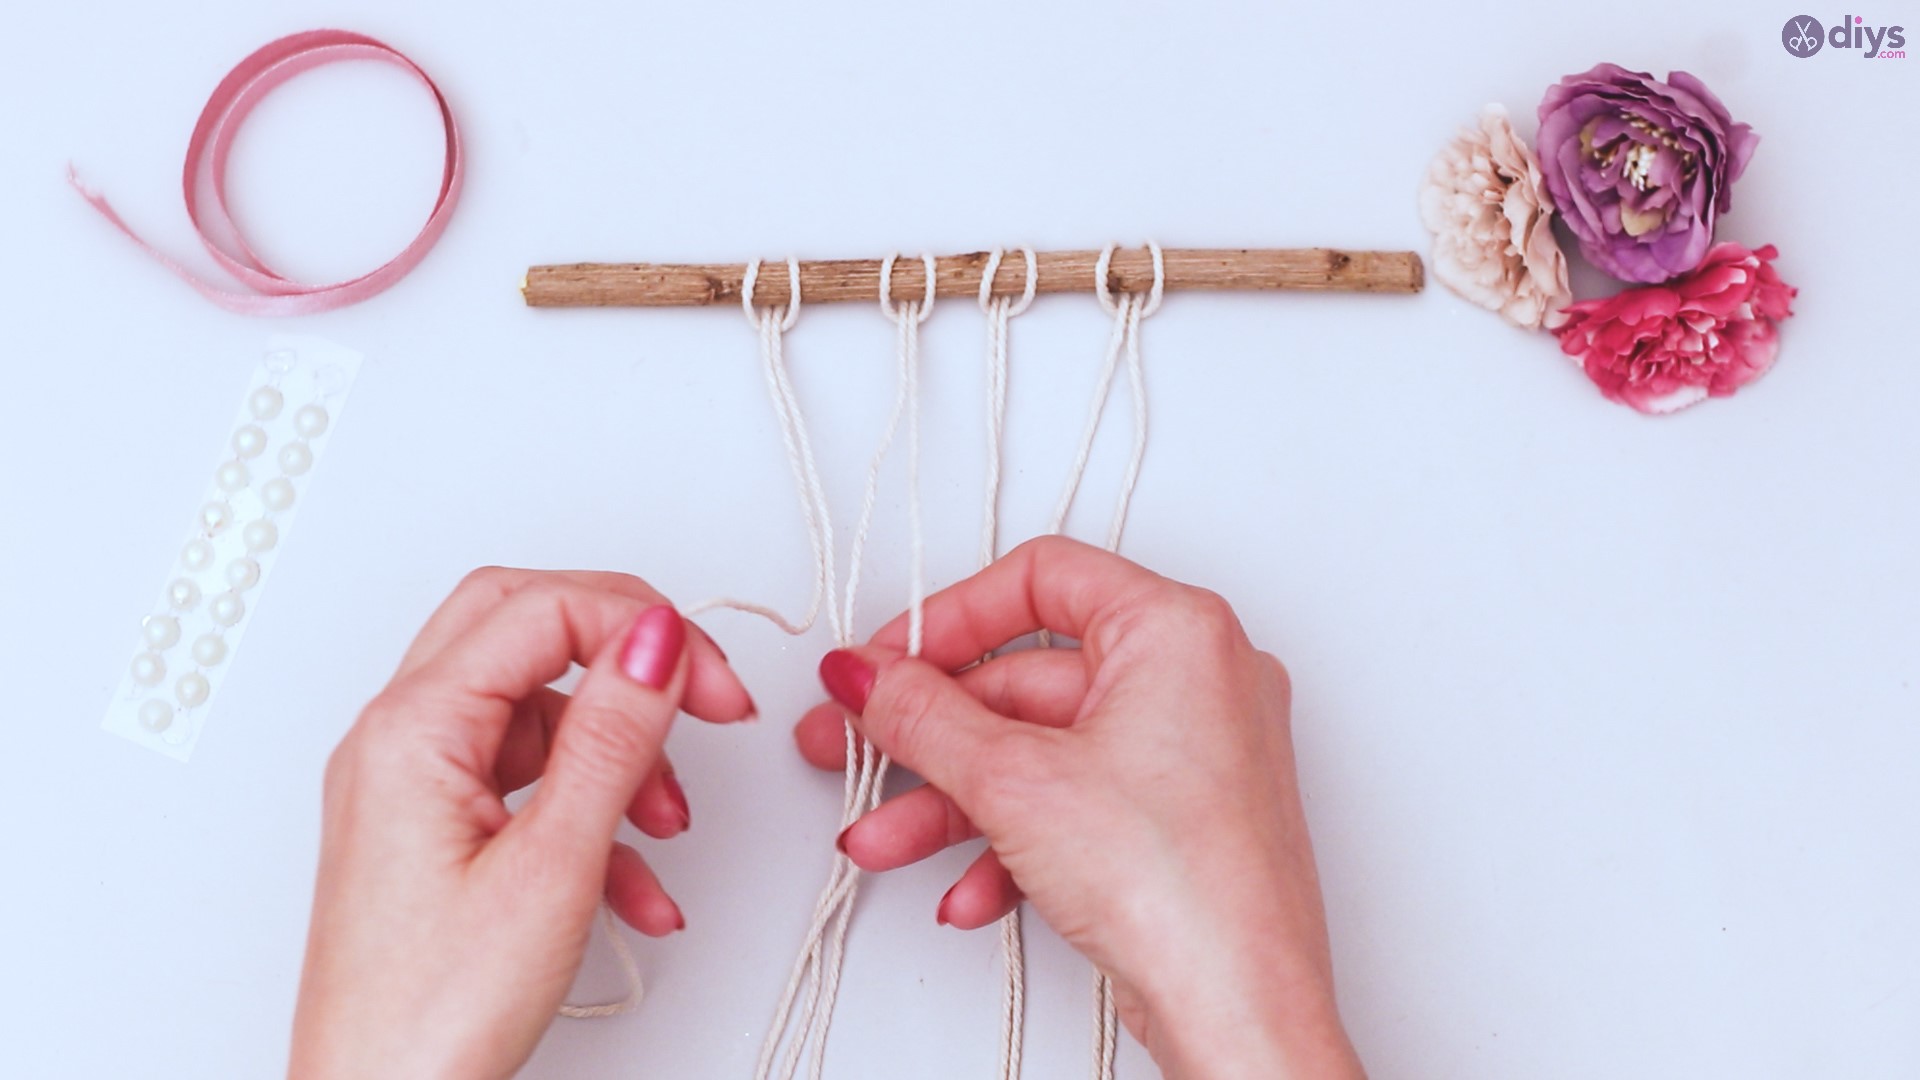
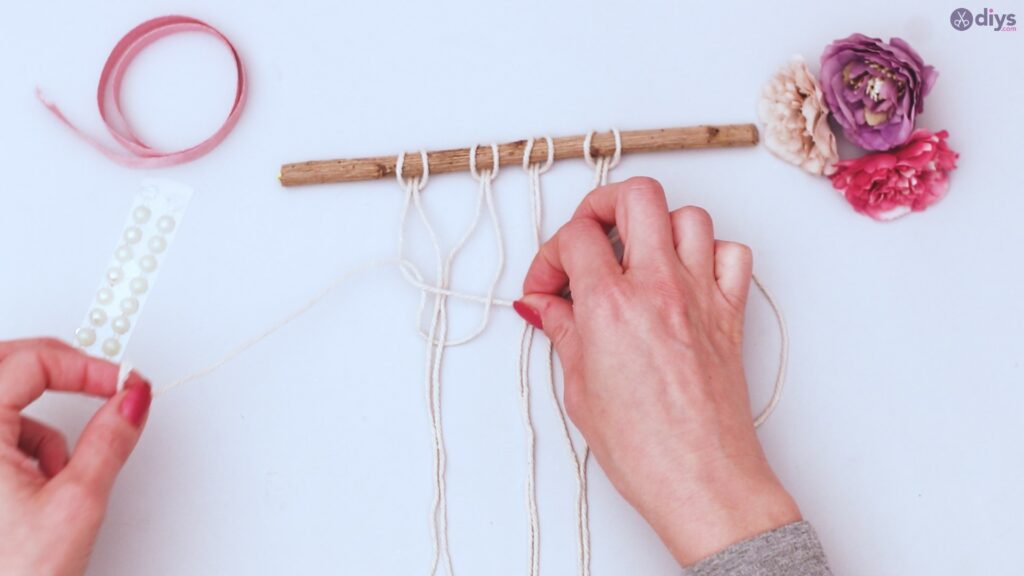
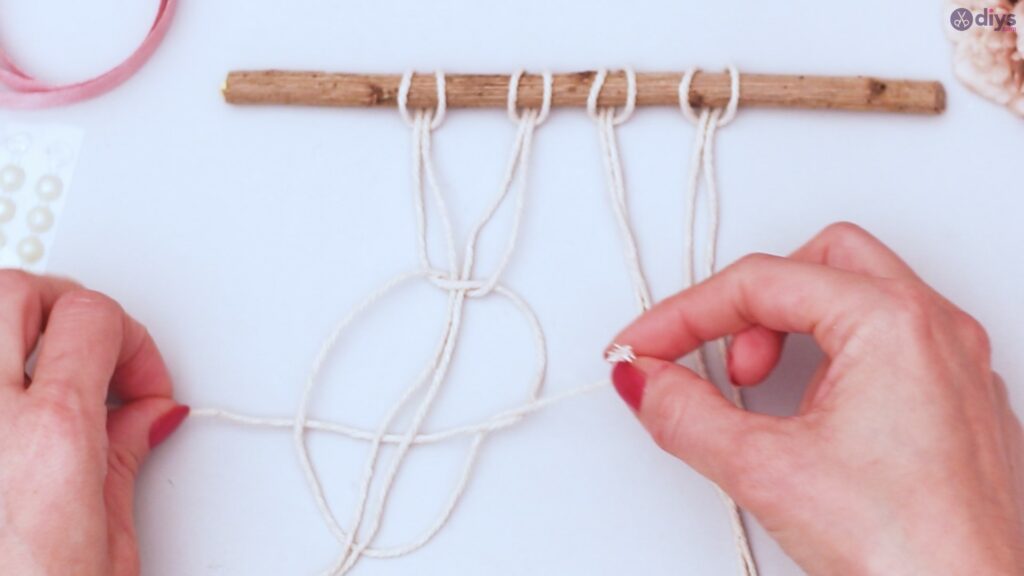
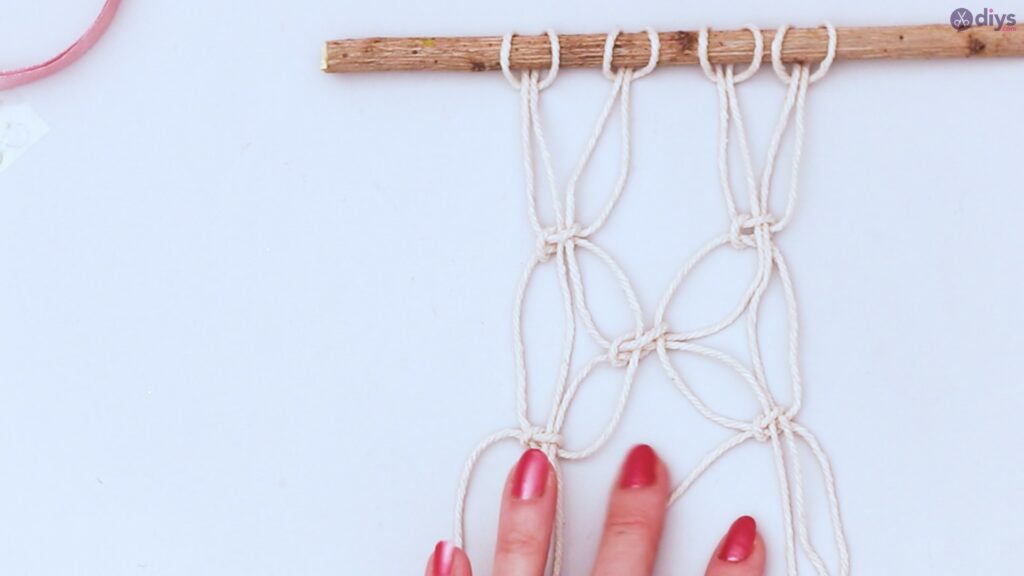
Step 4: Intermarriage
Okay, now, we’re going to renumber our strings. Look at the way they are now, and label them 1 through 8. Ignoring Strings 1, 2, 7, and 8, you are going to repeat Step 3, using Strings 3 through 6.
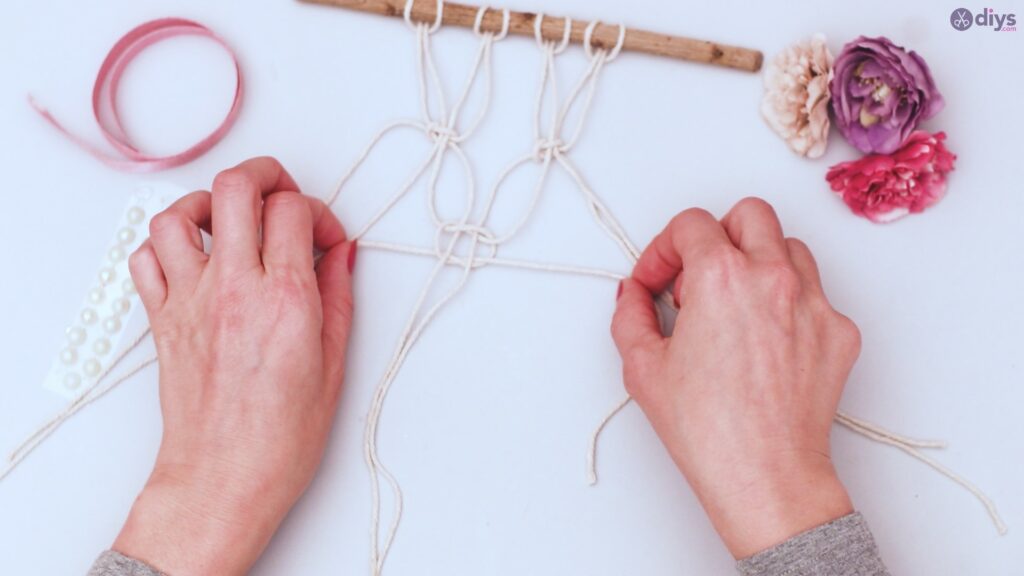
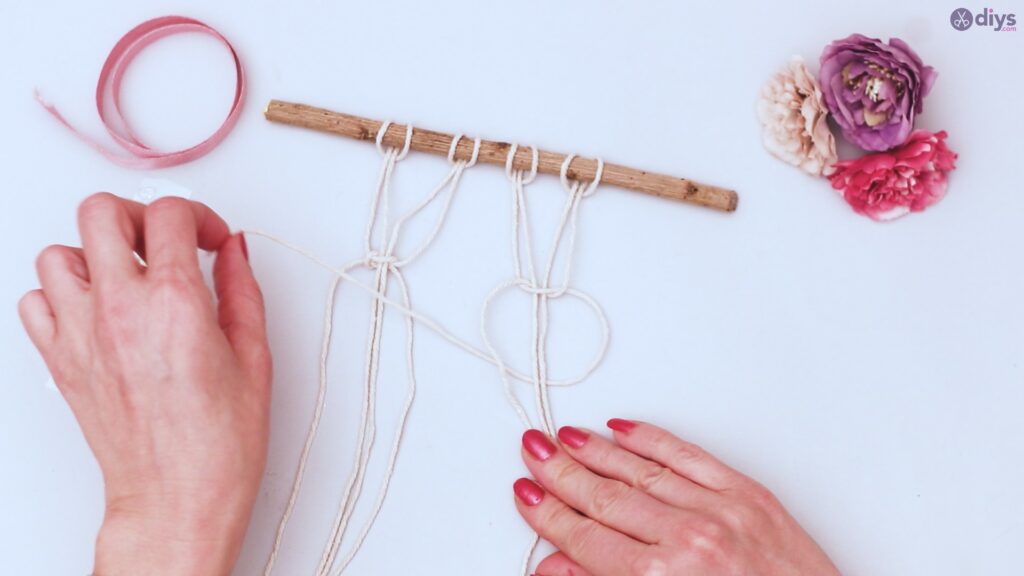
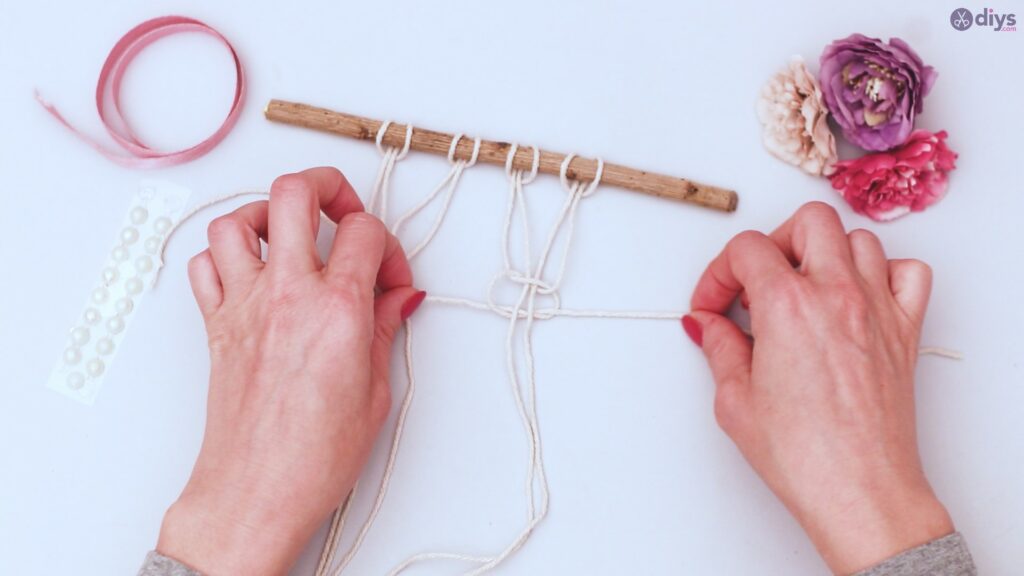
Step 5: Back to the Basics
You should now have 3 knots. Reset your ‘string count’ and repeat the knot work for strings 1 through 4 and for strings 5 through 8. You’ll see the pattern starting to form.


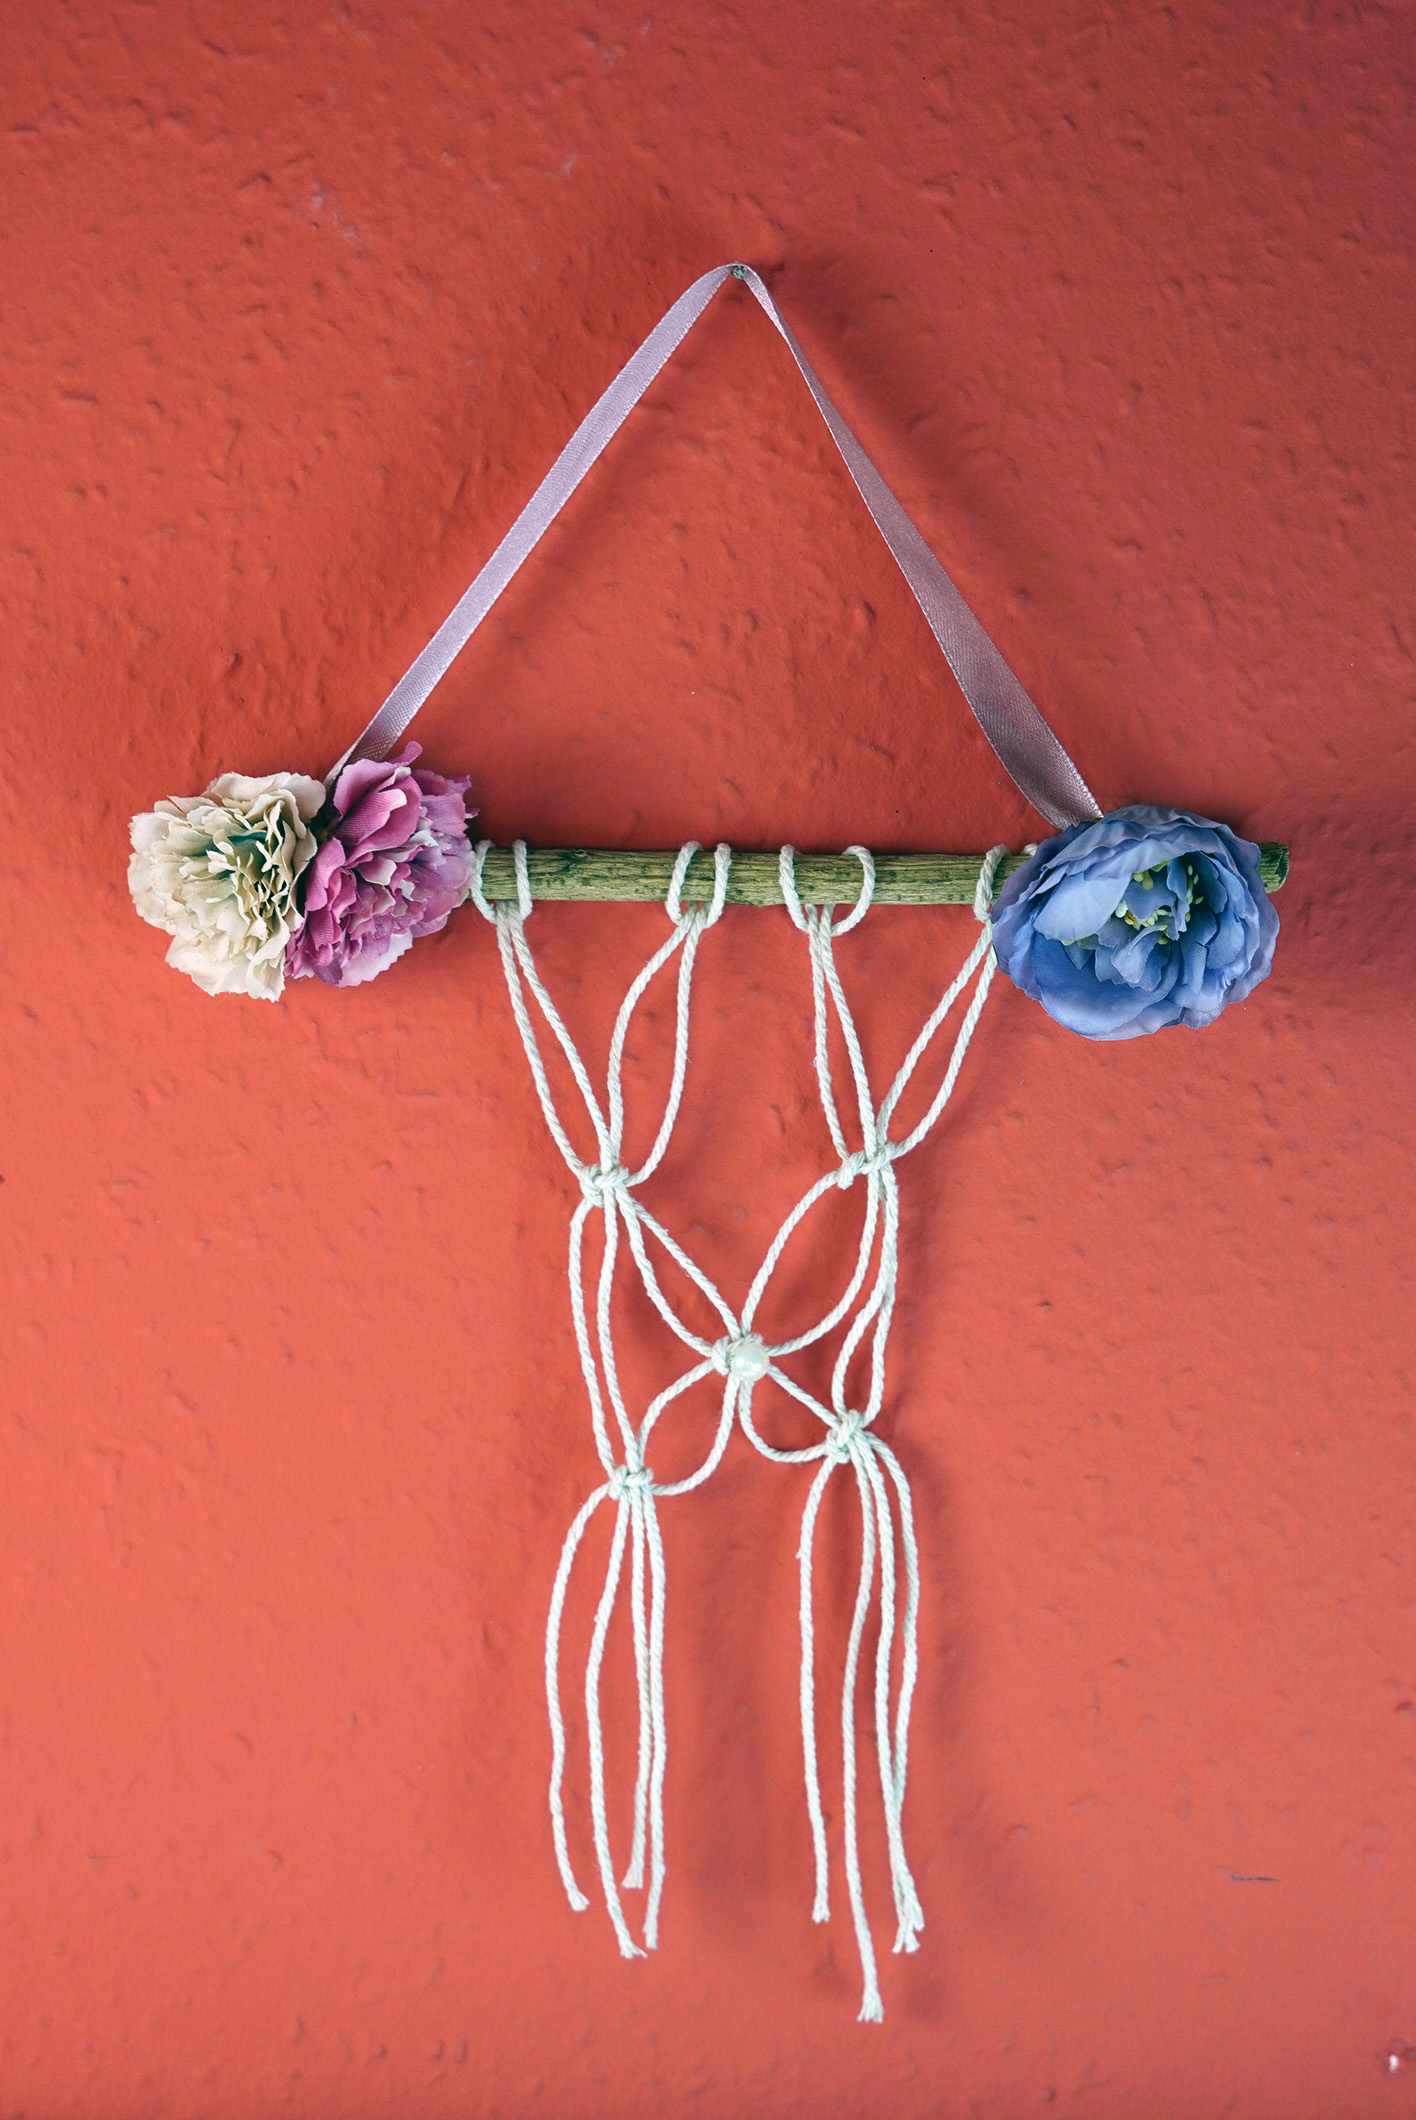
With 5 knots, you should have something like this.
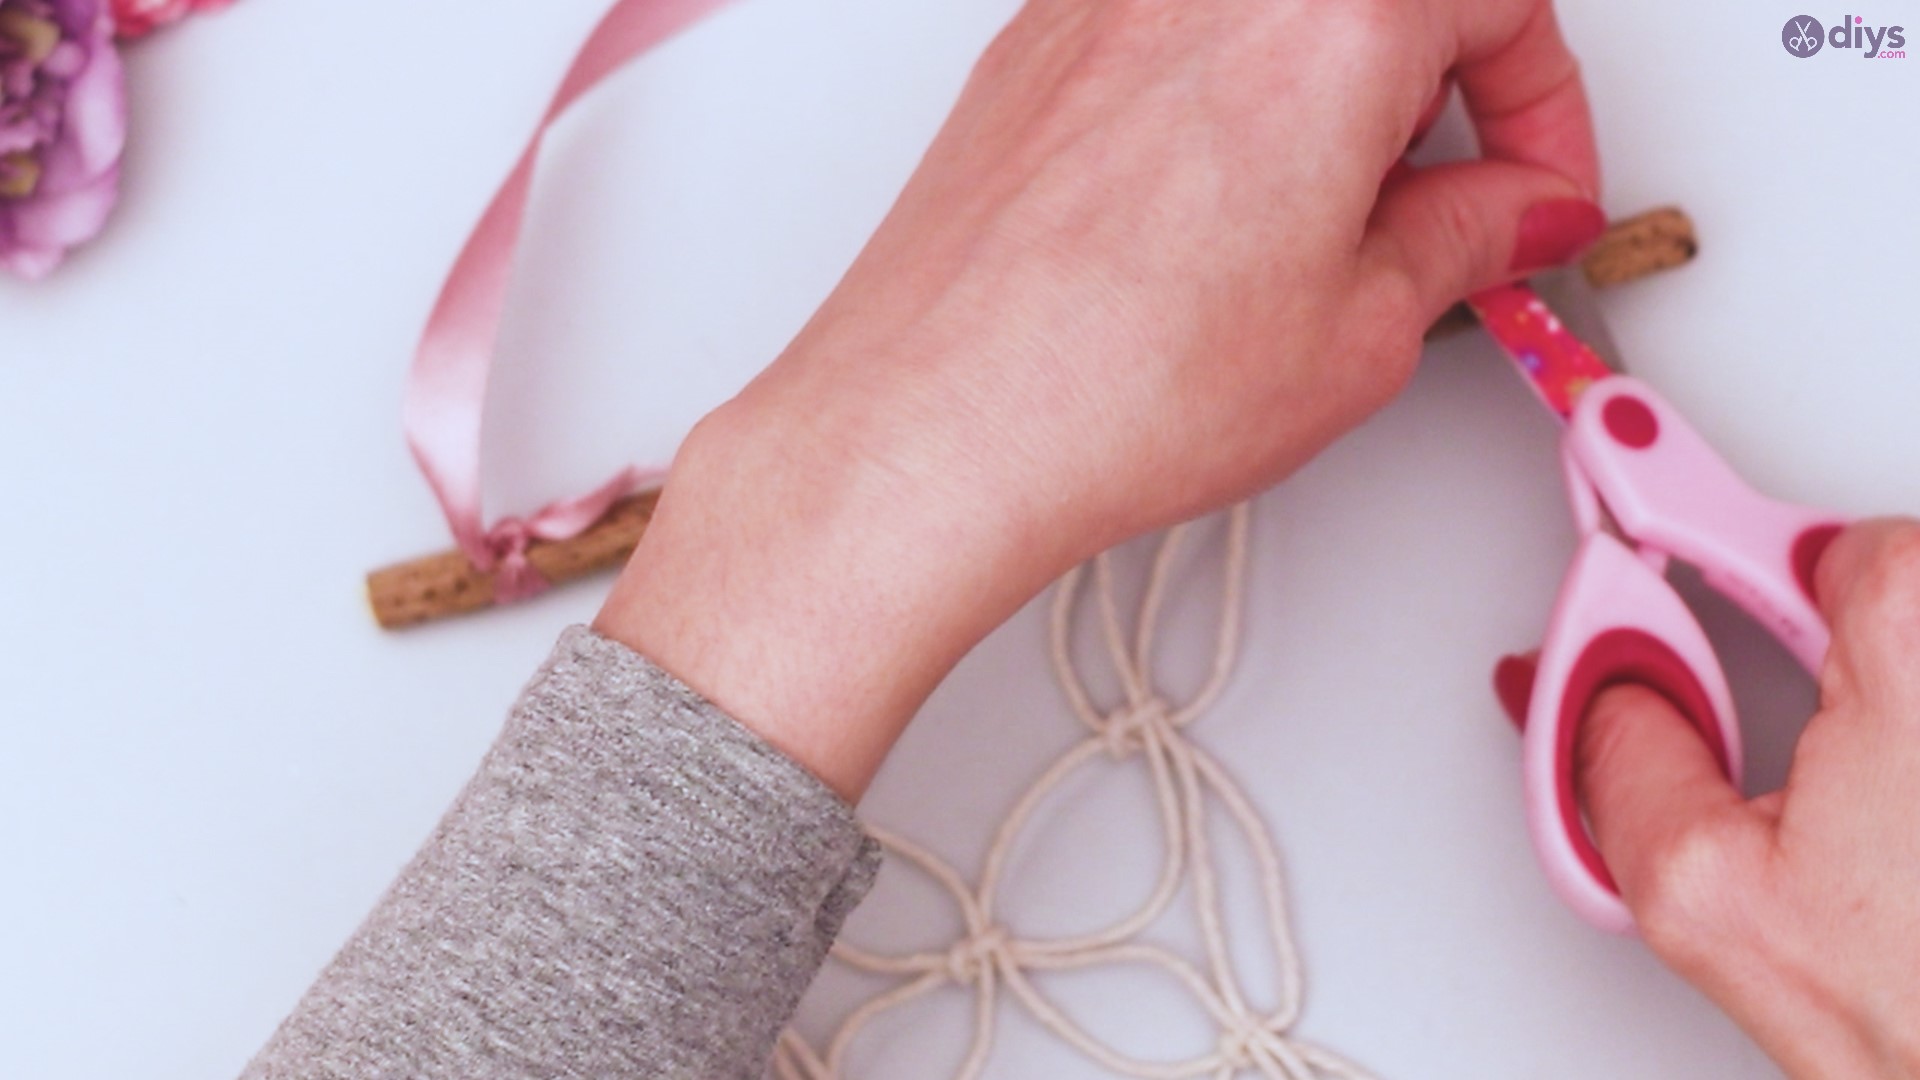
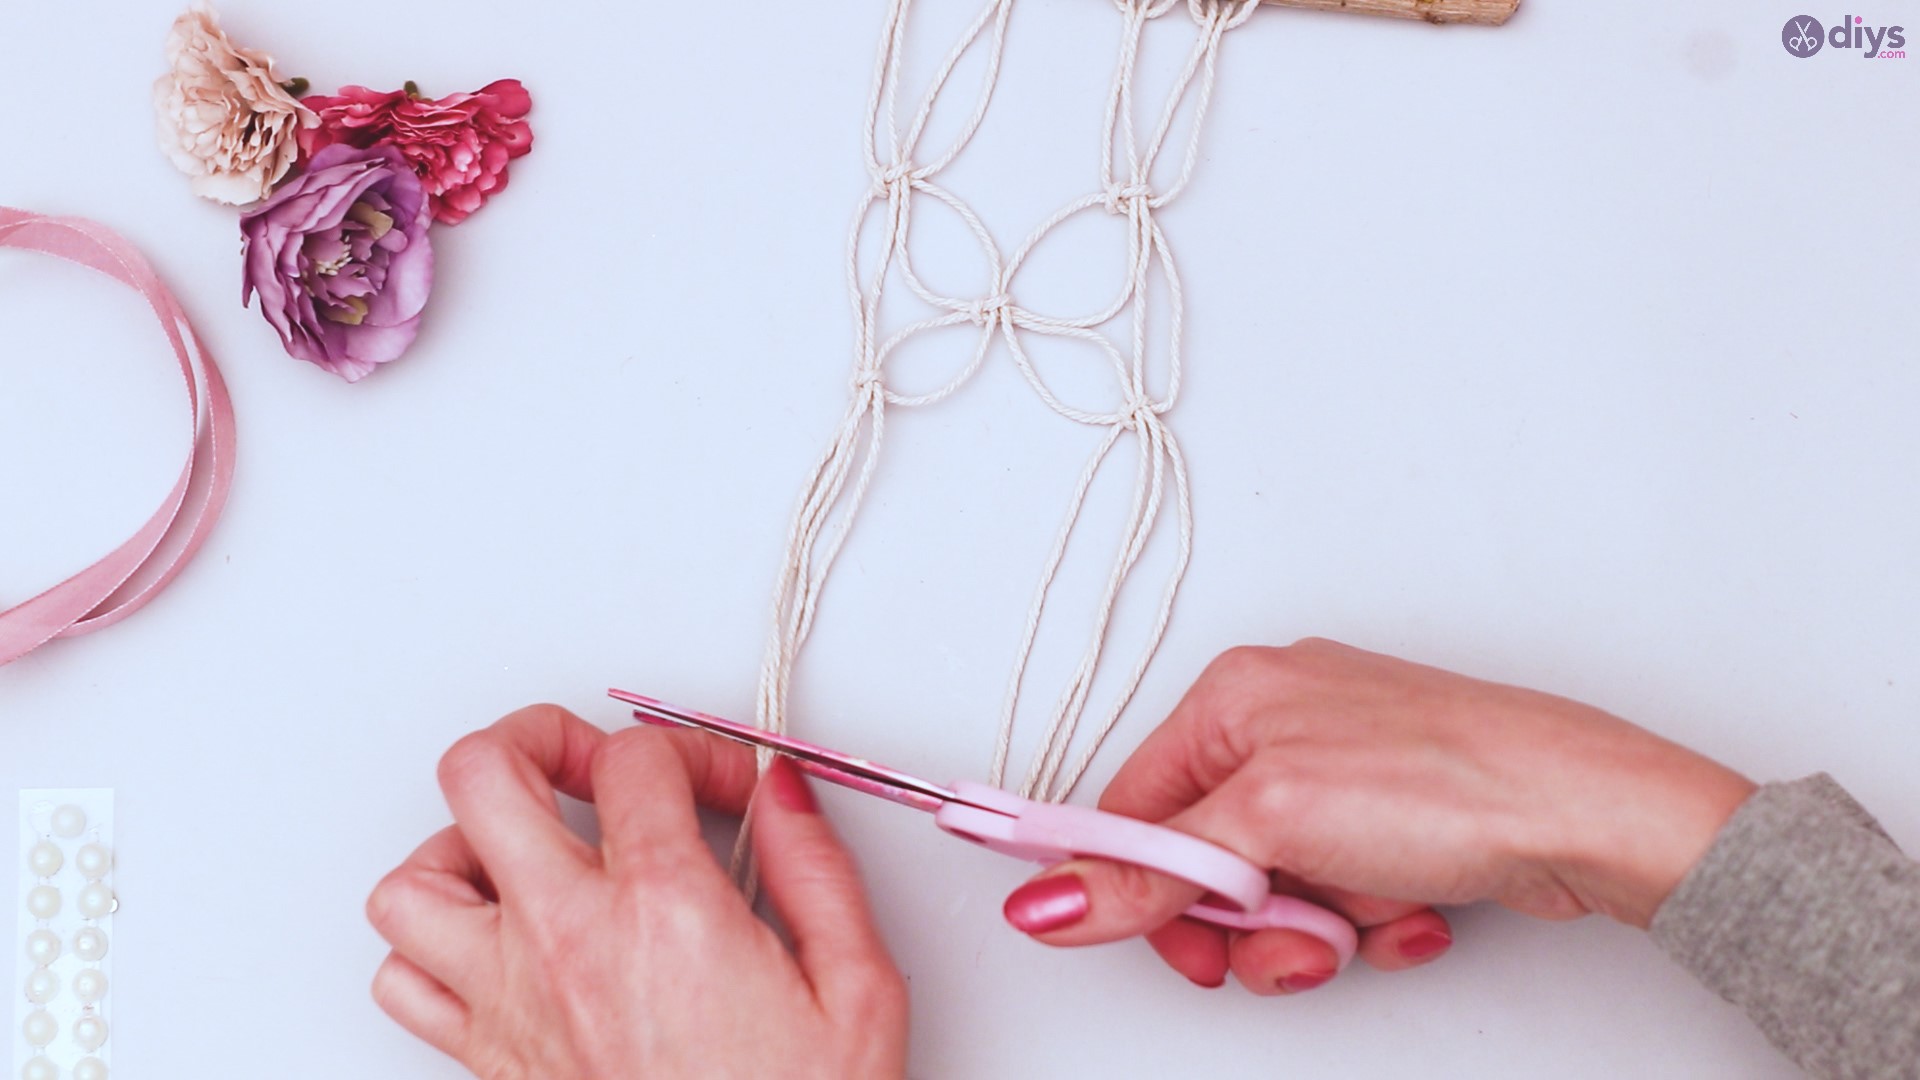
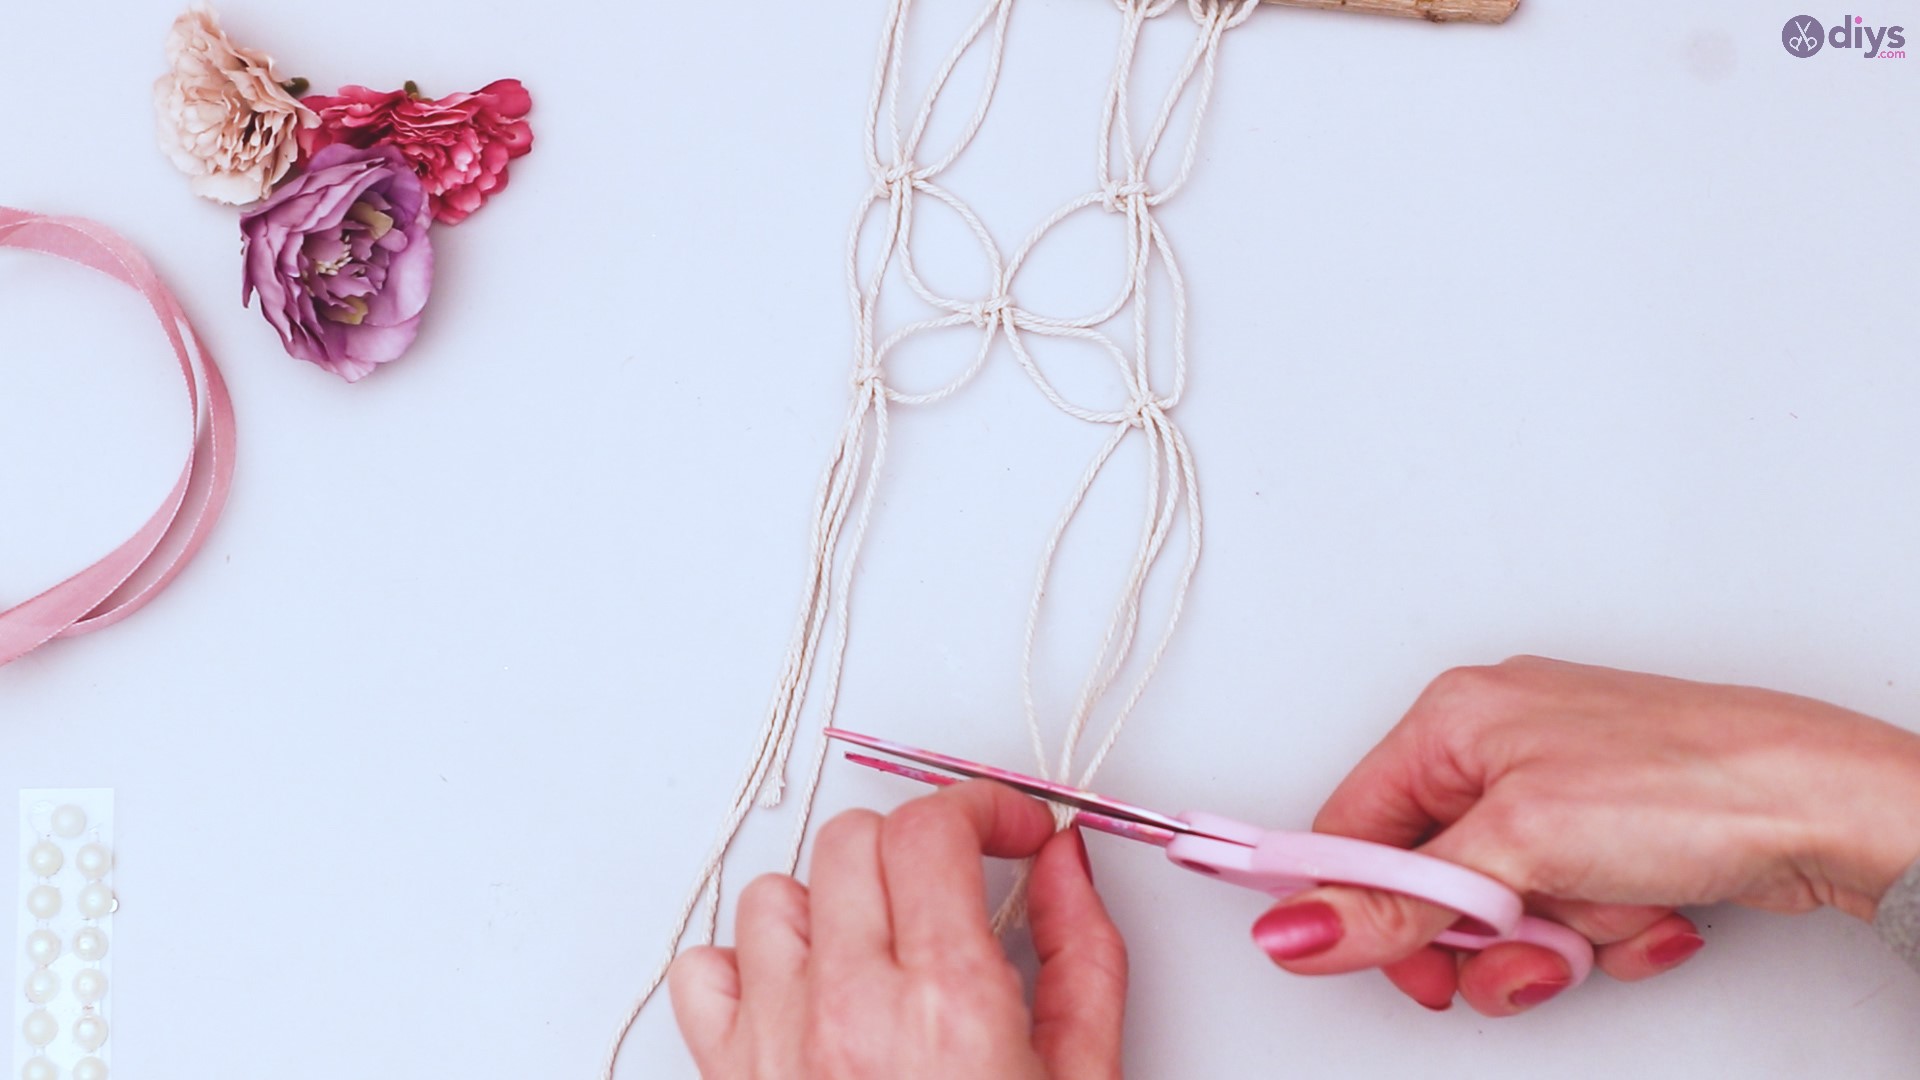
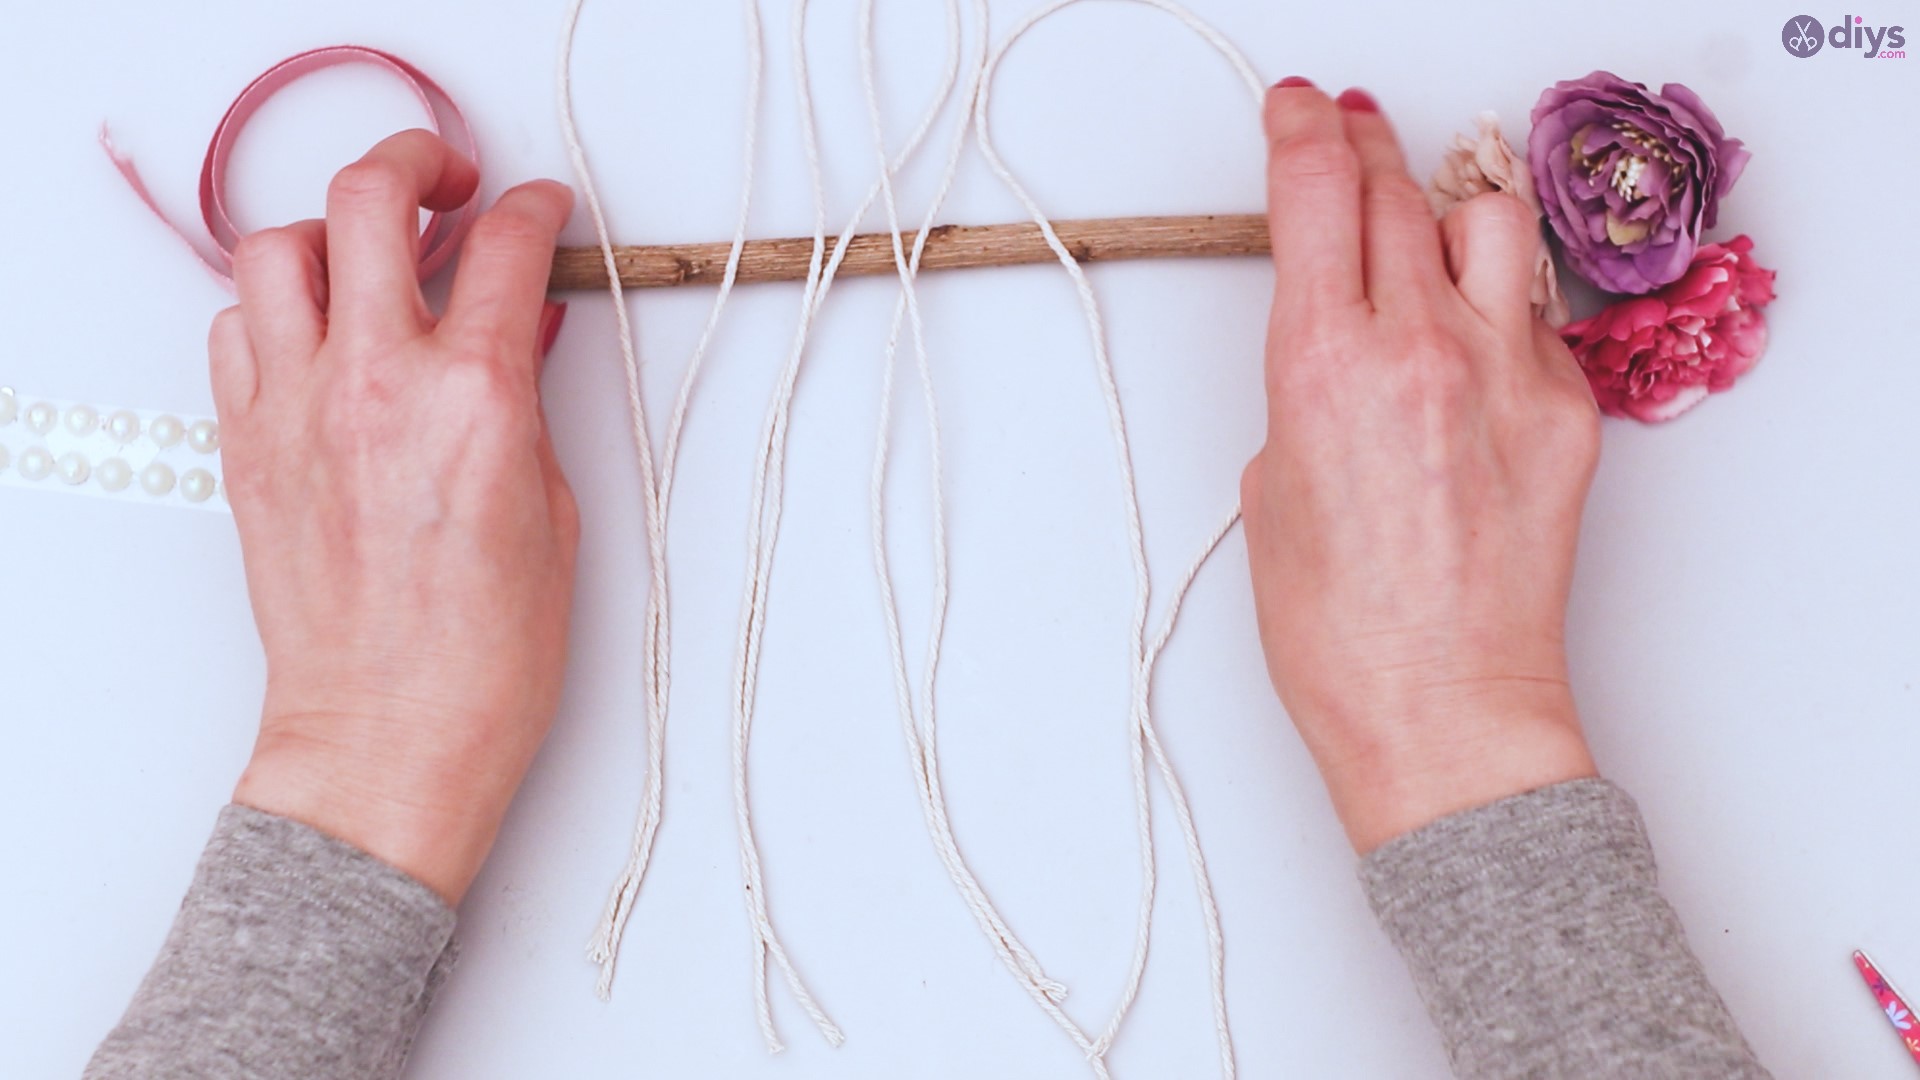
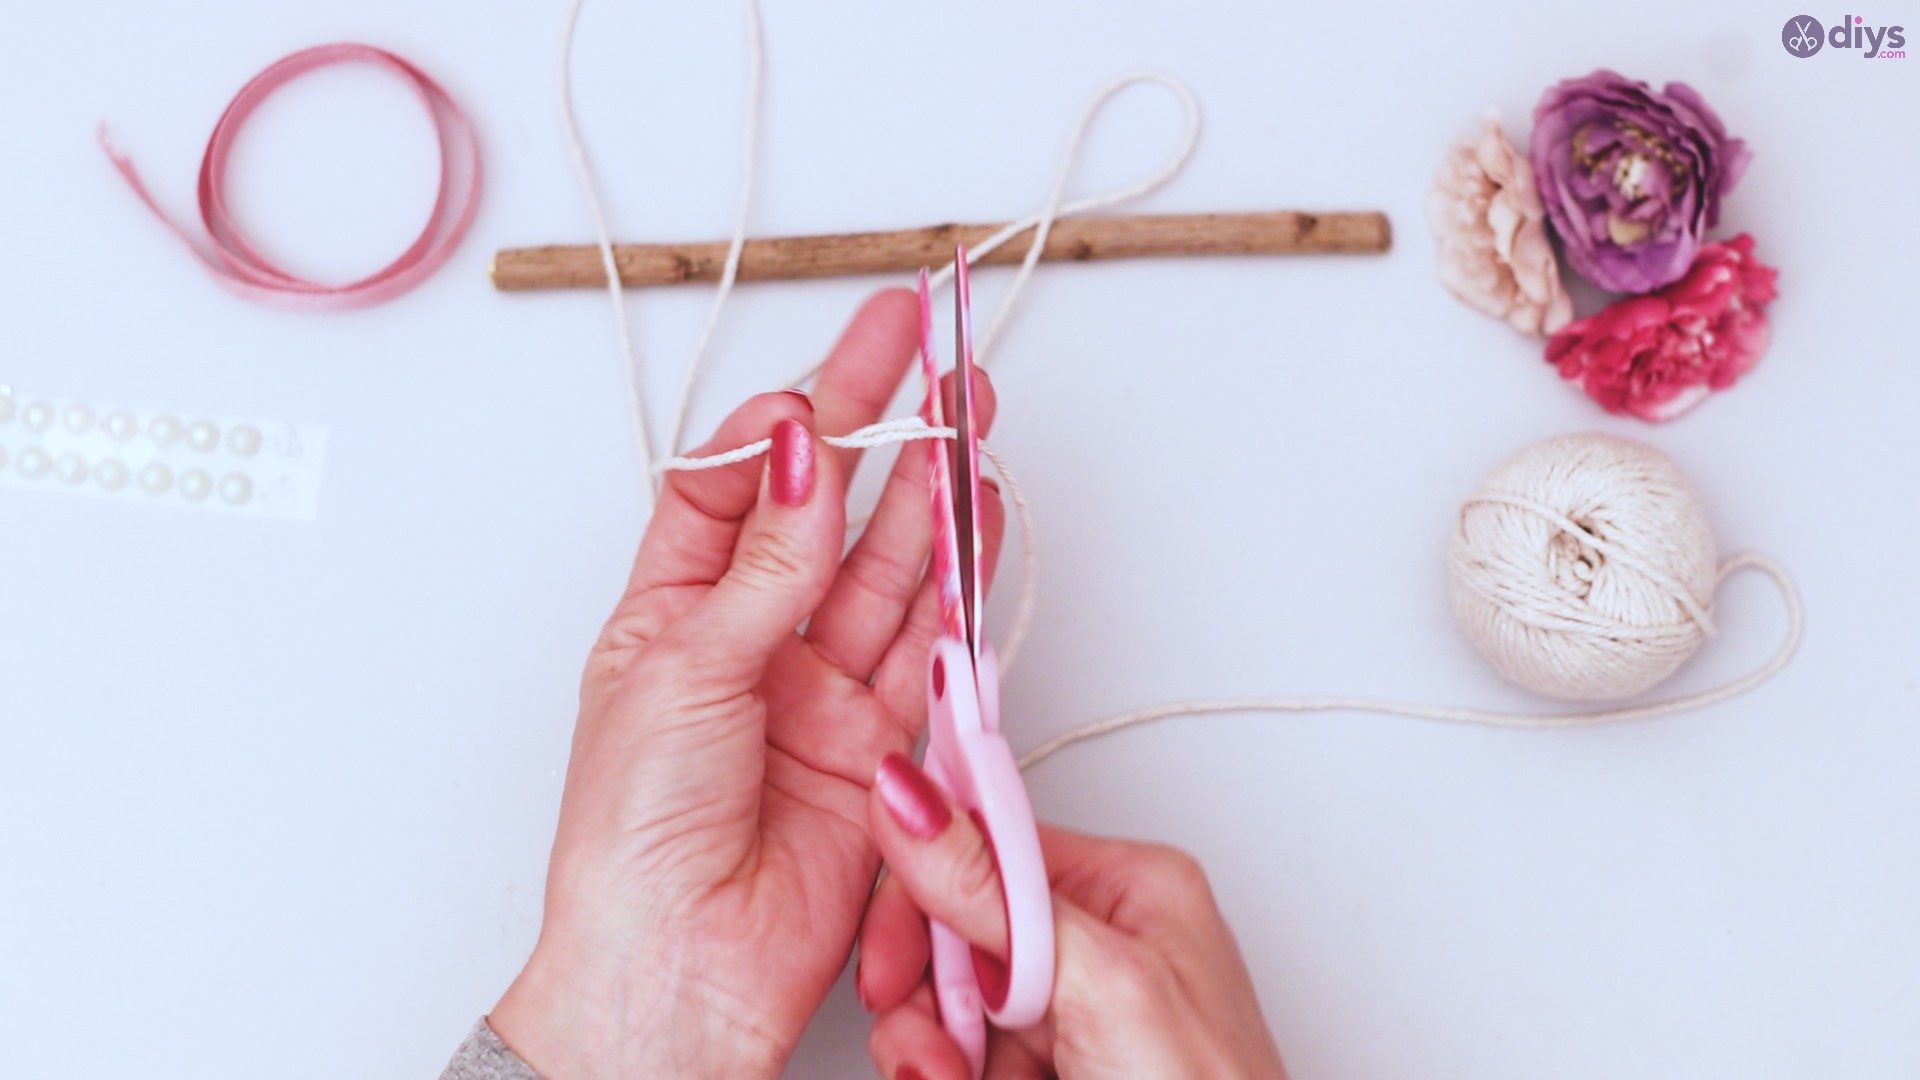
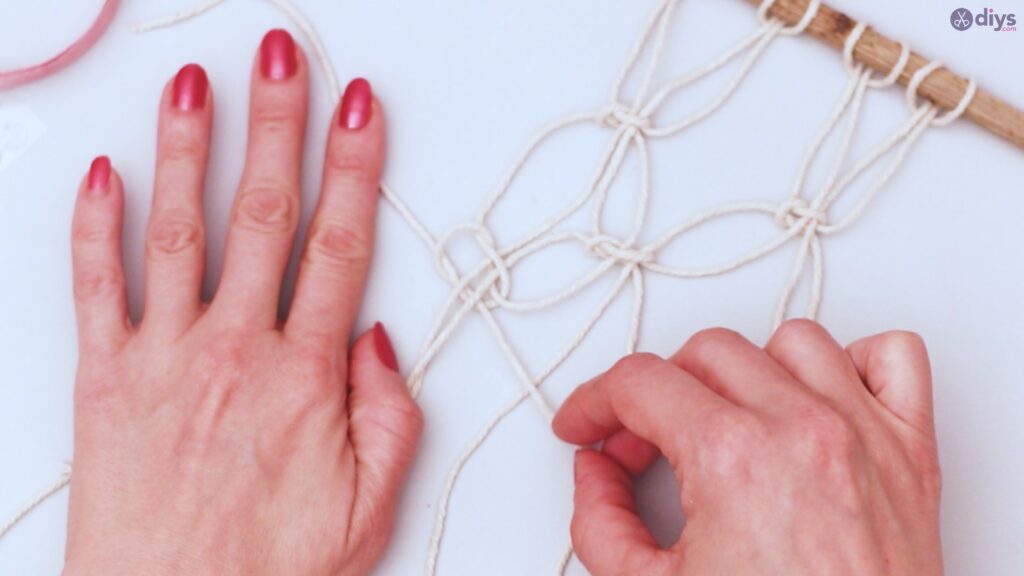
Step 6: Trim Work
It’s time to clean up your work. You’ll have excess string, which is good. It means you didn’t start with your string too short.
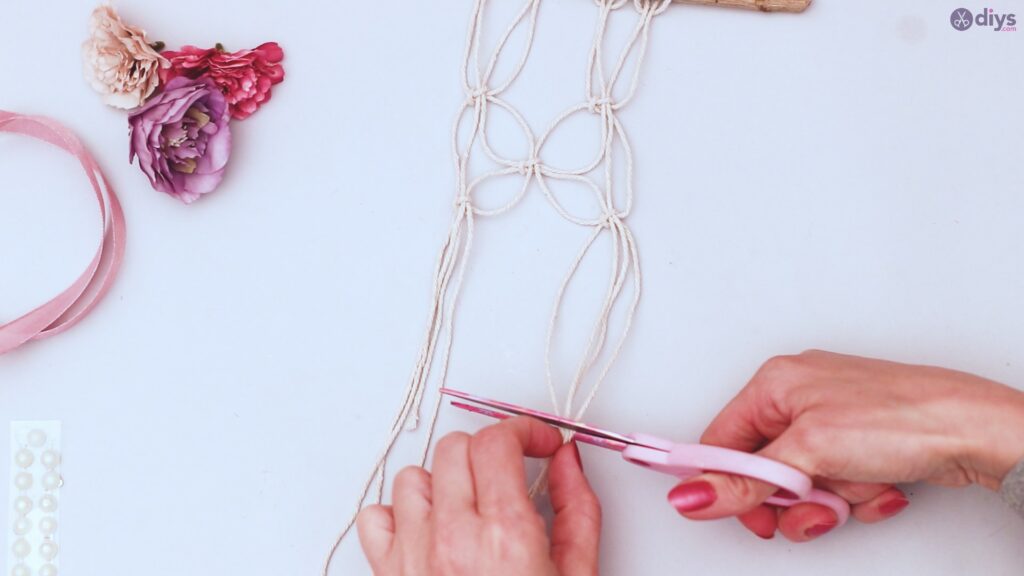
Cut the ends of the strings so that they are all relatively even. Don’t cut them off entirely, just a trim.

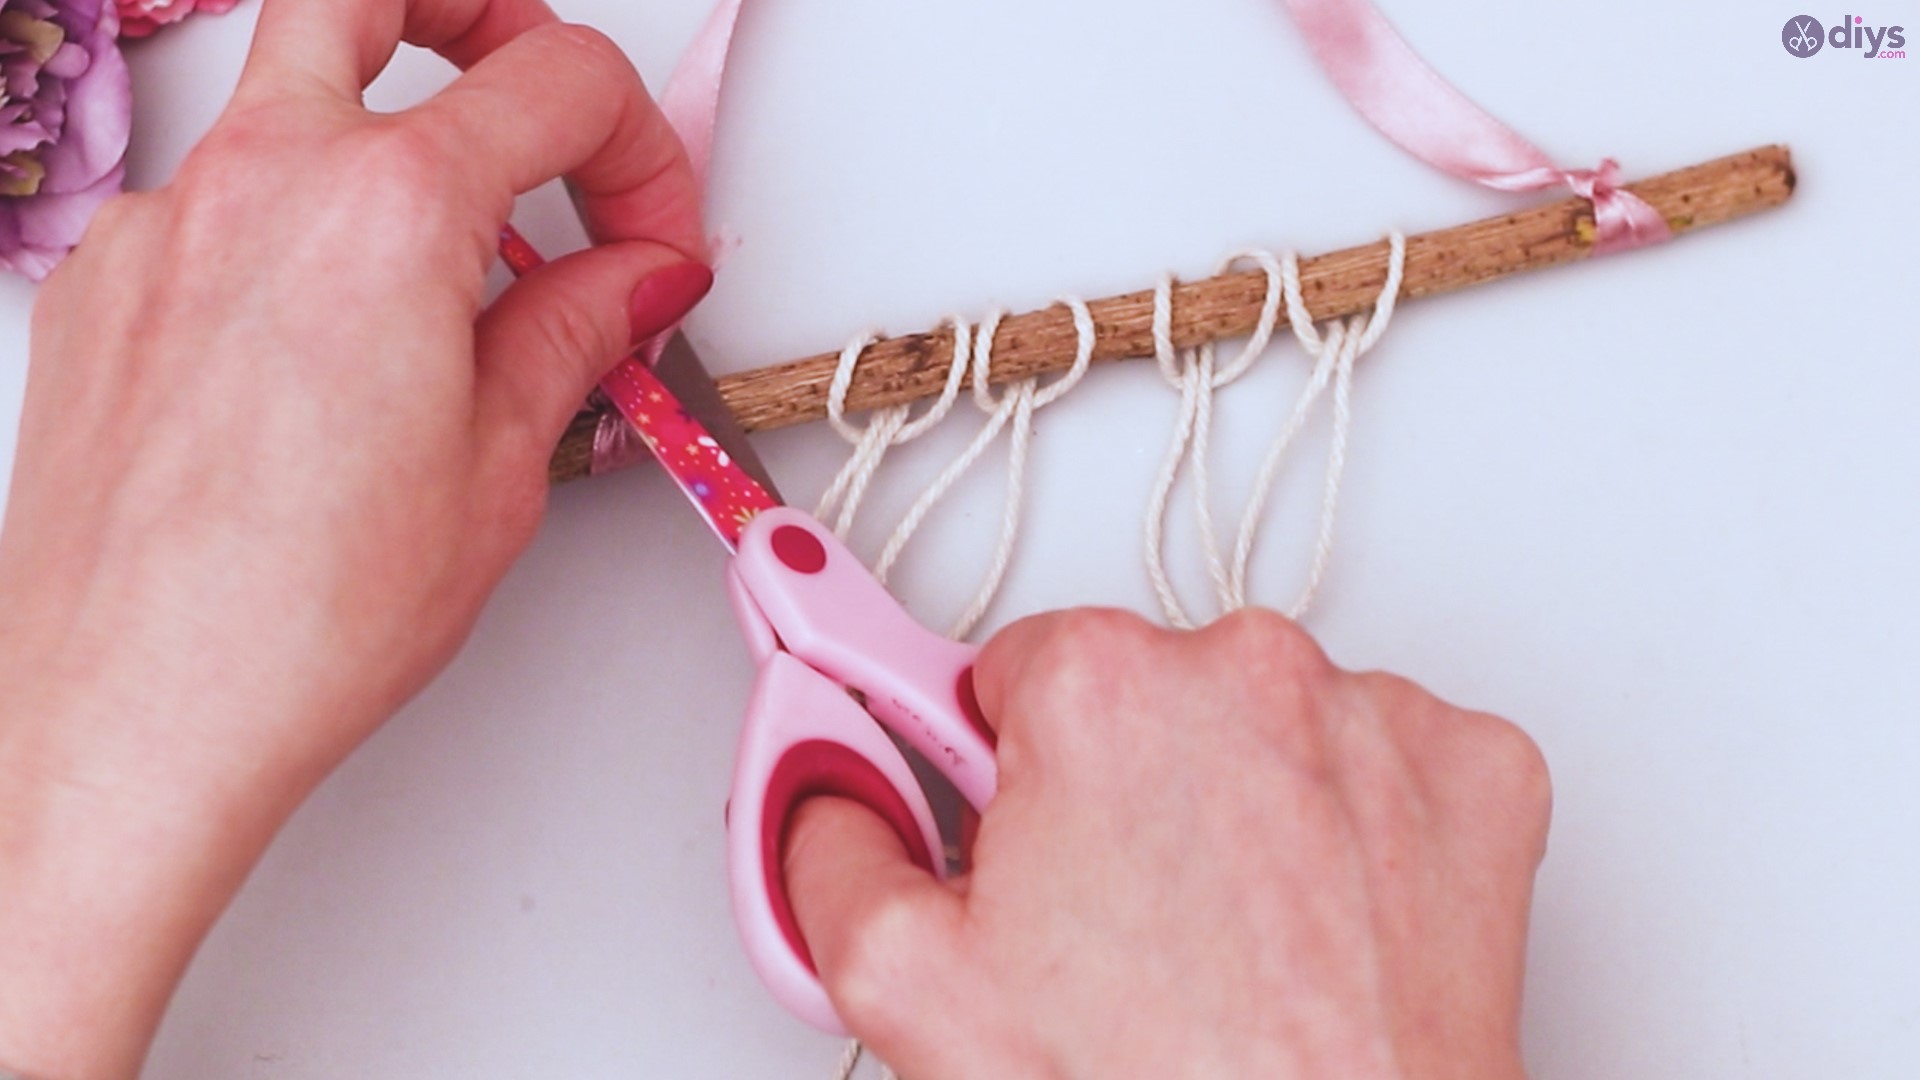
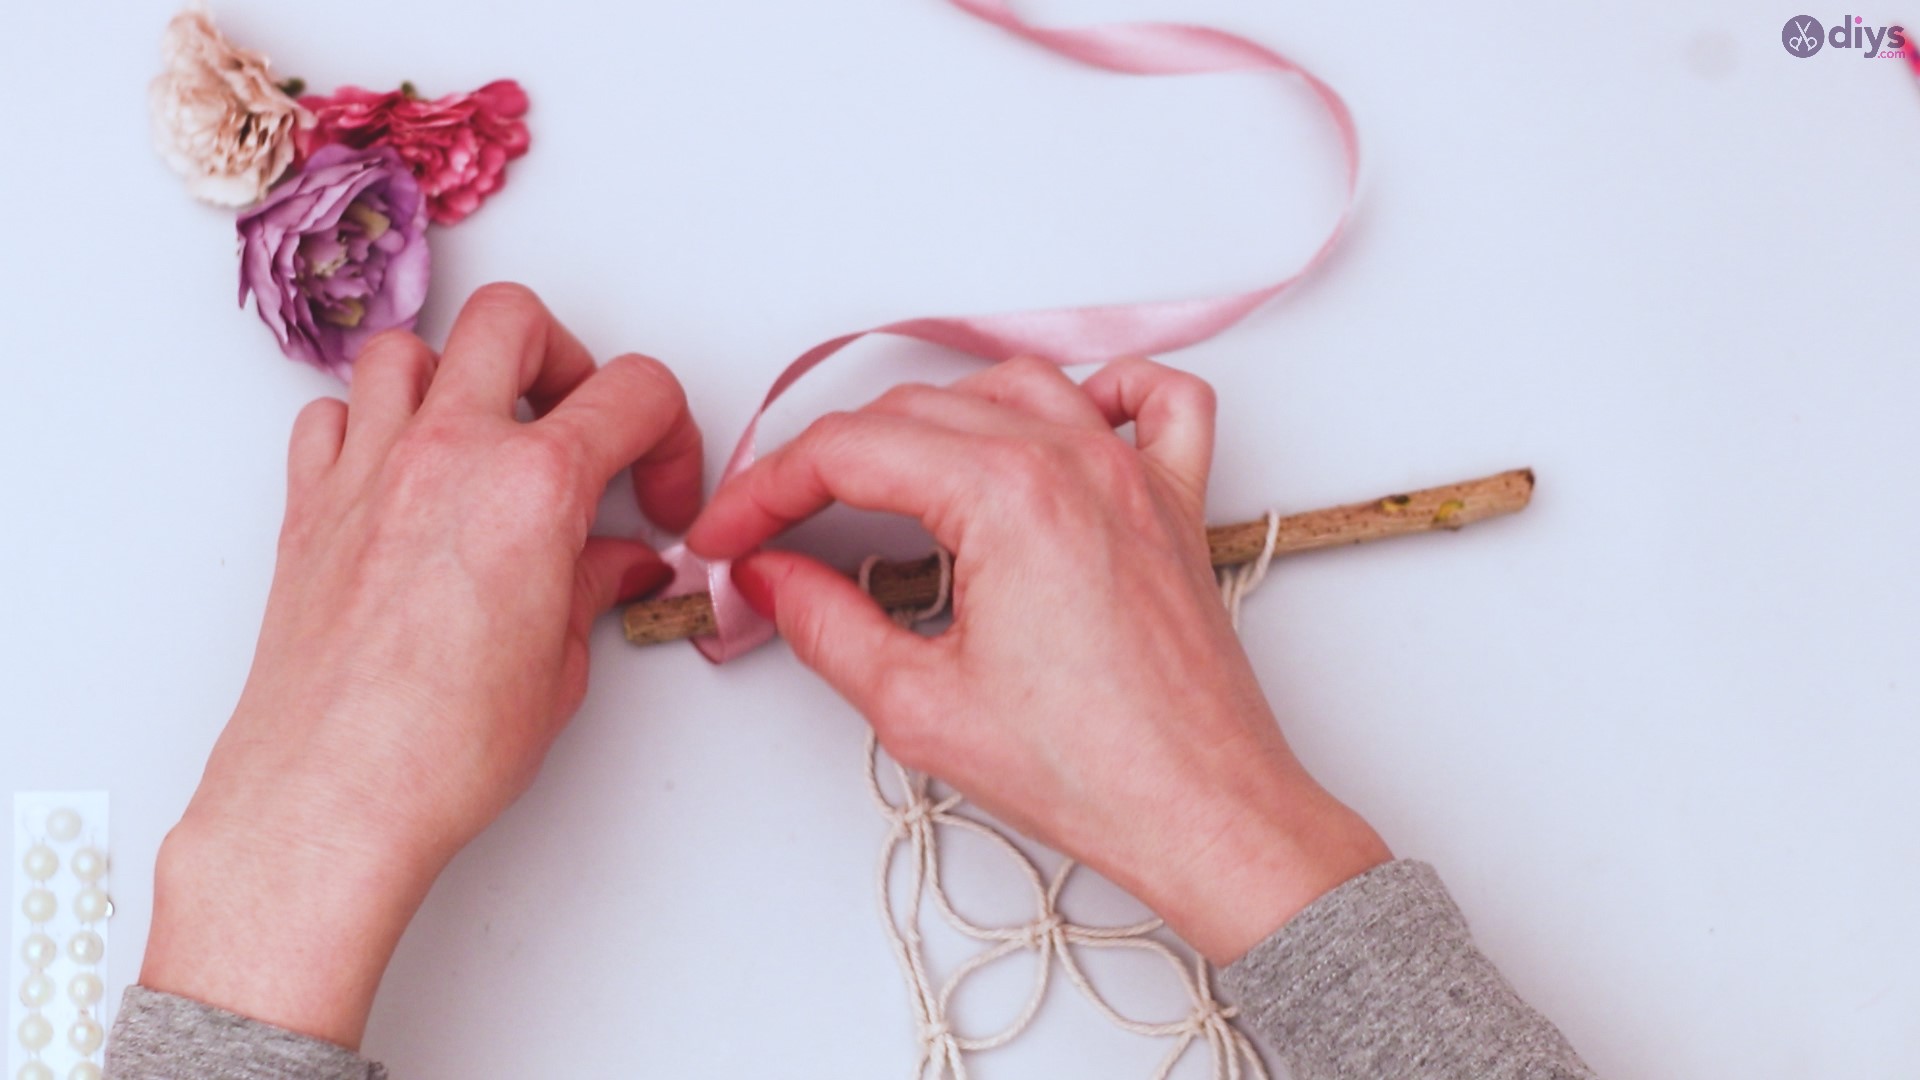
Step 7: And the Ribbon Goes To…
Take your silk ribbon, and measure out a piece about twice as long as your branch. Go ahead and snip it. Tie one end around one end of your branch. You may want to put a bead of hot glue on the branch where you tie it to make sure it stays tied.

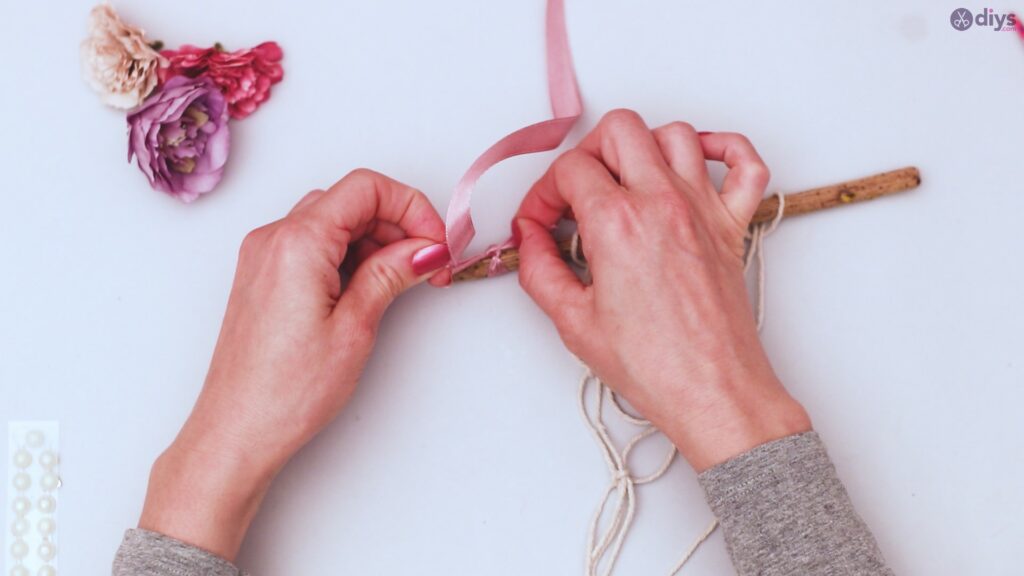
Tie the other end of your ribbon at the other end of your branch, evenly spaced from the end to match the first. Again, hot glue can work wonders to make sure it stays put.
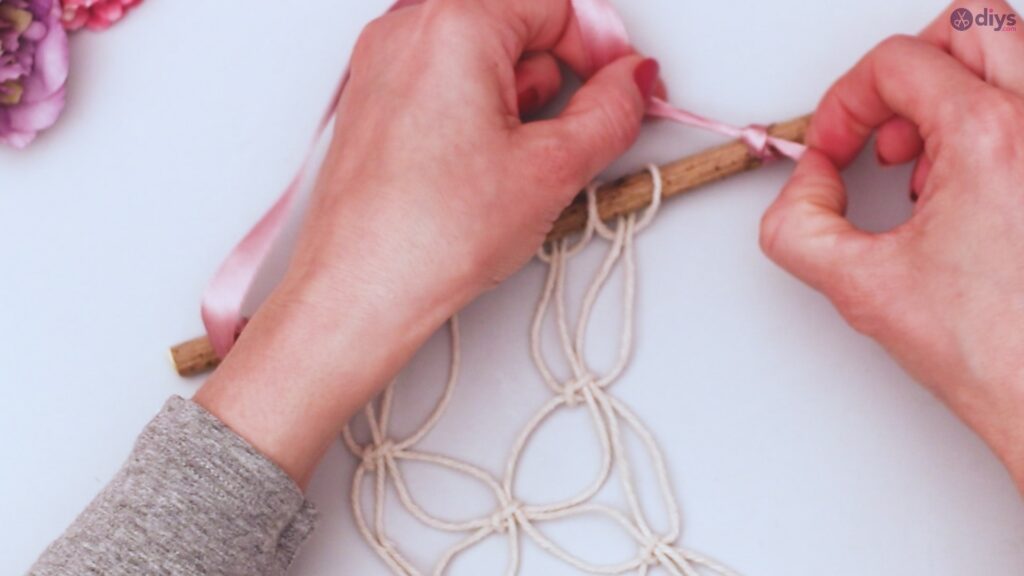
Wait till the glue dries, which should only take a minute, and cut off any excess ribbon at the ends. This is your hanger for your wall art.


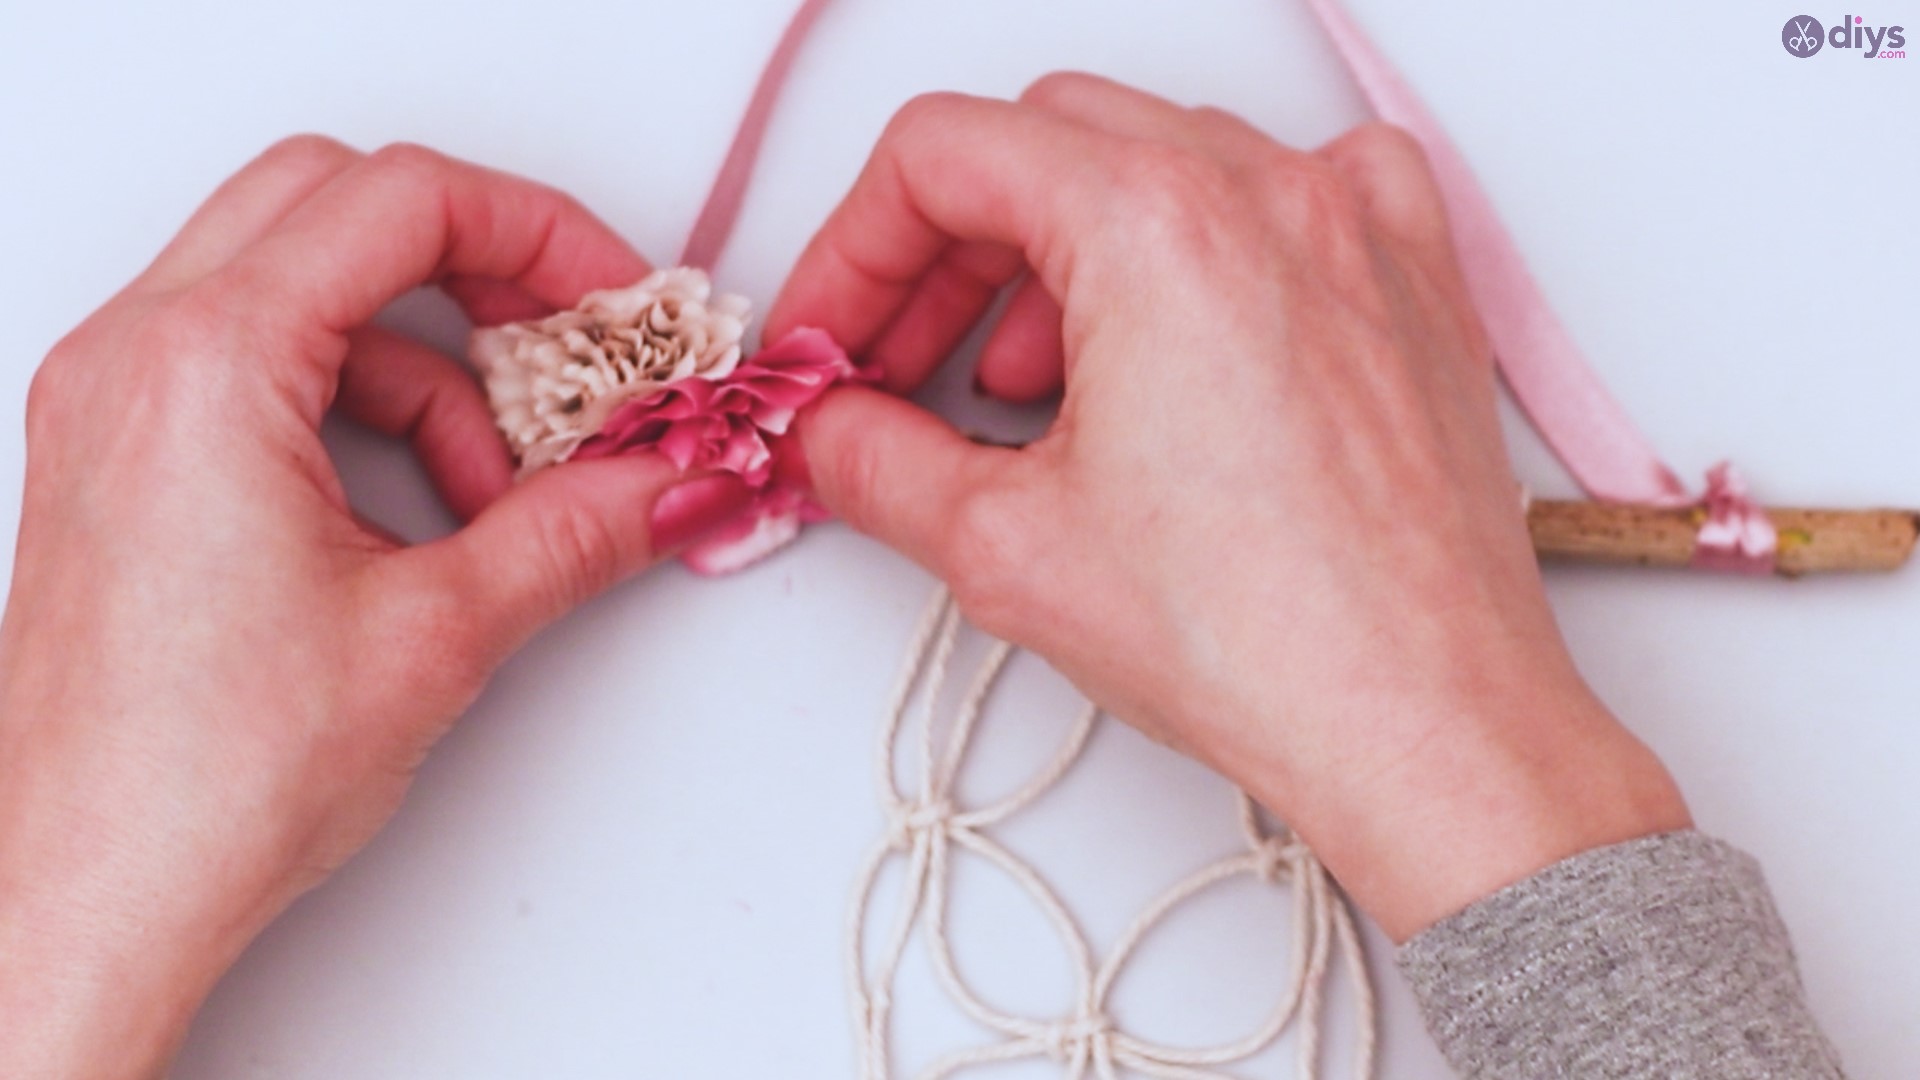
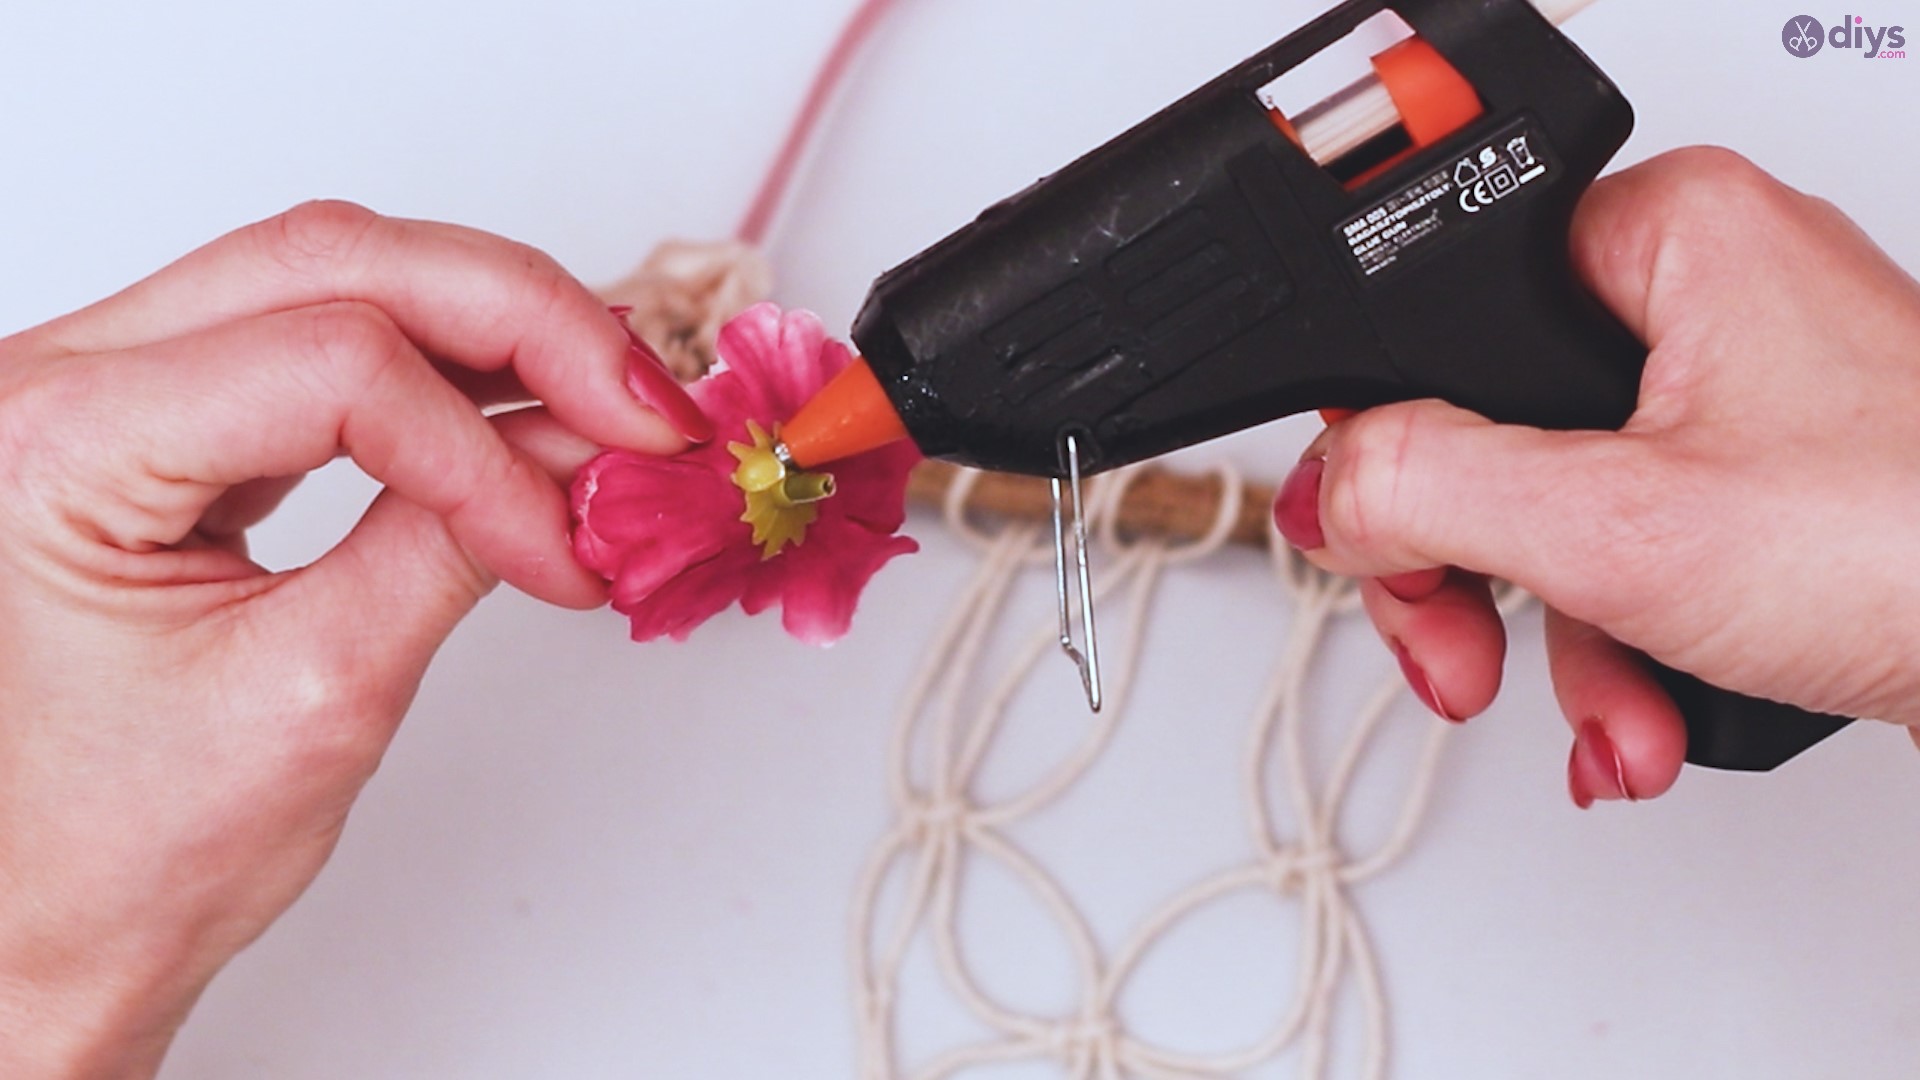
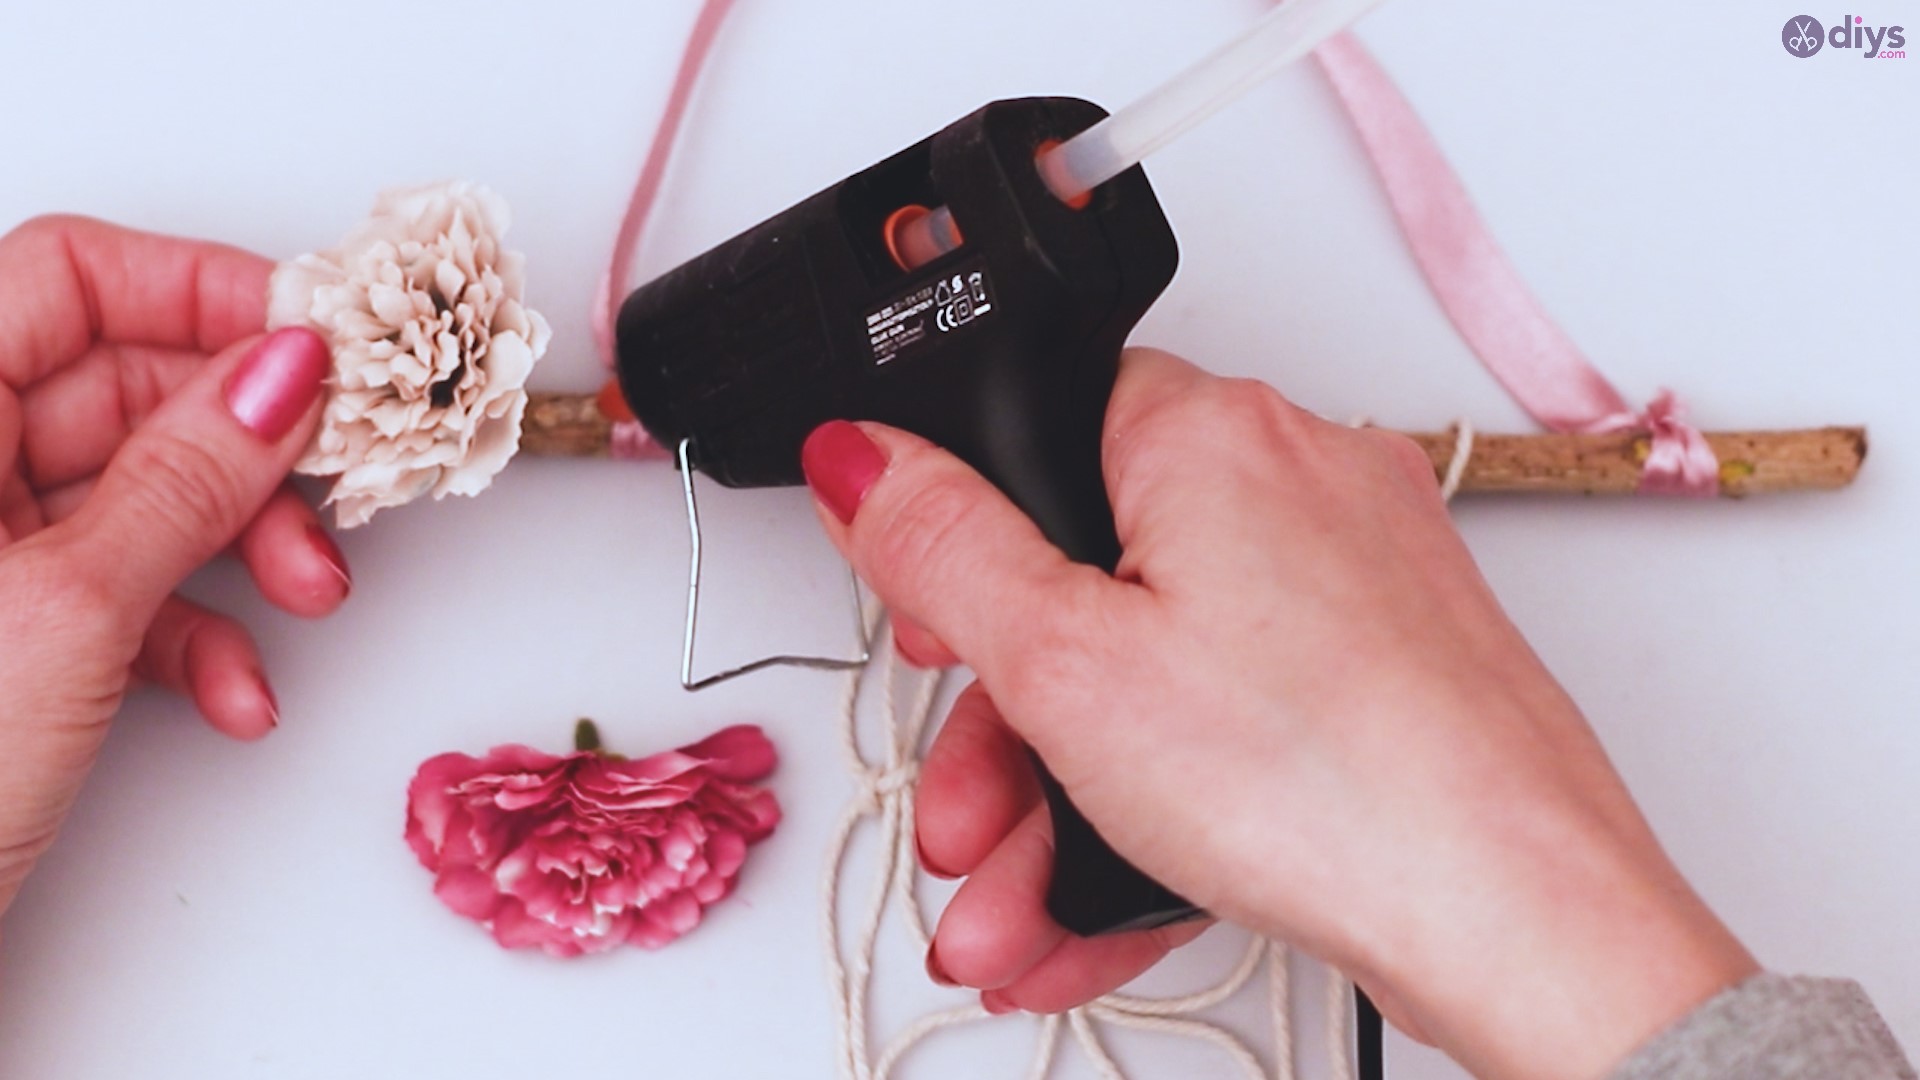
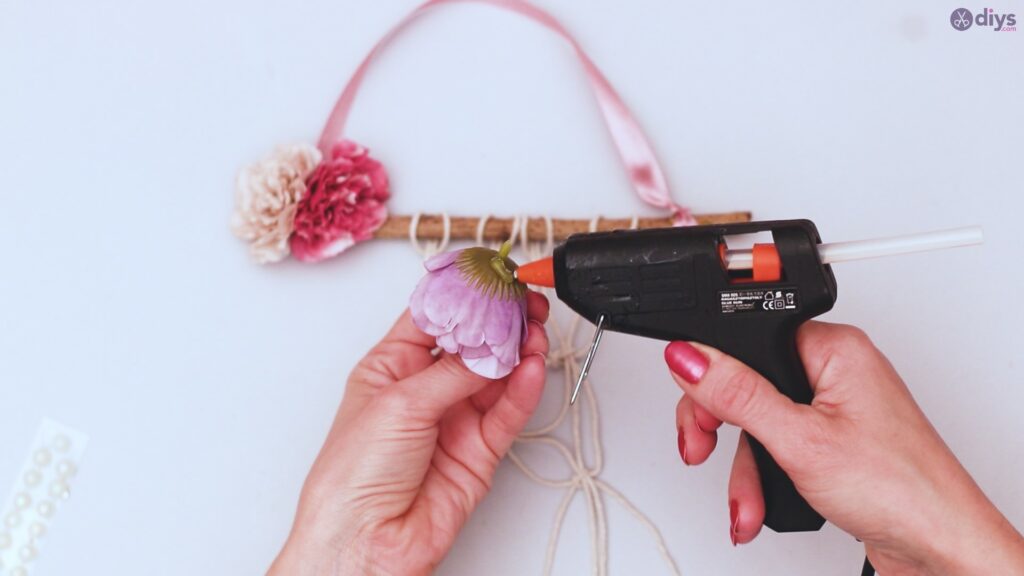
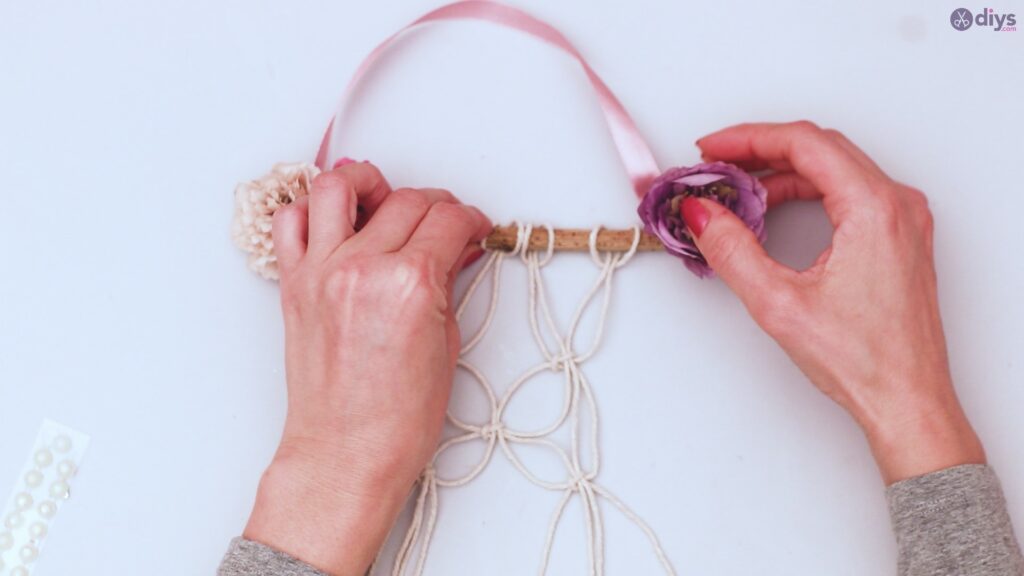
Step 8: Floral Arrangements
Gather the artificial flowers you’d like to use. They can be any shape, color, or size, and a mix-match. I used 4 – 2 at one end and 2 at the other. Place a dot of hot glue on the back of your first flower, and press the glue to the branch where you’d like it. It’s usually nicest if you put them toward the ends to cover up the end work of ribbon and such.
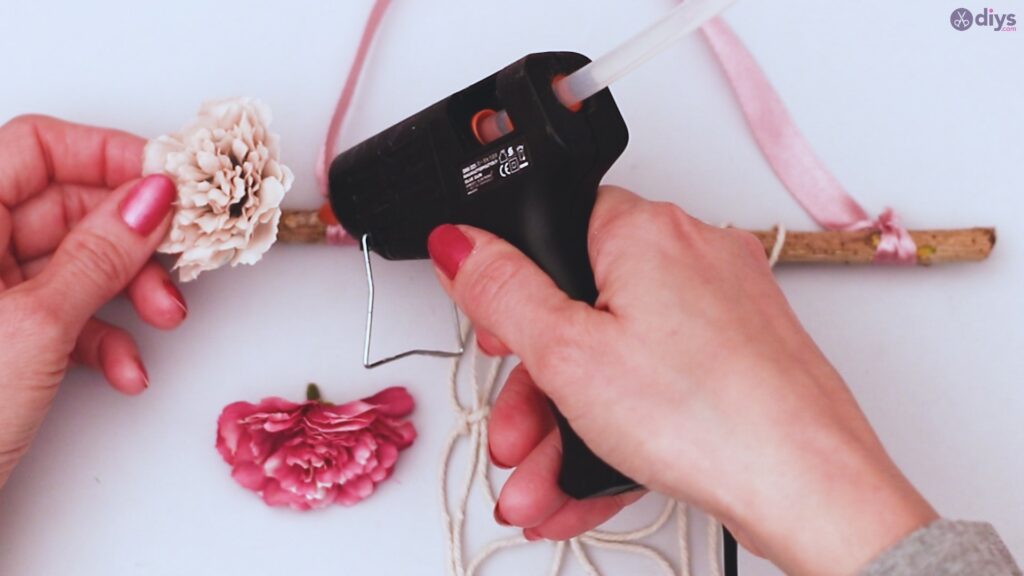
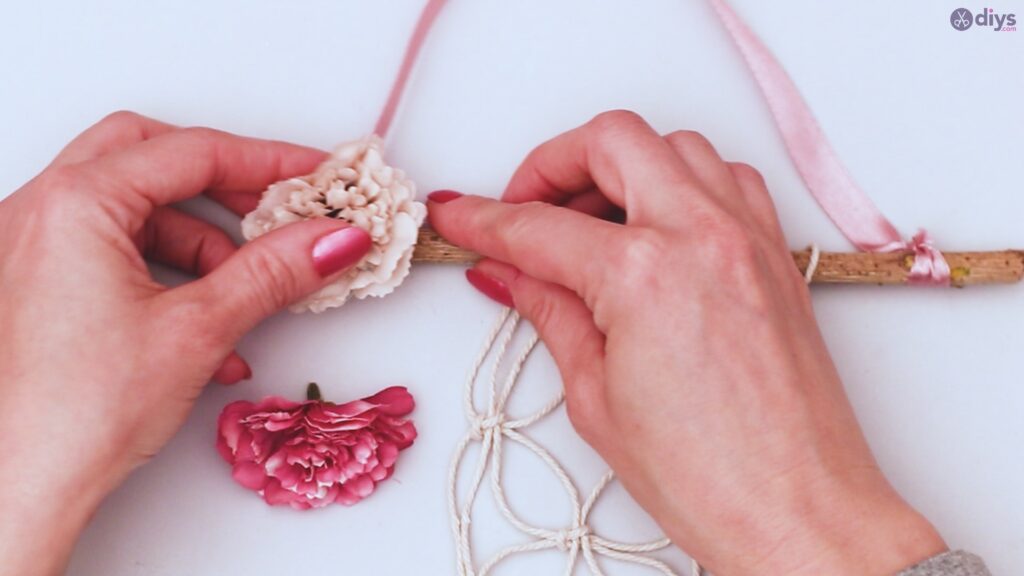
Repeat the process with other flowers as desired, until you have the look you want with your floral arrangement.


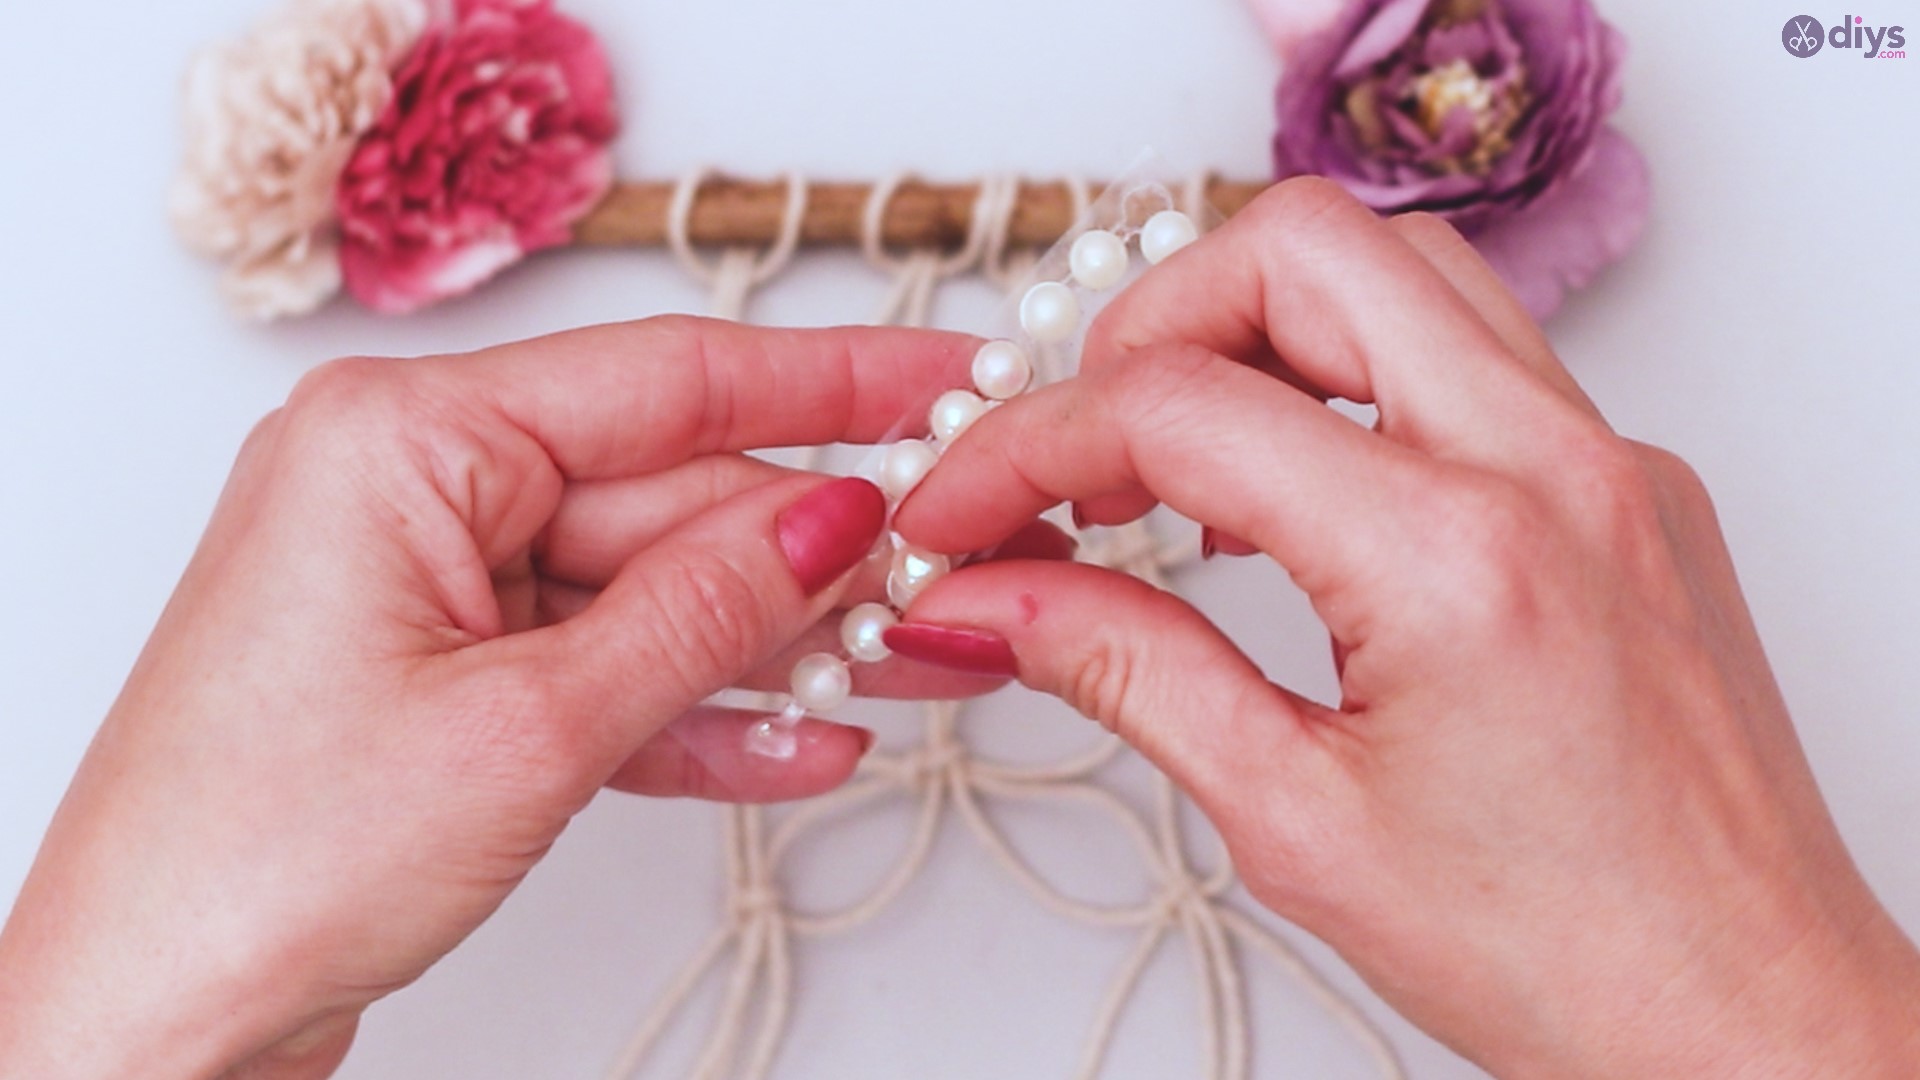
Step 9: Add Beads
Décor beads are perfect little trinkets to add a touch of flair to your knot work.
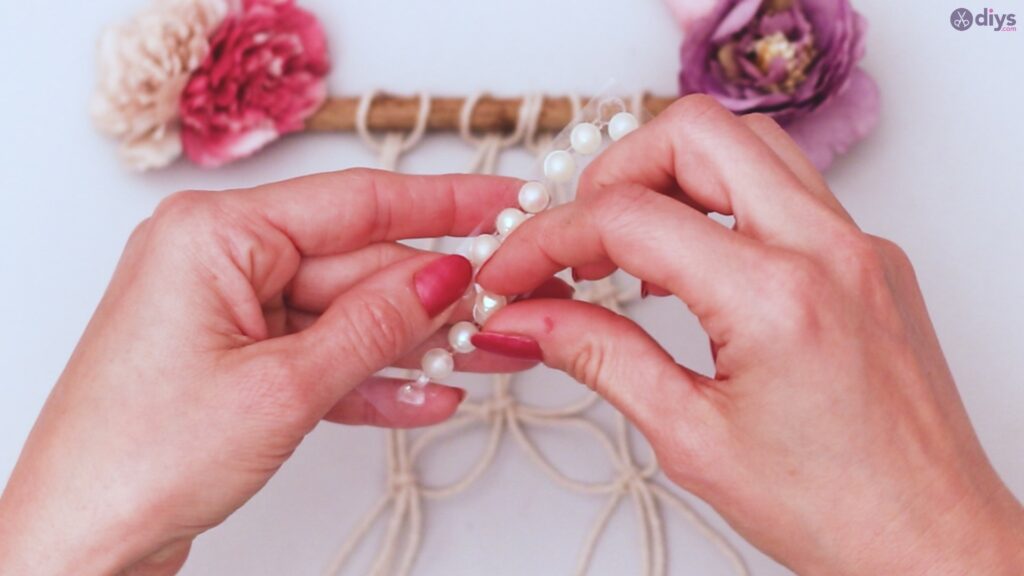

With a dab of hot glue on the back of your bead, place one in the center of each knot on your string design.

Your finished product will be a unique work of art, based on your choice of flowers, your spacing, and your particular style of knotting. It’s a great way to learn some new tricks, to make a beautiful piece of décor for your home or a gift for a crafty friend, or just to spend an afternoon doing something you love. Next time you’re trying to think of a unique idea to toil away the time, spend a few minutes staring at the remnants of supplies you already have, and you’d be surprised what you can come up with!