DIY Concrete Necklace with Glitter
Updated on November 19, 2025


When I found myself falling in love with minimalist and industrial chic home decor that uses exposed concrete, I decided to use my DIY skills to create my own concrete necklace, but with a little bit of sparkling flair for extra style. Check out how I made this one!
Check out these step by step instructions complete with photos! If you’d rather follow along with a video tutorial instead of written words, scroll to the bottom of this post to find just what you’re looking for.
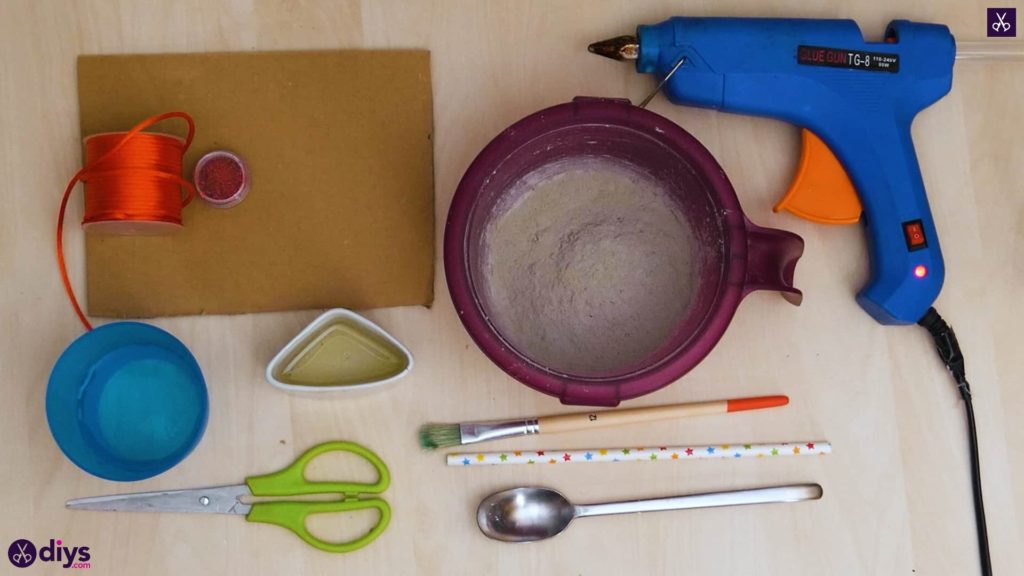
For this project, you’ll need:
- DIY fine particle cement
- Water
- A spoon
- Scissors
- Tape
- Oil
- A paintbrush
- Glitter
- Cardboard
- Hot glue
- Satin macrame cord
- A straw

Step 1: Gather your materials!
When I work with concrete, I always like to make sure I have everything I need before I begin.
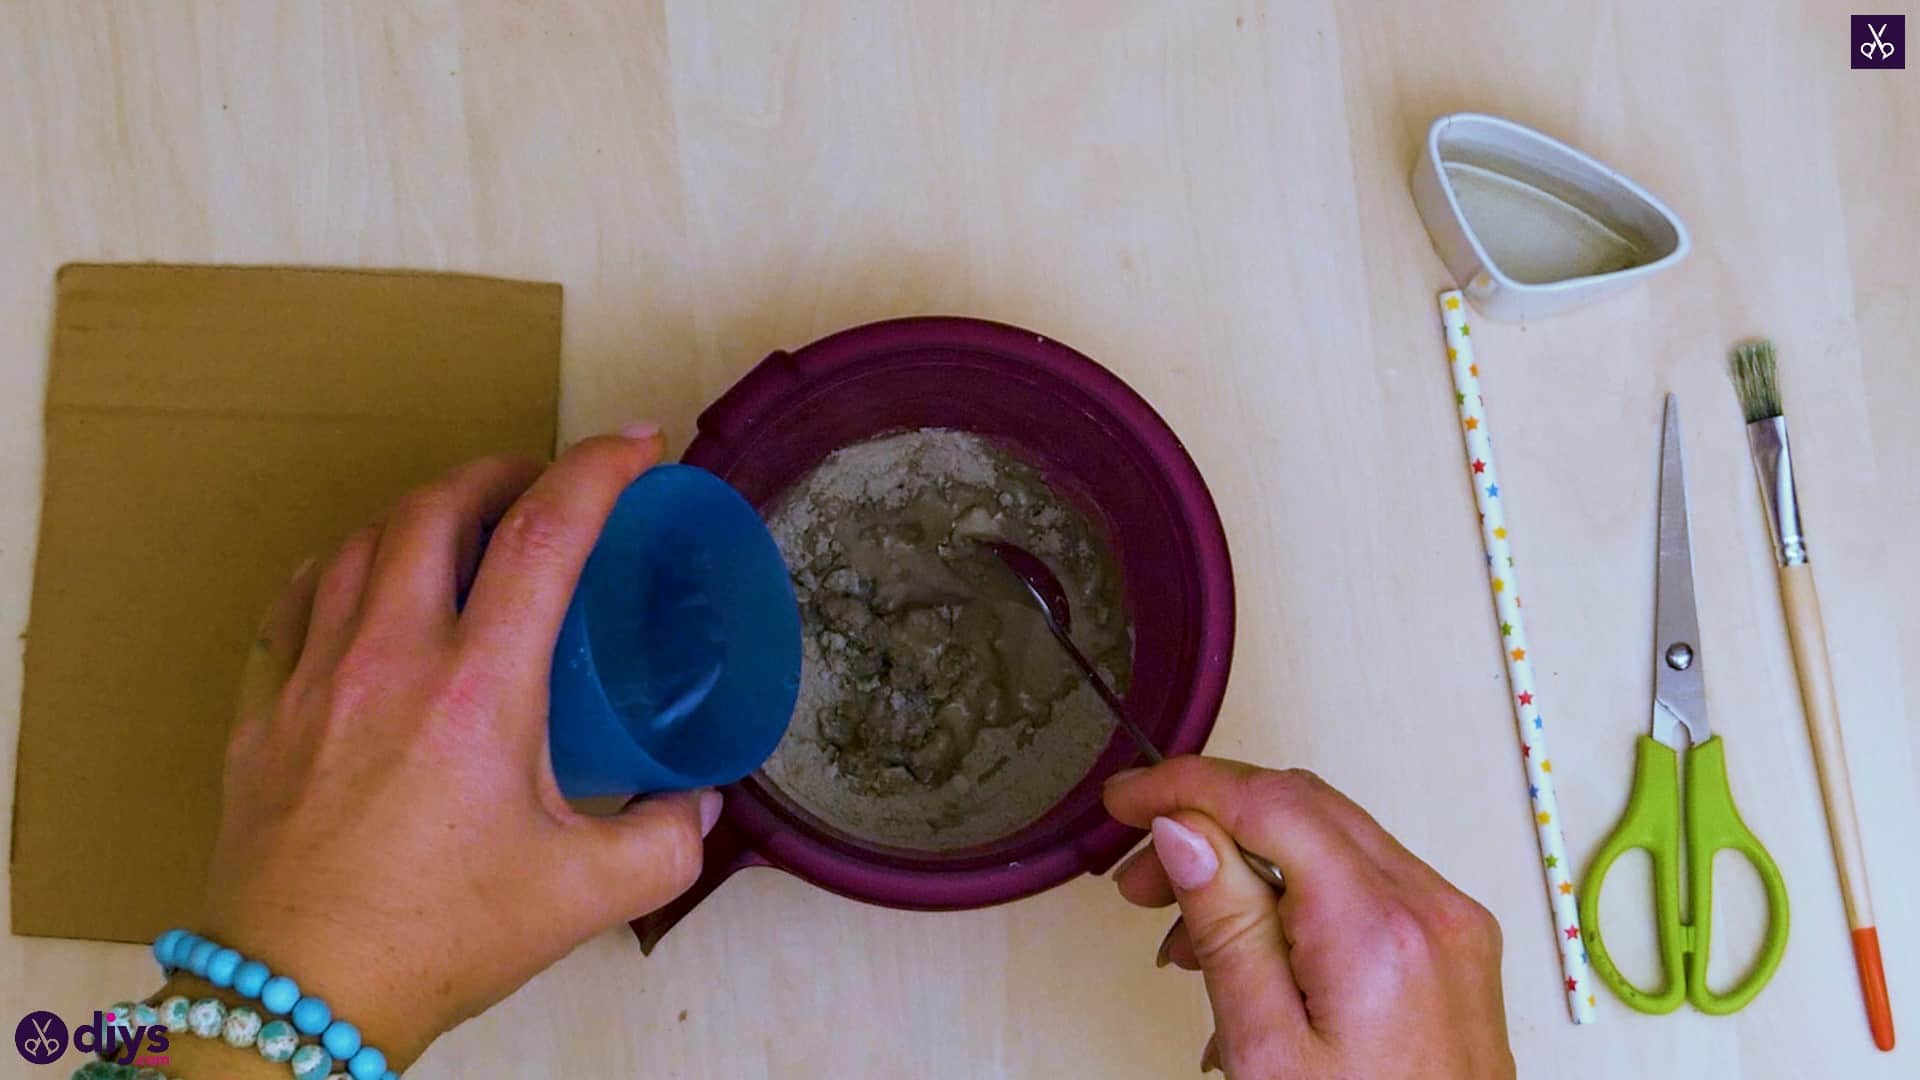
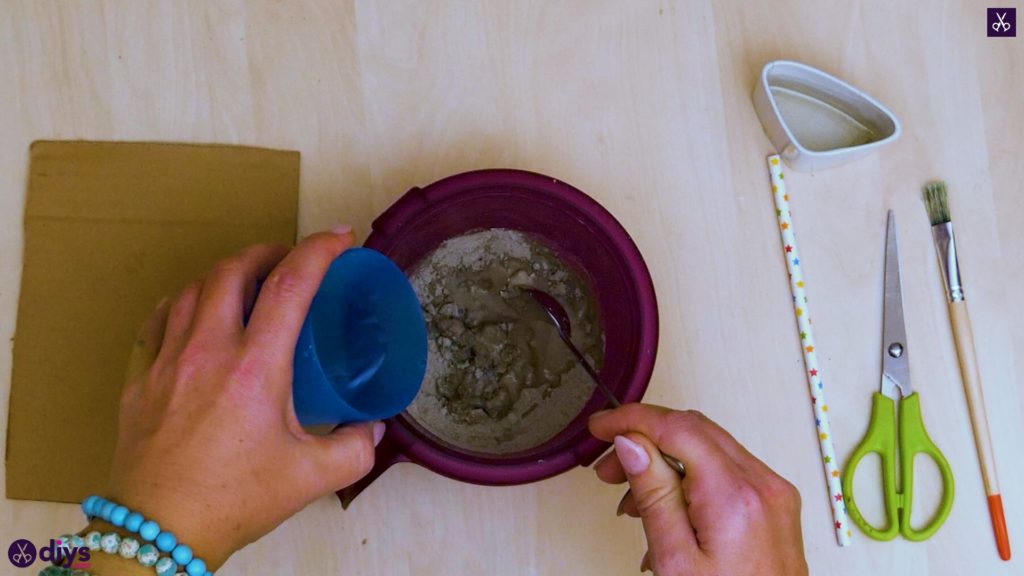
Step 2: mix your concrete
Add water to your DIY fine particle cement powder and mix it with your spoon until you’re free of clumps and have the right consistency! Follow the instructions on the back of your package to get the right ratio of water to mix, since it can vary from brand to brand. Set this aside for a second while you make your cardboard mold; concrete takes a long time to dry, so you’ll have plenty of time without any worry of it drying in your mixing bowl.
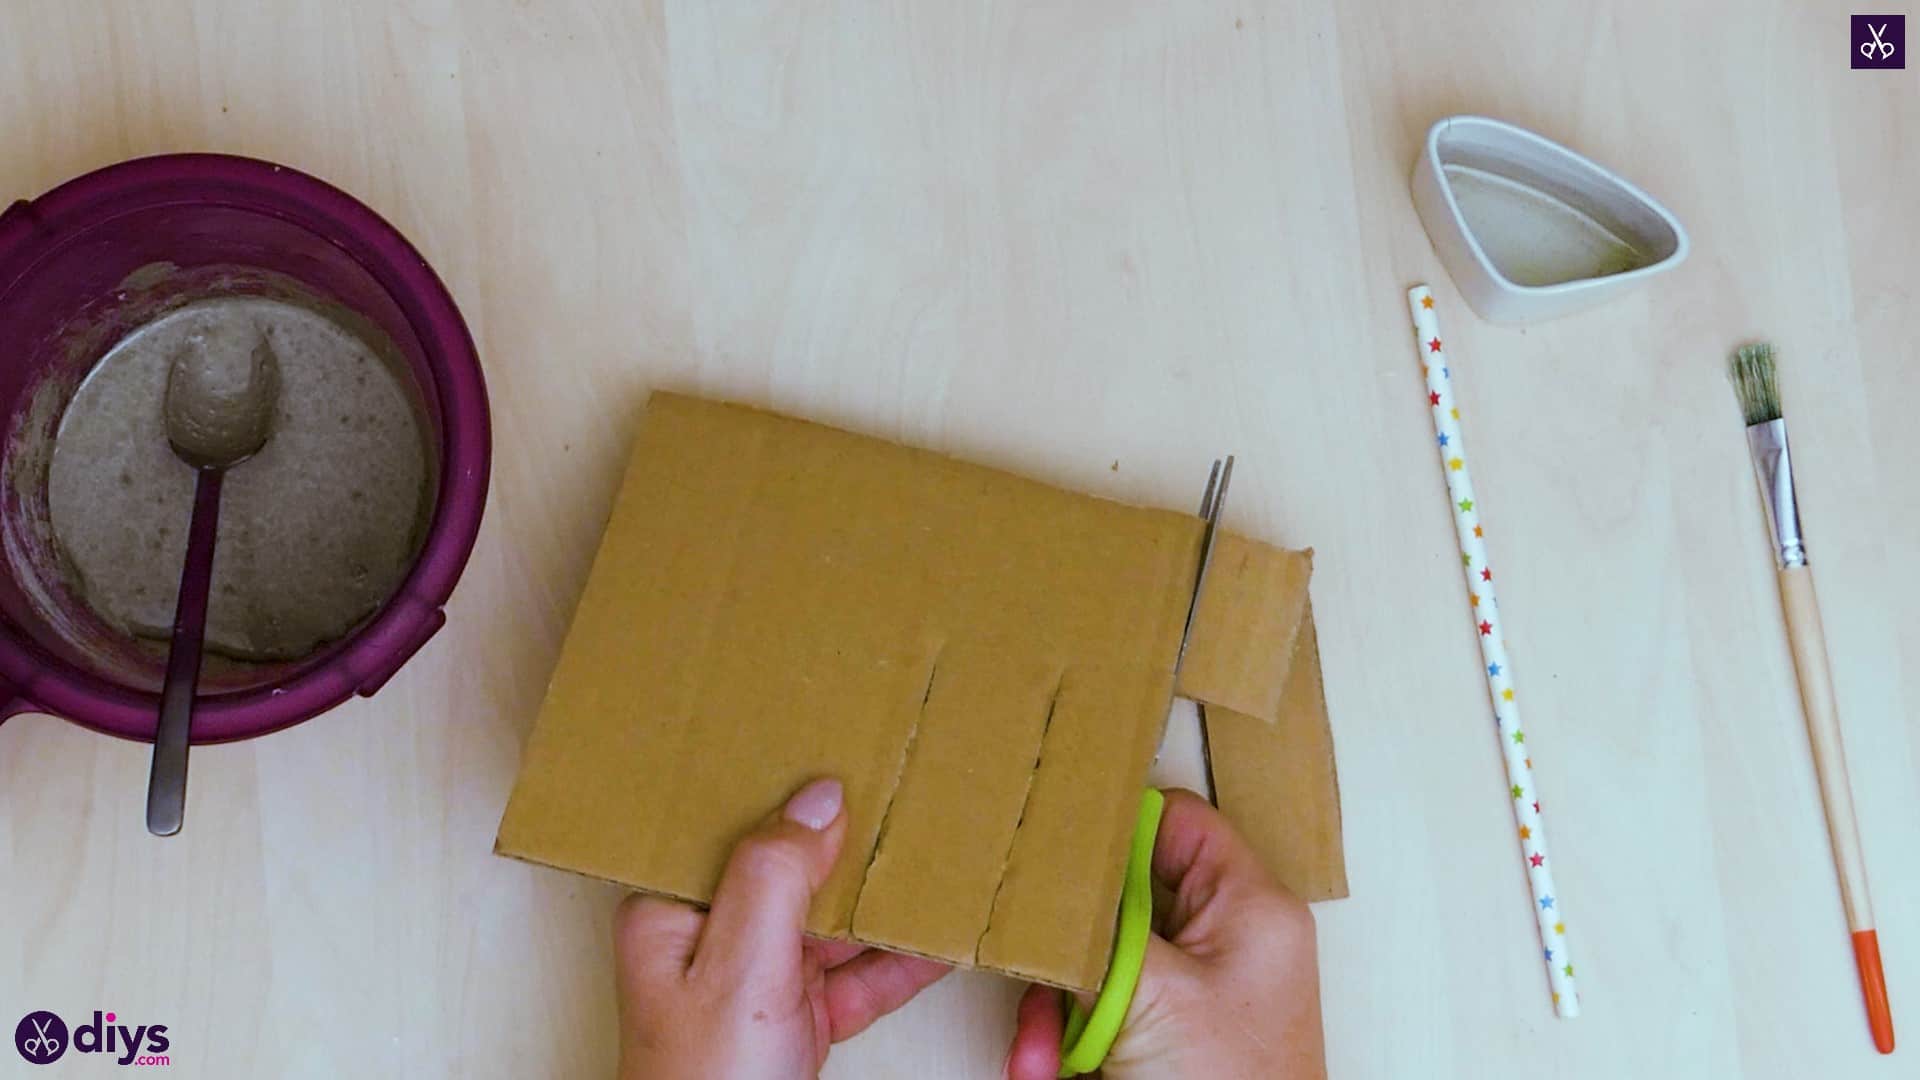
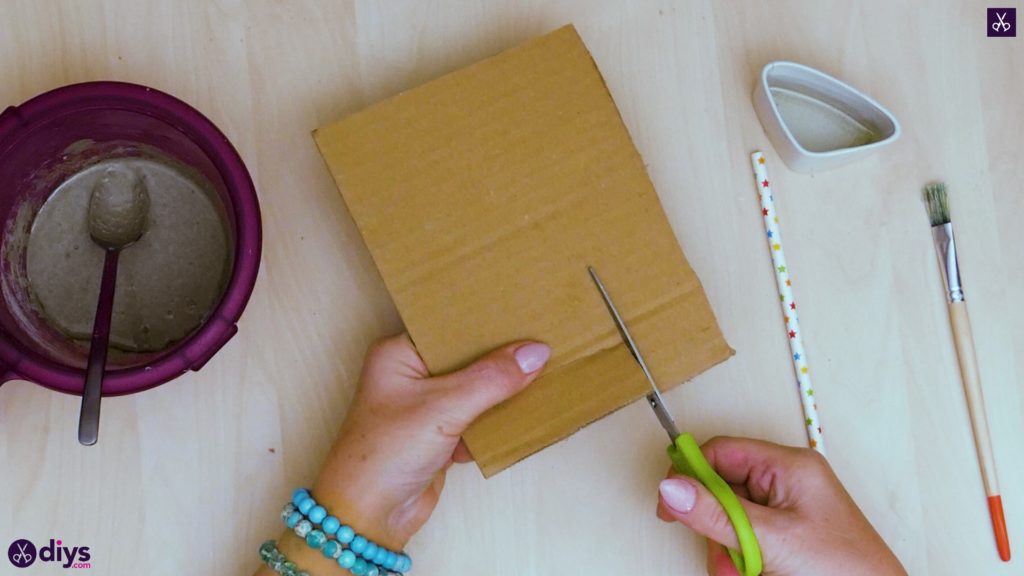
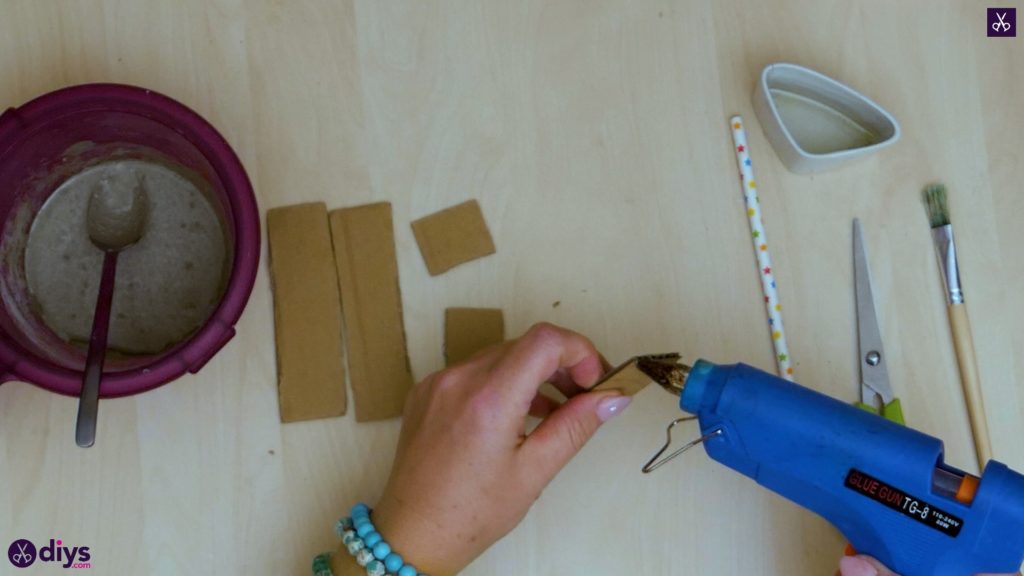
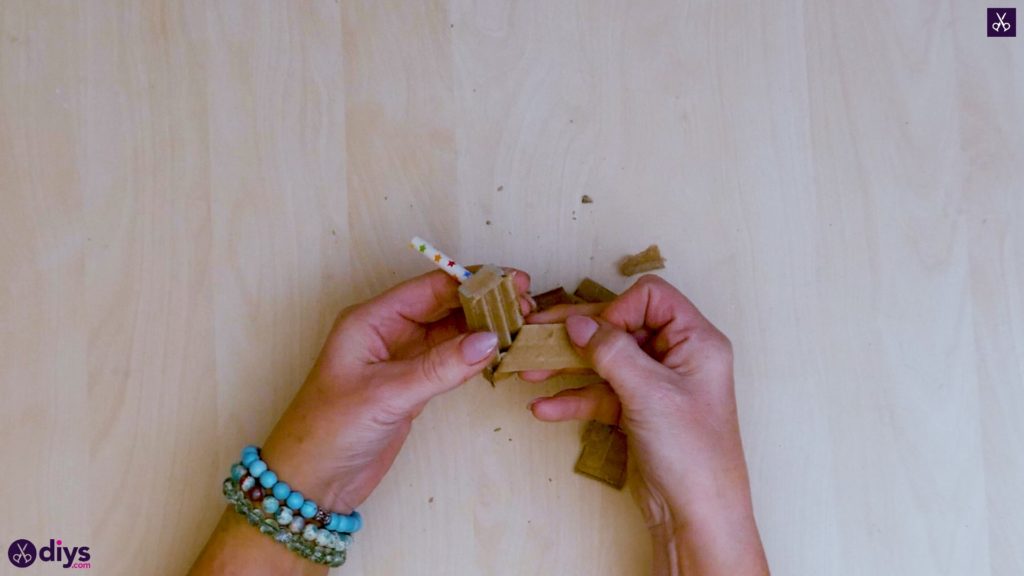
Step 3: make your form
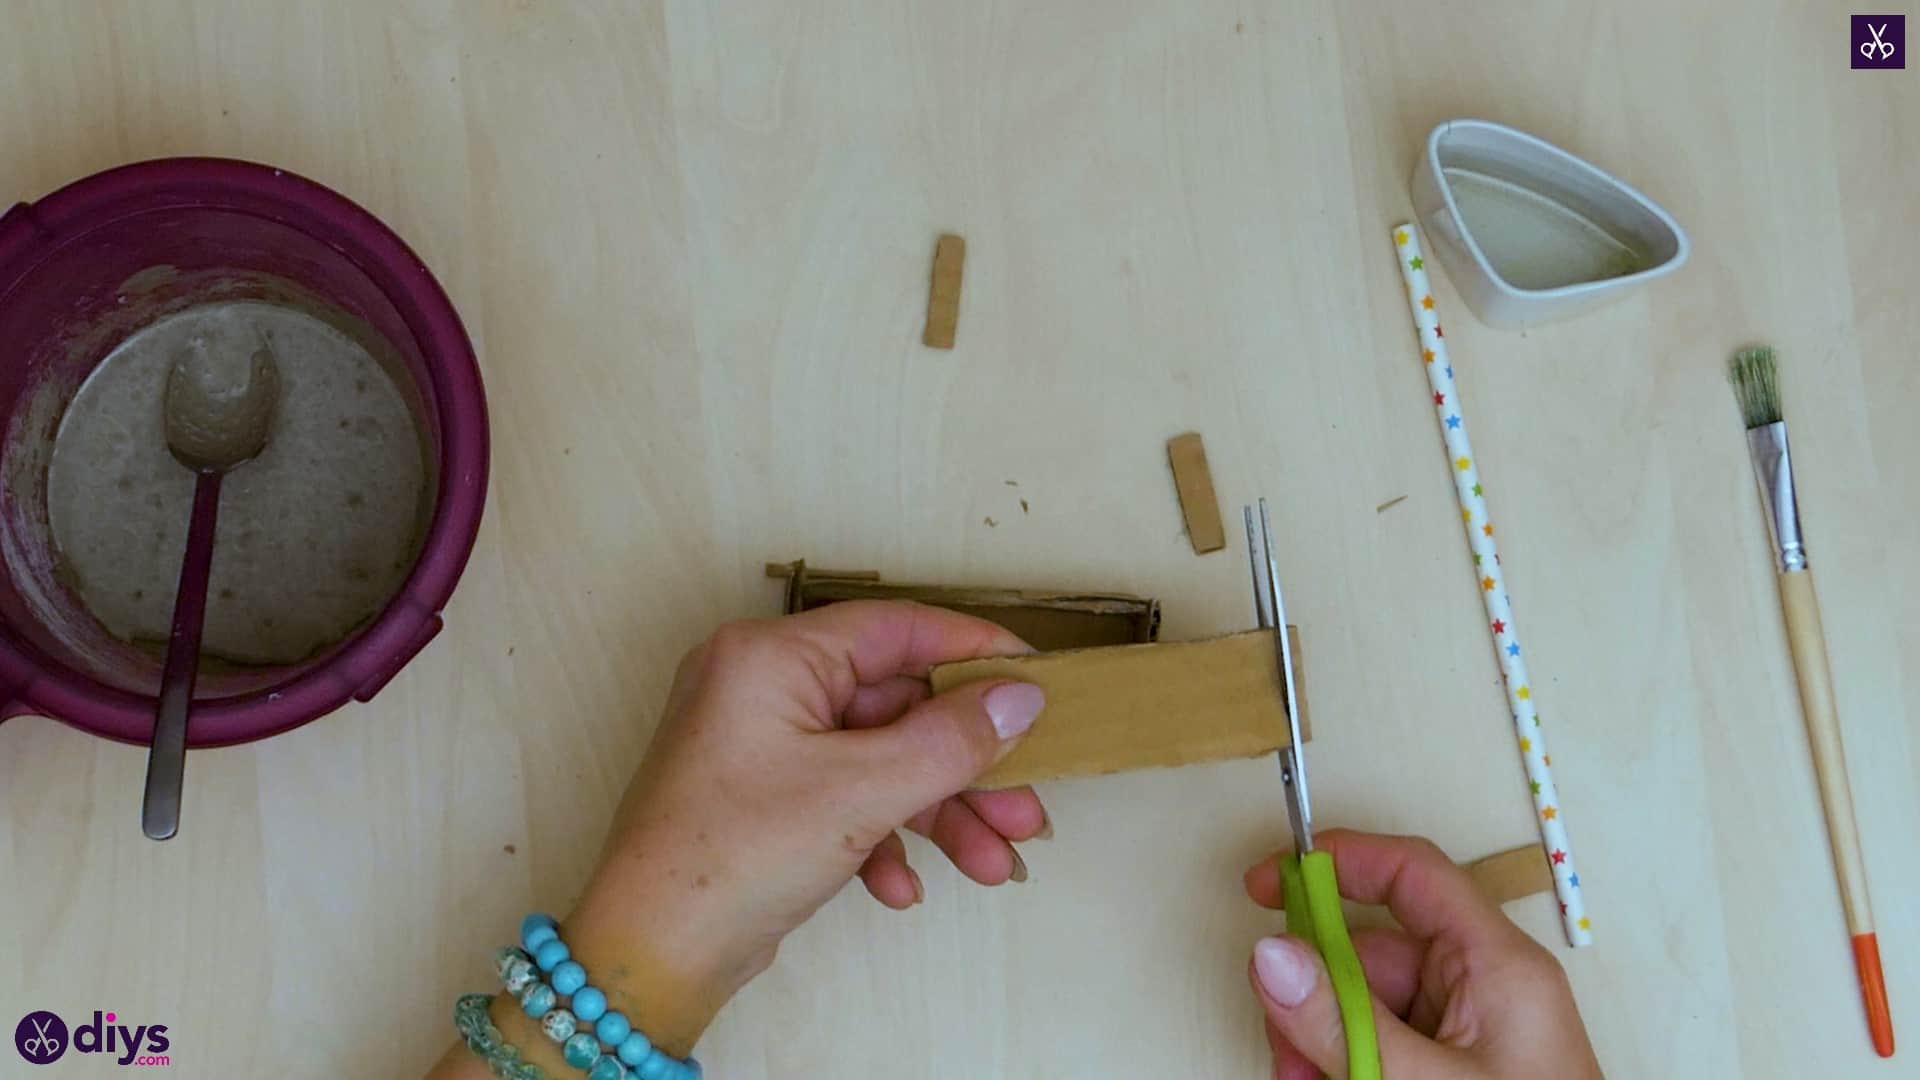
Use your scissors to cut one large rectangle, two medium rectangles, and two smaller rectangles from your piece of cardboard. You’ll need one slightly wider rectangle that’s about two inches long and an inch wide. This will be the base of the mold you’re about the make, which will determine the size and main shape of your cement necklace pendant. You’ll also need two thinner rectangles the same size as each other that are the same length as your first one (two inches) but don’t have to be quite as wide; mine were about half an inch wide instead of two. The width of these will determine how thick your pendant is, and I didn’t want mine to be too thick. You want to make them a little taller than you want your pendant to be thick so that you have room to work with when you’re filling the mold later in order to avoid cement spillage. Finally, cut two smaller shapes that are the same width as the base shape (two inches) and the same height as the side rectangles you just made (half an inch).
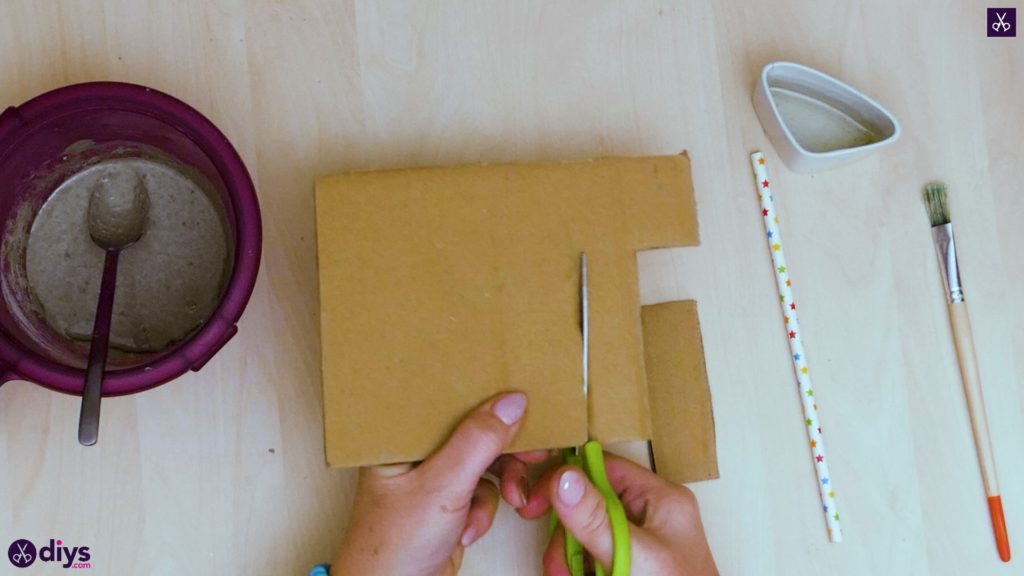
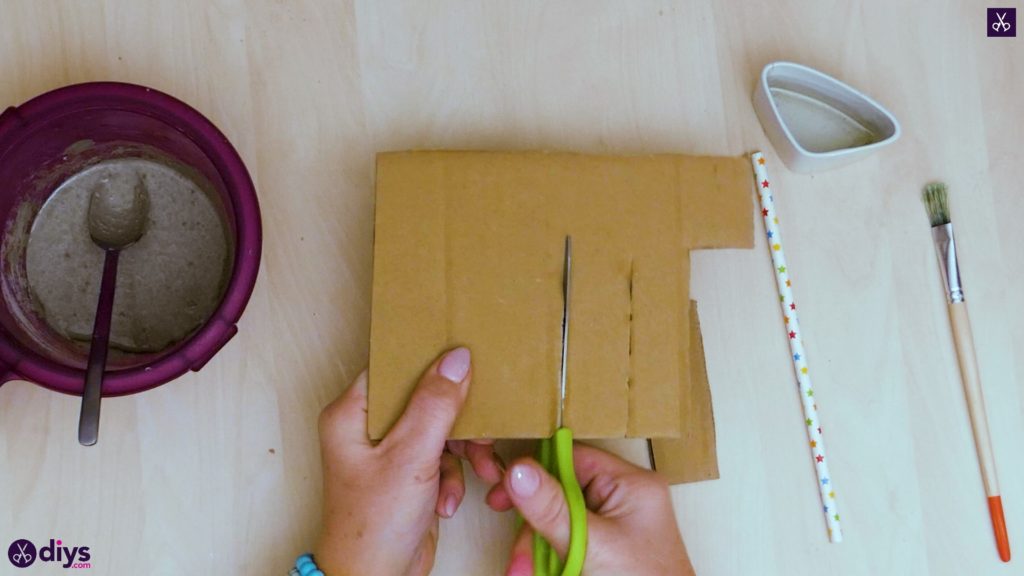


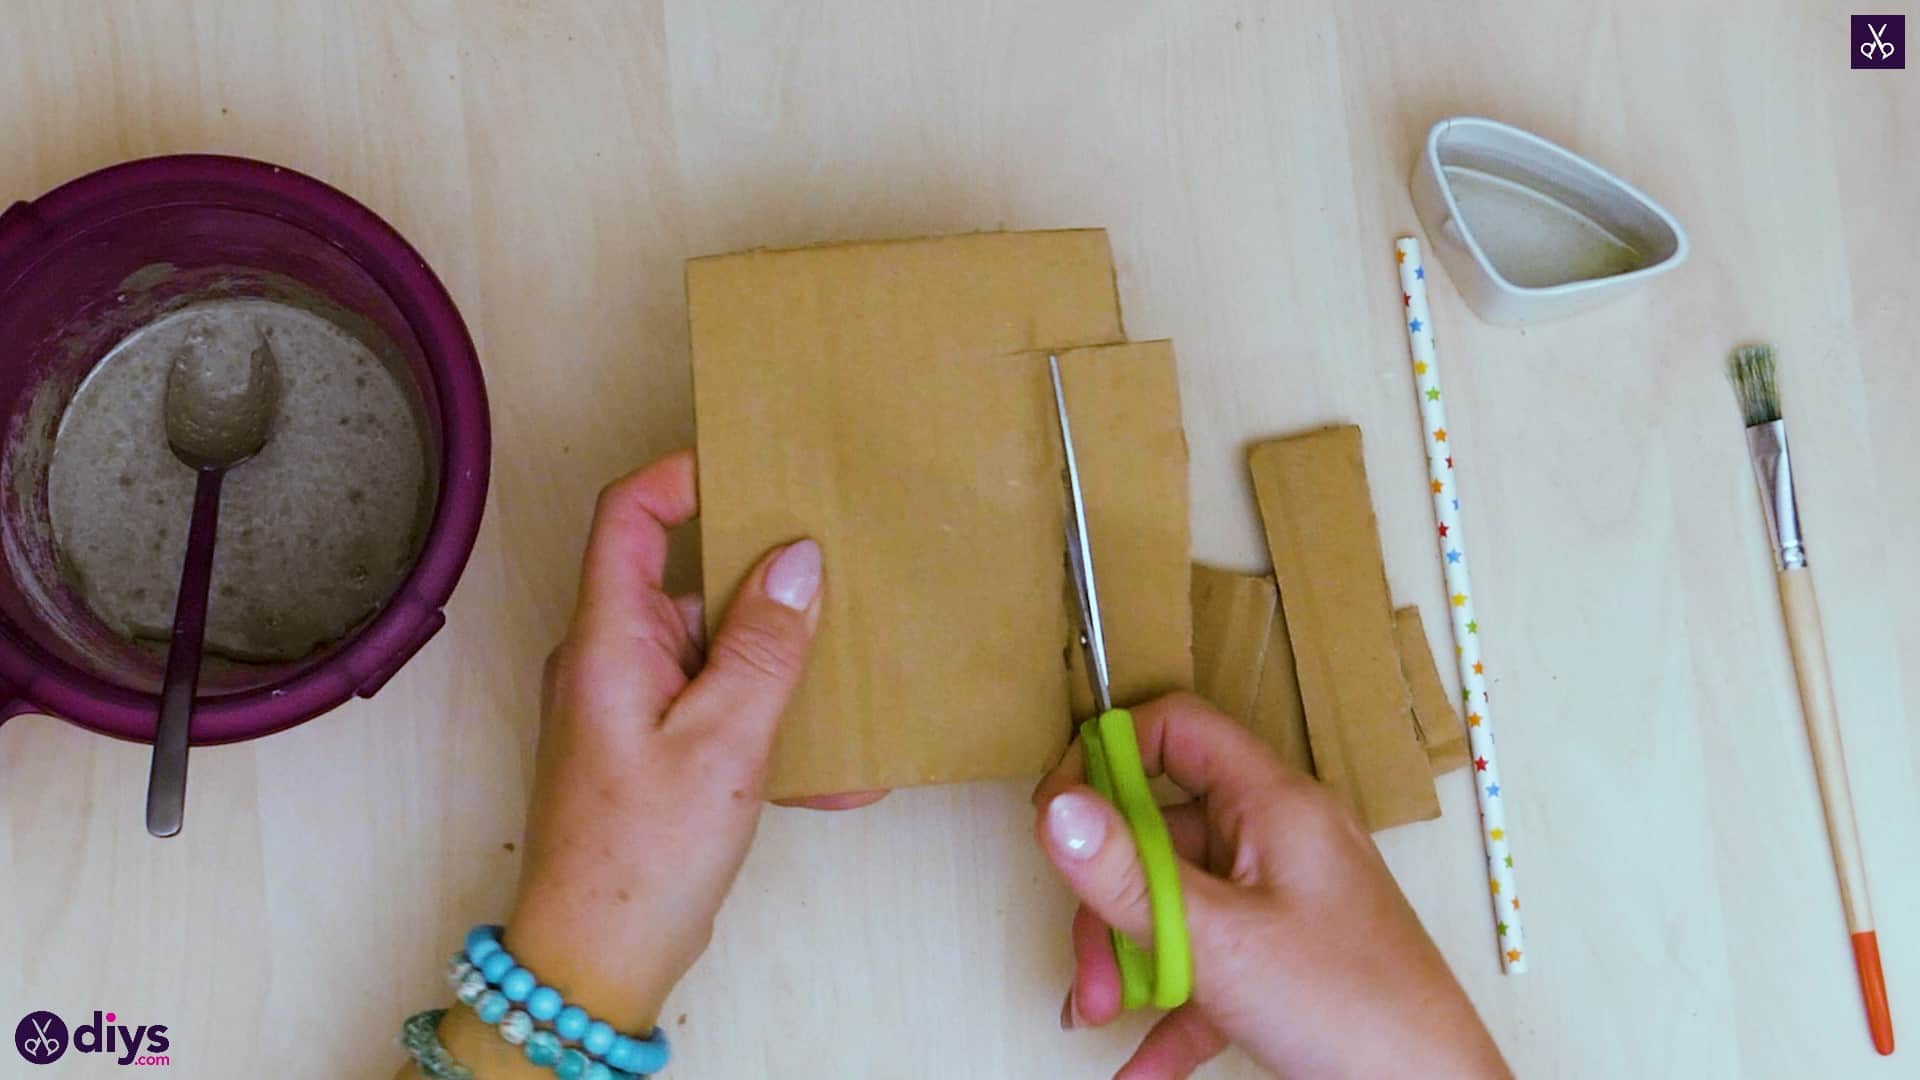
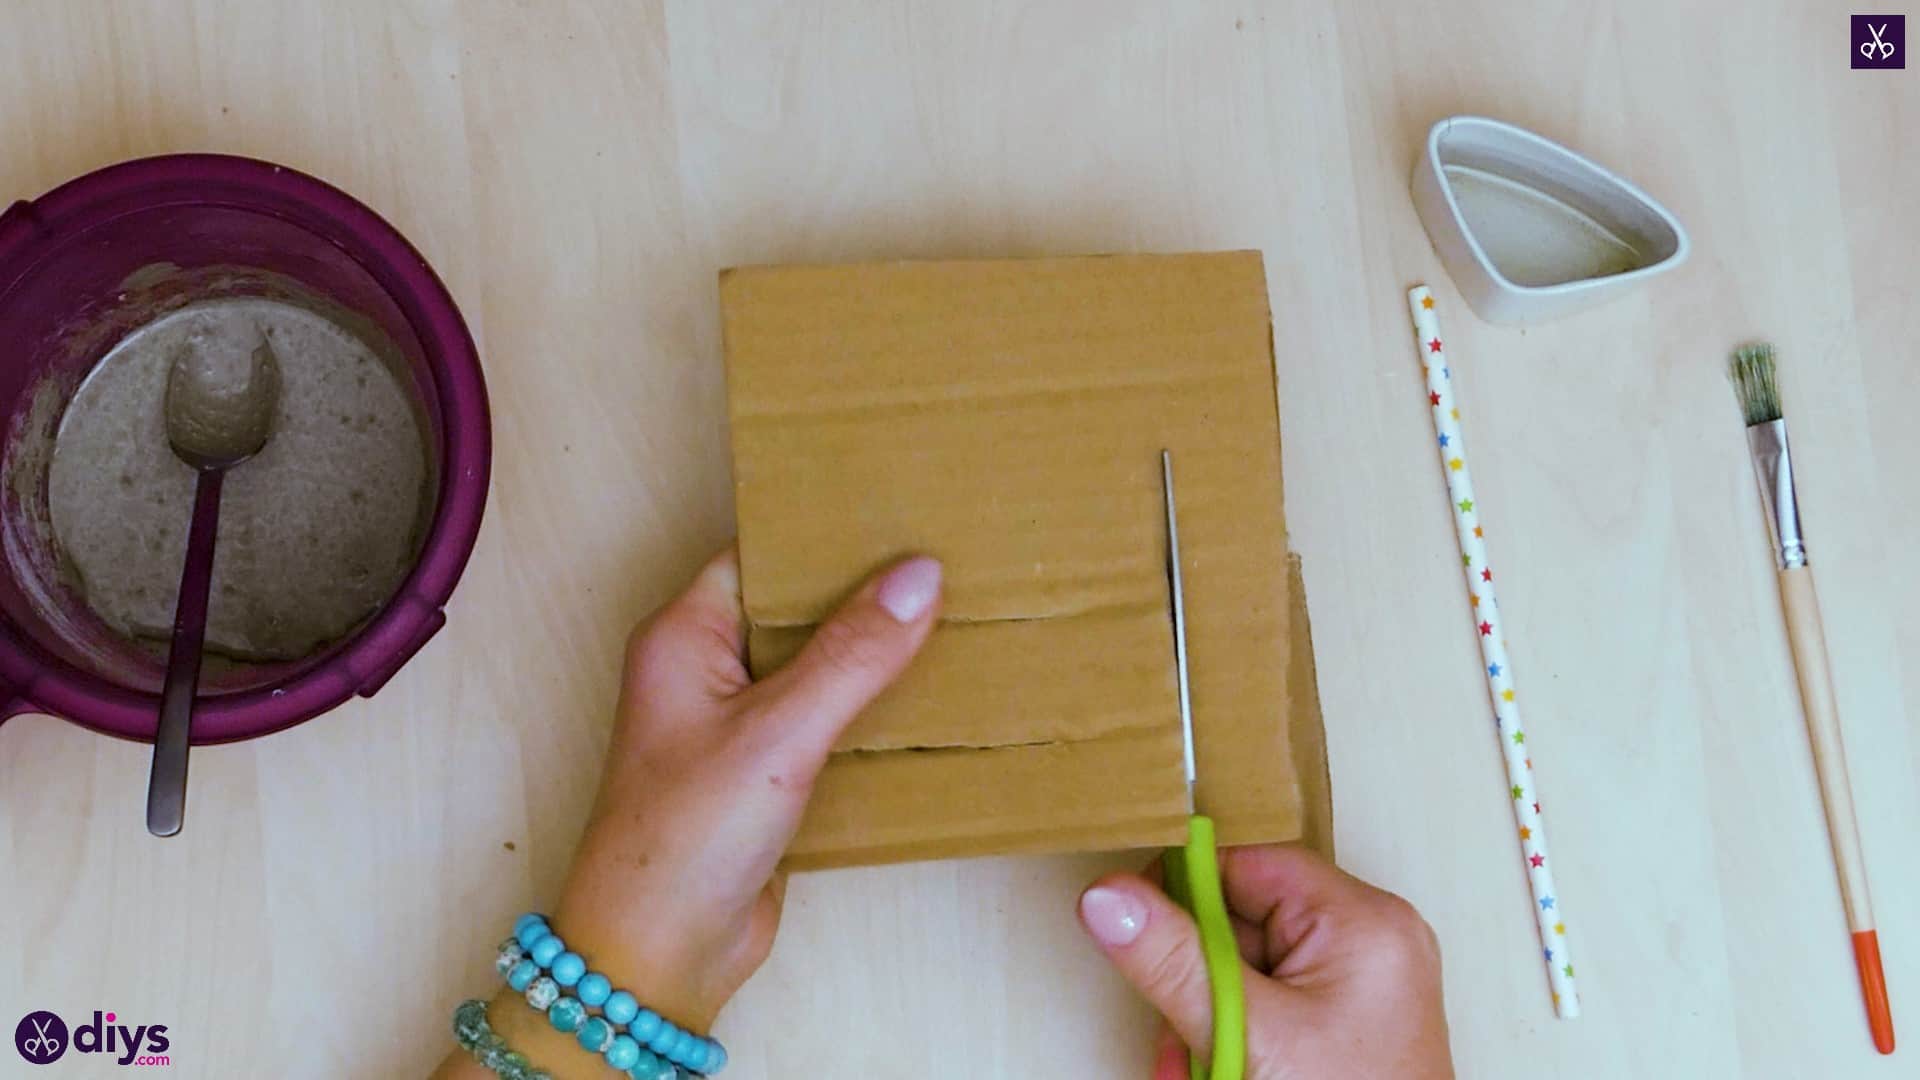
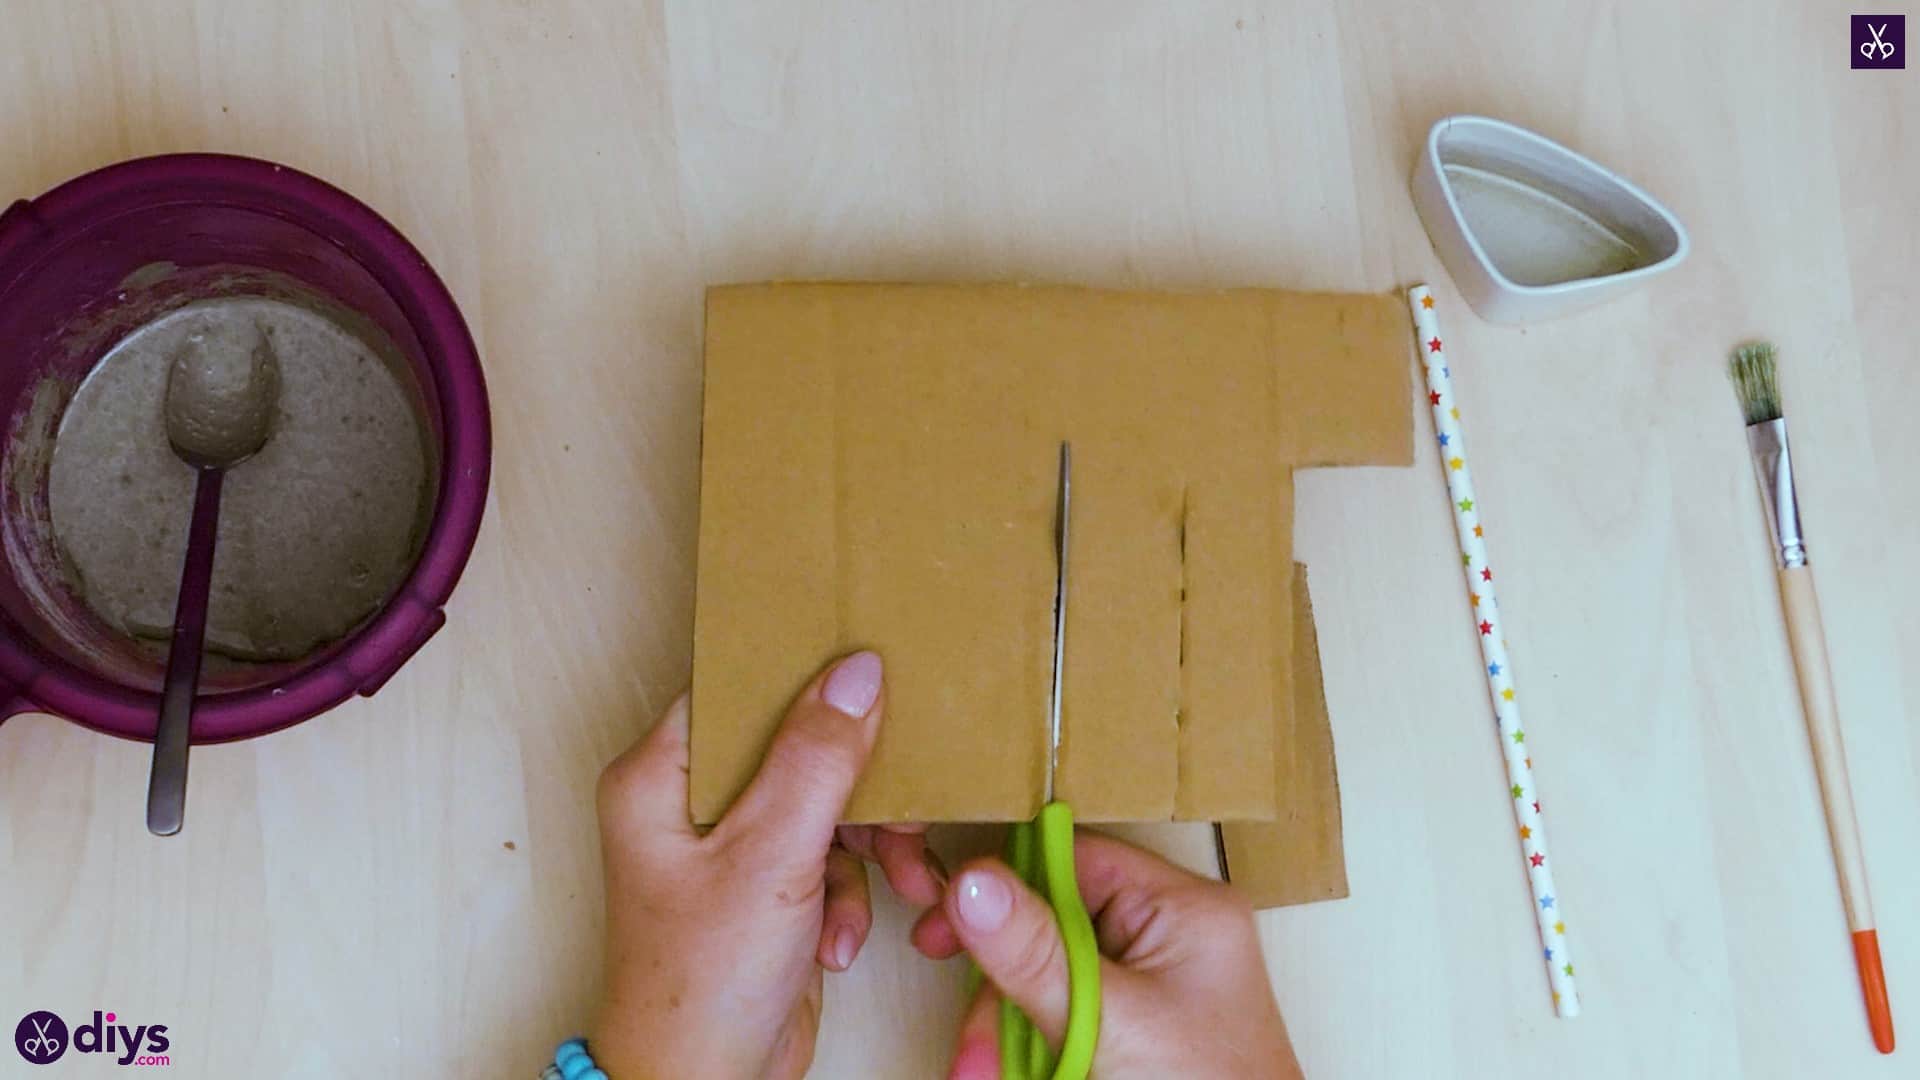
Step 4: trim and assemble
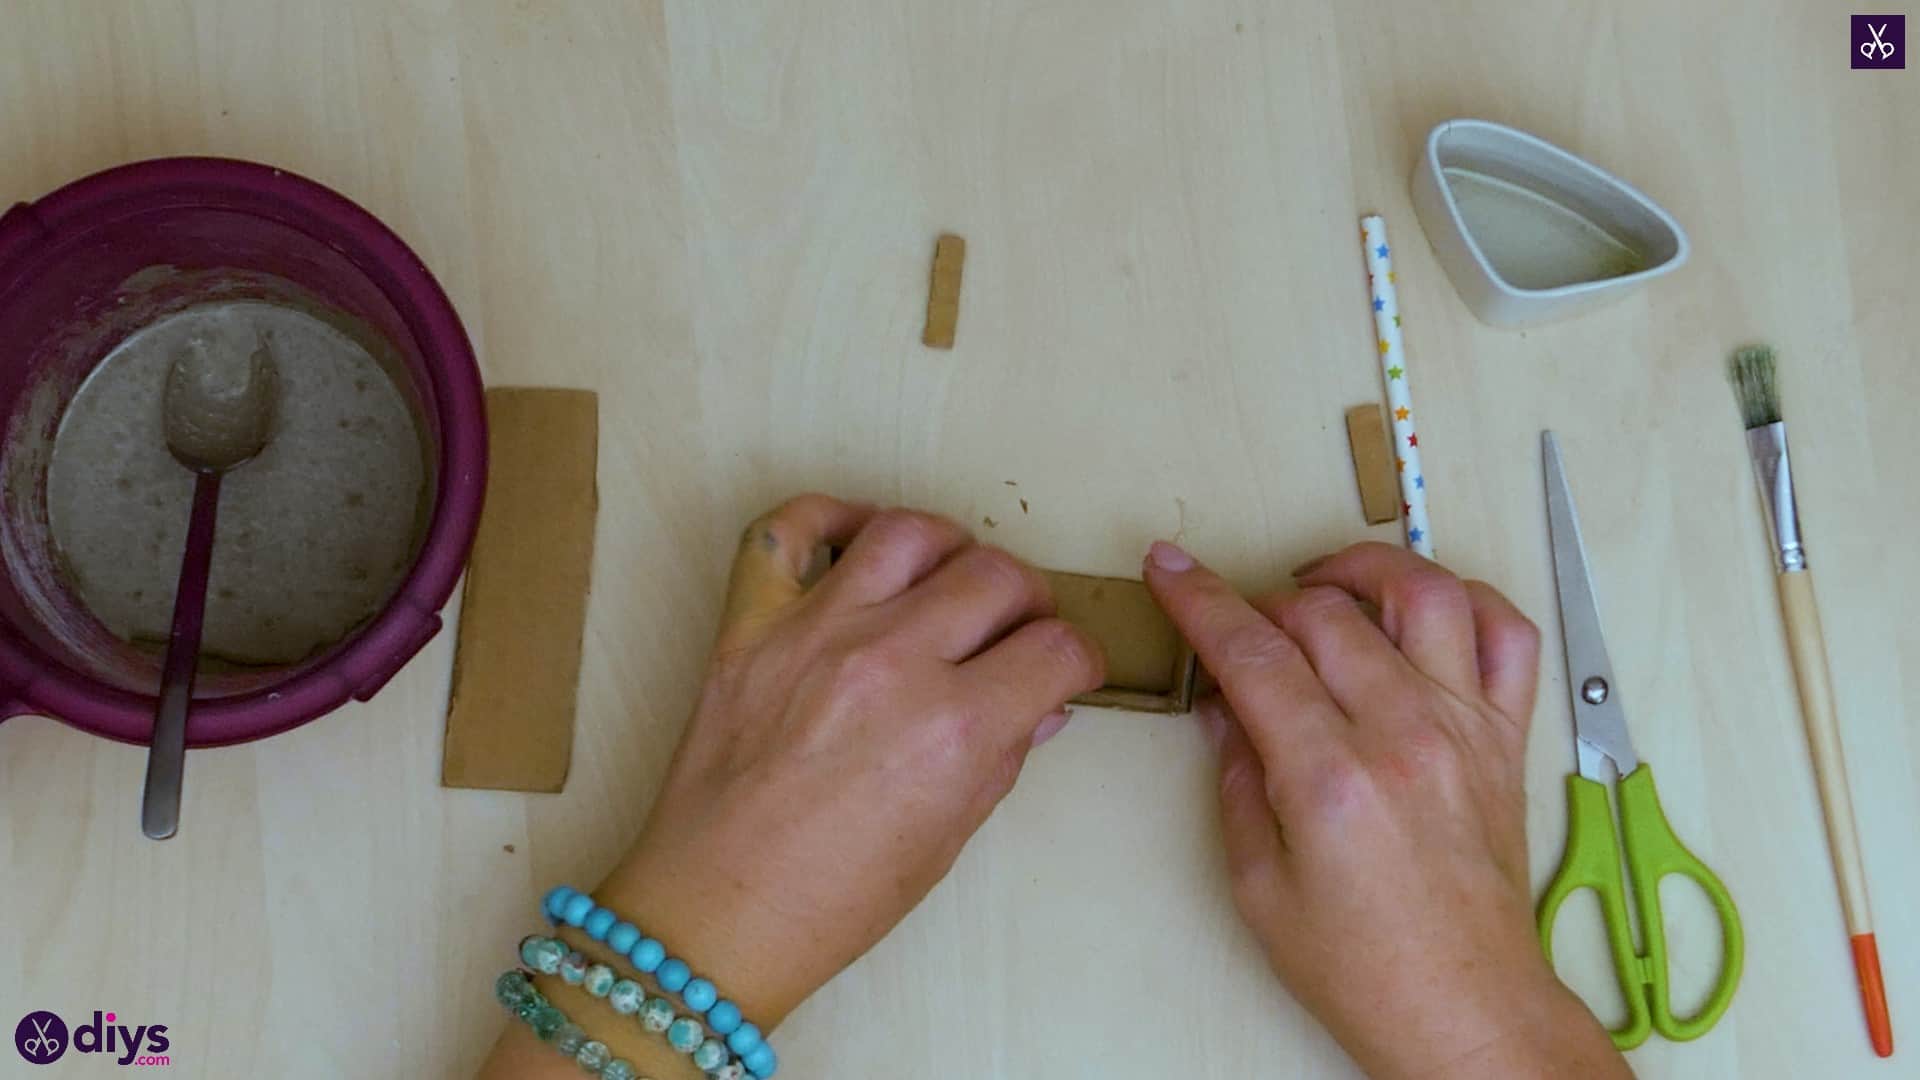
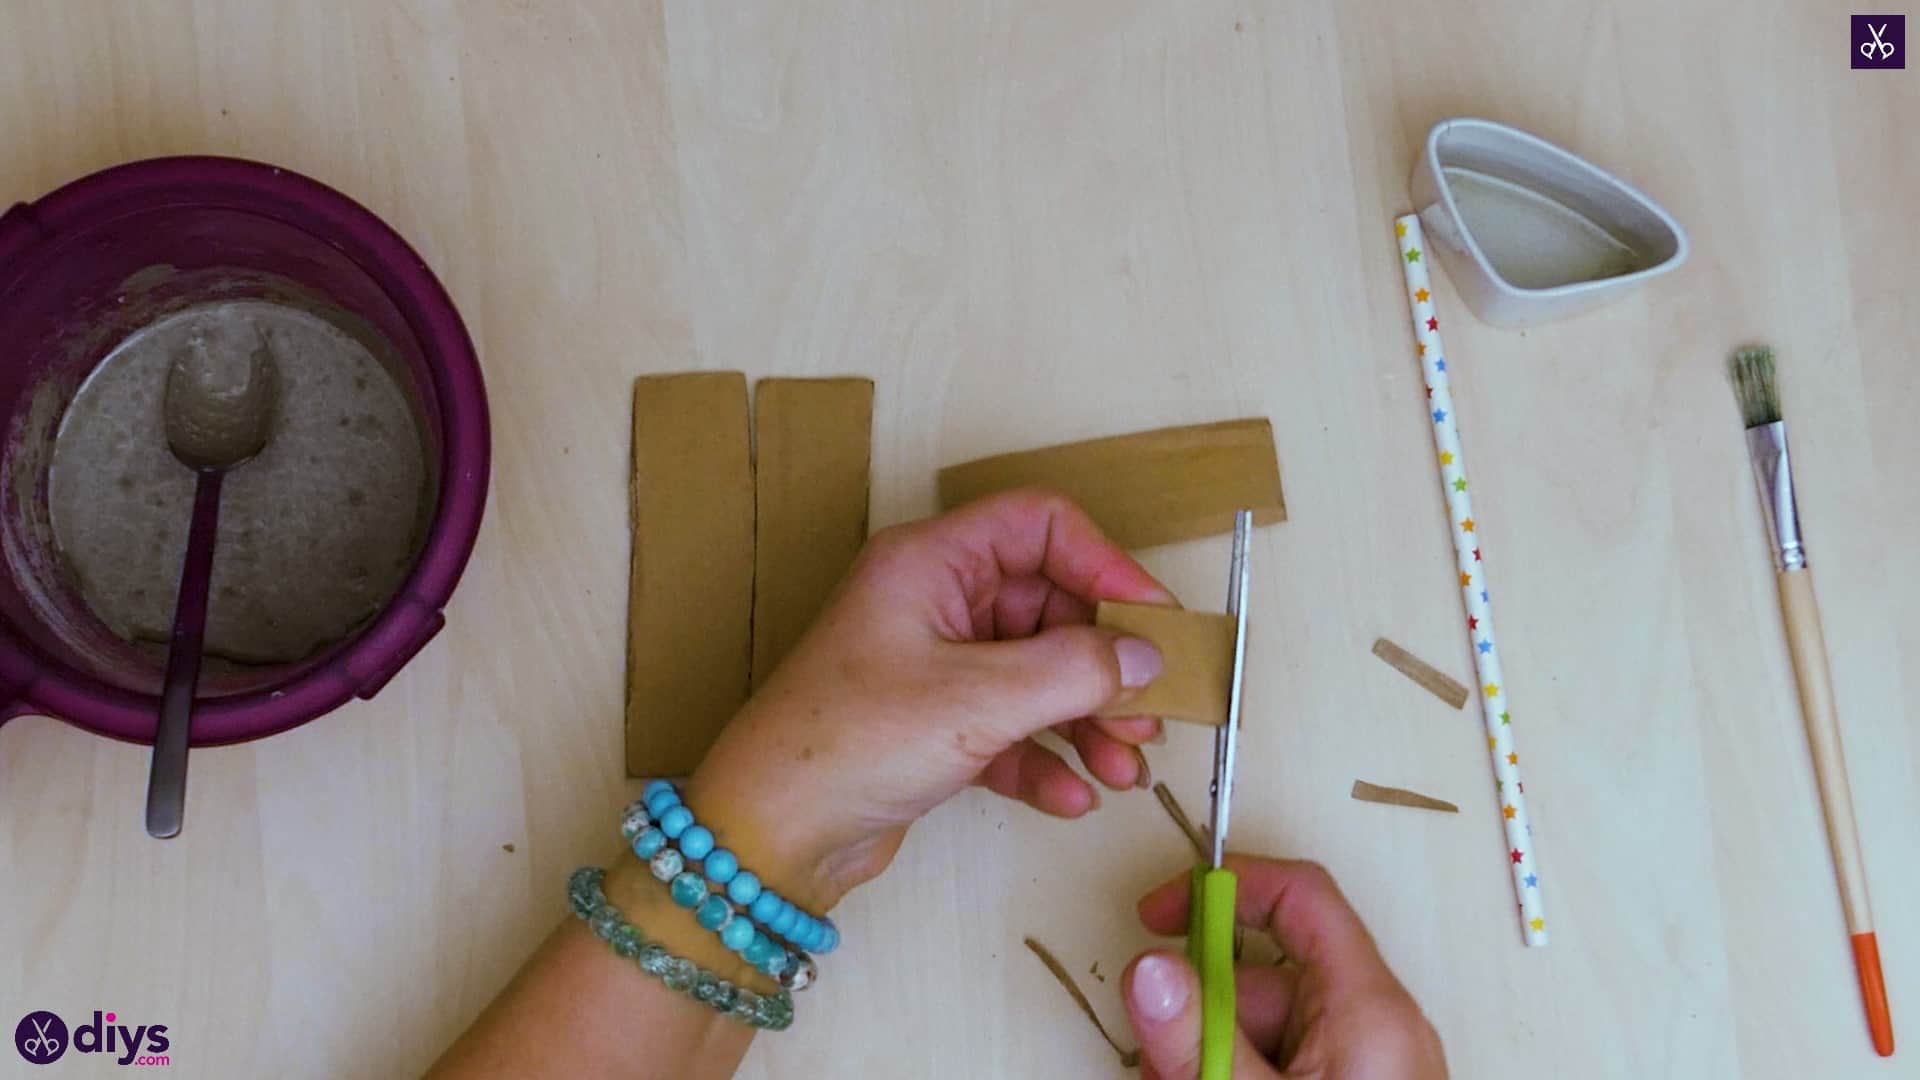
Use your scissors to trim the edges of and resize your rectangles as necessary to make sure they really fit together; your goal is to make a shape like a small rectangular box with no lid to use as a mold. You’ll leave your biggest rectangle flat on the table to make up the bottom of the mold (which will be the back of the pendant) and then you’ll turn the two medium sized rectangles perpendicular to fit down that piece’s sides. The two smaller shapes should fill the space at the short ends and line up to make the top and bottom of the pendant. I trimmed all five of my pieces up a little for a better fit so I could get a neater shape in the end.

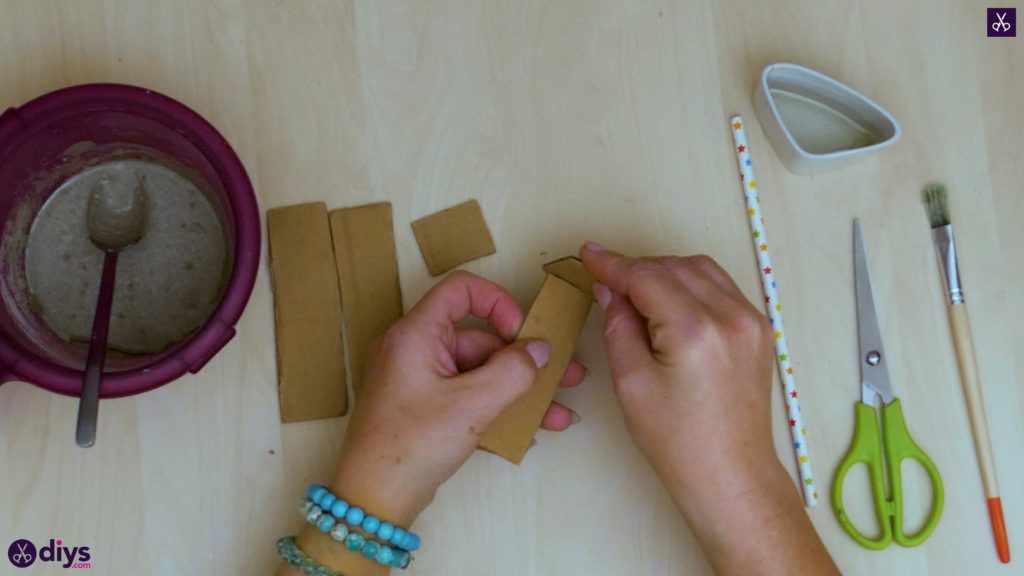

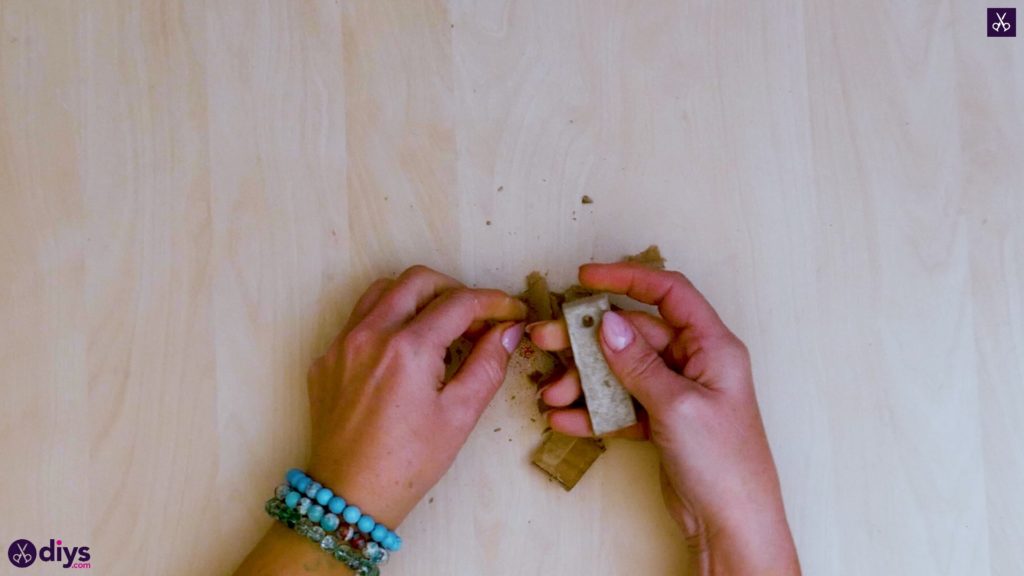
Step 5: finish assembling
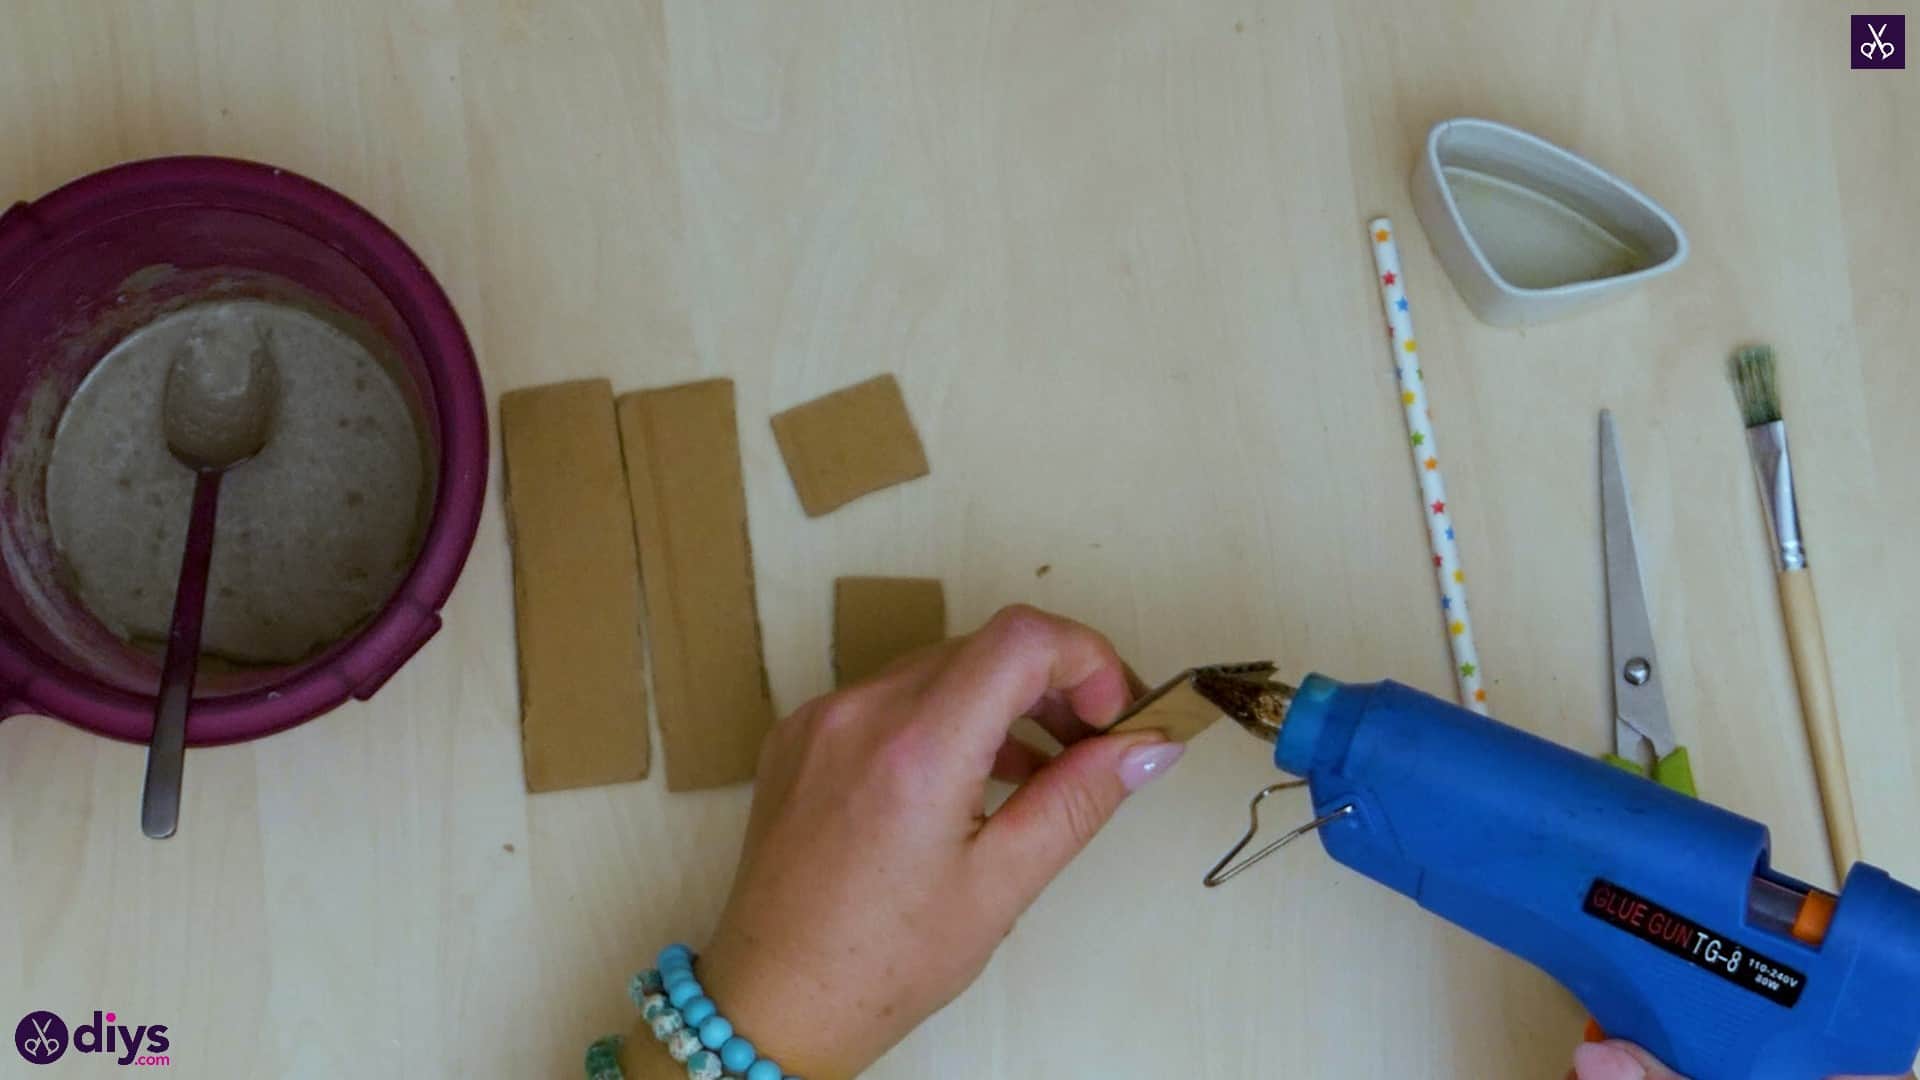
Use your hot glue gun to stick the pieces of your cardboard mold into place, trimming them with your scissors as necessary if you want a better fit than what you’re seeing before you glue.


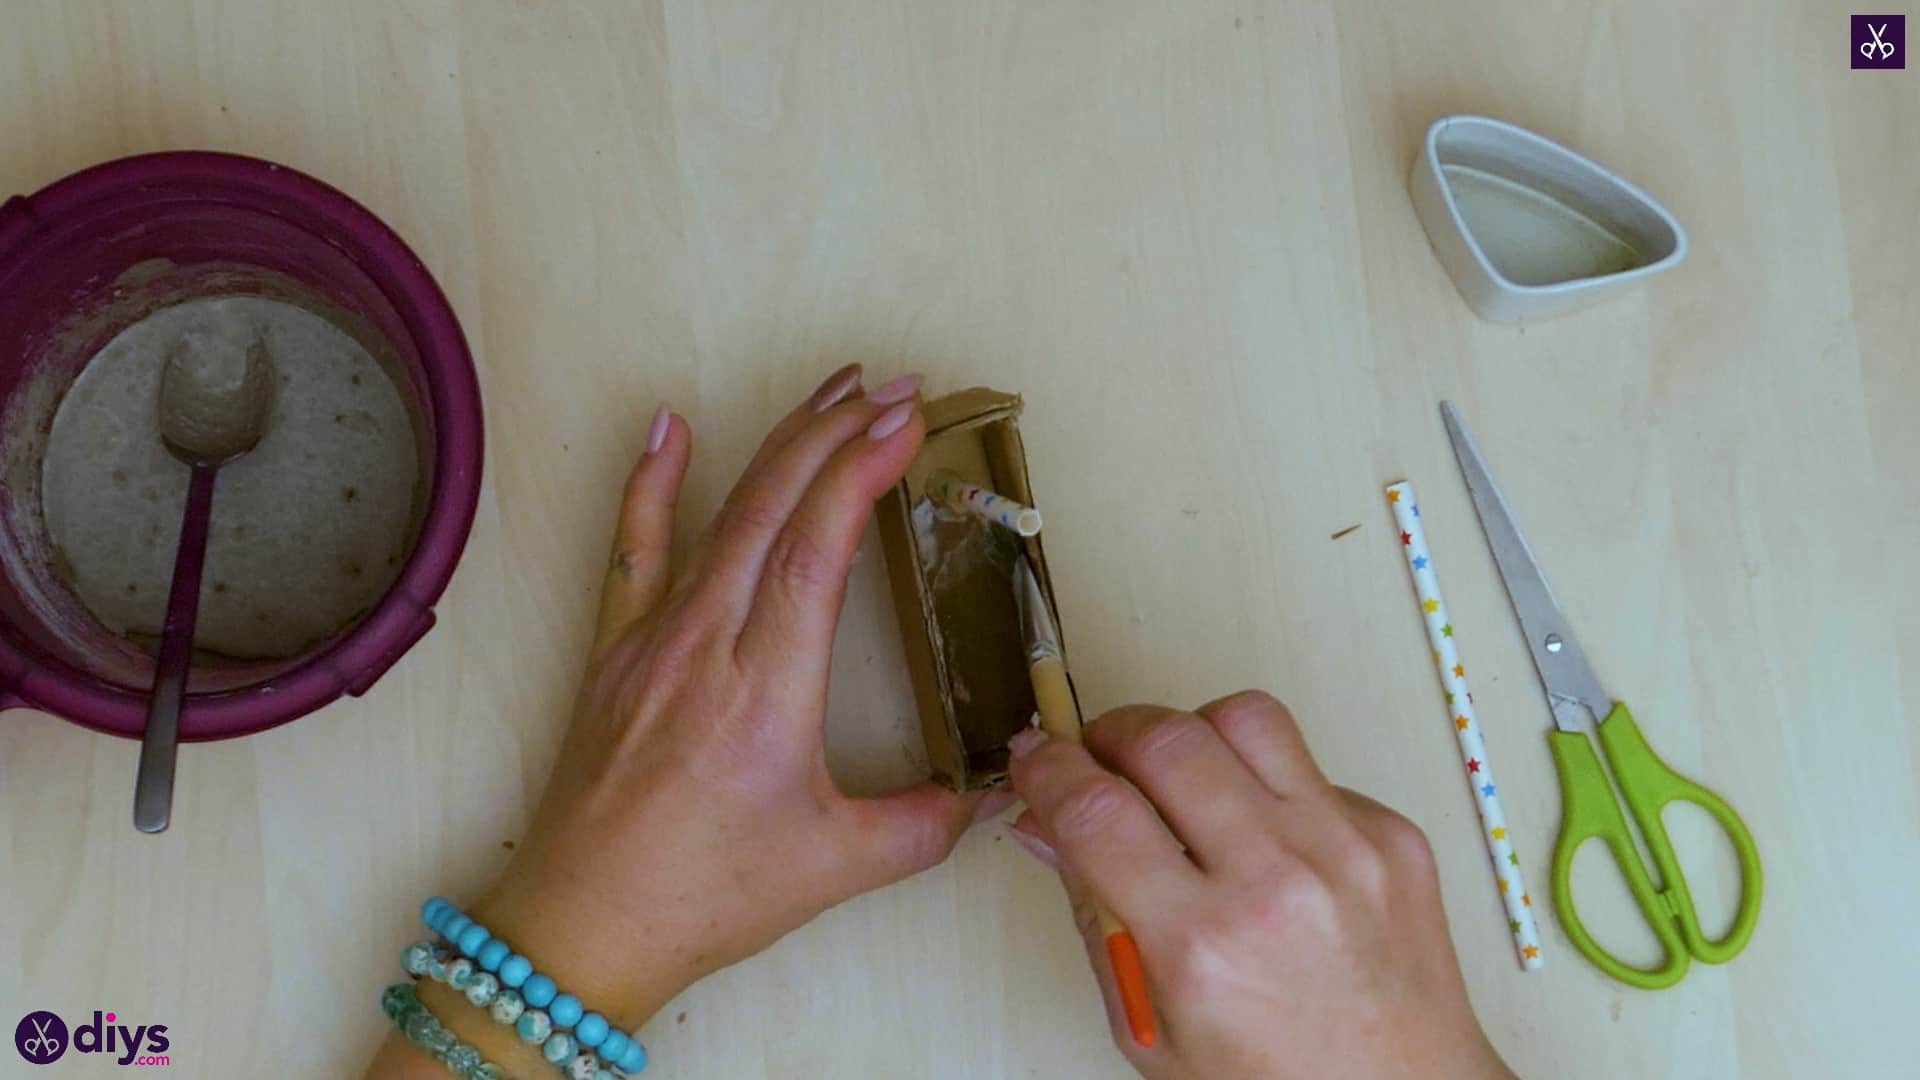
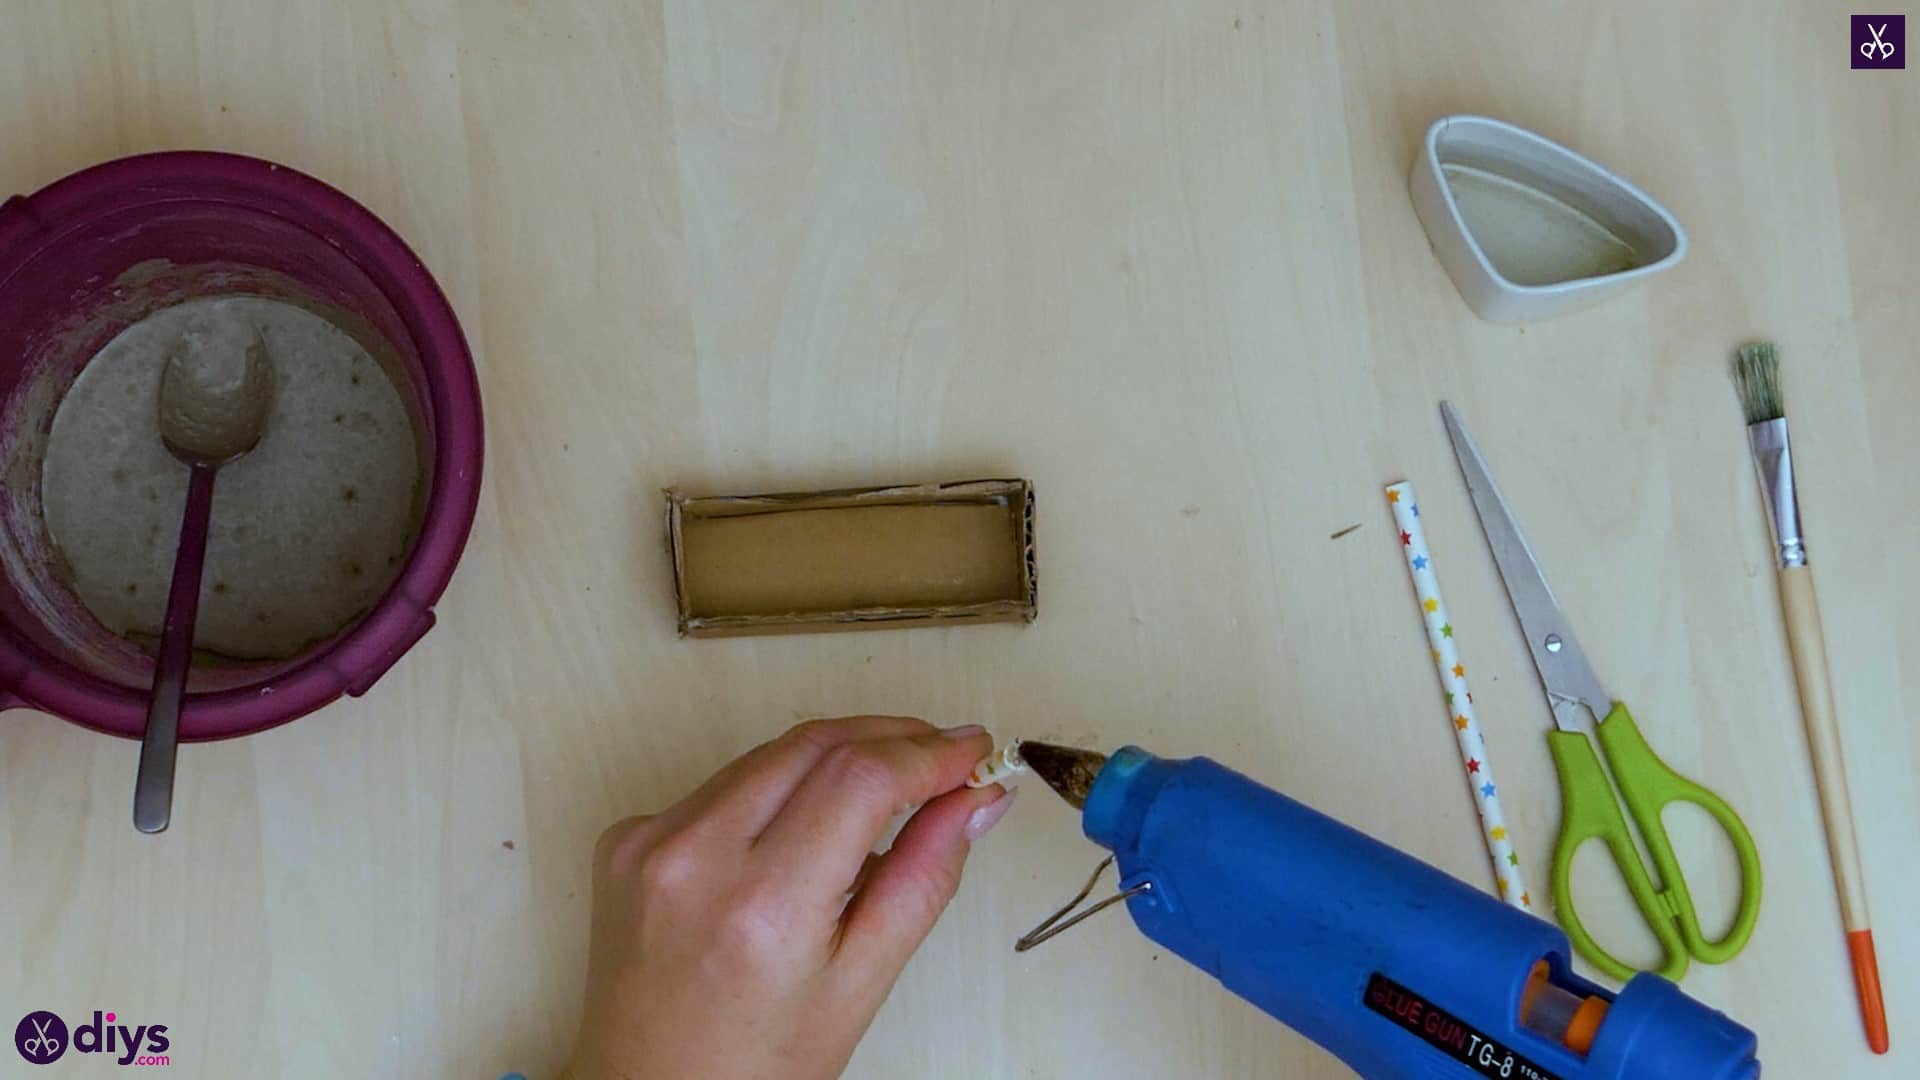
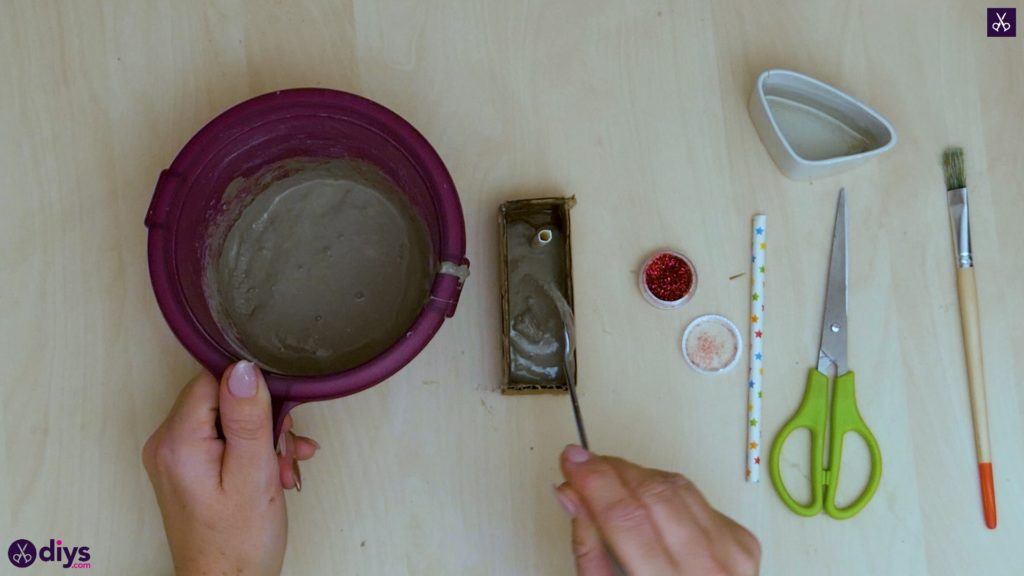
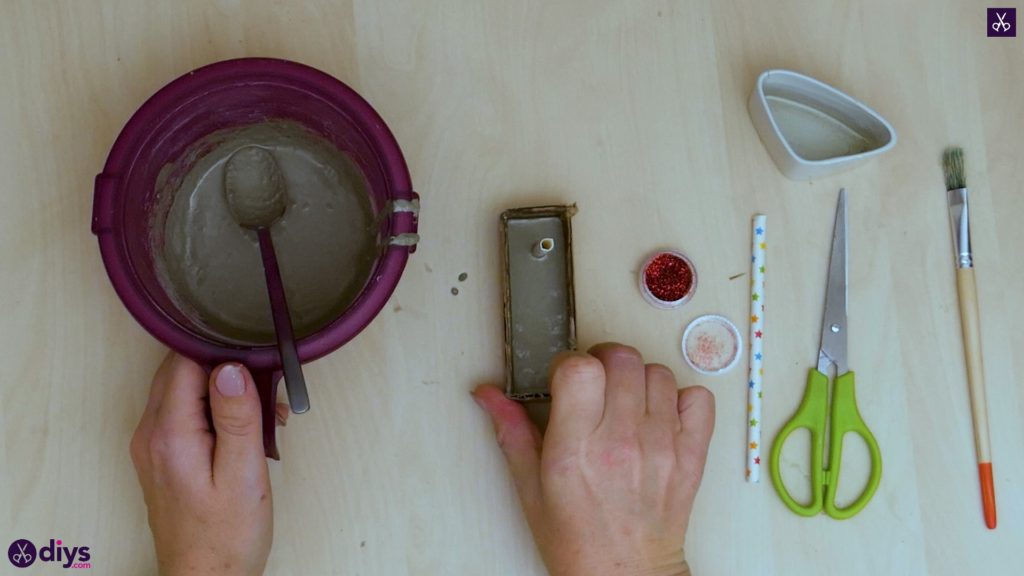
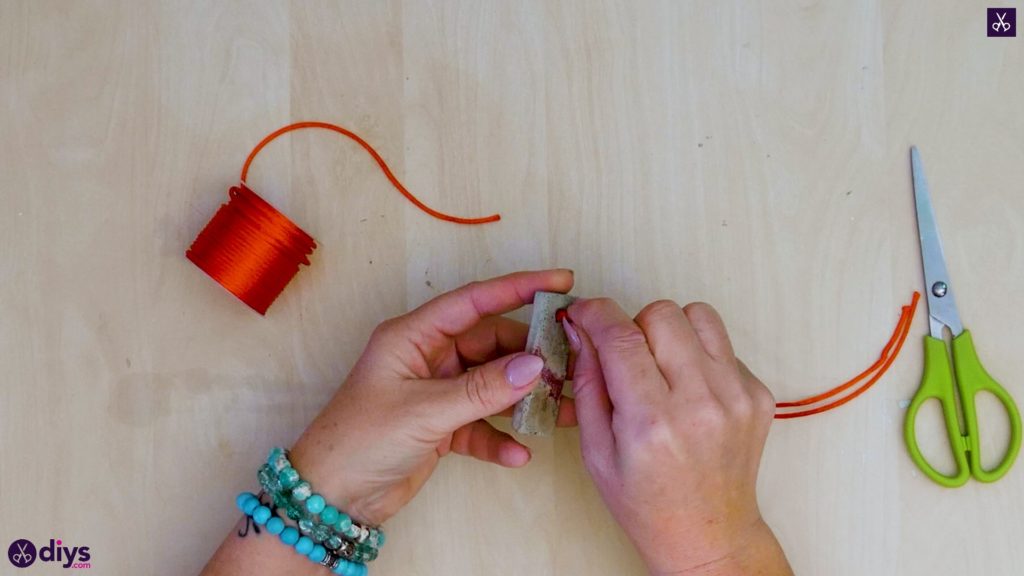
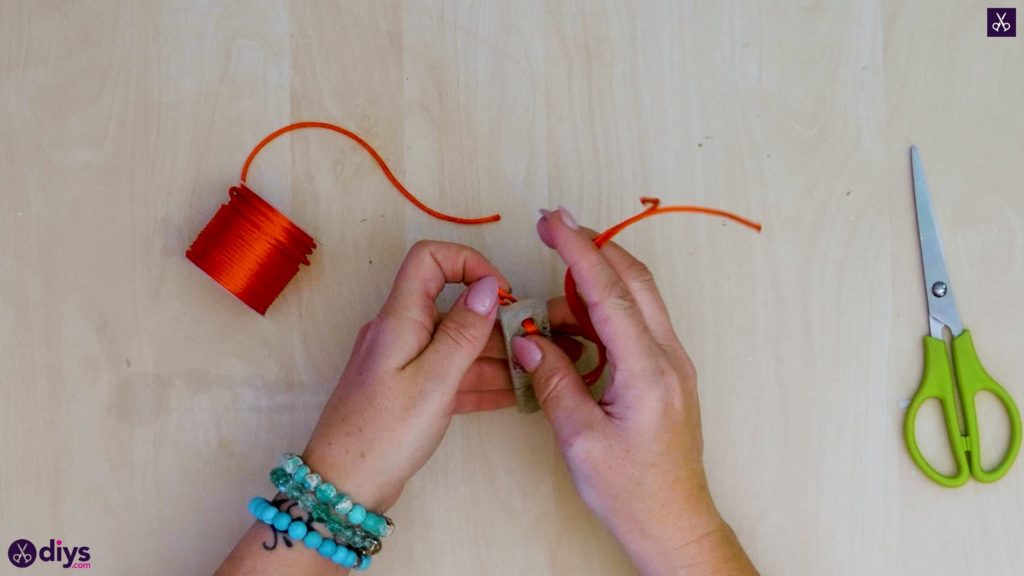
Step 6: add straw for hole
When your box is finished, apply hot glue to one end of your straw, making sure you block out the hole in the process. This seals it and lets you make a hole right through your finished cement shape without any wet mix getting under the straw and block part of the hole that you’ll want to string your necklace cord through later. Before the glue can dry, stick the straw down on the bottom of the cardboard mold you just make, in the centre but near the top where you want your pendant to hand down from. You can trim the straw’s length a little with your scissors so it doesn’t tip the mold over, so long as it’s still long enough to stick up well out of the wet concrete mix later.

Step 7: oil mold
Use your paintbrush to coat the entire inside surface, all across the bottom and up the sides, of your cardboard mold with oil. Make sure to coat the glued down end of the straw as well, at least as high up its length as the sides of the little cardboard box you made reach. This oil will help you remove the dried pendant more easily later because it’ll stop the cement mix from sticking to the sides of the cardboard and the straw as it dries.

Step 8: pour your concrete
Use your spoon to fill your cardboard mold with wet cement mix! Once you’ve filled the little box to your satisfaction, use the tip or edge of your spoon to smooth the surface so that your pendant will have a neat and even front face. You can also lightly tap the bottom of the cardboard mold on the tabletop to even the surface, break down clumps, and get rid of air bubbles.
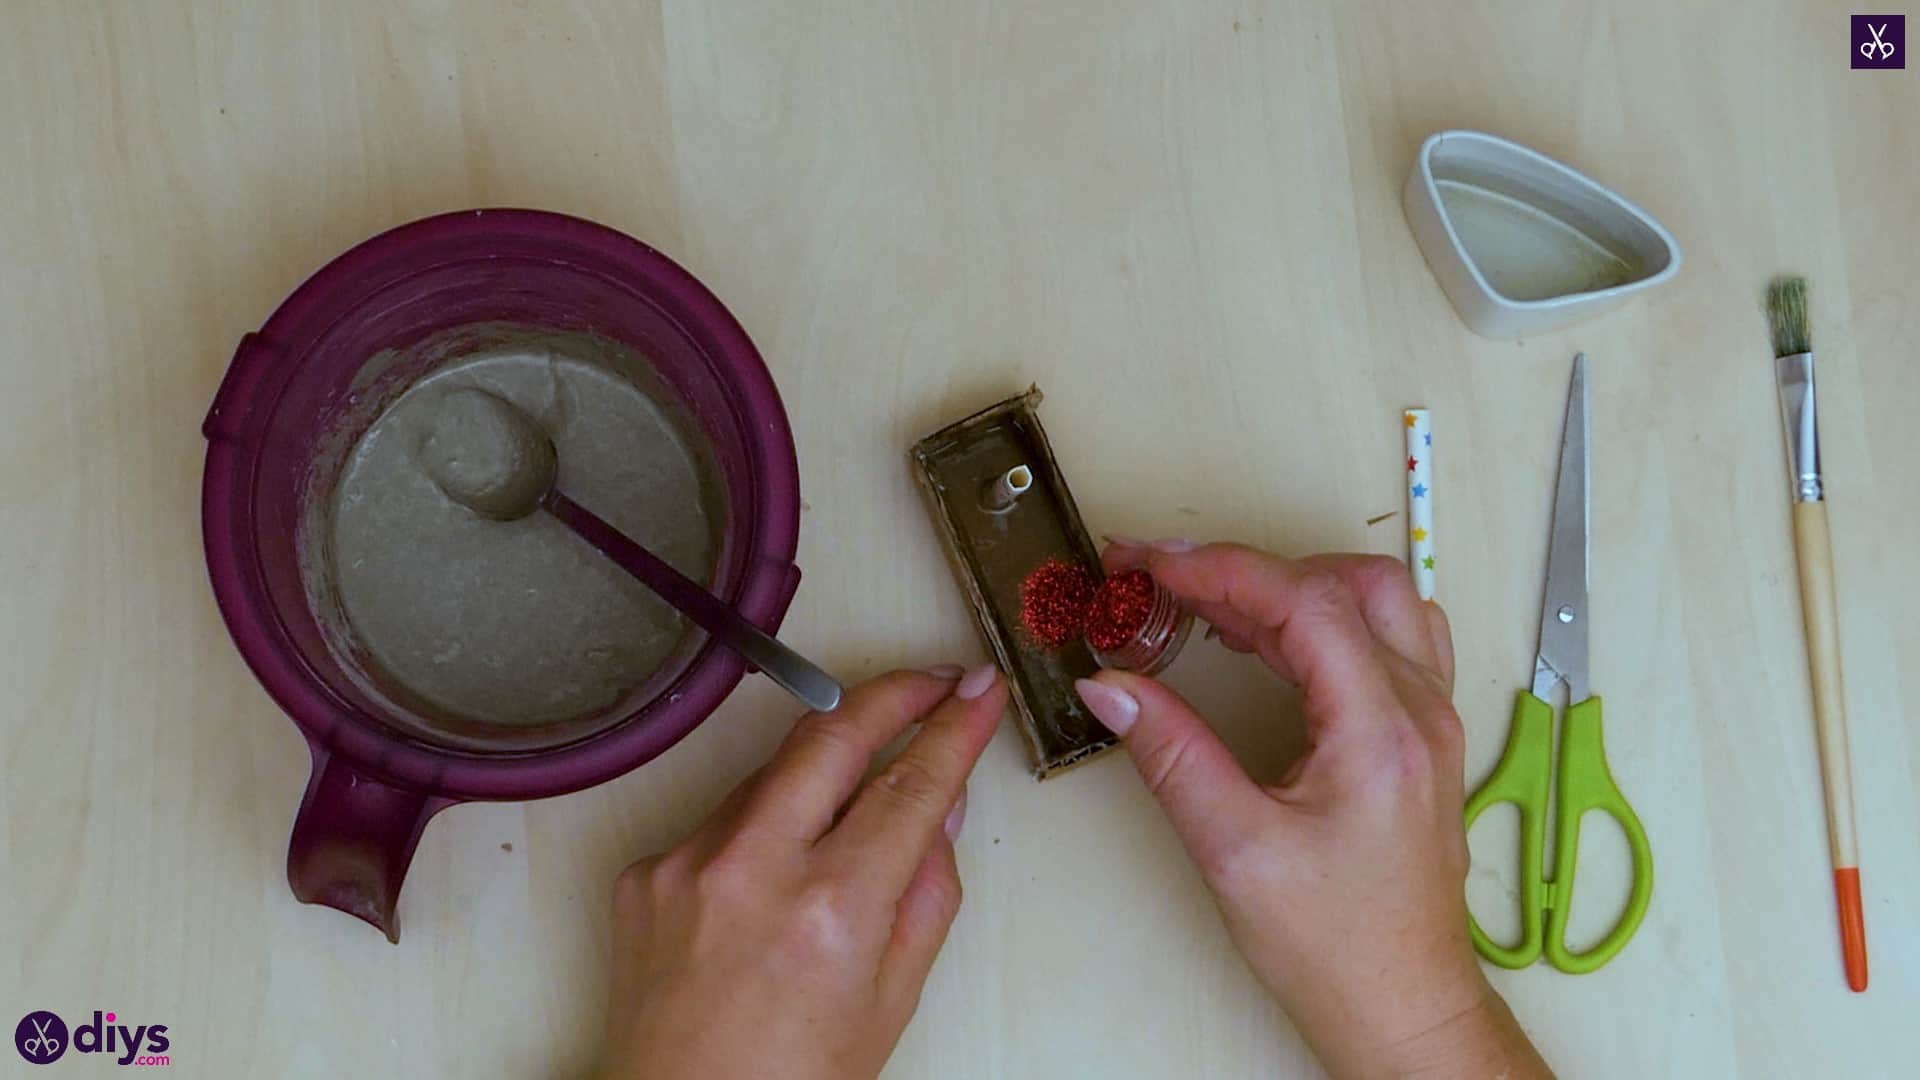
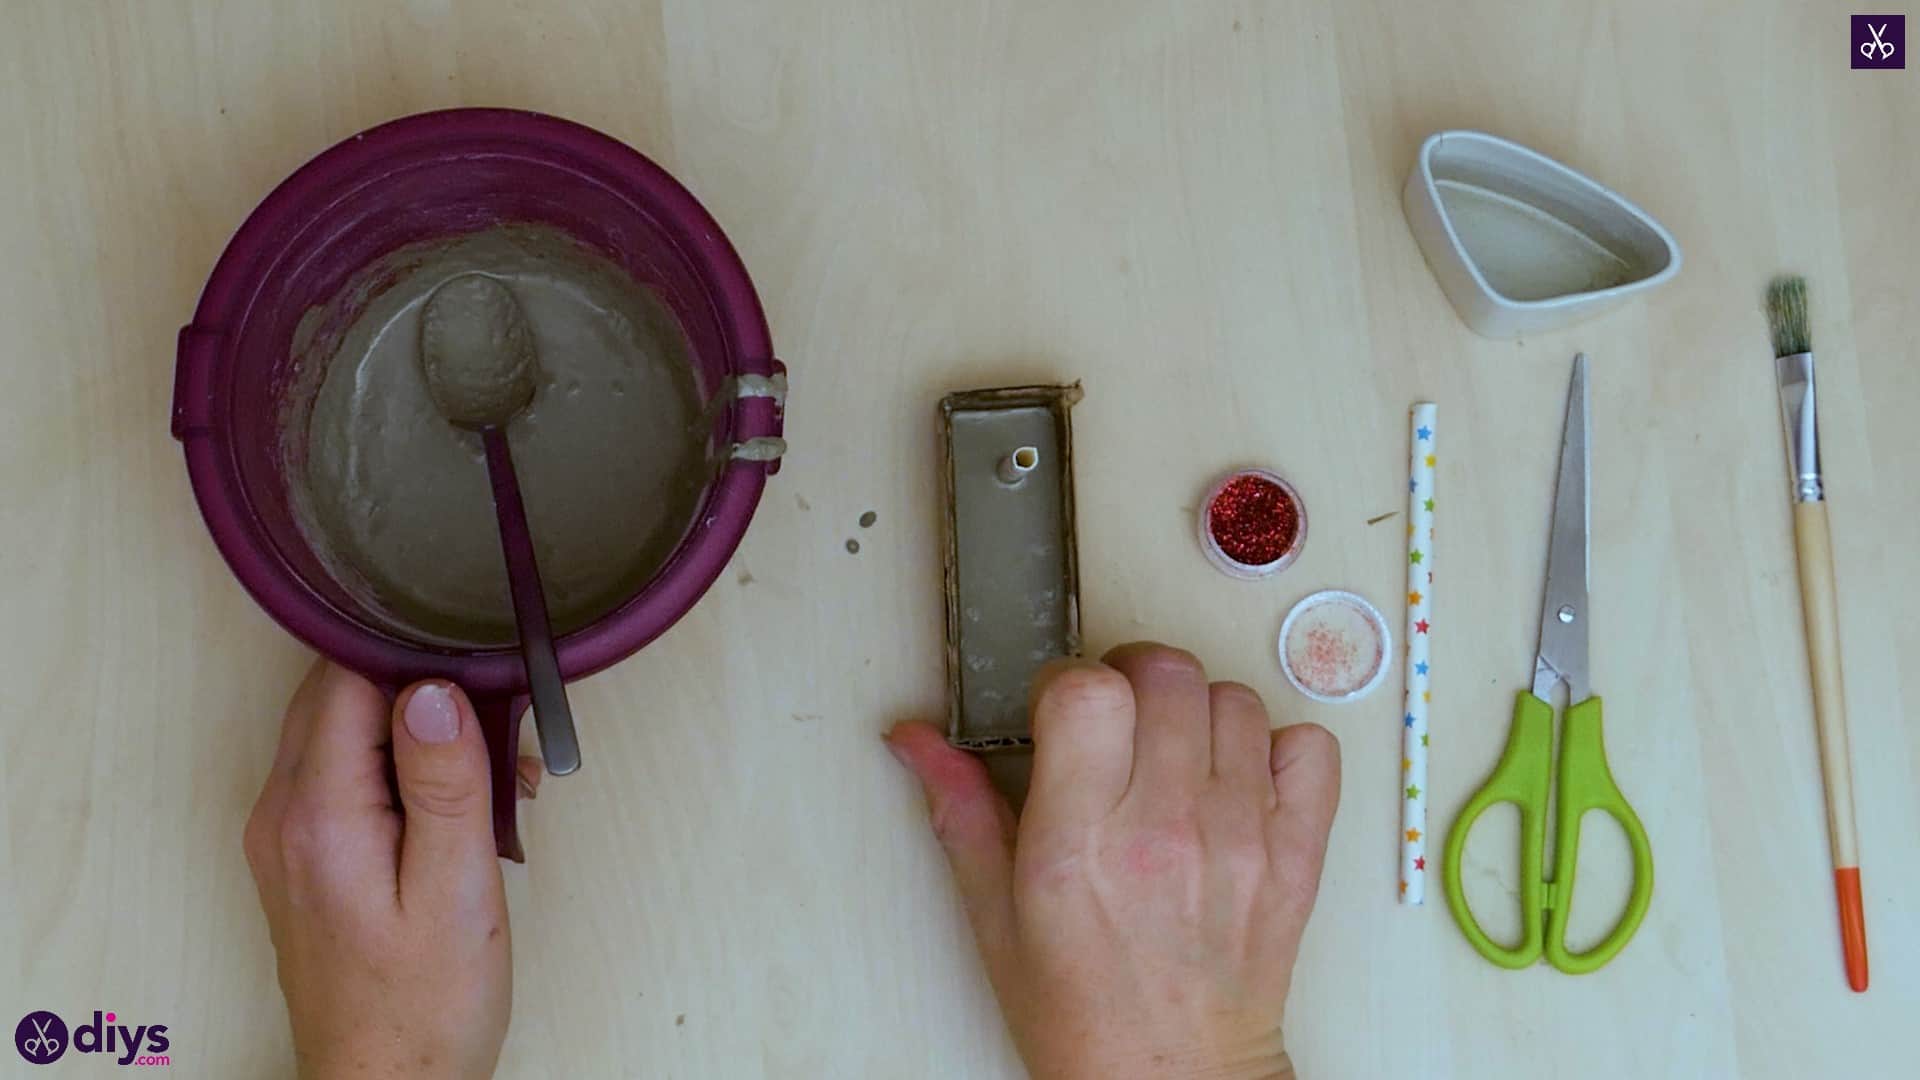
Step 9: add glitter
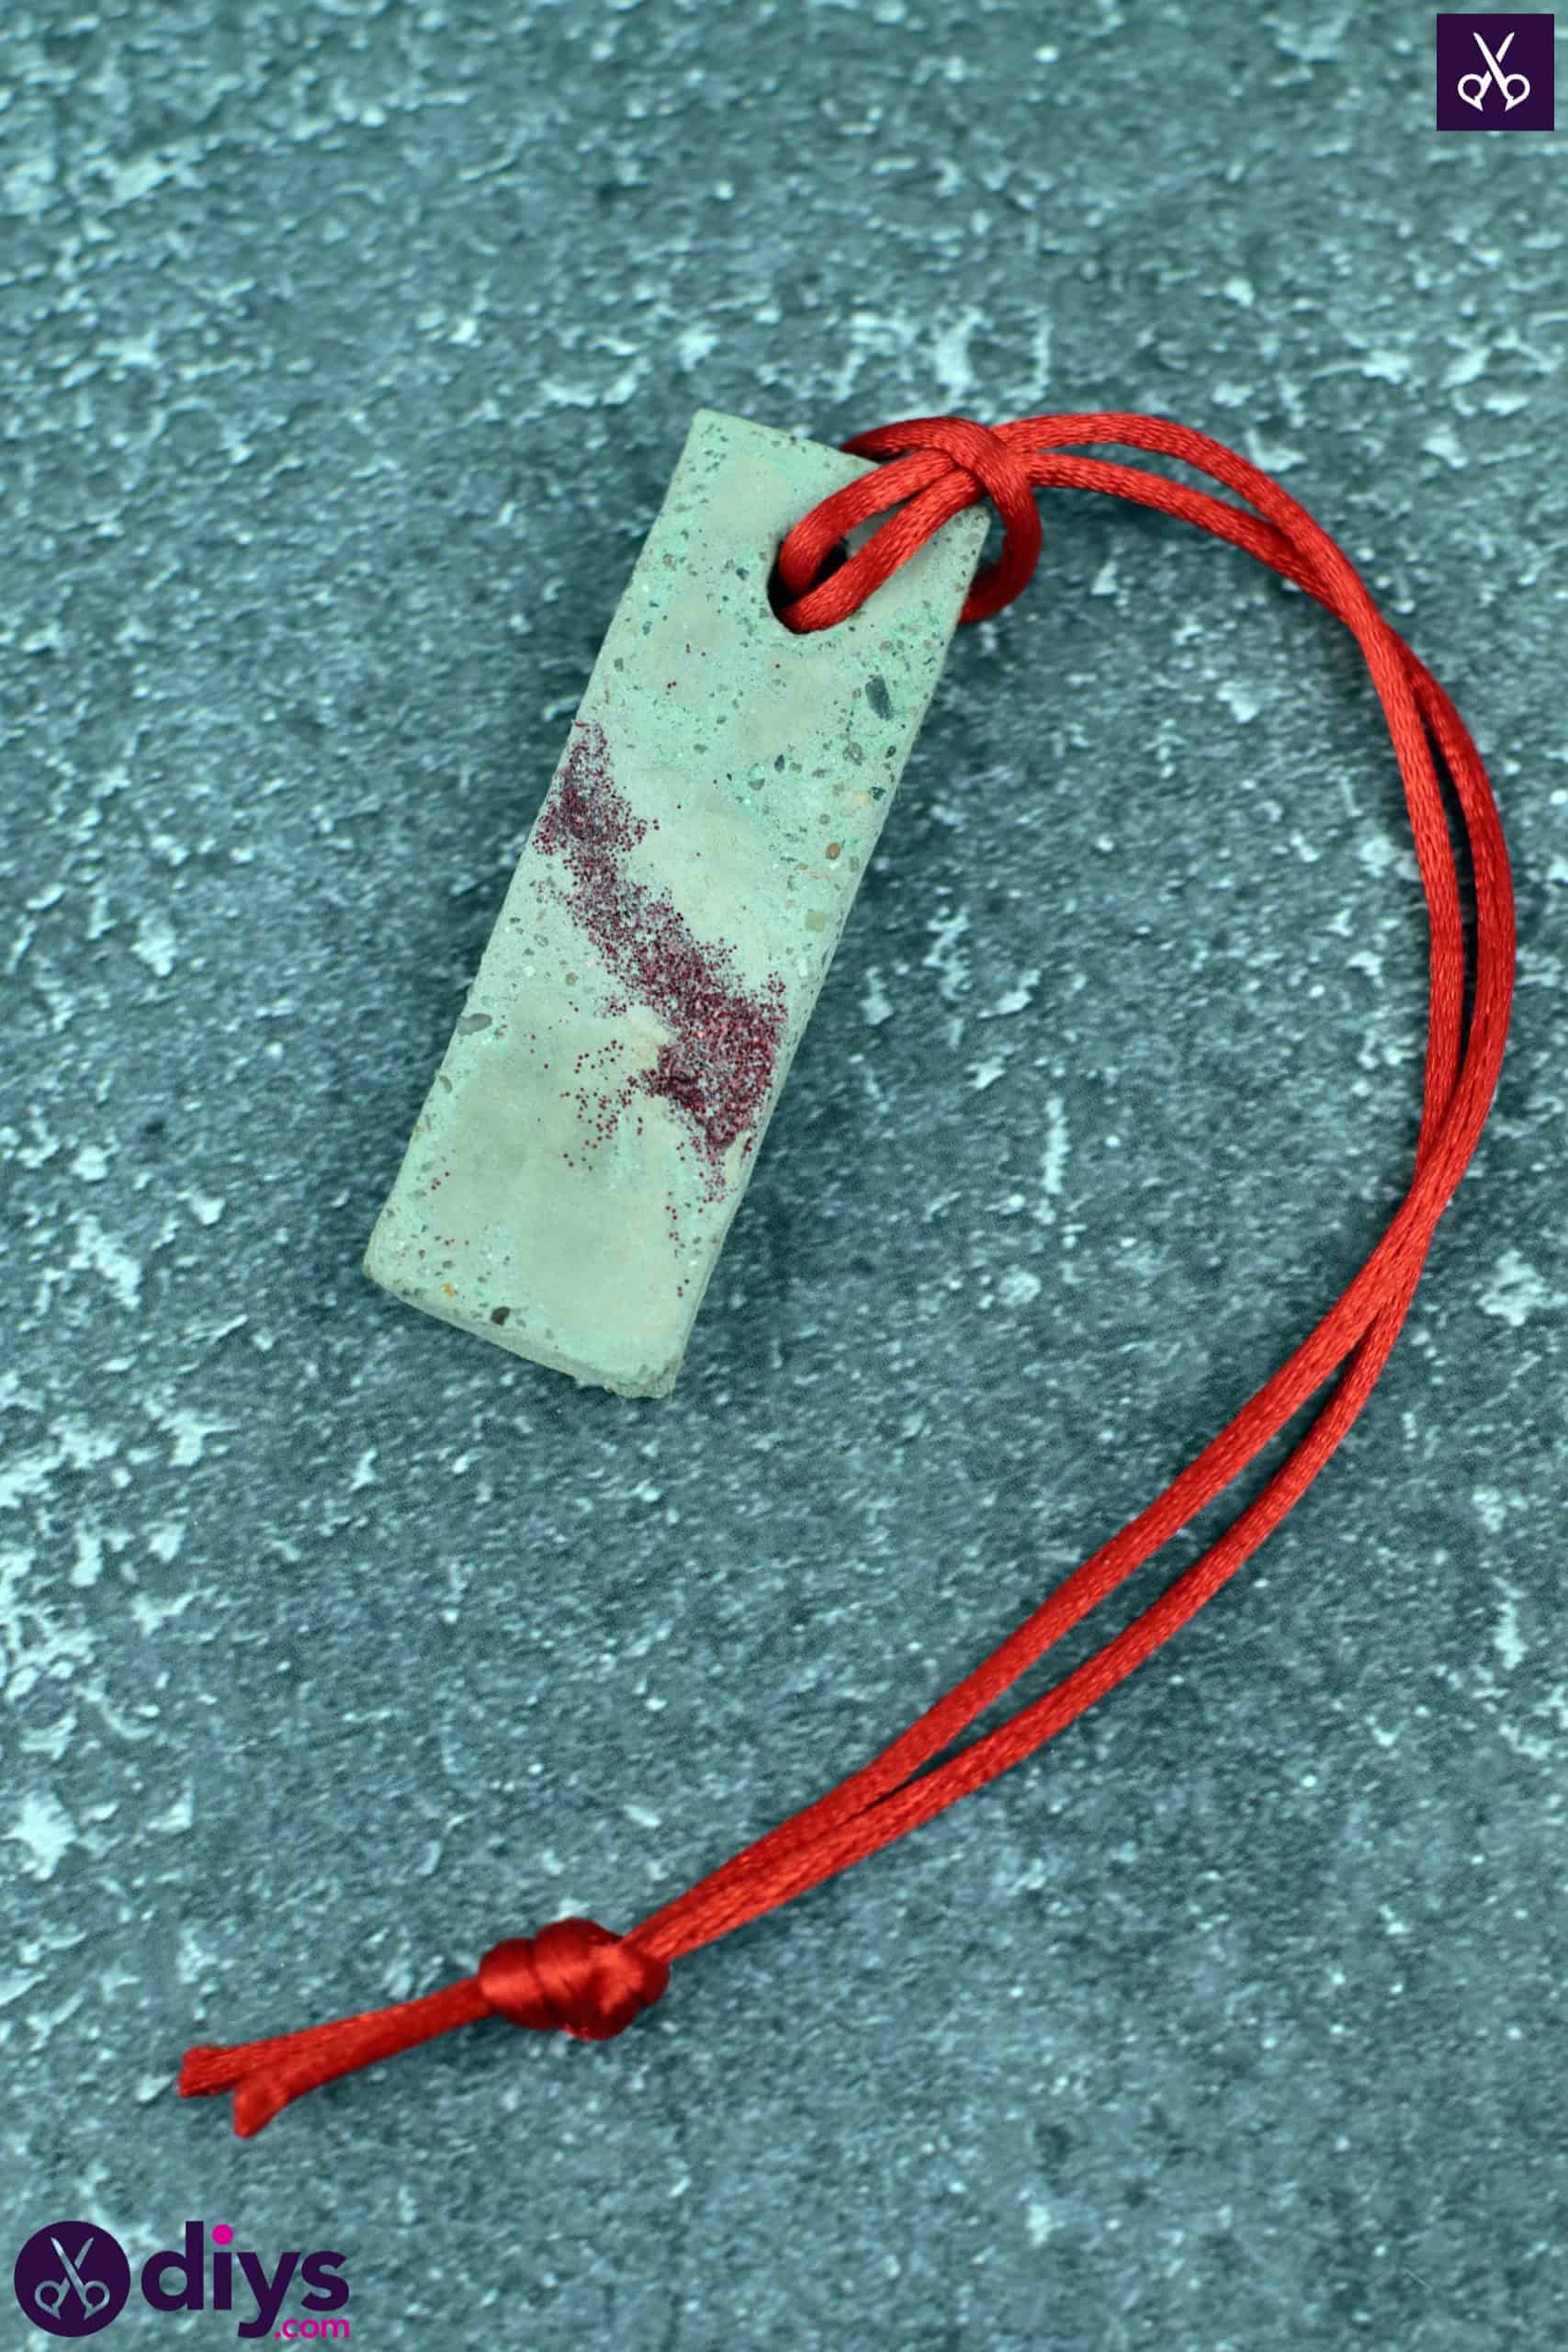
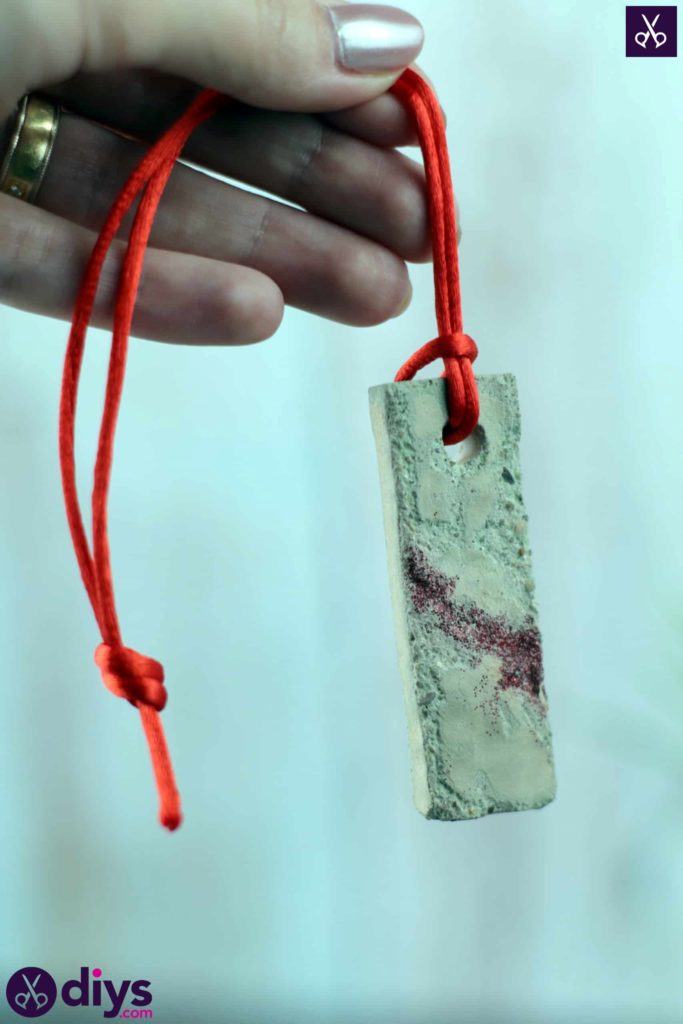
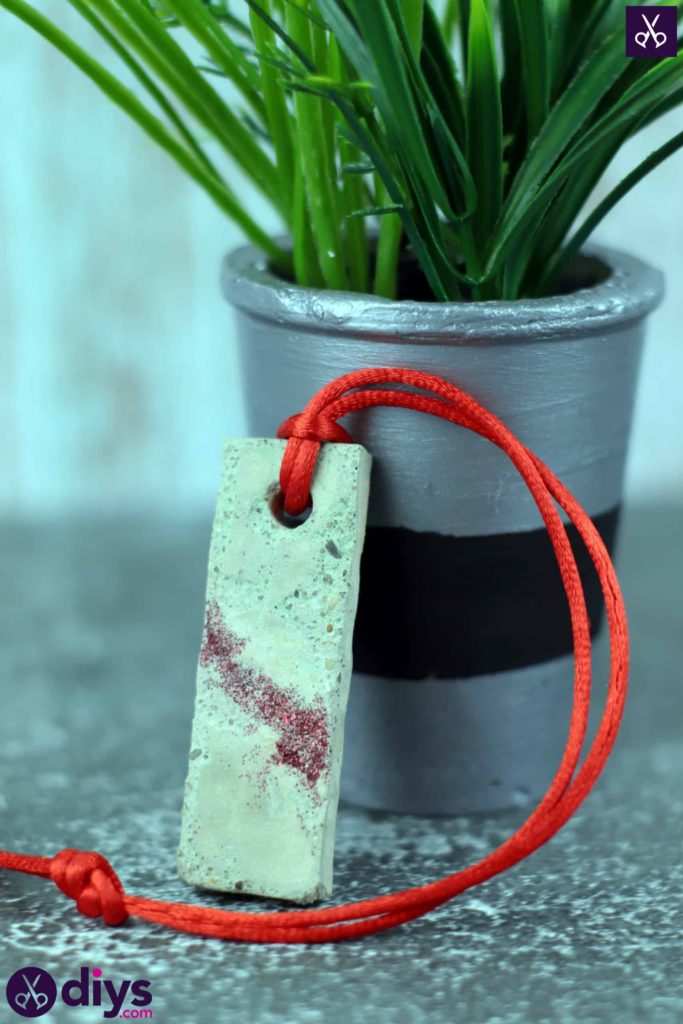
Just before you set the filled mold aside to dry, spread a dash of glitter across the surface of the wet cement mix! You can add as much or as little as you like, but I chose a subtle spray like you might see in the shining surface of a natural stone that has reflective pieces inside when you break it open. Now you can let it dry through.

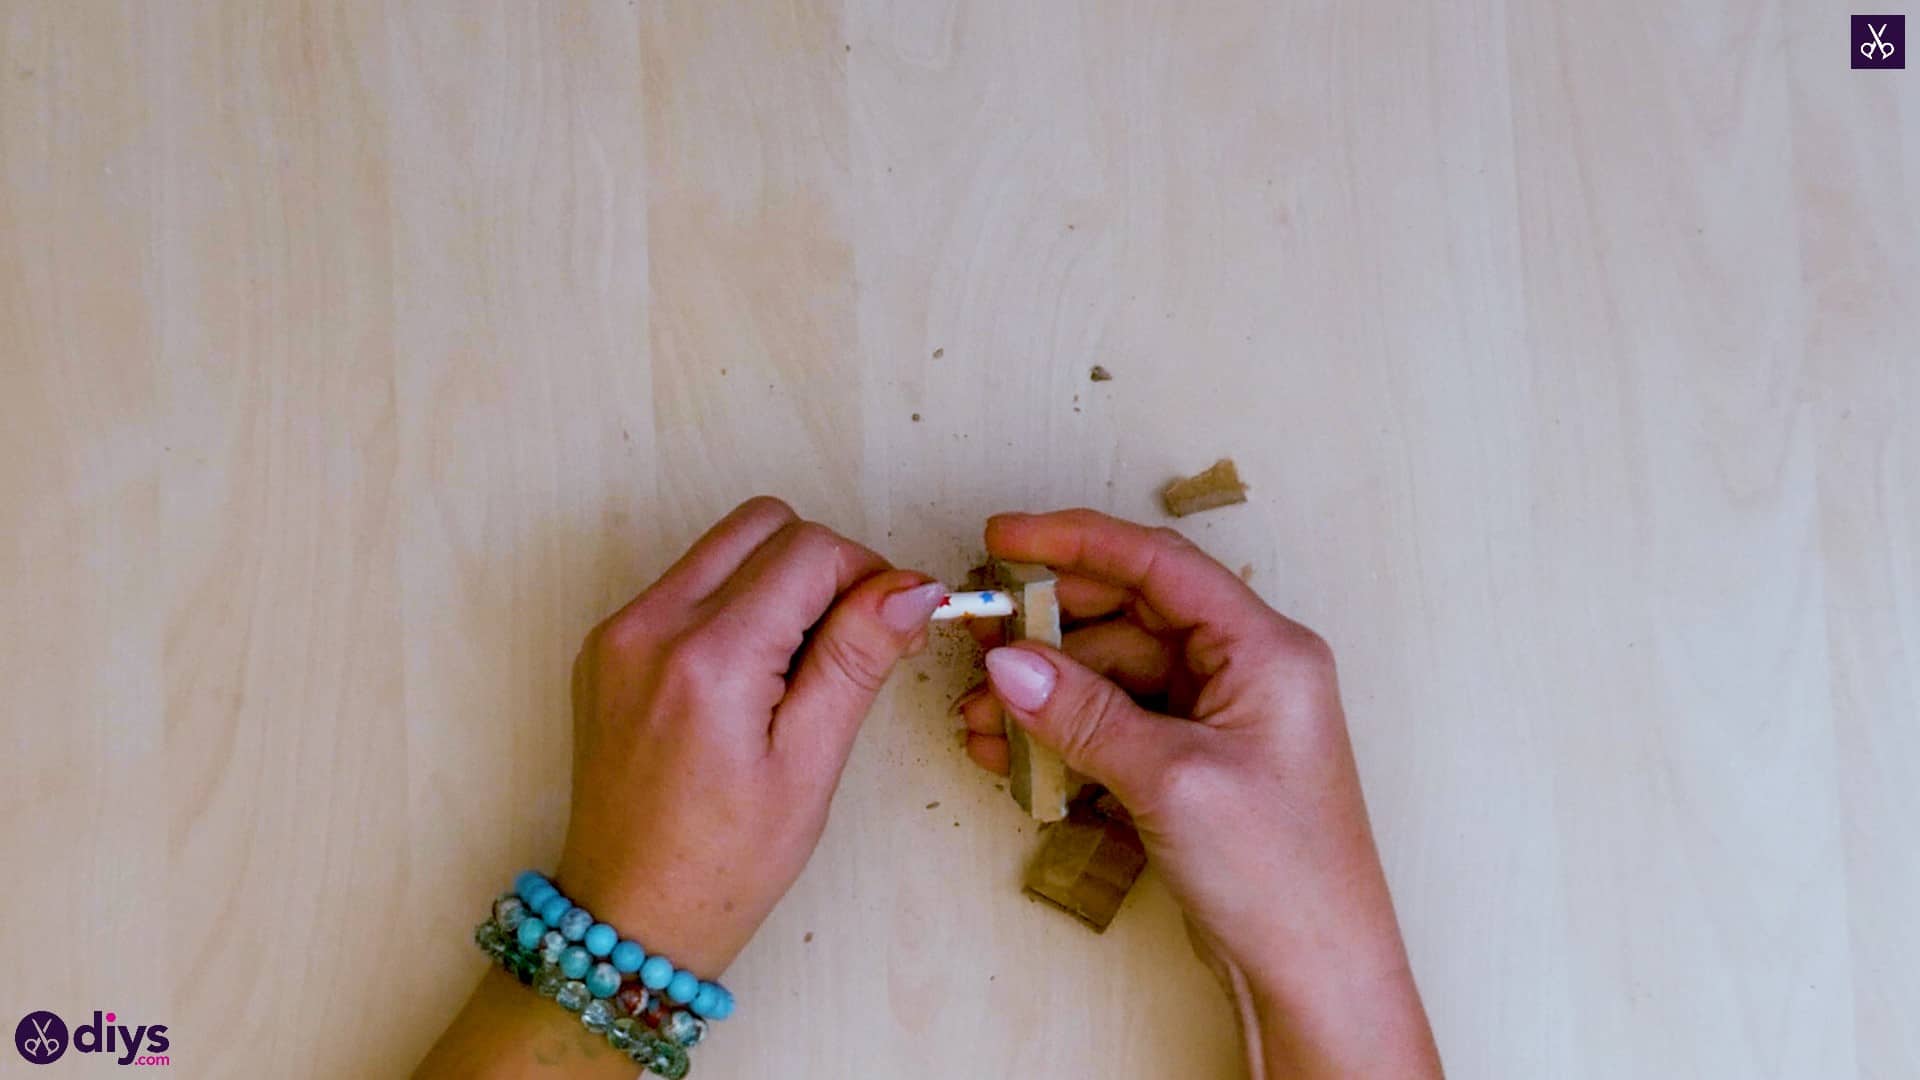
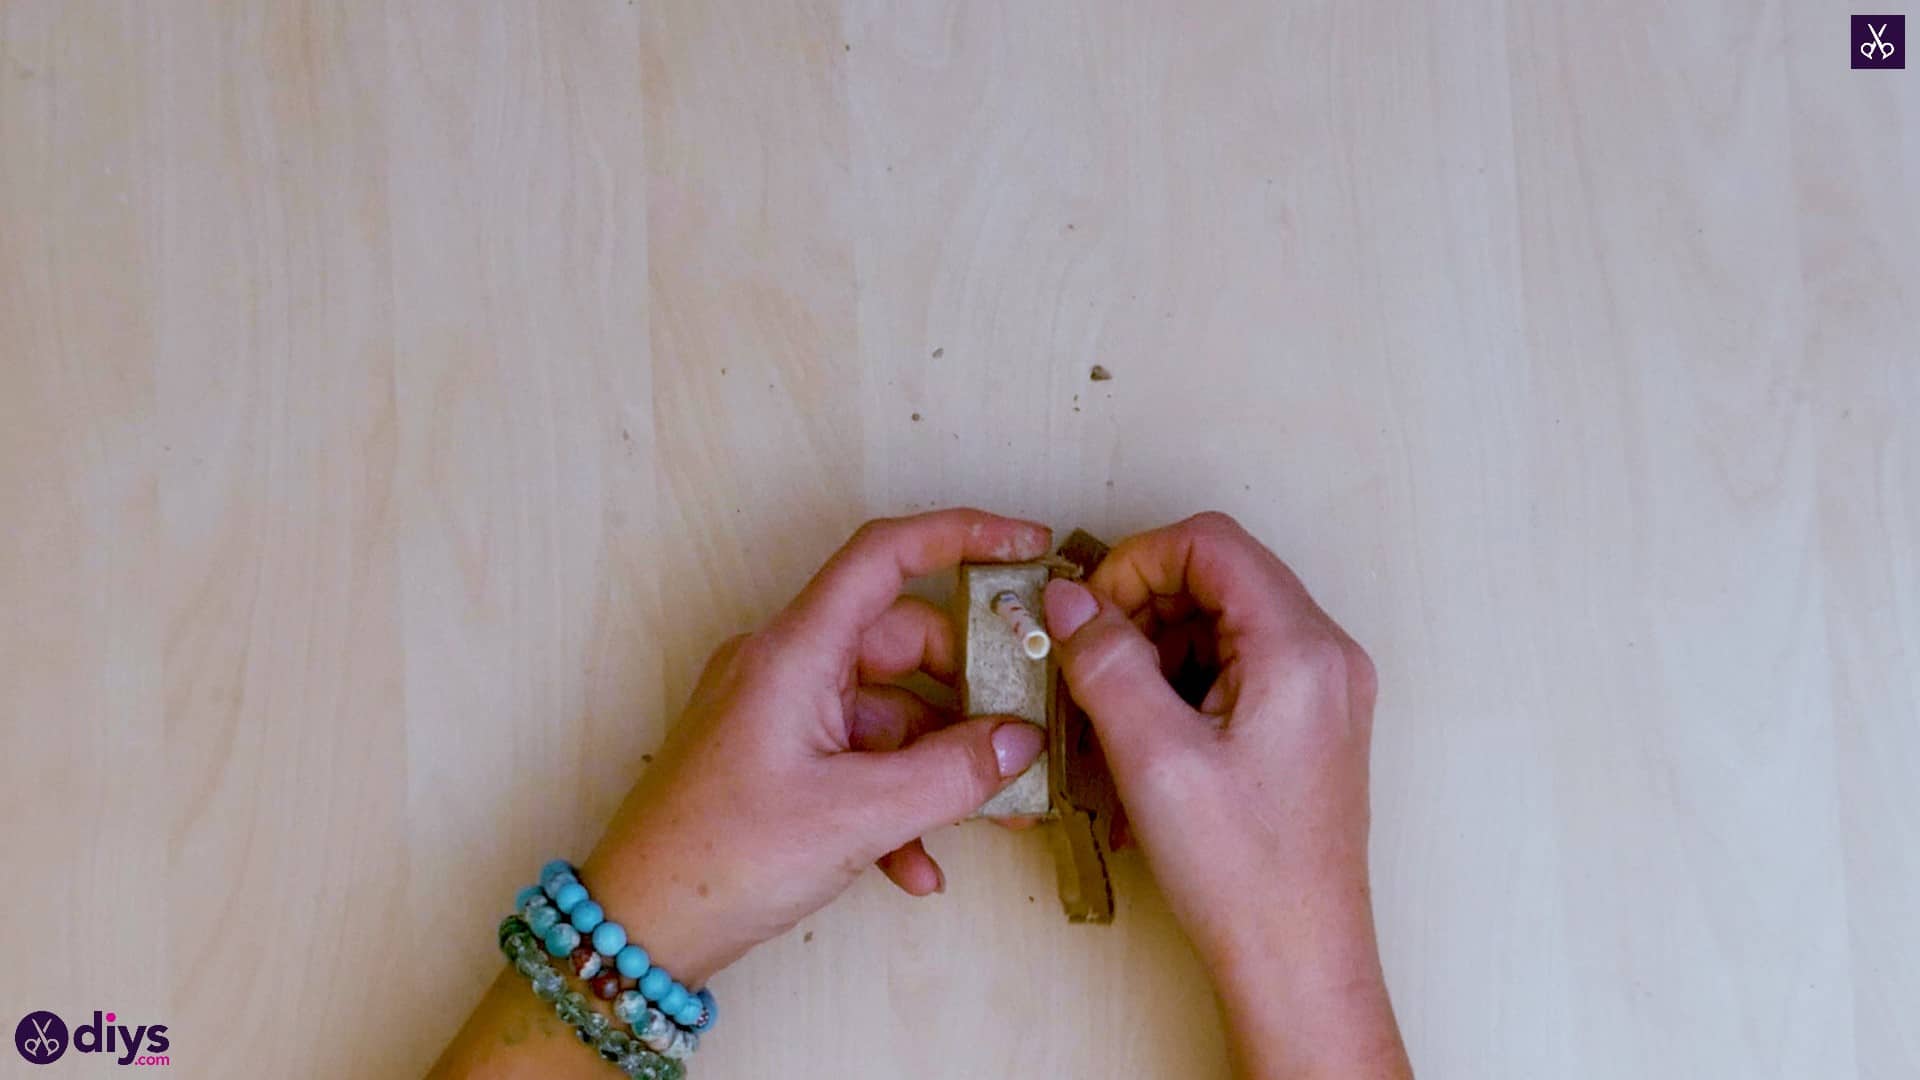
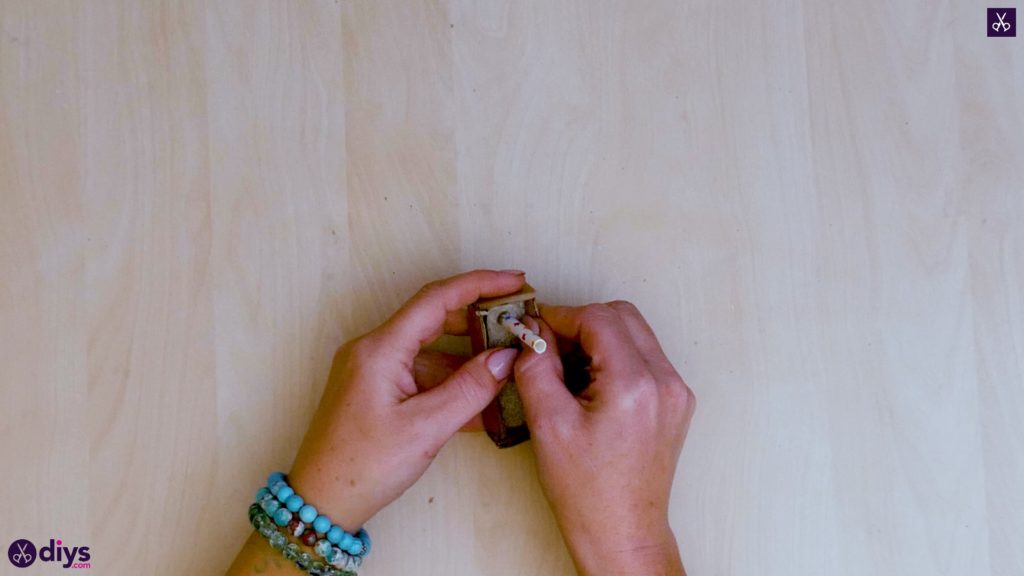
Step 10: remove from mold
Once your cement mix has dried and your pendant is solid all the way through, tear away the straw and the cardboard edges from the concrete’s surface. This should be much easier than it might be otherwise thanks to the way you coated the inside of the mold with oil before filling it. Make sure you get all the little pieces that might stick! You can sand the surface of your pendant with an abrasive block or a piece of sand paper if necessary, but I liked the little bit of texture that was left on mine, so I let it be natural the way it had dried. If you’re going to sand the pendant, just watch out to make sure you don’t sand your glitter detailing clear off!


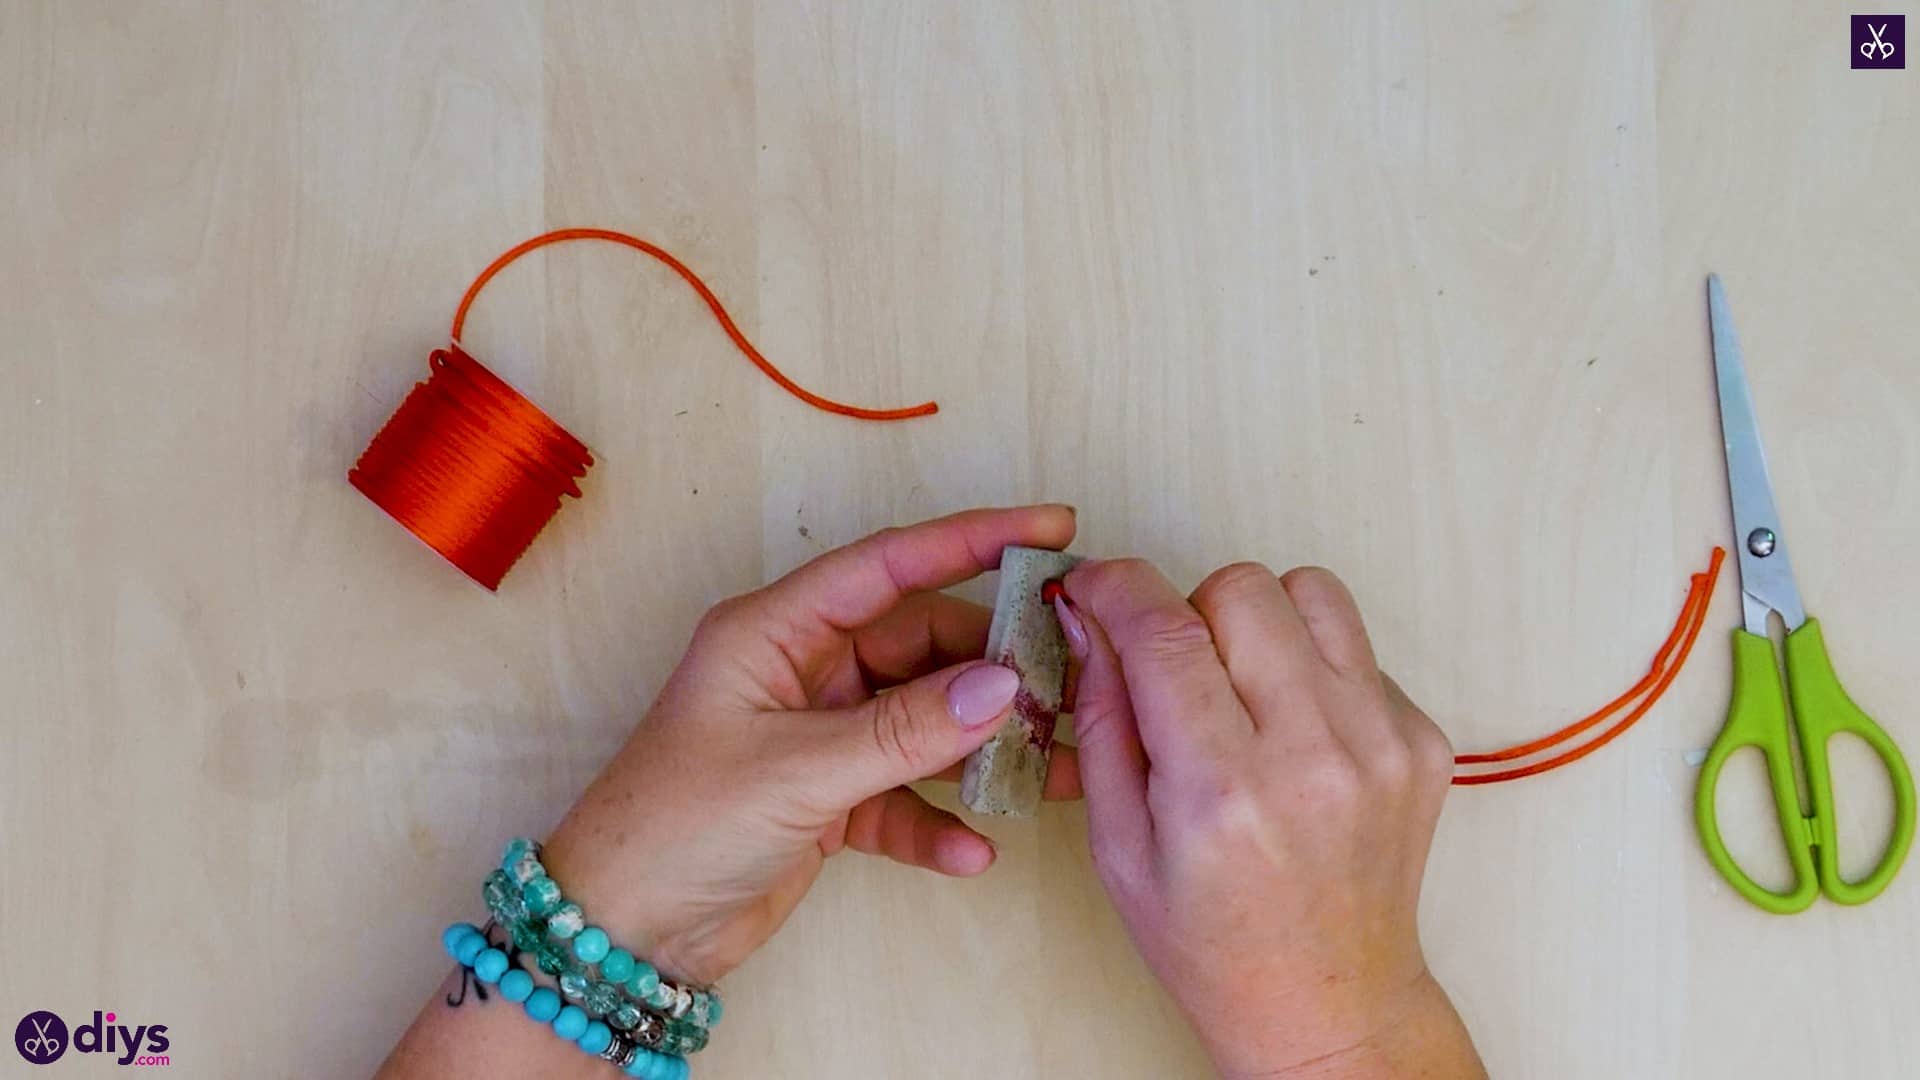
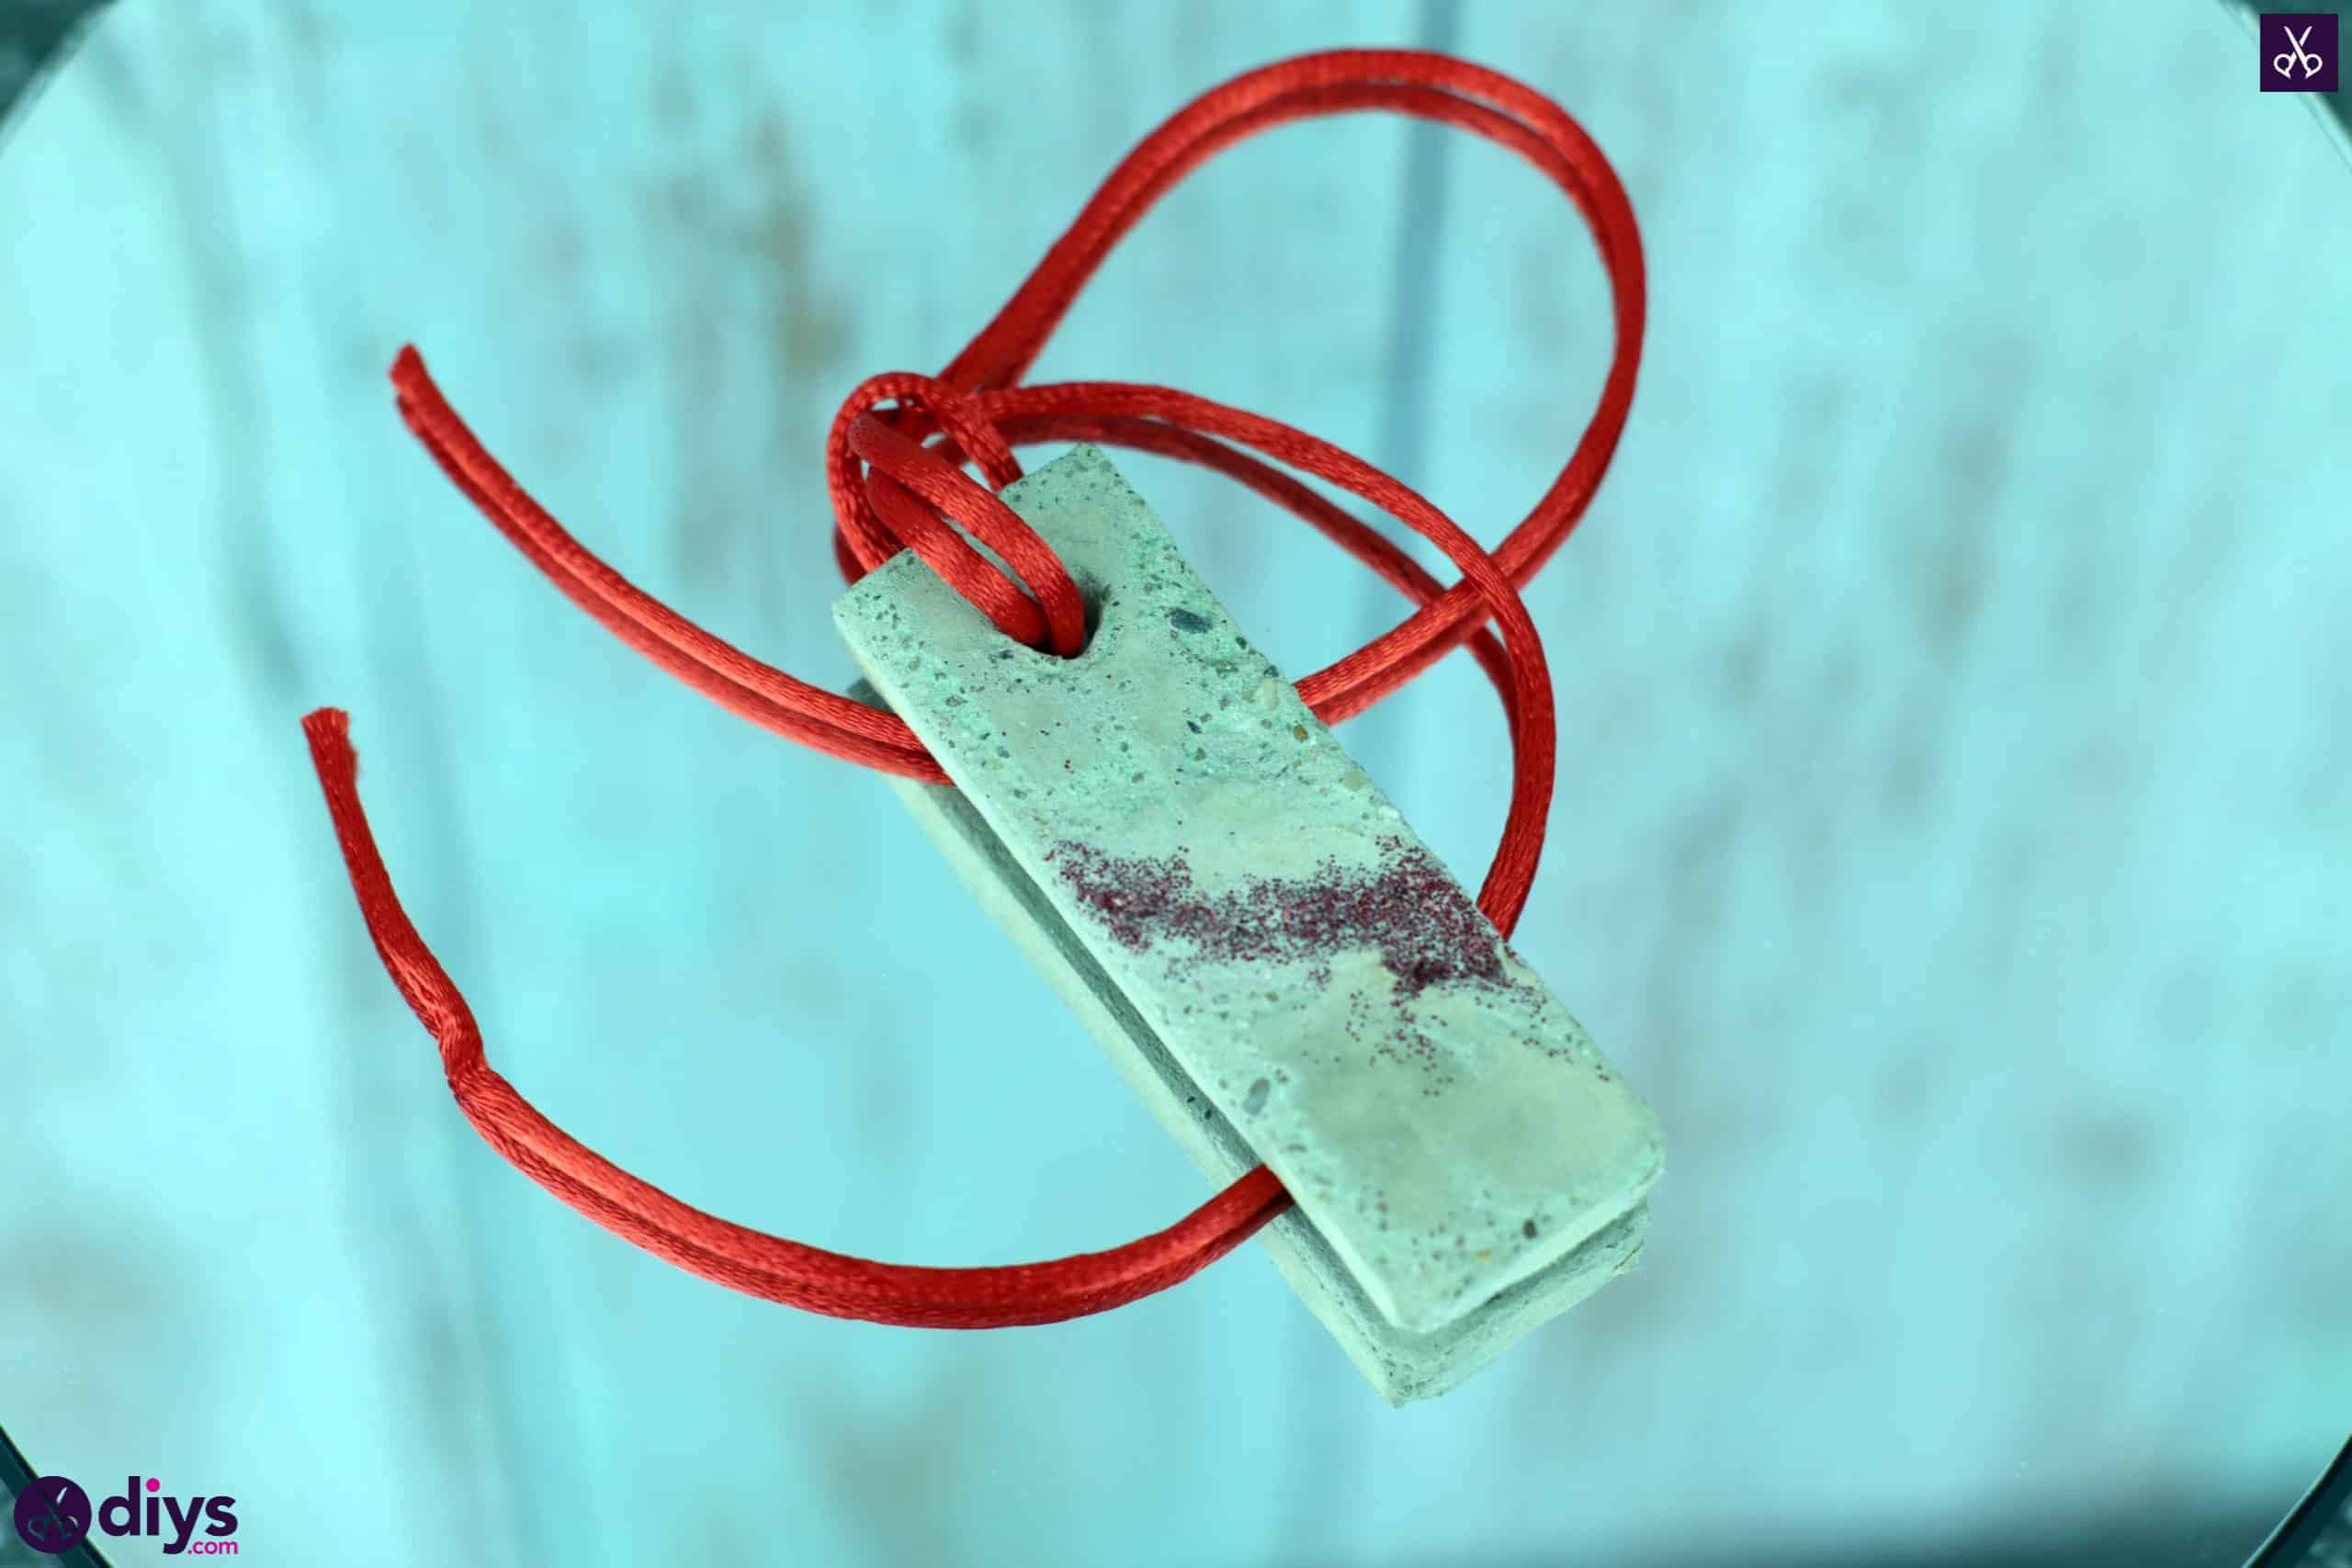
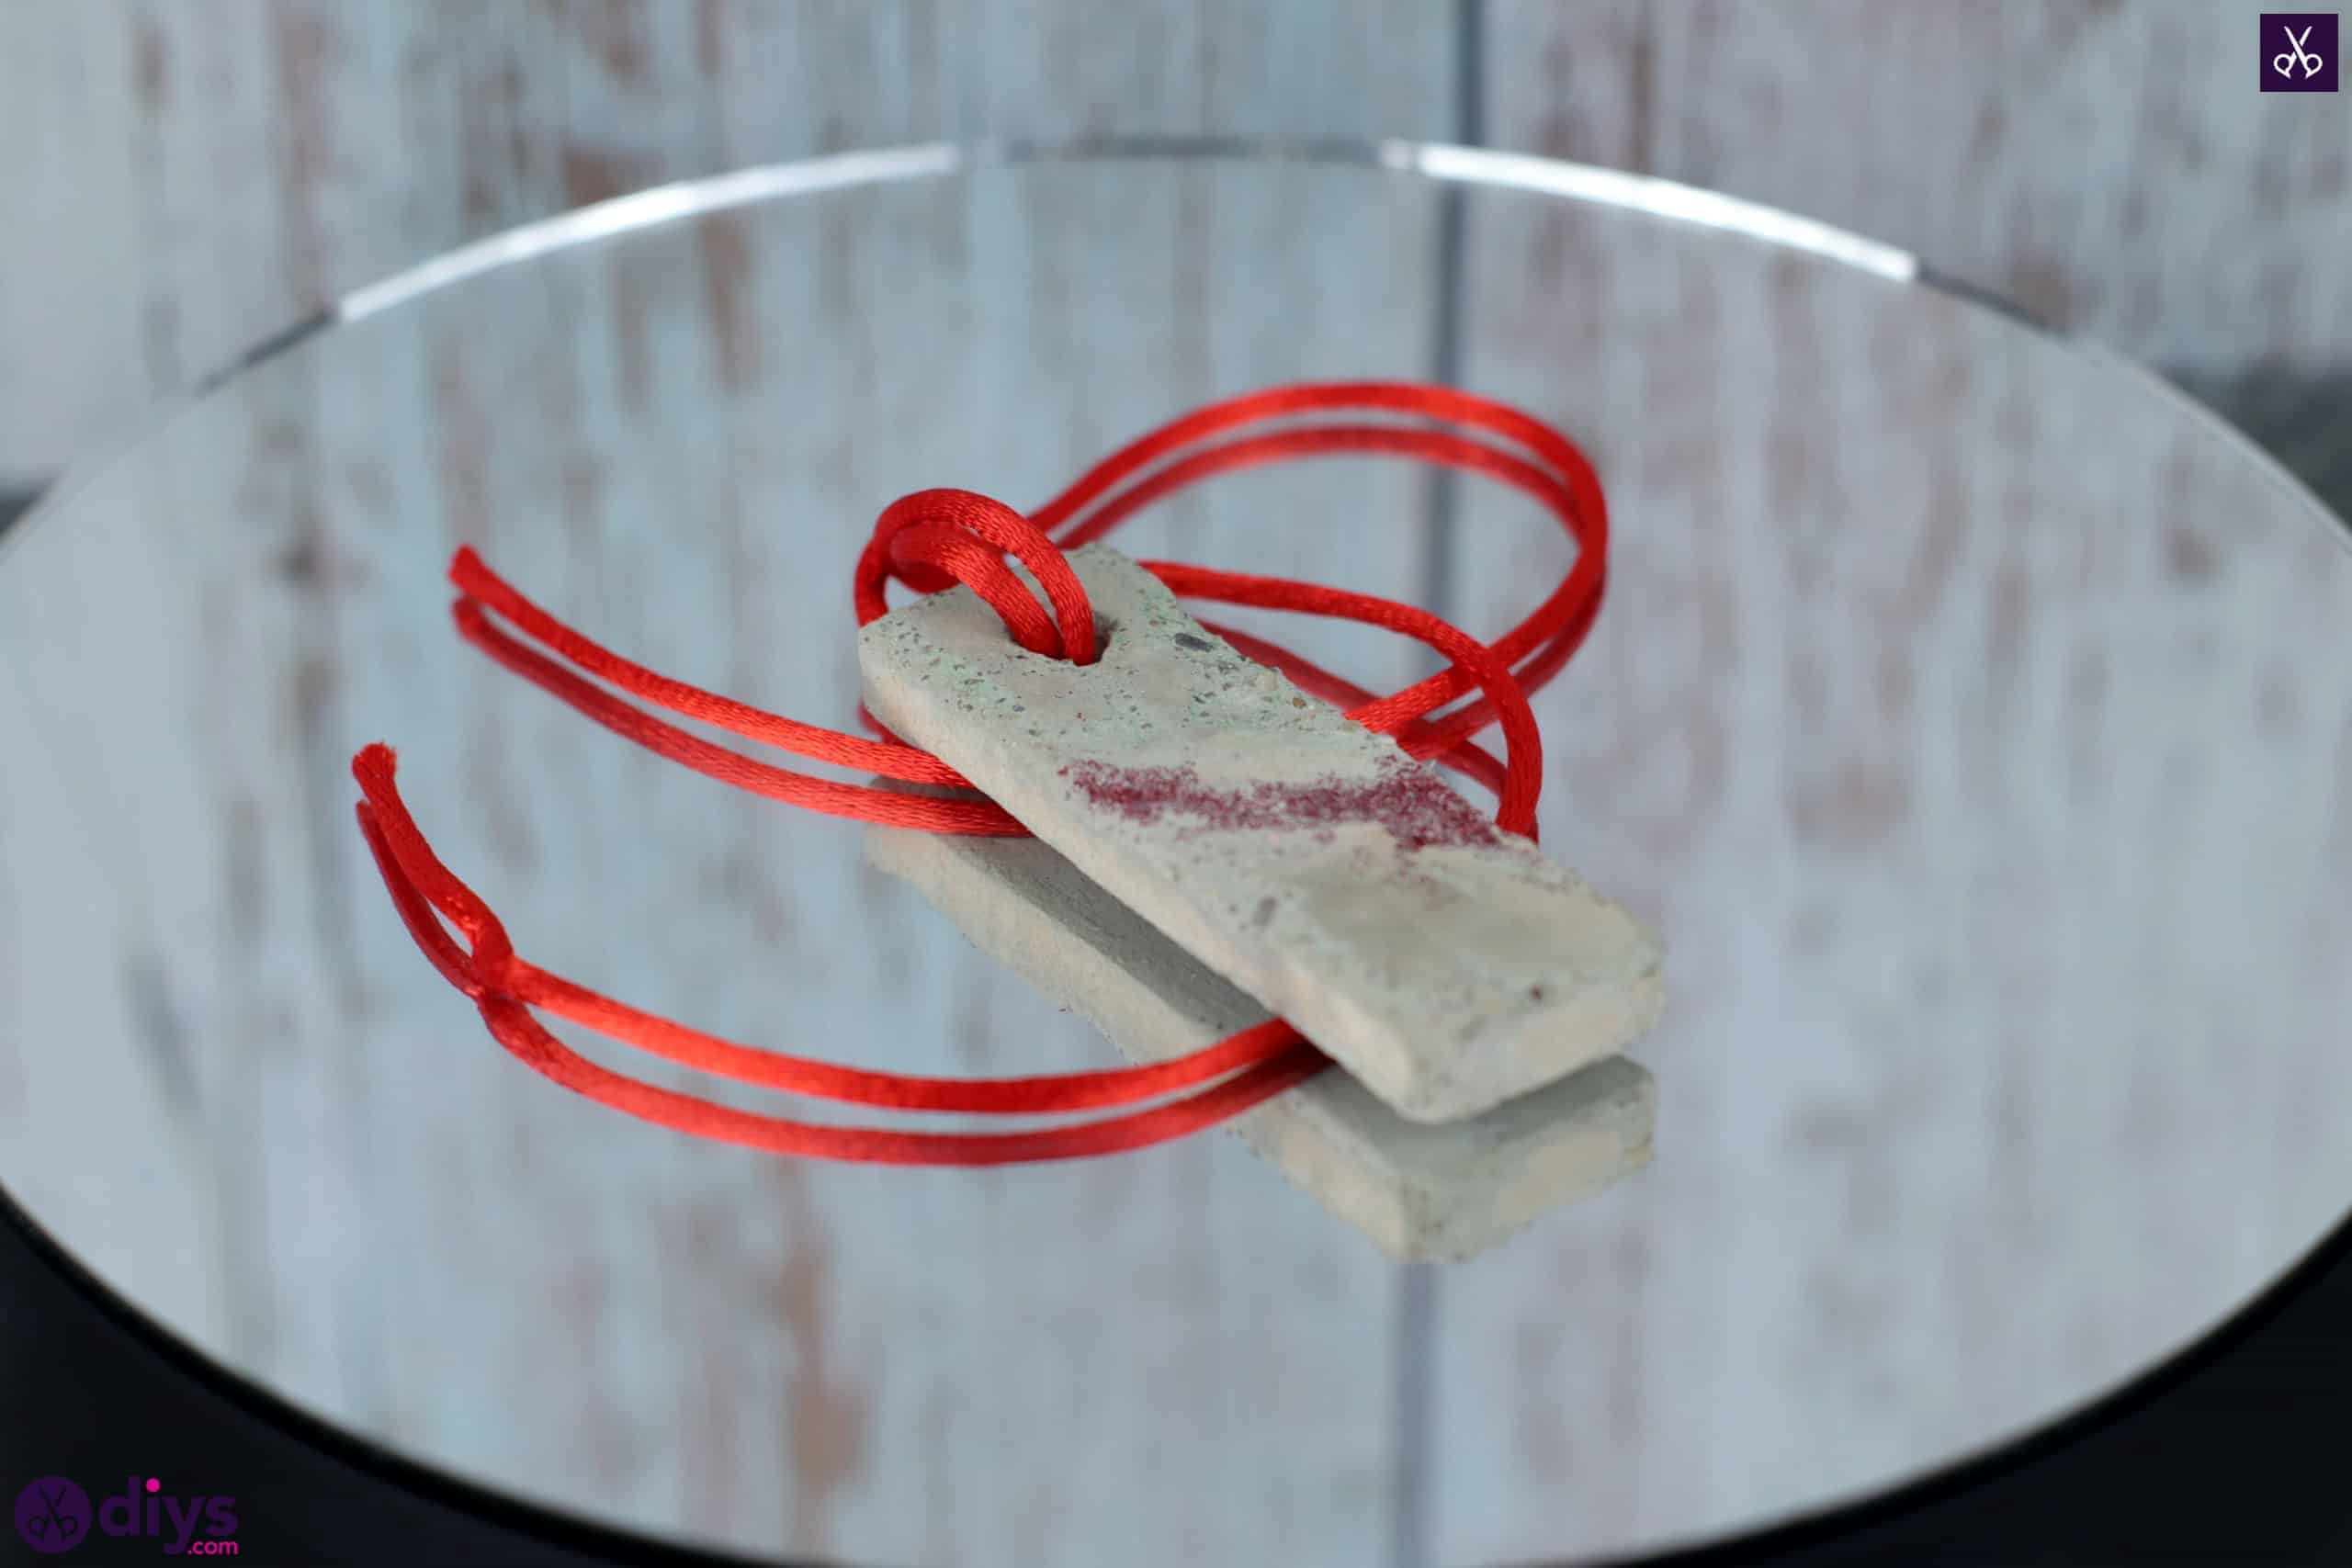
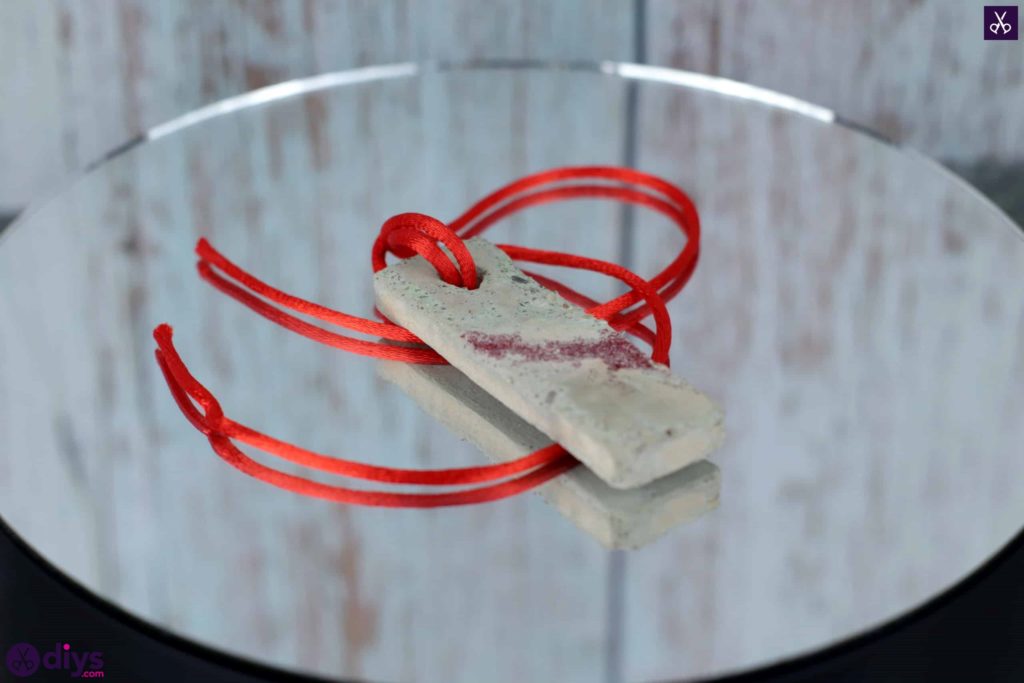
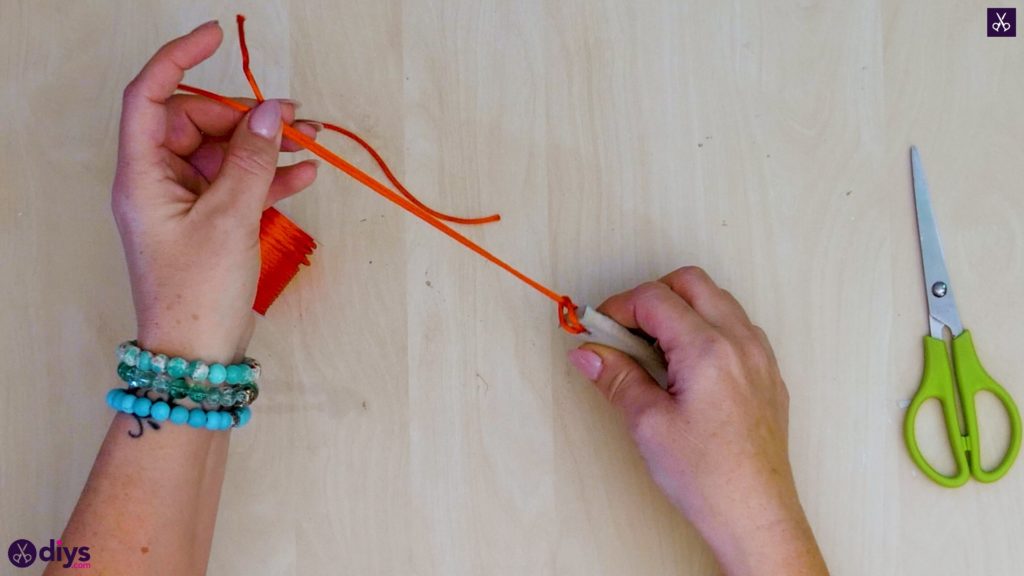
Step 11: make your cord
Cut a piece of silk macrame cord that’s double the length of how long you’d like your cement pendant to hang down. It might help to measure it around your neck and note where the centre point between the two ends hits on your chest. Once you’ve got the right length measured out, cut a second end and fold it to meet the first one, noting where the crease halfway down the string is made. Pinch this crease together and push it through the hole in the top of your cement pendant. Pull the loop through a little and then bend the ends you brought together both up and around to pass them through the loop. Pull them through so the loop and the rest of the cord tightens around the top of the pendant above the hole like a slip knot. Trim the ends to be even again if you find that one has become shorter than the other and then knot them together, tightening the knot as close to the end as you can.

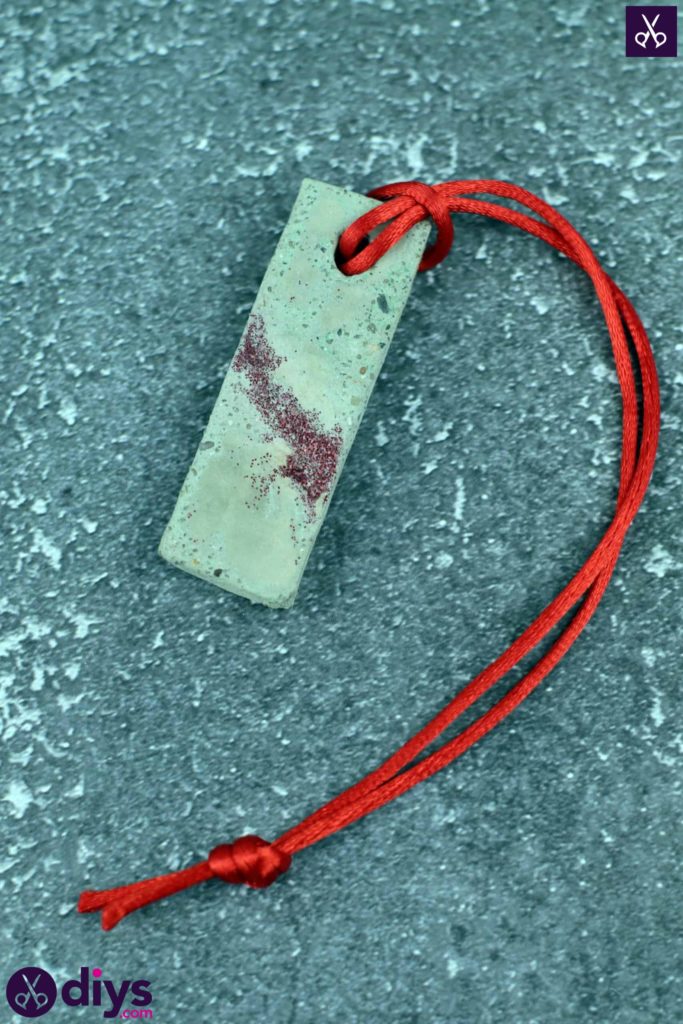
Your necklace is officially ready to slip over your head and wear! Of course, you can feel free to use this basic concept as a guide but still play with colour, add more character with paint, or even get creative by gluing on embellishments of other kinds, like rhinestones. Just in case you’d like to try this project out for yourself, here’s a fantastic tutorial video to help you!