DIY 3D Paper Dog Puppet
Updated on November 19, 2025


If you’re looking for a fun and easy craft to do with the kiddos this weekend, then check out how I made this DIY 3D paper dog puppet craft! Perfect for kid of all ages and fun to play with afterward. I documented all the steps right here.
The kids were so in love with their 3D puppets that I just couldn’t help wanting to share the process far and wide! Check out these step by step instructions complete with photos! If you’d rather follow along with a video tutorial instead of written words, scroll to the bottom of this post to find just what you’re looking for.
For this project, you’ll need:
- White paper
- String
- A black marker
- A wooden kebab skewer
- Two googly eyes
- Red paper
- Hot glue
- Scissors (regular and curved nail scissors)
- Black pipe cleaner (two regular and one puffy)
Step 1: get ready
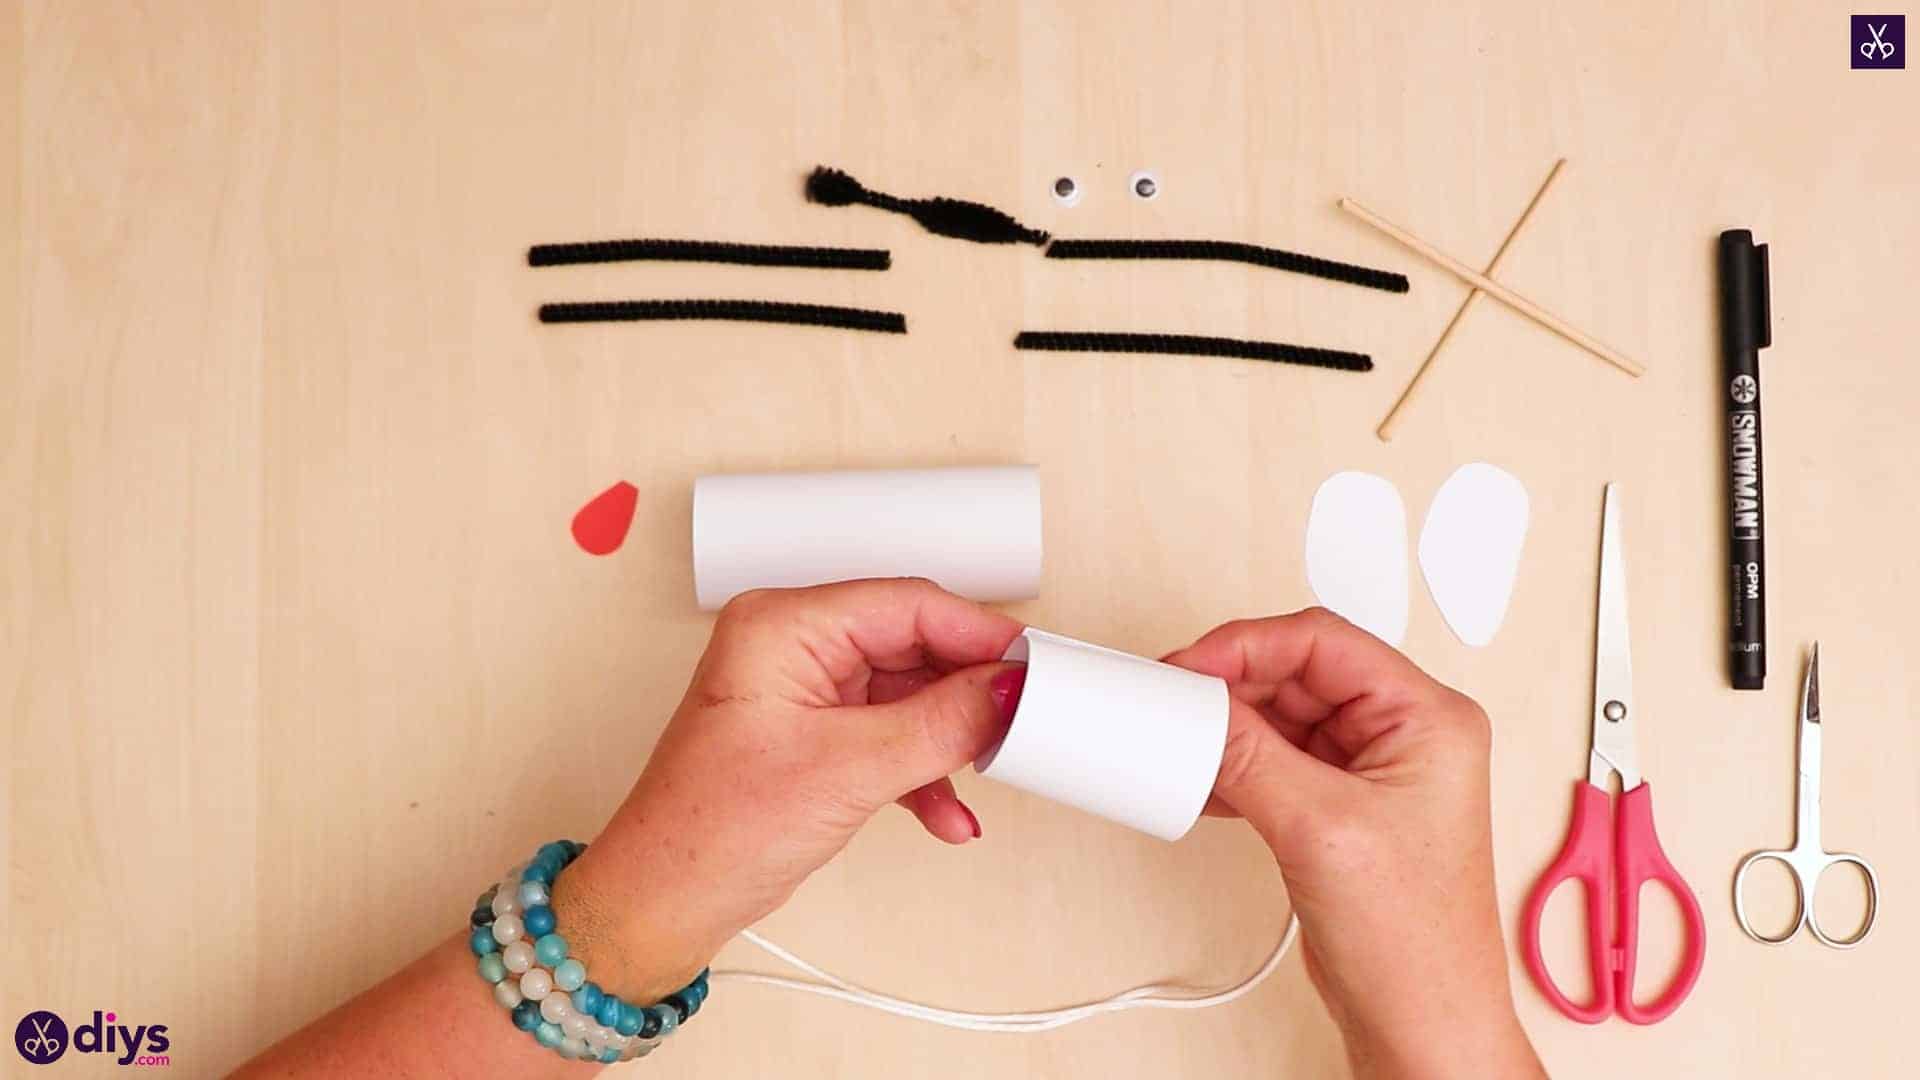
Gather your materials and place everything you need within reach!

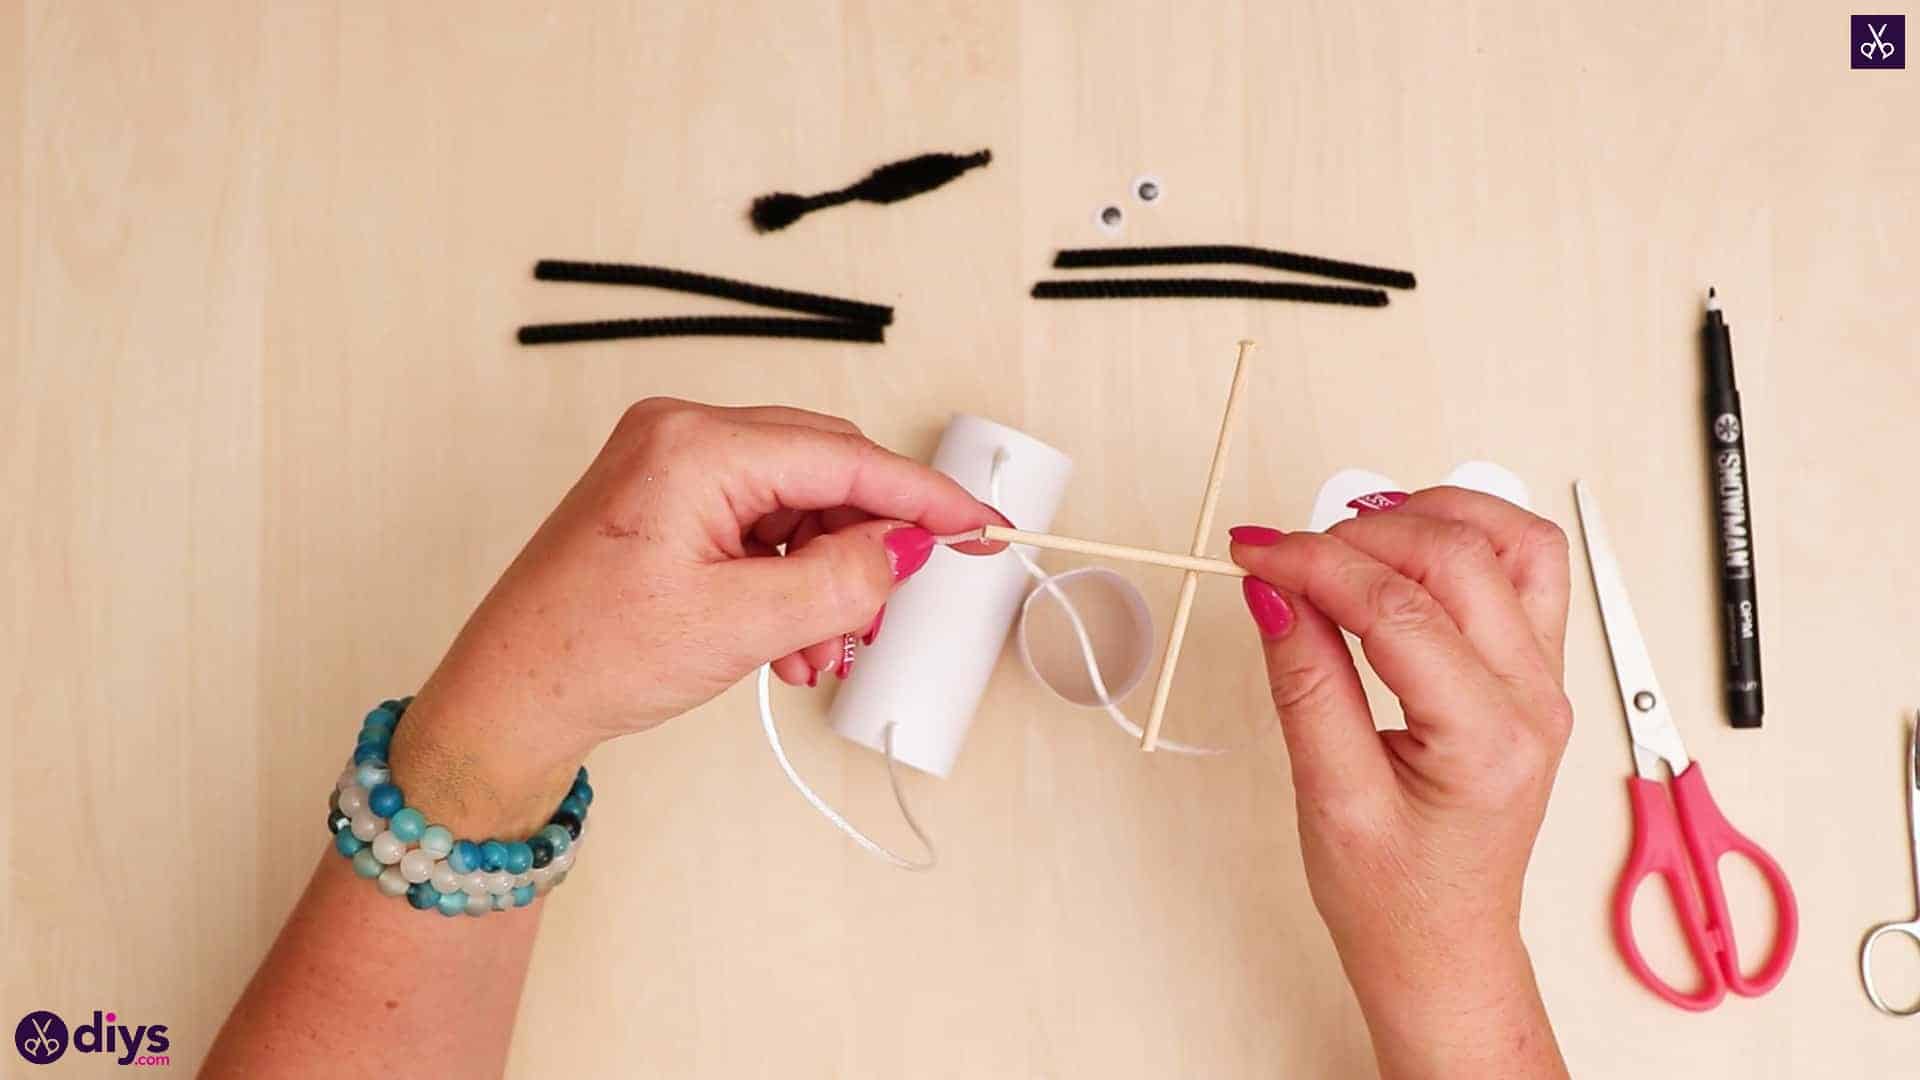
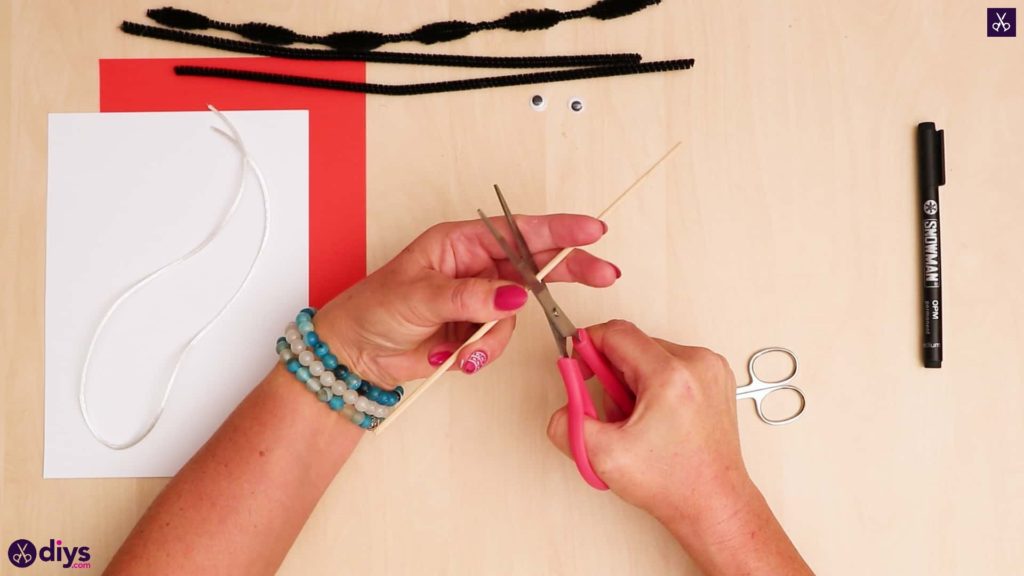
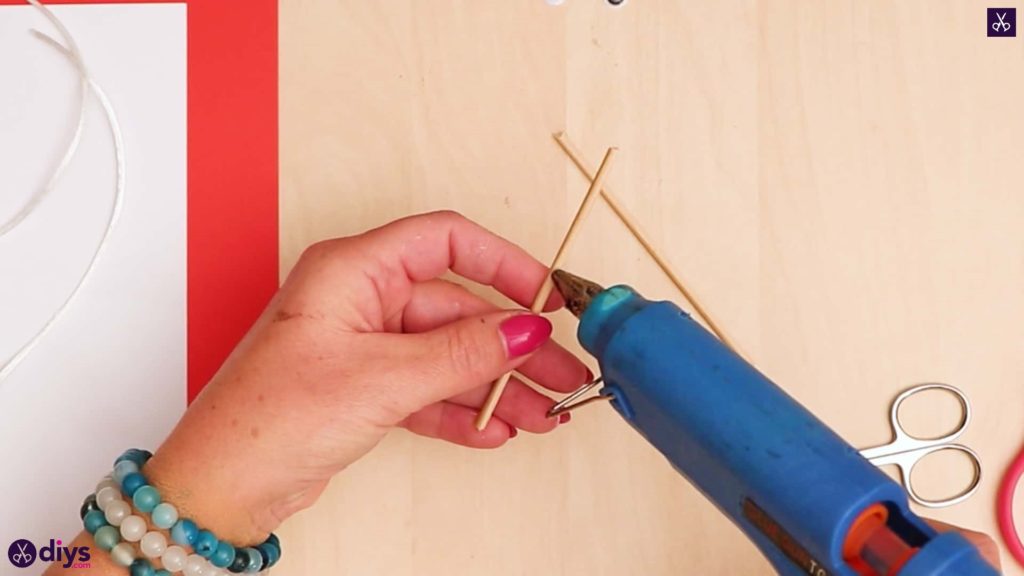
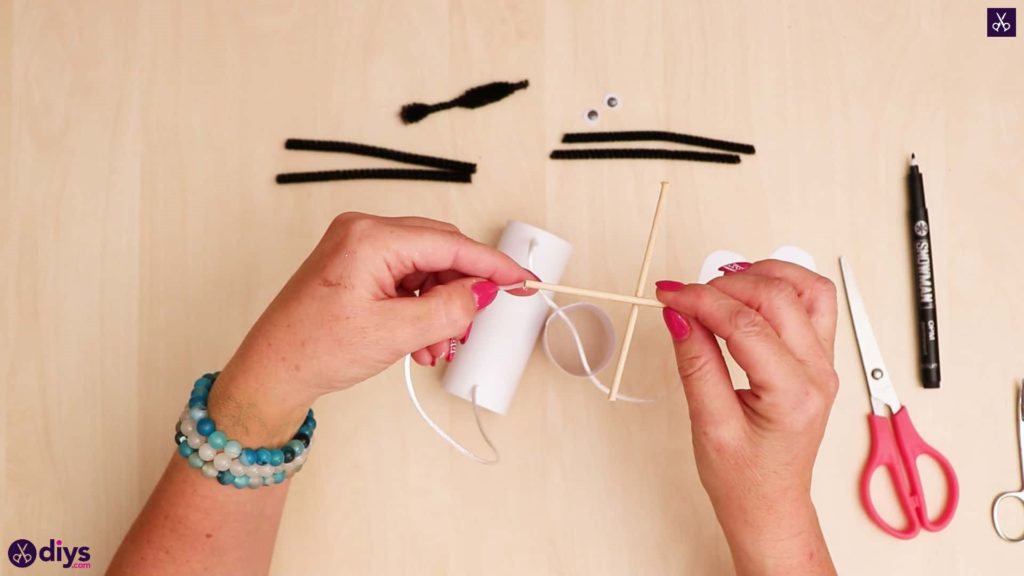
Step 2: cut skewer
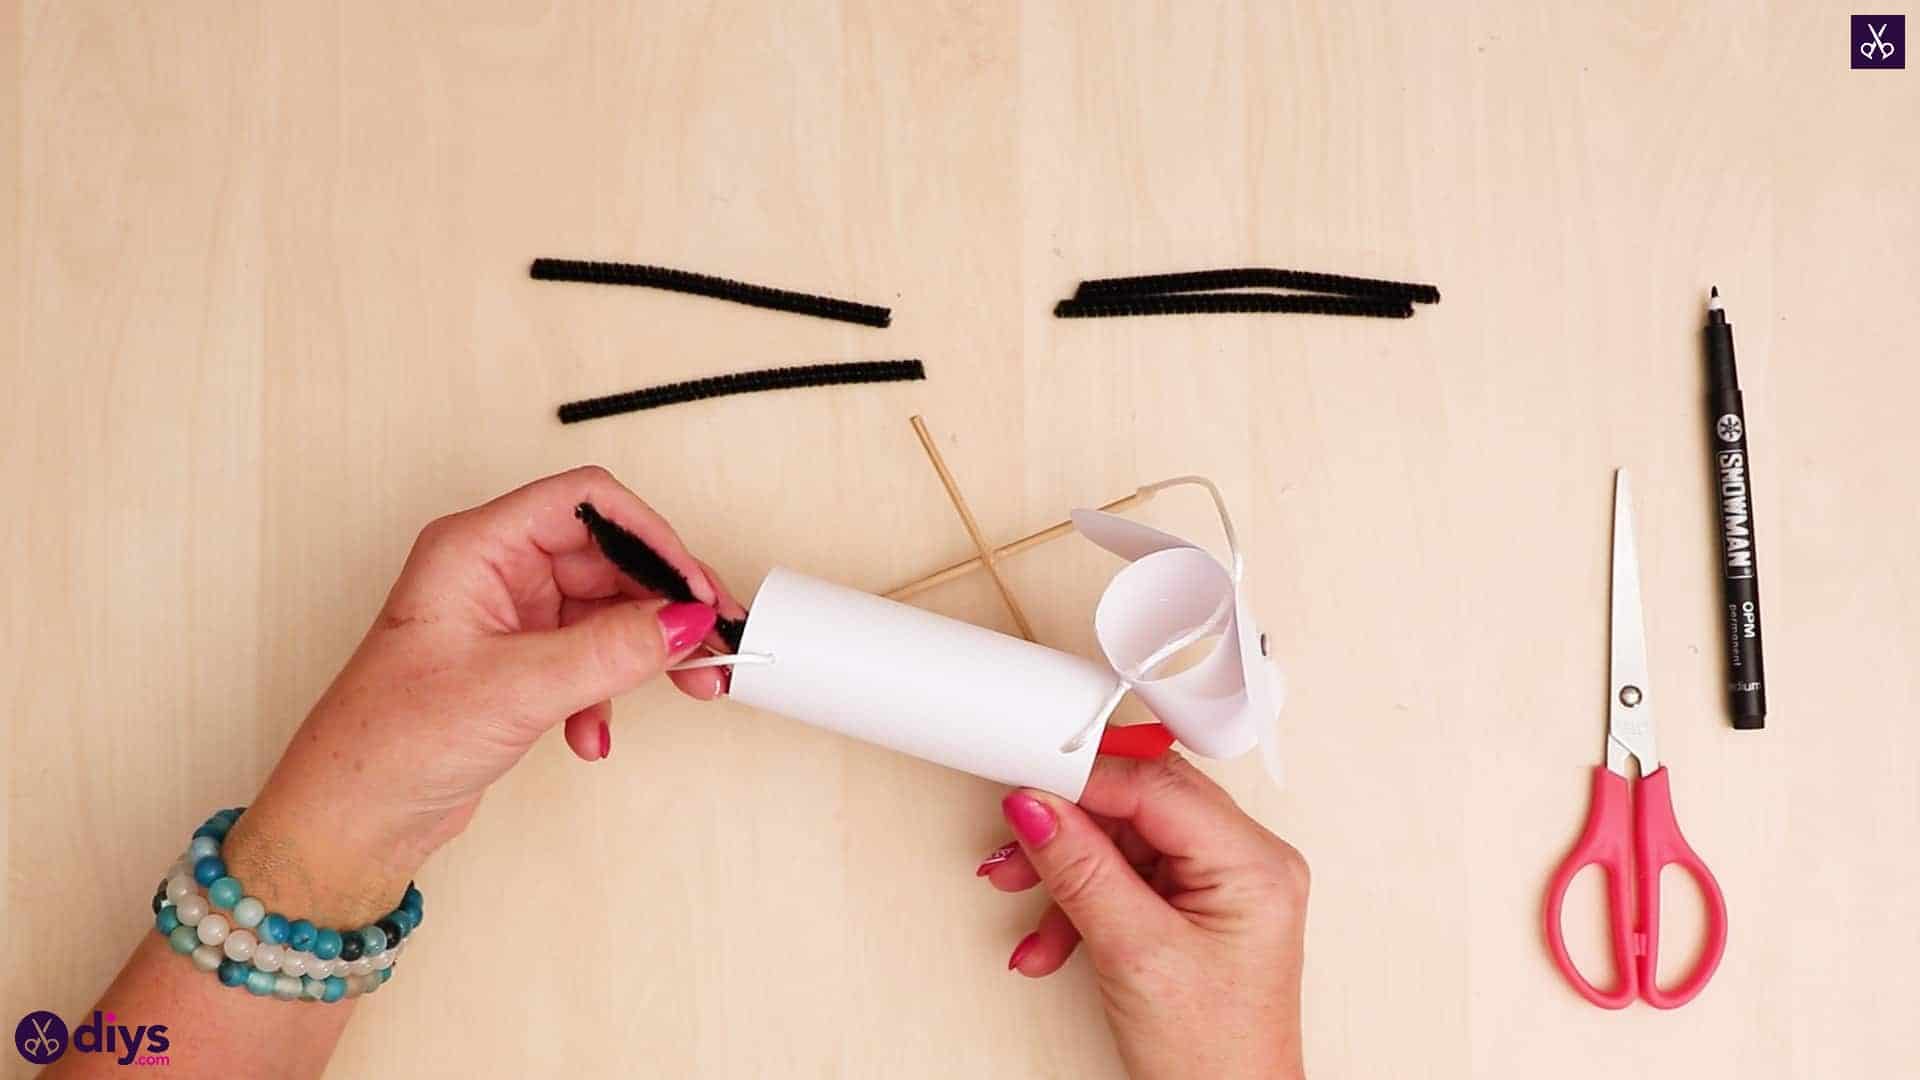
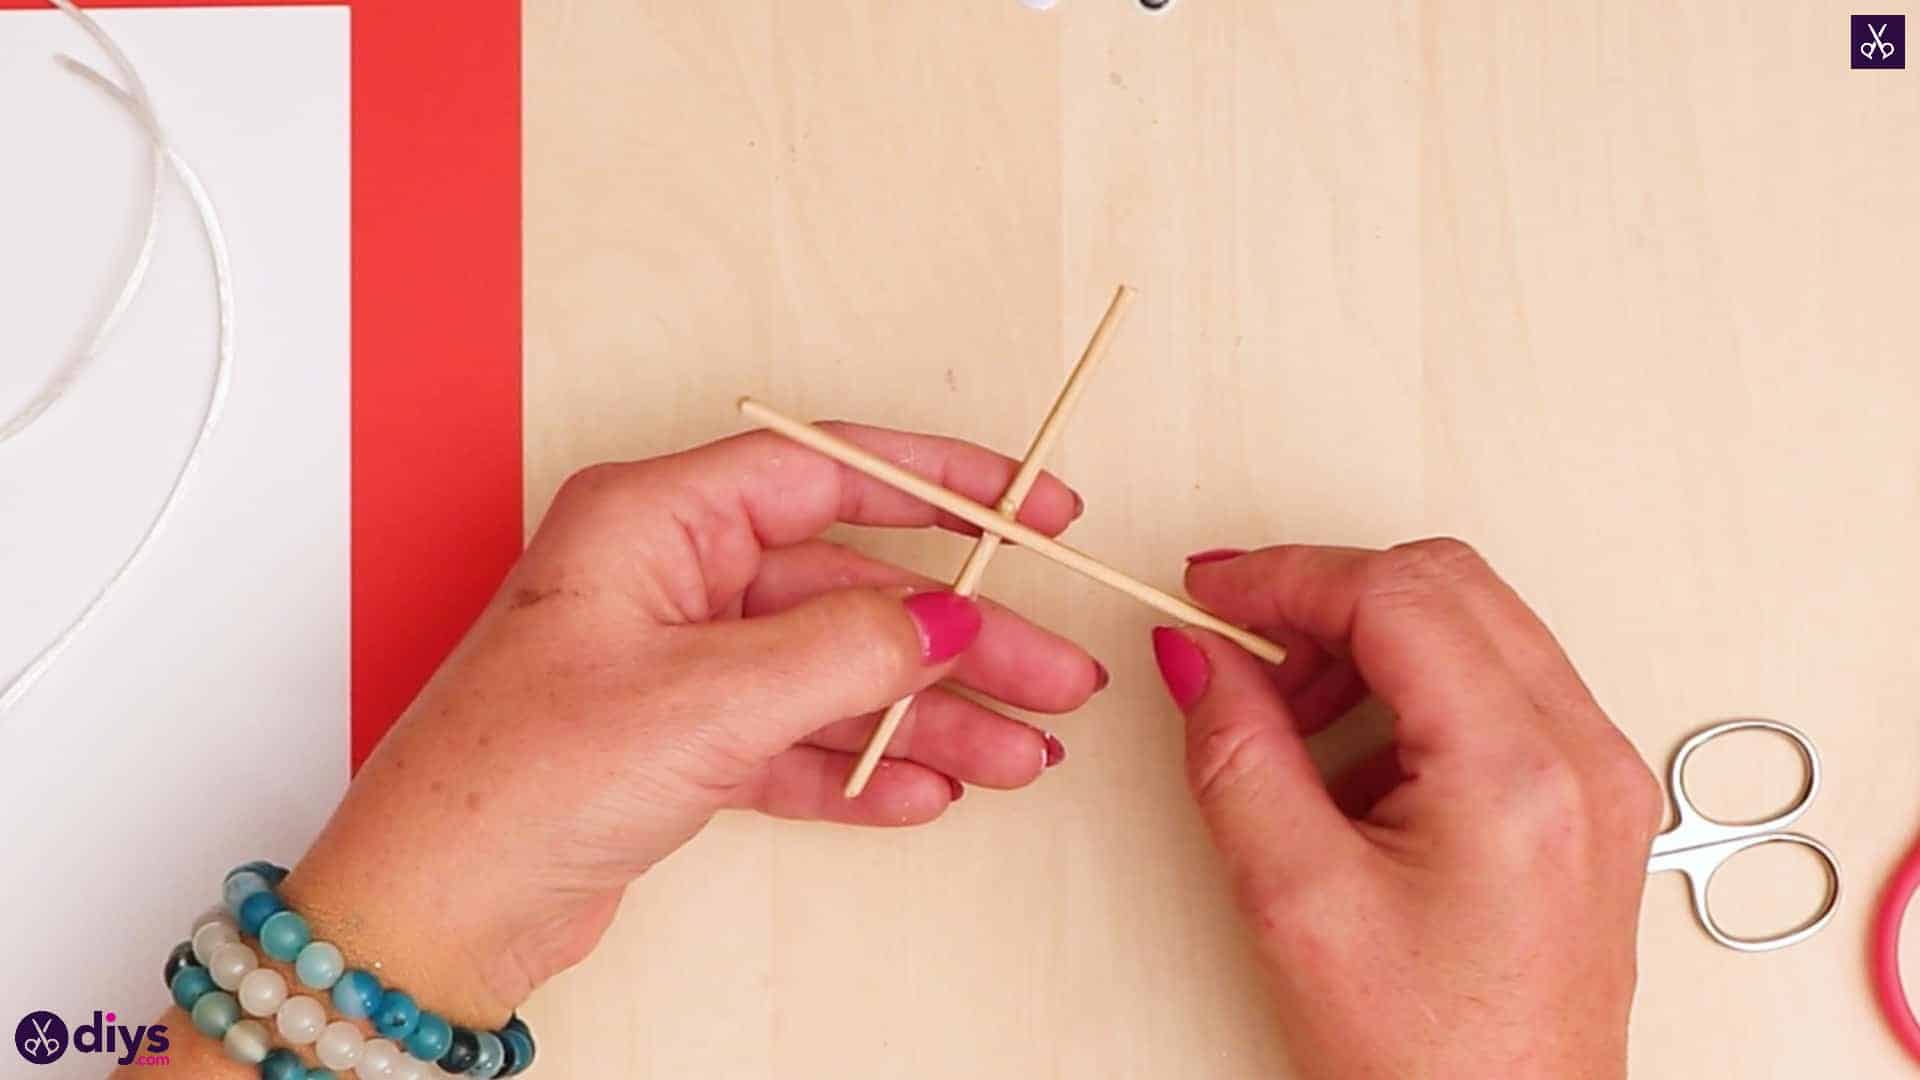
Cut your wooden kebab skewer in half at its centre. Cross these two new halves over each other in an X shape and use your hot glue gun to stick them together at their own centre pointes. This will be the handle of your puppet and how you make it move! Set it aside for now.

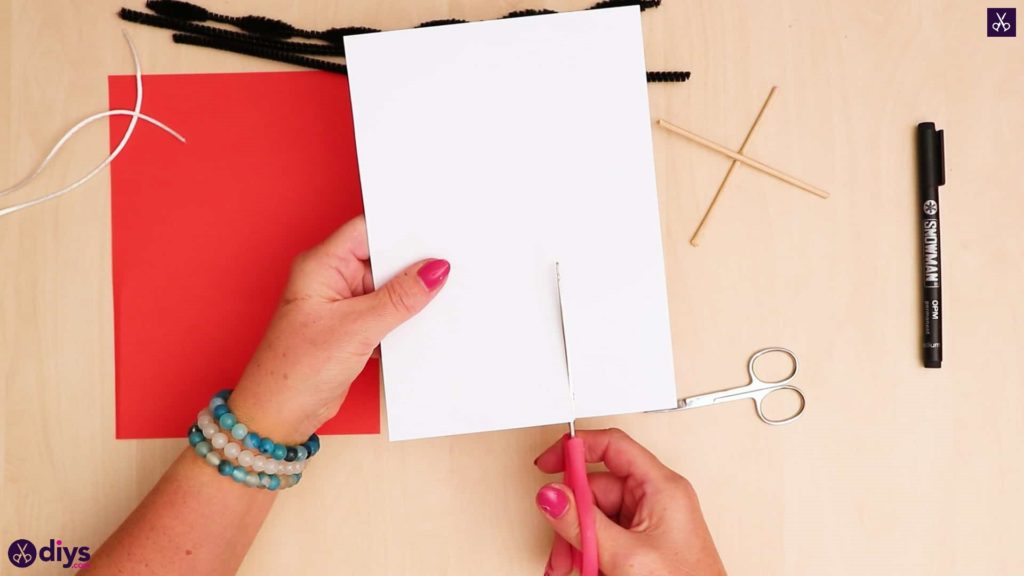
Step 3: start shaping the body
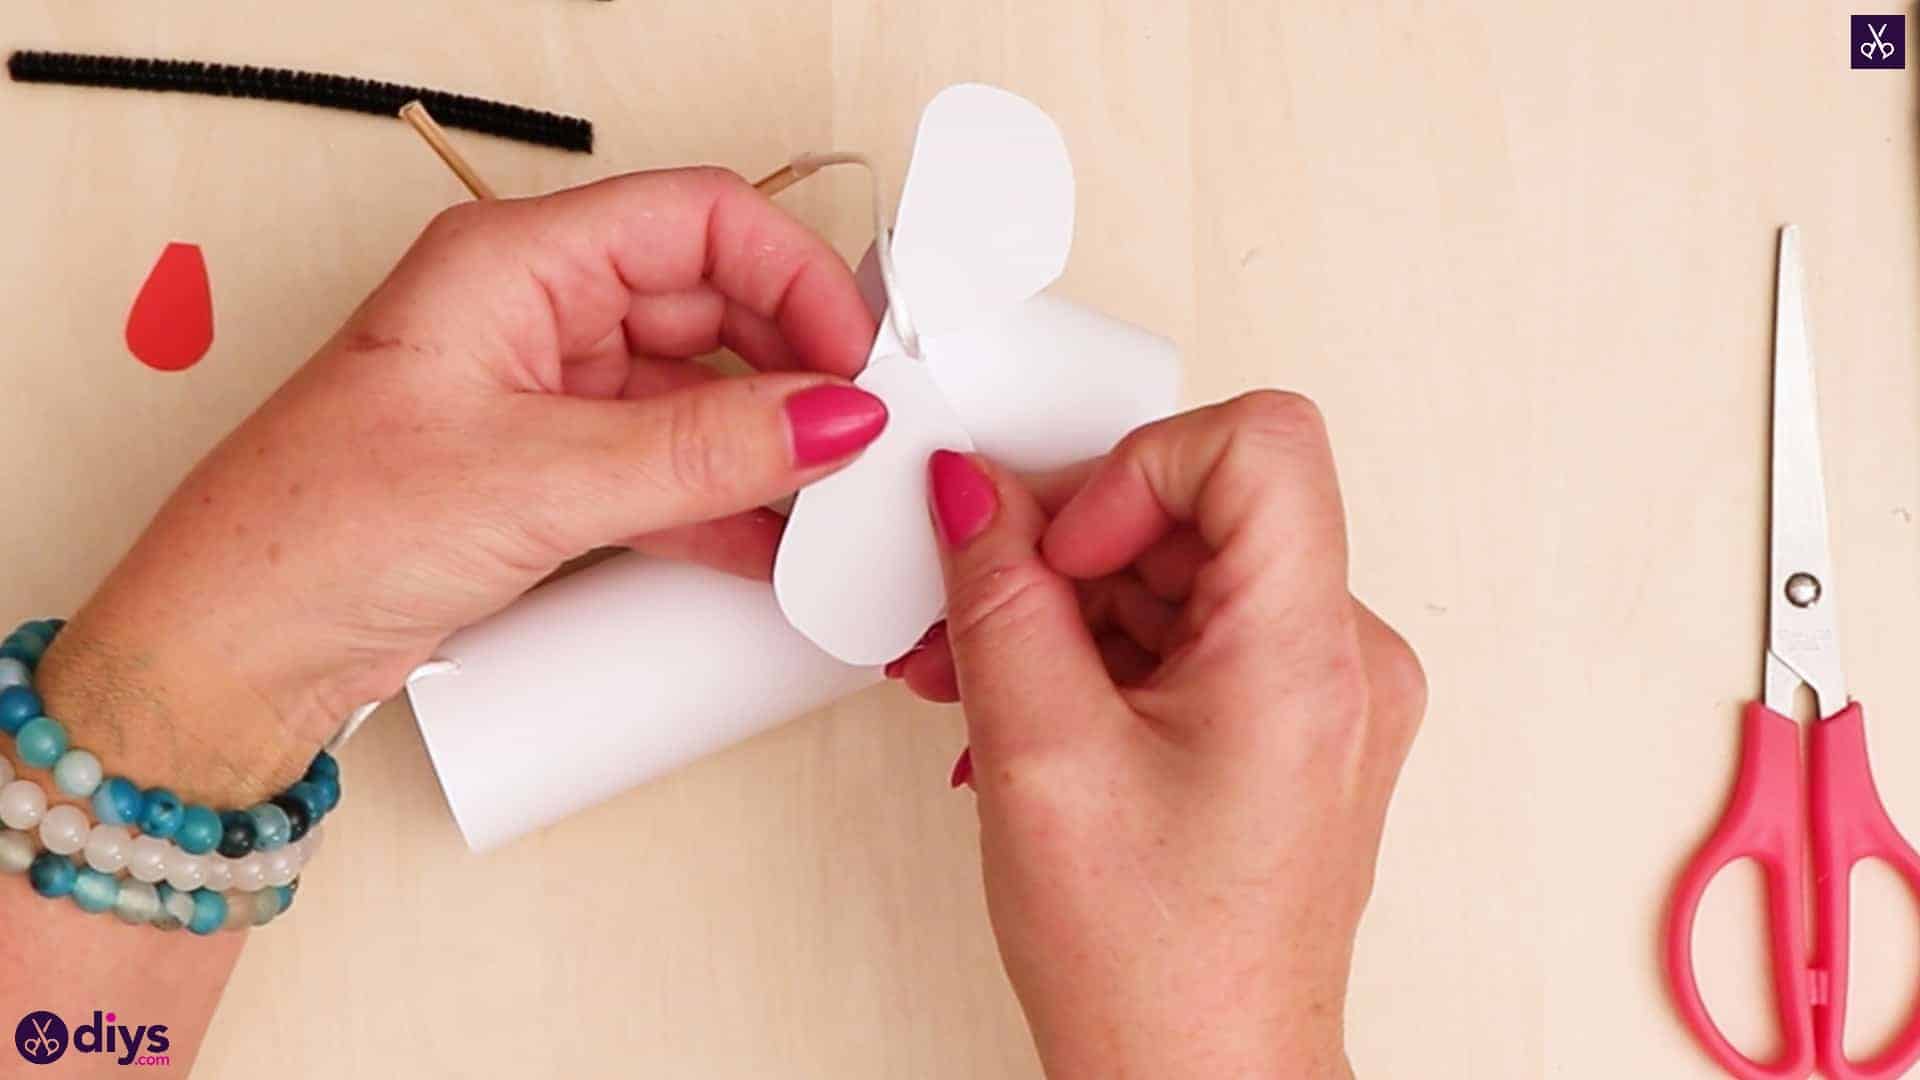
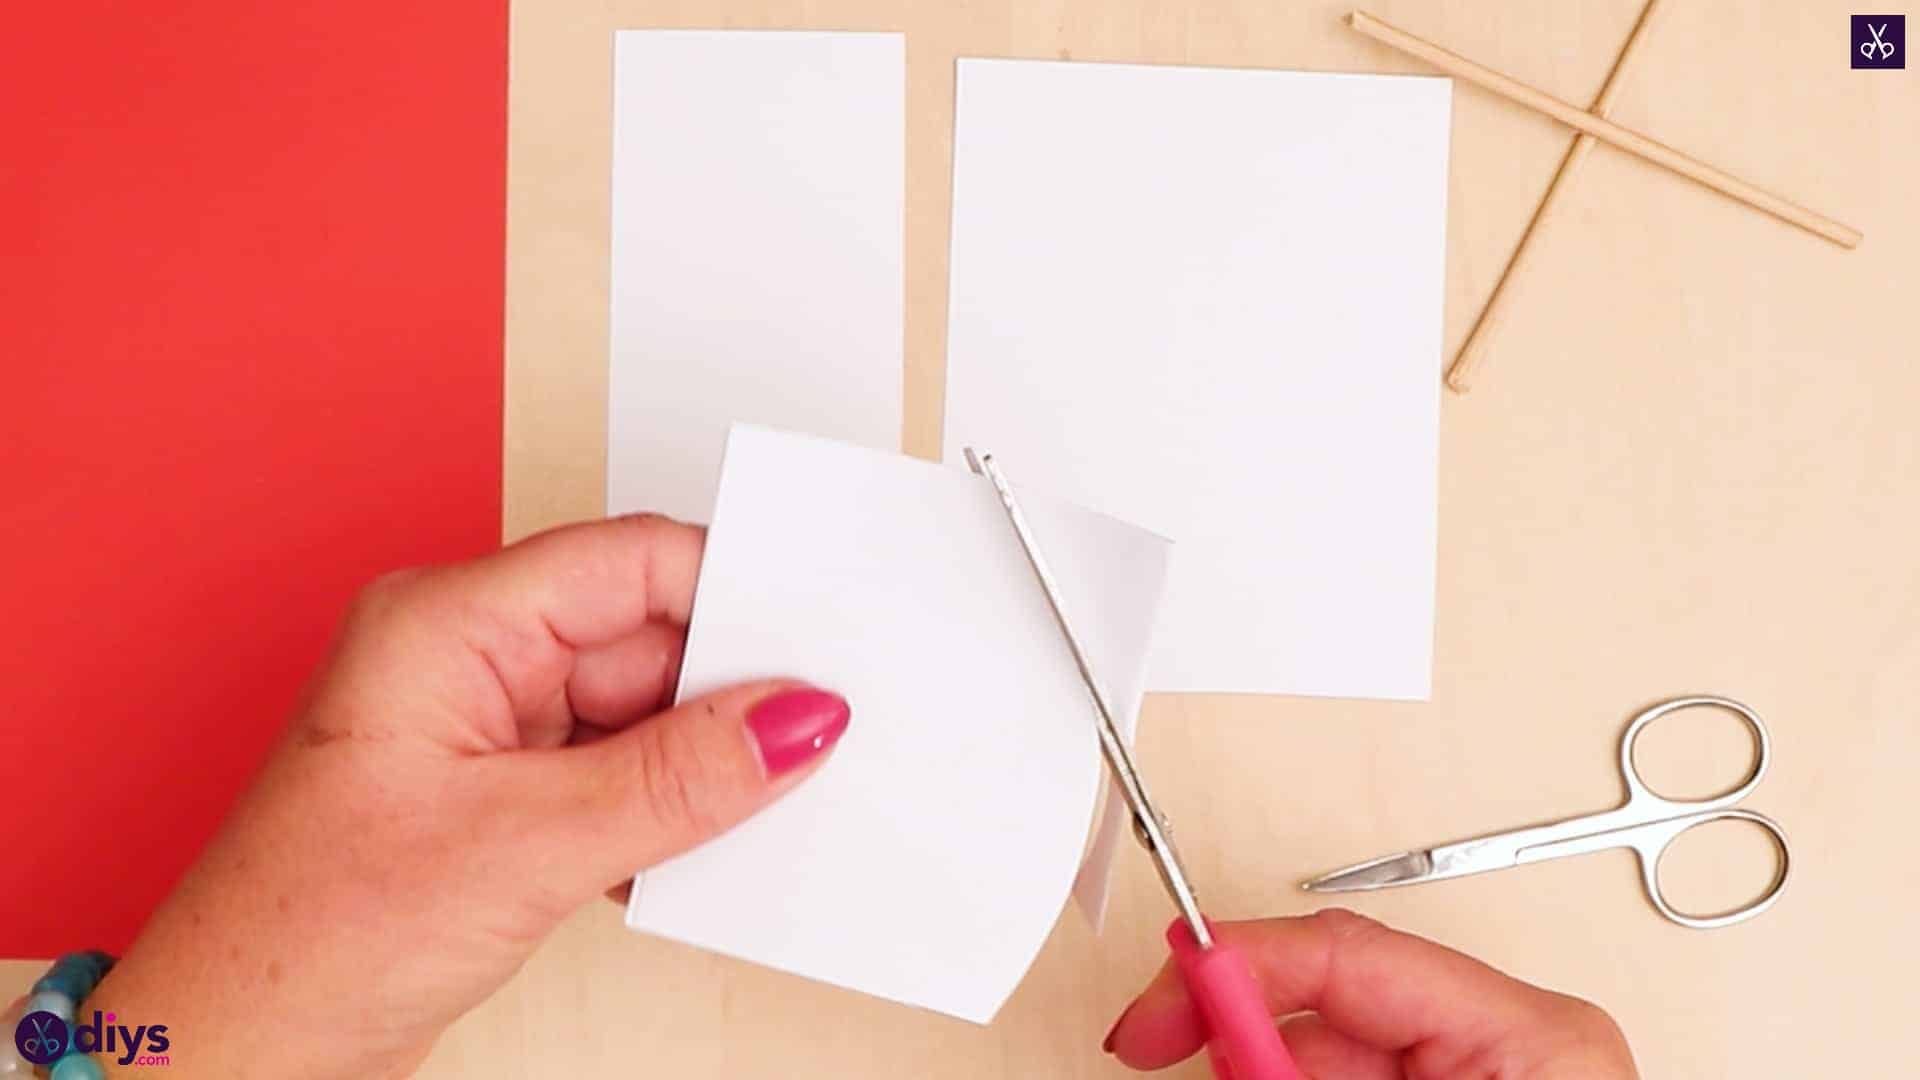
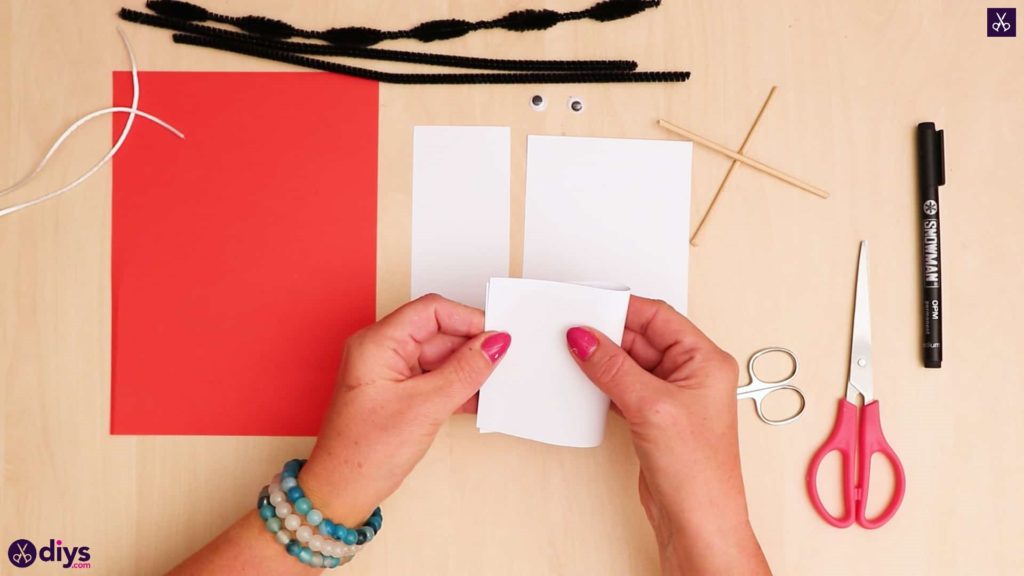
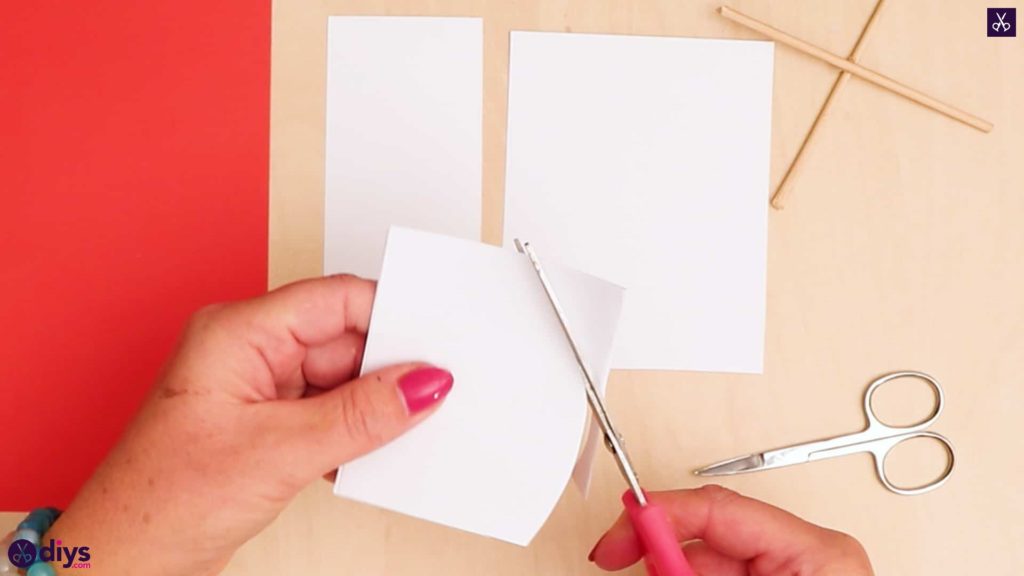
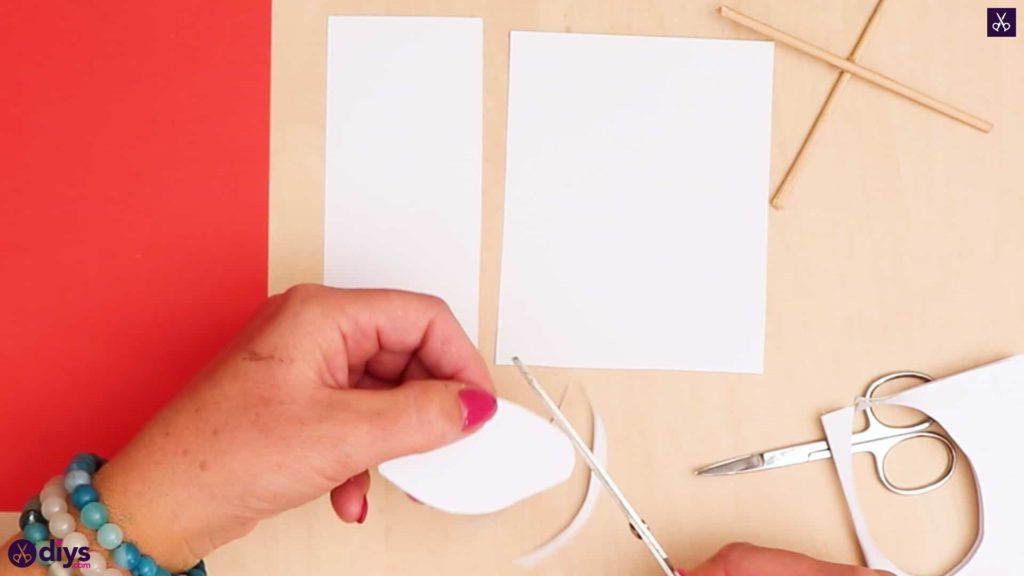
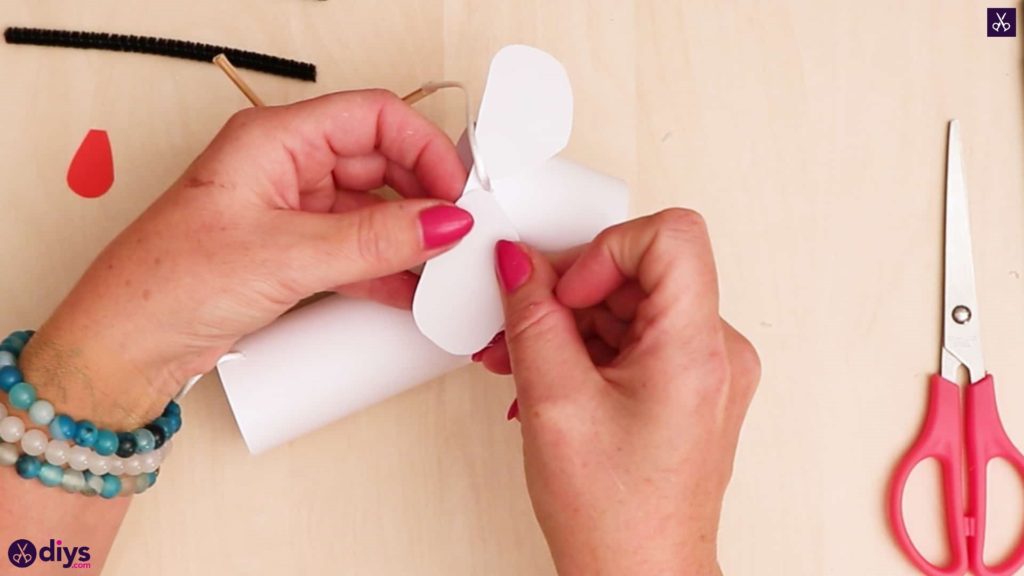
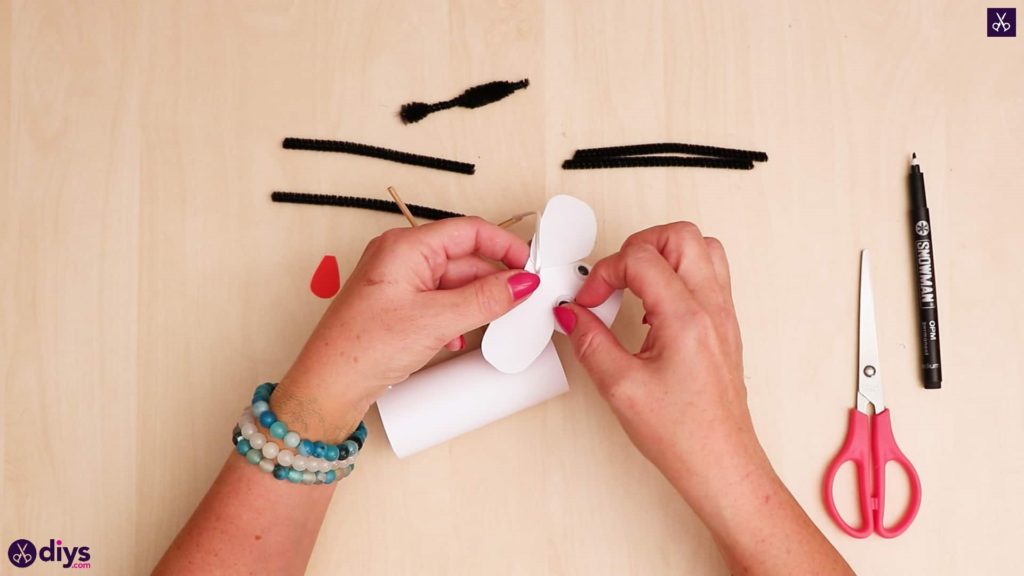
Turn your piece of white paper landscape or horizontally and cut it in half. Set one half aside and then cut the second half in two pieces horizontally about a third of the way way the top. You now have a large rectangle, a smaller rectangle, and a square. Take your larger rectangle and fold it in half long ways. Use your scissors to cut out the shape of a puppy dog’s ear, rounding off the corners and straight edges. I made mind kind of like a long and slightly wider egg shape. When you’re done, you’ll have two ears because of how your paper was layered from folding it. Set your dog’s ears aside.

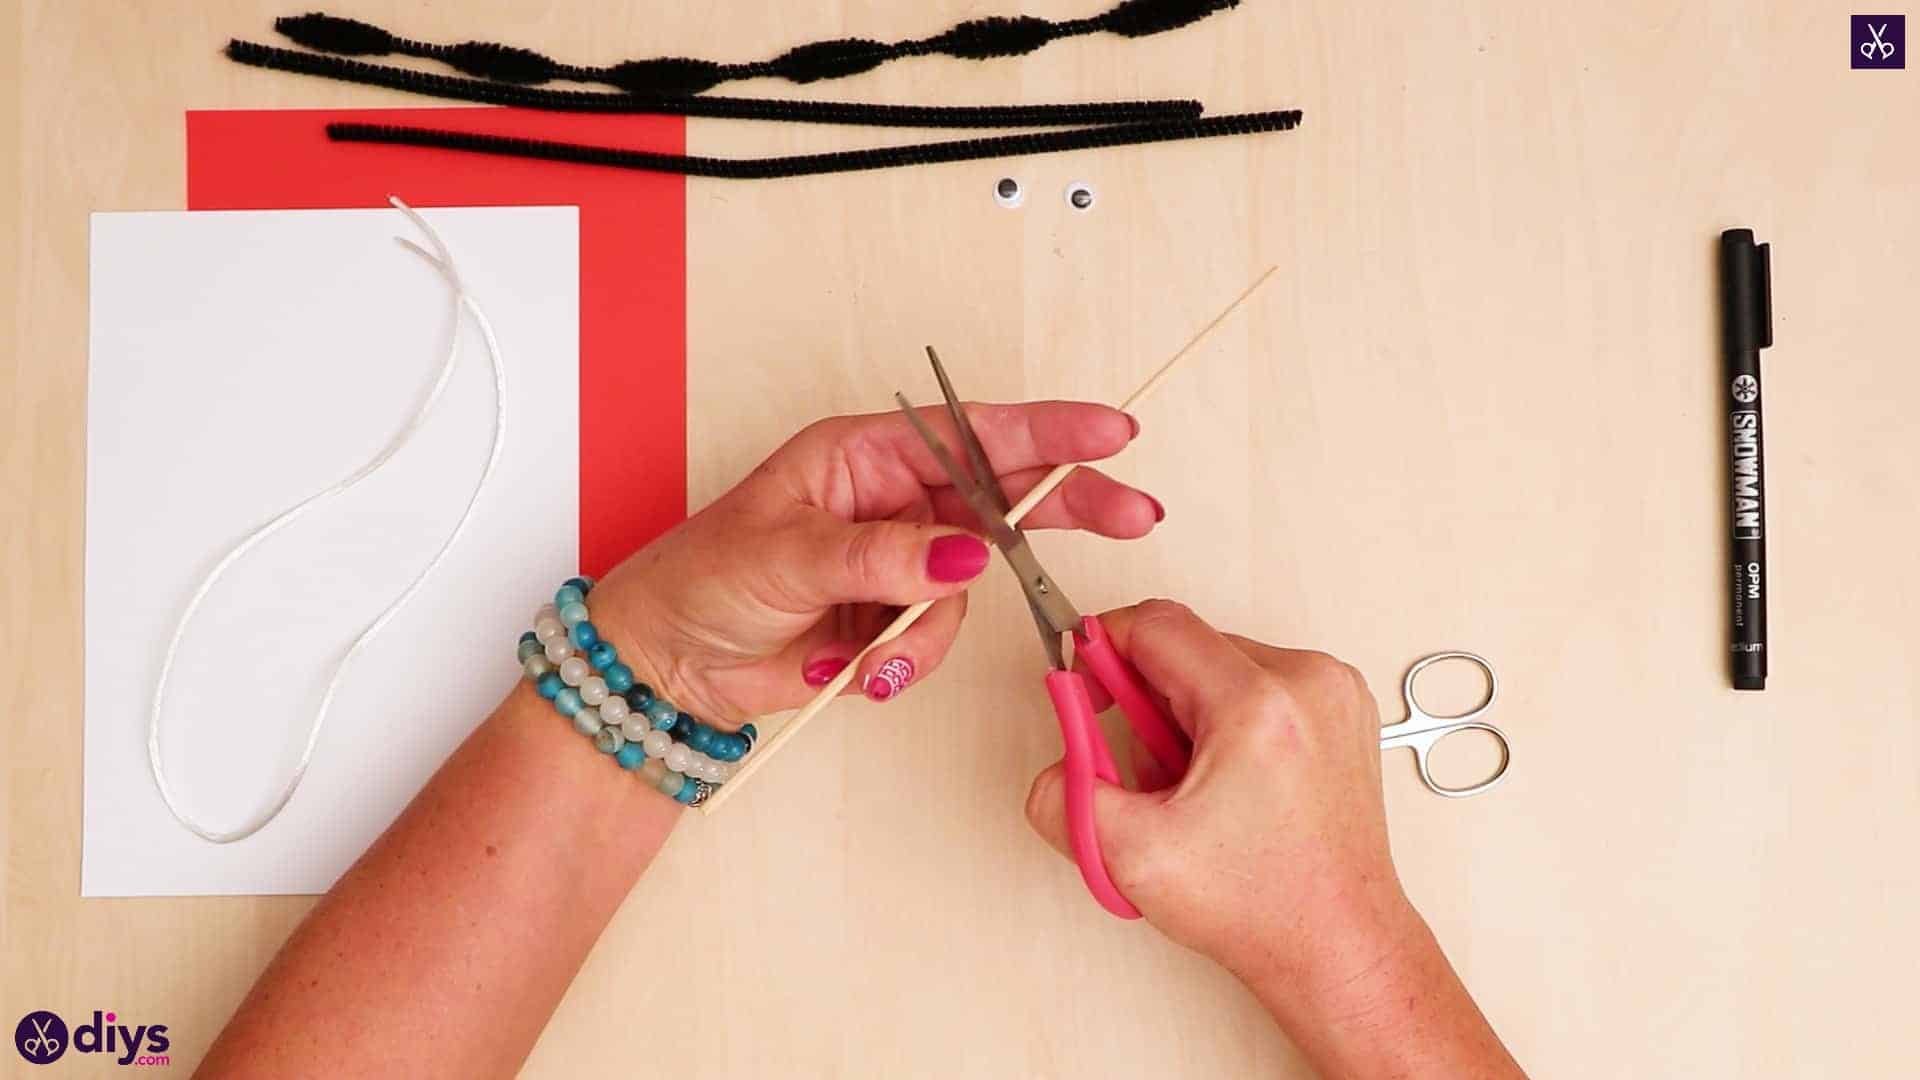
Step 4: cut string
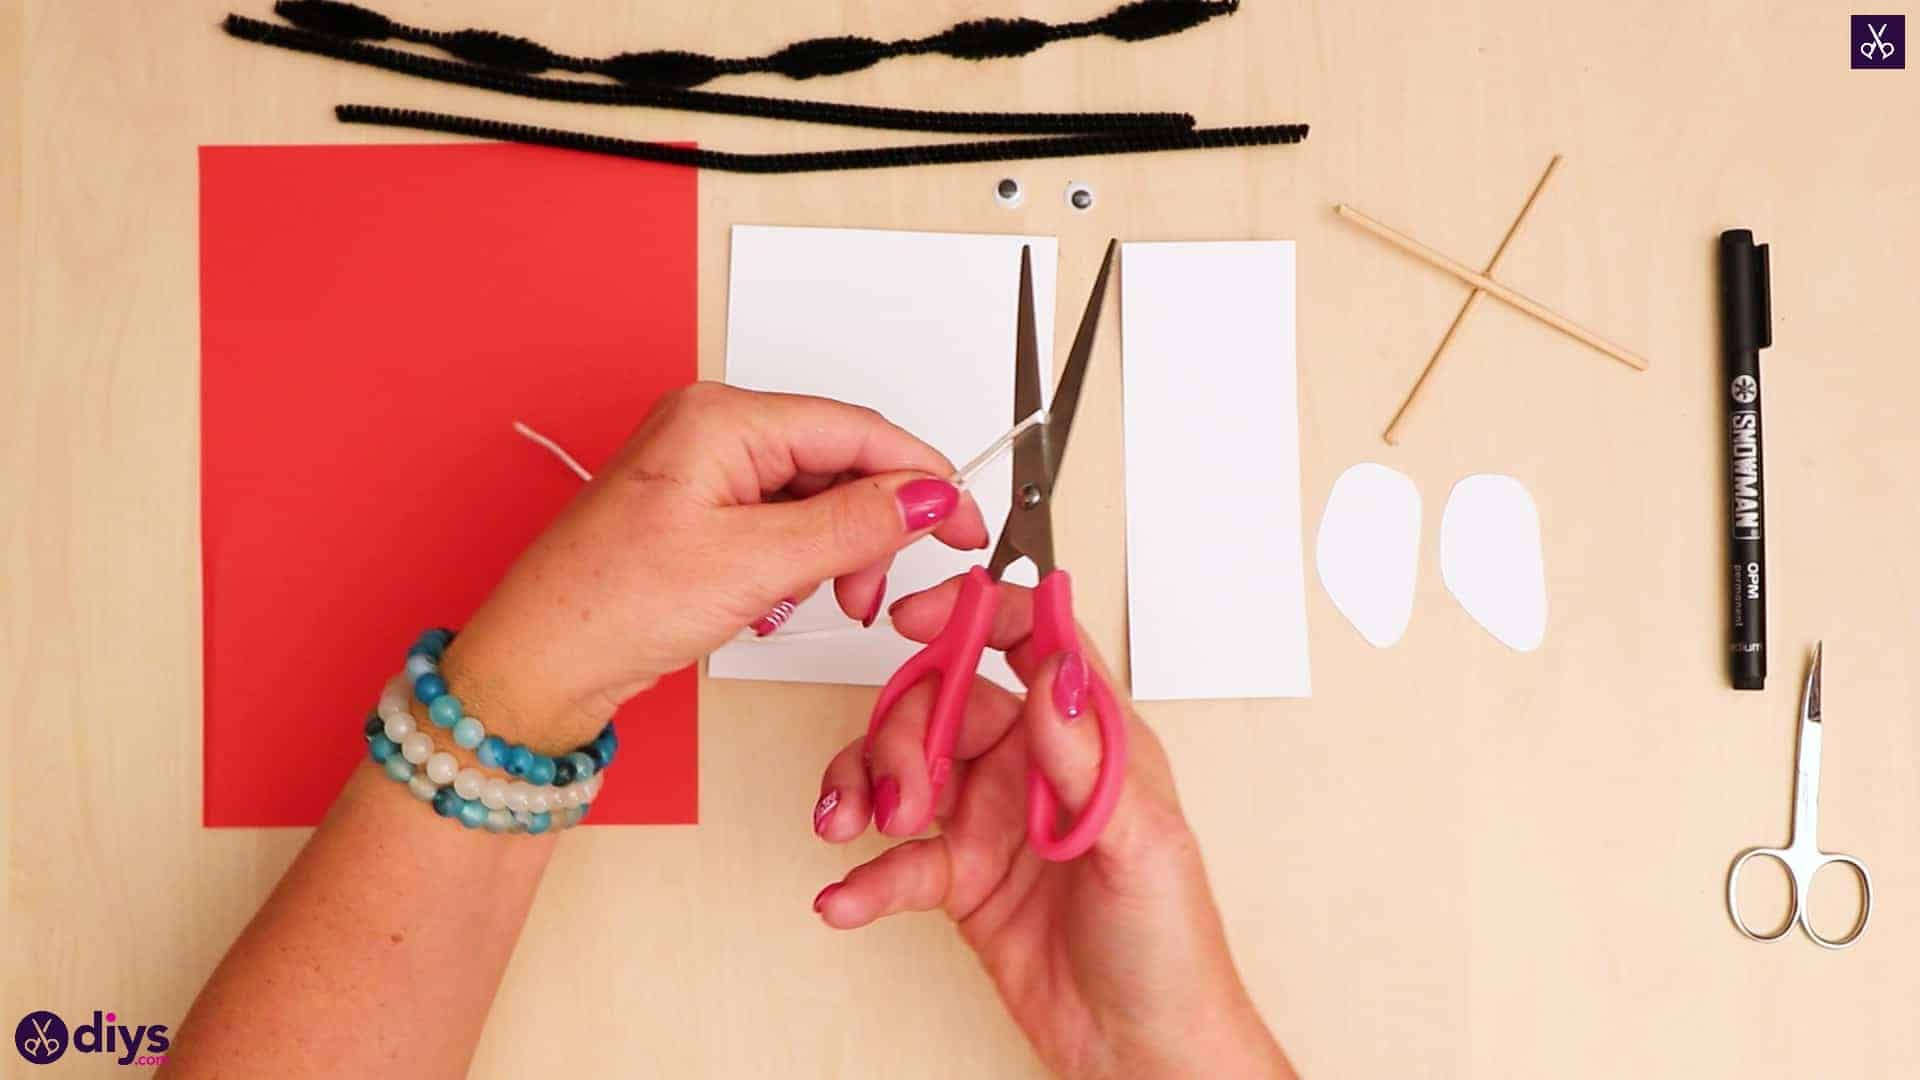
Cut two pieces of string about four inches long each and set these aside for the moment as well.

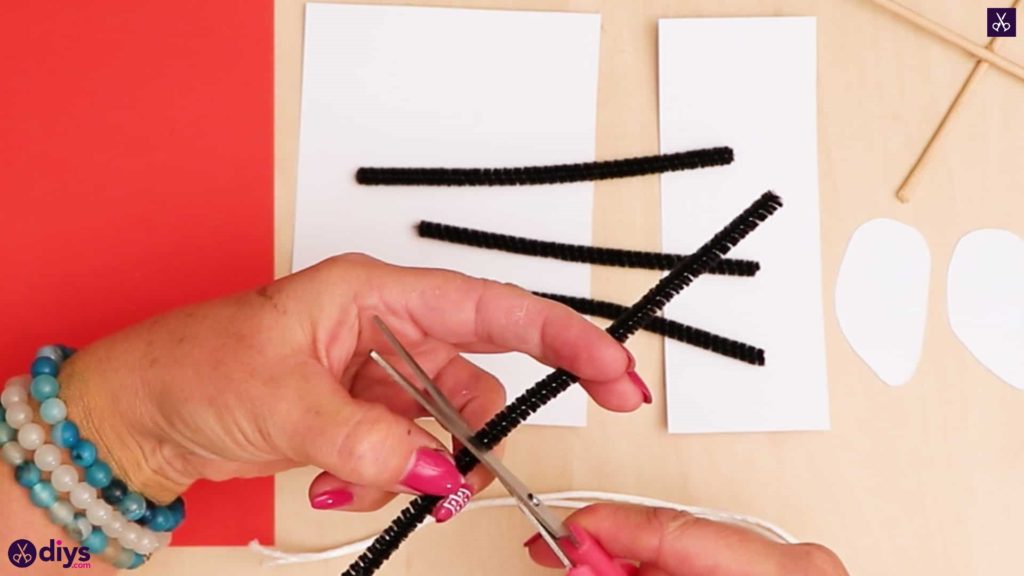
Step 5: cut pipe cleaners
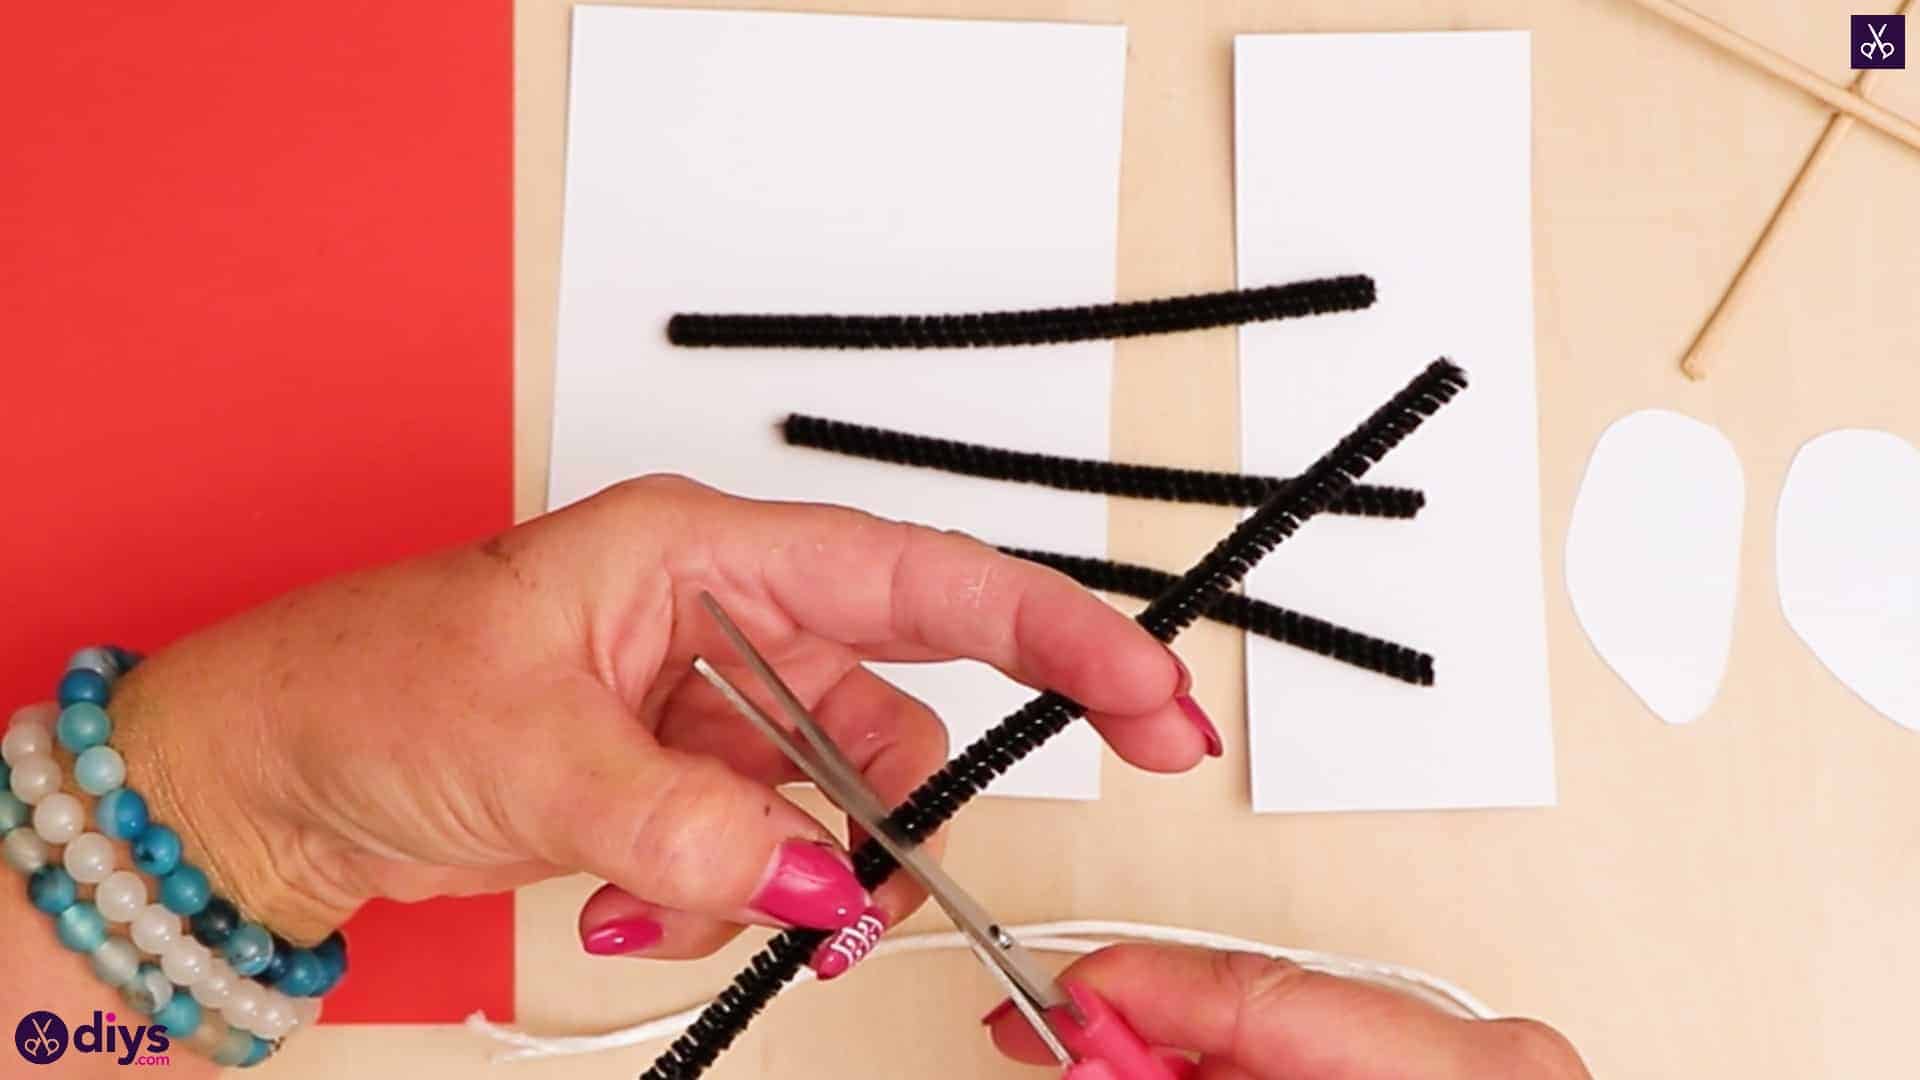
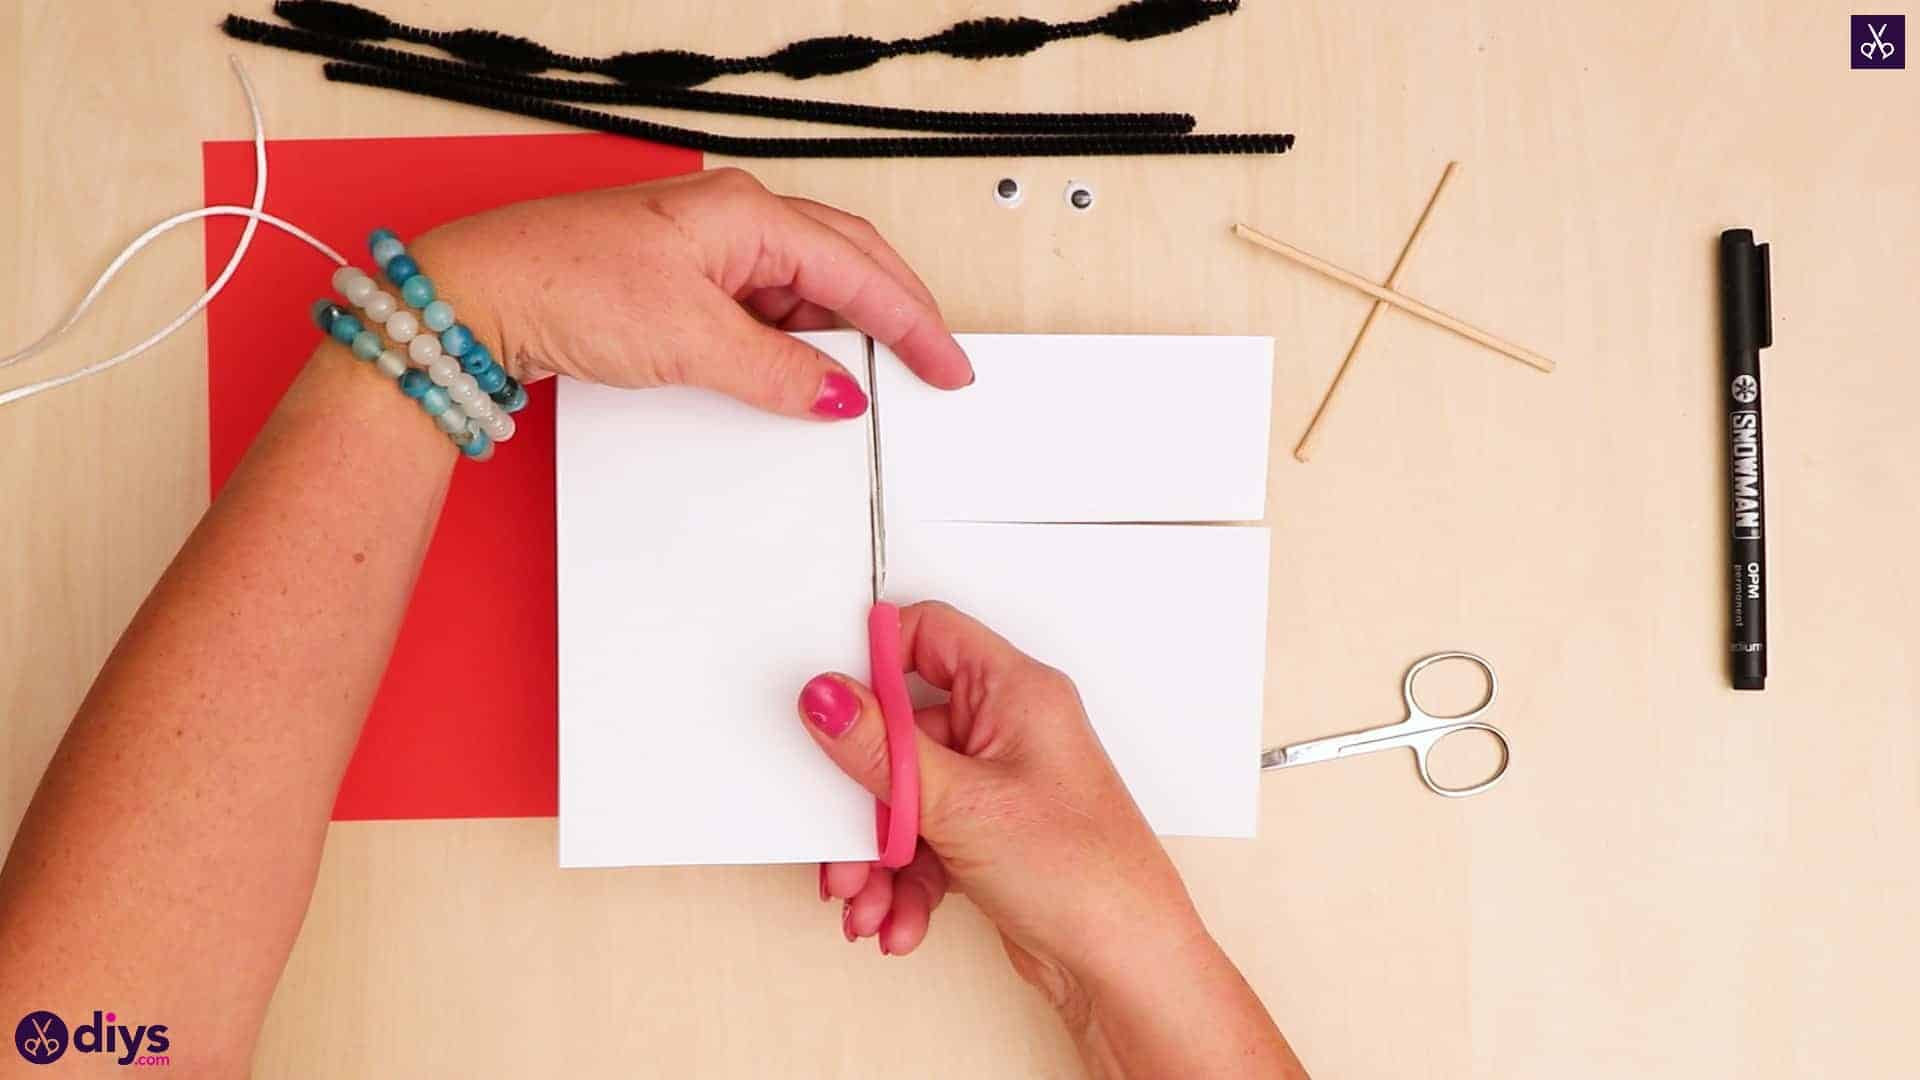
Cut four two-inch pieces from your regularly shaped black pipe cleaners. Next, cut a piece from your puffy pipe cleaner that gives you one entire puff at the end plus half of a second one; you’ll make your cut in the middle of the second puff.
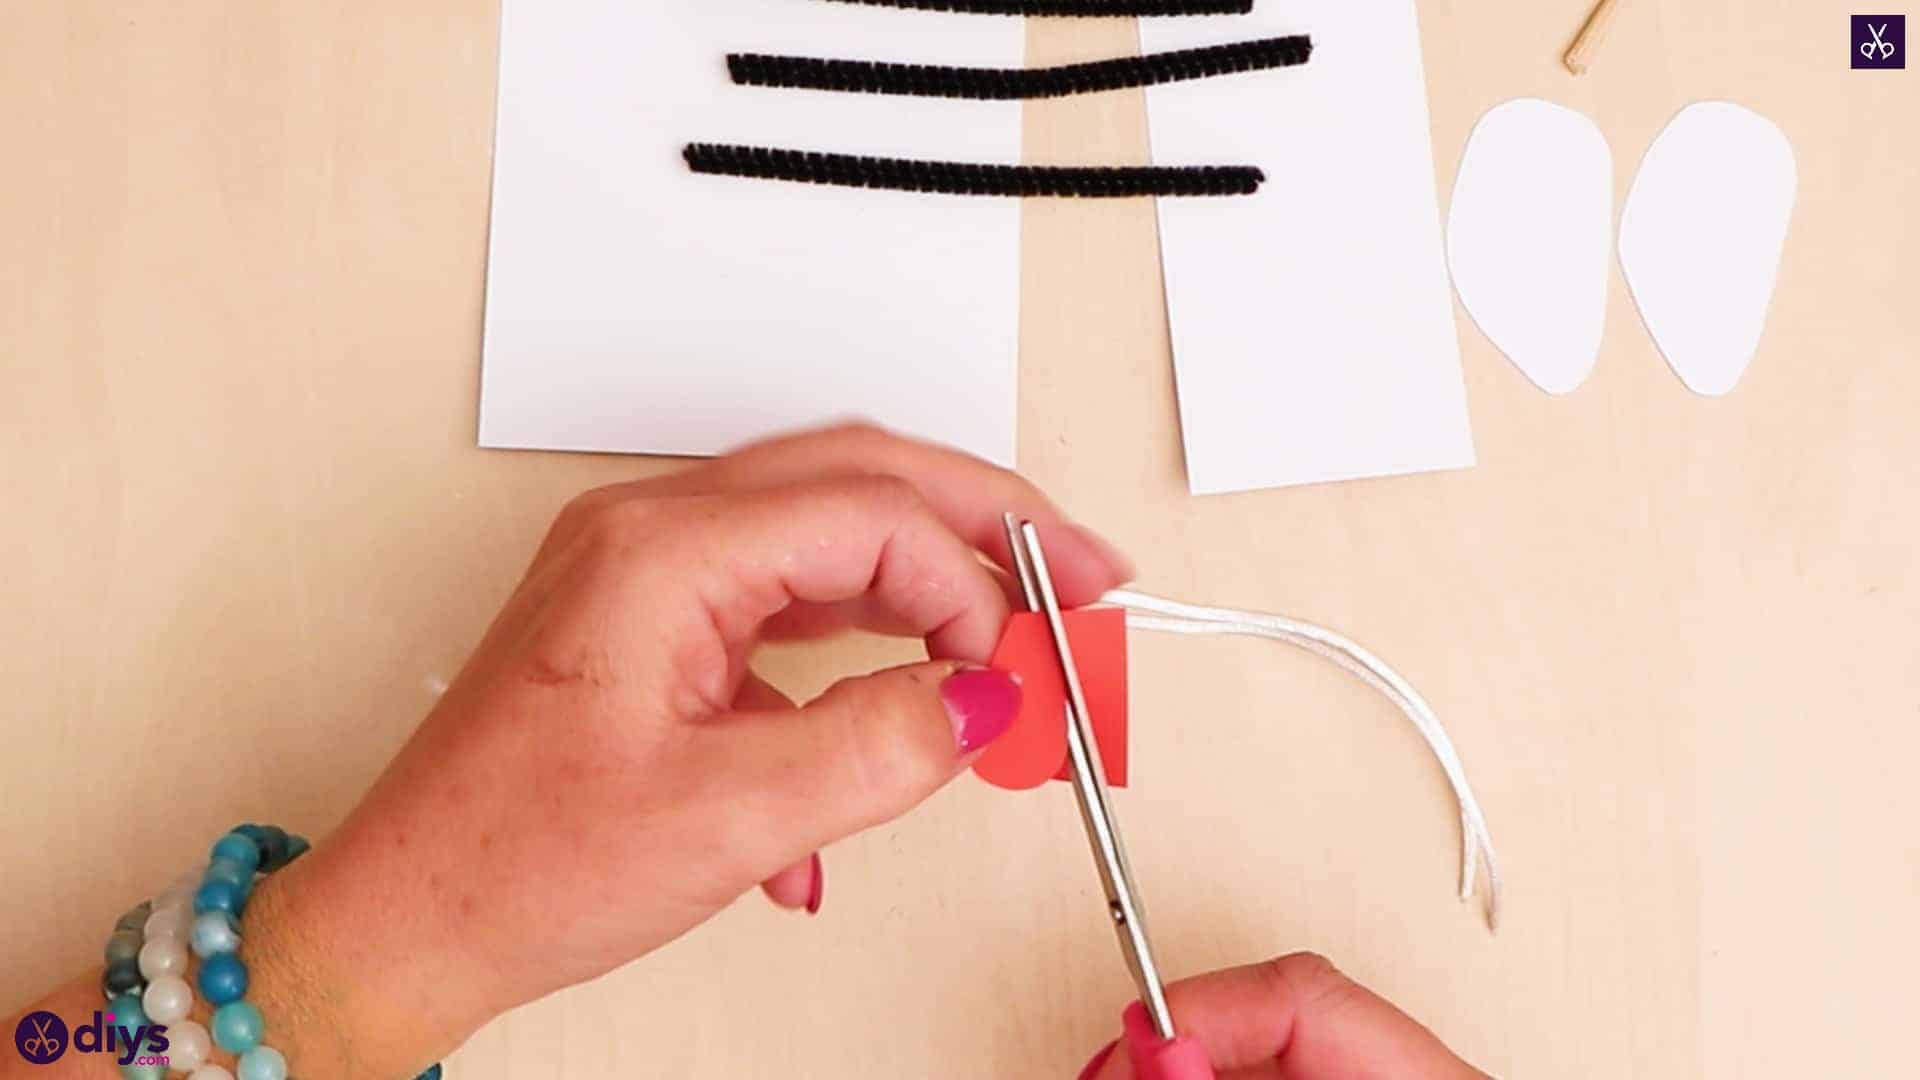
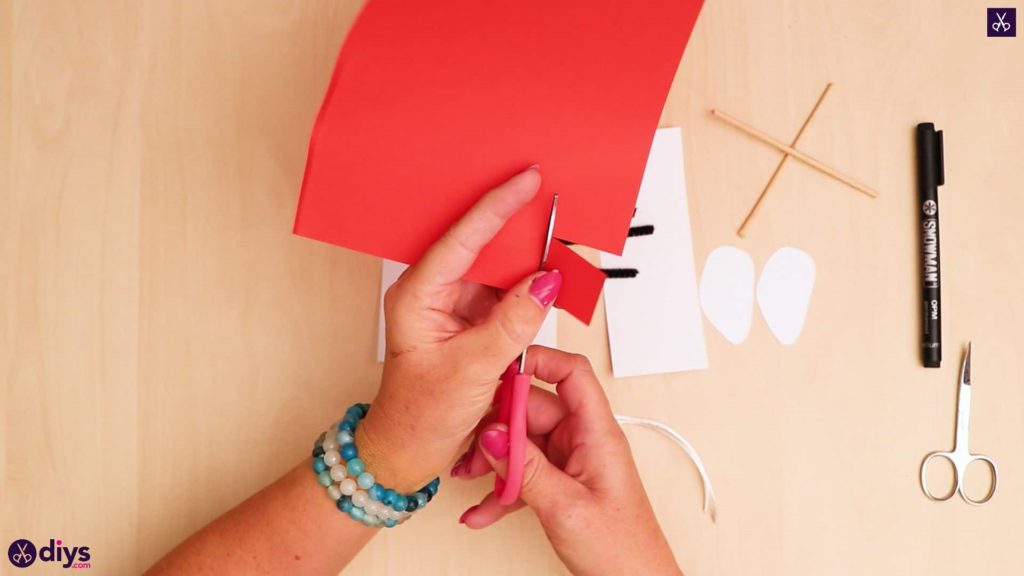
Step 6: cut a red square
Cut an inch by inch piece from one corner of your piece of red paper and then round the corners and edges off to make a teardrop-like shape but with a blunt tapered instead instead of pointed tip. This will be your dog’s tongue and you can set it side for the moment as well.

Step 7: start gluing
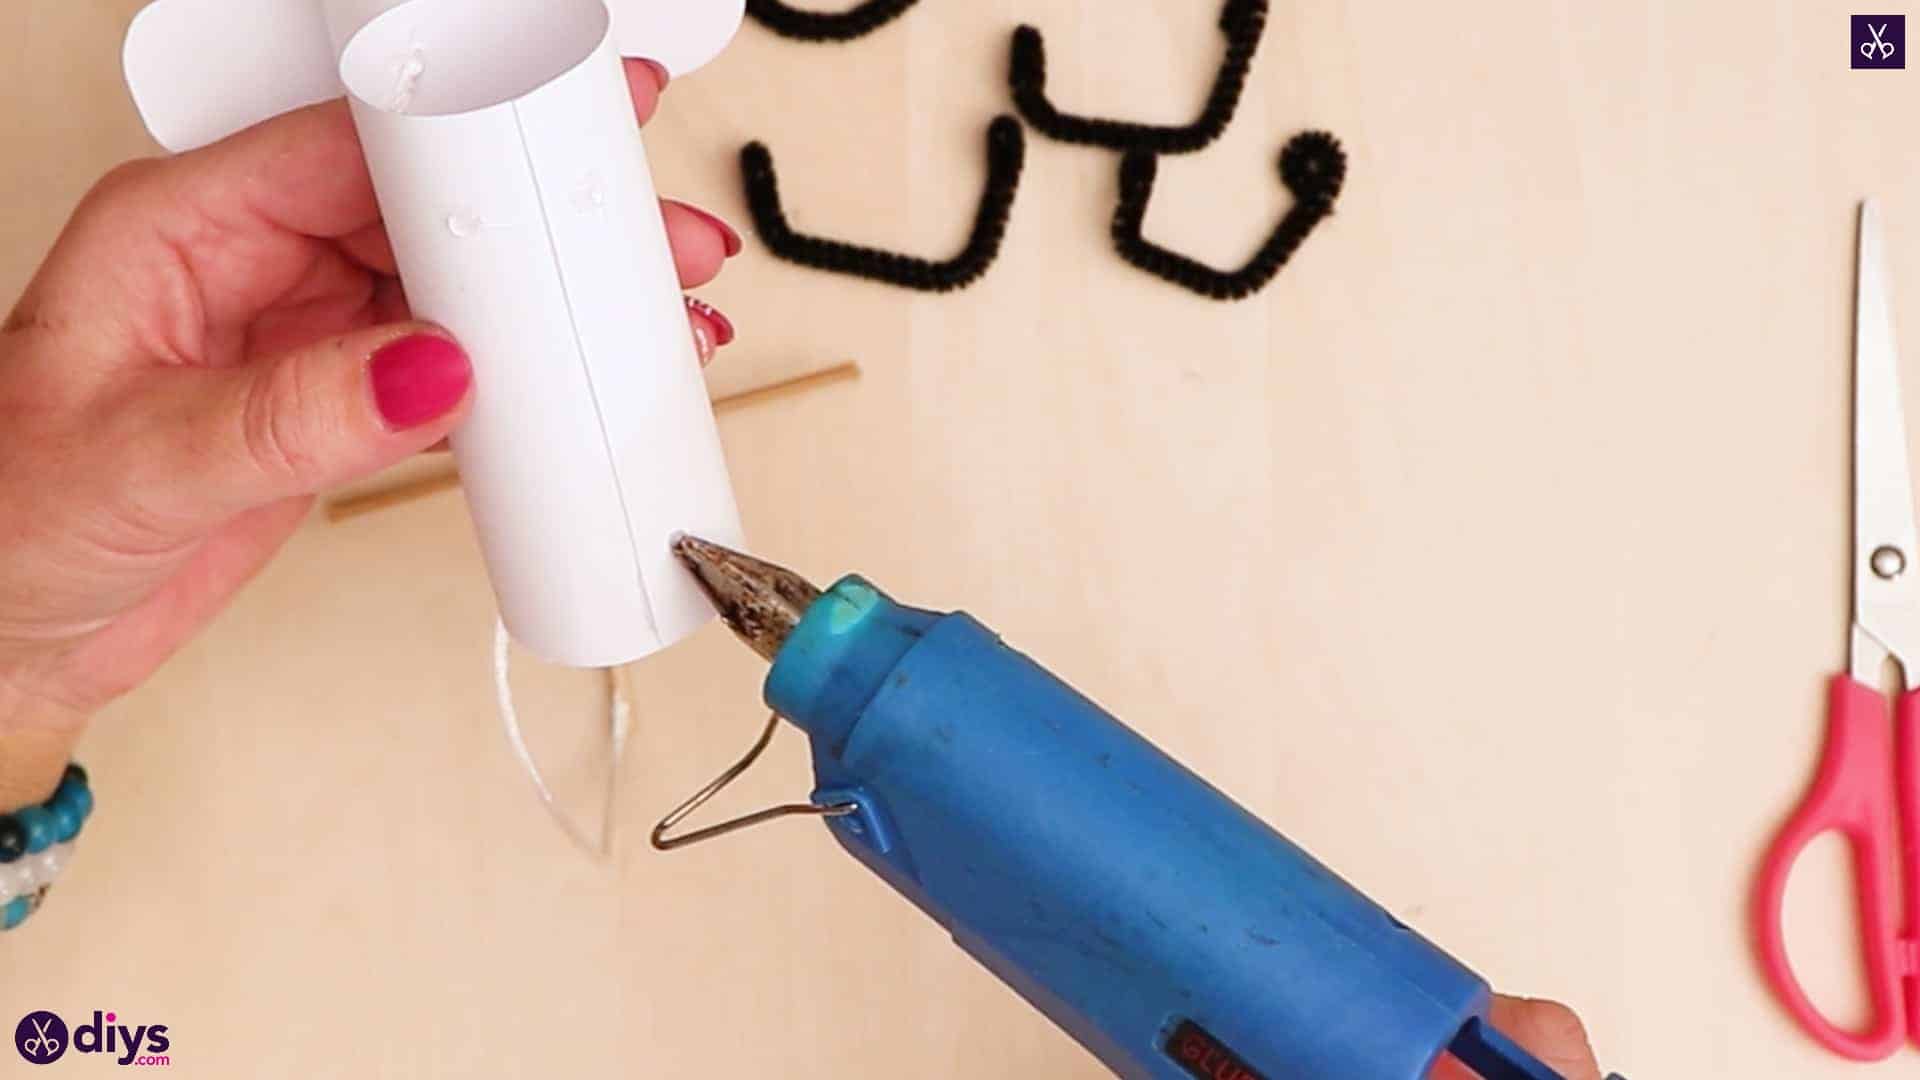
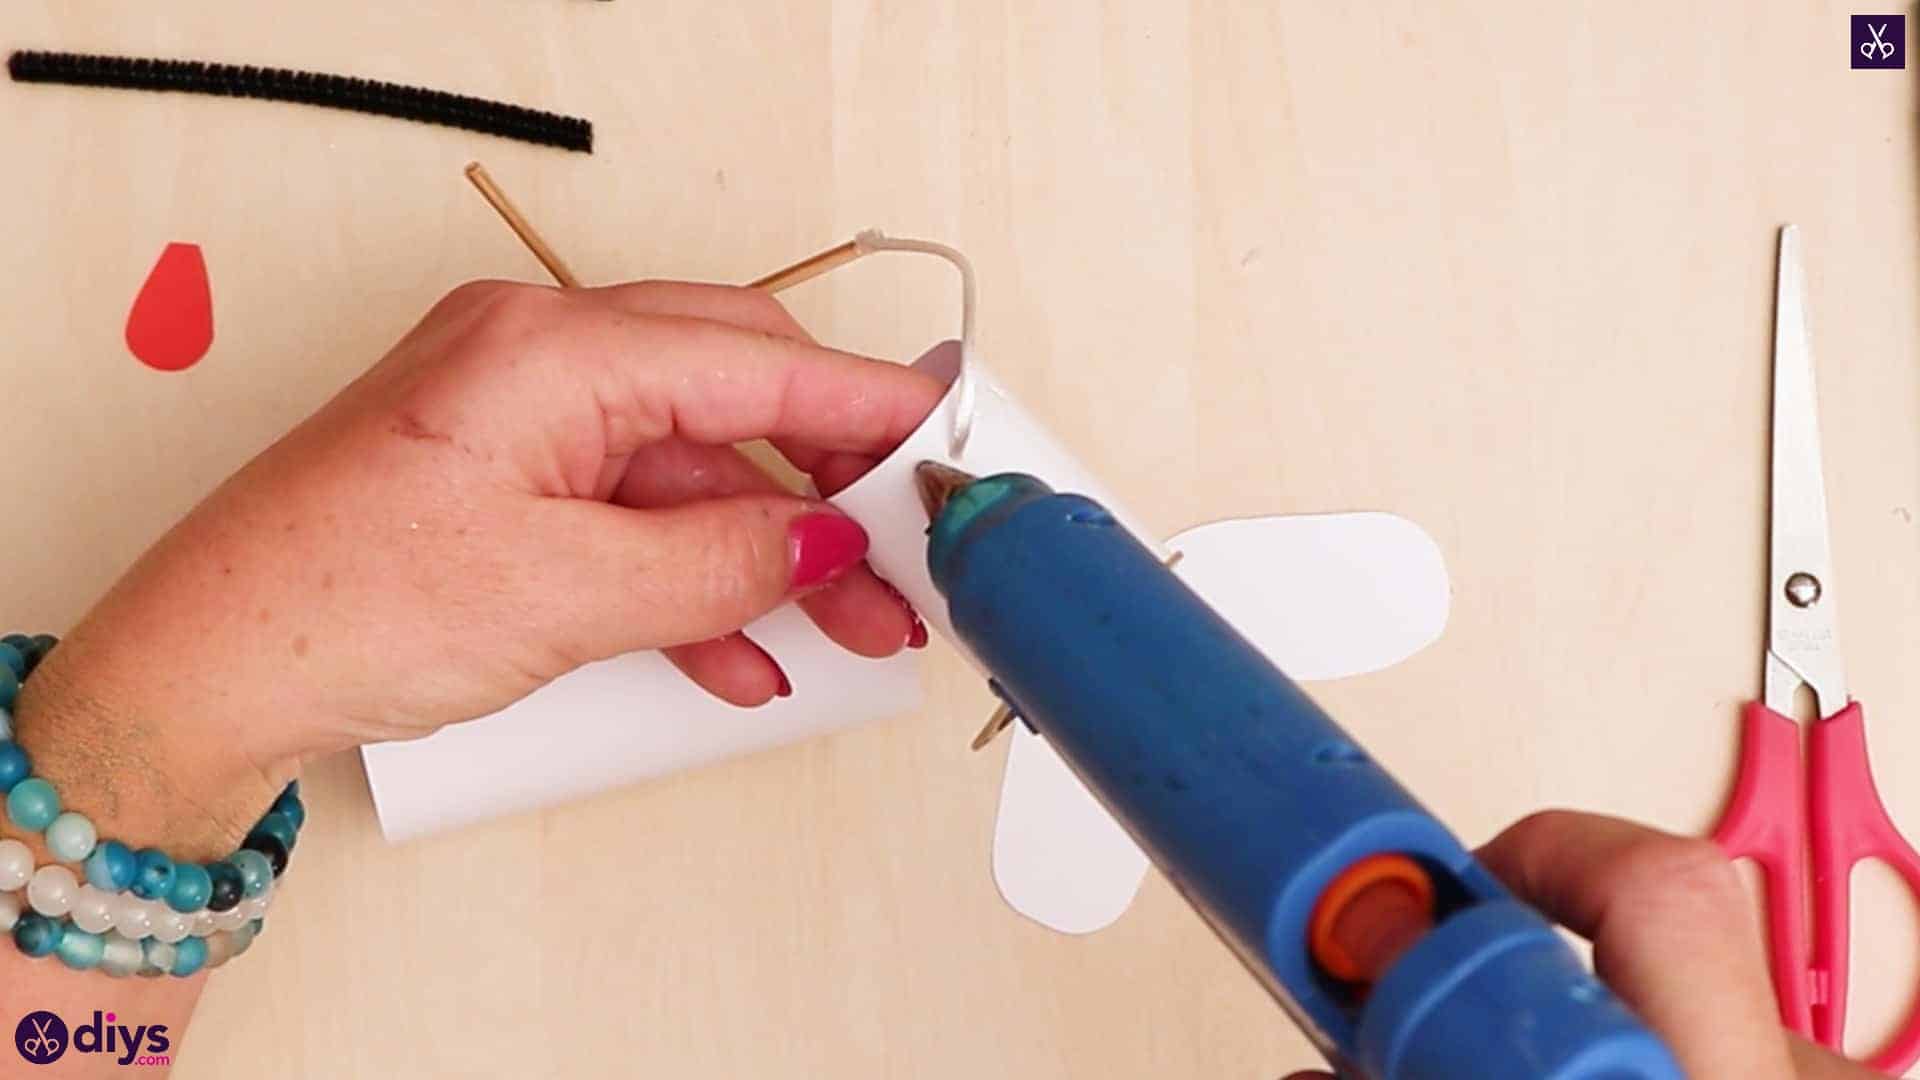
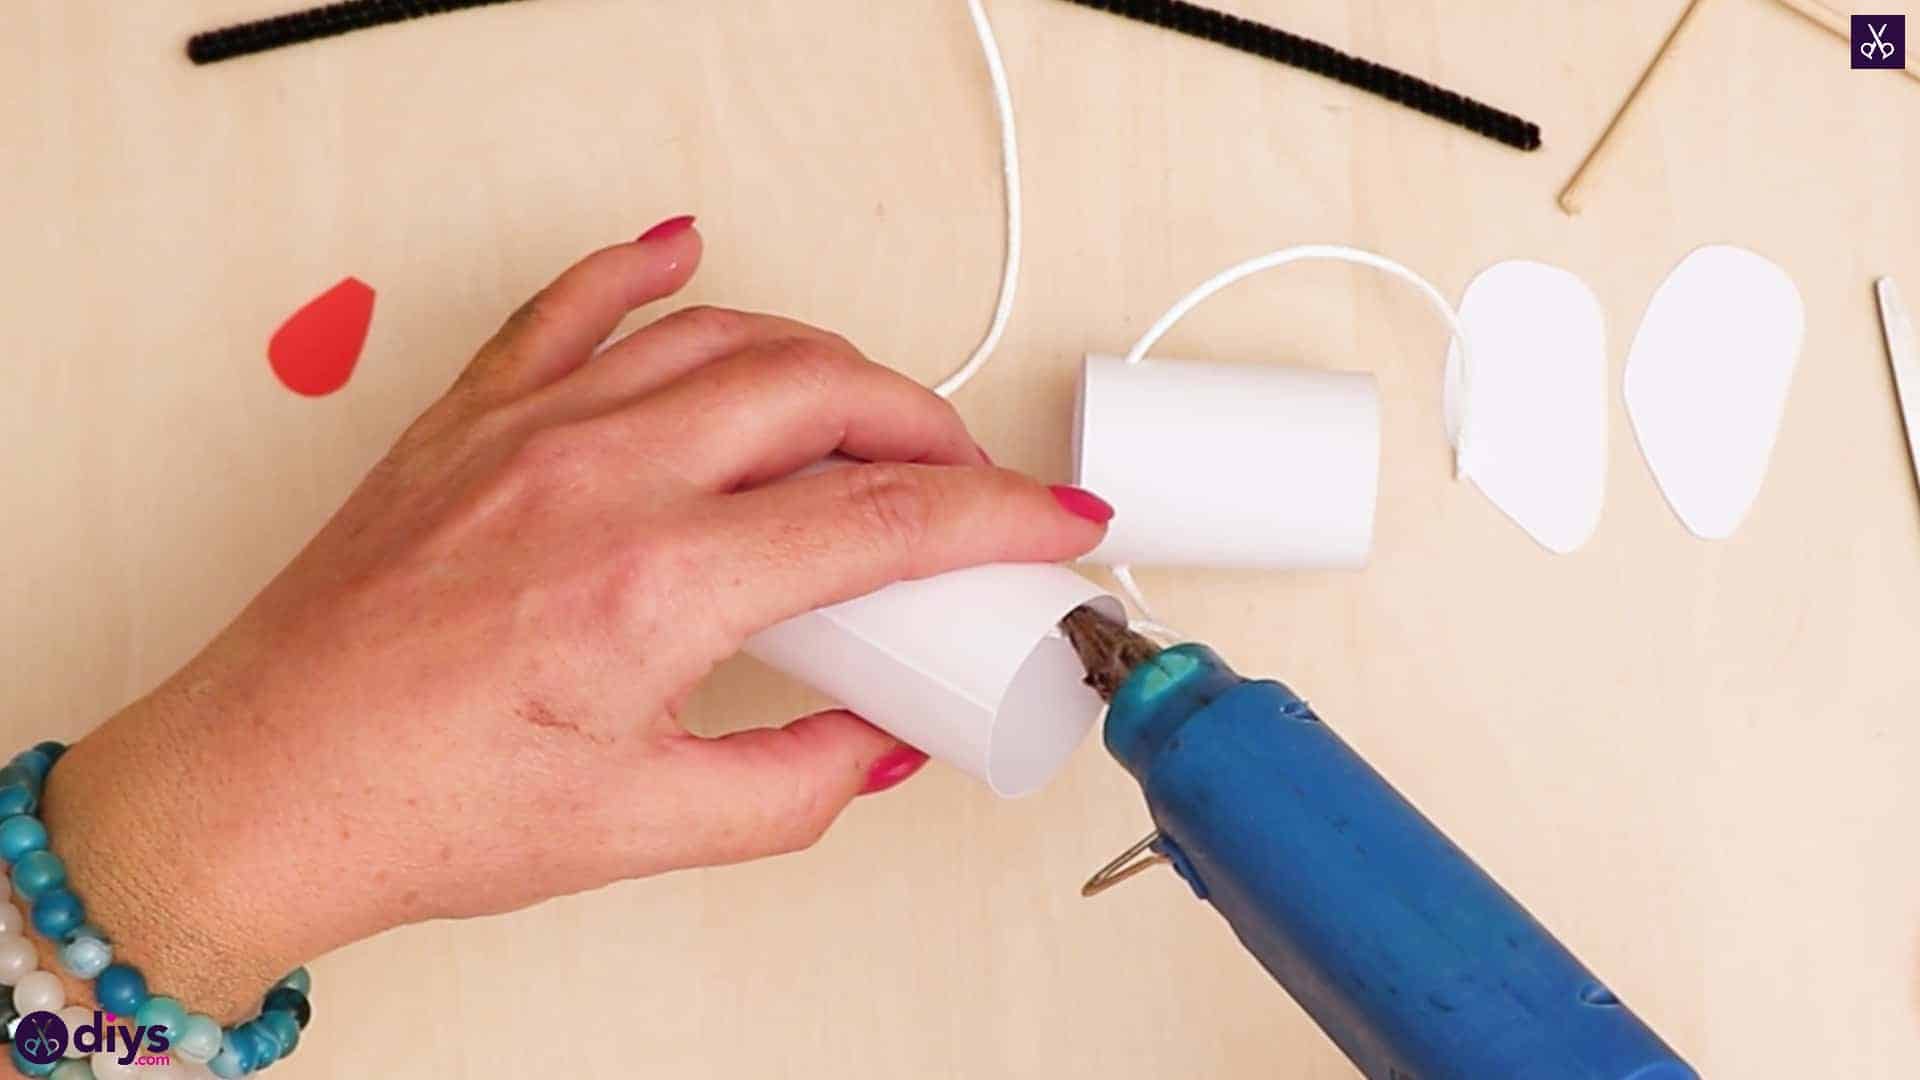
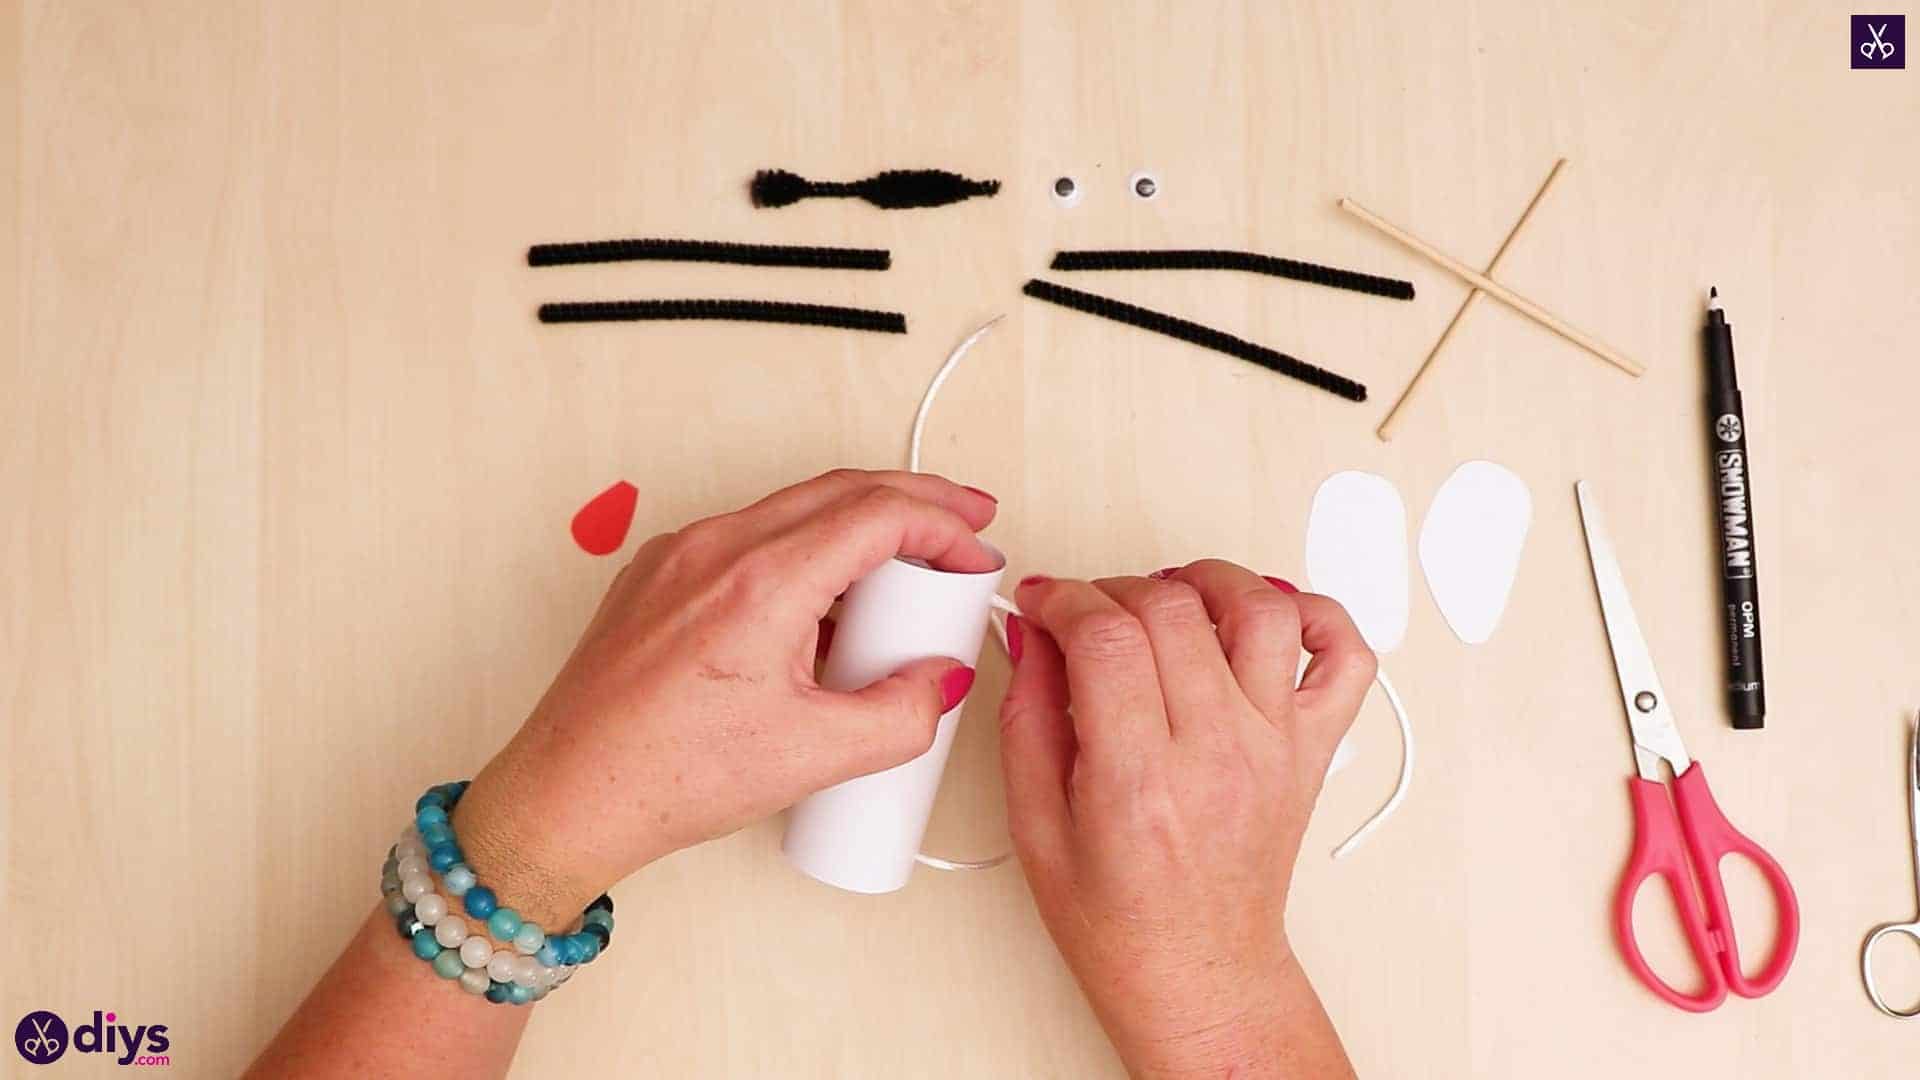
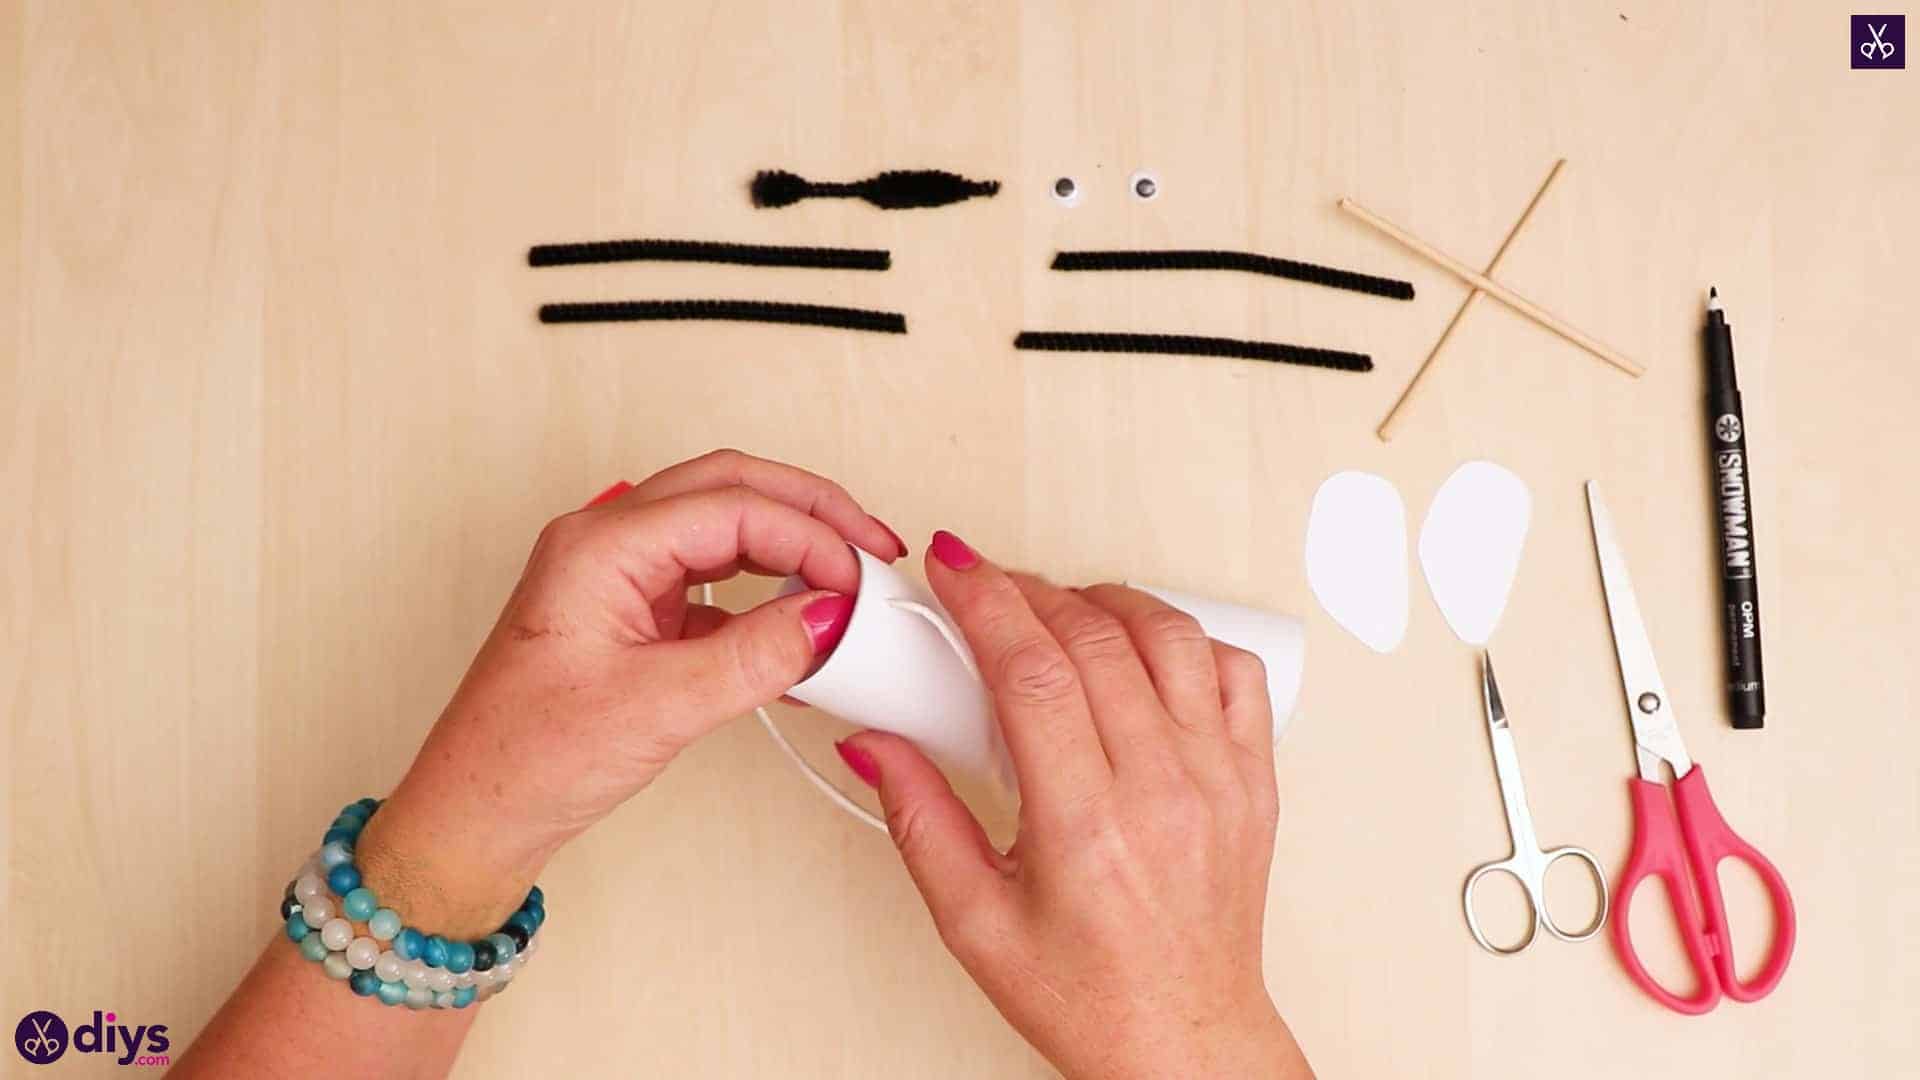
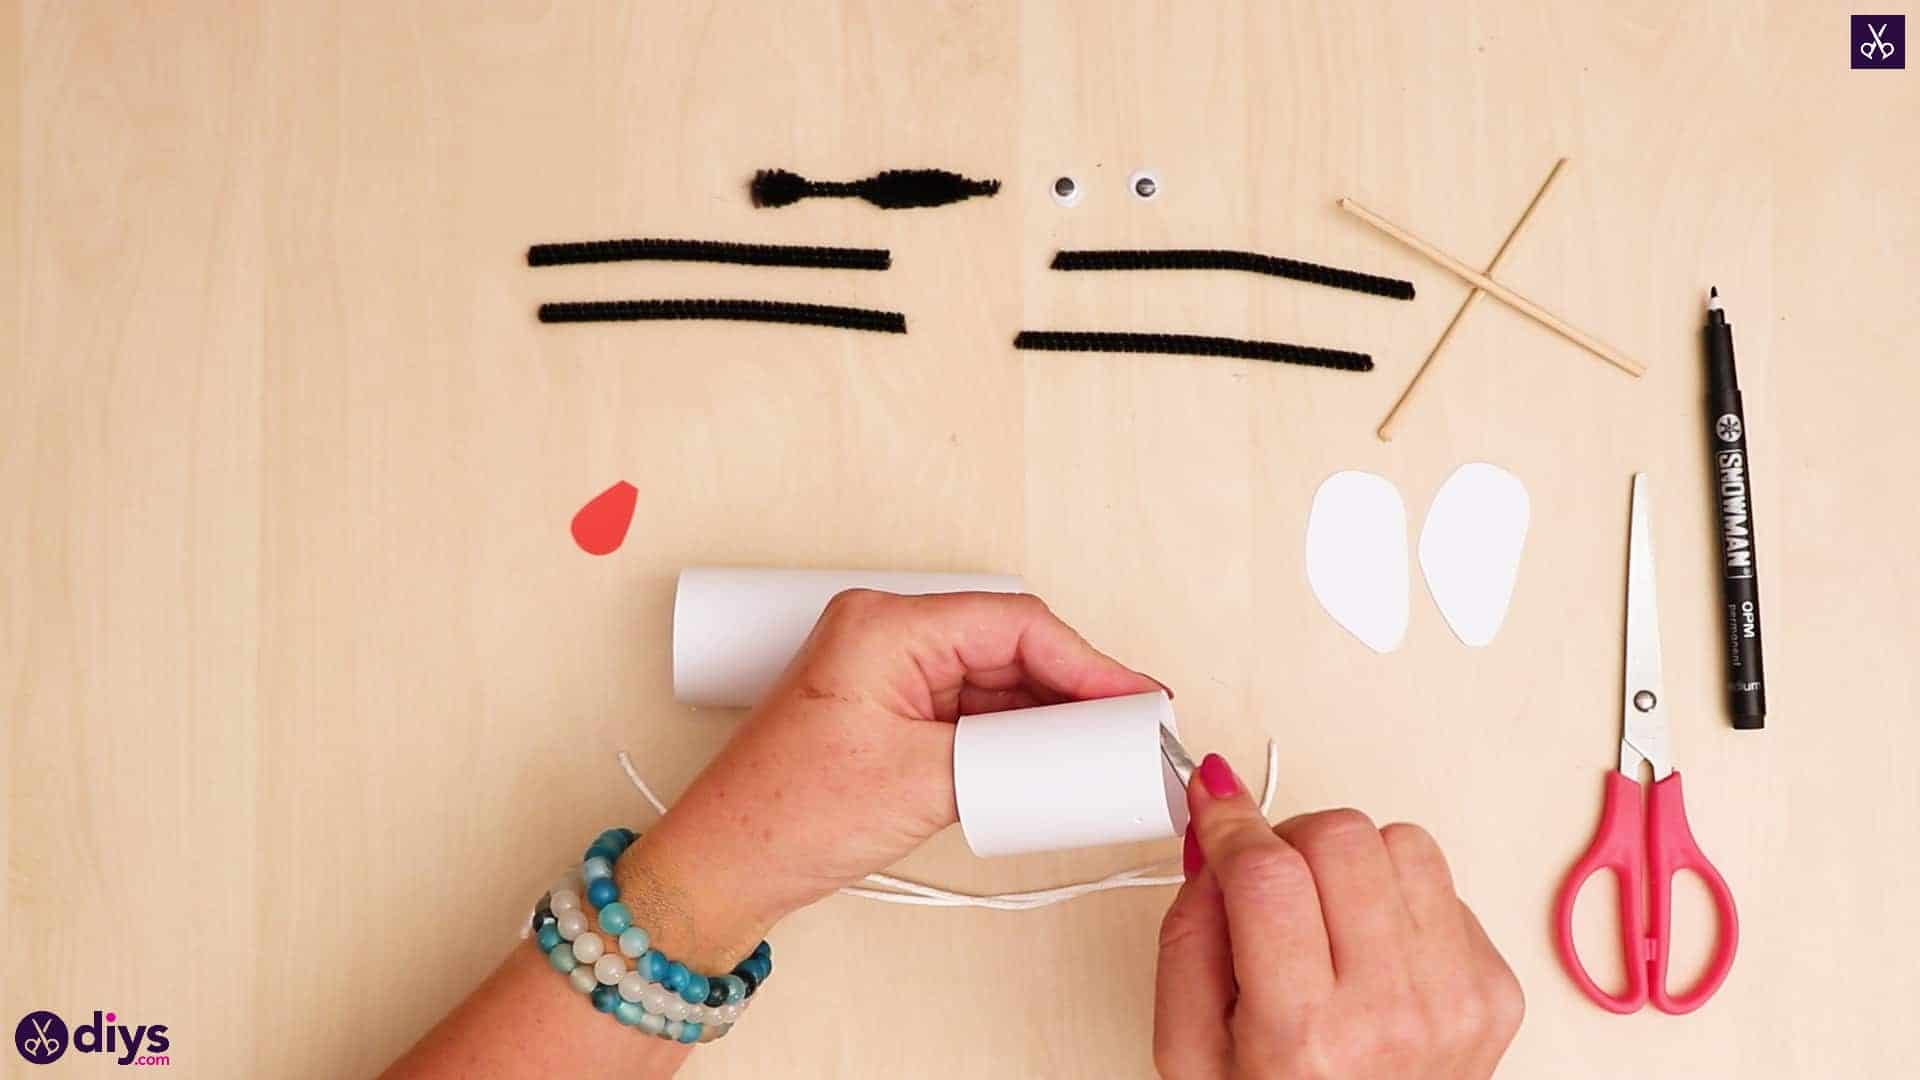
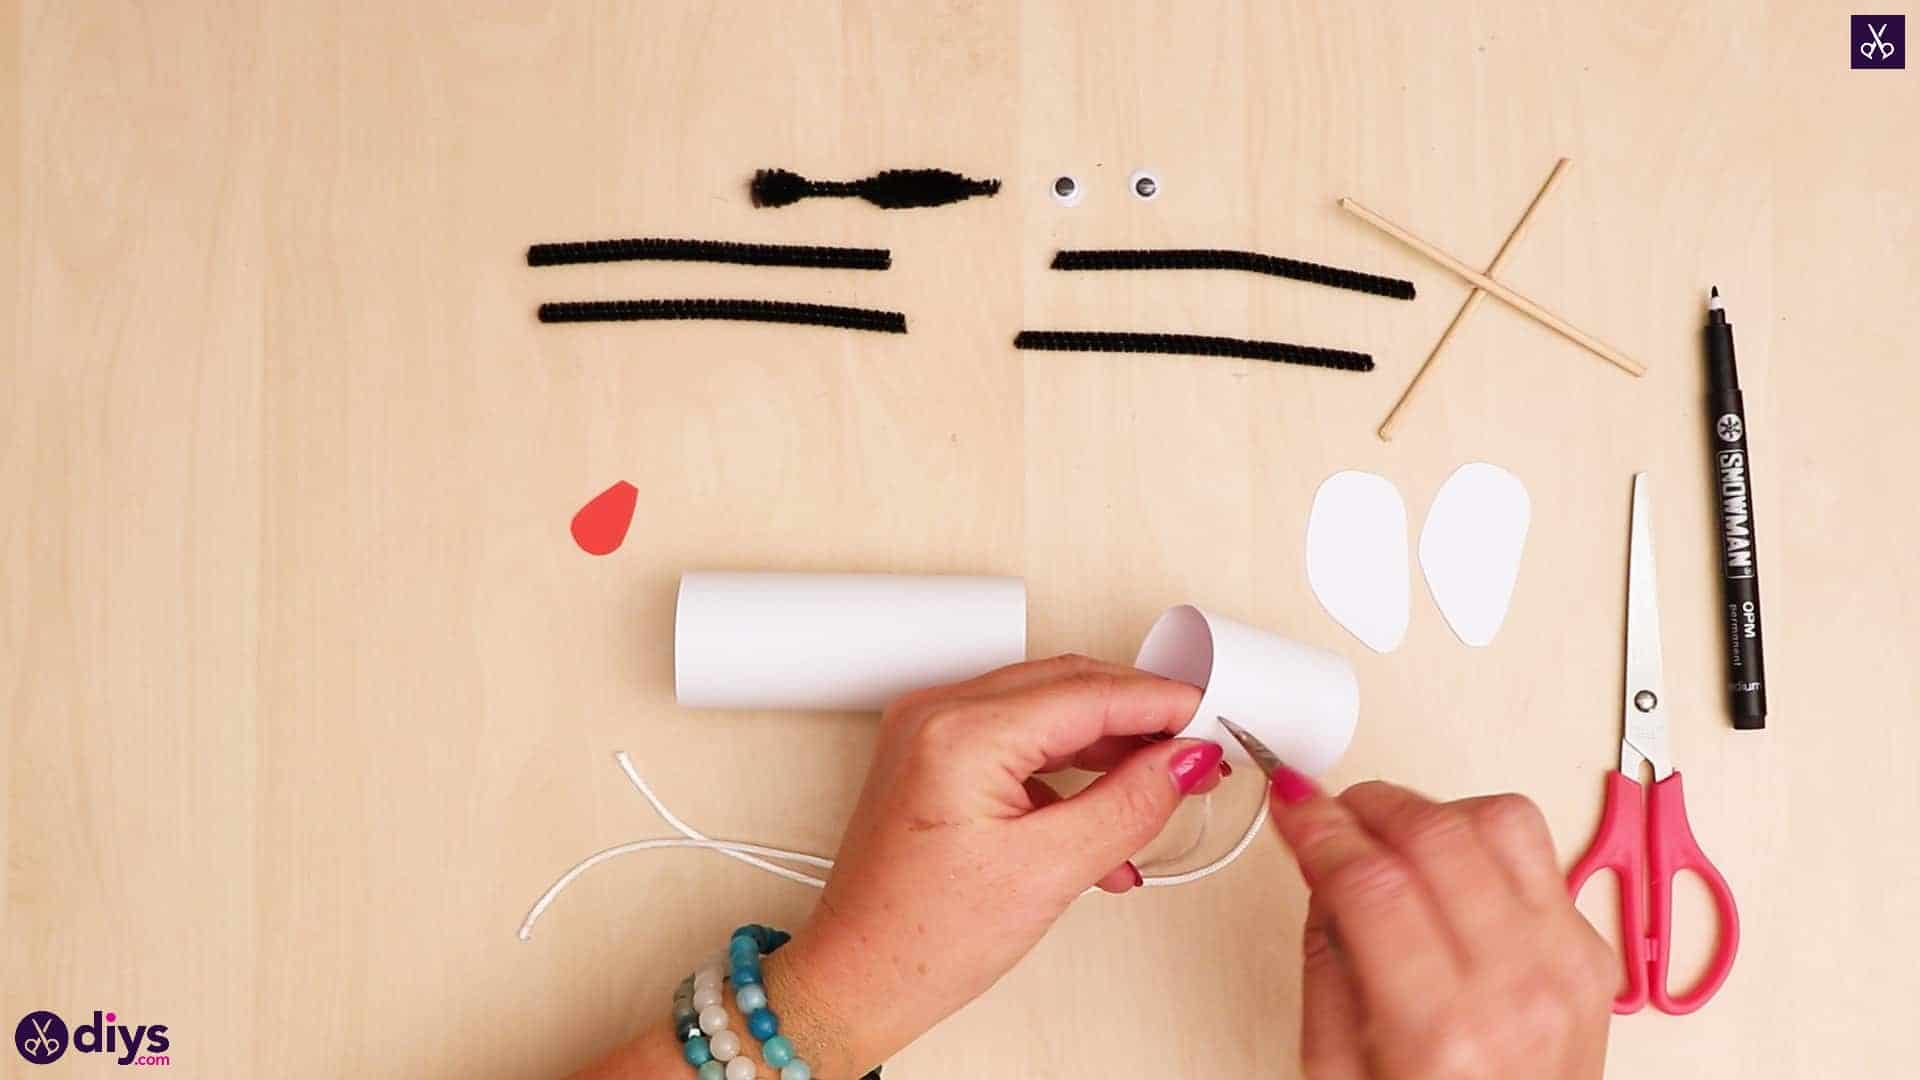
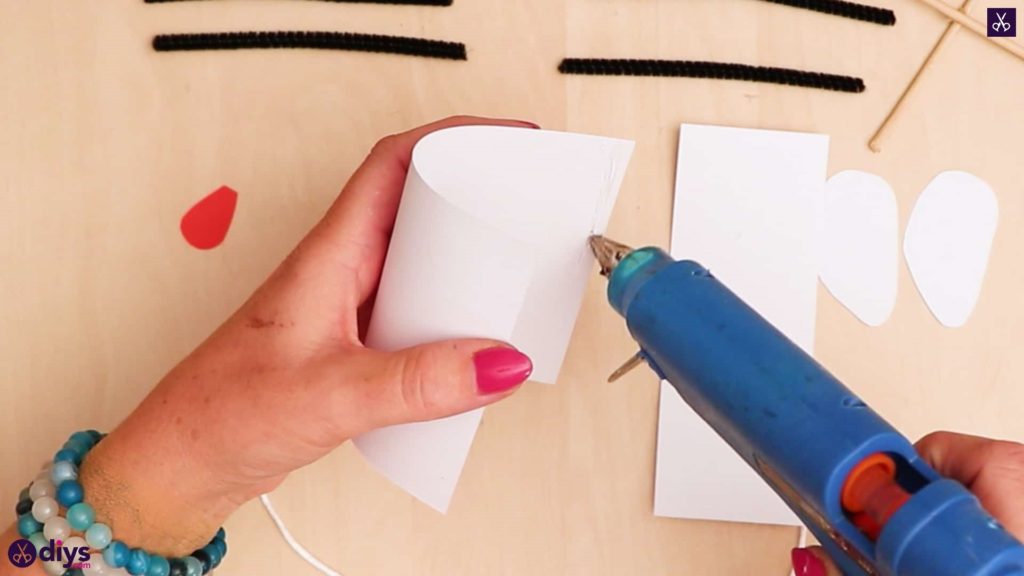
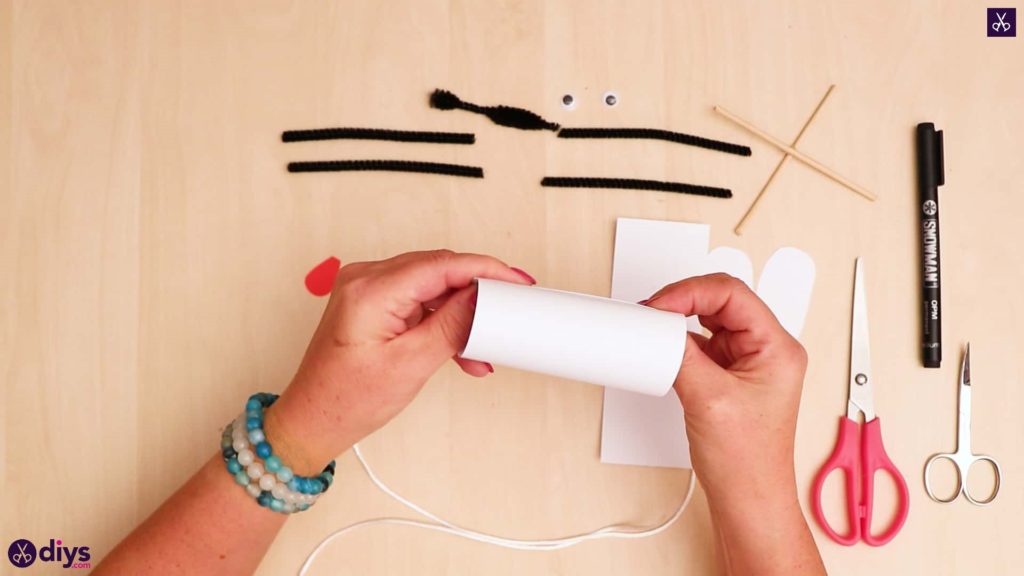
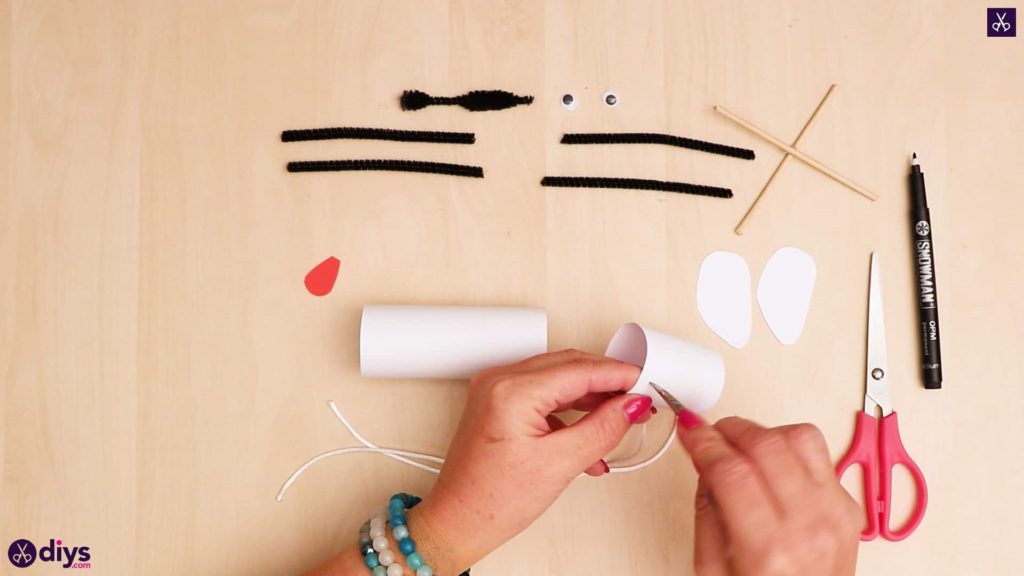
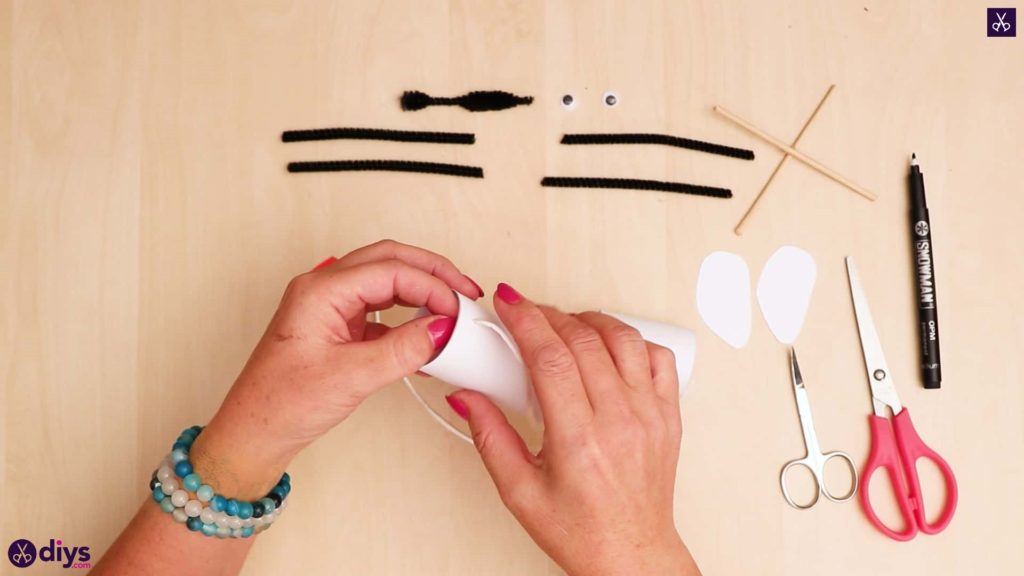
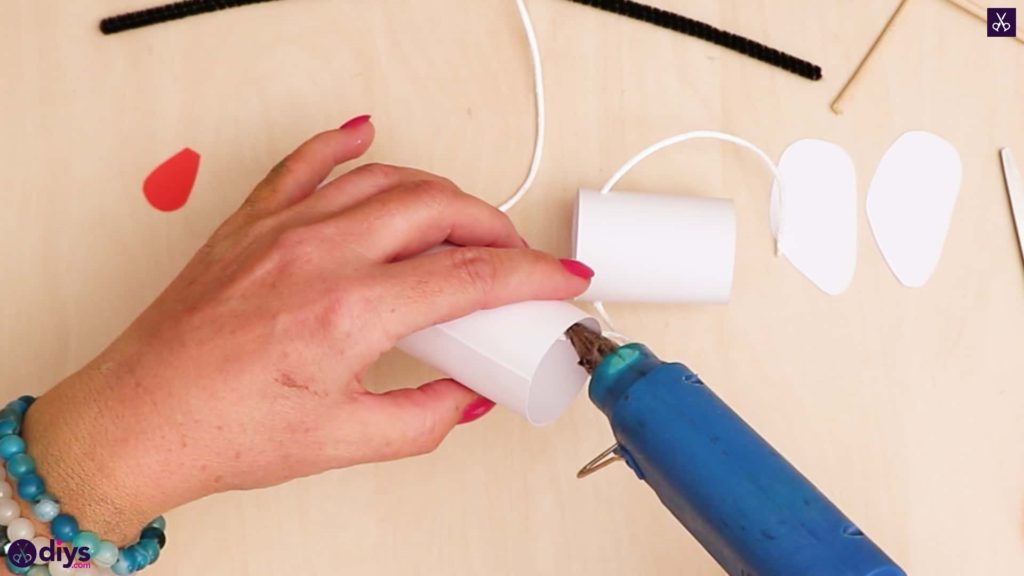
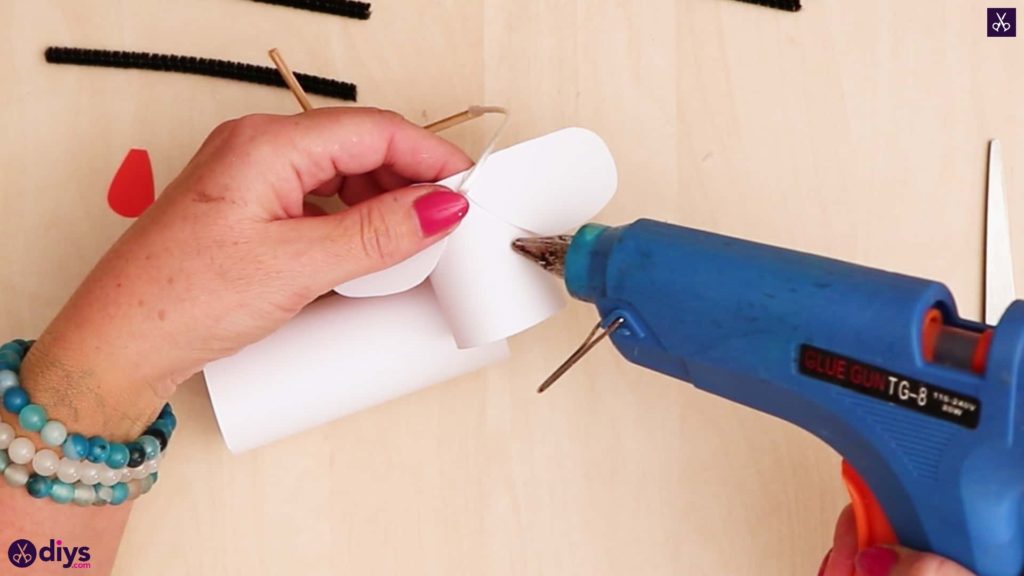
Go back to your two remaining white paper rectangles and roll them into cylinders to make your dog’s head and body. For each one, apply hot glue along one shorter edge, bring the one opposite curving across to meet it, curl the unglued edge under, and stick the first edge in place on the other side. Repeat the process for the second piece and you’ll have two cylinders; one smaller than the other. Try and make their diameter or width about even, despite the fact that one with be long (the body) and one will be short (the head).

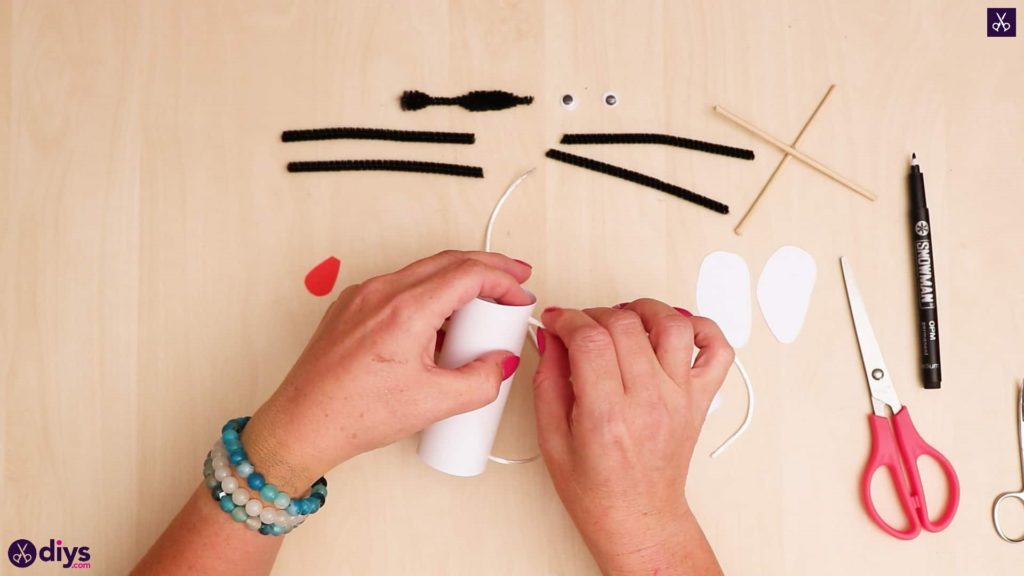
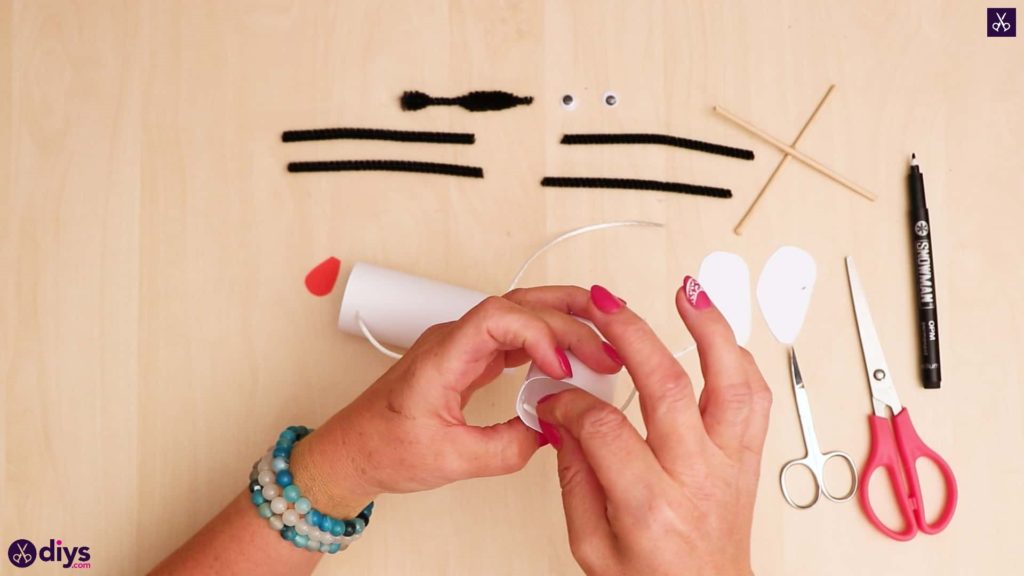
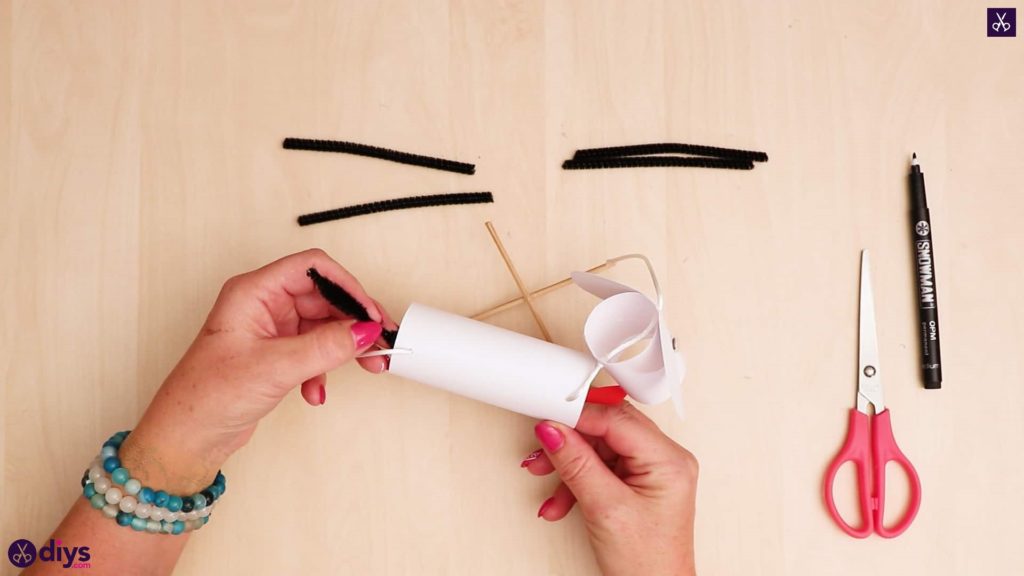
Step 8: add the string
Use the pointed tips of your nail scissors to poke holds in your white paper cylinders for your puppet strings. For your dog’s head, you’ll poke two holes in the same end but on the opposite sides of that end’s opening; turn the head horizontally and poke a hole in the top and a hole below it in the bottom. For the dog’s body, you’ll poke two holds again, but this time ateither end and on thesame side. Turn the cylinder horizontally again and poke a hole in the top at one end and a holealso in the top at the other end. String the dog’s head to the body like a neck by threading string through one of the holes in the body, then through the bottom hole in the head and straight up through the top hole in the head. Use your hot glue gun to fasten the string’s end in place inside the body cylinder and a dot of glue at each hole in the head to keep it in place rather than sliding up and down the string. Your dog has a neck how! At the other end of the body, thread the end of your string through the second hole and trim the string to be equal in length as the total length of your first string at the front of the puppet. Glue this end in place inside the body cylinder too.


Step 9: attach your handle
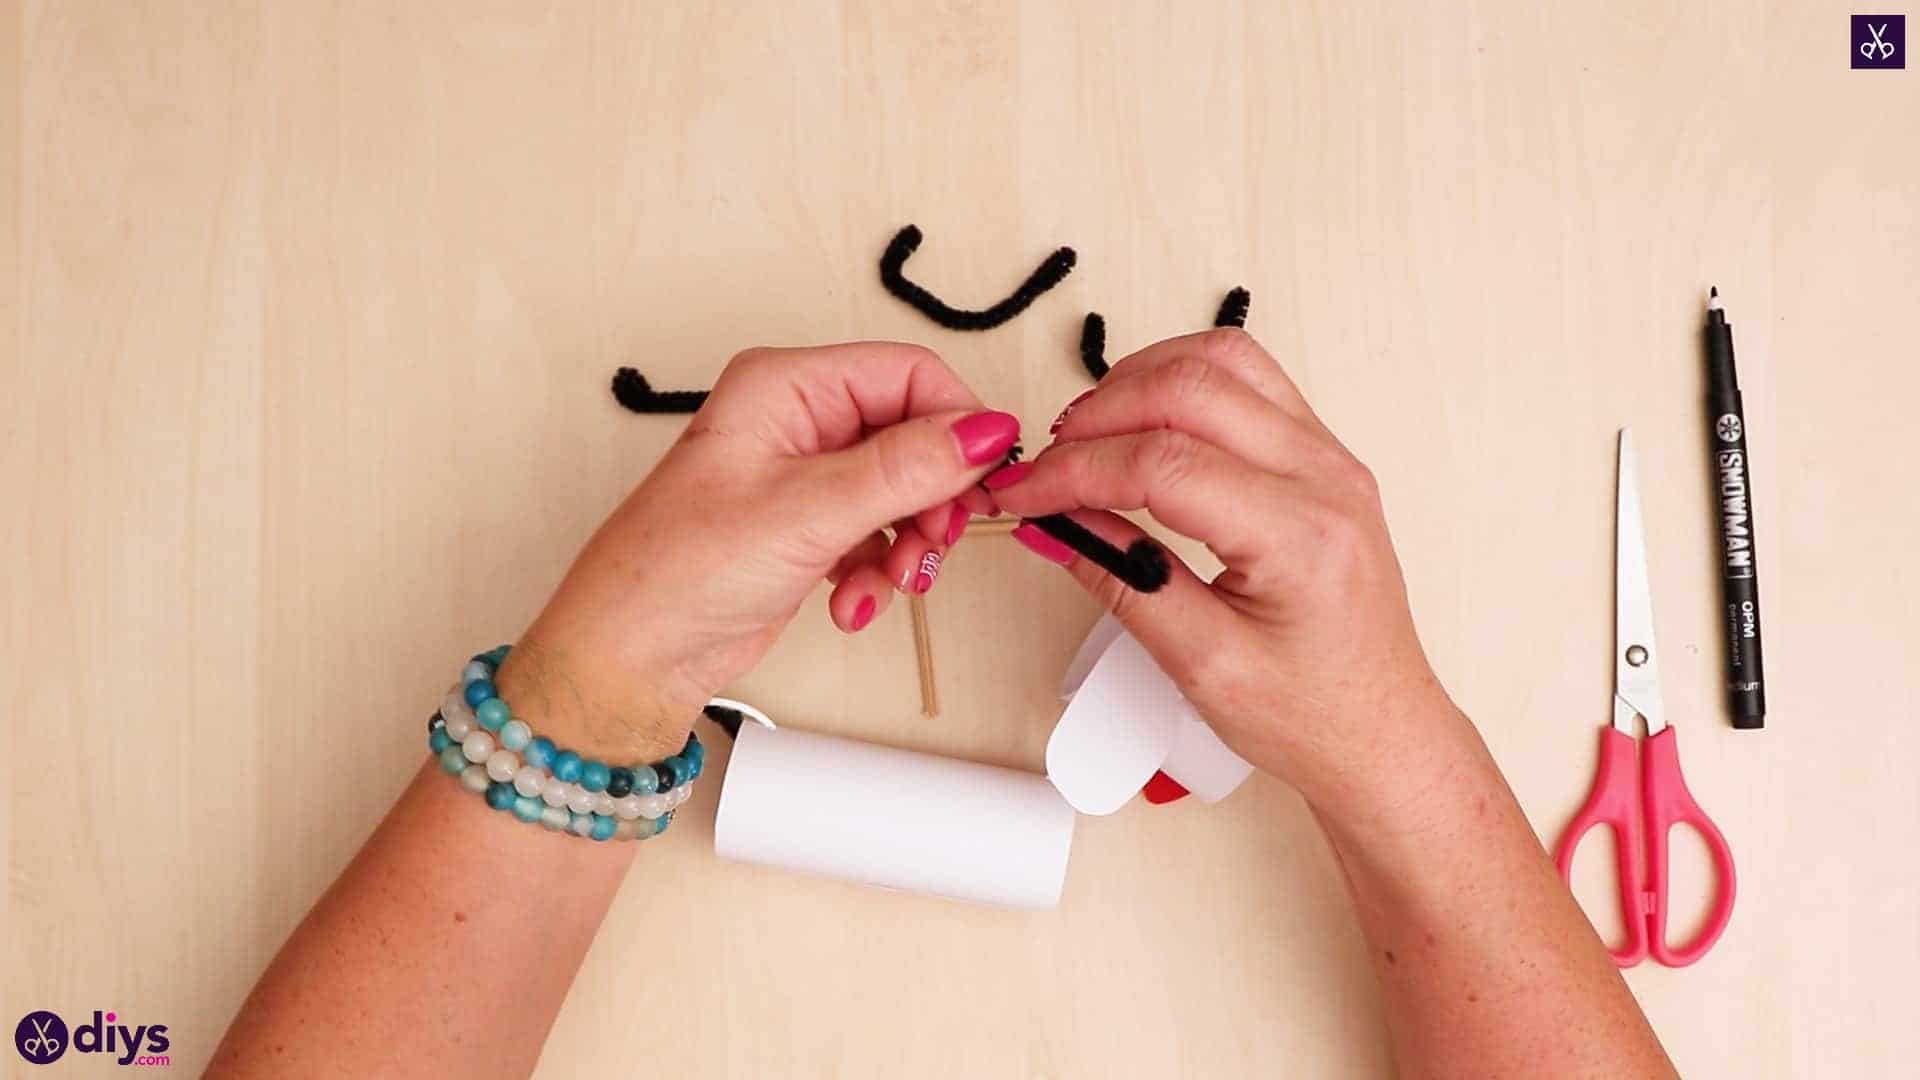
Use your hot glue gun to glue the end of your front string to one skewer end and the end of your back string to the opposite end of that same skewer. The other skewer that crosses perpendicularly through your glued stick won’t have any strings on it; it’s just for better grip when you make the puppet move, just like a classic marionette!
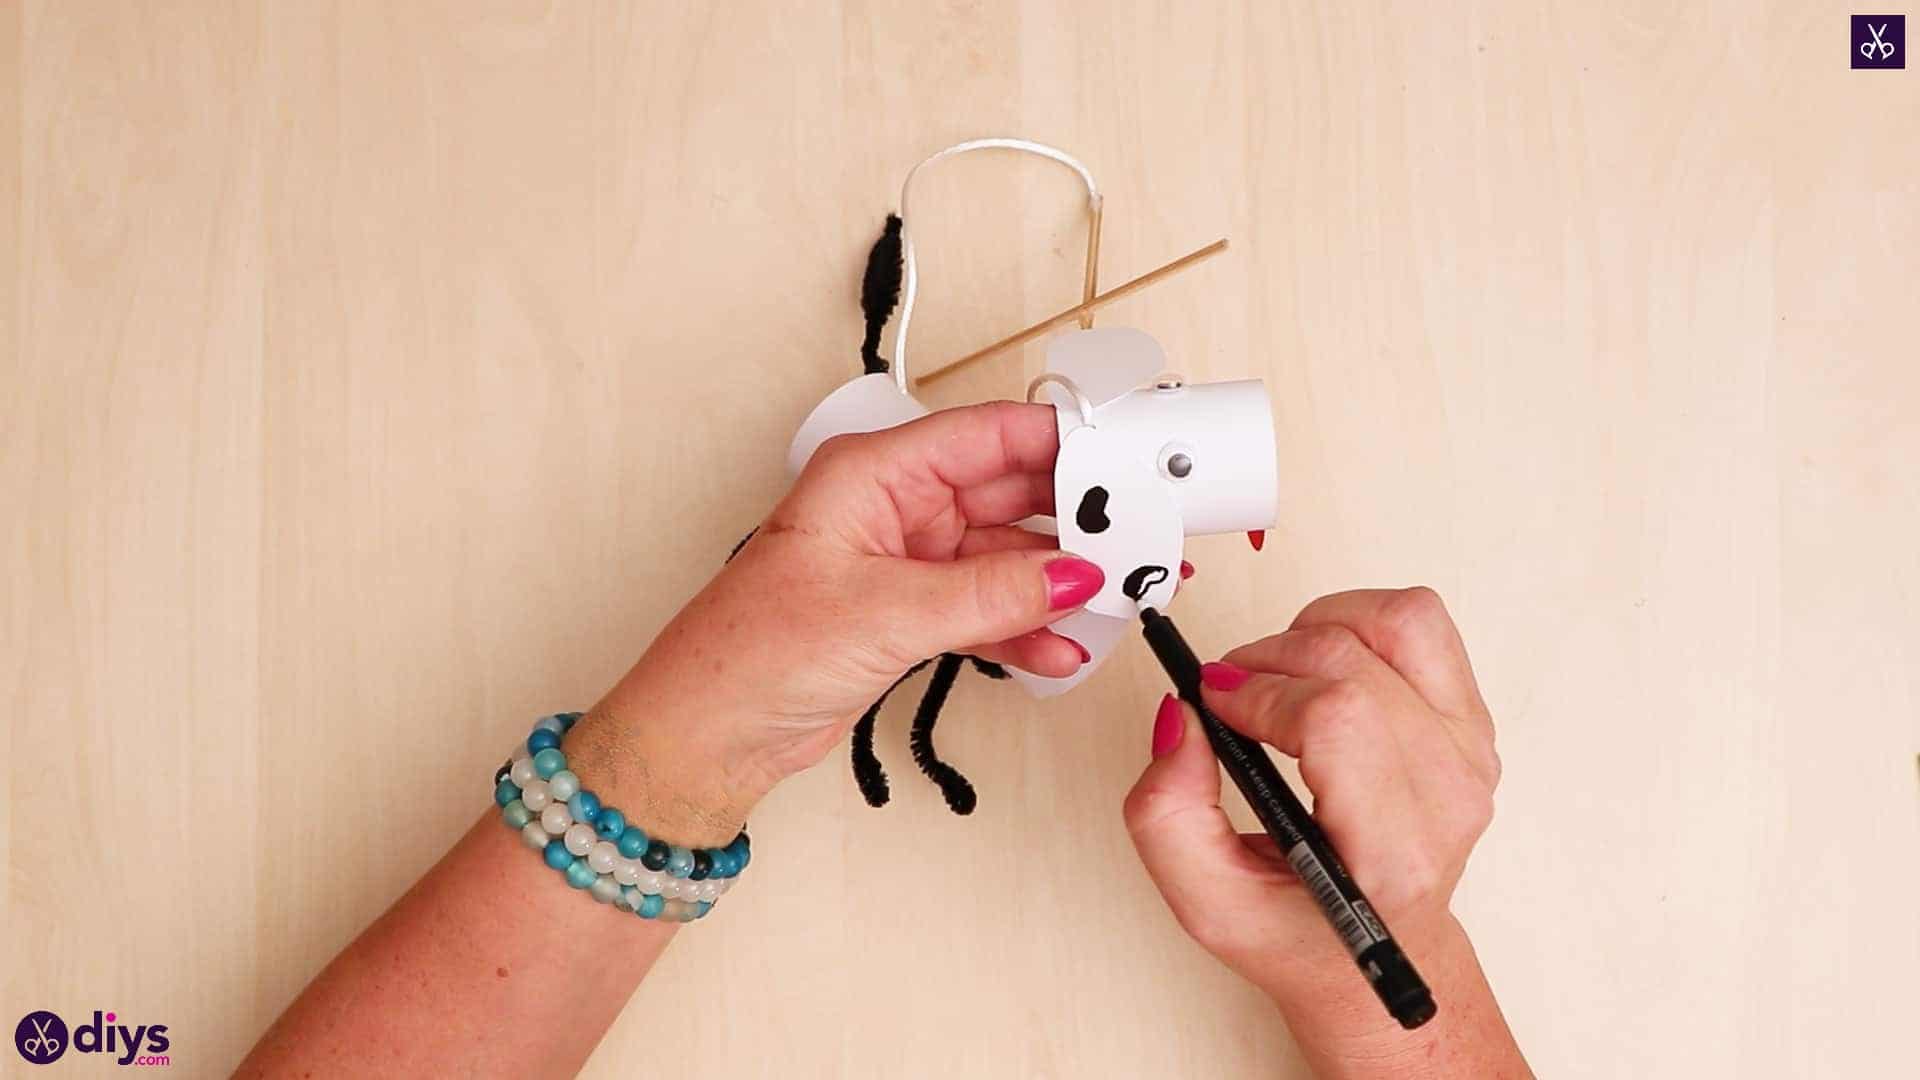
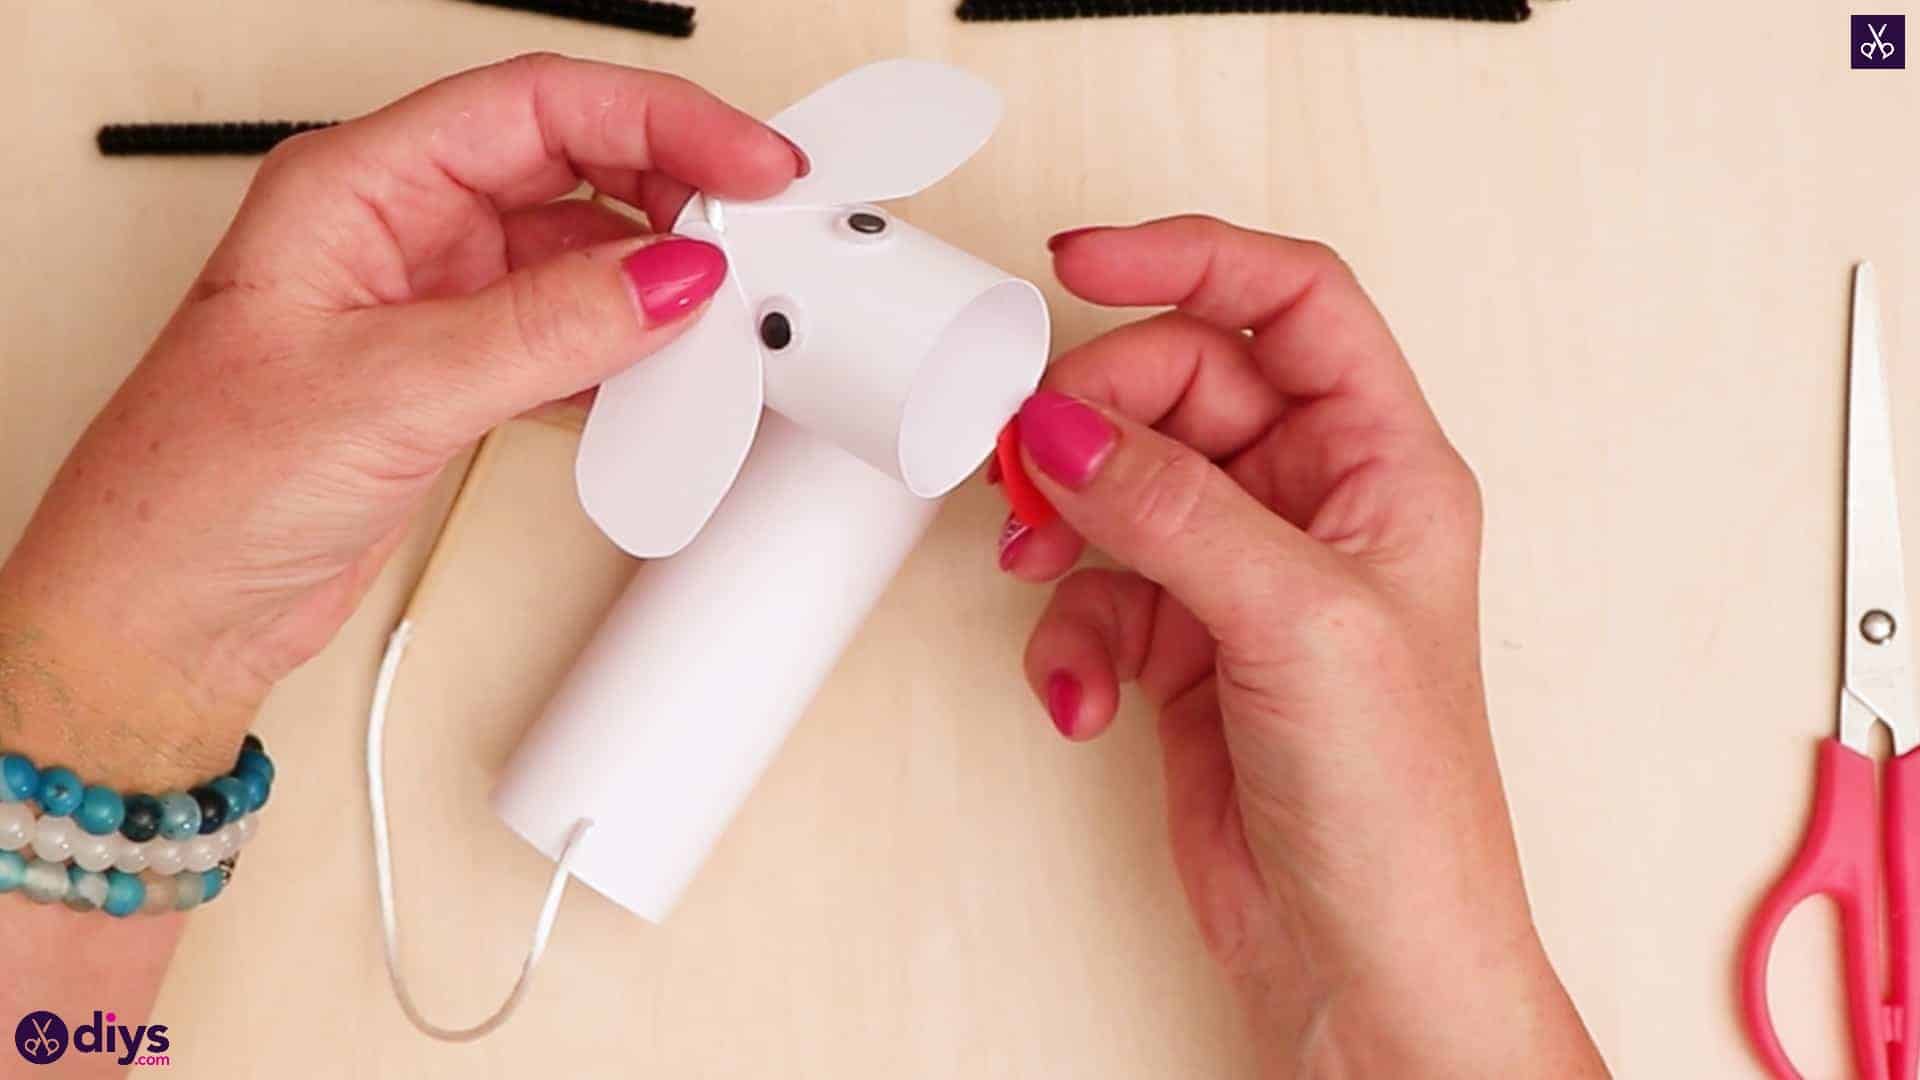
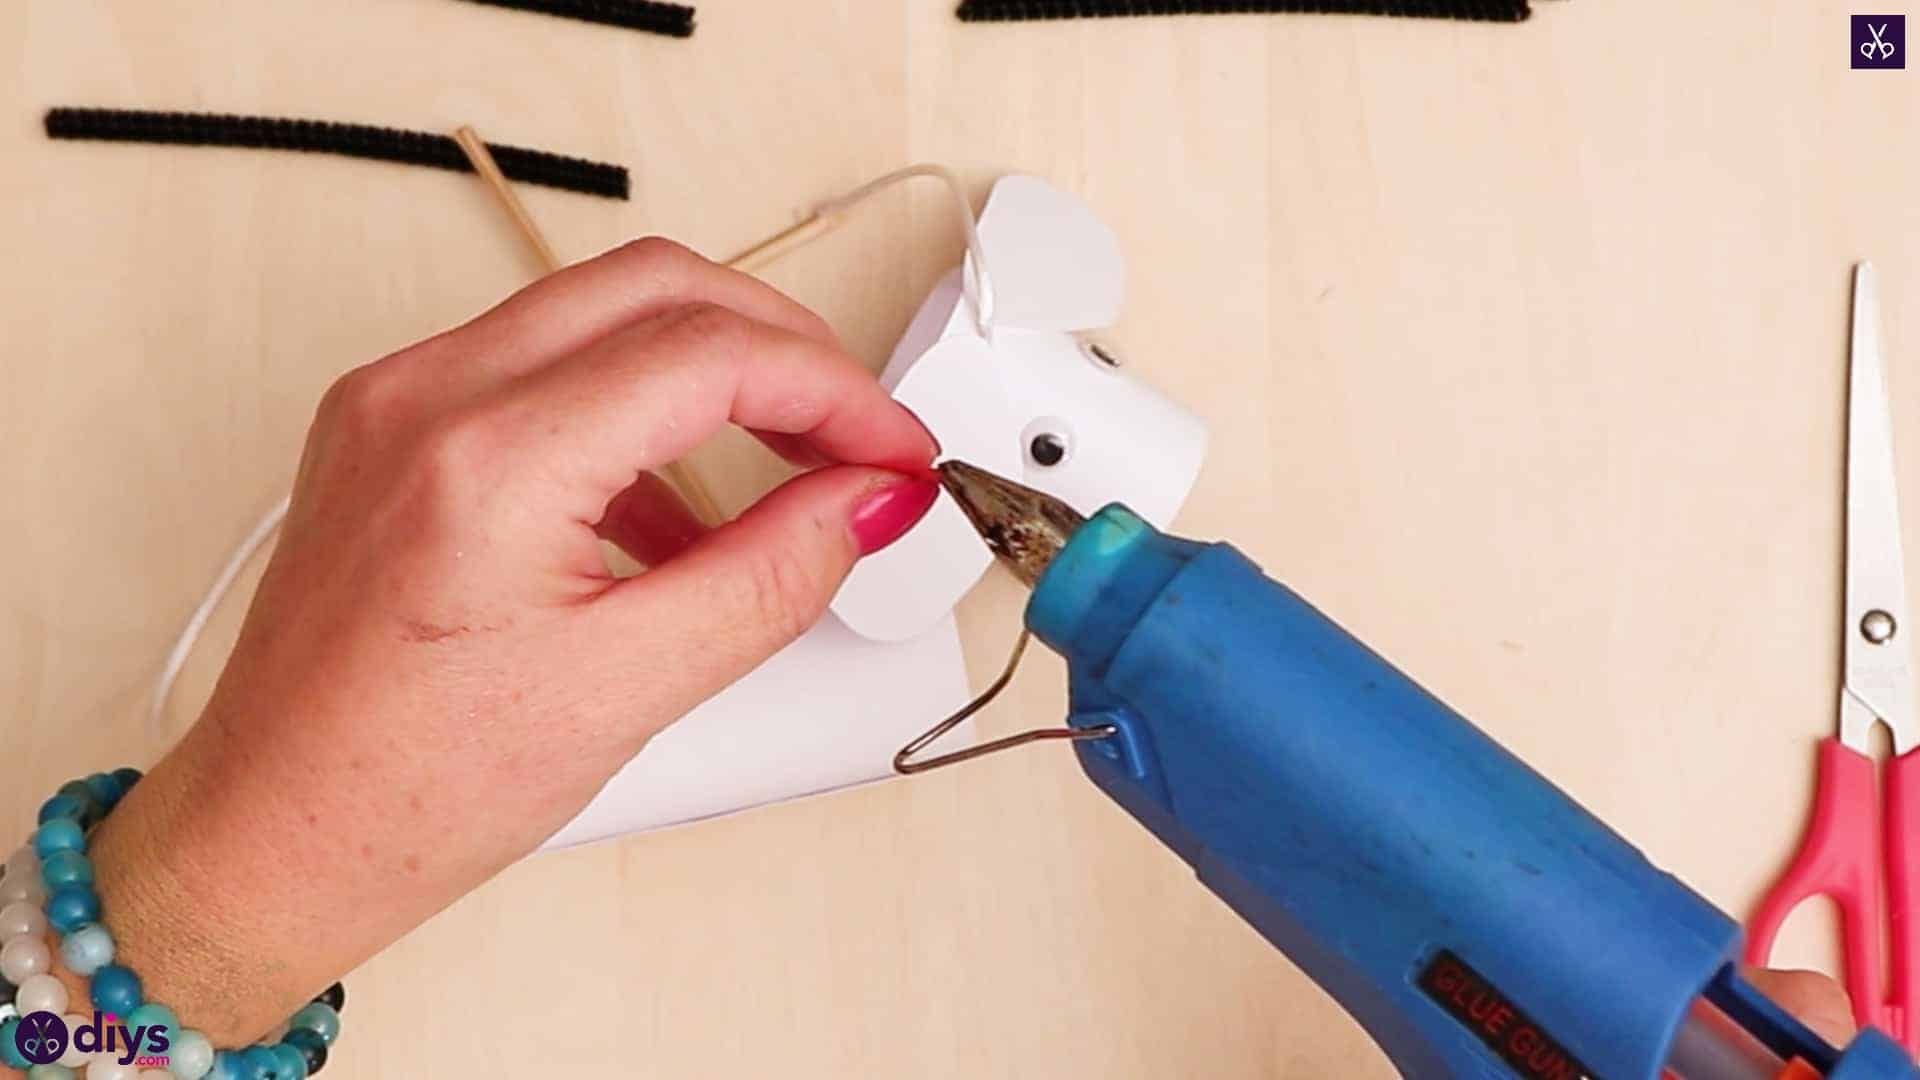
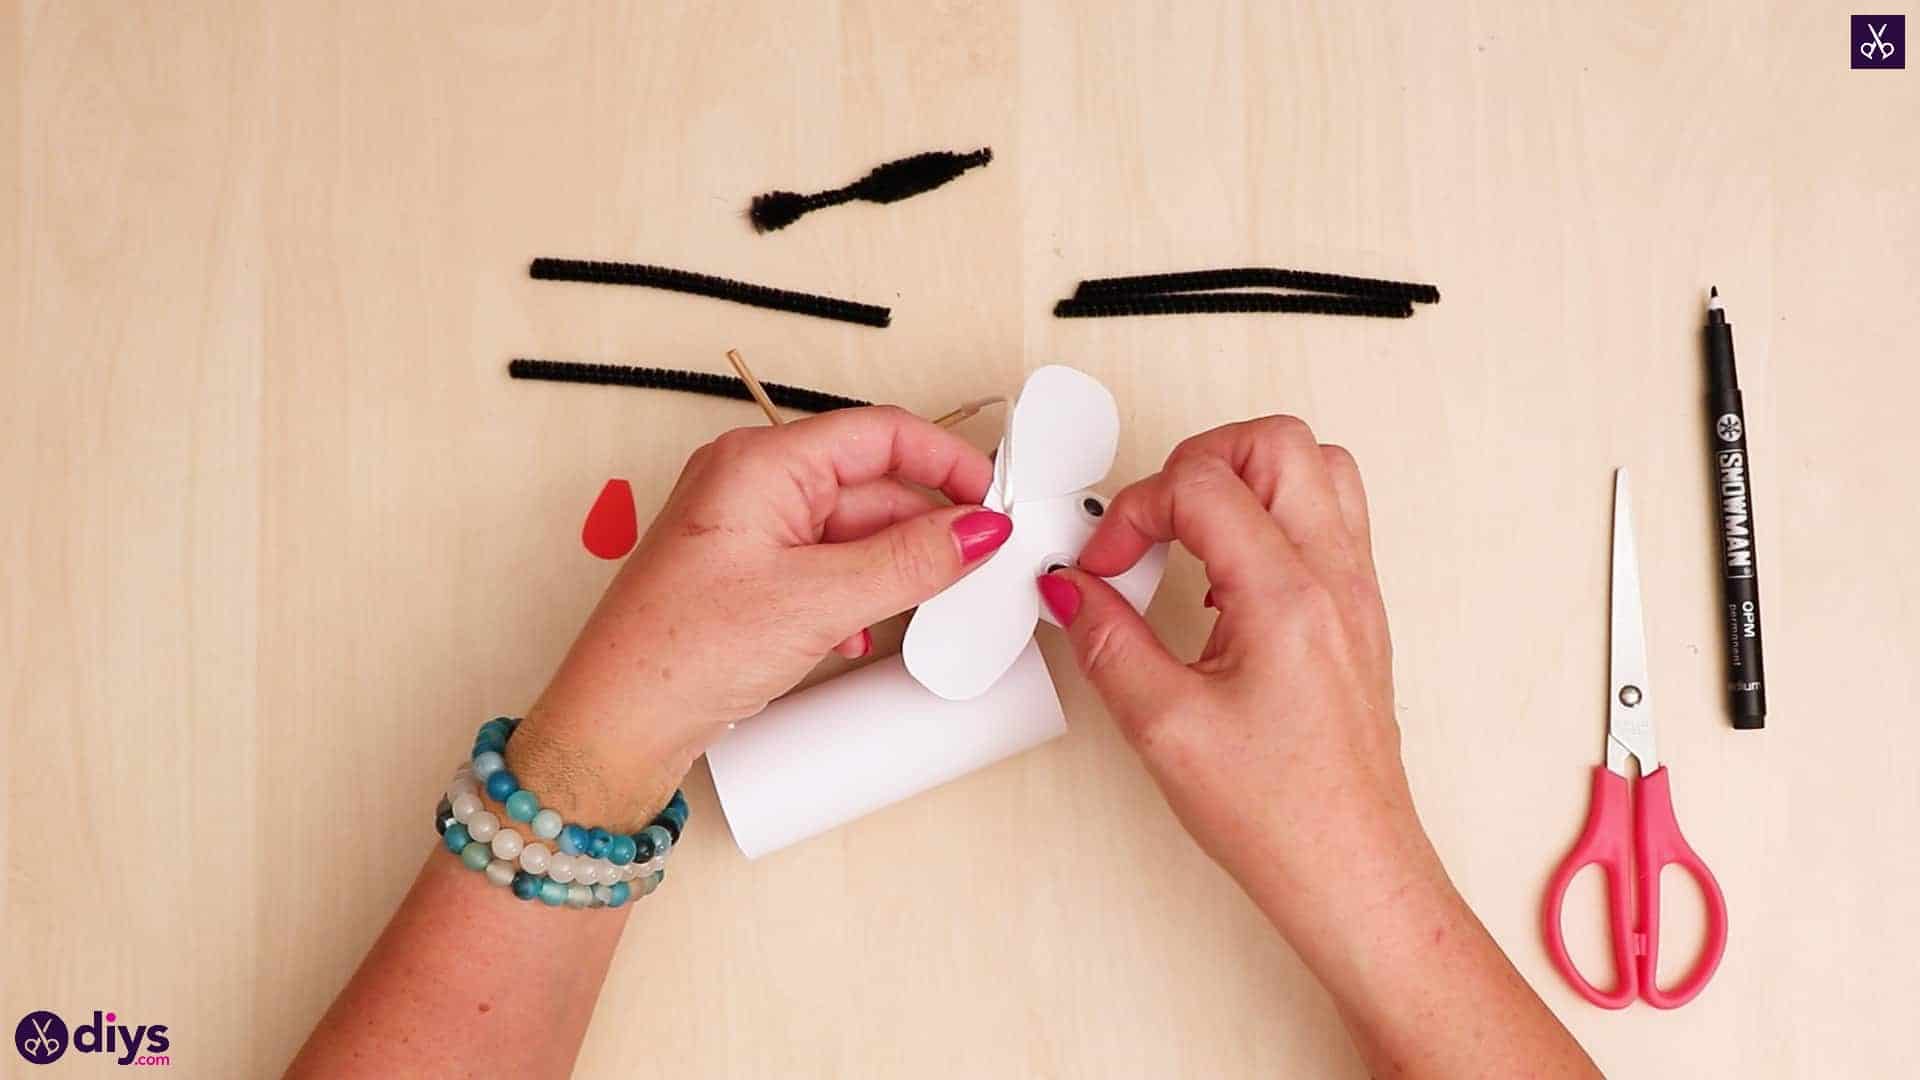
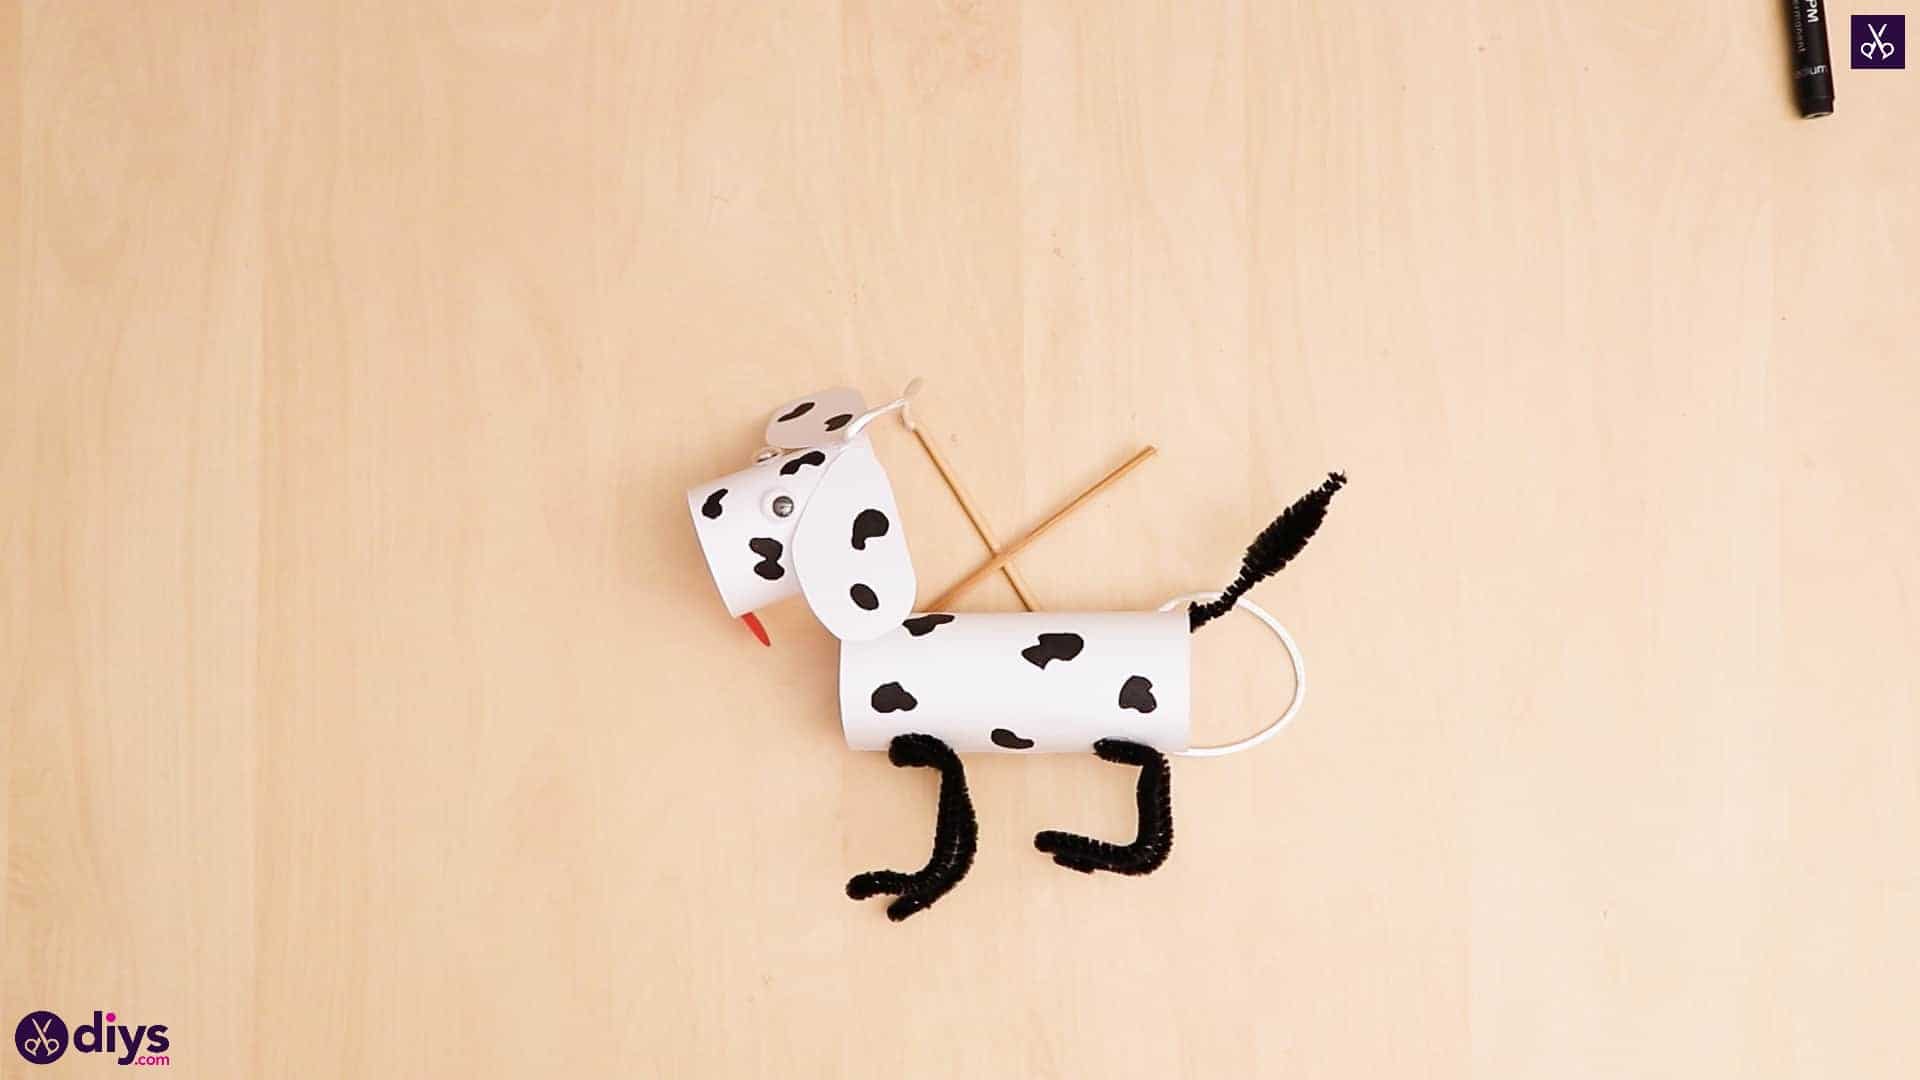
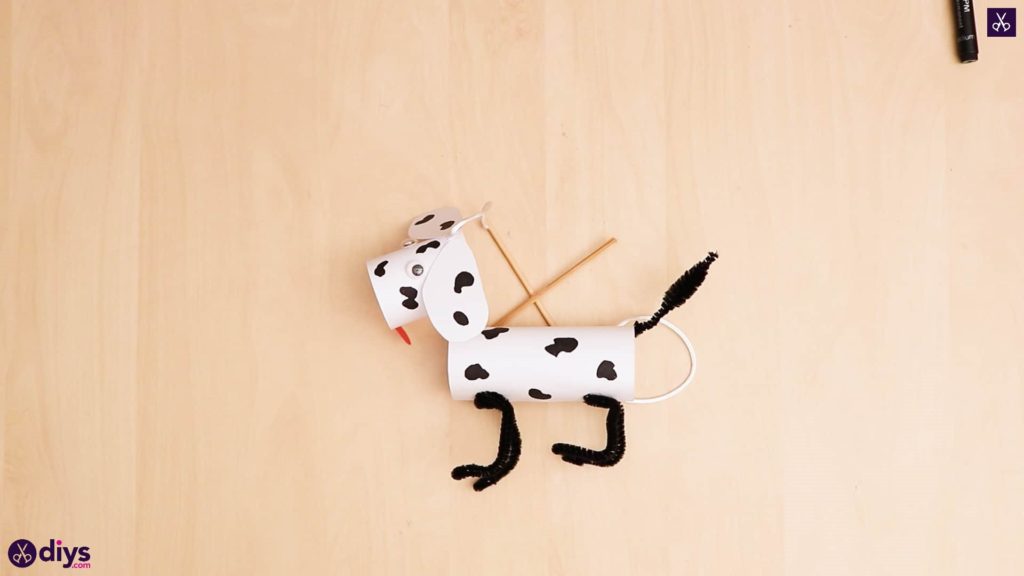
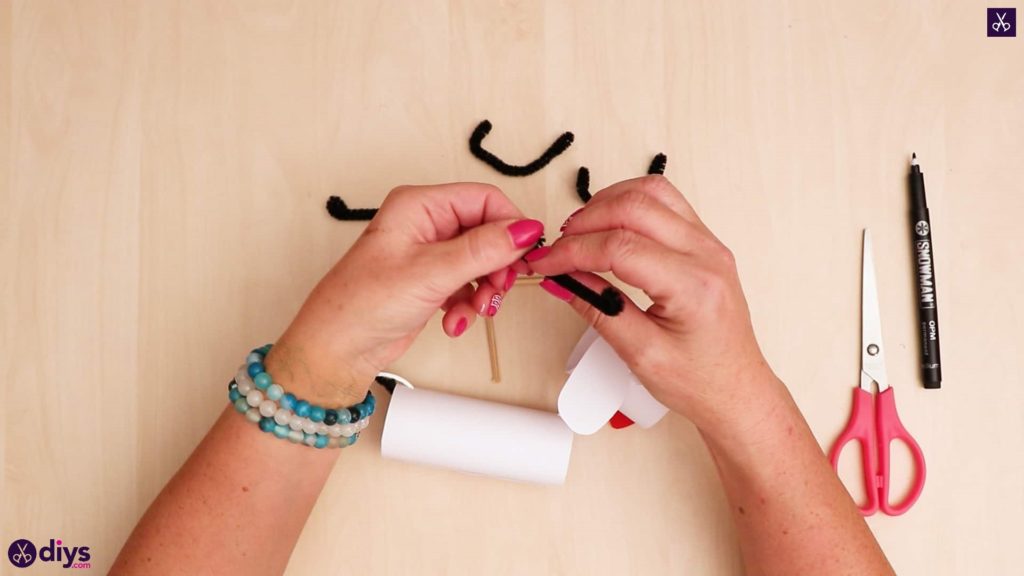
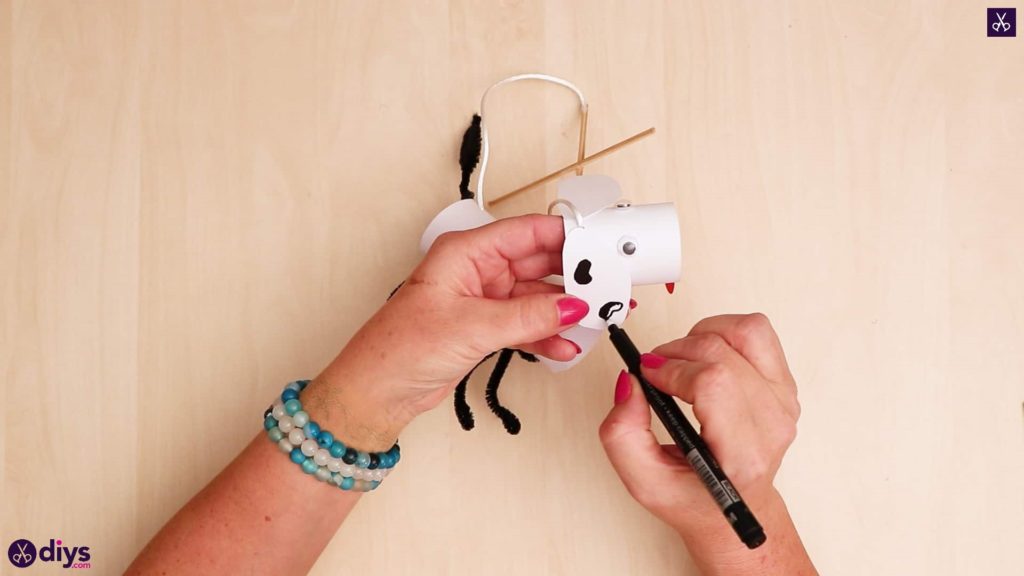
Step 10: create the face
Embellish your dog’s face! Apply glue to the top of your dog’s head, on either side of the string, and stick your ears in place. Then stick the googly eyes down in front of the ears. Next, apply glue to the tapered edge of your dog’s tongue and stick it on the bottom inside of your dog’s head cylinder so it sticks out and bounces a little when you move the dog, like he’s happy to see you!


Step 11: add the acessories
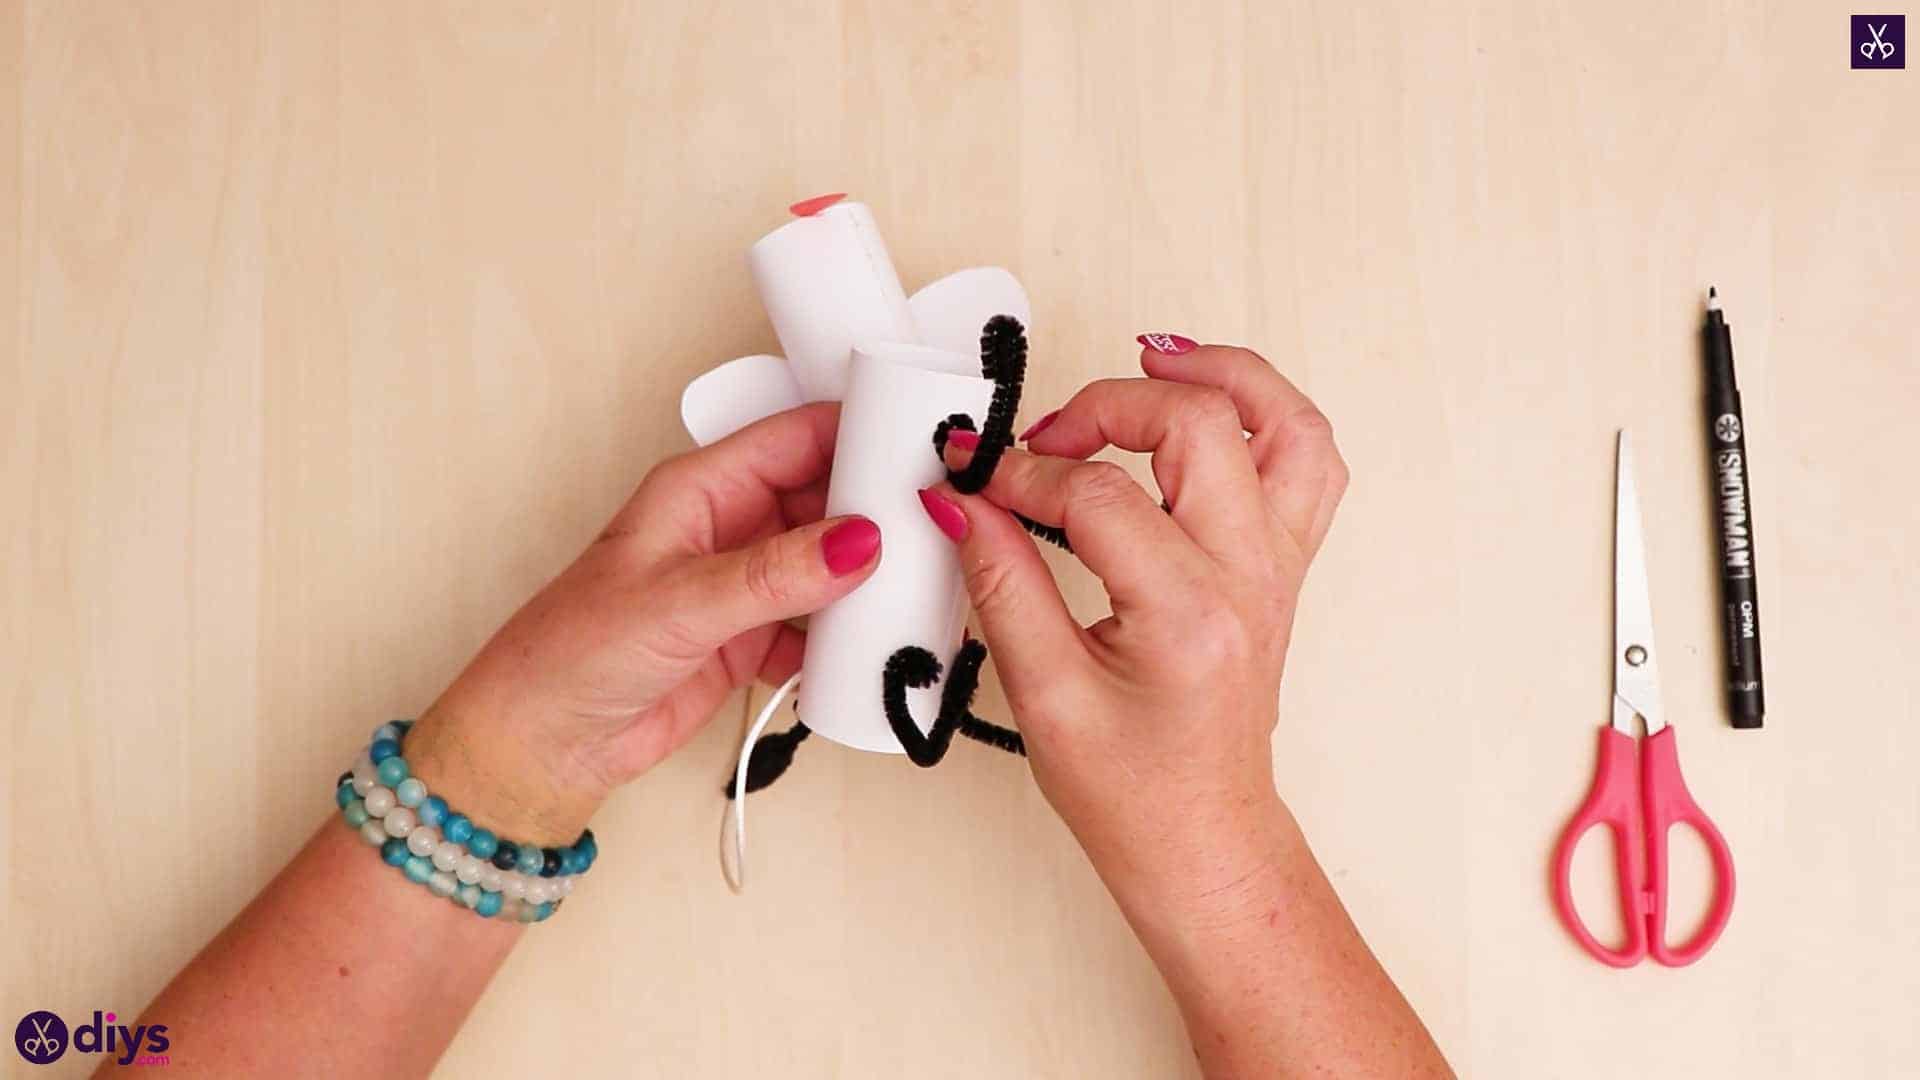
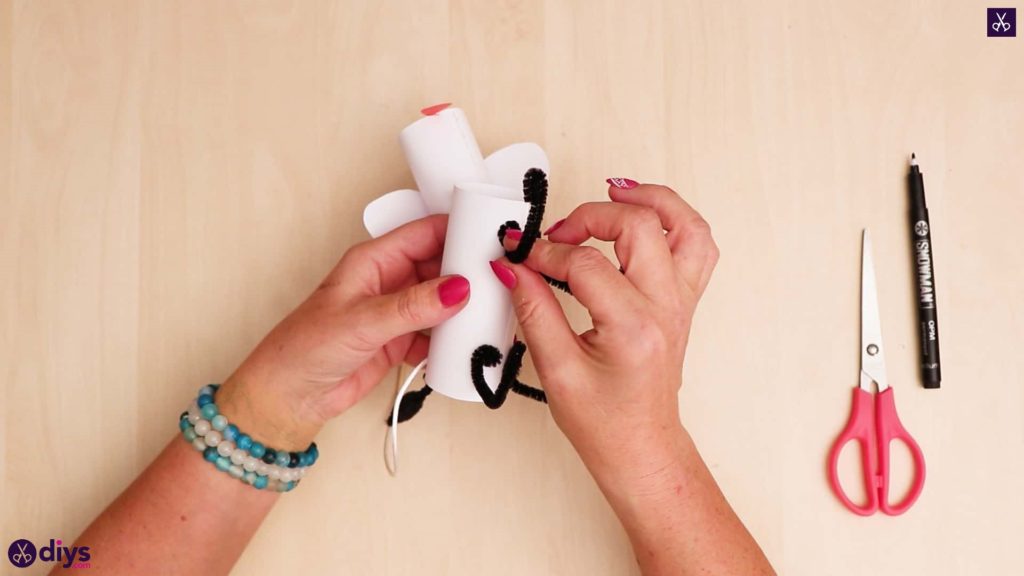
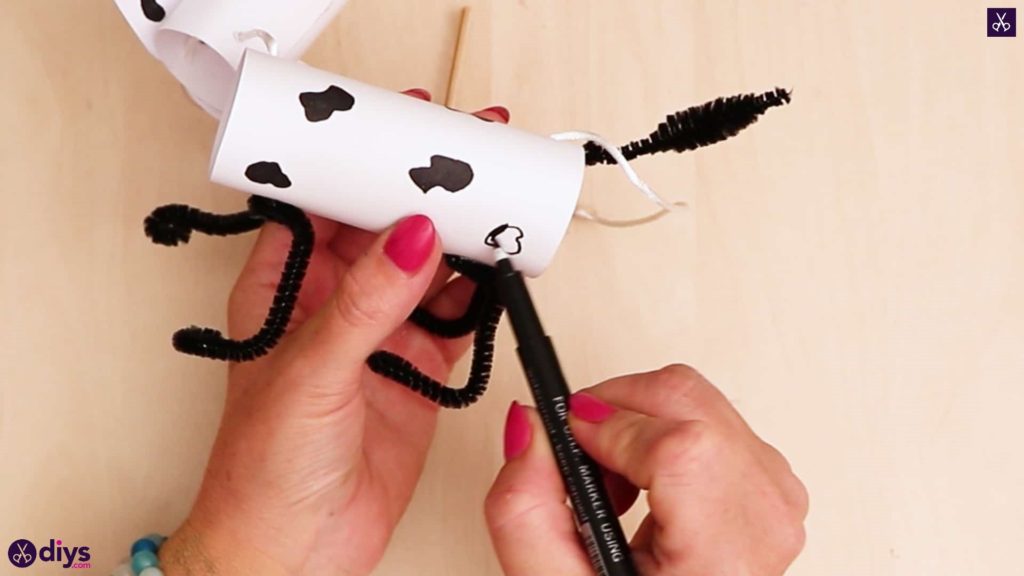
Put the finishing touches on the dog’s body! Apply glue to the end of the puffy pipe cleaner piece where you cut the second puff in half and stick it inside the top edge of the dog’s body cylinder, at the opposite end of the head. This is your dog’s tail. Next, curve your four remaining pipe cleaner pieces and loop the bent tip of each to make four legs with little feet. Glue them to the bottom outside of the body cylinder, two at each end to give your dog legs. Finally, use your black marker to draw little patches on your dog’s body and ears so he has black spots like a Dalmatian.

You’re all done! Of course, you can always feel free to get creative with colours and details to make different breeds of dog, or even use the basic shapes but change up the embellishment to make 3D puppets of other animals. Just in case you’d like to try this project out for yourself, here’s a fantastic tutorial video to help you!