How to Make and Style a DIY Clay Necklace
Updated on June 25, 2021
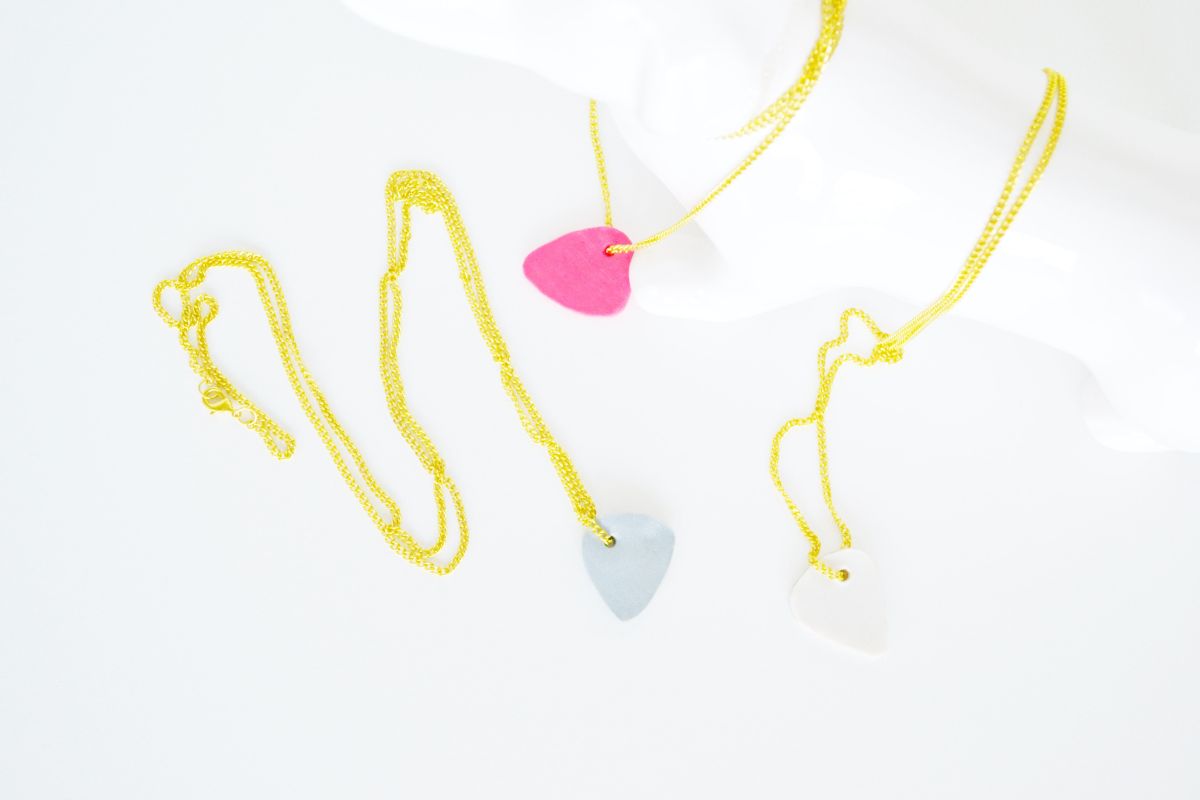
I remember as a kid molding colorful bits of clay in my hand — I felt like I could just about create anything with it. The great thing is, you can. Sculpting clay is super easy to work with — you can let it air dry and harden into a variety of different shapes, you can create erasers from it or you can let it harden by baking it in the oven. The best part about this DIY is figuring out what to sculpt. Here I’ve created a basic guitar pick shape to use as a pendant for a necklace. So grab your sculpting clay and let’s get started.
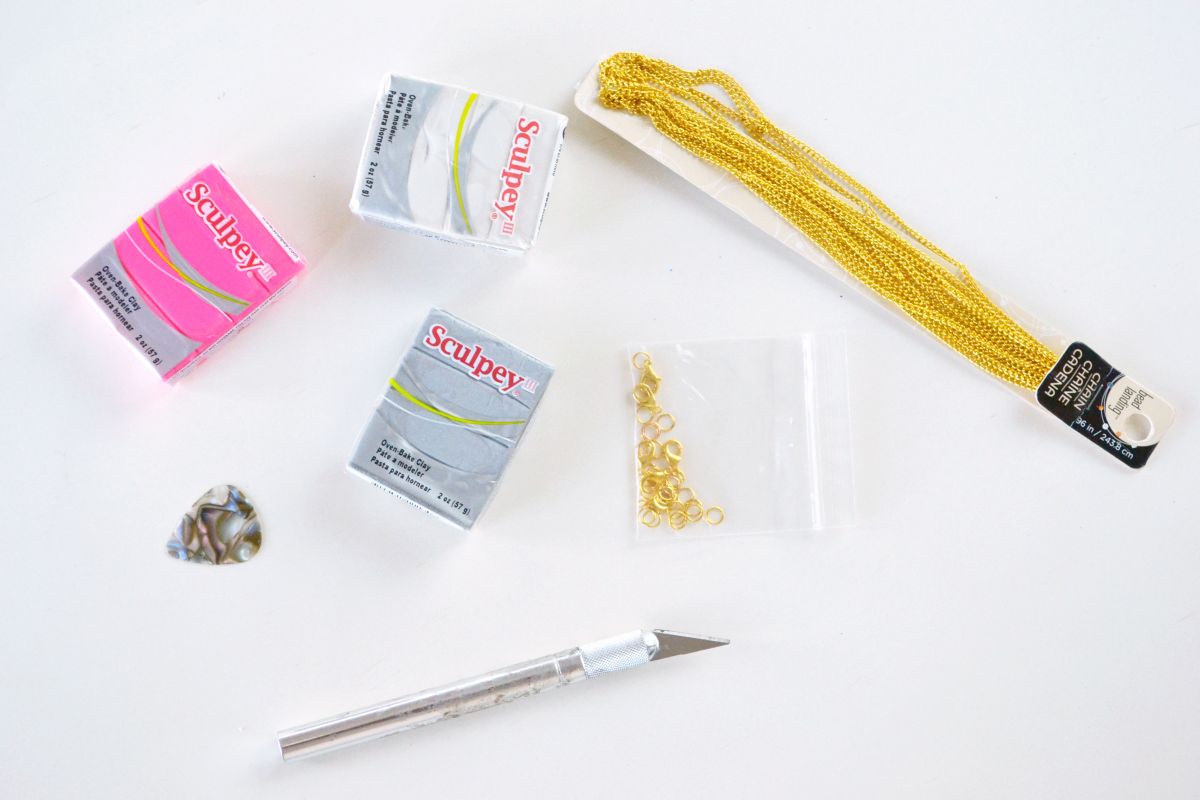
For this DIY, you’ll need:
- Sculpting clay (I’ve used Sculptey for this project)
- Craft knife or clay sculpting tools
- Chain necklace, jump rings and lobster claw fasteners
- Metal baking pan
- Spatula
- Parchment paper or aluminum foil
- Template to create 2-d shape
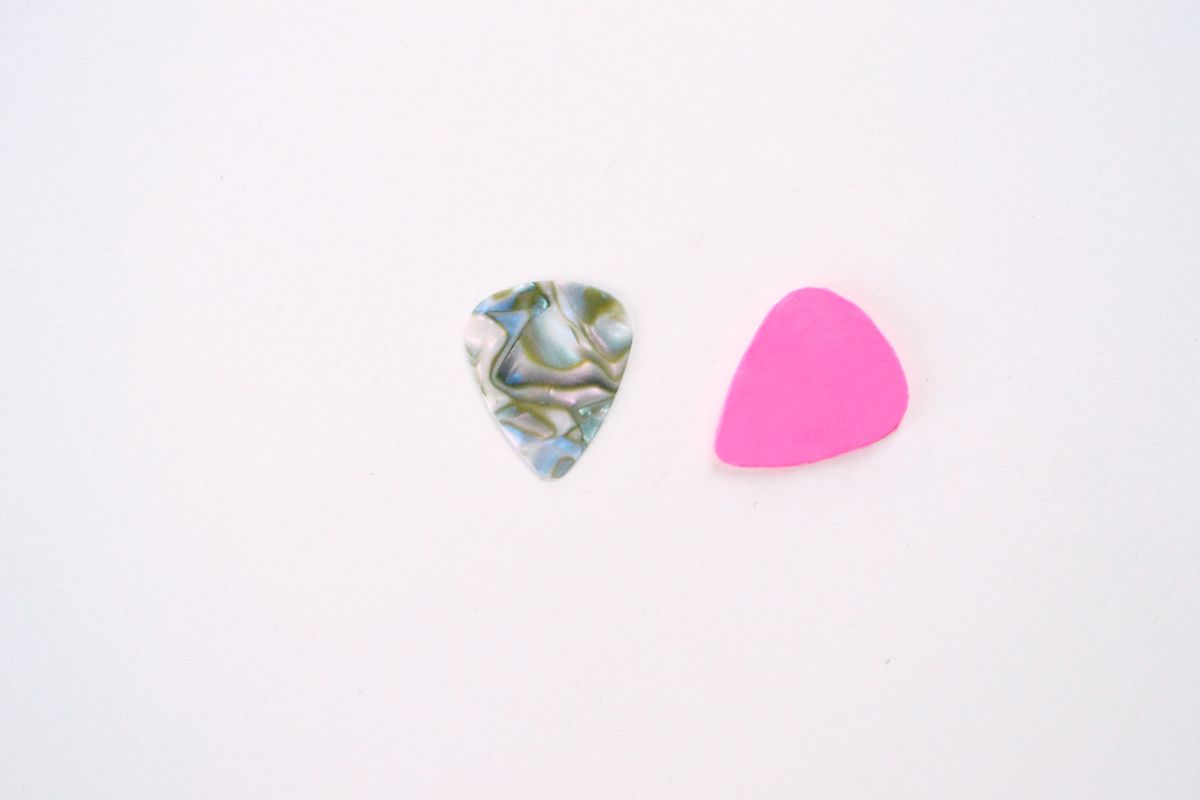
Step 1:First create your 2d templates. You can create a template by drawing a design on cardstock and carefully cutting it out with a craft knife. Here I decided to use my guitar pick as a template. When creating templates, make sure that your design is not complex. Simple shapes and designs make cutting out your pendant a lot easier and less time consuming.
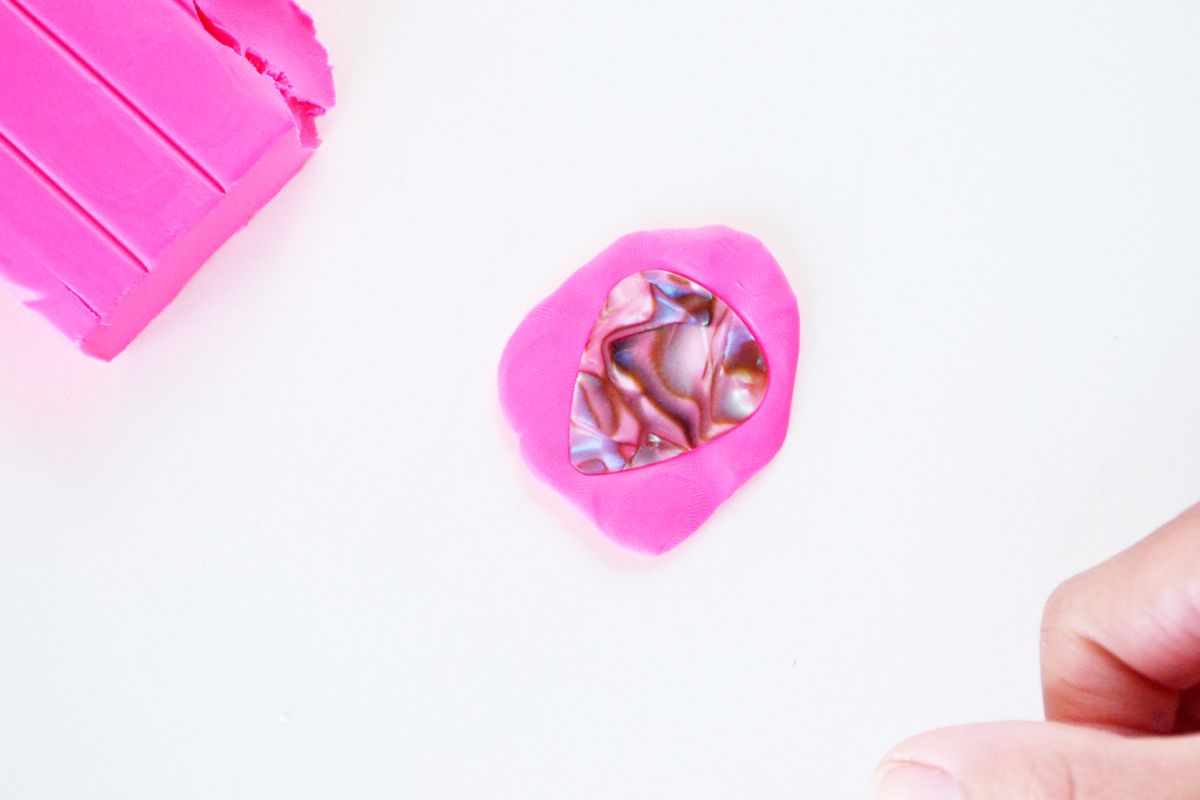
Step 2: Depending on what you’re creating, break off a sizable amount of clay from the larger chunk. For my guitar pick necklace, I only needed a pinch. Make sure that you break off enough to cover your entire template. Flatten the clay to the desired thickness. Use your fingers, or a smooth round tool for a smoother affect.
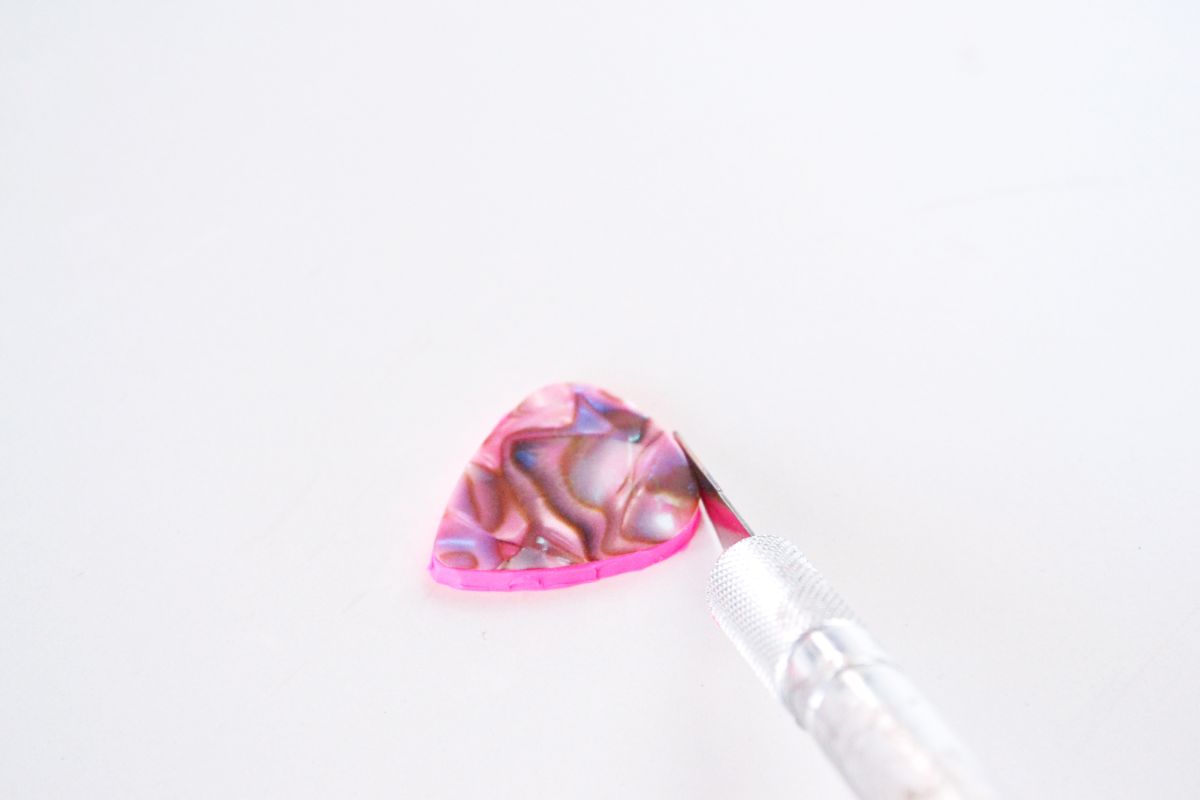
Step 3: Lay the template on top of the clay and carefully cut out the shape with a craft knife or sculpting tool. Use the tool to make sure the top and sides are smooth and neat. This finished piece will be your pendant.
Step 4: Poke a small hole in the clay pendant with a bamboo skewer or similar tool. Make sure the hole is wide enough to accommodate your chain.
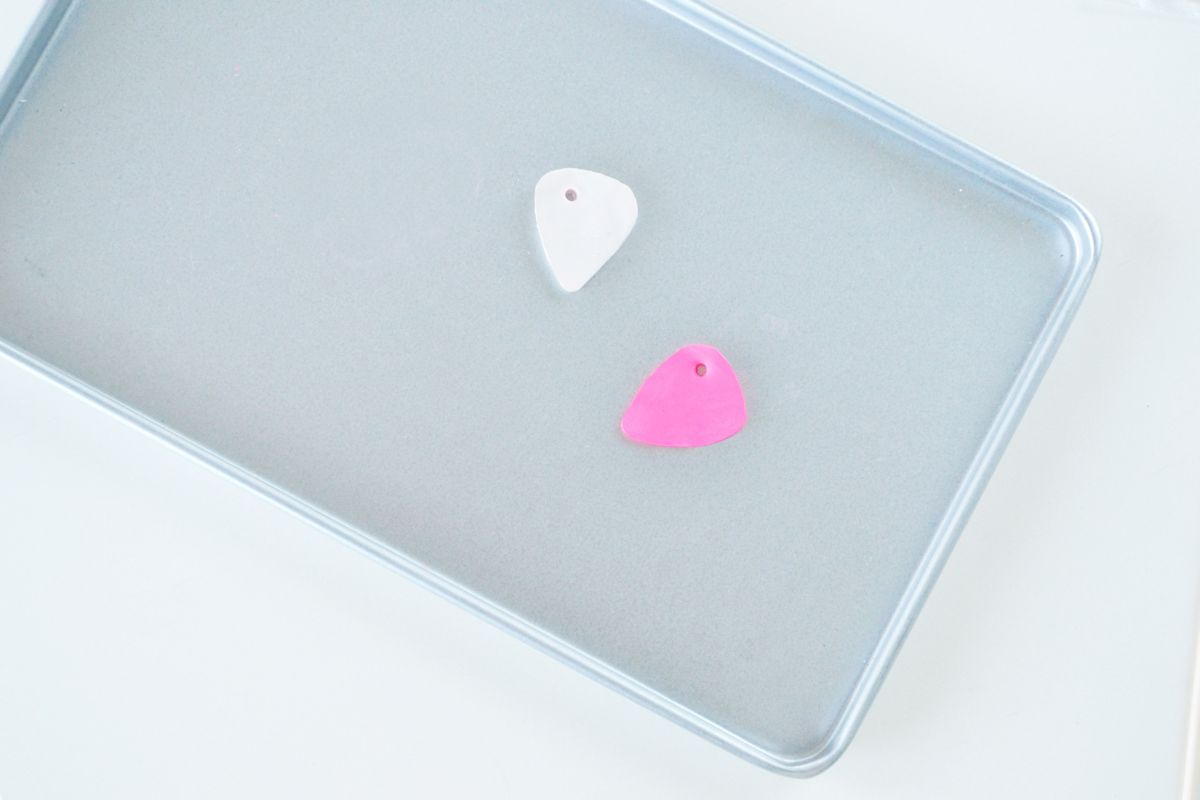
Step 5: Using a spatula, carefully lift and lay your pendant on the baking sheet. You can use parchment paper or foil to ensure that the clay does not stick to the pan. For Sculptey clay, bake the clay at 250 degrees for 20 minutes. For all others, bake according to the manufacturer’s instructions. Do not over-bake as to not scorch the clay. Once it’s done baking, let it cool for 10 minutes.
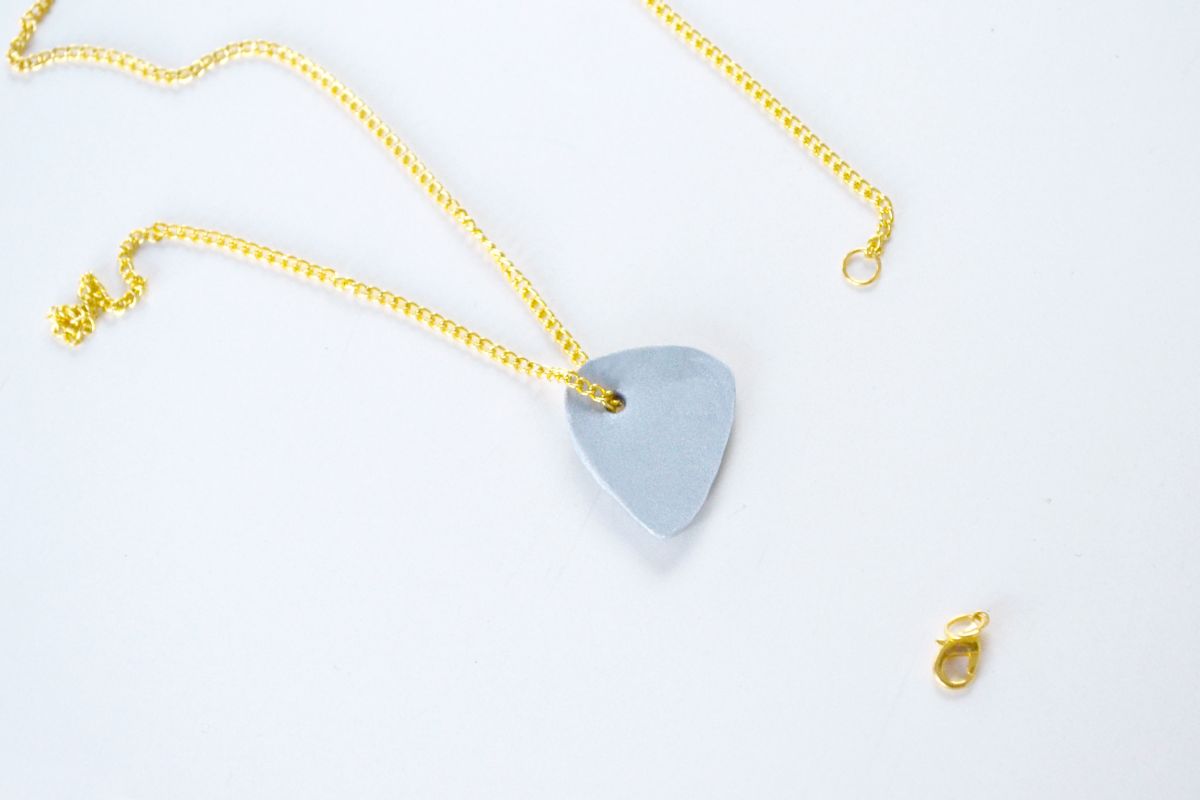
Step 6: String one end of your chain through the hole created in the pendant, before attaching the jump ring and fasteners to the end of the chain. Once the chain is through, attach the fasteners and the necklace is complete.
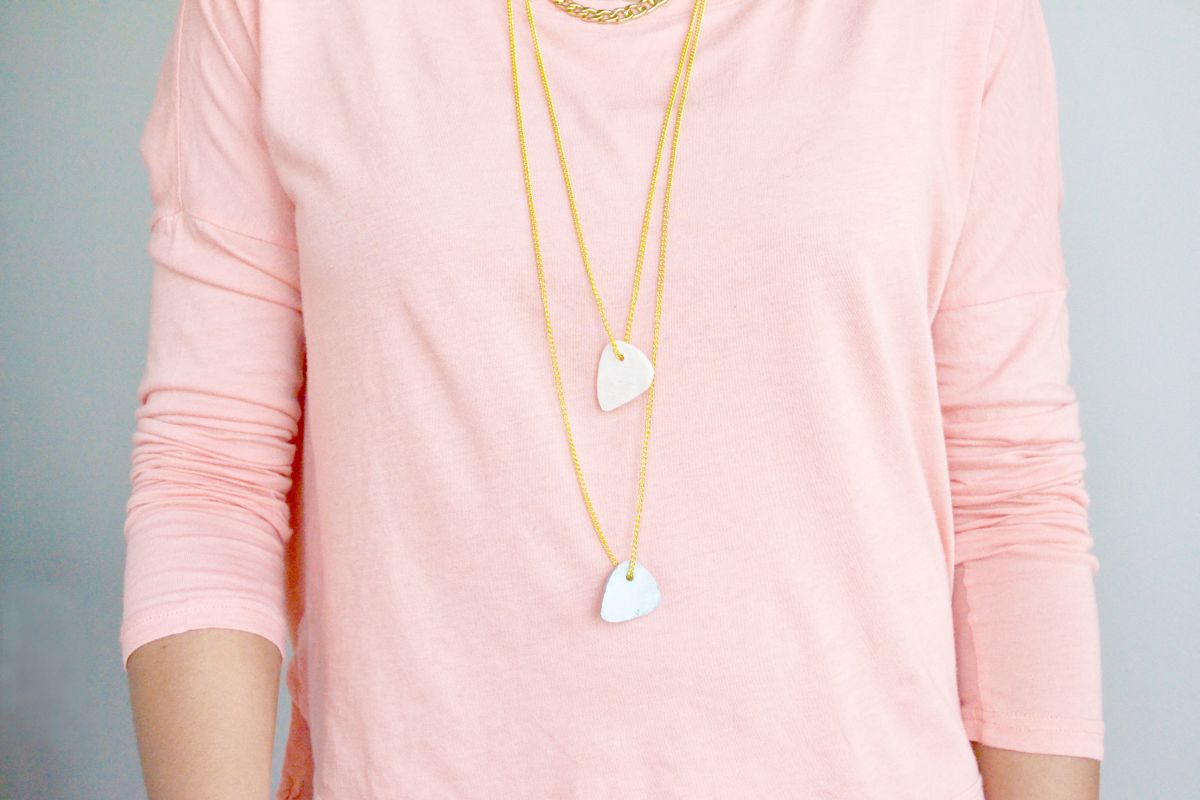
As far as wearing your necklace, style it as you wish! This piece compliments any basic, casual outfit for a day out, but can also pair with a bold tee on a fun night in with friends. And when your friends see you’re new necklace you’ll be able to tell them that you made it yourself with just a few supplies. This fun project is great for adults and kids alike and makes a very entertaining DIY for kid and teen parties!