DIY Woven Necklace
Updated on November 19, 2025
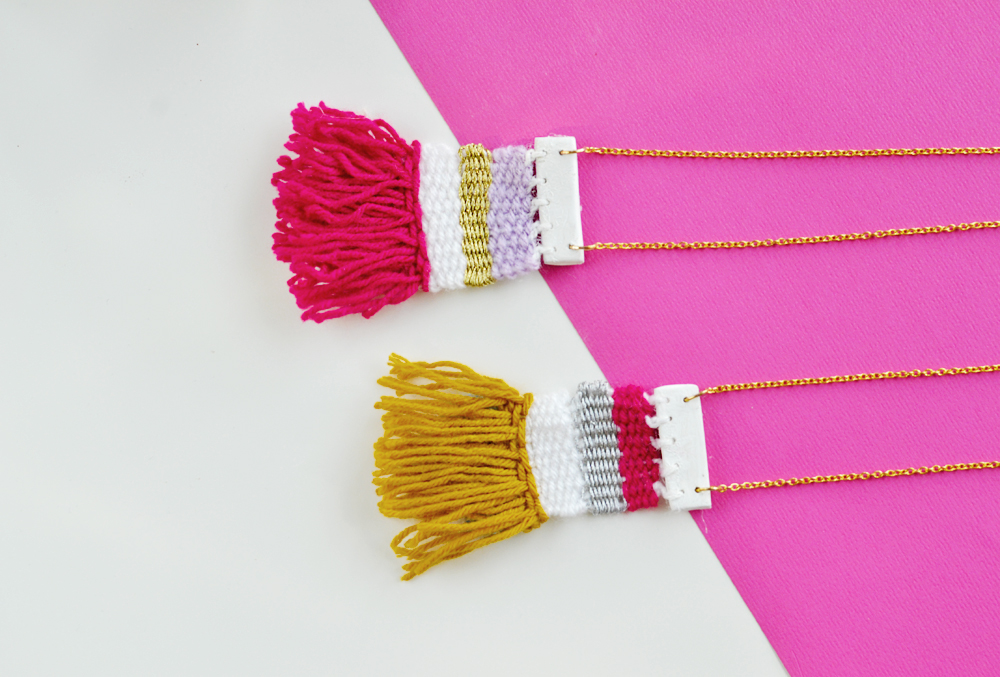
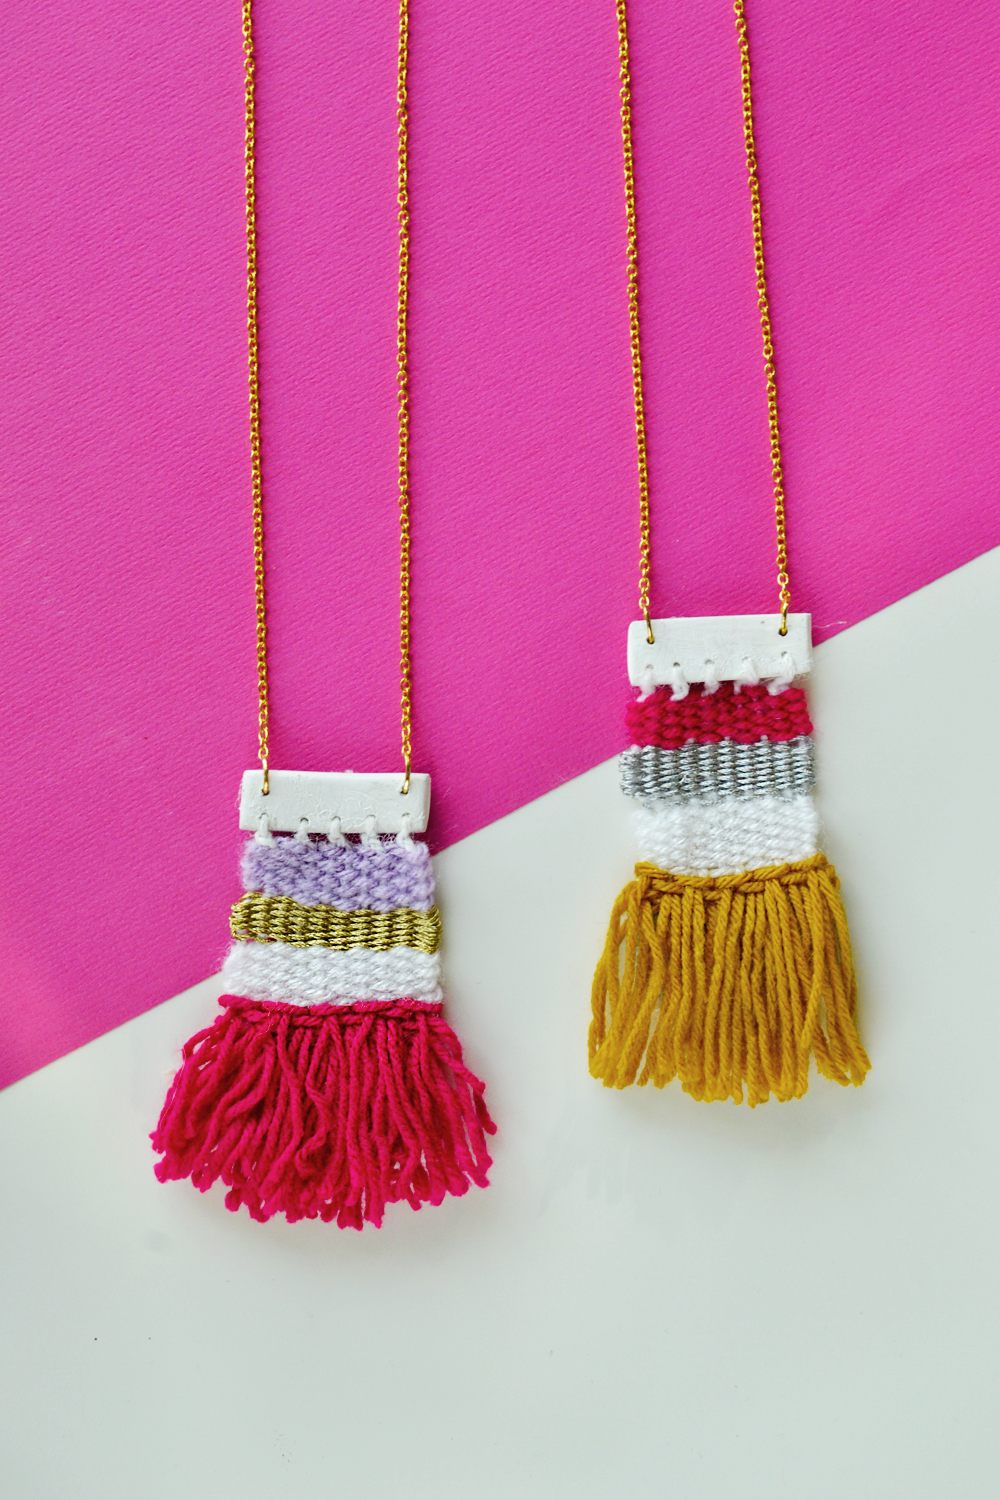
I know weaving is time-consuming and not everyone’s cup of tea, at the least not mine for the time being. But it doesn’t hurt to create a mini woven necklace and proudly wear it, does it? Now that fall is here and holidays are around the corner, you couldn’t get yourself styled better or maybe gift this to someone who is all about weaving!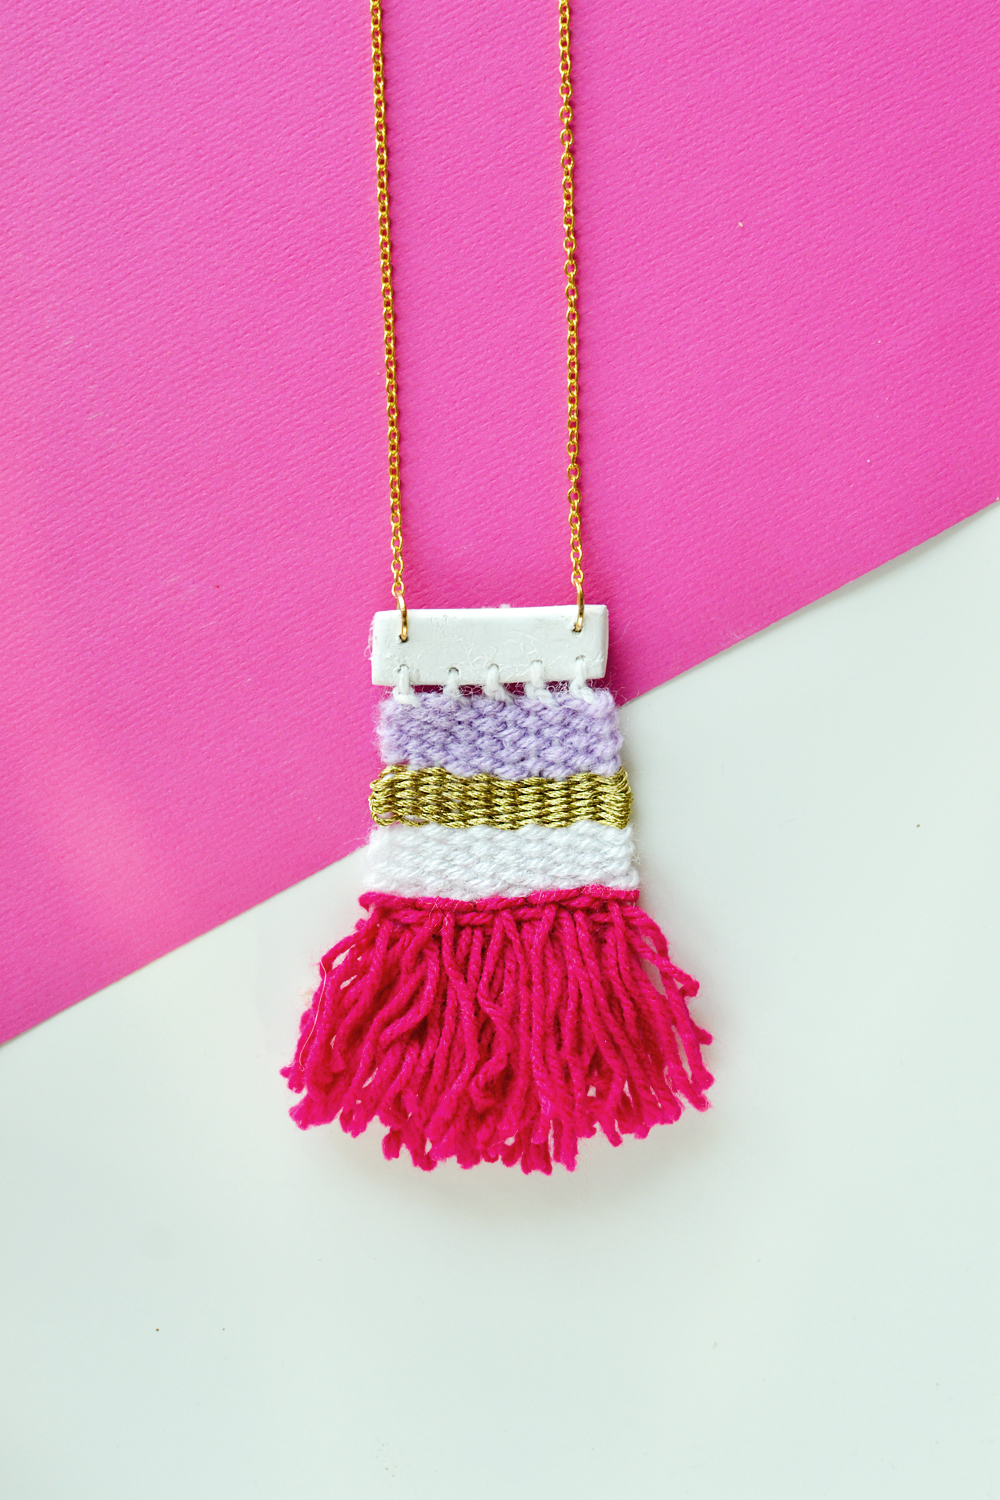 After creating a woven keychain with some wooden beads and yarn, I am hooked up. And all sorts of ideas are overflowing me, but I am taking them down one by one. Watch out! Here I come with a mix of vibrant and subtle colors to give you this mini woven necklace. Oh! And if you are wondering I couldn’t get enough of this beauty so I had to make another.
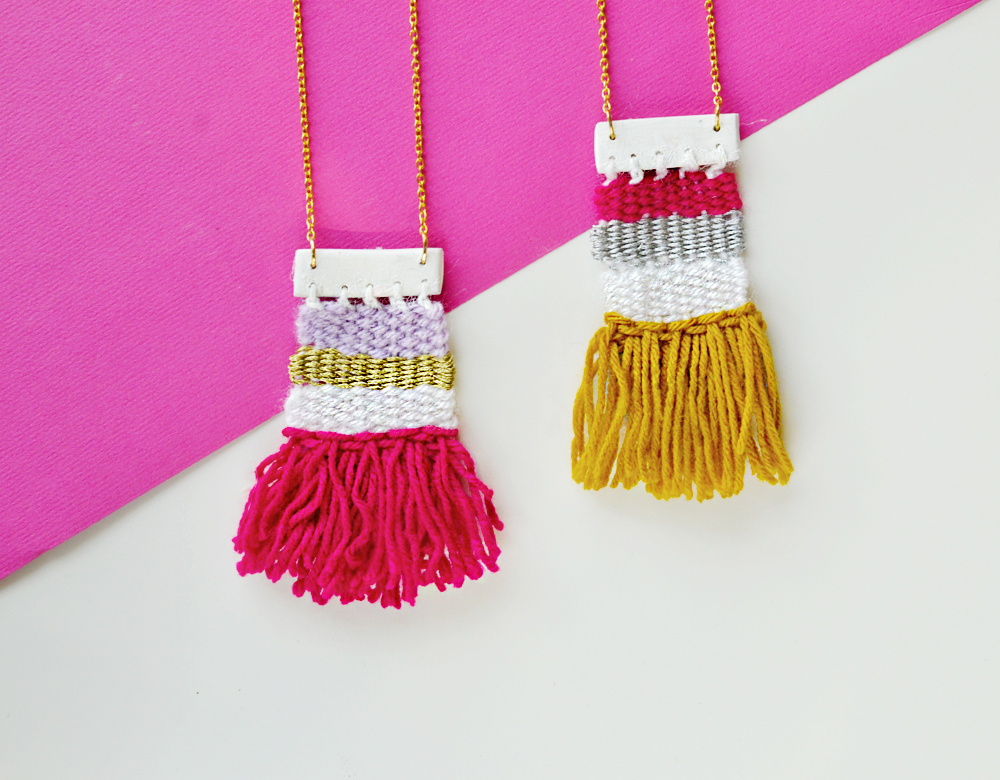 Let’s see what we will need in order to recreate this woven necklace
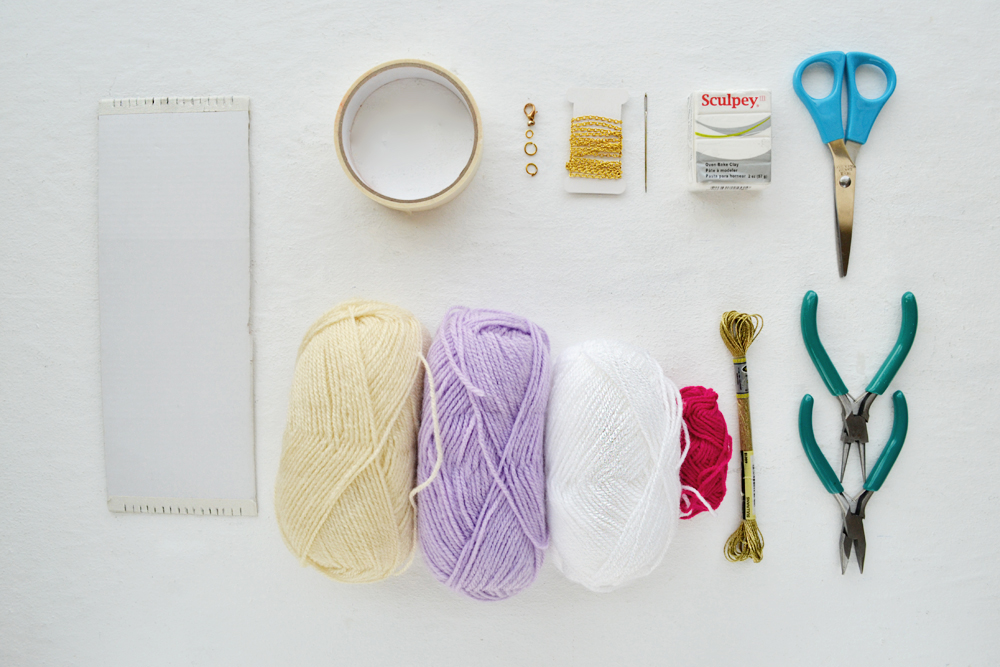
Materials:
- Assorted yarn
- Gold color skein
- Needle
- Piece of cardboard
- Masking Tape
- Scissors
- Keychain findings
- Clay
- Pliers
Steps:
If you want to know how I made this cardboard loom I have covered it here. Begin filling 10 of your notches with a white yarn or better cotton thread. Tape off the loose endings at the rear end of your cardboard loom.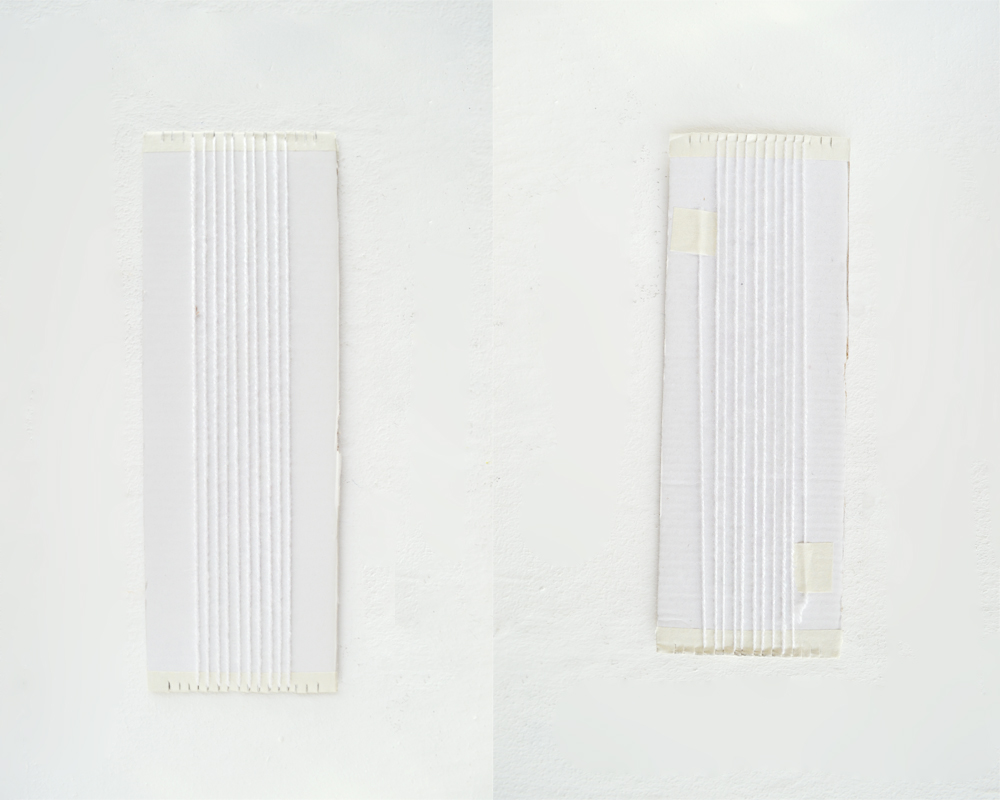 Before weaving, plan what color combinations you want to use and what technique as this will save you time and from undoing your work if you end up unhappy about it. Cut a 1/2 yard of yarn and begin weaving by guiding the yarn with your needle to go “under-over” the vertical thread and when you reach the other end, reverse and go under if your previous one is over and vice-versa. Make sure to keep a tail of 5′ inch of yarn loose, which you will later need to knot and tuck at the rear end of your work so that it stays on place.
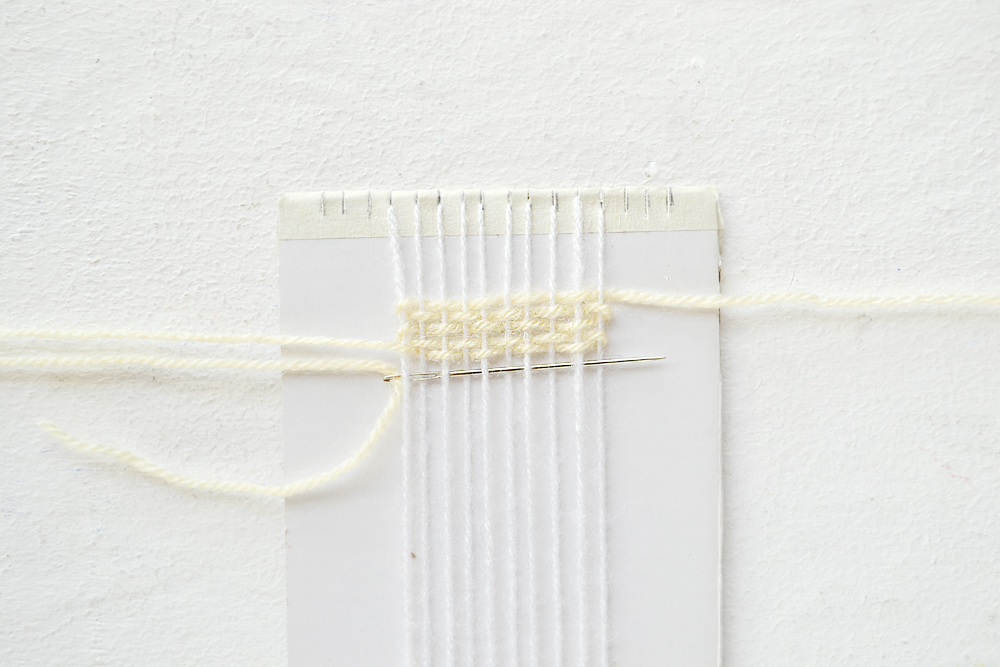 Now we use the rya technique to get the fringe look that we desire. Note that I am starting backwards which means that the fringe will end up at the bottom. To begin with, cut a bunch of 20-30 pieces of 4′ inch yarn. Take a piece of yarn and put it on top of two vertical threads like so and slide the ends from beneath so now the endings are facing towards you. Continue doing so until you finish this row, now for the next set of rows you’ve got to leave one thread and from the second one onwards begin creating the fringe following the same steps.
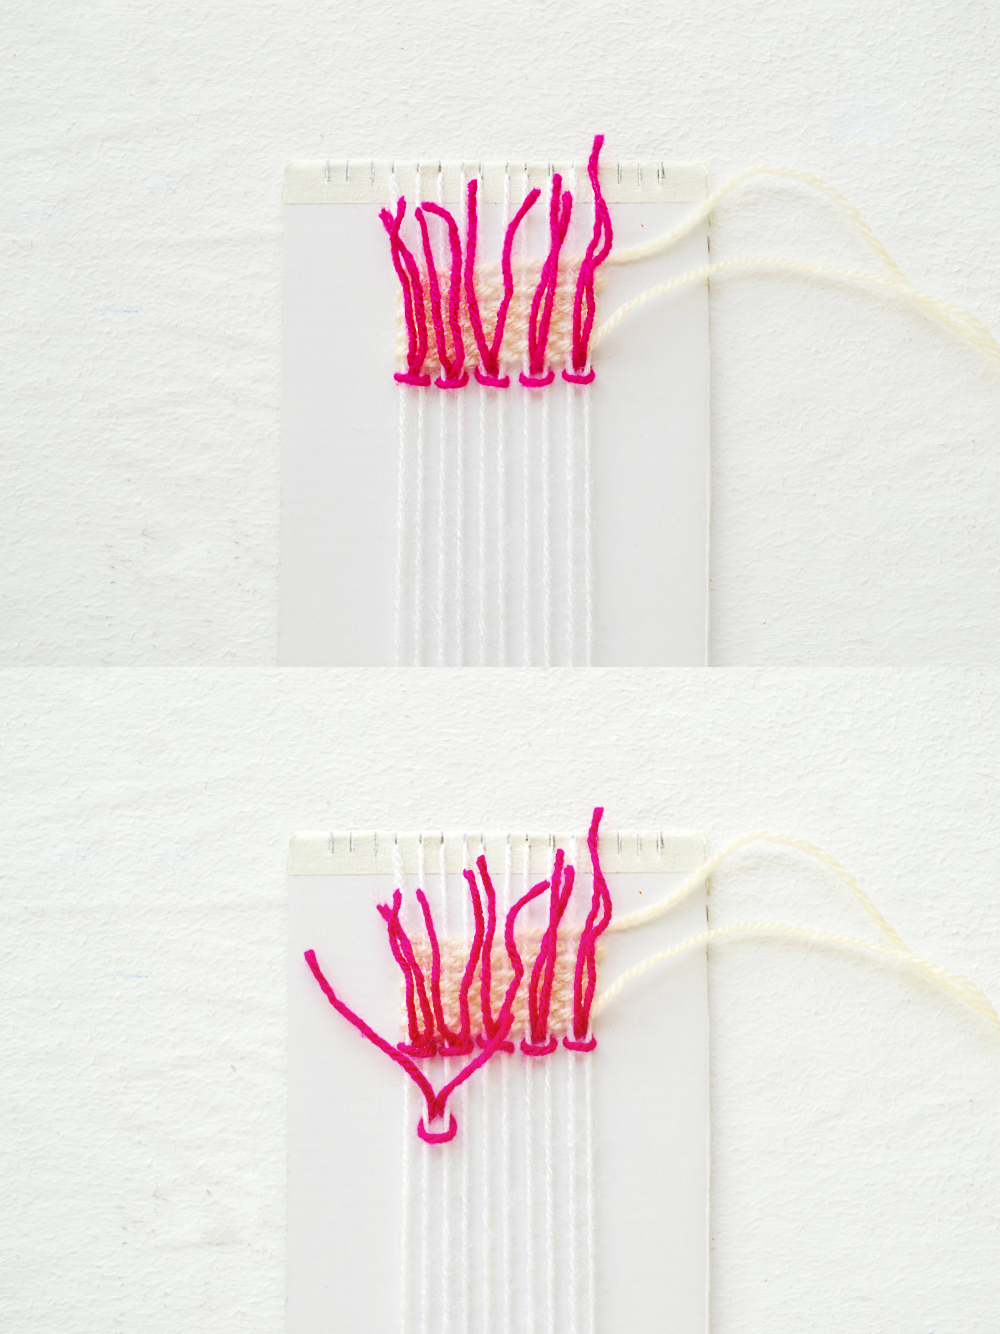 Weave a number of rows with the color of your choice using the same method of going “one under and one over” until you are satisfied with your design.
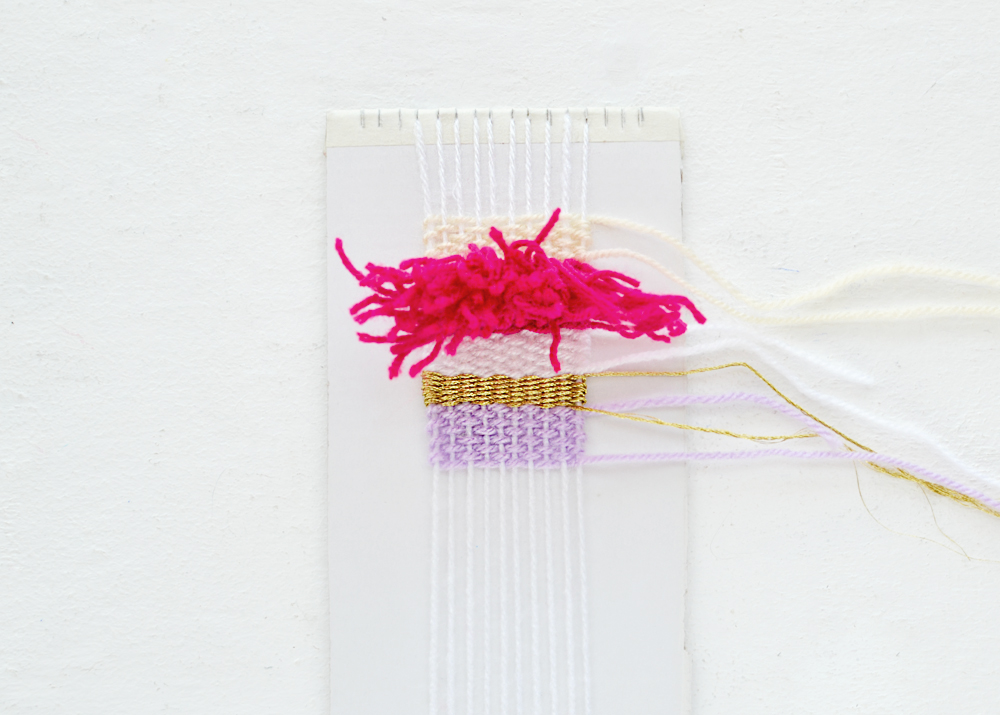 Cut the thread from behind and remove the vertical threads one by one carefully. Tie a knot with two adjacent threads to close off your work and strengthen it with a second. Trim off your fringe for an even look and tie the loose ends and insert them behind your work.
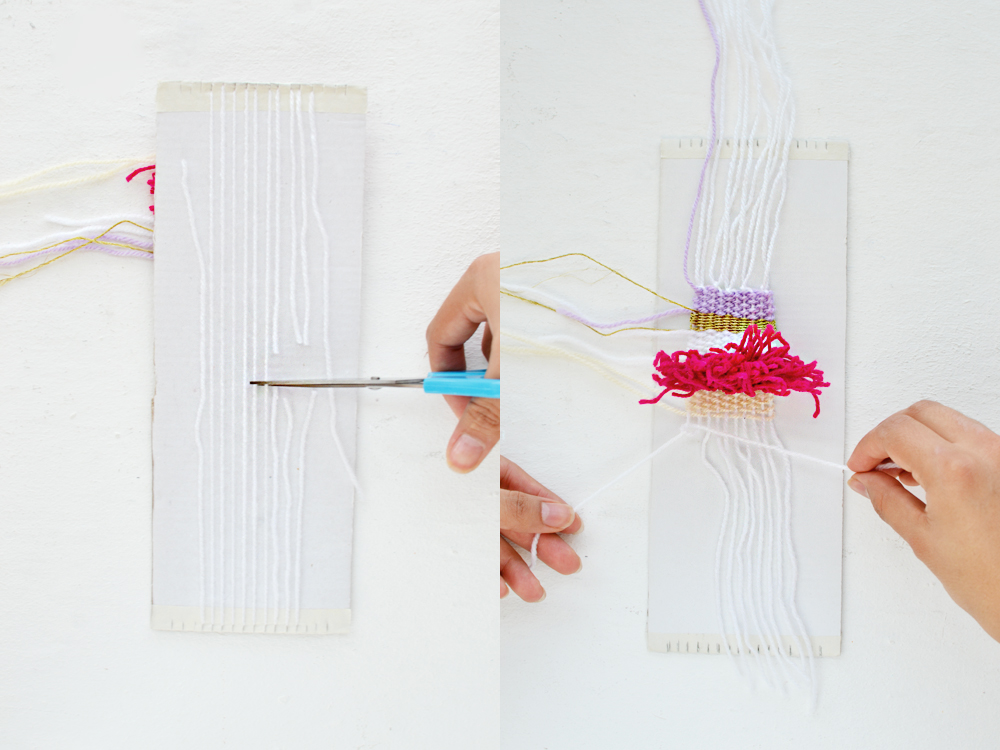 Cut a piece of clay and place over your work to mark the endings with a needle ( later on push a toothpick as the bigger the holes the easier to insert the yarn ). Bake your clay as per the instructions of the package. After the clay has cooled down, you can now insert the loose endings through the designated holes and finish it off by inserting the chain with the help of your pliers. And now you can proudly wear your woven necklace or little carpet that’s what my mum likes to call it.
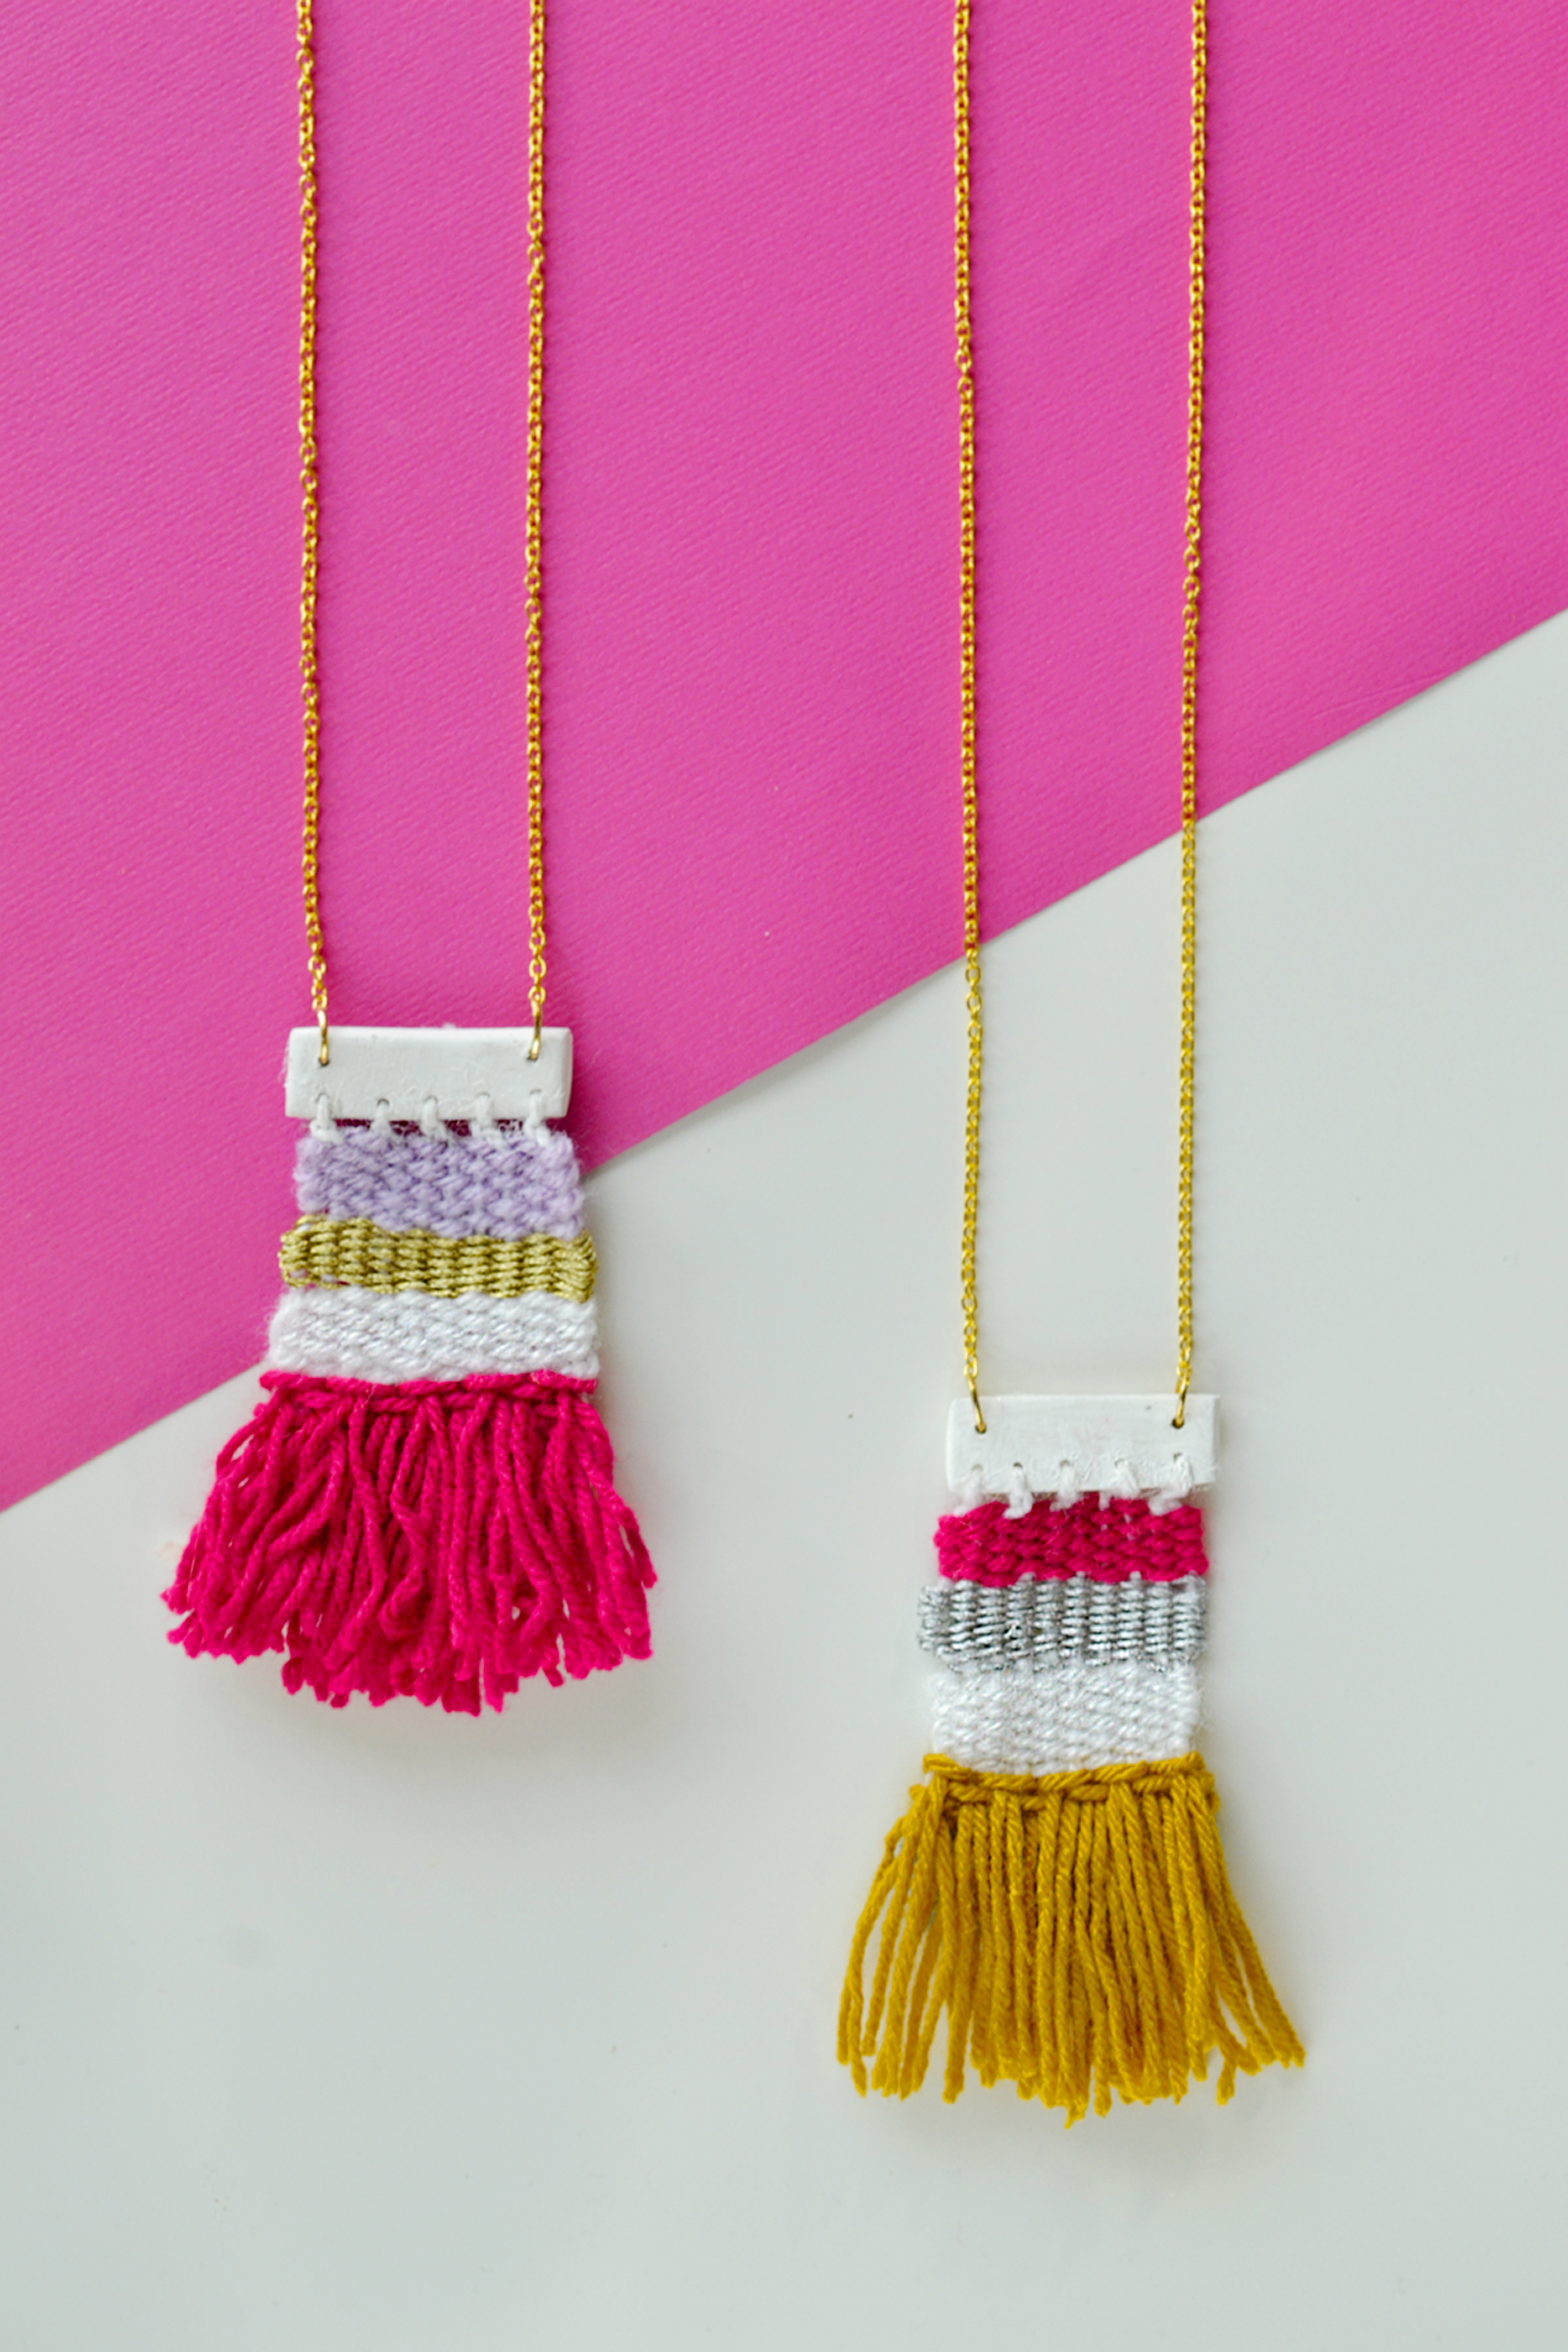
 So wasn’t this easy? Sincerely, if it weren’t for choosing a design because you can literally add just about anything and any color, I would have whipped this up in only a few hours. But, luckily you don’t have to go through the hurdle if you choose to do what I did. By making this necklace I have passed the litmus test and I think I will be able to weave in future and all the negativity surrounding the idea of weaving has left me for good.Let me know if this was helpful and would you make one for yourself or maybe gift it to someone special.
Beautiful! This is such a lovely craft idea and would make such a fabulous gift for friends. So much better than shop bought. Thank you for sharing, off to pin & share, hugs xx