DIY Popsicle Stick Angel Ornament
Updated on November 19, 2025


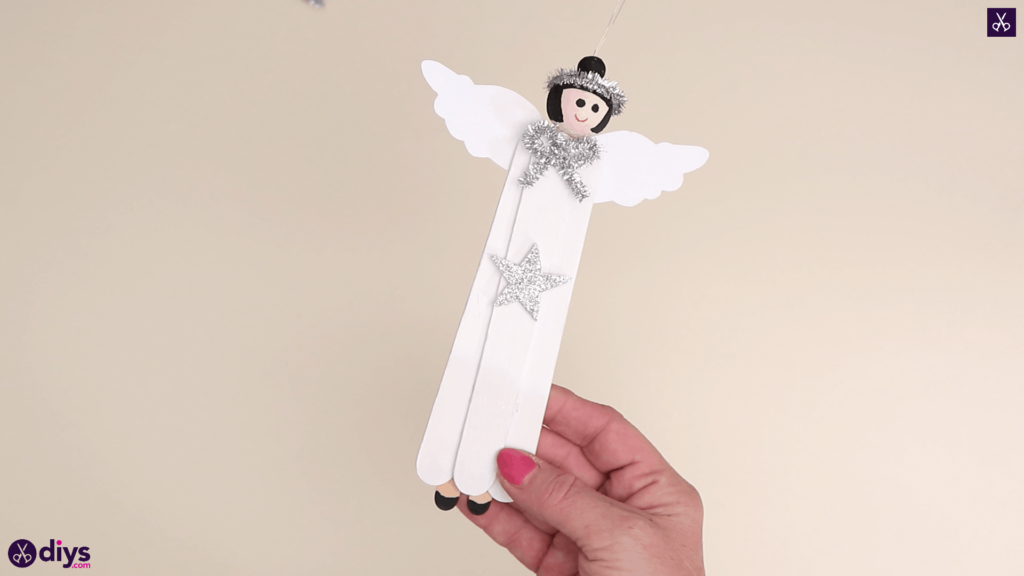
Ever since I was a little kid, I’veloved crafting with popsicle sticks. There’s just something so simple and pleasant about it. Now that I’m a parent, I love doing popsicle stick crafts with my kids because they’re always simple enough that they can manage almost entirely by themselves, but we still have a blast doing them all together. That’s how these adorable three-stick angels came about last week when we all sat down to do some Christmas crafting on a chilly afternoon! I was actually so happy with how they turned out that I made another one and documented the process for other people to see as well.
Check out these step by step instructions complete with photos! If you’d rather follow along with a video tutorial instead of written words, scroll to the bottom of this post to find just what you’re looking for.
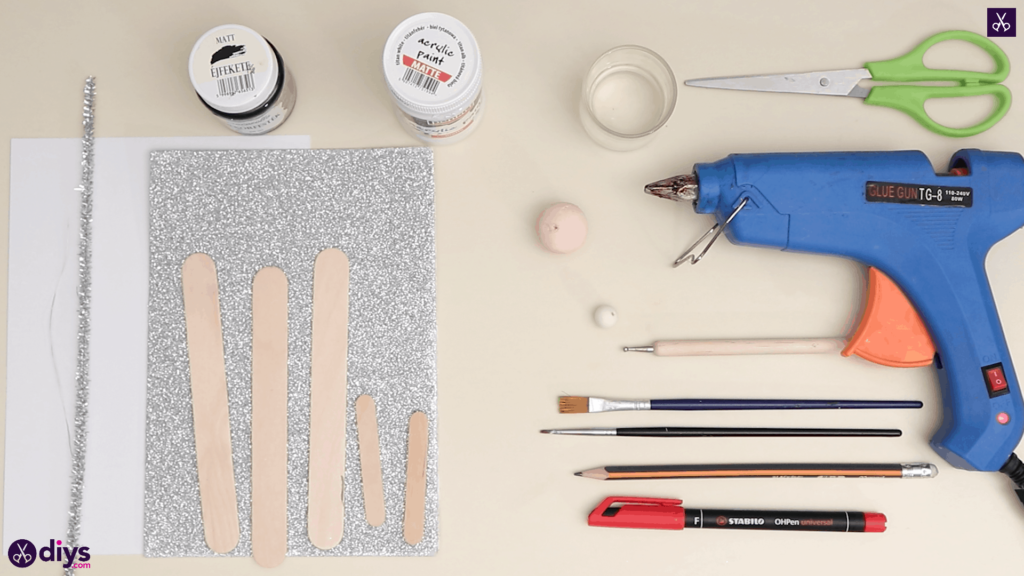
For this project, you’ll need:
- Five popsicle sticks (three big and two small)
- Paint (white and black)
- Paintbrushes (a larger flat one and a smaller pointed one)
- Scissors
- Hot glue
- A pencil
- A red marker
- Spun cotton balls (one big and one small)
- A dotting tool
- A silver pipe cleaner
- Silver foam paper
- White paper
Step 1: Gather your materials!
Check your list and get everything you need together.
Step 2:
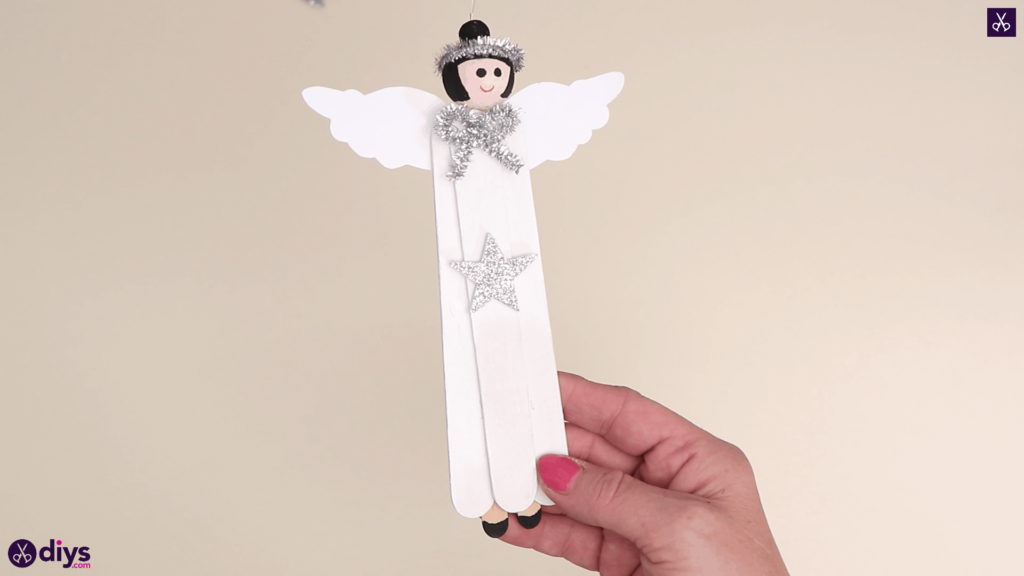
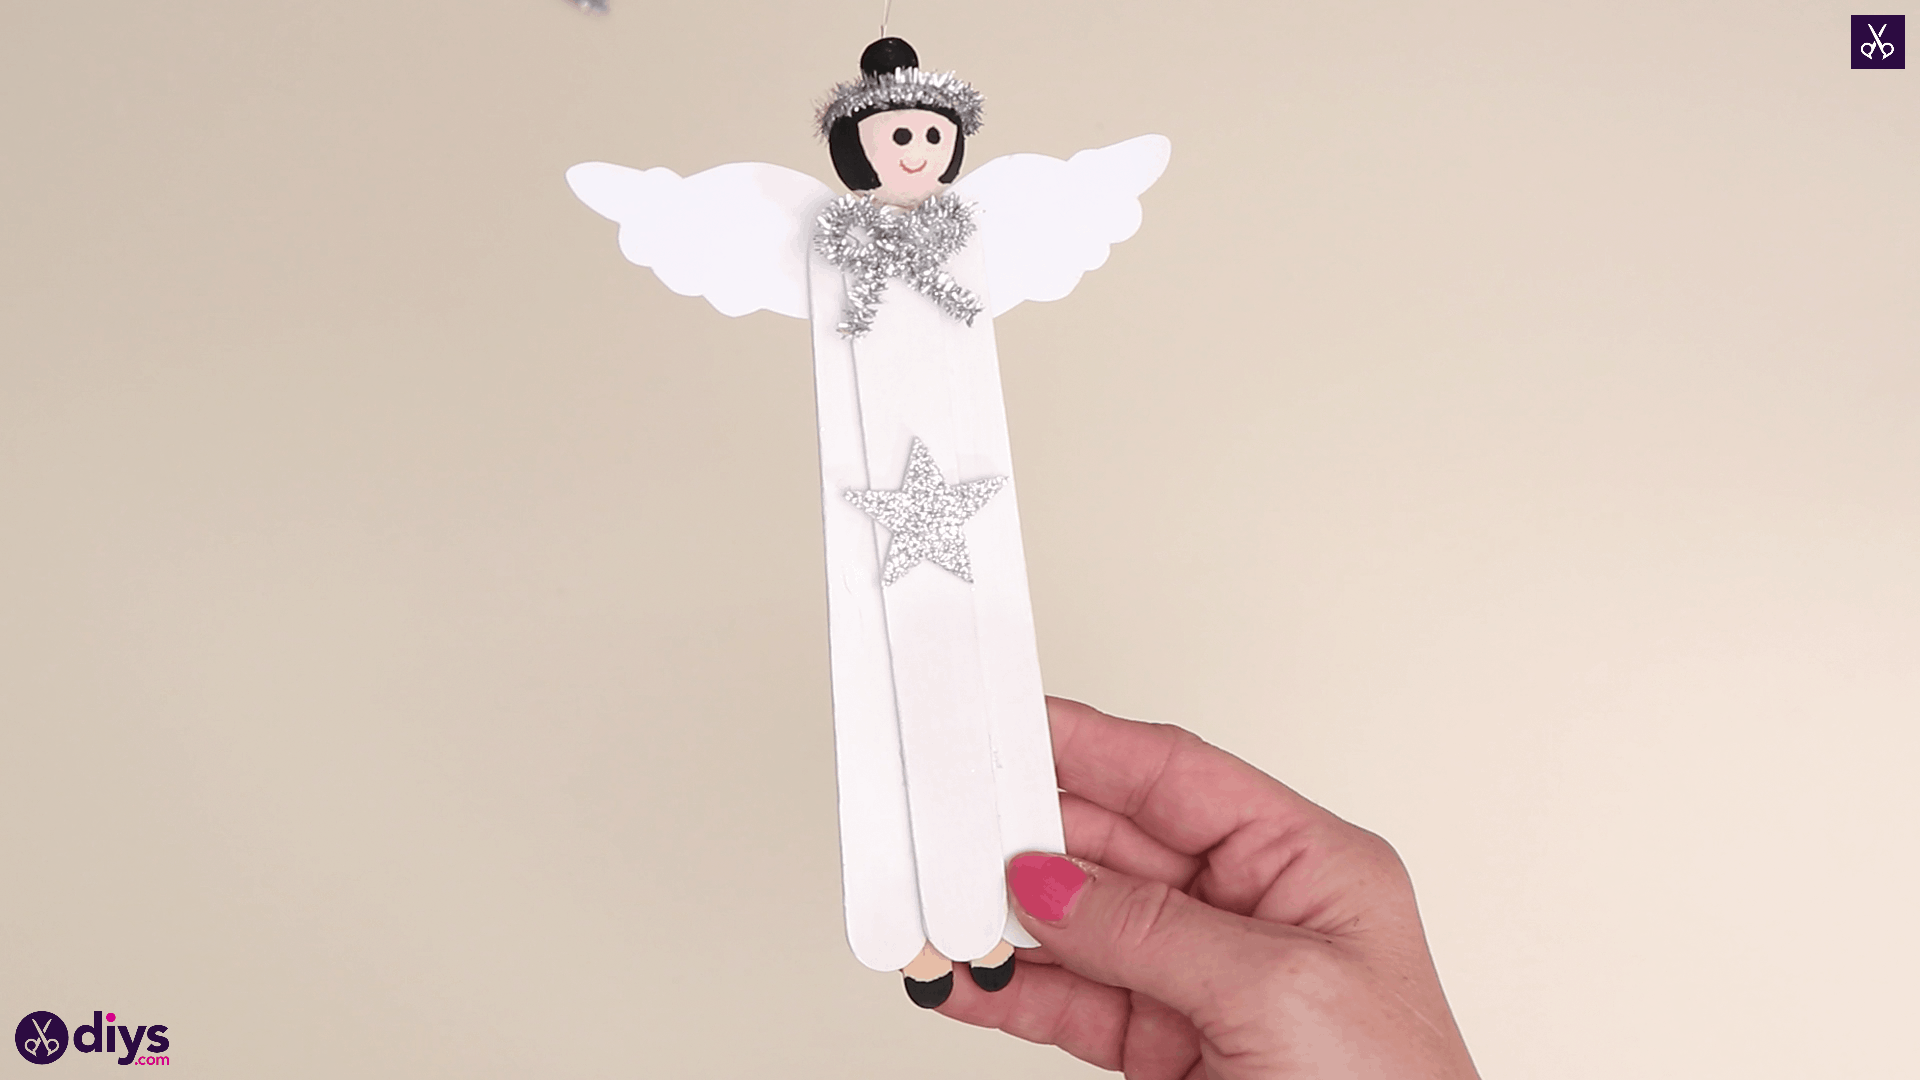
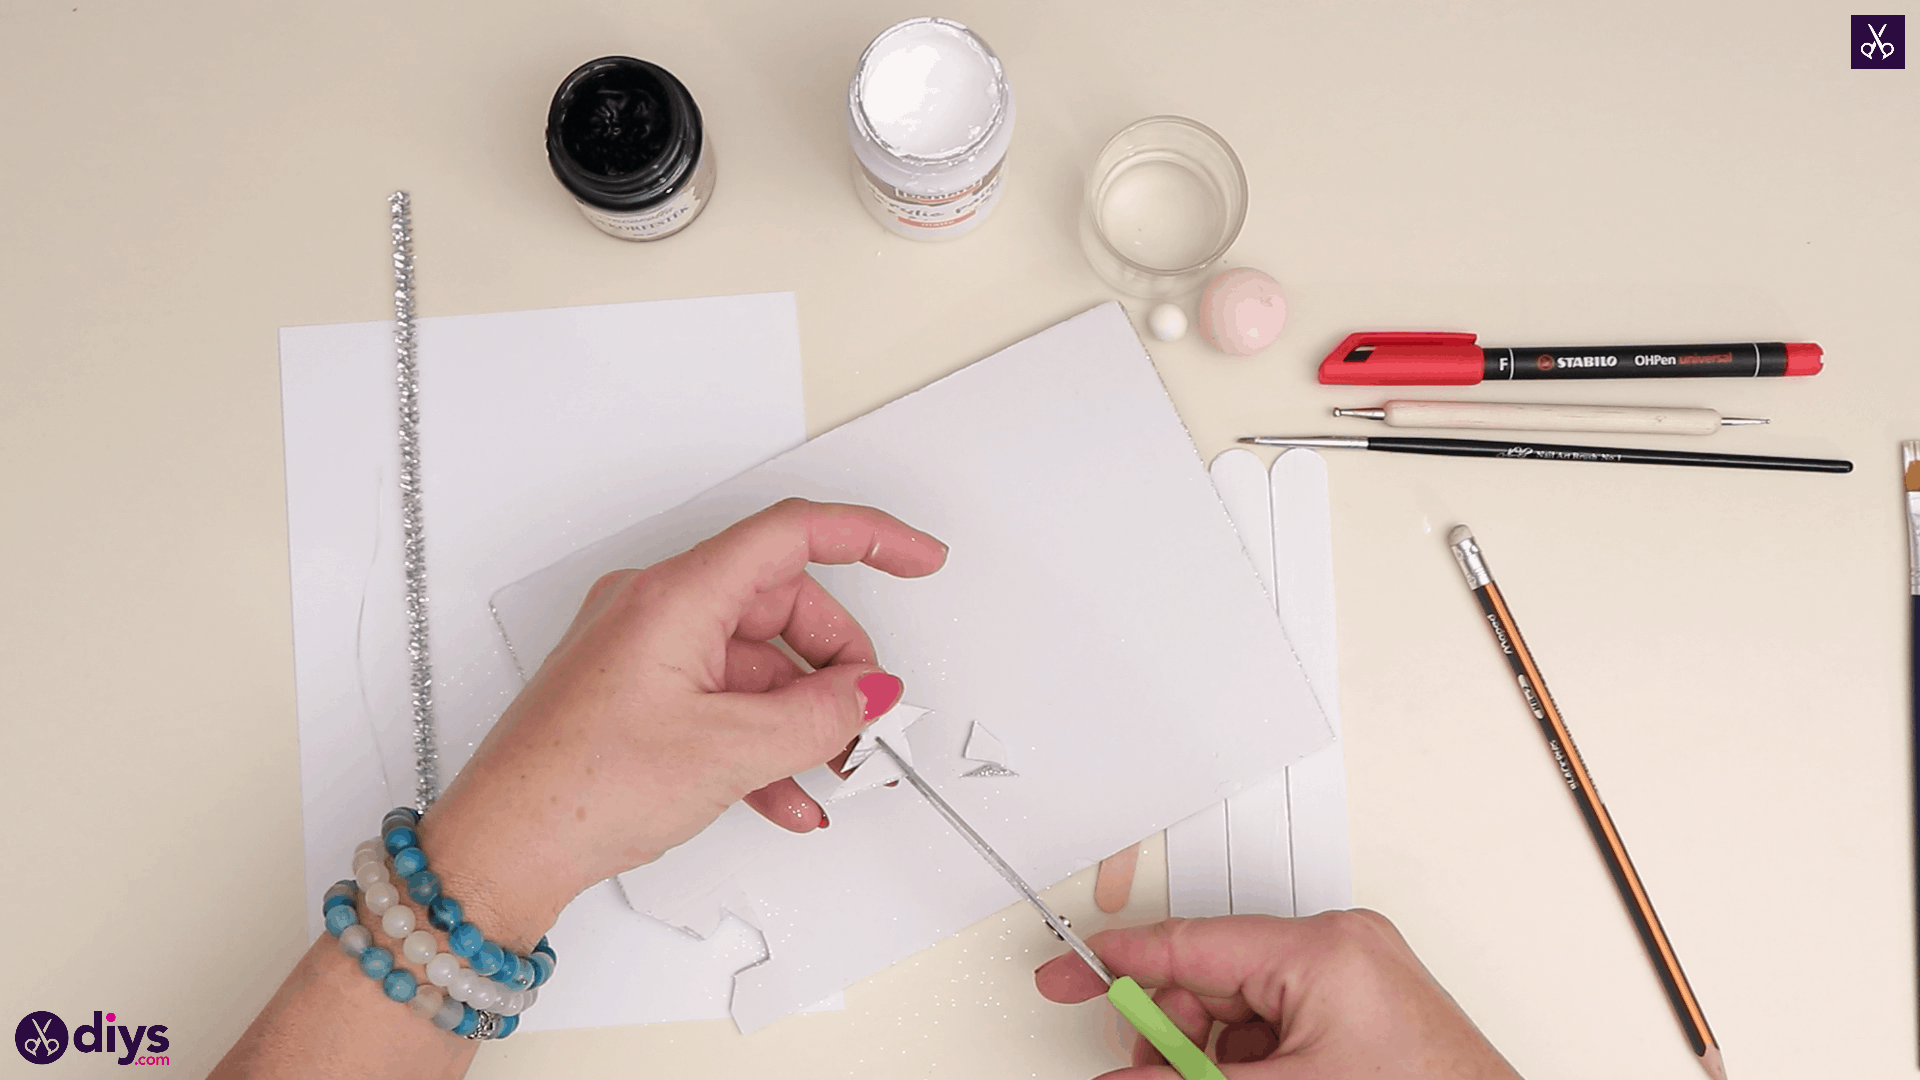
Use your larger paintbrush to paint your three bigger popsicle sticks entirely white on both sides. Next, flip your silver foam paper over and use your pencil to draw a star shape on the back side. Cut it out and set it side for later.
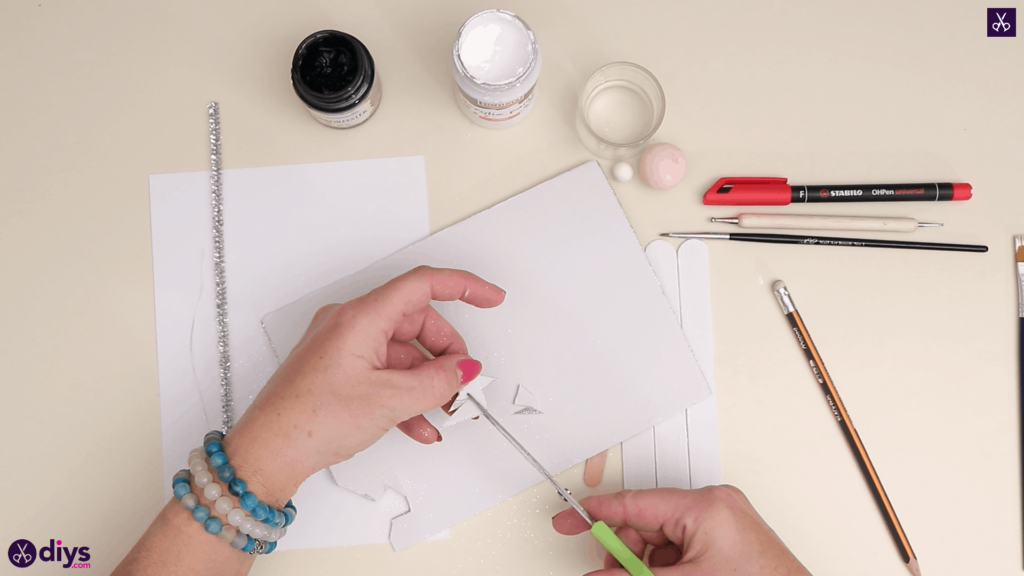
Step 3: paint sticks white
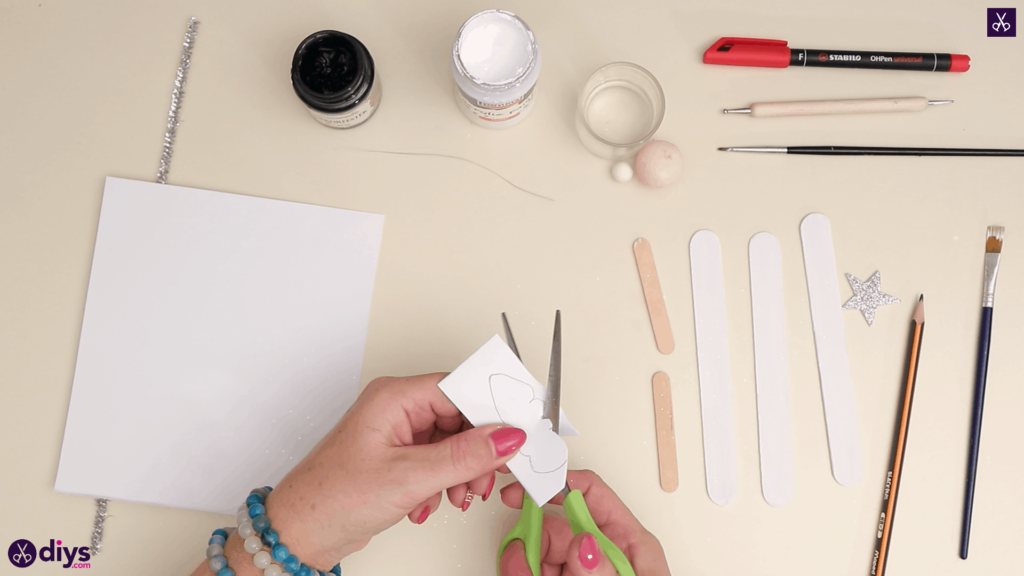
Use your pencil to draw a wing shape on your white paper. Cut out a rectangle around your wing but that is double the length of the wing, so the wing sits at the bottom of the strip and you have excess paper beyond that. Fold this piece in half, bending the top edge back so it meets the bottom edge, with your wing in the middle of the front surface. Cut out the wing shape, making sure your scissors pass throughboth layers of your folded piece. At the end, you’ll have two wings instead of just one.
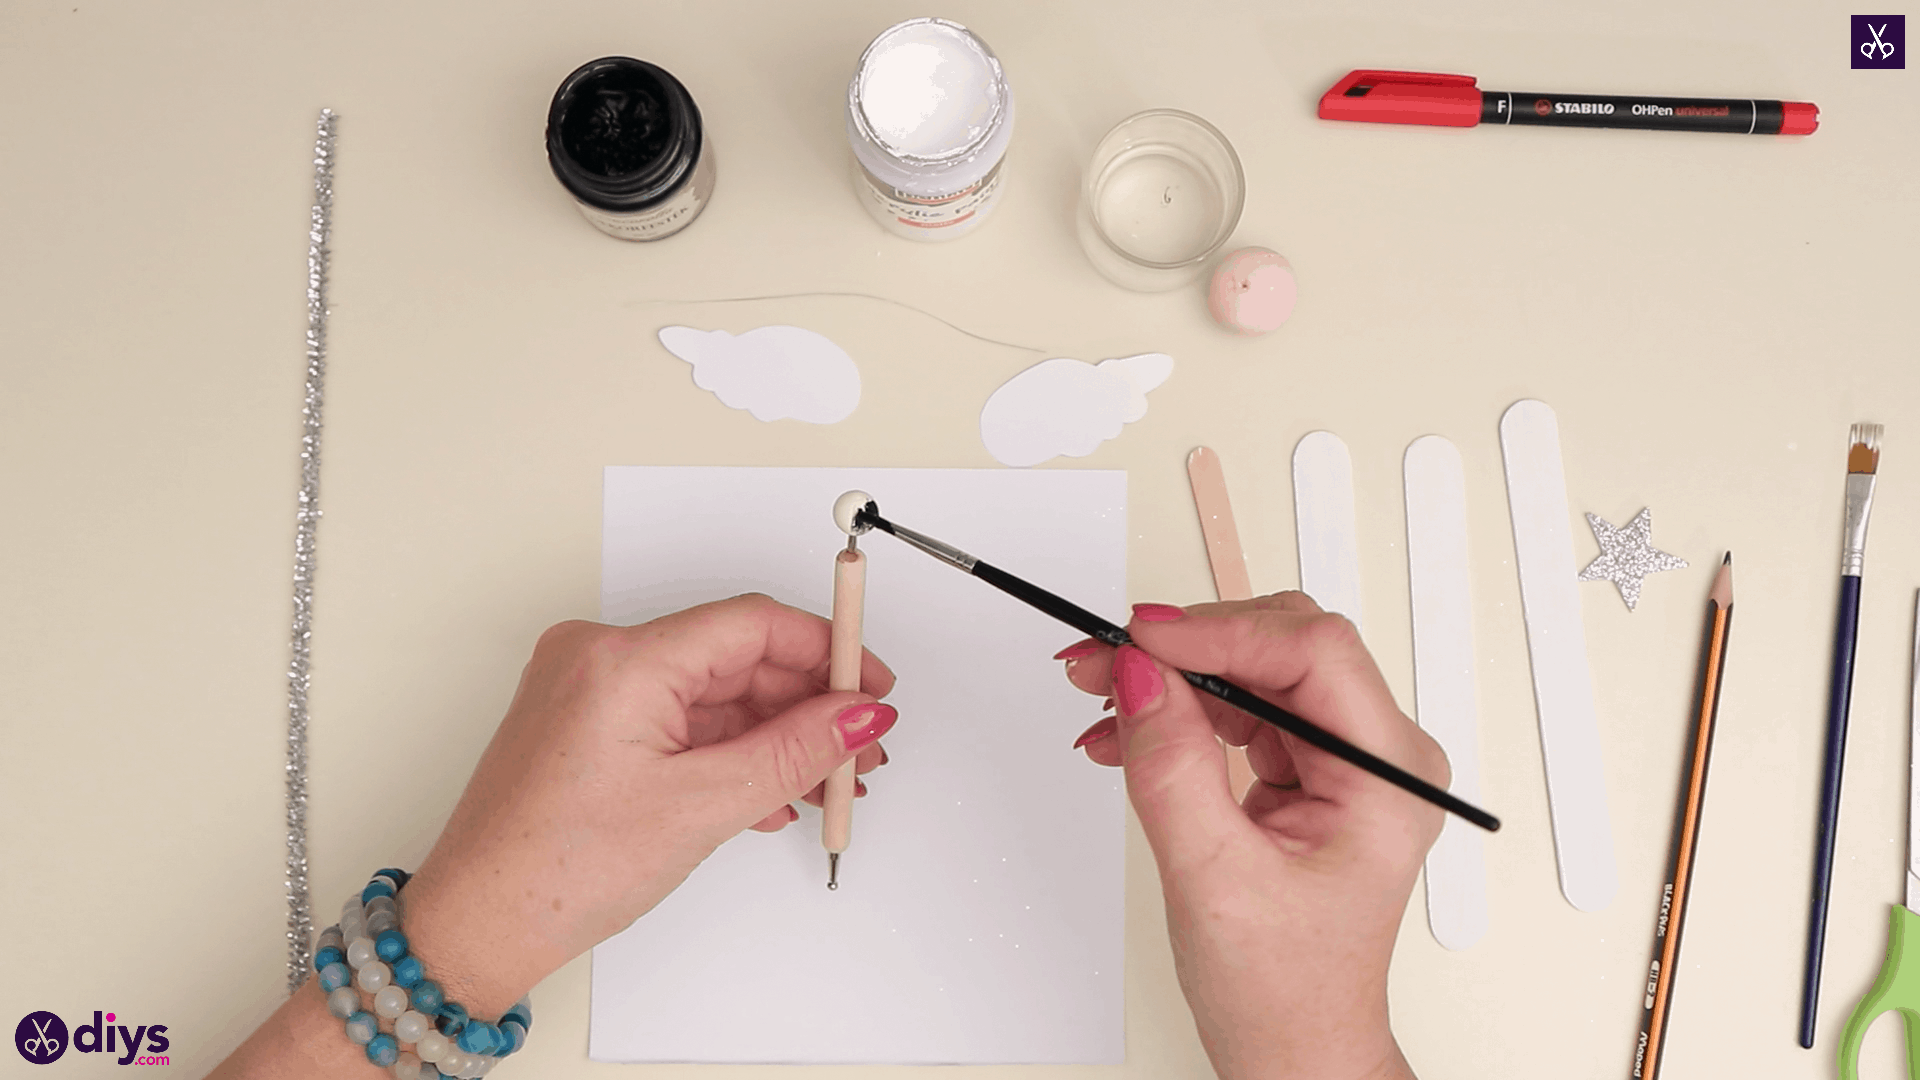
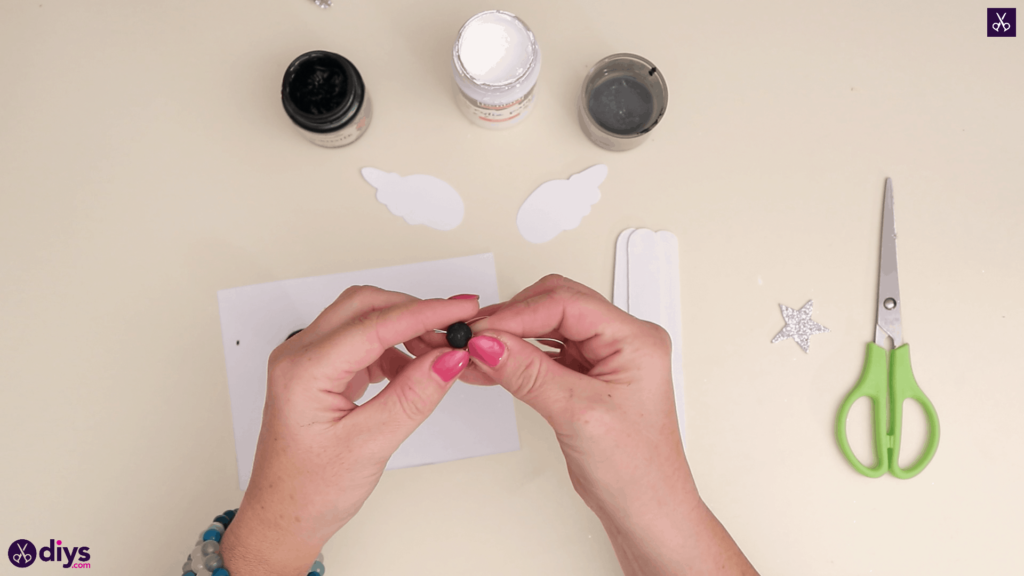
Step 4: paint the bun
Place your smaller spun cotton ball on the end of your dotting tool and use that to hold it still while you use your pointed paintbrush to paint the ball entirely black. This will be your angel’s bun. Set it aside to dry.
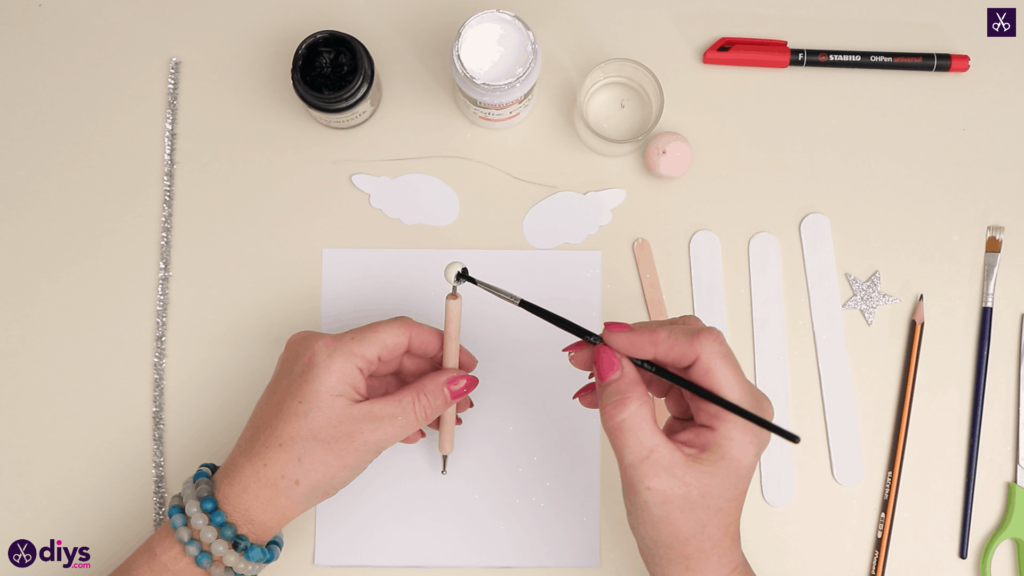
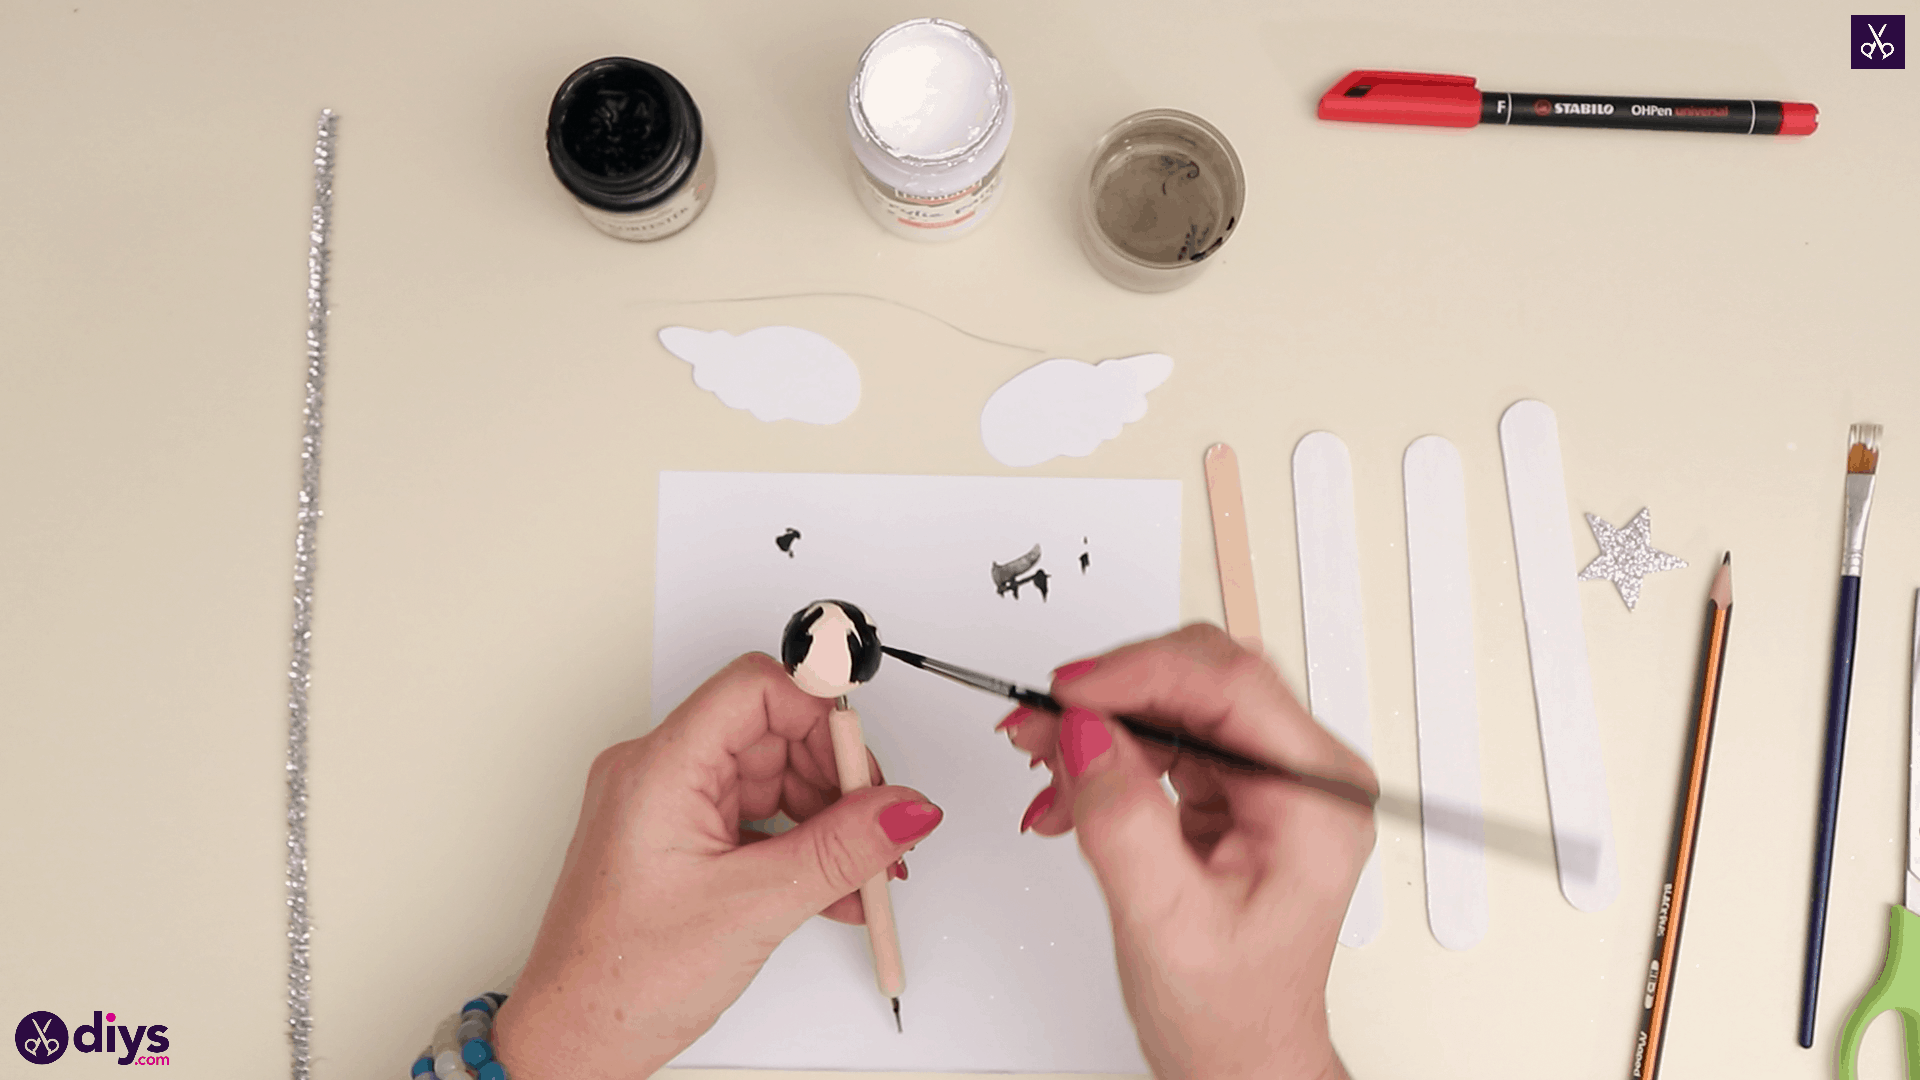
Step 5: paint the head
Swap your small spun cotton ball for your larger one on the end of your dotting tool and use the same paintbrush to give your angel’s head some hair. I painted the entire back of the ball black but rounded the edges off in a wave around the front to look like bangs and a hairline framing the angel’s face. Set the ball aside to dry with your first one.

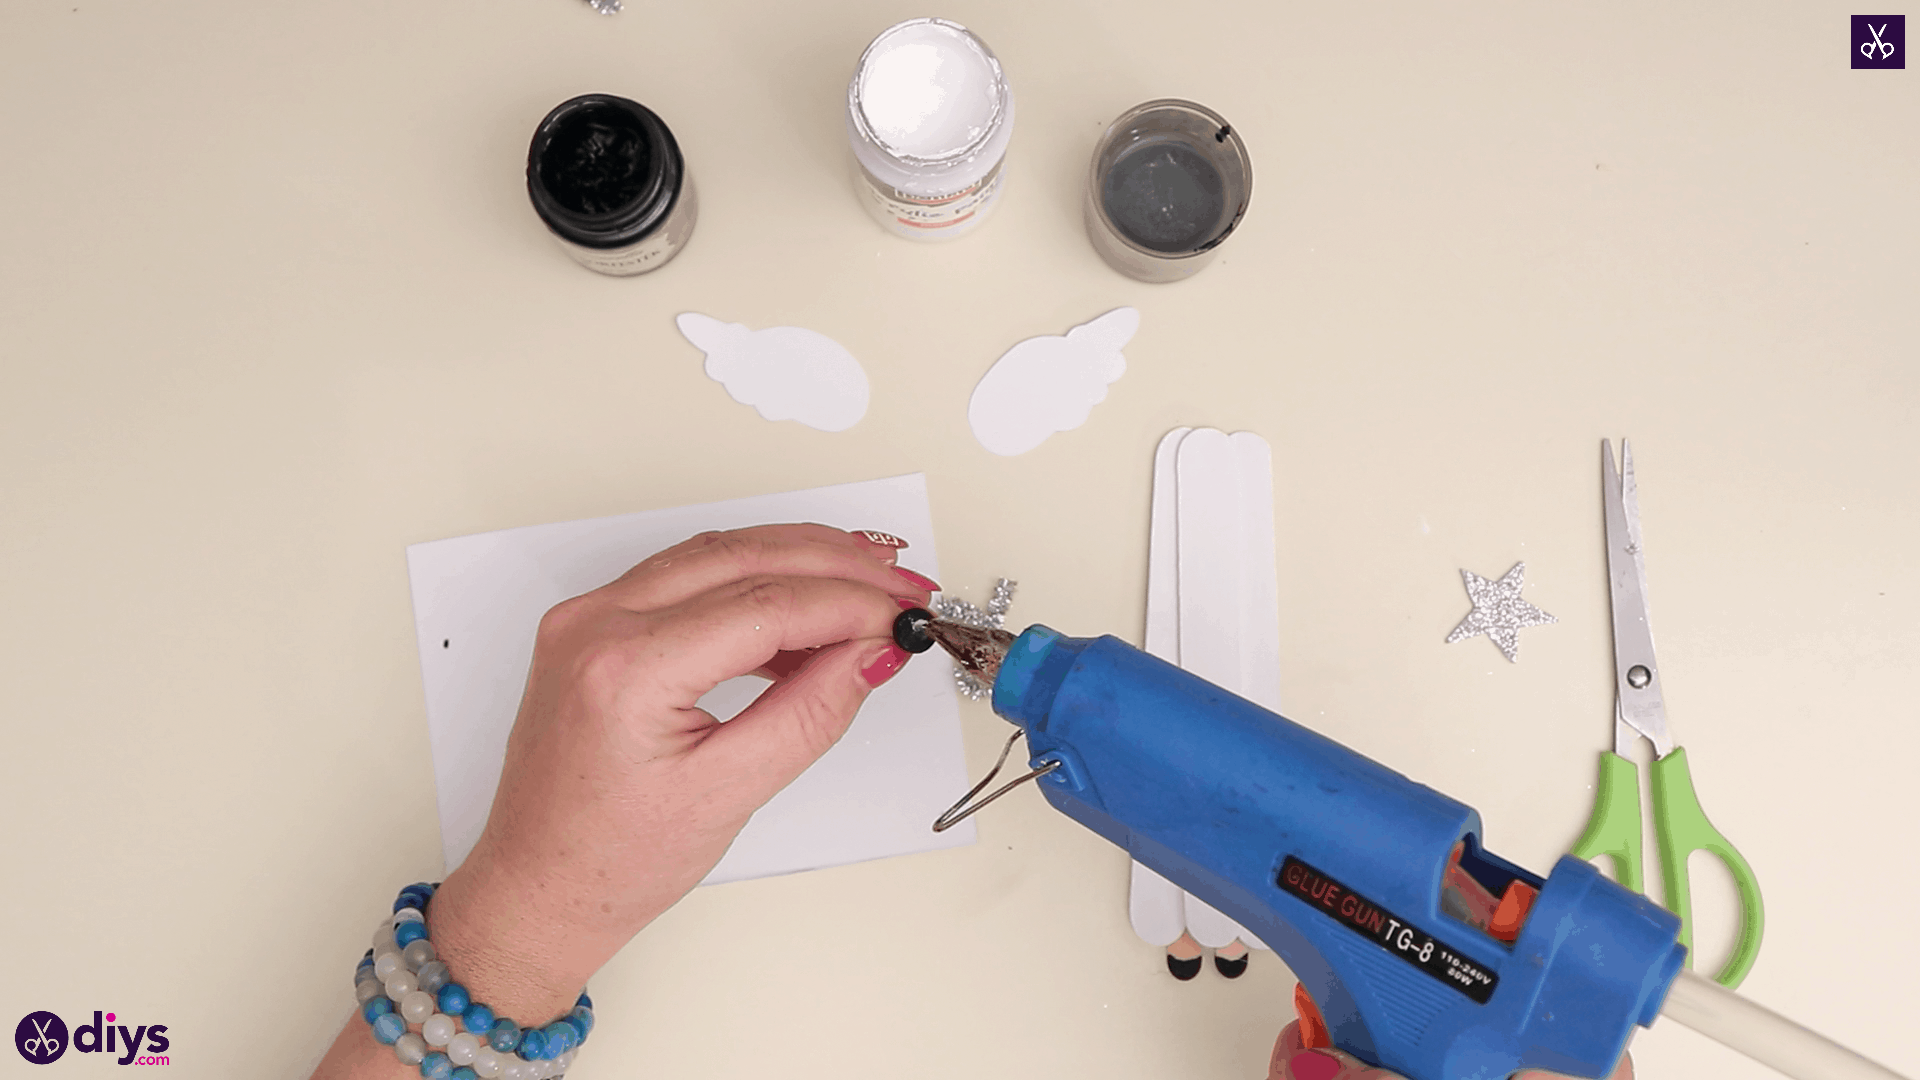
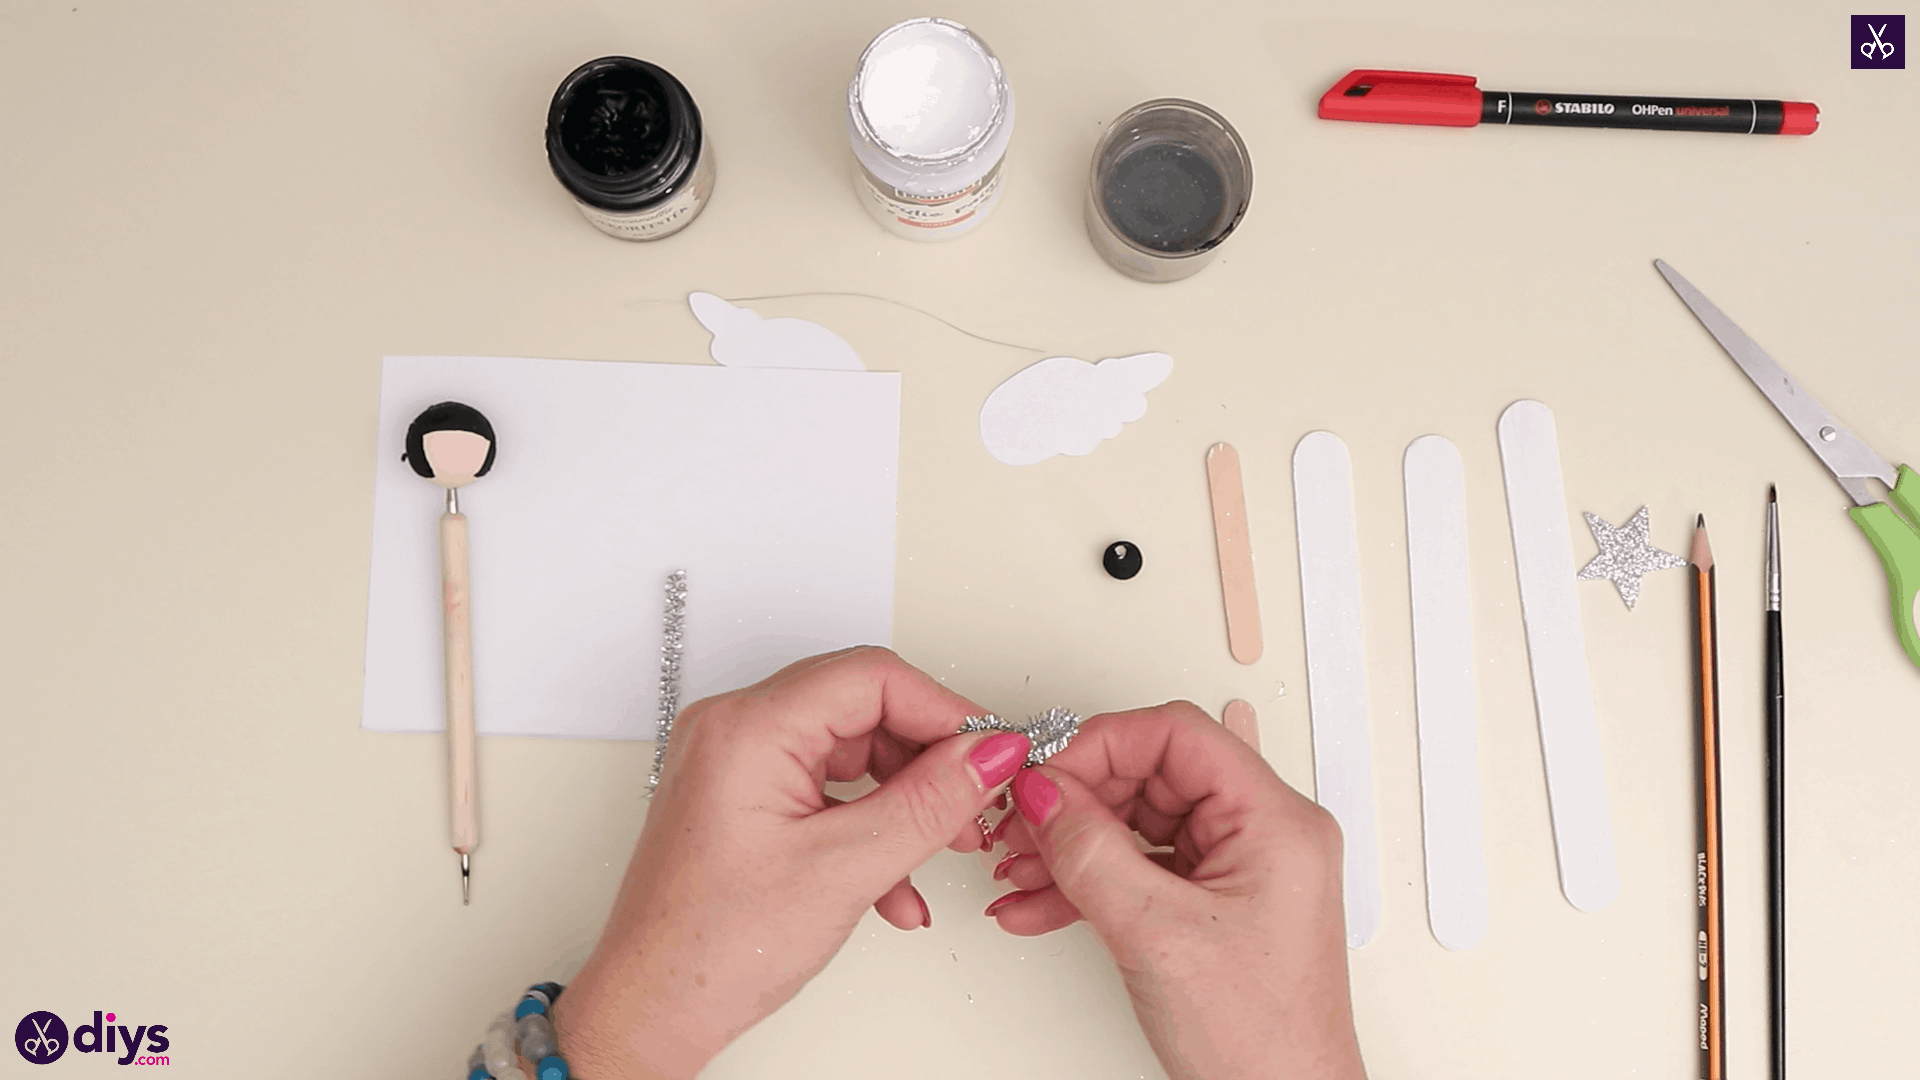
Step 6: form the details
Cut a piece about two inches long from your sparkly silver pipe cleaner and make it into a bow. Do this by curling one end in towards the middle in a loop, letting the excess to the tip hang past the centre mark, and then curling the other end or side inwards in the same way. You’ll have two loops at the top and two tails at the bottom. I twisted each of my ends around the piece’s centre at the middle where they met, just to keep the bow in place.

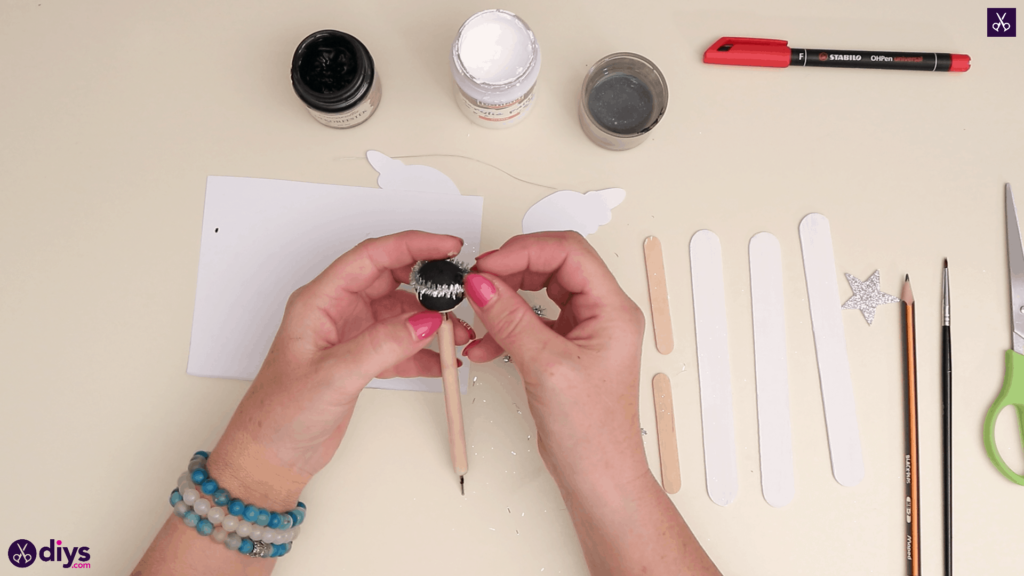
Step 7: make the halo
Take the rest of your silver pipe cleaner and wrap it around the larger spun cotton ball you painted earlier, measuring the circumference of the angel’s head with the pipe cleaner passing level with the bangs you painted on. Trim the excess off and apply some glue at the front of the head and the back, evenly. Stick the centre of your freshly cut piece own at the front to anchor it and then bend the ends around and stick them into place in the back. Your angel now has a halo!
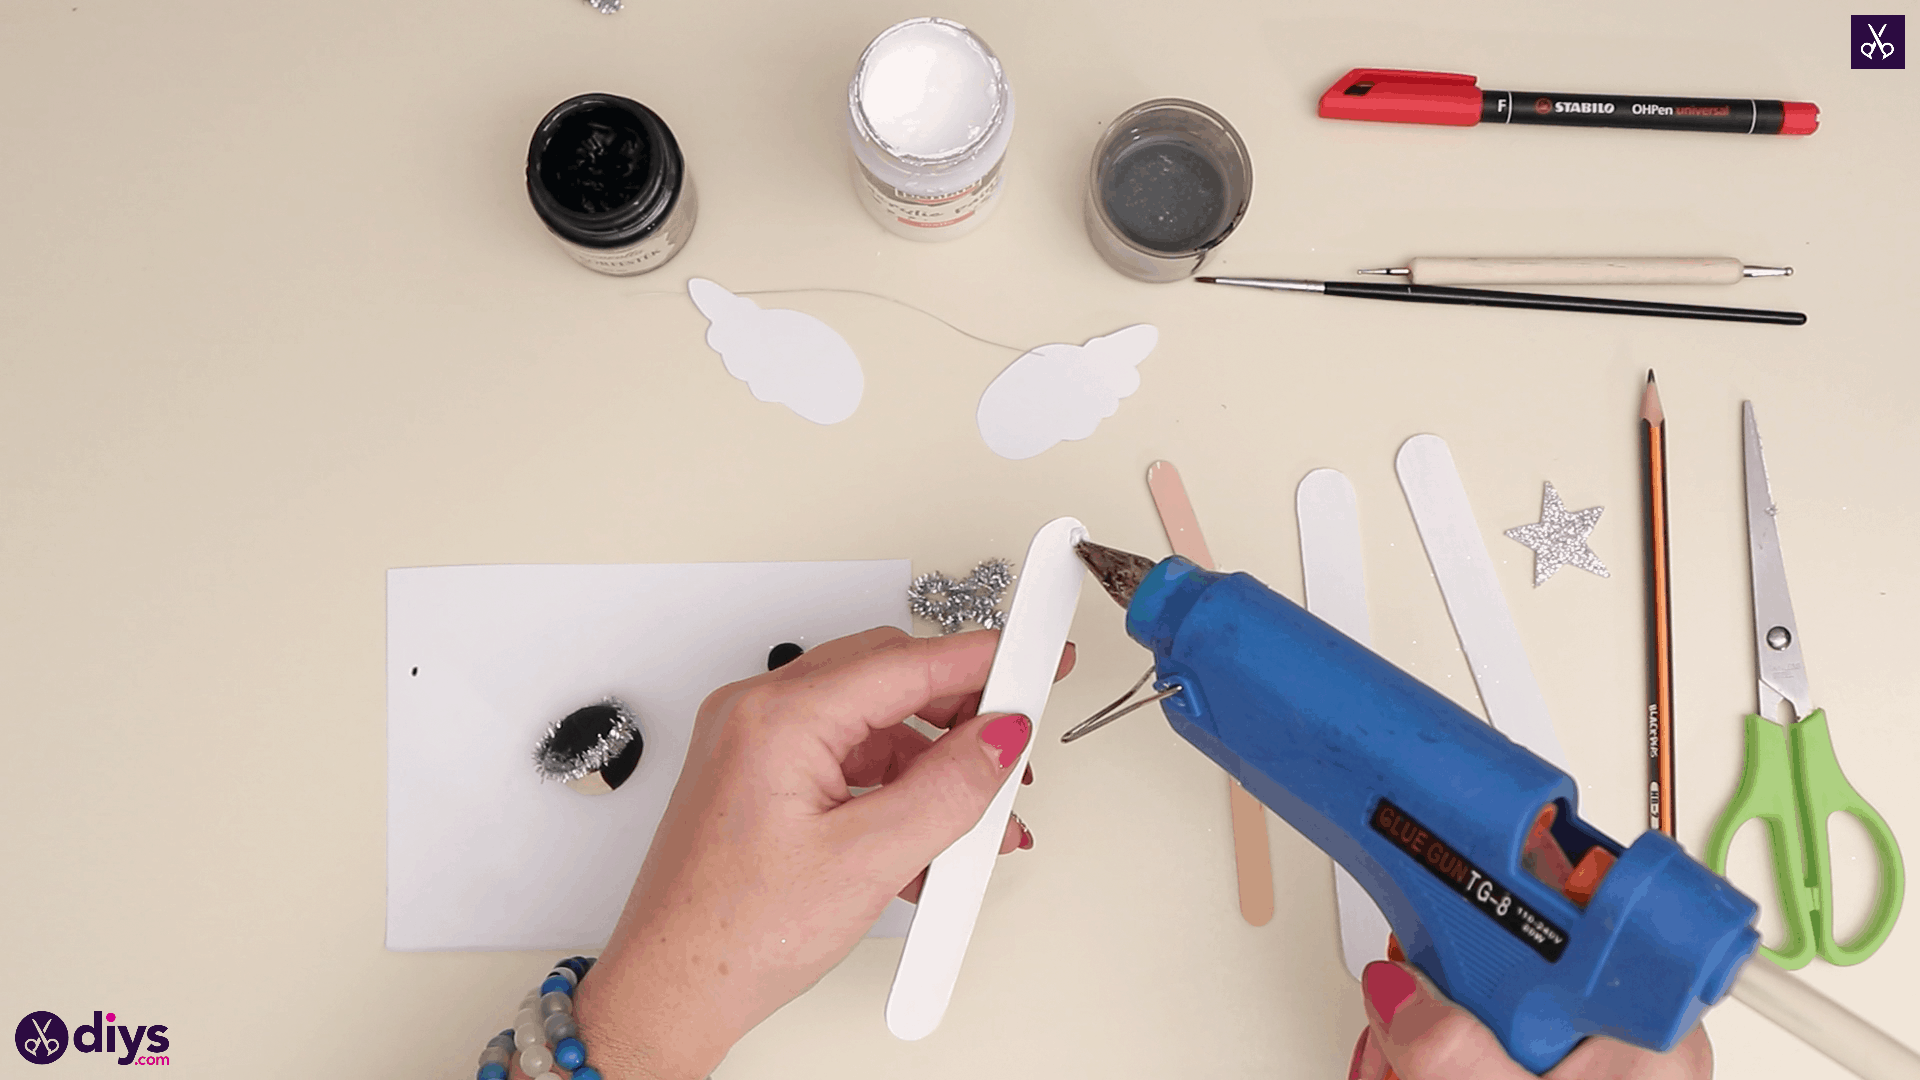
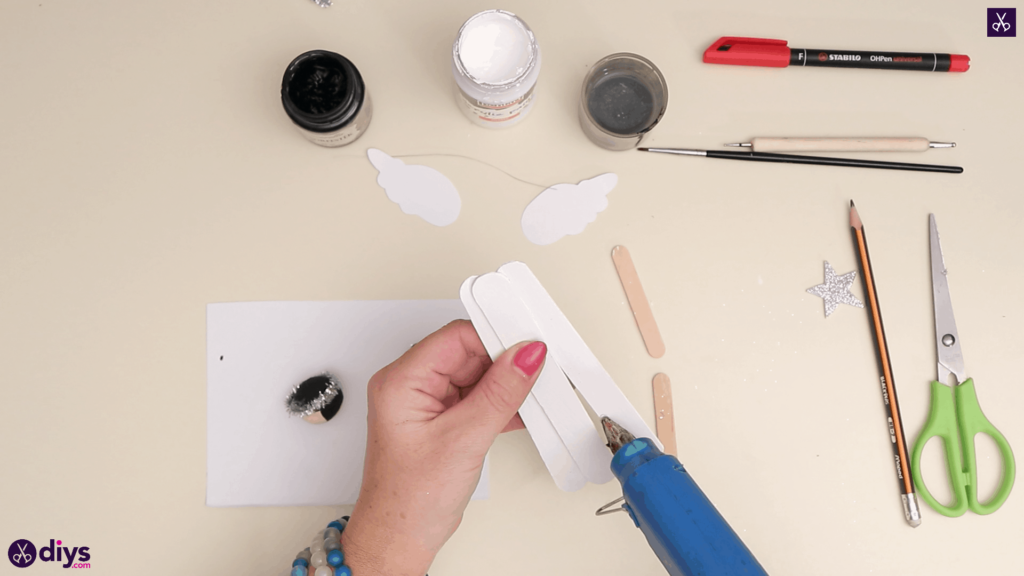
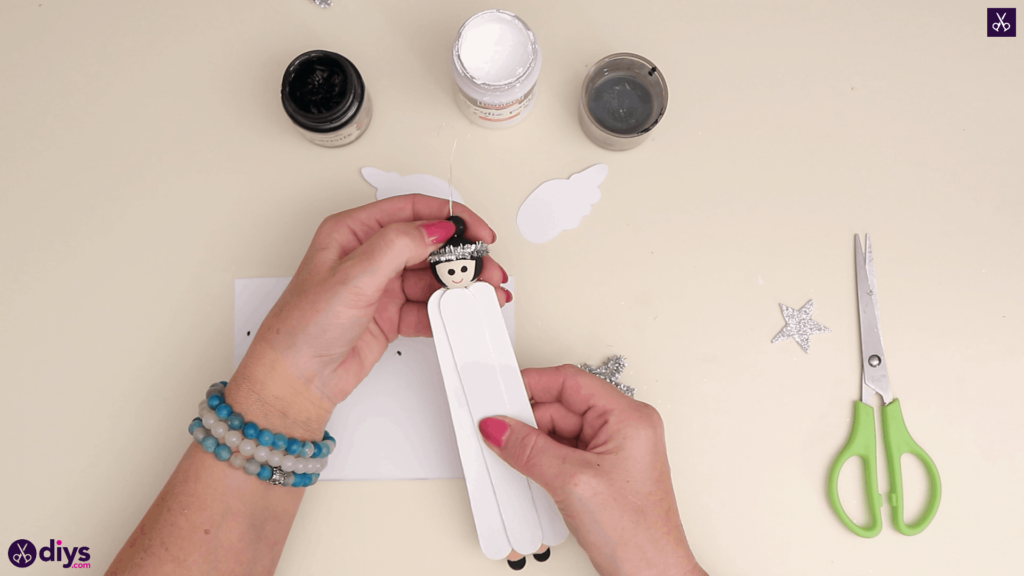
Step 8: start gluing the dress
Apply glue at one end of one of your white painted popsicle sticks, on the right side. Then apply another dot of glue near the right edge of the stick about three quarters of the way down. Take a second popsicle stick and angle it so its end sticks in the top dab of glue (sitting evenly wth the end of the first) and its left side sticks into the lower dab of glue. The two bow overlap at an angle. Repeat this process with your third popsicle stick but this time on the left side. You now have a long piece made from all three sticks that tapers at the top and widens towards the bottom. This will be your angel’s dress!

Step 9: add the feet
From your small popsicle sticks, cut little quarter inch pieces from the ends, giving you very short pieces to make your angel’s feet from. Turn your white dress over so the middle stick that lies on top of the other two faces downward and apply hot glue to the flat cut ends of your short stick pieces, pointing the rounded ends downward to be the feet. Stick then to the back of the dress near the bottom, so the feet stick out visibly on the other side like they’re nestled up under the dress. Turn the whole piece back over and use your smaller paintbrush to paint the curved tips of the feet in a black strip that matches their curved shape. Your angel now has little shoes!

Step 10: add the details
Use your dotting tool and black paint to give your angel’s head eyes. Complete the face by using your red marker to draw a smile below the eyes.

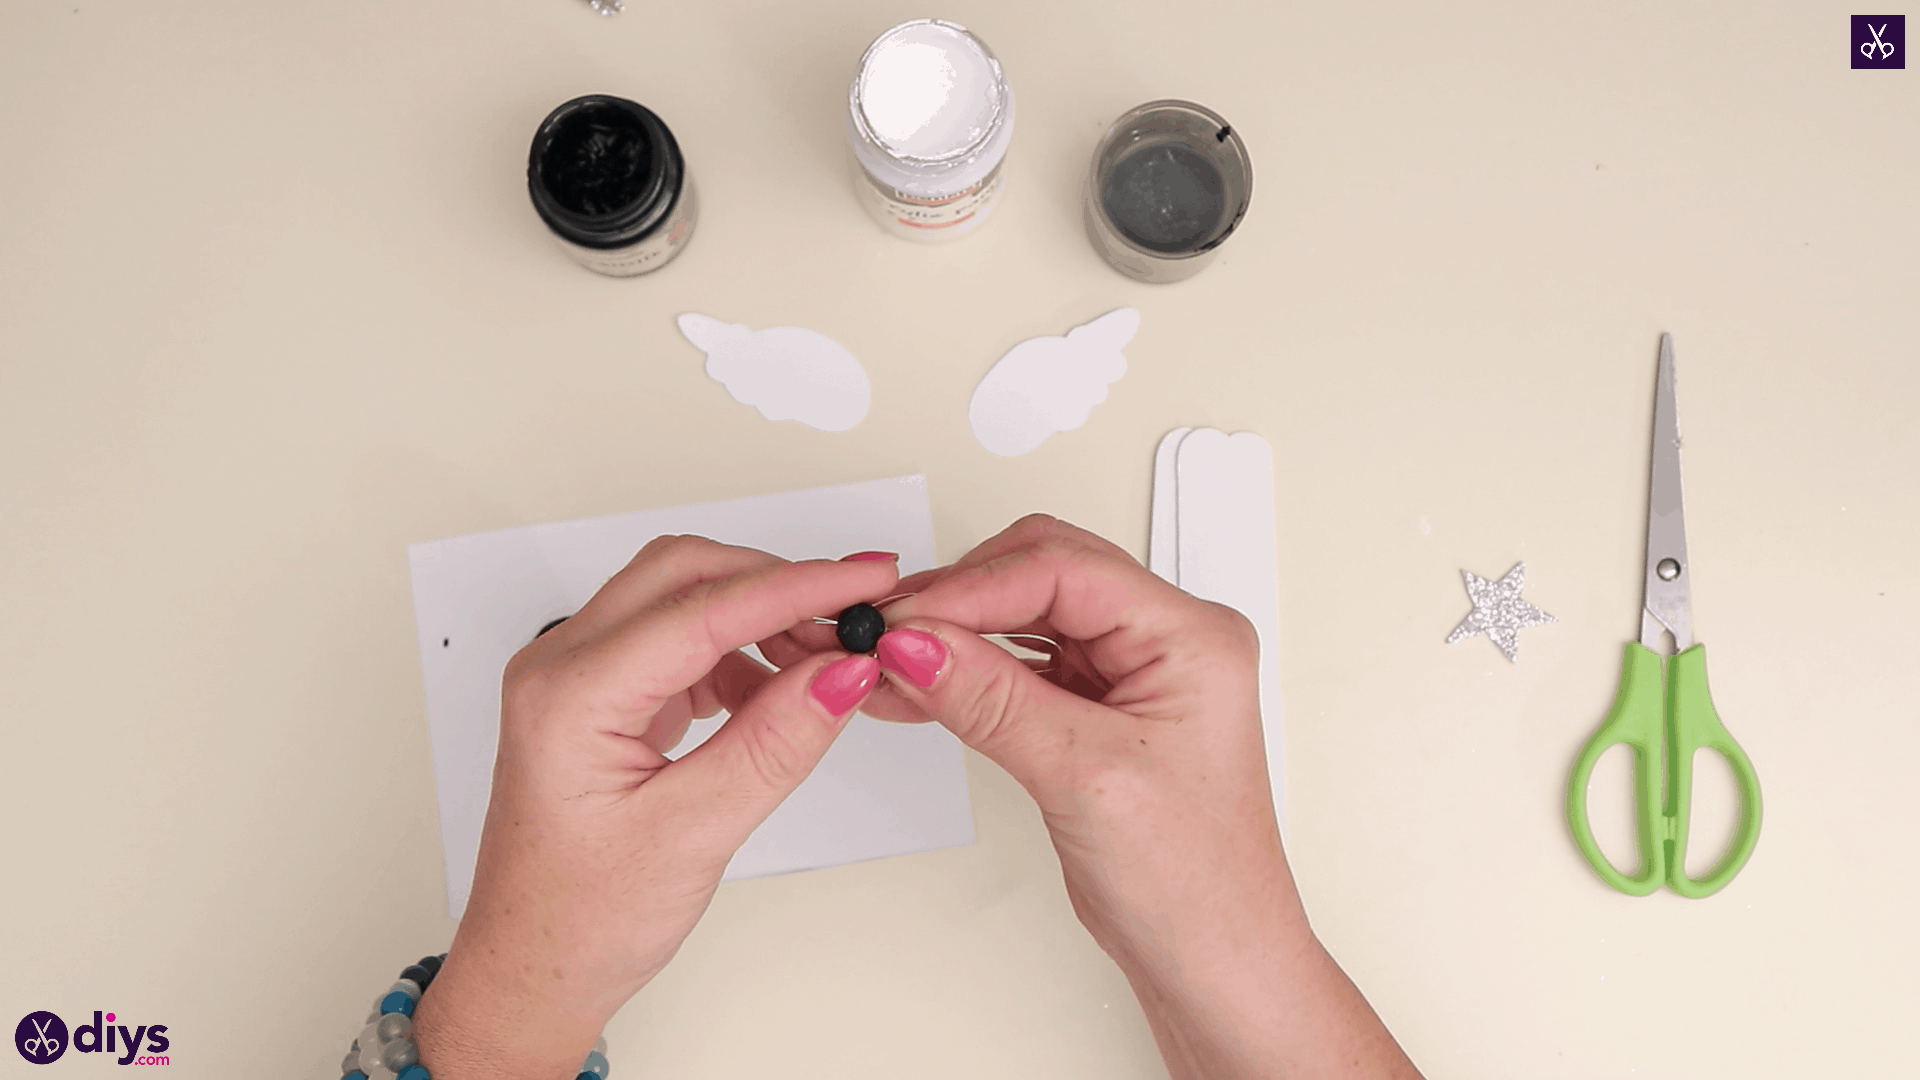
Step 11: wire the bun
Cut a two inch piece from your wire crafting thread and fold it in half, meeting the ends to create a loop. Slide those ends together through the hole in your smaller spun cotton ball and twist them together, bending them upwards and away from each other after a couple twists, against the ball, to keep them in place and from sliding out.
Step 12:
Apply glue to the bottom of the smaller ball where you just twisted those ends and stick it down on the top of your larger ball like a hair bun.

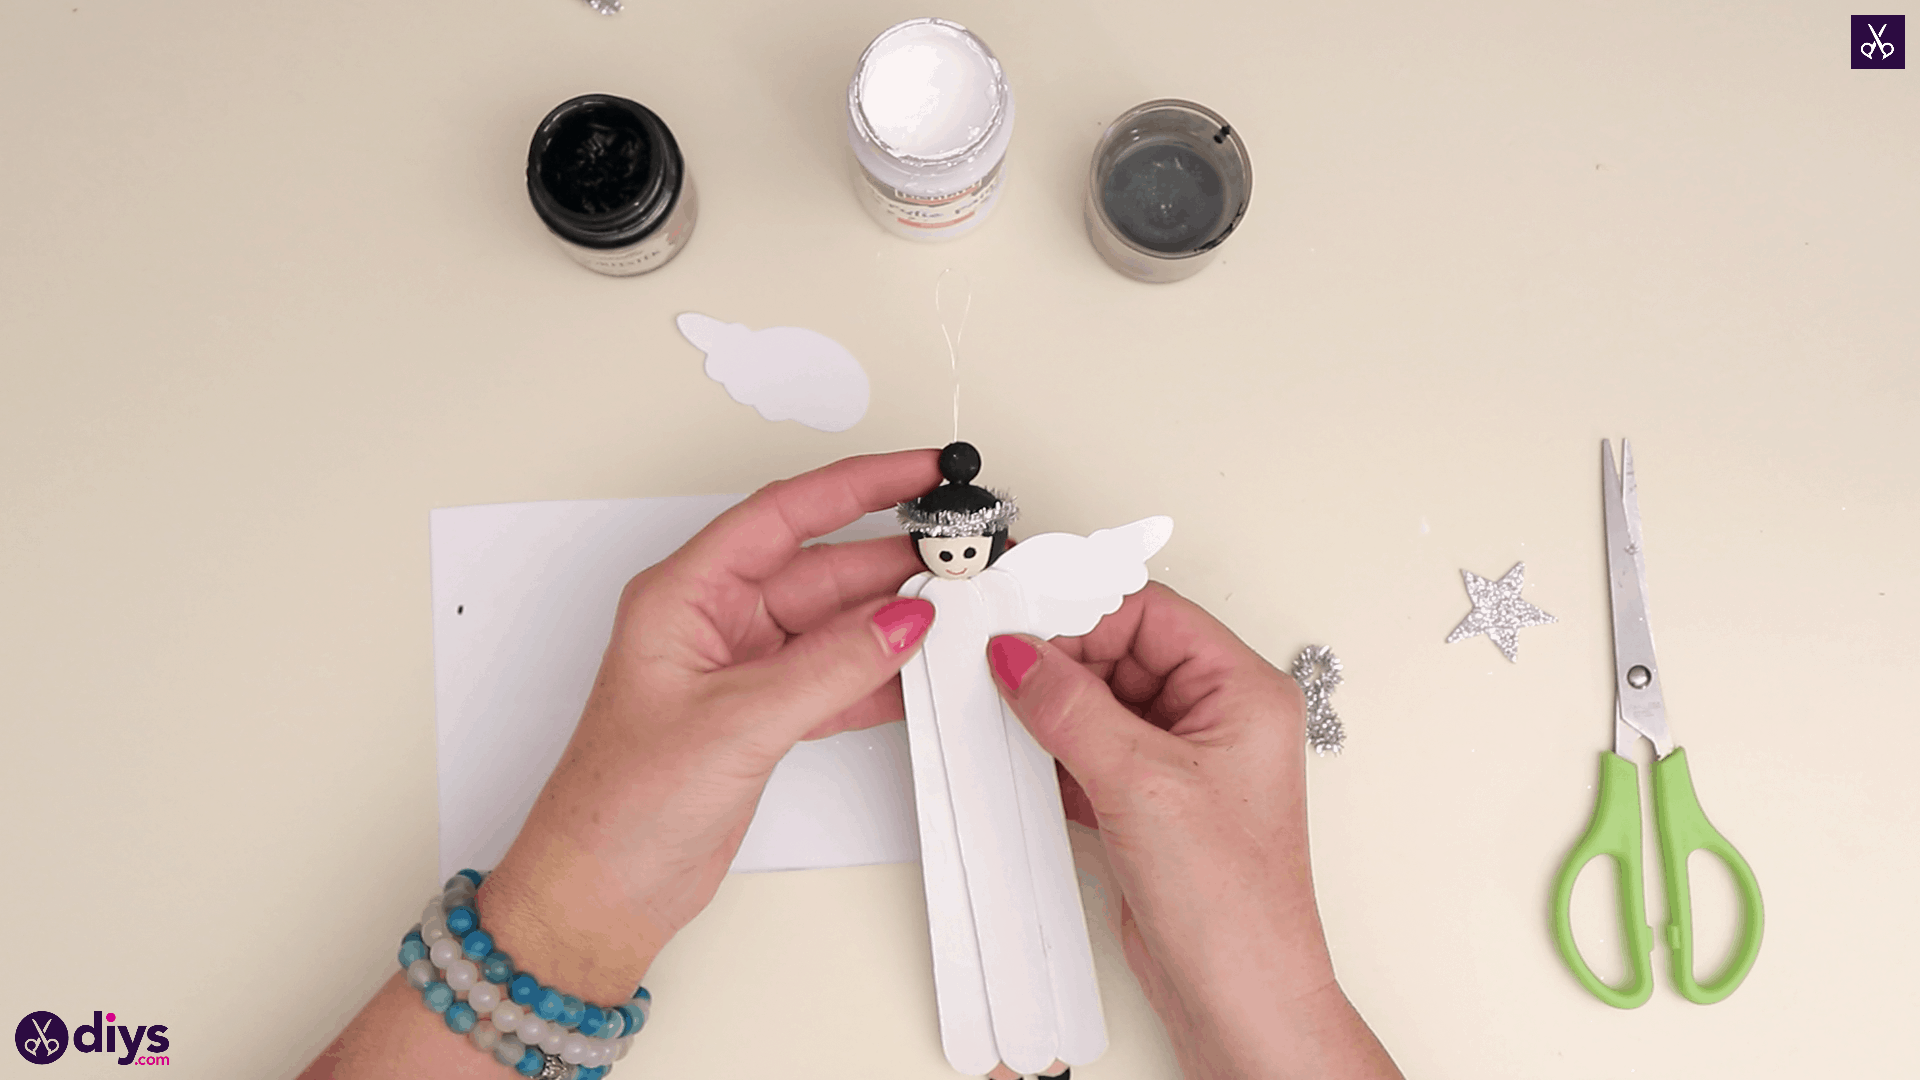
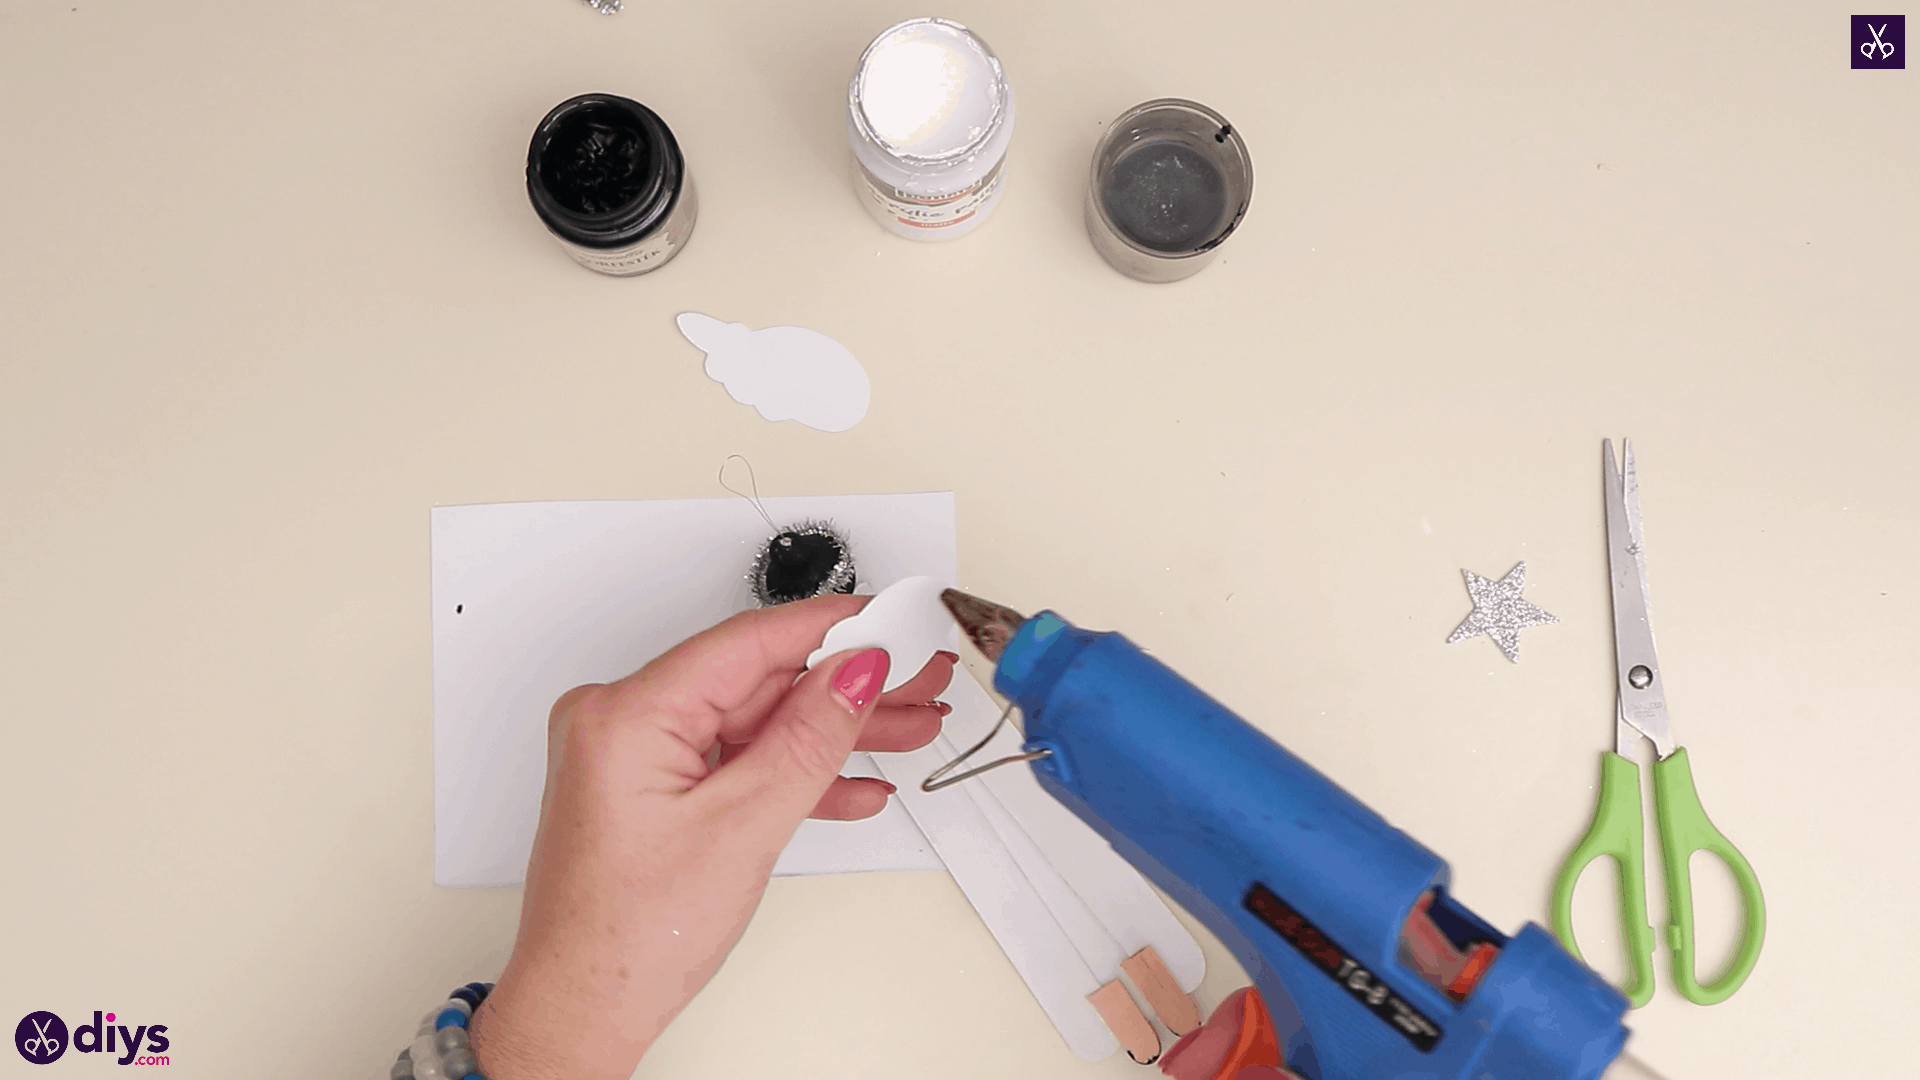
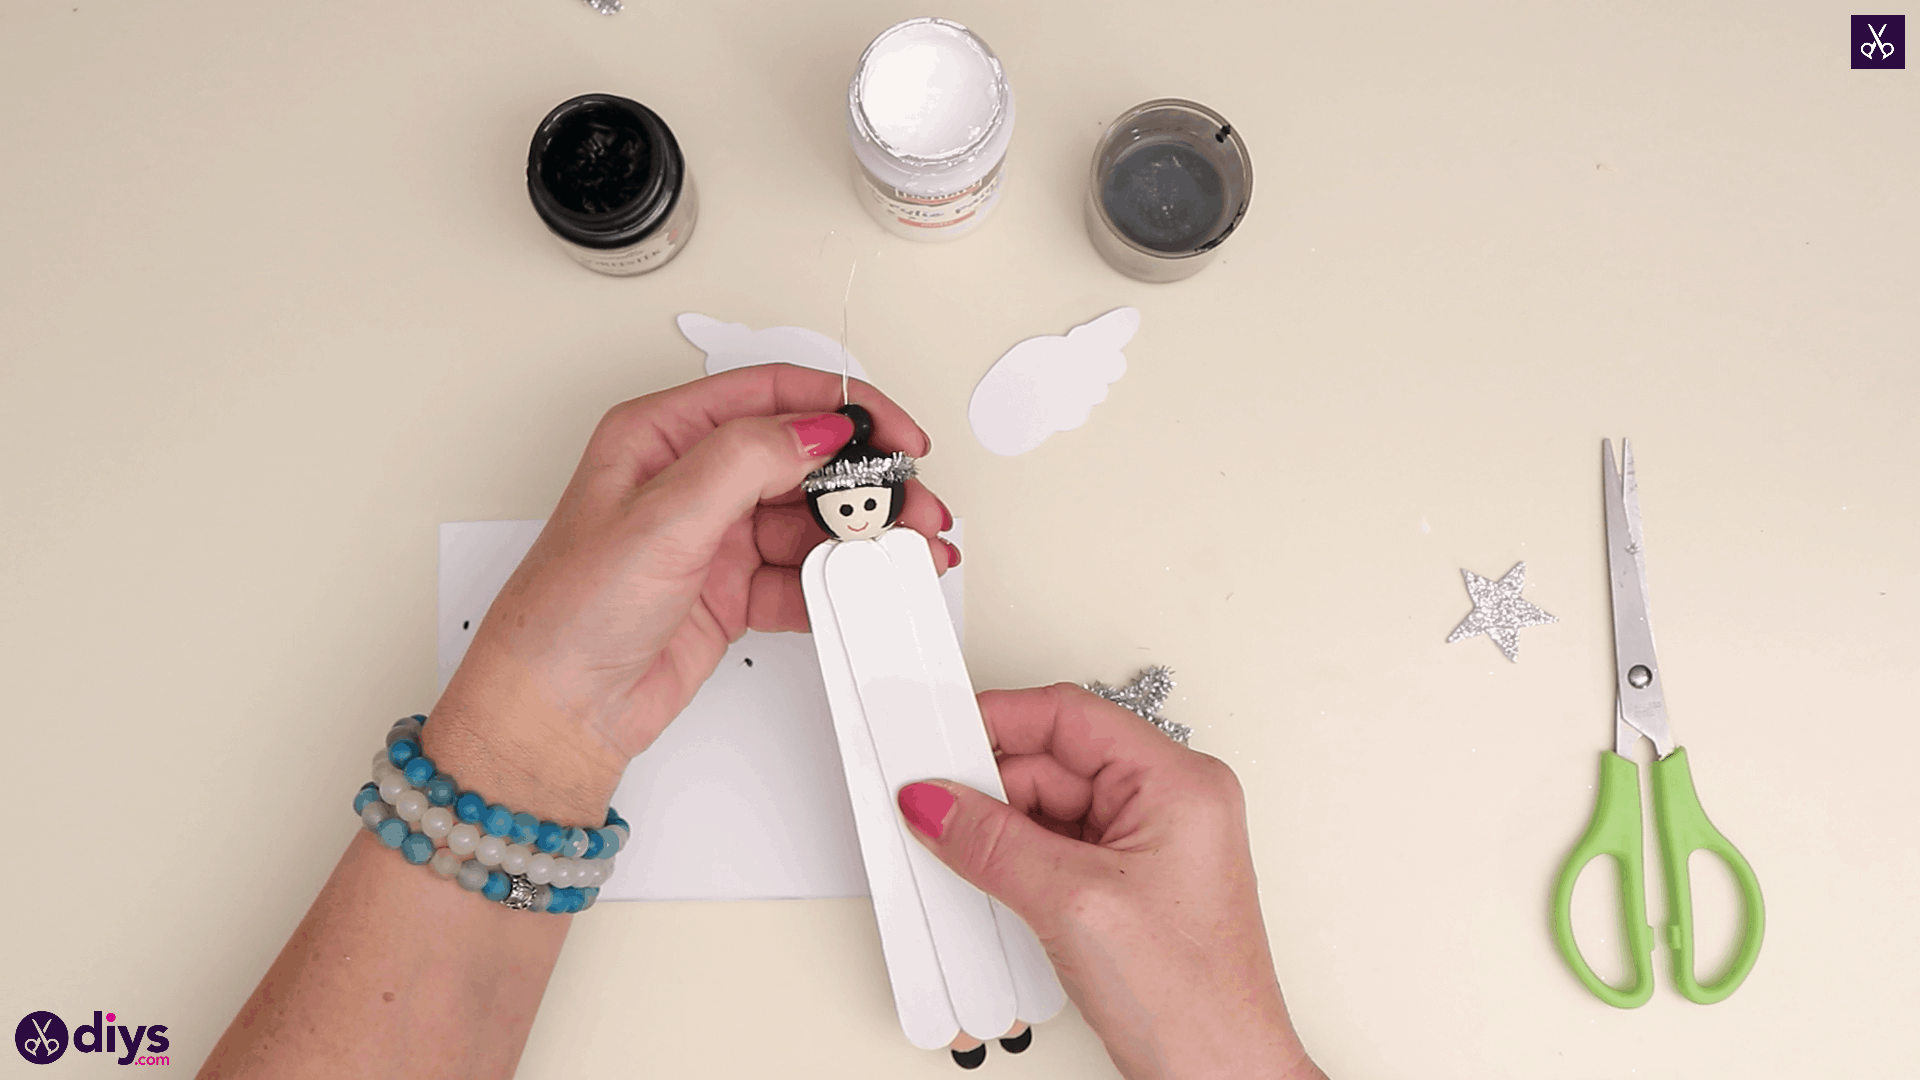
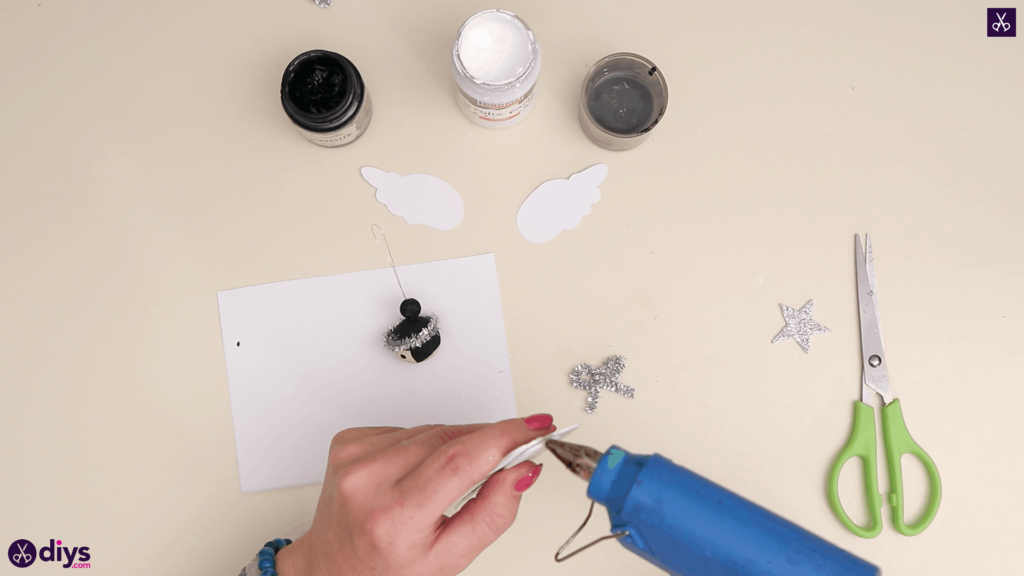
Step 13: start assembling
Apply glue to the top edge of your angel’s base dress piece and pressed the underside of the head down there. Once it’s dry, the loop in the top is how you’ll hang your angel in the window or on your Christmas tree.
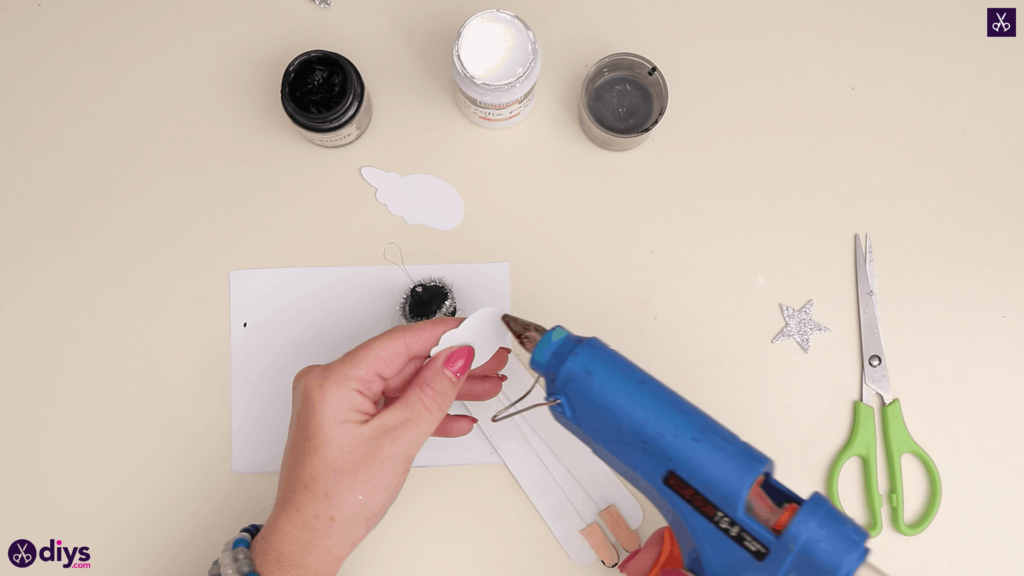
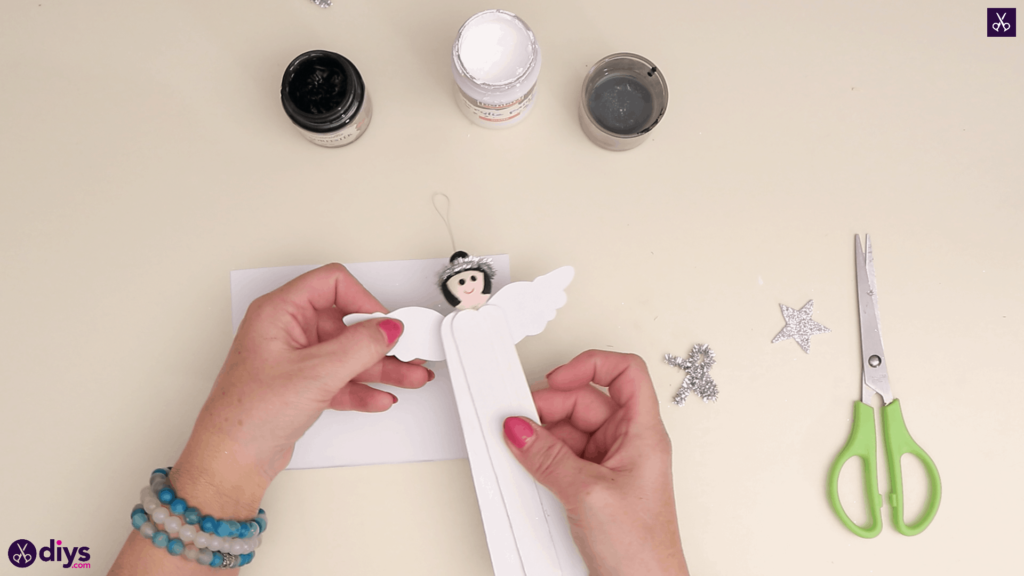
Step 14: add the wings
Apply glue to the larger rounded ends of your paper wings and glue them onto the back of your angel’s dress so the tops stick out either side.

That’s really all there is to it! Just in case you’d like to try this project out for yourself, here’s a fantastic tutorial video to help you!