DIY Concrete Outdoor Christmas Tree Decoration
Updated on November 19, 2025


It might not feel like it yet in the weather but Christmas is fast on its way and I couldn’t be happier about it! I’m already in the full swing of holiday crafts and have also been quite obsessed with the idea of working with DIY concrete lately, so I’ve been trying to think of cute, creative ways to combine the two and last week I finally found one. I made a concrete outdoor Christmas decoration that was so cute I couldn’t help doing it again so I could show other people who it’s made as well.
Check out these step by step instructions complete with photos! If you’d rather follow along with a video tutorial instead of written words, scroll to the bottom of this post to find just what you’re looking for.
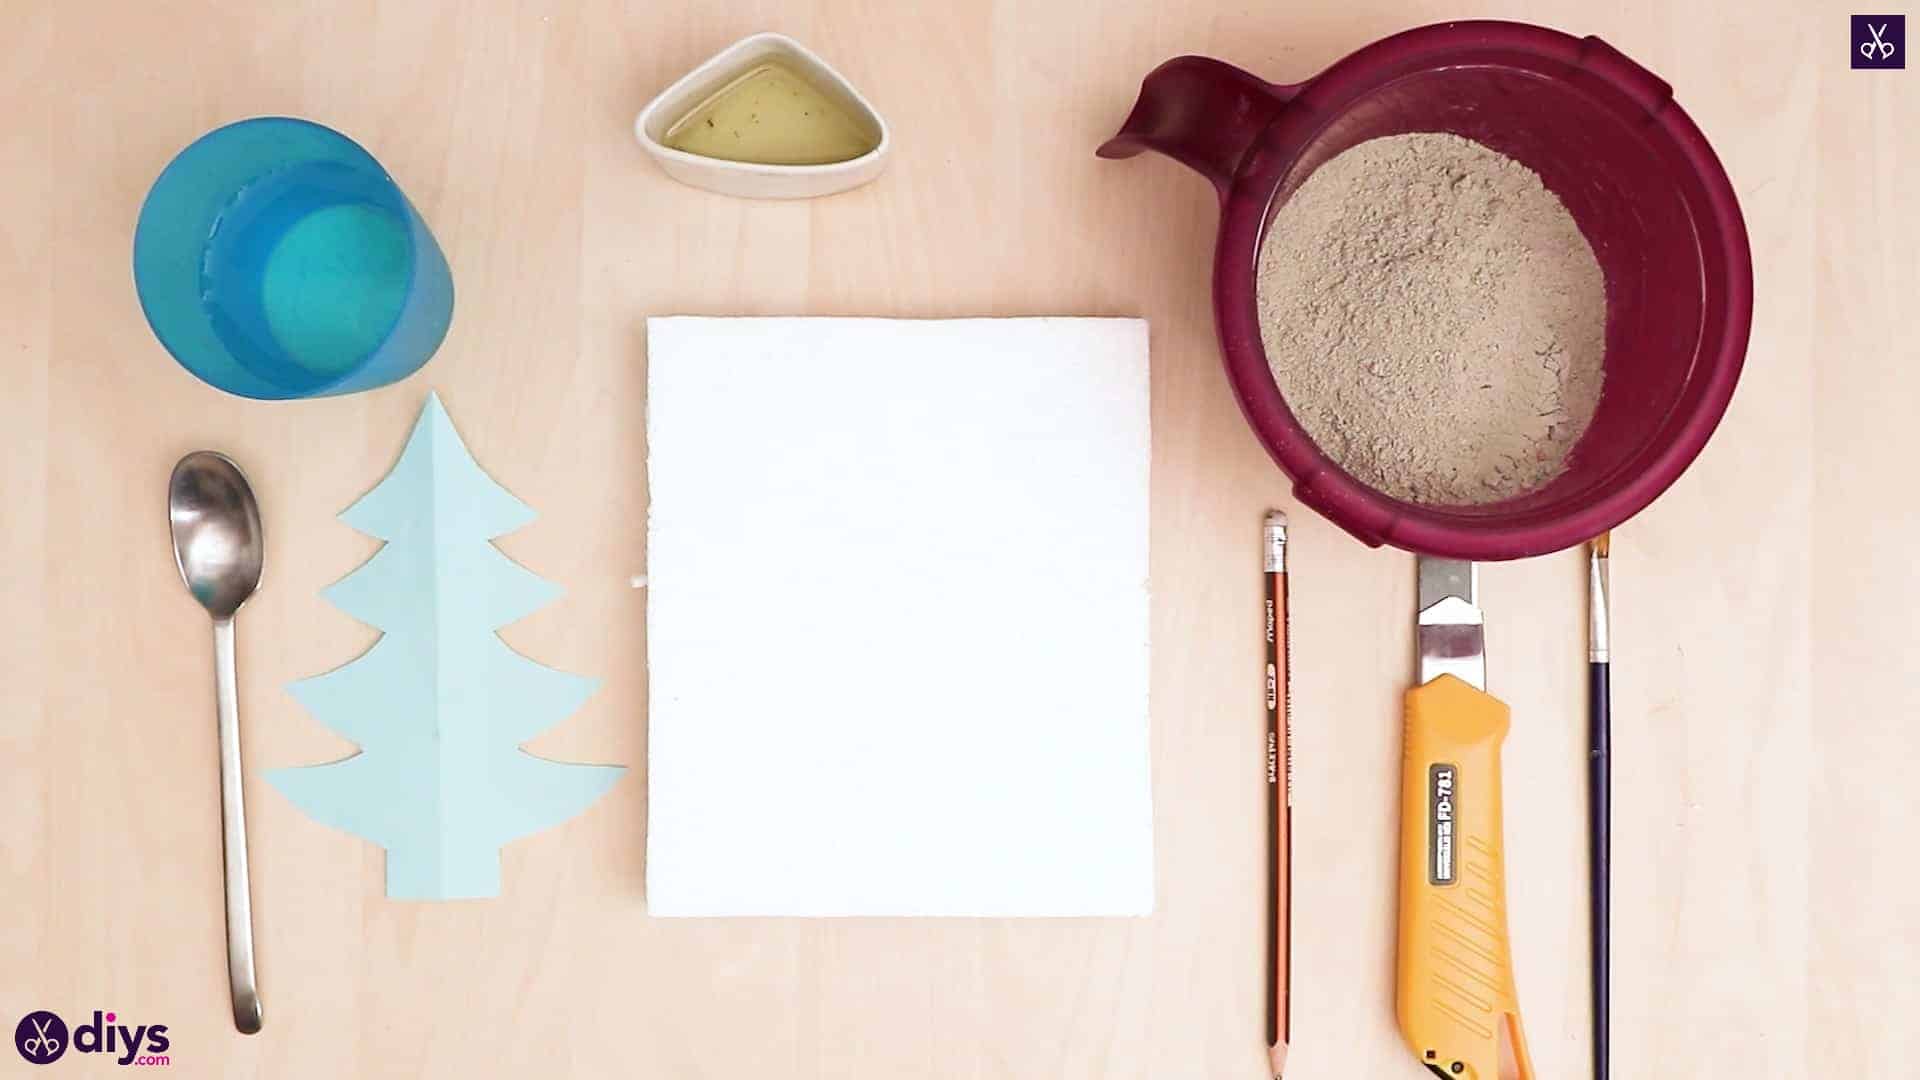
For this project, you’ll need:
- Fine particle DIY cement
- Water
- A plate
- A spoon
- Oil
- A paintbrush
- A folding utility knife
- A pencil
- Styrofoam
- Paper
Step 1:

Step 2:
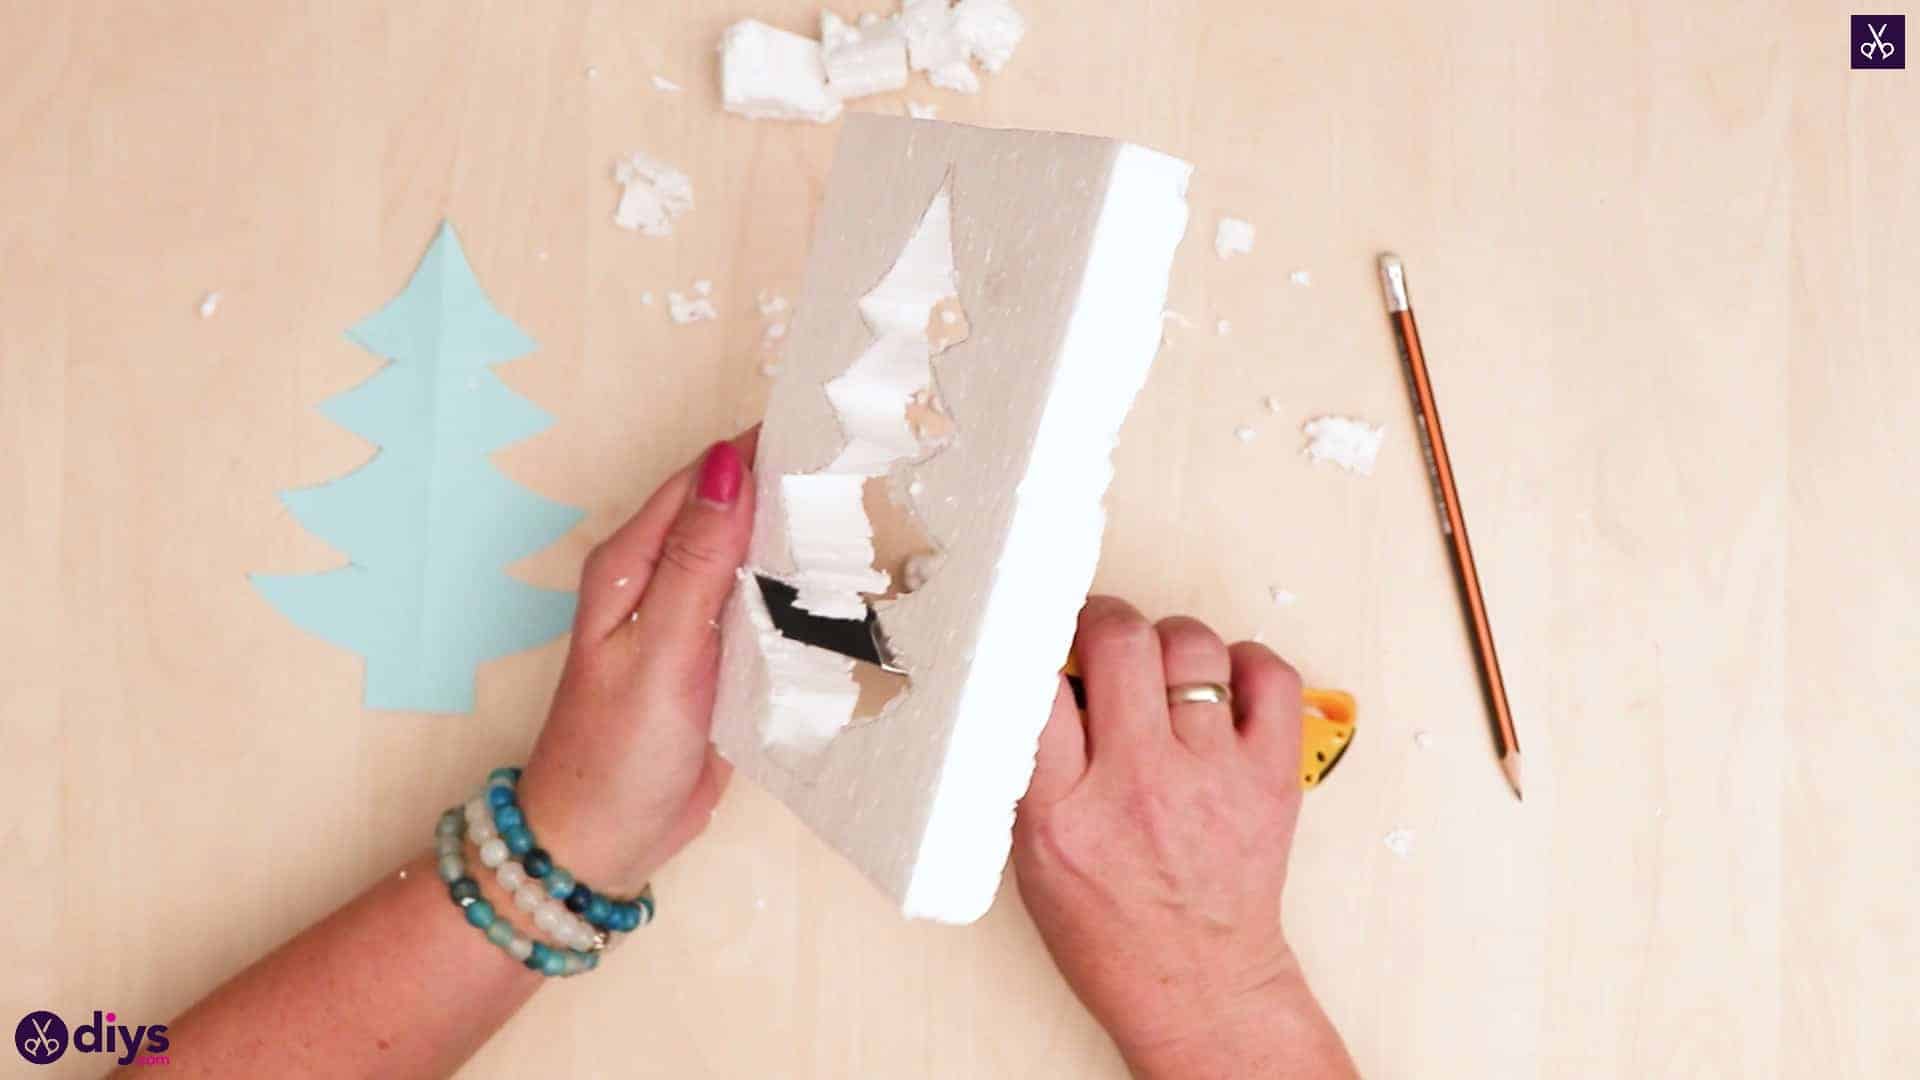
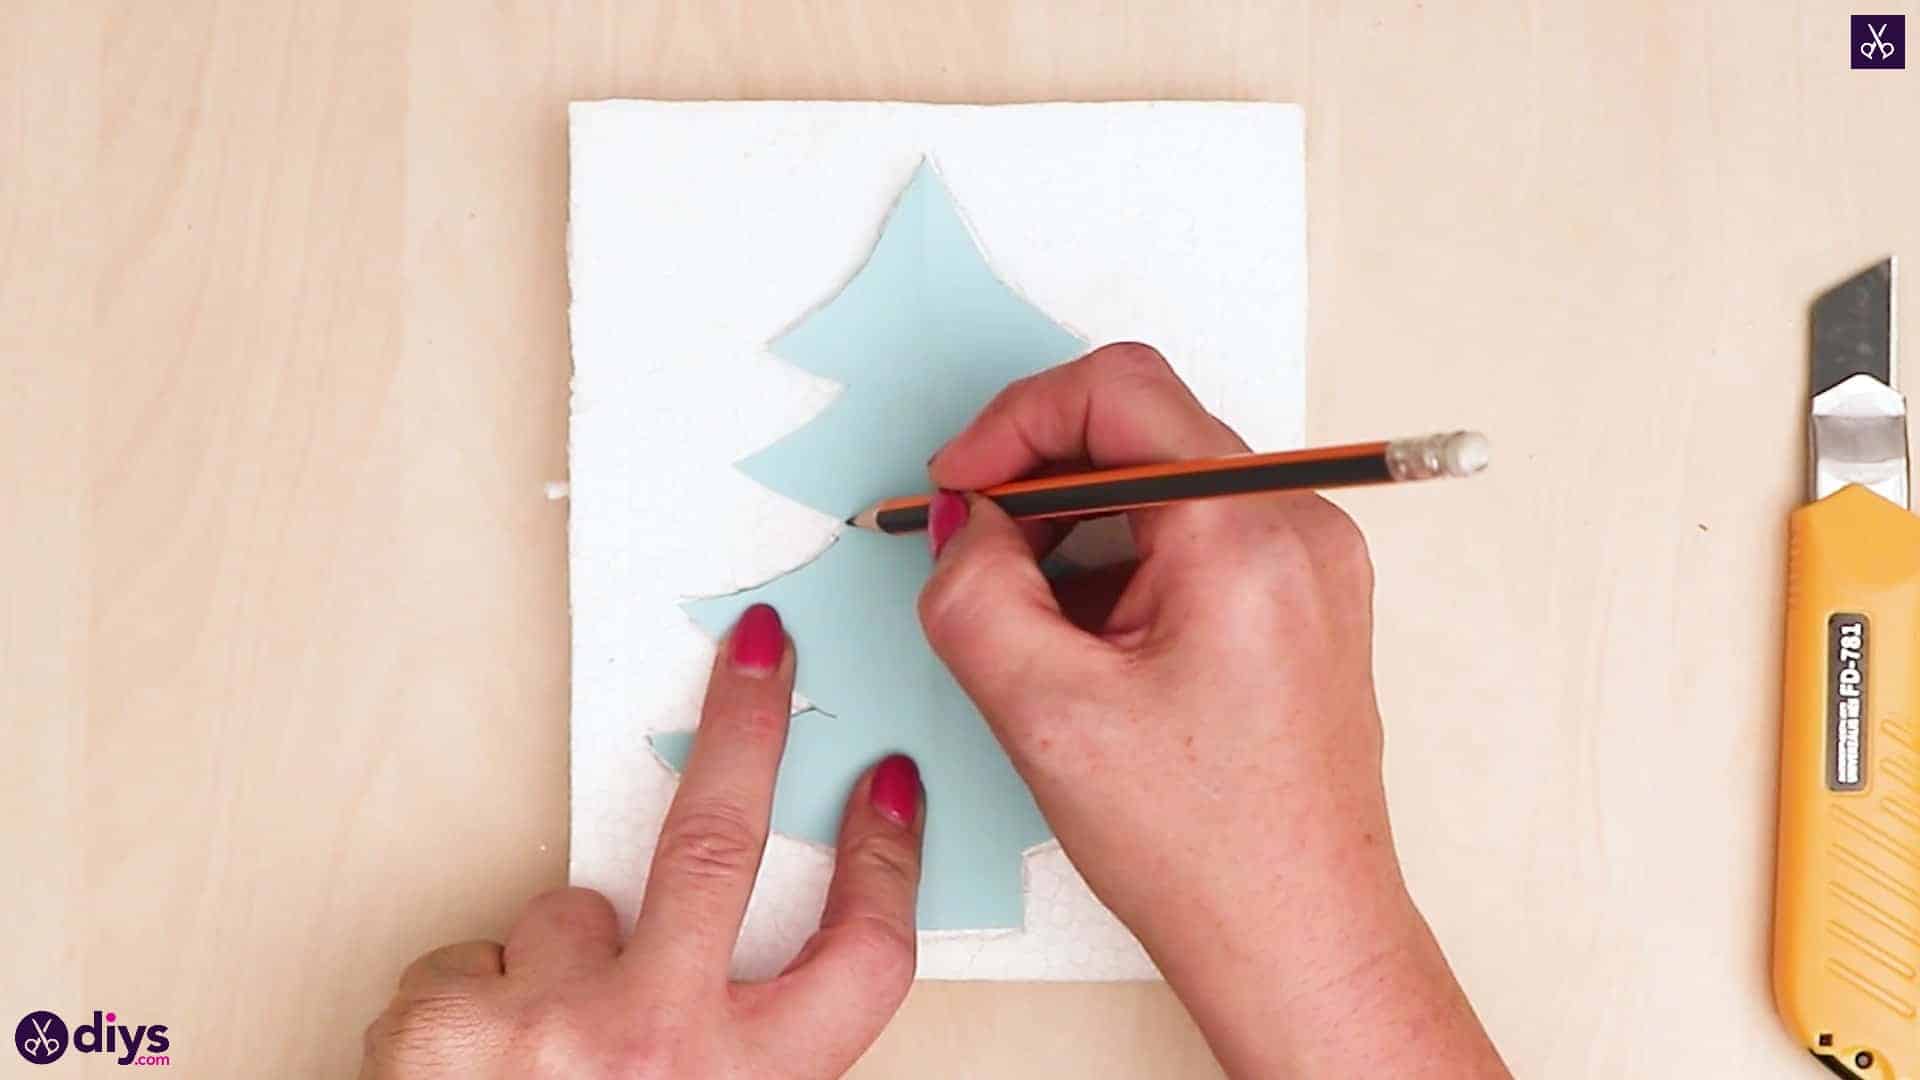
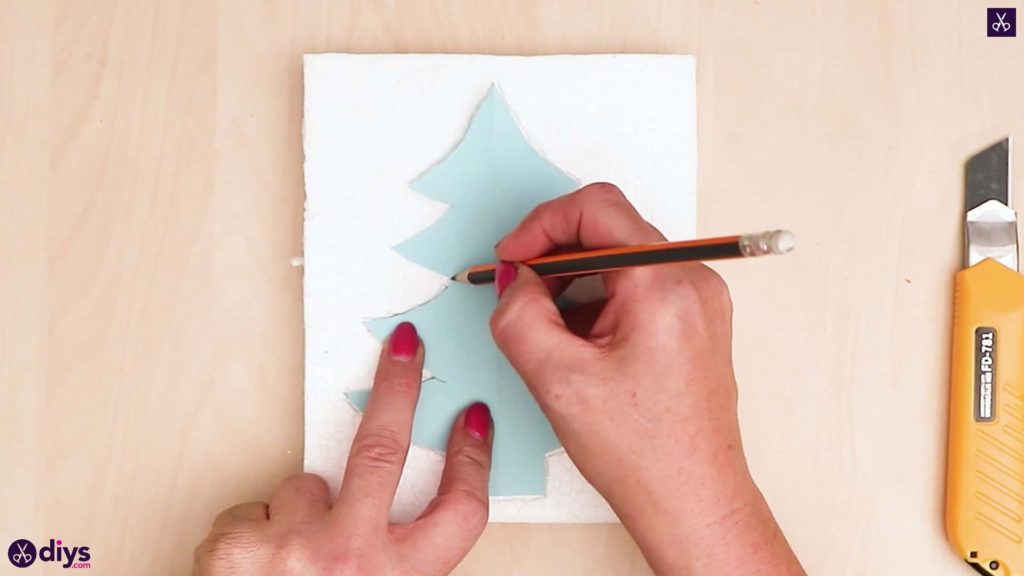
On a piece of paper, sketch out the shape of a Christmas tree; it can have whatever kind of branches you like. Mine perked up a bit at the ends! Cut the tree out and place it onto your piece of styrofoam. Use your pencil to trace around the outline of the Christmas tree so now you have the shape sketched onto your styrofoam.

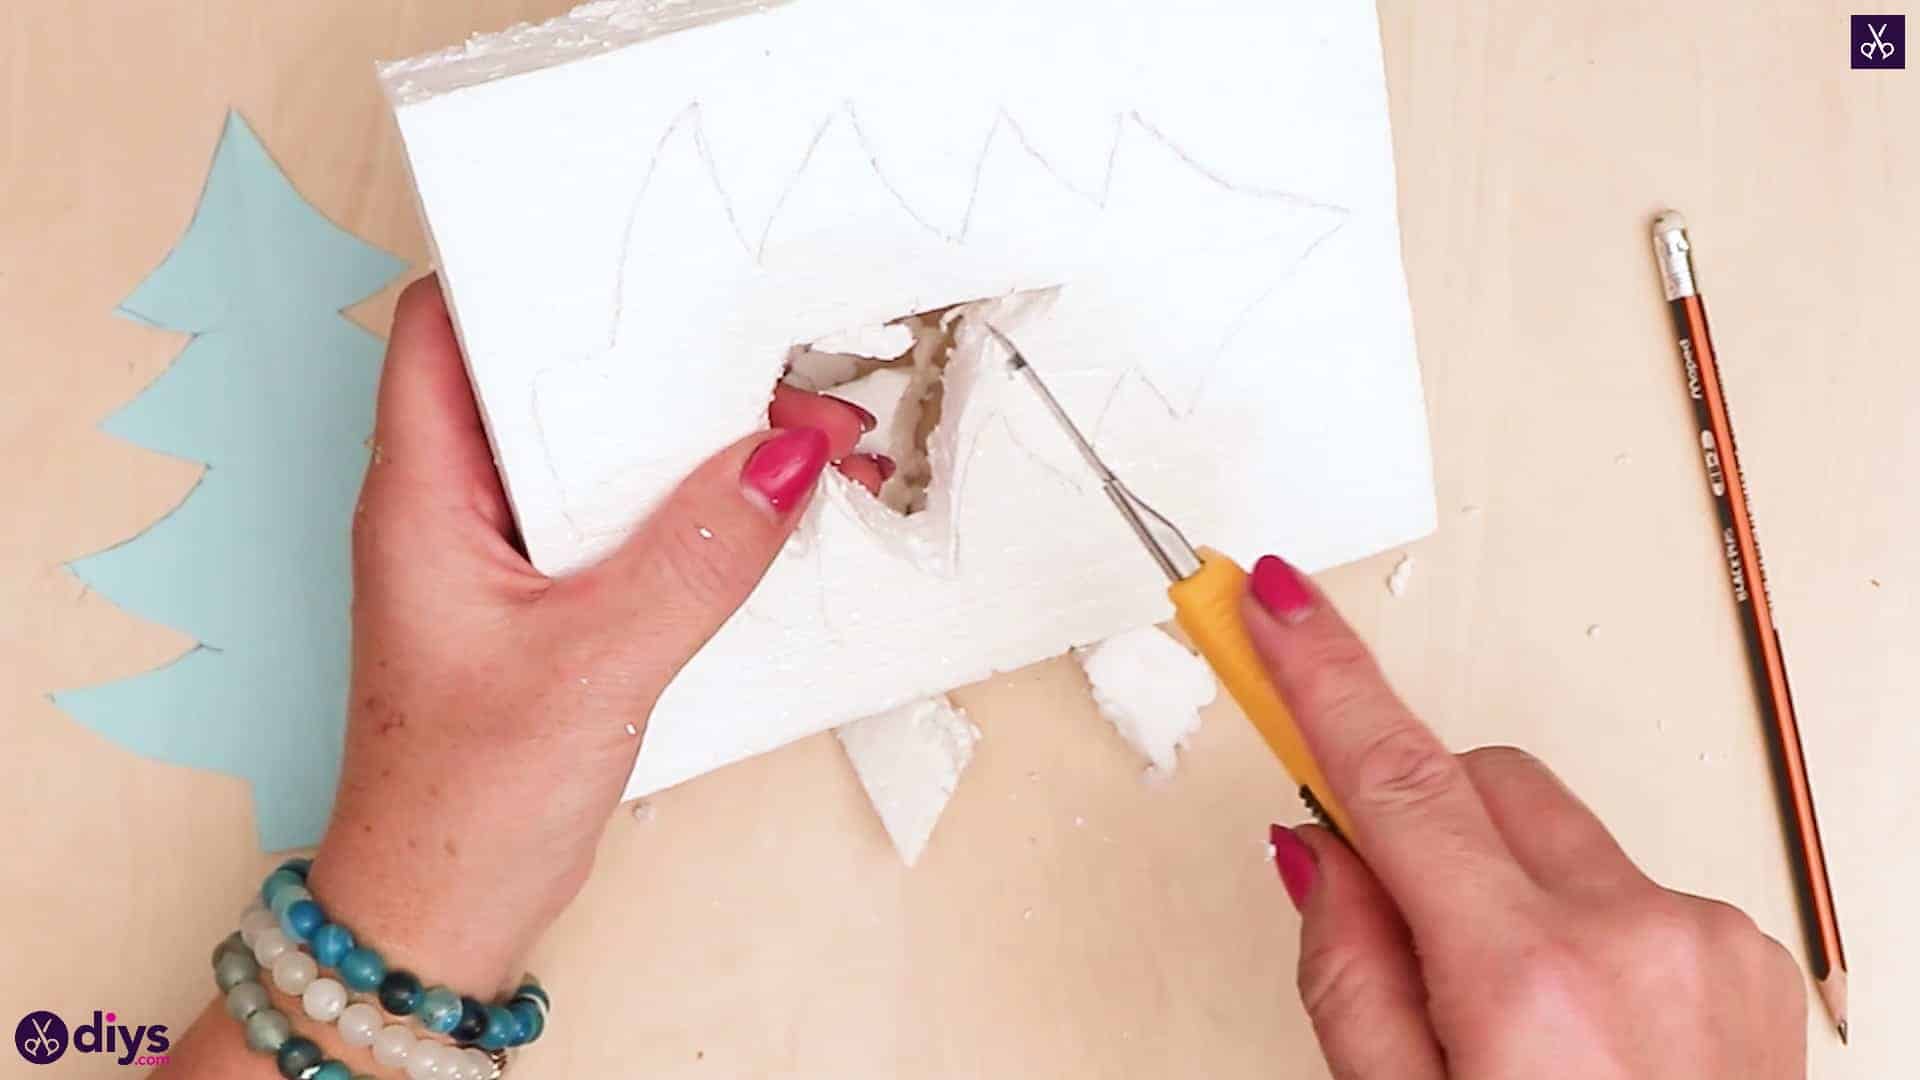
Step 3:
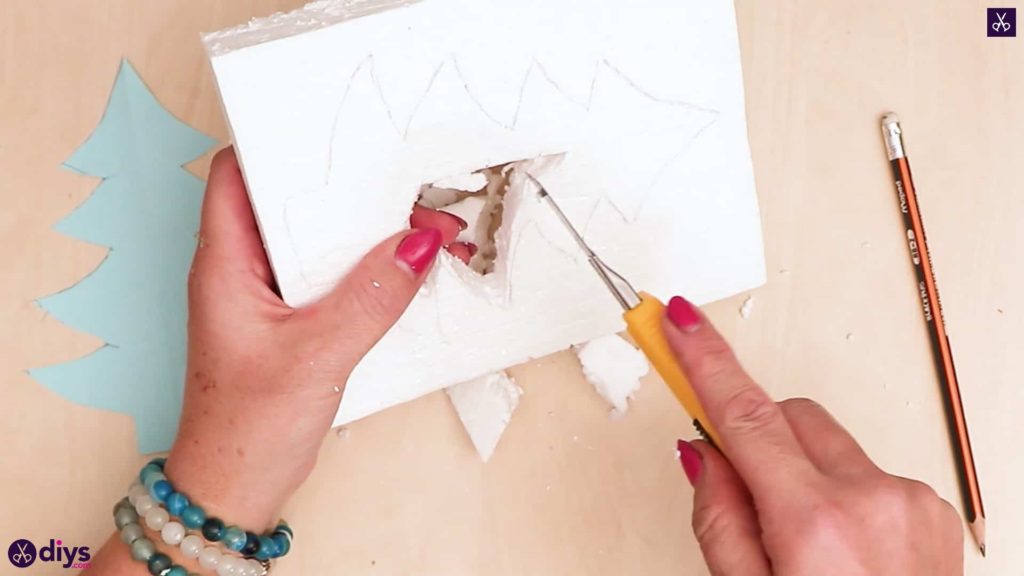
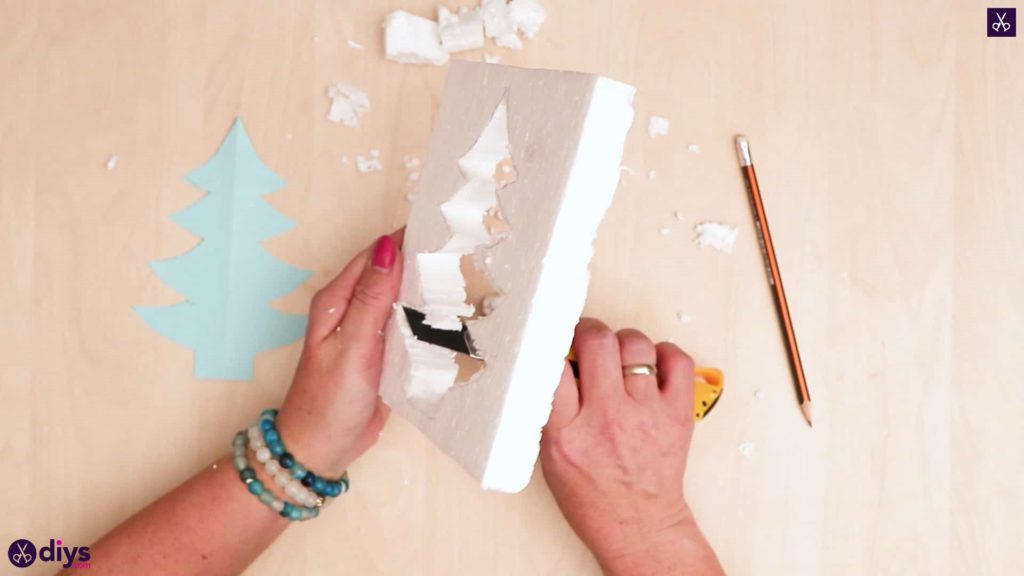
Use your utility knife to cut the shape of the Christmas tree out of the centre of your Styrofoam. Cut all around the edges of the shape to clear out the middle and creative a negative space, rather than cutting around the outside like you did we with paper. I found it helpful to cut out small chunks at a time because of how thick my Styrofoam was. Once I had the shape quite empty, I cleared out the very tips I couldn’t safely get with my knife using my thumb.

Step 4:
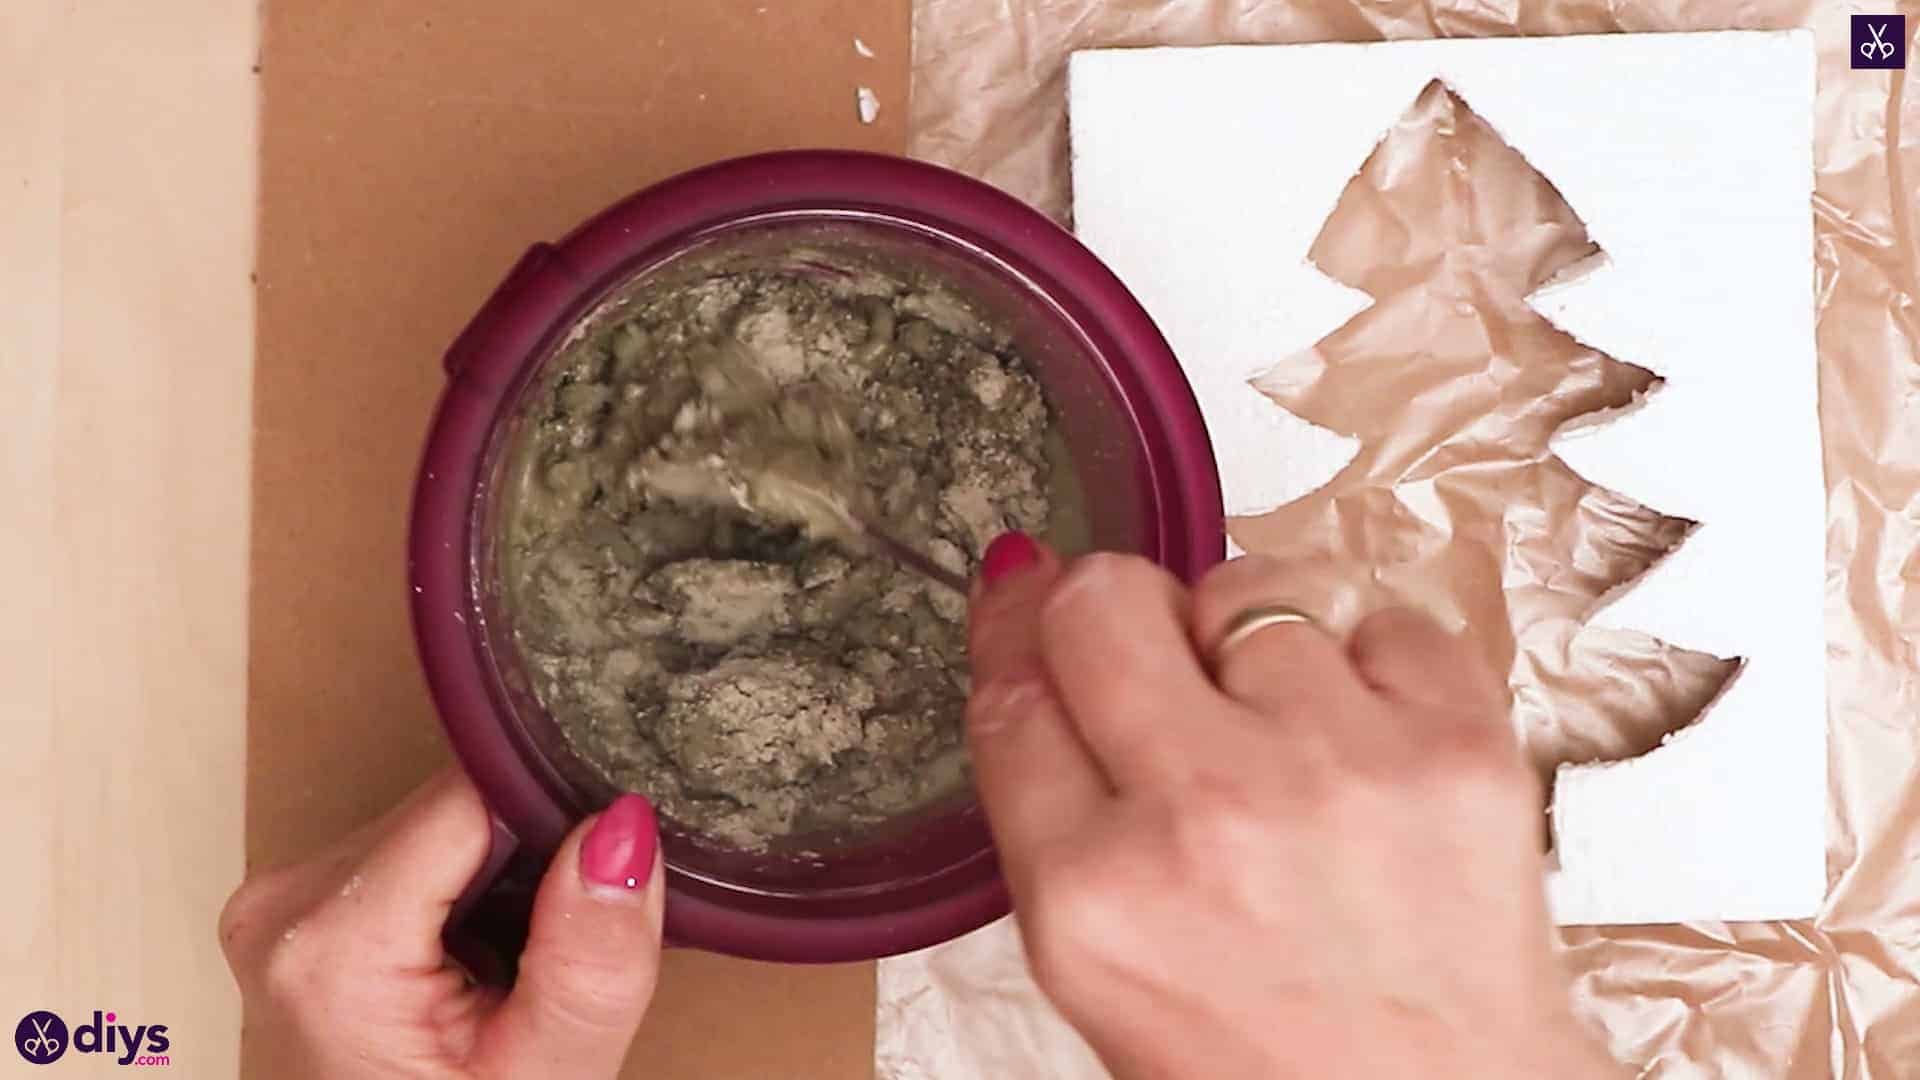
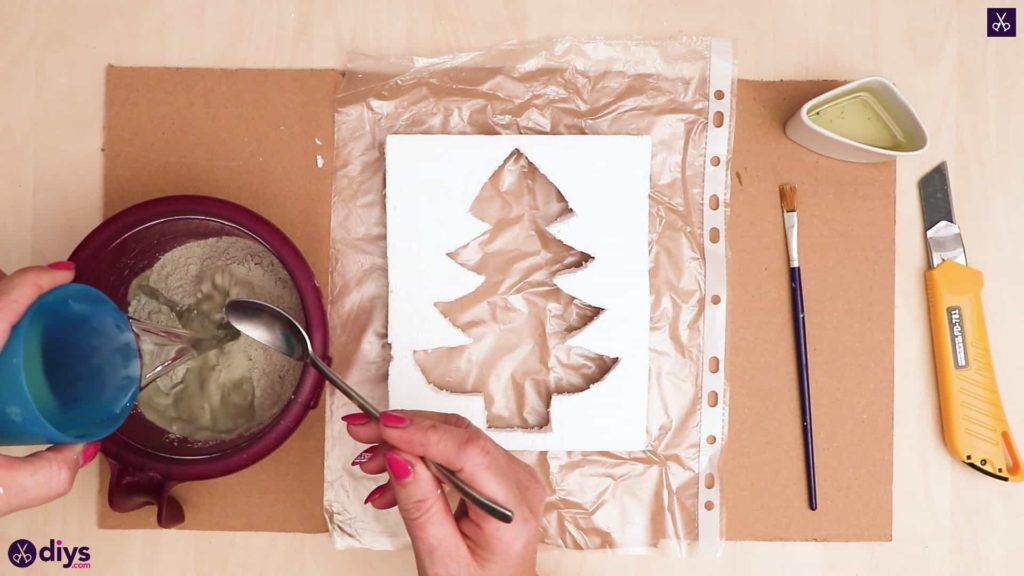
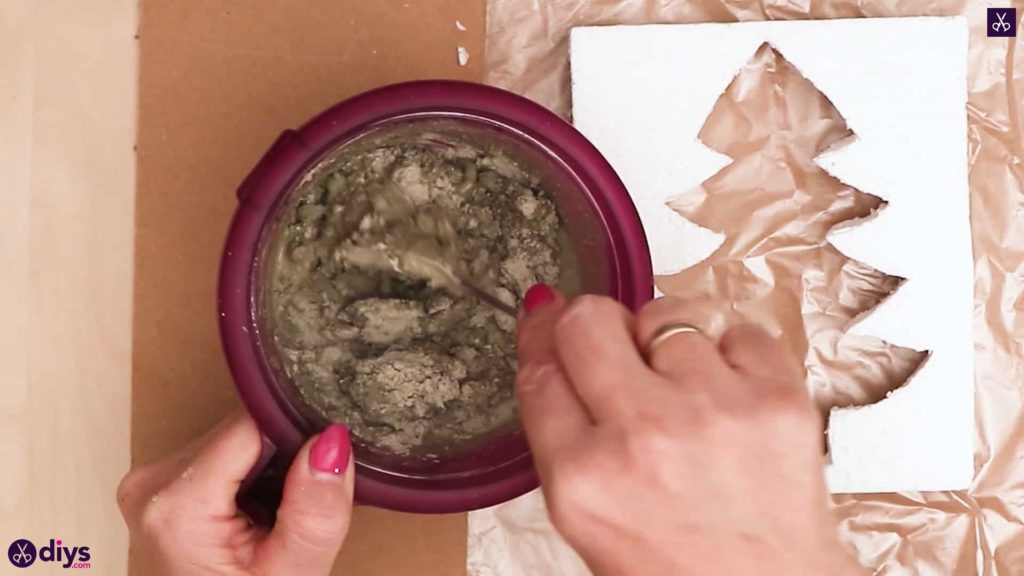
Pour water into your DIY cement powder and mix it thoroughly to get the right consistency (follow the instructions on the package, as the ratio of water to mix needed can vary from brand to brand).
Step 5:
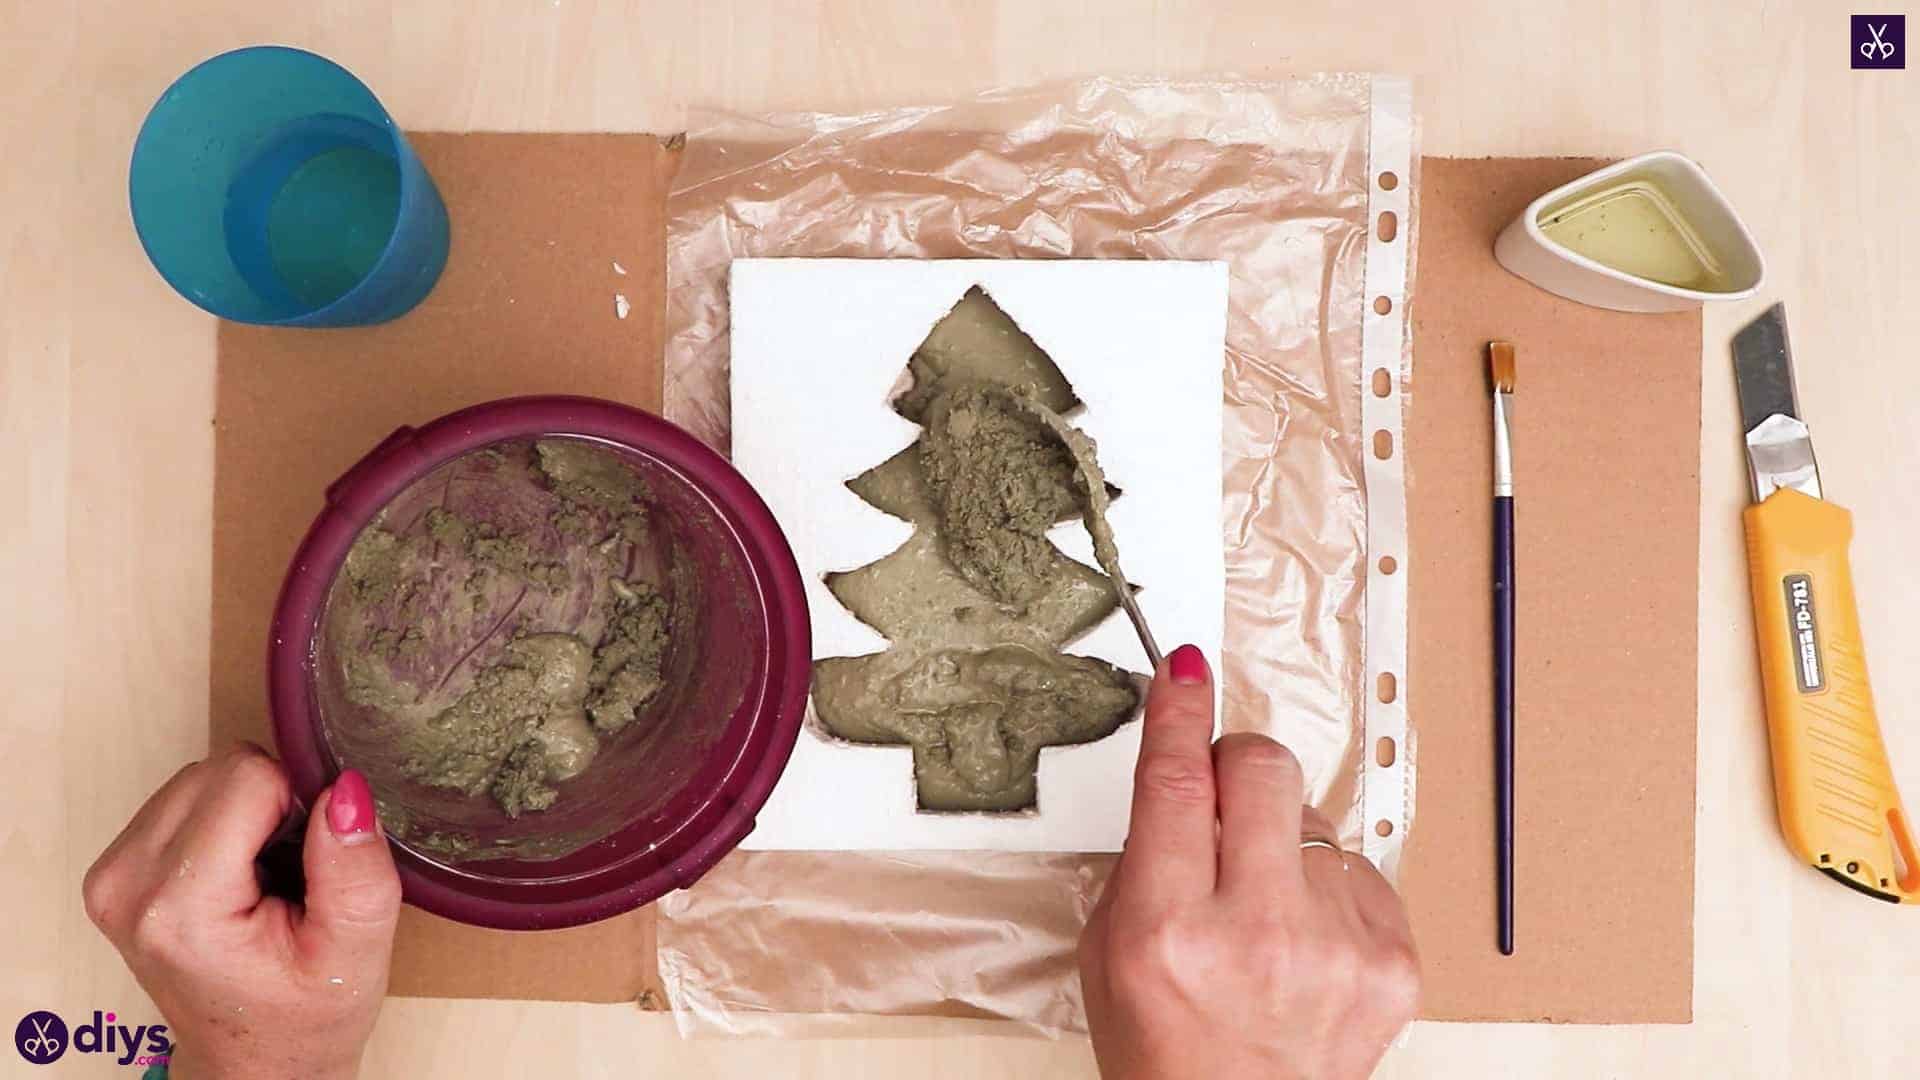
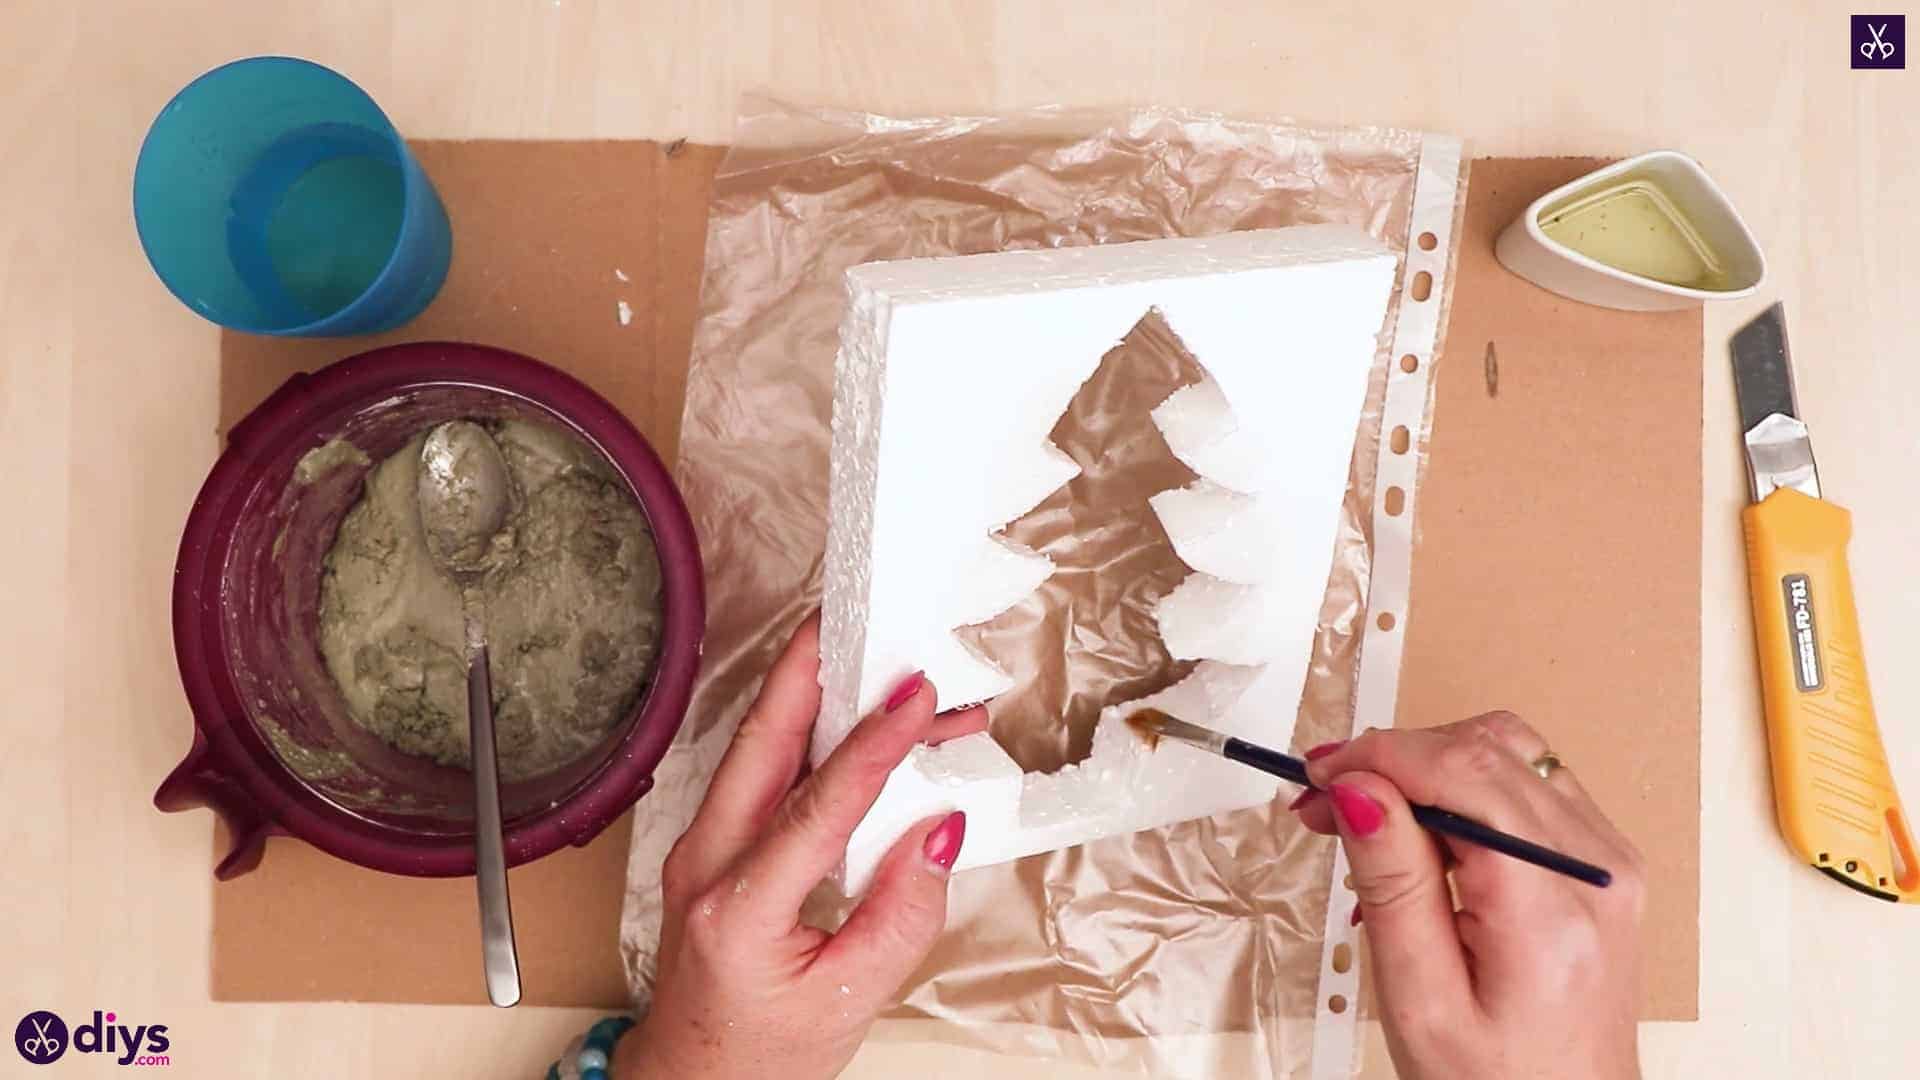
Use your paint brush to coat the inside outlined of the tree shape in your Styrofoam in oil. This will help the foam lift away from the concrete shape a little easier later one without sticking to it too badly.

Step 6:
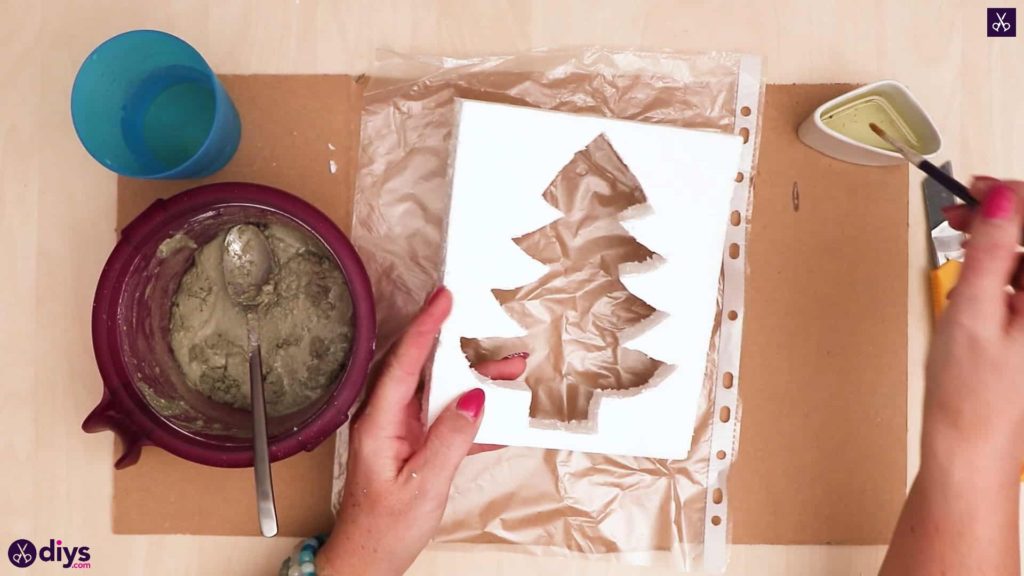
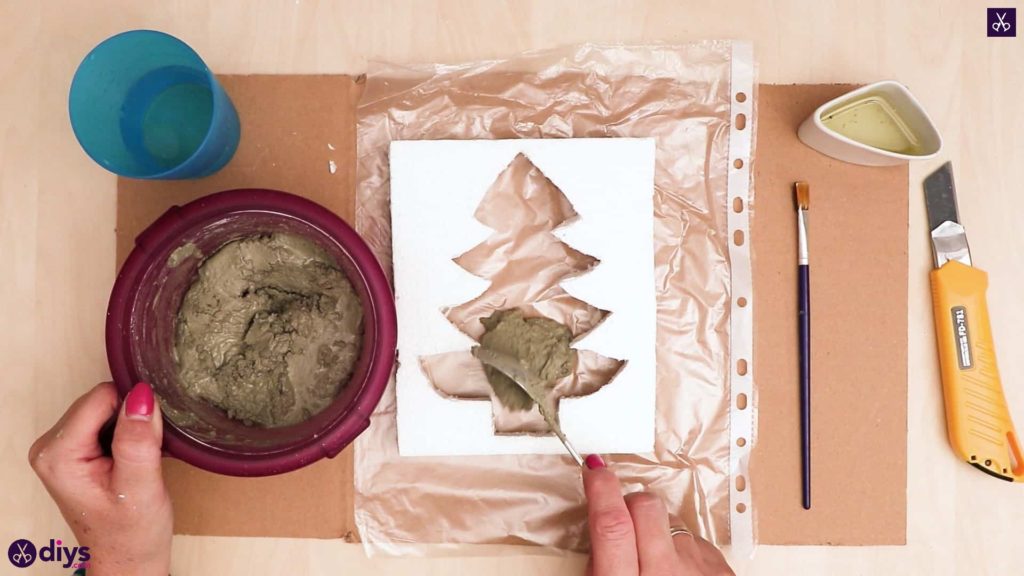
Place your Styrofoam outlined on top of a disposable plastic surface so it won’t stick to the concrete, like a plastic sleeve like I used here or a bag. Use your spoon to fill the whole inside tree shaped space with your concrete mixture until it meets the top of the outline. Smooth the top and set it aside to dry.


Step 7:
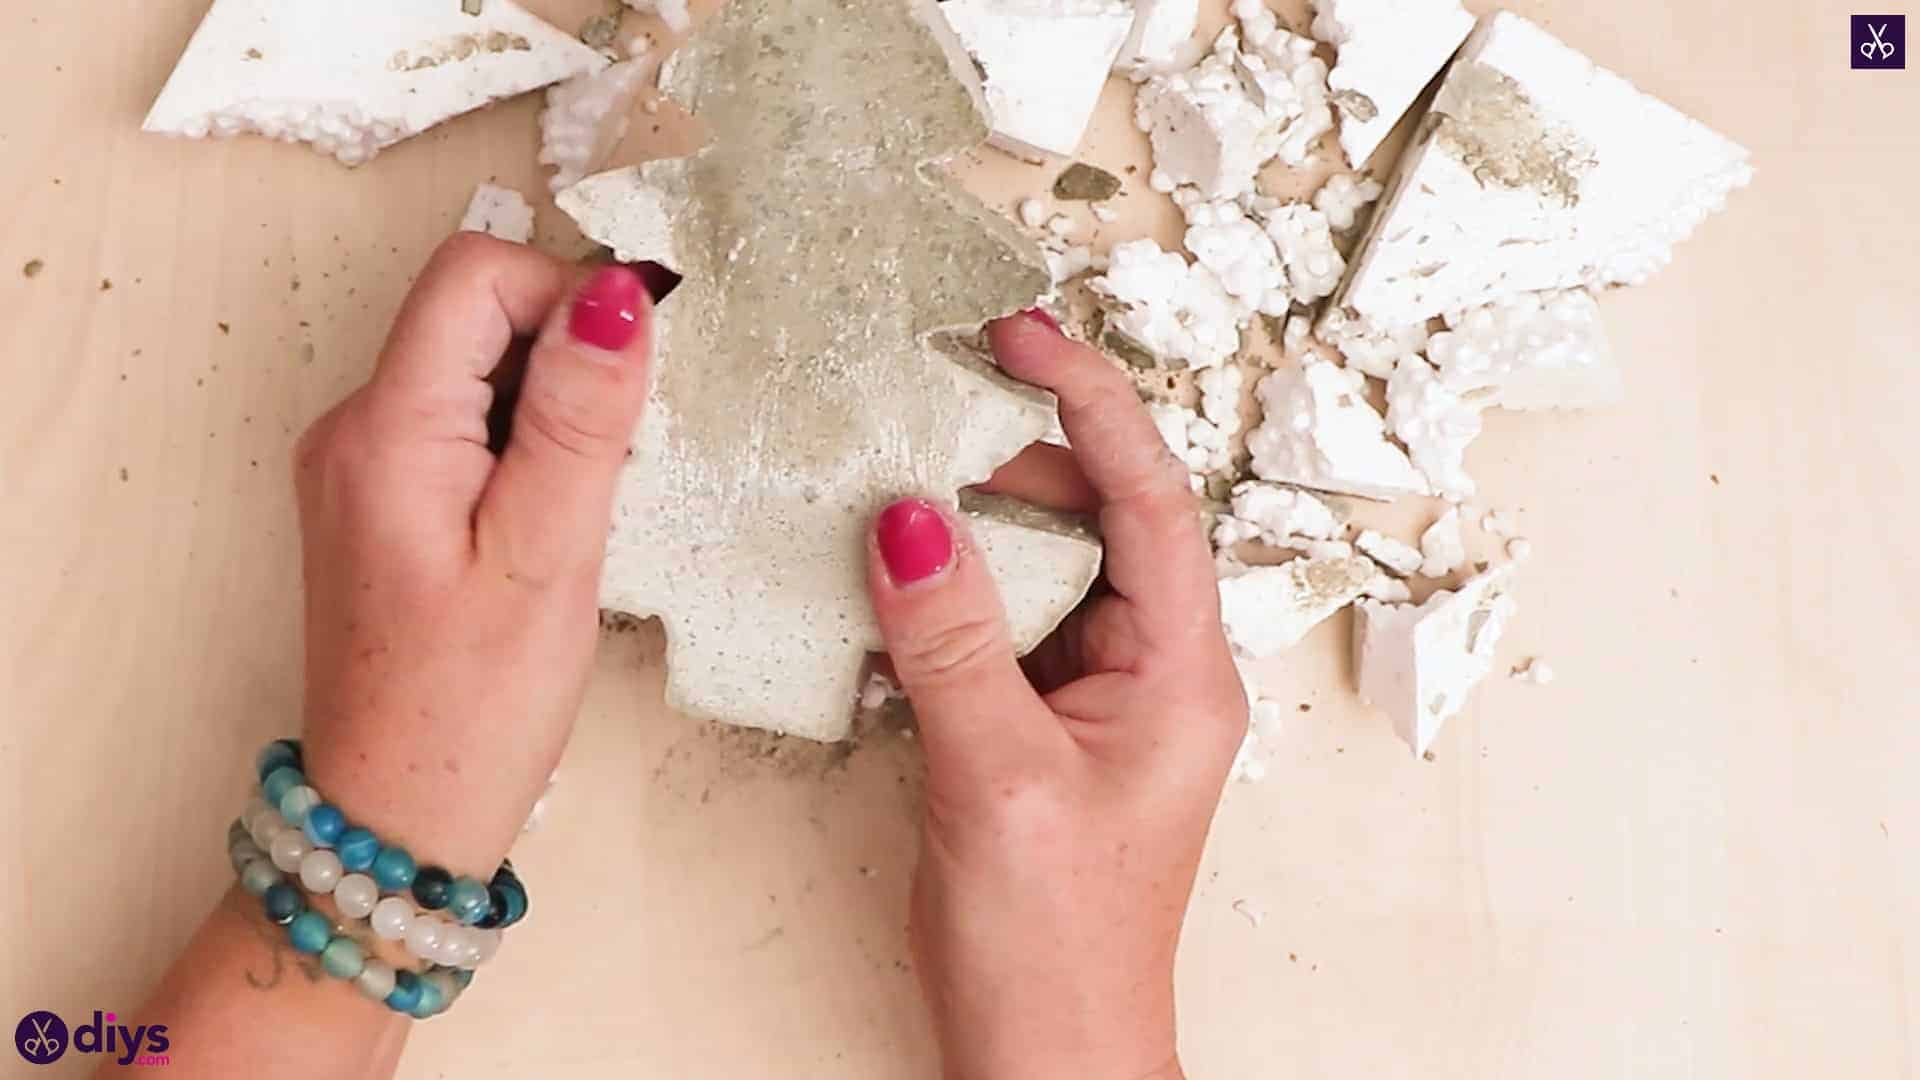
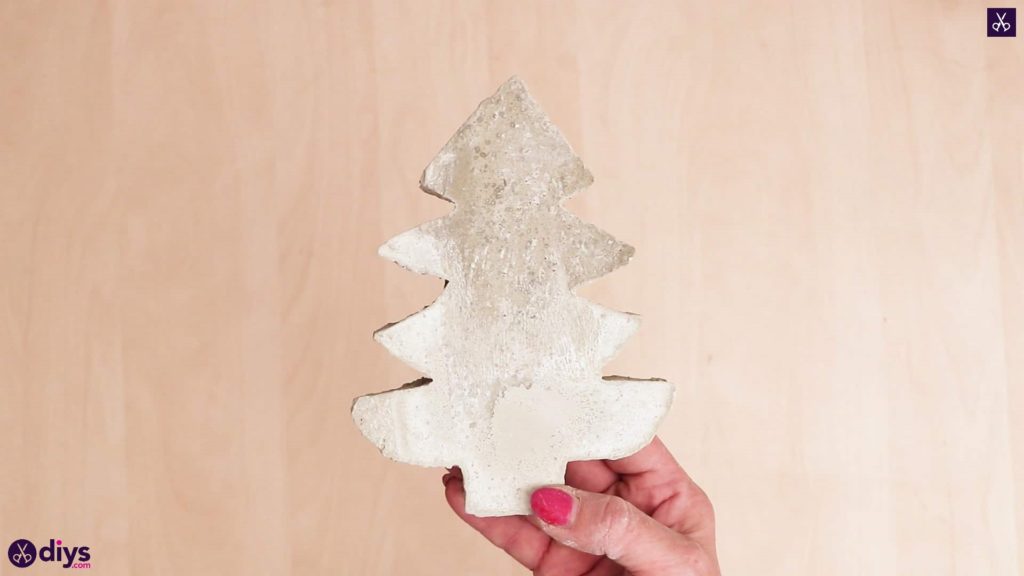
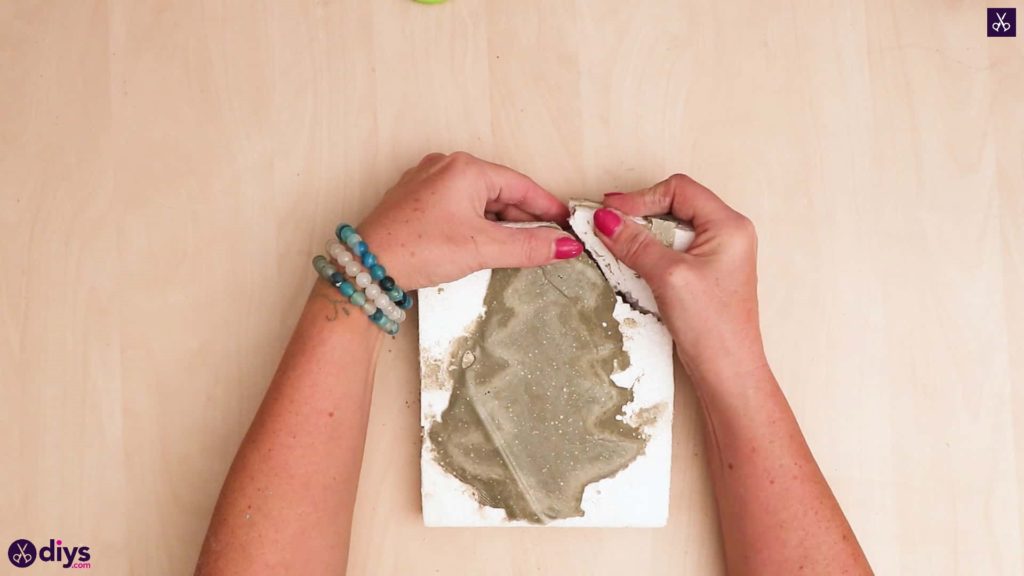
Once your tree shape is completely dried all the way through, lift the Styrofoam from the plastic you set it on and break the foam to remove it from the edges of the new concrete ornament. Continue all the way around until you’ve completely freed the shape from the Styrofoam.
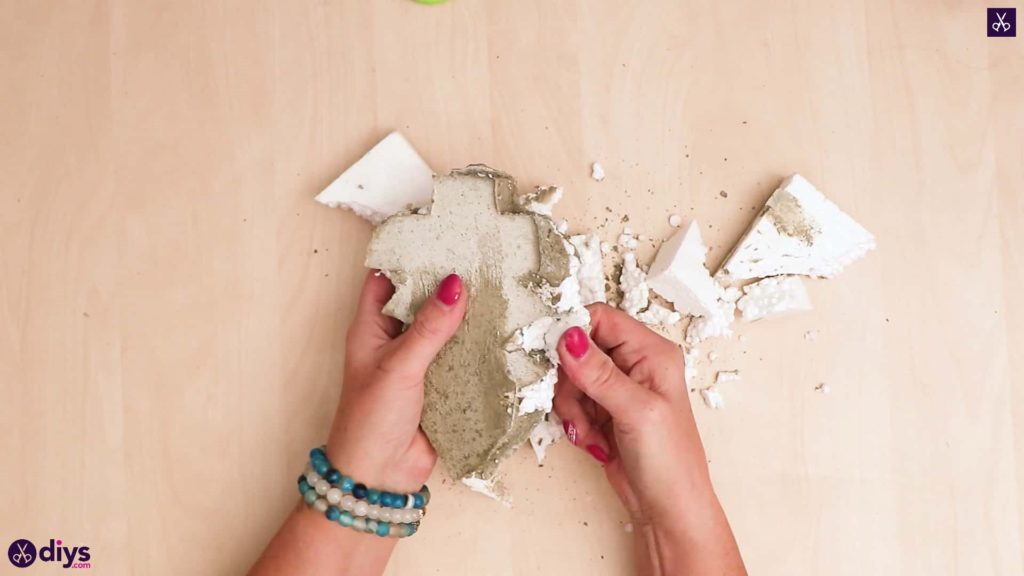

You’re all done! Feel free to paint or embellish your shape however you please or leave it natural and put it outside on the porch like I did. Just in case you’d like to try this project out for yourself, here‘s a fantastic tutorial video to help you!
to prevent breakage of tree limbs, reinforce them by unfolding paper clips and burying them in the concrete mixture