DIY Christmas Tree Table Decoration
Updated on November 19, 2025


Want to make a gorgeous DIY Christmas tree table decoration but don’t know where to start? I made one and I documented the whole process, just in case other people might like to give this adorable Christmas tree inspired rustic table decoration a try too, since I was so happy with it in the end.
Check out these step by step instructions complete with photos! If you’d rather follow along with a video tutorial instead of written words, scroll to the bottom of this post to find just what you’re looking for.
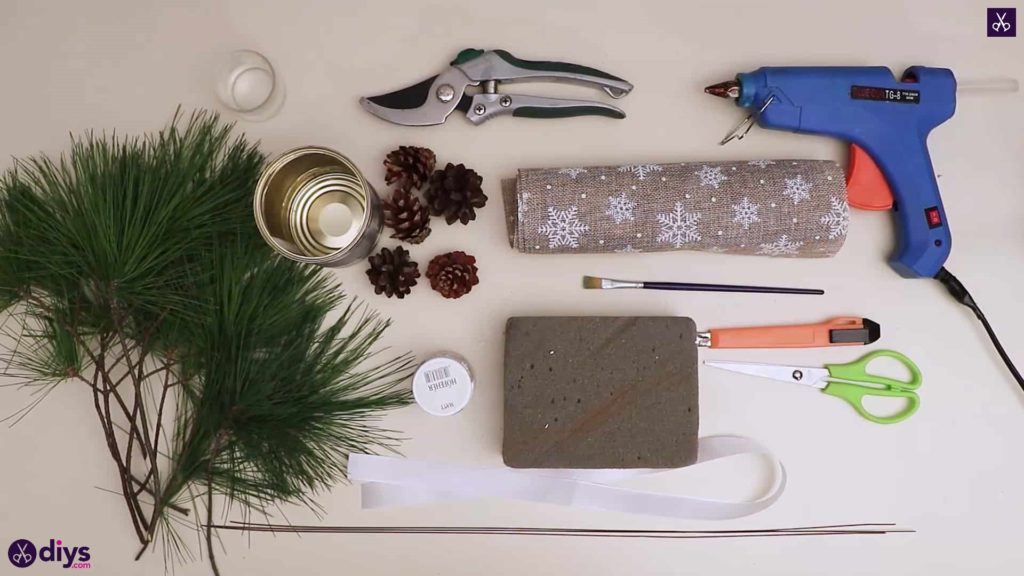
For this project, you’ll need:
- A pinecone
- A pine branch
- White paint
- A paintbrush
- A folding utility knife
- Ribbon (white and jute)
- Hot glue
- Secateurs
- Wire
- Dry oasis form or planters foam
- A tin can
- Malleable gardening wire
Step 1: prep
Gather your materials!
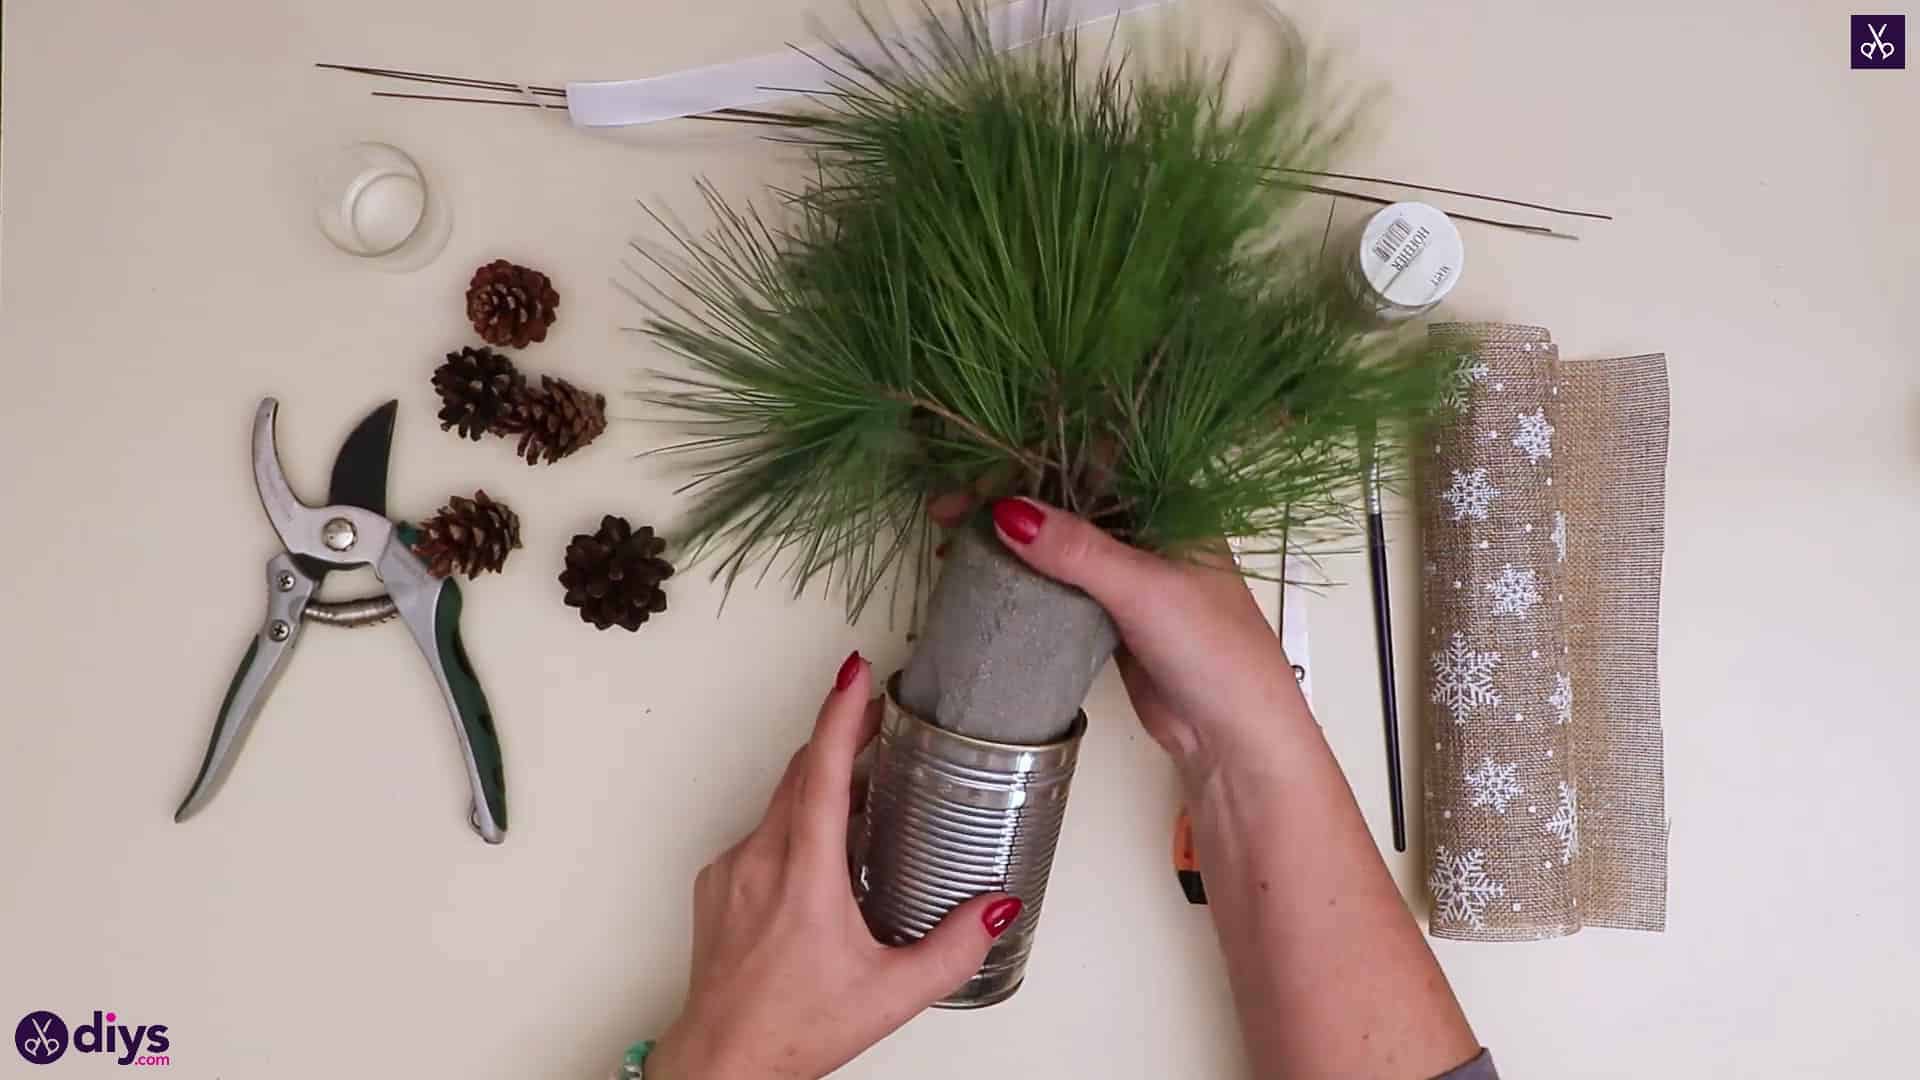
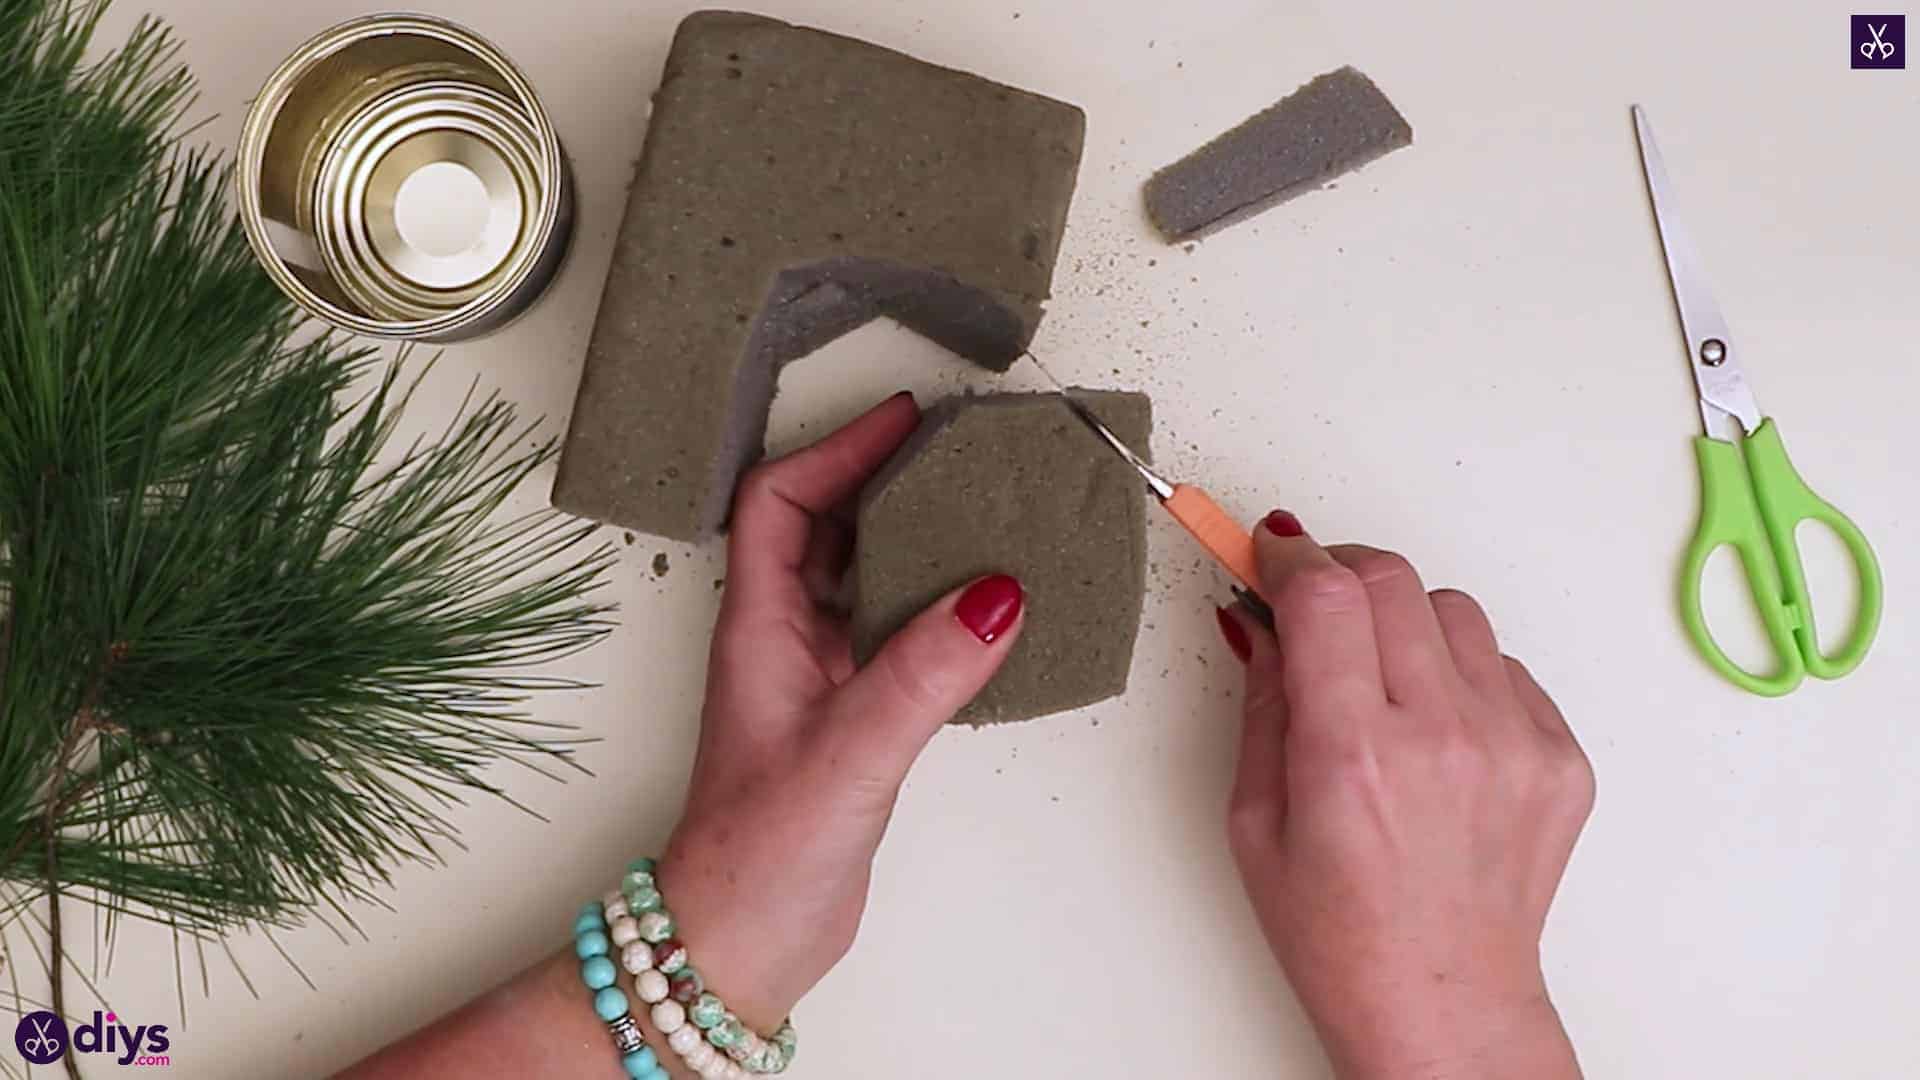
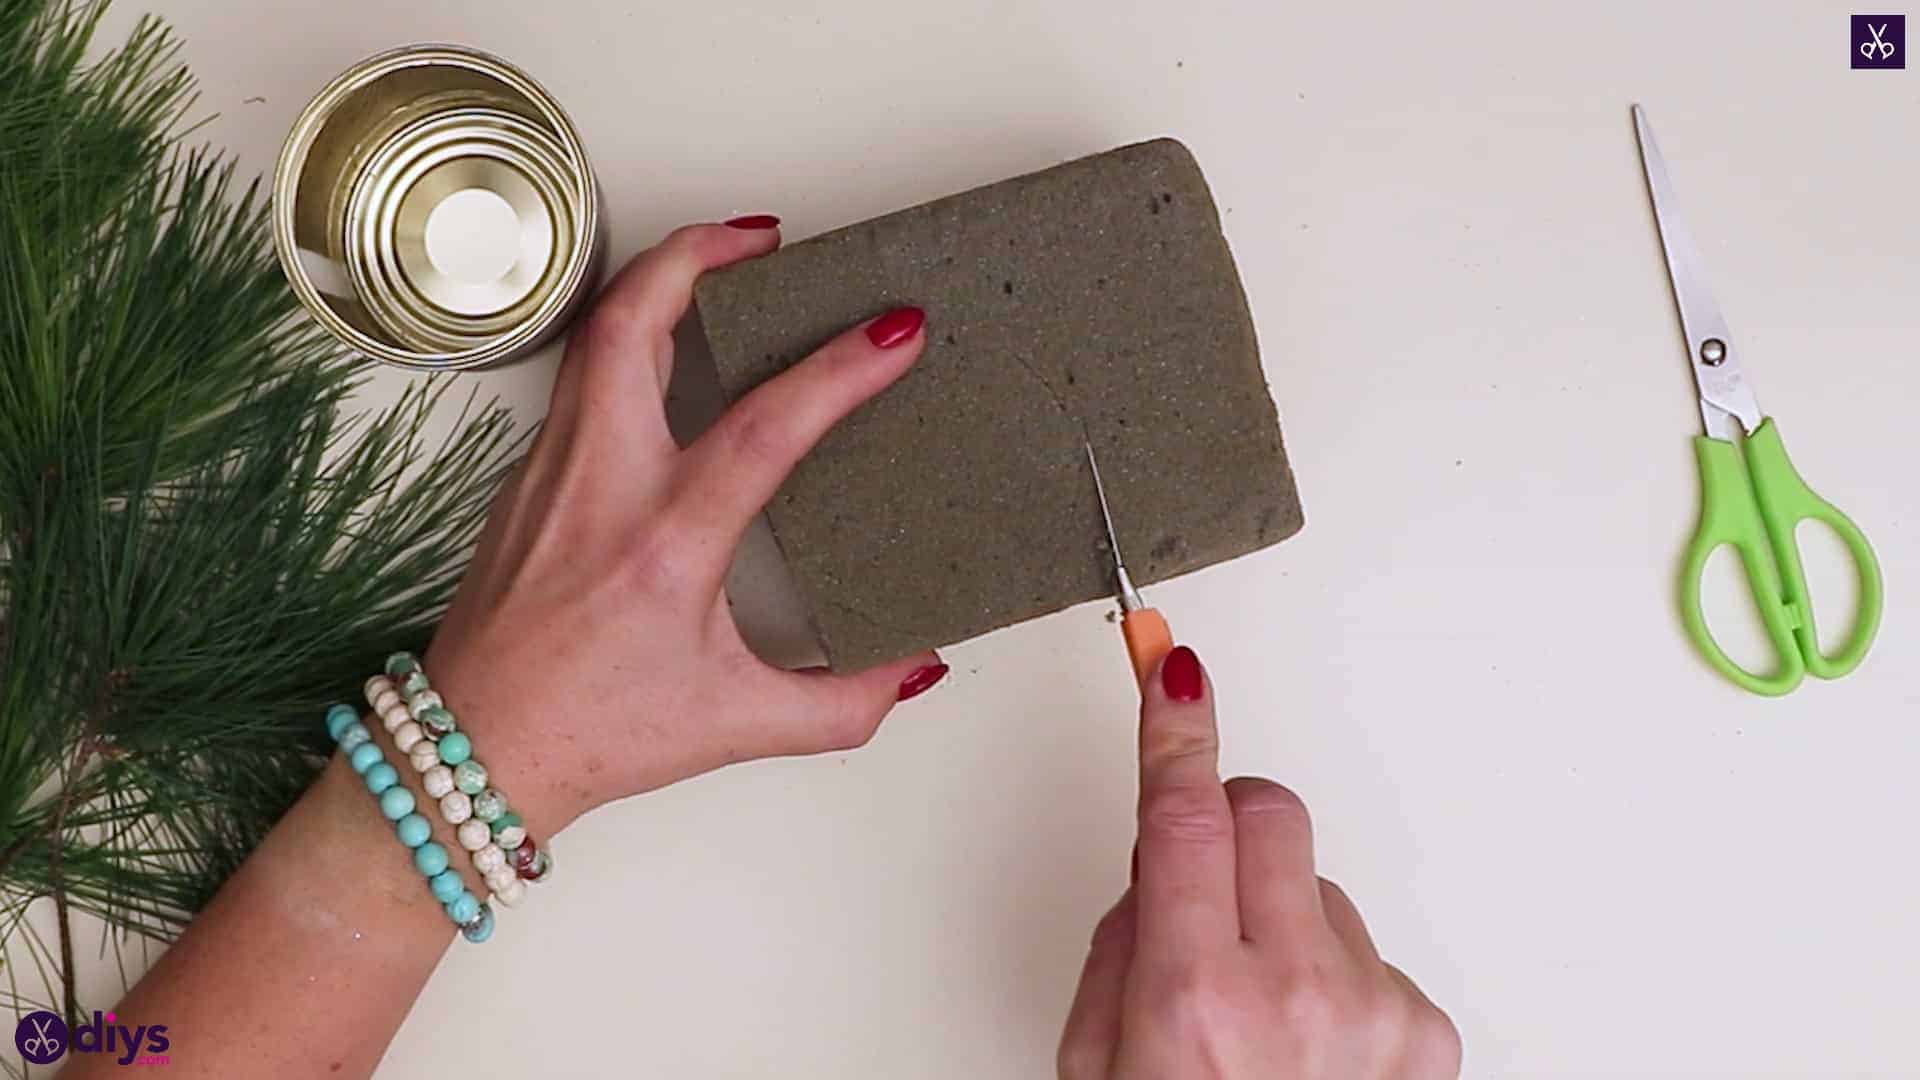
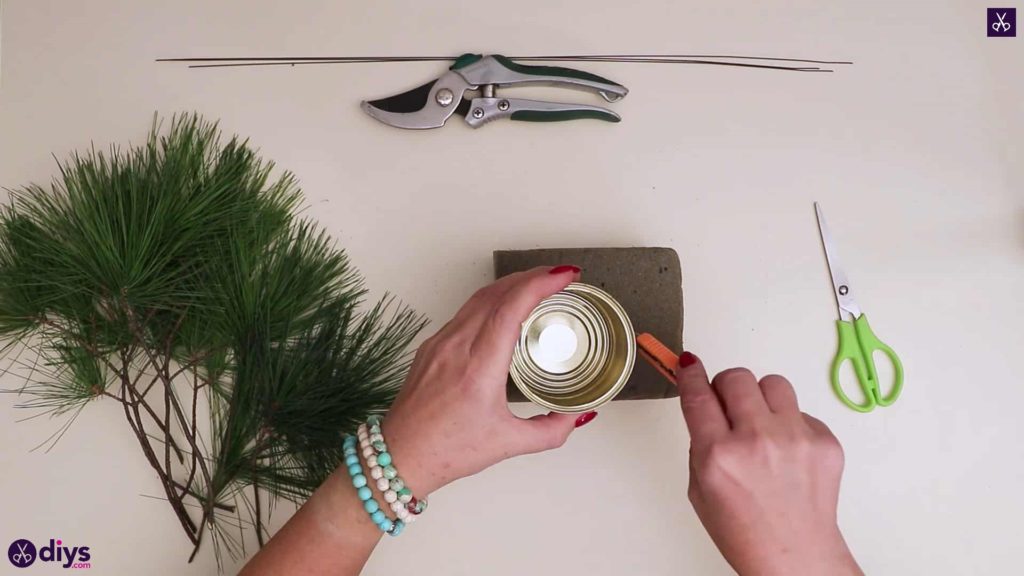
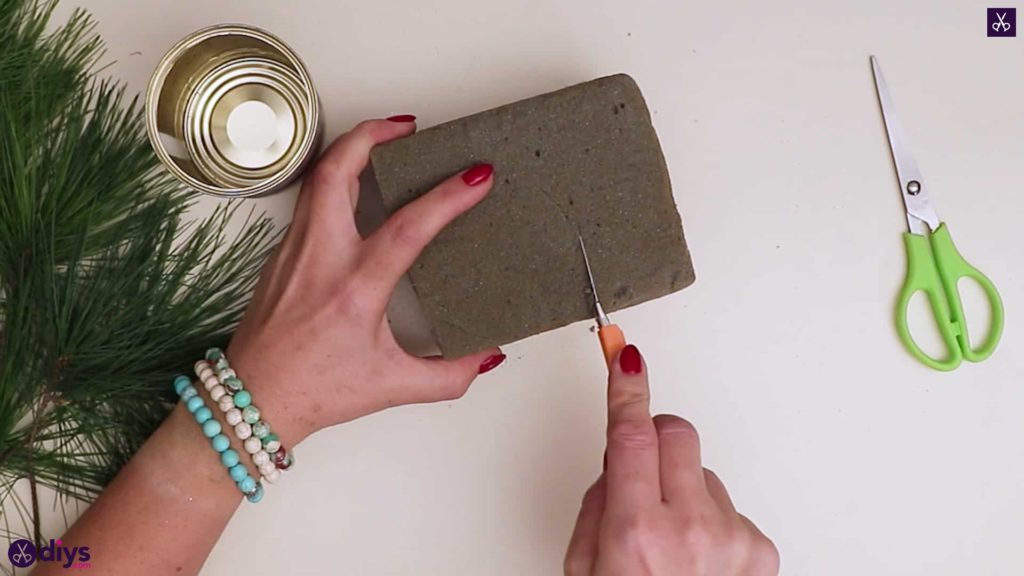
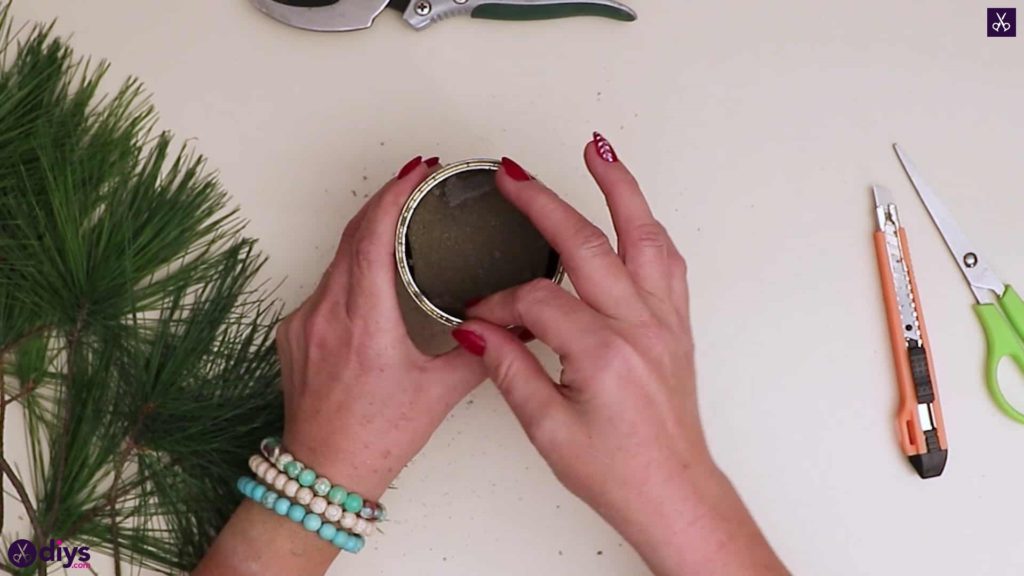
Step 2: cut the foam
Place the bottom of your tin can on top of your planter’s foam block and carefully use the tip of your folding knife to mark out a circle around it. Move the can and cut out a cylindrical shape in its size from the block, gently rounding the sides and edges.

Step 3: fill the can
Slide the cylinder inside the can so it fills most of it. Don’t worry if it’s not a perfect fit; you can force it a little and the easily moulded foam will move and shave off until it slides inside. Clear the excess out if necessary.
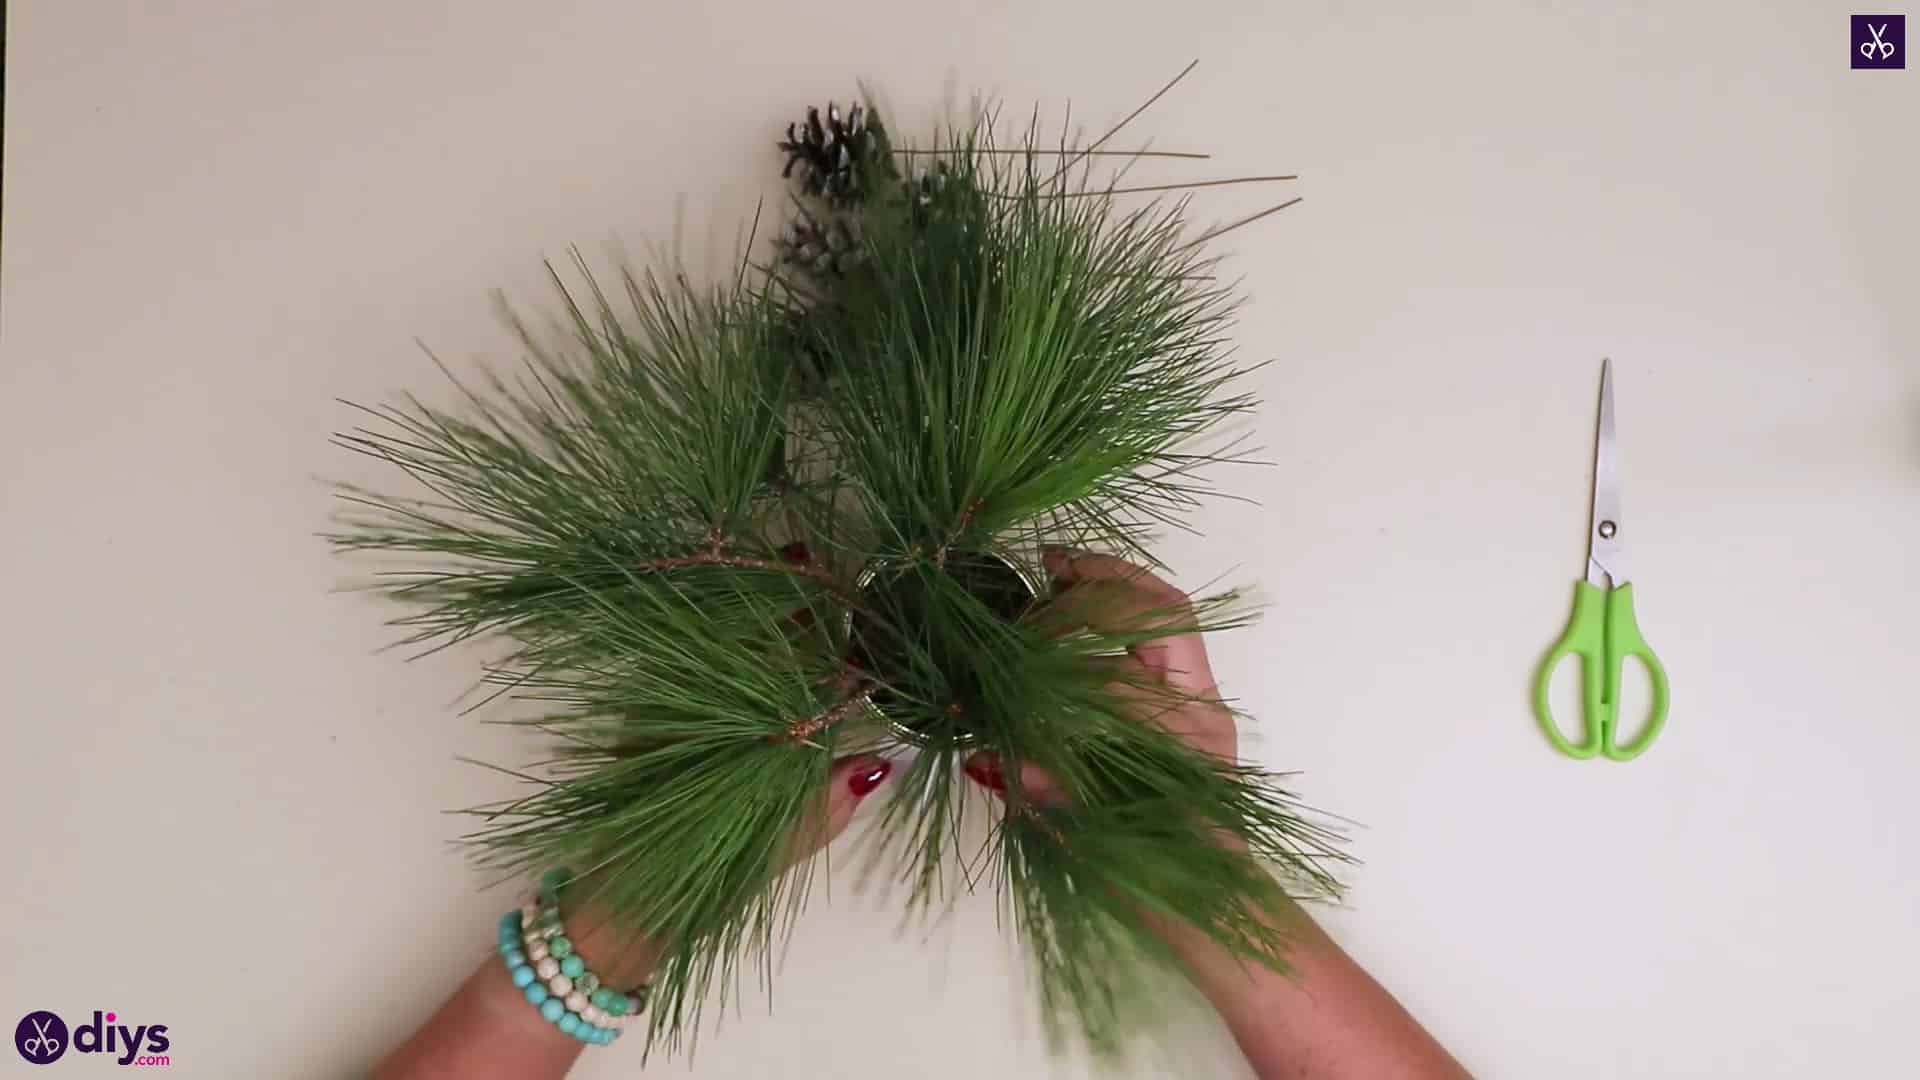
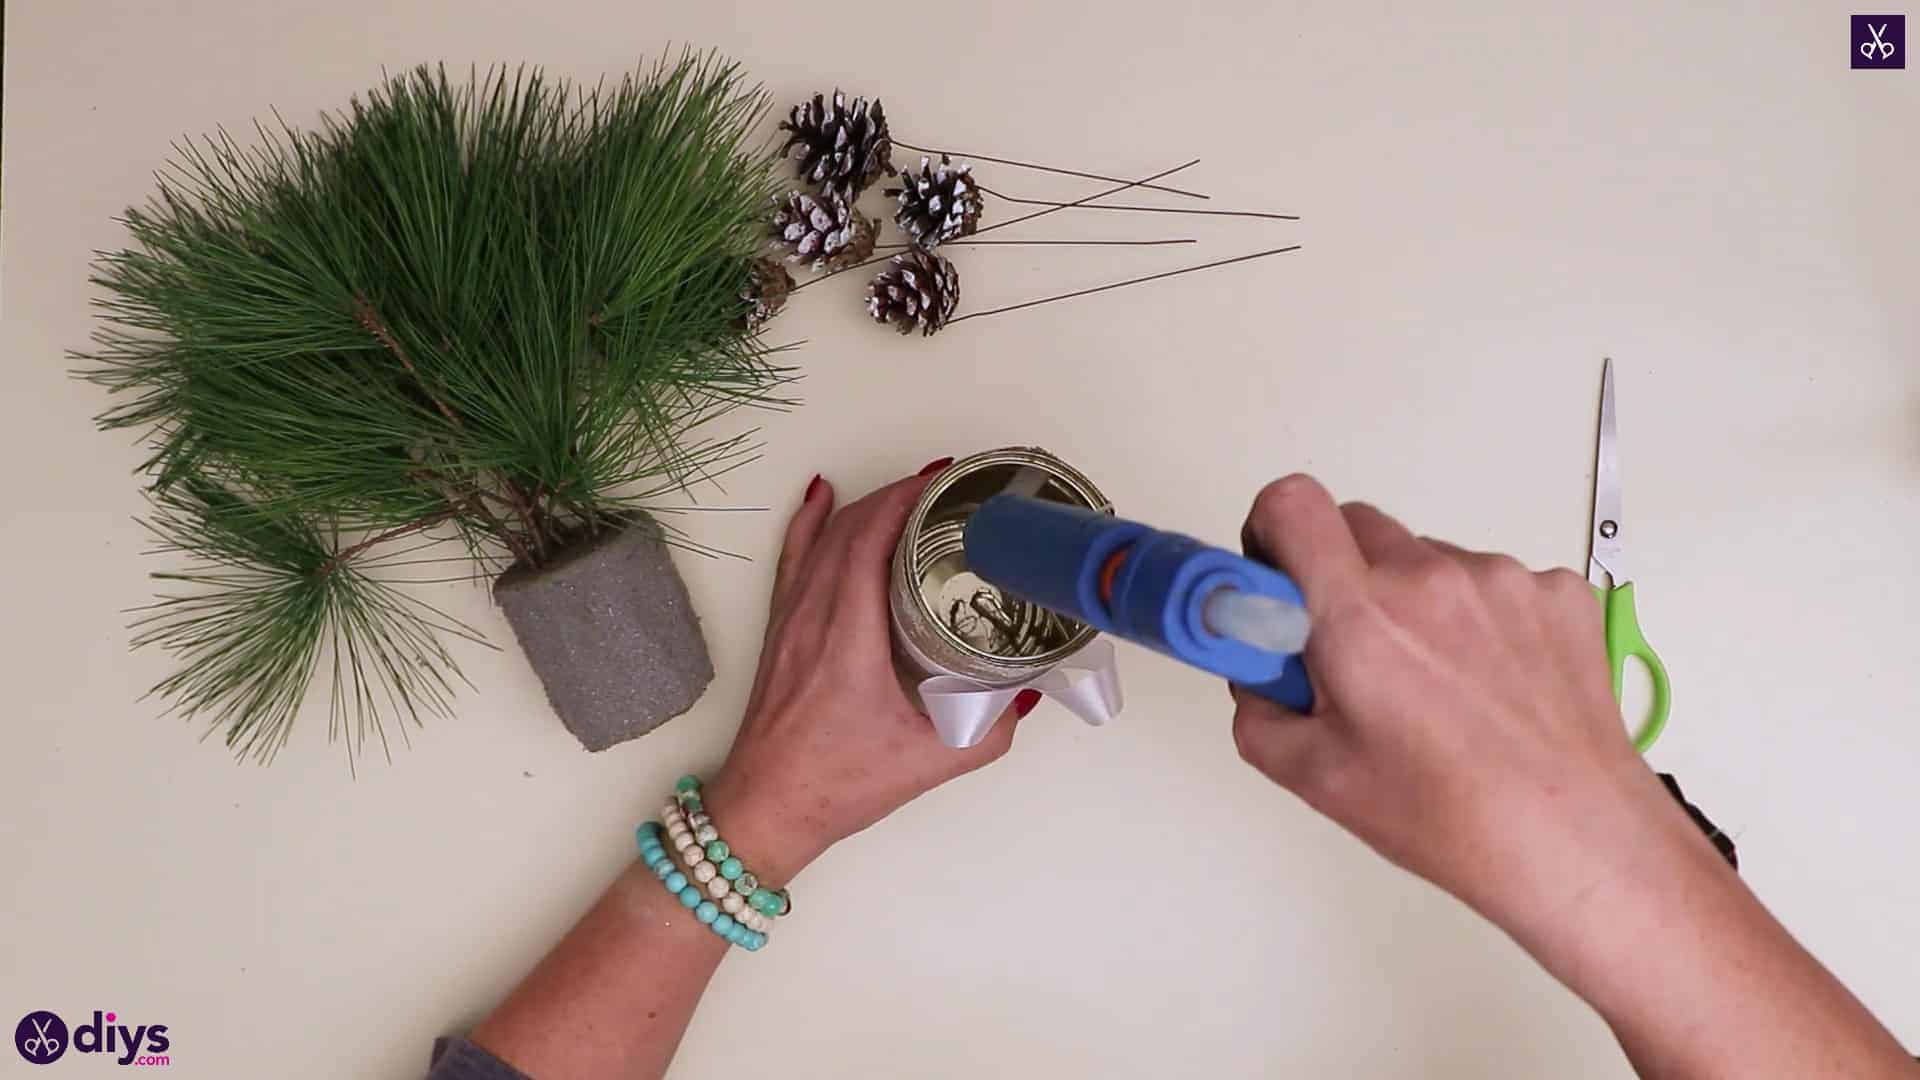
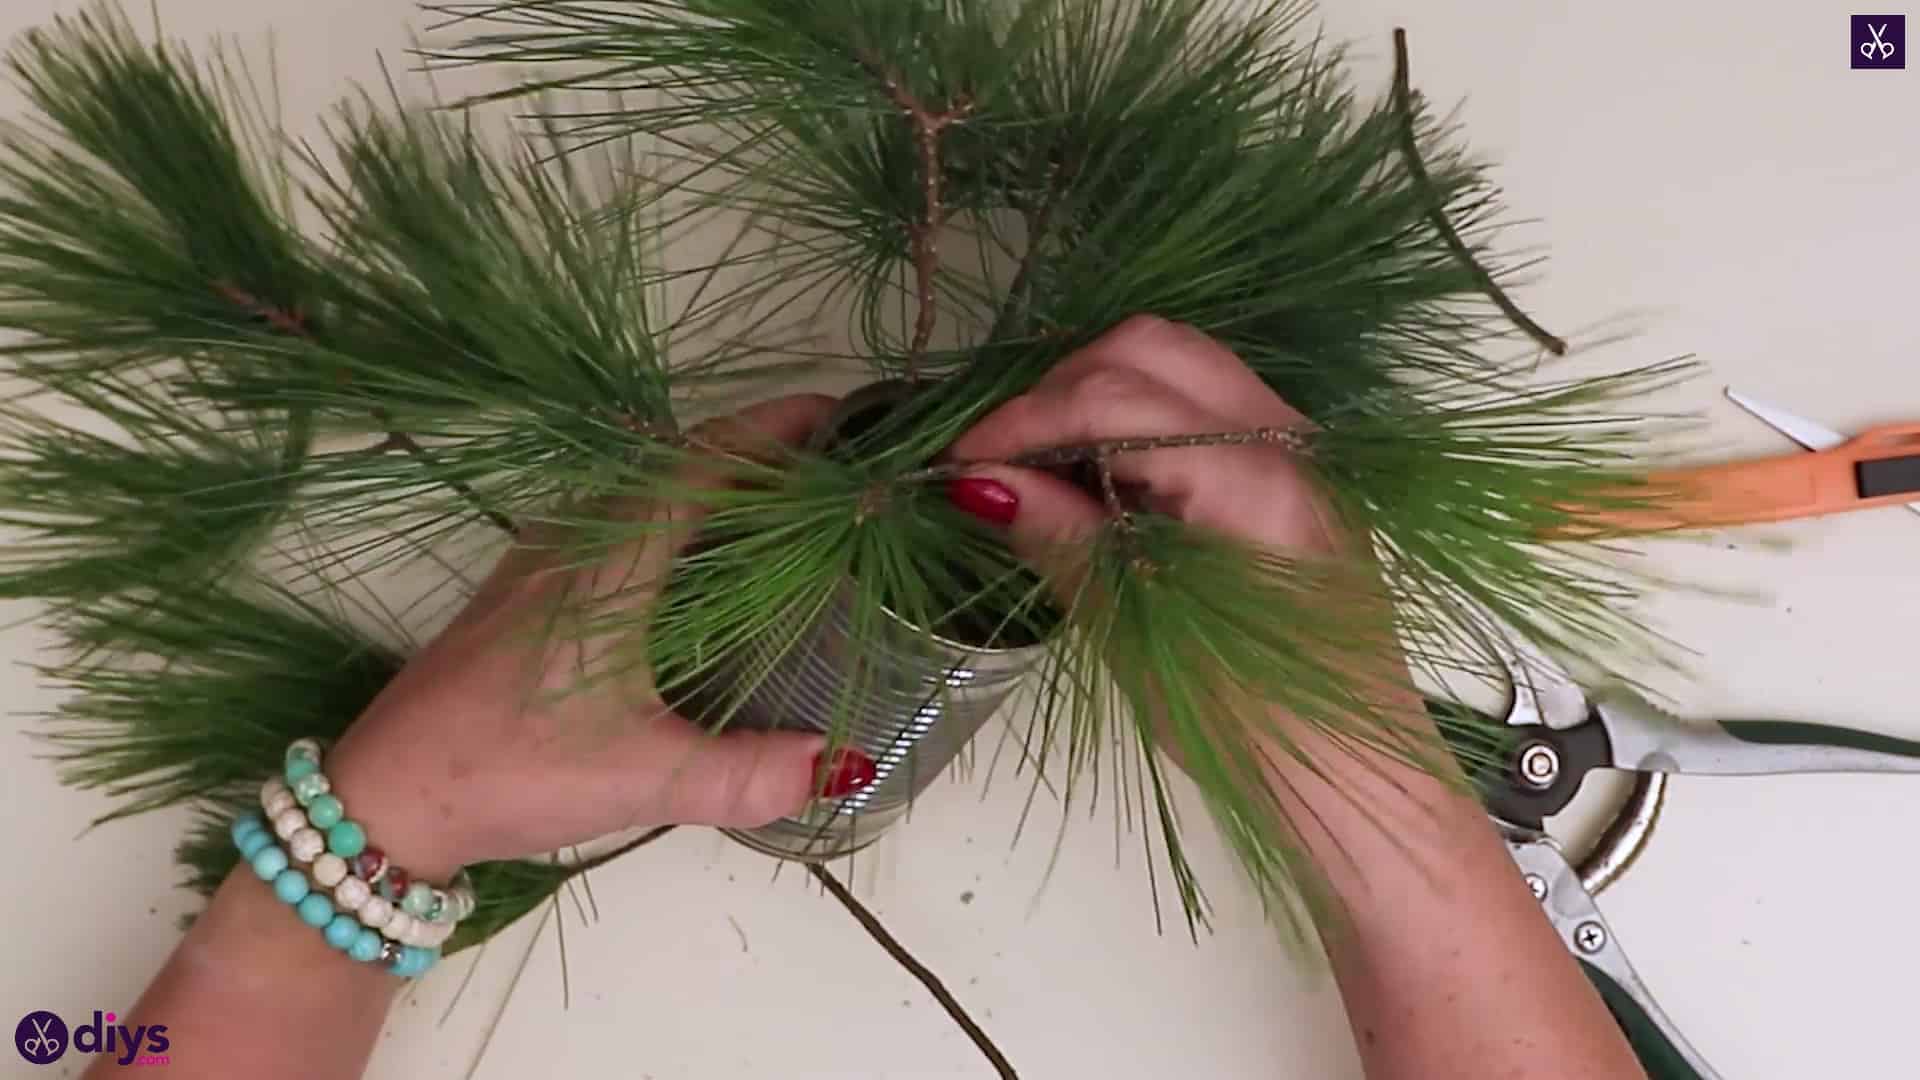
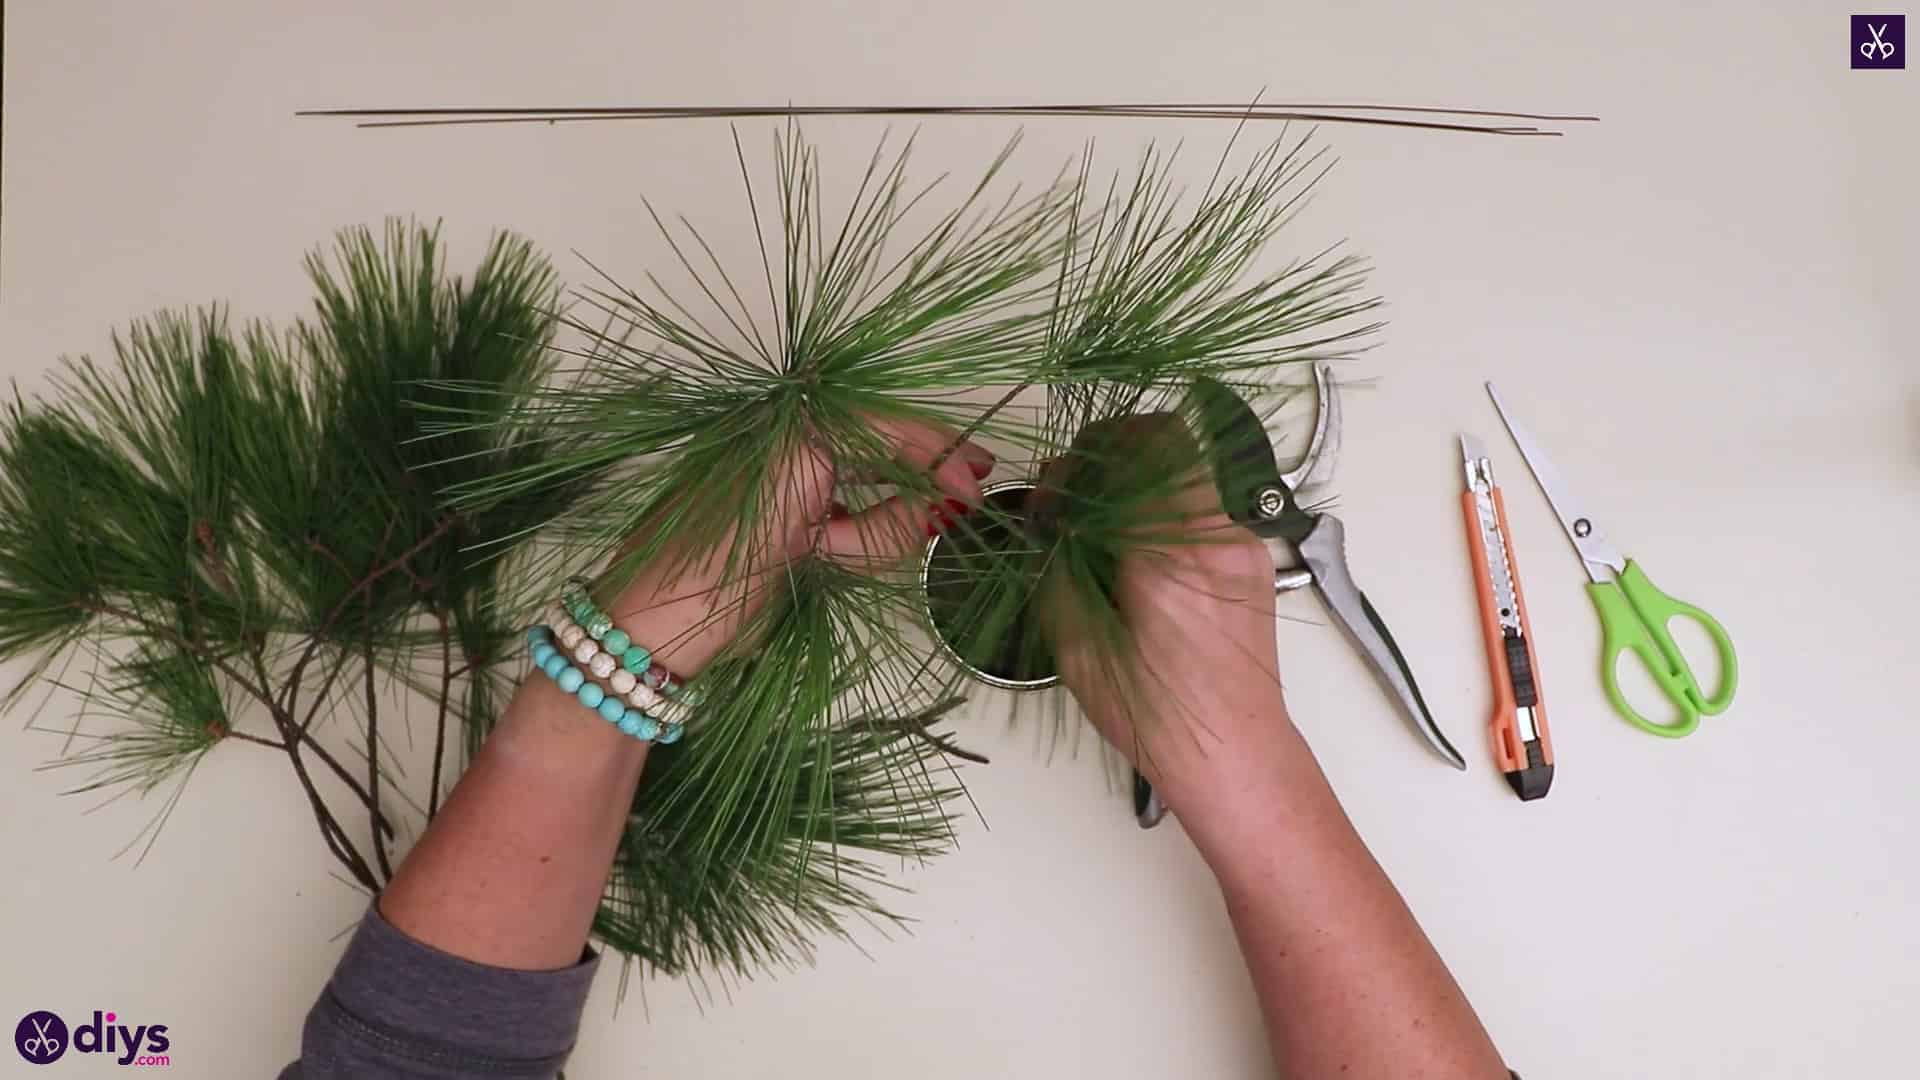
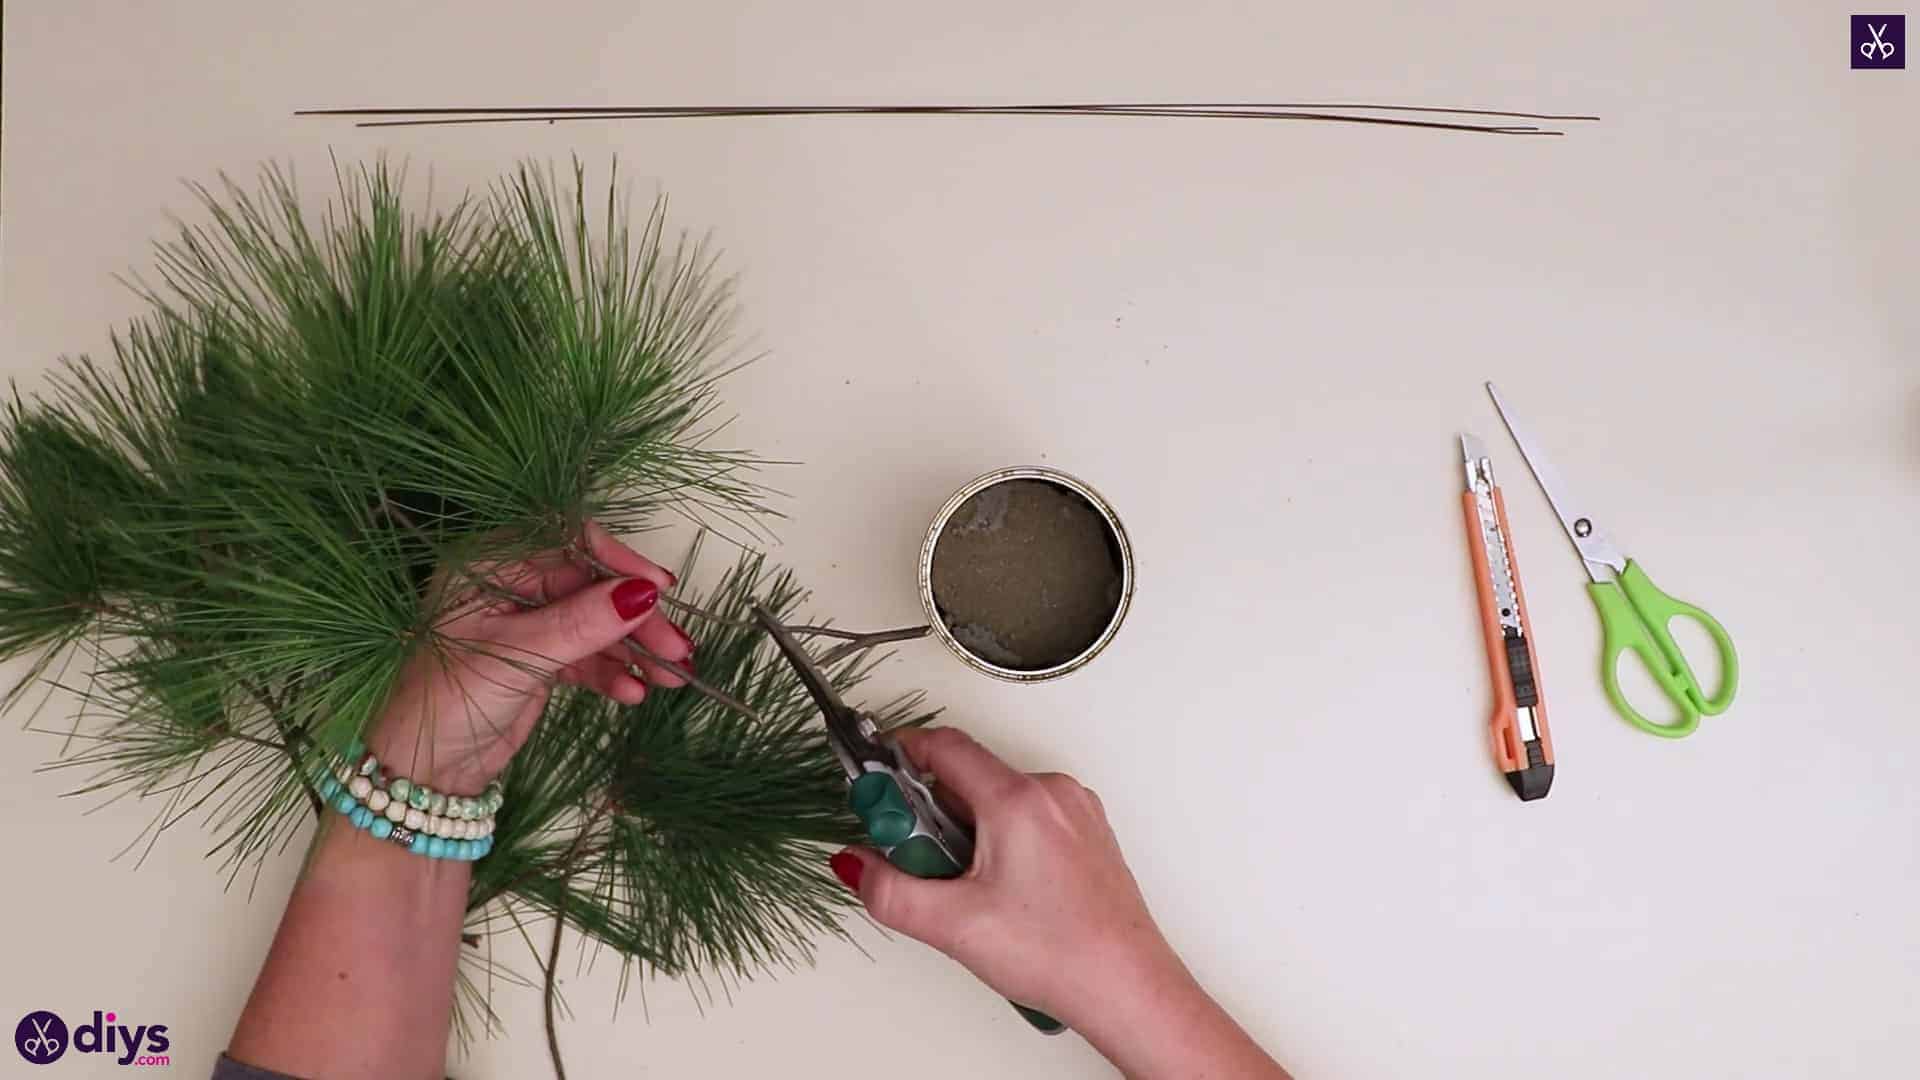
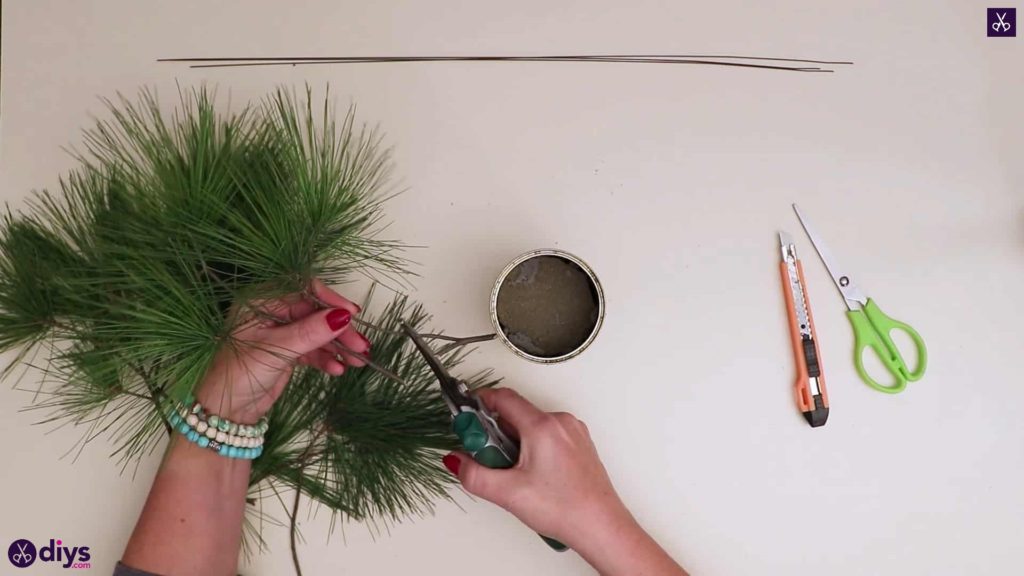
Step 4: add foliage
Use your secateurs to separate and trim your pine branches so you can poke them into the foam and arrange them how you please. Add or reposition branches until the piece looks full and voluminous, like a Christmas tree might. The slide the whole foam piece with all of its branches in it out of the can and set the whole thing aside for the moment.


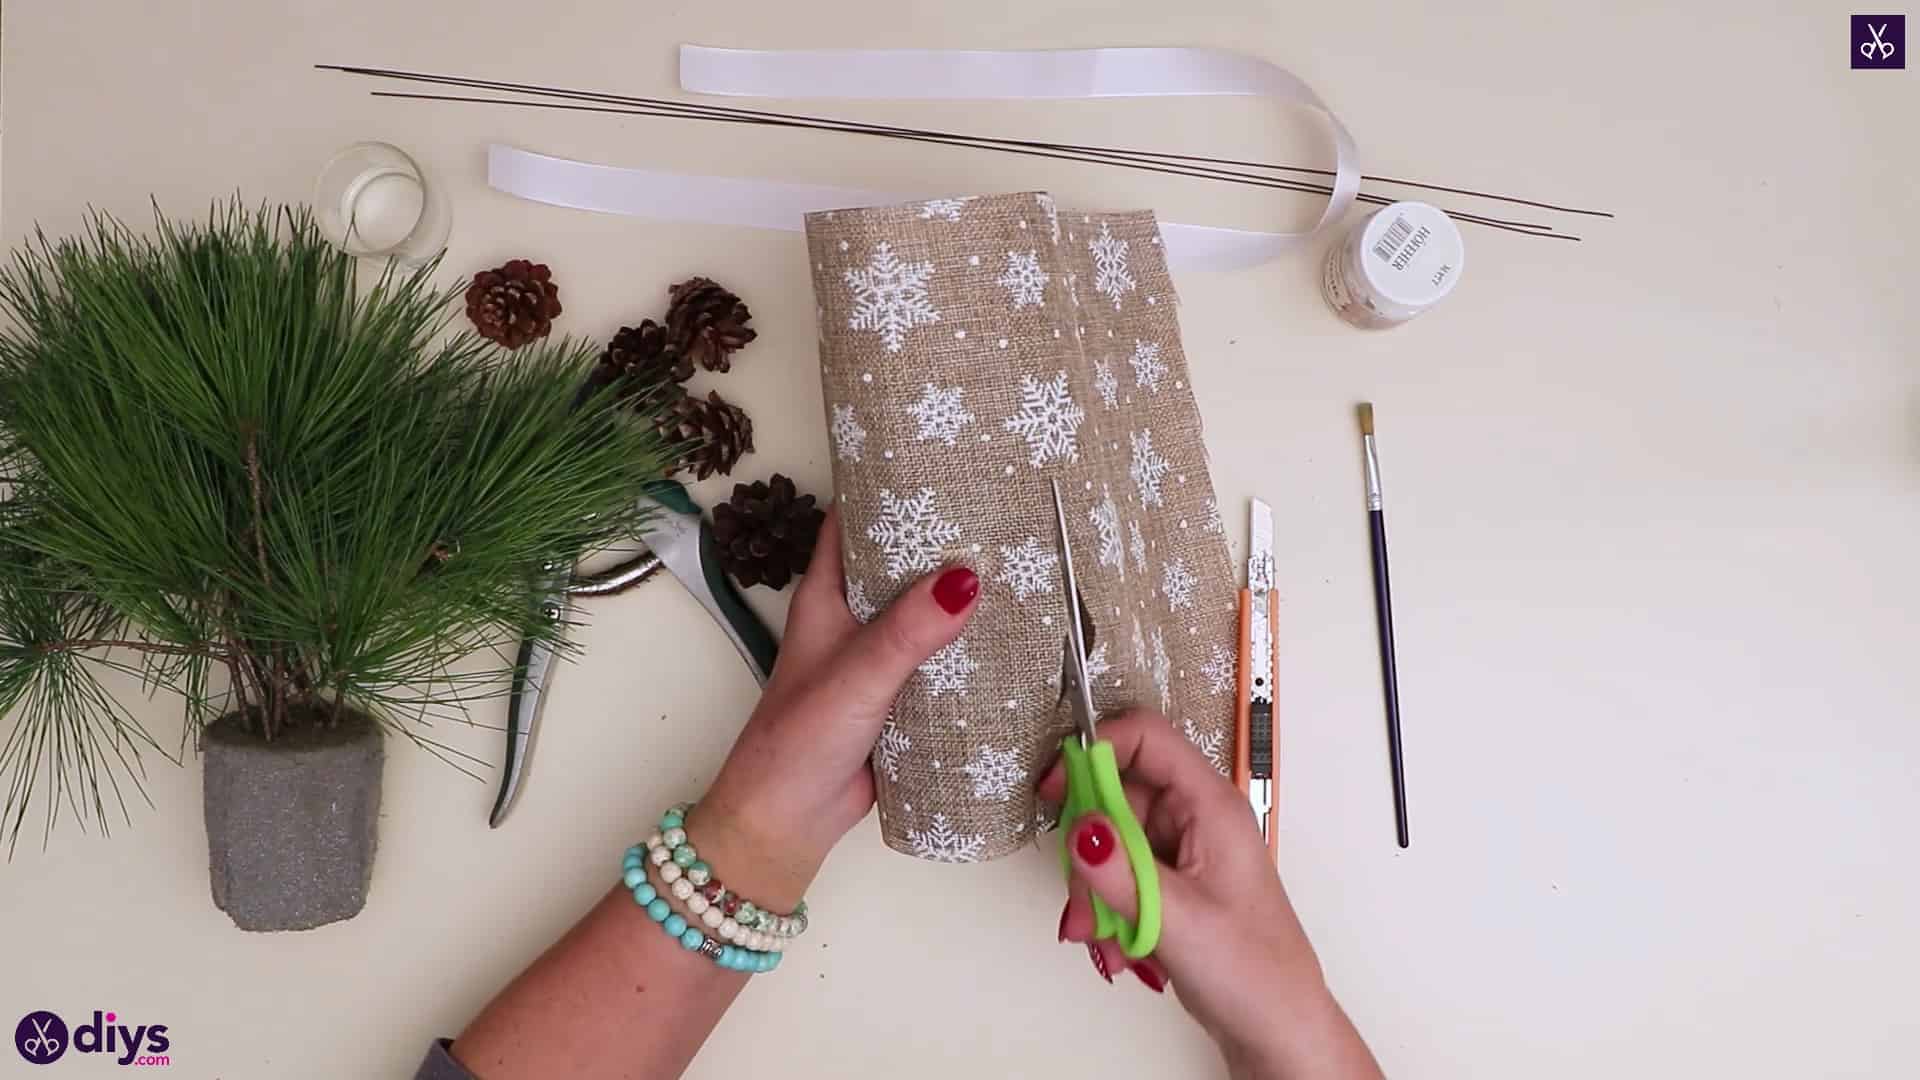
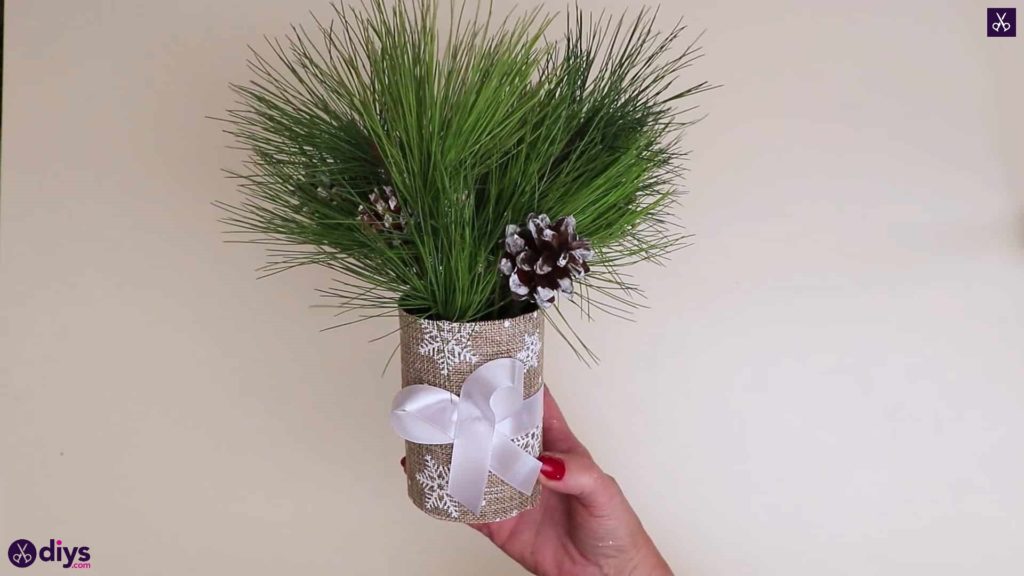
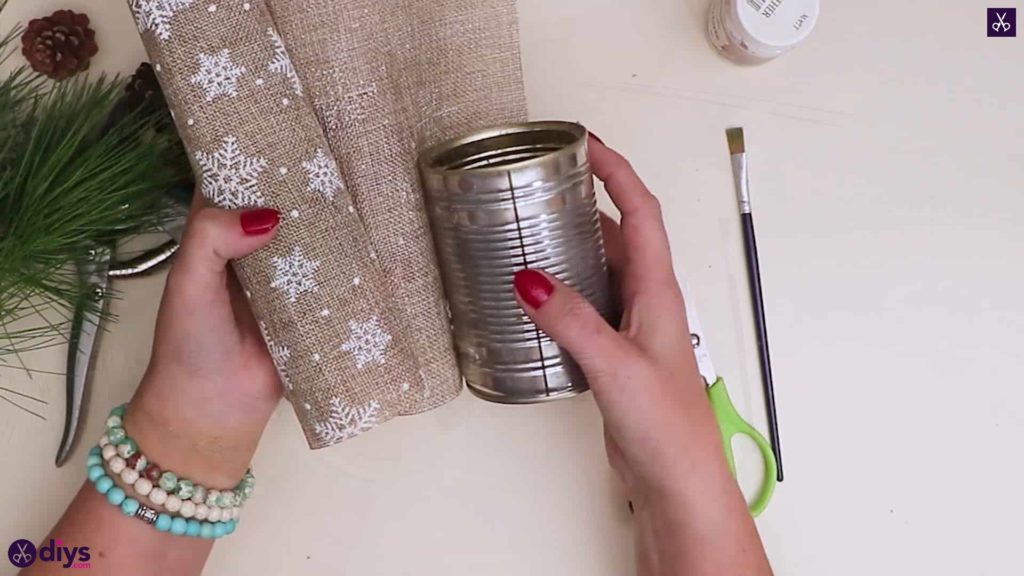
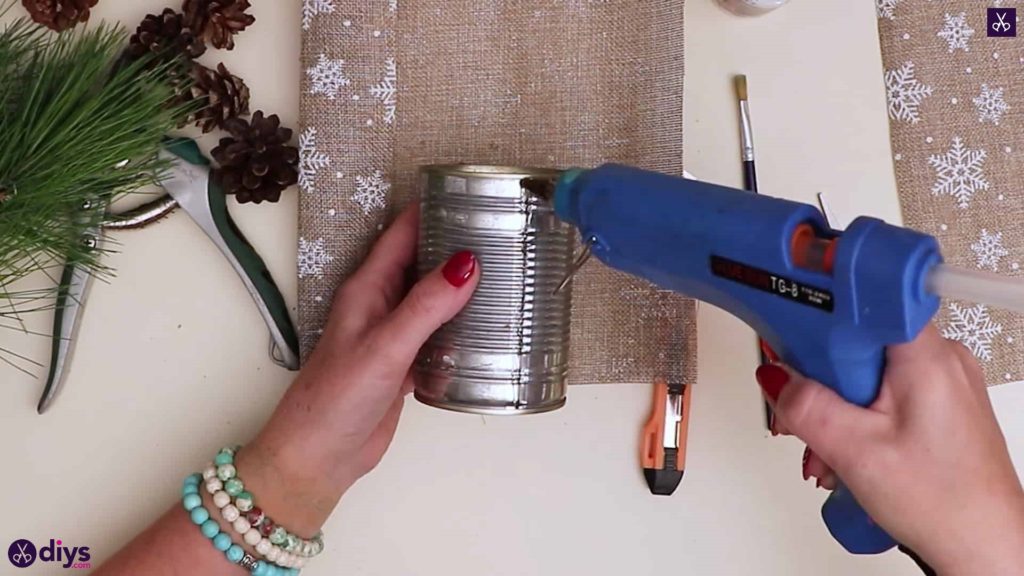
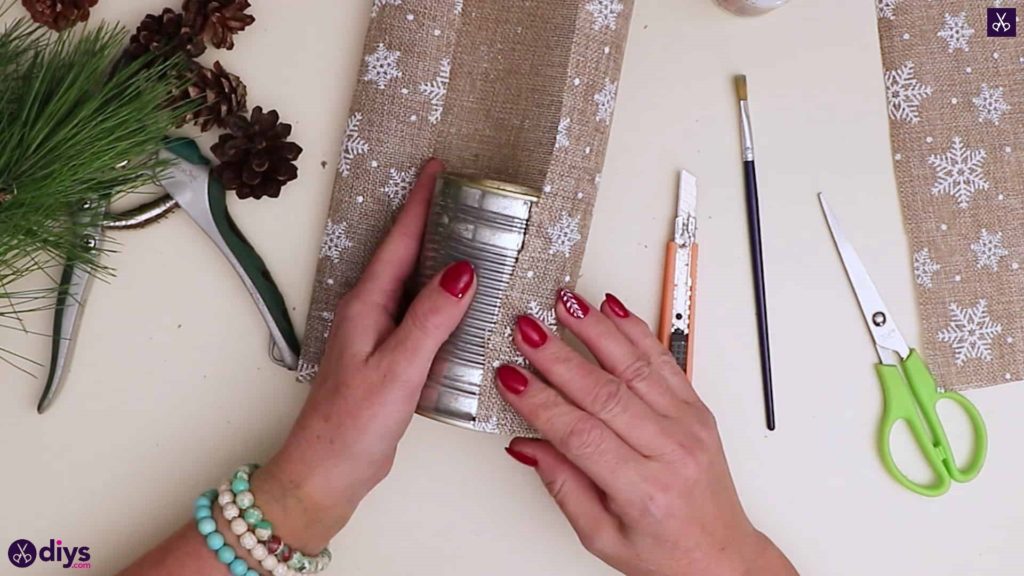
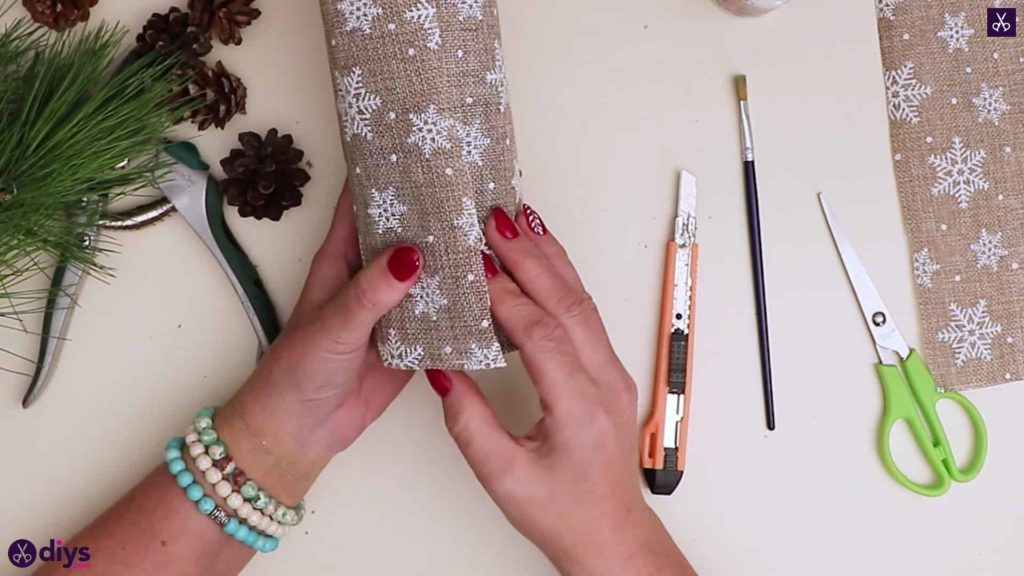
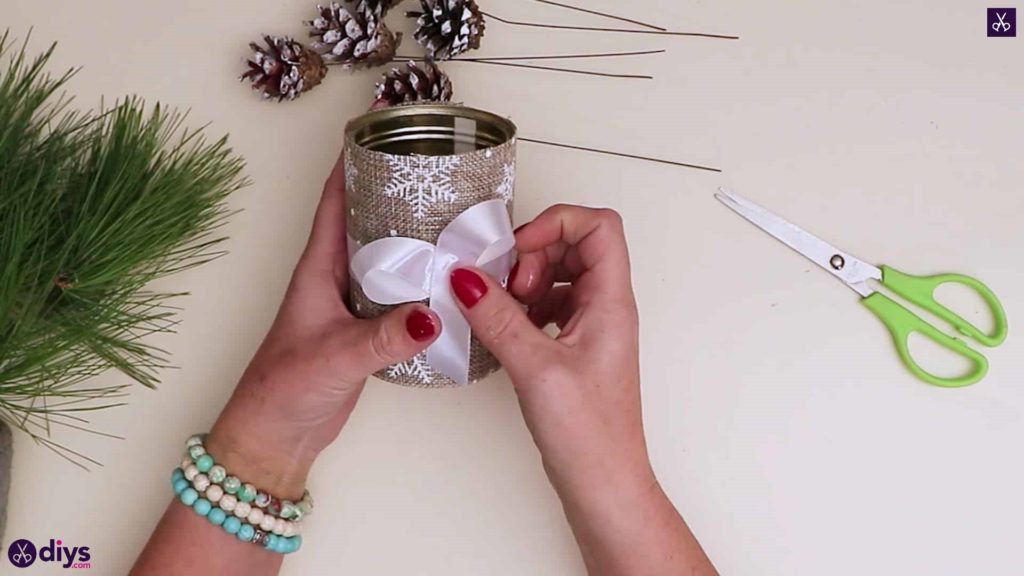
Step 5: wrap the can
Take your just ribbon or sheet of jute and unroll it. I managed to find cute jute printed with a snowflake pattern but you can use regular, coloured, or whatever you find. Place the bottom edge and side edge of the tin can against the bottom edge of the jute and wrap the rest around the until it’s covered, keeping the bottom edges even. When the jute meets back up with its first edge, trim the excess off. You now have a piece that’s the right width for covering your can. Apply hot glue down the length of your can, stick your first edge down, then wrap the can and stick the second edge down to meet the first. You’ll have excess jute at the top, so trim this off so its even with the top edge of the can too.

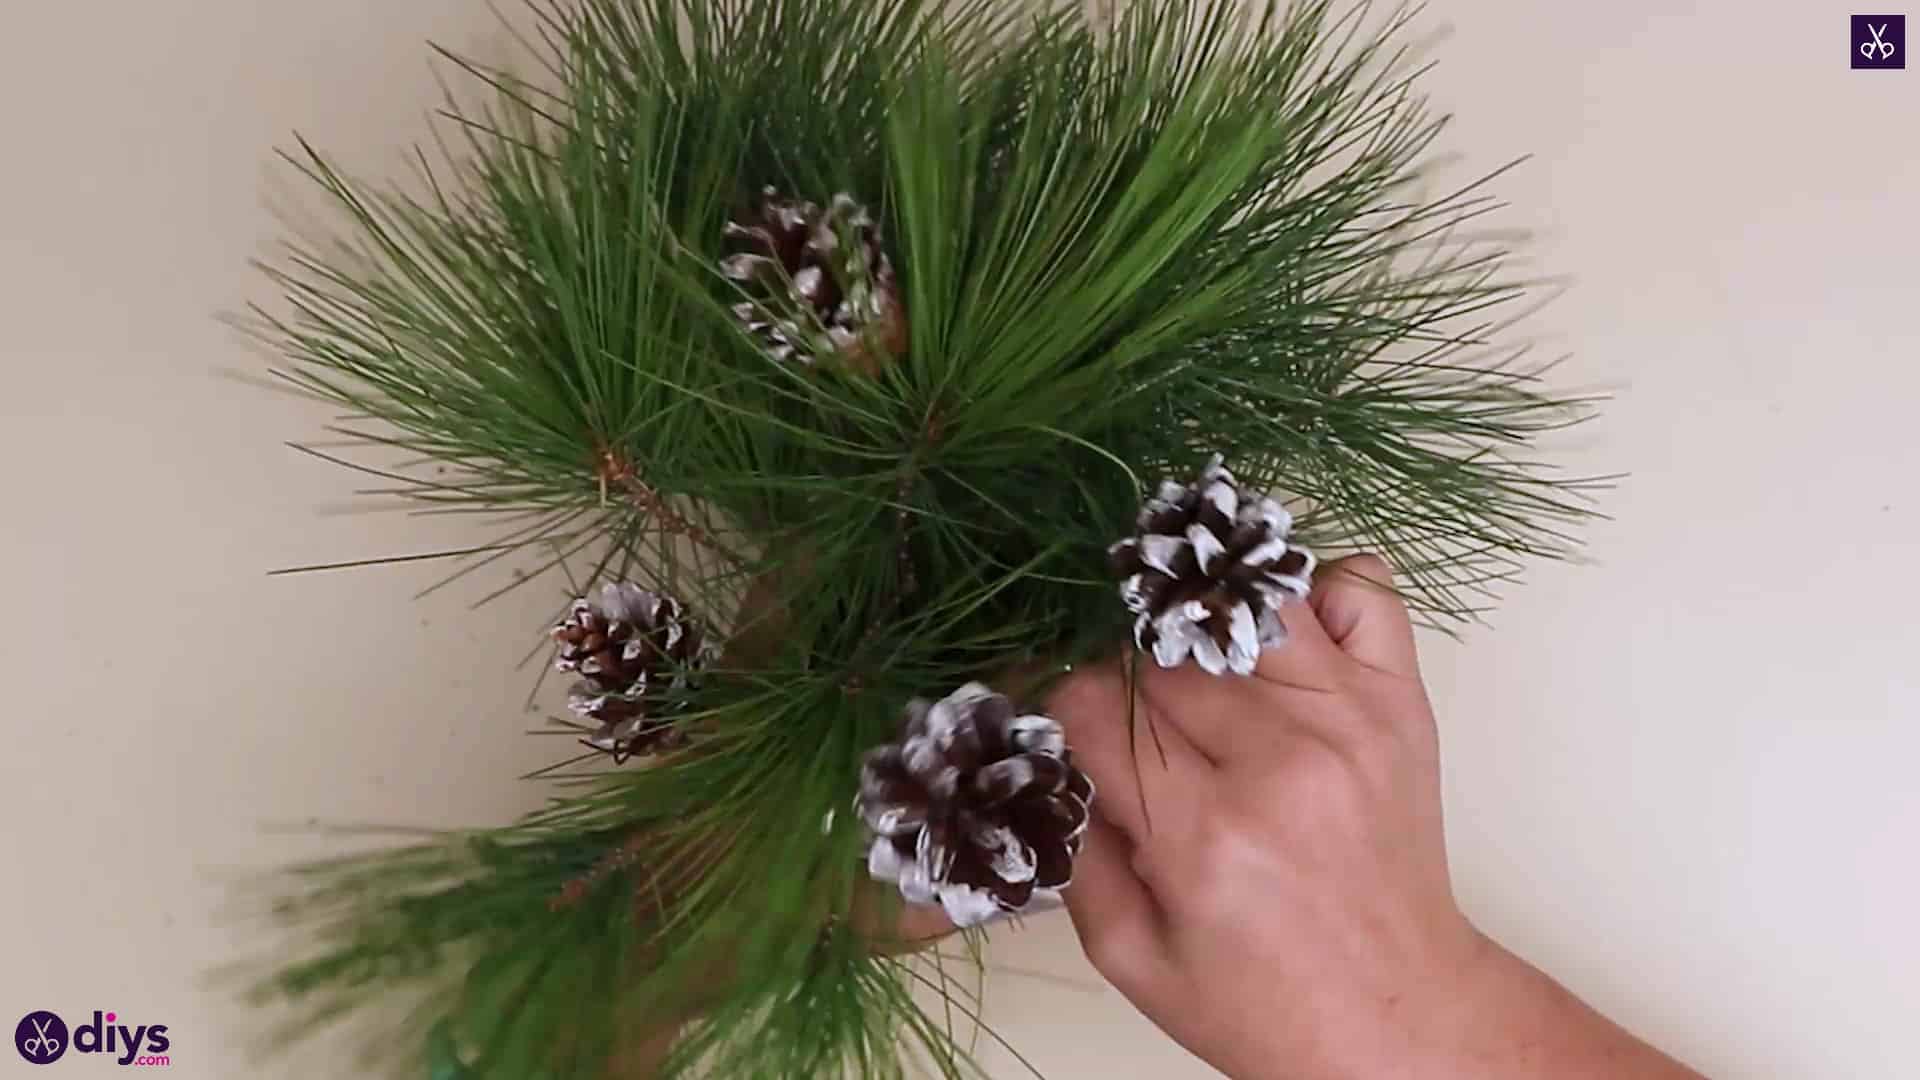
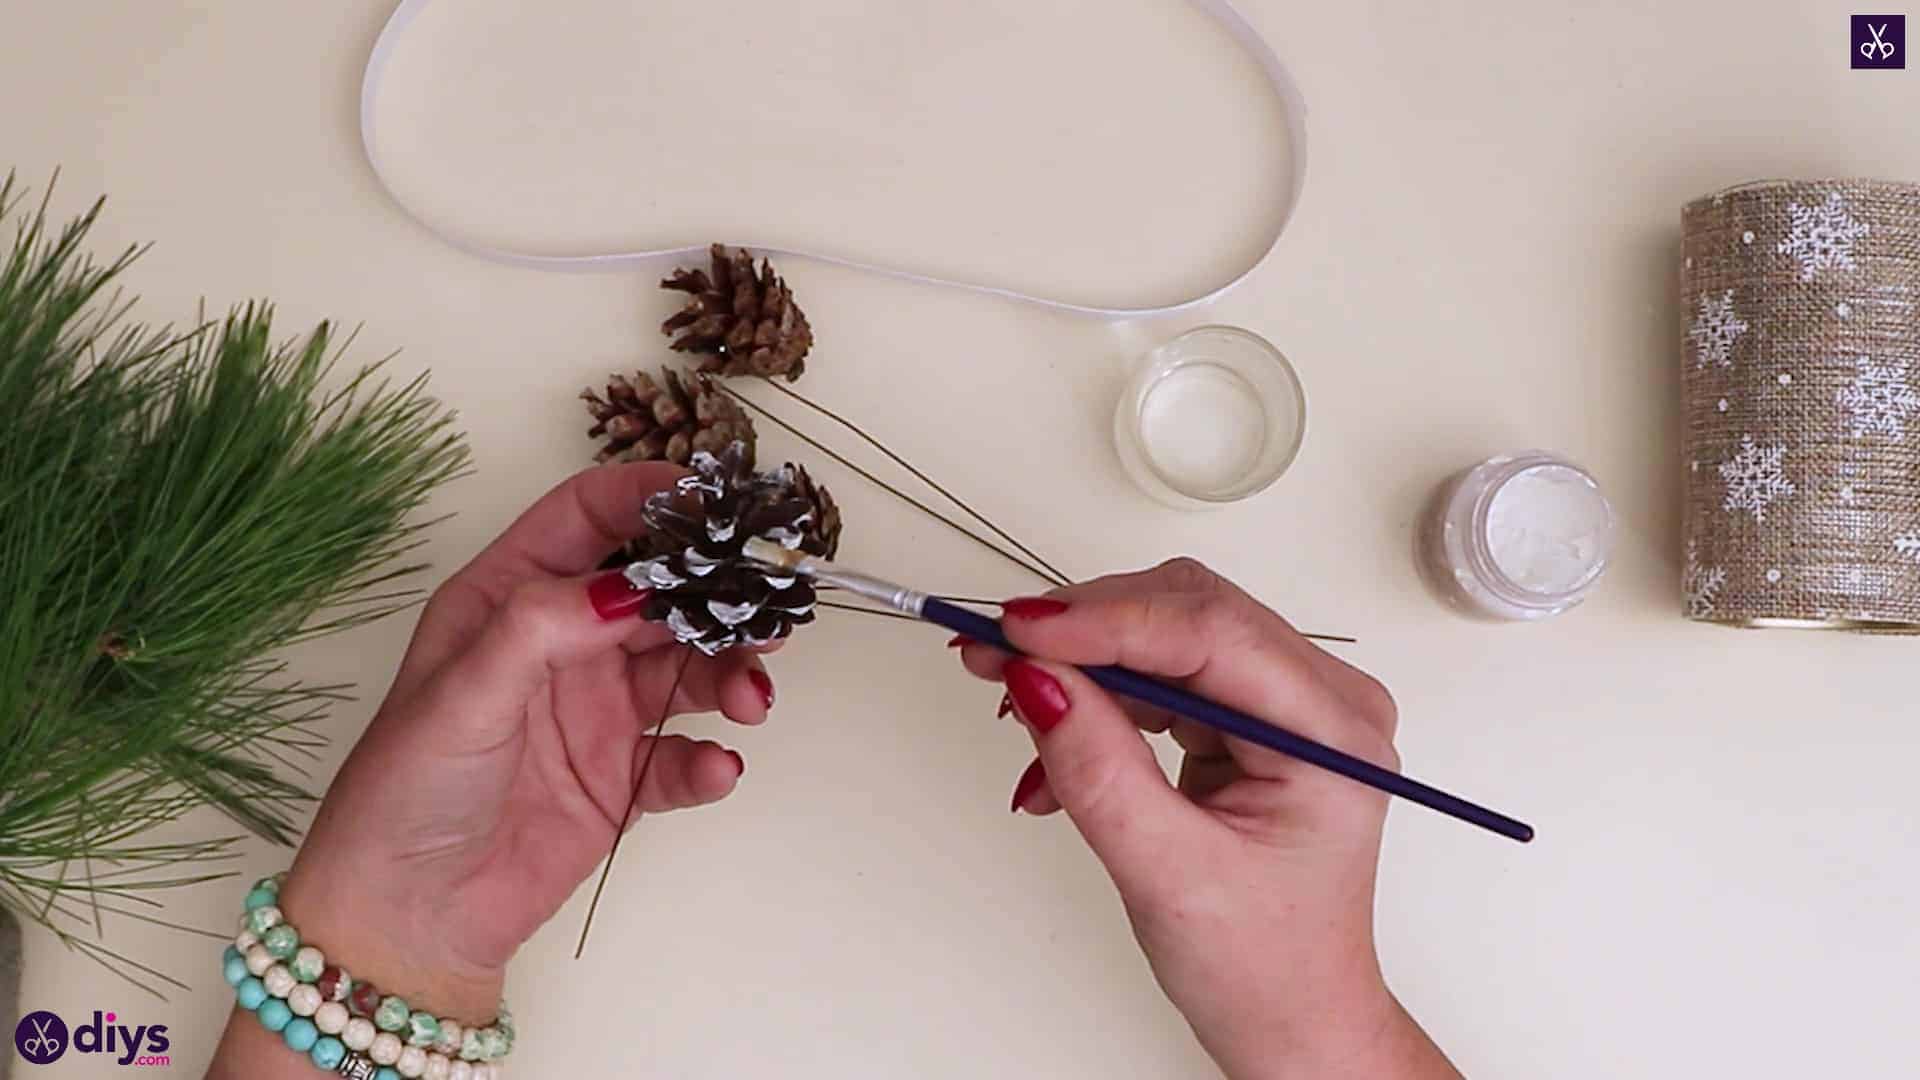
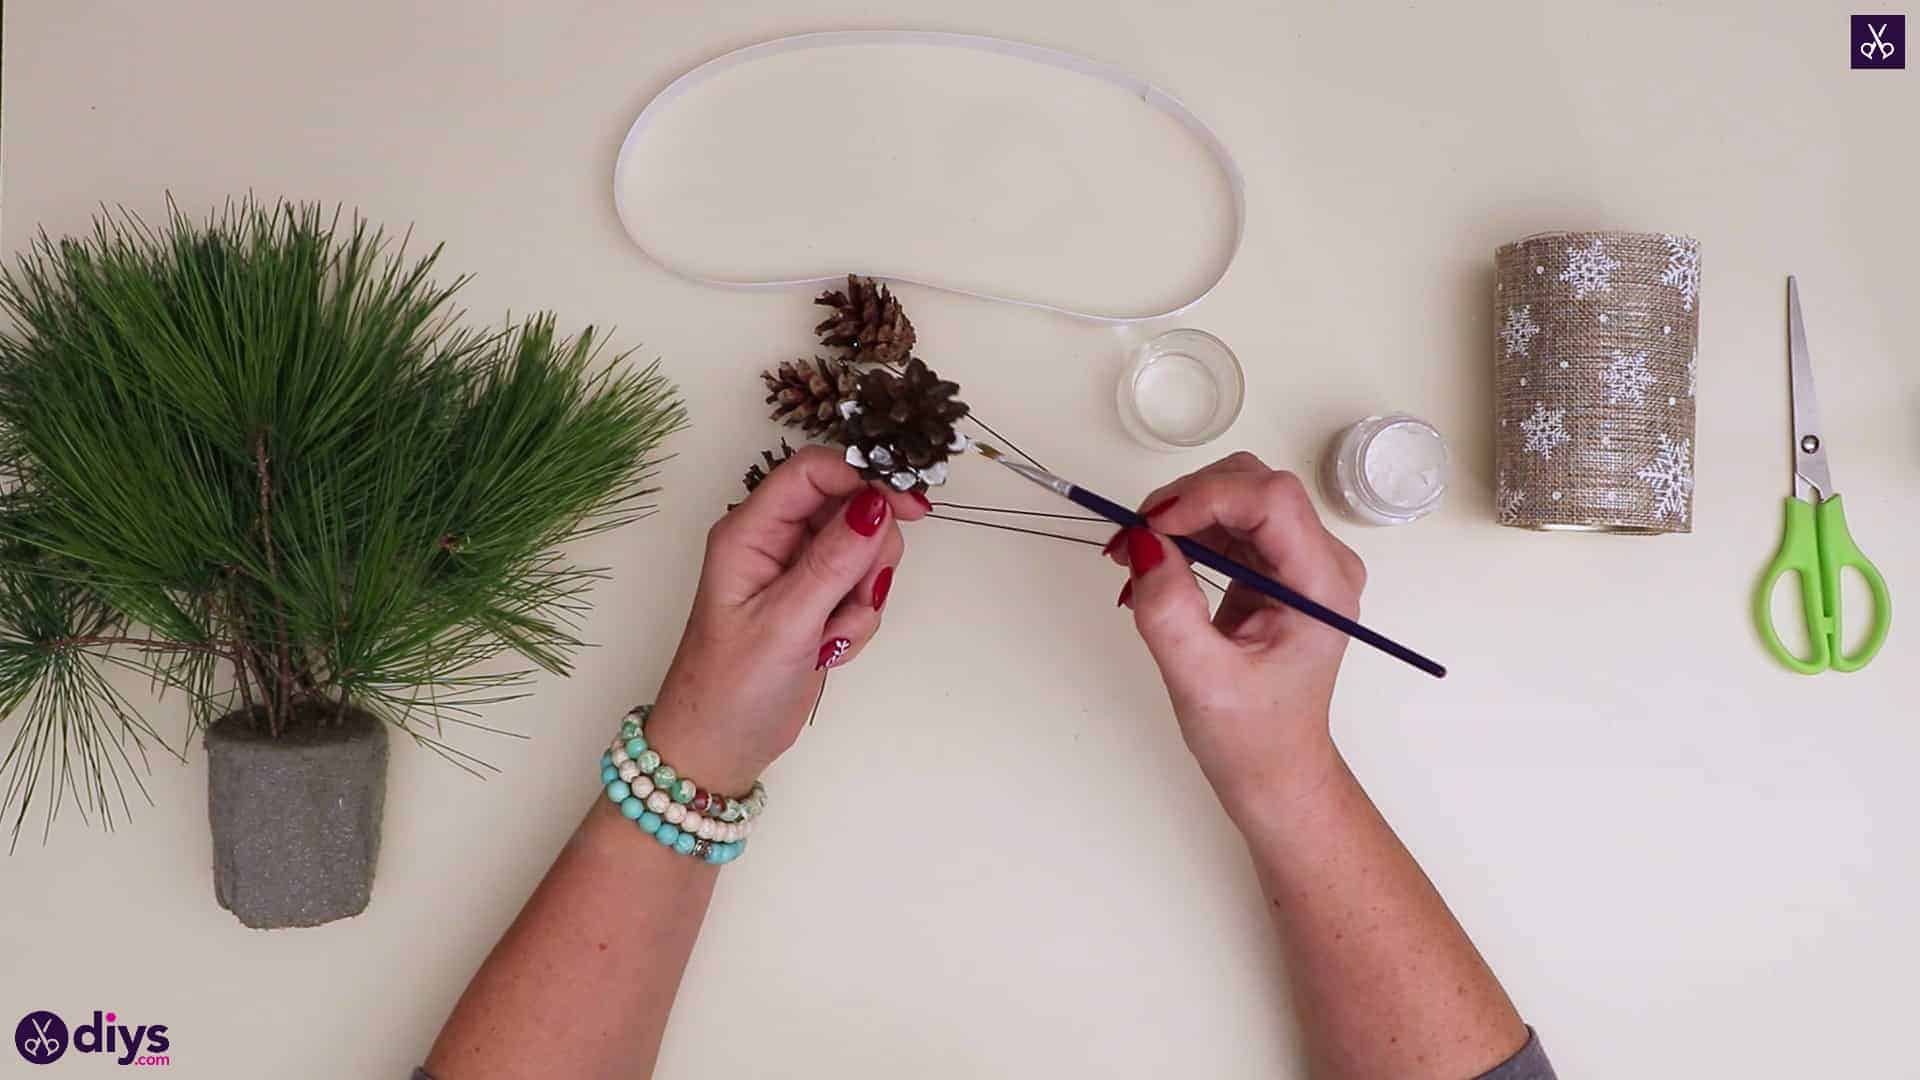
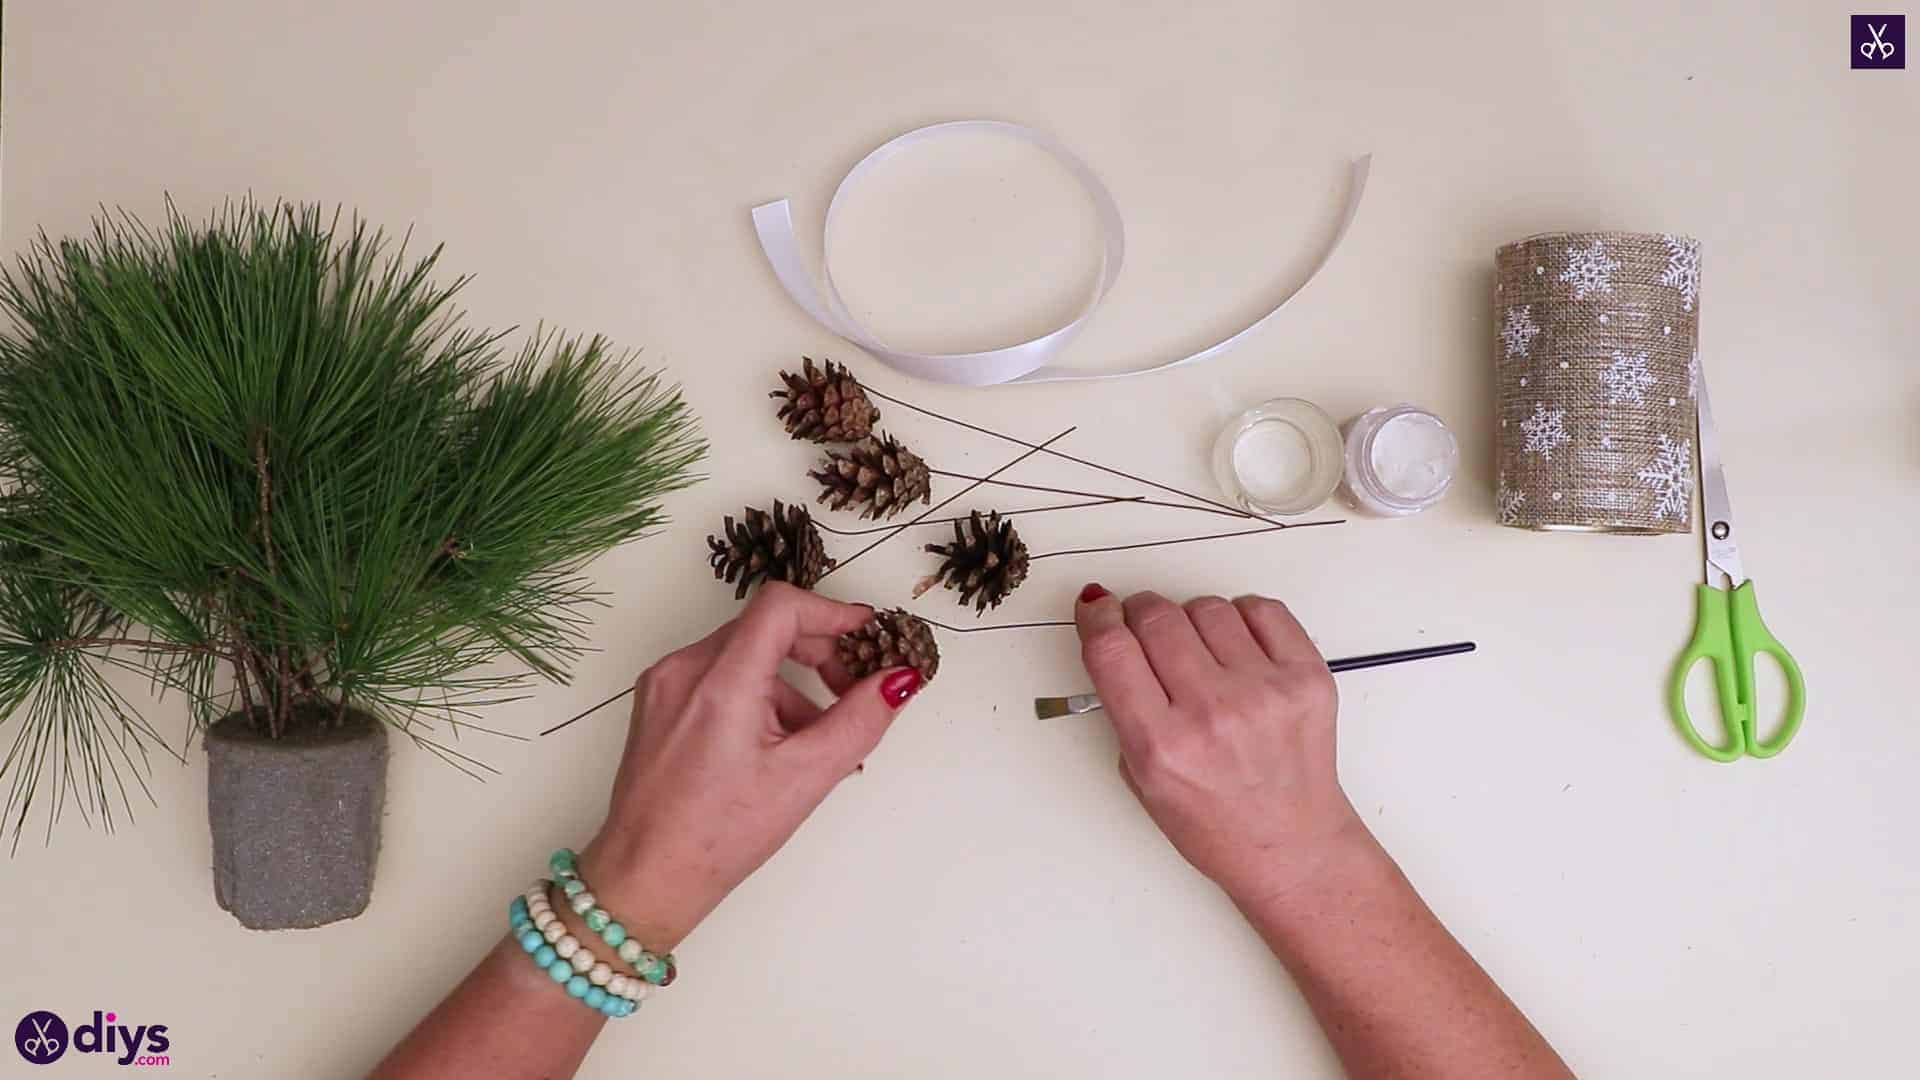
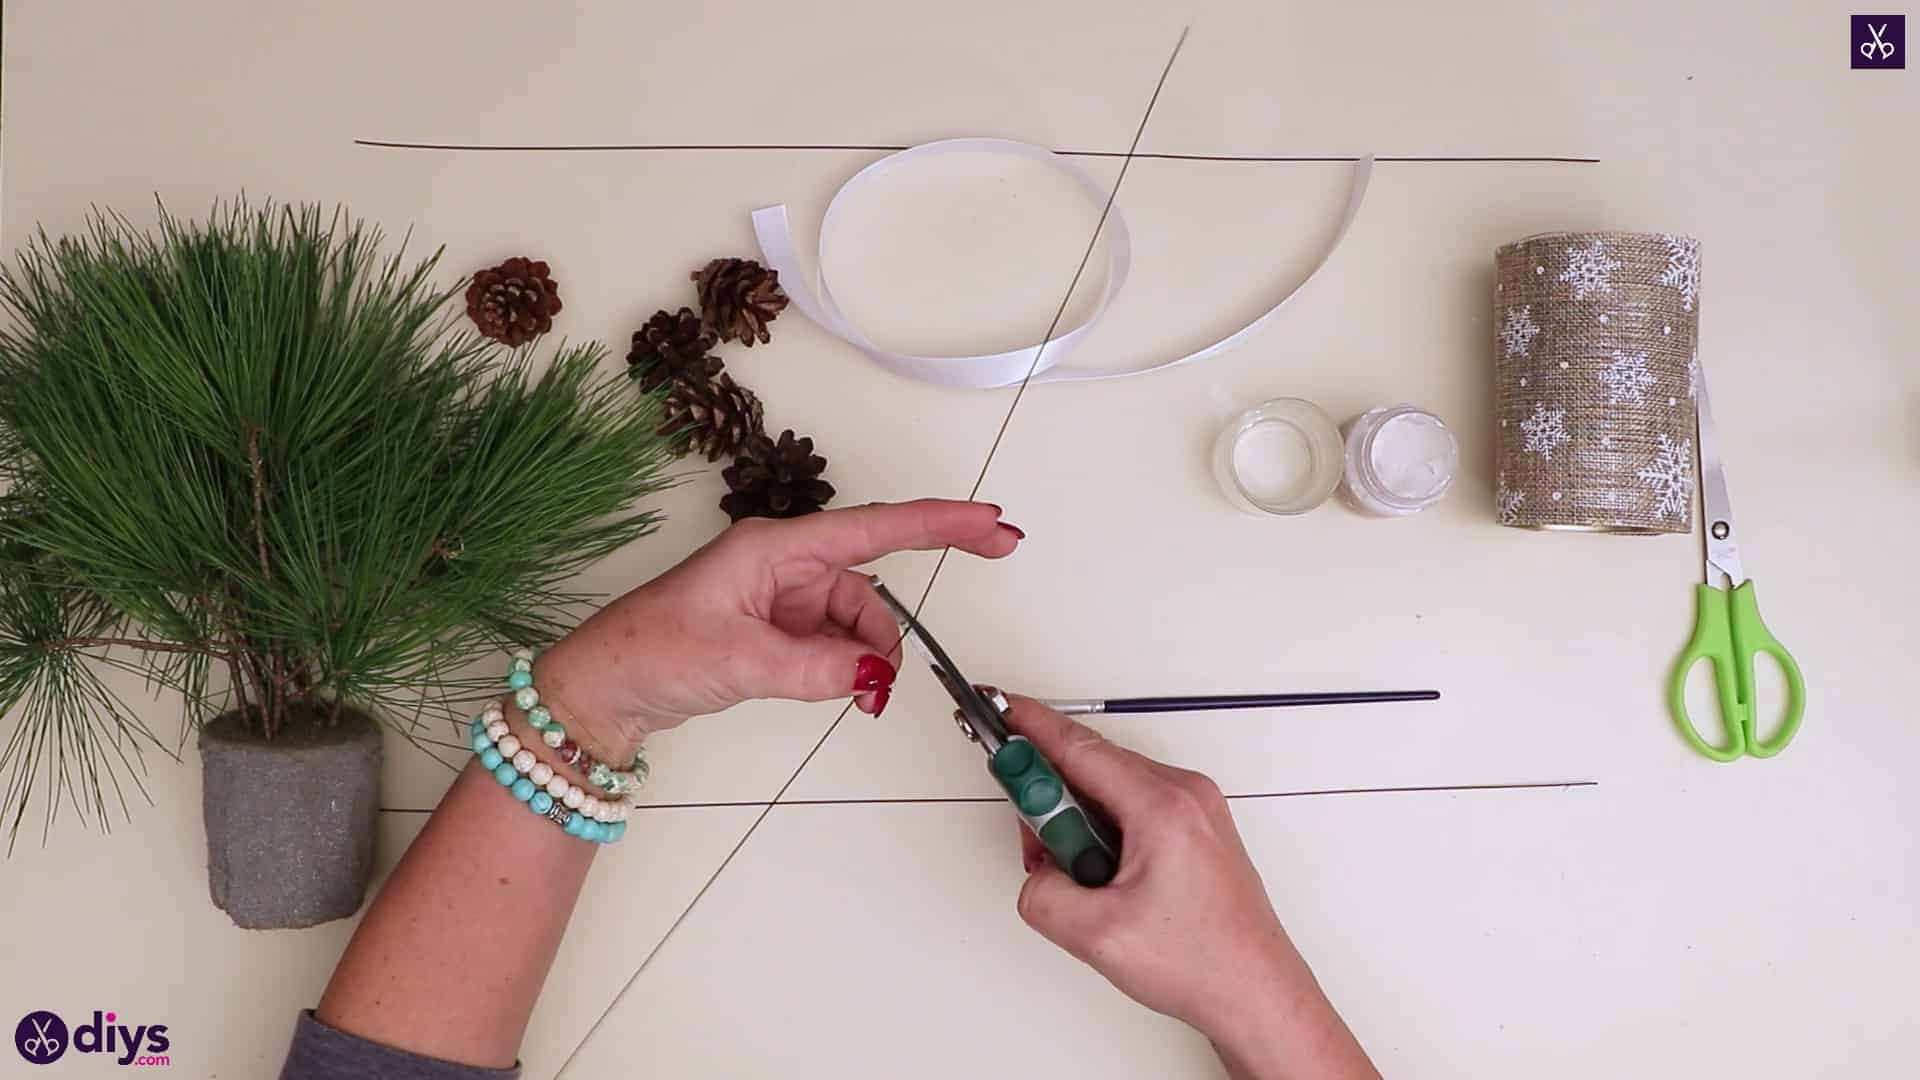
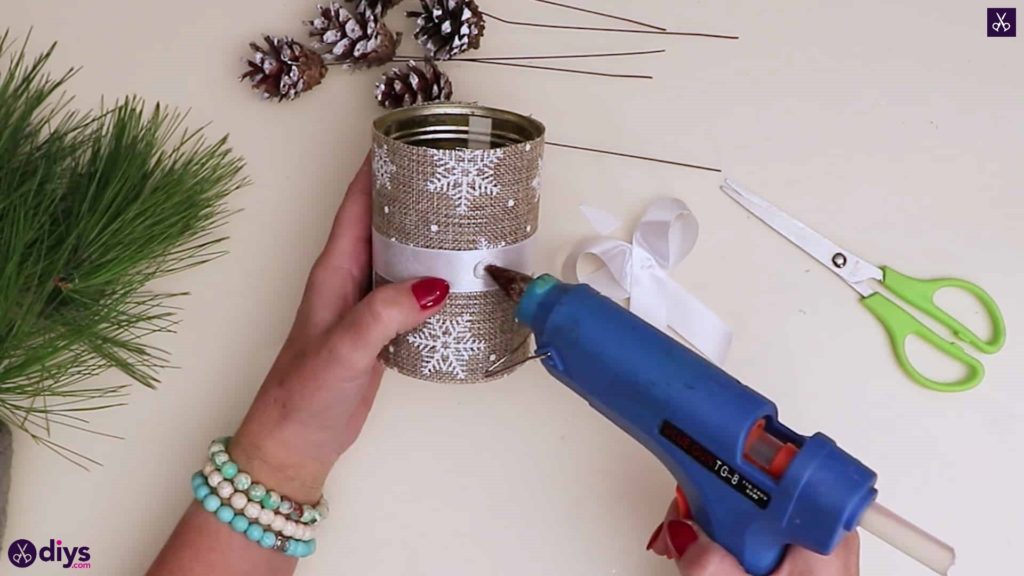
Step 6: add wire to pinecones
Use your secateurs to cut your gardening wire in half so you have shorter pieces to work with. Then stick the end of a piece of wire through the prongs of a pinecone and start wrapping it around and through the bottom layer, bending the excess (leave a decent amount) downward so your pinecone has a kind of stem like your branches did. Repeat this process for each pinecone you plan to include.


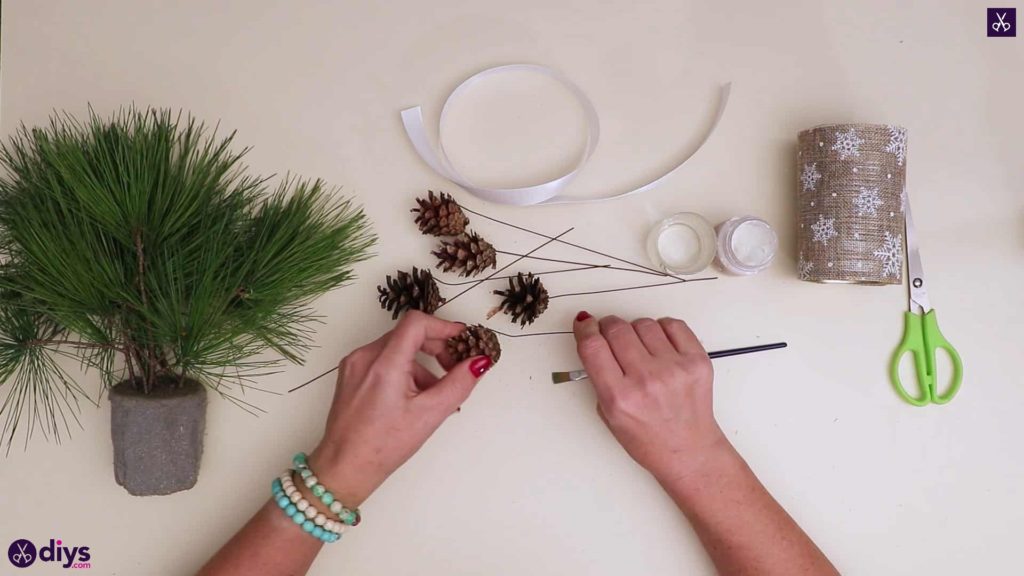
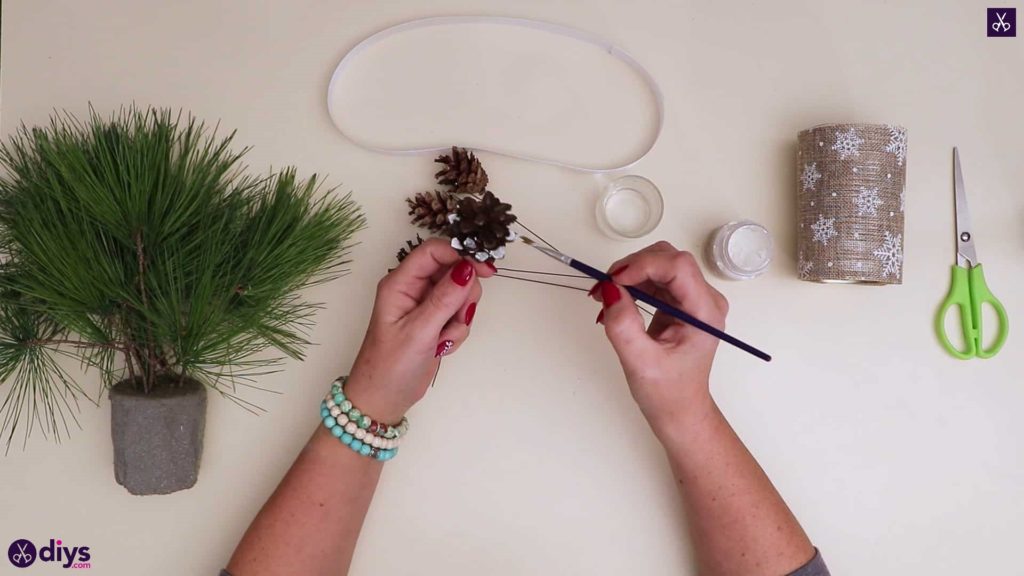
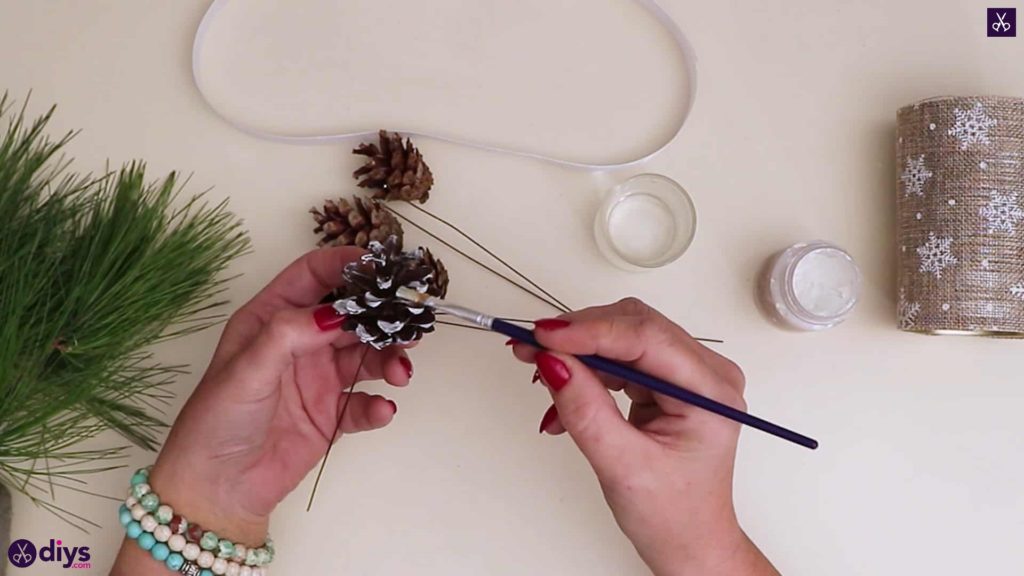
Step 7: paint
Use your paintbrush to dab white paint on the tips of your pinecones’ prongs like they’ve recently been in a light snowfall. Leave them to dry.

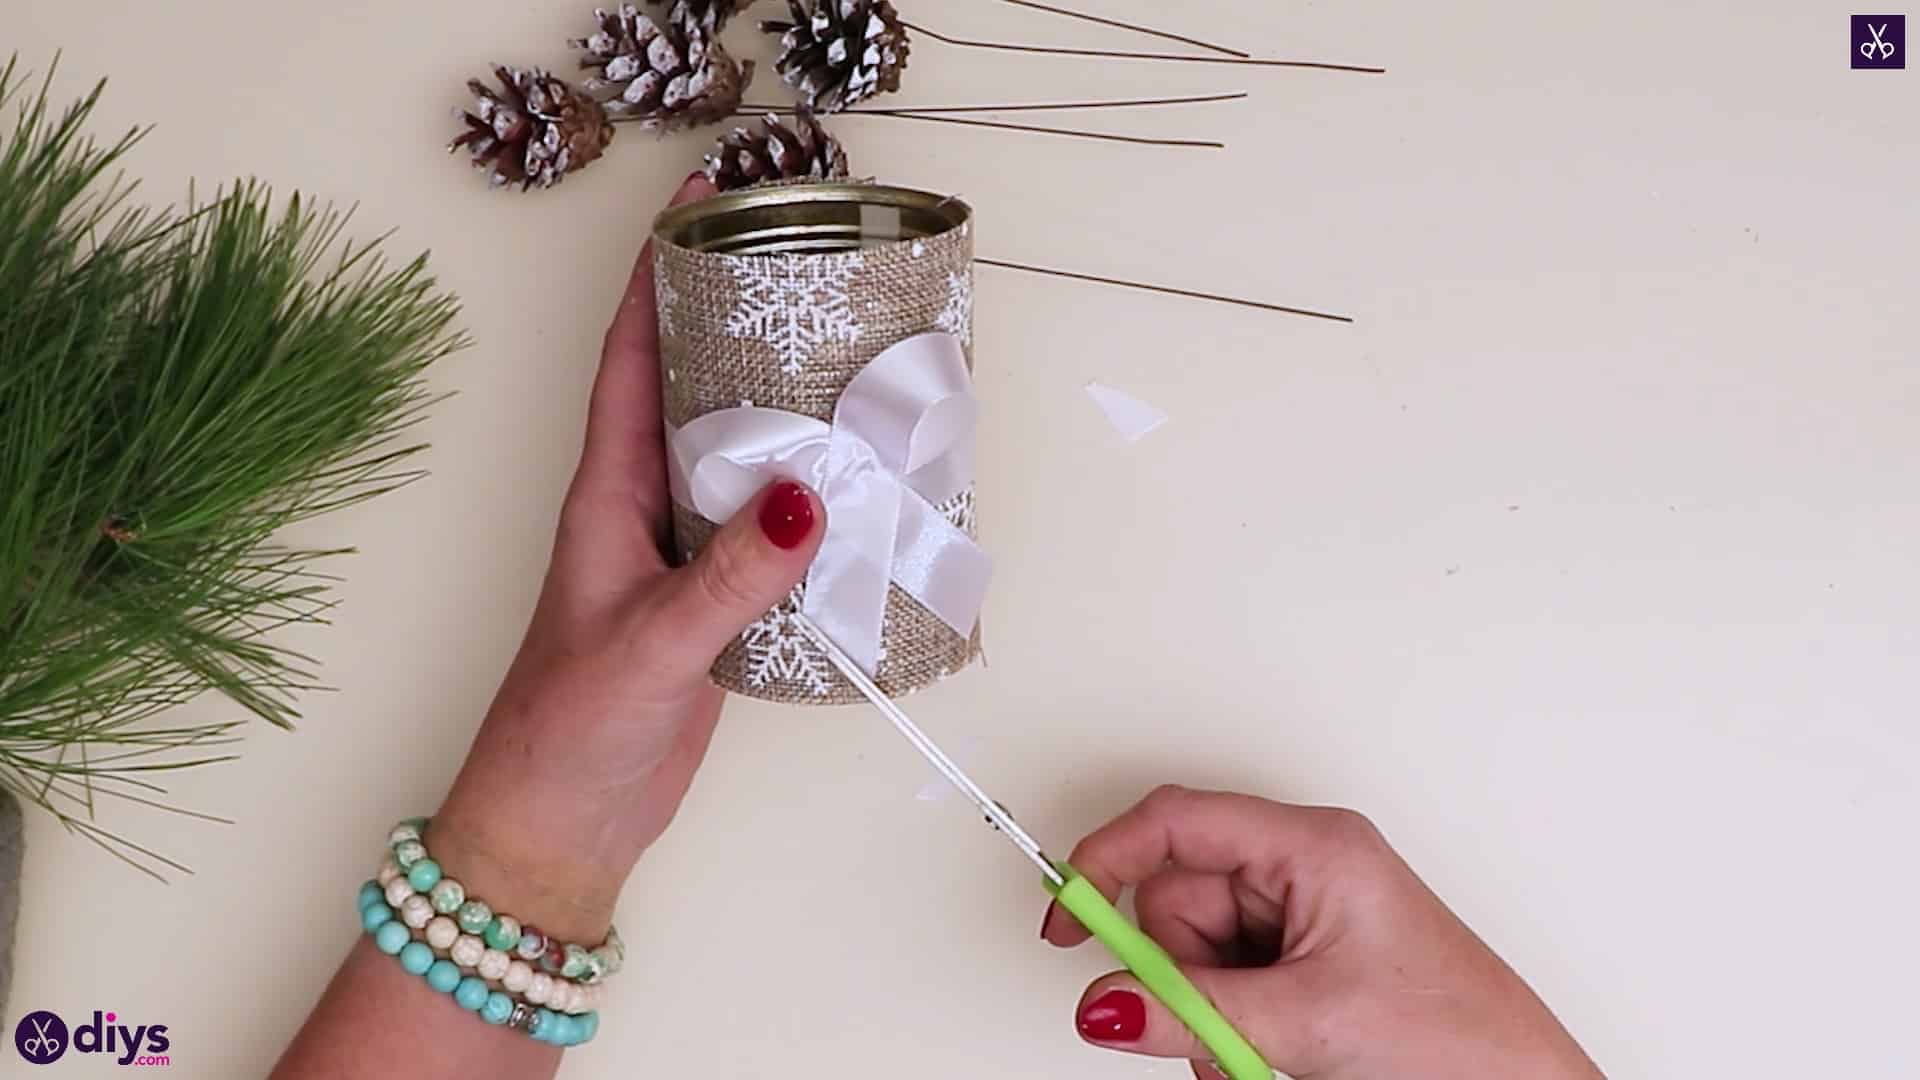
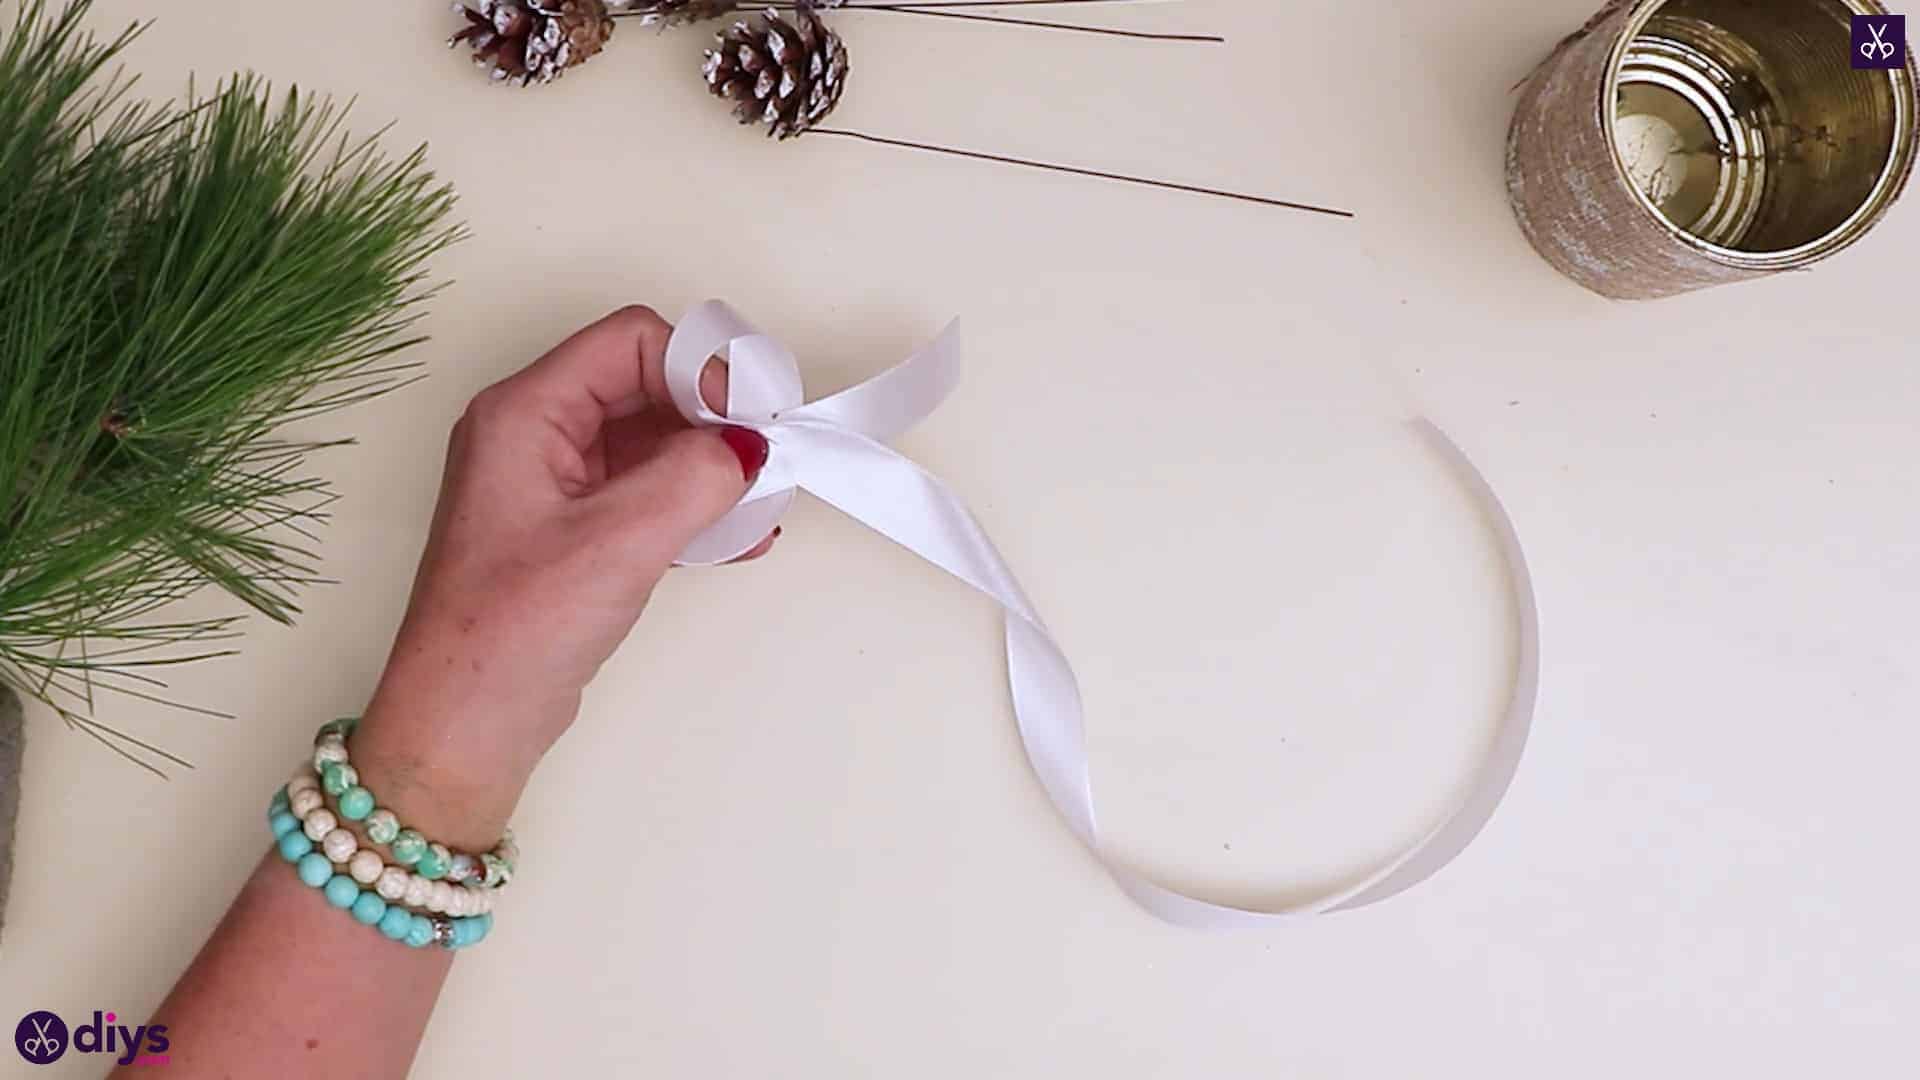
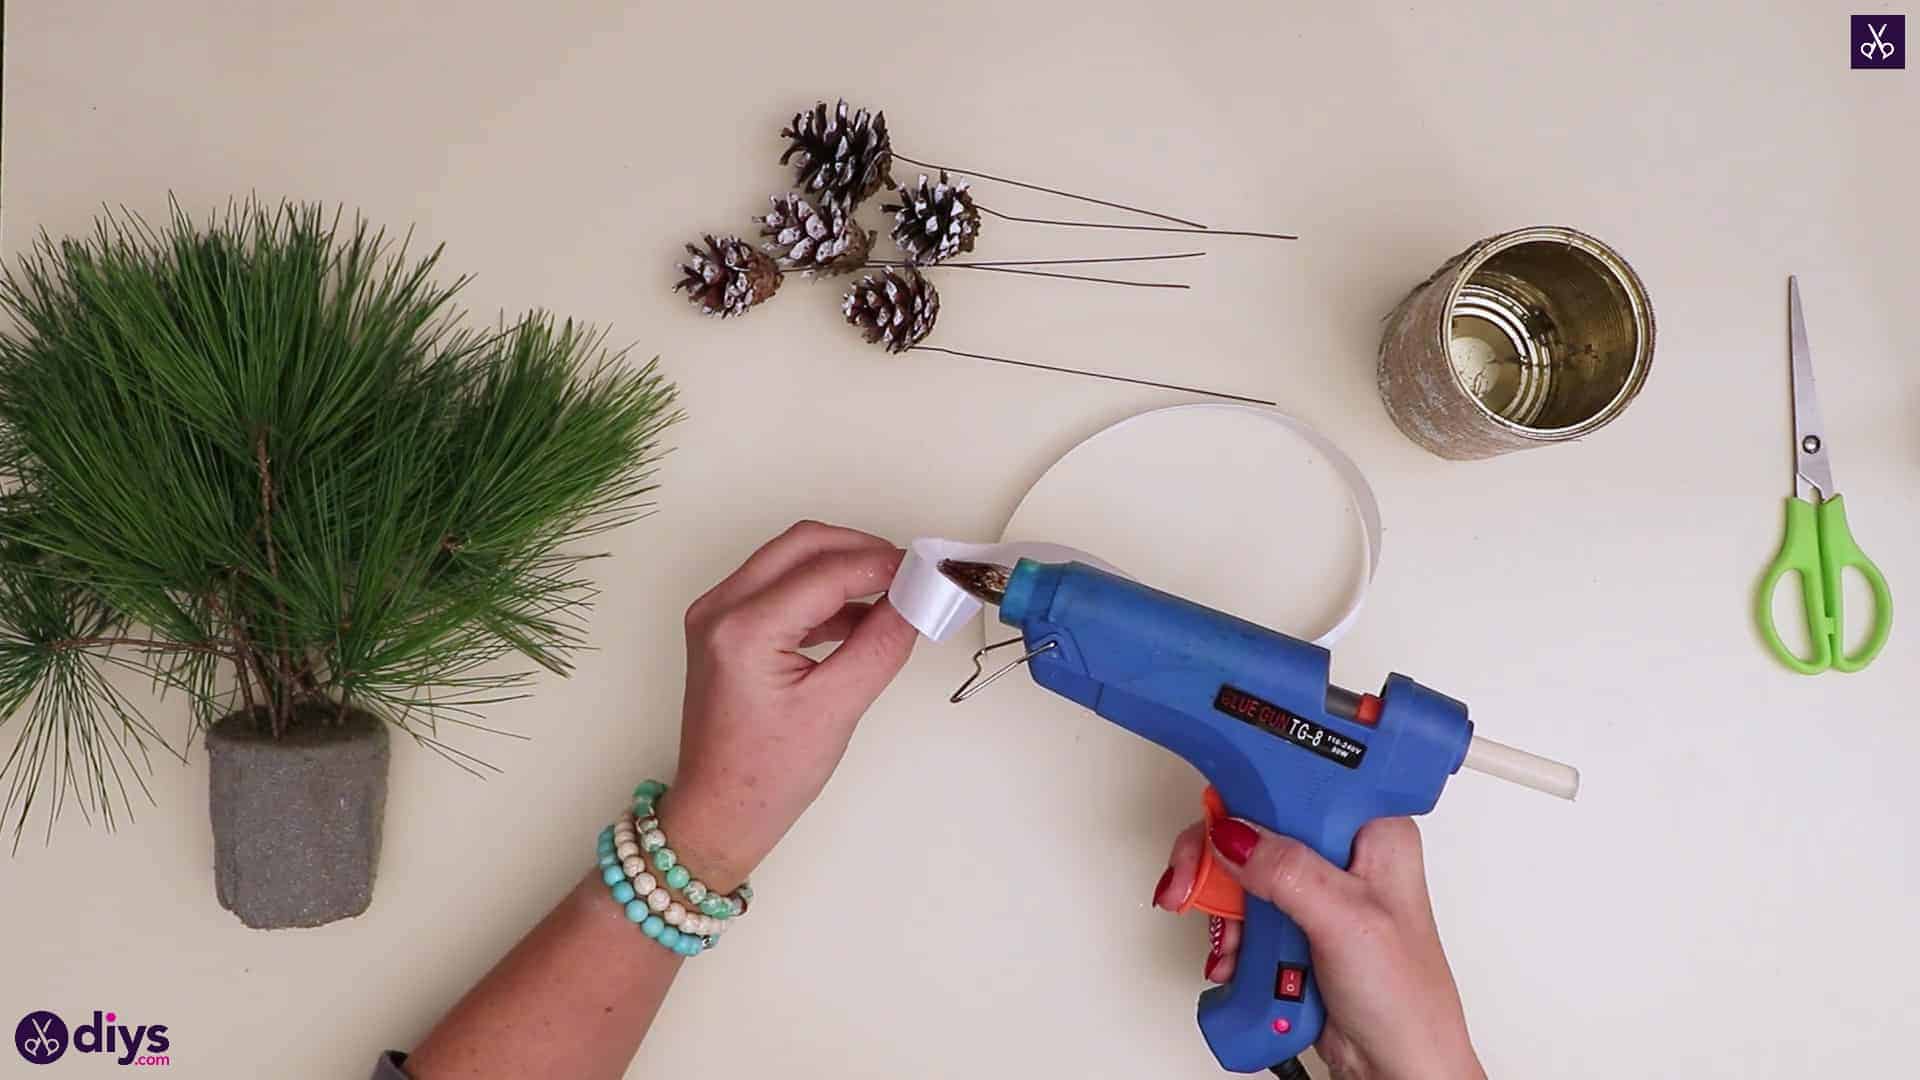
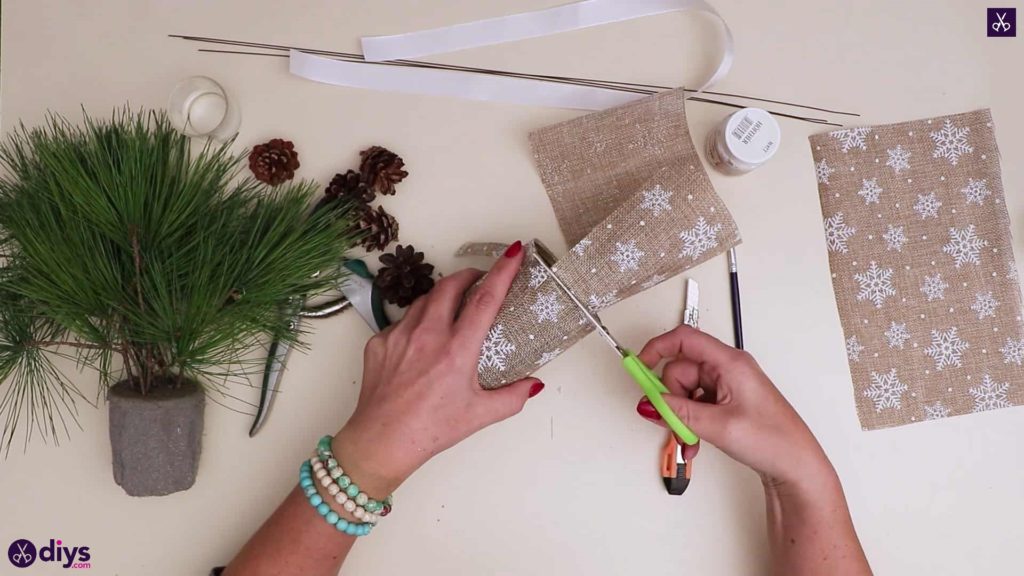
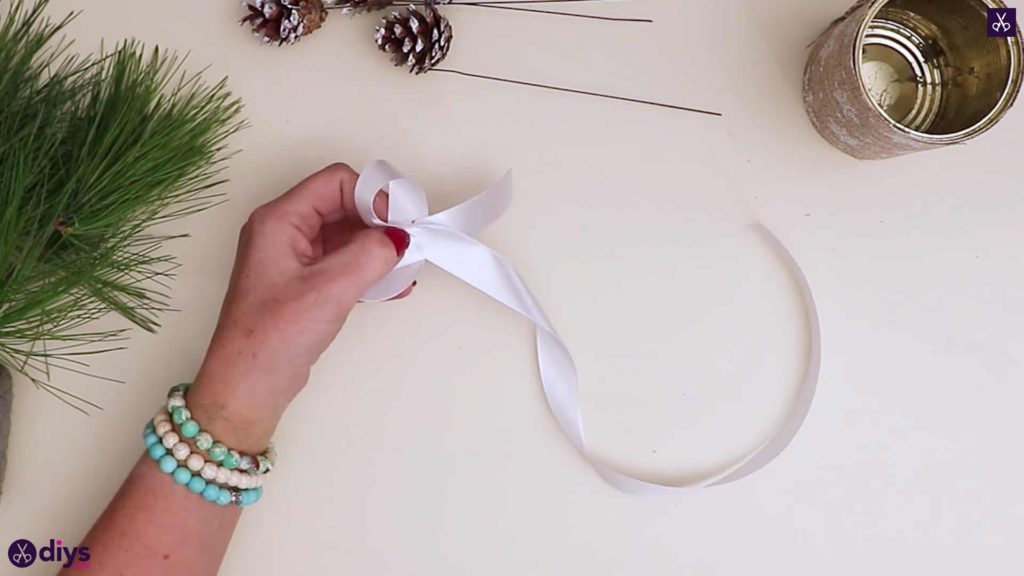
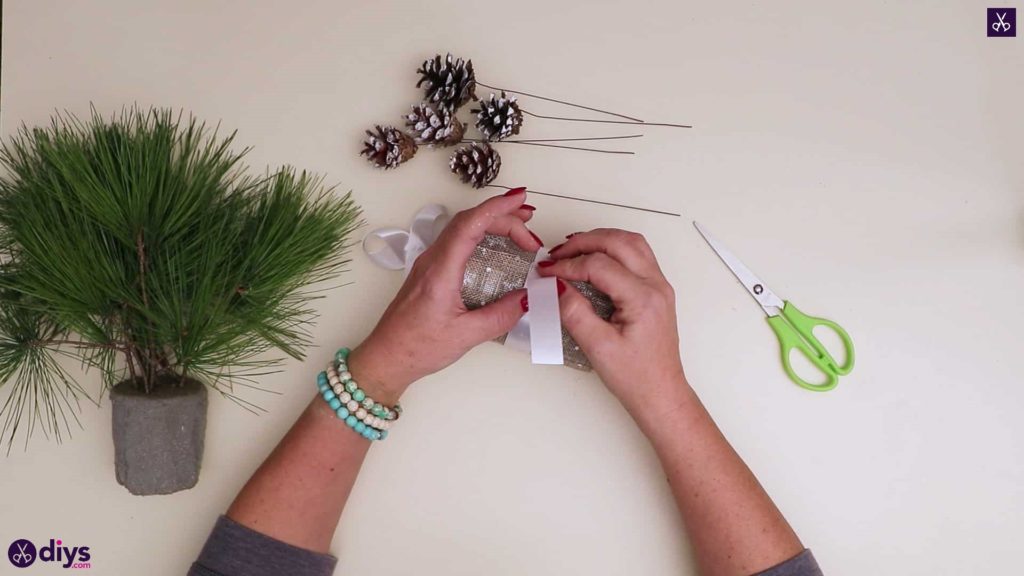
Step 8: make the bow
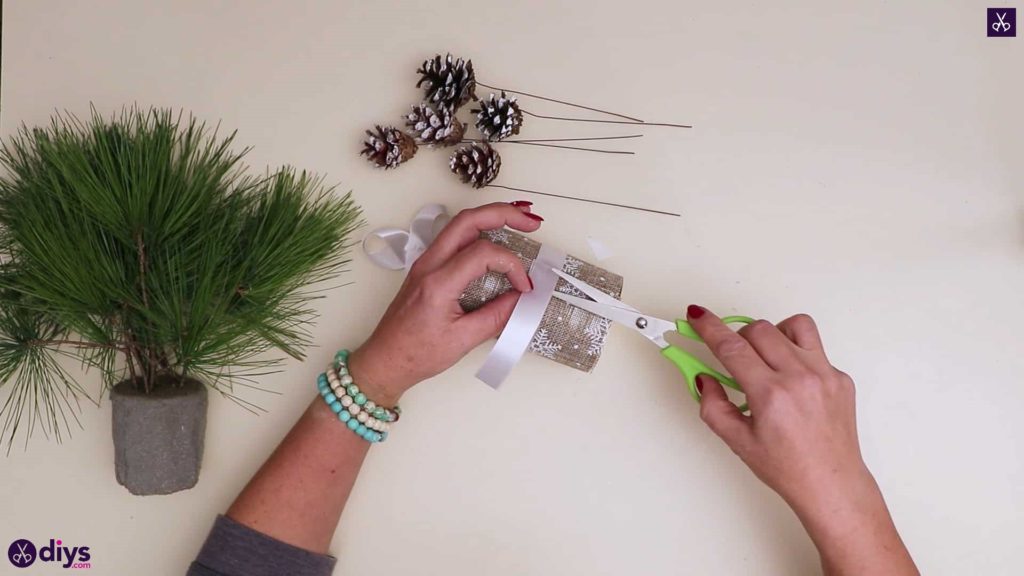
Cut a length of about four inches from your white ribbon and apply some glue at the middle point of this piece. Bring each end inward, curving it into a loop to cross at the middle, leaving a loose end below. Once you’ve looped both sides inwards, you’ll have a bow shape with tails. Trim the tails if necessary.

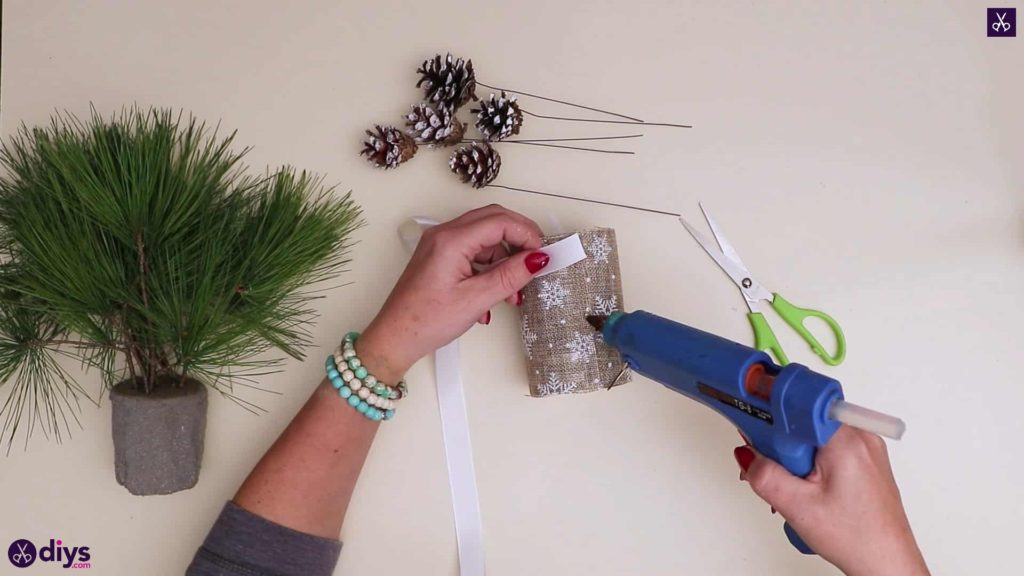
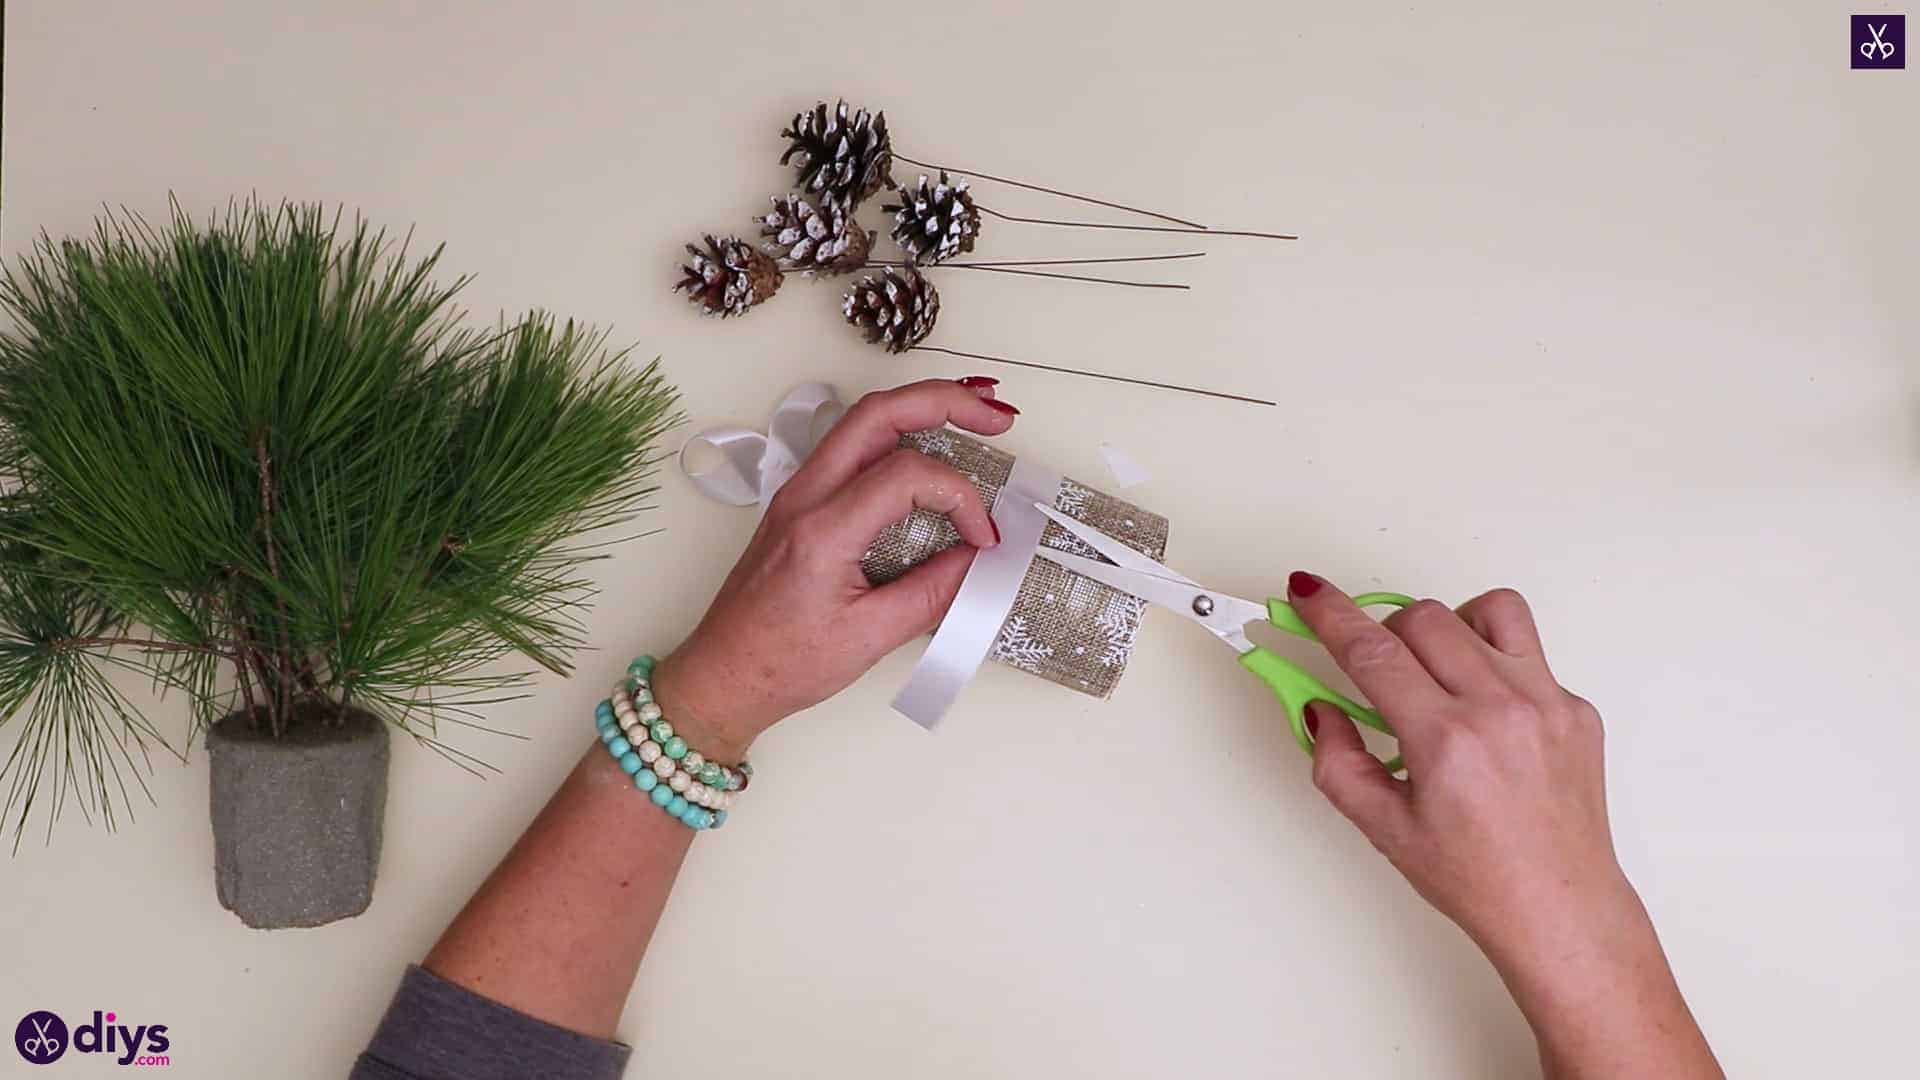
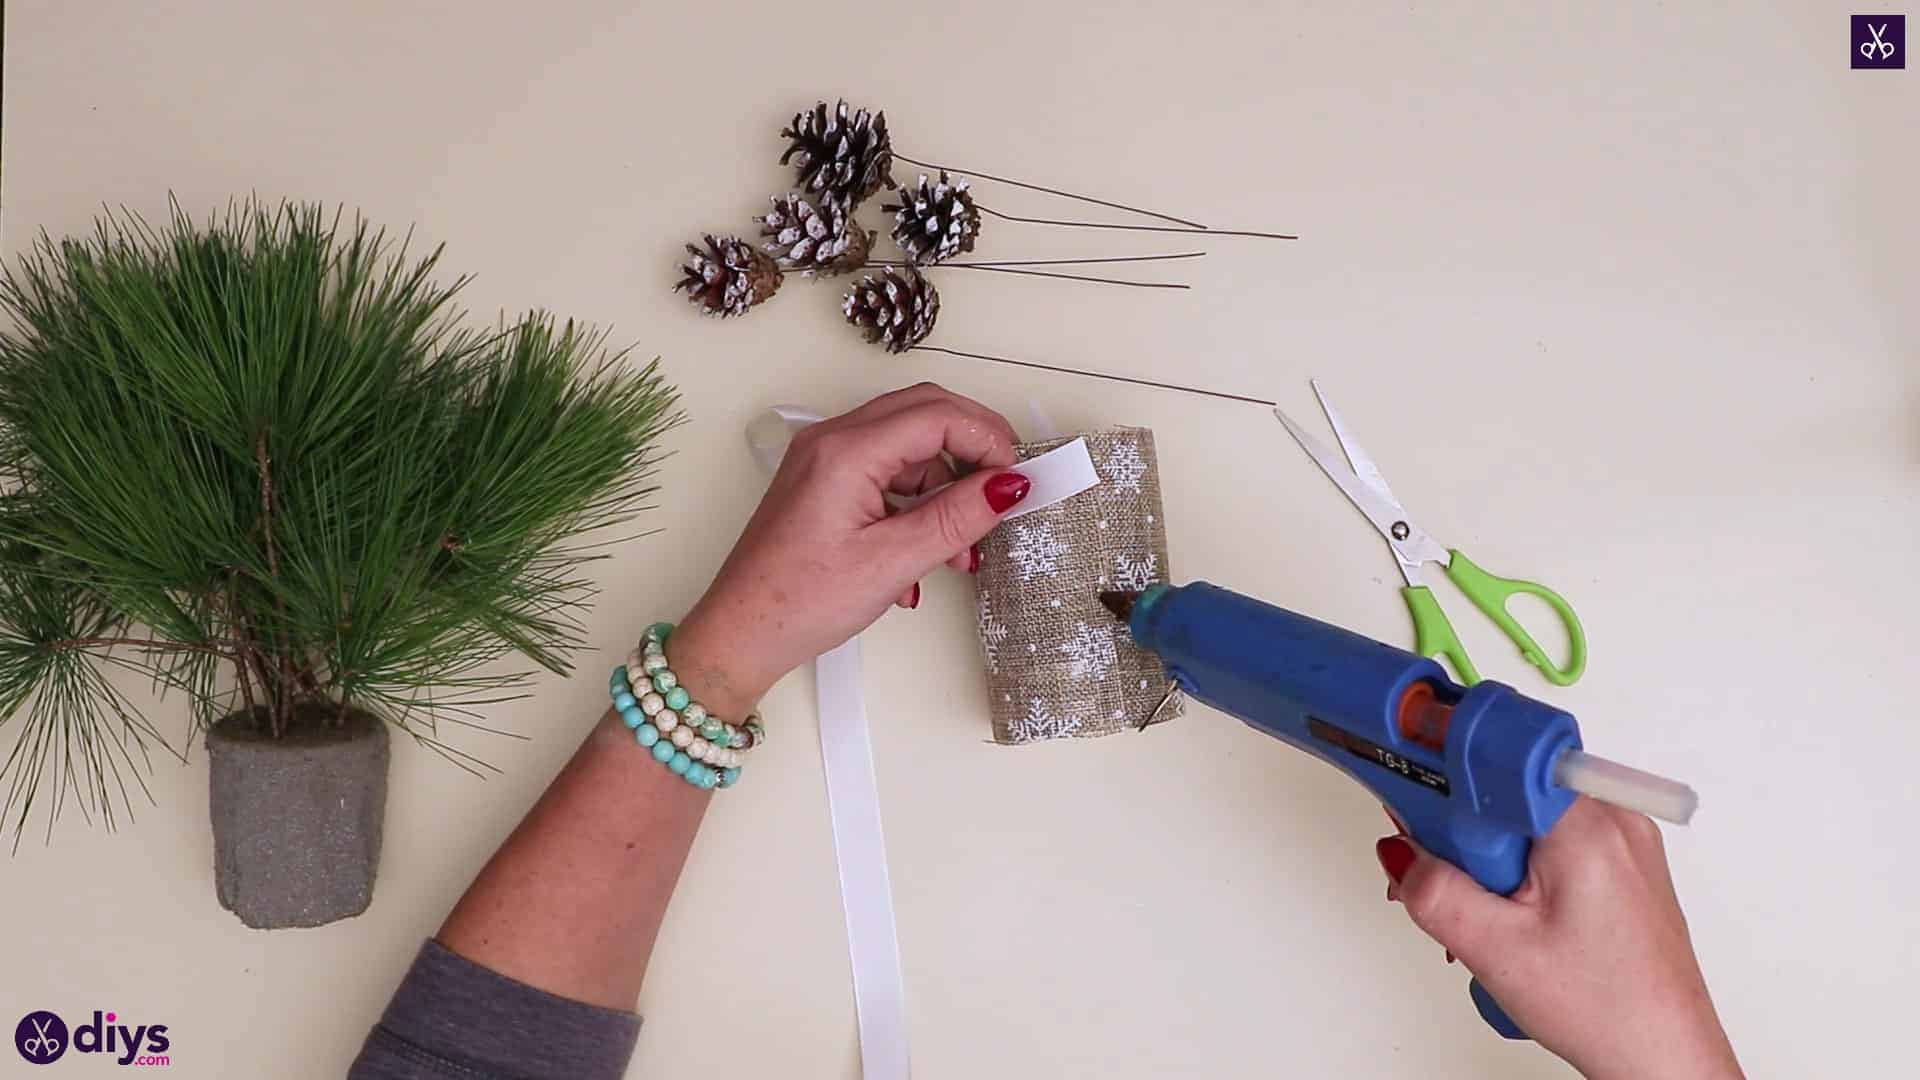
Step 9: add ribbon
Apply glue at the seam of the jute on your can, halfway up its length. Stick down one end of your remaining white ribbon here and wrap it around the middle of your can until it meets its own end back on the other side. Trim the excess and apply more glue to stick the new end down there too. Then turn the can back to the front, on the side opposite the seam, and apply a dot of glue on the middle of the ribbon. Stick your bow down here. Trim the ends at an angle to stop them from fraying.

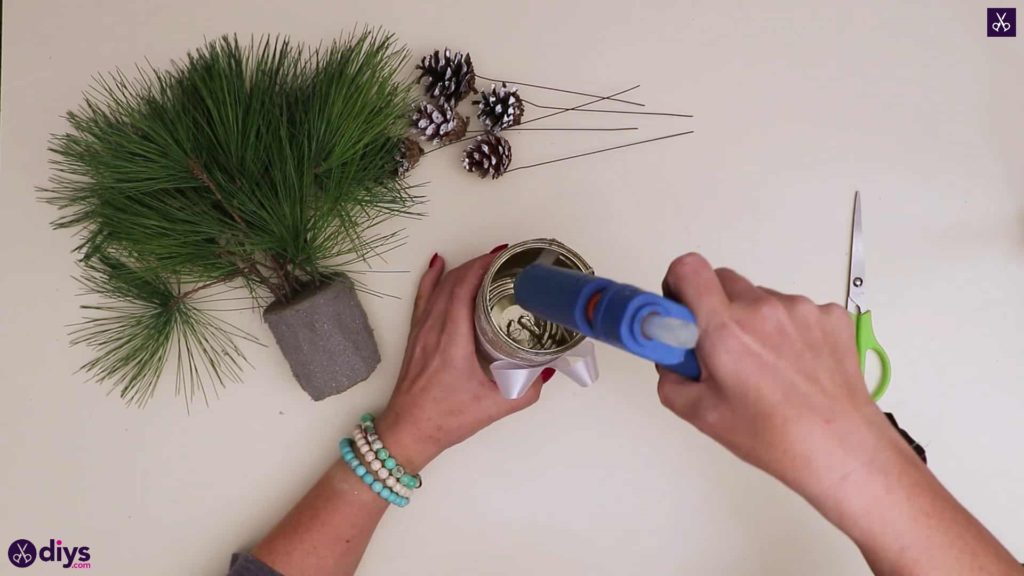
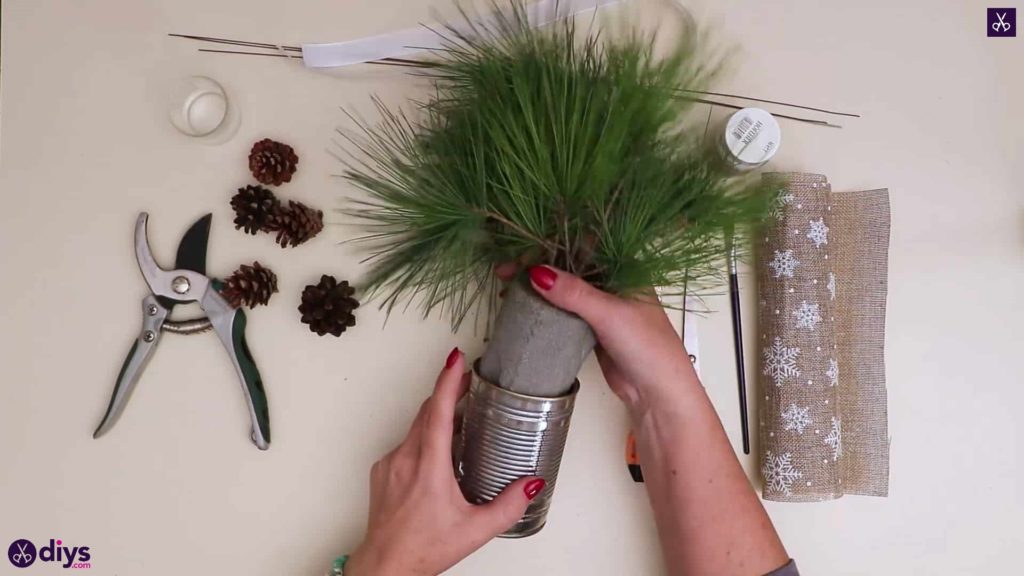
Step 10: assemble
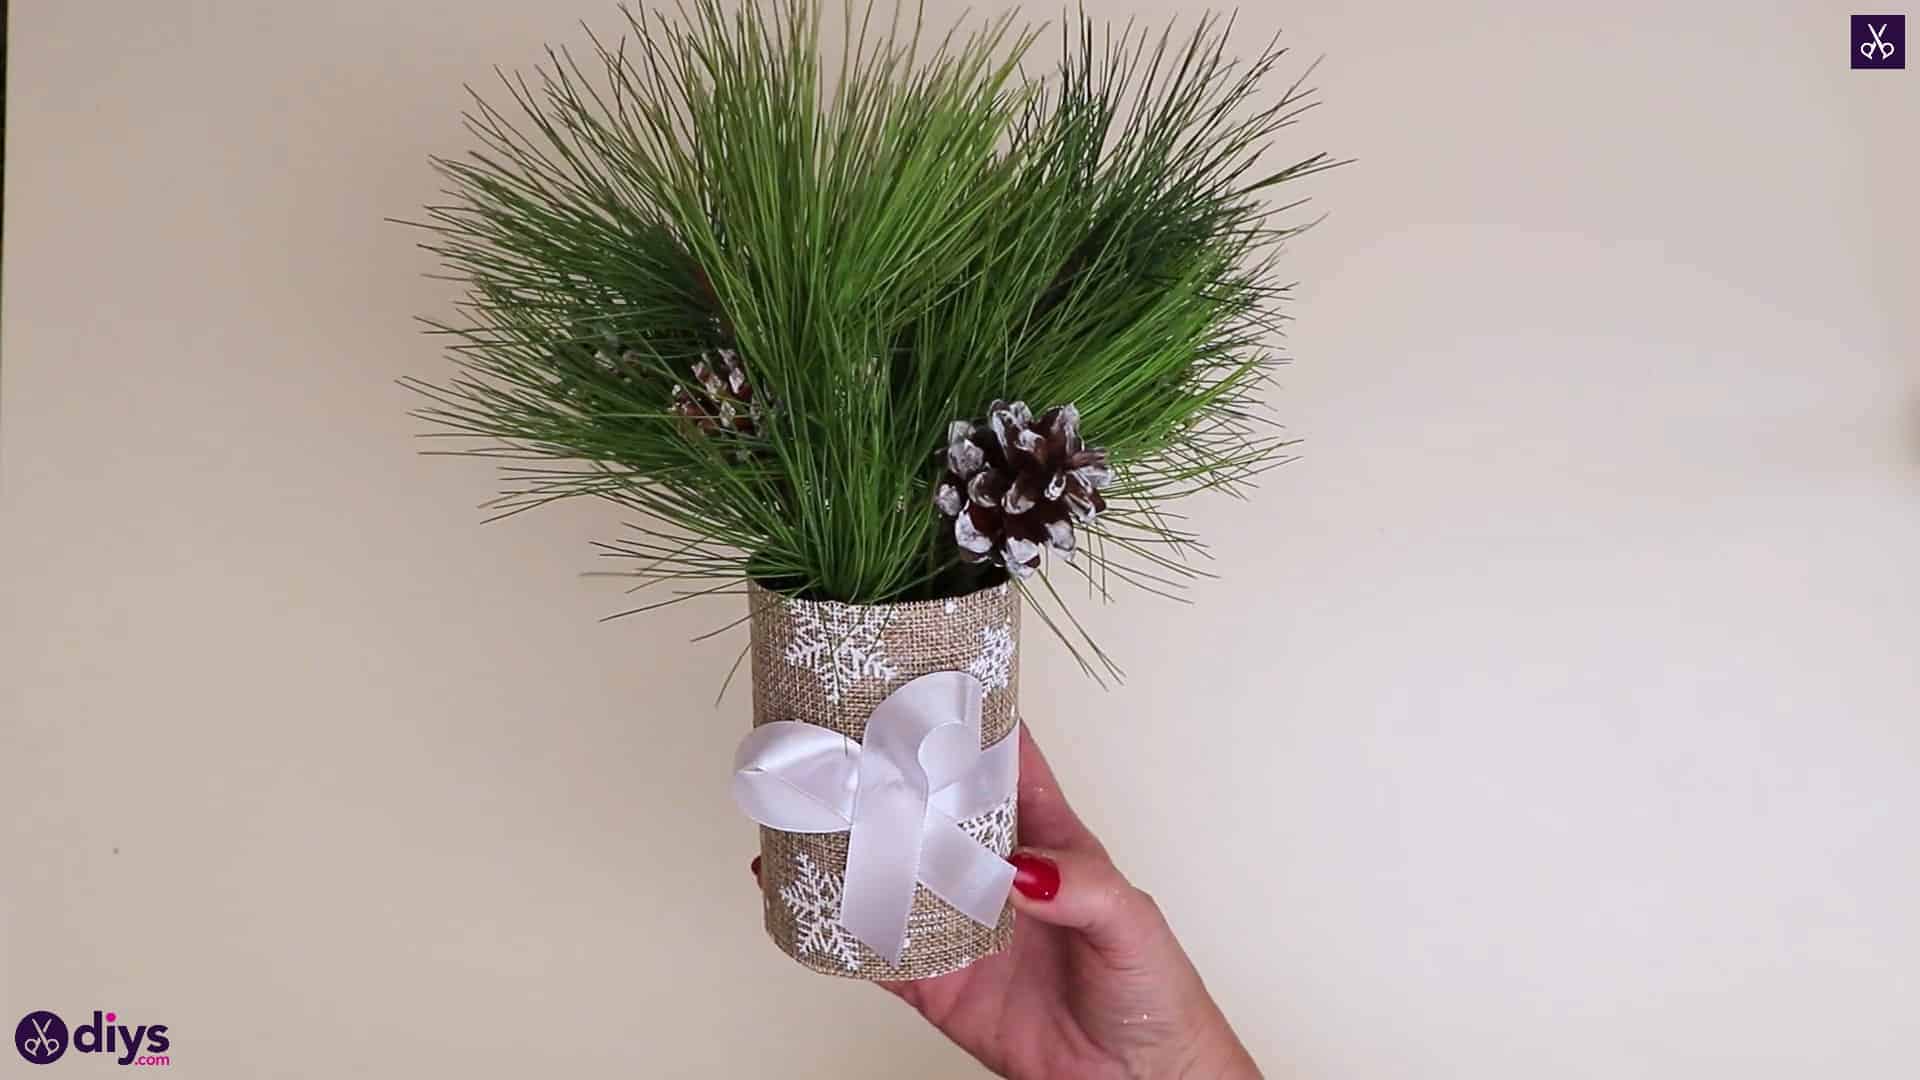
Apply glue to the inside bottom and sides of your tan can, as well as to the bottom of your foam piece, and slide it back into place in the can, pressing it down if you can. Then arrange your pinecones in amongst the pine branches using the wire stems you added to them earlier.


You’re all finished as soon as you’re happy with your pinecones! Just in case you’d like to try this project out for yourself, here’s a fantastic tutorial video to help you!