Brussels Sprouts Care – How To Grow And Harvest Brussels Sprouts
Updated on October 9, 2021
Truly an ancient cultivar, Brussels sprouts was the vegetable that put the Belgian capital on the map. A close relative of cabbage, it’s the kind of vegetable you can use in different recipes and salads and even freeze it to keep it fresh. The diminutive cabbage is a specialty of Brussels, Belgium. But its health benefits supersede those of its larger cousin, the cabbage.
For one thing, it is packed with nutrients and antioxidants. In addition, it has high fiber and vitamin K content which helps with digestion, reduces inflammation, and might improve your immune system. You can saute, roast, or cook these veggies any way you like.
Additionally, Brussels sprouts are better consumed fresh. That’s when you get most of the flavor and nutritional values. As a gardener, you know that the best way to eat a veggie fresh is to grow it in your garden. This article walks you through planting Brussels sprouts, caring for them, and finally harvesting them. It also discusses the different varieties you can grow at home.
Brussels Sprouts At a Glance
While the good people of Brussels, Belgium, were not the only ones growing Brussels sprouts (Brassica oleracea), they specialized in this dwarfish cabbage and went to great lengths growing and cooking it. So much so, the veggie became associated with that ancient European city.
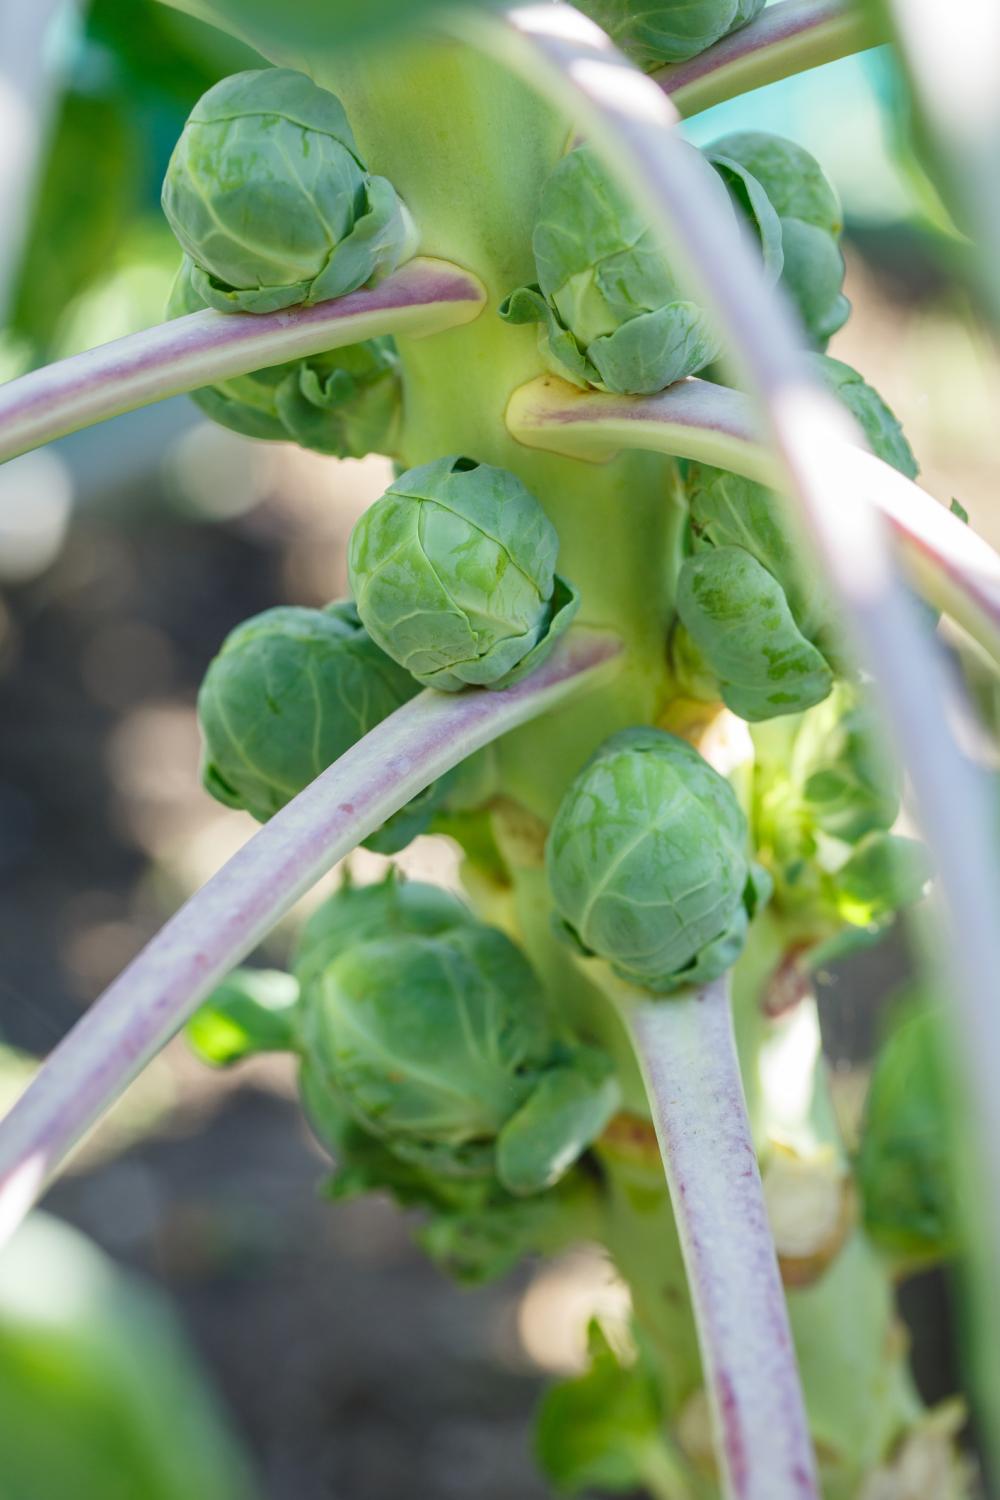
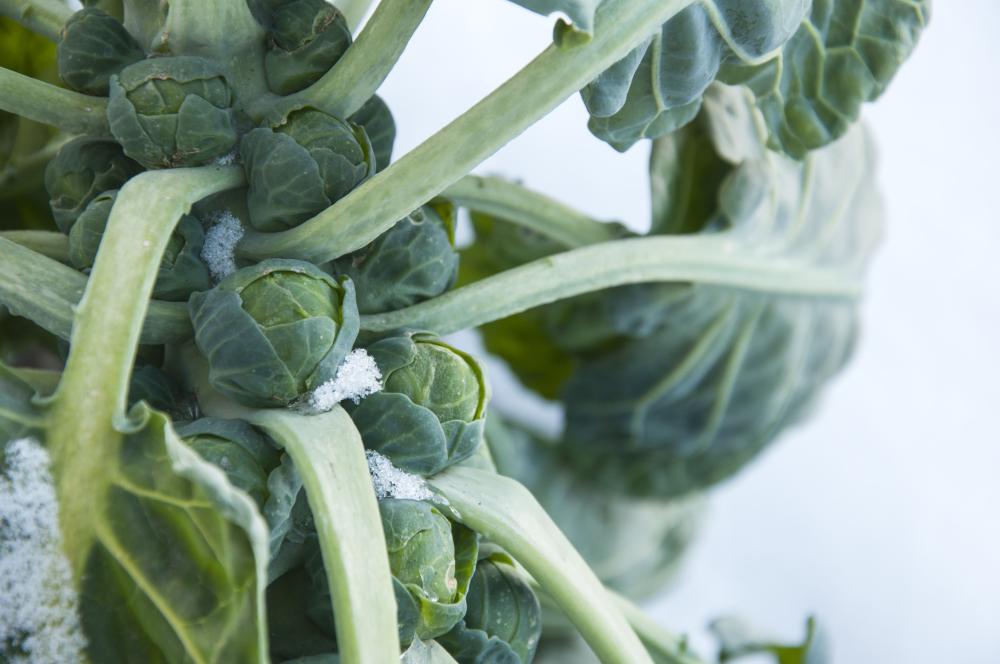
Growing Brussels sprouts is not different from growing cabbage. In fact, in the early stages of the vegetable’s life, it resembles cabbage in almost every way. However, small buds grow along the stem once the main stem reaches its full height of 3 feet. These buds will turn into small heads which you will need to harvest while they’re young and tender.
The sprouts are usually green, although some cultivars have red-laced leaves. On average the head of the veggie measures about 1.6 inches in diameter. It grows in zones 2 to 9. In the cold zones, you can only grow it as an annual. But those living in mild zones can keep the veggie going for a second year.
In its second year, it will develop yellow flowers in the spring. Once pollinated, fruits containing seeds develop inside of the female flower and you can use the seeds to start a new patch of Brussels sprouts.
Brussels Sprouts Varieties
The first Brussels sprouts were grown around the year 1200. Since then, many cultivars have sprung up everywhere. Some have more tolerance to warm temperatures while others have a buttery taste as compared to the earthy taste of most varieties. Here are some varieties to consider.
- Catskill: A recent cultivar that originates from New York. The main claim to fame of this cultivar is its 2-inch heads and large stalk. Each plant yields about 10 buds and it takes about 110 days to mature. The texture of the heads is crisp and they have a good flavor when sauteed or roasted.
- Churchill: The cultivar matures in just 90 days, giving you an advantage if you live in a warm zone. It is famous for its high yield although it needs more space than other varieties due to the dense lateral growths. It’s also more prone to fungal infection due to poor air ventilation than more slender cultivars.
- Redarling: A unique cultivar with purple leaves and a pleasant and mild taste. It takes about 140 days to mature and the plant grows to about 31.5 inches on average. The buds are about 1.2 inches each and the cultivar has a high yield.
- Capitola: The buds have a medium green color and need about 135 days to mature. Each bud is 1.6 inches in diameter and the plant grows to only 38.5 inches high. The color and texture of the buds are quite appealing and you can eat it fresh or cook it.
- Cryptus: A high-yielding cultivar that is also resistant to diseases especially clubroot. The buds are small averaging a little over 1 inch in diameter and have a medium green color. The only drawback is that it needs about 185 days in the garden to mature which means it’s not suitable for moderate zones.
- Gladius: Another small cultivar with blue-green buds. It needs only 140 days in the soil and the plant averages 31.5 inches in height. Besides its unique leaf color, this hybrid is known for its disease resistance.
How to Grow Brussels Sprouts
One of the main concerns about growing Brussels sprouts is their low tolerance to high temperatures. Once the temperature goes above 70 degrees F, the veggie will struggle noticeably and might bolt. So you need to time your planting of the veggie so that it’s ready to harvest in mild weather.
In warm zones, you could start it indoors about 12 weeks before the first frost. That way you will harvest your buds right after the frost. Here’s how to start Brussels sprouts in easy steps.
- Get your seeds from a reliable source and choose a disease-resistant cultivar.
- Choose a sunny spot in your garden and break the soil. Turn up 12 inches of the soil and mix in 6 inches of aged manure. Let the soil rest in the sun for a week or two.
- Sow the seeds about a quarter-inch deep into the soil and space them out keeping about 4 inches between the seeds. You’ll thin them out later.
- Cover the seeds with a thin layer of soil. Don’t pack the soil since the seeds need light to germinate.
- Water the seeds immediately to get the soil moist. Keep it moist as long as the seeds have not germinated yet.
- When the seedlings are about 4 inches high, thin them out. After you’re done, the seedlings would be about 36 inches apart.
- For a good crop, grow 2 plants for every person in the house.
Brussels Sprouts Care
If you time your Brussels sprouts so that the mature buds avoid high temperatures, you will enjoy a good and healthy harvest. But to get there, there’s a little bit of gardening work that needs to be done. From the usual watering and feeding to fighting off pests and diseases, Brussels sprouts need an attentive gardener.
Soil
Fertile soil is one of the keys to a successful and bountiful Brussels sprouts crop. But what’s more interesting is that this veggie prefers heavy soil over sandy or loamy soil. In other words, if you have clayish soil in your garden, you won’t need to amend it. Crop rotation is important to avoid diseases such as clubroot and allow the soil to replenish the depleted nutrients over time.
As for the soil pH, it should be between 6.0 to 6.8. If an earlier crop was infected with clubroot in this same area, increase the soil pH to 7.0 by adding lime. This prevents the pathogens in the soil from spreading and infecting the plants.
Water
When watering Brussels sprouts, your goal is to keep the soil evenly moist and get the water to the roots as quickly as possible before it evaporates. This is easily achieved by aiming the water can nozzle toward the base of the plants. And since the soil is heavy, it will retain moisture for long periods of time compared to sandy soil.
Provide the sprouts with one inch of water every week including rainfall. If the soil dries out fast due to high temperature or glaring sun, cover the beds with a 3-inch thick layer of mulch. You can use any organic mulch available at home from fallen leaves to pine needles, oak bark, or straw.
And in cases of hot weather where the temperature stays above 70 degrees F for a few days, consider providing the veggies with shade. As the buds approach maturity, cut back on watering to about half of the regular amount.
Fertilizer
As a heavy feeder, Brussels sprouts need rich soil with plenty of organic materials. This is why you shouldn’t plant the veggie in the same spot two years in a row. Before you plant the seeds or seedlings, mix in about 6 inches of aged manure or organic compost into the soil. And about six weeks in, you’ll need to apply a well-balanced 10-10-10 fertilizer.
If you grow the veggie in sandy soil, you’ll need to use a nitrogen-rich fertilizer. Boron deficiency is another cause for concern and one of its main symptoms is hollow stems. Feed the plant with borax (one tablespoon dissolved in 1.5 gallons of water). One application is usually enough.
Pests and Diseases
Fending off the numerous pests that attack Brussels sprouts can be a full-time job. Aphids are the first to make their presence known with the tiny holes they make in the leaves. Use a garden hose to blast them off the plants. If that doesn’t work, rub the leaves and stems with a swab soaked in rubbing alcohol.
Next in line are cabbage worms and cabbage loopers. They are not as tiny as aphids and you can easily pick them by hand and destroy them. A bucket full of water with two tablespoons of detergent is a merciful way to kill them.
As for cutworms, the best way is to prevent them from reaching the plants. Install cutworm collars around the seedlings.
Diseases are also numerous. Cabbage yellows is a fungal infection that starts with the lower leaves then spreads upward. As the leaves turn yellow, the stalk wilts and turns brown then rots. Fight it off with compost tea that helps suppress the fungus.
Clubroot is another devastating disease that damages the whole crop and stays in the soil for years. Increase the pH levels in the soil to 7.0 to control the spread of this fungus.
Harvesting Brussels Sprouts
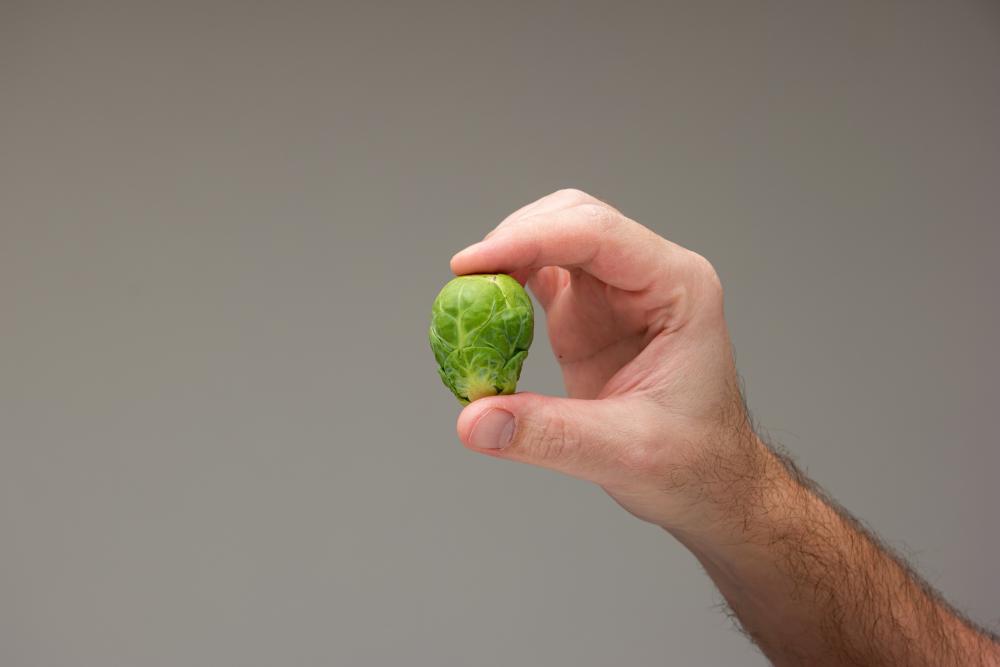
When it comes to harvesting Brussels sprouts, timing is everything. The small buds are usually tastier and more tender than the larger ones. So even if your cultivar grows buds as big as 2 inches in diameter, it’s better to harvest them when they are about 1.1 or 1.2 inches across.
One good clue that the buds are ripe is when the leaves nearby turn yellow. Usually, the ripening starts from the base and works its way up to the buds near the top of the stalk. That means each plant could take a few weeks to harvest all the buds.
Before you harvest the buds, you’ll need to remove the yellow leaves above each bud a few days in advance. This removes the clutter around the buds and allows them to gain their distinct round shape. And if you want to encourage all the buds on a stalk to ripen together, pinch the head of the stalk about 4 weeks before harvest time.
Storing Brussels Sprouts
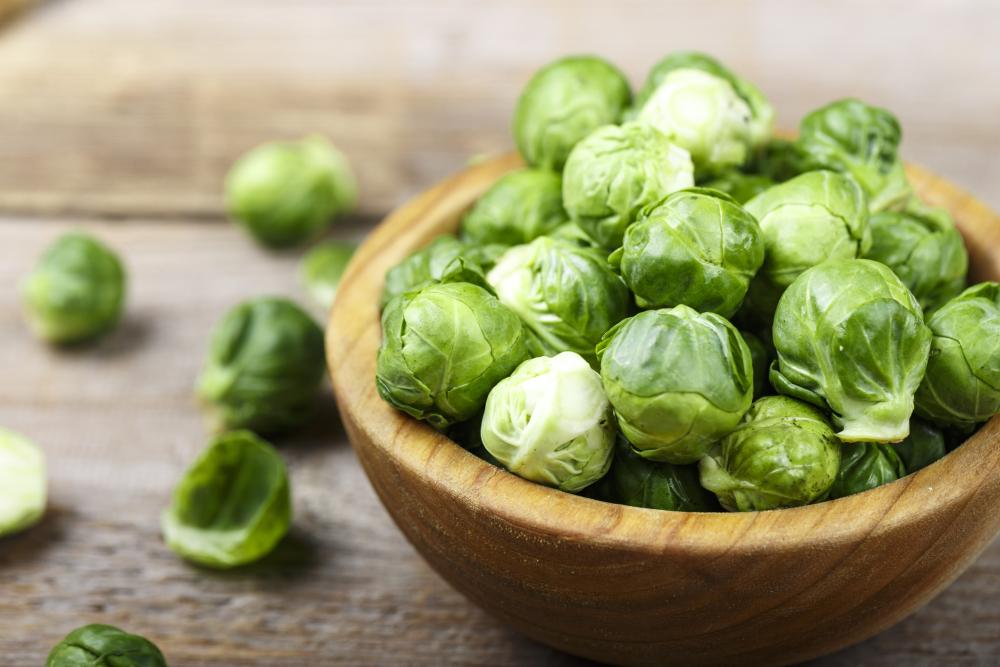
As with many other veggies and fruits, Brussels sprouts should be consumed fresh. That’s when you get the most flavors and nutrients out of it. Luckily, since the veggie has a large harvest window, you can collect as many buds as you need every day and eat them fresh.
If you want to store the buds, don’t wash them since the humidity could spoil them. Instead, keep them in a zip-lock bag and seal it then place it in the refrigerator. They will stay crisp and succulent for up to 5 days. When you take them out, you can wash them.
If you want to store Brussels sprouts for more than 5 days, then you’ll need to cook them right after harvesting. Cooked sprouts can stay in the fridge for far longer than raw buds. My favorite way to cook them is to roast the fresh buds with bacon and shallots. But of course, you can cook them as soup. And when cooked with sun-dried tomatoes, that brings out the deepest and richest flavors of Brussels sprouts.