Vanilla Orchid Care – How To Grow Vanilla Bean Orchids
Updated on April 29, 2021
Vanilla is a staple flavor in every kitchen. From ice cream and chocolate to dessert recipes and beverages, vanilla makes everything not just palatable but downright delicious. And if you’re wondering where this magical white substance comes from, wonder no more. Vanilla is extracted from the seed pods of the vanilla bean orchids. And while you can certainly grow the vanilla orchid in your garden, most gardeners do that for its landscaping values rather than for its fragrant seed pods. It’s not an easy plant to grow, though and there’s a lot to consider and pay attention to. Also, if you’re looking for a flowering plant, the vanilla orchid blooms can be a real challenge. So let’s unpack all of that.
Vanilla Orchid Basics
Vanilla orchid (Vanilla planifolia), or vanilla bean orchid as it’s sometimes known, has a vine-like growth and usually flowers in the late spring or early summer. The word vanilla comes from the Spanish word for small pods, “vainilla.” It’s a native of Mexico and likes to crawl and find support in other plants or trees nearby.
And that’s where the ornamental values of these orchids come in. They have flat leaves, which are the most striking features as far as horticulturalists are concerned. As we mentioned, you will find it hard to get the vanilla orchids to bloom in your garden, but the leaves are ornamental enough in many cases. Not to mention the way the flexible stems wrap themselves around tree trunks and create stunning zig-zags.
As perennial creepers, the succulent stems can reach heights of 30 feet. But since they crawl and wrap themselves like a vine, they usually end up taking less space than that. The aerial roots are another landscaping bonus. But it’s actually the leaves that steal the show.
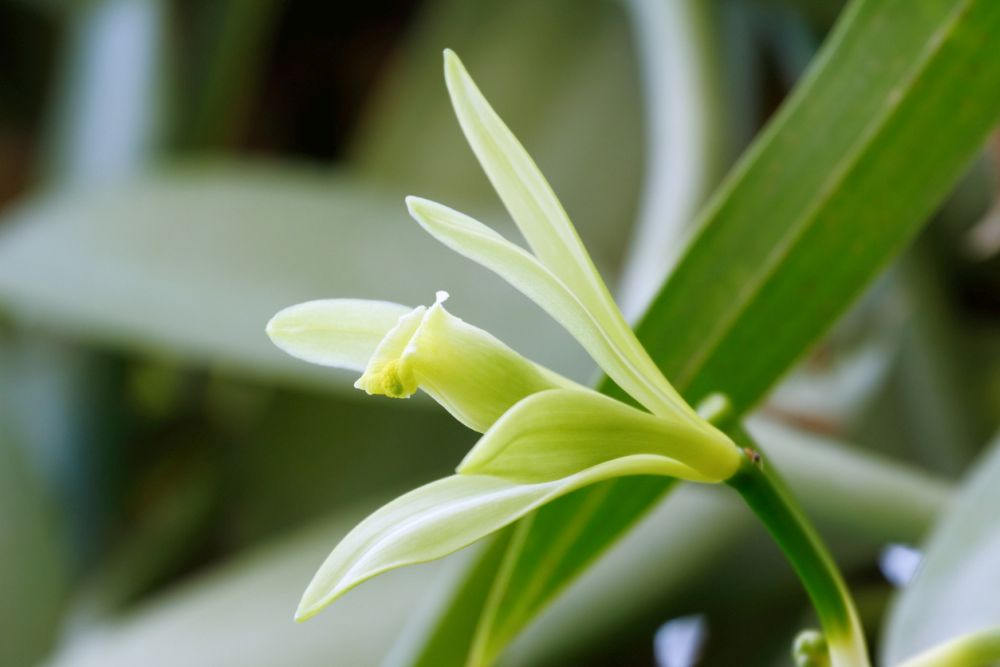
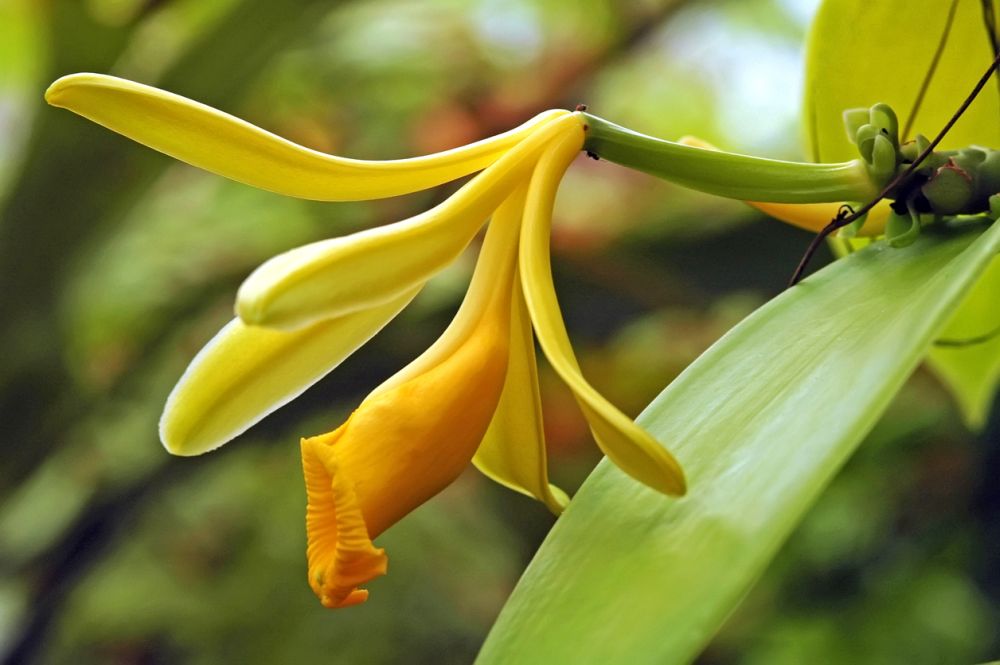
They are large and flat with bright green shades. Each leaf grows to up to 10 inches long and about two and a half inches wide. Even if your vanilla orchids bloom, they will take at least about three years from the time you plant them to finally show their flowers. When they finally appear, the blooms are yellow and fragrant.
The fruits of the vanilla, or its beans, are pods that turn dark as they ripen. Each pod is about 8 inches long, and they become aromatic once they’re ripe. This ripening might take anything between 8 to 9 months.
Vanilla Orchid Varieties
Some of the common vanilla orchid varieties to plant in your garden include the following.
- West Indian Vanilla (Vanilla pompona): One of the most popular vanilla orchid varieties that people mainly grow for the vanilla extracts. The aroma and fragrance of this type are both quite strong. But you can grow it for its ornamental values, especially the large and glossy leaves.
- Tahitian Vanilla (Vanilla tahitensis): Originates from Tahiti; that’s why it got that name. The vanilla you get out of this variety has a different taste and flavor than the other types. It also produces smaller pods, and its leaves are elliptic in shape. When it flowers, the yellowish-green blooms are a bonus.
- Leafless Vanilla (Vanilla aphylla): A native of South Asia, it’s famous for its clusters of flowers that bloom in the late spring and early summer. The stems of this variety twist and branch out like vines and are usually leafless and covered instead with internodes.
- Mexican Vanilla (Vanilla mexicana): The vines of this variety are usually long and can reach 15 feet. It’s a native of Central America, where people have been growing it for its aromatic vanilla extracts.
How to Grow Vanilla Bean Orchids
While the vanilla bean orchid is not your typical house or garden plant, that doesn’t mean you cannot grow it in your garden. Even if you have no interest in the vanilla extracts, the ornamental values of this orchid put it on the must-have list of many gardening enthusiasts. It does require some work and more care than other plants, but to have a live vanilla bean orchid growing in your garden is worth every amount of work you put into it.
- Pick a medium-size pot or container with plenty of drainage holes at the bottoms. Clay pots will work just fine.
- Fill the pot with a rich potting mix or fertile soil. Add in plenty of organic material, shredded osmunda, and organic compost. Mix well.
- Place the pot or container near a pole or a stake since the vine needs support to climb up.
- If you bought the vanilla orchid plant, take it out of the pot and dig a hole in the soil deeper and wider than the original pot. Place the plant in the hole and fill it up.
- If you are planting the orchid from a cutting, dig a hole in the soil and place the cutting about 4 inches deep in the hole. Fill the hole with soil and pack it lightly.
- Water the pot until the water flows out of the drainage holes to help settle the plant or cutting in the soil.
- Keep the soil moist but not wet.
- It will take the plant anything between 3 to 5 years before it matures and produces flowers.
- Once the flowers bloom, you’ll need to pollinate them yourself to produce pods.
Vanilla Bean Orchid Care
If patience is a virtue, the vanilla bean orchid sure needs you to be as virtuous as you possibly can. From the time you plant it until the blooms finally open on the orchid, you will need to dedicate your time and energy to keep the plant growing successfully. This includes providing adequate light, water, fertilizer and ensuring that it’s both pest- and disease-free. Easier said than done, you might say. And you’re absolutely right. The vanilla bean orchid is not for absolute beginners who want to see the fruits of their labor blossom in a matter of weeks rather than years.
Soil
For a plant that stays for years before it can show the first bloom, you need to pay extra attention to the soil. Even if the plant is not showing a whole lot of growth in the first 3 years of its life, that doesn’t mean that it doesn’t need rich soil. Before you plant the orchid, check that the soil has high deposits of potassium and calcium. The pH should not exceed 7 by any chance. The soil needs to be light and loose. If you can’t find the right potting mix, you can add perlite and organic material to loosen the soil and improve drainage.
Water
Watering is another tricky issue as far as the vanilla orchids are concerned. Again the plant takes years to grow and show signs of life, so it’s easy to forget to water it. But that could kill the plant since it likes the soil moist but not dry. Avoid overwatering since wet soil leads to root rot and fungal infections. Root rot can be hard to detect in the early stages of the orchid’s growth. As a rule of thumb, you should wait for the soil to go dry between irrigations.
Light
It goes without saying that all climbers don’t do well in the full sun. They grow in the shade of large trees, so whatever light they get is usually filtered. In your garden, you need to provide the same light conditions the vanilla orchids are used to in their natural habitat. A shaded place that keeps them from the glare of the sun is ideal for their growth and success. It’s okay if they get the morning sun for a couple of hours. But excessive sunlight stunts the growth of these slow-growing orchids. The lack of light also gives the same bad results. So aim for a partially shaded spot that has enough light.
Fertilizer
Whether they’re flowering or not, you need to fertilize your vanilla orchid. Regular fertilizing about once every two weeks improves the growth and speeds up the maturity and flowering of these orchids. By speeding up, I mean it can cut the waiting period from 5 years down to 3 years before you see the first flower. Once the flowers open, you need to increase the fertilizing to once a week. Use a diluted dose of the regular fertilizer not to burn the roots. Hold off the fertilizer after the flowers have faded.
Pests and Diseases
Plants attract bugs and pests, that’s a given. And when the plant is as aromatic as the vanilla orchid, you can expect a different type of pests than your average aphids and mealybugs. Most often, you’ll find bugs scurrying around, such as vanilla bug, beetle, giant African snail, vanilla vine weevil, Achatina, and white grubs. If you catch them early, there’s a good chance you can prevent an infestation. Use a swap soaked in alcohol to coat the stems and leaves and kill the small bugs. As for the large ones, such as the beetles, you can pick them up and drown them in a bucket full of water and detergent.
As for diseases, well, you also have a few to deal with. The first is root rot. A common problem for many annuals and perennials. It often happens when you overwater the plant, or the soil is not well-drained. The problem with the vanilla orchid is that for the first couple of years, you won’t be able to detect the symptoms of root rot since there are no leaves yet.
The other health issues you might encounter with the vanilla orchid include black rot, rust, anthracnose, and stem rot. Fungal infections are the main cause of these diseases.