DIY Origami Flower Art
Updated on July 1, 2021
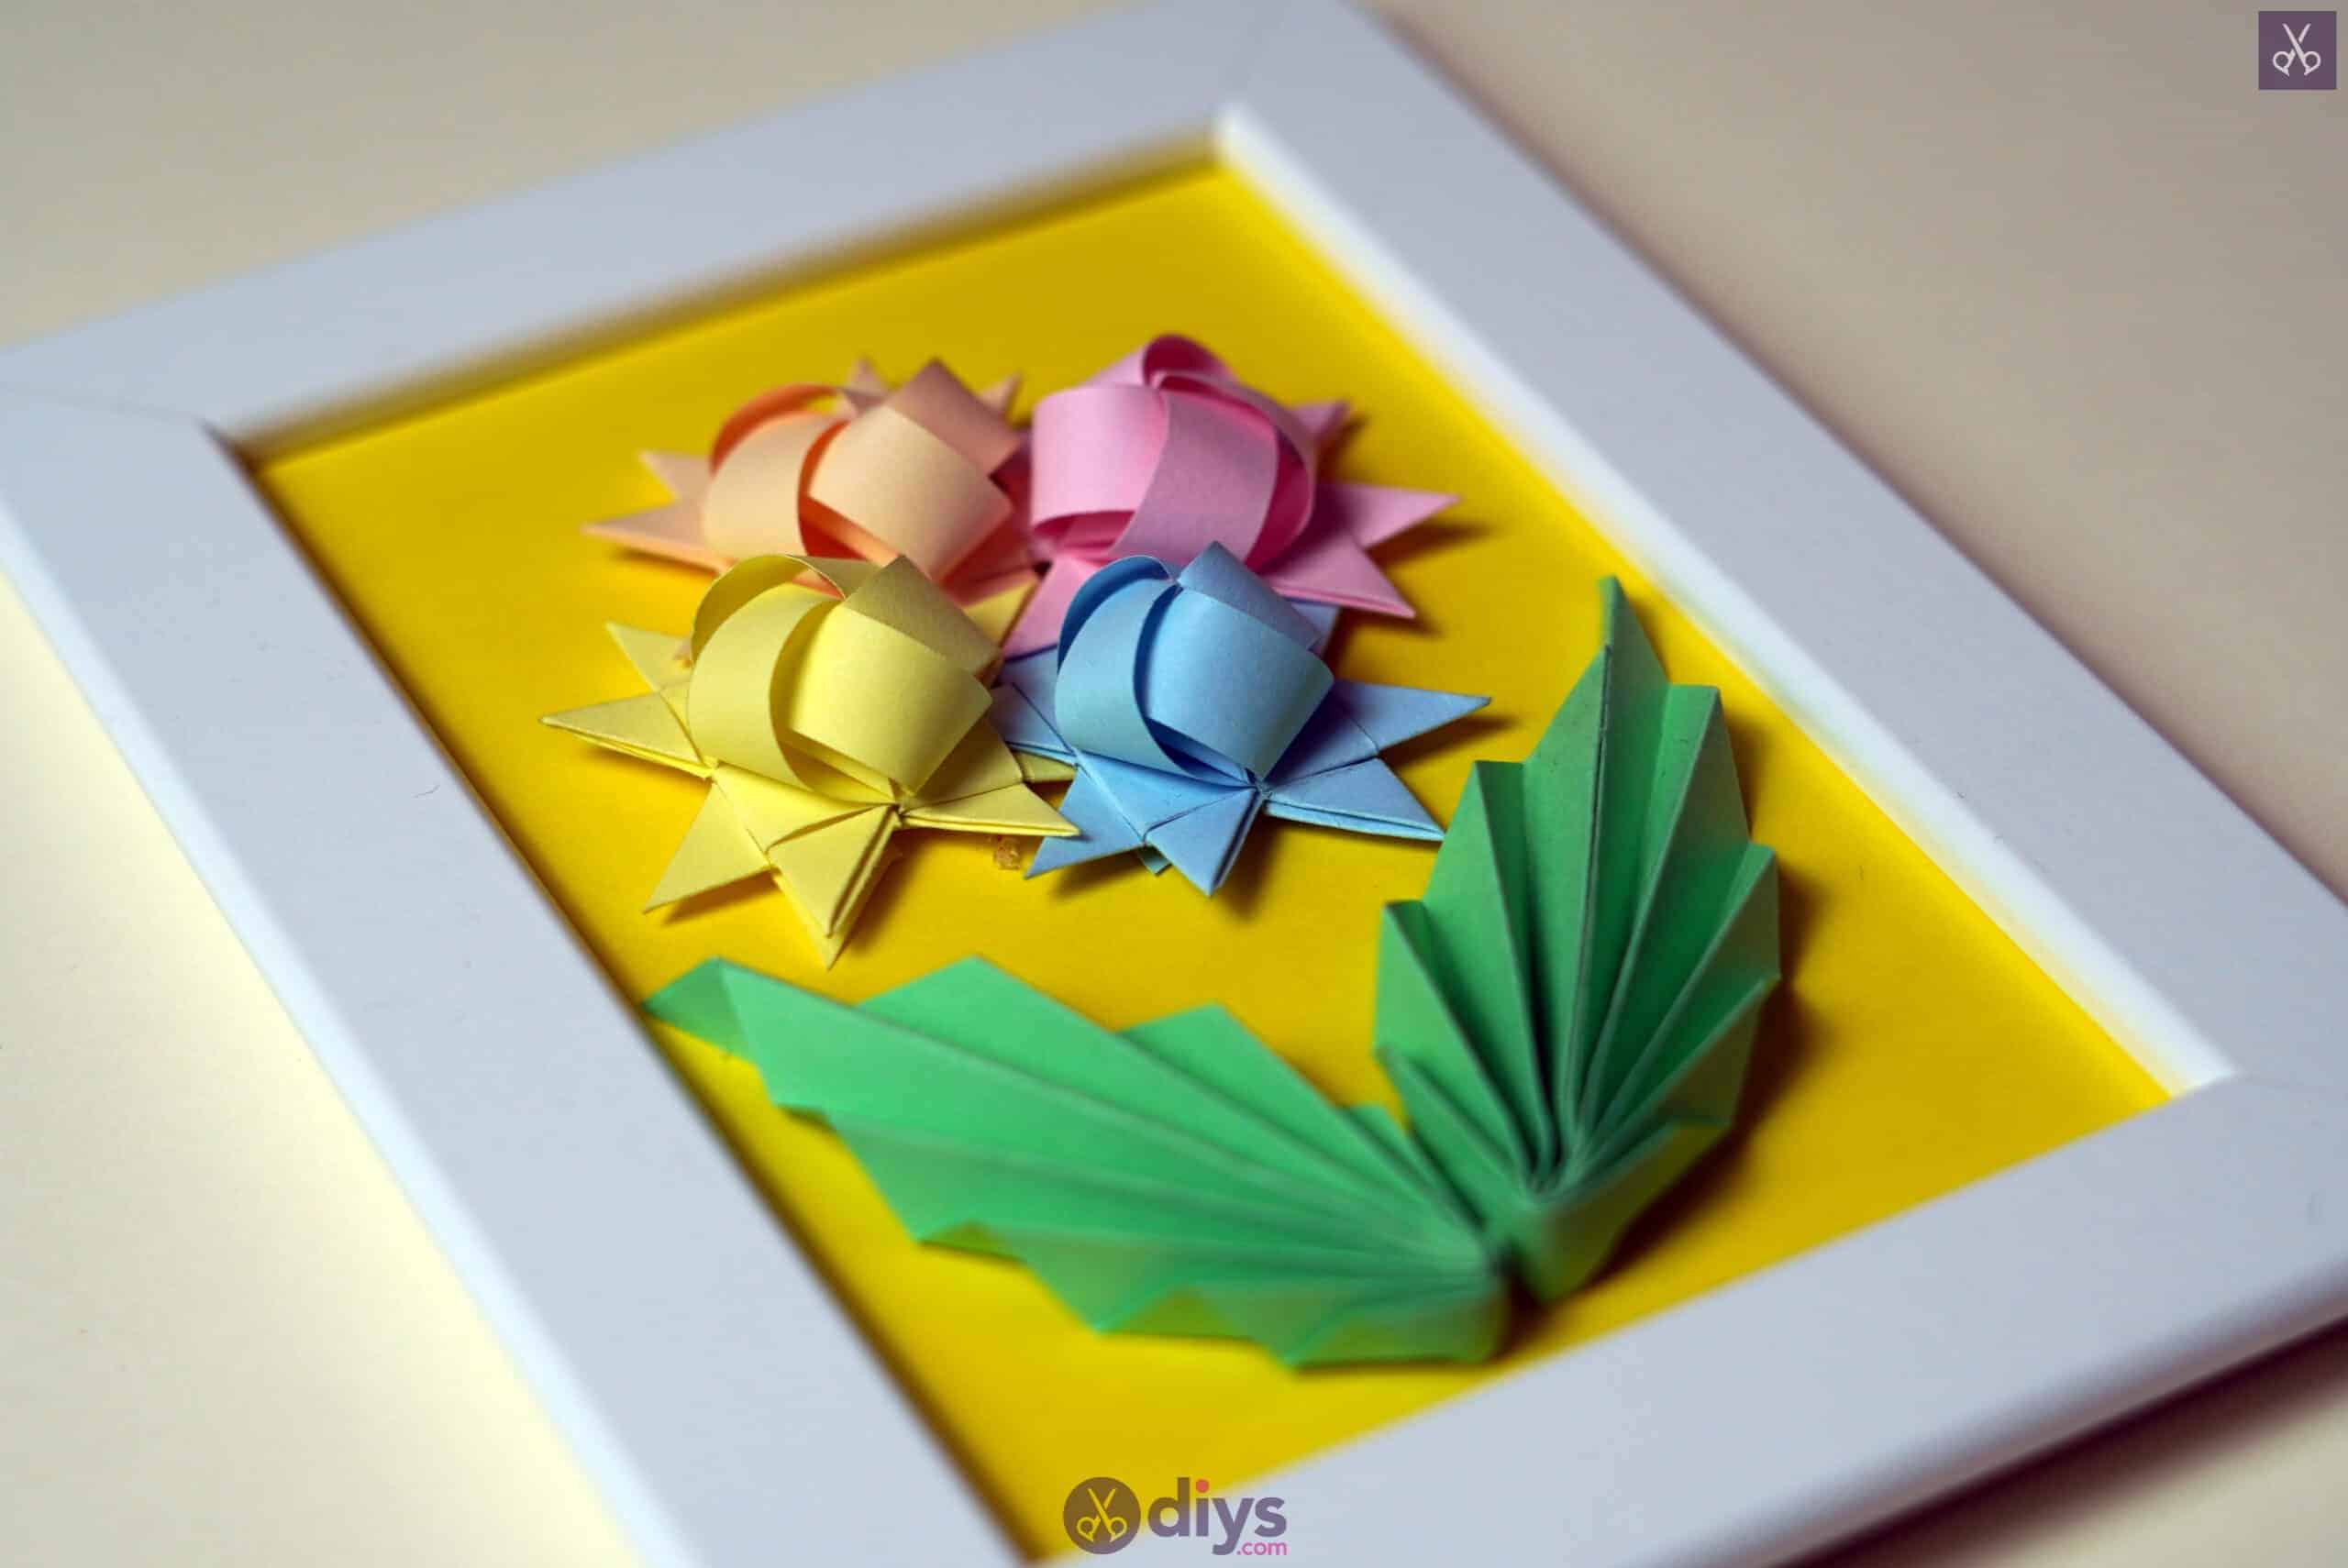


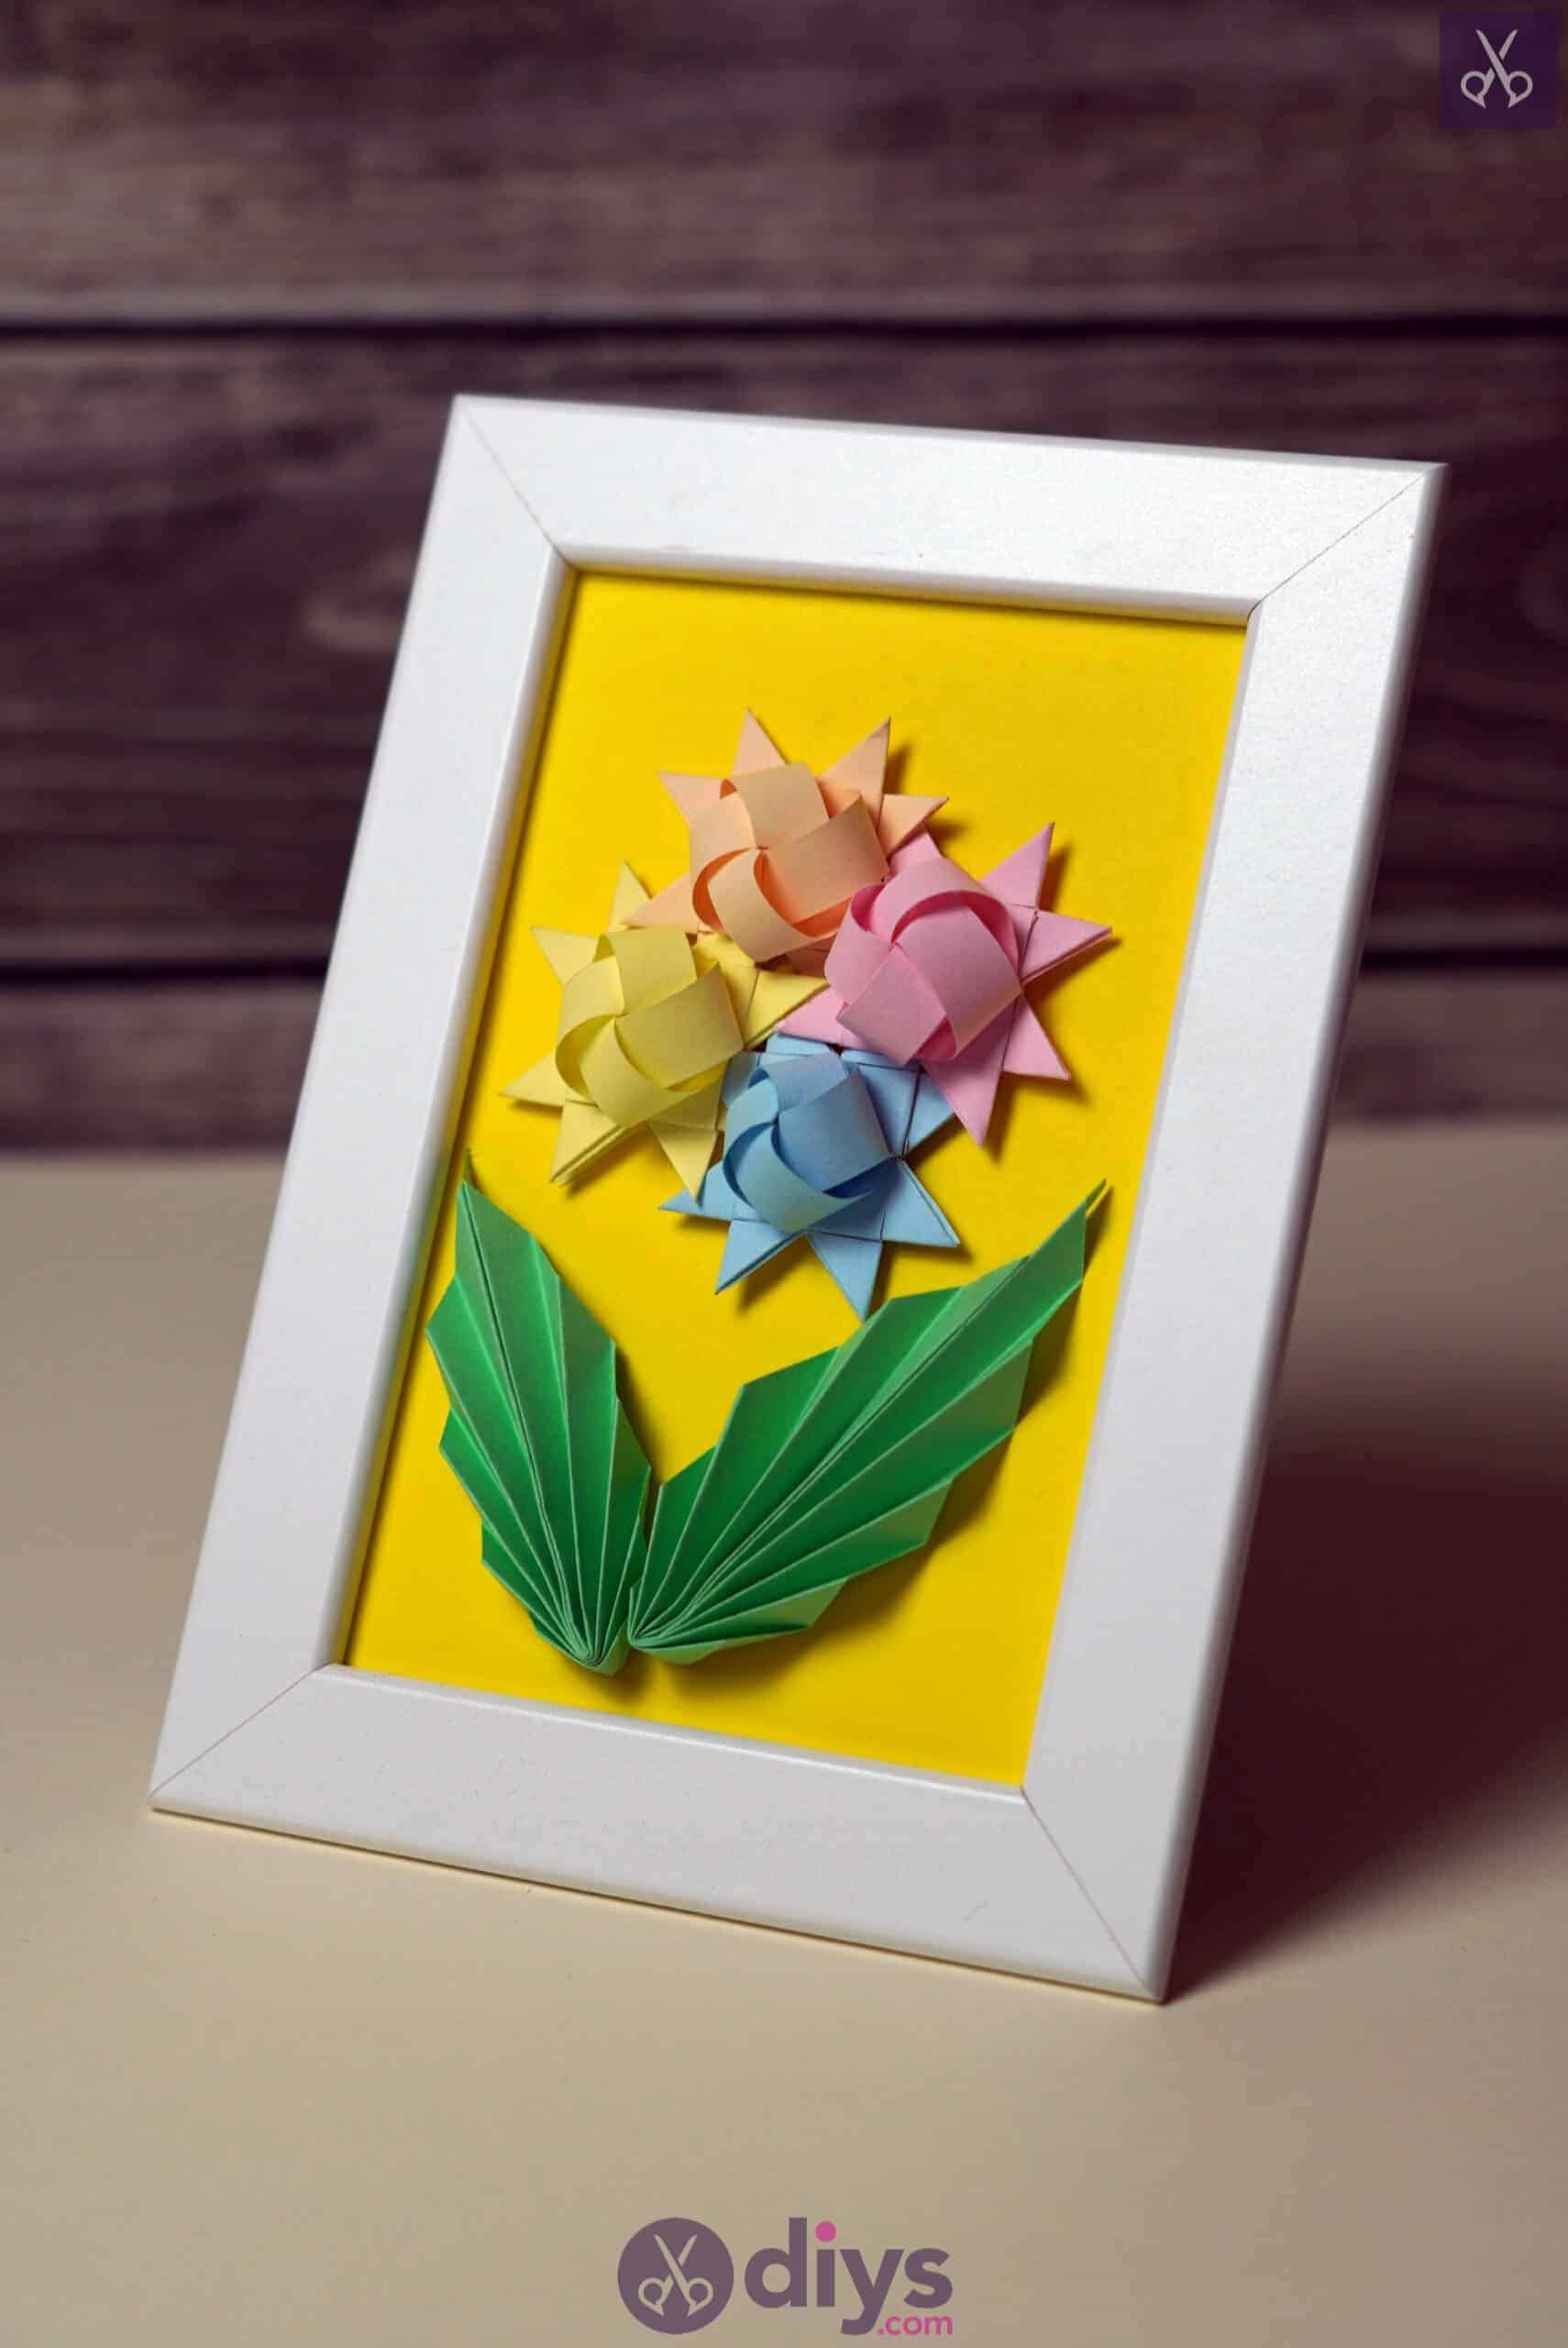
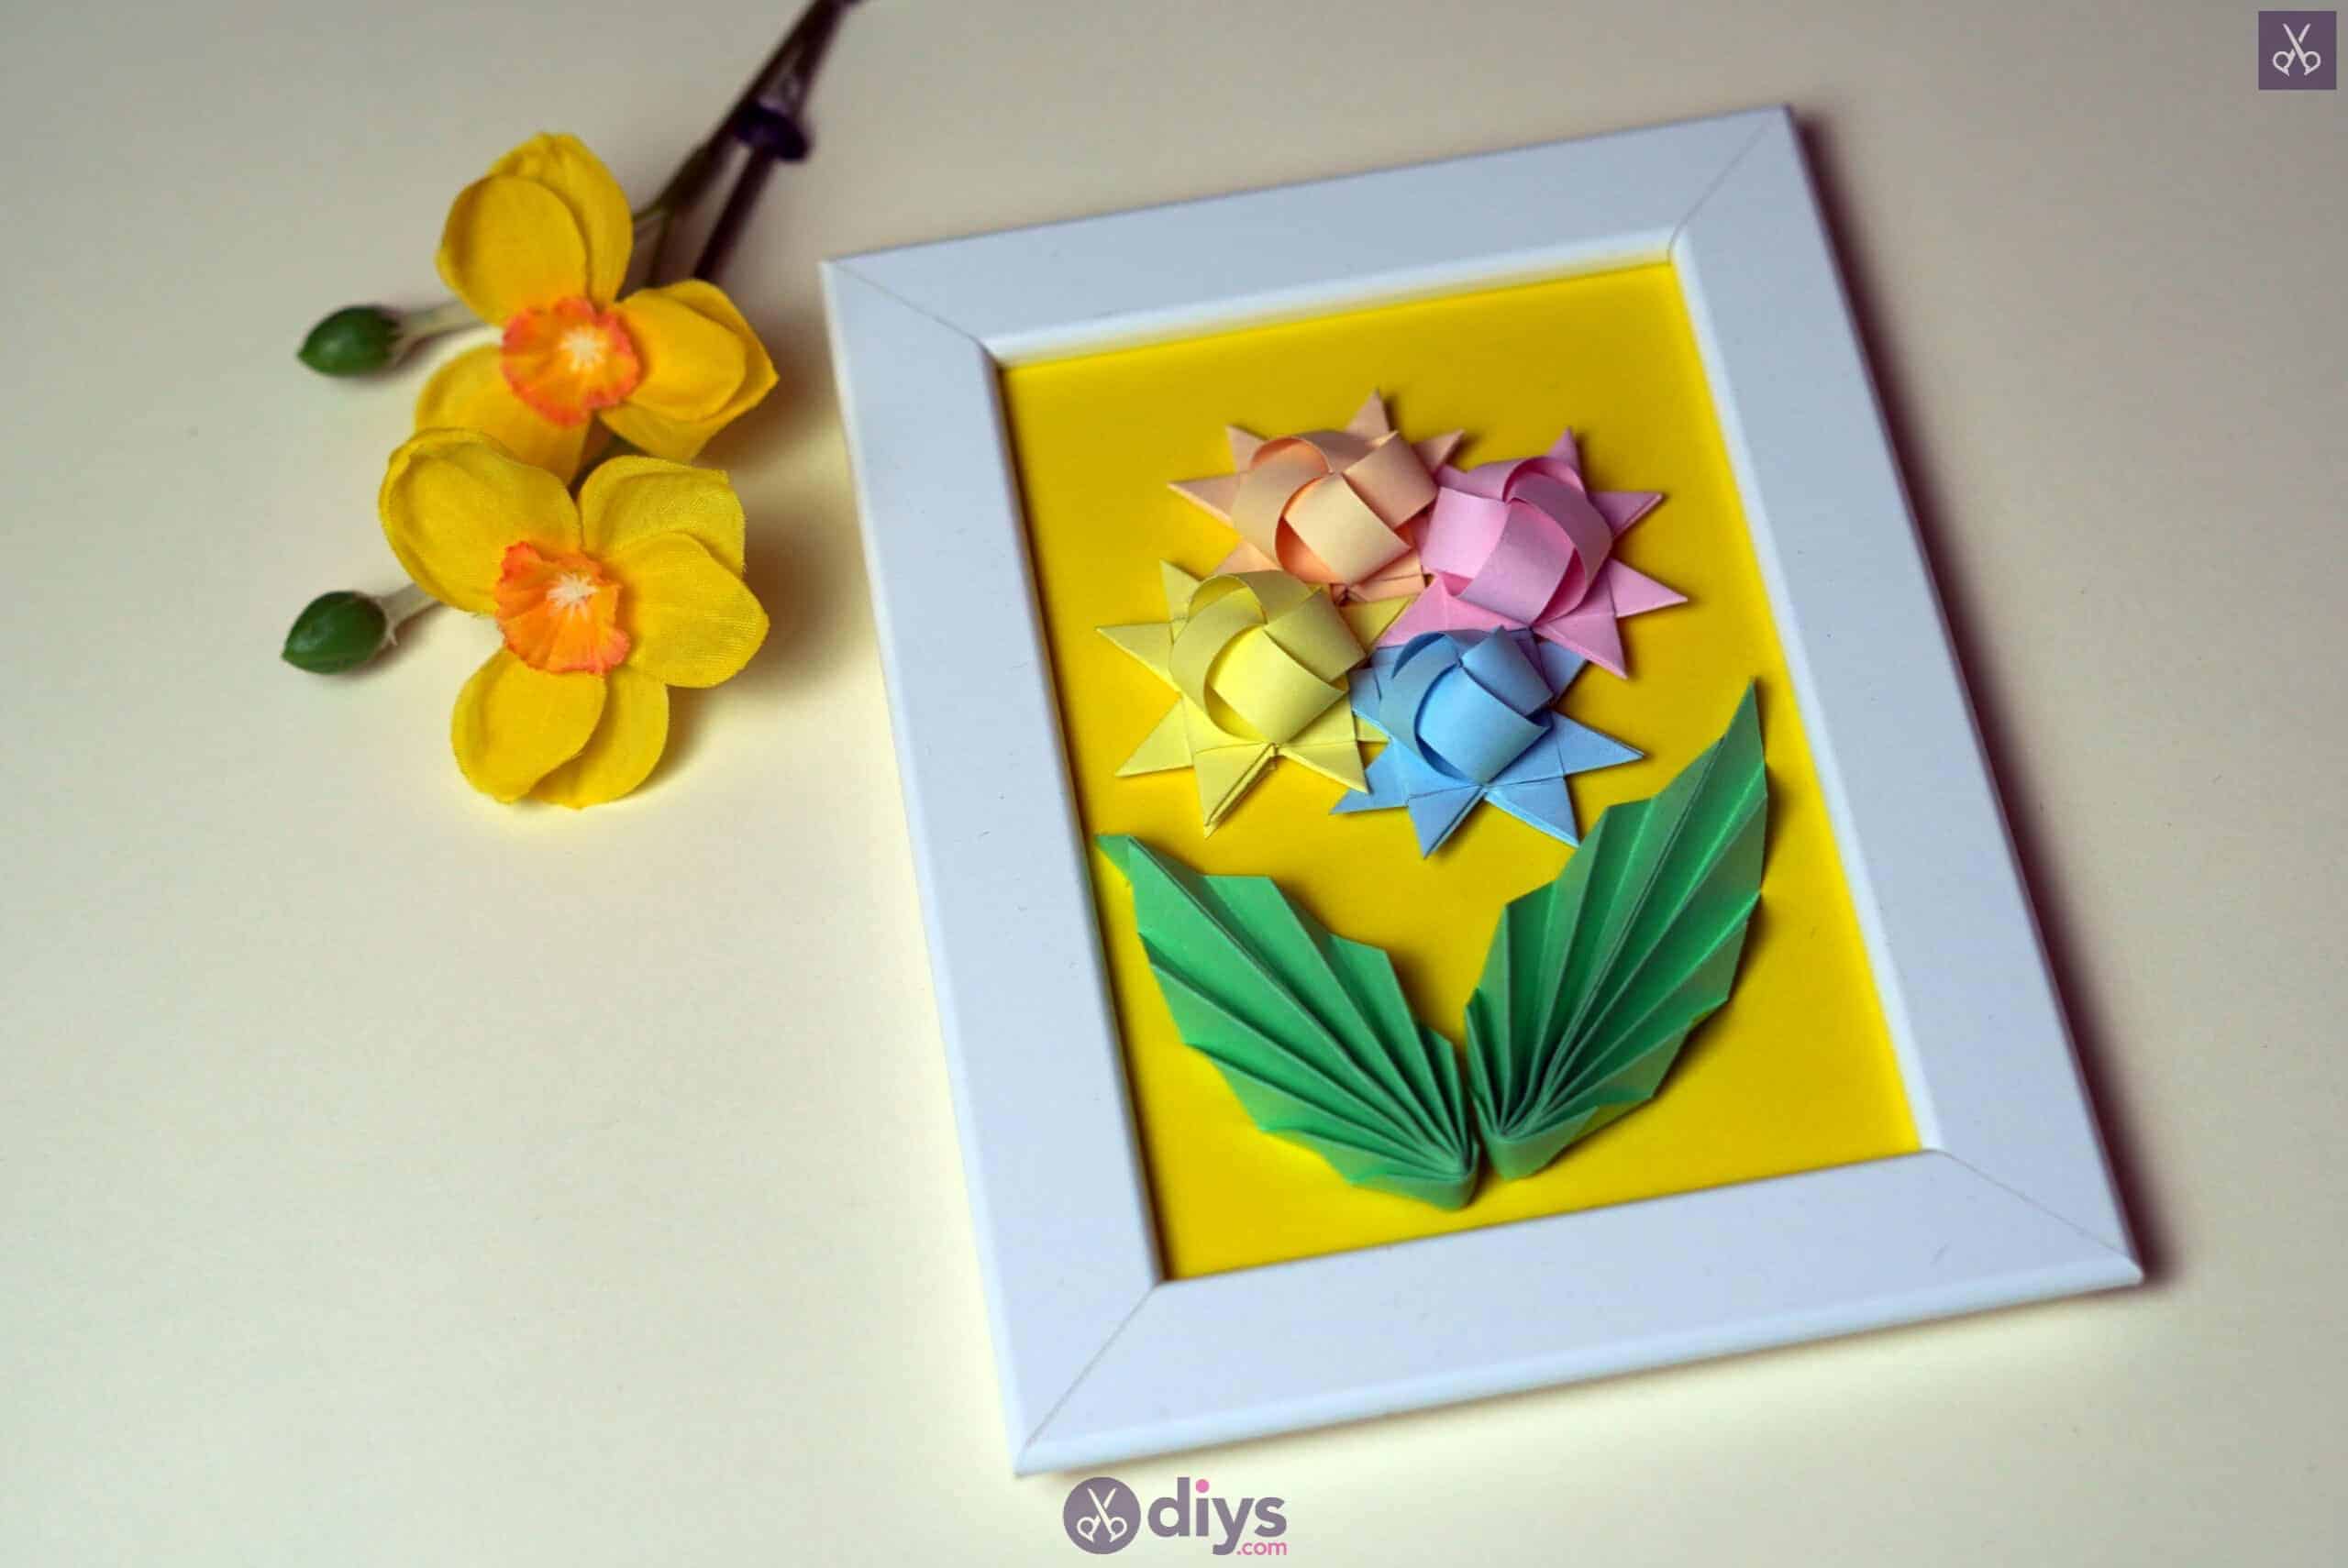
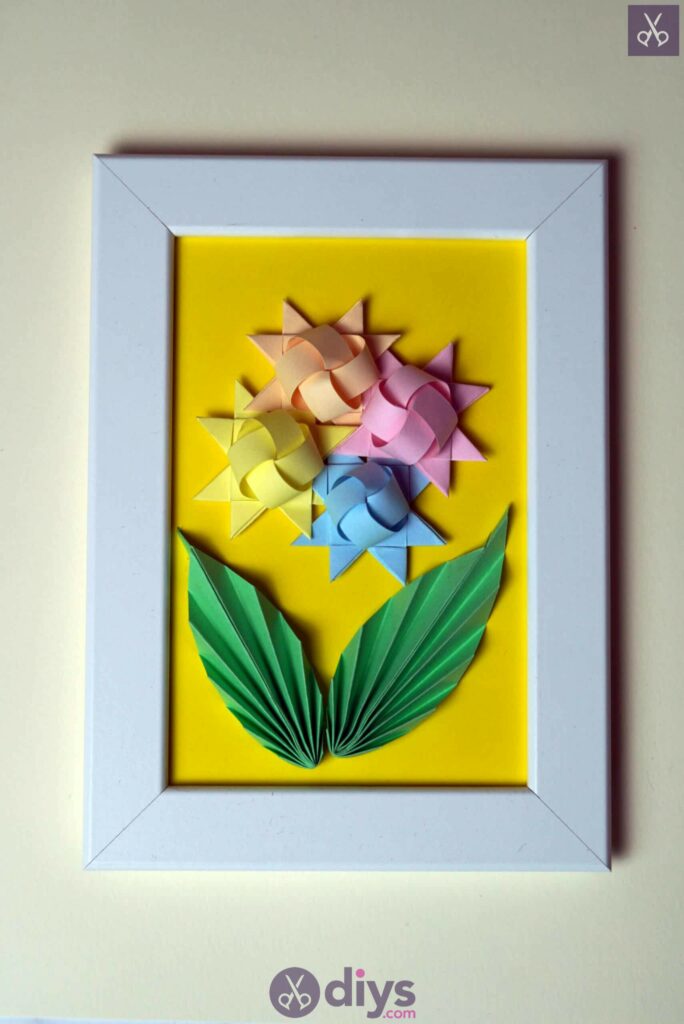
If you’ve ever tried origami before, then I’d be willing to bet that you made a cute little structure or shape from folded paper that was 3D in nature and might even have stood up on its own. That’s why kind or origami I first learned about and tried out as well! Recently, however, I came across the concept of making framed origami art and I was immediately smitten. This is a technique where you make several small piece or origami from coloured paper and arrange them together on a base piece to create a textured or 3D scene. I tried it out by making some flowers and I loved it so much that I framed it and hung it on my wall!

When I posted what I’d made on social media, it got a fantastic response. One friend in particular loved the concept so much that I actually decided to make her some origami flower art of her own as a gift. Since I enjoy watching other people’s tutorials so much, I decided I’d also document the process so that my fellow crafters can see how the project is done and try it out for themselves as well! Check out these step by step instructions complete with photo, or keep scrolling to find a video tutorial at the end of this post.

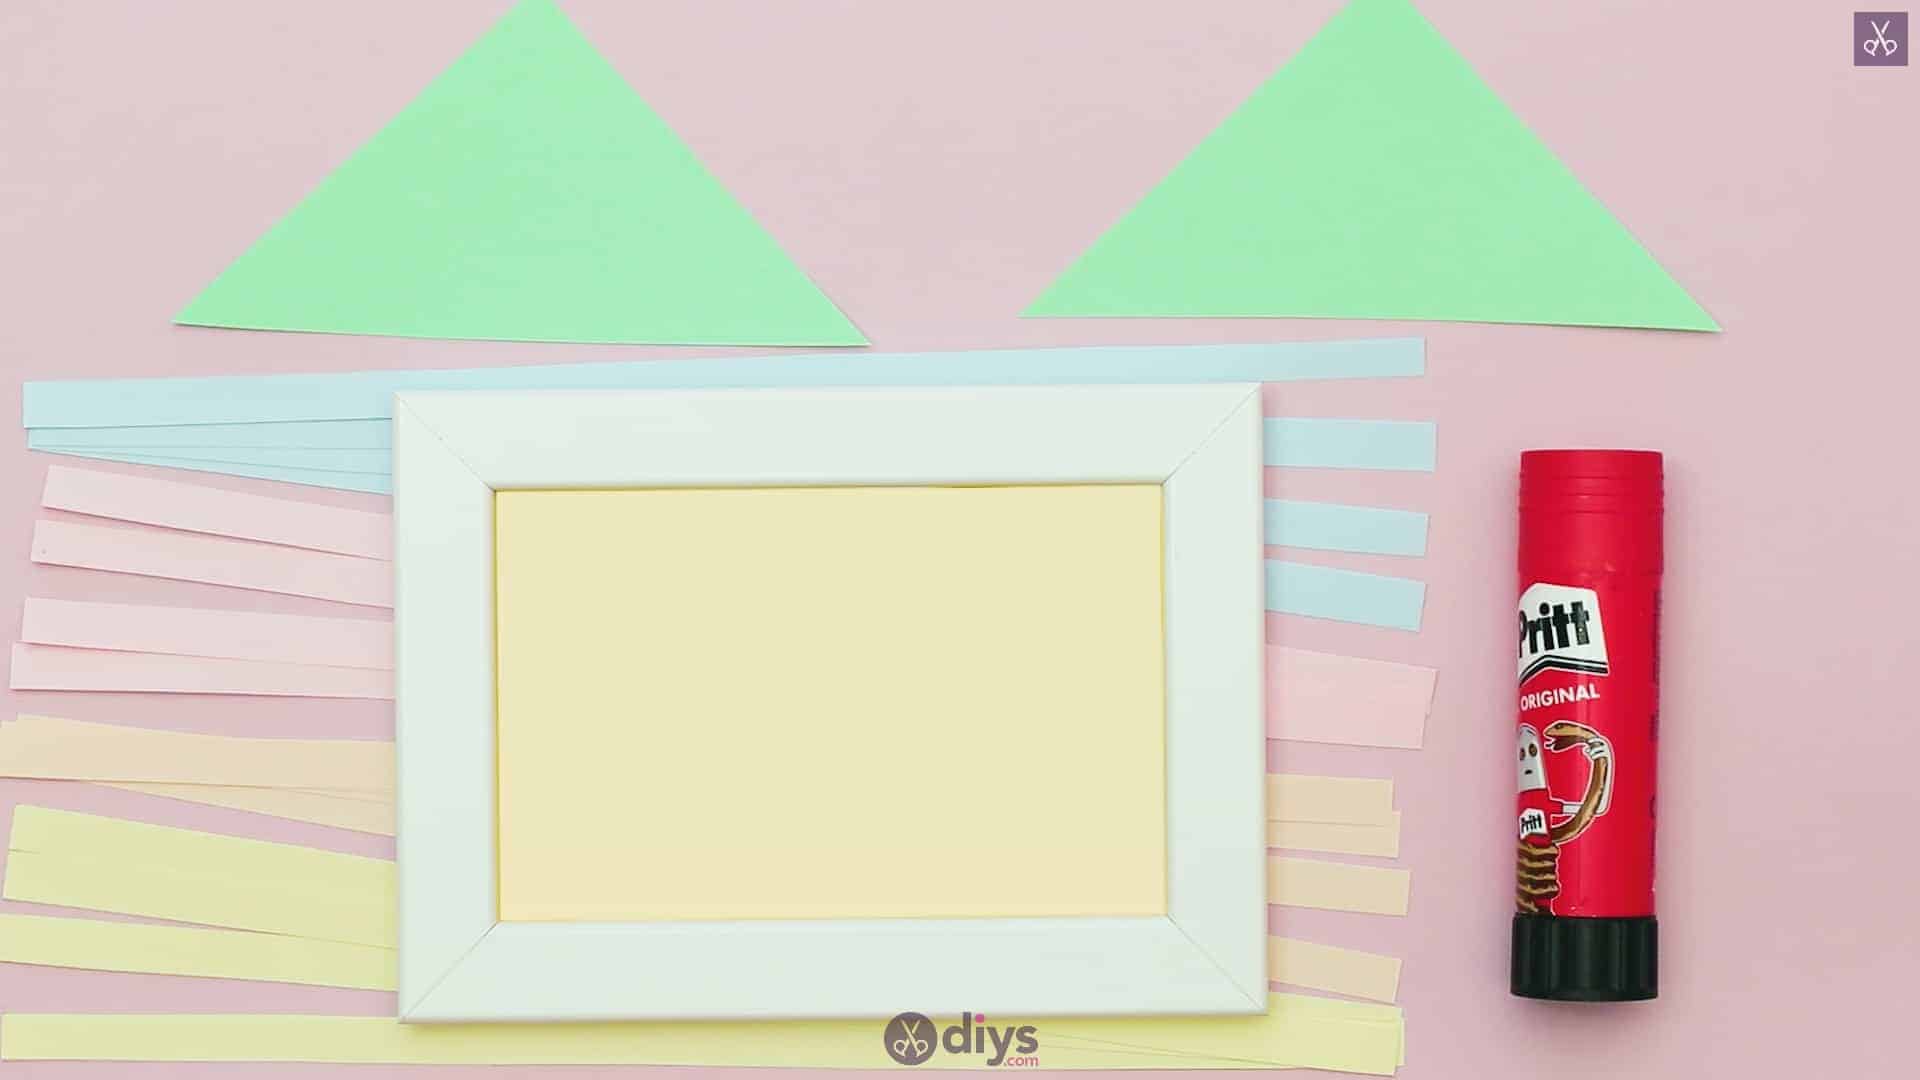
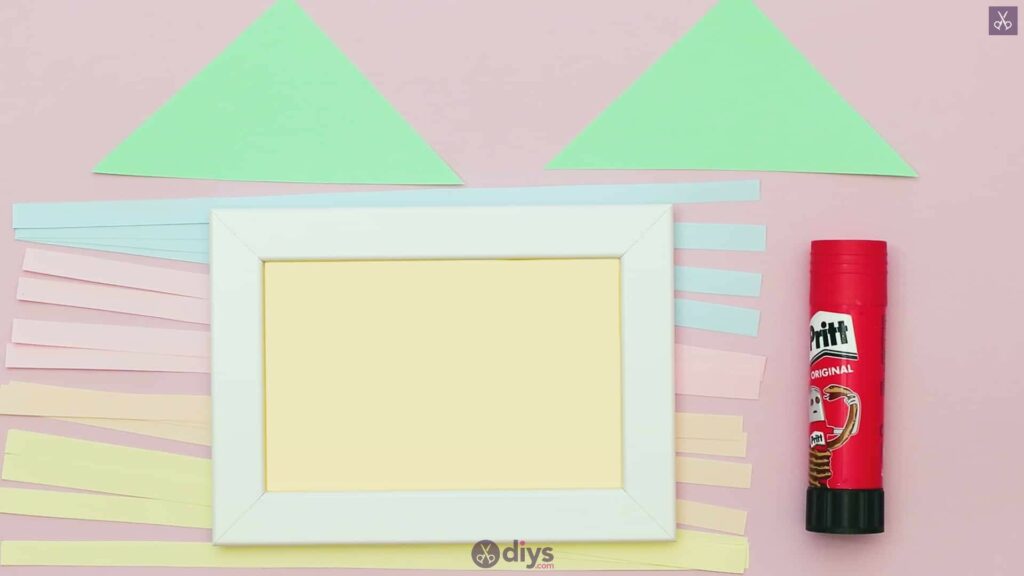
For this project, you’ll need:
- Picture frame
- Coloured paper (green, blue, yellow, orange, pink)
- Bright yellow cardstock
- Glue stick
- Scissors
Step 1:
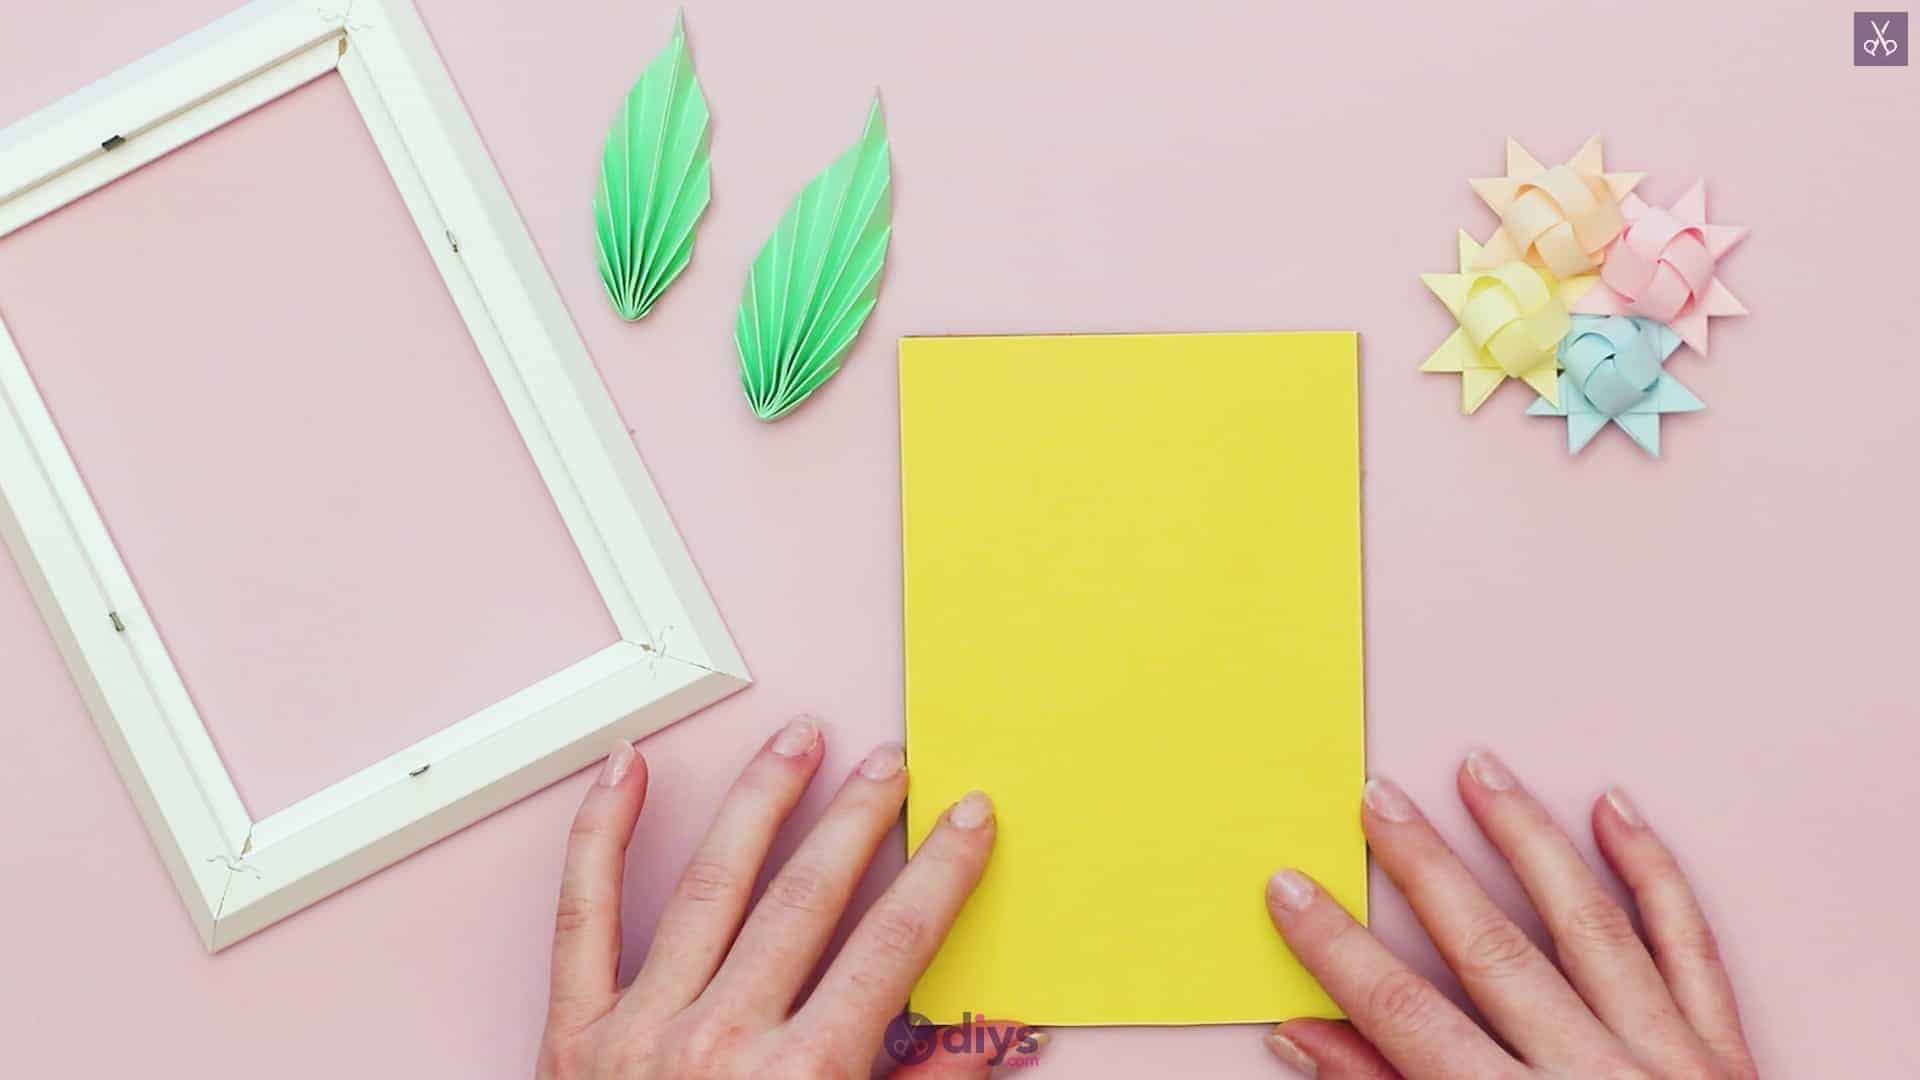
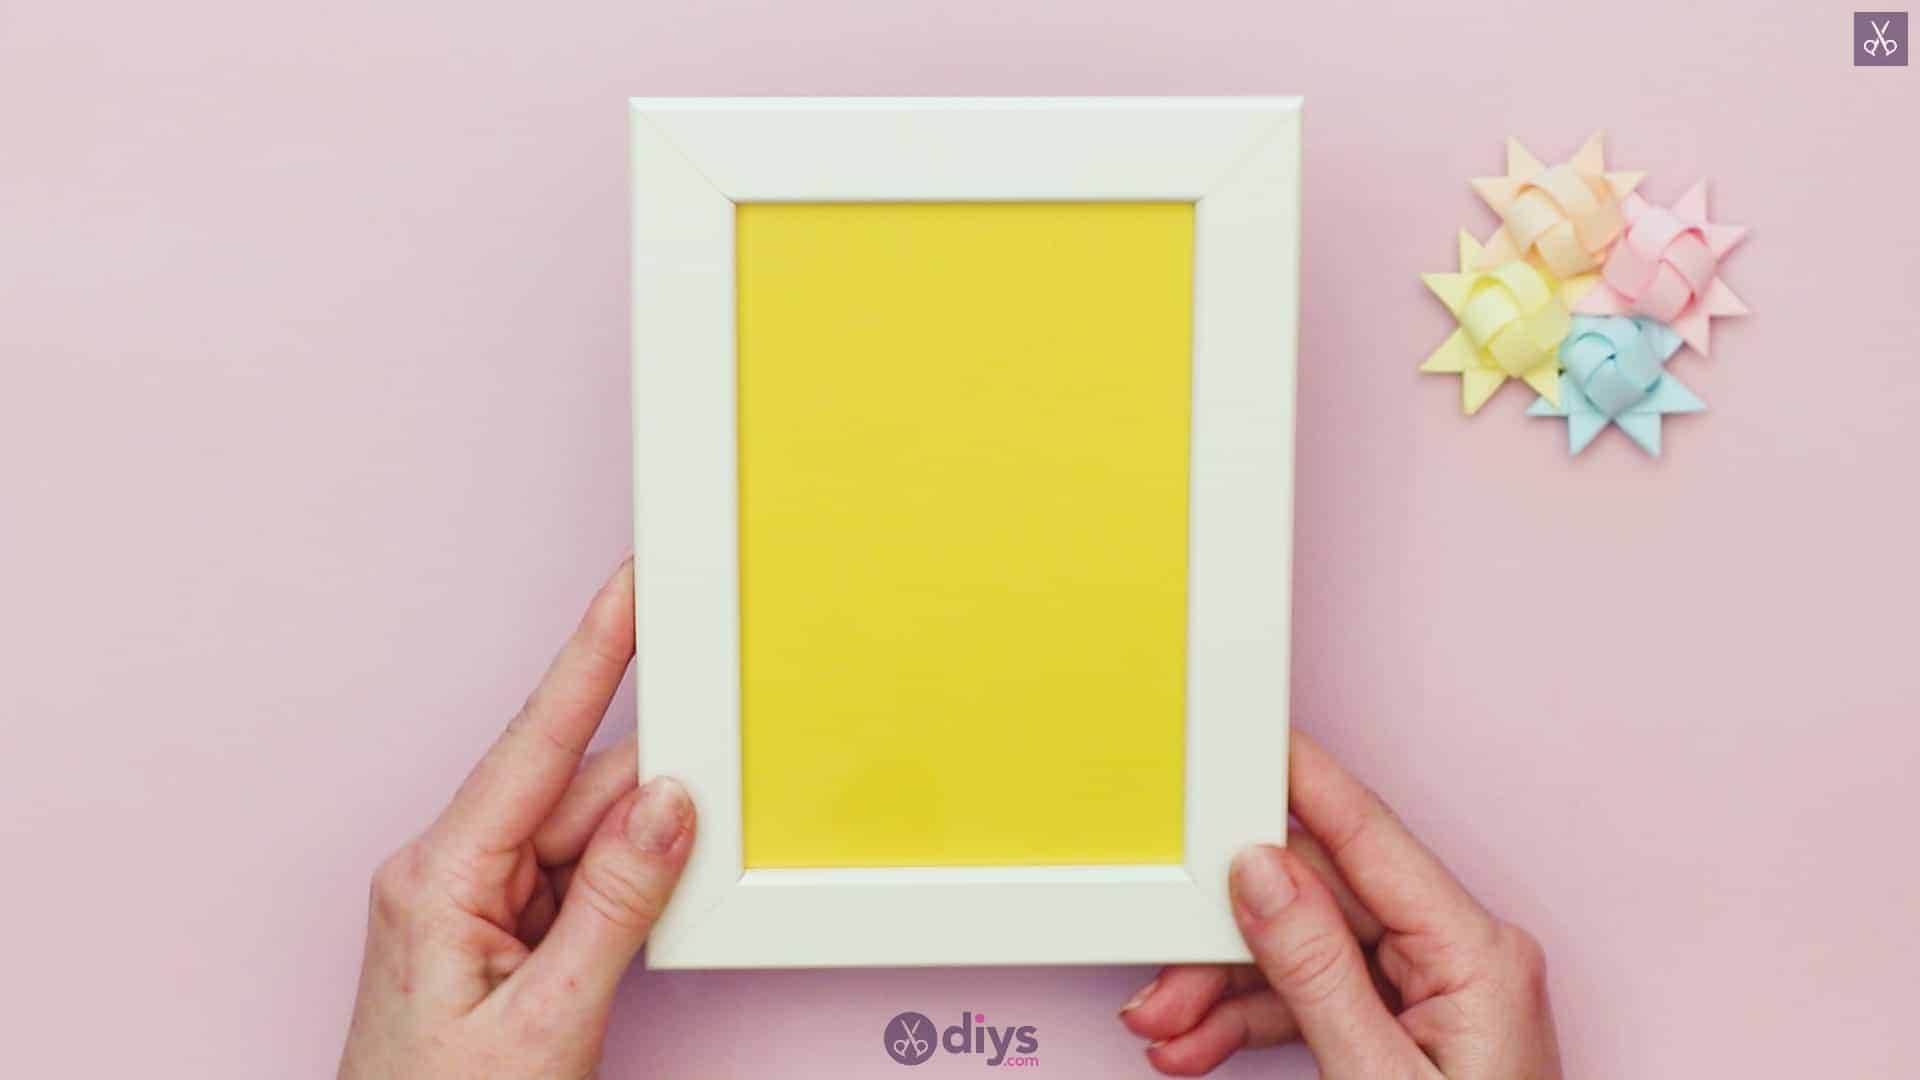
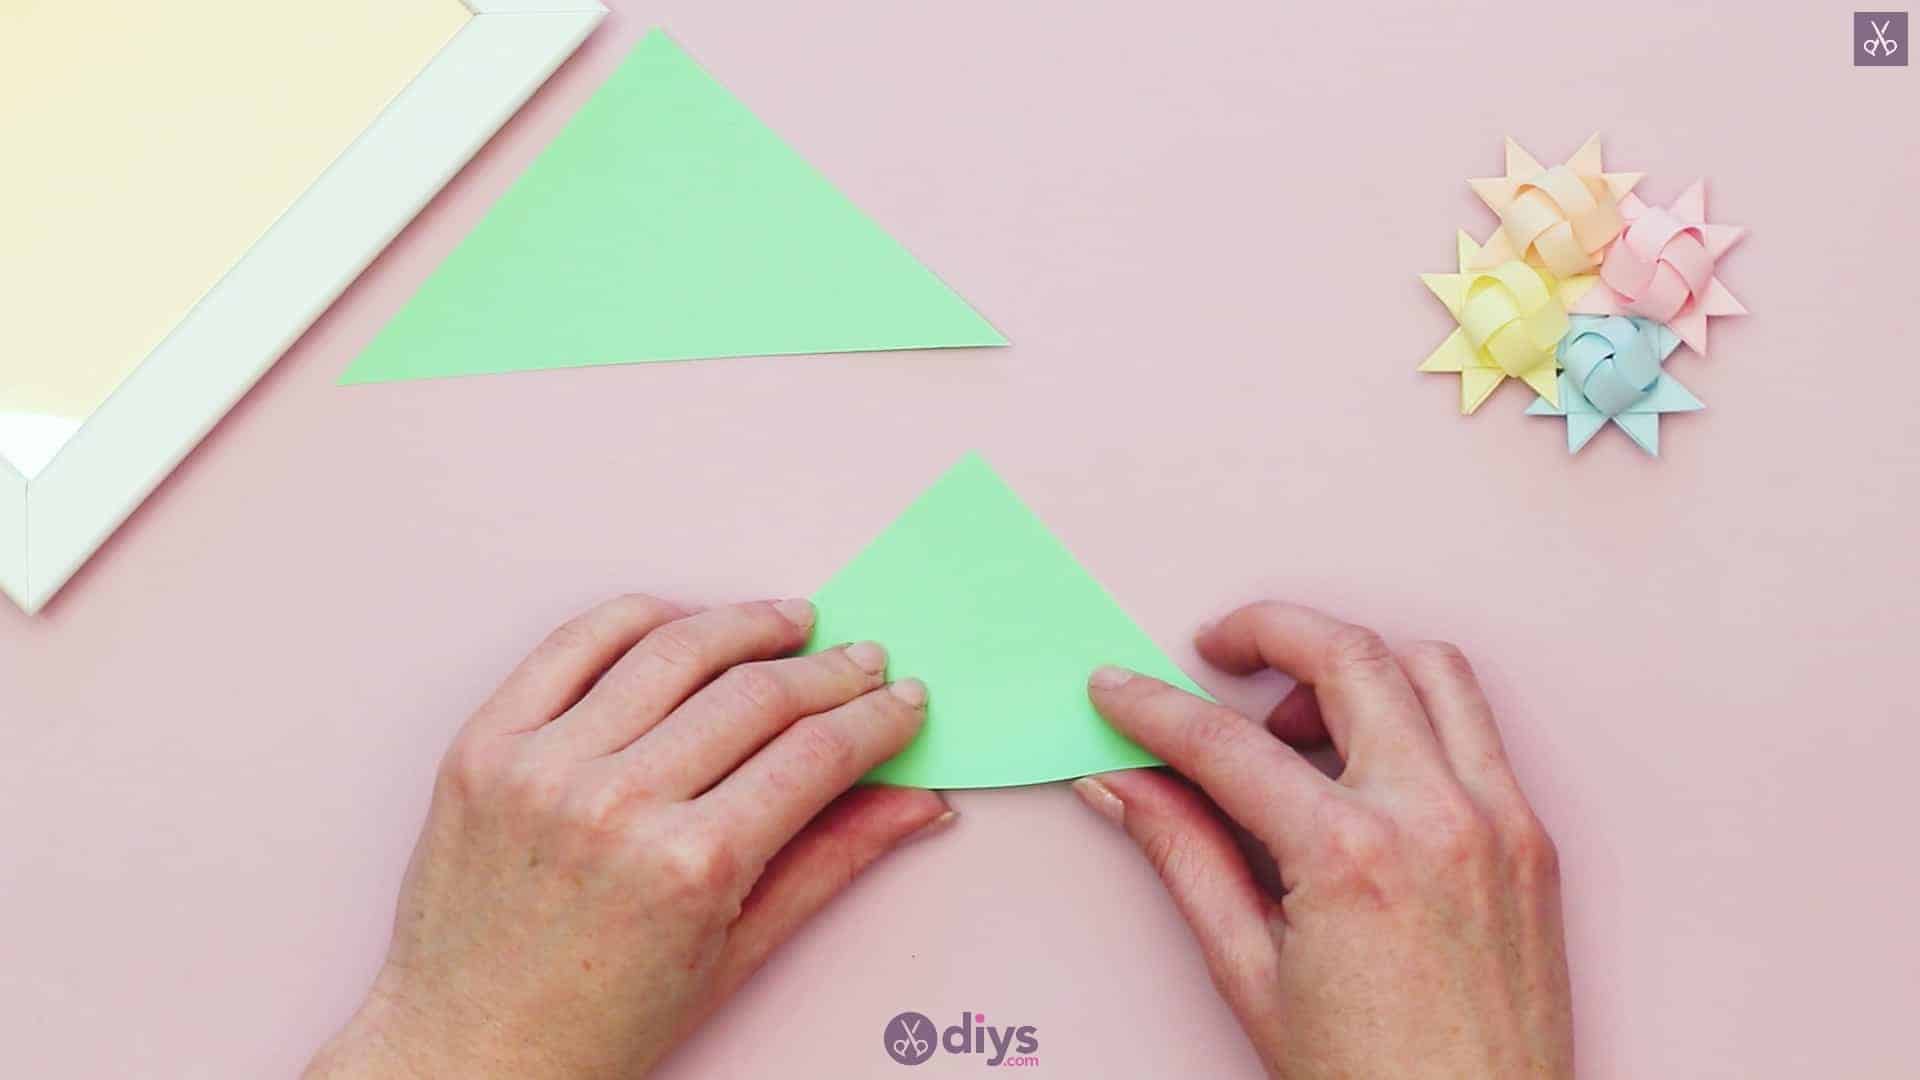
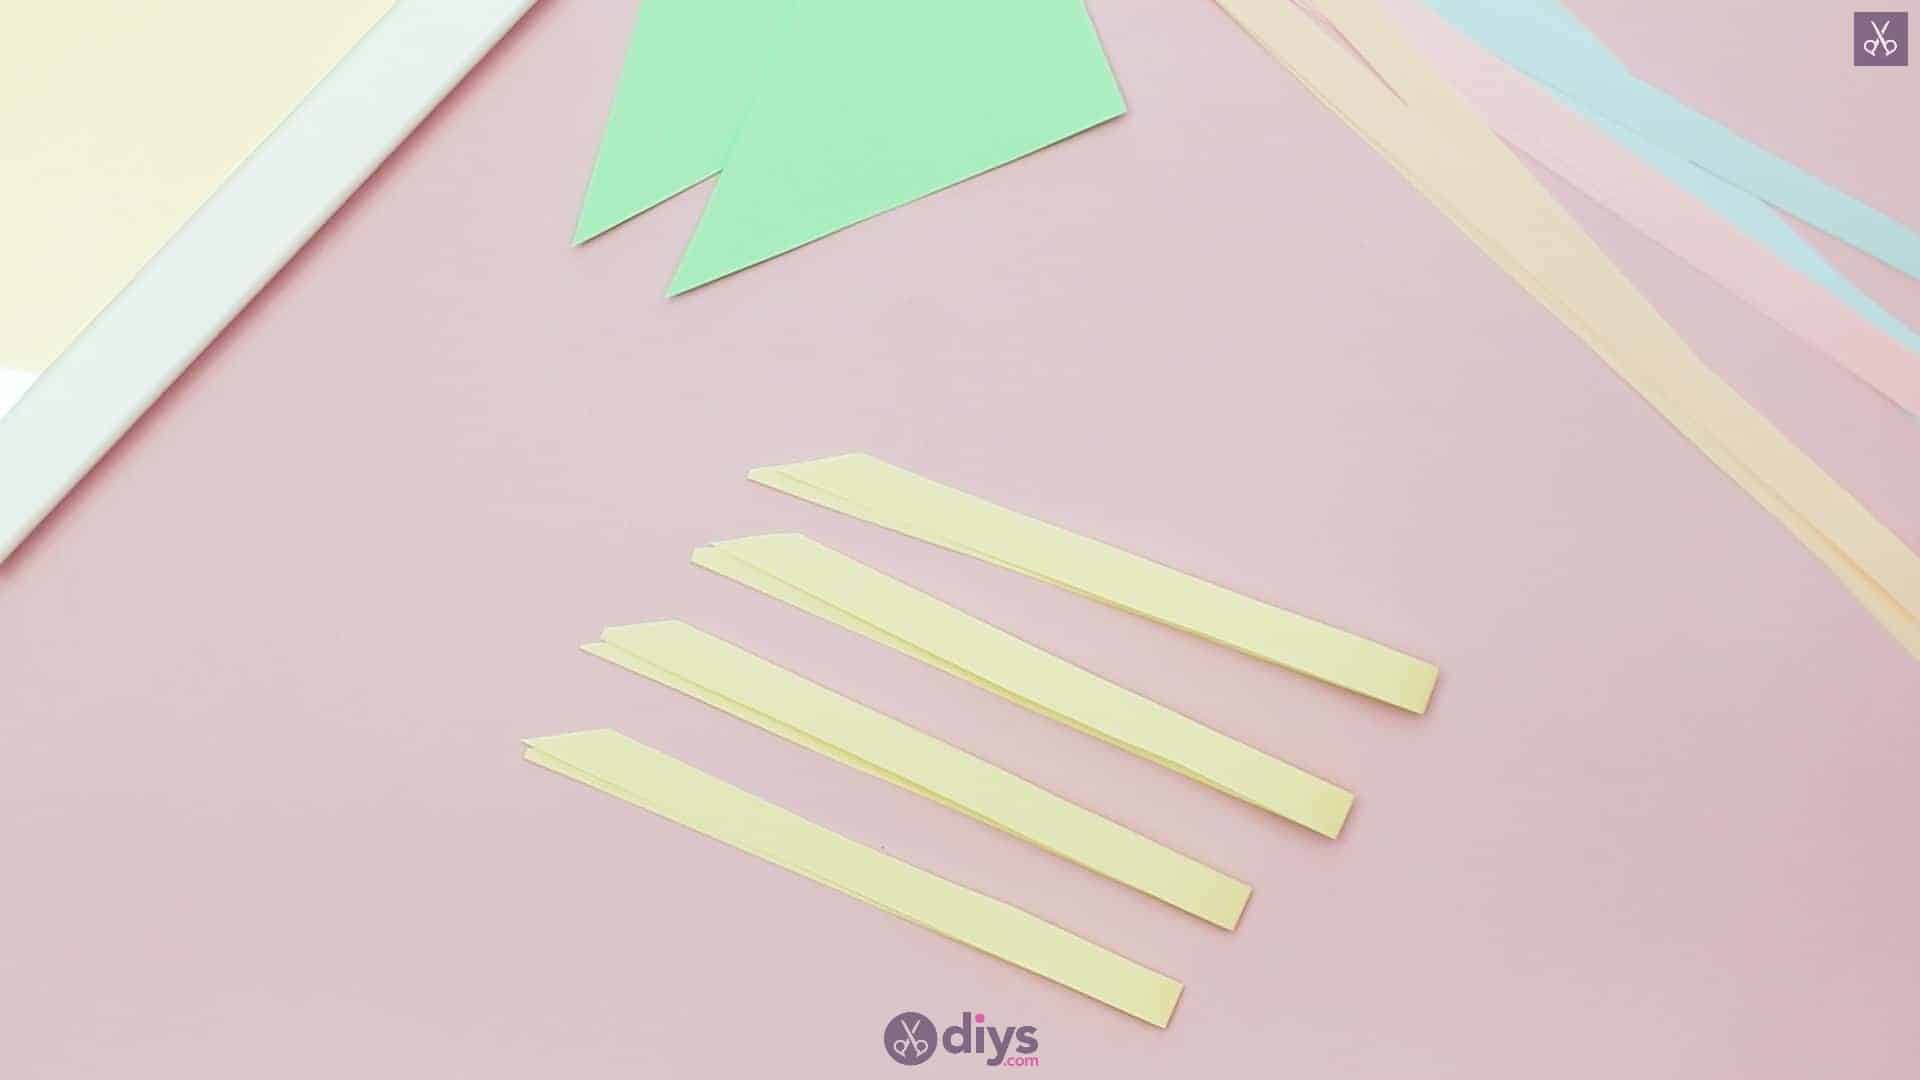
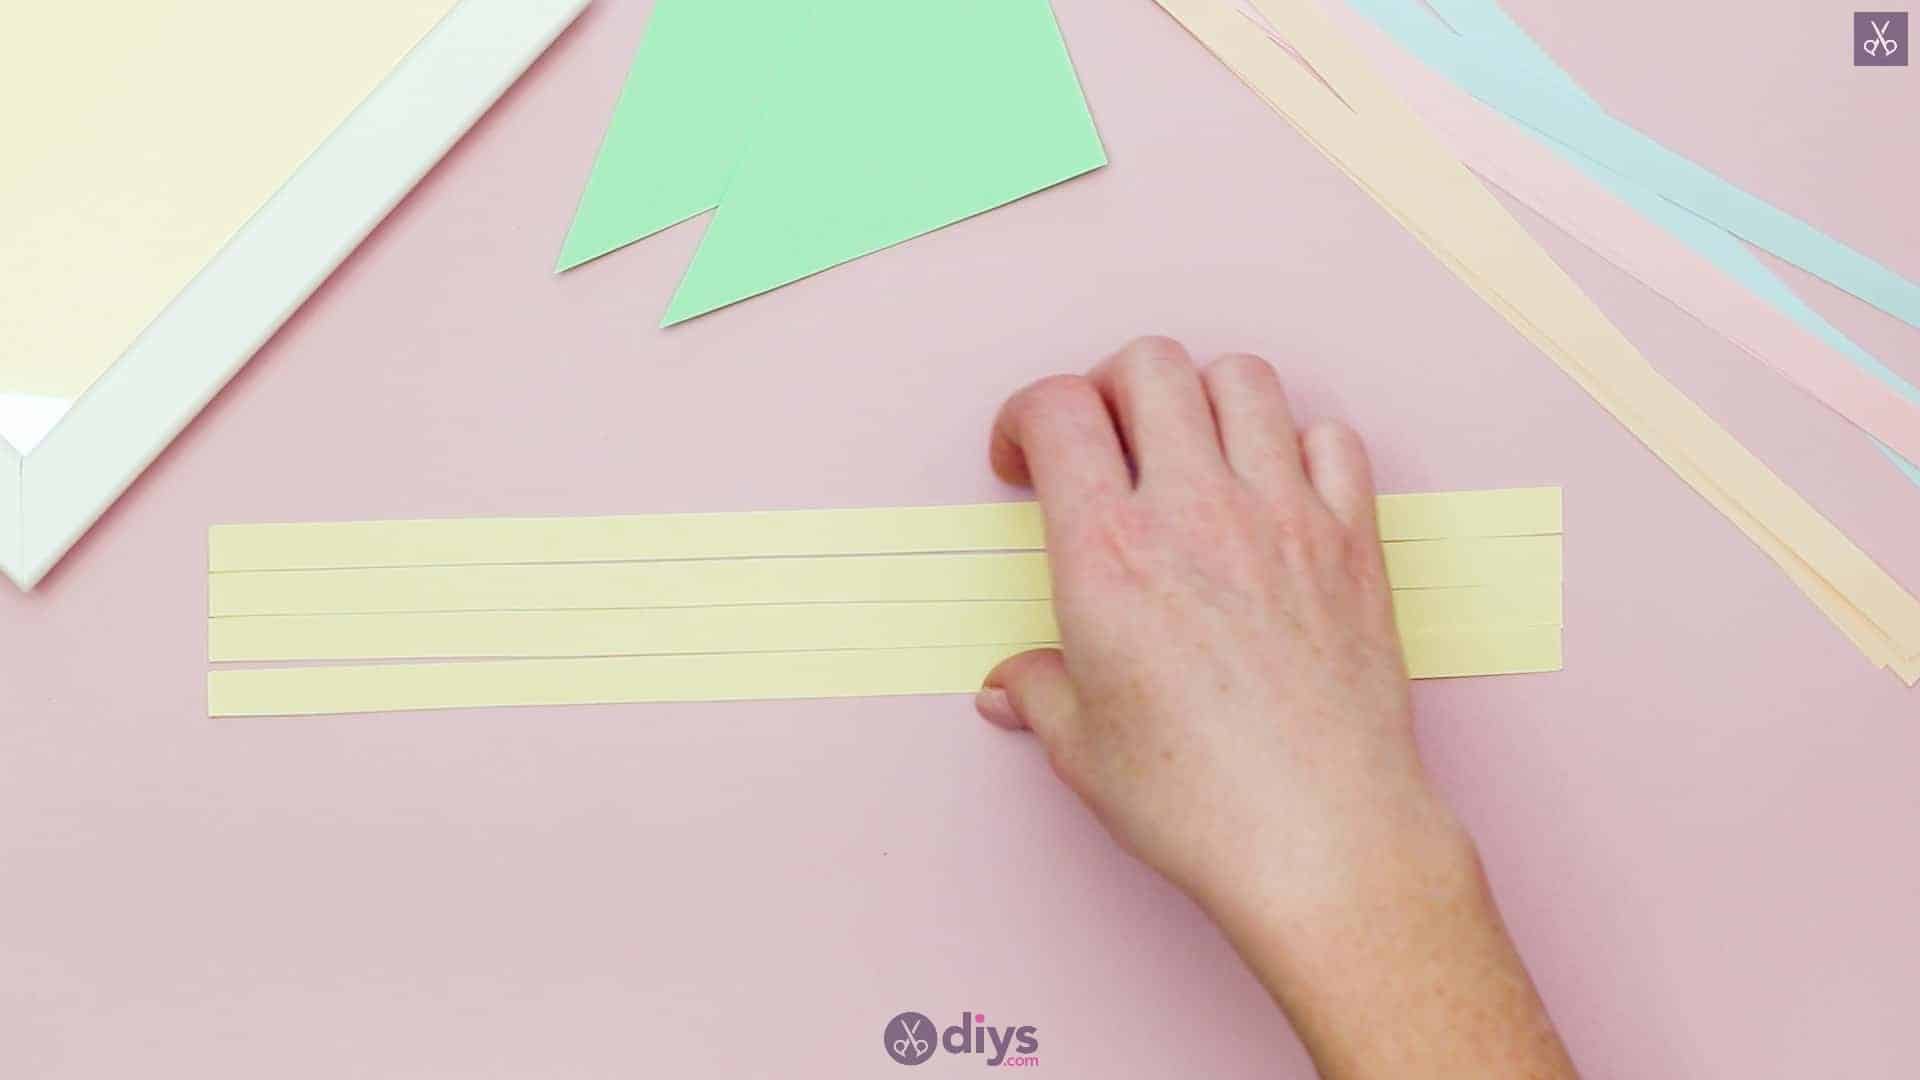
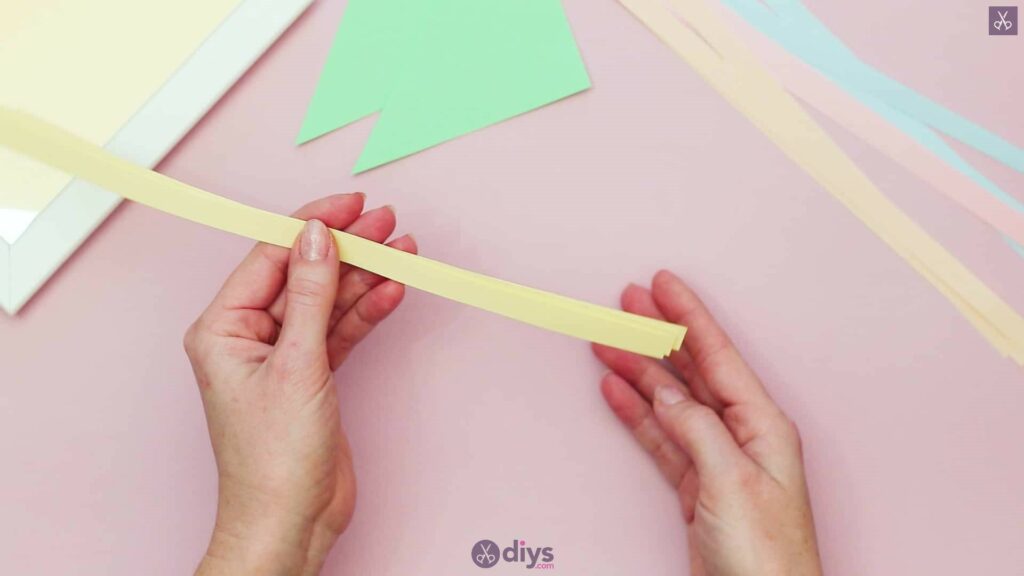
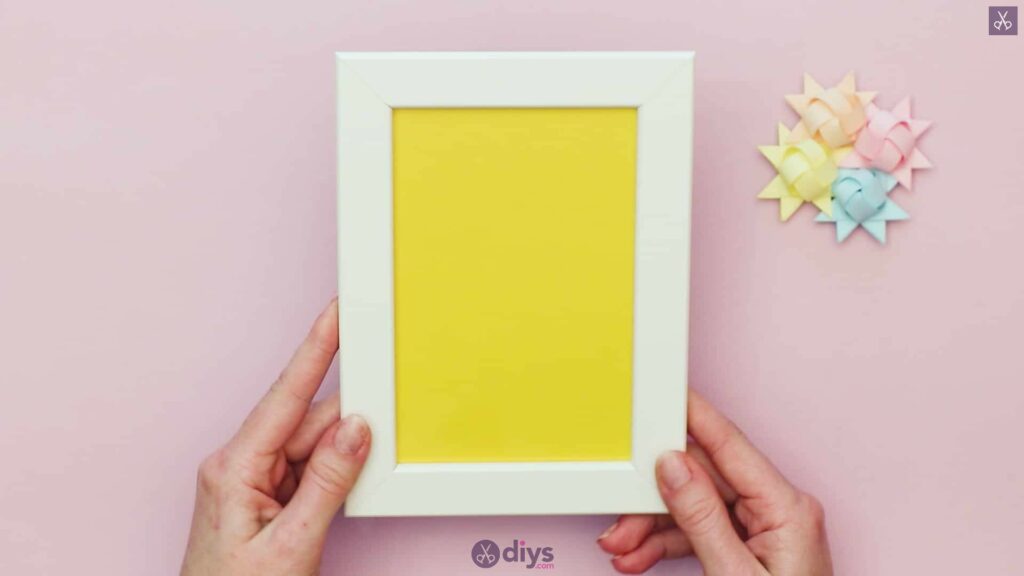
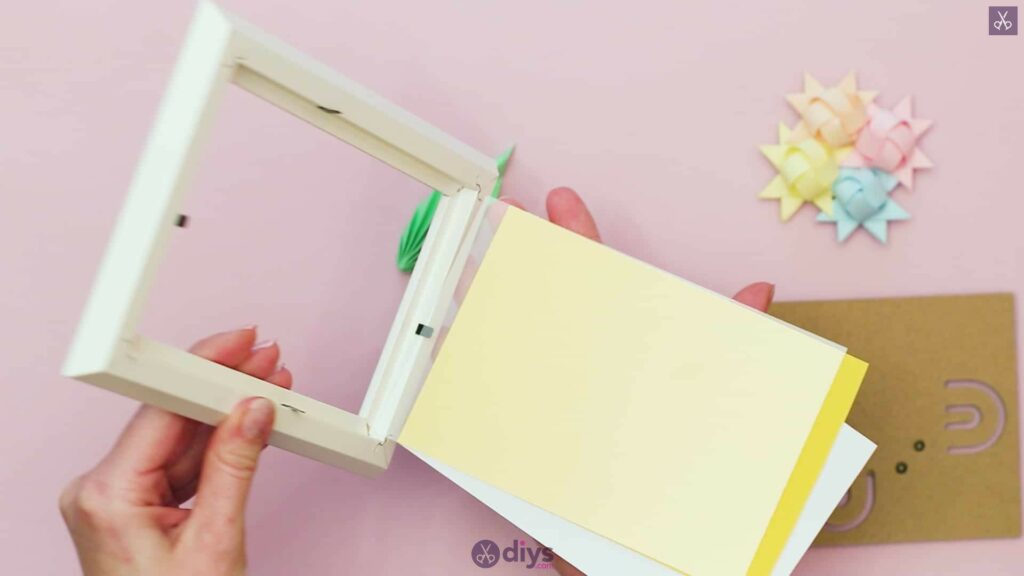
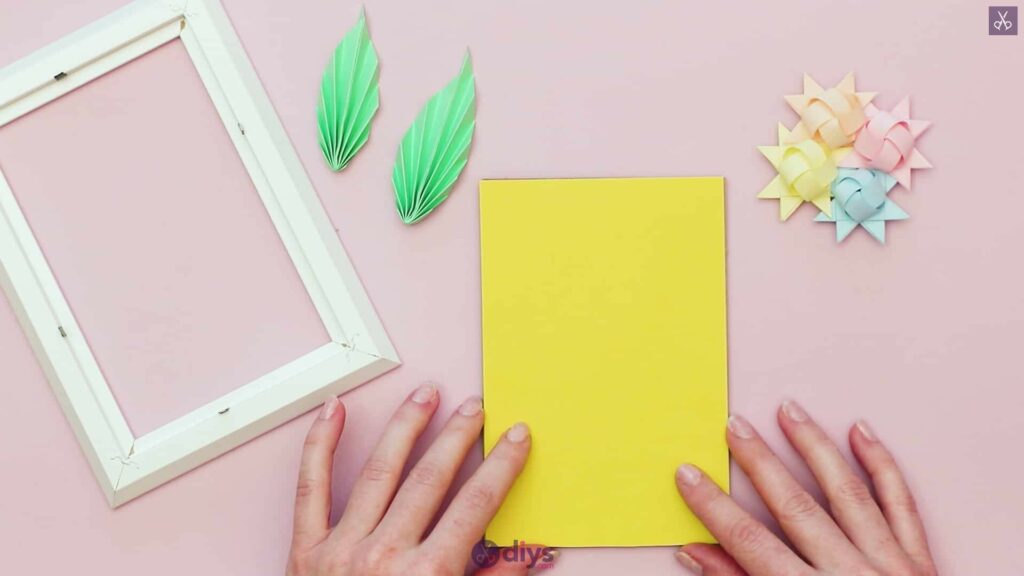
Gather your materials! Before you even start your actual origami techniques, do a little bit of setup to make things easier on yourself. Trim your yellow cardstock down if necessary and then set it into your frame. This will be the base on which you build your floral scene using your finished origami pieces. Next, cut two isosceles triangles out of your green paper. I made each of mine two inches wide along their straight bottom edges. I then measured two inches up from the centre of the bottom edge to get the top point and angled the two side slopes evenly to get my triangles. Finally, cut your other coloured paper pages into strips. Make your strips 1cm side each. You’ll need four strips in each colour (but you can cut more just in case or keep the leftover paper on hand as backup). Now you’re ready to start folding!
Step 2:
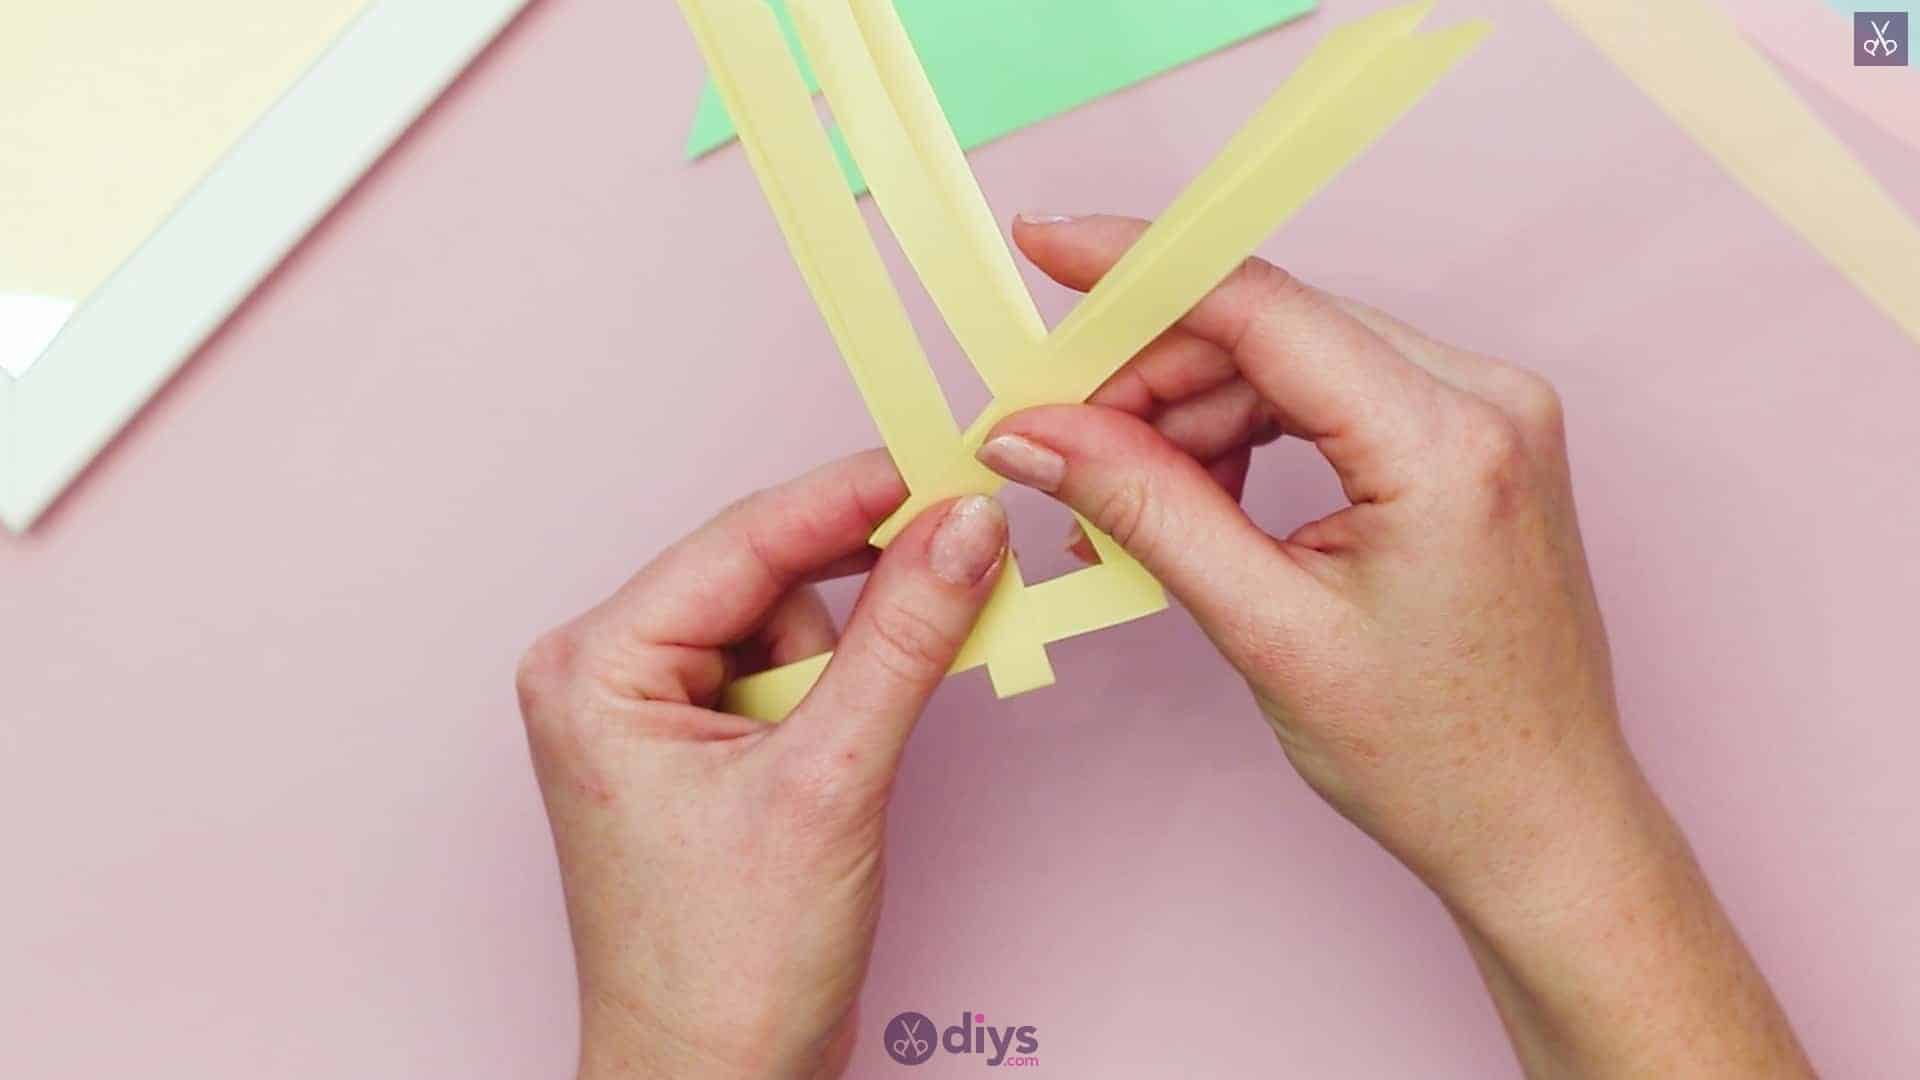
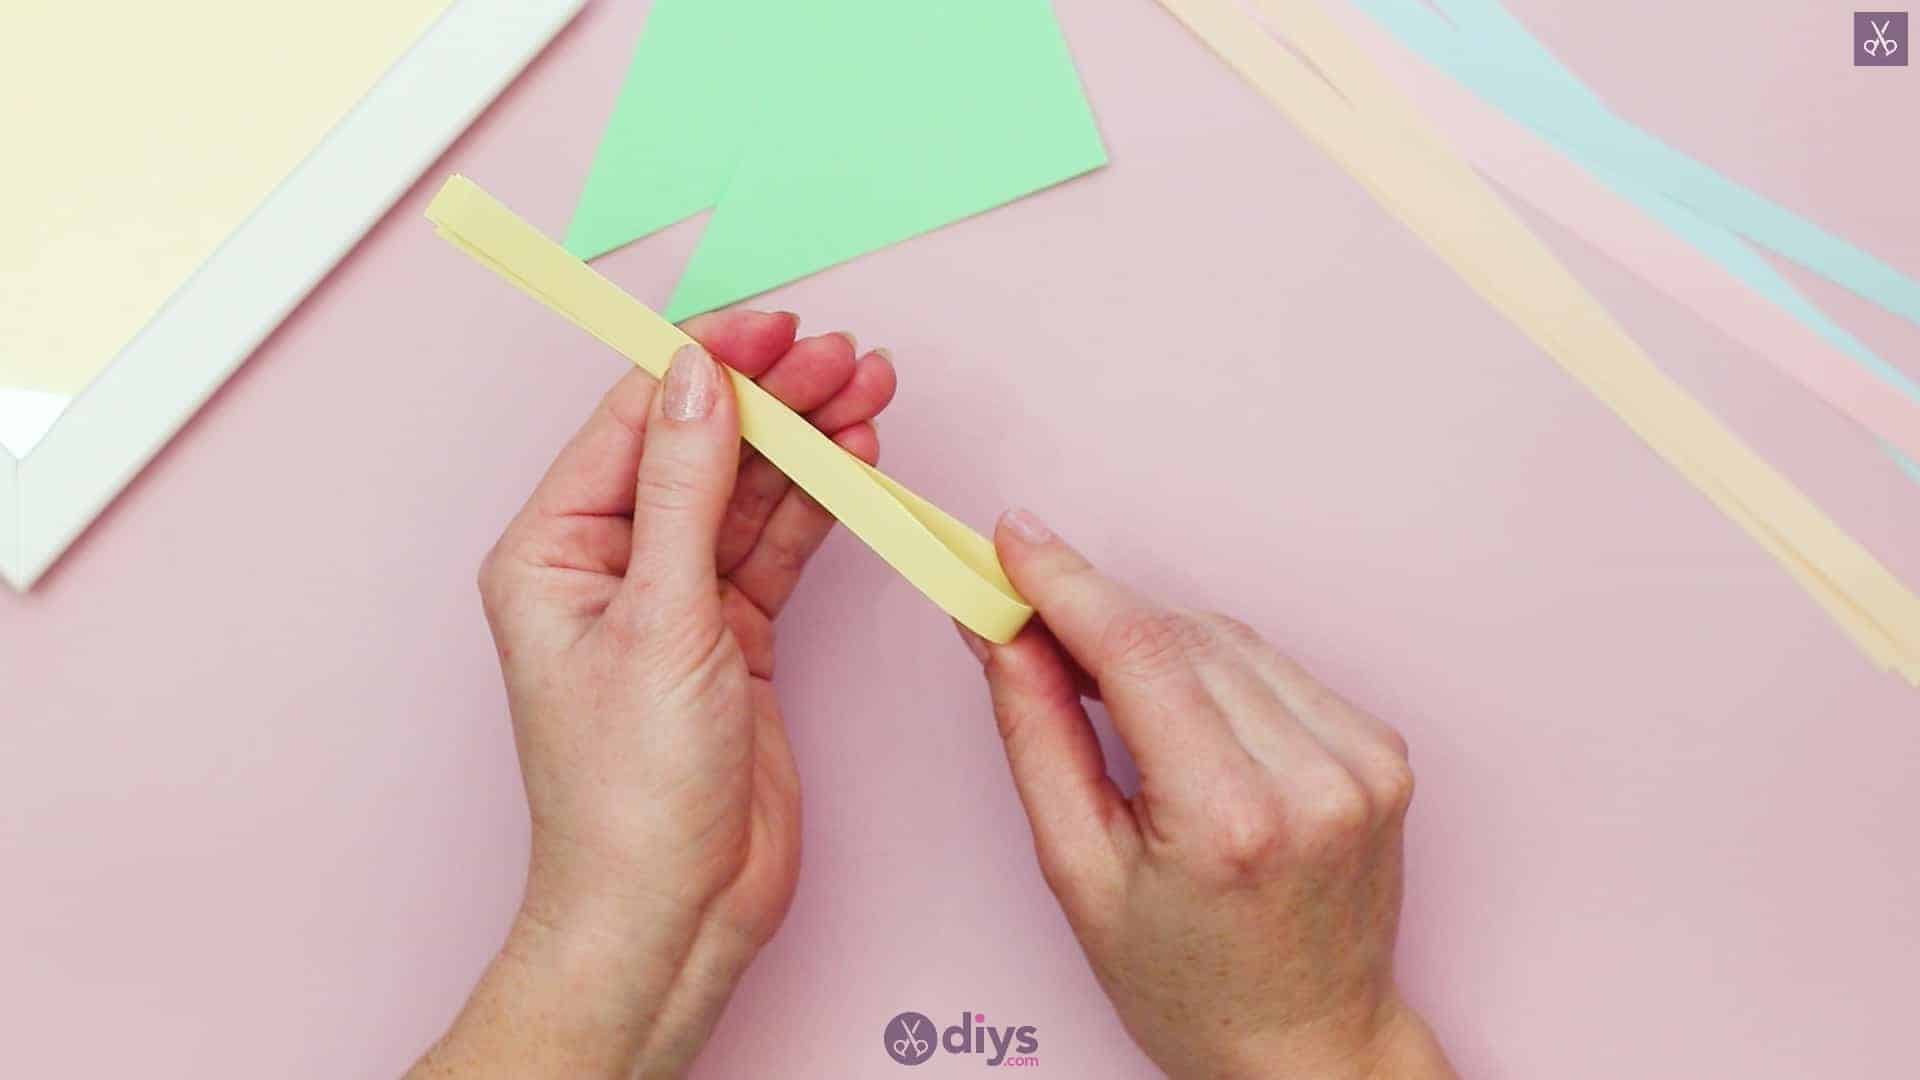
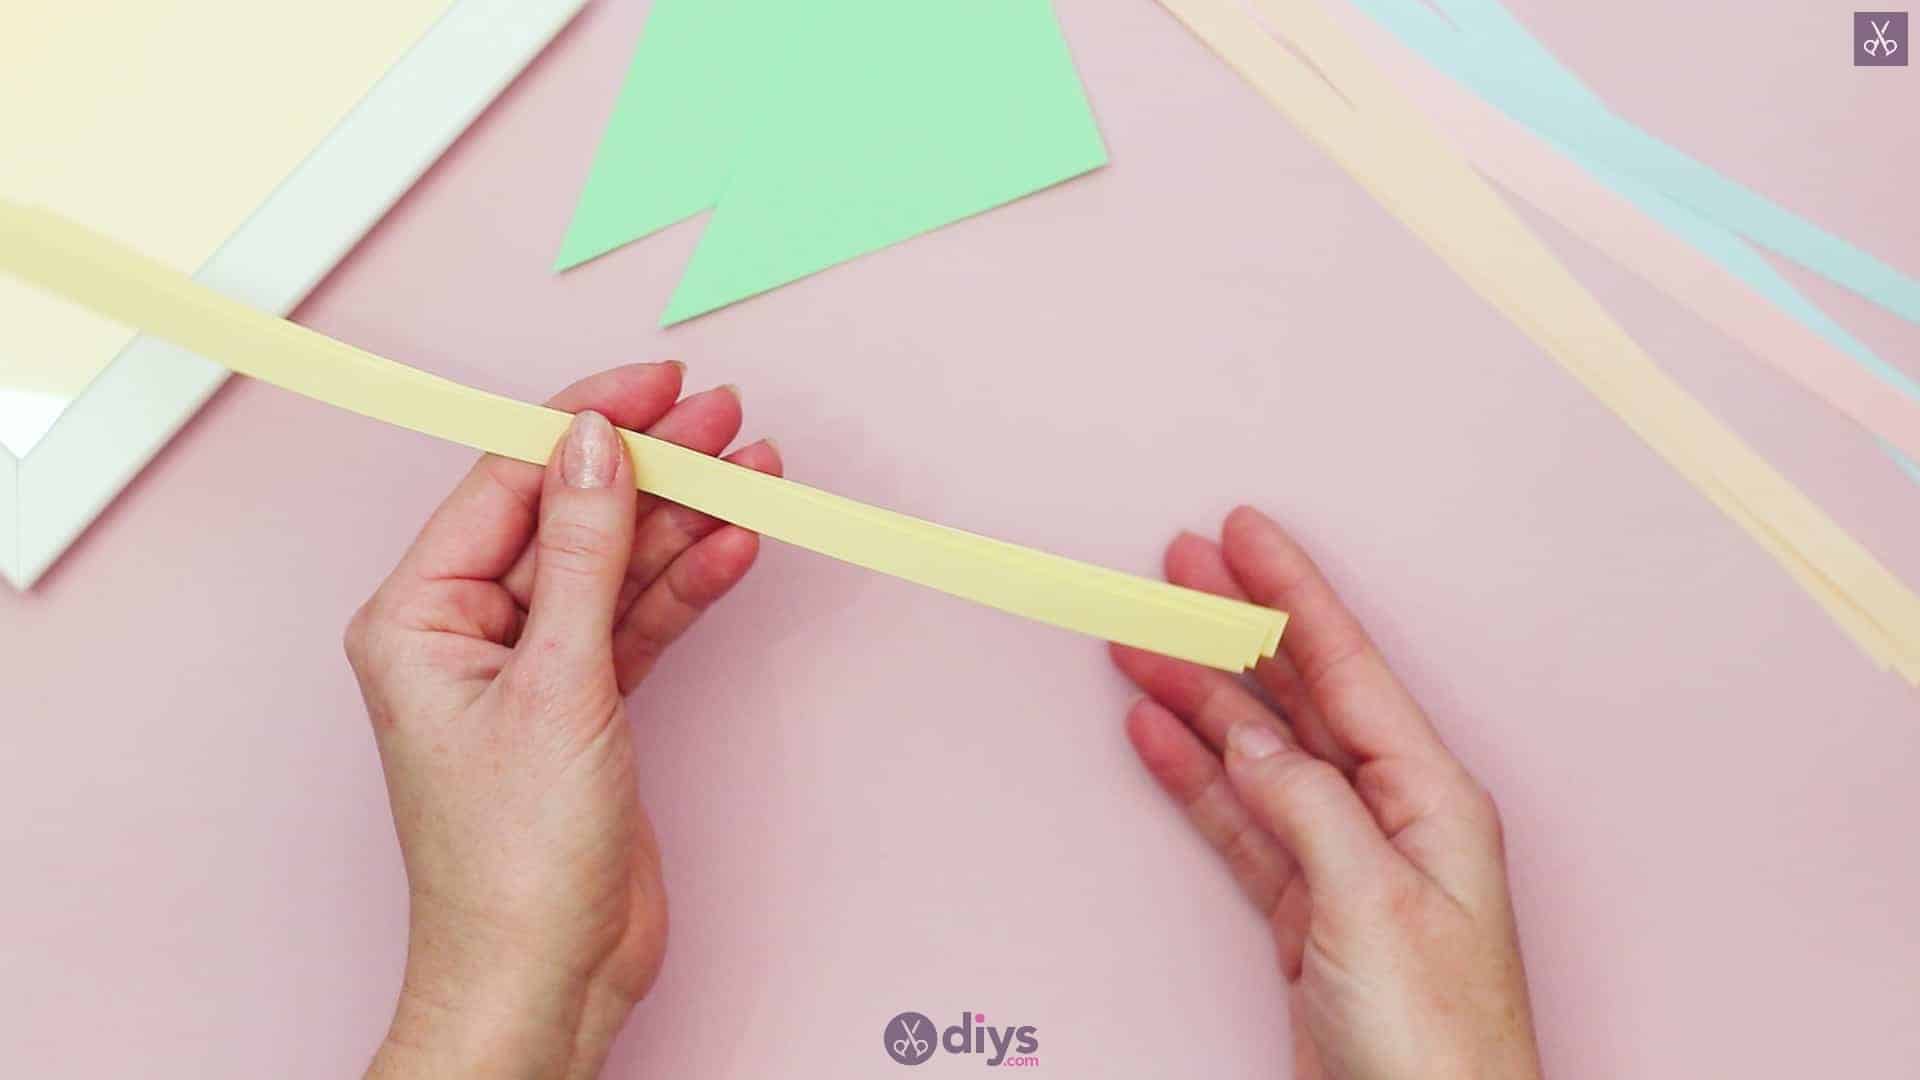
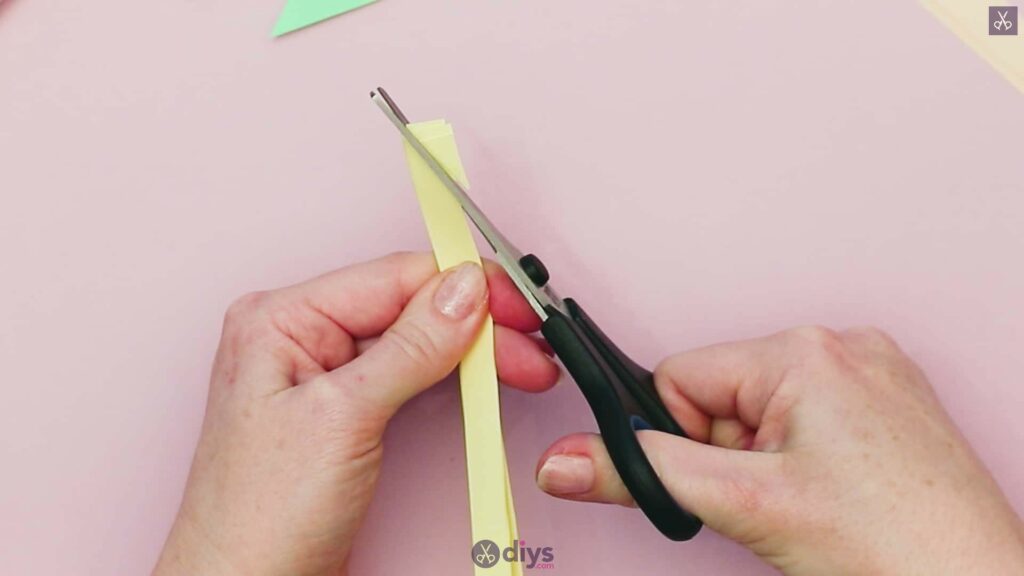
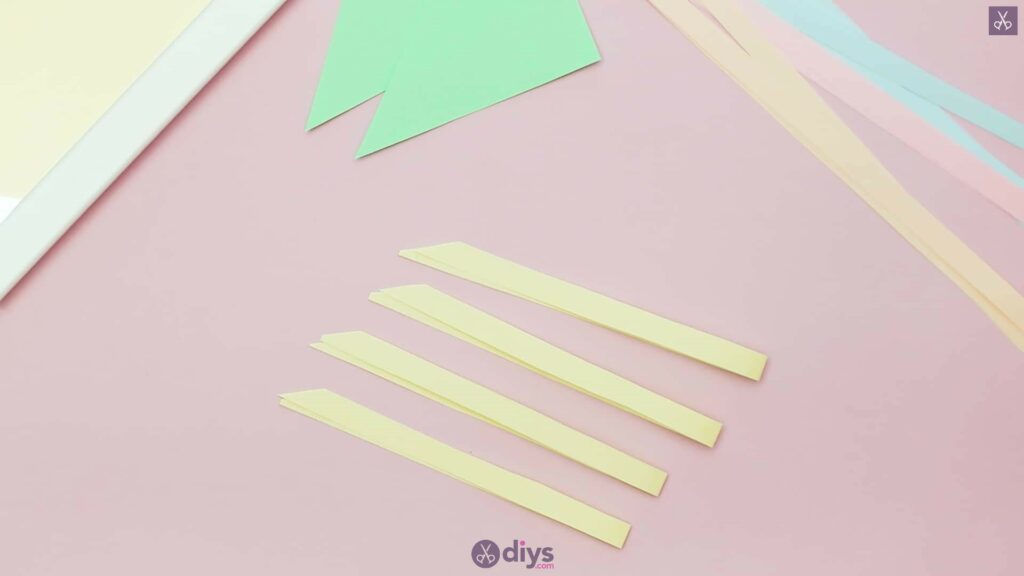
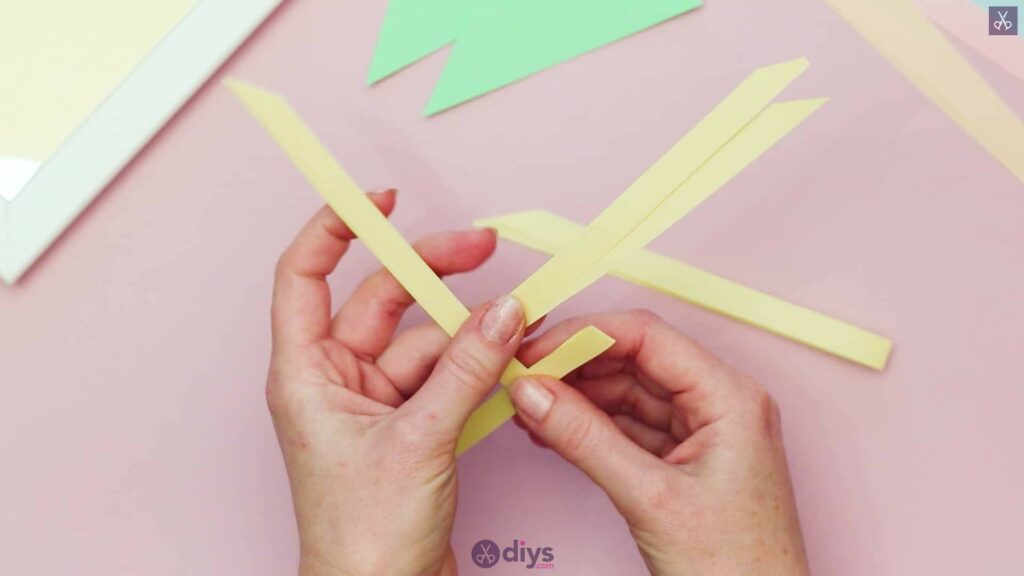
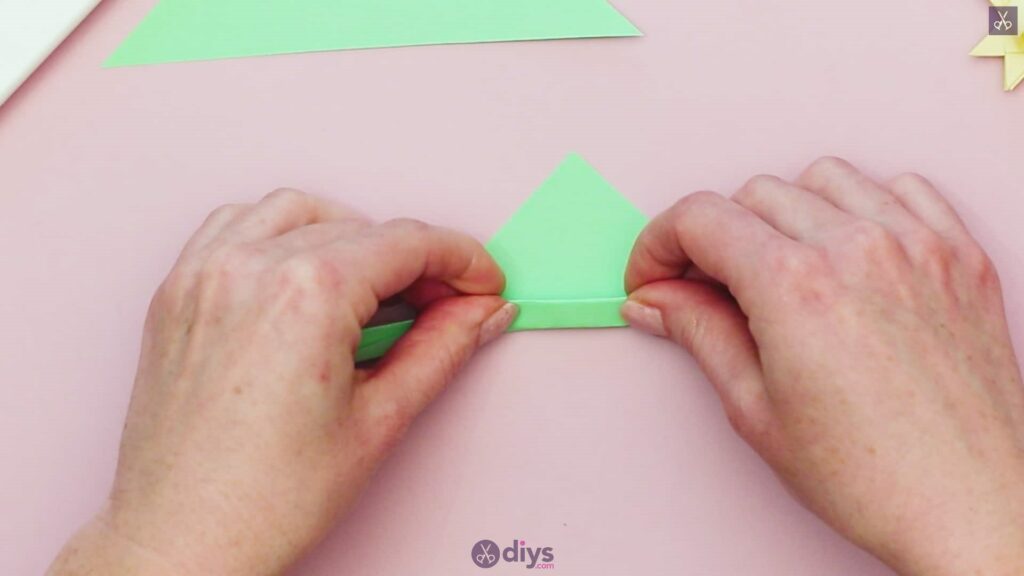
Create the first flower in your bunch! You’ll complete this step four times in total, once with each of your flower colours, to make the heads and petals that make up your finished bunch. First, take all four strips in your first colour and pile them on top of each other in a stack, nice and neatly with their ends and edges sitting evenly as though they’re all one. Without shifting the strips, bring the bottom end to meet the top end, folding their length in half. Find the absolute halfway point on the end that curves and pinch the strips there to make an actual fold, marking their middles all at once. Next, take your scissors to the ends and angle them downward and diagonally from the left corner, across to the right side a little lower down. Cut diagonally there to create angled pointed tips.


Step 3:
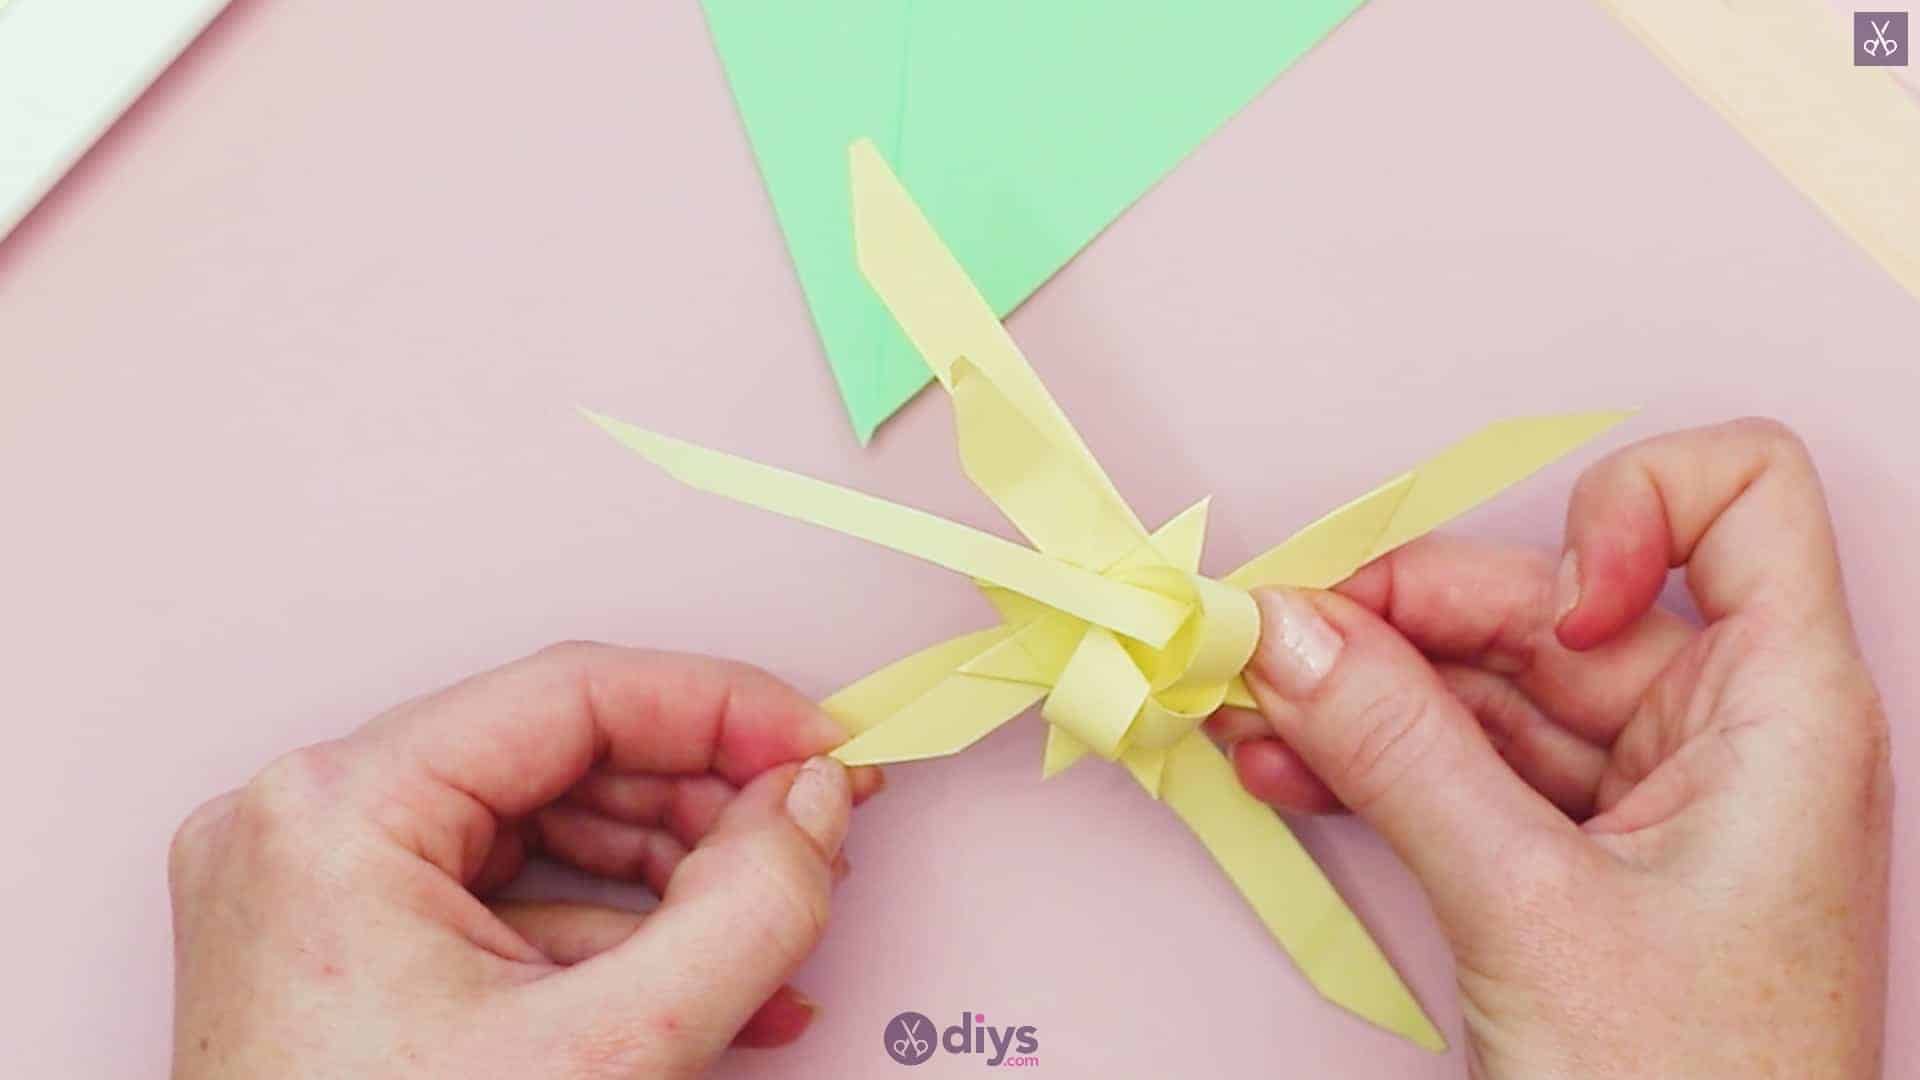
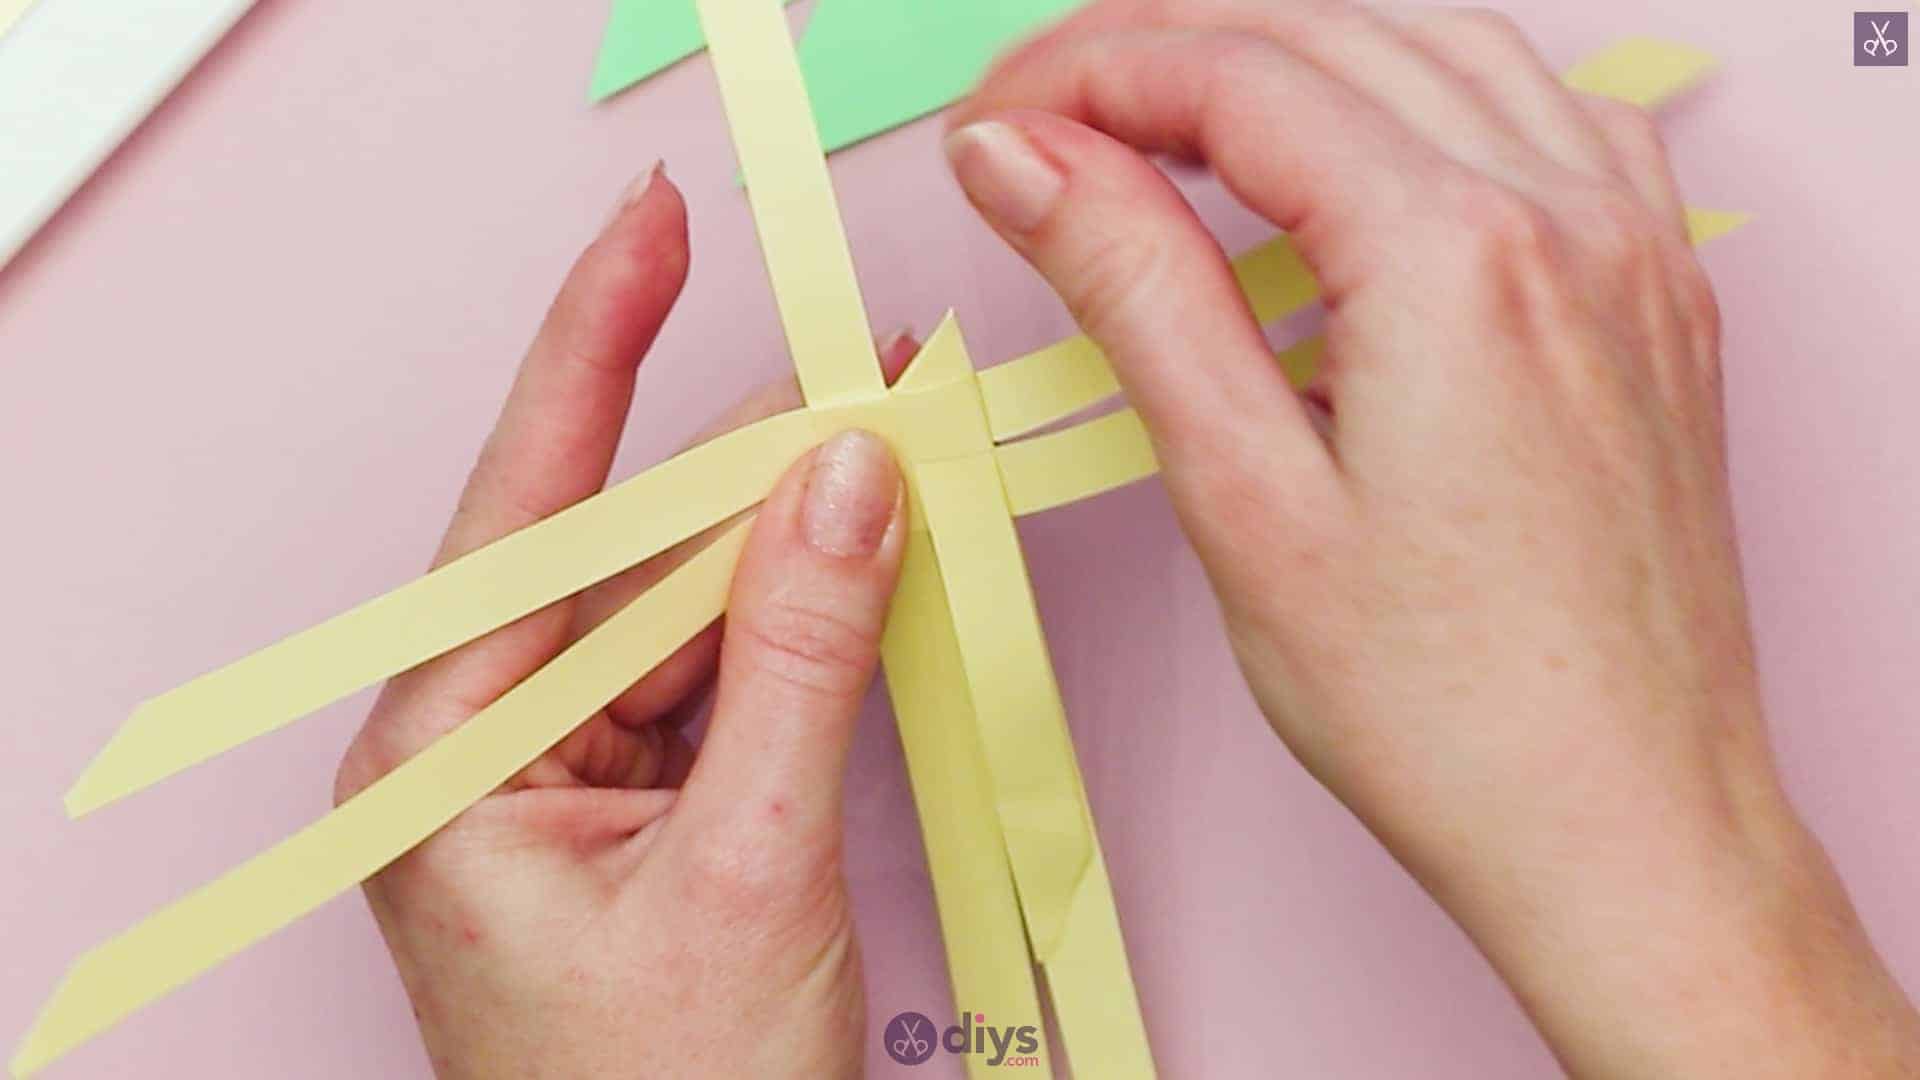
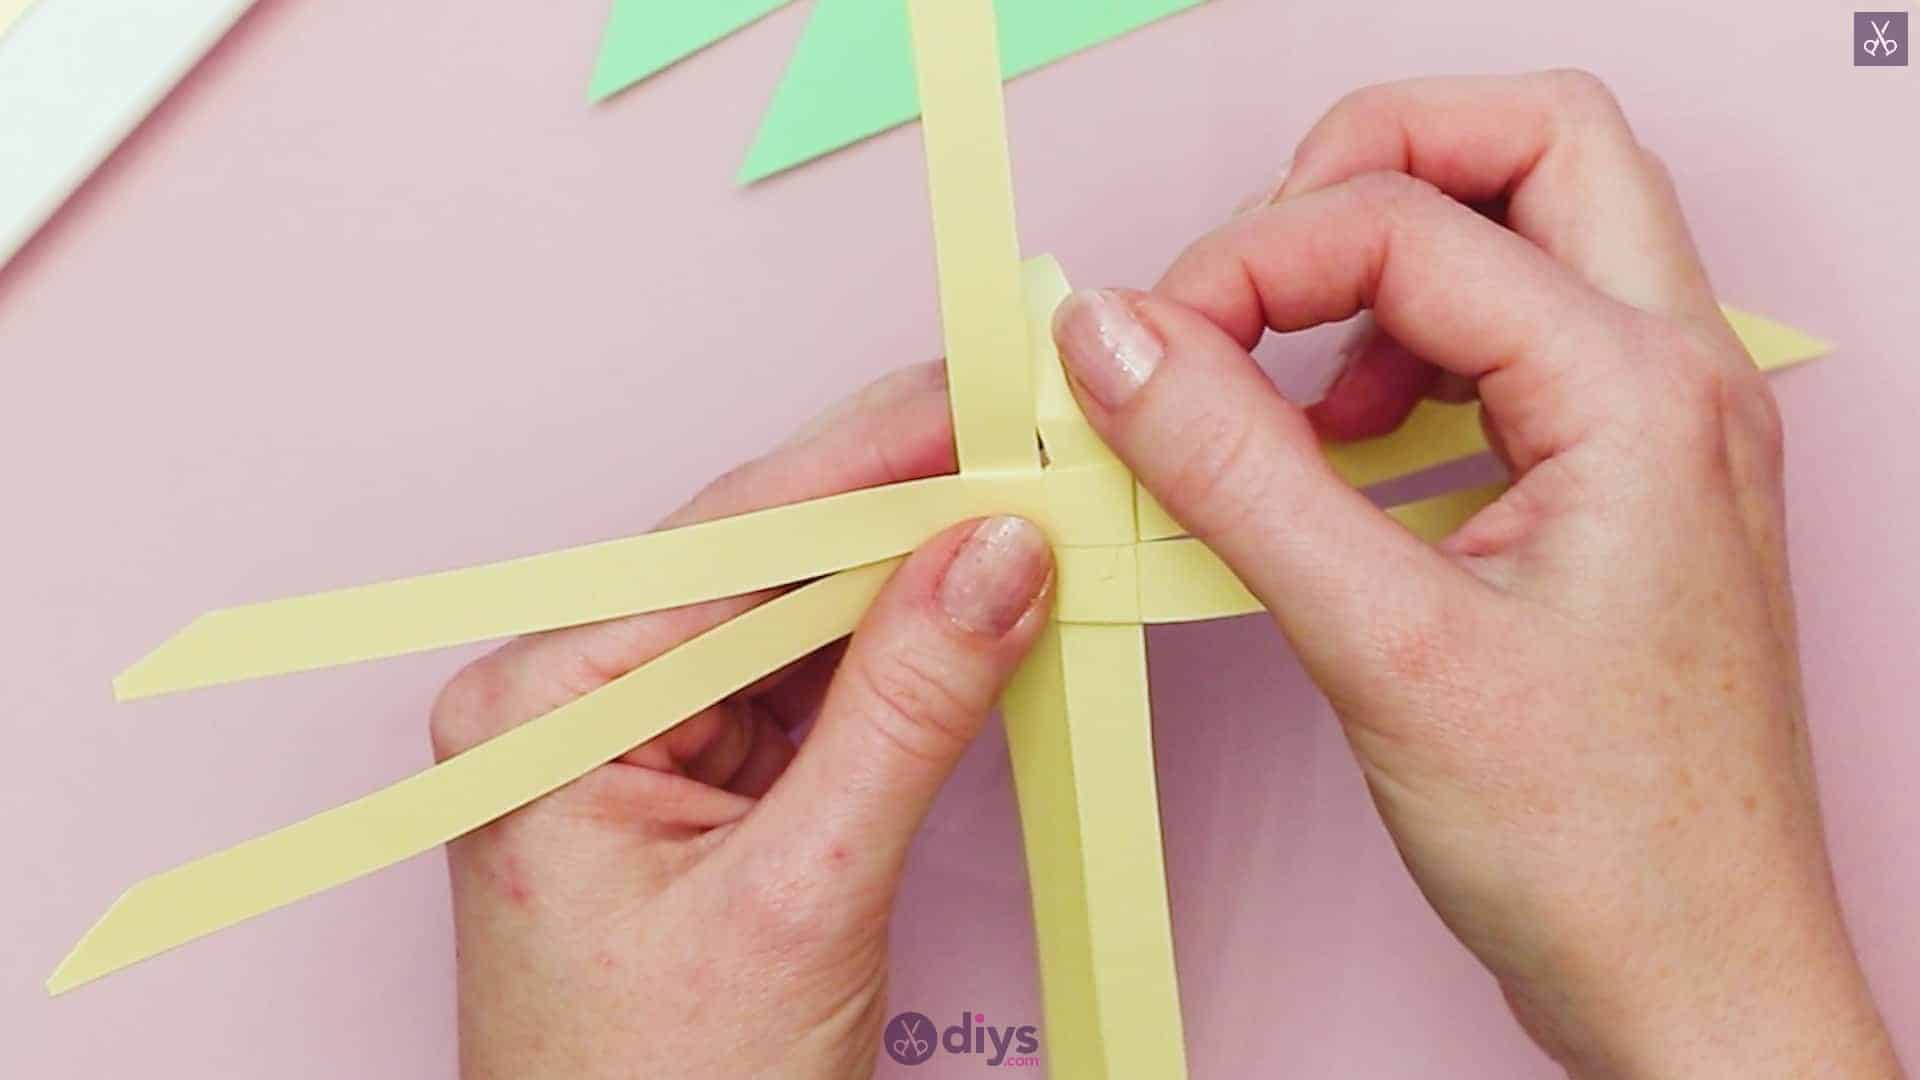
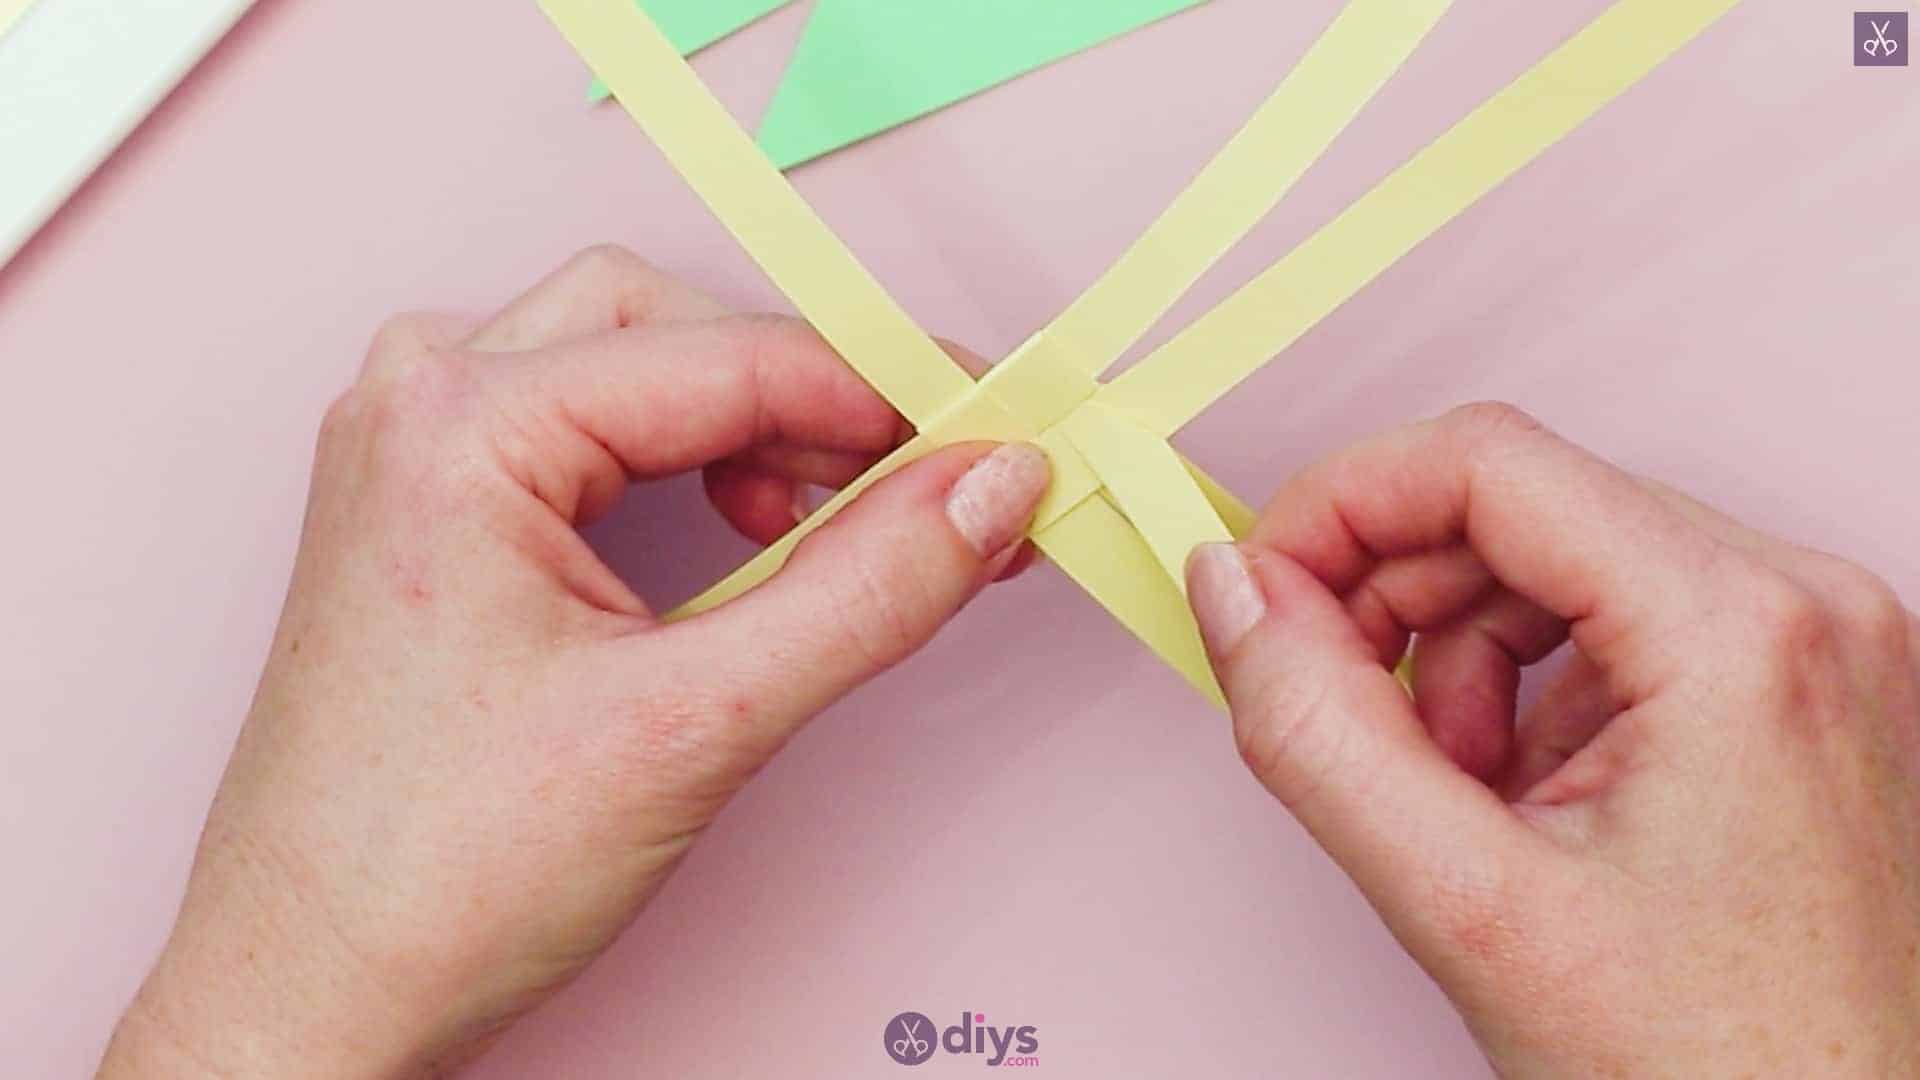
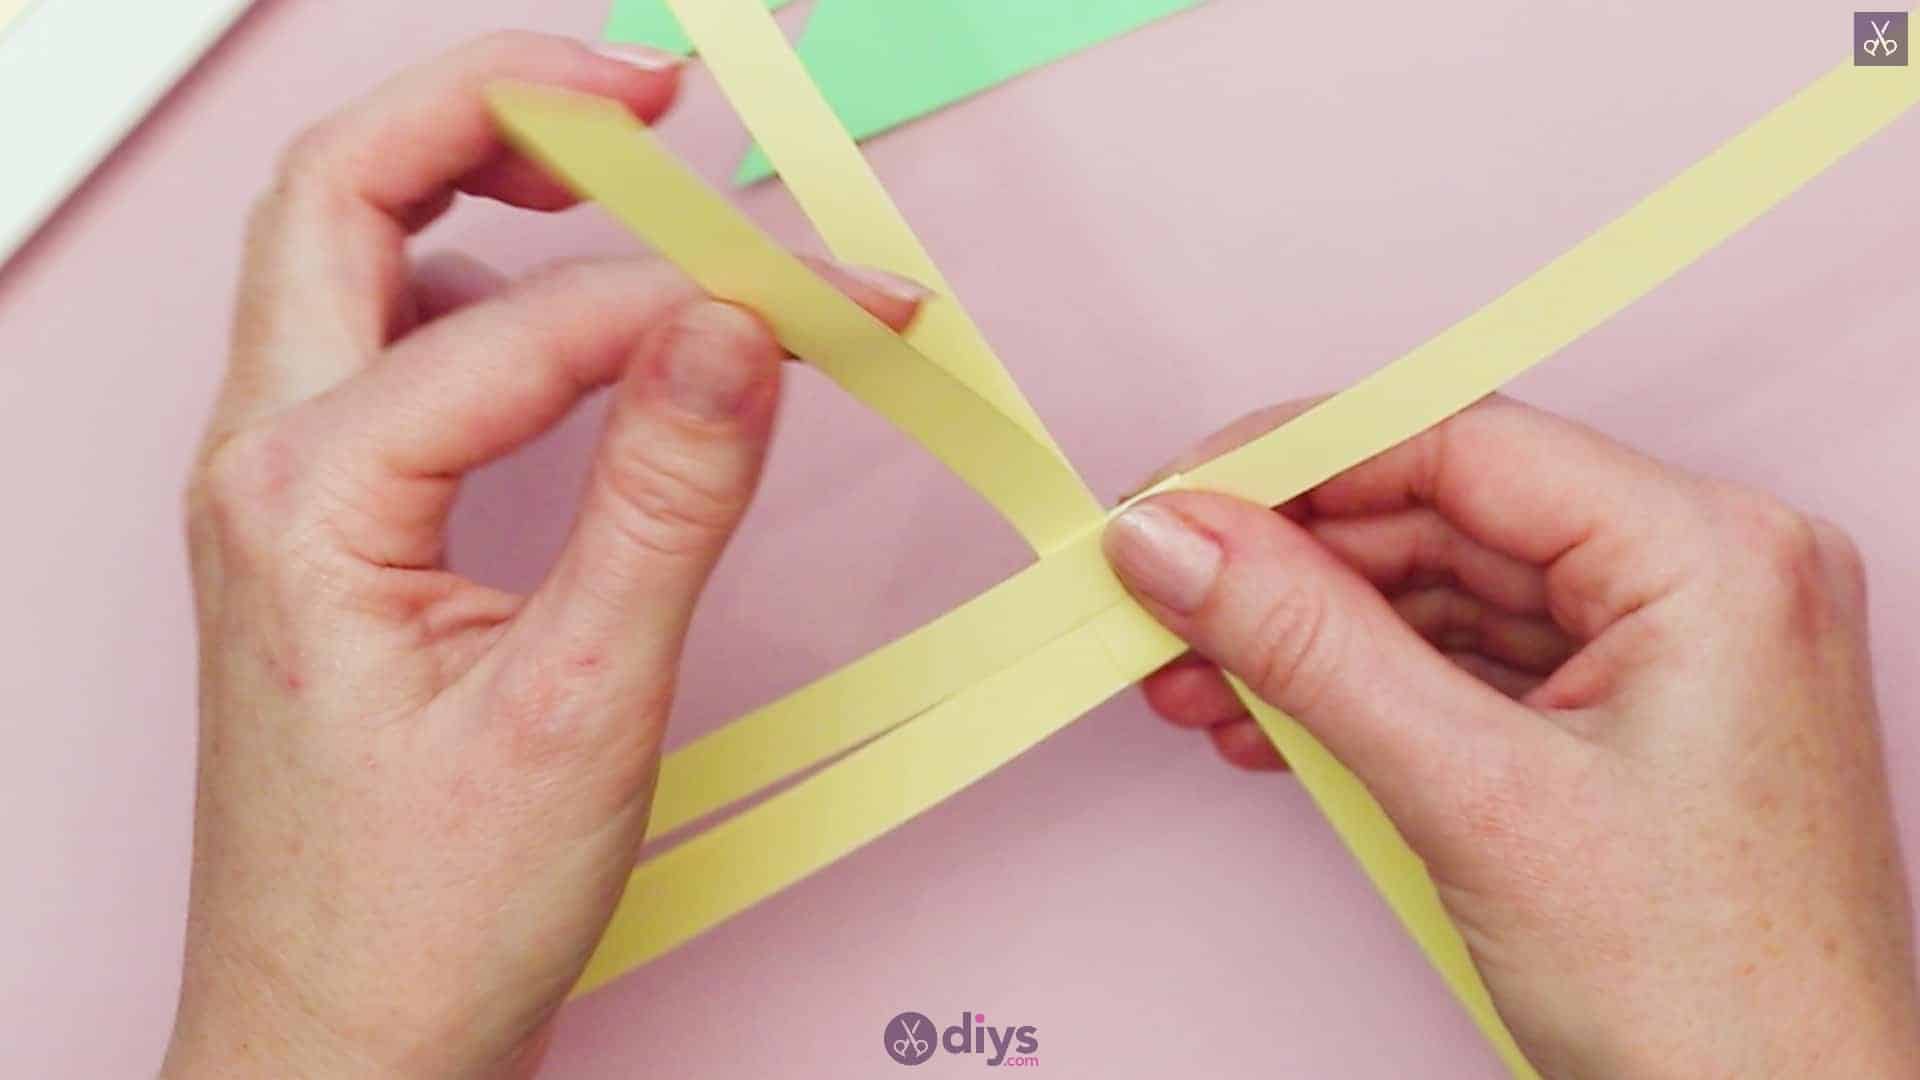
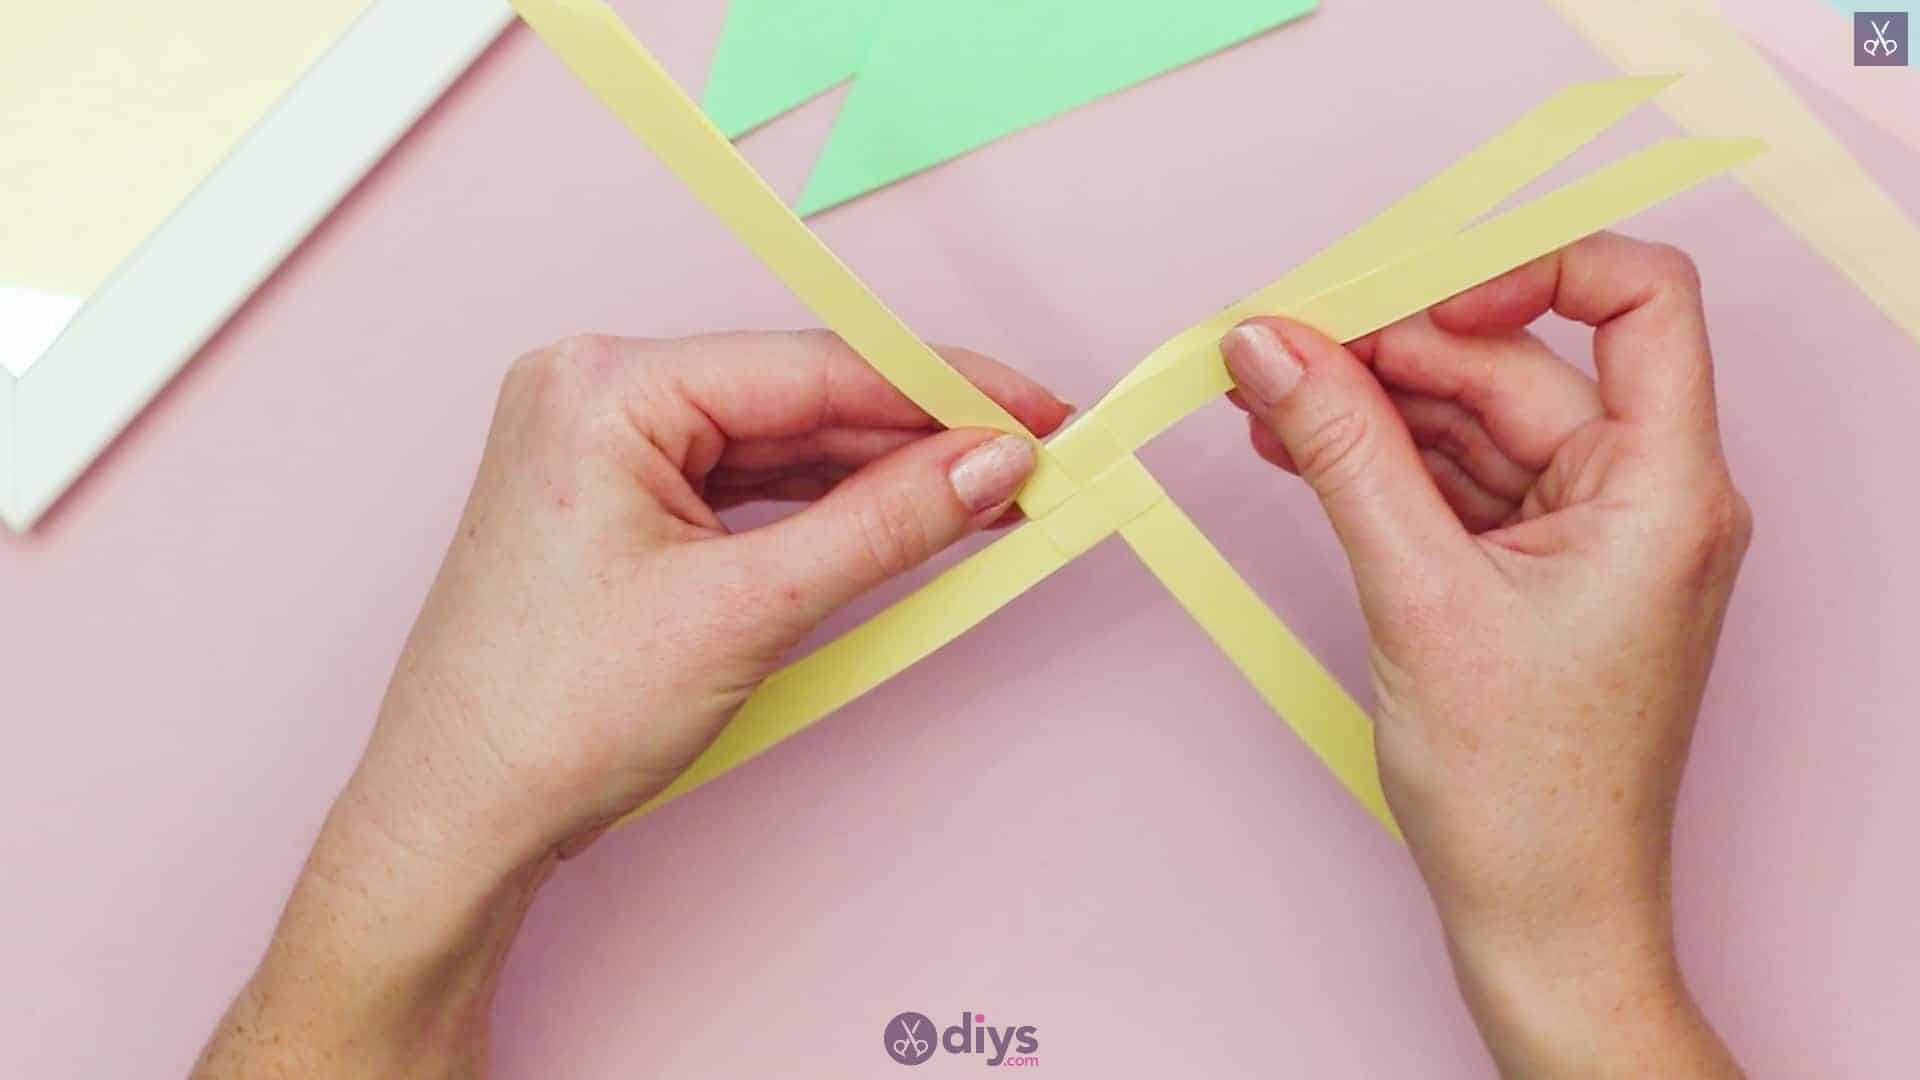
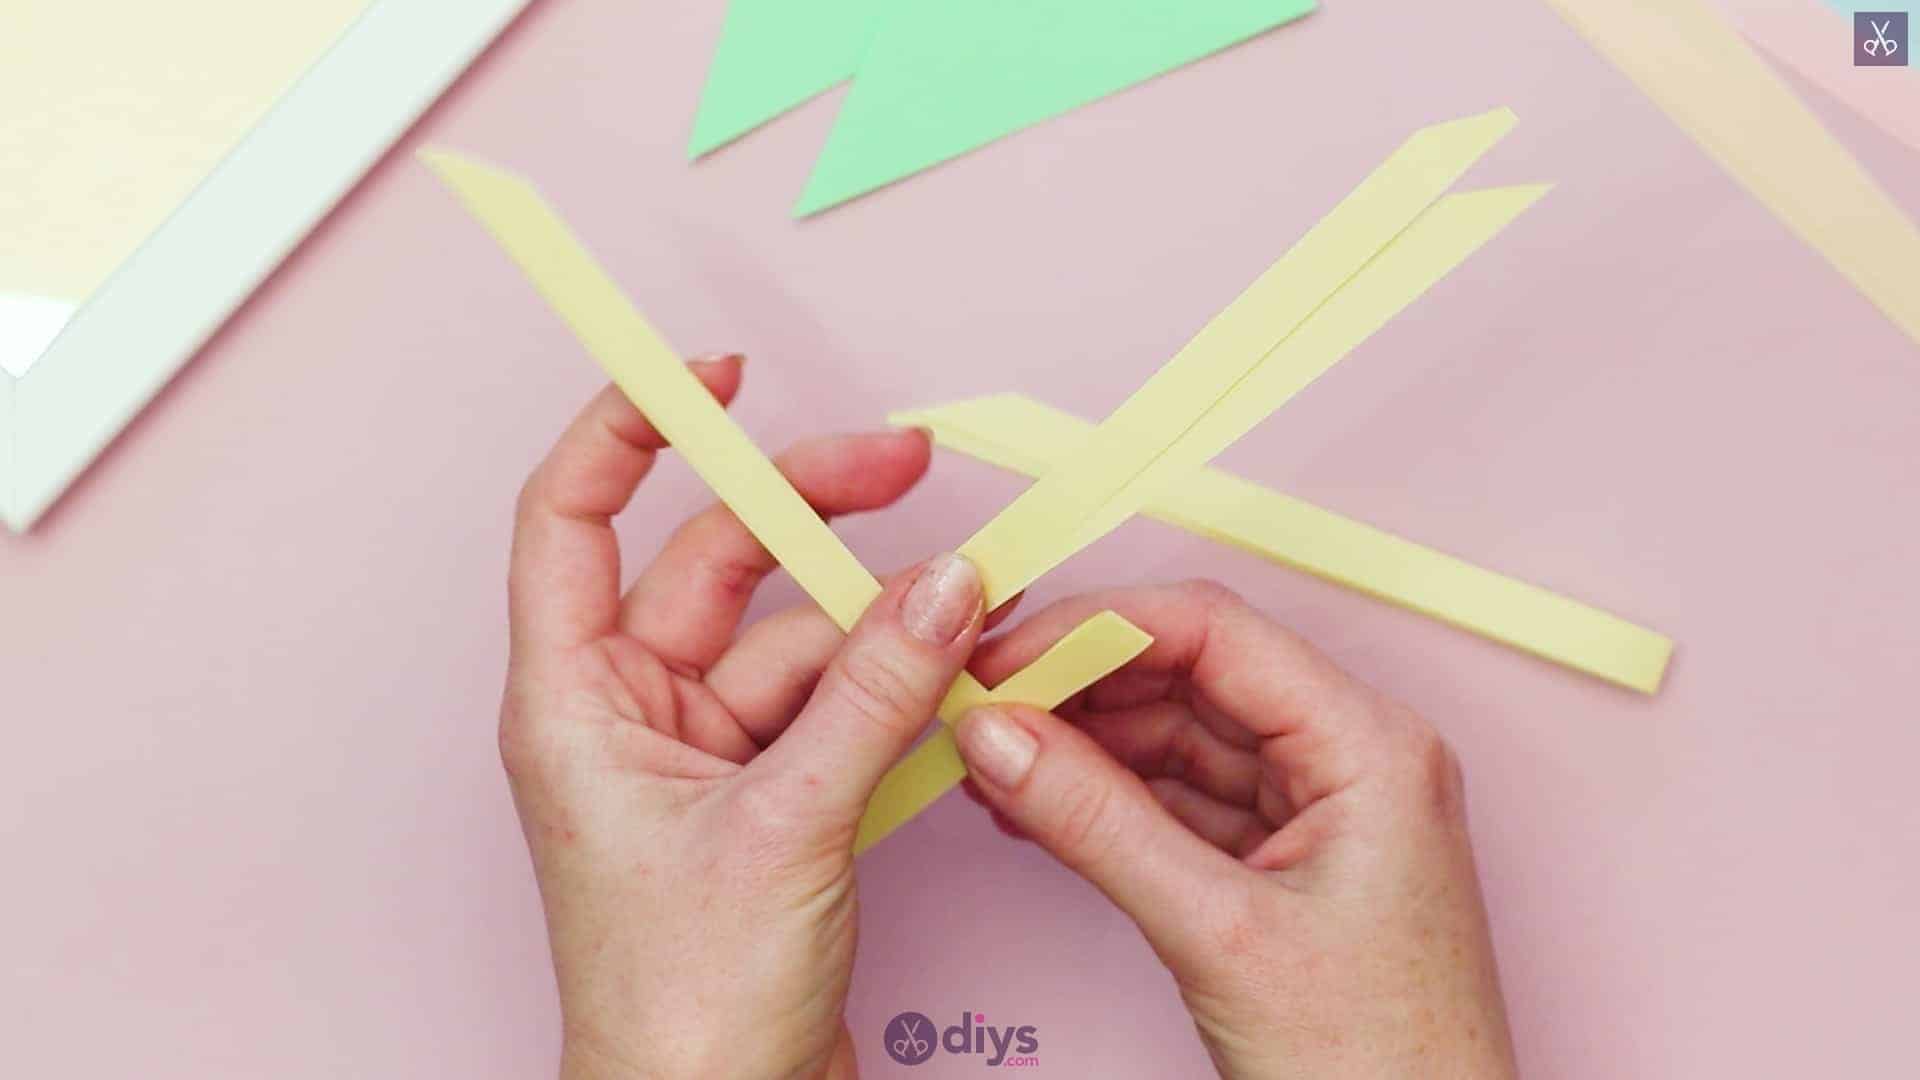
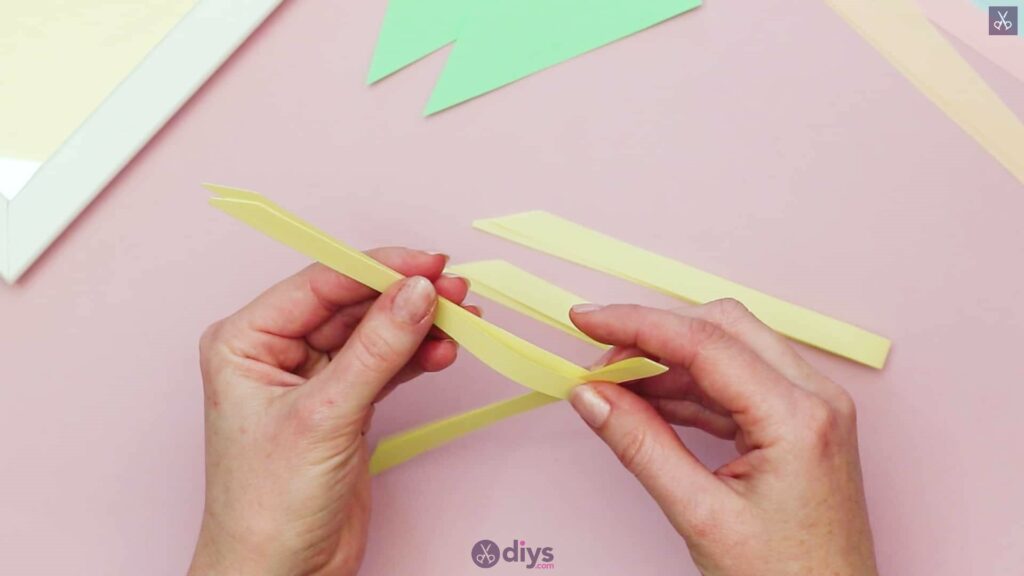
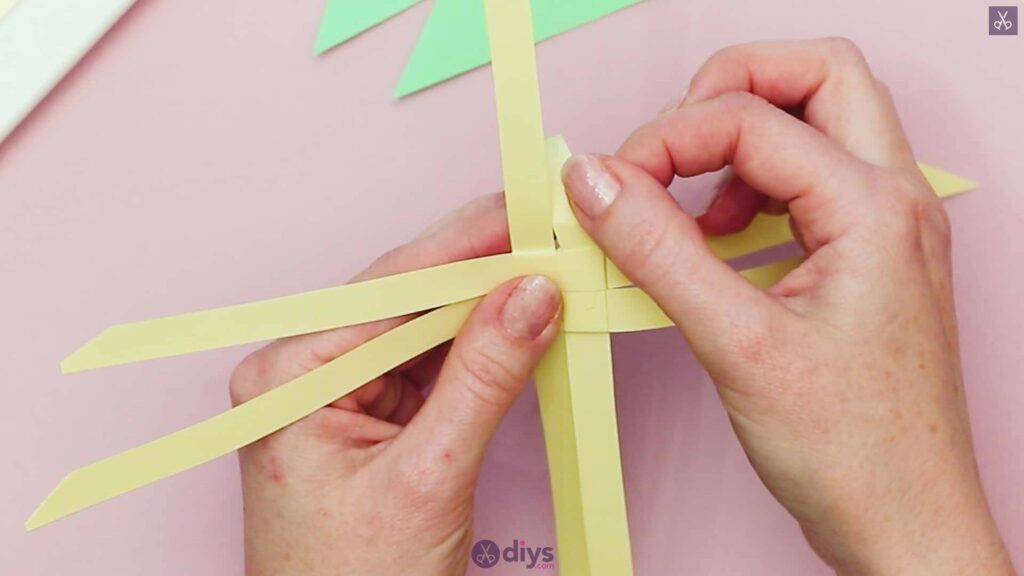
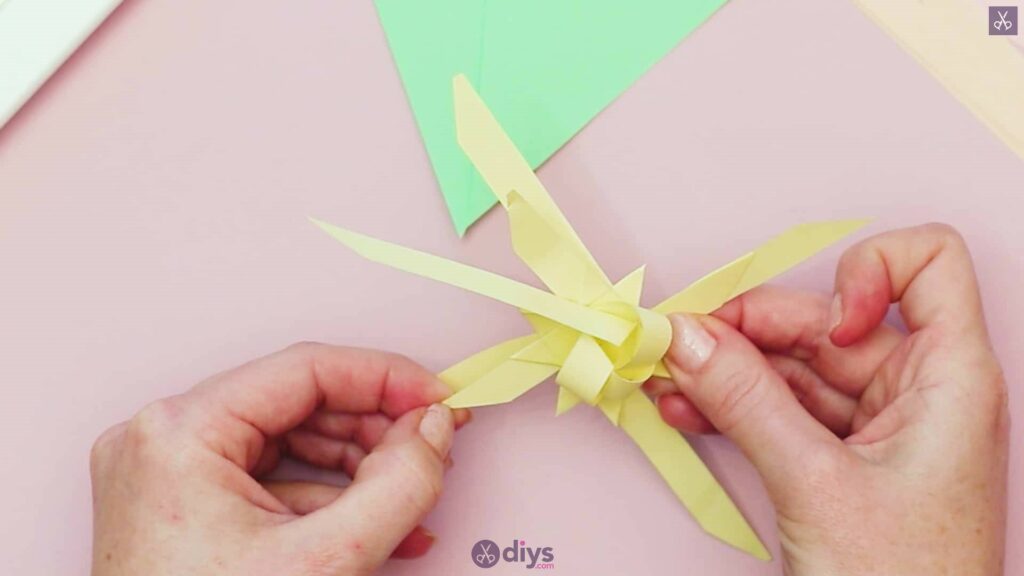
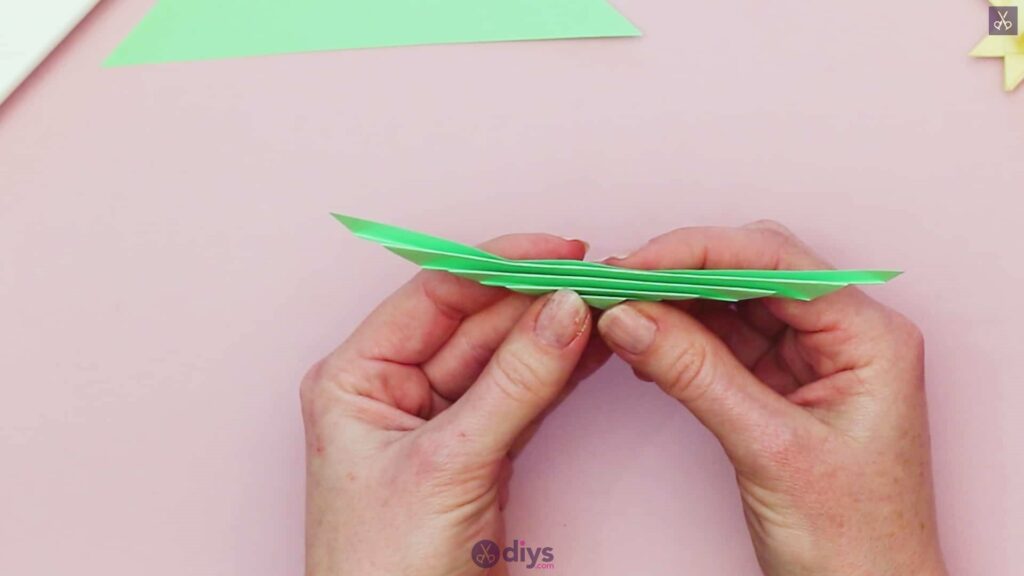
You now have four folded strips in your first colour, each with an even angle in the ends. Start by separating them. Next, pick up one and hold it with its folded end pointed downward. Pick up a second strip, with it horizontally with its folded end pointing to the right, and slide its further side between the sides of your first strip, near the bottom so it slides into the first strip’s fold. The two strips are now linked together, each with one side of the other between its own sides. Don’t slide the second strip all the way into the first one just yet; leave its folded end sticking out perpendicularly to the bottom of the first strip about an inch. Then pick up a third strip with whichever hand you’re not holding your other two in and turn it so it is also horizontal, but with its folded and pointing to the left. Slide the leg on its further side through your first strip again, just like you did with the second one, but higher up the strip this time. Once again, you’ll leave about an inch of its end sticking out (to the opposite side of the strip below it). Now, pick up your final strip in that colour and turn it so it’s vertical like the first one, but this time with its folded end facing up and its angled ends facing down. Position it to the right of your first vertical strip and slide its further leg down between the sides of the two horizontal strips, letting its forward leg that is closer to your pass over them. Now you can carefully pull them all together and against each other to create a square-shaped woven centre.
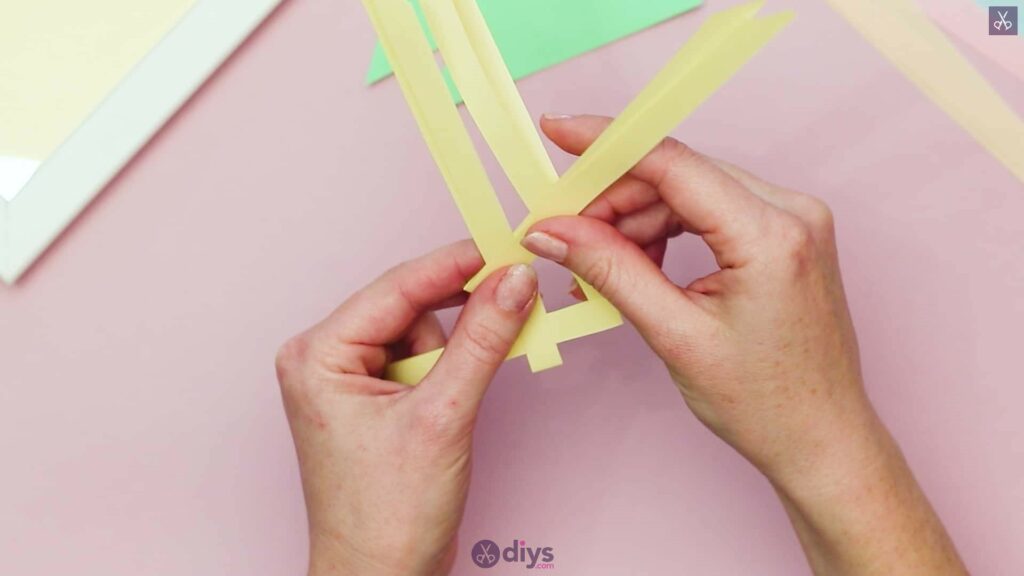
Step 4:
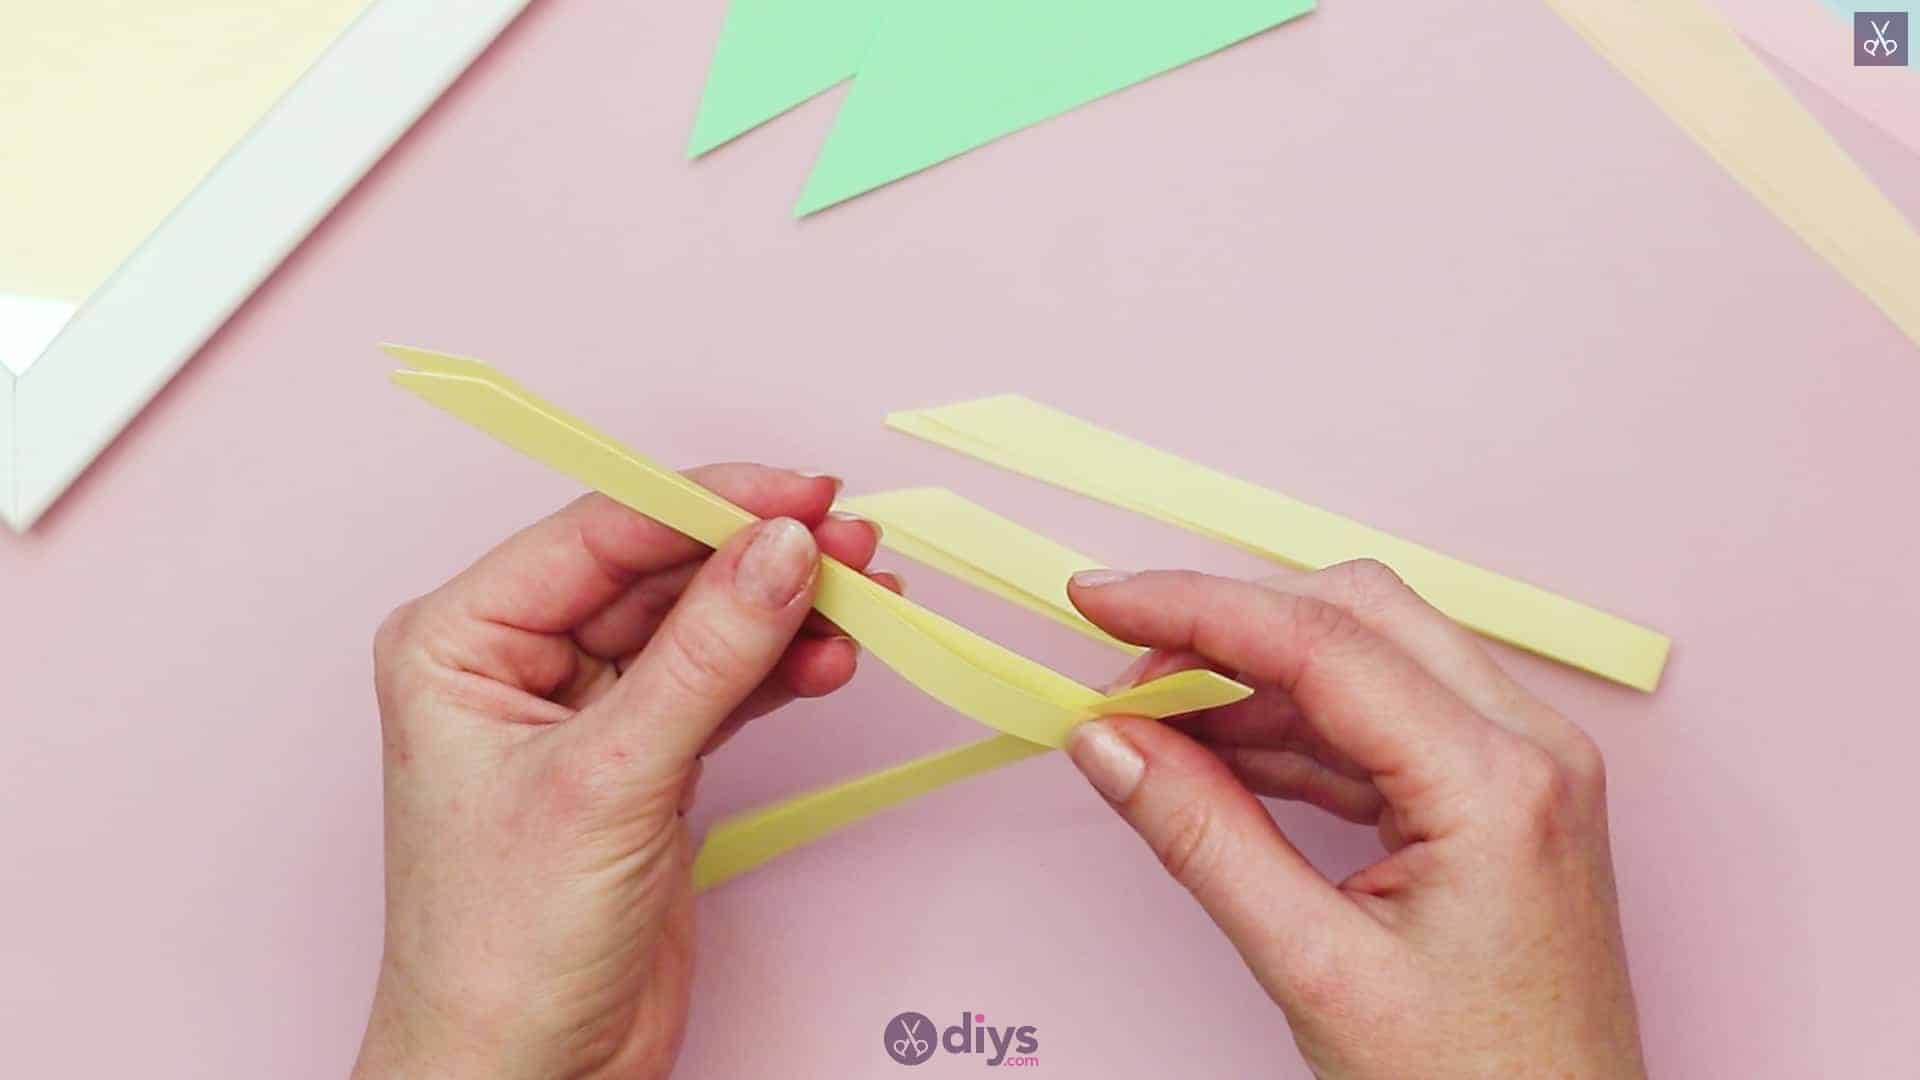
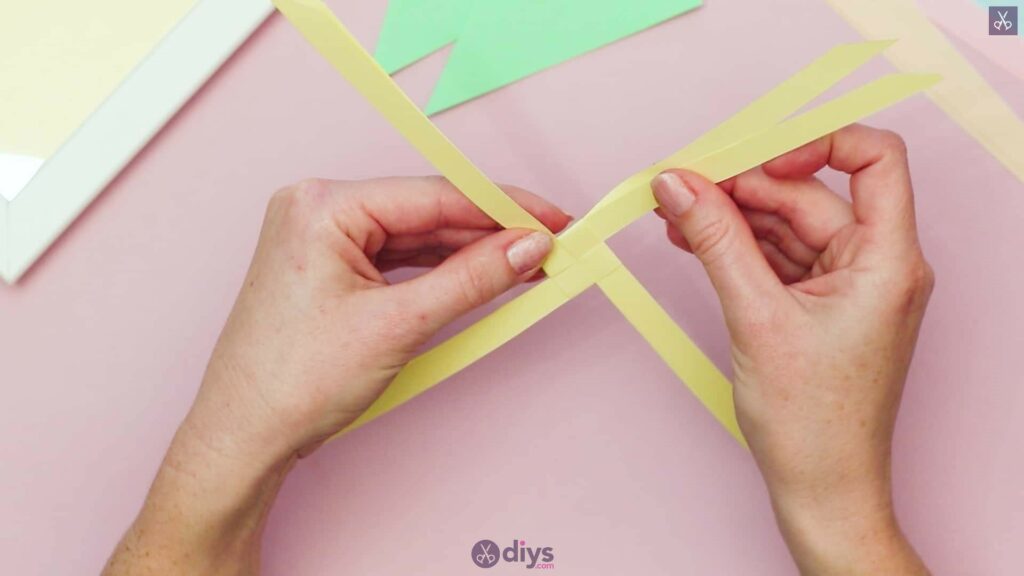
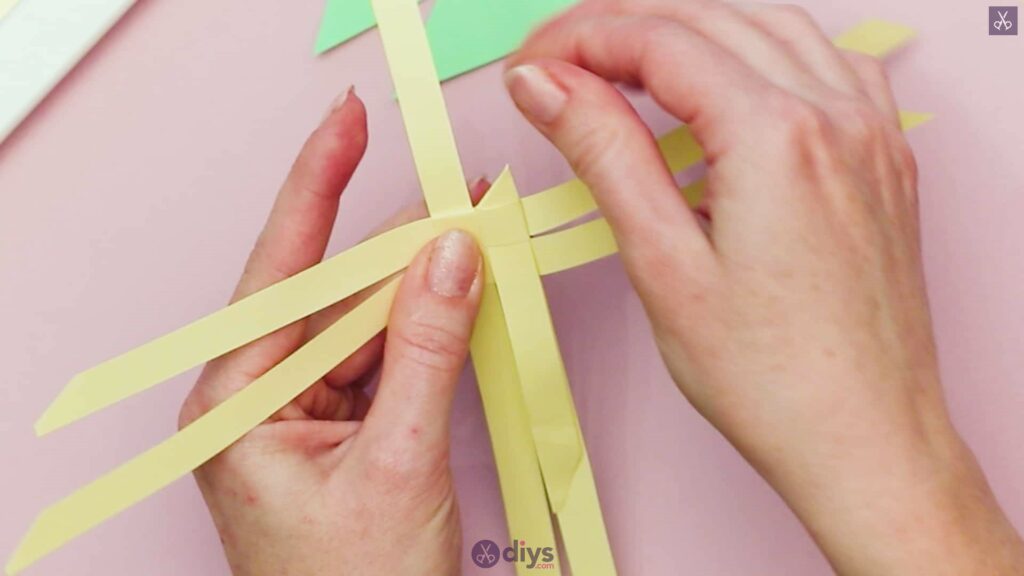
Now you’ll take the front leg of each strip and fold it back and down over that woven centre, keeping it in line with its other half so you don’t get any wonky angles. Start with the top right strip, folding its top layer back towards its creased end until it meets the strip that passes over it, then creasing it in place there. Then to the same with the top left strip, followed by the bottom left. Make sure you’re only folding one side of each strip (i.e. its top leg, and not also its back leg/both). When you get to the bottom right strip, you’ll fold it in the same manner and direction but, instead of just folding it over the middle like you did with the other three, you’ll slide the angled end underneath the first strip that you folded back over the centre. Then you can pull it through to lay like the others and crease it in place. You’ll see that it passes over the layer closest to where it came from and under the one next to it. You’ll notice that you now have two strips on each side of your woven centre square rather than one.

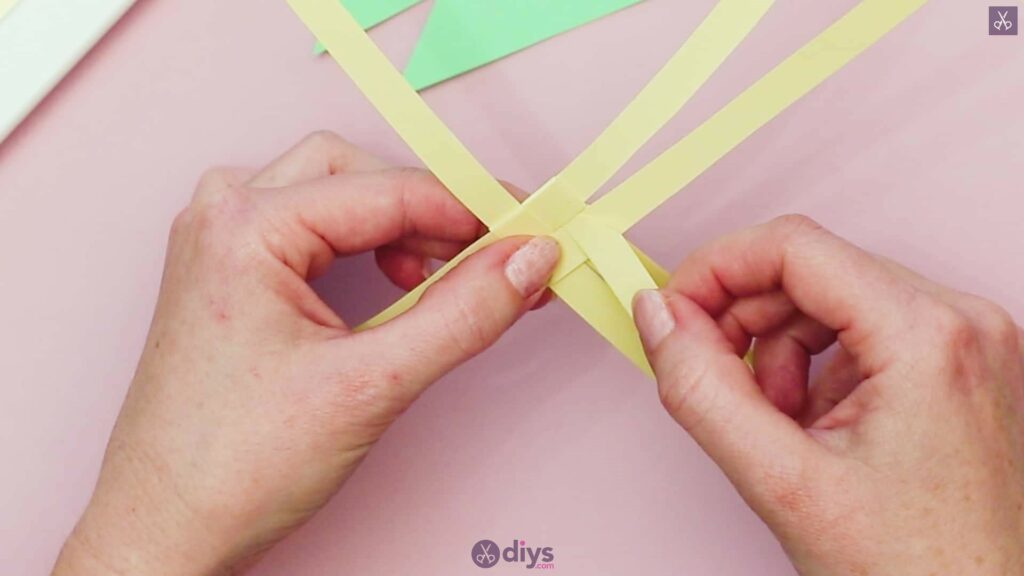
Step 5:
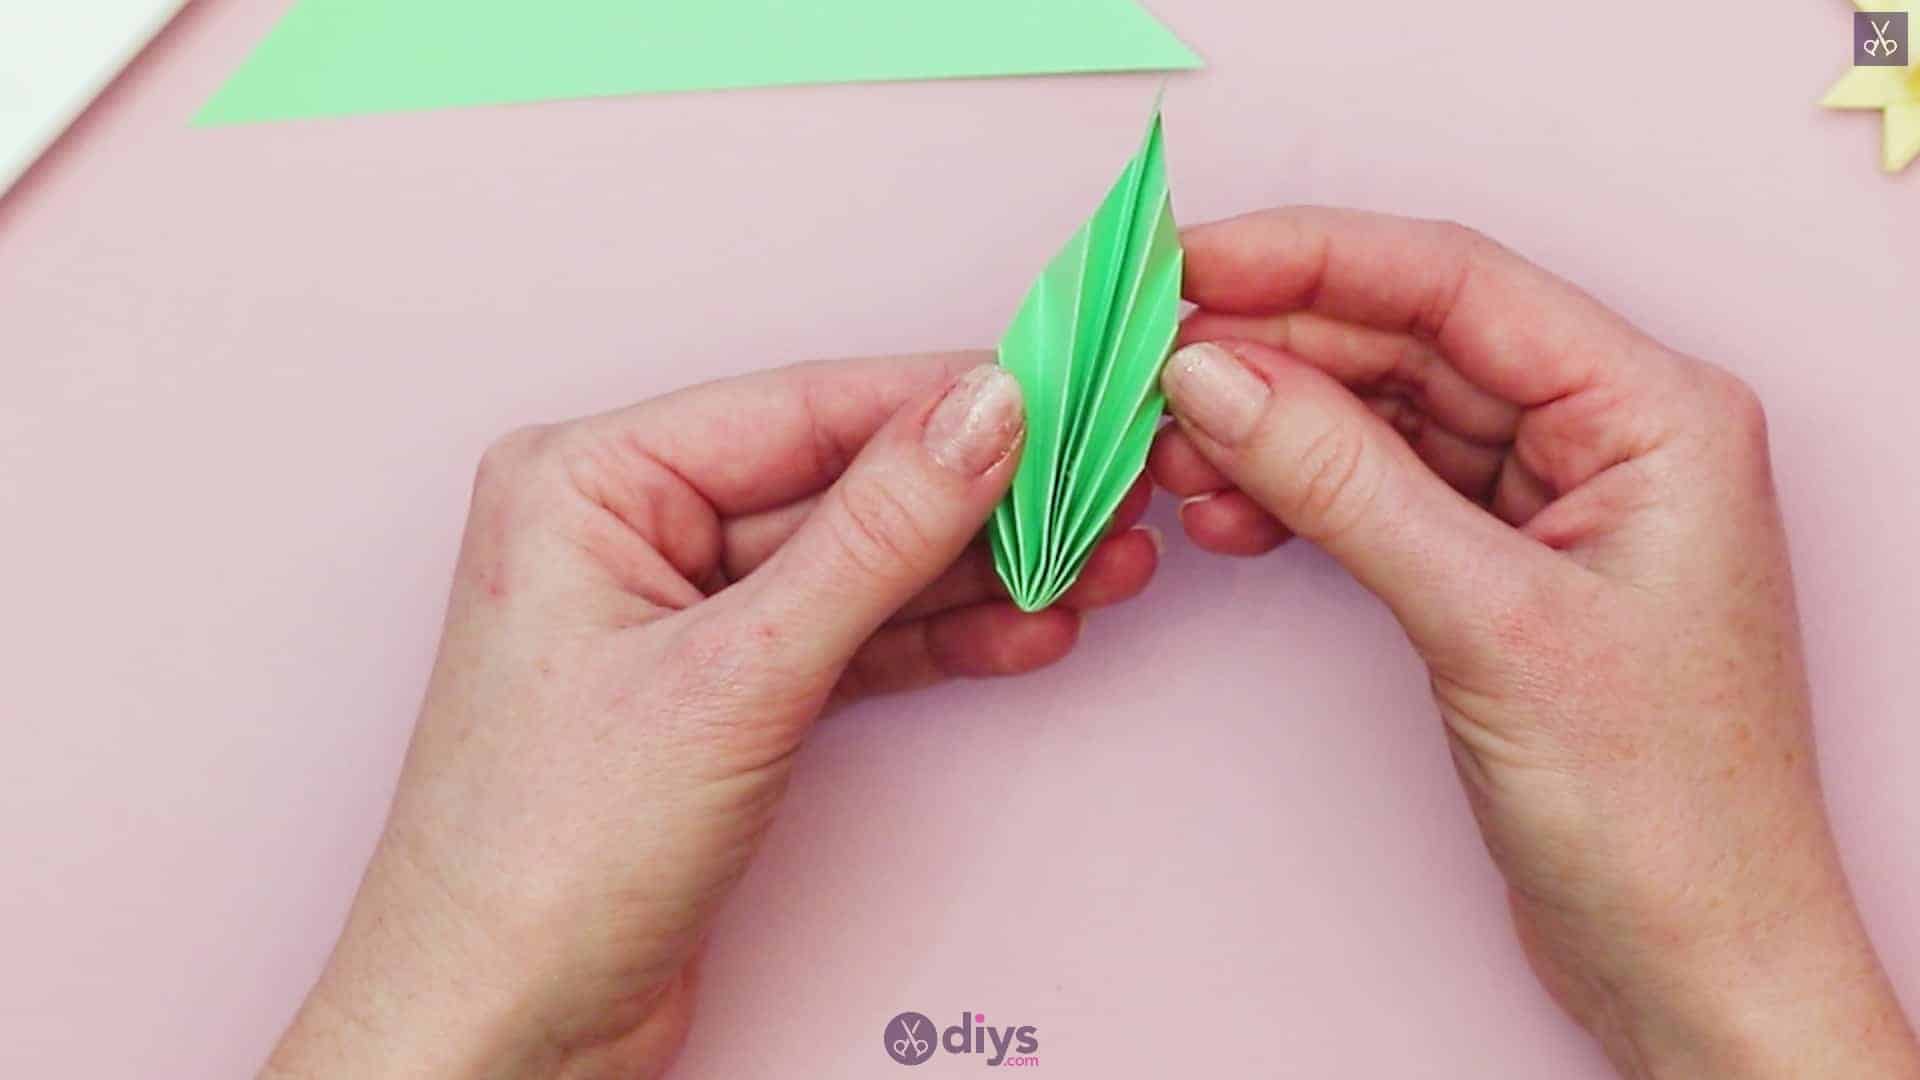
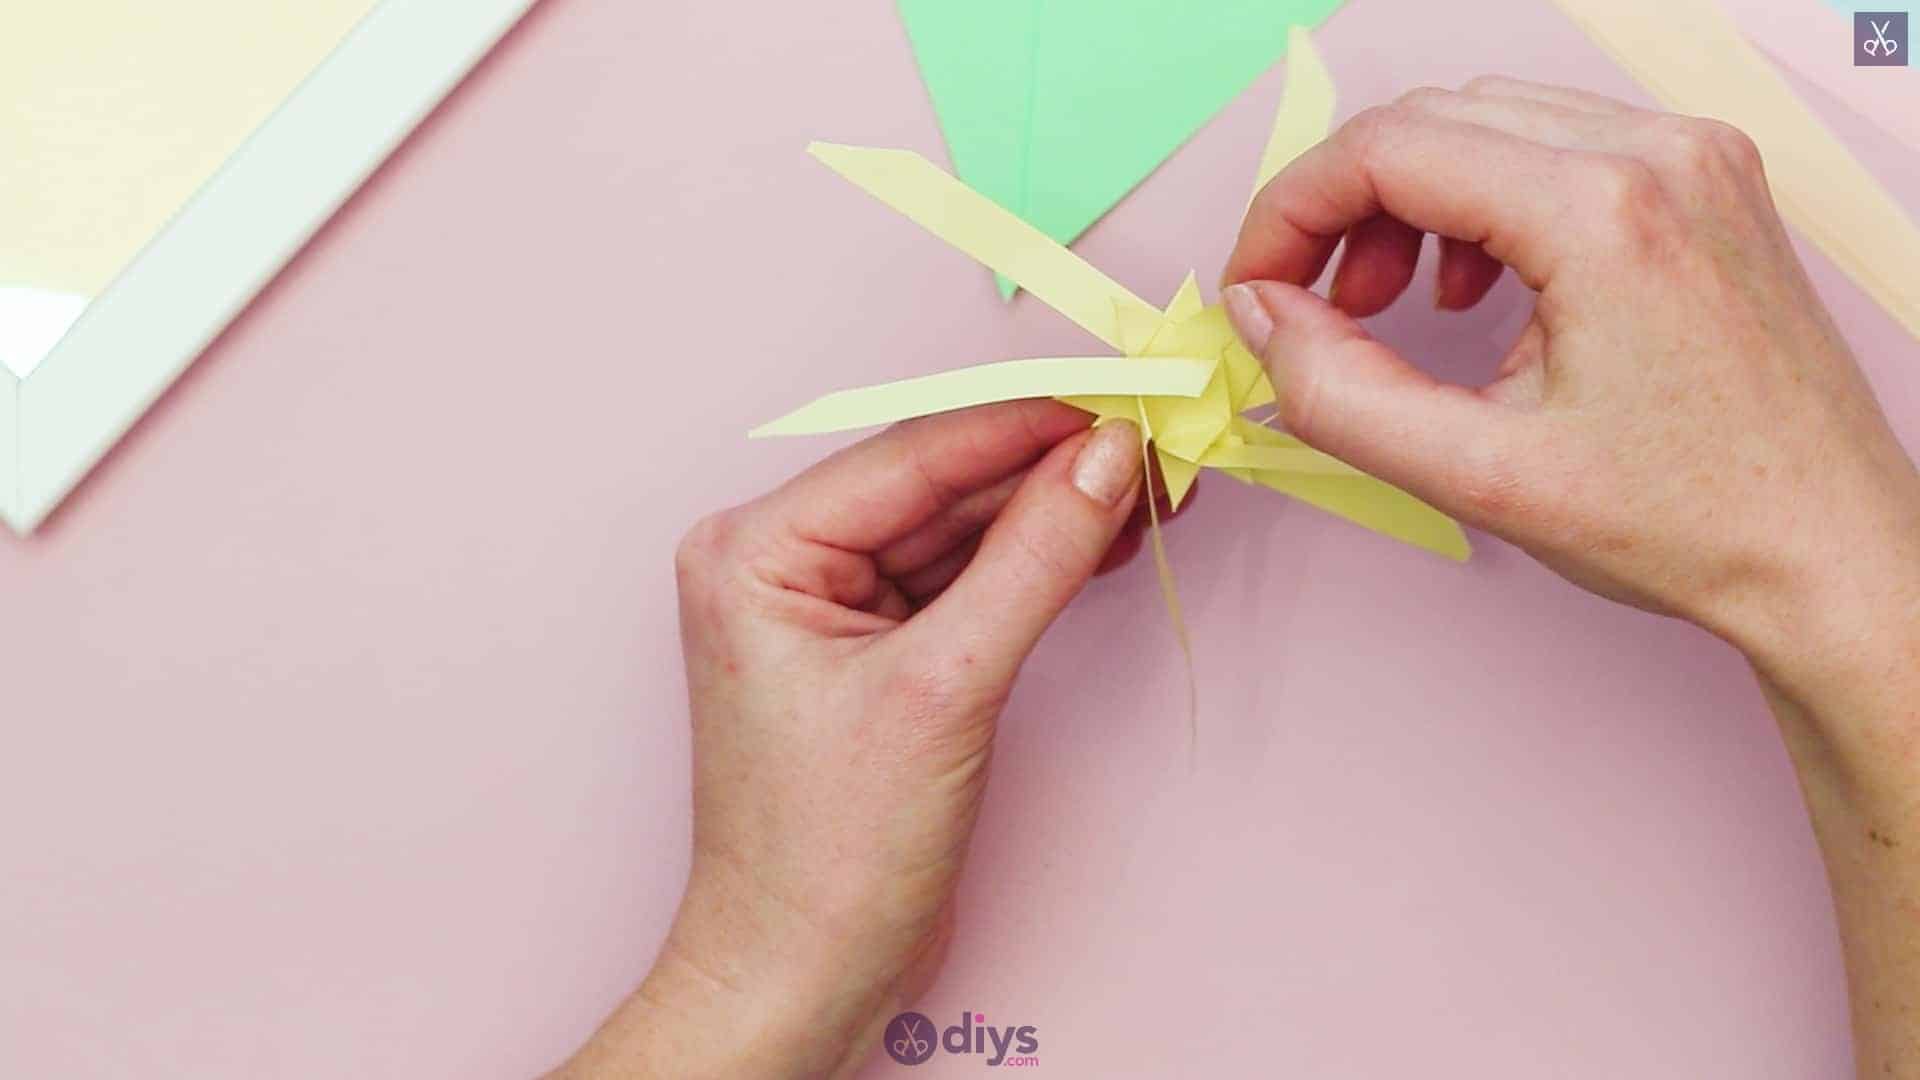
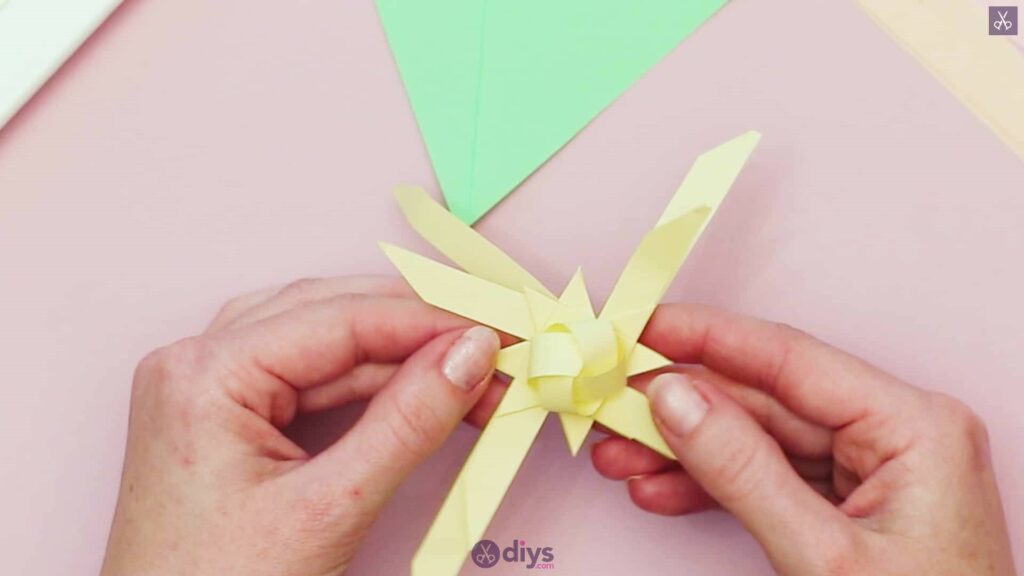
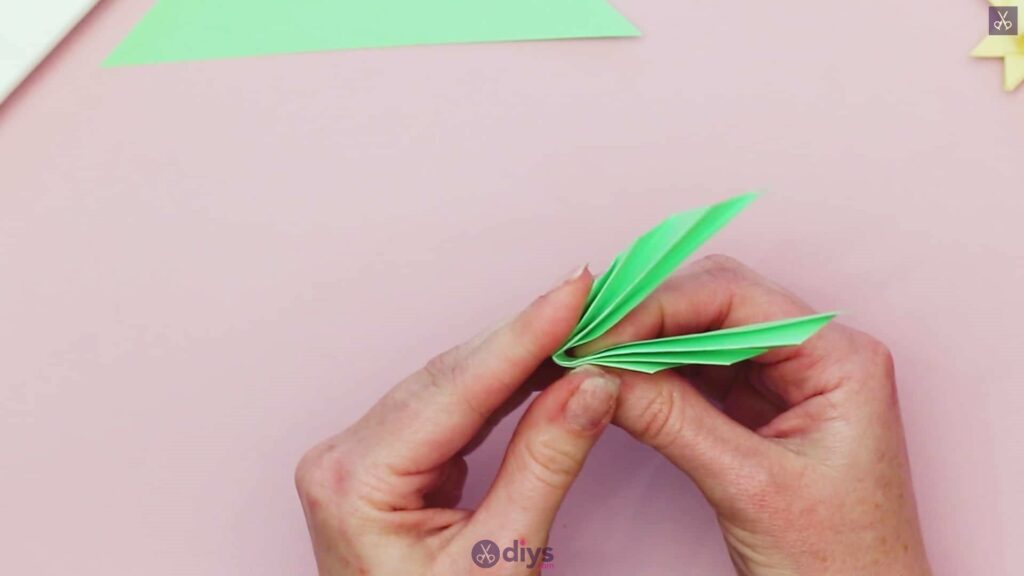
Turn your square so that you have one pair of strips each at the top, bottom, left, and right. Take the top right strip and fold it back and downwards diagonally, creating an upward pointed tip. The rest of your strip will be sticking out behind the point and to the right, horizontally. Take this part of the strip now and fold it to the left and diagonally downwards, back on itself again. The rest of your strip will now be lying downwards, over the central woven square, while the combination of angled points looks like a little triangle at the top. Take the right side of this triangle and fold it inward on a vertical axis over the left side, turning the triangle back into a singular point, only double layered. Now you’ll take the rest of that strip, bring it upwards to slide it under the woven layer below it, and pull it straight and smooth. Turn your square so the strips on the left side of your square become the top and repeat this whole process with the righthand strip in that pair as well. Continue repeating until you’ll created this pointed and woven effect on the righthand strip on all four sides.
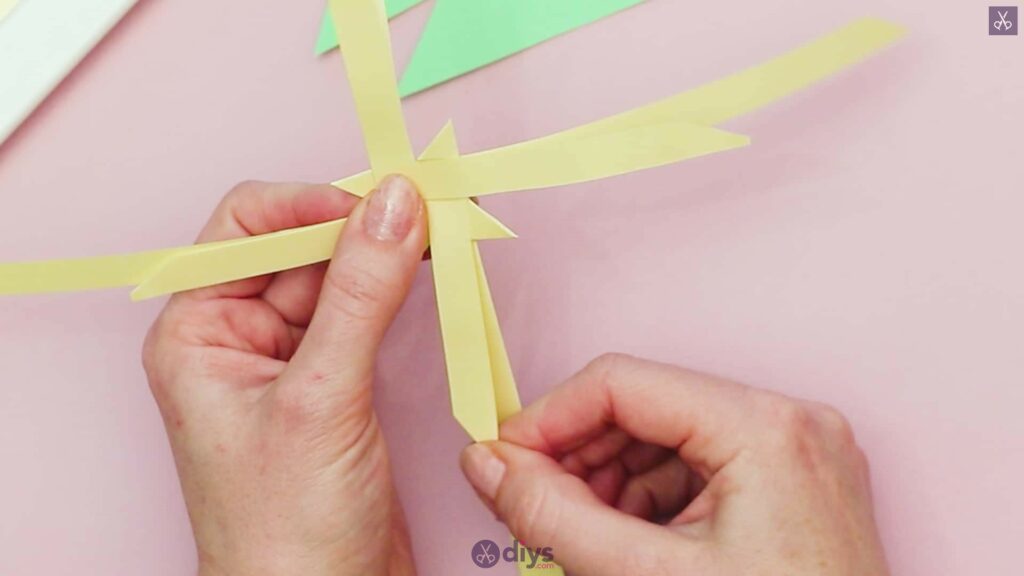
Step 6:
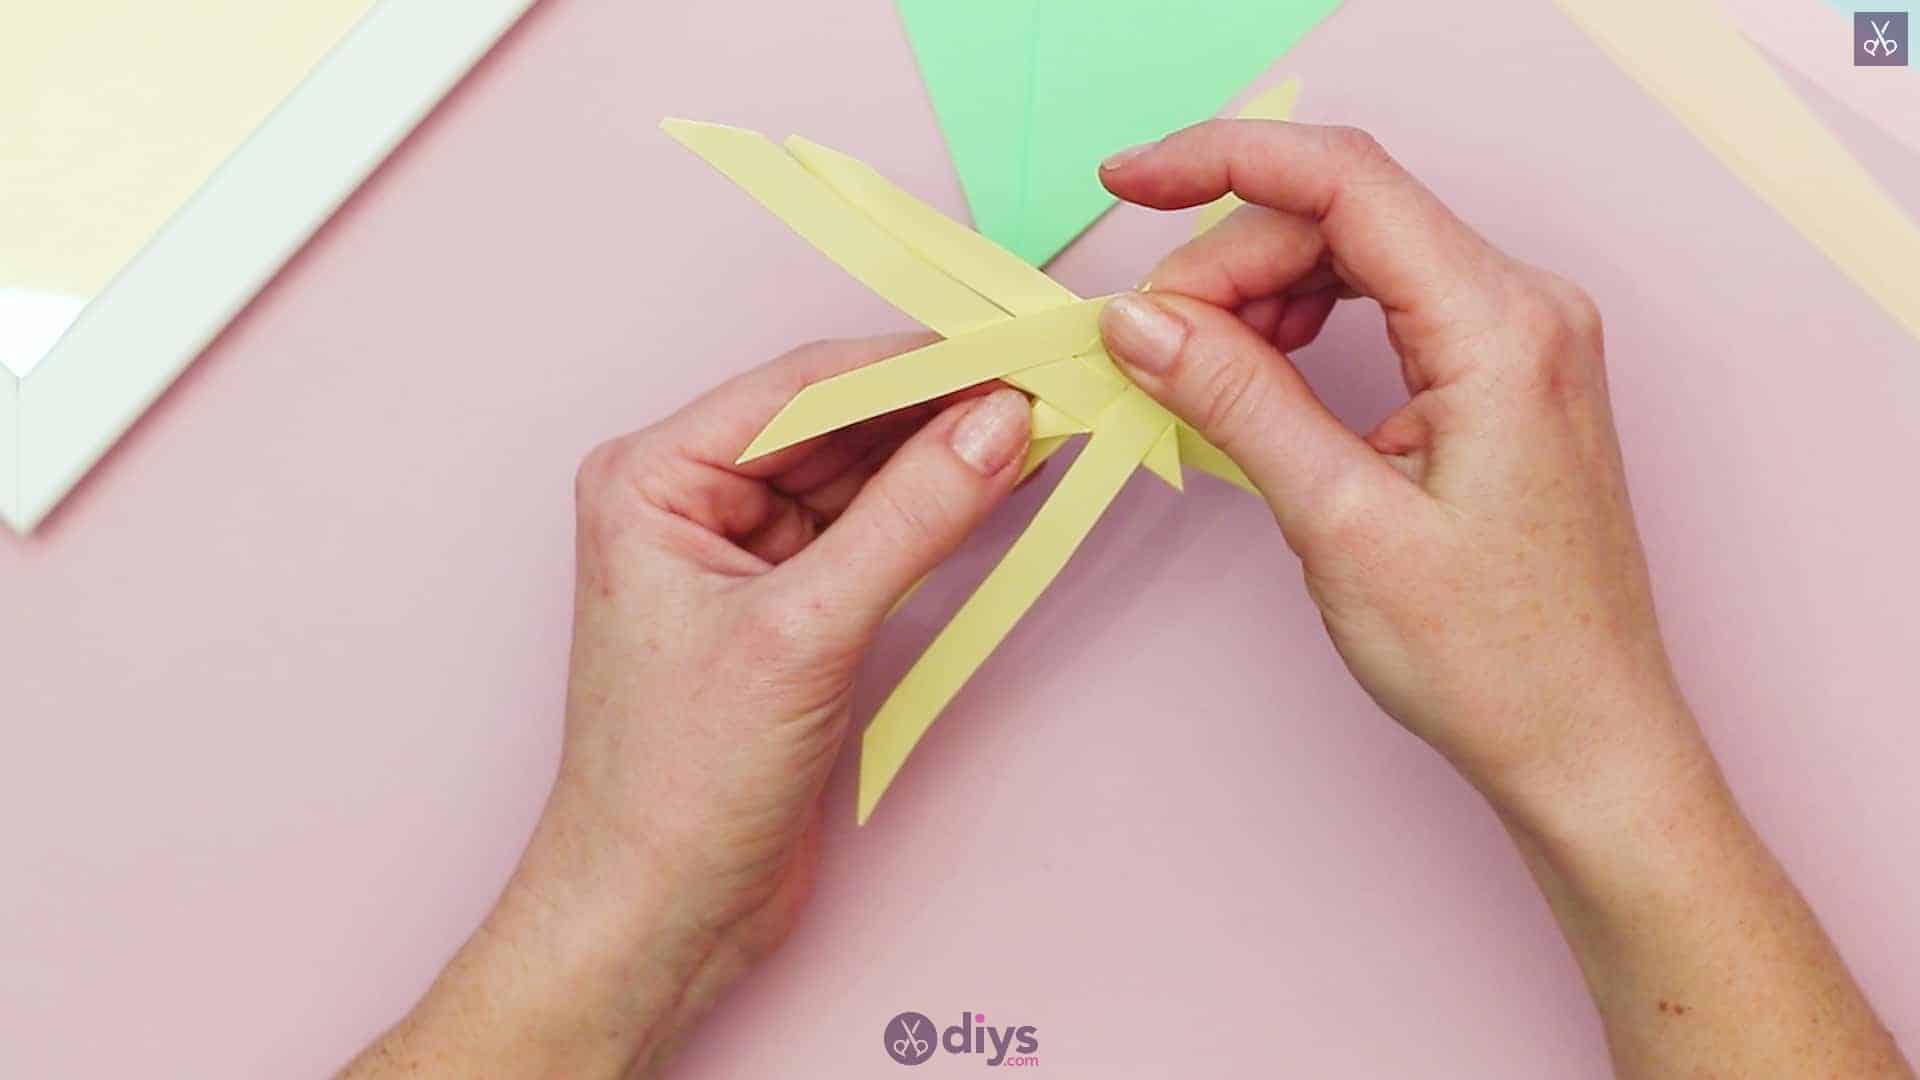
Once you’re back to the start, work with the left strip (whereas you were working with the right before). Fold the top left strip diagonally down and to the right, creasing at an angle and sitting horizontally. Then bring that same strip back diagonally to the left like you’re going to crease it again. Instead, curve it back and around on itself and downward so it creates a sort of loop and crease it that way instead. Repeat this process all the way around with the rest of the unfolded strips, the same way as you did before but with this new creasing pattern.


Step 7:
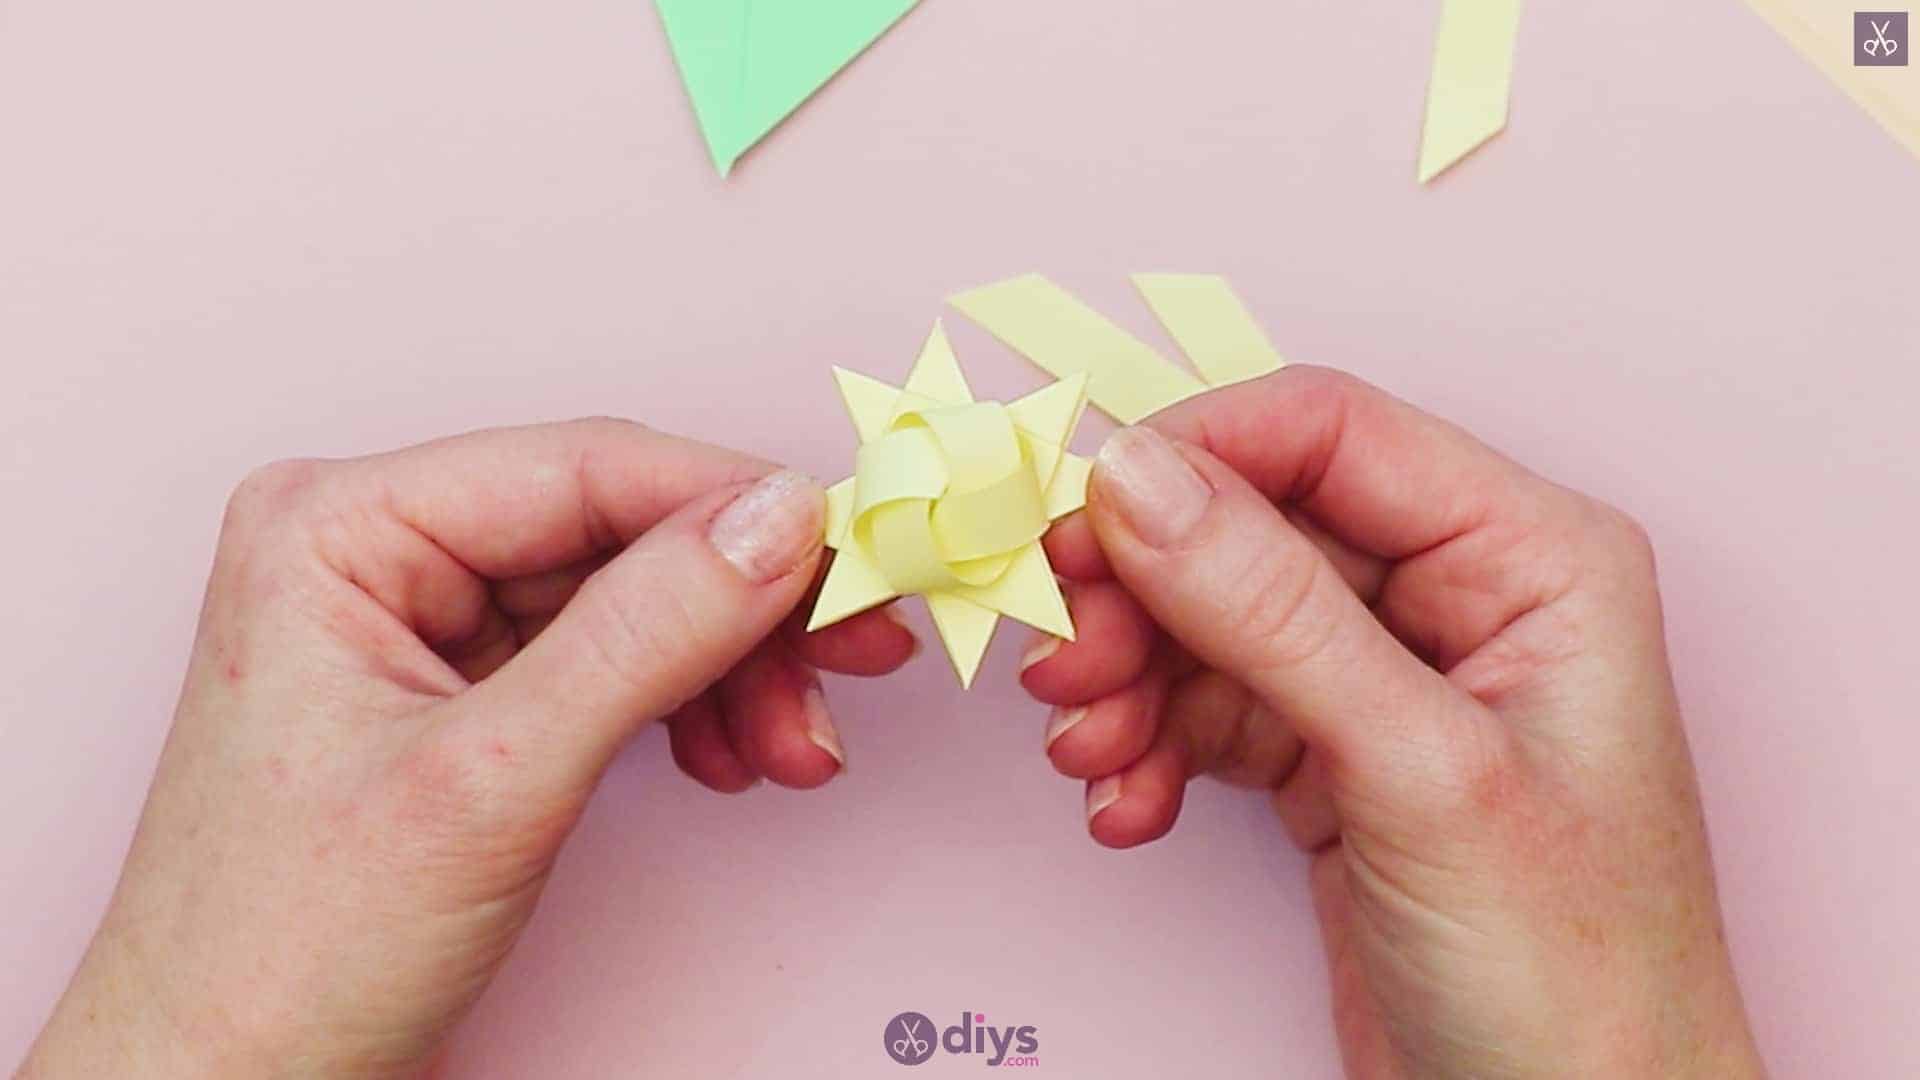
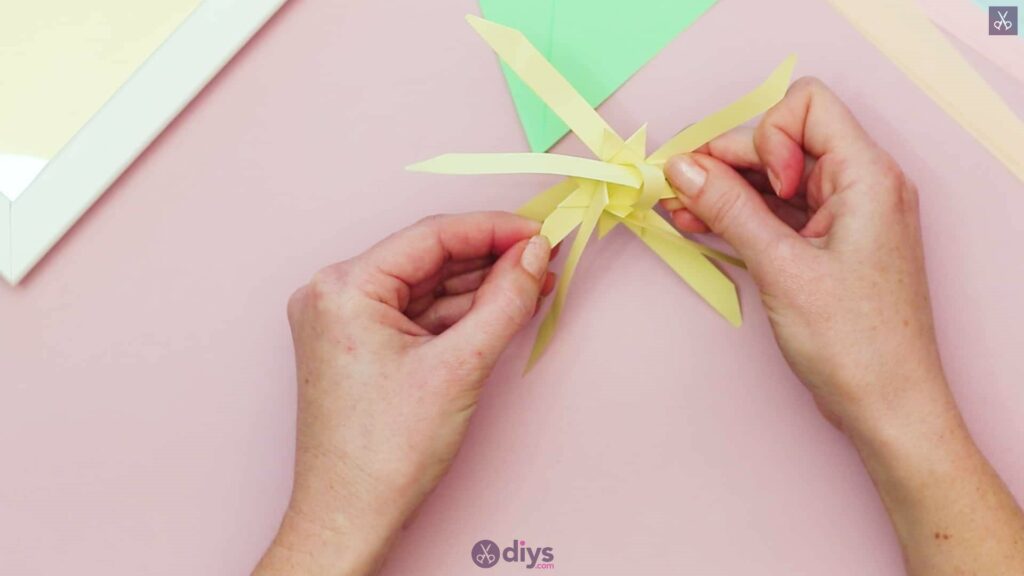
Take those four creases you just made all the way around (the uppermost ones in the centre) and lift them upwards, to look almost like the edges of a box in the middle. Notice how the ends of the strips stick outwards all the way around. Take the first end and curve it under so it rounds smoothly, tucking its angled tip under the next creased edge to the left. This creates a sort of loop that you can pull more tightly into place from the underside of the strip you tucked it beneath. Repeat this process all the way around until you have a fully rounded and woven looking centre. This is like the pollen of your flower.


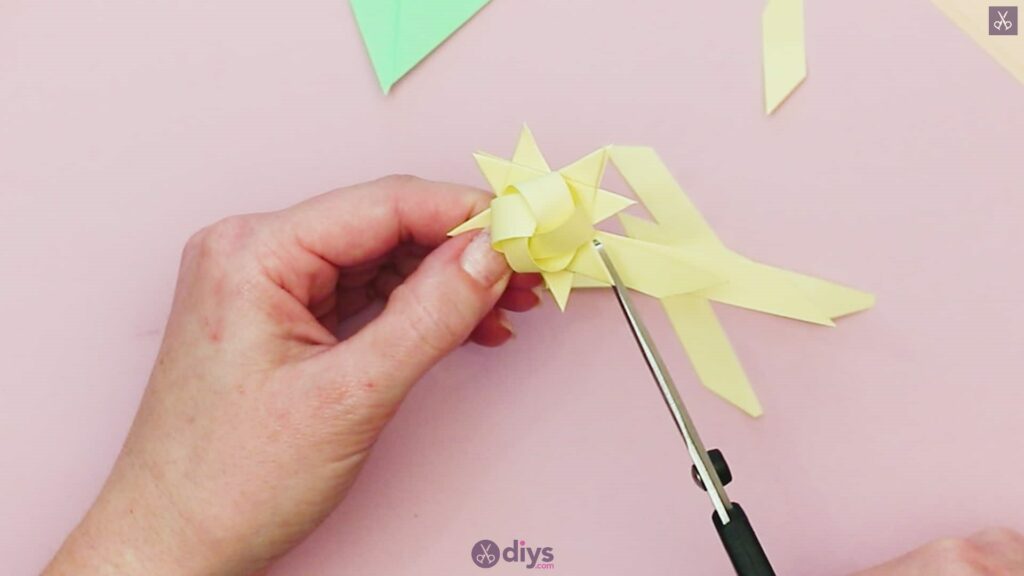
Step 8:
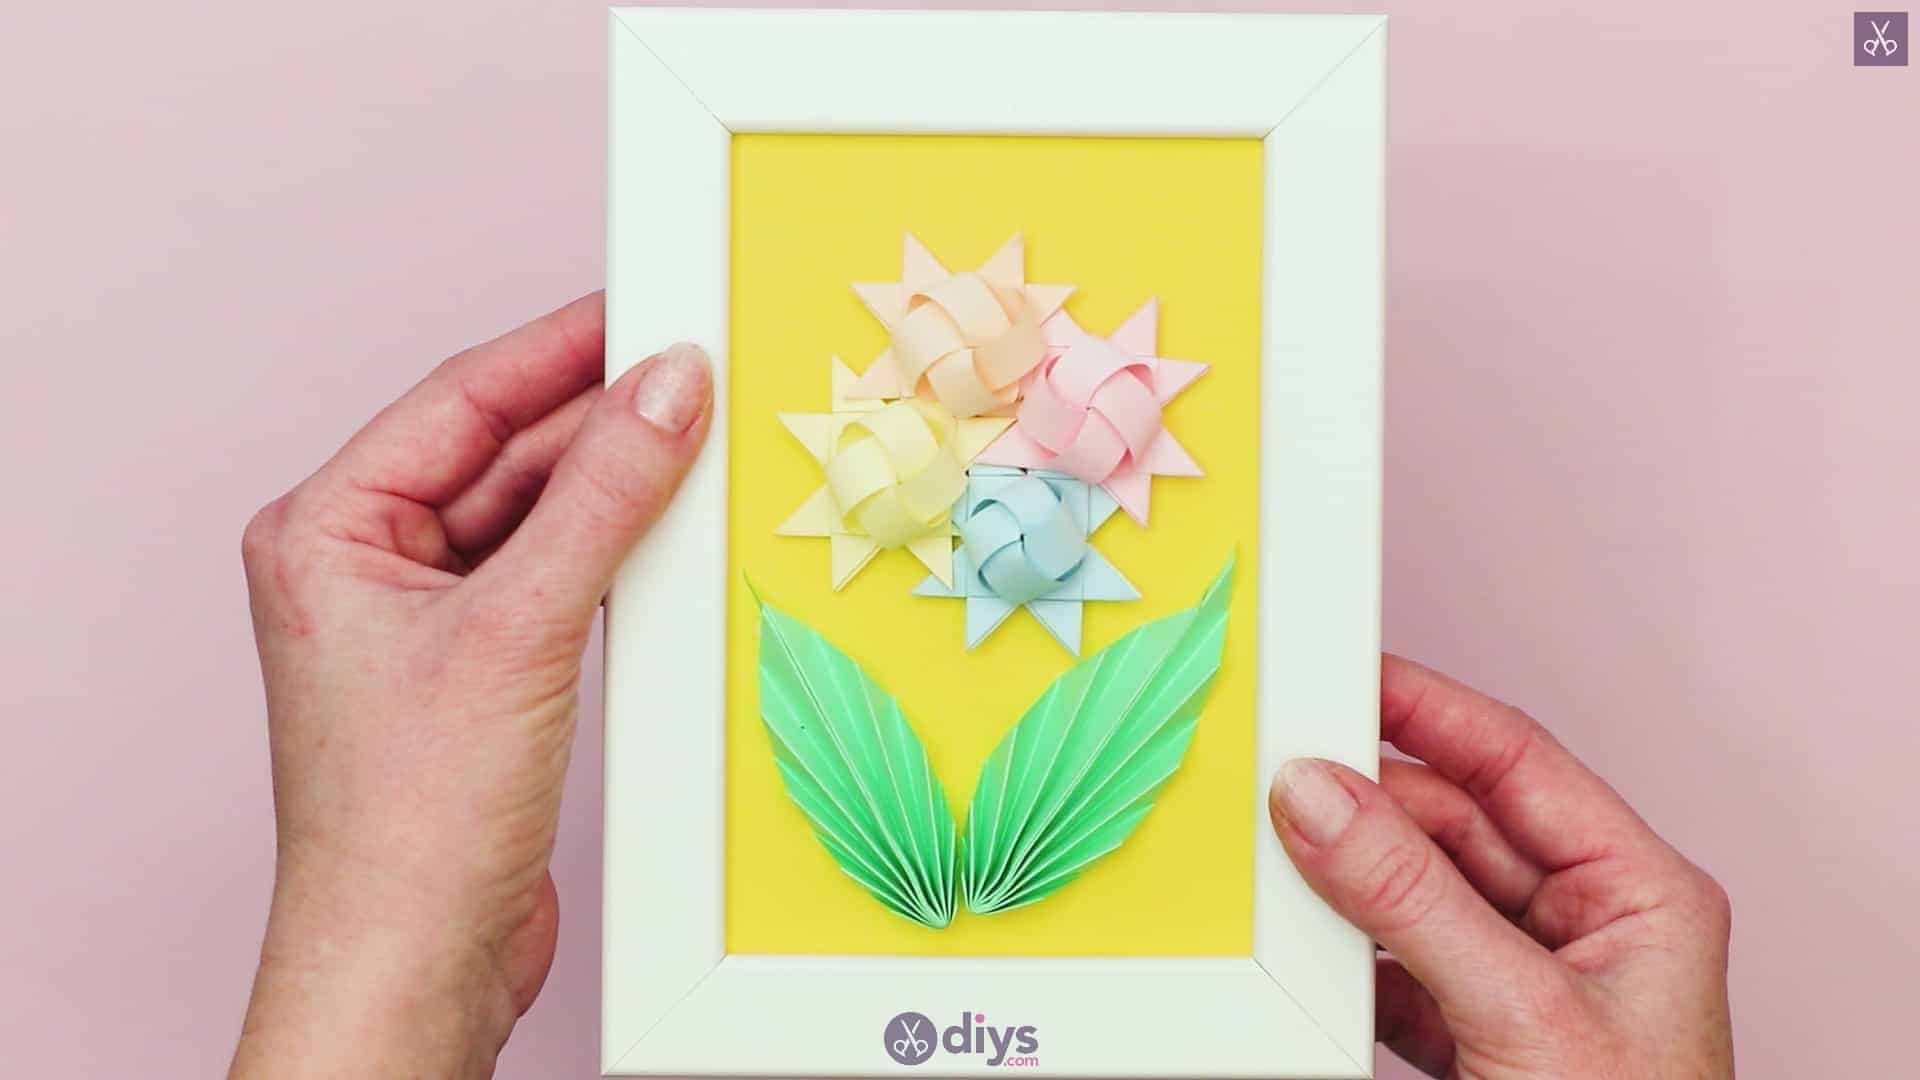
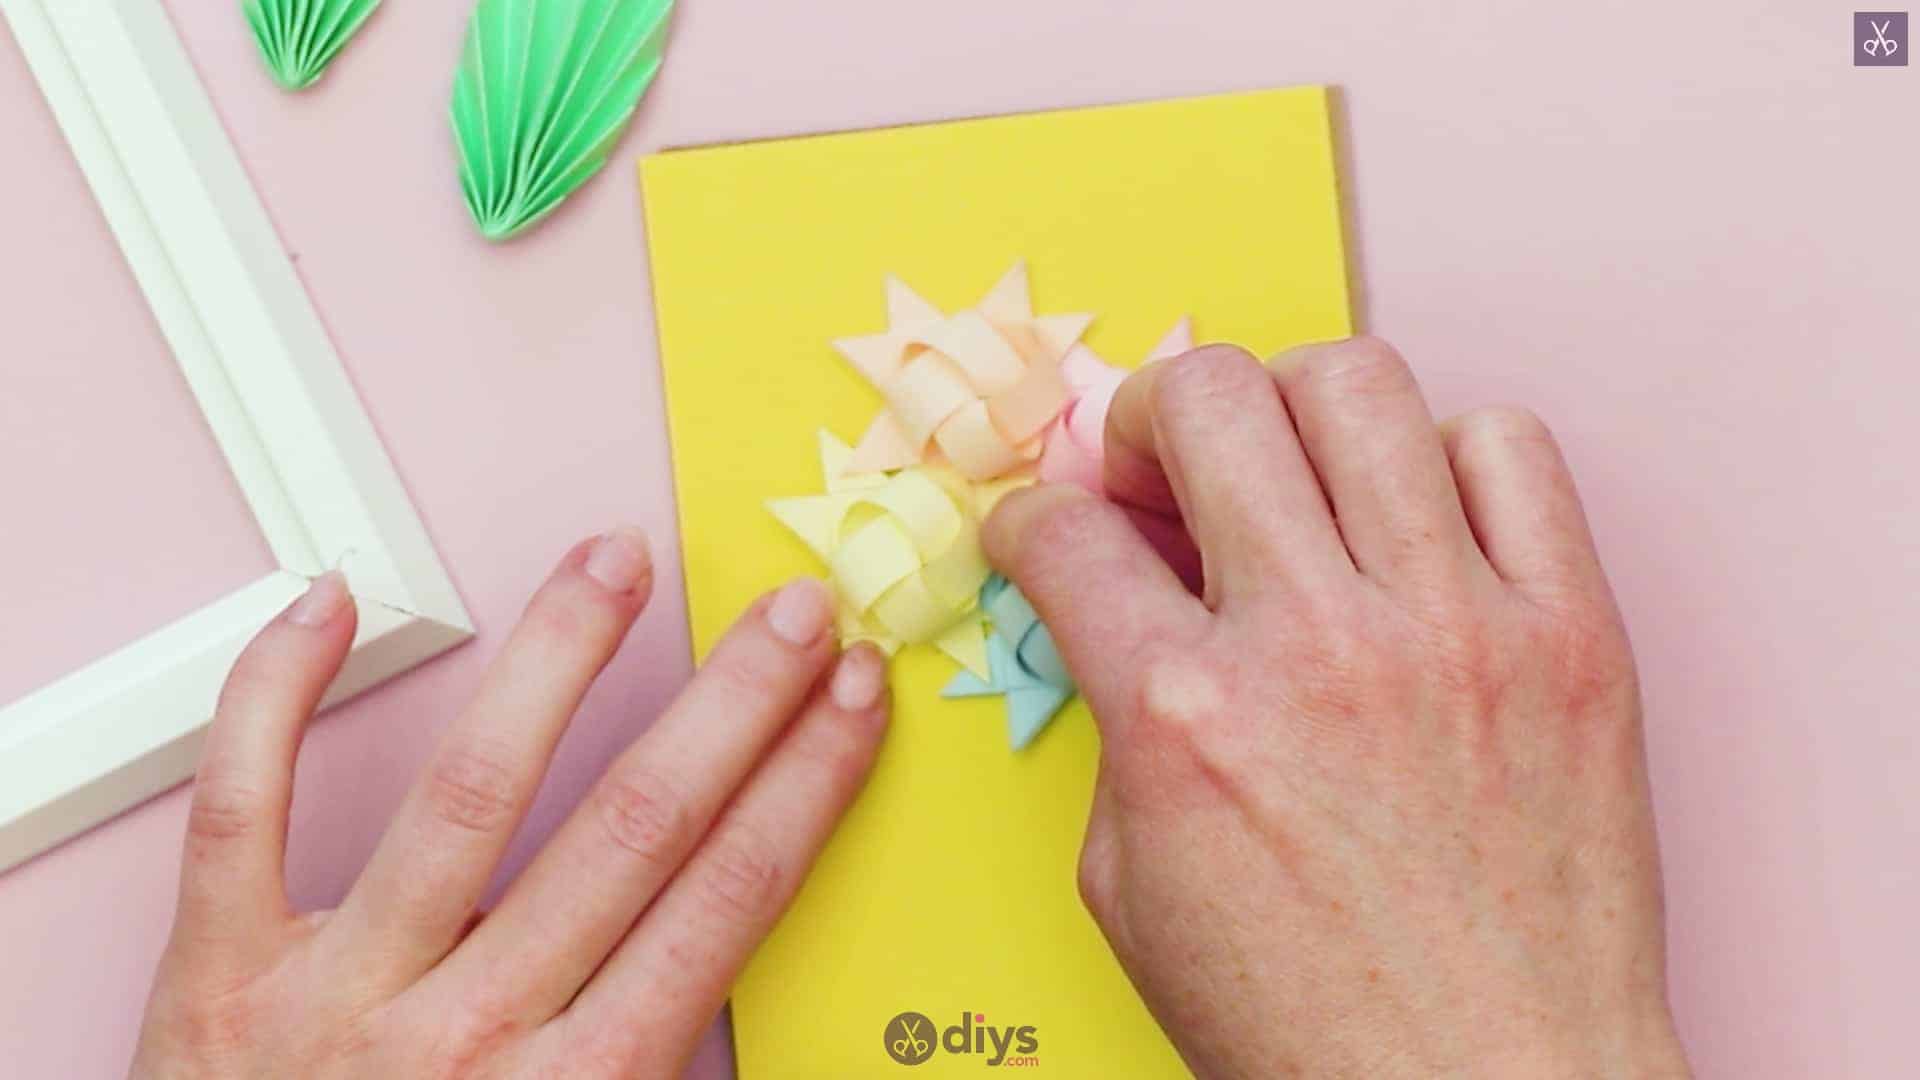
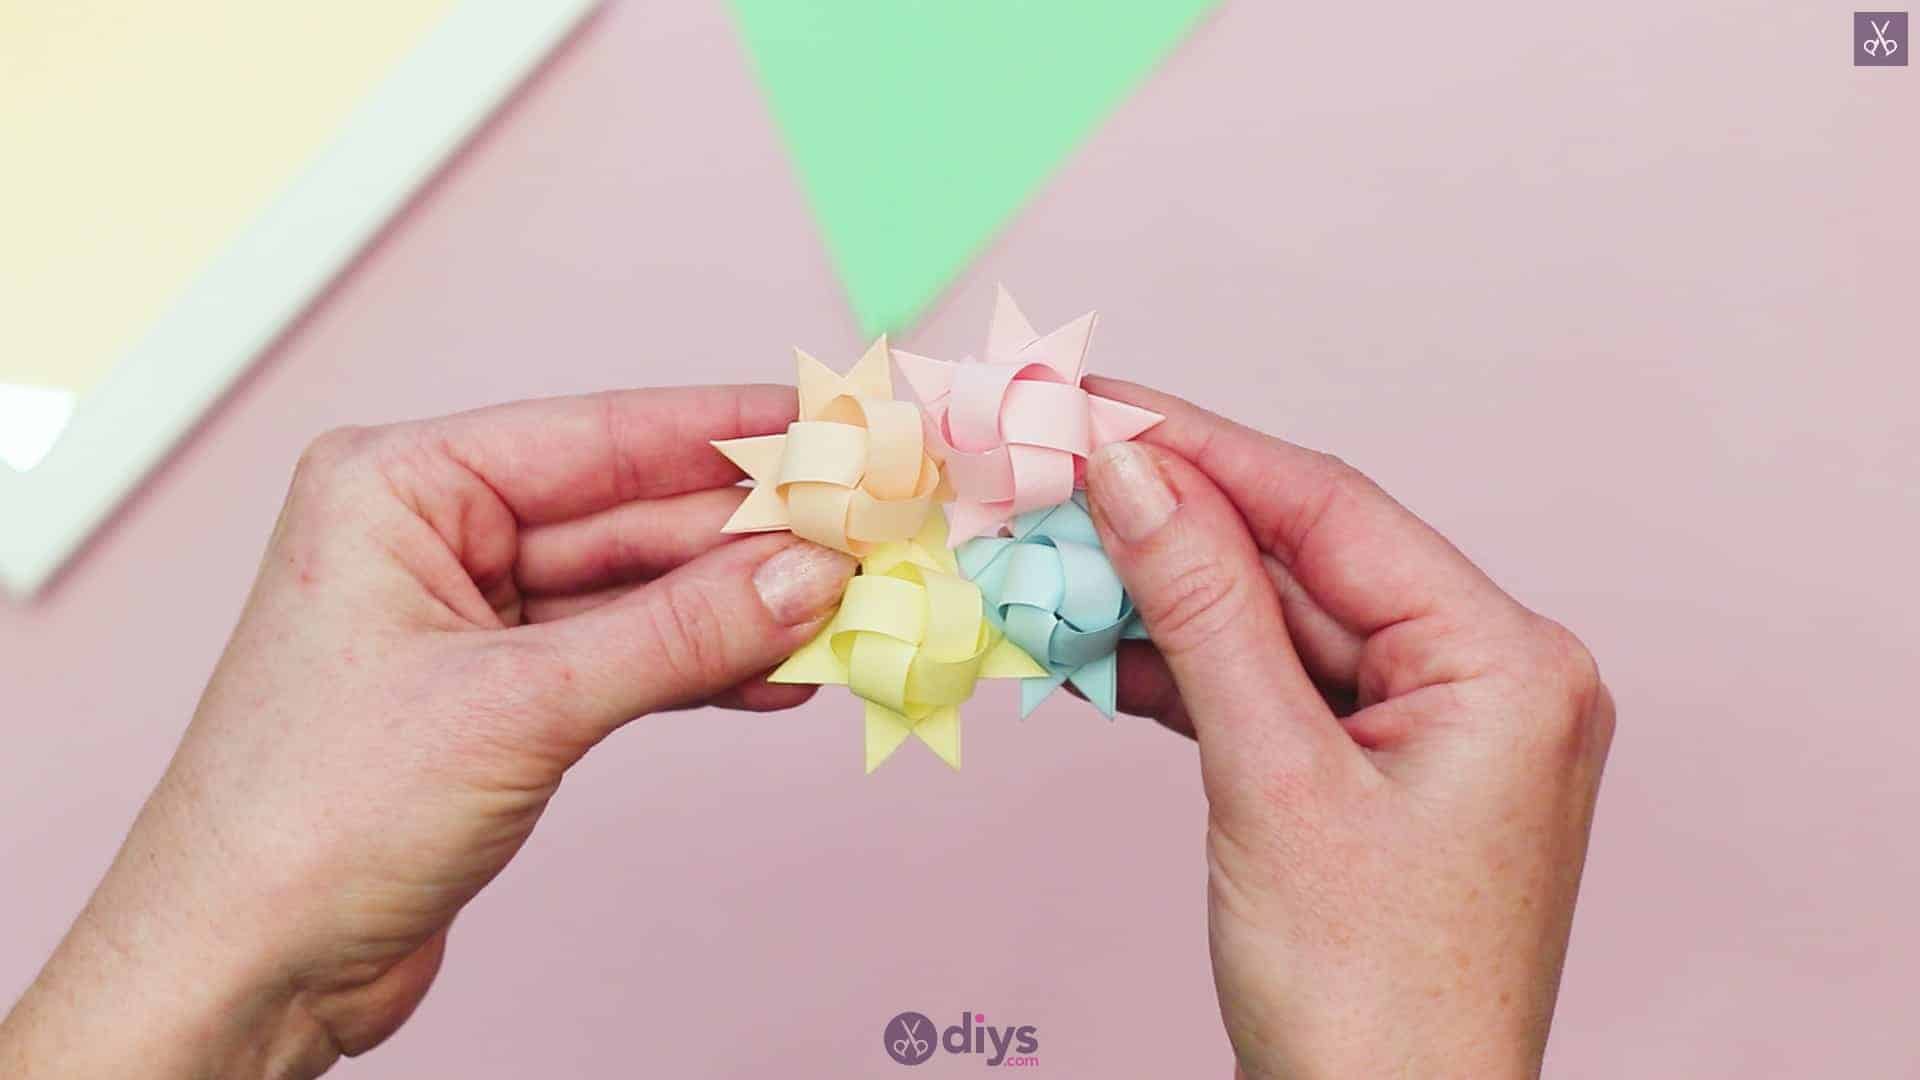
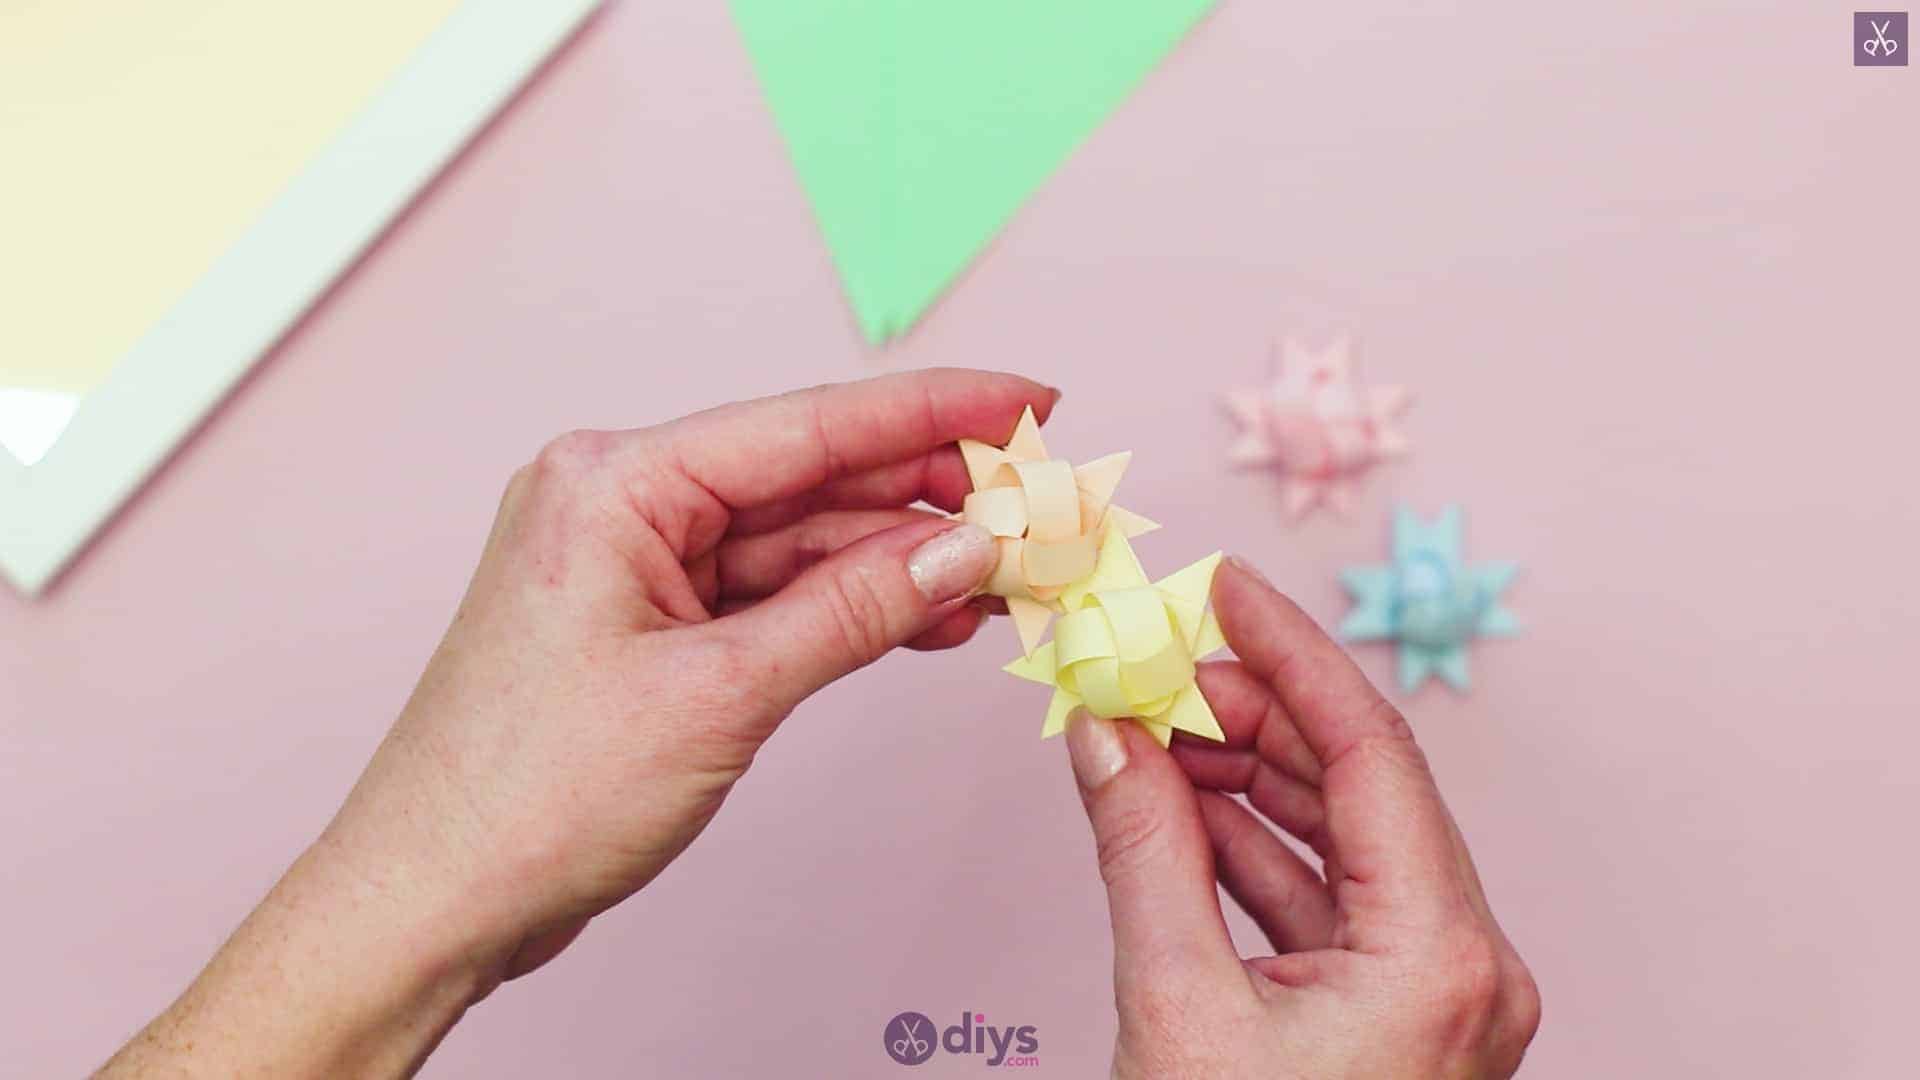
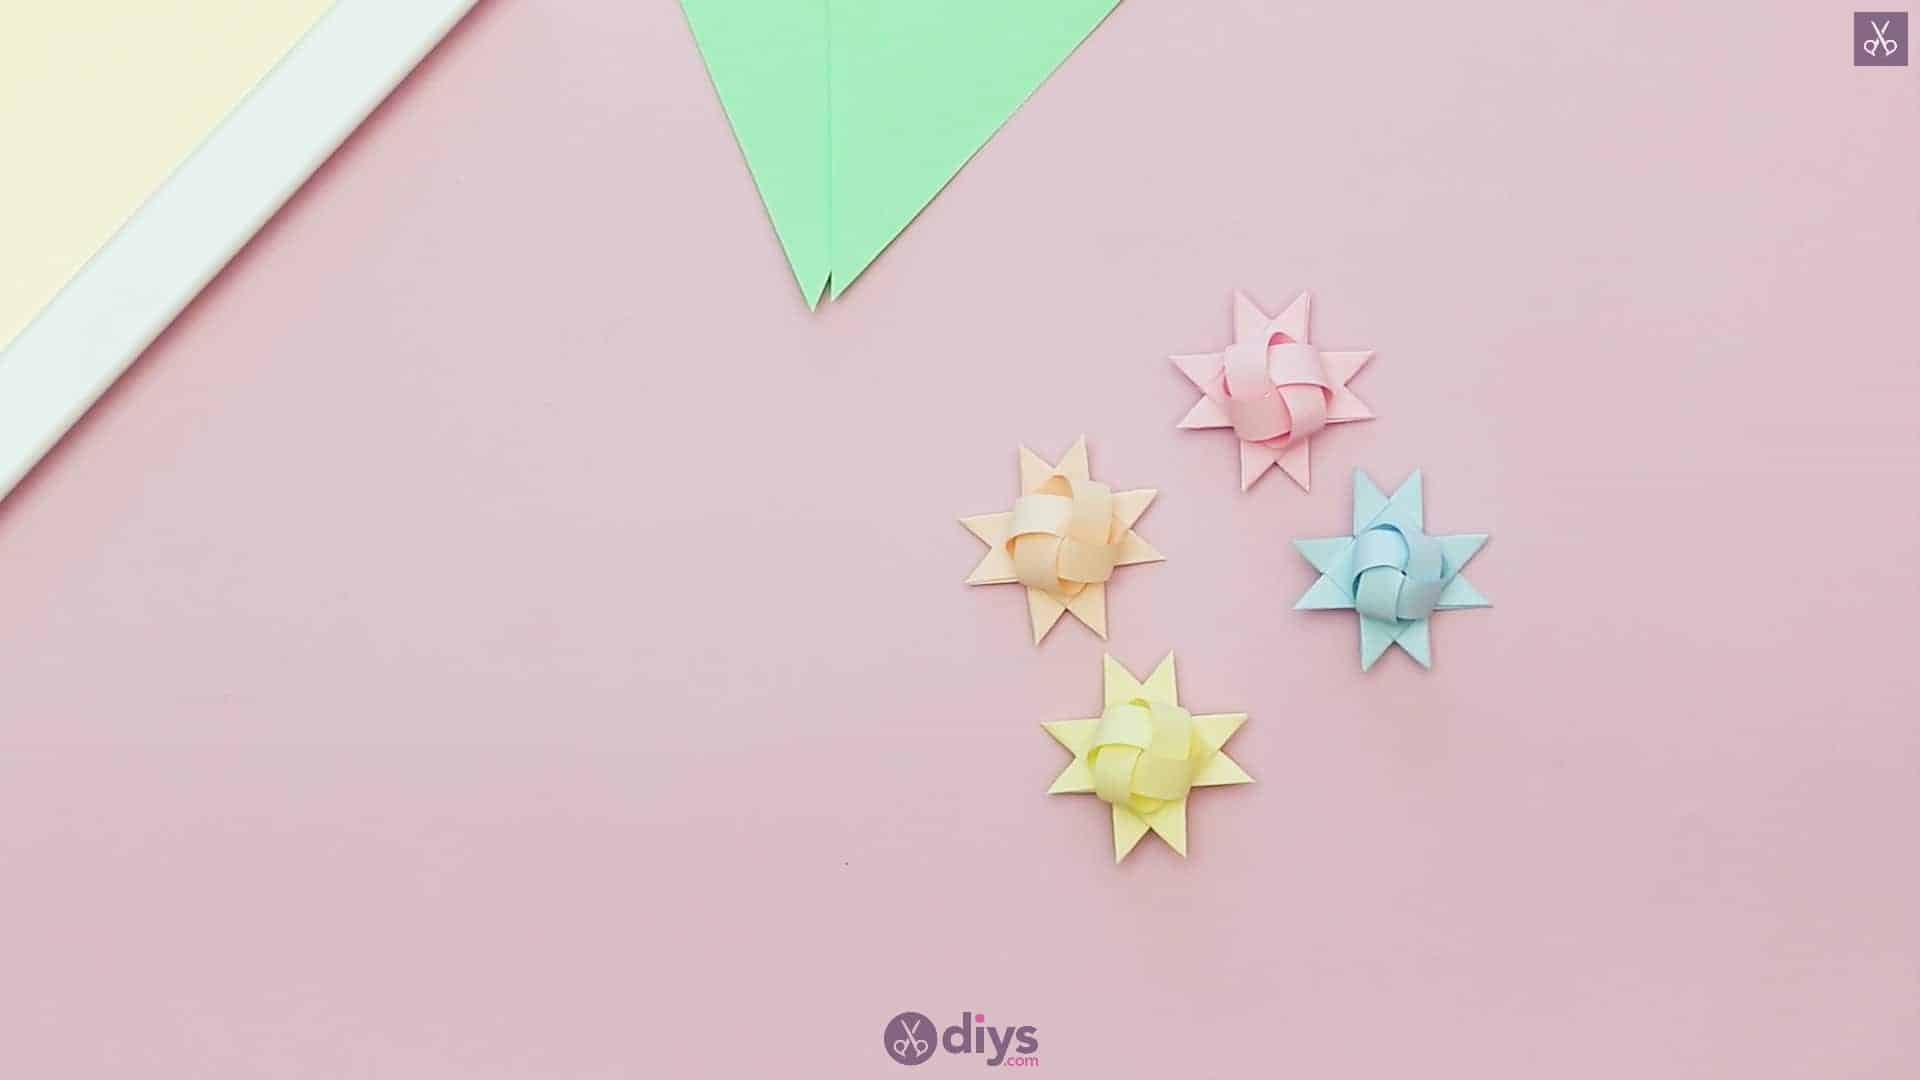
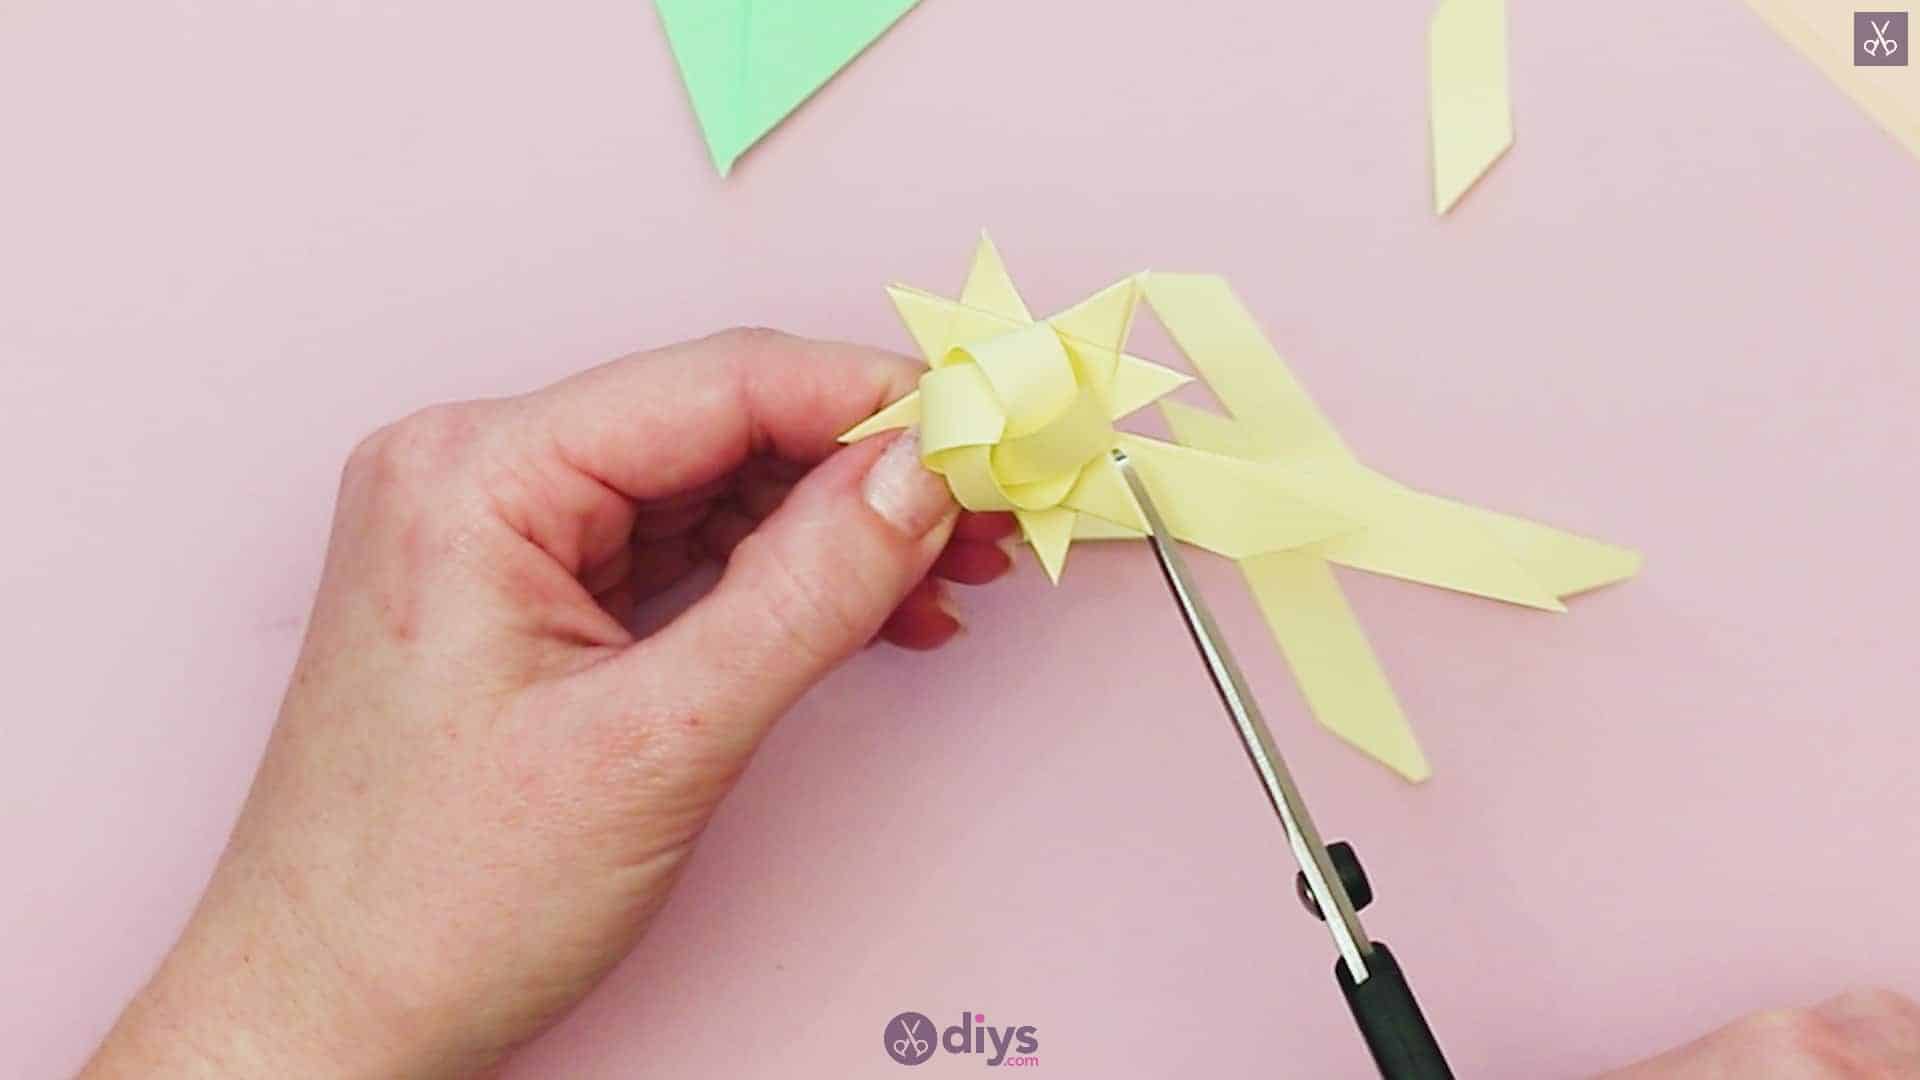
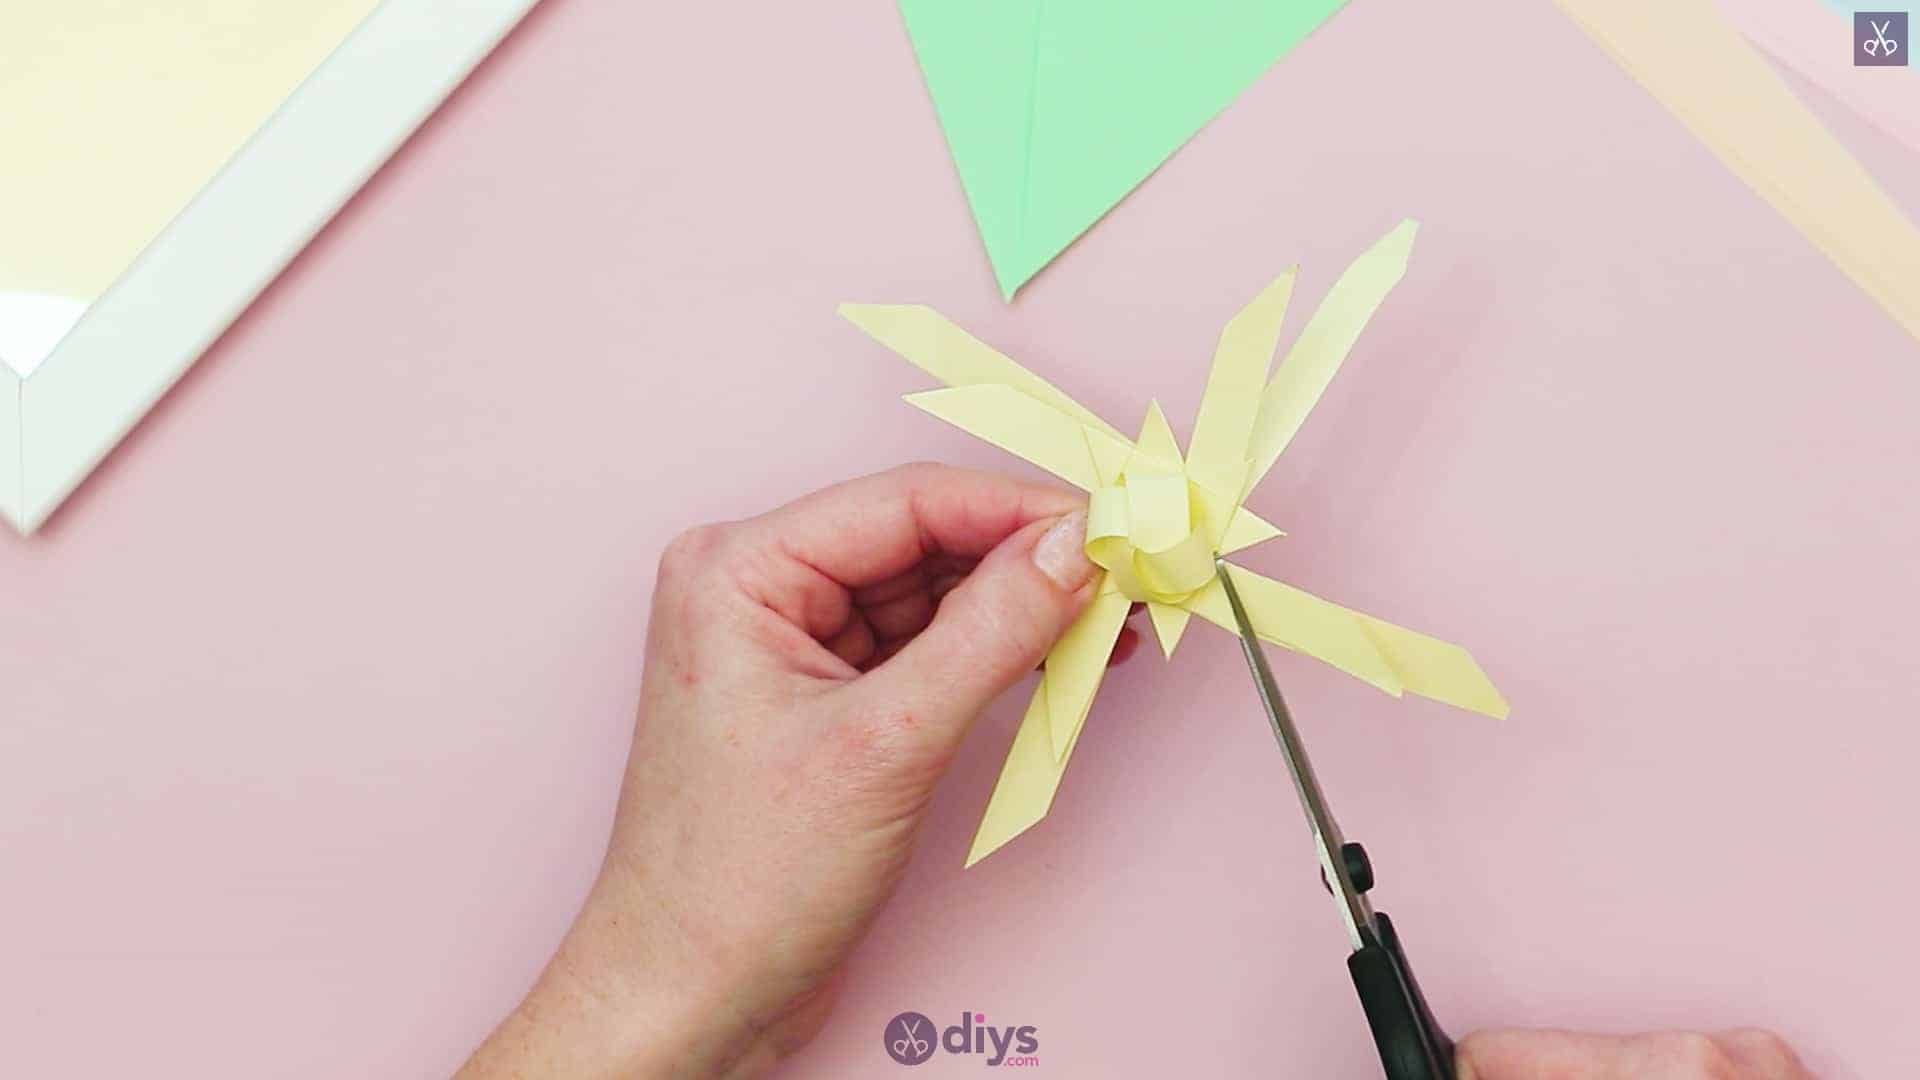
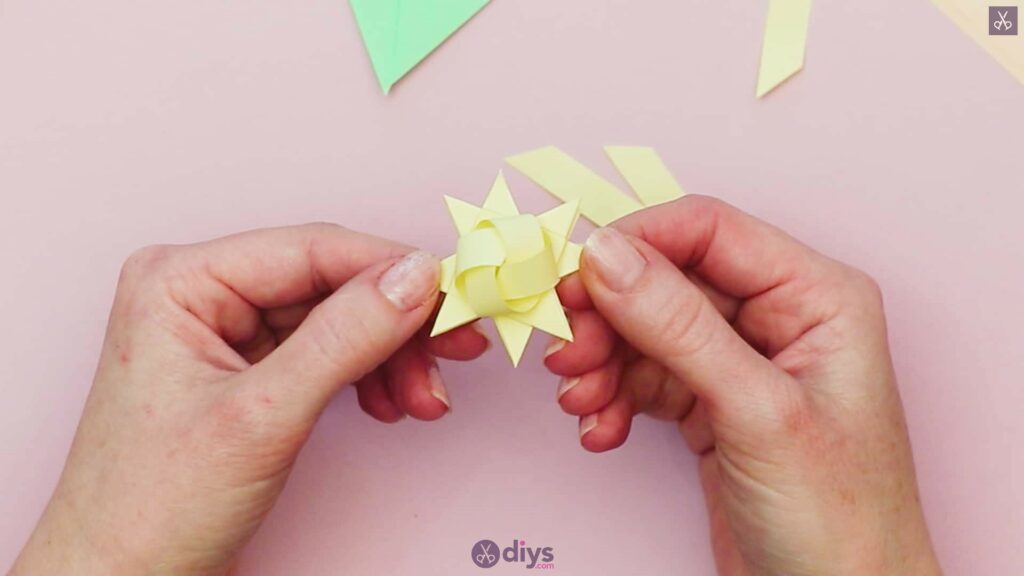
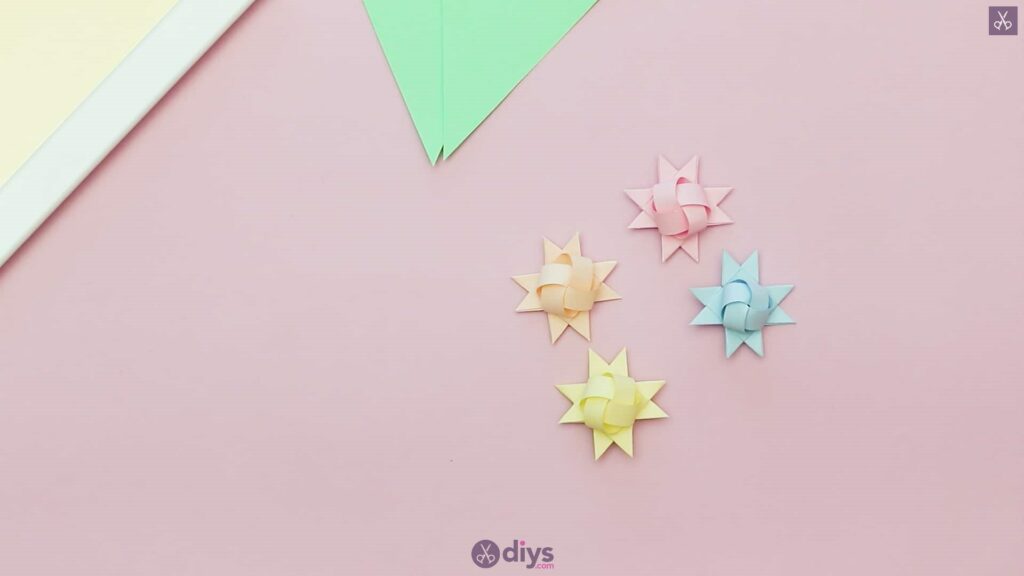
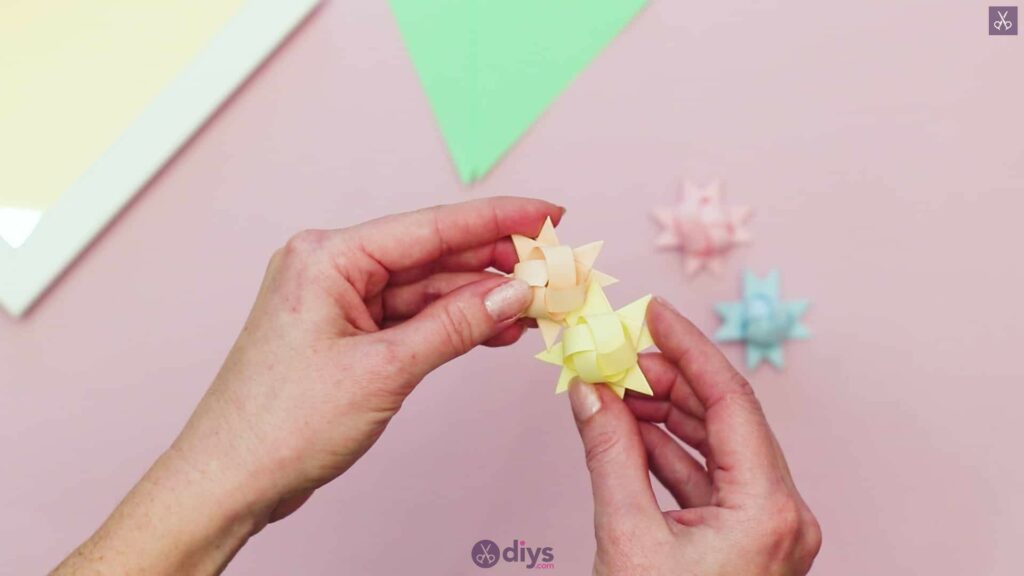
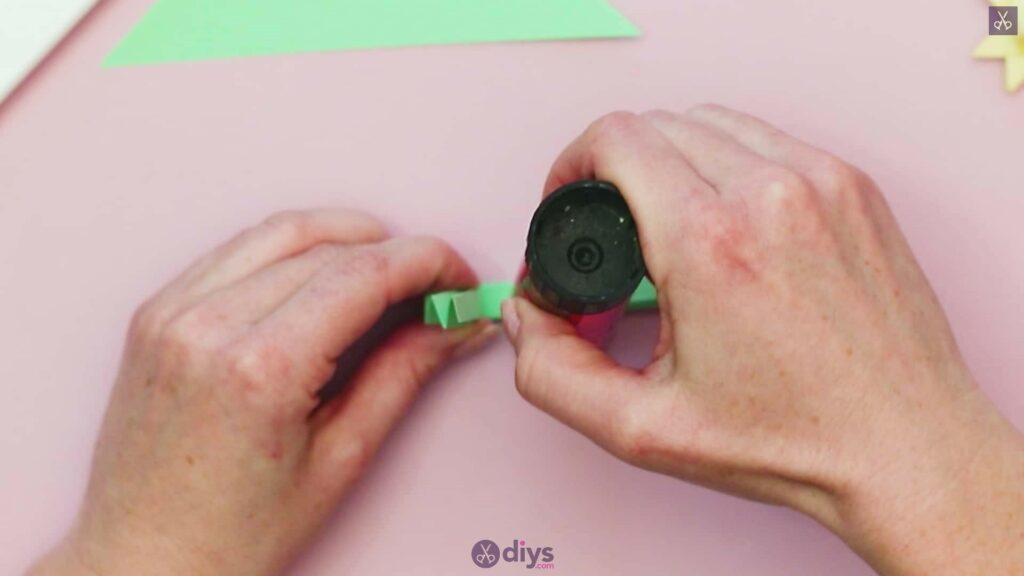
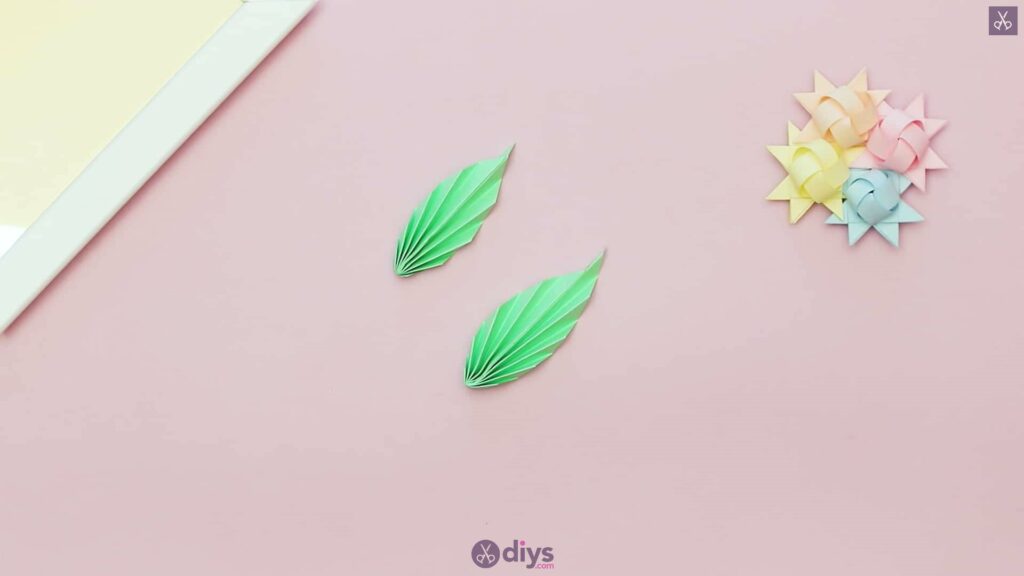
Now you’ll trim the excess strips that are left! To do this most neatly, find the original angled points you made with creases at the beginning, your strips will be sitting right behind them. Angle your scissors along the points’ edges and trim the excess from the strips so they hide behind those points. You will then have a finished flower with a rounded woven centre and a pointed border all the way around the edge. Repeat all of these steps so far for your other colours until you’ve got as many flowers as you please! I chose four colours- yellow, pink, orange, and blue- and made four flowers.
Step 9:
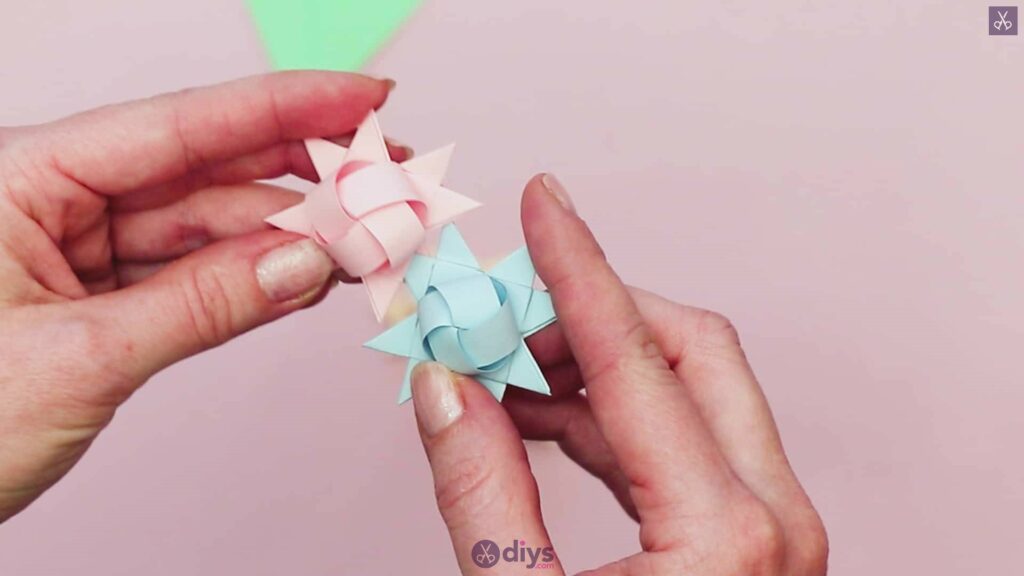
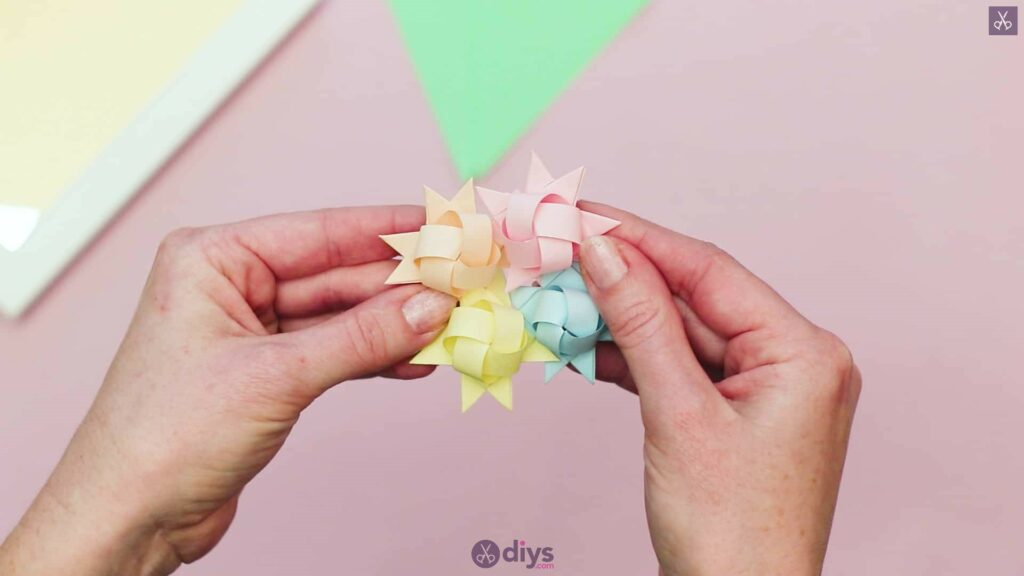
Turn your four flowers into one central piece like a bouquet. Pick up the first two and stagger them so you can tuck the upper left points of the lower flower into the spaces between the lower left points of the upper flower. Do the same with the second two, but inverting your stagger; if the flower in your left hand was the upper and the flower in your right hand was the lower on the first pair, do the opposite this time. Diagonally tuck the lower flower’s points into those on the lower edge of the upper flower. Now take your pairs and put them together to make one bunch; hold them next to each other and tuck the lefthand points of the flowers on the right into the spaces between the righthand points of the flowers on the left so that all four are attached.
Step 10:
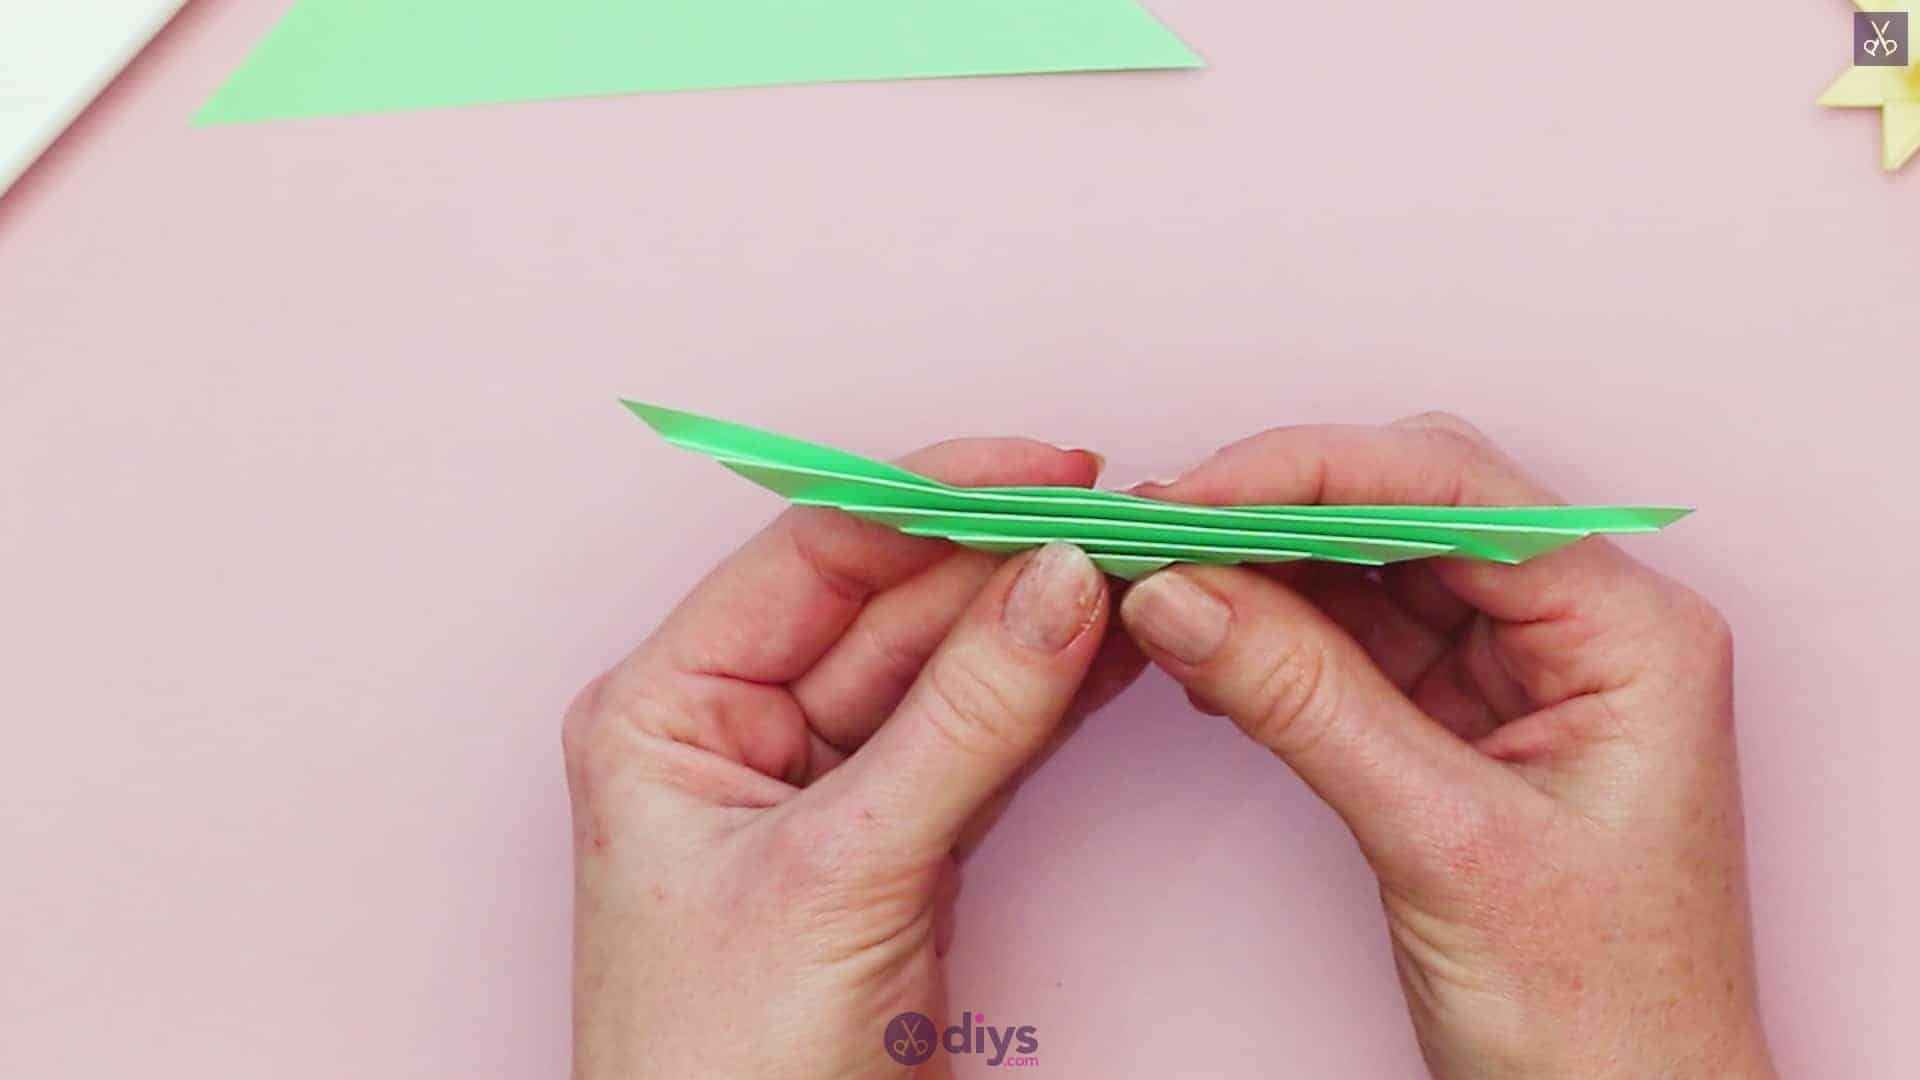
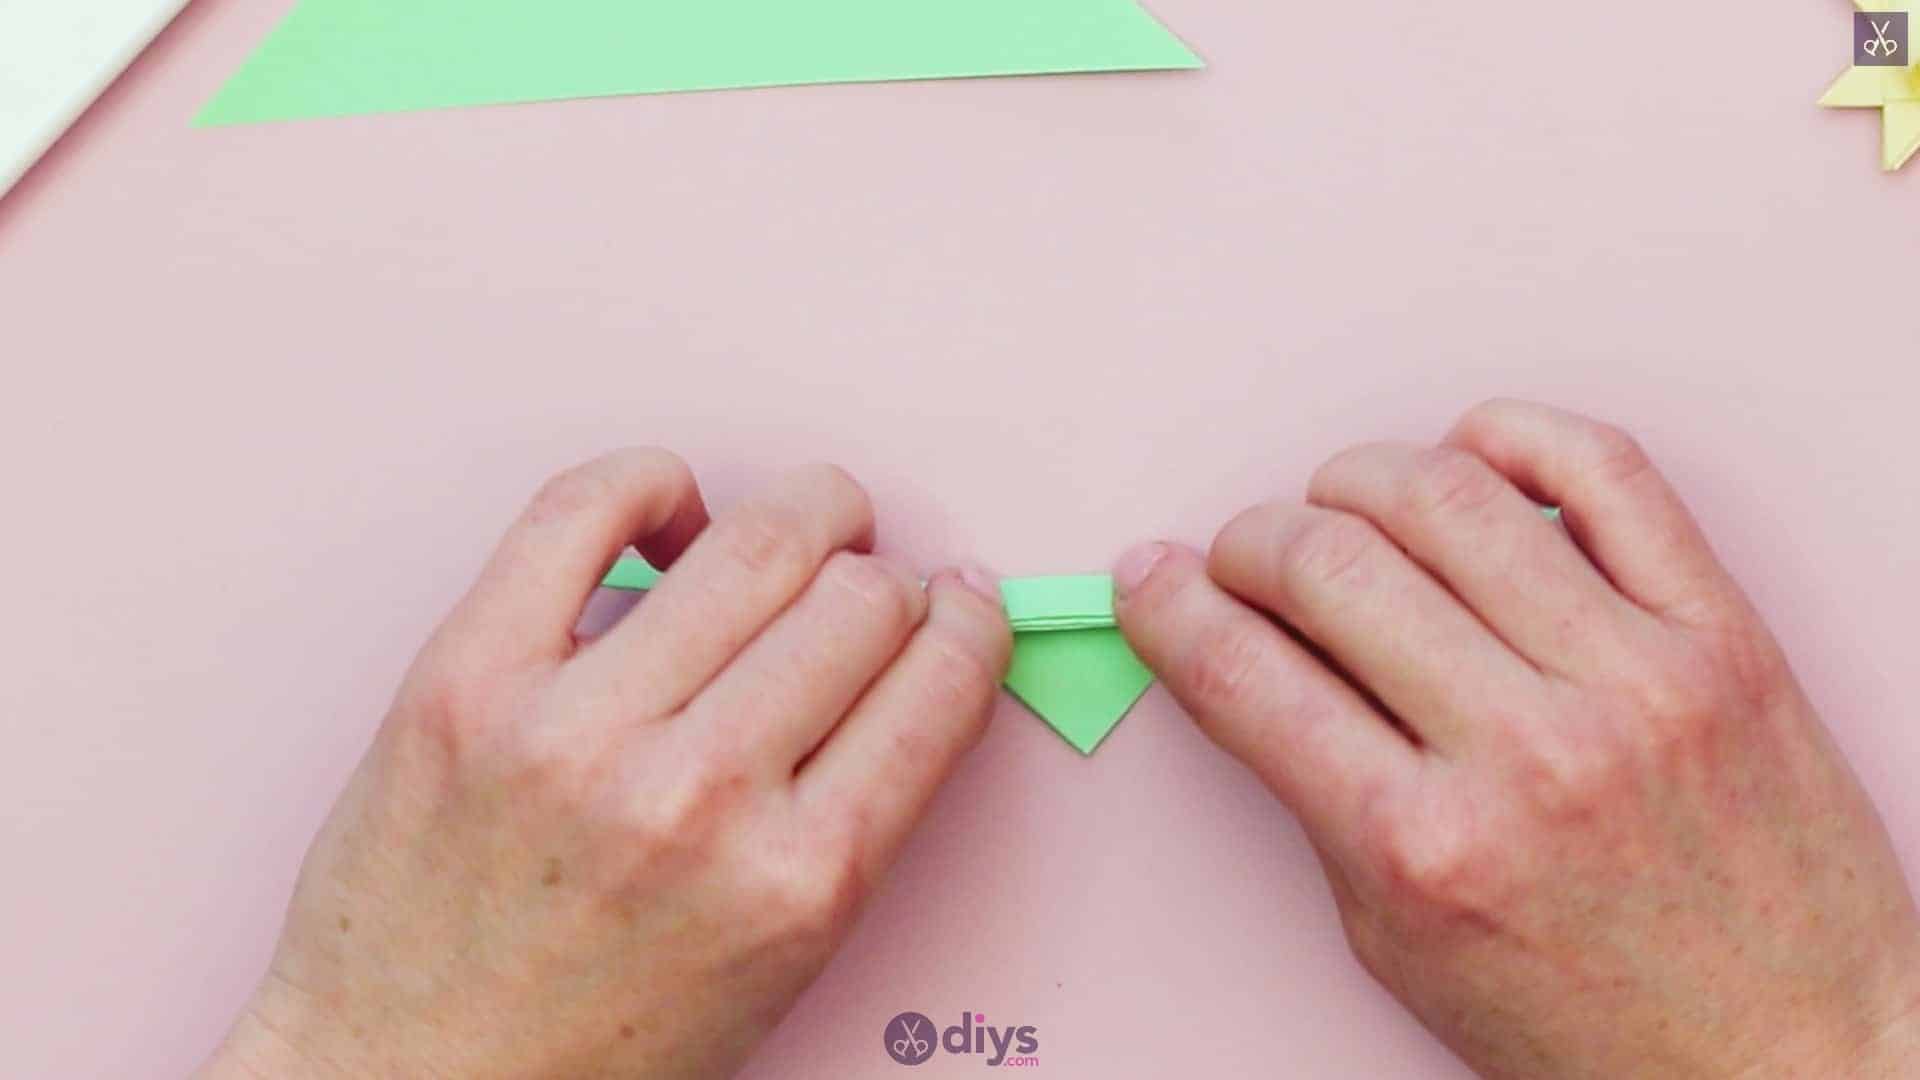
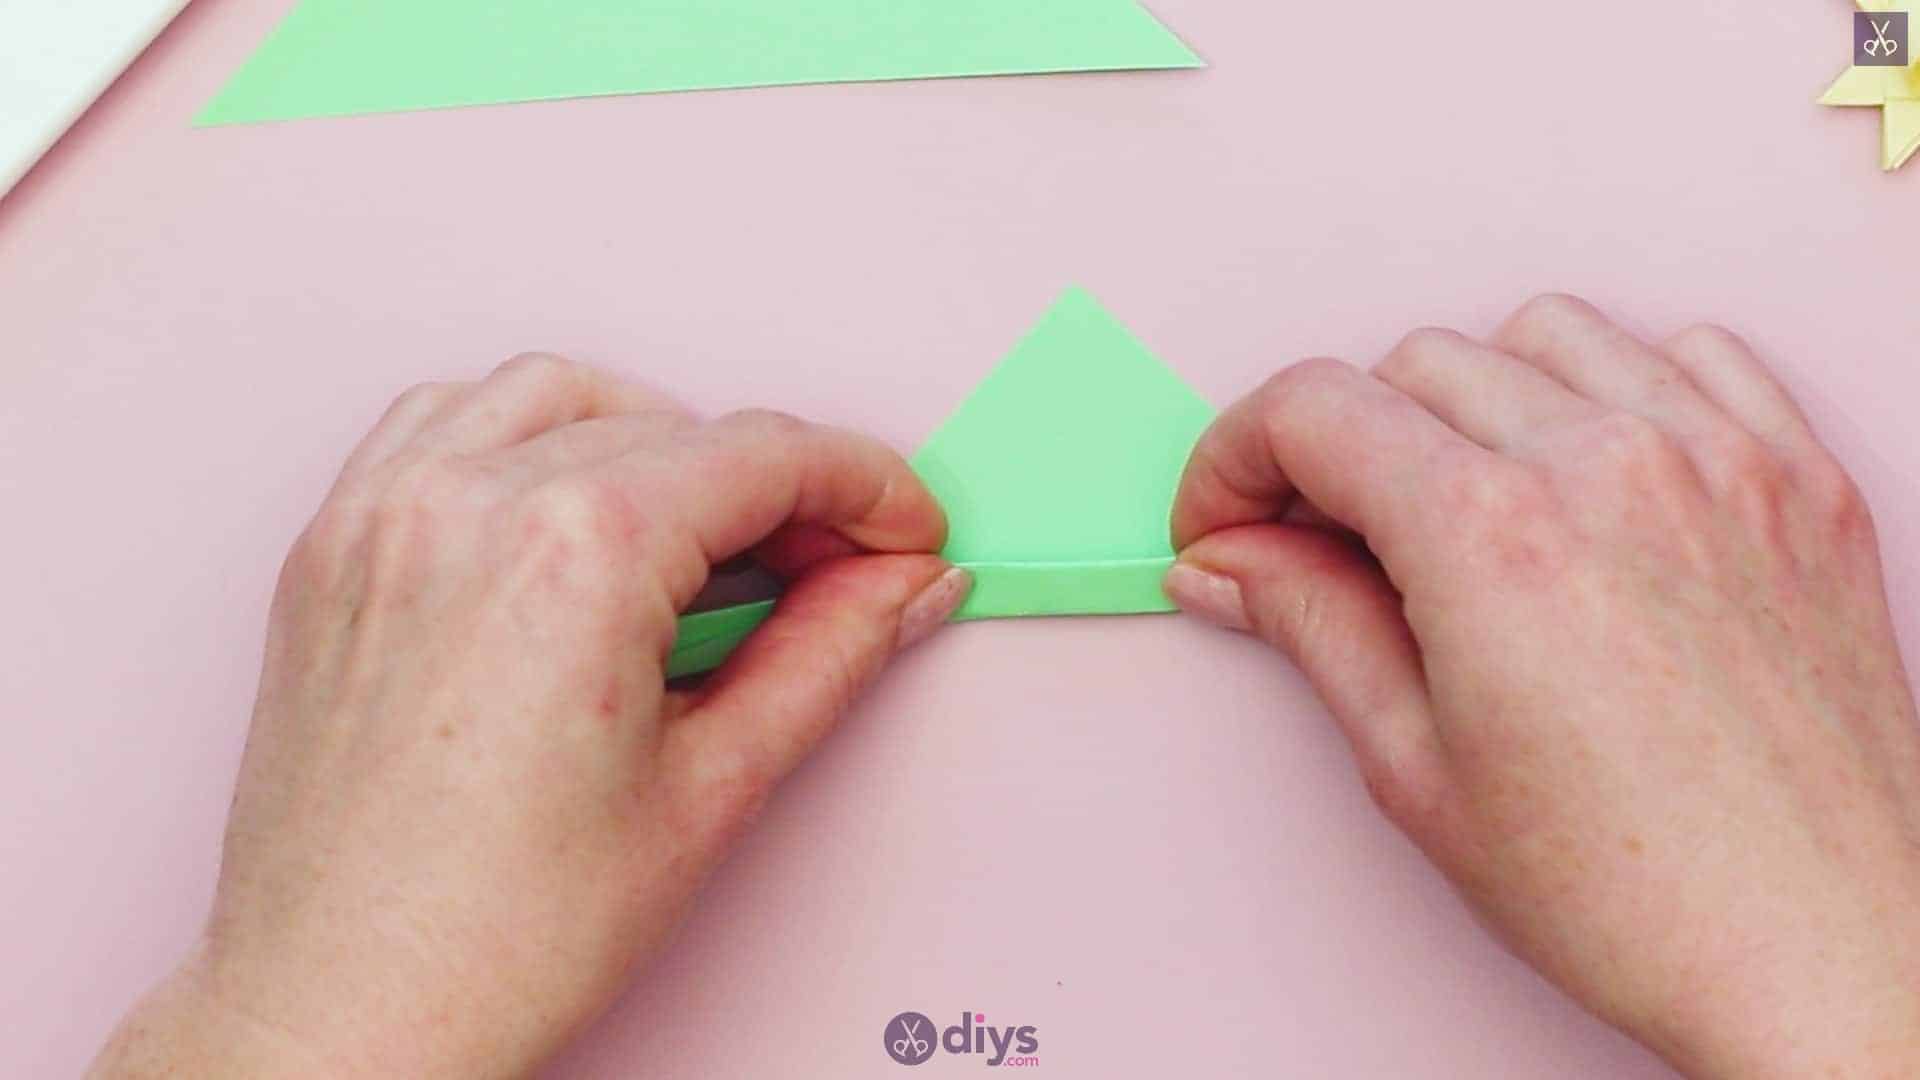
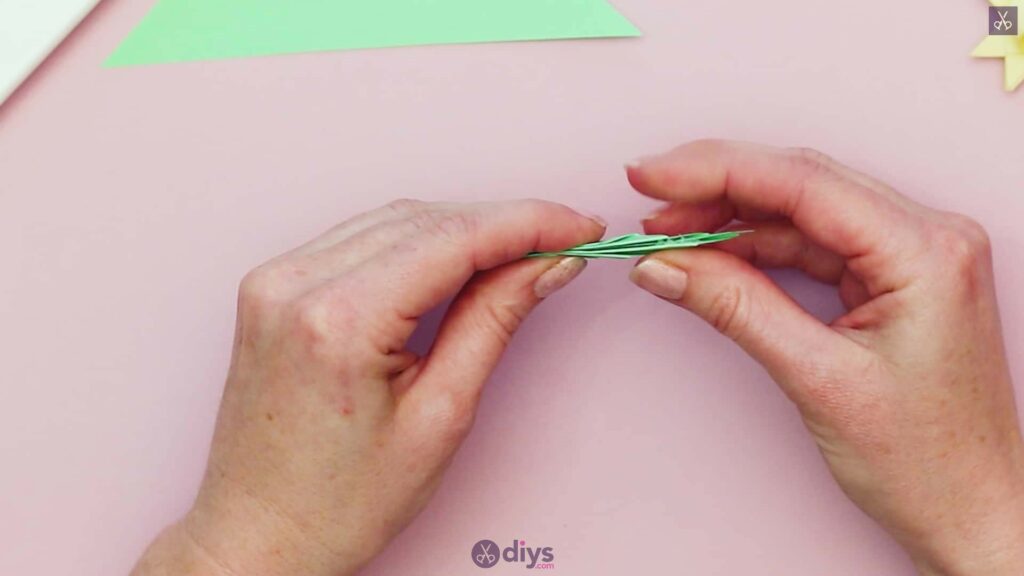
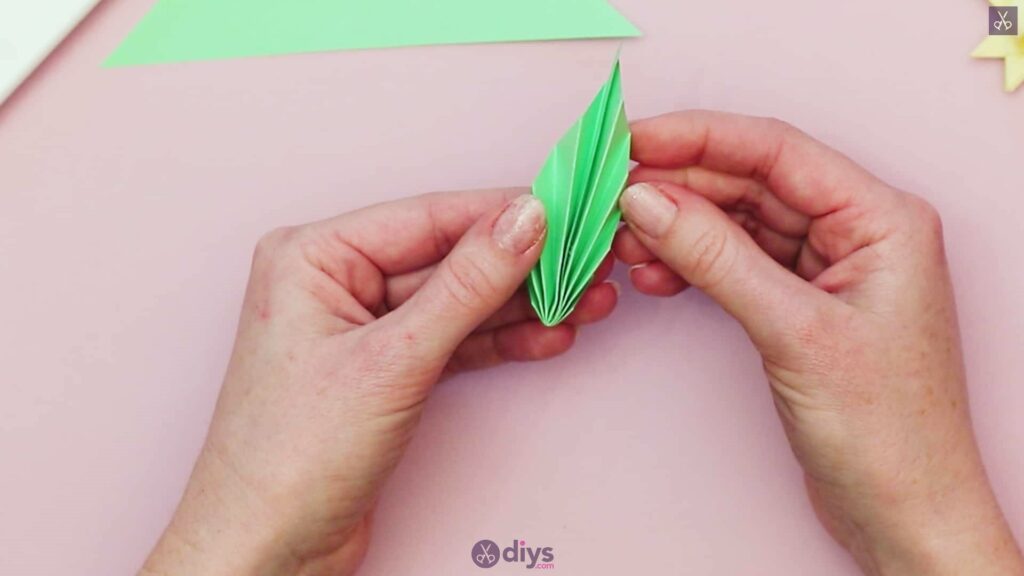
Use your green triangles to make your leaves. Lay the first one on your tabletop with its long, flat bottom edge facing downward and its point facing upwards. Fold your bottom edge upwards about a centimetre and crease it, then pick the triangle up and flip it over so you can fold that bottom edge back on itself the other way, making a crease the same size as your first one. Turn the triangle back over to the first side and make another fold, beginning an accordion-like pattern. Repeat this process all the way up the triangle, right to the tip, until no more folds can be made. Turn the whole piece upside down so that the longer bottom edge is now on the top and the little folded tip is at the bottom. Find the centre of the piece’s length and fold the ends upwards at that mark, bringing the tips together above, creasing the middle spot well. Let the piece fall open again a little so that you can use your glue stick to apply glue to that bottom edge (the first fold you made), all the way along. Fold the shape closed again so the ends stay together and form a pointed tip at the top. You can let the rest of the folded layers open as they please and see how they make a leaf shape. Repeat this entire process with your second green paper triangle to make a second leaf.


Step 11:
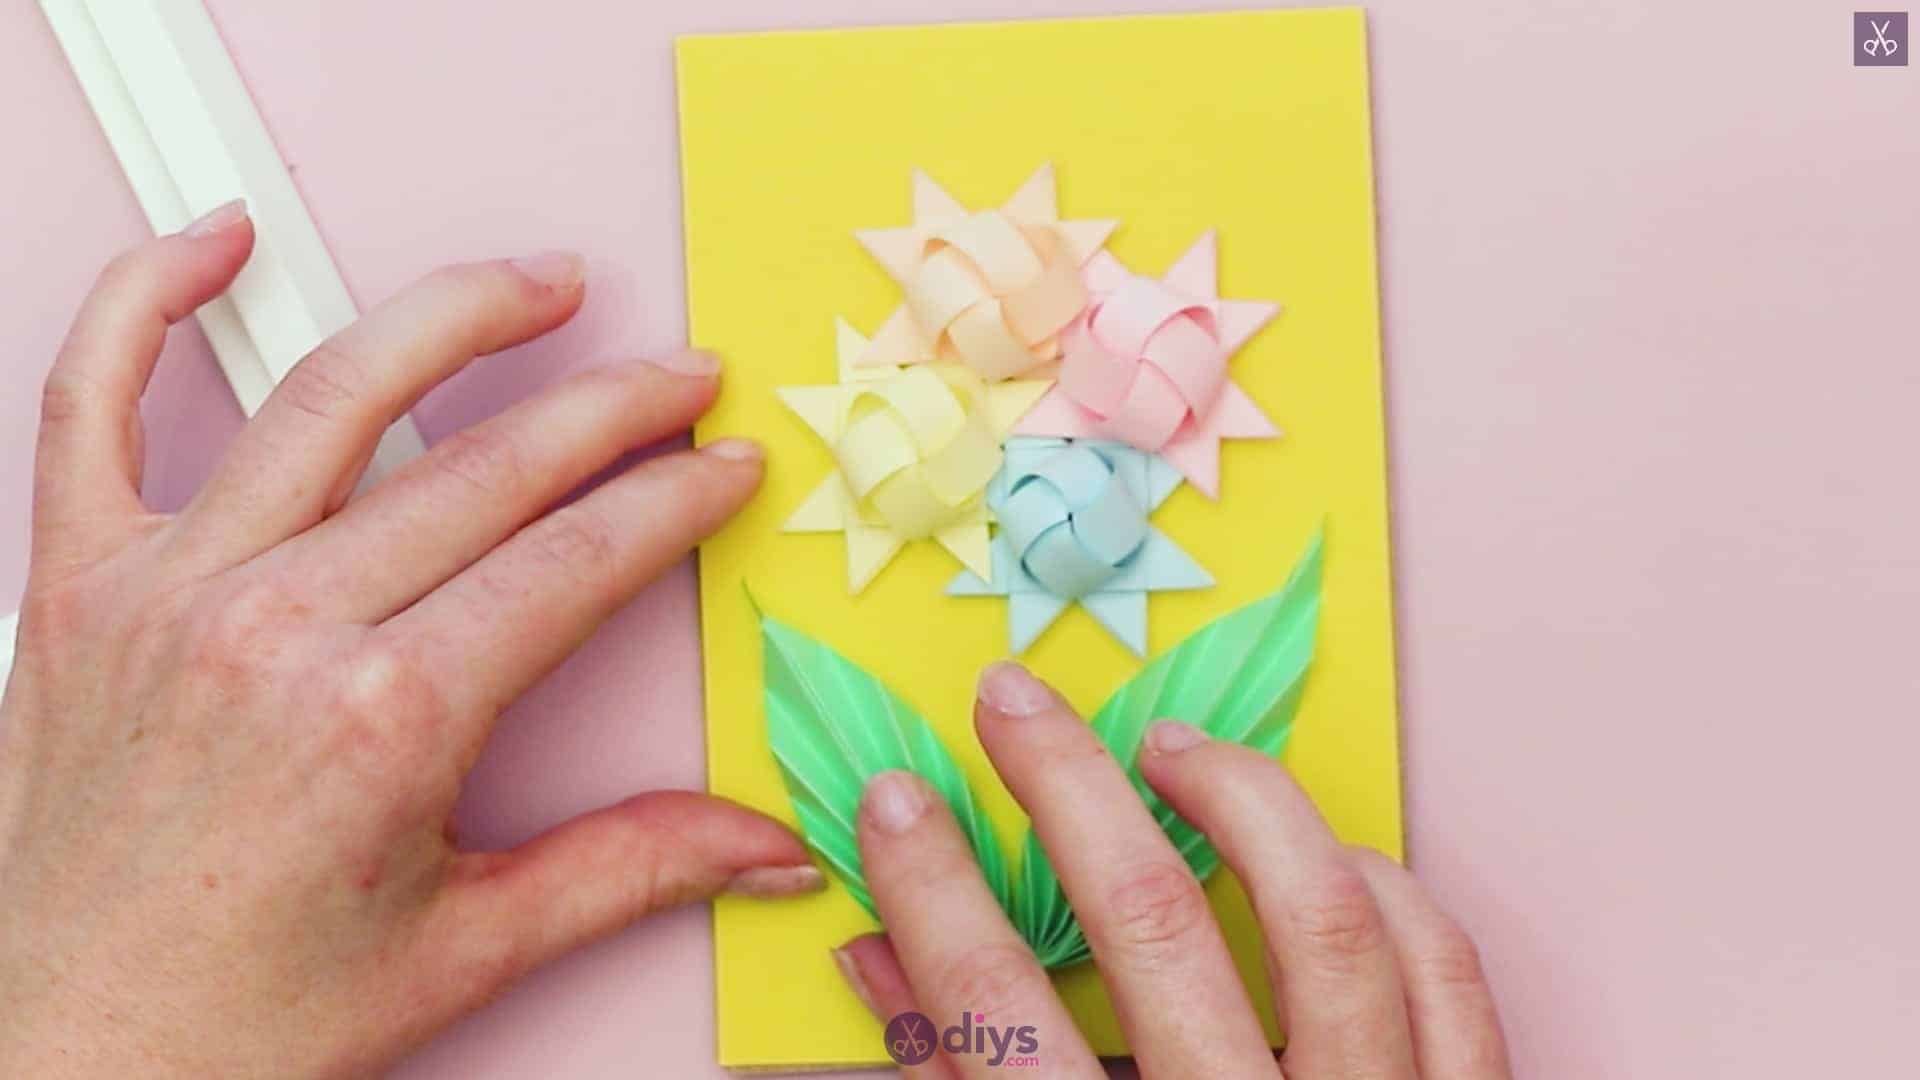
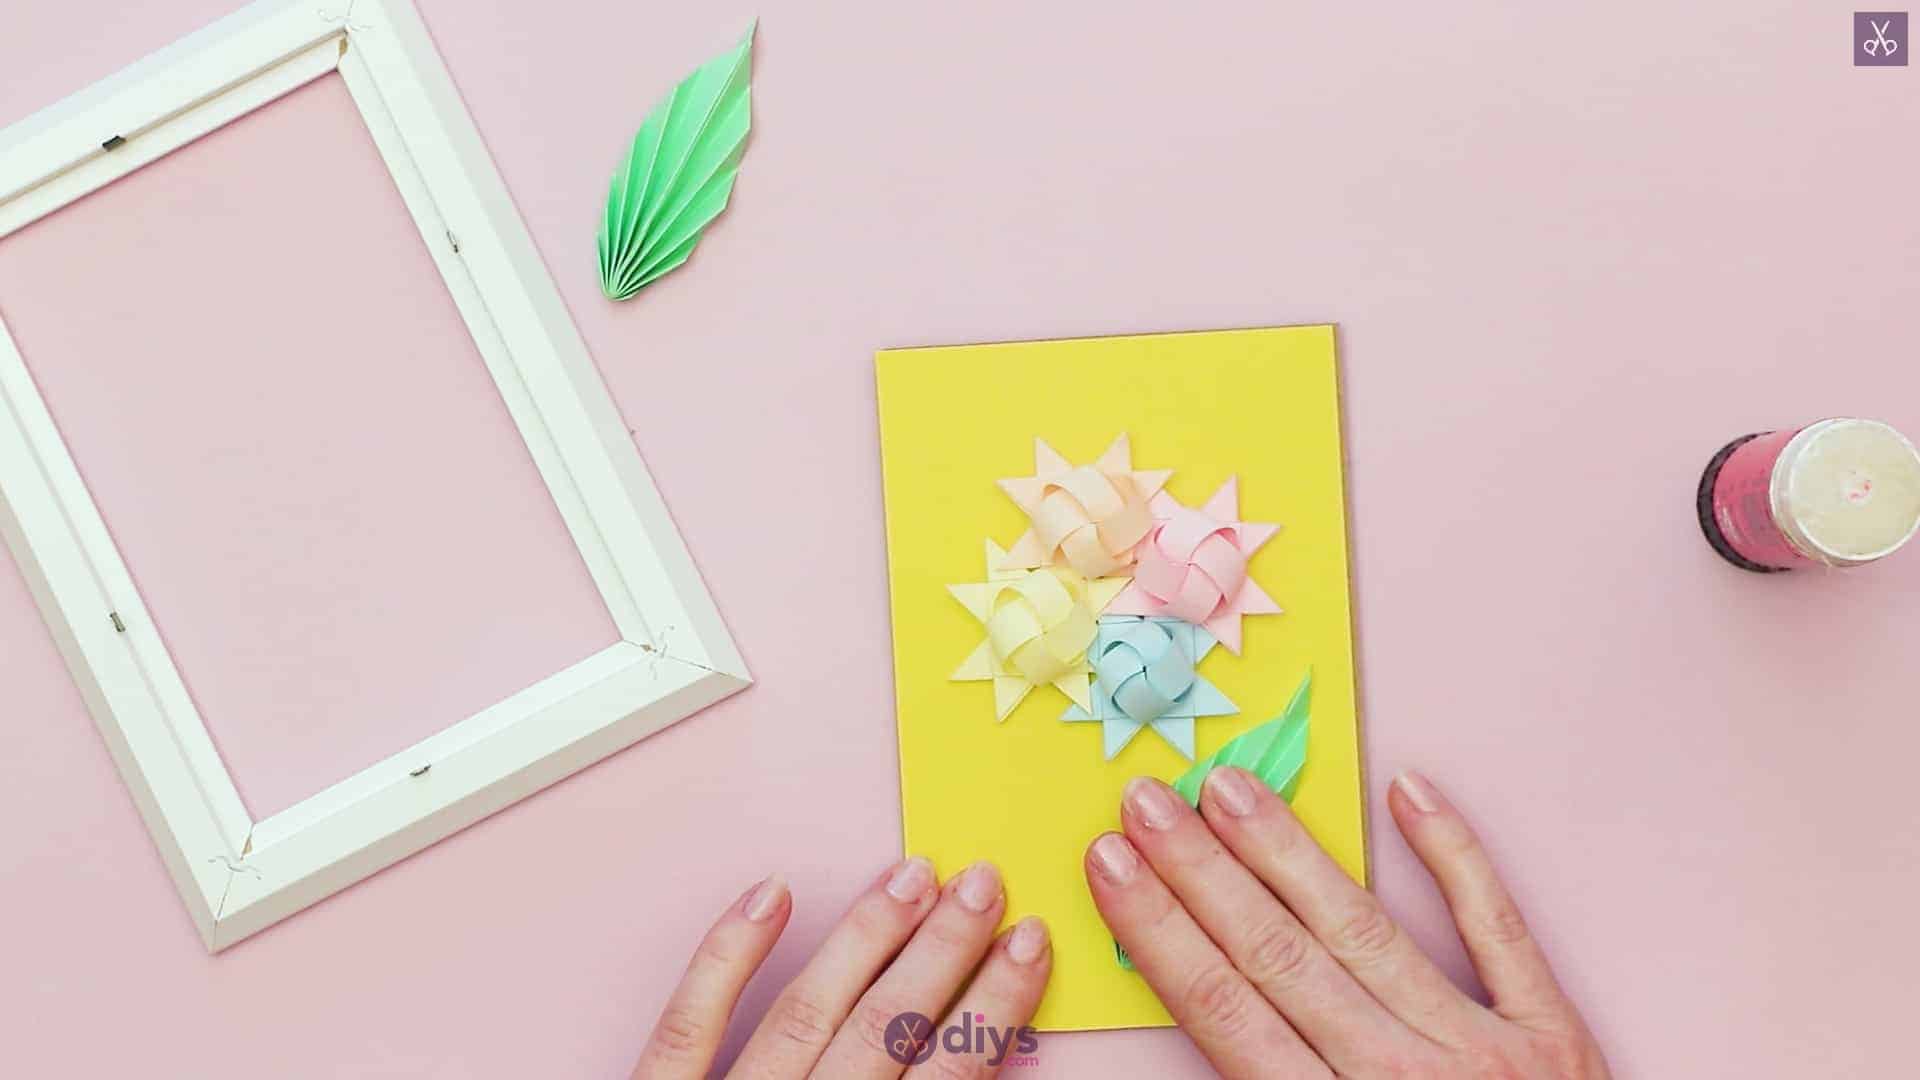
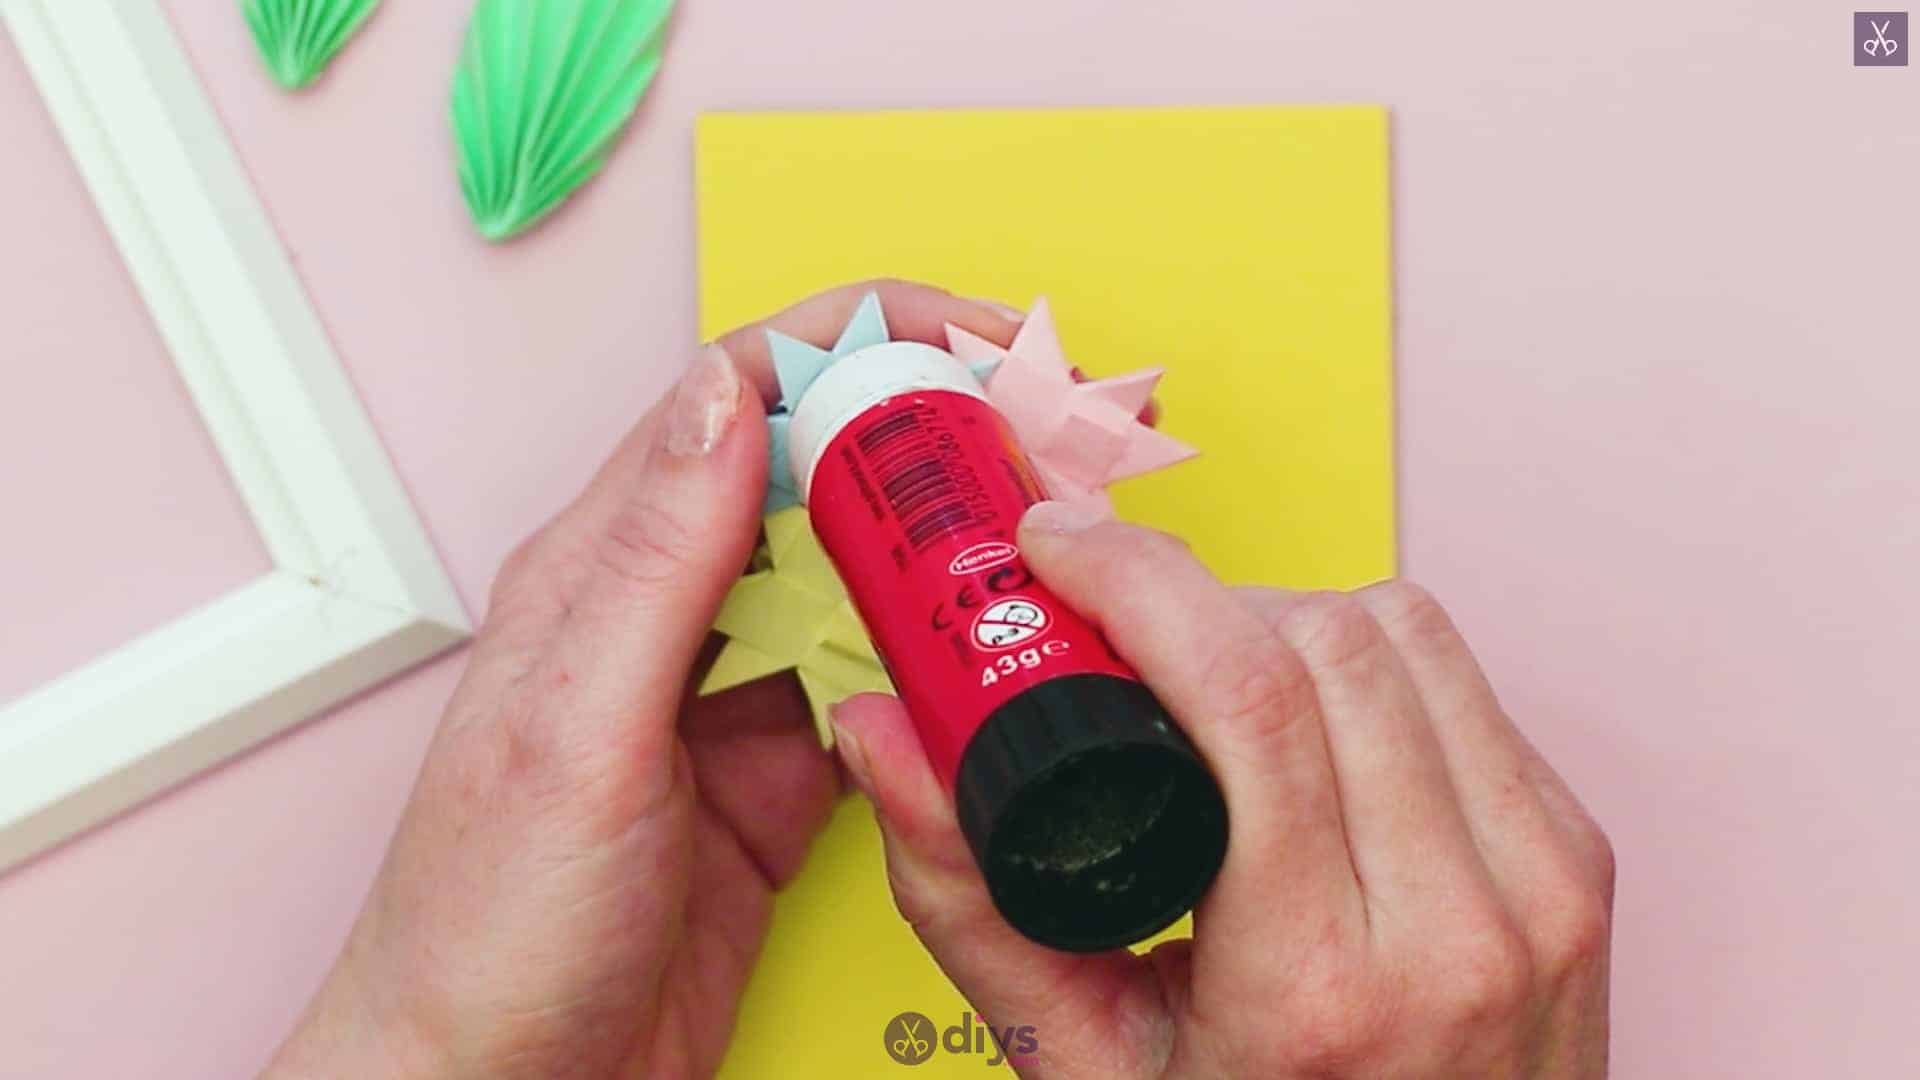
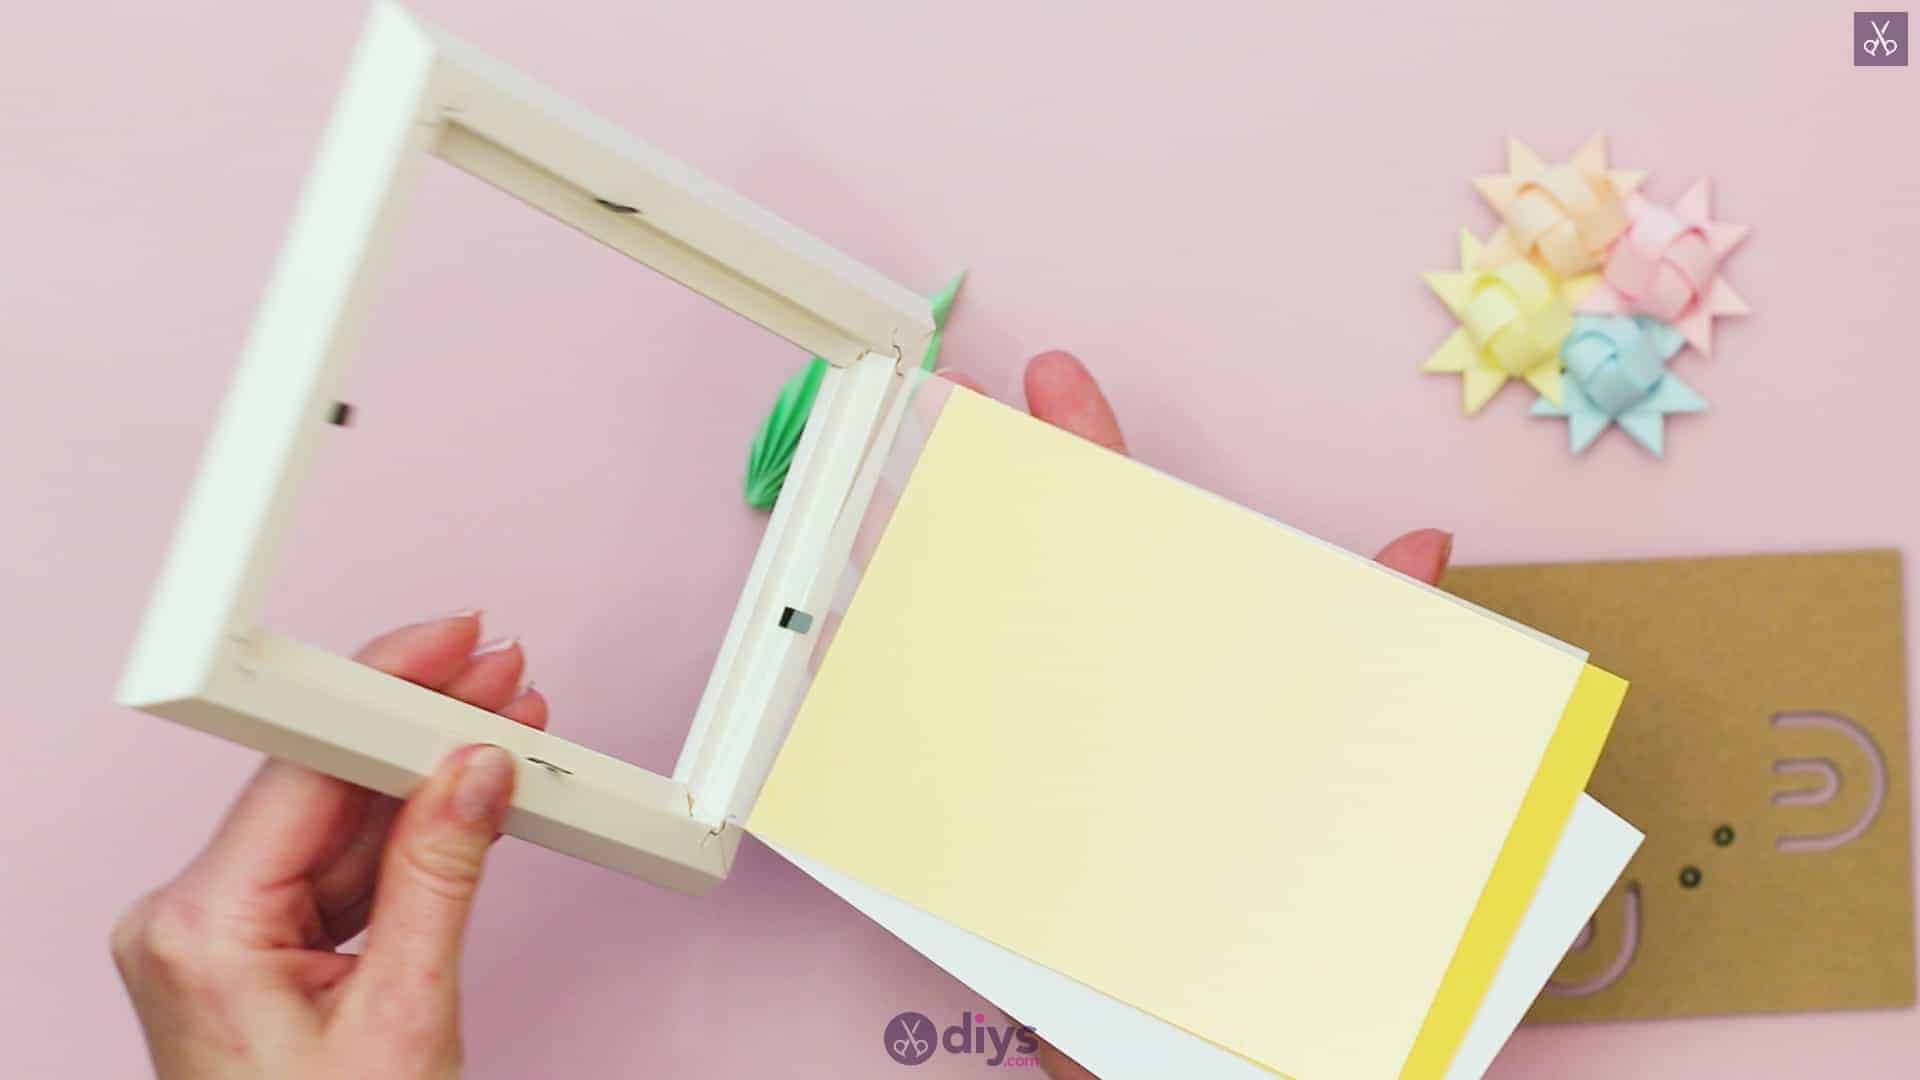
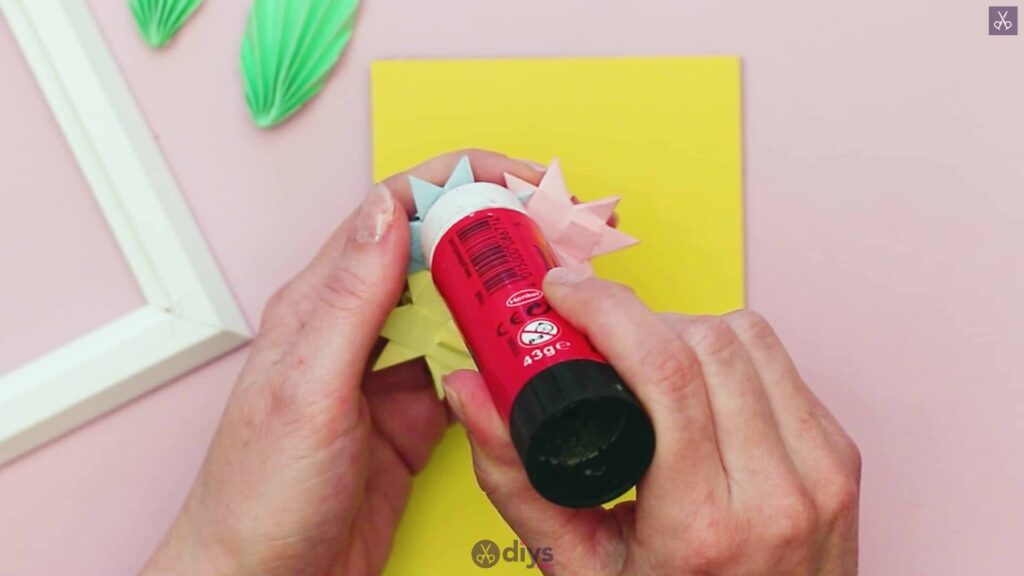
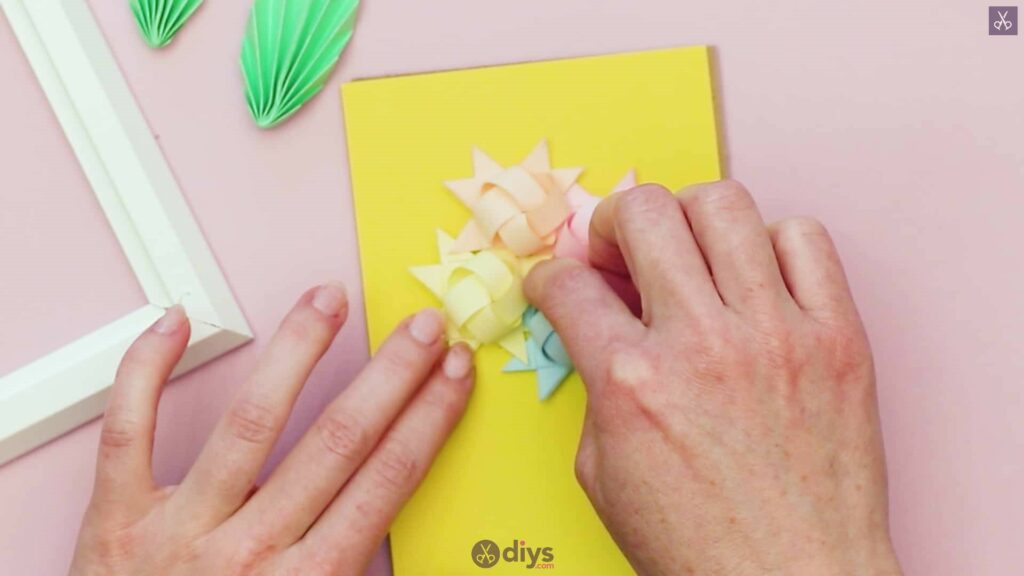
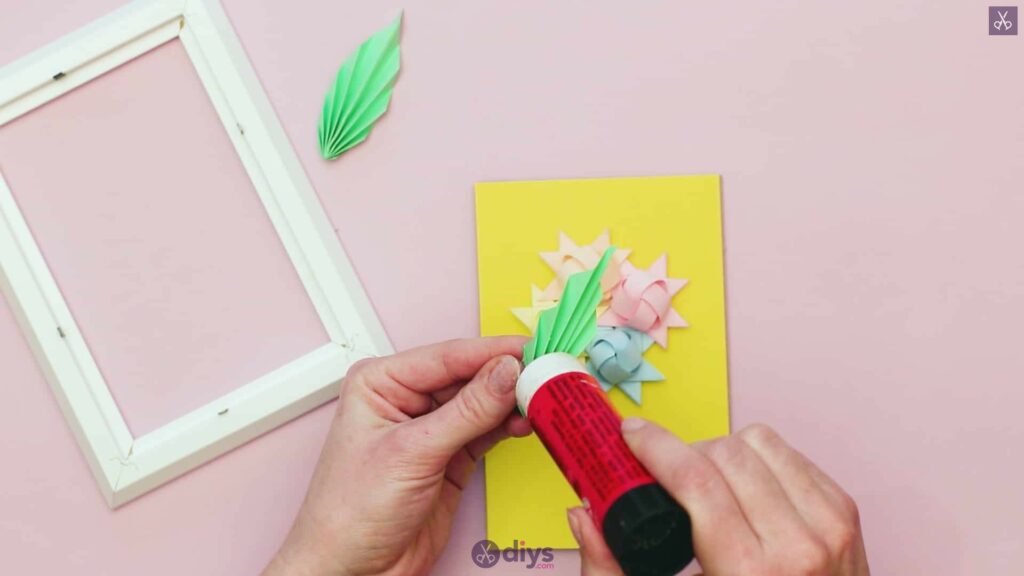
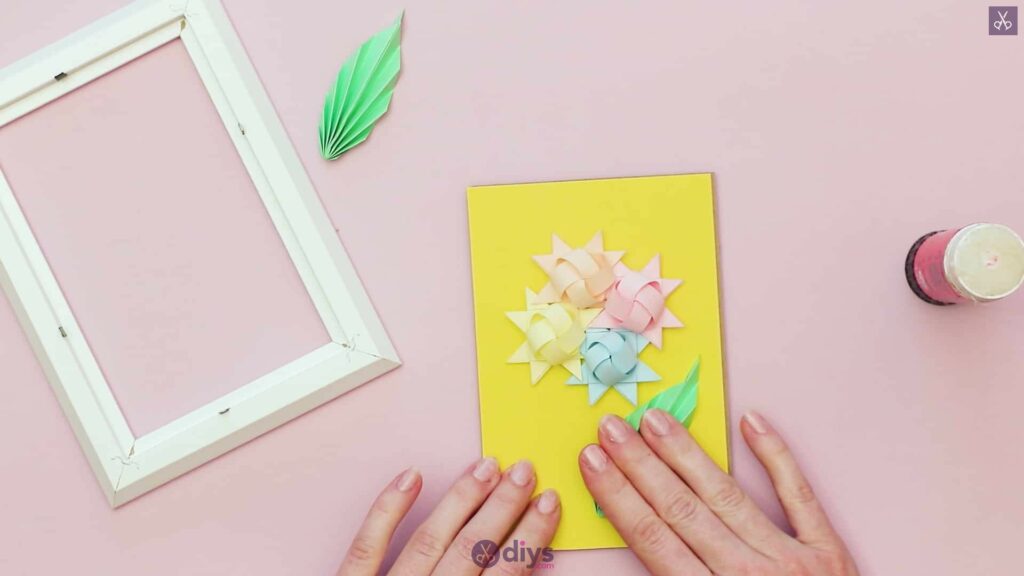
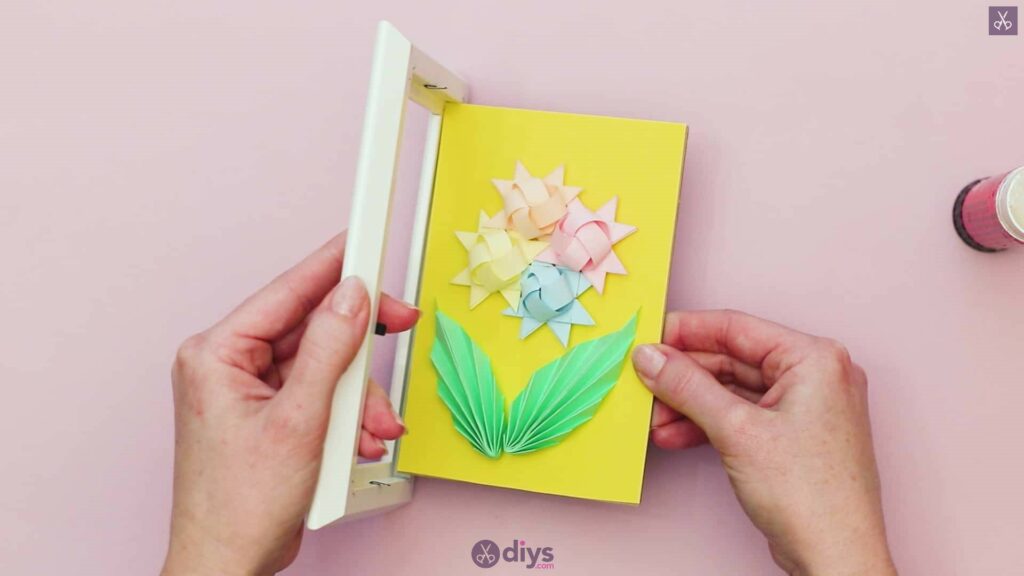
You now have all of your origami pieces and are ready to put them together into an art scene! If you haven’t already cut your cardstock background to fit your photo frame or removed the glass, you can do that now. You can also either complete these next steps on the cardstock first and then put it in the frame, so long as you keep in mind that its edges will be covered by the frame and don’t stick your shapes too close to that space, or you can put the background back into the frame without the glass and work in the central space. Apply glue to the flat underside of your bunch of flowers and strip them down to the background. I place mine in the centre but closer to the top in order to leave room for the leaves. Next, apply glue to the backside of each of your leaves and position them closer to the bottom, with each angled outwards in opposite directions so they fan towards the edges of the frame from beneath the flower bunch. you want the wider rounded bases of the leaves sitting together in the bottom centre of your frame and their tapered tips leaning out and away from each other to frame the flowers. Press them well into place (without crushing your shapes, of course), and then replace the background into the frame if you weren’t already working with it in place.

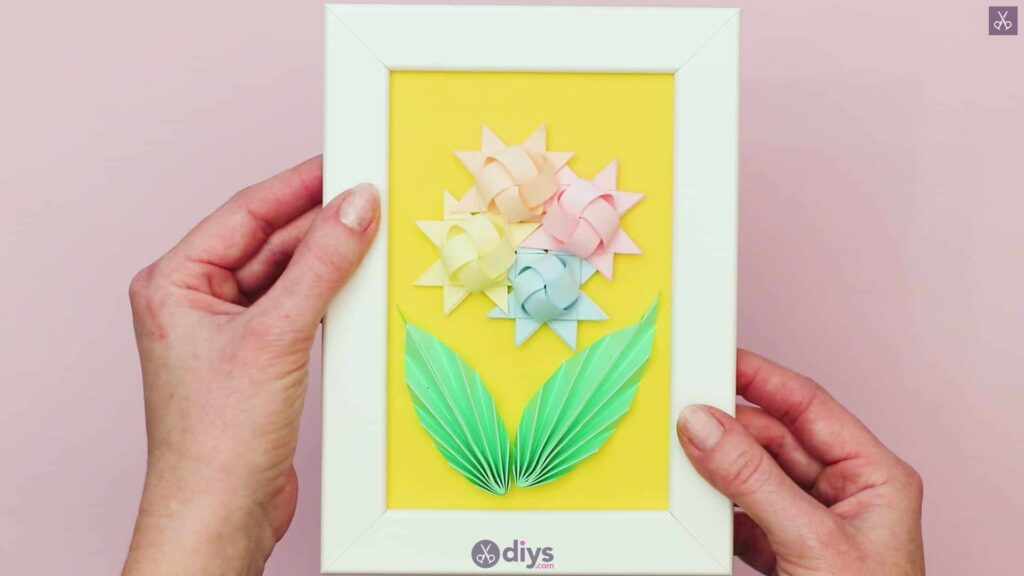
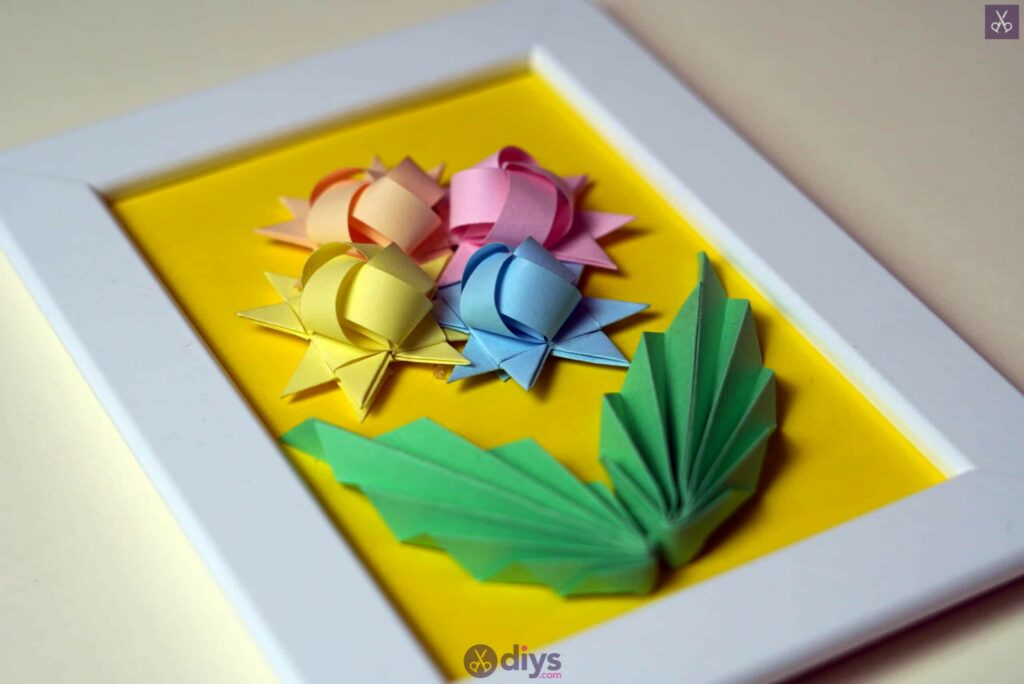
You’re officially all finished! Of course, you can use these basic techniques and feel free to get creative with different colours, or you could use a much larger frame and create more of these shapes for a piece of art that features more than once bunch of flowers. Just in case you’d like to try this project out for yourself, here’s a fantastic tutorial video to help you!