Common Boysenberry Growing Problems And How to Fix Them
Updated on September 3, 2021
Boysenberry like many cultivars has its own growing problems. It doesn’t help of course that the berry comes from crossbreeding 4 berries. And just as the ripe boysenberry is neither pure black nor downright purple, the bramble sometimes looks like it can’t make up its mind whether to produce berries the next year or just take a break.
Pests and diseases don’t make the bush’s life any easier either. They attack relentlessly from the time the first new leaves emerge until the berries are fully ripe. Add to that the winterizing process and cutting back boysenberries. You really got your hands full with this cultivar. But we’re here to make your life easier. We compiled a list of the most common boysenberry growing problems and attached a few solutions to each problem.
Winterizing Boysenberry Plants
One of the main advantages of growing boysenberry is that the brambles are tolerant to many weather conditions. Even cold winters will not put a dent in the dormant bramble and by next spring it will roar back into life and flower as usual. But sometimes when the winter is exceptionally harsh or frost is excessive, the boysenberry might struggle or even become damaged as a result.
To protect your investment and ensure that the boysenberry will survive the winter, you need to prepare the bramble for the cold months ahead. This can be as easy as mulching and fertilizing in cool climates. But in severely cold climates, the bramble will need a lot more preparation than that.
How to Fix It
First, you’ll need to decide whether your winter will be cold or extremely cold. And based on that assessment, you can prepare the boysenberry for the winter. Here we will discuss both options and the steps you need to take to protect the bramble.
- Mild Winter: If the winter is mild overall and the temperatures at night don’t reach the freezing point then winterizing the boysenberry will involve mulching and fertilizing and that’s about it. Cover the beds with a thick layer of mulch preferably after pruning the bramble. A 5-inch layer of straw, shredded bark, or dry leaves will protect the roots of the bramble from freezing over. Renew the mulch if it rots or thins out until the spring.
- Extreme Winter: If the frost seems like it’s endless from the fall to the early spring, you need to protect the brambles. Prune the brambles by cutting old branches. Lay the canes on the ground in parallel rows and hold them in place by covering the tips with soil. Cover the rest of the canes with soil and add a thick layer of mulch on top. In the spring, remove the soil and mulch and straighten up the canes. If you have a rodent or hare problem, surround the canes of the bramble with chickenwire.
Growing Boysenberries In A Container
Growing a bush in a container might seem like a risky endeavor. Especially if the bramble in question is the thorny type that scratches bare skin. But actually growing boysenberries in a container is not only feasible but recommended. If you live in a cold zone where the winter temperature drops sharply at night or frost is more than a passing incident, then growing boysenberries in containers is the logical thing to do.
For one thing, you can winterize the boysenberry by simply moving the container to a more sheltered area away from the freezing wind. It is also easier to prune the bush and feed it in the contained space. So how would you go about growing a bramble in a container?
How to Fix It
Due to their robust root systems and a large appetite for both water and food, you’ll need to pick a container that rises up to the task. A small pot will crowd the roots and make the plant stressed. The little soil in the pot will dry out fast and nutrients get depleted even faster. So choose a 16-inch container that’s 12 inches deep. You’ll need to change the container as the bramble grows thicker and heavier.
A terracotta container is preferable to a plastic one. Plastic containers have poor ventilation and tend to absorb the sunlight and heat up which could damage the roots. Place some pebbles at the bottom of the container but don’t block the drainage holes. These pebbles will weigh the container and keep it balanced as the bramble climbs up the trellis.
Mix the soil with aged manure and organic compost at a ratio of 3:1. The organic materials will improve water drainage and feed the plant. And before you plant the boysenberry, install the trellis in the container until it rests at the bottom. Transplant the young boysenberry to the pot and move it to a sunny spot that gets 6 to 8 hours of sunlight a day during the growing season.
Cutting Back Boysenberries
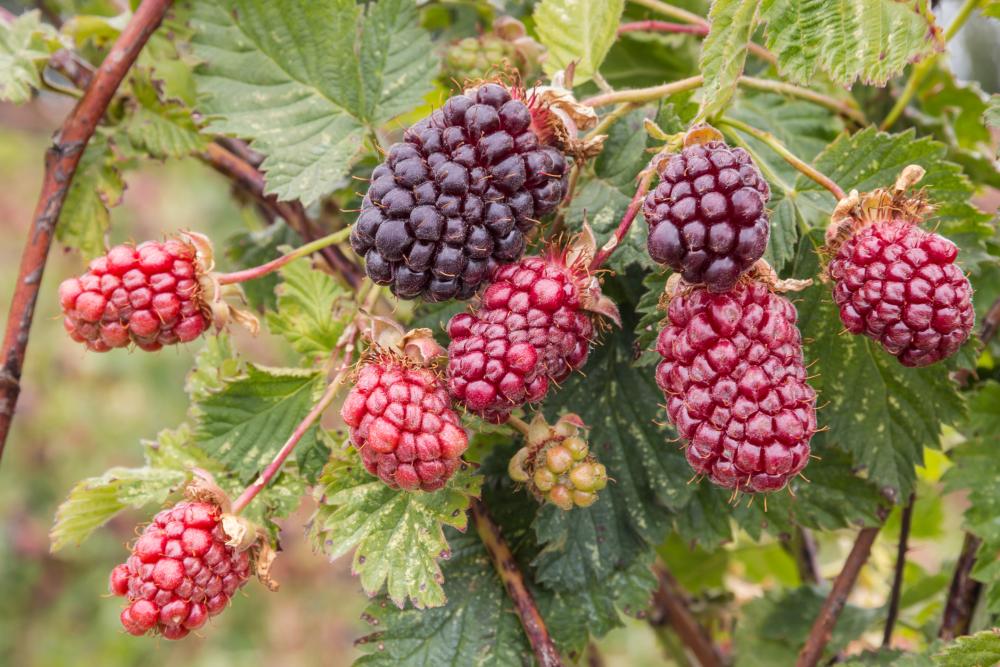
Brambles are a curious lot among plants. And fruiting brambles such as boysenberry have some unique features that you should be aware of before you prune the bramble. The stems and branches of the boysenberry in their first year are called primocanes. These canes will not flower or bear berries until they’ve turned into their second year. By then they’re called floricanes.
Since the mature bramble has both primocanes and floricanes at any given time, you need to identify both types and choose carefully which cane to cut and which cane to leave behind.
How to Fix It
Another issue has to do with boysenberries not growing flowers and berries on the same canes twice. That means the floricanes become expendable as soon as you pick all the berries for that season. As for the primocanes, these are the canes of the future. Next year, they’ll carry berries.
You should start your pruning in the fall after the first frost. Once the berries have been gathered and the leaves have dropped, use your pruning shears to cut off all the floricanes.
As for the floricanes, they need thinning out as well. When the bramble goes dormant, it doesn’t want to support a lot of floricanes. You should leave about 7 floricanes on the bramble after pruning.
In the summer as the plant starts growing and reaches the top of the trellis, trim off the tips of the canes to encourage lateral growth and make the bramble bushy.
Common Boysenberry Diseases
Despite all the above problems, they’re nothing compared to the diseases that plague the boysenberry. It’s safe to say that the main reason that boysenberry has become less popular among gardeners and farmers alike is the number of diseases the bramble suffers from.
Although to be fair, most cultivars are prone to more diseases than natural species and variants. And the boysenberry being a hybrid of 4 different types of berries inherits the various diseases that each berry is susceptible to. Here are some of the common boysenberry diseases and what you can do about each one.
How to Fix it
Of course, each disease requires a different approach to remedy it. Some diseases however are lethal and it’s best to prevent them and protect the boysenberry against infection.
- Anthracnose: The fungus Elsinoe veneta is the culprit behind anthracnose or dieback disease. If you notice purple circles on the new shoots and leaves in the spring or summer, chances are the bramble is infected. As the spots join together, the whole cane becomes gray and dies out eventually. Use a fungal spray in the early spring and then again in the summer to prevent this disease.
- Crown Gall: This disease is caused by the bacterium agrobacterium. It manifests in the form of knots or galls in the root system and the base of the canes near the ground. There’s no cure for crown gall and you should uproot the infected plants and burn them in a remote corner of the garden to prevent infecting any other plants.
- Orange Rust: This fungal infection is also untreatable. It first appears as spots on both sides of the leaves. The spots on the underside will turn into pustules that await the right weather conditions. These pustules will explode and spread orange spores all over the bramble. Once infected, the berries will not reach ripeness. Dig up infected brambles and dispose of them safely.
- Dryberry Disease: when the regular downy mildew infects a bramble, it opens the door for another fungus to take root as well. Both diseases work on the berries causing them to shrivel and become dry. Get rid of infected brambles to avoid spread the fungi to healthy plants.
Bugs That Eat Boysenberries
In addition to the diseases discussed in the previous section, the humble boysenberry attracts many pests. Some of those pests are regular garden-variety insects and some are birds. Birds relish the taste of boysenberries just as humans do. For a bird, a few of the large berries are enough for a meal. They’re nutritious and full of energy. But even if a few berries are enough for a meal, the bird will come back the next day with his friends to feast on this free meal. Pretty soon, your berry-laden bramble becomes stripped of the last berry.
Insects such as bronze beetles, and leafhoppers also feed on the foliage and berries. So how would you combat all of that?
How to Fix It
Each pest has a different way to deal with it and save your boysenberry harvest. So let’s go through them and the proposed solutions.
- Birds: Since birds are only interested in the ripe berries, you can save your berries by harvesting them in the early morning before the birds pay the bramble a visit. Unripe berries are too sour for the birds and they’ll leave them alone.
- Bugs: Aphids, mites, and leafhoppers are all too tiny to pick by hand. So spray the bramble with neem oil and dispose of the fallen insects. As for bronze beetles, you can pick them manually and drown them in a bucket full of soapy water.
Picking Boysenberries The Right Way
Harvesting boysenberries is not as simple or straightforward as other berries. This is especially true if the bramble is packed with thorns that stand guard around the berries. To complicate things further, not all berries mature at the same time. Your harvesting season usually stretches out between two months. So how do you pick boysenberries without bruising or crushing them?
How to Fix It
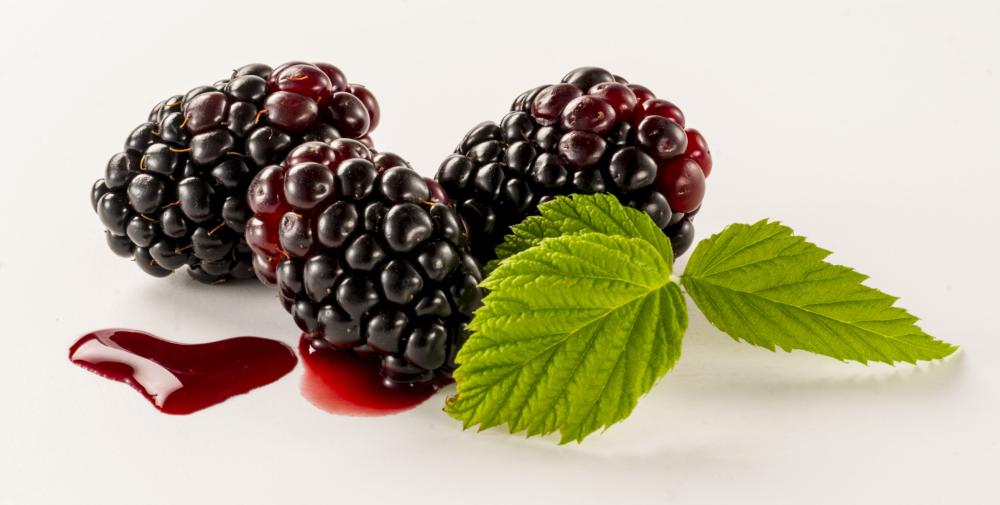
You should wait for your boysenberry to go through the usual colors of its parents. Once it settles into black with shades of purple, the berry is ripe for the taking. But be careful. There are thorns around it and the berry itself is soft. Use protective gloves and eyewear as you gently pick each ripe boysenberry and collect it in a bucket. Each berry will have a white stem attached to it. Remove that one gently and your boysenberry is ready for jams, smoothies, and fruit salads.